Embed Size (px)
Citation preview

Knitting Success
Love
of
5 g
uides to 5 Guides to


5 Guides | Love of Knitting 3
ContentsHats
Scarves
Mittens
Baby items
Home decor
page 5
page 13
page 20
page 29
page 39


5 Guides | Love of Knitting 5
Hats

6 5 Guides | Love of Knitting
The Aspen hat, designed for warmth and beauty, is both stylish and sophisticated. The soft cashmere and merino blend of yarn and a wonderful selection of patterned stitches is perfect for an advanced knitter. Yarn: Cash-merino DK by Debbie Bliss The bobble band hat features a favorite knitting enhancement — bobbles. Silk and sequin yarn teams with a luxurious soft tweed to make every minute of knitting a pleasure. Yarn: Kathmandu Aran Tweed by Queensland Collection and Disco Lights by Tilli Tomas
The AspenDesigned by Susan Crawford
Skill level: Experienced
Sizes: Child (Adult Small, Adult Large)
Finished measurements: 18 (20, 22)˝ in circumference
Yarn weight: 0 1 2 3 4 5 6
Materials• 2 skeins Cashmerino DK by Debbie Bliss,
55% merino wool, 33% microfiber, 12% cashmere, (120 yds/50g) in color 18031 Hunter Green
• U.S. size 5 (3.75mm) straight, 16˝ circular and set of 5 DPNs, or size required for gauge
• Stitch marker
• Cable needle
• Waste yarn
Gauge24 sts and 32 rows = 4˝ (10cm) in sequence 1 and 2 pat
Special abbreviationsC6F: Slip 3 sts to cable needle and hold in front, k3, k3 from cable needle.
M5: Lift strand between needles and knit in front, back, front, back, and front of same st; 5 sts increased.
Hip ∑ ∑ ∑ ∑ ∑ ∑ ∑ ∑
hats

5 Guides | Love of Knitting 7
NotesThe main portion of the hat is worked side-ways and joined in a circle. Sts are picked up along both long edges to create the brim and the crown.
Knit tipA helpful video for a provisional cast on can be found at www.knittinghelp.com/videos/cast-on. If you prefer, a regular cast on can be worked (omit waste yarn) and the seam sewn rather than grafted.
HatWith straight needles and using waste yarn and project yarn, cast on 32 sts using a provisional cast on.
Sequence 1Row 1 (RS): P7, k6, p6, k6, p7.
Row 2: Sl 1, k6, p6, k6, p6, k7.
Row 3: Sl 1, p3, M5, p3, C6F, p3, M5, p3, C6F, p3, M5, p4; 47 sts.
Row 4: Sl 1, k3, p5, k3, p6, k3, p5, k3, p6, k3, p5, k4.
Row 5: Sl 1, p3, k5, p3, k6, p3, k5, p3, k6, p3, k5, p4.
Child’s hat only Rows 6, 8, 10, 12, 14, 16: Rep row 4.
Rows 7, 9, 11, 13, 15: Rep row 5.
Small adult hat onlyRows 6, 8, 10, 12, 14, 16, 18: Rep row 4.
Rows 7, 9, 11, 13, 15, 17: Rep row 5.
Large adult hat onlyRows 6, 8, 10, 12, 14, 16, 18, 20: Rep row 4.
Rows 7, 9, 11, 13, 15, 17, 19: Rep row 5.
Sequence 2Row 1 (RS): Sl 1, p3, bind off 5 sts purlwise, p3 (*including last st of bind off), C6F, p3, bind off 5 sts purlwise, p3*, C6F, p3, bind off 5 sts purlwise, p4*; 32 sts.
Row 2: Sl 1, k6, p6, k6, p6, k7.
Row 3: Sl 1, p6, k6, p6, k6, p7.
Row 4: Rep row 2.
Row 5: Sl 1, C6F, p3, M5, p3, C6F, p3, M5, p3, C6F, k1; 42 sts.
Row 6: Sl 1, p6, k3, p5, k3, p6, k3, p5, k3, p7.
Row 7: Sl 1, k6, p3, k5, p3, k6, p3, k5, p3, k7.
Child’s hat only Rows 6, 8, 10, 12, 14, 16, 18: Rep row 6.
Rows 7, 9, 11, 13, 15, 17: Rep row 7.
Small adult hat onlyRows 6, 8, 10, 12, 14, 16, 18, 20: Rep row 6.
Rows 7, 9, 11, 13, 15, 17, 19: Rep row 7.
Large adult hat onlyRows 6, 8, 10, 12, 14, 16, 18, 20, 22: Rep row 6.
Rows 7, 9, 11, 13, 15, 17, 19, 21: Rep row 7.
End sequence 2 as followsRow 1: Sl 1, C6F, p3, bind off 5 sts purlwise, p3*, C6F, p3, bind off 5 sts purlwise, p3*, C6F, k1; 32 sts.
Row 2: Sl 1, k6, p6, k6, p6, k7.
∑ ∑ ∑ ∑ ∑ ∑ ∑ ∑

8 5 Guides | Love of Knitting
Rep sequences 1 and 2 a total of 4 times; strip should measure 18 (20, 22)”. Remove provisional cast on, place cast on sts on a spare needle and join ends using Kitchener st. (If sewing seam instead of grafting, bind off before sewing).
Cabled crownWith circular needle, pick up and knit 90 (100, 110) sts around top edge of hat. Pm and join. Change to DPNs when needed.
Purl 1 rnd.
Knit 3 rnds.
Next (dec) rnd: *K7, knit 2nd and 3rd sts on left needle tog tbl and do not drop from needle, knit first st on needle, drop both sts; rep from * around; 81 (90, 99) sts.
Knit 2 rnds.
Next (dec) rnd: *K6, knit 2nd and 3rd sts on left needle tog tbl and do not drop from needle, knit first st on needle, drop both sts; rep from * around; 72 (80, 88) sts.
Knit 2 rnds.
Next (dec) rnd: *K5, knit 2nd and 3rd sts on left needle tog tbl and do not drop from needle, knit first st on needle, drop both sts; rep from * around; 63 (70, 77) sts.
Knit 2 rnds.
Next (dec) rnd: *K4, knit 2nd and 3rd sts on left needle tog tbl and do not drop from needle, knit first st on needle, drop both sts; rep from * around; 54 (60, 66) sts.
Knit 2 rnds.
Next (dec) rnd: *K3, knit 2nd and 3rd sts on left needle tog tbl and do not drop from needle, knit first st on needle, drop both sts; rep from * around; 45 (50, 55) sts.
Knit 1 rnd.
Next (dec) rnd: *K2, knit 2nd and 3rd sts on left needle tog tbl and do not drop from needle, knit first st on needle, drop both sts; rep from * around; 36 (40, 44) sts.
Knit 1 rnd.
Next (dec) rnd: *K1, knit 2nd and 3rd sts on left needle tog tbl and do not drop from needle, knit first st on needle, drop both sts; rep from * around; 27 (30, 33) sts.
Knit 1 rnd.
Next (dec) rnd: *Knit 2nd and 3rd sts on left needle tog tbl and do not drop from needle, knit first st on needle, drop both sts; rep from * around; 18 (20, 22) sts.
Knit 1 rnd.
Next rnd: *K2tog tbl; rep from * around; 9 (10, 11) sts. Cut yarn, draw through rem sts and pull tight to secure.
BrimWith circular needle, pick up and knit 84 (96, 104) sts around bottom edge of hat. Pm and join. Work in k2, p2 rib for 1H˝. Bind off in pat.
FinishingWeave in ends. Block.

5 Guides | Love of Knitting 9
Bobble bandDesigned by Susan Crawford
Skill level: Intermediate
Sizes: Child (Adult Small, Adult Large)
Finished measurements: 17H (20, 22H)˝ circumference
Yarn weight: 0 1 2 3 4 5 6
Materials• 2 skeins Kathmandu Aran Tweed by
Queensland Collection, 85% merino wool, 10% silk, 5% cashmere, (104 yds/50g) in color 168 Ecru (A)
• 1 skein Disco Lights by Tilli Tomas, 90% spun silk, 10% petite sequins, (225 yds/100g) in color Natural (B)
• U.S. size 7 (4.5mm) 16˝ circular and set of 5 DPNs, or size required for gauge
• Stitch marker
• Yarn needle
Gauge20 sts and 28 rows = 4˝ (10cm) in St st
The Aspen
Bobble band
Special termsBobble: Knit in the front, back, front, back, and front of same st (5 sts created from 1 st). Turn, purl across these 5 sts. Turn, sl 1, k2tog, psso, k2tog, pass first k2tog over second; 1 st rem.
HatWith circular needle and A, cast on 88 (100, 112) sts. Place marker and join, being care-ful not to twist the sts.
Rnds 1–6: *K2, p2; rep from * around.
Rnds 7–8: *P2, k2; rep from * around.
Rnds 9–14: Rep rnds 1–6.
Rnd 15: Knit 1 rnd.
Welt Turn work inside out. With WS facing, knit 6 rnds (you will be working in the opposite direction around). Turn work back to RS. The last 6 rnds appear as rev St st when viewed from the RS. With tip of right needle, lift purl bump of first st on rnd 15 (last knit rnd) from WS and place on left needle. Knit the lifted st and the next st on needle tog. Rep around, creating a welt of purl sts.
Join B, do not cut A; carry yarn not in use loosely along WS of work.

10 5 Guides | Love of Knitting
With B, knit 3 rnds.
Bobble rnd 1: *With B, k3; with A, work bobble in next st; rep from * around.
With B, knit 3 rnds.
Bobble rnd 2: *With B, k1; with A, work bobble in next st; with B, k2; rep from * around.
With B, knit 3 rnds.
Bobble rnd 3: Rep bobble rnd 1.
With B, knit 3 rnds. Cut B.
With A, knit 1 rnd. Rep welt, picking up purl bumps from rnd just knit.
Cabled crownChange to DPNs when needed.
Purl 1 rnd, inc 2 (0, 0) sts and dec 0 (0, 2) sts evenly around; 90 (100, 110) sts.
Knit 3 rnds.
Next (dec) rnd: *K7, knit 2nd and 3rd sts on left needle tog tbl and do not drop from needle, knit first st on needle, drop both sts;
rep from * around; 81 (90, 99) sts.
Knit 2 rnds.
Next (dec) rnd: *K6, knit 2nd and 3rd sts on left needle tog tbl and do not drop from needle, knit first st on needle, drop both sts; rep from * around; 72 (80, 88) sts.
Knit 2 rnds.
Next (dec) rnd: *K5, knit 2nd and 3rd sts on left needle tog tbl and do not drop from needle, knit first st on needle, drop both sts; rep from * around; 63 (70, 77) sts.
Knit 2 rnds.
Next (dec) rnd: *K4, knit 2nd and 3rd sts on left needle tog tbl and do not drop from needle, knit first st on needle, drop both sts; rep from * around; 54 (60, 66) sts.
Knit 2 rnds.
Next (dec) rnd: *K3, knit 2nd and 3rd sts on left needle tog tbl and do not drop from needle, knit first st on needle, drop both sts; rep from * around; 45 (50, 55) sts.
Knit 1 rnd.
Next (dec) rnd: *K2, knit 2nd and 3rd sts on left needle tog tbl and do not drop from needle, knit first st on needle, drop both sts; rep from * around; 36 (40, 44) sts.
Knit 1 rnd.
Next (dec) rnd: *K1, knit 2nd and 3rd sts on left needle tog tbl and do not drop from needle, knit first st on needle, drop both sts; rep from * around; 27 (30, 33) sts.
Knit 1 rnd.
Next (dec) rnd: *Knit 2nd and 3rd sts on left needle tog tbl and do not drop from needle, knit first st on needle, drop both sts; rep from * around; 18 (20, 22) sts.
Knit 1 rnd.
Next rnd: *K2tog tbl; rep from * around; 9 (10, 11) sts. Cut yarn, draw through rem sts and pull tight to secure.
FinishingWeave in ends. Block. ;∑

5 Guides | Love of Knitting 11
What a great gift for someone special this holiday season. Make this handsome set for a man in these variegated colors, or use a soft-er palette for a woman. The slight variation of the rib stitch gives these their extra appeal. Yarn: Rhythm Superwash by JoJoLand
Furrowed-rib hat
Designed by Doreen L. Marquart
Skill level: Hat: Intermediate
Sizes: Men’s average
Finished measurements: Hat: 19˝ circumference (stretches to fit)
Yarn weight: 0 1 2 3 4 5 6
Materials• 3 (4) skeins Rhythm Superwash by
JoJoLand, 100% superwash wool, (110 yds/50g) in color 65 (A)
• 3 (4) skeins Rhythm Superwash by JoJoLand, 100% superwash wool, (110 yds/50g) in color 72 (B)
• U.S. size 6 (4mm) straight, 16˝ circular, and set of 5 DPNs, or size required for gauge
• Stitch marker
• Yarn needle
Gauge28 sts and 28 rows = 4˝ (10cm) in pat, unstretched
≈ ≈ ≈ ≈

12 5 Guides | Love of Knitting
NoteCarry yarn not in use loosely along side of piece (on hat, along WS of work).
HatUsing circular needle and A, cast on 132 sts. Place marker and join, being careful not to twist the sts.
Rnd 1: With A, *k2, p1; rep from * around.
Rnd 2: With A, *k1, p2; rep from * around.
Rnd 3: With B, *k2, p1; rep from * around.
Rnd 4: With B, *k1, p2; rep from * around.
Rep rnds 1–4 until piece measures 6”, end-ing with Rnd 2 or 4.
Shape Crown:Cont in stripe pat as established and change to DPNs when needed.
Rnd 1: *[K2, p1] 3 times, k1, k2tog; rep from * around; 121 sts.
Rnd 2: *[K1, p2] 3 times, k1, p1; rep from * around.
Rnd 3: *K2, p1, k1, p2tog, k2, p1, k1, p1; rep from * around.
Rnd 4: *K1, p2, k1, p1; rep from * around.
Rnd 5: *K2, p1, k1, p1, k1, p2tog, k1, p1; rep from * around.
Rnd 6: *K1, p2, [k1, p1] 3 times; rep from * around.
Rnd 7: *K1, p2tog, [k1, p1] 3 times; rep from * around.
Rnd 8: *K1, p1, rep from * around.
Rnd 9: *[K1, p1] 3 times, ssk; rep from * around.
Rnd 10: *[K1, p1] 3 times, k1; rep from * around.
Rnd 11: *K1, p1, ssk, k1, p1, k1; rep from * around.
Rnd 12: *K1, p1, k1; rep from * around.
Rnd 13: *K1, p1, k1, ssk, k1; rep from * around.
Rnd 14: *K1, p1, k3; rep from * around.
Rnd 15: *Ssk, k3; rep from * around.
Rnds 16, 18, and 20: Knit.
Rnd 17: *K1, k2tog, k1; rep from * around.
Rnd 19: *K2tog, k1; rep from * around.
Rnd 21: *K2tog, rep from * around; 11 sts.
Cut yarn leaving an 8˝ tail. Thread tail through sts. Pull tight and secure.
FinishingWeave in ends. ;

5 Guides | Love of Knitting 13
Scarves

14 5 Guides | Love of Knitting
Furrowed-rib scarf≈ ≈ ≈ ≈

5 Guides | Love of Knitting 15
Designed by Doreen L. Marquart
Skill level: Easy
Sizes: Men’s average
Finished measurements: Scarf: 6˝ x 60 (80)˝
Yarn weight: 0 1 2 3 4 5 6
Materials• 3 (4) skeins Rhythm Superwash by JoJoLand,
100% superwash wool, (110 yds/50g) in color 65 (A)
• 3 (4) skeins Rhythm Superwash by JoJoLand, 100% superwash wool, (110 yds/50g) in color 72 (B)
• U.S. size 6 (4mm) straight, 16˝ circular, and set of 5 DPNs, or size required for gauge
• Stitch marker
• Yarn needle
Gauge28 sts and 28 rows = 4˝ (10cm) in pat, unstretched
NoteCarry yarn not in use loosely along side of piece (on hat, along WS of work).
ScarfUsing straight needles and A, cast on 42 sts.
Row 1 (RS): With A, k1, *k2, p1; rep from * to last 2 sts, k2.
Row 2: k1, *p1, k2; rep from * to last 2 sts, p1, k1.
Row 3: With B, k1, *k2, p1; rep from * to last 2 sts, k2.
Row 4: k1, *p1, k2; rep from * to last 2 sts, p1, k1.
Rep rows 1–4 for pat until piece measures 64 (80)˝, ending with row 2. With A, bind off.
FinishingWeave in ends. ;

16 5 Guides | Love of Knitting
Summer sun scarf
3This creative and unusual scarf is knit completely in garter stitch. But-tonholes let you lace a matching hand-dyed silk scarf from end to end. Look for kits at your local yarn shop or add your own silk scarf. Yarn: Precious by HPKY

5 Guides | Love of Knitting 17
Designed by Bjorn Coordt for HPKY
Skill level: Easy
Size: One size
Finished measurements: 8˝ x 56˝
Yarn weight:
0 1 2 3 4 5 6
Materials• 4 skeins Precious by Hand Painted Knit-
ting Yarns, 60% silk, 40% merino wool, (275 yds/100g) in color Summer
• U.S. size 7 (4.5mm) needles, or size required for gauge
• Matching silk scarf from Hand Painted Knitting Yarns, 14˝ x 72˝
• Yarn needle
Gauge20 sts and 30 rows = 4˝ (10cm) in garter st
ScarfCast on 40 sts. Work in garter st for 20 rows.
*Next (eyelet) row (RS): K18, k2tog, [yo] twice, k2tog (eyelet made), k18.
Next row: Knit, working 2 sts in double yo; 40 sts.
Knit 40 rows. Rep from * until there are a total of 10 eyelets.
Knit 20 rows more. Bind off loosely.
FinishingWeave in ends. Weave scarf through eye-lets. See photos for ideas on how to wear the scarf. ;

18 5 Guides | Love of Knitting
© © © This fun and frivolous scarf in zippity-do-dah colors is an easy diagonal knit by expert Barry Klein. Have fun and don’t be too serious when wearing this one! Yarn: Tonalita and Flamenco by Trendsetter
Ruffled diagonal scarf
Designed by Barry Klein
Skill level: Easy
Sizes: One size
Finished measurements: 3H˝ x 68˝
Yarn weight:
0 1 2 3 4 5 6
Materials• 3 skeins Tonalita by Trendsetter,
52% wool, 48% acrylic, (100 yds/50g) in color 2376 Rio (A)
• 1 skein Flamenco by Trendsetter, 100% acrylic, (40 yds/100g) in color 143 Purple (B)
• U.S. size 9 (5.5mm) needles, or size required for gauge
• Yarn needle
GaugeGauge is not essential for this project.
ScarfWith A, cast on 24 sts.
Row 1 (WS): Knit.
Row 2: K1f&b, knit to last 3 sts, k2tog, k1.
Rep rows 1–2 for a total of 10 rows.
*Change to B. Work in pat for 6 rows. Change to A. Work in pat for 24 rows. Rep from * until there are 9 sections worked in B. Change to A and work for 10 rows more. Bind off.
FinishingWeave in ends. ;

5 Guides | Love of Knitting 19
Mittens

20 5 Guides | Love of Knitting
5 Guides | Love of Knitting 21
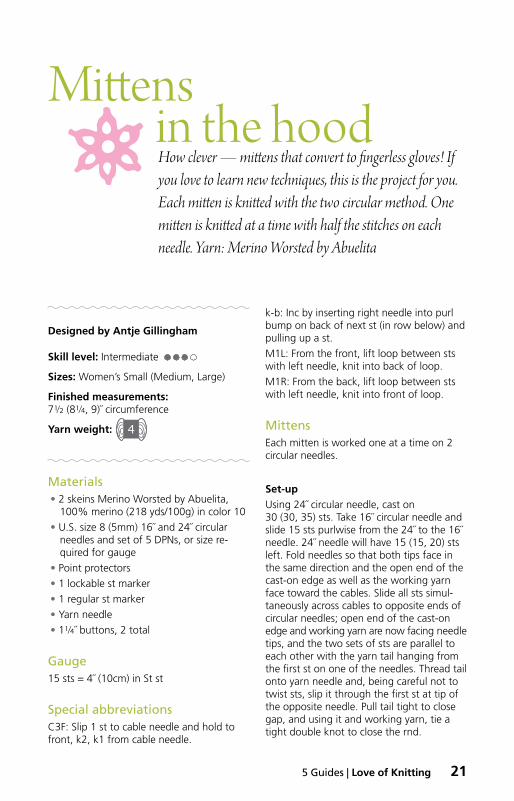
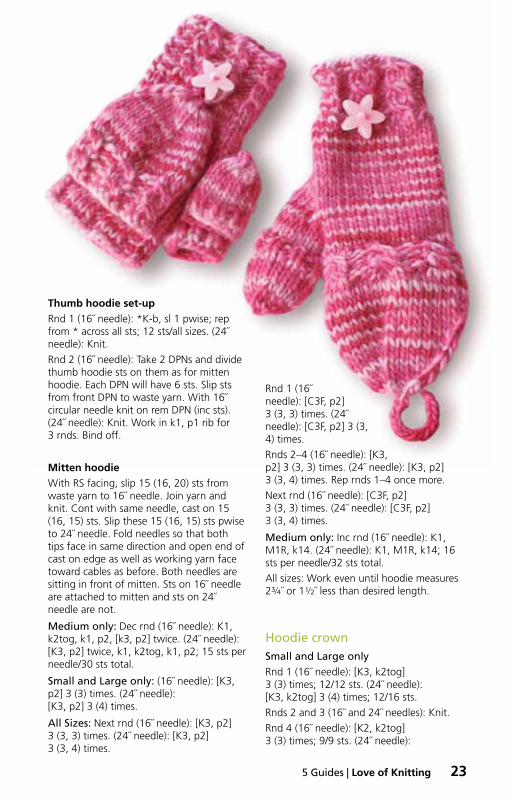
1 How clever — mittens that convert to fingerless gloves! If you love to learn new techniques, this is the project for you. Each mitten is knitted with the two circular method. One mitten is knitted at a time with half the stitches on each needle. Yarn: Merino Worsted by Abuelita
Designed by Antje Gillingham
Skill level: Intermediate
Sizes: Women’s Small (Medium, Large)
Finished measurements: 7H (8G, 9)˝ circumference
Yarn weight:
0 1 2 3 4 5 6
Materials• 2 skeins Merino Worsted by Abuelita,
100% merino (218 yds/100g) in color 10
• U.S. size 8 (5mm) 16˝ and 24˝ circular needles and set of 5 DPNs, or size re-quired for gauge
• Point protectors
• 1 lockable st marker
• 1 regular st marker
• Yarn needle
• 1G˝ buttons, 2 total
Gauge15 sts = 4˝ (10cm) in St st
Special abbreviationsC3F: Slip 1 st to cable needle and hold to front, k2, k1 from cable needle.
k-b: Inc by inserting right needle into purl bump on back of next st (in row below) and pulling up a st.
M1L: From the front, lift loop between sts with left needle, knit into back of loop.
M1R: From the back, lift loop between sts with left needle, knit into front of loop.
MittensEach mitten is worked one at a time on 2 circular needles.
Set-upUsing 24˝ circular needle, cast on 30 (30, 35) sts. Take 16˝ circular needle and slide 15 sts purlwise from the 24˝ to the 16˝ needle. 24˝ needle will have 15 (15, 20) sts left. Fold needles so that both tips face in the same direction and the open end of the cast-on edge as well as the working yarn face toward the cables. Slide all sts simul-taneously across cables to opposite ends of circular needles; open end of the cast-on edge and working yarn are now facing needle tips, and the two sets of sts are parallel to each other with the yarn tail hanging from the first st on one of the needles. Thread tail onto yarn needle and, being careful not to twist sts, slip it through the first st at tip of the opposite needle. Pull tail tight to close gap, and using it and working yarn, tie a tight double knot to close the rnd.
Mittens in the hood

22 5 Guides | Love of Knitting
Right mittenCuffThere are 15 (15, 15) sts on the 16˝ needle and 15 (15, 20) sts on the 24˝ needle. Cover both ends of 24˝ needle with point protectors. Hold both needles in left hand, 16˝ needle sits slightly in front of 24˝ needle. Pull tip of 24˝ needle to right until its sts sit on cable. Hold 16˝ needle tip with sts in left hand, and pick up empty tip with right hand. Beg cuff as follows:
Set up: (16˝ needle): K3, pm, p2, [k3, p2] twice for all sizes. 24˝ needle should now sit slightly in front of 16˝ needle. Switch point protectors to 16˝ needle tips. Slide sts on 24˝ needle to its tip, and pull tip of 16˝ needle to right until its sts sit on cable. Notice how working yarn is attached to 16˝ needle. Pull it toward 24˝ needle and get ready to work across 15 (15, 20) sts. (24˝ needle): K2, stop to pull working yarn tight (this will prevent ladders from forming at the beg of each set of sts), k1, p2, [k3, p2] 2 (2, 3) times. Note: Working across both needles com-pletes one rnd, and st marker (16˝ needle) marks beg of rnd.
Rnd 1 (16˝ needle): [C3F, p2] 3 times. (24˝ needle): [C3F, p2] 3 (3, 4) times.
Rnds 2–4 (16˝ needle): [K3, p2] 3 times. (24˝ needle): [K3, p2] 3 (3, 4) times.
Rep Rnds 1-4 until cuff measures 2˝ or desired length, ending with Rnd 4. Rep rnd 2 once more.
Body
Medium only: Inc rnd (16˝ needle): K1, M1R, k14. (24˝ needle): K1, M1R, k14; 16 sts per needle/32 sts total.
All sizes: Work even until piece measures 3 (3G, 3H)˝ from beg.
Thumb gussetThe thumb gusset is inc on 16˝ needle only; st count rem the same on 24˝ needle.
Rnd 1 (16˝ needle): K1f&b (beg of gusset), k1, k1f&b (end of gusset), knit across rem sts; 17 (18, 17) sts. (24˝ needle): Knit.
Rnds 2, 4, 6, 8: Knit.
Rnd 3 (16˝ needle): K1f&b, k3, k1f&b, knit across rem sts; 19 (20, 19) sts. (24˝ needle): Knit.
Rnd 5 (16˝ needle): K1f&b, k5, k1f&b, knit across rem sts; 21 (22, 21) sts. (24˝ needle): Knit.
Rnd 7 (16˝ needle): K1f&b, k7, k1f&b, knit across rem sts; 23 (24, 23) sts. (24˝ needle): Knit.
Rnd 9 (16˝ needle): K1, slip next 10 sts onto waste yarn and cast on 2 sts to close the gap. Knit across rem sts. (24˝ needle): Knit; 15 sts both needles/30 sts total (16 sts both needles/32 sts total, 15 sts and 20 sts/35 sts total). Work even until piece measures approx 4H (5, 5H)˝ from beg or 2˝ less than desired length.
Mitten hoodie set-up Rnd 1 (16˝ needle): Knit. (24˝ needle): *K-b, sl 1 pwise; rep from * across all sts; 30 (32, 40) sts.
Rnd 2 (16˝ needle): Knit. (24˝ needle): Take 2 DPNs and hold them parallel to each other in right hand. Work across 24˝ needle, alternately slipping inc to back DPN and slipped sts to front DPN. Each DPN will have 15 (16, 20) sts. Slip sts from front DPN to waste yarn. With 24˝ circular needle knit on rem DPN (inc sts). Work even until piece measures approx 5 (5H, 6)˝ from beg or 1˝ less than desired length.
Medium only: Dec rnd (16˝ needle): K1, k2tog, k13. (24˝ needle): K13, k2tog, k1; 15 sts per needle/30 sts total.
Next rnd (all sizes) (16˝ and 24˝ needles): [K3, p2] 3 (3, 3) times. (24˝ needle): [K3, p2] 3 (3, 4) times. Cont in rib until piece measures approx 6H (7, 7H)˝ from beg or desired length. Bind off all sts on 16˝ needle, 1 st rem. Slip on lockable marker. Slip st from marker to right needle and cont binding off.
ThumbWith RS facing (back of hand), slip all 10 sts to 16˝ needle. Join yarn and knit across 6 sts. Using 24˝ needle knit across rem 4 sts; then pick up and knit 4 sts along cast-on edge at top of gusset; 14 sts/all sizes. Work even for 3 rnds across both needles.
5 Guides | Love of Knitting 23
Thumb hoodie set-up Rnd 1 (16˝ needle): *K-b, sl 1 pwise; rep from * across all sts; 12 sts/all sizes. (24˝ needle): Knit.
Rnd 2 (16˝ needle): Take 2 DPNs and divide thumb hoodie sts on them as for mitten hoodie. Each DPN will have 6 sts. Slip sts from front DPN to waste yarn. With 16˝ circular needle knit on rem DPN (inc sts). (24˝ needle): Knit. Work in k1, p1 rib for 3 rnds. Bind off.
Mitten hoodieWith RS facing, slip 15 (16, 20) sts from waste yarn to 16˝ needle. Join yarn and knit. Cont with same needle, cast on 15 (16, 15) sts. Slip these 15 (16, 15) sts pwise to 24˝ needle. Fold needles so that both tips face in same direction and open end of cast on edge as well as working yarn face toward cables as before. Both needles are sitting in front of mitten. Sts on 16˝ needle are attached to mitten and sts on 24˝ needle are not.
Medium only: Dec rnd (16˝ needle): K1, k2tog, k1, p2, [k3, p2] twice. (24˝ needle): [K3, p2] twice, k1, k2tog, k1, p2; 15 sts per needle/30 sts total.
Small and Large only: (16˝ needle): [K3, p2] 3 (3) times. (24˝ needle): [K3, p2] 3 (4) times.
All Sizes: Next rnd (16˝ needle): [K3, p2] 3 (3, 3) times. (24˝ needle): [K3, p2] 3 (3, 4) times.
Rnd 1 (16˝ needle): [C3F, p2] 3 (3, 3) times. (24˝ needle): [C3F, p2] 3 (3, 4) times.
Rnds 2–4 (16˝ needle): [K3, p2] 3 (3, 3) times. (24˝ needle): [K3, p2] 3 (3, 4) times. Rep rnds 1–4 once more.
Next rnd (16˝ needle): [C3F, p2] 3 (3, 3) times. (24˝ needle): [C3F, p2] 3 (3, 4) times.
Medium only: Inc rnd (16˝ needle): K1, M1R, k14. (24˝ needle): K1, M1R, k14; 16 sts per needle/32 sts total.
All sizes: Work even until hoodie measures 2I˝ or 1H˝ less than desired length.
Hoodie crownSmall and Large onlyRnd 1 (16˝ needle): [K3, k2tog] 3 (3) times; 12/12 sts. (24˝ needle): [K3, k2tog] 3 (4) times; 12/16 sts.
Rnds 2 and 3 (16˝ and 24˝ needles): Knit.
Rnd 4 (16˝ needle): [K2, k2tog] 3 (3) times; 9/9 sts. (24˝ needle):

24 5 Guides | Love of Knitting
[K2, k2tog] 3 (4) times; 9/12 sts.
Rnds 5 and 6 (16˝ and 24˝ needles): Knit.
Rnd 7 (16˝ needle): [K1, k2tog] 3 (3) times; 6/6 sts. (24˝ needle): [K1, k2tog] 3 (4) times; 6/8 sts total.
Rnds 8 and 9 (16˝ and 24˝ needles): Knit.
Rnd 10 (16˝ needle): [K1, k2tog] twice; 4/4 sts total. Small (24˝ needle): [K1, k2tog] twice; 4 sts.
Large (24˝ needle): [K2tog] 4 times; 4 sts.
Rnd 11 (16˝ and 24˝ needles): Knit.
Rnd 12 (16˝ and 24˝ needles): [K2tog] twice; 2 sts per needle.
Rnd 13 (16˝ and 24˝ needles): K2tog, move st from 24˝ to 16˝ needle; 2 sts rem.
Medium onlyRnd 1 (16˝ and 24˝ needles): [K6, k2tog] twice; 28 sts total.
Rnds 2 and 3 (16˝ and 24˝ needles): Knit.
Rnd 4 (16˝ and 24˝ needles): [K5, k2tog] twice; 24 sts total.
Rnds 5 and 6 (16˝ and 24˝ needles): Knit.
Rnd 7 (16˝ and 24˝ needles): [K4, k2tog] twice; 20 sts total.
Rnd 8 (16˝ and 24˝ needles): Knit.
Rnd 9 (16˝ and 24˝ needles): [K3, k2tog] twice; 16 sts total.
Rnd 10 (16˝ and 24˝ needles): Knit.
Rnd 11 (16˝ and 24˝ needles): [K2, k2tog] twice; 12 sts total.
Rnd 12 (16˝ and 24˝ needles): [K1, k2tog] twice; 8 sts total.
Rnd 13 (16˝ and 24˝ needles): [K2tog] twice; 4 sts total.
Rnd 14 (16˝ and 24˝ needles): K2tog, move st from 24˝ to 16˝ needle; 2 sts rem.
All sizes: Work in I-cord on rem sts for 2I˝–3˝. Cut yarn, leaving an 8˝ tail. Use tail to form a loop with the I-cord and secure. Find I-cord instructions on page 16.
Thumb hoodieWith RS facing, slip 6 sts from waste yarn to 16˝ needle. Join yarn and knit. Cont with same needle, cast on 8 sts and slip them pwise to 24˝ needle. Fold needles so that
both tips face in same direction and open end of the cast-on edge as well as the working yarn face toward cables as before. Both needles are sitting in front of thumb. Sts on 16˝ needle are attached to mitten; sts on 24˝ needle are not. Work in k1, p1 rib for 6 rnds. Knit even for 5 (6, 6) rnds or desired length.
Hoodie crownRnd 1 (16˝ needle): [K1, k2tog] twice; 4 sts. (24˝ needle): [K2, k2tog] twice; 6 sts.
Rnd 2 (16˝ needle): [K2tog] twice; 2 sts. (24˝ needle): [K1, k2tog] twice; 4 sts.
Rnd 3 (16˝ needle): K2tog and slip rem st on lockable marker. (24˝ needle): Slip st from marker to right needle, [k2tog] twice. Cut yarn, draw through rem sts and secure.
Left mittenWork as for right mitten until piece mea-sures 3 (3G, 3H)˝ from beg.
Thumb gussetThe thumb gusset is inc on 24˝ needle only; st count rem the same on 16˝ needle.
Rnd 1 (16˝ needle): Knit. (24˝ needle): Knit to last 3 sts, pm, k1f&b, k1, k1f&b; 17 (18, 17) sts.
Rnds 2, 4, 6, 8: Knit.
Rnd 3 (16˝ needle): Knit; 19 (20, 19) sts. (24˝ needle): Knit to marker, k1f&b, k3, k1f&b; 19 (20, 19) sts.
Rnd 5 (16˝ needle): Knit. (24˝ needle): Knit to marker, k1f&b, k5, k1f&b; 21 (22, 21) sts.
Rnd 7 (16˝ needle): Knit. (24˝ needle): Knit to marker, k1f&b, k7, k1f&b; 23 (24, 23) sts.
Rnd 9 (16˝ needle): Knit. (24˝ needle): Knit to and remove marker, k1, slip next 10 sts onto waste yarn. Cont with same needle, cast on 2 sts to close gap; 15 sts both needles/30 sts total (16 sts both needles/32 sts total, 15 sts and 20 sts/35 sts total). Work even until piece measures approx 4H (5, 5H)˝ from beg or 2˝ less than desired length.
Mitten hoodie set-upRnd 1 (16˝ needle): *K-b, sl 1 pwise; rep from * across all sts; 30 (32, 40) sts. (24˝ needle): Knit.
Rnd 2 (16˝ needle): Take 2 DPNs and hold them parallel to each other in right hand. Work across 16˝ needle, alternately slipping inc to back DPN and slipped sts to front DPN. Each DPN will have 15 (16, 20) sts. Slip sts from front DPN to waste yarn. With 16˝ circular needle knit on rem DPN (inc sts). (24˝ needle): Knit. Cont as for right mitten.
ThumbWith RS facing (palm), slip all 10 sts to 16˝ needle. Join yarn and knit across 6 sts. Using 24˝ needle knit across rem 4 sts; then pick up and knit 4 sts along cast-on edge at top of gusset and place last 2 knitted sts on lockable marker. Slip sts from marker to right needle tip; 14 sts/all sizes. Knit even for 3 rnds across both needles.
Thumb hoodie set-up Rnd 1 (16˝ needle): Knit. (24˝ needle): *K-b, sl 1 pwise; rep from * across all sts, 12 sts/all sizes.
Rnd 2 (16˝ needle): Knit. (24˝ needle): Take 2 DPNs and divide thumb hoodie sts on them as for mitten hoodie. Each DPN will have 6 sts. Slip sts from front DPN to waste yarn. With 24˝ circular needle knit on rem DPN
(inc sts). Work in k1, p1 rib for 3 rnds or de-sired length. Bind off. Work mitten hoodie and hoodie crown as for right mitten.
Thumb hoodieWith RS facing, slip 8 sts from waste yarn to 16˝ needle. Join yarn and knit. Cont with same needle, cast on 6 sts and slip them pwise to 24˝ needle. Fold needles so that both tips face in same direction and open end of the cast-on edge as well as the working yarn face toward cables as before. Both needles are sitting in front of thumb. Sts on 16˝ needle are attached to mitten; sts on 24˝ needle are not. Finish as for Right Mitten.
Hoodie crownRnd 1 (16˝ needle): [K2, k2tog] twice; 6 sts. (24˝ needle): [K1, k2tog] twice; 4 sts.
Rnd 2 (16˝ needle): [K1, k2tog] twice; 4 sts. (24˝ needle): [K2tog] twice; 2 sts.
Rnd 3 (16˝ needle): [K2tog] twice, slip rem 2 sts on lockable marker. (24˝ needle): Slip sts from marker to right needle, then k2tog; 3 sts. Cut yarn, draw through rem sts and secure.
FinishingWeave in ends. Sew buttons in place. ;
5 Guides | Love of Knitting 25
26 5 Guides | Love of Knitting
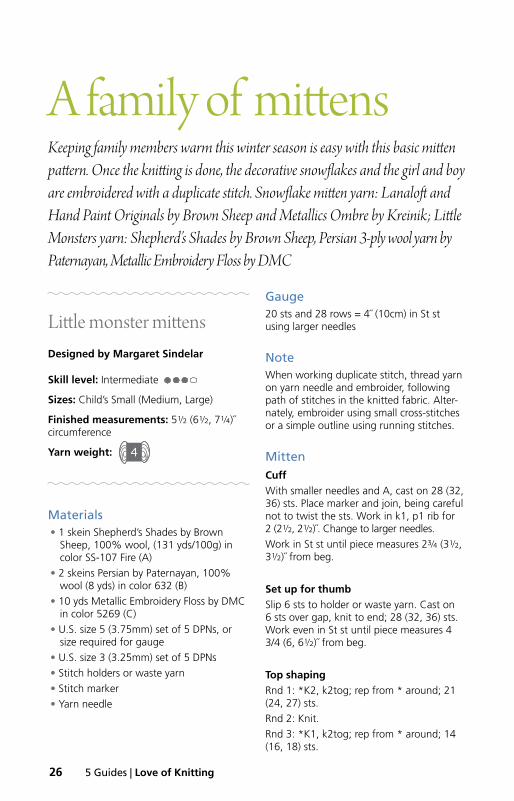
Keeping family members warm this winter season is easy with this basic mitten pattern. Once the knitting is done, the decorative snowflakes and the girl and boy are embroidered with a duplicate stitch. Snowflake mitten yarn: Lanaloft and Hand Paint Originals by Brown Sheep and Metallics Ombre by Kreinik; Little Monsters yarn: Shepherd’s Shades by Brown Sheep, Persian 3-ply wool yarn by Paternayan, Metallic Embroidery Floss by DMC
A family of mittens
Little monster mittensDesigned by Margaret Sindelar
Skill level: Intermediate
Sizes: Child’s Small (Medium, Large)
Finished measurements: 5H (6H, 7G)˝ circumference
Yarn weight:
0 1 2 3 4 5 6
Materials• 1 skein Shepherd’s Shades by Brown
Sheep, 100% wool, (131 yds/100g) in color SS-107 Fire (A)
• 2 skeins Persian by Paternayan, 100% wool (8 yds) in color 632 (B)
• 10 yds Metallic Embroidery Floss by DMC in color 5269 (C)
• U.S. size 5 (3.75mm) set of 5 DPNs, or size required for gauge
• U.S. size 3 (3.25mm) set of 5 DPNs
• Stitch holders or waste yarn
• Stitch marker
• Yarn needle
Gauge20 sts and 28 rows = 4˝ (10cm) in St st using larger needles
NoteWhen working duplicate stitch, thread yarn on yarn needle and embroider, following path of stitches in the knitted fabric. Alter-nately, embroider using small cross-stitches or a simple outline using running stitches.
Mitten CuffWith smaller needles and A, cast on 28 (32, 36) sts. Place marker and join, being careful not to twist the sts. Work in k1, p1 rib for 2 (2H, 2H)˝. Change to larger needles.
Work in St st until piece measures 2I (3H, 3H)˝ from beg.
Set up for thumbSlip 6 sts to holder or waste yarn. Cast on 6 sts over gap, knit to end; 28 (32, 36) sts. Work even in St st until piece measures 4 3/4 (6, 6H)˝ from beg.
Top shapingRnd 1: *K2, k2tog; rep from * around; 21 (24, 27) sts.
Rnd 2: Knit.
Rnd 3: *K1, k2tog; rep from * around; 14 (16, 18) sts.

5 Guides | Love of Knitting 27
Rnd 4: Knit.
Rnd 5: *K2tog; rep from * around; 7 (8, 9) sts. Cut yarn, leaving a 7˝ tail. Thread tail through rem sts and pull tight to secure.
ThumbPlace 6 held sts on needle. Join yarn, pick up and knit 1 st to close gap at side of thumb, knit across 6 held sts, pick up and knit 1 st on opposite side of thumb, pick up and knit 6 sts along cast on edge at top of thumb; 14 sts. Place marker and join. Work in St st for 2 rnds.
Next rnd: K2tog, k5, k2tog, knit to end; 12 sts. Work even in St st until thumb measures 1G (1H, 1I)˝ from beg.
Next rnd: *K2tog; rep from * around; 7 sts. Cut yarn, leaving a 7˝ tail. Thread tail through rem sts and pull tight to secure.
FinishingWeave in ends, block.
Boy and girlFollow the charts to embroider
duplicate- stitched figures on the back of
the hands (see photo). Use 2 plies of B (separate plies), then rep with 3
plies of C (separate plies). On girl mittens, cut lengths
of B and braid; tie ends to secure. Sew in place at top of head.
Snowflake mittensDesigned by Margaret Sindelar
Skill level: Intermediate
Sizes: Adult
Finished measurements: 8˝ circumference
Yarn weight:
0 1 2 3 4 5 6

28 5 Guides | Love of Knitting
SnowflakeLittle monster girl
1715131197531
11 9 7 5 3 1
1715131197531
11 9 7 5 3 1
131197531
13 11 9 7 5 3 1
Little monster boy
Materials• 1 skein Lanaloft by Brown Sheep, 100%
wool, (160 yds/200g) in color LL-48 Big Surf Blue (A)
• 10 yds Hand Paint Originals by Brown Sheep, 70% mohair, 30% wool (88 yds/50g) in color HP85 Cream Puff (B)
• 1 spool Metallics Ombre by Kreinik, in color 3200 Solid Pearl (C)
• U.S. size 5 (3.75mm) set of 5 DPNs, or size required for gauge
• U.S. size 3 (3.25mm) set of 5 DPNs
• Stitch holders or waste yarn
• Stitch marker
• Yarn needle
Gauge18 sts and 24 rows = 4˝ (10cm) in St st us-ing larger needles
NoteWhen working duplicate stitch, thread yarn on yarn needle and embroider, following path of stitches in the knitted fabric. Alternately, embroider using small cross-stitches or a simple outline using running stitches.
Mitten CuffWith smaller needles and A, cast on 36 sts. Place marker and join, being careful not to twist the sts. Work in k1, p1 rib for 2I˝. Change to larger needles. Work in St st until piece measures 4G˝ from beg.
Set up for thumbSlip 6 sts to holder or waste yarn. Cast on 6 sts over gap, knit to end; 36 sts. Work even in St st until piece measures 9” from beg.
Top shapingRnd 1: *K2, k2tog; rep from * around; 27 sts.
Rnd 2: Knit.
Rnd 3: *K1, k2tog; rep from * around; 18 sts.
Rnd 4: Knit.
Rnd 5: *K2tog; rep from * around; 9 sts. Cut yarn, leaving a 7˝ tail. Thread tail through rem sts and pull tight to secure.
ThumbPlace 6 held sts on needle. Join yarn, pick up and knit 1 st to close gap at side of thumb, knit across 6 held sts, pick up and knit 1 st on opposite side of thumb, pick up and knit 6 sts along cast on edge at top of thumb; 14 sts. Place marker and join. Work in St st for 2 rnds.
Next rnd: K2tog, k5, k2tog, knit to end; 12 sts. Work even in St st until thumb measures 2G˝ from beg.
Next rnd: *K2tog; rep from * around; 7 sts. Cut yarn, leaving a 7˝ tail. Thread tail through rem sts and pull tight to secure.
FinishingWeave in ends, block.
Follow the charts to embroider duplicate-stitched snowflakes on the back of the hands (see photo). Use one strand of B, then rep with 1 strand of C. ;

5 Guides | Love of Knitting 29
Baby items

30 5 Guides | Love of Knitting
Brothers pulloversGood looking sweaters for boys are often difficult to find , but these big and little brother pull-overs hit the target. The leather buttons add a distinctive masculine touch, but pick a pastel yarn and sparkly buttons and a sister can join in the fun. These pullovers are easy knits with a simple seed stitch and the slip stitch pattern throughout. The placets and buttonholes are easy to master with our step-by-step instructions. Yarn: Galway by Plymouth
Big brother sweaterDesigned by Jane Schwartz of Emerald Isle Designs
Skill level: Easy
Sizes: Child’s 4 (6, 8, 10) years
Finished measurements: Chest: 26H (28, 30, 31)˝
Yarn weight:
0 1 2 3 4 5 6
Materials• 725 (850, 1000, 1150) yds worsted
weight wool (any brand), in desired color
• U.S. size 8 (5mm) needles, or size re-quired for gauge
• U.S. G (4mm) crochet hook
• Stitch holders
• Yarn needle
• 4 (4, 5, 5) L˝ buttons
Gauge19 sts and 30 rows = 4˝ (10cm) in slip st pat
NoteFront is longer than back.
Stitch patSlip stitchRow 1 (RS): K1, *sl 1, k1; rep from * across.
Row 2: Purl.
Rep rows 1 and 2 for pat.
Sweater backCast on 59 (63, 67, 69) sts. Work in seed st (see instructions on page 32) until piece measures 1H˝, ending with a WS row and inc 4 sts evenly across last row; 63 (67, 71, 73) sts. Work even in slip st pat until piece measures 5I (6H, 8, 9)˝ from beg, ending with a WS row.
Shape armholesBind off 4 (5, 5, 5) sts at beg of next 2 rows; 55 (57, 61, 63) sts. Dec 1 st each end of row every RS row 3 times; 49 (51, 55, 57) sts. Work even in pat until piece measures 9H (10H, 12H, 14)˝ from beg, ending with a WS row.
Next row (RS): Work 12 (11, 13, 12) sts in slip st pat, work next 25 (29, 29, 33) sts in seed st, work last 12 (11, 13, 12) sts in slip st pat. Work even for 1˝ more. Bind off in pat.
FrontWork as for back until armholes measure 1˝ and all armhole shaping is complete, ending with a RS row.
Divide for placketNext row (WS): Work 29 (30, 32, 33) sts in pat for right front, place rem sts on holder for left front.
Right frontWork even in pat on right front sts only

5 Guides | Love of Knitting 31
until piece measures 8G (9G, 11G, 12I)˝ from beg, ending with a WS row.
Next row (RS): Work 17 (19, 19, 21) sts in seed st, work in slip st pat to end. Work as set until piece measures 9H (10H, 12H, 14)˝ from beg, ending with a WS row.
Shape neckNext row (RS): Bind off 12 (14, 14, 16) sts at neck edge, work in pat to end. Work even on rem sts until piece measures 11H (12H, 14H, 16)˝. Bind off in pat.
Place markers for 4 (4, 5, 5) buttons evenly spaced along right front edge, with first ap-prox I (I, 1, 1)˝ from beg of placket, last approx I˝ from top edge and rest spaced evenly between. When working buttonholes on left front, place them opposite these markers.
Left frontPlace 20 (21, 23, 24) held left front sts on needle. With WS facing, cast on 9 sts. Purl across cast-on sts and purl to end of row; 29 (30, 32, 33) sts. Work even in slip st pat, placing buttonholes opposite markers as follows:
Buttonhole row (RS): Work in pat to last 7 sts, k2tog, yo, work in pat to end. At the same time, when piece measures 8G (9G, 11G, 12I)˝, end with a RS row and incor-porate seed st as follows:
Next row (WS): Work 17 (19, 19, 21) sts in seed st, work in slip st pat to end. Work as set until piece measures 9H (10H, 12H, 14)˝ from beg, ending with a RS row.
Shape neckNext row (WS): Bind off 12 (14, 14, 16) sts

32 5 Guides | Love of Knitting
at neck edge, work in pat to end. Work even on rem sts until piece measures 11H (12H, 14H, 16)˝. Bind off in pat.
SleevesCast on 33 (33, 35, 35) sts. Work in seed st for 1”, inc 2 sts on last row; 35 (35, 37, 37) sts. Change to slip st pat and inc 1 st
each end of row every 11 (10, 10, 9) rows 6 (7, 8, 9) times; 47 (49, 53, 55) sts. Work even in pat until piece measures 10H (11H, 12H, 13H)˝ from beg, ending with a WS row.
Shape capBind off 4 (5, 5, 5) sts at beg of next 2 rows. Dec 1 st each end of row every 4 rows 0 (0, 2, 2) times, then every other row 6 (8, 6, 6) times, then every row 7 (5, 4, 4) times. Bind off 2 sts at beg of next 2 rows. Bind off rem 9 (9, 15, 17) sts.
FinishingSew shoulder seams. Set in sleeves, sew side and sleeve seams. With RS facing and crochet hook, beg at edge of placket, work slip st crochet around edges of placket and neck, working 2 slip sts in each corner. Fas-ten off. Weave in ends. Block. Sew buttons opposite buttonholes.
The crochet slip stitch (css) is a very handy and easy crochet stitch used in finishing off the armholes or necklines of many projects.

5 Guides | Love of Knitting 33
Little brother sweaterDesigned by Jane Schwartz
Skill level: Easy
Sizes: Child’s 12 months (18 months, 24 months, 2–3 years)
Finished measurements: Chest: 21 (22, 23 1/2, 24H)˝
Yarn weight:
0 1 2 3 4 5 6
Materials• 410 (435, 475, 500) yds worsted weight
wool (any brand), in desired color
• U.S. size 8 (5mm) needles, or size required for gauge
• U.S. G (4mm) crochet hook
• Stitch holders
• Yarn needle
• (6, 6, 8, 8) L˝ buttons 6 total
Gauge18 sts and 28 rows = 4˝ (10cm) in slip st pat
NoteFront is longer than back.
Stitch patSlip stitchRow 1 (RS): K1, *sl 1, k1; rep from * across.
Row 2: Purl.
Rep Rows 1 and 2 for pat.
Sweater backCast on 47 (49, 53, 55) sts. Work in seed st (see instructions on page 32) until piece measures I˝, ending with a WS row. Work even in slip st pat until piece measures 6G (6H, 6I, 6I)˝, ending with a WS row.
Big brother sweater
Little brother sweater
10 (11, 11¼, 11¾)˝
8¾ (9, 9, 10)˝
4½˝
2˝
3¼ (4, 4, 4¾)˝
2˝
7¼ (7¼, 7¾, 7¾)˝
10½ (11, 11¾, 12¼)˝
10½ (11, 11¾, 12¼)˝
7¾ (7¾, 7¾, 8¼)˝ 10½
(11½
, 12½
, 13½
)˝
3 (3
¼, 3
¾, 3
¾)˝
10 (10¼, 11¼, 11½)˝
10¼ (10¾, 11½, 12)˝
13¼ (14, 15, 15½)˝
13¼ (14, 15, 15½)˝
back
sleeve
front
back
sleeve
front5¾
(6½
, 8, 9
)˝
5¾ (6
, 6½
, 7)˝
7½ (8
, 8½
, 8½
)˝
2½ (2
¾, 2
¾, 3
)˝ 6¼
(6½
, 6¾
, 6¾
)˝
2¼ (3
, 3¼
, 3¼
)˝
6¼ (6
½, 6
½, 6
¾)˝
4¾ (5
, 5¼
, 5¼
)˝
5¾ (6
½, 8
, 9)˝
4¾ (5
, 5½
, 6)˝

34 5 Guides | Love of Knitting
Shape armholesBind off 3 (3, 4, 4) sts at beg of next 2 rows; 41 (43, 45, 47) sts. Dec 1 st each end of row every other row 1 (1, 2, 1) times; 39 (41, 41, 45) sts. Work even in slip st pat until piece measures 8G (8I, 9G, 9G)˝, ending with a WS row.
Next row (RS): Work 5 (6, 6, 8) sts in slip st pat, work 29 sts in seed st, and work rem 5 (6, 6, 8) sts in slip st pat.
Next row: Work 5 (6, 6, 8) sts in Slip st pat, work 29 sts in seed st, work rem 5 (6, 6, 8) sts in slip st pat. Cont in established pat until piece measures 9 (9H, 10, 10)˝ from beg, ending with a WS row. Bind off.
FrontWork as for back until piece measures 6I (7G, 7H, 7H)˝, ending with a WS row.
Divide for front flap Mark center 19 sts. Work in established pat to 5 sts before marker, work 5 sts in seed st, place next 19 sts on a holder, join a 2nd ball of yarn and work 5 sts in seed st, work rem sts in slip st pat. Working both sides at the same time, work even until piece measures 11 (11H, 12, 12)˝ from beg, ending with a WS row. Bind off.
Front flap Return 19 sts on holder to needle. With RS facing, cast on 5 sts, work across these 5 sts in seed st, work 19 sts in slip st pat, cast on 5 sts.
Next row: Work 5 sts in seed st, work 19 sts in slip st pat, work 5 sts in seed st. Work 4 rows even in pat.
Next (buttonhole) row Work 2 sts in pat, yo, k2tog, work in pat to last 4 sts, k2tog, yo, work last 2 sts in pat. Rep buttonhole row every 4 rows 2 more times and, at the same time, when center front measures 8H (9, 9H, 9H)˝ from beg, change to seed st on all sts. Work even in pat until center front mea-sures 9 (9H, 10, 10)” from beg. Bind off.
Big brother sweater
Little brother sweater
10 (11, 11¼, 11¾)˝
8¾ (9, 9, 10)˝
4½˝
2˝
3¼ (4, 4, 4¾)˝
2˝
7¼ (7¼, 7¾, 7¾)˝
10½ (11, 11¾, 12¼)˝
10½ (11, 11¾, 12¼)˝
7¾ (7¾, 7¾, 8¼)˝ 10½
(11½
, 12½
, 13½
)˝
3 (3
¼, 3
¾, 3
¾)˝
10 (10¼, 11¼, 11½)˝
10¼ (10¾, 11½, 12)˝
13¼ (14, 15, 15½)˝
13¼ (14, 15, 15½)˝
back
sleeve
front
back
sleeve
front
5¾ (6
½, 8
, 9)˝
5¾ (6
, 6½
, 7)˝
7½ (8
, 8½
, 8½
)˝
2½ (2
¾, 2
¾, 3
)˝ 6¼
(6½
, 6¾
, 6¾
)˝
2¼ (3
, 3¼
, 3¼
)˝
6¼ (6
½, 6
½, 6
¾)˝
4¾ (5
, 5¼
, 5¼
)˝
5¾ (6
½, 8
, 9)˝
4¾ (5
, 5½
, 6)˝

5 Guides | Love of Knitting 35
SleevesCast on 35 (35, 35, 37) sts. Work in seed stitch until piece measures I˝, ending with a WS row.
Work in slip st pat until pieces measures 1I˝ from beg. Inc 1 st each end of row ev-ery 8 (6, 6, 6) rows 5 (7, 8, 8) times; 45 (49, 51, 53) sts. Work even until piece measures 7H (8, 8H, 8H)˝, ending with a WS row.
Shape capBind off 3 (3, 4, 4) sts at beg of next 2 rows. Dec 1 st each end of row every other row 2 (3, 3, 4) times, then every row
10 (9, 10, 9) times; 15 (19, 17, 19) sts. Bind off 3 (4, 3, 3) sts at beg of next 2 rows. Bind off rem 9 (11, 11, 13) sts.
FinishingSew shoulder seams. Set in sleeves, sew side and sleeve seams. Sew buttons opposite buttonholes.
Edging With RS facing and crochet hook, join yarn to front flap where seed st pat meets stitch pat. Work in crocheted slip st around front flap. Fasten off. Weave in ends. Block. ;

36 5 Guides | Love of Knitting
This sweet newborn cardigan is a perfect beginner’s project. The garter stitch sweater is knit in one piece with easy instructions for the two front buttonholes. With a simple three-stitch bind-off and next row cast-on, you will be amazed how easy it is to finish this cardigan. Yarn: Tatamy DK by Kraemer Yarns
New arrival cardigan

5 Guides | Love of Knitting 37
Designed by Judy Head for Kraemer Yarns
Skill level: Beginner
Sizes: Child’s 3 (6) months
Finished measurements: Chest: 19 (22)˝ Length: 9 (10)˝
Yarn weight: 0 1 2 3 4 5 6
Materials• 2 skeins Tatamy DK by Kraemer Yarns,
45% cotton, 55% acrylic, (250 yds/100g) in color Playtime
• U.S. size 5 (3.75mm) needles, or size required for gauge
• Yarn needle
• Waste yarn or long stitch holder
• I˝ buttons, 2 total
Gauge22 sts and 40 rows= 4˝ (10cm) in garter st
NoteSweater is knit in one piece, starting at the lower back. Stitches are cast on for sleeves, then work continues over the shoulders and down the fronts, one side at a time.
Cardigan backCast on 52 (60) sts. Knit 50 (60) rows. Note: If you are counting ridges, remember that each ridge is 2 rows of garter st.
Cast on for sleevesNext row (RS): Knit to end of row, cast on 30 (34) sts for sleeve; 82 (94) sts.
Next row (WS): Knit to end of row, cast on 30 (34) sts for sleeve; 112 (128) sts.
Knit 40 rows more.

38 5 Guides | Love of Knitting
3 (4)˝
9½ (11)˝
5½ (6)˝
4˝
9 (10)˝
New arrival cardigan
Left shoulderPlace held sts on needles. With RS facing, join yarn and bind off 16 (22) sts for back neck, then knit to end of row; 48 (53) sts. Knit 6 (8) rows, ending last row at cuff of sleeve.
Left frontNext row (WS): Knit to last st, k1f&b.
Next row: Knit. Rep these rows 2 (3) times more; 51 (57) sts.
Next row (WS): Knit to end of row, cast on 3 (5) sts at neck edge; 54 (62) sts. Cont working even in garter st until sleeve mea-sures approx 8˝ from sleeve cast on, ending with a RS row.
Shape sleeveNext row (WS): Bind off 30 (34) sts for sleeve, knit to end of row; 24 (28) sts. Work rem sts in garter st for 50 (60) rows more. Bind off.
FinishingFold cardigan so that side and sleeve edges line up. Sew sleeve and side seams neatly, matching ridges. Sew buttons securely op-posite buttonholes, approx I˝ in from edge. Weave in ends. ;
Right shoulder Next row (RS): K48 (53), place rem 64 (75) sts (for back neck and left front) on a holder or waste yarn. Knit 7 (9) rows more, ending last row at cuff of sleeve.
Right frontRow 1 (RS): Knit to last st, k1f&b.
Row 2: Knit. Rep these rows 2 (3) times more; 51 (57) sts.
Next row (RS): Knit to end of row, cast on 17 (19) sts at front neck; 68 (76) sts. Knit 6 rows.
Buttonhole row 1 (WS): K4, bind off 4 sts, knit to end.
Buttonhole row 2 (RS): Knit to bound-off sts, cast on 4 sts over gap, knit to end. Knit 16 (20) rows even, then rep buttonhole rows. Cont working even in garter st until sleeve measures approx 8˝ from sleeve cast on, ending with a WS row.
Shape sleeveNext row (RS): Bind off 30 (34) sts for sleeve, knit to end of row; 38 (42) sts. Work rem sts in garter st for 50 (60) rows more. Bind off.

5 Guides | Love of Knitting 39
Home decor

40 5 Guides | Love of Knitting
Ivory throw
s
This extra large cotton throw is so lovely and soft that it will be a mainstay in the living room or on the porch all year around. Knit it in white for a perfect wedding gift or in school colors for the new graduate. Yarn: Sierra by Cascade
Designed by Melissa Leapman
Skill level: Easy
Sizes: One size
Finished measurements: Approx 50˝ x 70˝
Yarn weight:
0 1 2 3 4 5 6
Materials• 14 skeins Sierra by Cascade Yarns, 80%
pima cotton, 20% wool, (191 yds/100g) in color 03 Ivory
• U.S. size 6 (4mm) 36˝ circular needle, or size required for gauge
• U.S. size 5 (3.75mm) 36˝ circular needle
• Stitch markers
• Yarn needle
Gauge 19 sts and 24 rows = 4˝ (10cm) in pat using larger needles
NoteCircular needles are used to accommodate the large number of sts; do not join in a rnd.
Stitch patternsSee charts

5 Guides | Love of Knitting 41
ThrowWith smaller needle, cast on 269 sts. Work in double seed st pat for 12 rows. Change to larger needle.
Next row (RS): Work row 1 of double seed st pat over first 9 sts, place marker, work row 1 of lace pat over next 251 sts, place marker, work row 1 of double seed st pat to end. Continue as established until piece measures approx 68˝ from beg, ending with row 6 of lace pat. Change to smaller needle. Work in double seed st pat across
all sts for 12 rows. Bind off loosely.
FinishingWeave in ends. Block to measurements. ;
s

42 5 Guides | Love of Knitting
Key
Ivory throw lace pattern Double seed stitch pattern
K on RS; p on WS
P on RS; k on WS
K2tog
Ssk
Yarn over
Right twist: Slip next st onto cn and hold in back; k1; k1 from cn or k2tog, leaving them on LH needle; insert point of RH needle between these 2 sts and k the first one again
End Beg
Row 7
Row 5
Row 3
Row 1 (RS)
29-st repeatBeg
Row 3
Row 1 (RS)
2-st repeat
s
Key
Ivory throw lace pattern Double seed stitch pattern
K on RS; p on WS
P on RS; k on WS
K2tog
Ssk
Yarn over
Right twist: Slip next st onto cn and hold in back; k1; k1 from cn or k2tog, leaving them on LH needle; insert point of RH needle between these 2 sts and k the first one again
End Beg
Row 7
Row 5
Row 3
Row 1 (RS)
29-st repeatBeg
Row 3
Row 1 (RS)
2-st repeat

5 Guides | Love of Knitting 43
Best friend pillowA great beginner project, and a super gift idea. Write down the recipient’s phone number, birthday or other significant date, and assign each number to a color or type of yarn. Then, knit corresponding rows for each number, mixing up the yarns from your knitting bag. Repeat the sequence until the piece is a rectangle twice as big as the desired square. Yarn: Cottonwood by Fibra Natura, distributed by Universal Yarn
a

44 5 Guides | Love of Knitting
Designed by Lorna Miser
Skill level: Beginner
Sizes: One size
Finished measurements: 14˝ x 14˝
Yarn weight: 0 1 2 3 4 5 6
Materials• 1 skein Cottonwood by Fibra Natura,
100% organic cotton, (115 yds/50g) in each of colors 41109 Cindy (A), 41101 Cream (B), 41112 Austin (C), 41107 Monica (D), 41105 Janene (E), 41119 Gena (F)
• U.S. size 6 (4mm) needles, or size re-quired for gauge
• 14˝ square pillow form
• 6˝ x 3˝ rigid cardboard
• Masking tape
• Yarn needle
Gauge21 sts and 31 rows = 4˝ (10cm) in St st
NotesTo create the stripe pattern, take a friend’s phone number (or a special date such as a birthday or anniversary) and assign a yarn color to each digit—the first digit is worked in color A, the second in color B, and so on. Work for the same number of rows as the digit, working 10 rows for any zeros. Repeat sequence as needed to achieve the desired size.
For example, if your friend’s anniversary is 06-26-95, you would work the first digit, 0, in color A for 10 rows; the second digit, 6, in color B for 6 rows; the third digit, 2, in color C for 2 rows; the fourth digit, 6, in color D for 6 rows; the fifth digit, 9, in color E for 9 rows; and the sixth digit, 5, in color F for 5 rows. You would then repeat the sequence as needed to match the length of the pillow form.
PillowWith A, cast on 148 sts. Working in St st throughout, work the number of rows needed for your first digit. Change to B and work the number of rows needed for that digit. Cont for remaining digits, then rep sequence as needed until piece measures 14˝. Bind off.
FinishingWeave in ends. Fold piece in half widthwise. Sew side edges. Insert pillow form. Sew remaining seam closed. ;

5 Guides | Love of Knitting 45
How to make TASSeLSWith desired color, cut 3 pieces of yarn each 10˝ long. Lay these across the cardboard and tape in place (Photo A). Working with all the yarns used for the pillow, hold them together, and then wrap around the 6” length of cardboard 8 times with the ends op-posite the taped yarn pieces (Photo B). Remove the tape and tightly tie the 10˝ pieces around the wraps. Cut the yarn wraps at other end of cardboard (Photo C). Cut 3 more pieces of yarn 18˝ long, and wrap around the yarn bundle about H˝ from the tied end (Photo D). Fasten ends tightly and tuck inside tassel. Evenly trim ends of tassel. Make 4. Attach a tassel to each corner of pillow.
A B
C D
a
a
a
a
a
a
a
a

46 5 Guides | Love of Knitting
Babykid wrapEuropean elegance is the signature style of the Lana Grossa Design Team. Their extra-soft wrap is as easy to make as it is to wear. Knit the shawl with the simple stockinette stitch, and then add the ruffled edge. It’s sure to please the most sophisti-cated fashionista. Yarn: Babykid by Lana Grossa , distributed by Muench Yarns
©
Designed by Lana Grossa Design Team
Skill level: Easy
Sizes: One size
Finished measurements: 24H˝ x 60˝, excluding ruffle
Yarn weight:
0 1 2 3 4 5 6
Materials6 skeins Babykid by Lana Grossa, 57% superkid mohair, 43% microfiber, (220 yds/50g) in color 37
U.S. size 8 (5mm) 32˝ circular needle, or size required for gauge
U.S. size 7 (4.5mm) 32˝ circular needle
Yarn needle
Gauge16 sts and 22 rows = 4˝ (10cm) in St st us-ing larger needles
ShawlWith larger needles, cast on 98 sts. Do not join, work back and forth in rows. Work in St st for 60˝. Bind off.
Ruffle:With RS facing and smaller needles, pick up 236 sts along 1 long side of shawl. Work ruffle as follows:
Row 1 and all WS rows through 19: Purl.
Row 2: K2, *k1f&b, k5; rep from * to end; 275 sts.
Row 4: K2, *k1f&b, k6; rep from * end; 314 sts.
Row 6: K2, *k1f&b, k7; rep from * to end.
Row 8: K2, *k1f&b, k8; rep from * to end.
Row 10: K2, *k1f&b, k9; rep from * to end.
Row 12: K2, *k1f&b, k10; rep from * to end.
Row 14: K2, *k1f&b, k11; rep from * to end.
Row 16: K2, *k1f&b, k12; rep from * to end.
Row 18: K2, *k1f&b, k13; rep from * to end; 587 sts.
Bind off.
Rep on opposite long edge. Work short ends of shawl as for long, picking up 98 sts each side.
FinishingSew corners of ruffle together. Weave in ends. Block. ;

5 Guides | Love of Knitting 47