Embed Size (px)
Citation preview
Arts Corps is a 501(c)(3) nonprofit organization. Contributions to Arts Corps are tax deductible.
4408 Delridge Way SW #110, Seattle, WA 98106 •206.722.5440 • (f) 206.722.5459
• ARTSCORPS.ORG (visit our site for more online learning).
gratitude
Through
Art2020
@ArtsCorps
#makeartanyway
ACTIVITY 1: Maze Making
Discipline: Visual Art
Duration: 45 minutes
Age Range: Grades K - 5th
Creator: Adam Collet
Contact: [email protected]
Materials: Pencil with eraserpapermarkers
Vocabulary: Maze: a confusing path with a start and a finish
Parallel: lines that are next to each other and don’t touch, like the walls of a maze
Solution: the answer when you solve a problem, like a maze
In this project, we’ll learn to draw a fun maze. We’ll also learn how to make the solution and make it as hard or easy as we want. Also, there will be some fun stops at our favorite places along the way.
Learning Goals:
1. You will learn to make a maze.2. You will think about what’s important to you.3. You will learn to make a plan to get through the maze.
Activity Opening:
There are a lot of things in our way right now, keeping us from doing the things we like to do and seeing the people we like to see. But let’s imagine there’s a way around these obstacles. A way we can still have fun times with our friends and families is by creating interactive art.
#creativesolidarity
Instructions Part I:
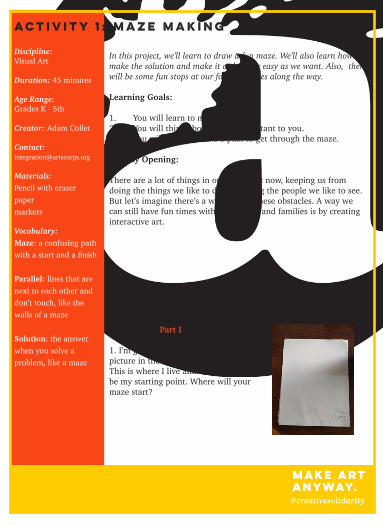
1. I’m going to start by drawing a little picture in the lower right hand corner. This is where I live and it’s going to be my starting point. Where will your maze start?
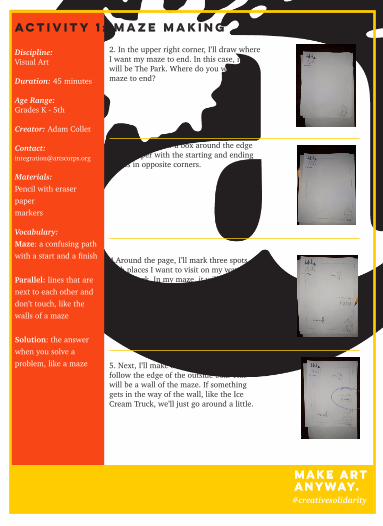
2. In the upper right corner, I’ll draw where I want my maze to end. In this case, it will be The Park. Where do you want your maze to end?
3. Now let’s draw a box around the edge of our paper with the starting and ending points in opposite corners.
4.Around the page, I’ll mark three spots with places I want to visit on my way to The Park. In my maze, it will be The Barbershop, The Ice Cream Truck, and The Library. What spots do you want to visit in your maze?
5. Next, I’ll make an inside line and try to follow the edge of the outside box. This will be a wall of the maze. If something gets in the way of the wall, like the Ice Cream Truck, we’ll just go around a little.
#creativesolidarity
ACTIVITY 1: Maze Making
Discipline: Visual Art
Duration: 45 minutes
Age Range: Grades K - 5th
Creator: Adam Collet
Contact: [email protected]
Materials: Pencil with eraserpapermarkers
Vocabulary: Maze: a confusing path with a start and a finish
Parallel: lines that are next to each other and don’t touch, like the walls of a maze
Solution: the answer when you solve a problem, like a maze
6. Now make two or three gaps in the wall by erasing a small section.
7. Next, I’ll make another wall inside the last one. When I’m done with that wall, I’ll erase two or three spots in that wall.
8. Keep drawing inner walls and erasing two or three spots in each one. Draw inner walls until you get to the middle and don’t have more room for walls. Don’t forget to erase some spots in each wall.
#creativesolidarity
ACTIVITY 1: Maze Making
Discipline: Visual Art
Duration: 45 minutes
Age Range: Grades K - 5th
Creator: Adam Collet
Contact: [email protected]
Materials: Pencil with eraserpapermarkers
Vocabulary: Maze: a confusing path with a start and a finish
Parallel: lines that are next to each other and don’t touch, like the walls of a maze
Solution: the answer when you solve a problem, like a maze
Instructions Part II:
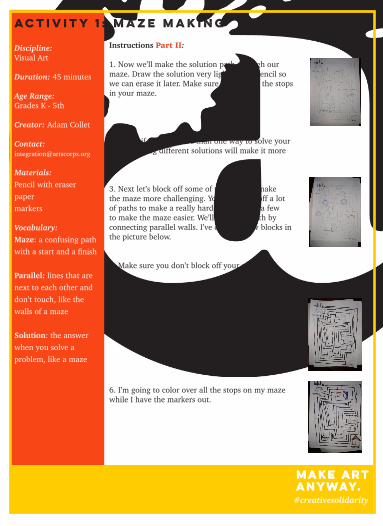
1. Now we’ll make the solution path through our maze. Draw the solution very lightly with pencil so we can erase it later. Make sure to go by all the stops in your maze.
2. It’s ok if there is more than one way to solve your maze. Having different solutions will make it more fun.
3. Next let’s block off some of the paths to make the maze more challenging. You can block off a lot of paths to make a really hard maze or just a few to make the maze easier. We’ll block the path by connecting parallel walls. I’ve circled a few blocks in the picture below.
4. Make sure you don’t block off your own path!
5. Now we’ll draw over the walls of our maze with dark colored marker.
6. I’m going to color over all the stops on my maze while I have the markers out.
ACTIVITY 1: Maze Making
Discipline: Visual Art
Duration: 45 minutes
Age Range: Grades K - 5th
Creator: Adam Collet
Contact: [email protected]
Materials: Pencil with eraserpapermarkers
Vocabulary: Maze: a confusing path with a start and a finish
Parallel: lines that are next to each other and don’t touch, like the walls of a maze
Solution: the answer when you solve a problem, like a maze
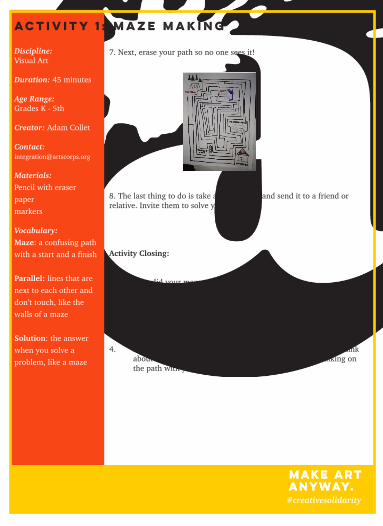
7. Next, erase your path so no one sees it!
8. The last thing to do is take a picture of it and send it to a friend or relative. Invite them to solve your maze!
Activity Closing:
1. How did your maze work out?
2. Think about what you want to include in your next maze?
3. What are some things you could do to make it more challenging? Try trading mazes with a friend or relative.
4. Let’s imagine walking the path of your maze with a friend. Think about all the a-MAZE-ing things you will see. Who is walking on the path with you?
#creativesolidarity

ACTIVITY 2: Thankful pose
Discipline: Healing arts Duration: 30-45 minutes
Age Range: 6th - 8th grade
Creator: Aishé Keita
Contact: [email protected]
Materials:Paper and pen
Vocabulary:
Thankful: expression of gratitude.
Pose: a frozen statue made with your body that doesn’t move or speak.
We will explore the things we are thankful for by drawing and using our bodies.
Learning Goal: You will learn to observe your surroundings and create pictures with your bodies.
Activity Opening:
1. When do we use the word thank or thankful?
2. Why do we use it?
3. Give me one example when you say ‘thank you’ and why do you say it?
Your Example:
#creativesolidarity
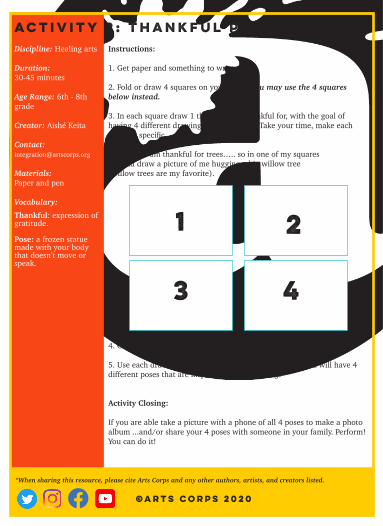
Instructions:
1. Get paper and something to write with.
2. Fold or draw 4 squares on your paper. You may use the 4 squares below instead.
3. In each square draw 1 thing you are thankful for, with the goal of having 4 different drawings on your paper. Take your time, make each drawing specific. Example: I am thankful for trees….. so in one of my squares I would draw a picture of me hugging a big willow tree (willow trees are my favorite).
4. Once you have 4 specific drawings, let’s make them come to life!
5. Use each drawing to make a pose / satue. By the end you will have 4 different poses that are inspired by your drawings Activity Closing:
If you are able take a picture with a phone of all 4 poses to make a photo album ...and/or share your 4 poses with someone in your family. Perform! You can do it!
*When sharing this resource, please cite Arts Corps and any other authors, artists, and creators listed.
©Arts Corps 2020
ACTIVITY 2: Thankful poseDiscipline: Healing arts Duration: 30-45 minutes
Age Range: 6th - 8th grade
Creator: Aishé Keita
Contact: [email protected]
Materials:Paper and pen
Vocabulary: Thankful: expression of gratitude.
Pose: a frozen statue made with your body that doesn’t move or speak.
1 2
3 4
How do you show your appreciation for someone? This could look like tidying up after them, or making them lunch? There are many ways to show your gratitude for someone, including creating art or making a card.
Learning Goals: You will learn how to create a pop up card.
Activity Opening:
What is something you are thankful for? Think of something that you’re happy to have in your life. Even if it seems so small, it most likely has great significance and meaning for you. This could be anything such as a person, or an object. Why are you thankful for this thing or person?
When I want to show my appreciation for someone, I make cards for that person. In this activity, you will choose one person for whom to make a card.
#creativesolidarity
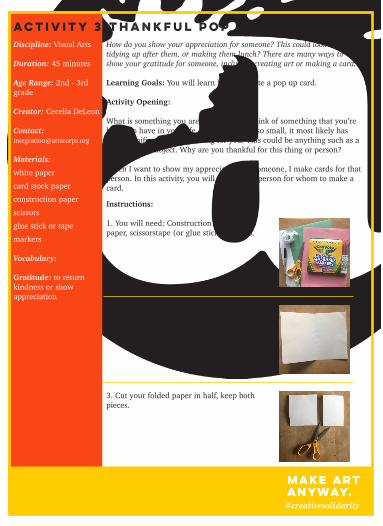
Instructions:
1. You will need: Construction paper, whitepaper, scissorstape (or glue stick) markers.
2. Take your white paper and fold it in half.
3. Cut your folded paper in half, keep both pieces.
ACTIVITY 3:Thankful Pop Up CardsDiscipline: Visual Arts
Duration: 45 minutes
Age Range: 2nd - 3rd grade
Creator: Cecelia DeLeon
Contact: [email protected]
Materials:white papercard stock paperconstruction paperscissorsglue stick or tapemarkers
Vocabulary:
Gratitude: to return kindness or show appreciation
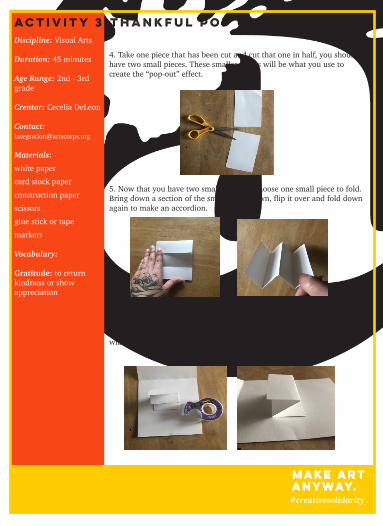
4. Take one piece that has been cut and cut that one in half, you should have two small pieces. These smaller pieces will be what you use to create the “pop-out” effect.
5. Now that you have two smaller pieces, choose one small piece to fold. Bring down a section of the small paper down, flip it over and fold down again to make an accordion.
6. Take the accordion-folded piece and tape it down in the middle of one side of the larger folded paper. This bouncing accordion paper is what will make your object pop out!
#creativesolidarity
ACTIVITY 3:Thankful Pop Up CardsDiscipline: Visual Arts
Duration: 45 minutes
Age Range: 2nd - 3rd grade
Creator: Cecelia DeLeon
Contact: [email protected]
Materials:white papercard stock paperconstruction paperscissorsglue stick or tapemarkers
Vocabulary:
Gratitude: to return kindness or show appreciation
#creativesolidarity
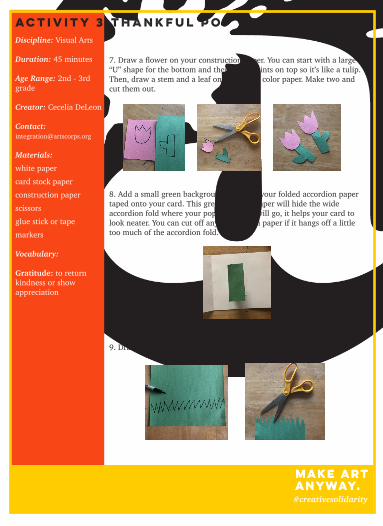
7. Draw a flower on your construction paper. You can start with a large “U” shape for the bottom and then three points on top so it’s like a tulip. Then, draw a stem and a leaf on a different color paper. Make two and cut them out.
8. Add a small green background on top of your folded accordion paper taped onto your card. This green piece of paper will hide the wide accordion fold where your pop out flower will go, it helps your card to look neater. You can cut off any extra green paper if it hangs off a little too much of the accordion fold.
9. Draw zig zags on your green paper; this will be grass. Cut it out.
ACTIVITY 3:Thankful Pop Up CardsDiscipline: Visual Arts
Duration: 45 minutes
Age Range: 2nd - 3rd grade
Creator: Cecelia DeLeon
Contact: [email protected]
Materials:white papercard stock paperconstruction paperscissorsglue stick or tapemarkers
Vocabulary:
Gratitude: to return kindness or show appreciation
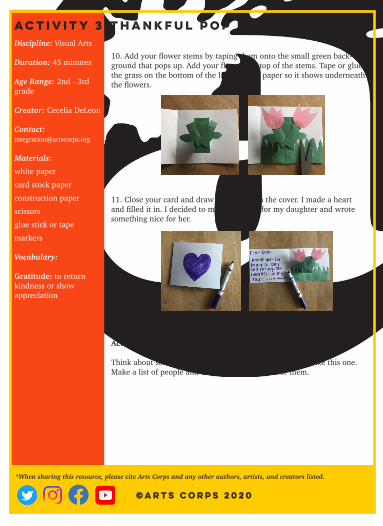
10. Add your flower stems by taping them onto the small green back-ground that pops up. Add your flowers on top of the stems. Tape or glue the grass on the bottom of the larger white paper so it shows underneath the flowers.
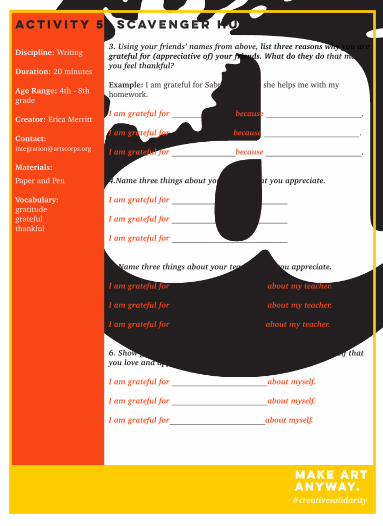
11. Close your card and draw something on the cover. I made a heart and filled it in. I decided to make this card for my daughter and wrote something nice for her.
Activity Closing:
Think about someone in your life who would need a card like this one. Make a list of people and create different cards for them.
ACTIVITY 3:Thankful Pop Up CardsDiscipline: Visual Arts
Duration: 45 minutes
Age Range: 2nd - 3rd grade
Creator: Cecelia DeLeon
Contact: [email protected]
Materials:white papercard stock paperconstruction paperscissorsglue stick or tapemarkers
Vocabulary:
Gratitude: to return kindness or show appreciation
*When sharing this resource, please cite Arts Corps and any other authors, artists, and creators listed.
©Arts Corps 2020

ACTIVITY 4: Heart Pop Up Gratitude Card Discipline: Visual Arts
Duration: 30-45 minutes
Age Range: 4th - 5th grade
Creator: Maria L. Guillen Valdovinos
Contact: [email protected]
Materials:
cardstock paper
scissors
glue
decorative paper
Vocabulary: stackingcut-outpop-upeffect
There are so many ways to express your gratitude to a loved one. In this creative project, we will be layering hearts to create a pop-up gratitude card!
Learning Goals: 1. You will learn the basics of stacking paper to create a pop-up effect. 2. You will learn to make a fun card!3. You will learn to enjoy the process of pop-up art.
Activity Opening:
Card-making is a great way to express our gratitude in infinite ways. We will be exploring pop-up effects with a simple card-making project. Think of someone you are grateful for and design/create a card for them.
Instructions:
1. Fold a small piece of paper that will serve as your main card.
2. Take a different color paper and fold it in half. Starting from the folded edge, draw half a heart then cut it out. Unfold it so now you have a full heart. Repeat this step with various papers cut out hearts in different sizes that you can stack up on top of each other.
#creativesolidarity

ACTIVITY 4: Heart Pop Up Gratitude Card Discipline: Visual Arts
Duration: 30-45 minutes
Age Range: 4th - 5th grade
Creator: Maria L. Guillen Valdovinos
Contact: [email protected]
Materials:
cardstock paper
scissors
glue
decorative paper
Vocabulary: stackingcut-outpop-upeffect
3. Apply glue on each heart, just along the crease. Glue the hearts on top of each other, with the largest one at the bottom and smallest one on top.
4. Glue the entire back of the heart at the bottom of the stack to the crease on the card. Let the glue dry for a few minutes. When you close and open the card, the layered hearts will pop-out!
Activity Closing:
Once the glue dries you can decorate the front and inside of the card with a message for your special person. Cards are a great way of personalizing a message and letting a loved one know how much you appreciate them. You can challenge yourself by creating more hearts!
*When sharing this resource, please cite Arts Corps and any other authors, artists, and creators listed.
©Arts Corps 2020

#creativesolidarity
ACTIVITY 5: scavenger Hunt
Discipline: Writing
Duration: 20 minutes
Age Range: 4th - 8th grade
Creator: Erica Merritt
Contact: [email protected]
Materials:Paper and Pen
Vocabulary: gratitudegratefulthankful
You can explore different areas in your life so that you may find gratitude.
Learning Goal: You will learn to find gratitude in a variety of things.
Activity Opening: What does it mean to be grateful, thankful or appreciative? You can write your response below.
Instructions: Find gratitude in each of the following subjects... 1. Name three things about your family that you appreciate.
I am grateful for ______________________________________________ (family member or members).
I am grateful for ______________________________________________ (something you do with your family).
I am grateful for ______________________________________________ (one more thing you love about your family).
2. Name three friends who you appreciate.
I am grateful for ______________________(name of friend).
I am grateful for ______________________(name of friend).
I am grateful for ______________________(name of friend).
3. Using your friends’ names from above, list three reasons why you are grateful for (appreciative of) your friends. What do they do that makes you feel thankful?
Example: I am grateful for Sabrina because she helps me with my homework.
I am grateful for ________________because ________________________.
I am grateful for________________because ________________________.
I am grateful for ________________because ________________________.
4.Name three things about your school that you appreciate.
I am grateful for _____________________________
I am grateful for _____________________________
I am grateful for _____________________________
5. Name three things about your teacher that you appreciate.
I am grateful for ________________________about my teacher.
I am grateful for________________________ about my teacher.
I am grateful for _______________________ about my teacher.
6. Show gratitude for yourself! Name three things about yourself that you love and appreciate.
I am grateful for ________________________about myself.
I am grateful for ________________________about myself.
I am grateful for________________________about myself.
#creativesolidarity
ACTIVITY 5: scavenger Hunt
Discipline: Writing
Duration: 20 minutes
Age Range: 4th - 8th grade
Creator: Erica Merritt
Contact: [email protected]
Materials:Paper and Pen
Vocabulary: gratitudegratefulthankful

*When sharing this resource, please cite Arts Corps and any other authors, artists, and creators listed.
©Arts Corps 2020
7. Name three things about quarantine that you have appreciated.
Example: I appreciate that I get to sleep a little later.
I appreciate____________________
I appreciate____________________
I appreciate____________________ 8. Name three of your own choices that you are grateful you made.
Example: I am grateful I made the choice to be nice to my little brother yesterday. I am grateful for ______________________________________.
I am grateful for ______________________________________.
I am grateful for______________________________________.
9. Name three things that you have that others might not have.
Example: I have a garden where I grow vegetables.
I have________________________________.
I have________________________________.
I have________________________________.
Closing Activity: Go tell 2 people why you are grateful to have them in your life.
ACTIVITY 5: scavenger Hunt
Discipline: Writing
Duration: 20 minutes
Age Range: 4th - 8th grade
Creator: Erica Merritt
Contact: [email protected]
Materials:Paper and Pen
Vocabulary: gratitudegratefulthankful

*When sharing this resource, please cite Arts Corps and any other authors, artists, and creators listed.
©Arts Corps 2020
ACTIVITY 6: Gratitude Writing
Discipline: Writing
Duration: 20 minutes
Age Range: 3rd - 8th grade
Creator: Erica Merritt
Contact: [email protected]
Materials:Paper and Pen
Vocabulary: gratitudegratefuloptimism
You can find gratitude in various situations.
Learning Goal: You will practice the art of optimism. Optimism is when you look at a situation and find the good in it.
Instructions: Can you find ways to be grateful in every situation?
For example: You didn’t get everything you asked for on your birthday. (turn the frown upside down)
Gratitude Statement: “I am grateful that I got a few things that I really wanted for my birthday!!”
Try to turn these frowns upside down by changing these into gratitude statements.
I didn’t get the new pair of tennis shoes that I wanted. Gratitude Statement: __________________________________________ It’s rains a lot here in Washington.Gratitude Statement: __________________________________________
I don’t get to hang out with my friends during quarantine.Gratitude Statement: __________________________________________
I don’t have an XBox like some of my other friends.Gratitude Statement: __________________________________________
I don’t like doing homework.Gratitude Statement: __________________________________________
Activity Closing: Name 3 things that you are grateful for.
1. __________________________________________
2. __________________________________________
3. __________________________________________

ACTIVITY 7: Gratitude song
Discipline: Writing
Duration: 20 minutes
Age Range: K - 3rd
Creator: Erica Merritt
Contact: [email protected]
Materials:Your voice and willingness to sing!
Vocabulary: gratitudegratefulthankful
You will learn to make a new song using the melody from “You Are My Sun-shine”. Your song will focus on gratitude. Learning Goal: You will learn a new song with the same melody of a familiar song.
Activity Opening:
Do you remember the song “You Are My Sunshine”? Well this song will have the same melody but with different words
Instructions: 1. Listen to “You Are My Sunshine” and get to know the melody of the song. You can try humming it to yourself.
2. Sing the lyrics below to the same melody as “You Are My Sunshine” * I Am Grateful (to the tune of “You Are My Sunshine”) I am so grateful, so very grateful, That I am healthy, In every way! I love my family and friends around me I am grateful so, grateful today! I am so grateful so very grateful, For what I have dear, and so much more! I have my family and friends around me, I am grateful so grateful always! Closing Activity:
What are two things for which the song expresses gratitude?
1. ______________________________________
2. ______________________________________
*When sharing this resource, please cite Arts Corps and any other authors, artists, and creators listed.
©Arts Corps 2020
#creativesolidarity
ACTIVITY 8: Visual Poem
Discipline: Poetry/ Visual arts
Duration: 30 minutes
Age Range: 8th - 12th
Creator: Meredith Arena
Contact: [email protected]
Materials:PaperAnything you like to draw with (pencil, pen, crayon etc)
Vocabulary:
gratituderhymeline breaksmicromacro
In this activity, you will write a poem with drawings to go with it about what you are grateful for in your life right now.
Learning Goals:
1. You will practice writing poetry.2. You will think about all the things big and small, near and far for
which you feel grateful.3. You will make an accordion book with drawings to go with your
poem. (You can also choose a separate framing art project to display your poem.)
Activity Opening:
Think about things you are grateful for right now in your everyday life. To be grateful means to be thankful. It means that we appreciate those people and things.
Make a list starting with small everyday things (I used the example of my garden and my time to relax) and move to things outside yourself, like family and community.
The micro, meaning small, are the people and things we know well, that we are with almost everyday that are close to us. The macro are the bigger things outside of your home and yourself, like essential workers, hospitals, government and elected officials, and even the sun and the moon or things that bring us joy. We all have to be changemakers right now and one way to do that is to practice gratitude for all things big and small.

Instructions:
1. Make a list, starting with the things on the micro level that are near to you like plants in the house, home-cooked food, brothers and sisters, songs you sing at home. Write a few lines about those things; describe what about them makes you happy.
1. _______________________________________________________2. _______________________________________________________3. _______________________________________________________
2. Then list the things that are outside your home (macro level), like essential workers who are working everyday to take care of everyone. If you are grateful for food, maybe you can write about how that food gets to your table.
If you are grateful for the sun, maybe you can write about how the sun feels on your skin or how they help things grow.
1. ________________________________________________________2. ________________________________________________________3. ________________________________________________________
3. Write a poem about the things on your list. Use scrap paper so you can cross out and make changes. You can use rhyme, repetition, metaphors. Use sensory language: what do people or things on your list look, sound, smell, feel or taste like.
4. Fold paper of any size into your accordion book and rewrite your poem onto the pages of the book, maybe one line per fold. Usually this kind of book will stand on its own. If you don’t want to make the book, you can simply rewrite your poem on any paper. You can do a separate activity to make a frame for it, if you like.
5. You can write the words however you want and add any drawings you want to go with the words.
Activity Closing:
Share you poem and book with your family. Think about the things you are grateful for each day.
ACTIVITY 8: Visual Poem Discipline: Poetry/ Visual arts
Duration: 30 minutes
Age Range: 8th - 12th
Creator: Meredith Arena
Contact: [email protected]
Materials:PaperAnything you like to draw with (pencil, pen, crayon etc)
Vocabulary:
gratituderhymeline breaksmicromacro
*When sharing this resource, please cite Arts Corps and any other authors, artists, and creators listed.
©Arts Corps 2020
ACTIVITY 9: Patterned Frames Discipline: Visual arts
Duration: 45 minutes
Age Range: 2nd - 5th grade
Creator: Carina A. del Rosario
Contact: [email protected]
Materials:paperrulerpencilscrayons/color pencils/markersvarious colored paper scissors glue
Vocabulary:
framingmosaicpatternsymmetryemphasis/emphasize
Learning Goals:
1. You will understand you can use emphasis to show something important.
2. You will understand and use pattern and symmetry to design a frame.
3. You will learn to use mosaic technique to create pattern. Activity Opening:
What are different ways we show that something is important or special to us? In art, we use different design techniques to emphasize what is most important in a picture: placement, size, space, and framing, to name a few. Framing is when we create a border around the important object in order to draw attention to it.
We’ll make our frame extra special by creating a pattern around it. Pattern is a design that repeats. We’ll make sure our patterns show mirror symmetry, so that one side matches the opposite side if we were to fold it in half.
You can choose whether to create a mosaic design (cut shapes arranged with space in between) or one that you draw and color.
Instructions: Click here to follow this lesson with a video!
Use your ruler to draw a border line on each side of your paper.You can choose to create a mosaic design or a drawing and coloring design:
Mosaic Design:
1. Cut shapes out of colored or recycled papers. Remember, you’ll need many of the same size, so fold or stack your paper, draw your shape, then cut a few sheets of paper at the same time.
2. Arrange your shapes into a pattern inside the border. (Don’t put anything in the middle--that’s where the picture will go!) Make the sure the pattern at the top, matches the bottom. You can use a different pattern for the sides, as long as the sides are symmetrical.
3. Glue your pieces down. Leave space in between each piece so the main paper creates an outline around each shape.
#creativesolidarity

ACTIVITY 9: Patterned Frames Discipline: Visual arts
Duration: 45 minutes
Age Range: 2nd - 5th grade
Creator: Carina A. del Rosario
Contact: [email protected]
Materials:paperrulerpencilscrayons/color pencils/markersvarious colored paper scissors glue
Vocabulary:
framingmosaicpatternsymmetryemphasis/emphasize
Drawing and Coloring Design:
1. After you draw your border lines, divide the long rectangles on the sides by drawing diagonal lines to form a long X in each rectangle. You’ll end up with 4 triangles on each side.
2. Draw a pattern in one of the triangles. Repeat the same pattern on the opposite side. Use the same color(s) for your pattern on both sides.
3. Repeat for all the triangles on the left and the right sides.
4. You could do the same thing for the top, bottom and corners, but perhaps use different shapes instead of triangles. Another option is to color them solid. Just make sure it’s symmetrical and the pattern on top matches the pattern on the bottom.
5. After you’ve finished decorating the border, you can glue a picture or poem in the middle blank space. Or, cut out the middle to make a frame and lay it over a poem or picture. Glue or tape the frame to your poem or picture.
Activity Closing:
What did you decide to put in the middle of your frame? What do you want to show is special to you? Hang your framed art or poem in your house, at your window and let others know who or what you are grateful for, who or what is important to you.
*When sharing this resource, please cite Arts Corps and any other authors, artists, and creators listed.
©Arts Corps 2020
#creativesolidarity