Embed Size (px)
Citation preview

Getting StartedWith Your
4G LTE mobile phone
Model: S6001L, G2 SUN CUPID declares that this device complies with the essential requirements and relevant provisions of the 2014/53/EU, 2014/30/EU and 2014/35/EU directives. Visit www.nuumobile.com to view the Declaration of Conformity.
SUN CUPID declares that the device complies with the International guidelines on exposure of radio waves. To check the values visit www.nuumobile.com.

Index
G2 Overview 3
Setting up Your Phone 4
Getting Started 16
Safety information 24 Certificate 28 Warranty information & Registration 34 Customer Support 35

3
Front/Back
G2 Overview
Top
Bottom
Wake/Sleepbutton
Microphone Speaker
Volumecontrol
Front camera
Rear camera flash
Notification LED
Micro-USBconnector
Headphone jack
Fingerprintsensor
Earpiece
Primarycamera
Secondary camera

4
Setting Up Your PhoneFollow these step-by-step instructions to set up your G2. Power off the phone before inserting any cards!
Remove SIM Tray• Remove the SIM tray by inserting a pin eject key/
paper clip in the small circular hole at the bottom of the tray. The tray will then eject from the phone.
Configuration 2: microSD™ Card/SIM• Orient microSD/SIM card to match layout on tray.• microSD card supports up to 64GB• SIM 2 (Nano) supports 4GLTE connections.
Configuration 1: Dual SIM Standby • Orient SIM card to match layout on tray.• SIM 1 (Nano) supports 4GLTE connections.• SIM 2 (Nano) supports 4GLTE connections.
Replace SIM Tray• After placing the SIMs and/or memory card in the
tray, slide it back into its slot. It will click and hold in place.
Charge/Sync• Plug in the type C connector to charge the phone or
transfer data.
1
3
2
4
5
Warning: SIM cards are small enough to become a choking hazard, so please keep them away from Children & Pets. SIM cards are also quite delicate. Please be careful when handling your card.
EN

5
EN
3
2
1
SIM
1
SIM
2SI
M 2
Mic
roSD

6
Ajuste de su TeléfonoSiga paso a paso estas instrucciones para configurar su G2. ¡Apague el teléfono antes de introducir la tarjeta!
Retirar la Tarjeta SIM• Retire la tarjeta SIM introduciendo una clavija / clip de
papel en el pequeño orificio circular situado en la base de la bandeja. La bandeja de la tarjeta SIM se abrirá.
Configuración 2: Tarjeta microSD™/SIM• Coloque la tarjeta microSD/SIM en la orientación indicada en la bandeja.• Compatible con tarjeta microSDde hasta64GB• SIM 2 (Nano) compatible con conexiones 4GLTE.
Configuración 1: Doble tarjeta SIM En Espera • Coloque la tarjeta SIM en la orientación indicada en la bandeja.• SIM 1 (Nano) compatible con conexiones 4GLTE.• SIM 2 (Nano) compatible con conexiones 4GLTE.
Introducir la Bandeja de la tarjeta SIM• Después de colocar la/s tarjeta/s SIMs y la tarjeta de
memoria en la bandeja, vuelva a introducir la bandeja en su ranura. Se escuchará un clic y quedará cerrada.
Cargar/Sincronizar• Enchufe el conector tipo C para cargar el teléfono o
transferir datos.
1
3
2
4
5
Advertencia:Las tarjetas SIM son suficientemente pequeñas para poder ser accidentalmente ingeridas, por este motivo deberán mantenerse fuera del alcance de niños y animales. Las tarjetas SIM también son bastante delicadas. Manipule su tarjeta con precaución.
SP

7
SP
3
2
1
SIM
1
SIM
2SI
M 2
Mic
roSD

8
Configuration de votre téléphoneSuivez ces instructions étape par étape pour configurer votre G2. Éteignez le téléphone avant d’insérer les cartes, le cas échéant !
Retrait du plateau SIM• Retirez le plateau de la carte SIM en insérant une clé
d’éjection / un trombone dans le petit trou circulaire situé au bas du plateau. Le plateau sera ensuite éjecté du téléphone.
Configuration 2: Carte microSD™ Card/SIM• Orientez la cartemicroSD/SIM de façon à la faire correspondre à la
forme du plateau.• La carte microSDpeut stocker jusqu’à 64GB• SIM 2 (Nano) prend en charge les connexions 4GLTE.
Configuration 1: Double SIM en veille • Orientez la carteSIMde façon à la faire correspondre à la forme du
plateau..• SIM 1 (Nano) prend en charge les connexions 4GLTE.• SIM 2 (Nano) prend en charge les connexions 4GLTE.
Replace SIM Tray• Après avoir inséré les cartes SIM et / ou la carte mémoire
dans le(s) plateau(x), faites-les glisser dans leur logement. Il s’enclencheront et se maintiendront en place.
Charge/Sync• Branchez le connecteur de type C pour charger le
téléphone ou transférer des données.
1
3
2
4
5
Avertissement:Les cartes SIM sont assez petites pour constituer un risque d’étouffement, veuillez ainsi les tenir éloignés des enfants et des animaux de compagnie. Les cartes SIM sont également assez délicates. Veuillez prendre des précautions lorsque vous manipulez vos cartes.
FR

9
Configuration de votre téléphone
FR
3
2
1
SIM
1
SIM
2SI
M 2
Mic
roSD
10
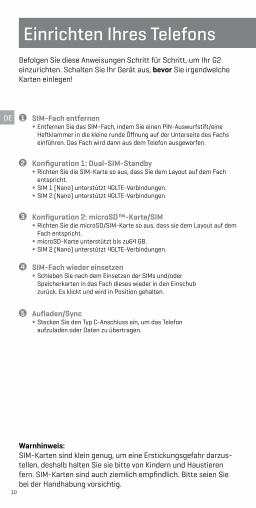
Einrichten Ihres TelefonsBefolgen Sie diese Anweisungen Schritt für Schritt, um Ihr G2 einzurichten. Schalten Sie Ihr Gerät aus, bevor Sie irgendwelche Karten einlegen!
SIM-Fach entfernen• Entfernen Sie das SIM-Fach, indem Sie einen PIN-Auswurfstift/eine
Heftklammer in die kleine runde Öffnung auf der Unterseite des Fachs einführen. Das Fach wird dann aus dem Telefon ausgeworfen.
Konfiguration 2: microSD™-Karte/SIM• Richten Sie die microSD/SIM-Karte so aus, dass sie dem Layout auf dem
Fach entspricht.• microSD-Karte unterstützt bis zu64 GB.• SIM 2 (Nano) unterstützt 4GLTE-Verbindungen.
Konfiguration 1: Dual-SIM-Standby • Richten Sie die SIM-Karte so aus, dass Sie dem Layout auf dem Fach
entspricht.• SIM 1 (Nano) unterstützt 4GLTE-Verbindungen.• SIM 2 (Nano) unterstützt 4GLTE-Verbindungen.
SIM-Fach wieder einsetzen• Schieben Sie nach dem Einsetzen der SIMs und/oder
Speicherkarten in das Fach dieses wieder in den Einschub zurück. Es klickt und wird in Position gehalten.
Aufladen/Sync• Stecken Sie den Typ C-Anschluss ein, um das Telefon
aufzuladen oder Daten zu übertragen.
1
3
2
4
5
Warnhinweis: SIM-Karten sind klein genug, um eine Erstickungsgefahr darzus-tellen, deshalb halten Sie sie bitte von Kindern und Haustieren fern. SIM-Karten sind auch ziemlich empfindlich. Bitte seien Sie bei der Handhabung vorsichtig.
DE

11
DE
3
2
1
SIM
1
SIM
2SI
M 2
Mic
roSD
12
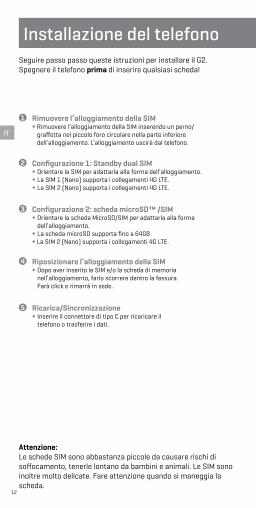
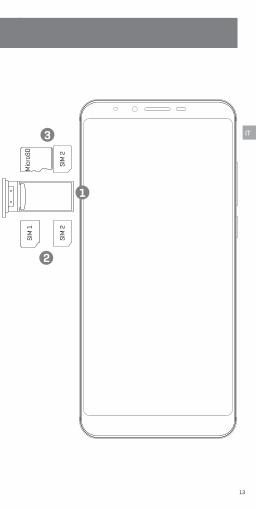
Installazione del telefonoSeguire passo passo queste istruzioni per installare il G2. Spegnere il telefono prima di inserire qualsiasi scheda!
Rimuovere l’alloggiamento della SIM• Rimuovere l’alloggiamento della SIM inserendo un perno/
graffetta nel piccolo foro circolare nella parte inferiore dell’alloggiamento. L’alloggiamento uscirà dal telefono.
Configurazione 2: scheda microSD™ /SIM• Orientare la scheda MicroSD/SIM per adattarla alla forma
dell’alloggiamento.• La scheda microSD supporta fino a 64GB• La SIM 2 (Nano) supporta i collegamenti 4G LTE.
Configurazione 1: Standby dual SIM • Orientare la SIM per adattarla alla forma dell’alloggiamento.• La SIM 1 (Nano) supporta i collegamenti 4G LTE.• La SIM 2 (Nano) supporta i collegamenti 4G LTE.
Riposizionare l’alloggiamento della SIM• Dopo aver inserito le SIM e/o la scheda di memoria
nell’alloggiamento, farlo scorrere dentro la fessura. Farà click e rimarrà in sede.
Ricarica/Sincronizzazione• Inserire il connettore di tipo C per ricaricare il
telefono o trasferire i dati.
1
3
2
4
5
Attenzione:Le schede SIM sono abbastanza piccole da causare rischi di soffocamento, tenerle lontano da bambini e animali. Le SIM sono inoltre molto delicate. Fare attenzione quando si maneggia la scheda.
IT
13
IT3
2
1
SIM
1
SIM
2SI
M 2
Mic
roSD

14
Je mobiel instellenVolg deze stapsgewijze instructies om je G2 in te stellen. Schakel de mobiel uit voordat je kaarten gaat inzetten!
De SIM-lade openen• Schuif de SIM-lade uit door een uitwerpsleutel / paperclip
in de kleine ronde opening aan de onderkant van de lade te steken.De lade komt vervolgens uit de mobiel.
Configuratie 2: microSD™-kaart / SIM• Zet demicroSD / SIM-kaart in als aangegeven door de lay-out van
de lade.• microSD-kaartondersteunt maximaal64GB• SIM 2 (Nano) ondersteunt 4GLTE-verbindingen.
Configuratie 1: twee SIM’s stand-by • Zet deSIM-kaarten in als aangegeven door de lay-out van de lade.• SIM 1 (Nano) ondersteunt 4GLTE-verbindingen.• SIM 2 (Nano) ondersteunt 4GLTE-verbindingen.
De SIM-lade weer inzetten• Schuif de SIM-lade terug in de sleuf nadat je de SIM’s
en/of geheugenkaart hebt ingezet. De lade klikt vast.
Opladen / synchroniseren• Sluit de type-C aansluiting aan om de mobiel op te
laden of gegevens over te dragen.
1
3
2
4
5
Waarschuwing: SIM-kaarten zijn voldoende klein om een verstikkingsgevaar te vormen, houd deze dus uit de buurt van kinderen & huisdieren.SIM-kaarten zijn ook behoorlijk gevoelig, ga er voorzichtig mee om.
NL

15
NL3
2
1
SIM
1
SIM
2SI
M 2
Mic
roSD

16
Getting StartedHow to use the phone keysIn any screen, tap the back key “ ” to return to previous screen or exit the application. Tap the home key “ ” to return to the home screen. Tap the recent key “ ” to display all the programs that are currently in use. Tap the “on/off” button, to turn on or off the screen and lock the screen. Long press “on/off” to shut down or to restart your mobile device. Press and hold the “on/off” button and the volume down key at the same time to take a screen capture.
LanguageTap the settings icon. Scroll down under “Personal” and tap “Language & input”, then select your preferred language by tapping “Language”.
CallsTap the “Phone” icon, then tap on “ ” to select the contact you would like to call. Or, simply make a call by entering the number after selecting the “ ” icon.
Android™ MessagesTap the Android Messages icon, then tap “ ” to create a new message. Input a name or number into the “To” field or choose someone from your contact list, then tap “ ”, and input your message. Press the paperclip icon if you want to attach a picture, video or other media. When done, tap “Send”.
Writing and copying a text
The phone will make recommendations as you type. If you want to copy or cut text, long press the text for a few seconds and use the selecting arrows to select, or use the “select all” option, then copy or paste your text.
CameraTap the “camera” icon to open the camera. The phone supports a variety of picture modes such as HDR, flash, Face beauty etc. To access these modes, select the “options” icon.
Google™ PhotosTap the Google Photos icon in the Google folder to open the gallery to browse your photos, tap on a photo to open it. Tap “ ” to enter edit mode. You can add color filter effects, rotate, crop and so on. Click “save”.
Video cameraTap the “camera” icon to open the camera and switch to “video” mode by tapping “ ” to record.
GmailTap the Gmail icon in the Google folder. Then select the “ ” icon in the lower right corner to compose a new message. Use the paperclip to attach files or images. Tap on “ ” when done. Note: You must set up an email account first.
Google Play MusicTap the Google Play Music icon in the Google Folder. Select the playlist or song you would like to play. Playlists can be categorized by Artist, Albums, Genre or what you have created.
FM RadioConnect earphones to the audio jack, tap the “FM Radio” icon in All Apps “ ” and select frequency.
EN

17
Primeros pasos¿Cómo usar las teclas del teléfono?Desde cualquier pantalla, toque la tecla para ir hacia atrás “ ” y regresará a la pantalla anterior o saldrá de la aplicación. Toque la tecla de inicio “ ” para regresar a la pantalla de inicio. Toque la tecla con el cuadrado “ ” para ver todos los programas que están en uso. Toque el botón de encendido/apagado “on/off”, para encender o apagar la pantalla o para bloquearla. Presione durante unos segundos el botón “on/off” para apagar o reiniciar su dispositivo. Mantenga presionado el botón “on/off” y la tecla de volumen al mismo tiempo para obtener una captura de la pantalla.
IdiomaToque el ícono de configuraciones. Baje hasta la opción “Personal” y toque “Idioma & Entrada”, luego toque “Idioma” para seleccionar su idioma de preferencia.
LlamadasToque el ícono del “Teléfono”, luego toque “ ” para seleccionar el contacto al que desea llamar. O, simplemente haga una llamada ingresando el número de teléfono luego de seleccionar el ícono “ ”.
Mensajes Android™Toque el ícono de Mensajes Android Messages, luego toque “ ” para crear un nuevo mensaje. Ingrese el nombre o el número en el campo “Para” o elija algún contacto de su lista, luego toque “ ”e ingrese su mensaje. Presione el ícono con el clip si desea adjuntar una imagen, video u otro archivo multimedia. Cuando haya terminado presione “Enviar”.
Escritura y copiado de mensajesEl teléfono le hará recomendaciones a medida que vaya escribiendo. Si desea copiar o cortar texto, presione durante algunos segundos el texto y use las flechas de seleccionado o elija la opción “seleccionar todo”, y luego copie su texto.
CámaraToque el ícono de la “cámara” para abrir la cámara. El teléfono soporta distintos modos de imágenes como por ejemplo HDR, flash, Face beauty, etc. Para acceder a estos modos, seleccione el ícono de “Opciones”.
Fotos de Google™ (Google Photos)Toque el ícono de Google Photos dentro de la carpeta Google para abrir la galería y ver sus fotos. Toque una foto para abrirla. Toque “ ” para ingresar al modo de edición. Se pueden agregar efectos de filtros de color, rotación, recortado, entre otras cosas. Haga clic en “Guardar”.
Cámara de videoToque el ícono de “Cámara” para abrir la cámara y para cambiar al modo de “Video” toque “ ” para grabar.
GmailToque el ícono de the Gmail en la carpeta de Google. Luego seleccione el ícono “ ” que se encuentra en la esquina inferior a la derecha para componer un nuevo mensaje. Use el clip para adjuntar imágenes o archivos. Toque “ ” cuando haya terminado. Nota: Deberá contar con una cuenta de correo electrónico antes de realizar estos pasos.
Reproductor de música “Google Play Music”Toque el ícono de Google Play Music en la carpeta de Google. Seleccione una lista de temas o una canción que desee reproducir. Las listas de temas se pueden categorizar por artista, género o por una categoría creada por usted.
Radio FMConecte los auriculares en el enchufe, toque el ícono de “Radio FM” en todas las aplicaciones “ ” y elija la frecuencia.
Google, Android, Google Play y otras marcas son marcas de Google LLC.
SP

18
Guide de démarrage
FR
Comment utiliser les touches du téléphoneDepuis n’importe quel écran appuyez sur la touche “ ” pour retourner à l’écran précédent ou sortir de l’application. Appuyez sur la touche “ ” pour retourner à l’écran d’accueil. Tapez sur “ ” pour afficher tous les programmes en cours d’utilisation. Appuyez sur le bouton “Marche/Arrêt” pour allumer, éteindre ou verrouiller l’écran. Appuyez de manière prolongée sur le bouton “Marche/Arrêt”pour éteindre ou redémarrer votre téléphone. Maintenir appuyées les touches “Marche/Arrêt” et “Volume -” simultanément pour effectuer une capture d’écran.
LanguesAppuyez sur l’icône des paramètres Faites défiler vers le bas jusqu’à “Personnel” et appuyez sur “Langues et saisie” puis appuyez sur “Langues” et sélectionnez la langue de votre choix.
AppelsAppuyez sur l’icône “Téléphone”, ensuite appuyez sur la touche “ ” pour sélectionner le contact que vous souhaitez appeler. Ou saisissez simplement le numéro de votre correspondant après avoir sélectionné l’icône “ ”.
Android™ MessagesAppuyez sur l’icône Android Messages, puis tapez sur la touche “ ” pour rédiger un nouveau message. Saisissez le nom ou le numéro de téléphone du destinataire dans le champ “à” ou choisissez un contact dans votre répertoire, appuyez sur “ ” et saisissez votre message. Appuyez sur l’icône “pièce jointe” pour joindre une photo, une vidéo ou autres, et taper sur “envoyer” lorsque c’est fait.
Saisir et copier un texteLe téléphone fera des recommandations pendant la saisie. Si vous souhaitez copier ou couper du texte, appuyez sur le texte durant quelques secondes et utiliser les flèches pour sélectionner, ou utilisez l’option “tout sélectionner”, puis copiez ou collez votre texte.
Appareil photoAppuyez sur l’icône “appareil photo”pour l’allumer. Le téléphone comprend un ensemble de modes photo tels que HDR, flash, Face Beauty etc. Pour accéder à ces modes, appuyez sur l’cône “options”.
Google™ PhotosAppuyez sur l’icône de Google Photos se trouvant dans le dossier Google pour ouvrir la galerie vous permettant d’explorer vos photos, appuyez sur une photo pour l’ouvrir. Appuyez sur “ ” pour vous mettre en mode édition. Vous pouvez rajouter des filtres de couleur, faire pivoter, couper etc. Appuyez sur “sauvegarder”.
Caméra vidéoAppuyez sur l’icône“appareil photo” pour ouvrir la caméra et passer en mode vidéo en appuyant sur “ ” pour commencer à enregistrer.
GmailAppuyez sur l’icône Gmail se trouvant dans le dossier Google. Sélectionnez l’icône “ ” en bas à droite de l’écran pour rédiger un nouveau message. Utilisez l’icône “pièce jointe” pour joindre des fichiers ou des images. Appuyez sur “ ” lorsque vous aurez terminé. Remarque: Vous devez d’abord créer un compte de messagerie.s
Google Play MusicAppuyez sur l’icône Google Play Music se trouvant dans le dossier Google. Sélectionnez la liste de lecture ou le morceau que vous voulez écouter. Les listes de lectures peuvent êtres organisées par Artiste, Album, Genre ou ce que vous avez créé.
Radio FMBrancher des écouteurs sur la prise audio, appuyez sur l’icône “Radio FM” dans le lanceur “ ” et sélectionnez la fréquence désirée.
Google, Android, Google Play et les autres marques sont des marques de Google LLC.

19
DE
Erste SchritteBedienung der Tasten des SmartphonesTippen Sie auf die Zurück-Taste (back key) „ ” um aus einer Ansicht zur vorherigen zurückzukehren, oder um eine Anwendung zu verlassen. Tippen Sie auf die Home-Taste (home key) „ ” um zur Hauptansicht zurückzukehren. Tippen Sie auf die Menü-Taste (recent key) „ ” um alle Anwendungen darzustellen, die aktuell in Gebrauch sind. Tippen Sie auf die An-Aus-Taste (on/off button), um den Bildschirm an- oder auszuschalten sowie um den Bildschirm zu sperren. Längeres Drücken der An-Aus-Taste führt zum Ausschalten oder Neustart Ihres mobilen Gerätes. Halten Sie gleichzeitig die An-Aus-Taste und die Leiser-Taste gedrückt, um ein Foto einer Ansicht zu machen.
SpracheTippen Sie auf das „Einstellungen“-Symbol. Scrollen Sie zu „Persönlich” (Personal) und tippen Sie auf „Sprache & Eingabe” (Language & Input). Wählen Sie dann Ihre bevorzugte Sprache indem Sie auf „Sprache” tippen.
AnrufeTippen Sie auf das Telefon-Symbol (Phone) und dann auf „ ” um den Kontakt auszuwählen, den Sie anrufen möchten. Es ist einfacher jemanden anzurufen, indem Sie die Nummer eingeben, nachdem Sie das Symbol „ ” auswählen.
Android™ MessagesTippen Sie auf das „Android Messages“-Symbol und dann auf „ ”, um eine neue Nachricht zu erstellen. Geben Sie einen Namen oder eine Nummer in das Feld „An“ (To field) ein, oder wählen Sie jemanden aus Ihrer Kontaktliste und tippen Sie auf „ ”. Geben Sie dann Ihre Nachricht ein. Drücken Sie auf das Büroklammer-Symbol falls Sie ein Bild, Video oder eine andere Datei anhängen wollen. Wenn Sie fertig sind, tippen Sie auf „Absenden“ (Send).
Schreiben und Kopieren von TextWährend Sie etwas eintippen, wird das Smartphone Vorschläge machen. Wenn Sie Text kopieren oder ausschneiden wollen, drücken Sie einige Sekunden lang auf den Text und wählen sie einen der Auswahlpfeile. Oder benutzen Sie die „Alles auswählen“-Option (select all) und kopieren Sie dann Ihren Text, oder fügen Sie ihn ein.
KameraTippen Sie auf das „Kamera”-Symbol um die Kamera-App zu öffnen. Das Smartphone unterstützt eine Vielzahl an Bildmodi, wie zum Beispiel HDR, Blitzlicht, „Face beauty“ und weitere. Um auf diese Modi zuzugreifen, wählen Sie das „Optionen“-Symbol (options).
Google™ FotosTippen Sie auf das „Google Fotos“-Symbol im Google Ordner um die Galerie zu öffnen. Sehen Sie hier Ihre Fotos an und tippen darauf, um eines zu öffnen. Tippen Sie auf “ ”, um in den Editiermodus zu kommen. Sie können einen Farbfiltereffekt hinzufügen, das Foto drehen, zuschneiden und vieles mehr. Klicken Sie dann auf „Speichern“ (save).
VideokameraTippen Sie auf das „Kamera”-Symbol um die Kamera-Anwendung zu öffnen und wechseln Sie in den Videomodus, indem Sie auf “ ” tippen um ein Video aufzunehmen.
GmailTippen Sie auf das Gmail-Symbol im Google Ordner. Wählen Sie dann das Symbol “ ” in der unteren rechten Ecke um eine neue Nachricht zu erstellen. Benutzen Sie die Büroklammer, um Dateien oder Bilder anzuhängen. Tippen Sie auf “ ” wenn Sie fertig sind. Hinweis: Sie müssen zuerst ein E-Mail-Konto erstellen.
Google Play MusicTippen Sie auf das „Google Play Music“-Symbol im Google Ordner. Wählen Sie die Wiedergabeliste oder das Lied, das Sie abspielen wollen. Wiedergabelisten können nach Künstler, Album, Genre oder nach Ihrer eigenen Einteilung kategorisiert werden.
FM RadioStecken Sie Ihren Kopfhörerstecker in den Audioanschluss, tippen Sie auf das “FM Radio”-Symbol unter „Alle Apps“ “ ” und wählen Sie dann eine Frequenz.
Google, Android, Google Play und andere Marken sind Marken von Google LLC.

20
IT
Iniziare Come usare i tasti del telefonoSu qualsiasi schermata, toccare il tasto indietro “ ” per tornare alla schermata precedente o uscire dall’applicazione. Toccare il tasto home “ ” per tornare alla schermata iniziale. Toccare il tasto recente “ ” per visualizzare tutti i programmi attualmente in uso. Toccare il tasto “on/off” per accendere o spegnere lo schermo e bloccarlo. Premere a lungo “on/off” per spegnere o riavviare il telefono. Tenere premuti contemporaneamente il tasto “on/off” e il tasto volume giù per fare uno screenshot.
LinguaToccare l’icona impostazioni. Andare su “Personale” e toccare “Lingua & Input”, quindi selezionare la lingua preferita toccando “Lingua”.
ChiamateToccare l’icona “Telefono”, quindi toccare “ ” per selezionare il contatto che si vuole chiamare. O, semplicemente fare una chiamata immettendo il numero dopo aver selezionato l’icona “ ”.
Messaggi Android™ Toccare l’icona Messaggi Android, quindi toccare “ ” per creare un nuovo messaggio. Immettere un nome o un numero nel campo “A” o scegliere qualcuno dalla lista dei contatti, quindi toccare “ ” e digitare il messaggio. Premere l’icona con la graffetta se si desidera allegare un’immagine, video o altri media. Una volta fatto, toccare “Invia”.
Scrivere e copiare un testoIl telefono darà suggerimenti mentre si scrive. Se si vuole copiare o tagliare il testo, premere il testo per alcuni secondi e usare le frecce di selezione per selezionare, o usare l’opzione “seleziona tutto”, quindi copiare o incollare il testo.
FotocameraToccare l’icona “fotocamera” per aprire la fotocamera. Il telefono supporta molte modalità immagine quali HDR, flash, bellezza ecc. Per accedere a queste modalità, selezionare l’icona “opzioni”.
Google™ FotoToccare l’icona Google Foto nella cartella Google per aprire la galleria e visualizzare le foto, toccare una foto per aprirla. Toccare “ ” per entrare nella modalità modifica. È possibile aggiungere gli effetti colore, ruotare, ritagliare ecc. Cliccare “salva”.
VideocameraToccare l’icona “fotocamera” per aprire la fotocamera e passare alla modalità “video” toccando “ ” per registrare.
GmailToccare l’icona Gmail nella cartella Google. Quindi selezionare l’icona “ ” sull’angolo in basso a destra per comporre un nuovo messaggio. Usare la graffetta per allegare file o immagini. Infine toccare “ ”. Nota: Dapprima è necessario installare un account email.
Google Play MusicToccare l’icona Google Play Music nella cartella Google. Selezionare la playlist o la canzone che si desidera ascoltare. Le playlist possono essere catalogate per Artista, Album, Genere o ciò che si è creato.
Radio FMCollegare gli auricolari alla presa audio, toccare l’icona “Radio FM” in tutte le App “ ” e selezionare la frequenza.
Google, Android, Google Play e altri marchi sono marchi di Google LLC.
21
NL
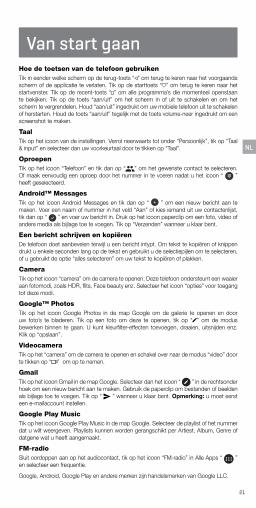
Van start gaanHoe de toetsen van de telefoon gebruikenTik in eender welke scherm op de terug-toets “ ” om terug te keren naar het voorgaande scherm of de applicatie te verlaten. Tik op de starttoets “ ” om terug te keren naar het startvenster. Tik op de recent-toets “ ” om alle programma’s die momenteel openstaan te bekijken. Tik op de toets “aan/uit” om het scherm in of uit te schakelen en om het scherm te vergrendelen. Houd “aan/uit” ingedrukt om uw mobiele telefoon uit te schakelen of herstarten. Houd de toets “aan/uit” tegelijk met de toets volume-neer ingedrukt om een screenshot te maken.
TaalTik op het icoon van de instellingen. Verrol neerwaarts tot onder “Persoonlijk”, tik op “Taal & input” en selecteer dan uw voorkeurtaal door te tikken op “Taal”.
OproepenTik op het icoon “Telefoon” en tik dan op “ ” om het gewenste contact te selecteren. Of maak eenvoudig een oproep door het nummer in te voeren nadat u het icoon “ ” heeft geselecteerd.
Android™ MessagesTik op het icoon Android Messages en tik dan op “ ” om een nieuw bericht aan te maken. Voer een naam of nummer in het veld “Aan” of kies iemand uit uw contactenlijst, tik dan op “ ” en voer uw bericht in. Druk op het icoon paperclip om een foto, video of andere media als bijlage toe te voegen. Tik op “Verzenden” wanneer u klaar bent.
Een bericht schrijven en kopiëren
De telefoon doet aanbevelen terwijl u een bericht intypt. Om tekst te kopiëren of knippen drukt u enkele seconden lang op de tekst en gebruikt u de selectiepijlen om te selecteren, of u gebruikt de optie “alles selecteren” om uw tekst te kopiëren of plakken.
CameraTik op het icoon “camera” om de camera te openen. Deze telefoon ondersteunt een waaier aan fotomodi, zoals HDR, flits, Face beauty enz. Selecteer het icoon “opties” voor toegang tot deze modi.
Google™ PhotosTik op het icoon Google Photos in de map Google om de galerie te openen en door uw foto’s te bladeren. Tik op een foto om deze te openen, tik op “ ” om de modus bewerken binnen te gaan. U kunt kleurfilter-effecten toevoegen, draaien, uitsnijden enz. Klik op “opslaan”.
VideocameraTik op het “camera” om de camera te openen en schakel over naar de modus “video” door te tikken op “ ” om op te nemen.
GmailTik op het icoon Gmail in de map Google. Selecteer dan het icoon “ ” in de rechtsonder hoek om een nieuw bericht aan te maken. Gebruik de paperclip om bestanden of beelden als bijlage toe te voegen. Tik op “ ” wanneer u klaar bent. Opmerking: u moet eerst een e-mailaccount instellen.
Google Play MusicTik op het icoon Google Play Music in de map Google. Selecteer de playlist of het nummer dat u wilt weergeven. Playlists kunnen worden gerangschikt per Artiest, Album, Genre of datgene wat u heeft aangemaakt.
FM-radioSluit oordoppen aan op het audiocontact, tik op het icoon “FM-radio” in Alle Apps “ ” en selecteer een frequentie.
Google, Android, Google Play en andere merken zijn handelsmerken van Google LLC.

22
AR
كيفية استخدام مفاتيح الهاتف املحمول
اضغط عىل مفتاح الرجوع “ ”، يف أي شاشة، للرجوع إىل الشاشة السابقة أو الخروج من التطبيق. اضغط عىل زر بداية الشاشة “ ”
للرجوع إىل الشاشة الرئيسية. اضغط عىل الزر األخري “ ” لعرض جميع الربامج قيد االستخدام حاليًا. اضغط عىل زر “فتح/إغالق”، لفتح
أو إغالق الشاشة وقفل الشاشة. اضغط مع االستمرار عىل “تشغيل/إيقاف” إلغالق الهاتف املحمول أو إعادة تشغيله. اضغط مع االستمرار
عىل زر “تشغيل/إيقاف” وزر خفض مستوى الصوت يف وقت واحد اللتقاط صورة شاشة
اللغة
“اضغط عىل رمز اإلعدادات مرر ألسفل تحت “شخيص” واضغط عىل “اللغة واإلدخال”، ثم اخرت لغتك املفضلة بالضغط عىل “اللغة
املكاملات
اضغط عىل رمز “الهاتف”، ثم اضغط عىل “ ” جهة االتصال التي ترغب يف االتصال بها. أو، ميكنك ببساطة إجراء مكاملة عن طريق
“ ” إدخال الرقم بعد تحديد رمز
Android™ Messages
اضغط عىل رمز رسائل أندرويد، ثم اضغط عىل “ ” إلنشاء رسالة جديدة. أدخل اسًم أو رقًم يف حقل “إىل” أو اخرت اسًم من قامئة
جهات االتصال، ثم اضغط عىل “ ”، وأدخل رسالتك. اضغط عىل رمز املشبك إذا كنت ترغب يف إرفاق صورة أو مقطع فيديو أو أي
“وسائط أخرى. عند االنتهاء من اإلرفاق، اضغط عىل “إرسال
كتابة نص ونسخه
ما إن تكتب رسالة، سيعرض لك الهاتف اقرتاحات. إذا كنت تريد كتابة نص أو قصه، اضغط باستمرار عىل النص لبضع ثوان واستخدم
سهمْي التحديد يف التحديد، أو استخدم خيار “تحديد الكل”، ثم انسخ النص أو الصقه
الكامريا
Face beautyو flashو HDR اضغط عىل رمز “الكامريا” لفتح الكامريا. يدعم الهاتف مجموعة متنوعة من أمناط الصور مثل“وغريهم. للوصول إىل هذه األمناط، حدد رمز “الخيارات
Google™ Photos
لفتح معرض الصور لتصفح صورك، اضغط عىل أي صورة Google يف املجلد (Google Photos) اضغط عىل رمز صور غوغل
“لفتحها. اضغط عىل “ ” للدخول إىل وضع التحرير. ميكنك إضافة تأثريات مرشح األلوان والتدوير والقص وما إىل ذلك. انقر فوق “حفظ
كامريا فيديو
اضغط عىل رمز “الكامريا” لفتح الكامريا ثم انتقل إىل وضع “فيديو” عن طريق الضغط عىل “ ” للتسجيل
Gmail
من مجلد غوغل. ثم حدد رمز “ ” يف الزاوية اليمنى السفلية إلنشاء رسالة جديدة. استخدم (Gmail) اضغط عىل رمز جيميل
املشبك إلرفاق امللفات أو الصور. اضغط عىل “ ” عند االنتهاء. ملحوظة: يتعني عليك إنشاء حساب بريد إلكرتوين أواًل
Google Play Music
من مجلد غوغل. حدد قامئة التشغيل أو األغنية التي ترغب يف (Google Play Music) اضغط عىل رمز موسيقى غوغل بالي
تشغيلها. ميكن ترتيب قوائم التشغيل حسب الفنان أو األلبومات أو النوع أو حسب ما أنشأته
راديو إف إم
قم بتوصيل سمعات األذن مبقبس الصوت، ثم اضغط عىل رمز “راديو إف إم” من جميع التطبيقات “ ” وحدد الرتدد
Google و Android و Google Play وعالمات أخرى هي عالمات تجارية لرشكة Google LLC
بدء االستخدام
.
.
.
.
.
.
.
.
.
.
.
.
23
BA
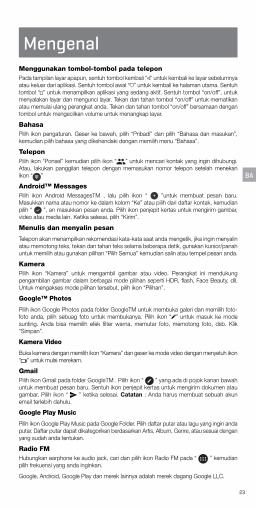
Menggunakan tombol-tombol pada teleponPada tampilan layar apapun, sentuh tombol kembali “ ” untuk kembali ke layar sebelumnya atau keluar dari aplikasi. Sentuh tombol awal “ ” untuk kembali ke halaman utama. Sentuh tombol “ ” untuk menampilkan aplikasi yang sedang aktif. Sentuh tombol “on/off”, untuk menyalakan layar dan mengunci layar. Tekan dan tahan tombol “on/off” untuk mematikan atau memulai ulang perangkat anda. Tekan dan tahan tombol “on/off” bersamaan dengan tombol untuk mengecilkan volume untuk menangkap layar.
BahasaPilih ikon pengaturan. Geser ke bawah, pilih “Pribadi” dan pilih “Bahasa dan masukan”, kemudian pilih bahasa yang dikehendaki dengan memilih menu “Bahasa”.
TeleponPilih ikon “Ponsel” kemudian pilih ikon “ ” untuk mencari kontak yang ingin dihubungi. Atau, lakukan panggilan telepon dengan memasukan nomor telepon setelah menekan ikon “ ”
Android™ MessagesPilih ikon Android MessagesTM , lalu pilih ikon “ ”untuk membuat pesan baru. Masukkan nama atau nomor ke dalam kolom “Ke” atau pilih dari daftar kontak, kemudian pilih “ ”, an masukkan pesan anda. Pilih ikon penjepit kertas untuk mengirim gambar, video atau media lain. Ketika selesai, pilih “Kirim”.
Menulis dan menyalin pesan
Telepon akan menampilkan rekomendasi kata-kata saat anda mengetik, jika ingin menyalin atau memotong teks, tekan dan tahan teks selama beberapa detik, gunakan kursor/panah untuk memilih atau gunakan pilihan “Pilih Semua” kemudian salin atau tempel pesan anda.
KameraPilih ikon “Kamera” untuk mengambil gambar atau video. Perangkat ini mendukung pengambilan gambar dalam berbagai mode pilihan seperti HDR, flash, Face Beauty, dll. Untuk mengakses mode pilihan tersebut, pilih ikon “Pilihan”.
Google™ Photos
Pilih ikon Google Photos pada folder GoogleTM untuk membuka galeri dan memilih foto-foto anda, pilih sebuag foto untuk membukanya. Pilih ikon “ ” untuk masuk ke mode sunting. Anda bisa memilih efek filter warna, memutar foto, memotong foto, dsb. Klik “Simpan”.
Kamera Video
Buka kamera dengan memilih ikon “Kamera” dan geser ke mode video dengan menyetuh ikon “ ” untuk mulai merekam.
GmailPilih ikon Gmail pada folder GoogleTM . Pilih ikon “ ” yang ada di pojok kanan bawah untuk membuat pesan baru. Sentuh ikon penjepit kertas untuk mengirim dokumen atau gambar. Pilih ikon “ ” ketika selesai. Catatan : Anda harus membuat sebuah akun email terlebih dahulu.
Google Play Music
Pilih ikon Google Play Music pada Google Folder. Pilih daftar putar atau lagu yang ingin anda putar. Daftar putar dapat dikategorikan berdasarkan Artis, Album, Genre, atau sesuai dengan yang sudah anda tentukan.
Radio FMHubungkan earphone ke audio jack, cari dan pilih ikon Radio FM pada “ ” kemudian pilih frekuensi yang anda inginkan.
Google, Android, Google Play dan merek lainnya adalah merek dagang Google LLC.
Mengenal

24
Safety information• This section contains important information about the operation of your device, it also
contains information about how to use the device safely. Read this information carefully before using your device.
Electronic device
Do not use your device if using the device is prohibited.
Do not use the device if doing so causes danger or interference with other electronic devices.
Interference with medical equipment
• Follow rules and regulations set forth by hospitals and health care facilities. Do not use your device where prohibited.
• Some wireless devices may affect the performance of hearing aids or pacemakers. Consult your service provider for more information.
• Pacemaker manufacturers recommend that a minimum distance of 15 cm be maintained between a device and a pacemaker to prevent potential interference with the pacemaker. If using a pacemaker, hold the device on the side opposite the pacemaker and do not carry the device in your front pocket.
Protecting your hearing when using a headset
• To prevent possible hearing damage, do not listen at high volume levels for long periods.
• Using a headset at high volumes may damage your hearing. To reduce this risk, lower the headset volume to a safe and comfortable level.
• Exposure to high volumes while driving may cause distraction and increase your risk of an accident.
Areas with flammables and explosives
• Do not use the device where flammables or explosives are stored (in a gas station, oil depot, or chemical plant, for example). Using your device in these environments increases the risk of explosion or fire. In addition, follow the instructions indicated in text or symbols.
• Do not store or transport the device in containers with flammable liquids, gases, or explosives.
Traffic security
• Observe local laws and regulations while using the device. To reduce the risk of accidents, do not use your wireless device while driving.
• Concentrate on driving. Your first responsibility is to drive safely.
• Do not hold the device while driving. Use hands-free accessories.
• When you must make or answer a call, pull off the road safely and park the vehicle first.
• RF signals may affect the electronic systems of motor vehicles. For more information, consult the vehicle manufacturer.
• Do not place the device over the air bag or in the air bag deployment area in a motor vehicle. Doing so may hurt you because of the strong force when the air bag inflates.
• Wireless devices may interfere with the airplane’s flight system. Do not use your device where wireless devices are not allowed according to the airplane company’s regulations.
Operating environment
• Avoid dusty, damp, or dirty environments. Avoid magnetic fields. Using the device in these environments may result in circuit malfunctions. Do not use your device during thunderstorms

25
to protect your device against any danger caused by lightning.
• Ideal operating temperatures are 0 °C to 35 °C. Ideal storage temperatures are -20 °C to 45 °C. Extreme heat or cold may damage your device or accessories.
• Do not expose your device to direct sunlight (such as on a car dashboard) for prolonged periods.
• To protect your device or accessories from fire or electrical shock hazards, avoid rain and moisture.
• Keep the device away from sources of heat and fire, such as a heater, microwave oven, stove, water heater, radiator, or candle.
• Do not place sharp metal objects, such as pins, near the earpiece or speaker. The earpiece may attract these objects and result in injury.
• Stop using your device or applications for a while if the device is overheated. If skin is exposed to an overheated device for an extended period, low temperature burn symptoms, such as red spots and darker pigmentation, may occur.
• Do not use your device’s camera flash directly in the eyes of people or pets. Otherwise temporary loss of vision or damage to the eyes may occur.
• Do not touch the device’s antenna. Otherwise, communication quality may be reduced.
• Do not allow children or pets to bite or suck the device or accessories. Doing so may result in damage or explosion.
• Observe local laws and regulations, and respect the privacy and legal rights of others.
Child’s safety
• Comply with all precautions with regard to child’s safety. Letting children play with the device or its accessories may be dangerous. The device includes detachable parts that may present a choking hazard. Keep away from children.
• The device and its accessories are not intended for use by children. Children should only use the device with adult supervision.
Accessories
• Using an unapproved or incompatible power adapter, charger or battery may cause fire, explosion or other hazards.
• Choose only accessories approved for use with this model by the device manufacturer. The use of any other types of accessories may void the warranty, may violate local regulations and laws, and may be dangerous.
• If the power cable is damaged (for example, the cord is exposed or broken), or the plug loosens, stop using it at once. Continued use may lead to electric shocks, short circuits, or fire.
• Do not touch the power cord with wet hands or pull the power cord to disconnect the charger.
• Do not touch the device or the charger with wet hands. Doing so may lead to short circuits, malfunctions, or electric shocks.
• If your charger has been exposed to water, other liquids, or excessive moisture, only an authorized service center has the right to inspect.
Battery safety
• Do not connect battery poles with conductors, such as keys, jewelry, or other metal materials. Doing so may short-circuit the battery and cause injuries or burns.

26
• Keep the battery away from excessive heat and direct sunlight. Do not place it on or in heating devices, such as microwave ovens, stoves, or radiators. Batteries may explode if overheated.
• Do not attempt to modify or remanufacture the battery, insert foreign objects into it, or immerse or expose it to water or other liquids. Doing so may lead to fire, explosion, or other hazards.
• If the battery leaks, ensure that the electrolyte does not make direct contact with your skins or eyes. If the electrolyte touches your skins or splashes into your eyes, immediately flush with clean water and consult a doctor.
• In case of battery deformation, color change, or overheating while charging or storing, immediately stop using the device and remove the battery. Continued use may lead to battery leakage, fire, or explosion.
• Do not put batteries in fire as they may explode. Damaged batteries may also explode.
• Dispose of used batteries in accordance with local regulations. Improper battery use may lead to fire, explosion, or other hazards.
• Do not allow children or pets to bite or suck the battery. Doing so may result in damage or explosion.
• Do not smash or pierce the battery, or expose it to high external pressure. Doing so may lead to a short circuit or overheating.
• Do not drop the device or battery. If the device or battery is dropped, especially on a hard surface, it may be damaged.
• If the device standby time shortens significantly, replace the battery.
Cleaning and maintenance
• Keep the device and accessories dry. Do not attempt to dry it with an external heat source, such as a microwave oven or hair dryer.
• Do not expose your device or accessories to extreme heat or cold. These environments may interfere with proper function and may lead to fire or explosion.
• Avoid collision, which may lead to device malfunctions, overheating, fire, or explosion.
• Before you clean or maintain the device, stop using it, stop all applications, and disconnect all cables connected to it.
• Do not use any chemical detergent, powder, or other chemical agents (such as alcohol and benzene) to clean the device oraccessories. These substances may cause damage to parts or present a fire hazard. Use a clean, soft, and dry cloth to clean the device and accessories.
• Do not place magnetic stripe cards, such as credit cards and phone cards, near the device for extended periods of time. Otherwise the magnetic stripe cards may be damaged.
• Do not dismantle or remanufacture the device and its accessories. This voids the warranty and releases the manufacturer from liability for damage. In case of damage, contact an authorized service center for assistance or repair.
• If the device screen is broken in a collision, immediately stop using the device. Do not touch or attempt to remove the broken parts. Promptly contact an authorized service center.
Emergency calls
• The availability of emergency calls is subject to your cellular network quality, service provider policy, and local laws and regulations. Never rely solely on your device for critical communications like medical emergencies.

27
Environmental protection
• The device and its accessories (if included), such as the power adapter, headset, and battery should not be disposed of with household garbage.
• Disposal of the device and its accessories is subject to local regulations. Support proper collection and recycling.
Safety precautions
• Use of wireless hands-free system (headphone, headset) with a low power Bluetooth emitter.
• Make sure the cell phone has a low SAR.
• Keep your calls short or send a text message (SMS) instead. This advice applies especially to children, adolescents and pregnant women.
• Use cell phone when the signal quality is good.
• People having active medical implants should preferably keep the cell phone at least 15 cm away from the implant.
Disposal and recycling information
This symbol on the device or on its packaging indicates that the device (including its electrical accessories) should not be disposed of as normal household garbage. Do not dispose of your device as unsorted municipal waste. The device should be handed over to an authorized collection center for recycling or proper disposal at the end of its life.
Battery Caution1. Use only NUU approved batteries, chargers, and cables to charge your phone.
Unapproved chargers or cables can cause the battery to explode or damage the device.
2. Use only NUU approved batteries, chargers and cables. Use unapproved batteries, chargers and cables may cause safety issue and the warranty will be lost.
3. You can recharge your battery many times, but all batteries have a limited lifespan. If you notice a significant deterioration in your phone’s battery life, you will need to purchase a replacement battery for replacement. If the battery is built-in in the phone, do not attempt to remove built-in batteries and contact an authorized NUU service center for a replacement.
4. Your phone may become warm after prolonged use or when exposed to high ambient temperatures. If your phone becomes hot to the touch, unplug the USB cable, disable non-essential features, and avoid prolonged skin contact. Place your phone in a cool location and allow it to cool down to room temperature.
5. Charging times may vary depending on the ambient temperature and the remaining battery level.
6. Avoid using your phone when it is charging. Do not cover your phone or the charger when it is charging.

CAUTION1. Use careful with the earphone maybe possible excessive sound pressure from
earphones and headphones can cause hearing loss
2. CAUTION : RISK OF EXPLOSION IF BATTERY IS REPLACED BY AN INCORRECT TYPE. DISPOSE OF USED BATTERIES ACCORDING TO THE INSTRUCTIONS
3. The product shall only be connected to a USB interface of version USB2.0
4. Adapter shall be installed near the equipment and shall be easily accessible
5. Operation temperature:-20~35ºC
6. The plug considered as disconnect device of adapter
7. The device complies with RF specifications when the device used at 0.5cm from your body
8. AC adapter:
Model No.: HJ-0502000V5
Input: AC 100-240V 50/60Hz 0.3A
Output: DC 5V, 2000mA
SUN CUPID TECHNOLOGY (HK) LIMITED hereby declares that this LTE mobile phone is in compliance with the essential requirements and other relevant provisions of Directive 2014/53/EU
This information has to be presented in such a way that the user can readily understand it. Typically, this will necessitate translation into every local language (required by national consumer laws) of the markets where the equipment is intended to be sold. Illustrations, pictograms and using international abbreviations for country names may help reduce the need for translation.
Max power:
GSM900: 32.79dBm
DCS1800: 29.73dBm
WCDMA 2100 (Band I): 24.26 dBm
WCDMA 900 (Band VIII): 23.84 dBm
LTE Band 1: 23.71 dBm
LTE Band 3: 23.49 dBm
LTE Band 7: 23.26 dBm
LTE Band 8: 23.48 dBm
LTE Band 20: 23.45 dBm
GSM 900: 880MHz~915MHz,
DCS 1800: 1710MHz~1785MHz
WCDMA 900 (Band VIII): 880MHz~915MHz,
WCDMA 2100(Band I): 1920MHz~1980MHz
LTE Band 3: 1710MHz~1785MHz,
LTE Band 1: 1920MHz~1980MHz,
LTE Band 7: 2500MHz~2570MHz,
LTE Band 8: 880MHz~915MHz,
LTE Band 20: 832MHz~862MHz,
Bluetooth /BLE: 2402MHz~2480MHz
2.4G WiFi: 2412MHz~2472MHz
GSM /WCDMA/LTE/WIFI and BT can be used in Europe without restriction.
Made in China

30
Please visit our website for details on warranty information.
www.nuumobile.com
Warranty Registration
Warranty information
Register Your Device
Thank you for choosing NUU mobile. To receive helpful tips and faster tech support, register your device online at
Hong Kong:
intl.nuumobile.com/product-registration/
US:
us.nuumobile.com/my-account/product-registration
UK and Europe:
uk.nuumobile.com/product-registration/
Indonesia:
Please fill up the warranty card in the package, and call for the warranty to begin.
India:

31
Customer SupportQuestions? Let us help. We’re here to support you.
Hong Kong:
Service Center: 16F, CEO Tower, 77 Wing Hong St. Kowloon, Hong Kong. Phone: (852) 2725-0161 HK hours: M-F 9:00am-5:30pm CTEmail: [email protected]
US:
Service Center: 5050 75th AVE NW Byron, MN 55920 Phone: Toll Free: 844-NUU-3365 U.S. hours: M-F 8:00am-4:30pm CTEmail: [email protected]
UK:
Phone: 0333 121 0239 UK hours: Mon-Sat 8:00am - 7:00pm Sun 10:00am - 4:00pmEmail: [email protected] Center: 119 King Henry’s Road, London, NW3 3RB
Europe:
Support: nuumobile.com/europe
Italy:
Phone: 199 309 314 Mon-Fri 9:00am - 1:00pm Mon-Fri 2:00pm - 6:00pm
Indonesia:
Service Center: JAKARTA Ruko Roxy Mas Blok C4 No. 4 Jl. KH. Hasyim Ashari No. 125 Cideng, Jakarta Pusat 10150 Phone: 021 - 633 7359 BANDUNG Jl. Leuwi Panjang No. 101 B, Situsaeur,Bojongloa Kidul,Phone: 022 - 42822704Operasional: Hari Senin-Jum’at, Jam 10-5 sore Hari Sabtu, Jam 10-1 siang Hari Minggu & hari libur nasional tutup

Learn more about NUU Mobile products, features and accessories at
www.nuumobile.com
Google LLC., used with permission.Google, Android, Google Play and other marks are trademarks of Google LLC.