Embed Size (px)
DESCRIPTION
byHermanvanGoubergen 1 2 3 4 5 6 7 8 9
Citation preview

Gecko and Fly on a Wallby Herman van Goubergen
1
2

3

4

5

6

7
8

9

Instructions
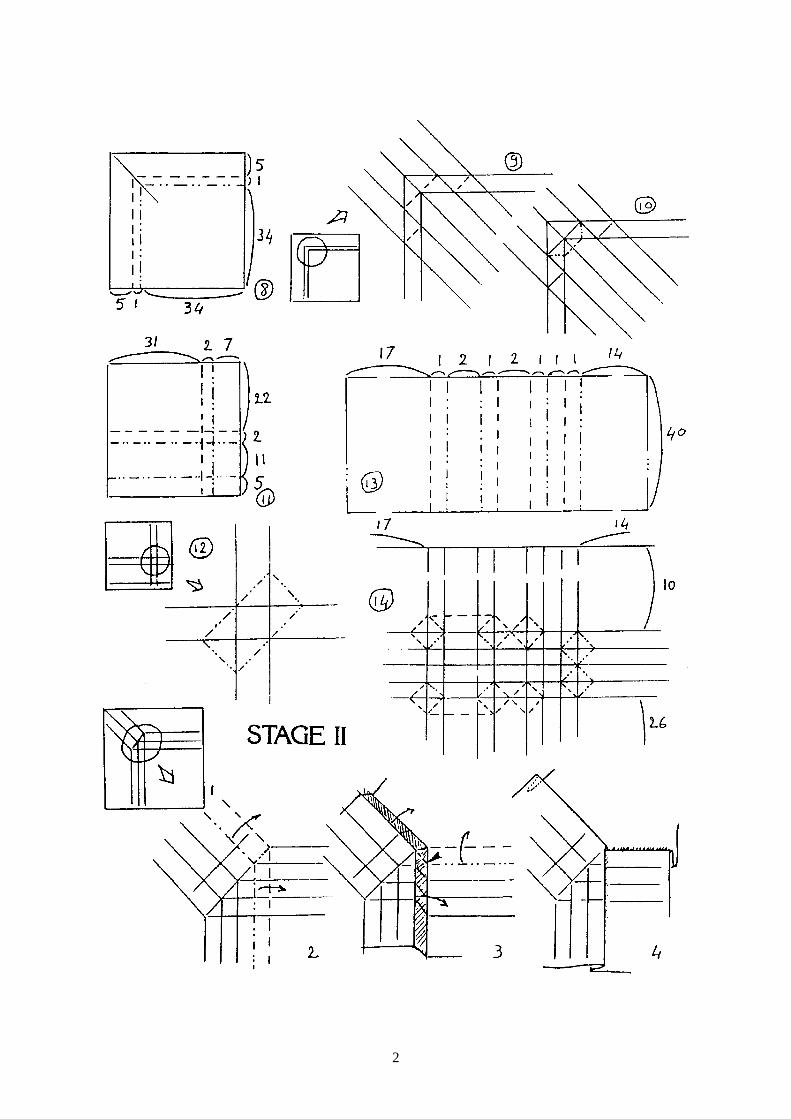
Use a large square (I use a 30×30 cm piece of Kraftpaper).The distances around the edges of the paper aremeasured in units of 1/40th of the side of the square.The final model is 22 by 25 units.
stage 1: precreasing. Measure the correct positionfor the long folds and draw them on the backof the paper before folding.
stage 2: collapsing. To do some manoeuvres, youmay have to undo previous folds.
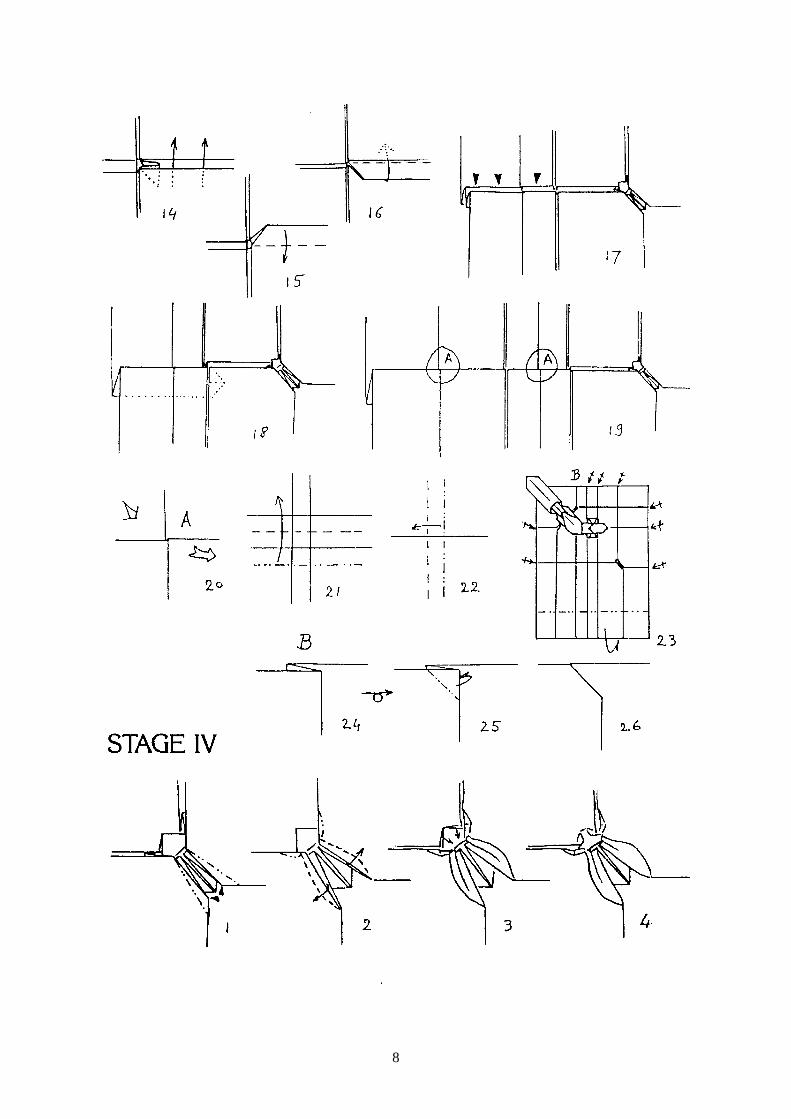
stage 3: rearranging. Where the long pleats cross,
they tend to open out. To avoid this, thepleat sequence is rearranged locally to lockthe pleats. After this stage (or after stage 4)it is a good idea to put some heavy books onthe ‘wall’ portions of the model and leave itovernight to get a nice flat background.
stage 4: final modelling. Fold the details and 3Dthe lizard. Give it a nice curved shape.
You can either stand the model as indicated in thedrawing (if the paper is stiff enough) or hang it onthe wall.
Copyright c© 1993–1994 Herman van Goubergen, all rights reserved.PDF version 1999 by Sebastian Marius Kirsch<[email protected]> .
Distribution for noncommercial purposes is free. Please contact the authorif you want to use this model for commercial purposes.


