Embed Size (px)
Citation preview
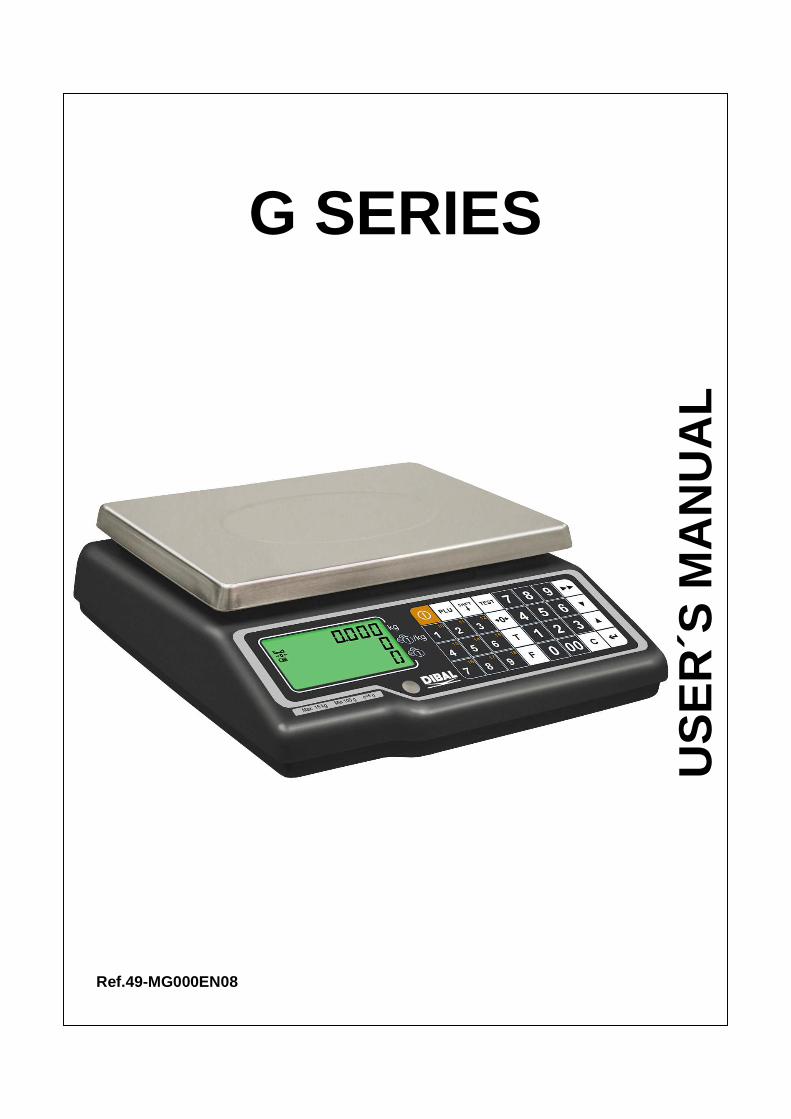
USER´S MANUAL
G SERIES
US
ER
´S M
AN
UA
L
Ref.49-MG000EN08
USER´S MANUAL
Index 1. DESCRIPTION OF THE SERIE G SCALE................................................................................. 1
1.1. KEYBOARD..............................................................................................................................1
2. INTRODUCTION.................................................................................................................... 2
2.1. GENERAL SPECIFICATIONS ...................................................................................................2 2.2. OPERATIONAL AND METROLOGICAL SPECIFICATIONS .......................................................2 2.3. INSTALLING THE SCALES .......................................................................................................2 2.4. USE AND MAINTENANCE ADVICE ..........................................................................................3 2.4.1. BATTERY OPERATION .............................................................................................3 2.5. SWITCHING THE SCALES ON AND OFF.....................................................................................4
3. OPERATING THE SCALES................................................................................................... 4
3.1. NORMAL WEIGHING...................................................................................................................4 3.2. SET PRICE ..................................................................................................................................4 3.3. TARE ...........................................................................................................................................4 3.4. SEGMENT TEST..........................................................................................................................5 3.5. AUTOMATIC ZERO ......................................................................................................................5 3.6. SHOW AMOUNT IN EUROS.........................................................................................................5 3.7. SWITCHING ON/OFF OF THE BACKGROUND LIGHT.................................................................5
4. PROGRAMMING ................................................................................................................... 5
4.1. ITEM PROGRAMMING ................................................................................................................6 4.1.1 CODE........................................................................................................................6 4.1.2 PRICE .......................................................................................................................6 4.1.3 FAST SEARCH FOR ITEMS ......................................................................................6 4.2. CONFIGURATION PROGRAMMING............................................................................................6 4.2.1 AUTOMATIC DISCONNECTION................................................................................7 4.2.2. EURO CONVERSION................................................................................................7 4.2.3. show euro ..................................................................................................................7 4.2.4. EURO PHASE ...........................................................................................................7 4.3 PROGRAMMING OF GRAMS WINDOW ...................................................................................8 4.4 PROGRAMMING OF EAN HEADING ........................................................................................8

USER´S MANUAL
1. DESCRIPTION OF THE SERIE G SCALE
1.1. KEYBOARD
1
SERIE G
2
2. INTRODUCTION
2.1. GENERAL SPECIFICATIONS 1. Power supply.................................…………........................ 220VAC 12VDC 500mA adaptor (1) 2. Battery (optional) ................................................………........................................6VDC 4Ah (2) 3. Approx. Battery operating time...............................……………………...............…........100 hours. 4. Approx. Battery charging time ...................................................................…………….....8 hours. 5. Operating temperature .........................................................……………..............-10ºC to +40ºC. 6. Weight of scales (battery model).........................................................……………….......4.740 kg. 7. External dimensions:.....................................………………..31×36×12cm. With tower: 31x36x36
(1) We recommended only using power supply adaptors supplied by DIBAL S.A.. If for any reason, a power supply adaptor is used that has not been supplied by DIBAL S.A., it must be provided with double insulation between the primary and secondary. The scales’ guarantee does not cover damage caused as a result of using parts that are not supplied by DIBAL S.A.
(2) Battery specifications are as follows: lead battery, 6vdc 4.5ah. Use original batteries supplied by DIBAL S.A. the use of any other type will render the scales’ guarantee void and may be dangerous. The scales’ guarantee does not cover damage caused as a result of using batteries that are not supplied by DIBAL S.A. See paragraph 2.4.1. Battery operation
2.2. OPERATIONAL AND METROLOGICAL SPECIFICATIONS 1. Range up to 6, 6/15MR, 15, 15/30MR or 30 kg, with a precision to 2, 2/5, 5, 5/10 or 10 grams,
respectively (according to model). 2. Programming of 100 prices of items. 3. 9 direct item keys, permitting access to 18 items. 4. Possibility of taring up to the maximum range, minus one step. 5. Choice of different operating modes. 6. Amount calculated. 7. RS-232 communications.
2.3. INSTALLING THE SCALES 1. Use only adaptors and batteries supplied by DIBAL S.A. the use of any other type will render the
scales’ guarantee void and may be dangerous. 2. Before using a mains adaptor check the voltage of the adaptor and the corresponding mains. 3. Make sure that the scales can be connected to a nearby socket that is easy to access. We recommend
that the socket should be provided with differential breaker, thermal-magnetic trips. If the scales have a battery option, see paragraph 2.4.1. Battery operation.
4. Check that there is no equipment that generates electromagnetic fields (such as refrigerators, cutting machines, etc.) Connected to the same socket as the scales.
5. Check that the scales are placed on a firm, level surface. 6. Check that no object comes into contact with the dish. 7. Avoid extreme temperatures. Do not place the scales in direct sunlight or close to air conditioning
vents. 8. These scales have not been designed as waterproof scales. Therefore, avoid high levels of
humidity since this might cause condensation. Protect from rain and avoid direct contact with water. Do not spray water on the scales or submerge in water. If the scales get wet, switch off the power supply immediately.
USER´S MANUAL
3
2.4. USE AND MAINTENANCE ADVICE 1. Never place a weight on the scales that exceeds the maximum limit. 2. Do not place weights suddenly on the dish. 3. Do not exert sideways pressure on the dish. 4. Clean the scales with a damp cloth. Never pour or spray water on the scales. If the scales get wet,
switch off the power supply immediately. 5. Always keep the scales clean. 6. Do not use abrasive chemical substances, solvents or strong detergents to clean the scales 7. Do not use the scales in dirty or dusty places.
2.4.1. BATTERY OPERATION Optionally, the scales may be provided with one 6VDC 4.5Ah lead battery. Use original batteries supplied by DIBAL S.A. the use of any other type will render the scales’ guarantee void and may be dangerous. New batteries are partly charged. Before you can use your scales, you should put in the battery and charge it as follows:
To charge the battery, simply plug the scales into the mains. It is not necessary to switch on the scales. It should take 8 hours to fully charge the battery. Some batteries perform better after being fully charged/discharged several times. Battery performance depends on many factors, including background light set-up and operation set-up. Only charge the battery in a ventilated room. When the battery needs to be charged, an icon will light up on the display. Recharge the battery as soon as the arrow appears over the symbol. The scales will still work for about 10 hours, and will then switch off automatically in order to protect the battery. New batteries and batteries that have been stored for a long period of time may require a longer charging time. Keep the battery at room temperature or similar when charging. Do not expose batteries to temperatures below -10°C or above 45°C. Over a long period of time, the batteries will gradually lose their charging capacity and will require a longer time for charging. This is normal. If you recharge the battery regularly, and note that it lasts for a shorter time or charging time is longer, it is probably time to buy a new battery. Only use the battery for the purpose for which it was designed. Never use damaged chargers or batteries. Never short-circuit battery. An accidental short circuit may occur if a metal object (a coin, paper clip or a ballpoint pen) causes a direct connection between the + and – poles of the battery (the battery’s metal strips), for example, if you are carrying a spare battery in your pocket. Short-circuiting the poles may harm the battery or the object that is causing the connection. Do not throw batteries onto fire. Dispose of batteries according to local regulations (e.g. Recycling). Do not throw them into domestic rubbish bins.
SERIE G
4
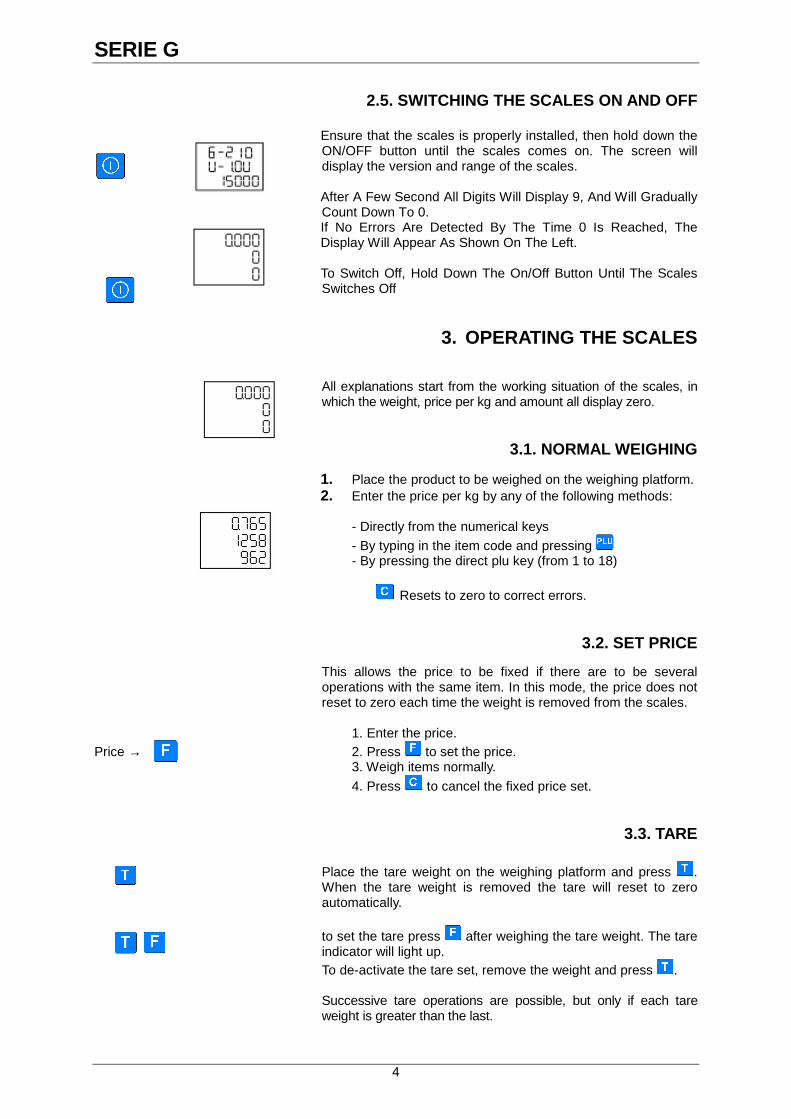
2.5. SWITCHING THE SCALES ON AND OFF
Ensure that the scales is properly installed, then hold down the ON/OFF button until the scales comes on. The screen will display the version and range of the scales. After A Few Second All Digits Will Display 9, And Will Gradually Count Down To 0. If No Errors Are Detected By The Time 0 Is Reached, The Display Will Appear As Shown On The Left. To Switch Off, Hold Down The On/Off Button Until The Scales Switches Off
3. OPERATING THE SCALES
All explanations start from the working situation of the scales, in which the weight, price per kg and amount all display zero.
3.1. NORMAL WEIGHING
1. Place the product to be weighed on the weighing platform. 2. Enter the price per kg by any of the following methods:
- Directly from the numerical keys
- By typing in the item code and pressing - By pressing the direct plu key (from 1 to 18)
Resets to zero to correct errors.
3.2. SET PRICE
This allows the price to be fixed if there are to be several operations with the same item. In this mode, the price does not reset to zero each time the weight is removed from the scales.
1. Enter the price.
Price → 2. Press to set the price. 3. Weigh items normally.
4. Press to cancel the fixed price set.
3.3. TARE
Place the tare weight on the weighing platform and press . When the tare weight is removed the tare will reset to zero automatically. to set the tare press after weighing the tare weight. The tare indicator will light up. To de-activate the tare set, remove the weight and press . Successive tare operations are possible, but only if each tare weight is greater than the last.
USER´S MANUAL
5
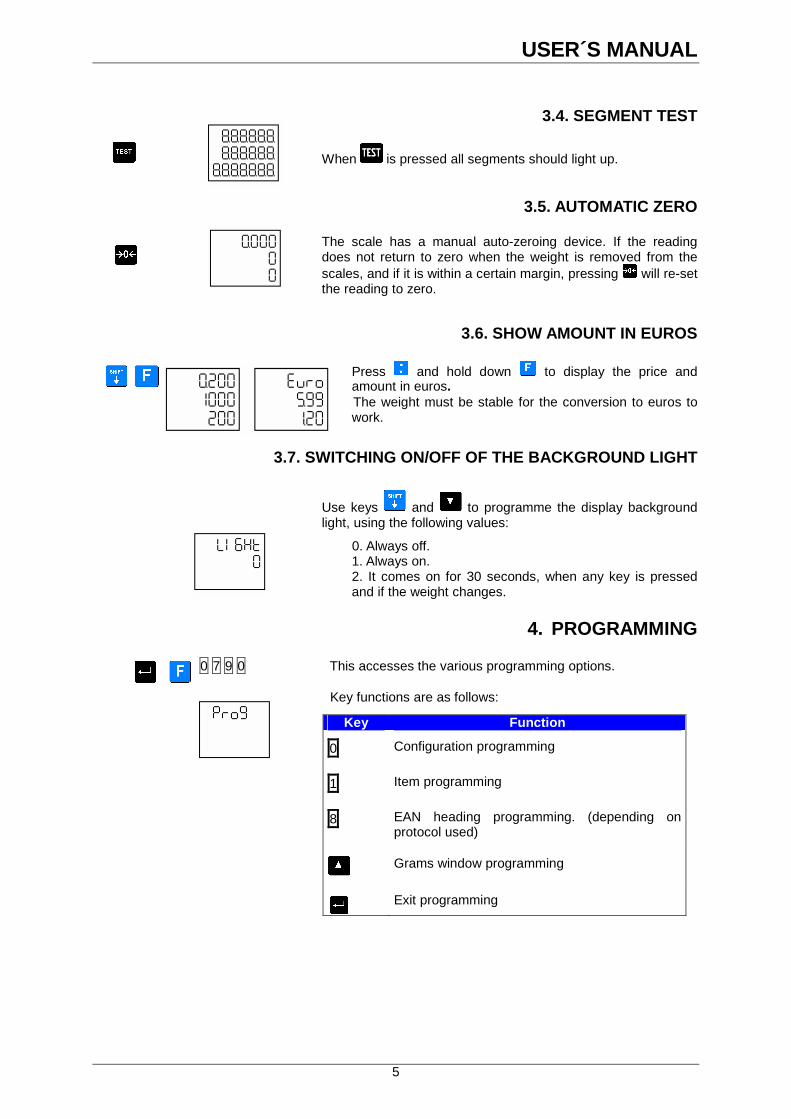
3.4. SEGMENT TEST
When is pressed all segments should light up.
3.5. AUTOMATIC ZERO
The scale has a manual auto-zeroing device. If the reading does not return to zero when the weight is removed from the scales, and if it is within a certain margin, pressing will re-set the reading to zero.
3.6. SHOW AMOUNT IN EUROS
Press and hold down to display the price and amount in euros. The weight must be stable for the conversion to euros to work.
3.7. SWITCHING ON/OFF OF THE BACKGROUND LIGHT
Use keys and to programme the display background light, using the following values:
0. Always off. 1. Always on.
2. It comes on for 30 seconds, when any key is pressed and if the weight changes.
4. PROGRAMMING
0 7 9 0 This accesses the various programming options.
Key functions are as follows:
Key Function
0 Configuration programming
1 Item programming
8 EAN heading programming. (depending on protocol used)
Grams window programming
Exit programming
SERIE G
6
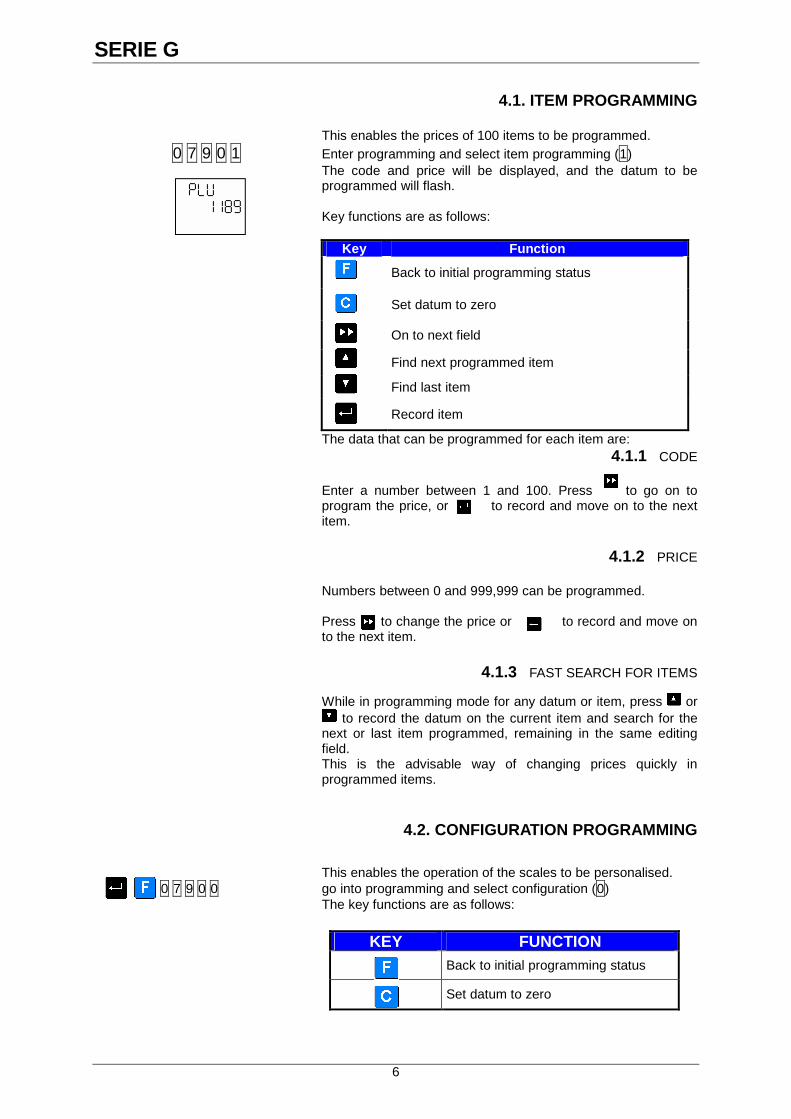
4.1. ITEM PROGRAMMING
This enables the prices of 100 items to be programmed. 0 7 9 0 1 Enter programming and select item programming (1)
The code and price will be displayed, and the datum to be programmed will flash.
Key functions are as follows:
Key Function
Back to initial programming status
Set datum to zero
On to next field
Find next programmed item
Find last item
Record item
The data that can be programmed for each item are: 4.1.1 CODE
Enter a number between 1 and 100. Press to go on to program the price, or to record and move on to the next item.
4.1.2 PRICE
Numbers between 0 and 999,999 can be programmed. Press to change the price or to record and move on to the next item.
4.1.3 FAST SEARCH FOR ITEMS
While in programming mode for any datum or item, press or to record the datum on the current item and search for the
next or last item programmed, remaining in the same editing field. This is the advisable way of changing prices quickly in programmed items.
4.2. CONFIGURATION PROGRAMMING
This enables the operation of the scales to be personalised. 0 7 9 0 0 go into programming and select configuration (0)
The key functions are as follows:
KEY FUNCTION
Back to initial programming status
Set datum to zero
USER´S MANUAL
7
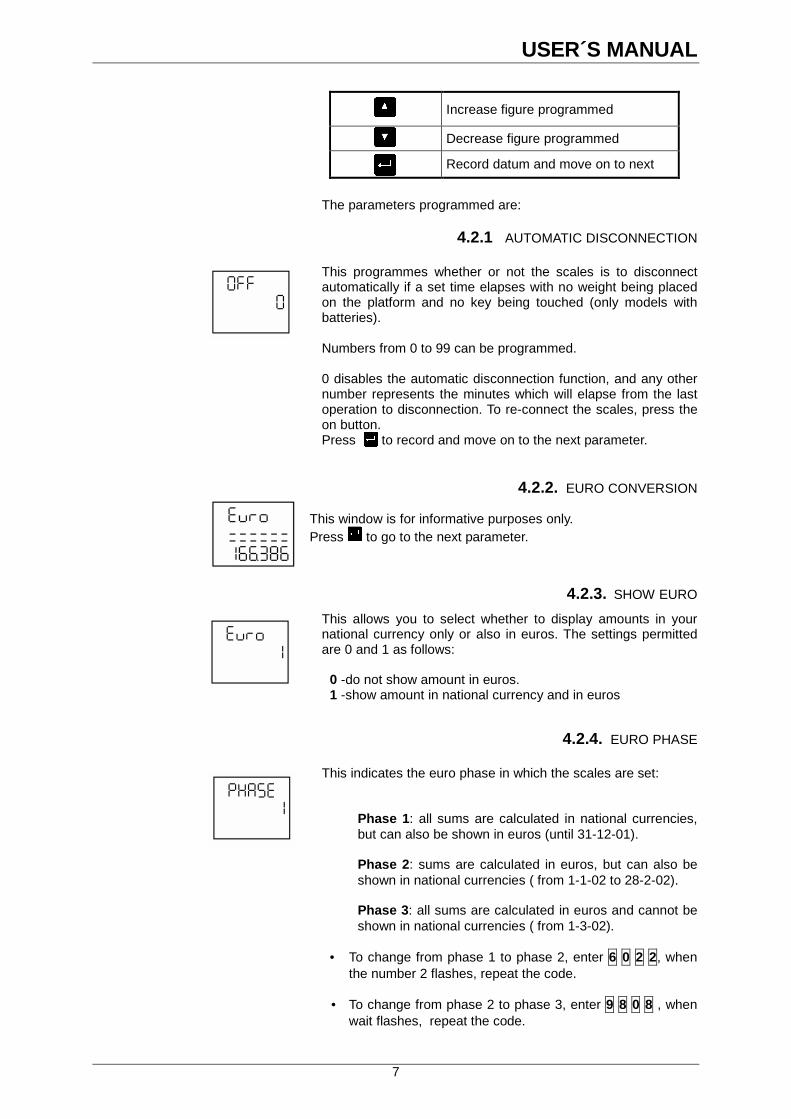
Increase figure programmed
Decrease figure programmed
Record datum and move on to next
The parameters programmed are:
4.2.1 AUTOMATIC DISCONNECTION
This programmes whether or not the scales is to disconnect automatically if a set time elapses with no weight being placed on the platform and no key being touched (only models with batteries). Numbers from 0 to 99 can be programmed. 0 disables the automatic disconnection function, and any other number represents the minutes which will elapse from the last operation to disconnection. To re-connect the scales, press the on button. Press to record and move on to the next parameter.
4.2.2. EURO CONVERSION
This window is for informative purposes only. Press to go to the next parameter.
4.2.3. SHOW EURO
This allows you to select whether to display amounts in your national currency only or also in euros. The settings permitted are 0 and 1 as follows: 0 -do not show amount in euros. 1 -show amount in national currency and in euros
4.2.4. EURO PHASE
This indicates the euro phase in which the scales are set: Phase 1: all sums are calculated in national currencies, but can also be shown in euros (until 31-12-01). Phase 2: sums are calculated in euros, but can also be shown in national currencies ( from 1-1-02 to 28-2-02). Phase 3: all sums are calculated in euros and cannot be shown in national currencies ( from 1-3-02).
• To change from phase 1 to phase 2, enter 6 0 2 2, when
the number 2 flashes, repeat the code.
• To change from phase 2 to phase 3, enter 9 8 0 8 , when wait flashes, repeat the code.
SERIE G
8
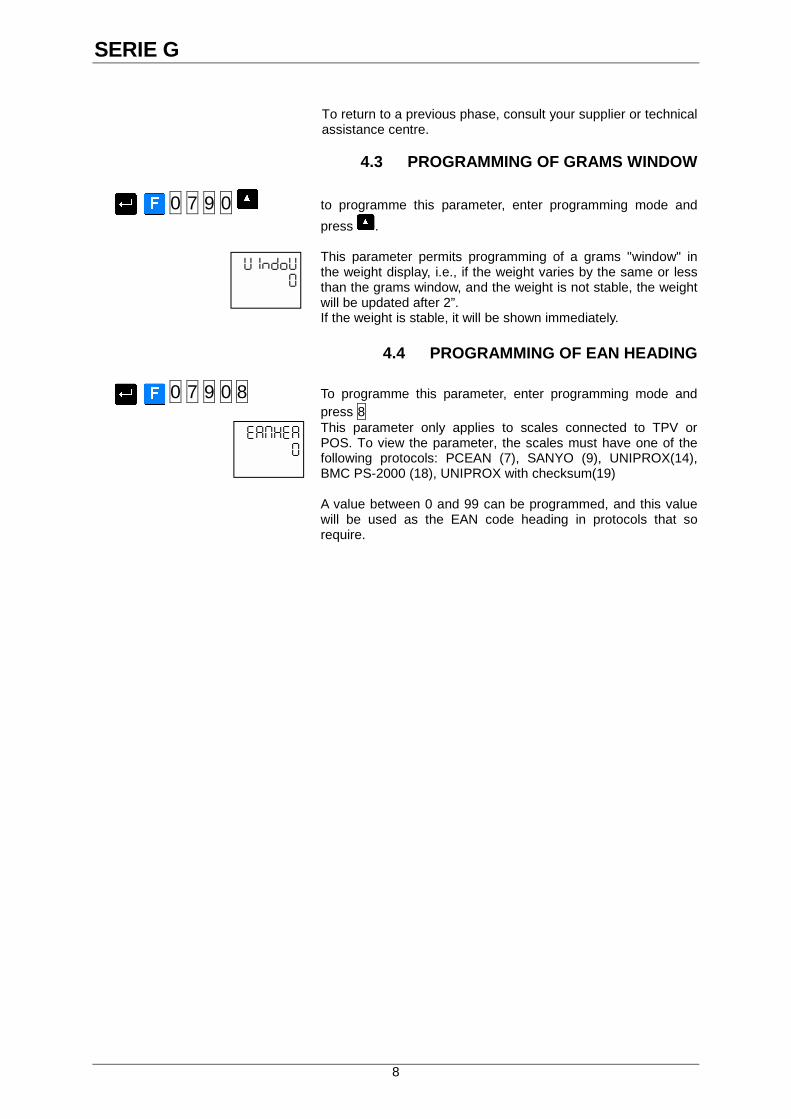
To return to a previous phase, consult your supplier or technical assistance centre.
4.3 PROGRAMMING OF GRAMS WINDOW
0 7 9 0 to programme this parameter, enter programming mode and
press .
This parameter permits programming of a grams "window" in the weight display, i.e., if the weight varies by the same or less than the grams window, and the weight is not stable, the weight will be updated after 2”. If the weight is stable, it will be shown immediately.
4.4 PROGRAMMING OF EAN HEADING
0 7 9 0 8 To programme this parameter, enter programming mode and press 8 This parameter only applies to scales connected to TPV or POS. To view the parameter, the scales must have one of the following protocols: PCEAN (7), SANYO (9), UNIPROX(14), BMC PS-2000 (18), UNIPROX with checksum(19) A value between 0 and 99 can be programmed, and this value will be used as the EAN code heading in protocols that so require.

USER´S MANUAL
9
SERIE G
10
The information in this manual may be modified by the manufacturer without prior notice.
REF.: 49-MG000EN08 REV 08 20/04/2010
USER´S MANUAL