Embed Size (px)
Citation preview
1
RawWorkflow
CALUMET
PHOTOGRAPHIC
2
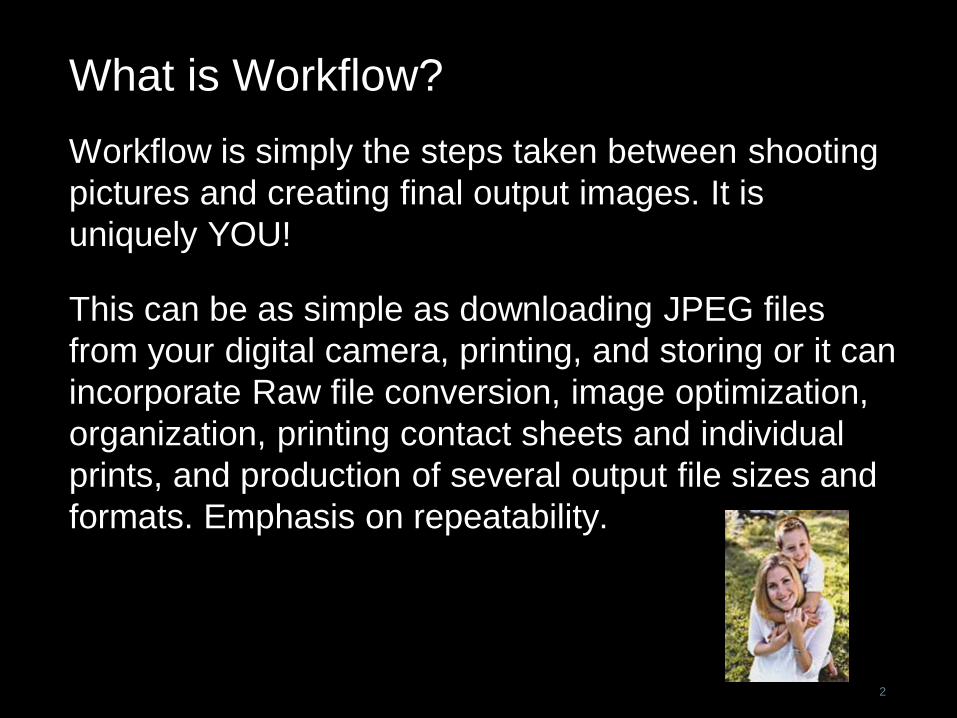
What is Workflow?
Workflow is simply the steps taken between shooting
pictures and creating final output images. It is
uniquely YOU!
This can be as simple as downloading JPEG files
from your digital camera, printing, and storing or it can
incorporate Raw file conversion, image optimization,
organization, printing contact sheets and individual
prints, and production of several output file sizes and
formats. Emphasis on repeatability.
3
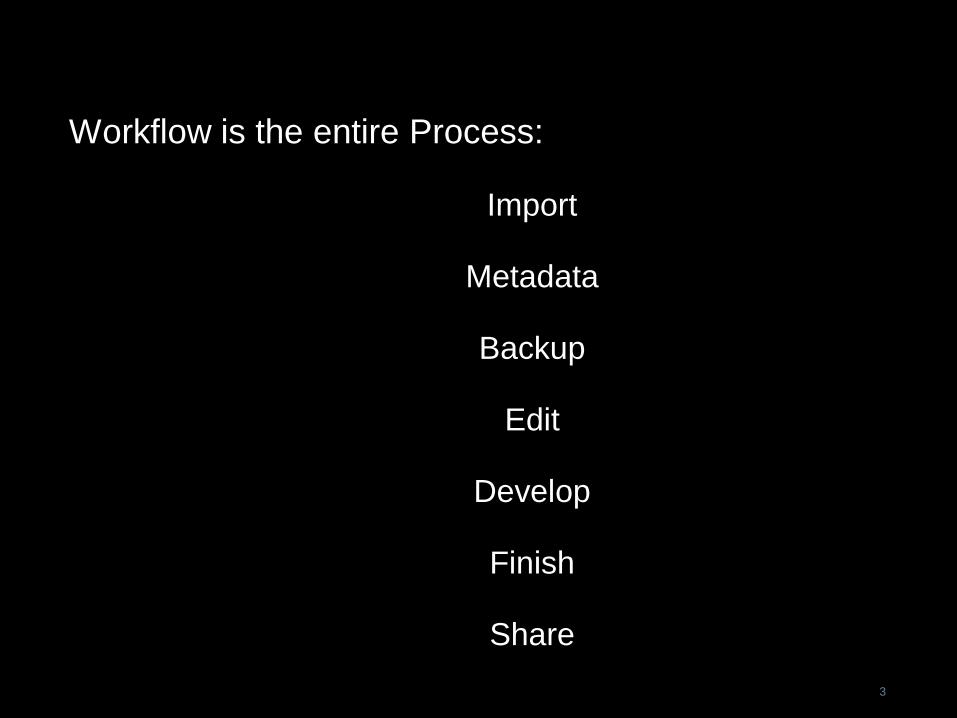
Workflow is the entire Process:
Import
Metadata
Backup
Edit
Develop
Finish
Share
4
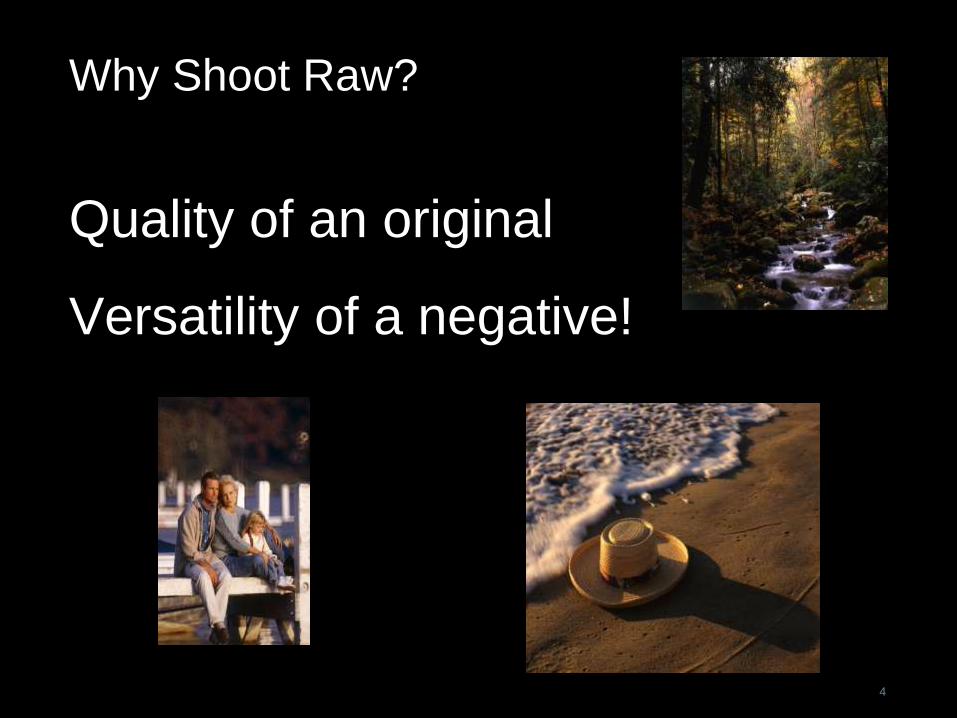
Why Shoot Raw?
Quality of an original
Versatility of a negative!
5
What makes a file Raw?
1. Undeveloped
2. High Bit depth
3. Linear response
6
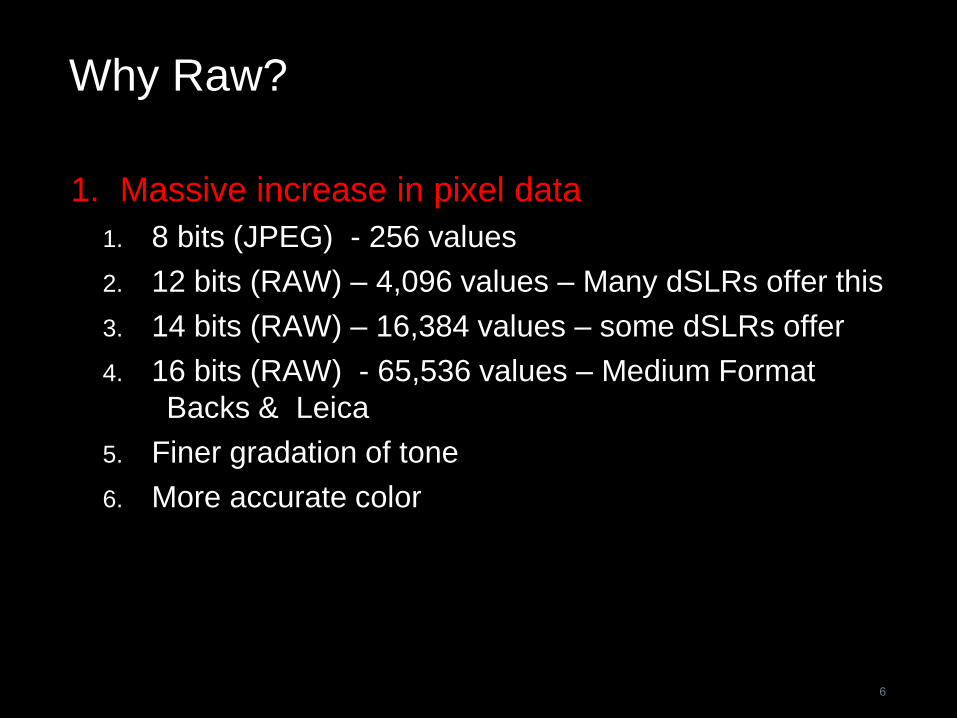
Why Raw?
1. Massive increase in pixel data
1. 8 bits (JPEG) - 256 values
2. 12 bits (RAW) – 4,096 values – Many dSLRs offer this
3. 14 bits (RAW) – 16,384 values – some dSLRs offer
4. 16 bits (RAW) - 65,536 values – Medium Format
Backs & Leica
5. Finer gradation of tone
6. More accurate color
7
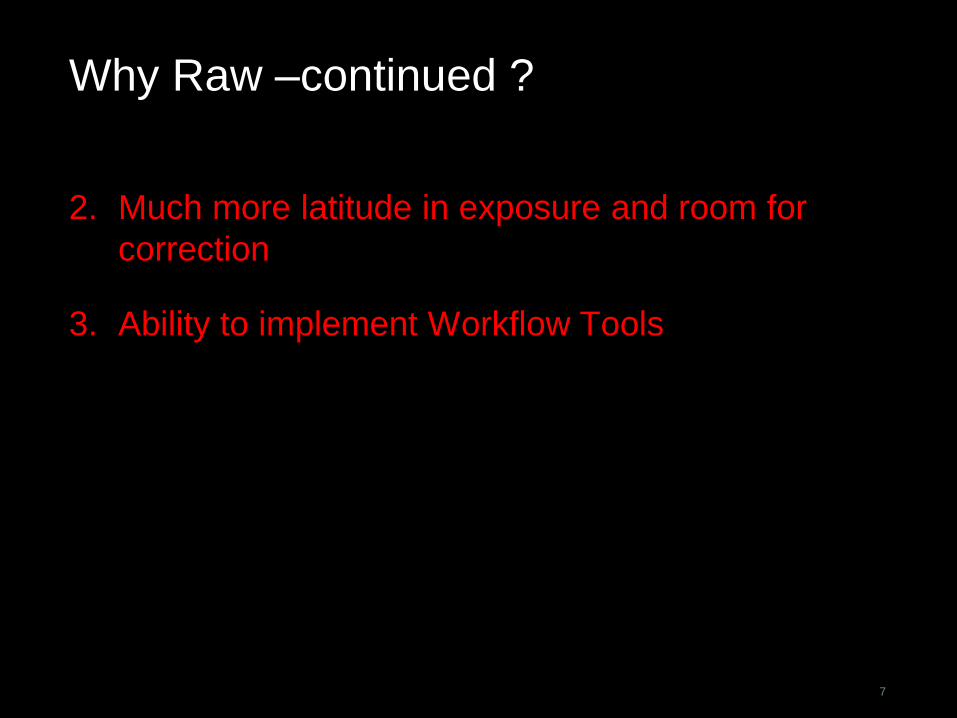
Why Raw –continued ?
2. Much more latitude in exposure and room for
correction
3. Ability to implement Workflow Tools
8
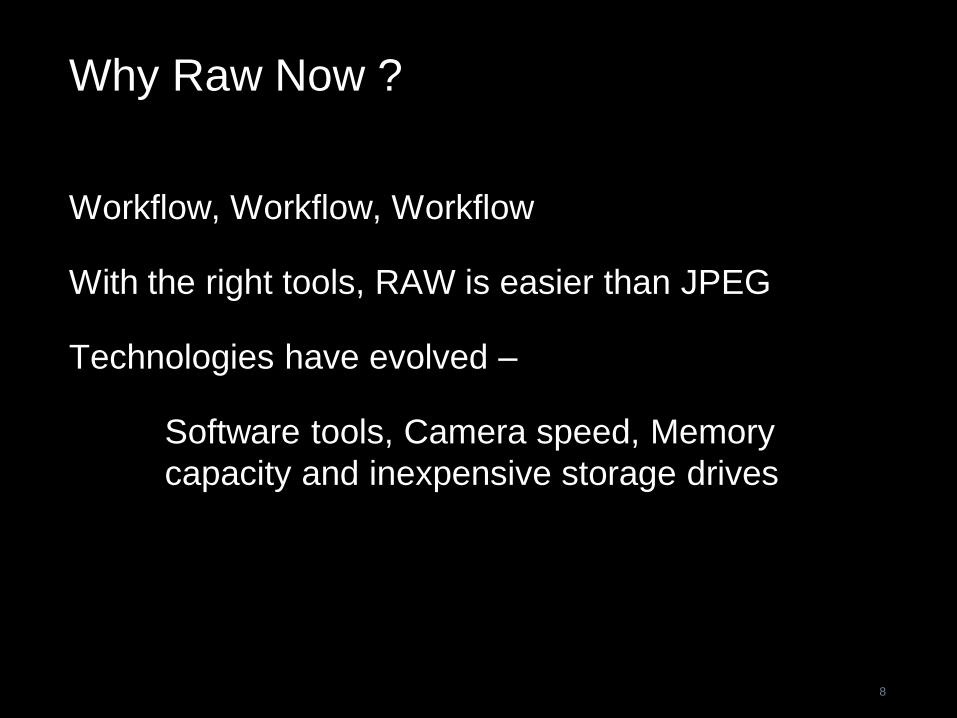
Why Raw Now ?
Workflow, Workflow, Workflow
With the right tools, RAW is easier than JPEG
Technologies have evolved –
Software tools, Camera speed, Memory
capacity and inexpensive storage drives
9
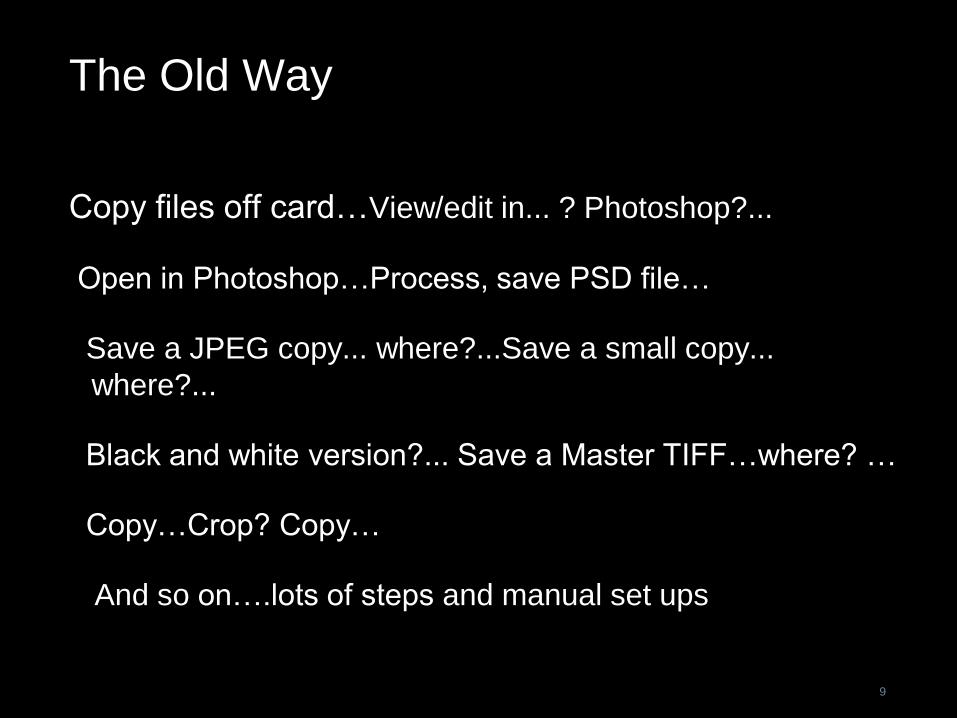
The Old Way
Copy files off card…View/edit in... ? Photoshop?...
Open in Photoshop…Process, save PSD file…
Save a JPEG copy... where?...Save a small copy...
where?...
Black and white version?... Save a Master TIFF…where? …
Copy…Crop? Copy…
And so on….lots of steps and manual set ups
10
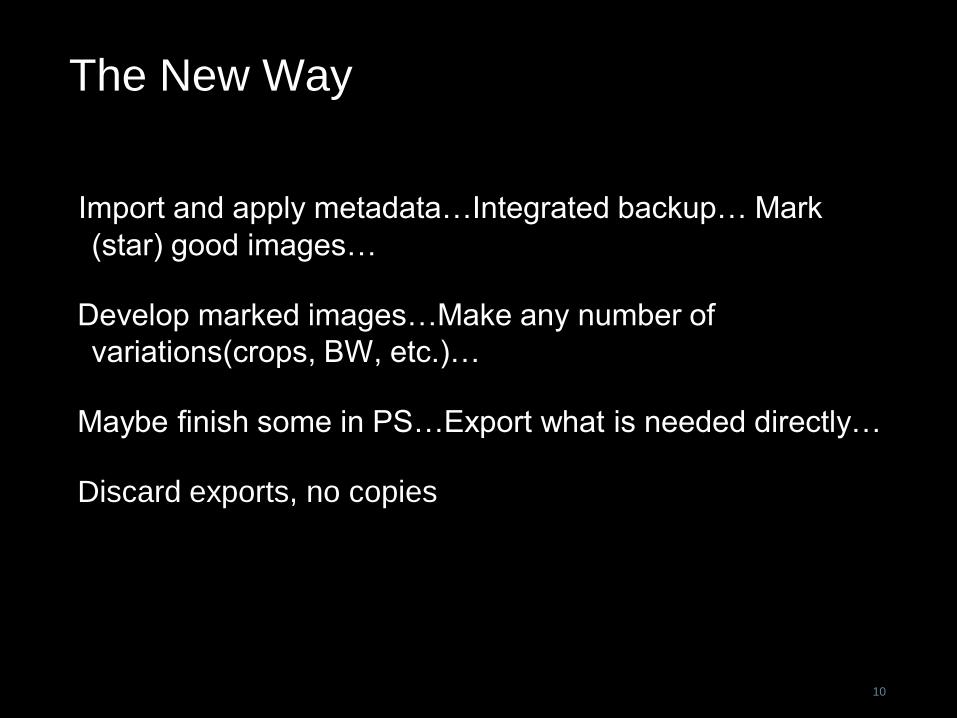
The New Way
Import and apply metadata…Integrated backup… Mark
(star) good images…
Develop marked images…Make any number of
variations(crops, BW, etc.)…
Maybe finish some in PS…Export what is needed directly…
Discard exports, no copies
11
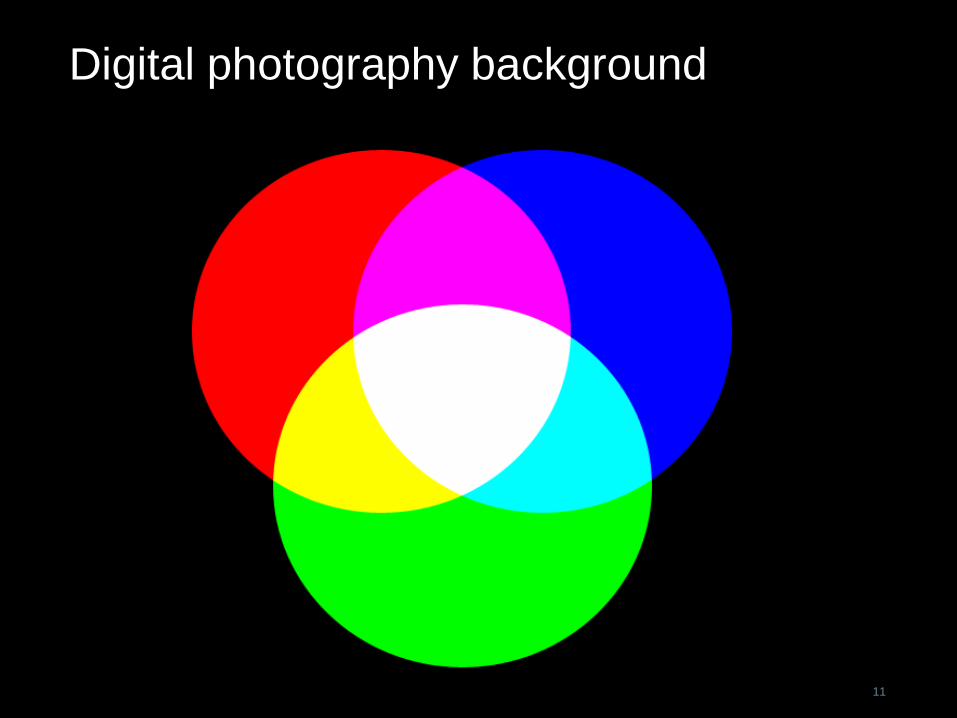
Digital photography background
12
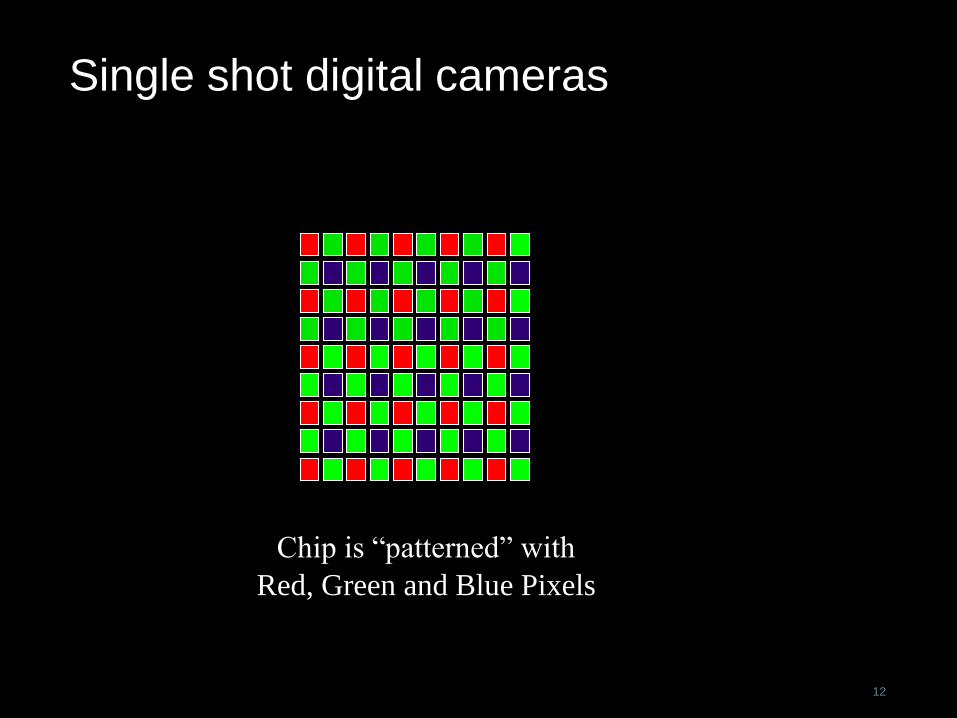
Single shot digital cameras
Chip is “patterned” with
Red, Green and Blue Pixels
13
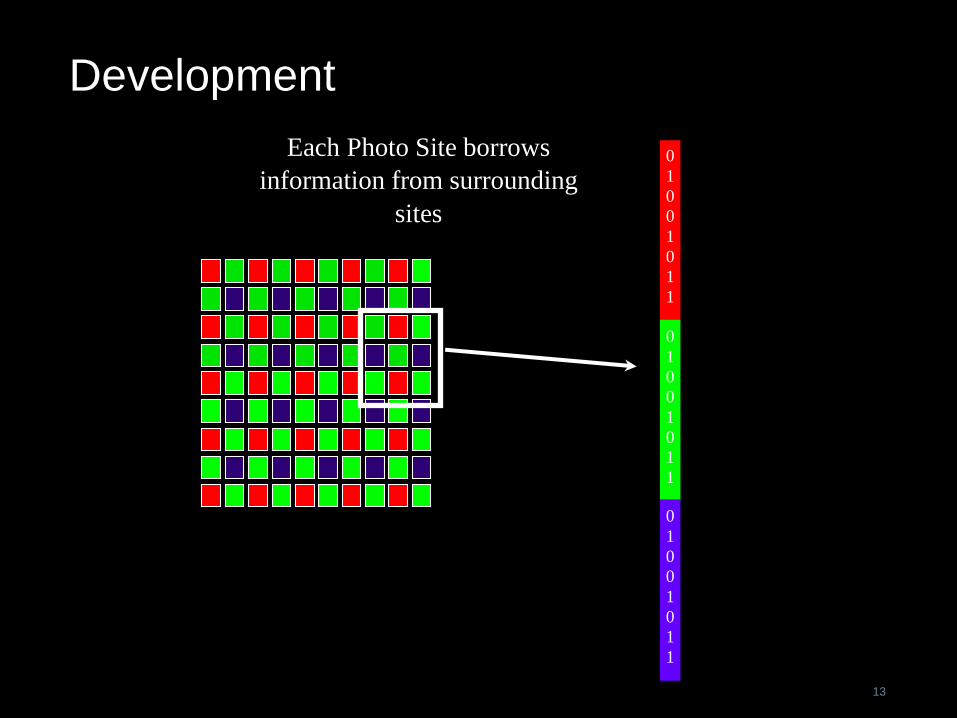
Development
0
1
0
0
1
0
1
1
Each Photo Site borrows
information from surrounding
sites
0
1
0
0
1
0
1
1
0
1
0
0
1
0
1
1
14
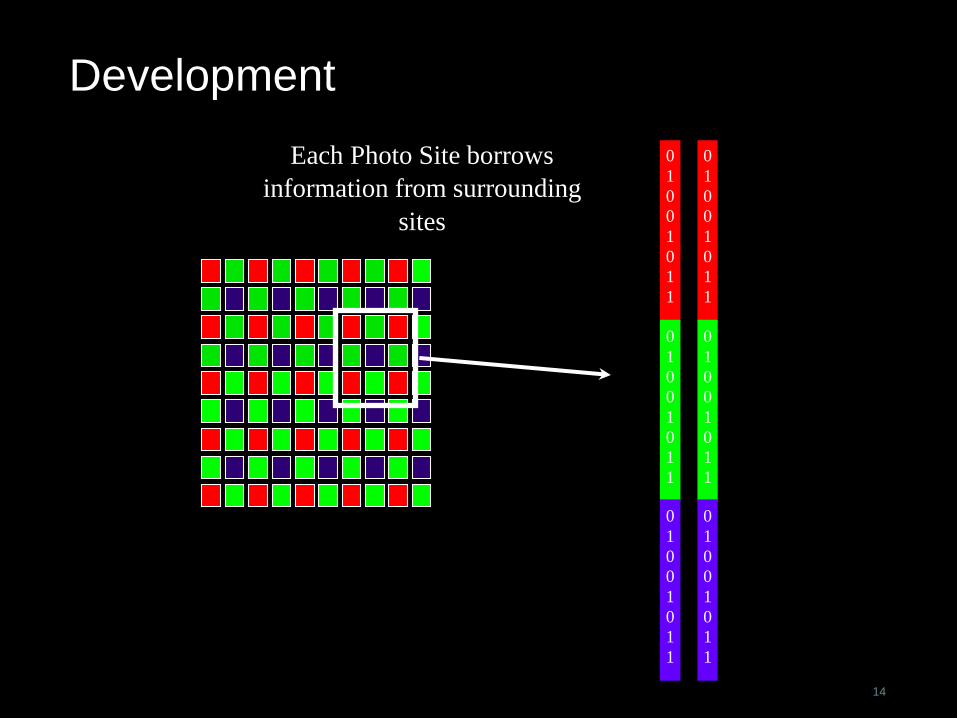
Development
0
1
0
0
1
0
1
1
0
1
0
0
1
0
1
1
0
1
0
0
1
0
1
1
0
1
0
0
1
0
1
1
Each Photo Site borrows
information from surrounding
sites
0
1
0
0
1
0
1
1
0
1
0
0
1
0
1
1
15
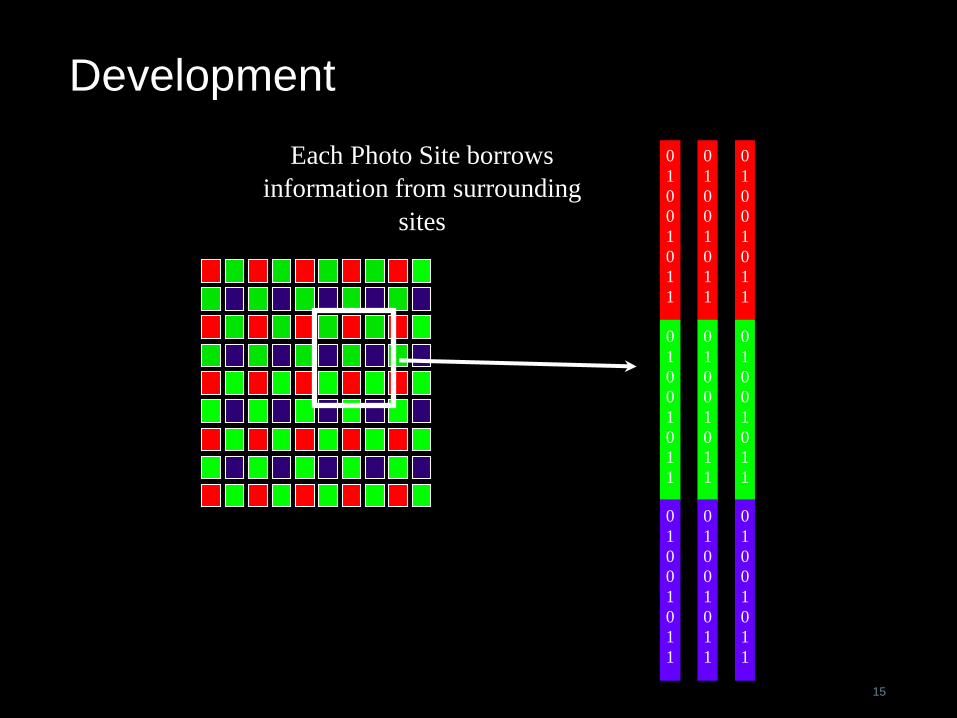
Development
0
1
0
0
1
0
1
1
Each Photo Site borrows
information from surrounding
sites
0
1
0
0
1
0
1
1
0
1
0
0
1
0
1
1
0
1
0
0
1
0
1
1
0
1
0
0
1
0
1
1
0
1
0
0
1
0
1
1
0
1
0
0
1
0
1
1
0
1
0
0
1
0
1
1
0
1
0
0
1
0
1
1
16
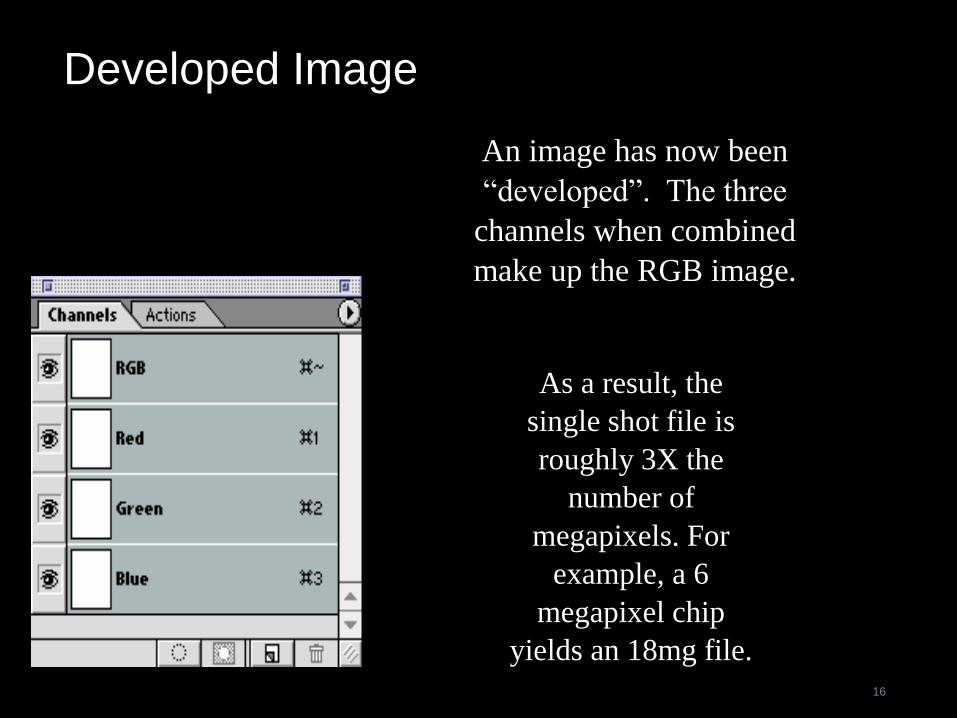
Developed Image
As a result, the
single shot file is
roughly 3X the
number of
megapixels. For
example, a 6
megapixel chip
yields an 18mg file.
An image has now been
“developed”. The three
channels when combined
make up the RGB image.
17
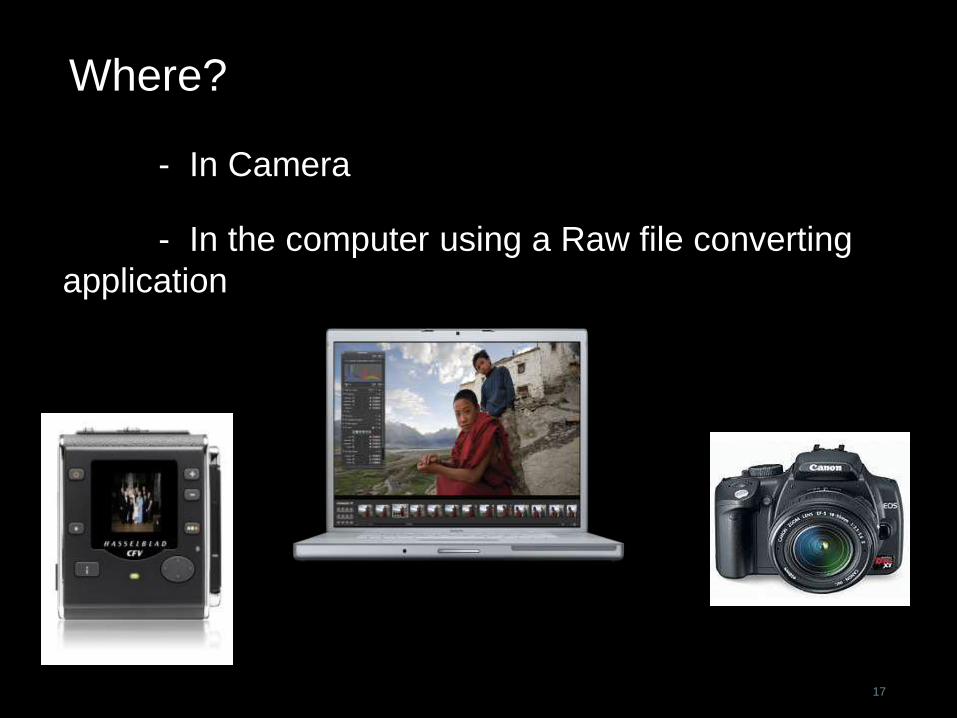
Where?
- In Camera
- In the computer using a Raw file converting
application
1.
18
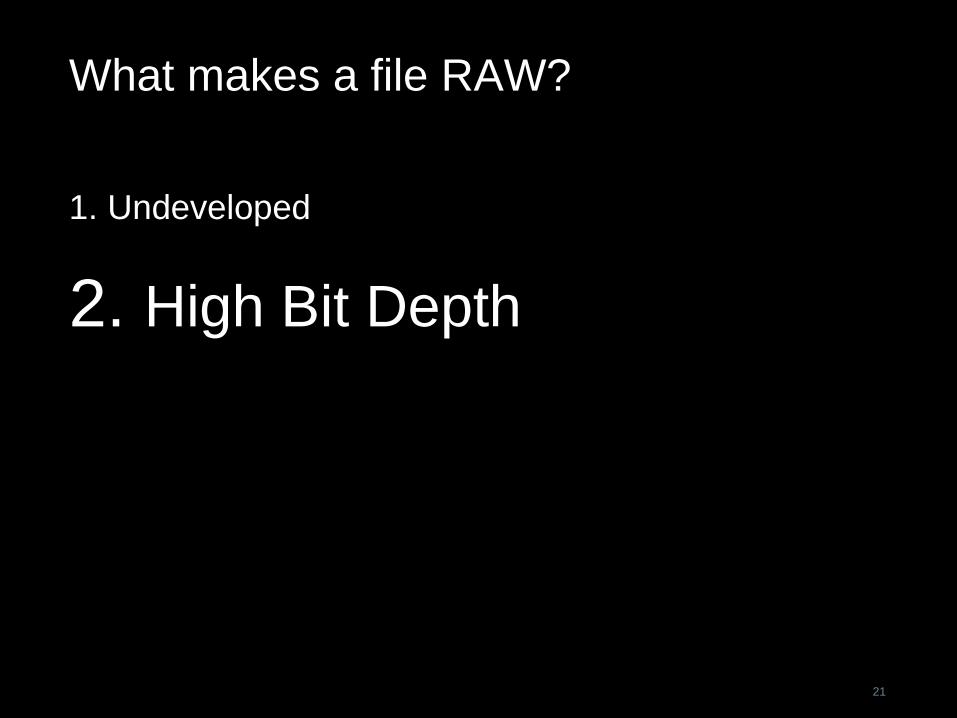
What makes a file Raw?
1. Undeveloped
19
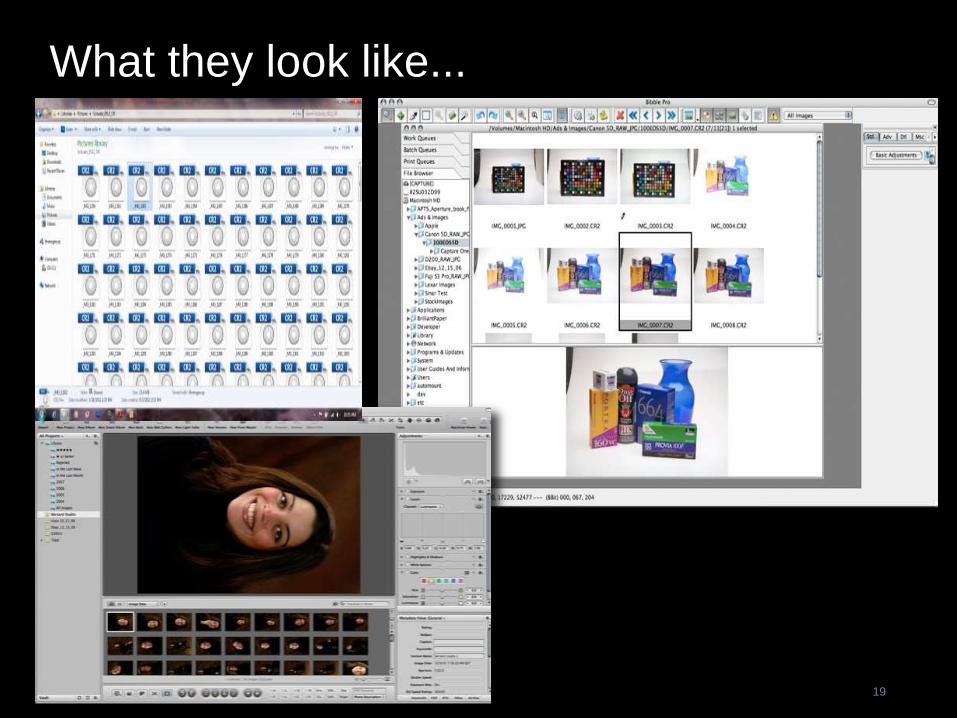
What they look like...
20
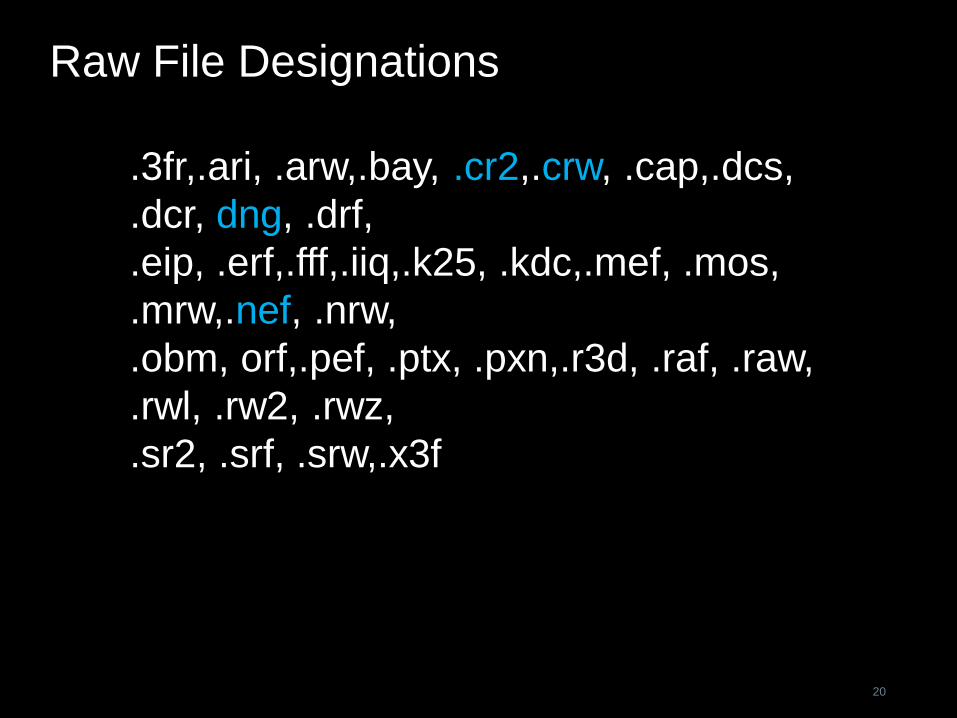
Raw File Designations
.3fr,.ari, .arw,.bay, .cr2,.crw, .cap,.dcs,
.dcr, dng, .drf,
.eip, .erf,.fff,.iiq,.k25, .kdc,.mef, .mos,
.mrw,.nef, .nrw,
.obm, orf,.pef, .ptx, .pxn,.r3d, .raf, .raw,
.rwl, .rw2, .rwz,
.sr2, .srf, .srw,.x3f
21
What makes a file RAW?
1. Undeveloped
2. High Bit Depth

22
Bit Depth
12 bits per channel = 4096 shades of
gray
010010101011
For high quality work, Bigger
adjustments need to be made at
Higher bit depths.
23
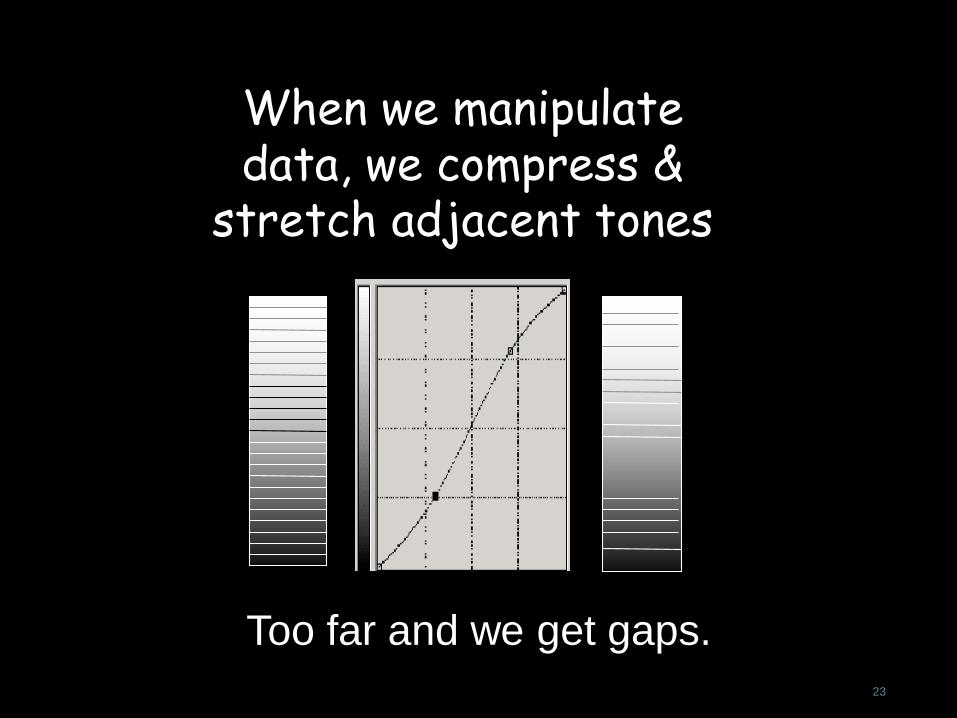
When we manipulate data, we compress &
stretch adjacent tones
Too far and we get gaps.
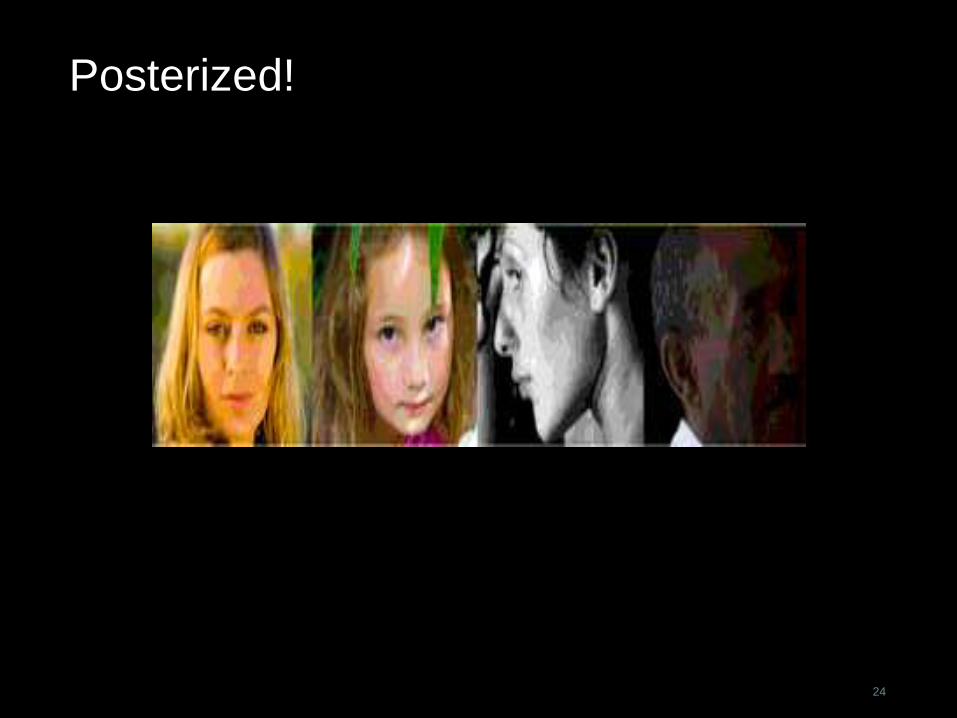
Posterized!
24
25
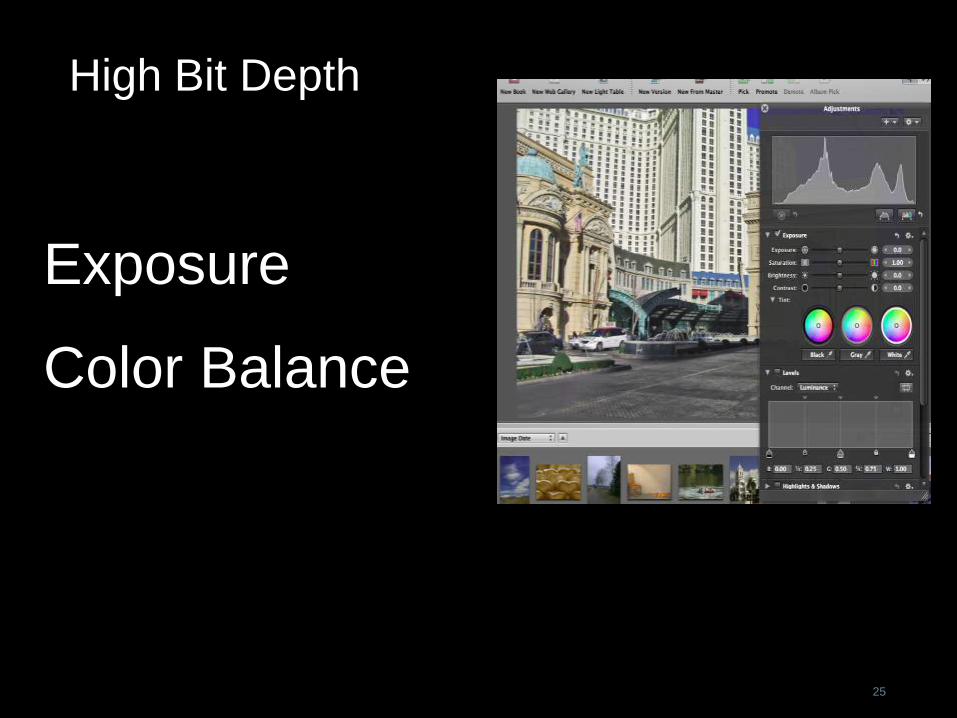
High Bit Depth
Exposure
Color Balance

26
Exposure
Any of the controls...Exposure, Contrast, Brightness
may alter exposure.
27
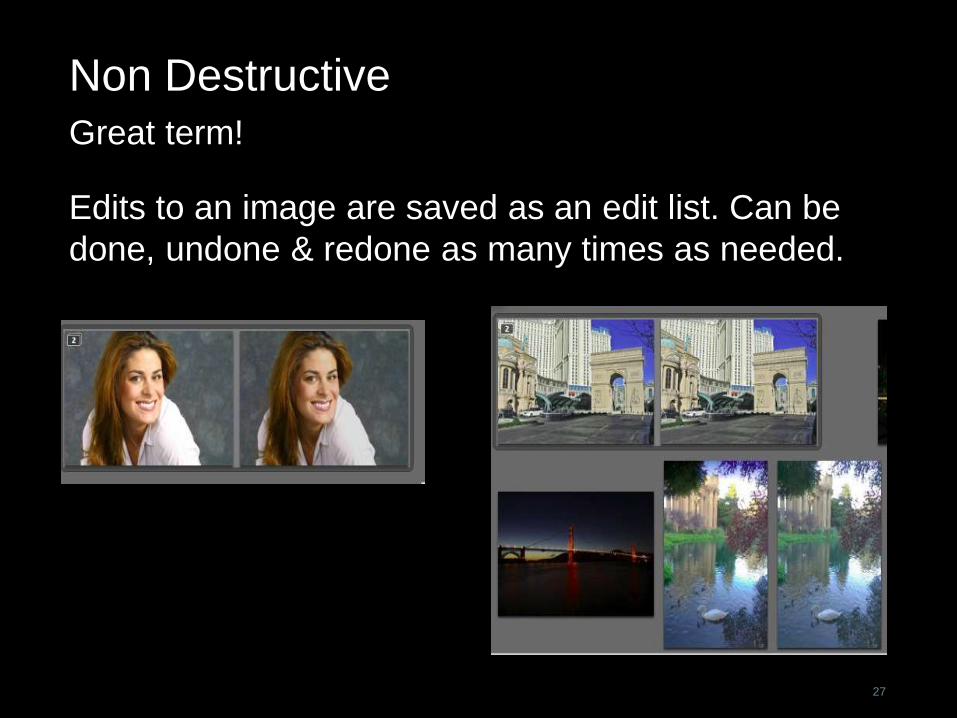
Non Destructive
Great term!
Edits to an image are saved as an edit list. Can be
done, undone & redone as many times as needed.
28
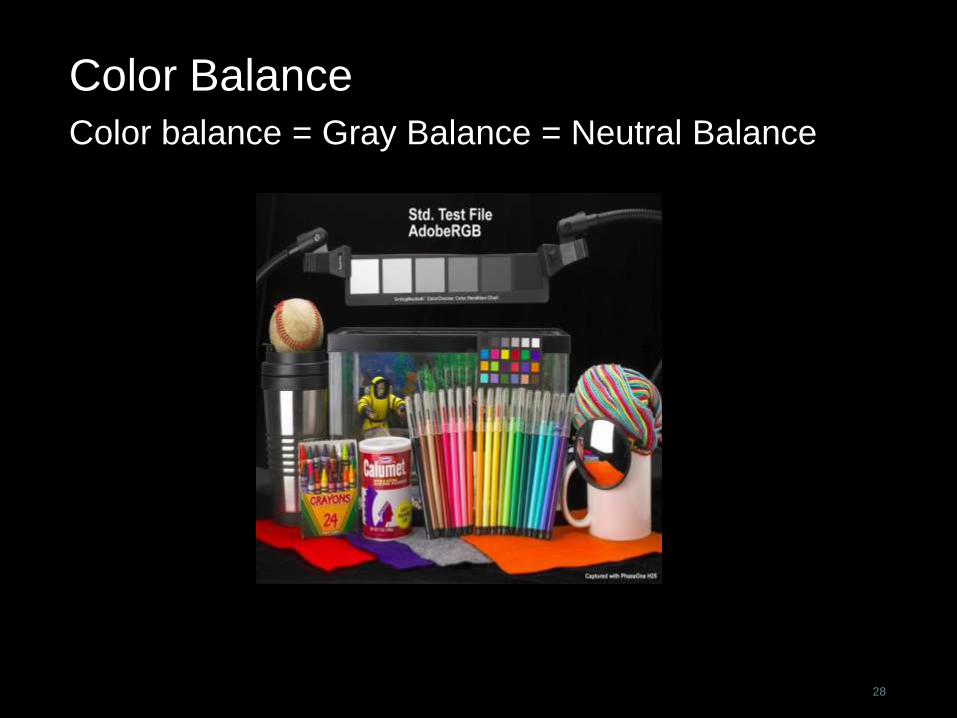
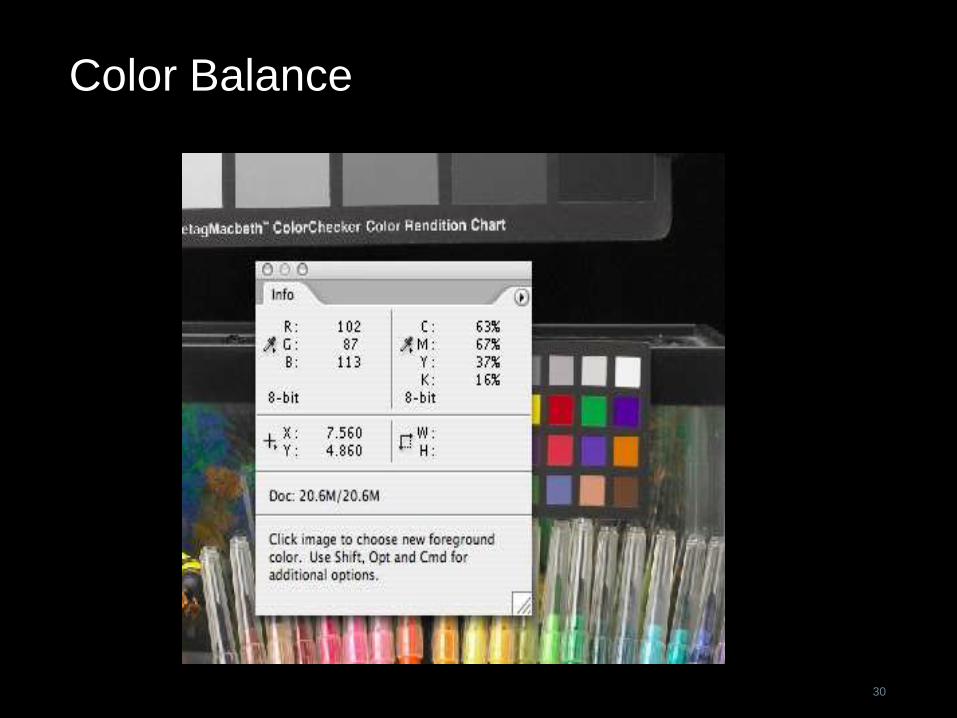
Color Balance
Color balance = Gray Balance = Neutral Balance
29
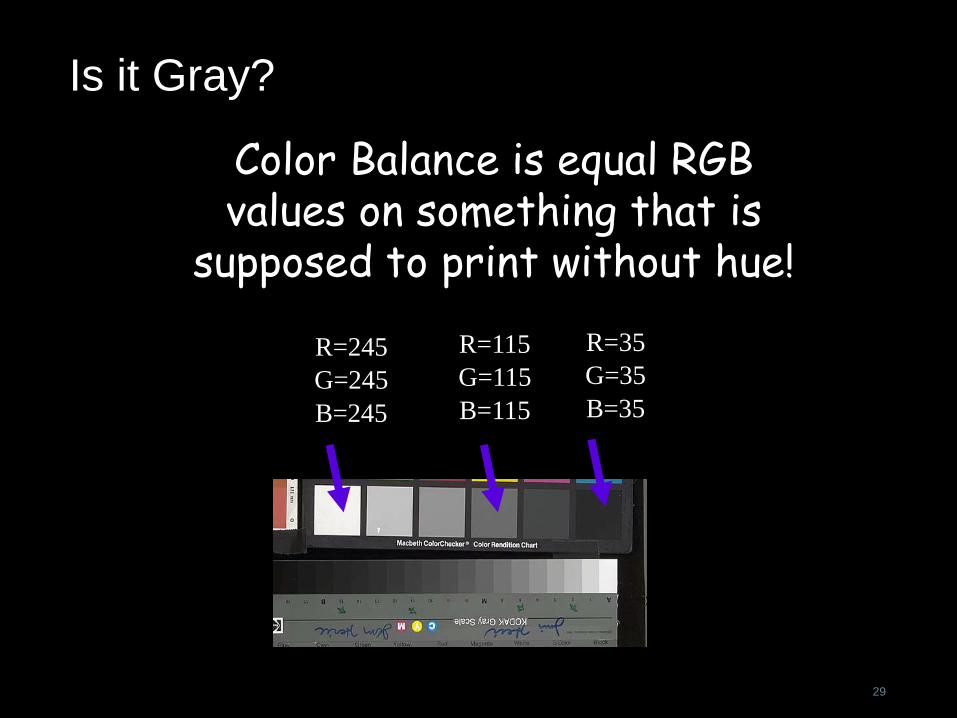
Is it Gray?
Color Balance is equal RGB values on something that is
supposed to print without hue!
R=245
G=245
B=245
R=115
G=115
B=115
R=35
G=35
B=35
30
Color Balance
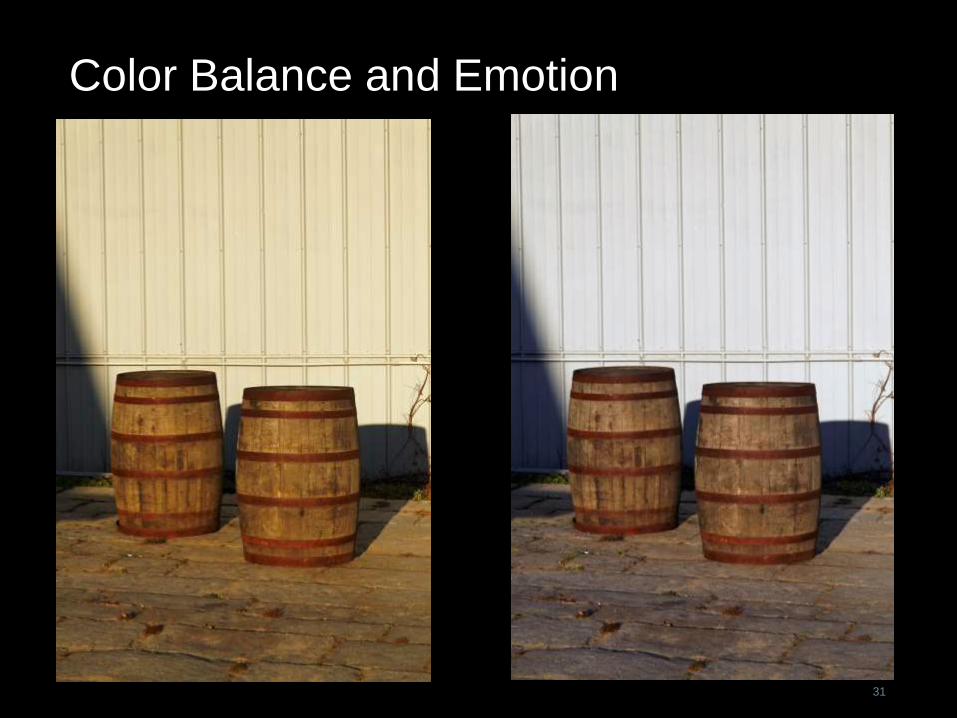
Color Balance and Emotion
31
32
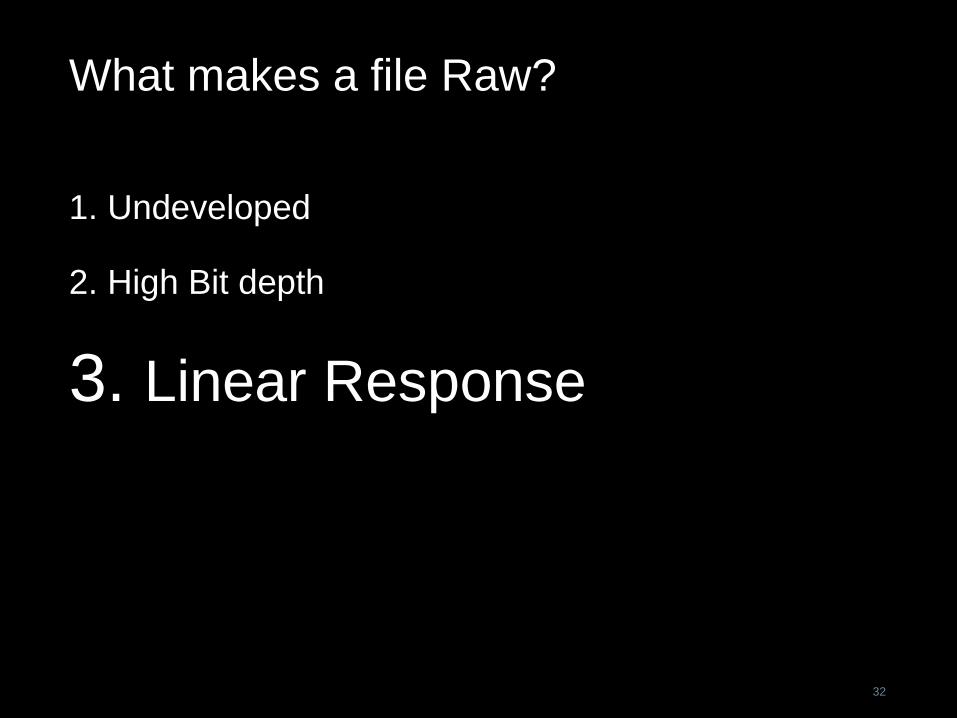
What makes a file Raw?
1. Undeveloped
2. High Bit depth
3. Linear Response
33
Linear Response
The human eye and film are non-linear.
The recording response of a digital sensor is
proportional to the number of photons that hit it. The
response is linear. Unlike film digital sensors record
twice the signal when twice the number of photons hit
it. The linear raw data will usually look very dark and
low in contrast compared to a normal photograph.
Raw linear data allows much better complete control
to an image.
34
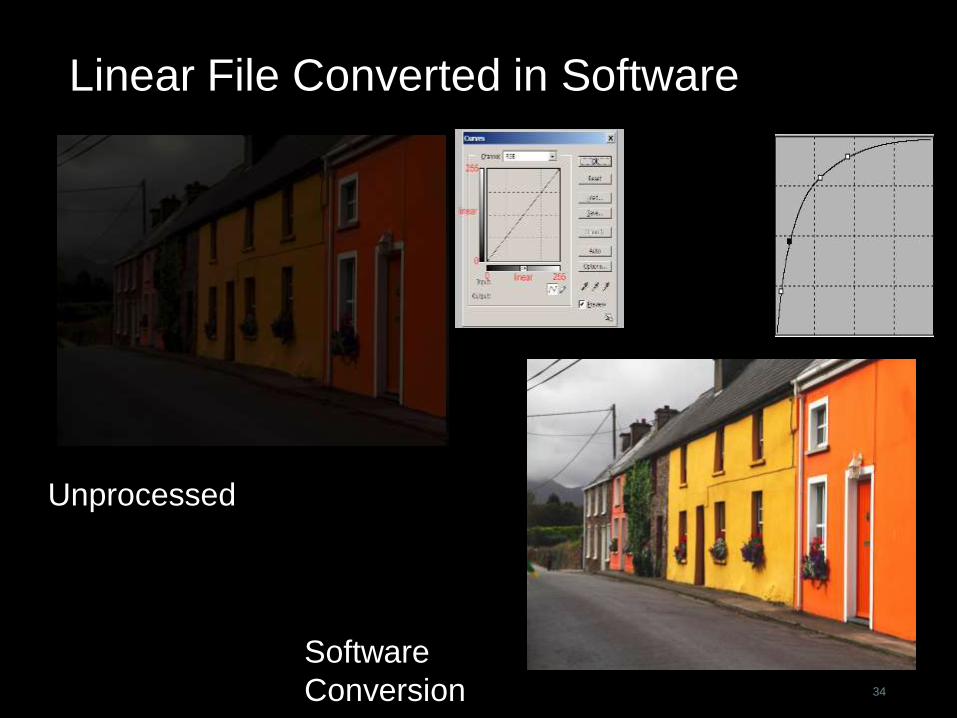
Linear File Converted in Software
Un
Unprocessed
Software
Conversion
35
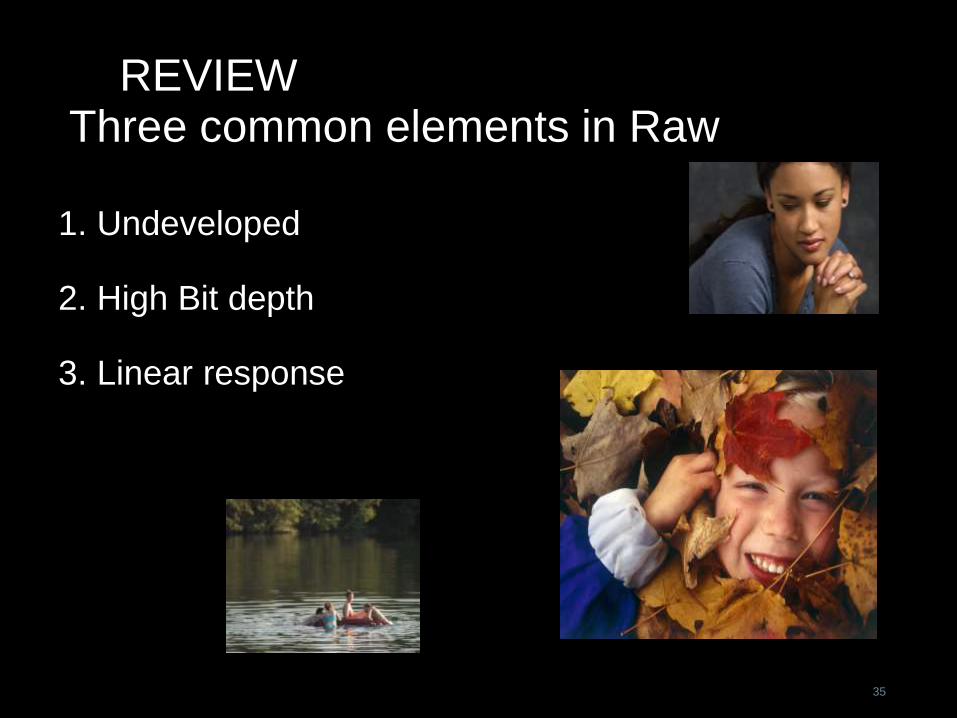
REVIEWThree common elements in Raw
1. Undeveloped
2. High Bit depth
3. Linear response
36
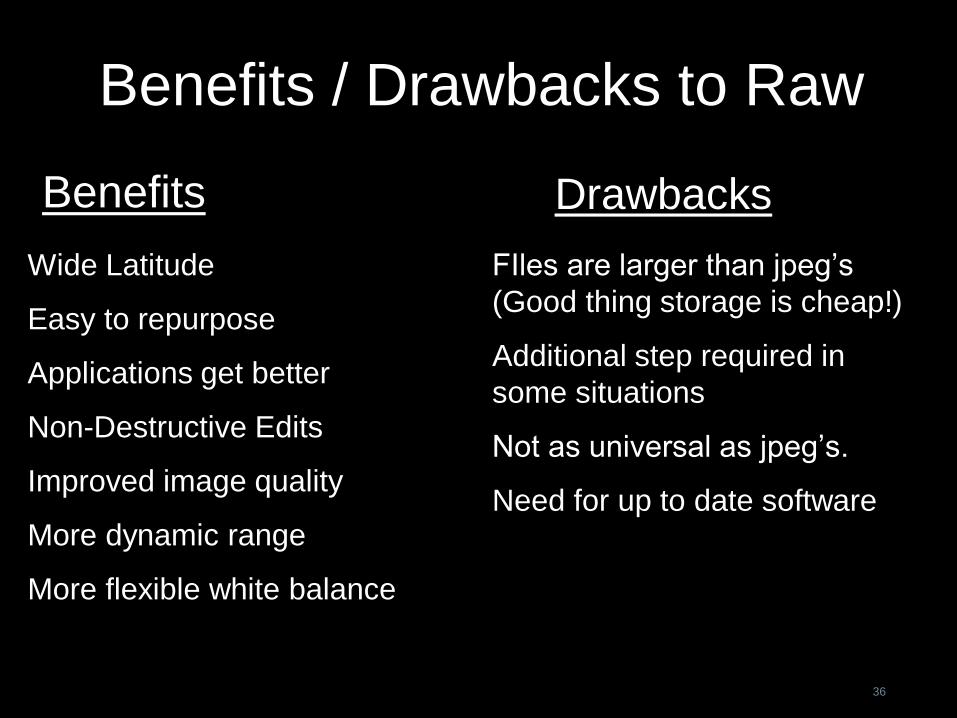
Benefits / Drawbacks to Raw
FIles are larger than jpeg’s
(Good thing storage is cheap!)
Additional step required in
some situations
Not as universal as jpeg’s.
Need for up to date software
Wide Latitude
Easy to repurpose
Applications get better
Non-Destructive Edits
Improved image quality
More dynamic range
More flexible white balance
DrawbacksBenefits
37
Applications that support RawCamera manufacturer’s
• Nikon (NX2), Canon (DPP), Fujifilm, and Sony all make applications suitable to their own file formats. Using the camera manufacturer’s Raw software will allow access to all that the file can offer (SDK).
Adobe Camera Raw / Photoshop/ Elements/ Lightroom 5
Capture One
Aperture – Mac Only
Corel Aftershot Pro – formerly Bibble Pro
DxO Optics Pro
ACDSee Pro 5
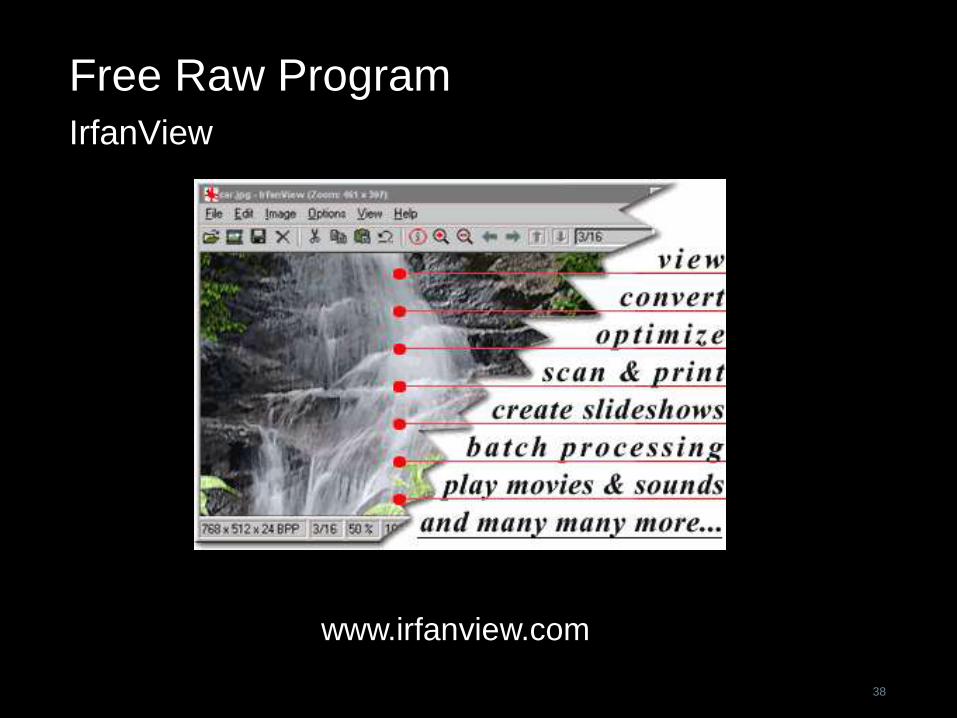
Free Raw Program
IrfanView
38
www.irfanview.com

FREE Raw Program – Open Source
39
www.rawtherapee.com
40
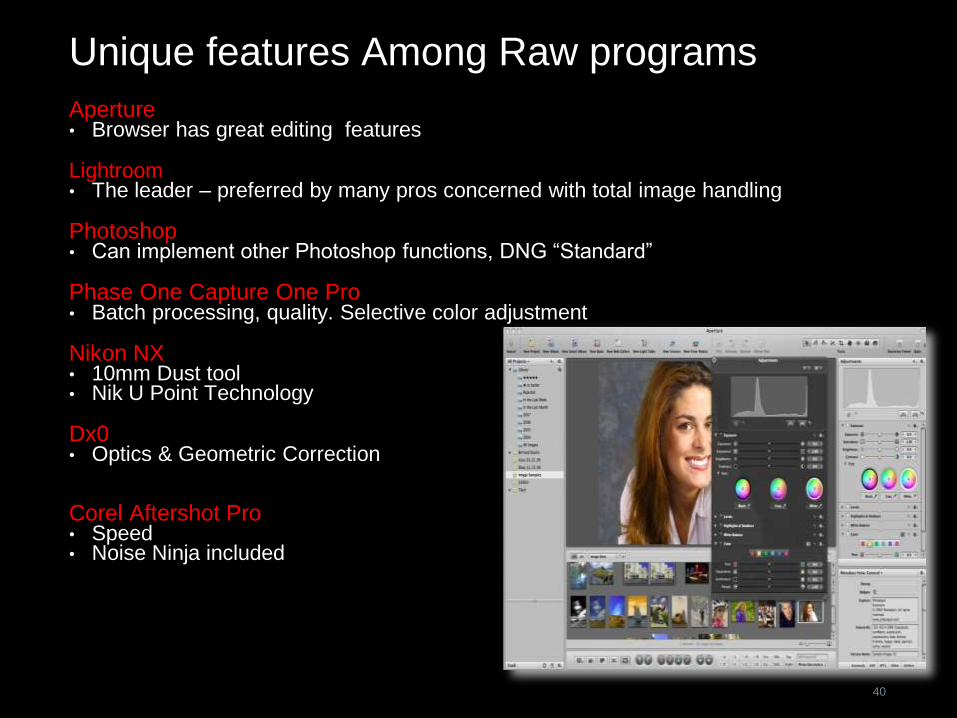
Unique features Among Raw programs
Aperture• Browser has great editing features
Lightroom• The leader – preferred by many pros concerned with total image handling
Photoshop• Can implement other Photoshop functions, DNG “Standard”
Phase One Capture One Pro• Batch processing, quality. Selective color adjustment
Nikon NX• 10mm Dust tool• Nik U Point Technology
Dx0• Optics & Geometric Correction
Corel Aftershot Pro• Speed• Noise Ninja included
41
All Raw applications have elements in common
42
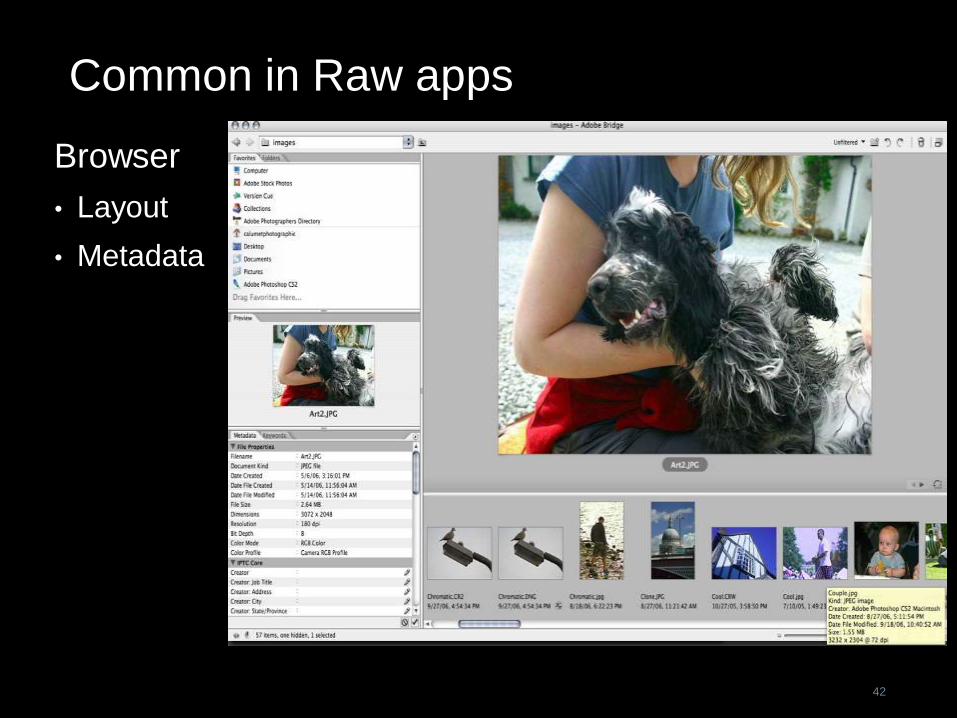
Common in Raw apps
Browser
• Layout
• Metadata
43
Common Tools in RAW applications
Adjust Exposure, Color Balance
Scaling
Save in Common formats
Sharpening
Renaming
Cropping
Color Management
Some form of Batch Processing
Raw Convertor Features
User Interface
Support for Color Management (Monitor profile,
Camera profiles, Output profiles)
Histogram or aid for EV correction
Large Preview
Realtime WB,EV and other correction previews
Batch Capabilities
44
Raw Convertor Features - 2
Good Workflow integration
Integration with Raw Image Browser (Lightroom,etc.)
Saving & Recalling settings (like WB, Sharpening)
16 Bit file save
Tag saved files with profiles
45
More on Conversion
JPEGS can be saved as TIFFS to avoid losing data.
This will allow better editing on a JPEG so no
artifacts are introduced. (Lossless)
I usually convert to 16 bit TIFF unless creating web
files
Color Space can be assigned – sRGB for web use –
make sure your browser is capable of Color
Management
Multiple file editing saves time
Feel free to take files into an external editor (PS)
46
You may have multiple needs – process accordingly
All digital images need sharpening. Always Sharpen
last
Never add Sharpening to your Master image
47
48
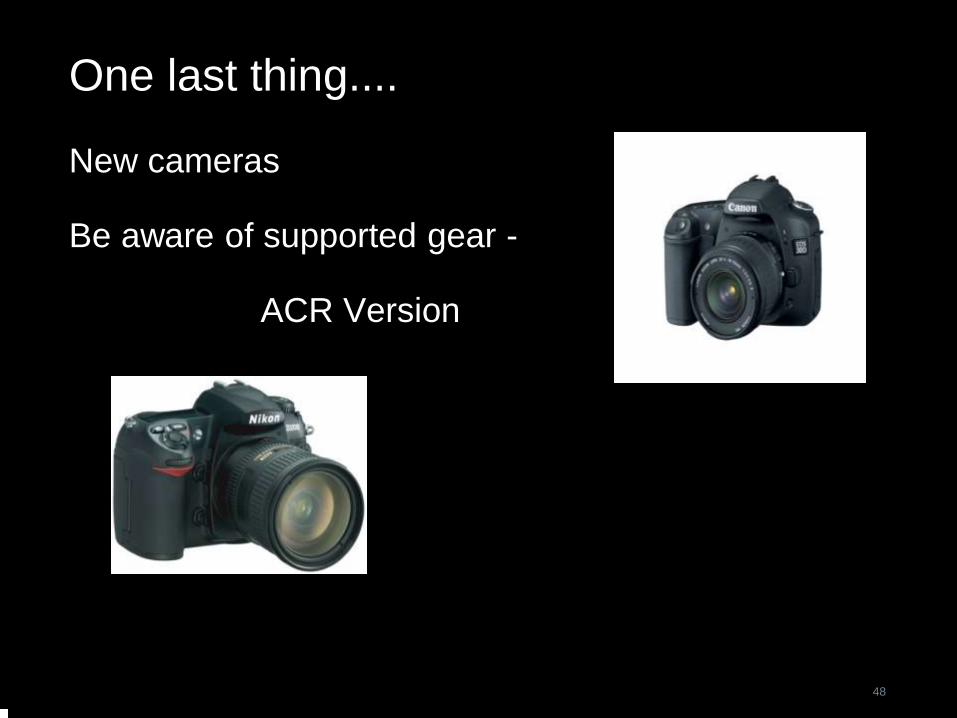
One last thing....
New cameras
Be aware of supported gear -
ACR Version
ADOBE DNG
49
• DNG format helps promote archival confidence, since
digital imaging software solutions will be able to open raw
files more easily in the future.
• A single raw processing solution enables a more efficient
workflow when handling raw files from multiple camera
models and manufacturers.
• A publicly documented and readily available specification
can be easily adopted by camera manufacturers and
updated to accommodate technology changes.
FREE from
Adobelabs.com
IMPLEMENTATION
Steps Involved
50
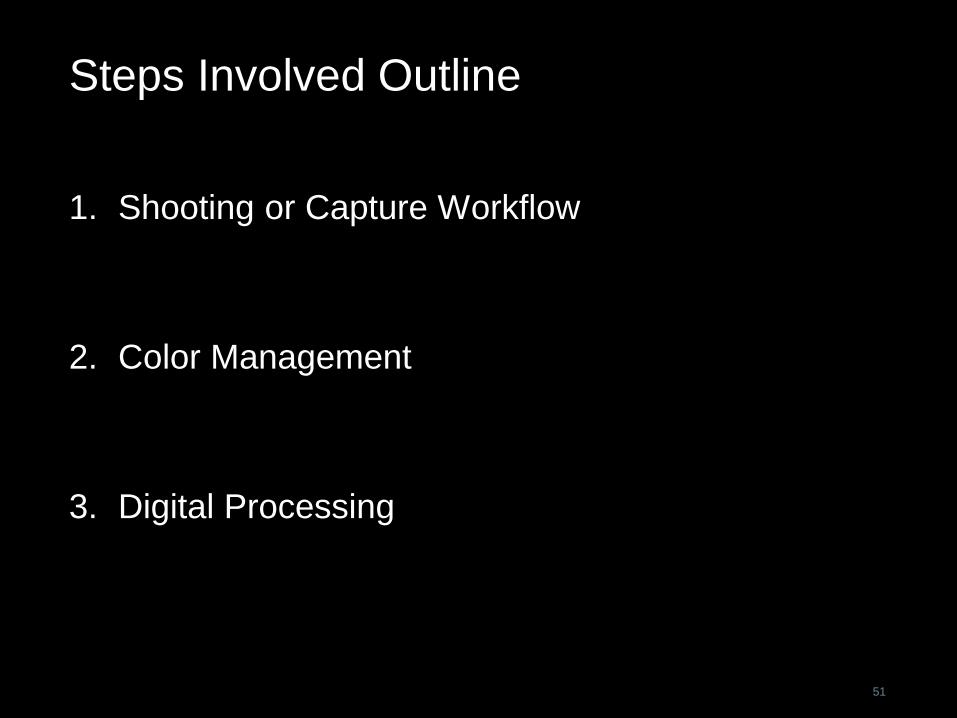
Steps Involved Outline
1. Shooting or Capture Workflow
2. Color Management
3. Digital Processing
51
52
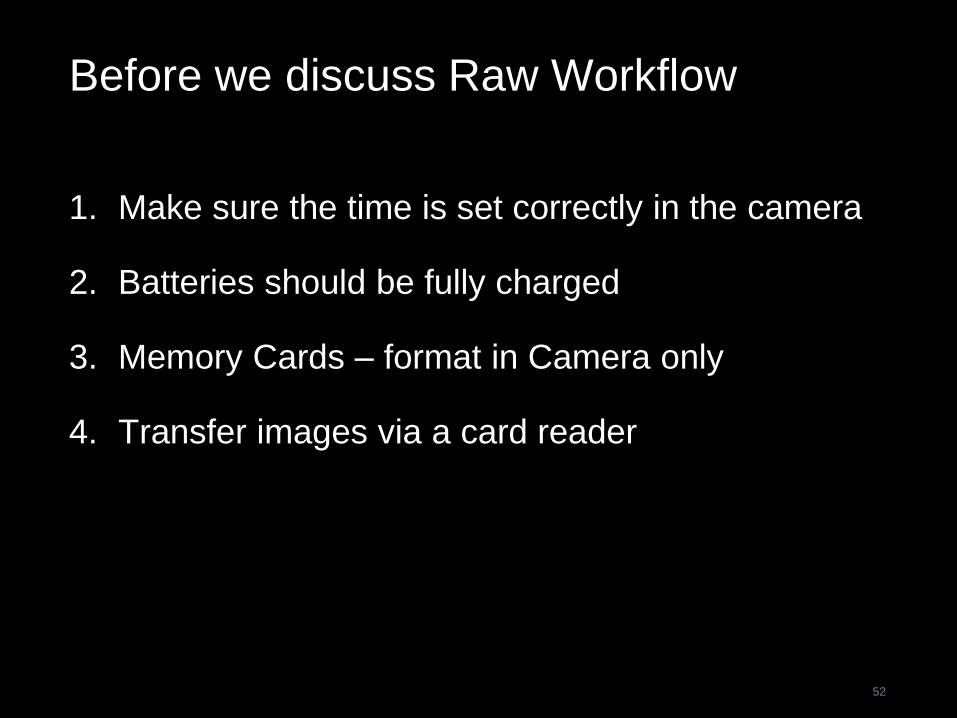
Before we discuss Raw Workflow
1. Make sure the time is set correctly in the camera
2. Batteries should be fully charged
3. Memory Cards – format in Camera only
4. Transfer images via a card reader
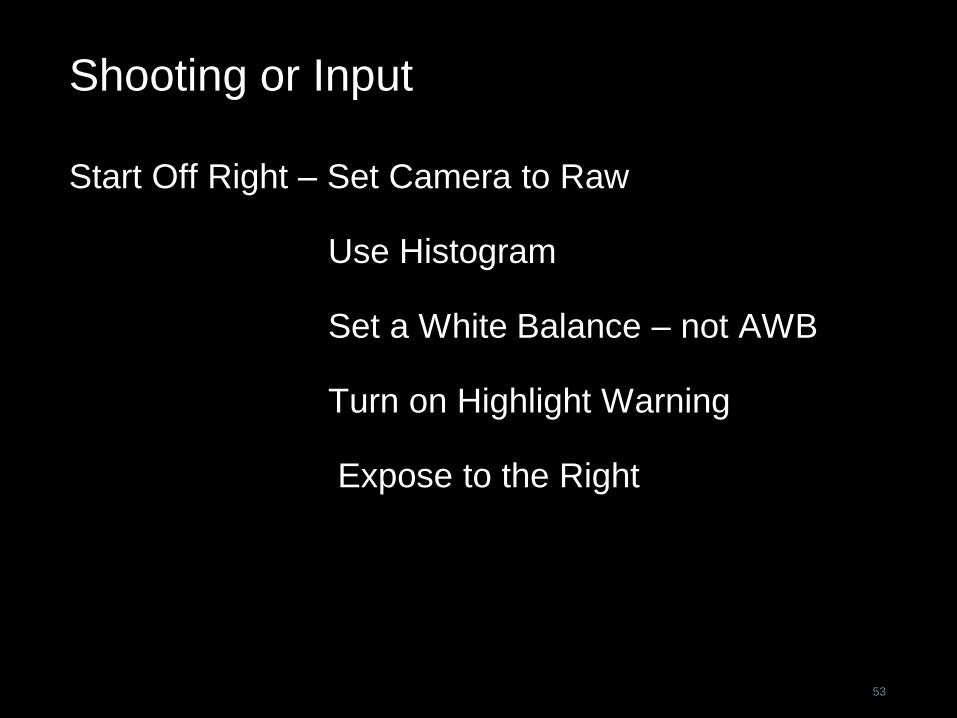
Shooting or Input
Start Off Right – Set Camera to Raw
Use Histogram
Set a White Balance – not AWB
Turn on Highlight Warning
Expose to the Right
53
54
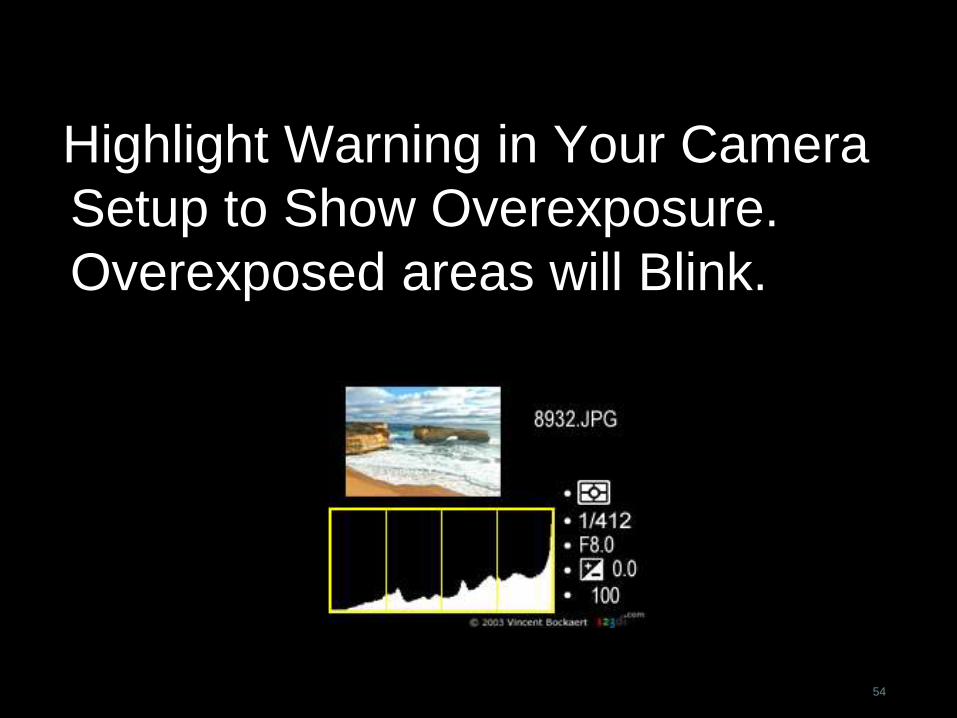
Highlight Warning in Your Camera
Setup to Show Overexposure.
Overexposed areas will Blink.
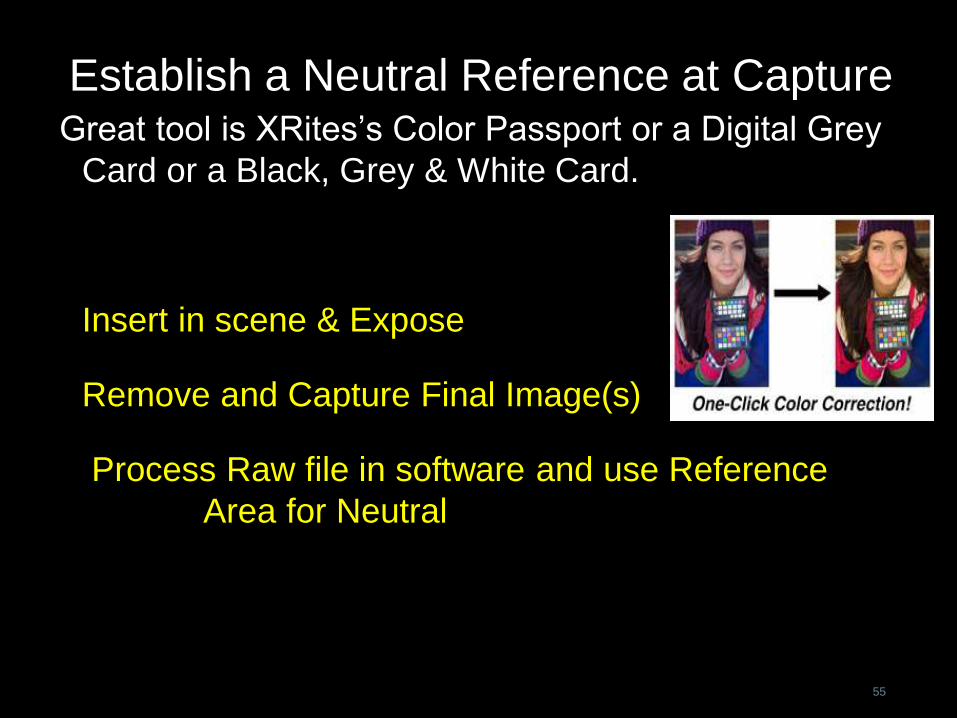
Establish a Neutral Reference at CaptureGreat tool is XRites’s Color Passport or a Digital Grey
Card or a Black, Grey & White Card.
Insert in scene & Expose
Remove and Capture Final Image(s)
Process Raw file in software and use Reference
Area for Neutral
55
Histograms
The tendency when you begin to photograph digitally is
to underexpose to preserve highlights. You should
avoid this under normal conditions. Over exposure or
metering as your camera suggests on your subject will
serve you much better. This is counter intuitive and it
will take some time to get comfortable with. Raw
allows you the most control. It is important to
understand the entire digital workflow while you are
out shooting to obtain the best digital exposure.
Remember Linear.
56
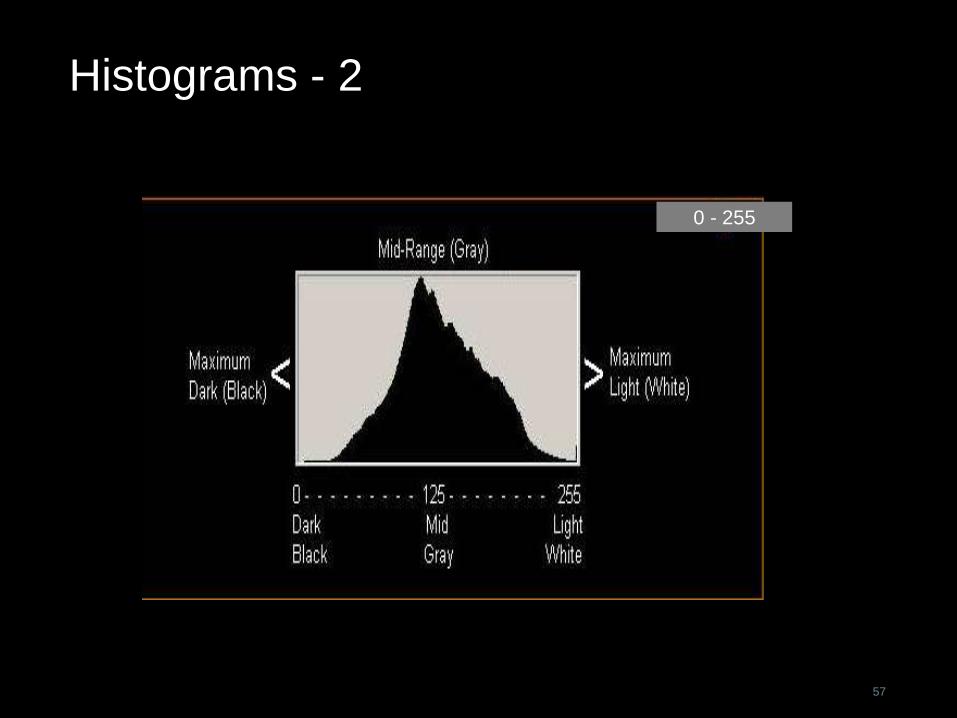
Histograms - 2
57
0 - 255
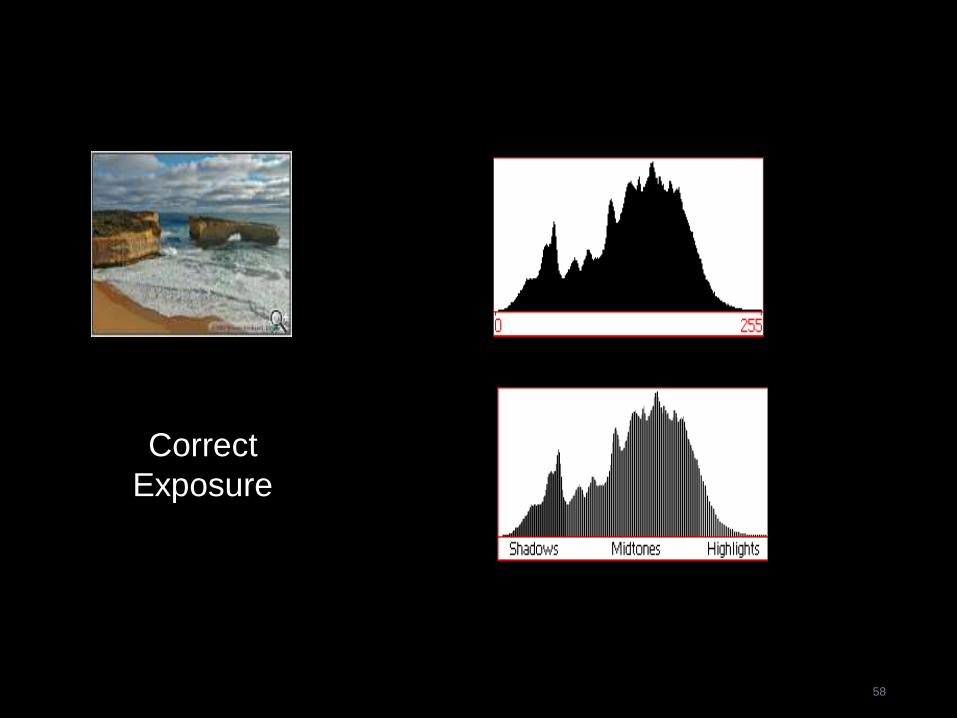
58
Correct
Exposure
59
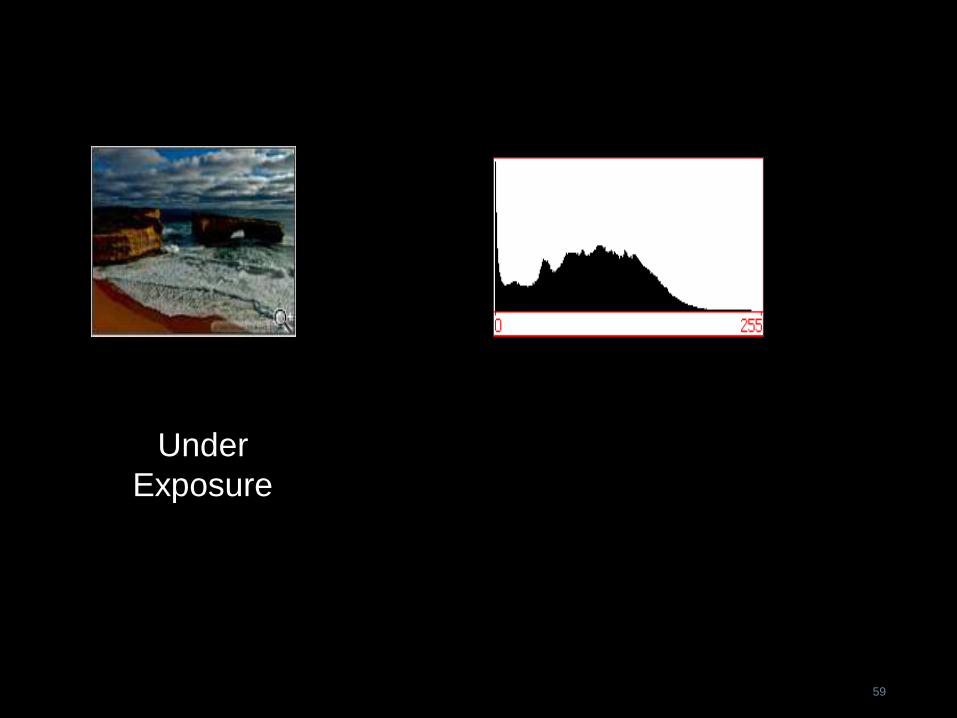
Under
Exposure
60
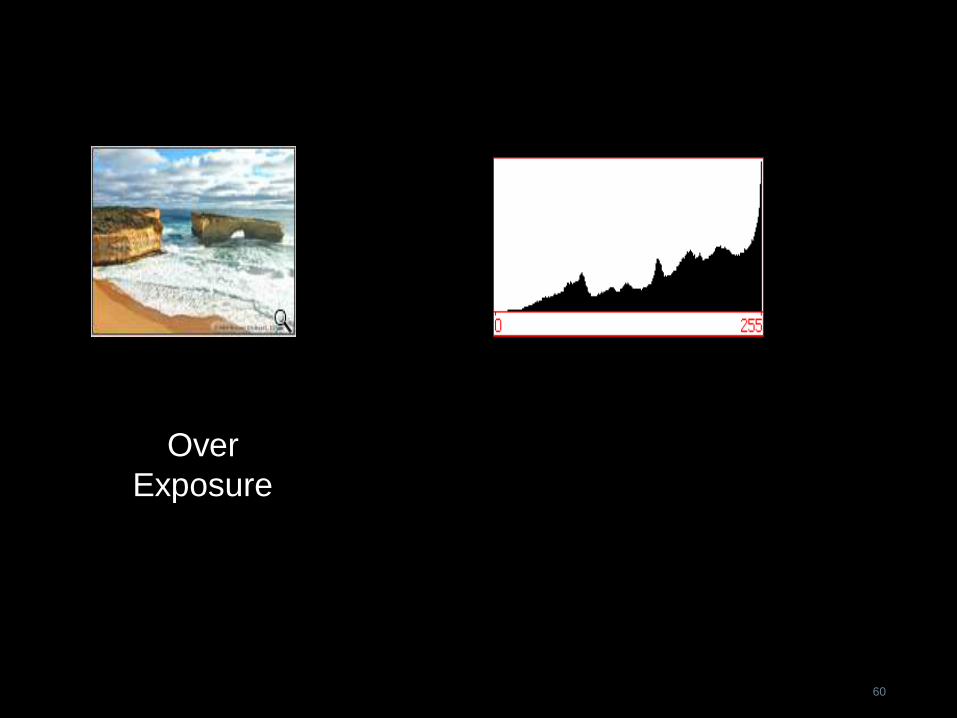
Over
Exposure
61
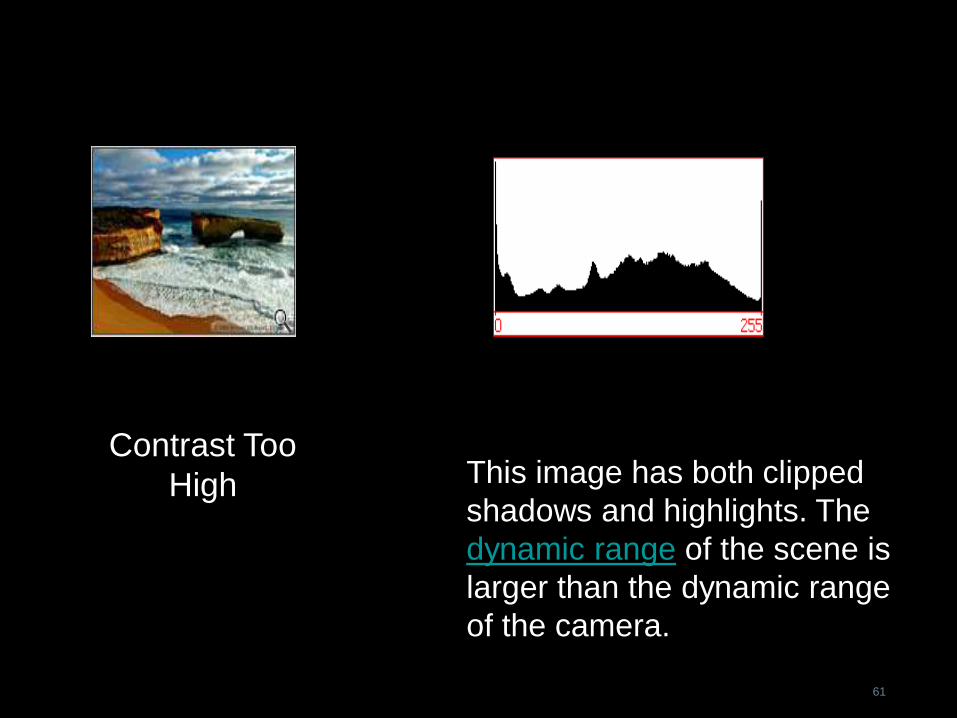
Contrast Too
High This image has both clipped
shadows and highlights. The
dynamic range of the scene is
larger than the dynamic range
of the camera.
62
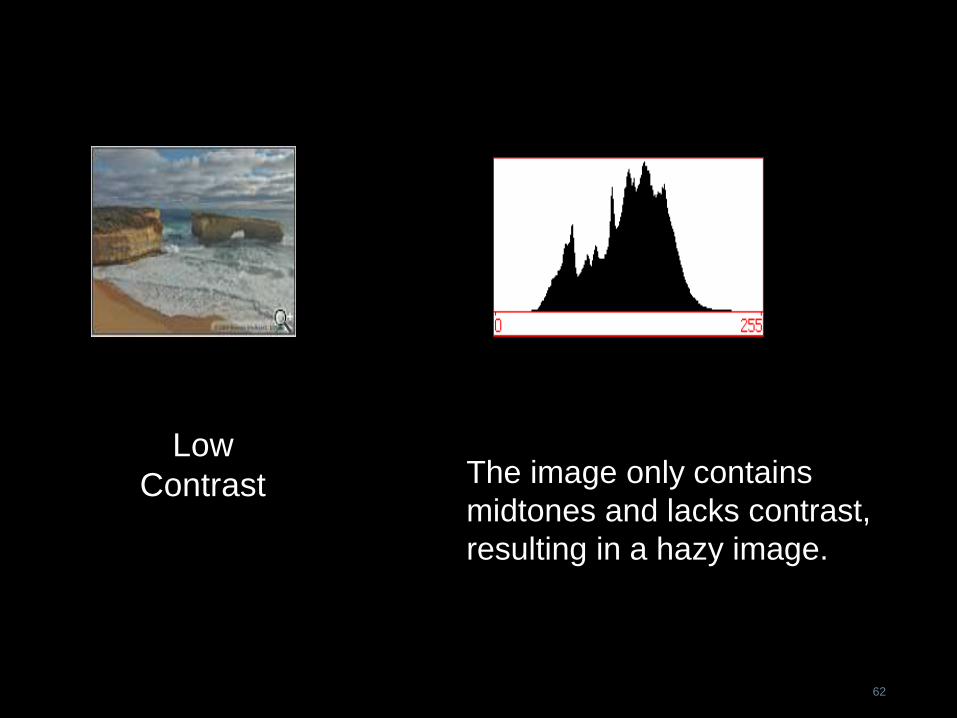
Low
Contrast The image only contains
midtones and lacks contrast,
resulting in a hazy image.
63
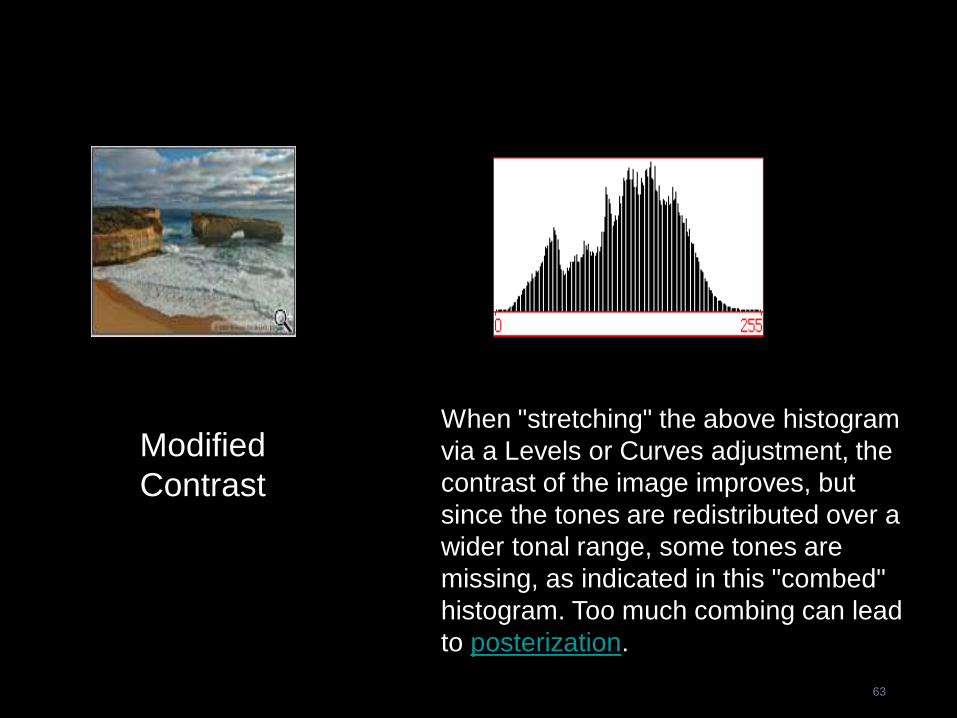
Modified
Contrast
When "stretching" the above histogram
via a Levels or Curves adjustment, the
contrast of the image improves, but
since the tones are redistributed over a
wider tonal range, some tones are
missing, as indicated in this "combed"
histogram. Too much combing can lead
to posterization.
REMEMBER that you can recover
highlights in Adobe Camera Raw (or with
Apple’s Aperture, DXO, Adobe Lightroom
or Capture One, etc.) – Up to 2 stops!
REMEMBER that you can control the
brightness and bring it back to the way the
image should look!
64

Since you are capturing in Raw and using 12 to 16 bits
of information you have plenty of room to manipulate
the image if you need to – as long as you don’t blow
out the highlights too much. With Jpeg’s the camera
is converting them, adding sharpening and also
dropping it down to an 8-bit file which has only 256
tonal values. That may sound ok, but if you have to
do serious levels work in an Editing Program on that
Jpeg (for example, wrong exposure) you will be
seriously damaging the file. That is why Raw is so
much better for critical image capture.
65
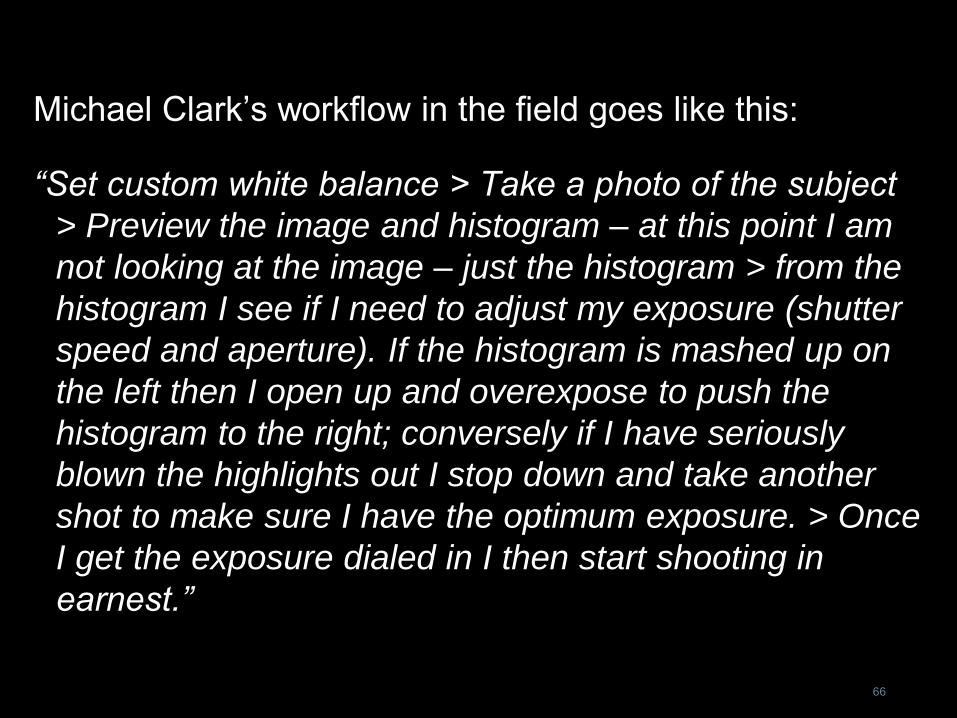
Michael Clark’s workflow in the field goes like this:
“Set custom white balance > Take a photo of the subject
> Preview the image and histogram – at this point I am
not looking at the image – just the histogram > from the
histogram I see if I need to adjust my exposure (shutter
speed and aperture). If the histogram is mashed up on
the left then I open up and overexpose to push the
histogram to the right; conversely if I have seriously
blown the highlights out I stop down and take another
shot to make sure I have the optimum exposure. > Once
I get the exposure dialed in I then start shooting in
earnest.”
66
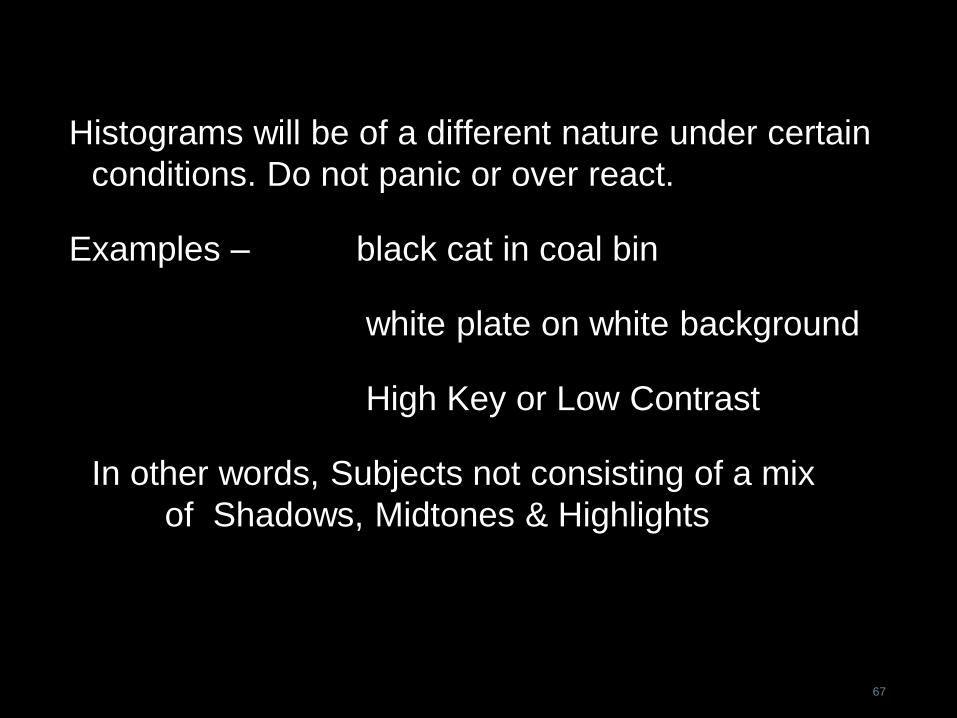
Histograms will be of a different nature under certain
conditions. Do not panic or over react.
Examples – black cat in coal bin
white plate on white background
High Key or Low Contrast
In other words, Subjects not consisting of a mix
of Shadows, Midtones & Highlights
67
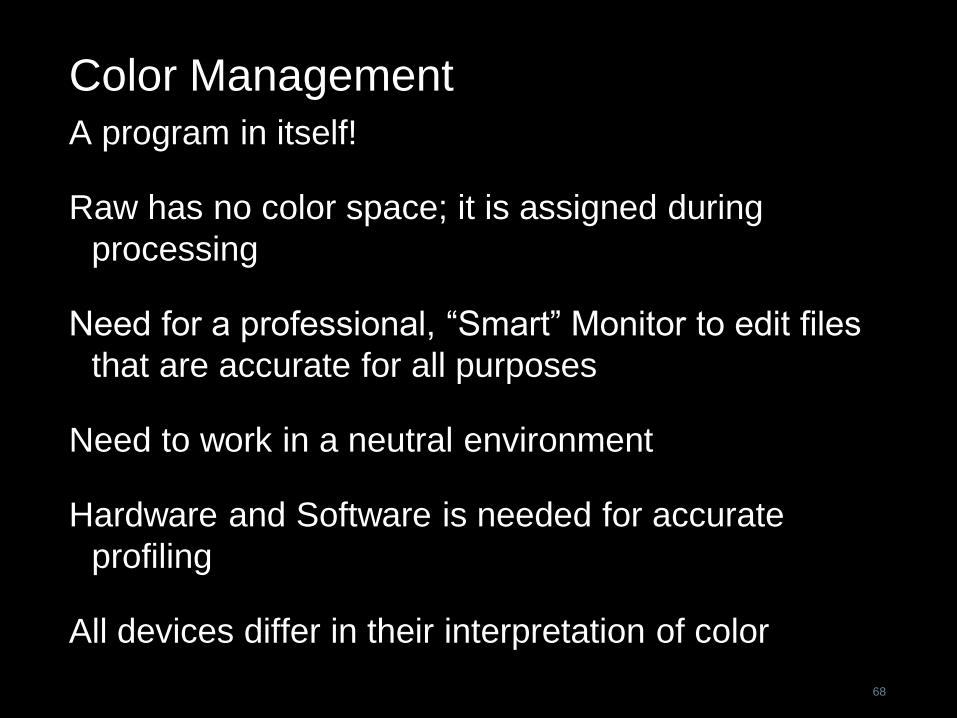
Color Management
A program in itself!
Raw has no color space; it is assigned during
processing
Need for a professional, “Smart” Monitor to edit files
that are accurate for all purposes
Need to work in a neutral environment
Hardware and Software is needed for accurate
profiling
All devices differ in their interpretation of color
68
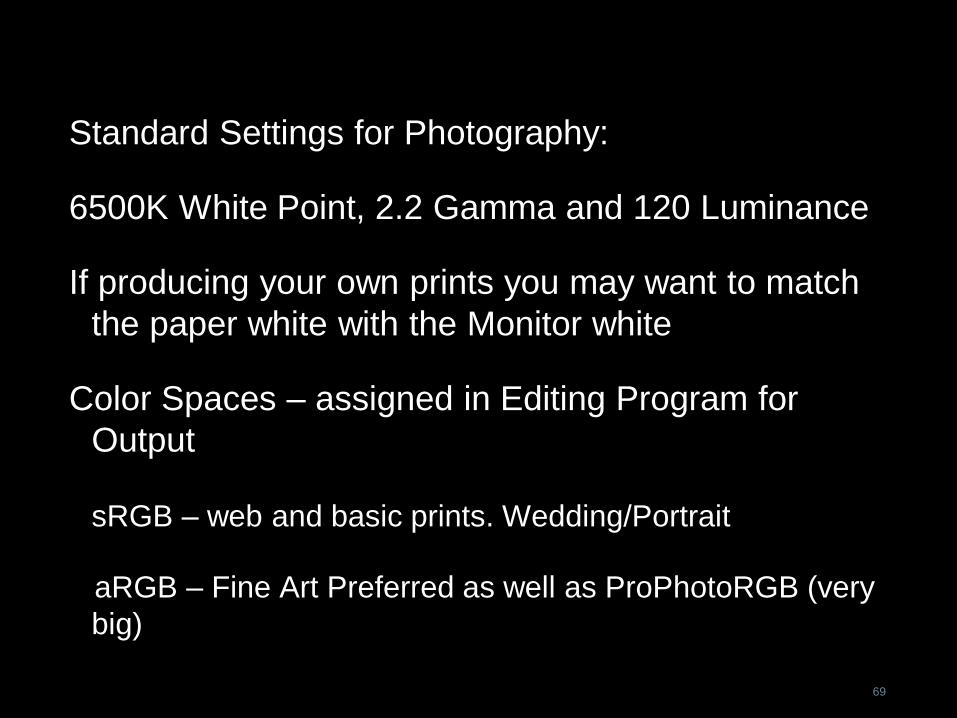
Standard Settings for Photography:
6500K White Point, 2.2 Gamma and 120 Luminance
If producing your own prints you may want to match
the paper white with the Monitor white
Color Spaces – assigned in Editing Program for
Output
sRGB – web and basic prints. Wedding/Portrait
aRGB – Fine Art Preferred as well as ProPhotoRGB (very
big)
69
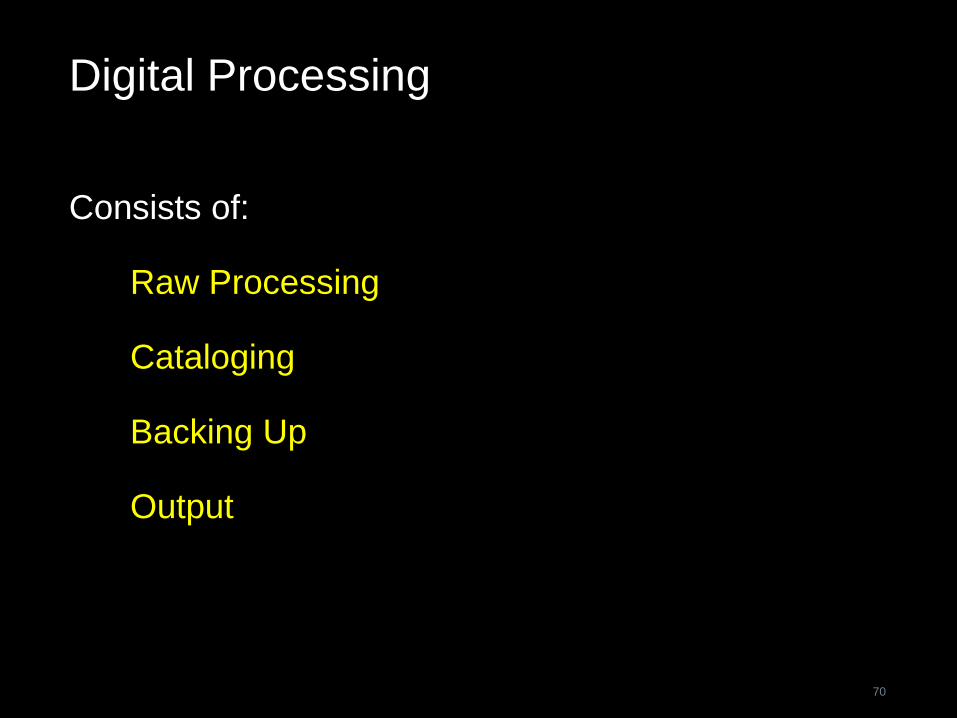
Digital Processing
Consists of:
Raw Processing
Cataloging
Backing Up
Output
70
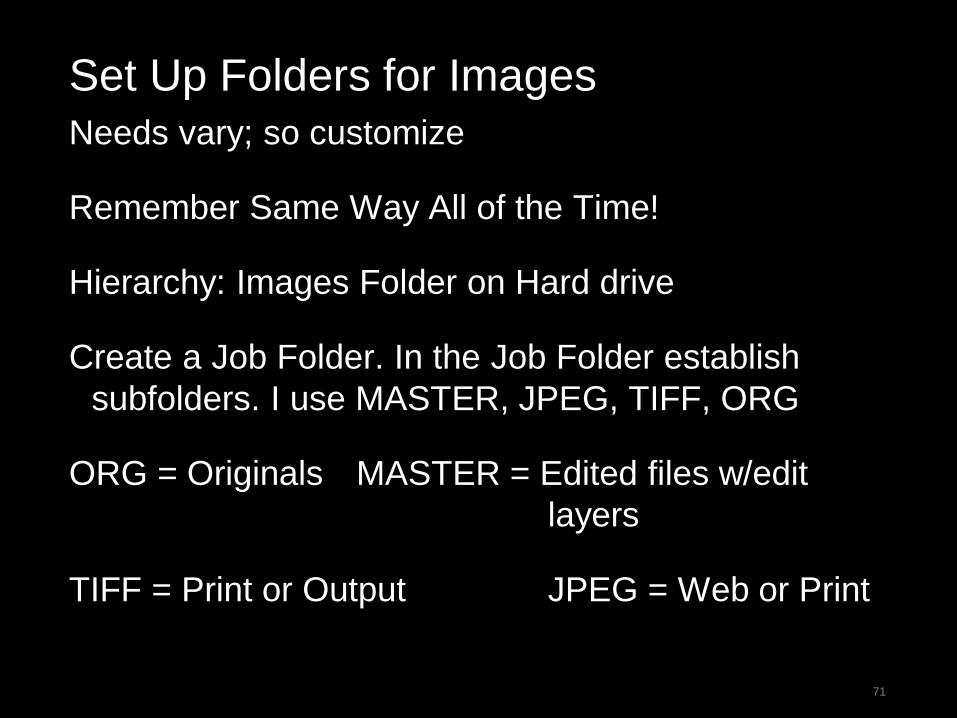
Set Up Folders for Images
Needs vary; so customize
Remember Same Way All of the Time!
Hierarchy: Images Folder on Hard drive
Create a Job Folder. In the Job Folder establish
subfolders. I use MASTER, JPEG, TIFF, ORG
ORG = Originals MASTER = Edited files w/edit
layers
TIFF = Print or Output JPEG = Web or Print
71
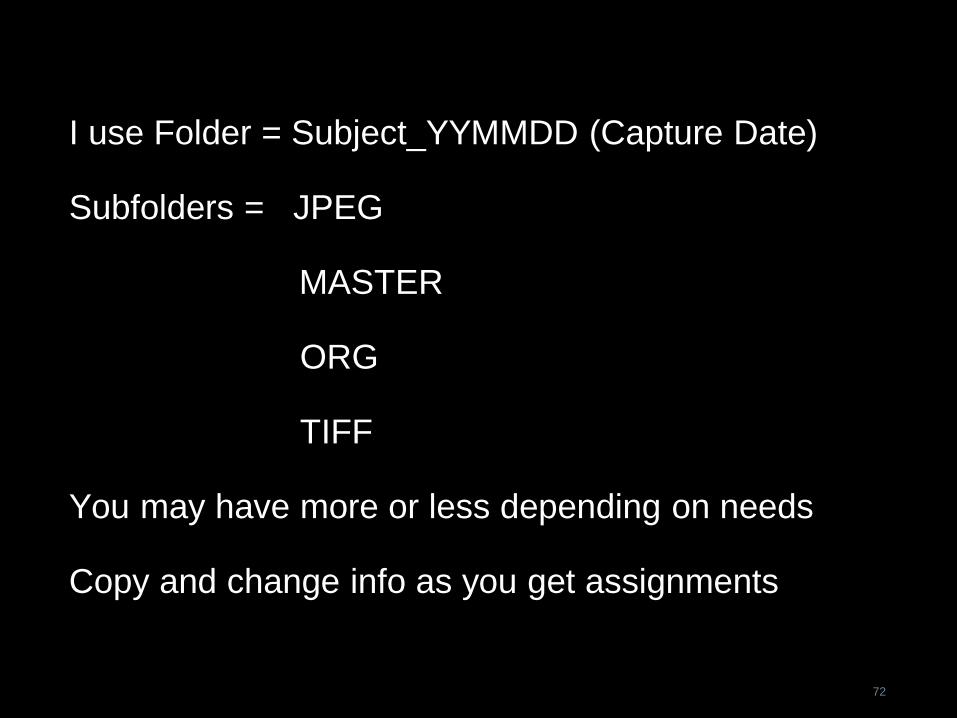
I use Folder = Subject_YYMMDD (Capture Date)
Subfolders = JPEG
MASTER
ORG
TIFF
You may have more or less depending on needs
Copy and change info as you get assignments
72
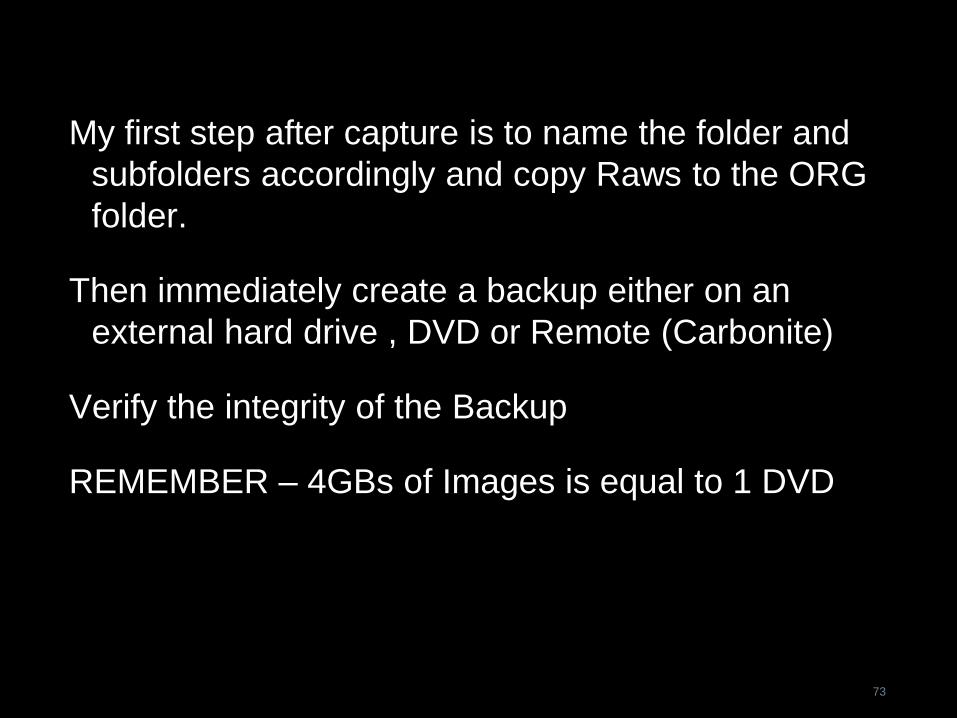
My first step after capture is to name the folder and
subfolders accordingly and copy Raws to the ORG
folder.
Then immediately create a backup either on an
external hard drive , DVD or Remote (Carbonite)
Verify the integrity of the Backup
REMEMBER – 4GBs of Images is equal to 1 DVD
73
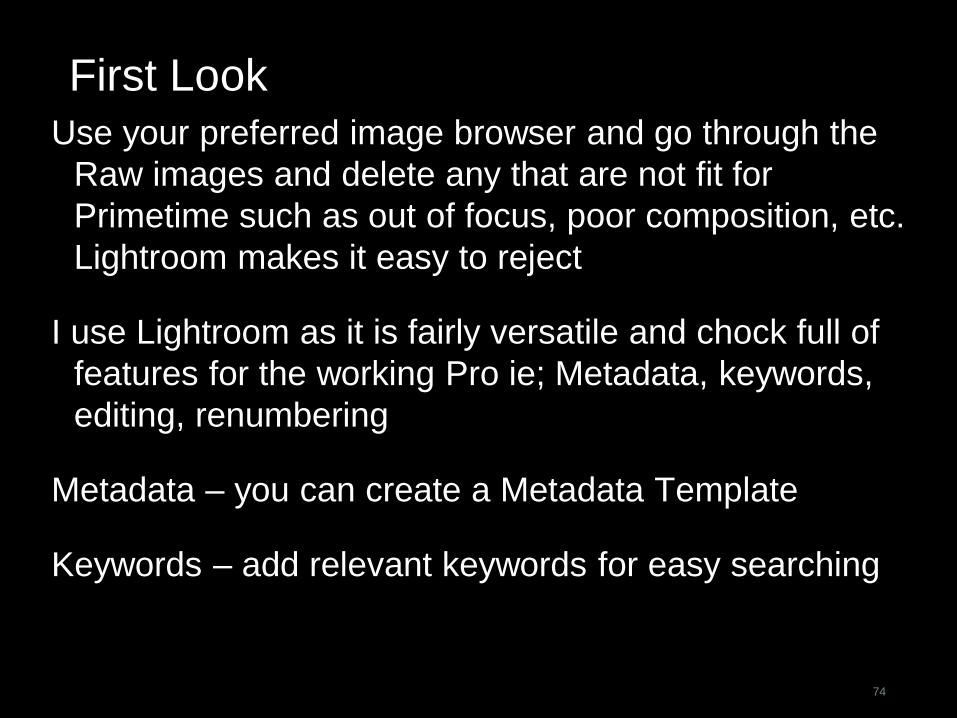
First Look
Use your preferred image browser and go through the
Raw images and delete any that are not fit for
Primetime such as out of focus, poor composition, etc.
Lightroom makes it easy to reject
I use Lightroom as it is fairly versatile and chock full of
features for the working Pro ie; Metadata, keywords,
editing, renumbering
Metadata – you can create a Metadata Template
Keywords – add relevant keywords for easy searching
74
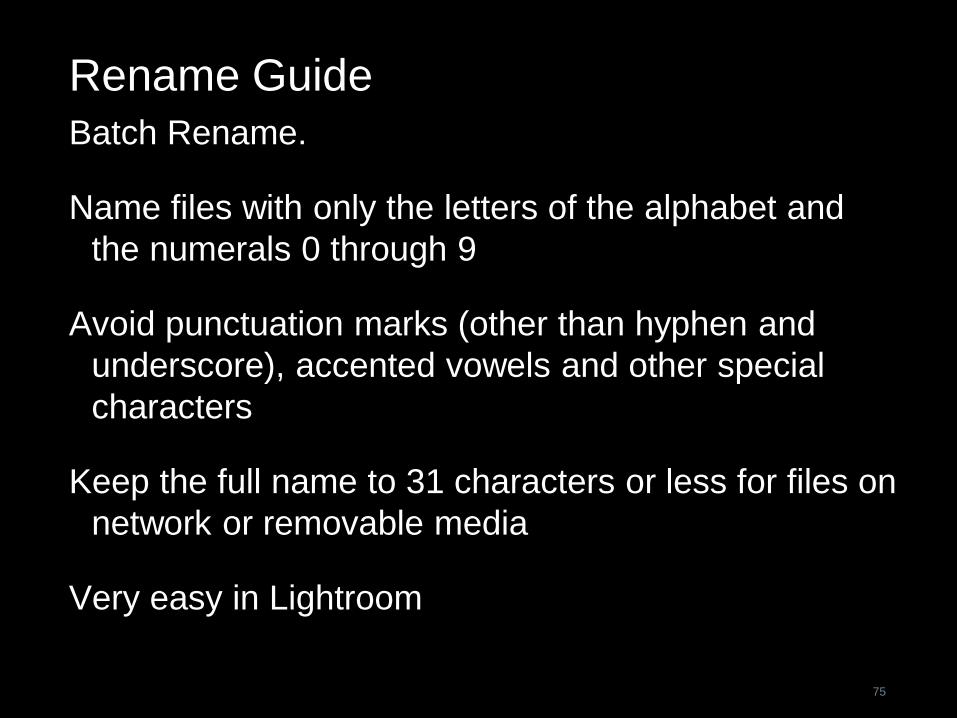
Rename Guide
Batch Rename.
Name files with only the letters of the alphabet and
the numerals 0 through 9
Avoid punctuation marks (other than hyphen and
underscore), accented vowels and other special
characters
Keep the full name to 31 characters or less for files on
network or removable media
Very easy in Lightroom
75
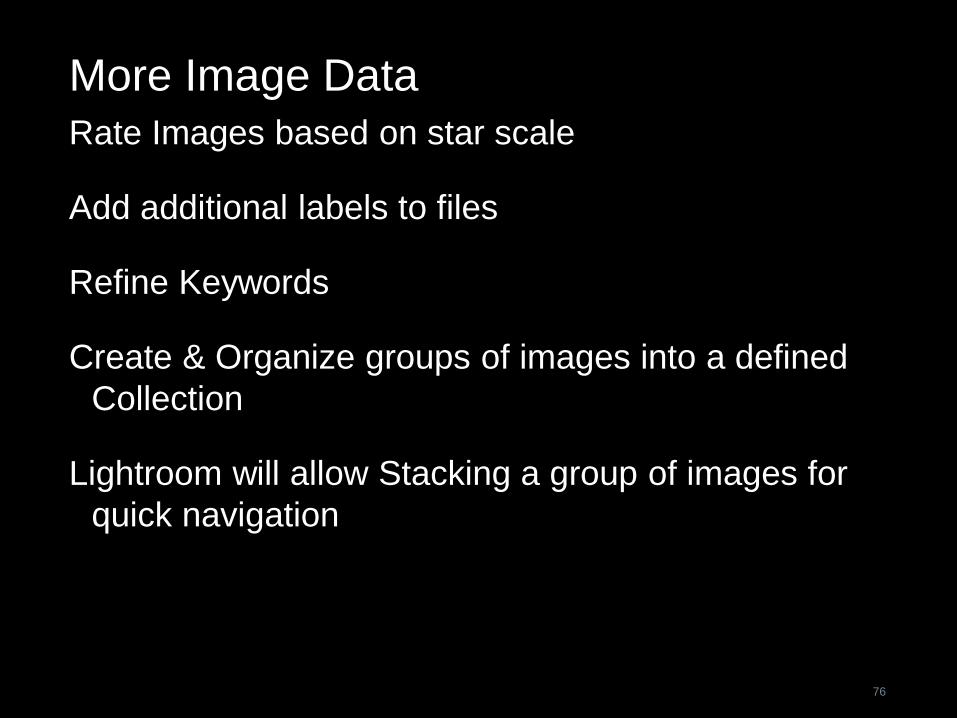
More Image Data
Rate Images based on star scale
Add additional labels to files
Refine Keywords
Create & Organize groups of images into a defined
Collection
Lightroom will allow Stacking a group of images for
quick navigation
76
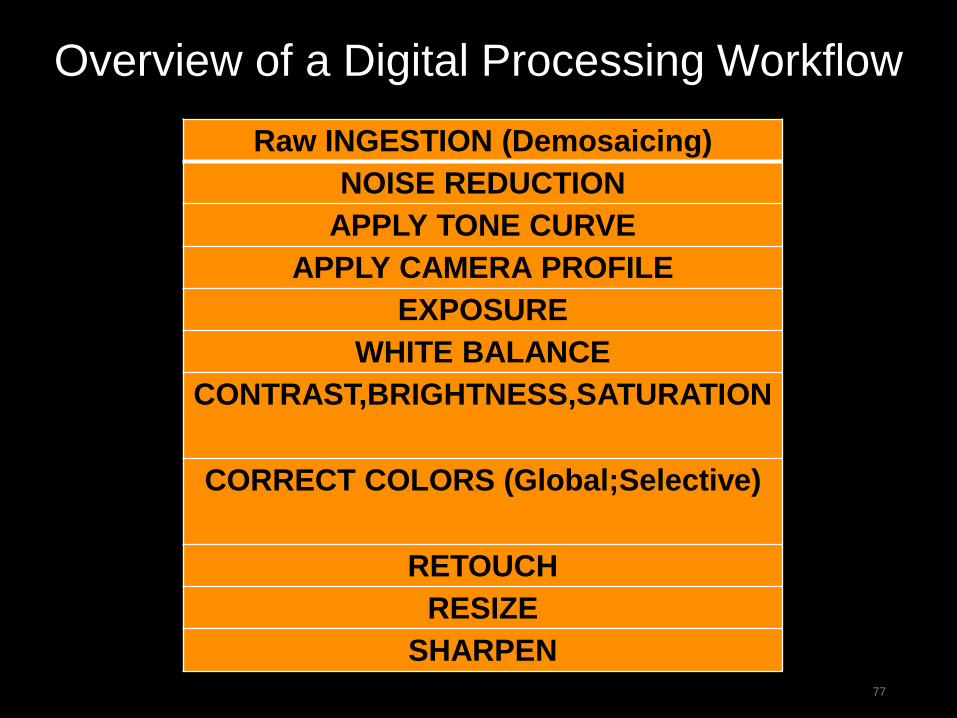
Overview of a Digital Processing Workflow
77
Raw INGESTION (Demosaicing)
NOISE REDUCTION
APPLY TONE CURVE
APPLY CAMERA PROFILE
EXPOSURE
WHITE BALANCE
CONTRAST,BRIGHTNESS,SATURATION
CORRECT COLORS (Global;Selective)
RETOUCH
RESIZE
SHARPEN
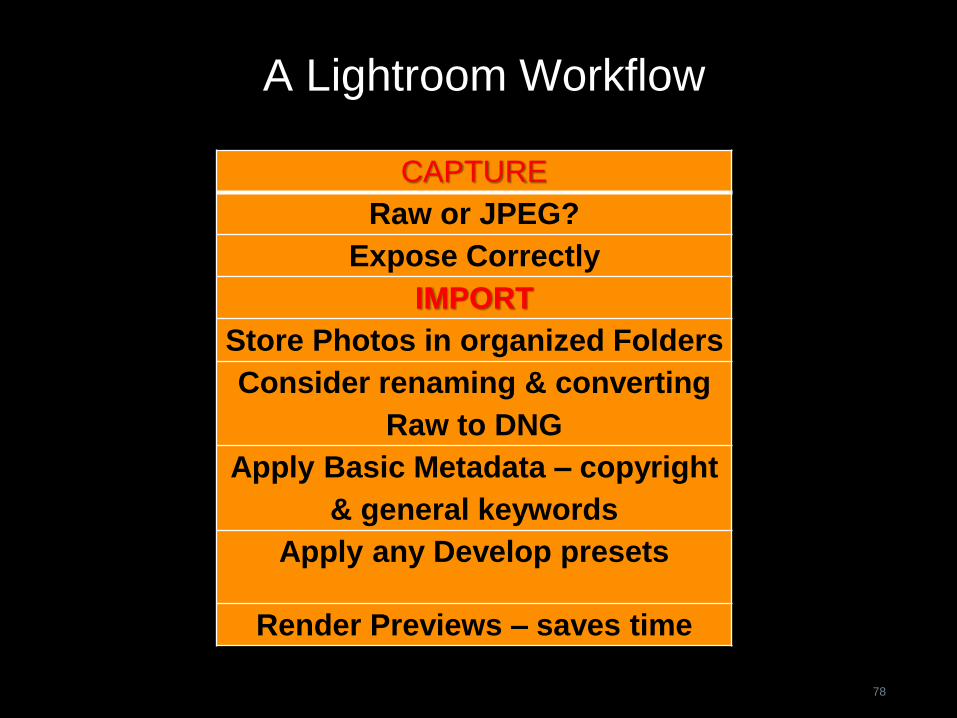
A Lightroom Workflow
78
CAPTURE
Raw or JPEG?
Expose Correctly
IMPORT
Store Photos in organized Folders
Consider renaming & converting
Raw to DNG
Apply Basic Metadata – copyright
& general keywords
Apply any Develop presets
Render Previews – saves time
A Lightroom Workflow - 2
79
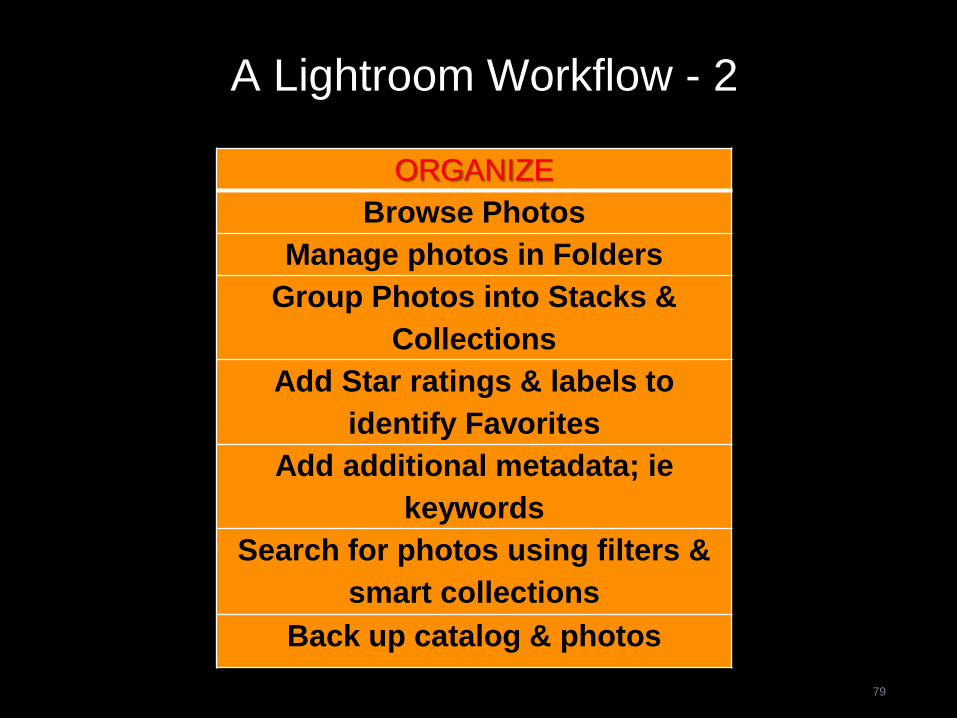
ORGANIZE
Browse Photos
Manage photos in Folders
Group Photos into Stacks &
Collections
Add Star ratings & labels to
identify Favorites
Add additional metadata; ie
keywords
Search for photos using filters &
smart collections
Back up catalog & photos
A Lightroom Workflow - 3
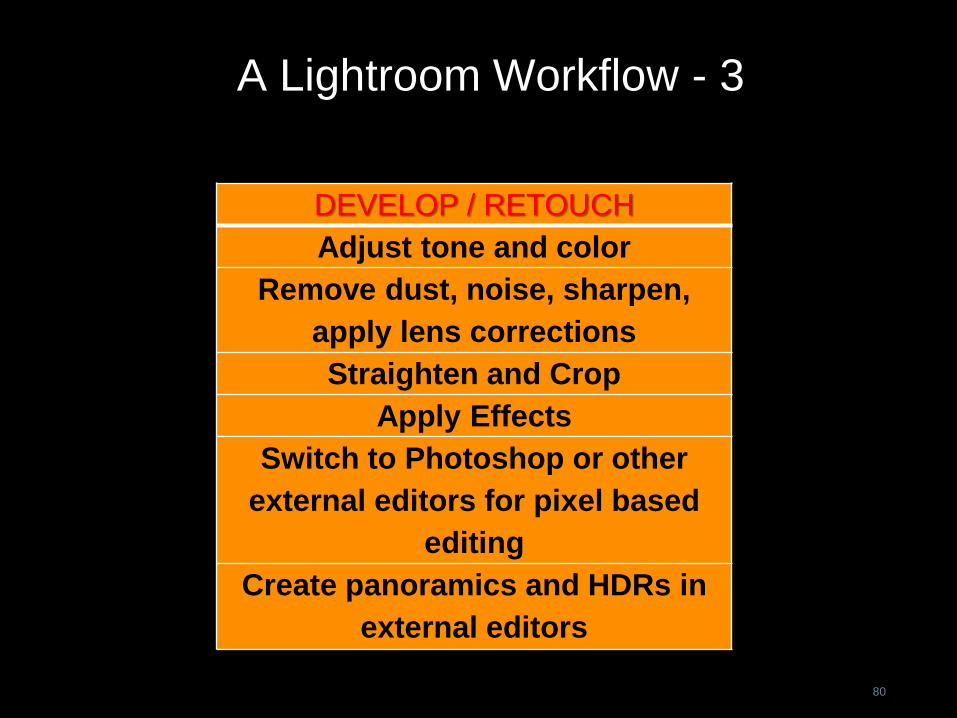
80
DEVELOP / RETOUCH
Adjust tone and color
Remove dust, noise, sharpen,
apply lens corrections
Straighten and Crop
Apply Effects
Switch to Photoshop or other
external editors for pixel based
editing
Create panoramics and HDRs in
external editors
A Lightroom Workflow - 4
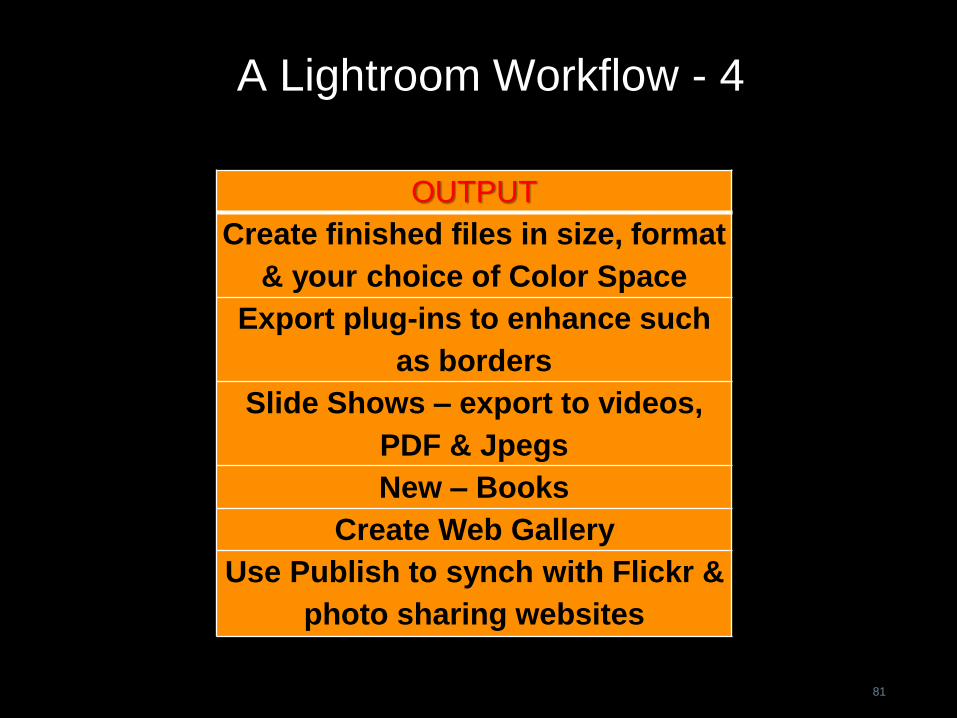
81
OUTPUT
Create finished files in size, format
& your choice of Color Space
Export plug-ins to enhance such
as borders
Slide Shows – export to videos,
PDF & Jpegs
New – Books
Create Web Gallery
Use Publish to synch with Flickr &
photo sharing websites
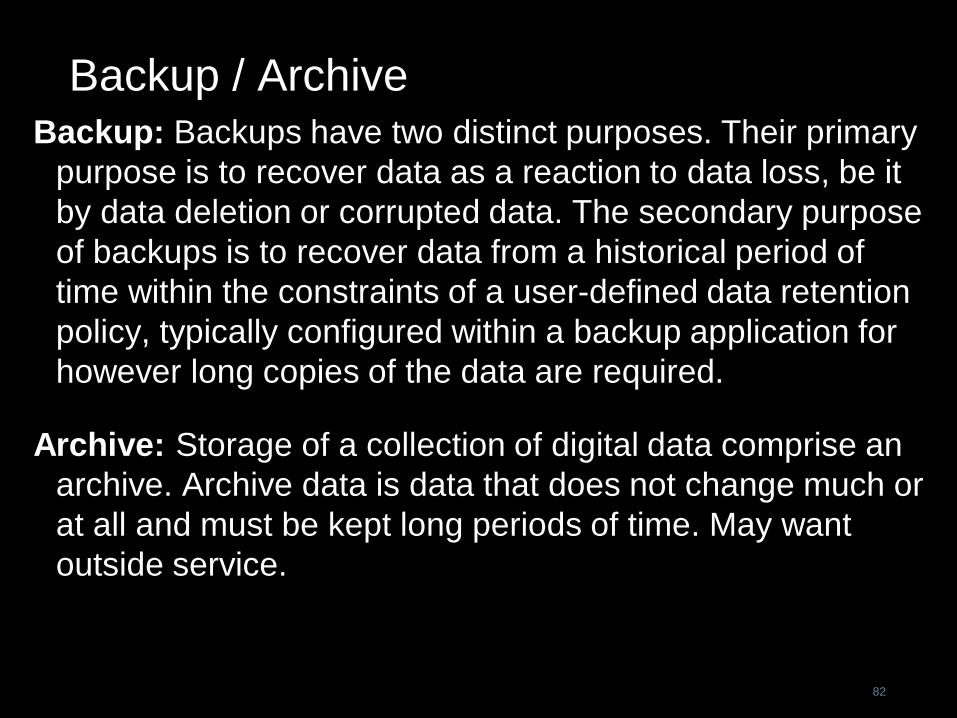
Backup / ArchiveBackup: Backups have two distinct purposes. Their primary
purpose is to recover data as a reaction to data loss, be it
by data deletion or corrupted data. The secondary purpose
of backups is to recover data from a historical period of
time within the constraints of a user-defined data retention
policy, typically configured within a backup application for
however long copies of the data are required.
Archive: Storage of a collection of digital data comprise an
archive. Archive data is data that does not change much or
at all and must be kept long periods of time. May want
outside service.
82
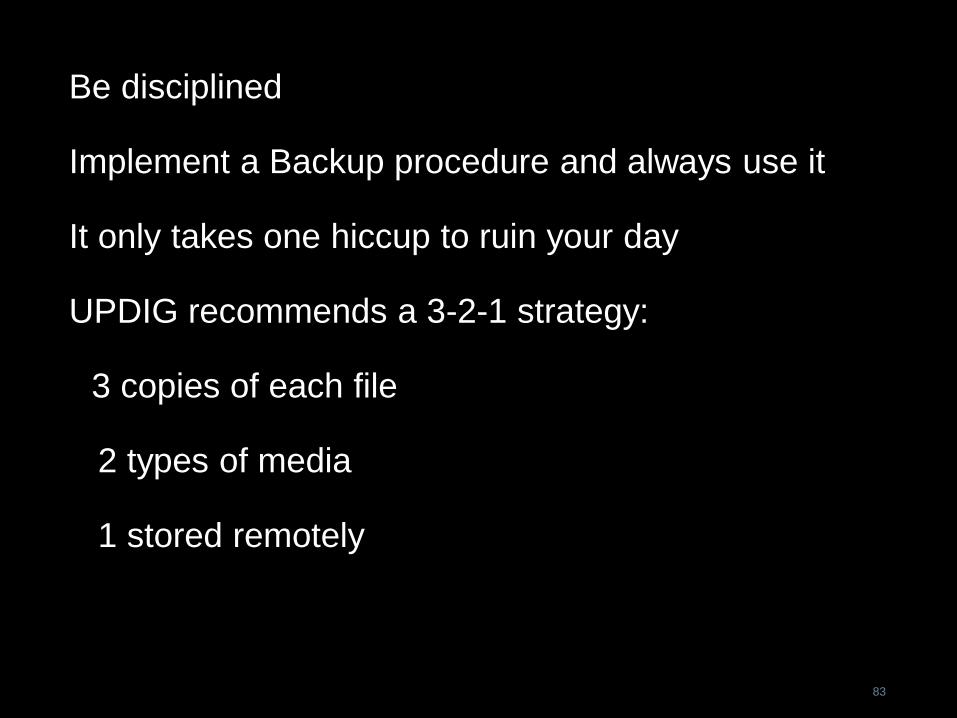
Be disciplined
Implement a Backup procedure and always use it
It only takes one hiccup to ruin your day
UPDIG recommends a 3-2-1 strategy:
3 copies of each file
2 types of media
1 stored remotely
83
DAM
The term "digital asset management" (DAM) refers to
the protocol for downloading, renaming, backing up,
rating, grouping, archiving, optimizing, maintaining,
thinning, and exporting files. It covers a lot of
ground.
DAM software helps you sort, track, back up, convert,
and archive your photographs. Its function is to
store, view, control, and manipulate all the
information you have collected about your photos,
as well as the photos themselves.
84
Parametric Image Editor (PIE)
Parametric image editing is a class of non-destructive
image editing in which the editing software does not
alter original files, but instead records changes to
images as sets of instructions or parameters.
Software that adjusts images in this way — like
Lightroom, Adobe Camera Raw (ACR), Aperture,
Bibble, and Capture One — is particularly well
suited to the challenges of digital photography, as
we’ll see. And because you can save your work as a
set of instructions, it’s the adjustment method that
best suits a DAM environment.
85
It starts with the raw ingredientsRaw files from each camera model are
unique. So a NEF or a CR2 that one
camera model creates will have a different
structure from a NEF or CR2 that a
different model creates. Furthermore,
proprietary raw files are undocumented,
which means that the manufacturer does
not disclose the way the data is stacked up
in the file.
86
Because altering an undocumented file
format is dangerous, third party
applications for adjusting raw images (that
is, applications from companies other than
the camera manufacturer) generally don’t
alter the raw file. In order to make changes
to the image, they reinterpret the image,
save the user’s changes as rendering
instructions, then send the image through
a rendering engine that decodes the raw
data and makes the user’s changes.
87
88
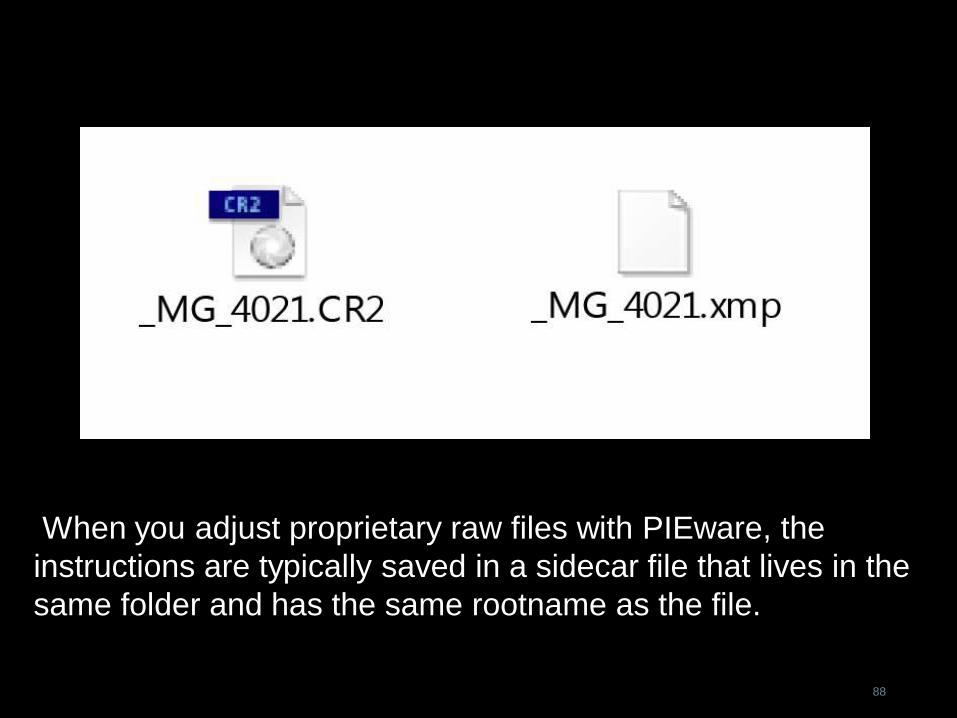
When you adjust proprietary raw files with PIEware, the
instructions are typically saved in a sidecar file that lives in the
same folder and has the same rootname as the file.
Rendering engines are unique
Advantages of parametric image editing
* Non-destructive workflow
* Paste settings easily
* Save and compare multiple
interpretations
* Take advantage of software
upgrades89
90
The DAM Book
Digital Asset Management for
Photographers
by Peter Krogh
http://www.peterkrogh.com/

Q&A