Embed Size (px)
Citation preview
1FOREWORD
Welcome to the Royal Enfield family.
Royal Enfield motorcycles are being manufactured by us since 1955 with state of the art technology, while takingcare to maintain the traditional Classic looks.
The motorcycle that you have just bought, confirms to United States Environment Protection Agency laws, FederalMotor Vehicle Safety Standards and California Air Resources Board regulations. (Applicable only for motorcyclessold within the state of California.)
This Owner’s manual will help you to acquaint with the important aspects of operation, care and minor maintenanceof your new Royal Enfield motorcycle. We recommend that you read this manual carefully, before using themotorcycle which will help you to maintain your motorcycle in top riding condition. Major repairs are detailed inthe Royal Enfield service manual. Such major repairs require the attention of a skilled technician and use ofspecial tools and techniques. Your Royal Enfield dealer has the facilities, experience and genuine Royal Enfieldspare parts necessary to render those valuable services in a correct procedure.
2FOREWORD
We have also provided several vital safety information for the rider and for the care and safety of the motorcycle.Please read and follow these carefully for safe riding and for maximum riding pleasure. Please ride cautiously,safely and within the law. Always wear a helmet, good riding goggles and proper riding clothes while riding themotorcycle. Please insist and ensure that your pillion rider also follows these guidelines while riding with you.Log on to the exciting world of Royal Enfield web site: www.royalenfield.com to get to know more about us andexciting news from time to time.We wish you many years of riding pleasure with your Royal Enfield motorcycle.
NOTICEBecause of continuous improvements in the product and changes that may occur in the manufacturing process,subsequent to printing of this manual, it is possible some instructions, illustrations, pictures or designs foundwithin this manual may differ from those actually in the motorcycle. However the technical information foundwithin this manual was correct at the time it was approved for printing.Royal Enfield teamChennai, India.“© Copyright 2006 Eicher Limited, Royal Enfield Unit. All Rights Reserved. No part of this manual shall be copied, distributed orotherwise dealt, without the express permission in writing of Eicher Motor Limited, Royal Enfield Unit.”
Part No. 581672/a / Qty. 350 / Aug ’12

3REPORTING SAFETY DEFECTS
If you believe your motorcycle has a defect which could cause a crash and result in serious injury or loss of life,you should immediately contact the National Highway Traffic Safety Administration (NHTSA) in addition to notifyingClassic Motor works, 1405 Cannon Circle Suite 12, Faribault, MN 55021. Toll Free: 1 800 201 7472
If NHTSA receives similar complaints, it may open an investigation and if it finds that a safety defect exists in agroup of vehicles, it may order a recall and remedy campaign. However, NHTSA cannot become involved in anyindividual problems between you, and your dealer or Classic Motor works.
To contact NHTSA you may call the Auto Safety Hotline toll-free within the United Stateson 1-800-424-9393 or write to: NHTSA, 400 Seventh Street SW, Washington, DC 20590.You can also obtain other information about motor vehicle safety from the hotline.
4IMPORTANT
United States Environment Protection laws, Federal Motor Vehicle Safety Standardsand California Air Resources Board (Applicable only for motorcycles sold within thestate of California.) strictly prohibits tampering with the Exhaust Emission Control, NoiseControl and Evaporative Emission Control systems:
We would like to emphasize that any repairs to the induction, emission, exhaust and evaporative systems mustbe performed only by an Authorized Royal Enfield Dealer so that the motorcycle confirms to the United StatesEnvironment Protection laws, Federal Motor Vehicle Safety Standards and California Air Resources Boardregulation (Applicable only for motorcycles sold within the state of California.)
It is the responsibility of the Owner / User of the motorcycle to read this manual carefully and to comply with thesafety guidelines, operating instructions, and periodical maintenance instructions given here. Keep this manualin a convenient place for easy reference. DO NOT use the motorcycle until you have become familiar with thismotorcycle and after reading and understanding this manual completely. In case you need any furtherclarifications, please contact an Authorized Royal Enfield Dealer, nearest to you, for assistance.
If your motorcycle is being used by a friend, relative, or any other person, it is your responsibility to make certainthat they have completely understood the operating procedures of the motorcycle, and the contents in thismanual with particular reference to the safety aspects, before riding your motorcycle.
This motorcycle is designed for NORMAL ON ROAD USE ONLY. Operation in off-road usage in some areas maybe illegal and could be dangerous. Please obey local laws and regulations.
In the event of your motorcycle being sold to another person, it is your responsibility to hand over this manualalong with the motorcycle to the new owner.
5
SAFETY DEFINITIONSStatements in this manual preceded by the following words are of special significance:
WARNING
Indicates a potentially hazardous situation, which if not avoided, could result in an accident causing seriousinjury or loss of life.
CAUTION
Caution with the safety alert symbol, indicates a potentially hazardous situation, which if not avoided, may result inminor or moderate injury leading to disability.
Caution
Caution without the safety alert symbol indicates a potentially hazardous situation, which if not avoided, may result indamage to the motorcycle and its rider, property etc.All images in this manual are only for reference and to explain the relevance. They may not be exactly the same in themotorcycle you own. Technical specifications are subject to change without prior notice.
IMPORTANT NOTICE !

6CONTENTS
Personal & Motorcycle information ................... 10
Safe Operating Rules .......................................... 11
Accessories and cargo ....................................... 18
Rules of the Road ................................................ 20
Technical Specifications ..................................... 22- Engine ......................................................... 22
- Ignition System ............................................ 23
- Transmission ............................................... 23
- Electricals .................................................... 25
- Chassis ....................................................... 26
- Dimensions ................................................. 27
- Weights ....................................................... 27
- Performance ................................................ 27
Motorcycle Identification Number ...................... 28
Engine Number Details ....................................... 30
Key Parts Location .............................................. 31- Top View ...................................................... 31
- Right Side View ........................................... 32
- Left Side View ............................................. 33
OPERATION OF CONTROLS .............................. 34- Ignition Switch ............................................. 34
- Dip Switch ................................................... 35
- Head lamp Day flash ................................... 35
- Supplementary Engine Stop ........................ 36
- Engine Start Switch ..................................... 36
- Turn Signal Switch ...................................... 37- Manual Bi Starter ........................................ 38- Horn ............................................................ 38- Fuel Tank Cap ............................................. 39
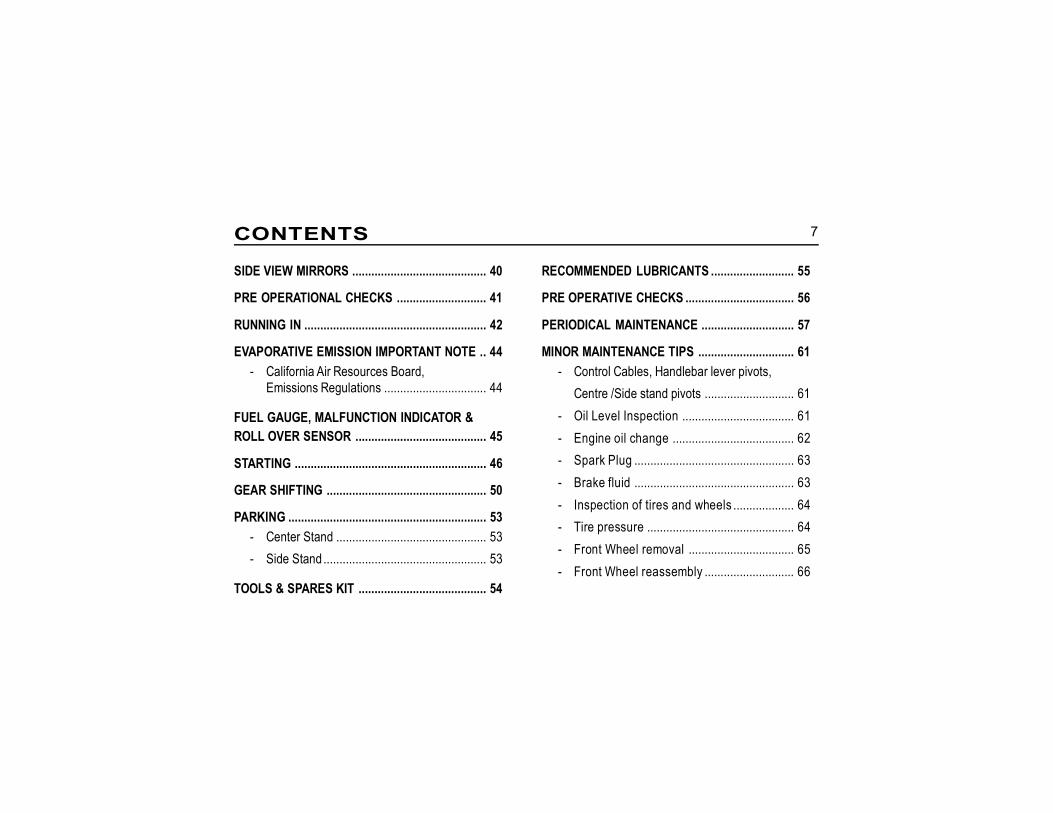
7CONTENTS
SIDE VIEW MIRRORS .......................................... 40
PRE OPERATIONAL CHECKS ............................ 41
RUNNING IN ......................................................... 42
EVAPORATIVE EMISSION IMPORTANT NOTE .. 44- California Air Resources Board,
Emissions Regulations ................................ 44
FUEL GAUGE, MALFUNCTION INDICATOR &ROLL OVER SENSOR ......................................... 45
STARTING ............................................................ 46
GEAR SHIFTING .................................................. 50
PARKING .............................................................. 53- Center Stand ............................................... 53- Side Stand ................................................... 53
TOOLS & SPARES KIT ........................................ 54
RECOMMENDED LUBRICANTS .......................... 55
PRE OPERATIVE CHECKS .................................. 56
PERIODICAL MAINTENANCE ............................. 57
MINOR MAINTENANCE TIPS .............................. 61- Control Cables, Handlebar lever pivots,
Centre /Side stand pivots ............................ 61- Oil Level Inspection ................................... 61- Engine oil change ...................................... 62- Spark Plug .................................................. 63- Brake fluid .................................................. 63- Inspection of tires and wheels ................... 64- Tire pressure .............................................. 64- Front Wheel removal ................................. 65- Front Wheel reassembly ............................ 66

8CONTENTS
- Rear wheel removal ................................... 67- Rear wheel reassembly ............................. 68ADJUSTMENTS .............................................. 69- Clutch Cable play ....................................... 69- Drive Chain tension ................................... 70
- Rear Brake pedal height ............................ 71- Rear Brake ................................................. 71- Rear Shock Absorber ................................. 73- Battery Maintenance .................................. 74- Battery removal from the Motorcycle ........ 74- Battery assembly on Motorcycle ............... 75- Head Lamp sealed beam .......................... 76- Tail Lamp bulb ............................................ 76- Trafficator bulbs ......................................... 77- Fuse ............................................................ 78
WASHING PROCEDURE ..................................... 79- Precautions ................................................ 79
- After washing ............................................. 79STORAGE PRECAUTION .................................... 81
- Preparing the motorcycle for reuse ......... 82SAFETY RIDING TIPS .......................................... 83
- Riding Apparel .......................................... 83- Sitting posture .......................................... 83
- Braking ..................................................... 83LONG TRIP PRECAUTONS ................................. 84
- Pre Ride checks ....................................... 84- Checks after every
900 Miles /1500 kms ................................ 84- Essentials to be carried ........................... 84
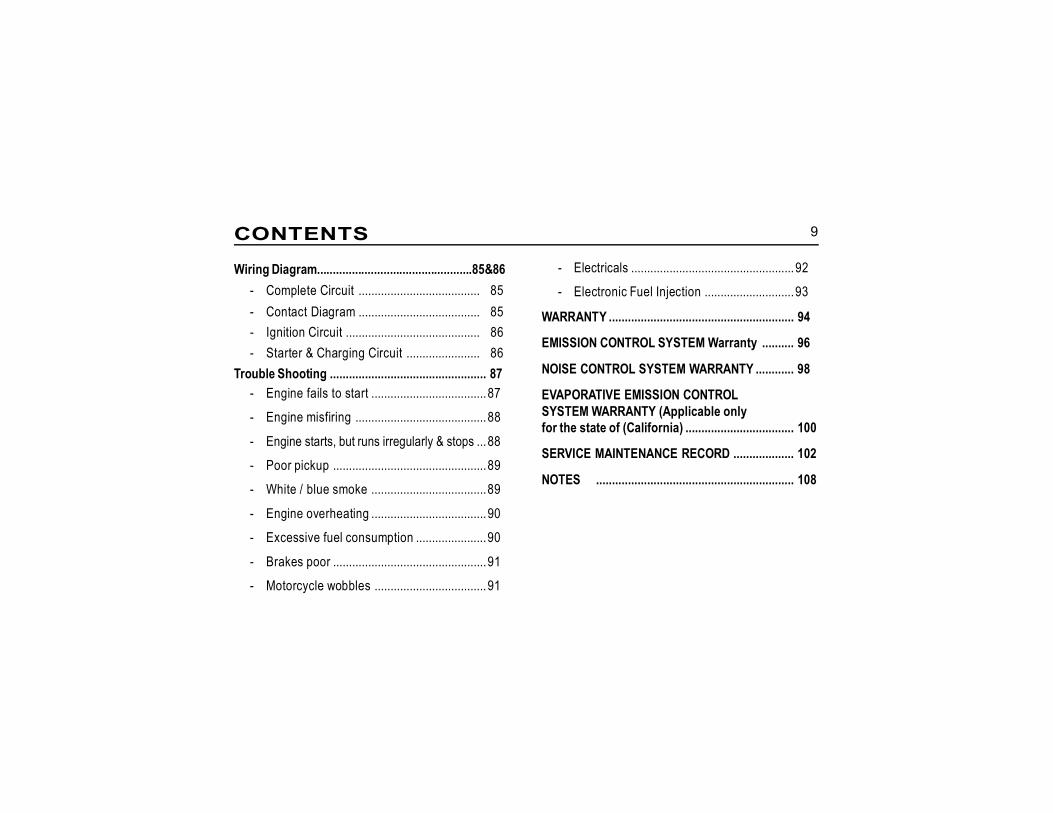
9CONTENTS
Wiring Diagram.................................................85&86- Complete Circuit ...................................... 85- Contact Diagram ...................................... 85- Ignition Circuit .......................................... 86- Starter & Charging Circuit ....................... 86
Trouble Shooting ................................................. 87- Engine fails to start ....................................87- Engine misfiring .........................................88
- Engine starts, but runs irregularly & stops ...88- Poor pickup ................................................89- White / blue smoke ....................................89
- Engine overheating ....................................90- Excessive fuel consumption ......................90
- Brakes poor ................................................91- Motorcycle wobbles ...................................91
- Electricals ...................................................92- Electronic Fuel Injection ............................93
WARRANTY .......................................................... 94
EMISSION CONTROL SYSTEM Warranty .......... 96
NOISE CONTROL SYSTEM WARRANTY ............ 98
EVAPORATIVE EMISSION CONTROLSYSTEM WARRANTY (Applicable onlyfor the state of (California) .................................. 100
SERVICE MAINTENANCE RECORD ................... 102
NOTES .............................................................. 108
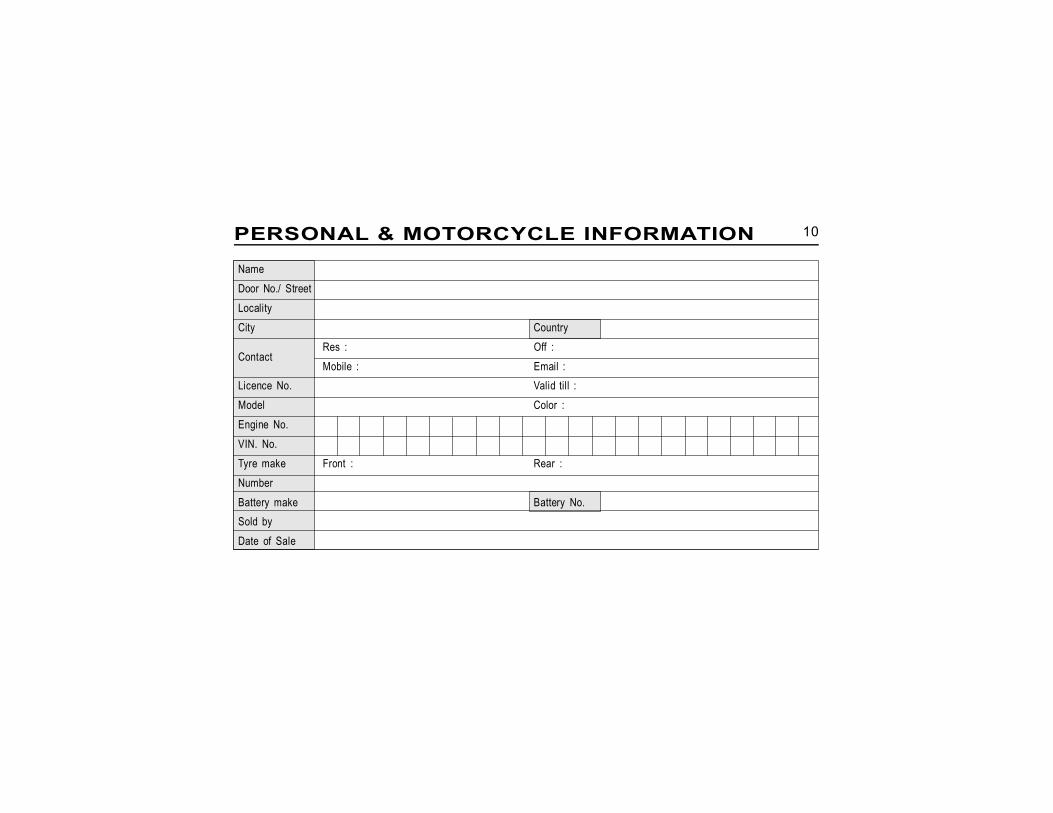
10PERSONAL & MOTORCYCLE INFORMATION
NameDoor No./ StreetLocalityCity Country
ContactRes : Off :Mobile : Email :
Licence No. Valid till :Model Color :Engine No.VIN. No.Tyre make Front : Rear :NumberBattery make Battery No.Sold byDate of Sale
11SAFE OPERATING RULES
Royal Enfield motorcycles are designed to serve as ameans of personal transport, and for on-road use only.It is not meant to be used as an off-road motorcycle.
WARNINGUsing the motorcycle for Off-road purposes
could lead to loss of control which could result in anaccident causing serious injury or loss of life.Before operating your new motorcycle, it is yourresponsibility to carefully read and follow the operatingand maintenance instructions detailed in this manualfor your own safety, your motorcycle and that of othersBefore starting the motorcycle, check for properoperation of brakes, clutch, gear shift, electricalcomponents, handle bar controls, tire pressures, fueland oil levels.Know and respect the rules of the road. Be a saferider for your own safety and for other road users.
Fuel / RefuelingRoyal Enfield motorcycles are designed to performbest with unleaded gasoline only. Use a good qualityunleaded gasoline of 87 RON or higher. If ‘knocking’or ‘pinging’ occurs at a steady engine speed undernormal load, use a different brand of gasoline orgasoline which has a higher octane rating.
WARNINGDo not use leaded gasoline in this motorcycle.
It will cause serious damage to the internals of theengine, exhaust emission system and the motorcyclewill not meet the emission norms. Using leadedgasoline will also render the warranty void.It is illegal to use leaded gasoline as it is known tocause serious health problemsFuels containing methanol should not be used as itcan cause damage to the fuel system components
12SAFE OPERATING RULES
WARNINGGasoline is extremely flammable and highly
explosive under certain conditions. Any fuel leak,spillage, or negligence of adhere to safety normsmay lead to a fire hazard or explosion, which couldcause damage to property, injury to persons orloss of life. When refueling your motorcycle,please exercise utmost caution and carefullyobserve the following rules: Turn the ignition switch to the ‘OFF’ position Open the fuel filler cap slowly. This will help to release
any pressure that may have built up in the fuel tank. DO NOT smoke and please ensure that there are
no open flames or sparks near the motorcycle, whenrefueling OR servicing the fuel system.
Refuel in a well ventilated area. DO NOT use a mobile telephone. Switch OFF
mobile telephones and any other electrical andelectronic devices including any appliances with apilot light.
DO NOT fill the fuel tank to its brim. Please fill fuelonly till the bottom of the filler neck insert so as toleave air space for fuel expansion, inside the fueltank. Overfilling the tank can lead to fuel spillage.
Avoid filling the tank in rainy or dusty conditionswhere airborne material can contaminate the fuel.Contaminated fuel may cause damage to fuelsystem components.
After refueling, please ensure the fuel filler cap isclosed firmly and correctly.
WARNINGFuel spilled on the floor or on motorcycle
tires will reduce the tire’s ability to grip the road.This can result in dangerous riding condition,potentially causing loss of control and could resultin an accident If fuel is spilled, thoroughly cleanup the spillage immediately. Take care not to spillany fuel on the engine, exhaust pipes, rubber partsor any other part of the motorcycle.Do not store motorcycle with gasoline in the tank,within your home or garage where open flames,pilot lights, spark or any appliance with a pilotlight, electric motors are present. Inadequatesafety precautions could cause an explosion orfire and could result in damage to property, seriousinjury or loss of life.
13SAFE OPERATING RULES
Tires & SuspensionPlease inspect and ensure tires are seated evenly &properly in the rims. Maintain the recommended tirepressures as it is very important for riding stability. Paystrict attention to loose and / or broken spokes Ensurethe front and rear wheels are correctly aligned. Checkspokes for correct tightness in the rims and freemovement of steering system.Inspect the tires thread condition periodically and replaceworn out tires with approved make only. Failure to do socan lead to improper balance, poor stability, poorhandling, and abnormal tread wear.Please replace tires which are punctured or damaged.Small punctures in the tread area may be repaired fromwithin the tire. The motorcycle should not be driven over40 MPH (60 Kmph) for the first 24 hours and over 55MPH (90 Kmph) thereafter with a repaired tire.
WARNINGIn emergency situations, please ride slowly
with least possible load until the tire is permanentlyrepaired or replaced. Failure to heed to this warningcould result in serious injury or loss of life.
Regularly inspect front forks, rear shock absorbers andrear suspensions for any wear, looseness / side play, oilleaks etc. Replace worn parts. Worn parts can adverselyaffect stability and handling.
WARNINGDO NOT operate motorcycle with a loose, worn
or damaged steering system, including the front andrear suspension system. Contact your dealer forrepair of steering or suspension system. Damagedsteering or suspension components may adverselyaffect handling which could result in serious injuryor loss of life.Running inA new motorcycle must be operated according to thespecial break-in-procedure. (See BREAK-IN-THE FIRST300 Miles (500 Kms) section.) Operate motorcycle onlyat moderate speeds and out of traffic until you havebecome thoroughly familiar with its operation andhandling characteristics under all conditionDO NOT exceed the legal speed limit or drive too fast forexisting conditions. Always reduce speed when poordriving conditions exist. High speed increases theinfluence of any other condition affecting stability andincreases the possibility of loss of control.

14SAFE OPERATING RULES
NOTEIf you are an inexperienced rider we recommendthat you obtain formal training on correctmotorcycle riding techniques and becomethoroughly familiar with the operation of yourparticular motorcycle. New riders should gainexperience under various conditions while drivingat moderate speeds.
WARNINGAvoid over speeding and never travel over
the speed limit. Excessive speed may cause lossof control and could result in an accident causingserious injury or loss of life.DO NOT exceed 70 MPH (110 Kmph) riding solo.DO NOT exceed 55 MPH (90 Kmph) when carrying apassenger and/or cargo.Pay strict at tention to road surfaces and windconditions. Any two wheeled motorcycle may besubject to the following upsetting forces: Wind blasts from passing trucks. Rough uneven road surfaces.
Slippery road surfaces.These forces may affect the handling characteristicsof your motorcycle. If this happens, reduce speed andguide the motorcycle with a relaxed grip to a controlledcondit ion. Do not brake abruptly o r force thehandlebar.Operate your motorcycle defensively. Remember, amotorcycle does not afford the same protection as anautomobile in an accident. One of the most commonaccident situations occurs when the driver of the othervehicle fails to see or recognize a motorcycle and turnsinto the oncoming motorcyclist.Safe motorcycle operation requires alert mentaljudgment combined with a defensive driving attitude.DO Not allow fatigue, alcohol or drugs to endangeryour safety OR that of others.Wear an approved helmet, clothing, and foot gearsuited for riding a motorcycle. Bright OR light colorsare best for greater visibility in traffic, especially atnight. Avoid loose, flowing garments and scarves.When carrying a pillion rider, it is your responsibilityto instruct them on proper riding procedures.
15SAFE OPERATING RULES
DO NOT a l low other indiv iduals, under anycircumstances, to operate your motorcycle unless youknow they are experienced, licensed riders and arethoroughly familiar with the operating conditions of yourmotorcycleAdditional electrical accessories and equipments mayoverload the motorcycle’s electrical system and will resultin system and/or component failure.Maintain your motorcycle in proper operating conditionin accordance with the Maintenance intervals chart inthis Owner’s Manual.Use only genuine Royal Enfield spare parts and approvedaccessories. Use of other manufacturer’s performanceparts may affect the performance of your motorcycle andrender the motorcycle void of warranty. Contact yourRoyal Enfield dealer for further details
WARNINGFor your personal welfare, all the listed service
and maintenance recommendations should beperformed. Lack of regular maintenance at thesuggested intervals may affect the safe operation ofyour motorcycle, which could result in serious injuryor loss of life.
WARNINGConsult your Royal Enfield Dealer regarding
any questions or problems that occur in the operationof your motorcycle. Failure to do so may aggravatean initial problem, cause costly repairs, jeopardizeyour personal safety and could result in seriousinjury or loss of life.
WARNINGAvoid any contact with the exhaust system.
Wear clothing that will completely cover the legswhile riding. The exhaust system gets very hot whenthe engine is running and remains too hot, even afterthe engine is turned off. Failure to wear proper orprotective clothing could result in serious injury.
WARNINGExhaust gases contains poisonous carbon
monoxide and chemicals, known to cause Cancer, BirthDefects or other reproductive defects. DO NOT INHALEexhaust gases. Do not stay inside a closed garage afterparking the motorcycle as the residual fumes from theexhaust can contain harmful gases. Failure to heed tothese warnings can result in loss of life.
16SAFE OPERATING RULES
WARNINGMotorcycle batteries contain lead and lead
components, acids and chemicals known to causecancer, birth defects or other reproductive harm.Exercise extreme caution while handling a battery.Wash hands thoroughly whenever a battery ishandled.This motorcycle is not designed to tow a trailer or beused with a sidecar. It is designed to be used as atwo wheeler, for carrying a rider and a pillion.
WARNINGTowing a trailer may cause loss of control
of the motorcycle in the front, reduced brakingefficiency, tire overloading and unstable handling,leading to an accident resulting in serious injuryor loss of life.Using the motorcycle with a side car could causeloss of control, resulting in an accident which maycause serious injury or loss of life.
WARNINGDO NOT tow a diabled motorcycle. The
steering and handling of the disabled motorcyclewill be impaired due to the force of the towline. If adisabled motorcycle must be transported, use a truckor a trailer. Towing a motorcycle may cause loss ofcontrol of the motorcycle in the front, leading to anaccident resulting in serious injury or loss of life.DO NOT exceed the Gross Vehicle Weight Rating(GVWR) of your motorcycle which is provided in theinformation plate, located on the frame down tube.(GVWR is the total sum of the weight of the motorcycle,accessories, rider, pillion and cargo that may be safelycarried).
WARNINGExceeding GVWR may lead to instability of the
motorcycle, leading to an accident and result inserious injury or loss of life.
17SAFE OPERATING RULES
WARNINGUse only genuine Royal Enfield replacement
fasteners tightened to the proper torque. Wecaution you against the use of certain nonstandardparts such as aftermarket and custom madefasteners which may not have specific strength,finish and type requirements to perform properlyin the assembly and its environment. The use ofany nonstandard parts, including fasteners, couldresult in serious injury or loss of life.
WARNINGRoyal Enfield cautions you against the use
of certain nonstandard parts such as aftermarketand custom made extended f ront forks orsuspensions, which may adversely a ffectperformance and handling. Removing or alteringoriginal parts may adversely affect performanceand could result in an accident causing seriousinjury or loss of life.
18ACCESSORIES & CARGO
Royal En field canno t tes t and make specif icrecommendations concern ing specif ic or acombination of accessories sold. Therefore, the ridermust be responsible for safe operation of themotorcycle when installing accessories or carryingadditional weight.Please adhere to the following guidelines whencarry ing a pi l l ion , cargo o r when f it t ing anyaccessories. DO NOT exceed 70 MPH (110 km/h) when riding
solo. DO NOT exceed 55 MPH (90 Km/h) when carrying
a pillion and/or cargo. Keep cargo weight concentrated close to the
motorcycle and as low as possible; this minimizessudden shift in the motorcycle’s center of gravity.
Distribute weight evenly on both sides of themotorcycle.
DO NOT load bulky items too far behind the rideror add weight to the handlebars or front forks.
DO NOT exceed 5 pounds (2.3 kgs) maximumhanging load on either side of the motorcycle atthe rear end.
Recheck the cargo periodically to be sure it issecured and will not shift while riding. Accessoriessecured loosely may affect the riding of themotorcycle and a ffect the stabil i ty o f themotorcycle.
Large surfaces such as fairings, windshields,backrests and luggage racks can adversely affecthandling of the motorcycle.Only genuine RoyalEnfield accessories, designed specifically for themotorcycle model should be used with properinstallation.
WARNINGDO NOT load weight or install accessories
improperly on the motorcycle. Doing so may affectthe motorcycle’s stability, handling characteris-tics, and safe operation and could result in anaccident causing serious injury or loss of life.
19
WARNINGRoyal Enfield motorcycles have been
carefully designed and engineered for riding intheir original configuration. DO NOT alter thehandling characteristics of these motorcycles.Doing so may affect its stability and could cause anaccident resulting in serious injury or loss of life.
WARNINGRoyal Enfield cautions you against use of
nonstandard parts such as aftermarket and custommade extended front forks which may adverselyaffect the performance and handling of themotorcycle. Removing or altering original parts mayadversely affect the performance of the motorcycle,causing an accident, which could result in seriousinjury or loss of life.
WARNINGDO NOT ignore model / design specifications.
Doing so constitutes to motorcycle misuse whichmay adversely affect the handling and performanceof the motorcycle causing an accident, which couldresult in serious injury or loss of life.
ACCESSORIES & CARGO
20RULES OF THE ROAD
Be sure all equipment required by Federal, State,province and local law is installed and are in goodcondition.
Be sure your license plate is installed in the positionspecified by law and is clearly visible at all times.
Keep to the correct side of the road centre linewhen meeting oncoming vehicle.
Watch for loose debris, such as dry or wet leaves,slippery substances or loose gravel that canhamper the stability of your motorcycle.
DO NOT leave the curb or parking area withoutsignaling. Be sure your way is clear to enter movingtraffic. A moving line of traffic always has the rightof way.
Always actuate your turn signals, and exerciseutmost caution when passing other vehicles goingin the same direction. Never try to pass anothervehicle going in the same direction at street
intersections, on curves, or when going up/or downa hill.
While turning either right or left, watch out forpedestrians, animals, as well as vehicles.
At street intersections always allow vehicles fromyour right and left to pass before turning. DO NOTassume you have the right of way.
Always signal when preparing to stop, turn or pass.When intending to turn, signal at least 100 feet(30.5 meters) before reaching the turning. Be closeto the center line (unless local rules requireotherwise), slow down and then turn carefully.
All traffic signs, including manual controls atintersections, should be obeyed promptly. Slowdown at traffic signs near schools and caution signsat railroad crossings.
Never jump a traffic light. When a change isimminent from GO to STOP (or vice versa) at
21RULES OF THE ROAD
intersections, slow down and wait for the light tochange to green. Never run through a yellow orred traffic light.
Ride at a safe speed that is consistent with thetype of road surface you are on. Pay strict attentionto whether the surface is
Dry.
Oily
Wet.
Icy.
DO NOT Exceed the legal speed limit or drive toofast for existing conditions. Always reduce speedwhen poor driving conditions exist. High speedincreases the influence of any other conditionaffecting stability and increases the possibility ofloss of control.
WARNINGAvoid excessive speed and never travel at a
speed faster than the speed limit. Excessive speedmay cause loss of control of motorcycle, whichcould result in loss of life or serious injury.
Park your motorcycle on a firm and flat surface toprevent it from falling over.
Protect your motorcycle against theft. After parkingyour motorcycle, remove Ignition key from switchand lock the steering head.
22
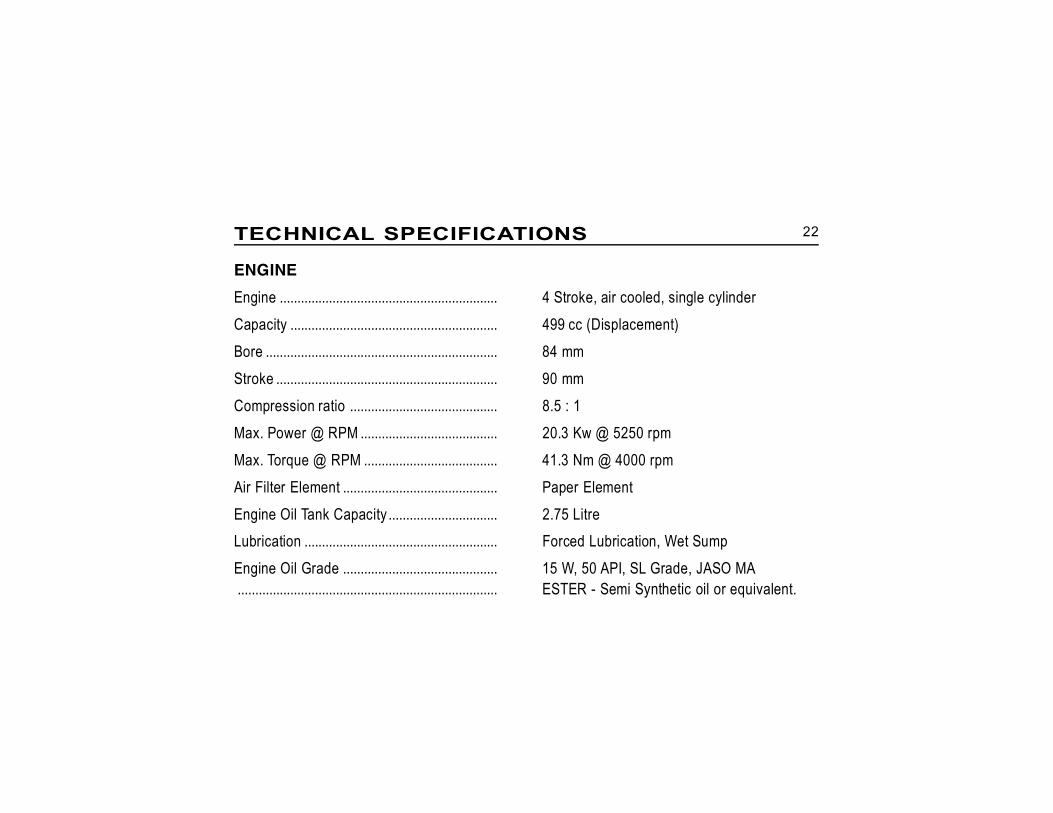
ENGINE
Engine .............................................................. 4 Stroke, air cooled, single cylinderCapacity ........................................................... 499 cc (Displacement)Bore .................................................................. 84 mmStroke ............................................................... 90 mmCompression ratio .......................................... 8.5 : 1Max. Power @ RPM ....................................... 20.3 Kw @ 5250 rpmMax. Torque @ RPM ...................................... 41.3 Nm @ 4000 rpmAir Filter Element ............................................ Paper ElementEngine Oil Tank Capacity ............................... 2.75 LitreLubrication ....................................................... Forced Lubrication, Wet SumpEngine Oil Grade ............................................ 15 W, 50 API, SL Grade, JASO MA.......................................................................... ESTER - Semi Synthetic oil or equivalent.
TECHNICAL SPECIFICATIONS
23TECHNICAL SPECIFICATIONS
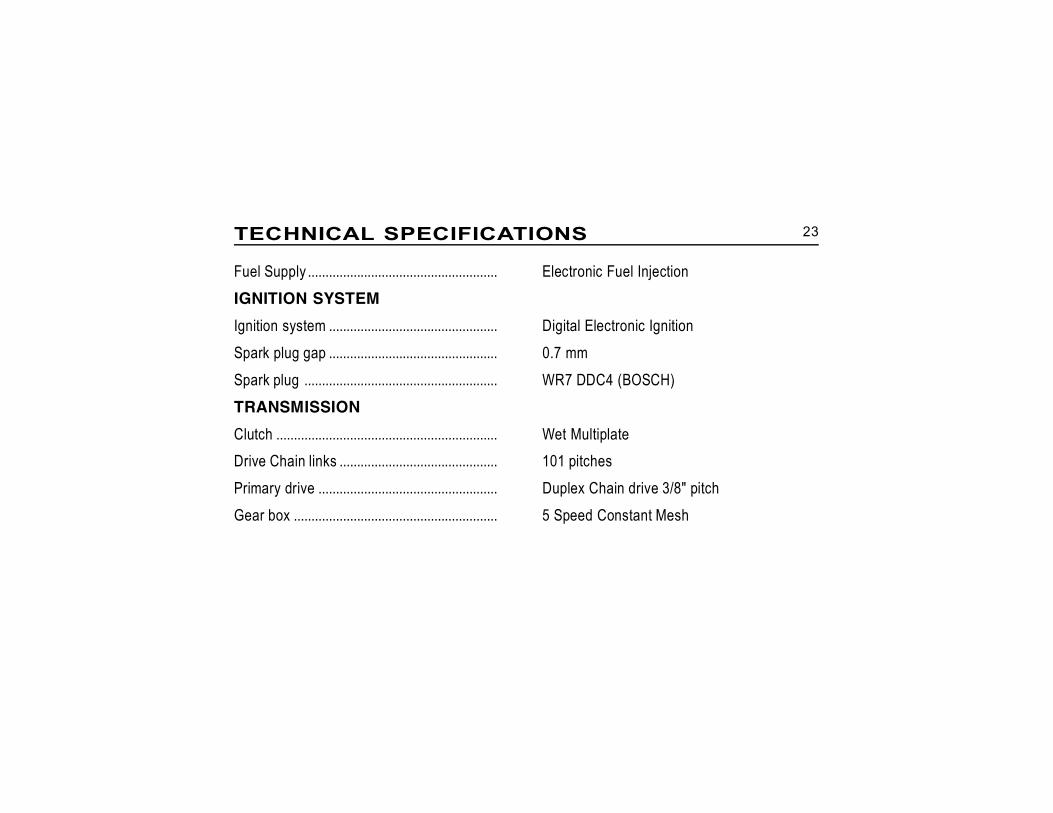
Fuel Supply ...................................................... Electronic Fuel InjectionIGNITION SYSTEM
Ignition system ................................................ Digital Electronic IgnitionSpark plug gap ................................................ 0.7 mmSpark plug ....................................................... WR7 DDC4 (BOSCH)TRANSMISSION
Clutch ............................................................... Wet MultiplateDrive Chain links ............................................. 101 pitchesPrimary drive ................................................... Duplex Chain drive 3/8" pitchGear box .......................................................... 5 Speed Constant Mesh
24TECHNICAL SPECIFICATIONS
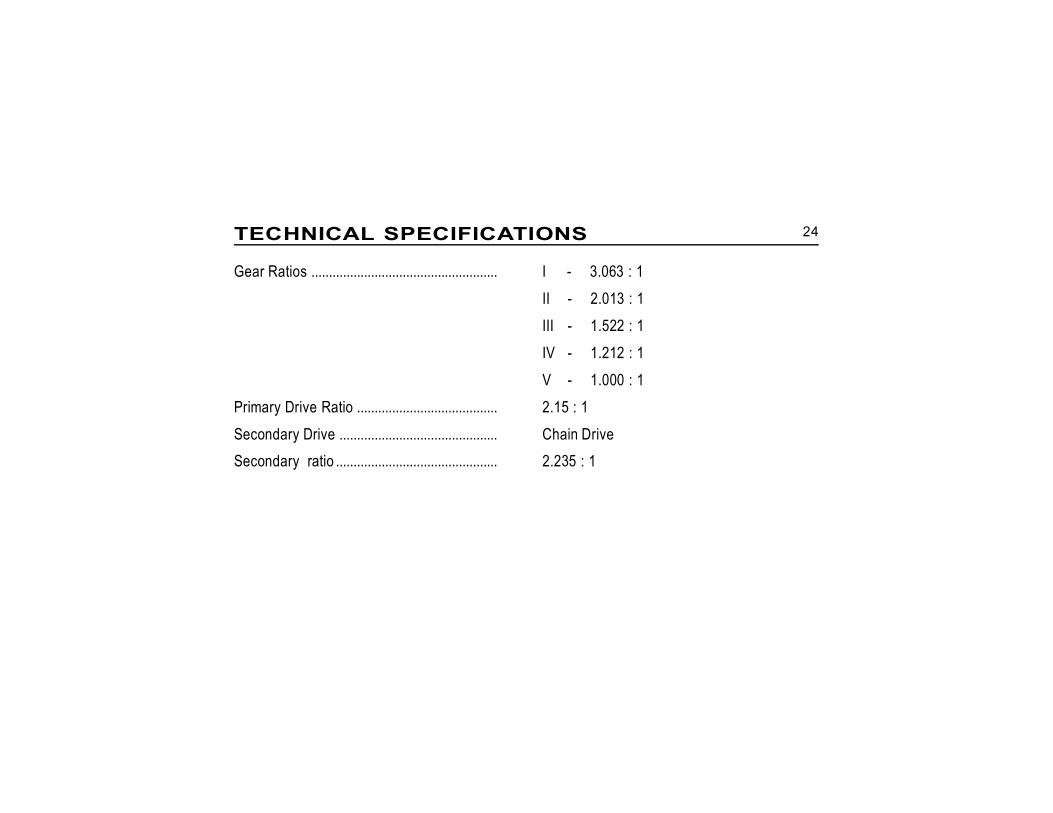
Gear Ratios ..................................................... I - 3.063 : 1II - 2.013 : 1III - 1.522 : 1IV - 1.212 : 1V - 1.000 : 1
Primary Drive Ratio ........................................ 2.15 : 1Secondary Drive ............................................. Chain DriveSecondary ratio .............................................. 2.235 : 1
25TECHNICAL SPECIFICATIONS
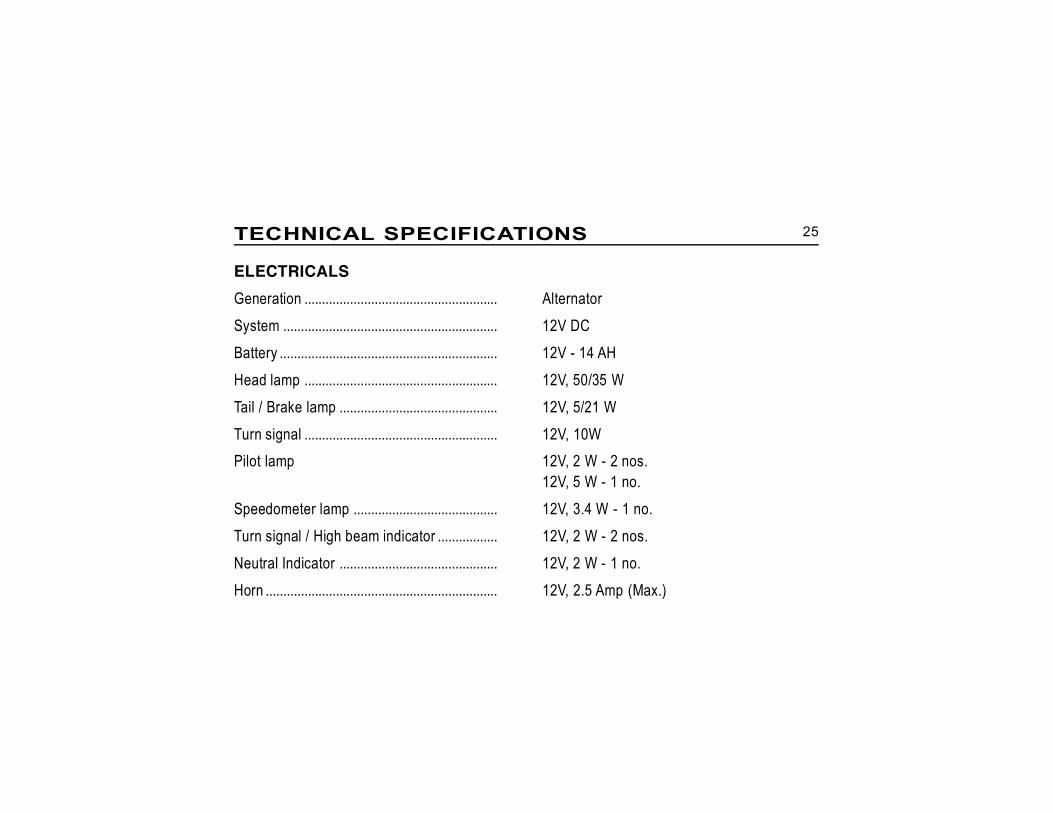
ELECTRICALS
Generation ....................................................... AlternatorSystem ............................................................. 12V DCBattery .............................................................. 12V - 14 AHHead lamp ....................................................... 12V, 50/35 WTail / Brake lamp ............................................. 12V, 5/21 WTurn signal ....................................................... 12V, 10WPilot lamp 12V, 2 W - 2 nos.
12V, 5 W - 1 no.Speedometer lamp ......................................... 12V, 3.4 W - 1 no.Turn signal / High beam indicator ................. 12V, 2 W - 2 nos.Neutral Indicator ............................................. 12V, 2 W - 1 no.Horn .................................................................. 12V, 2.5 Amp (Max.)
26TECHNICAL SPECIFICATIONS
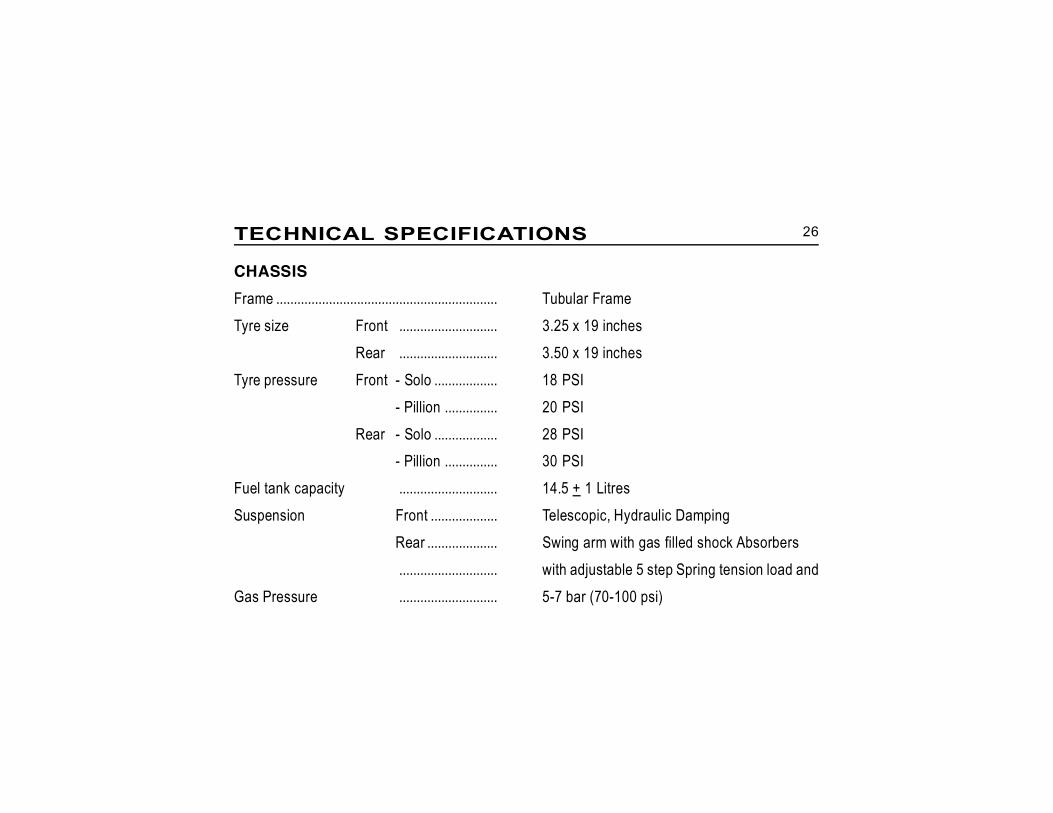
CHASSIS
Frame ............................................................... Tubular FrameTyre size Front ............................ 3.25 x 19 inches
Rear ............................ 3.50 x 19 inchesTyre pressure Front - Solo .................. 18 PSI
- Pillion ............... 20 PSIRear - Solo .................. 28 PSI
- Pillion ............... 30 PSIFuel tank capacity ............................ 14.5 + 1 LitresSuspension Front ................... Telescopic, Hydraulic Damping
Rear .................... Swing arm with gas filled shock Absorbers............................ with adjustable 5 step Spring tension load and
Gas Pressure ............................ 5-7 bar (70-100 psi)

27TECHNICAL SPECIFICATIONS
DIMENSIONSLength ............................................. 2160 mmWidth ............................................... 800 mmHeight .............................................. 1050 mmWheel base ..................................... 1370 mmSaddle height ................................. 800 mmGround clearance .......................... 140 mm
NOTE:
1. Values given above are for your guidelines only
2. In view of continuous improvements being done on our products, the specificationsare likely to change without notice
WEIGHTSMass of vehicle in running order ... 187 KgMax pay load ................................... 178 KgMax technical permissible mass ... 365 Kg
PERFORMANCEMaximum Speed ............................. 82 MPH
28
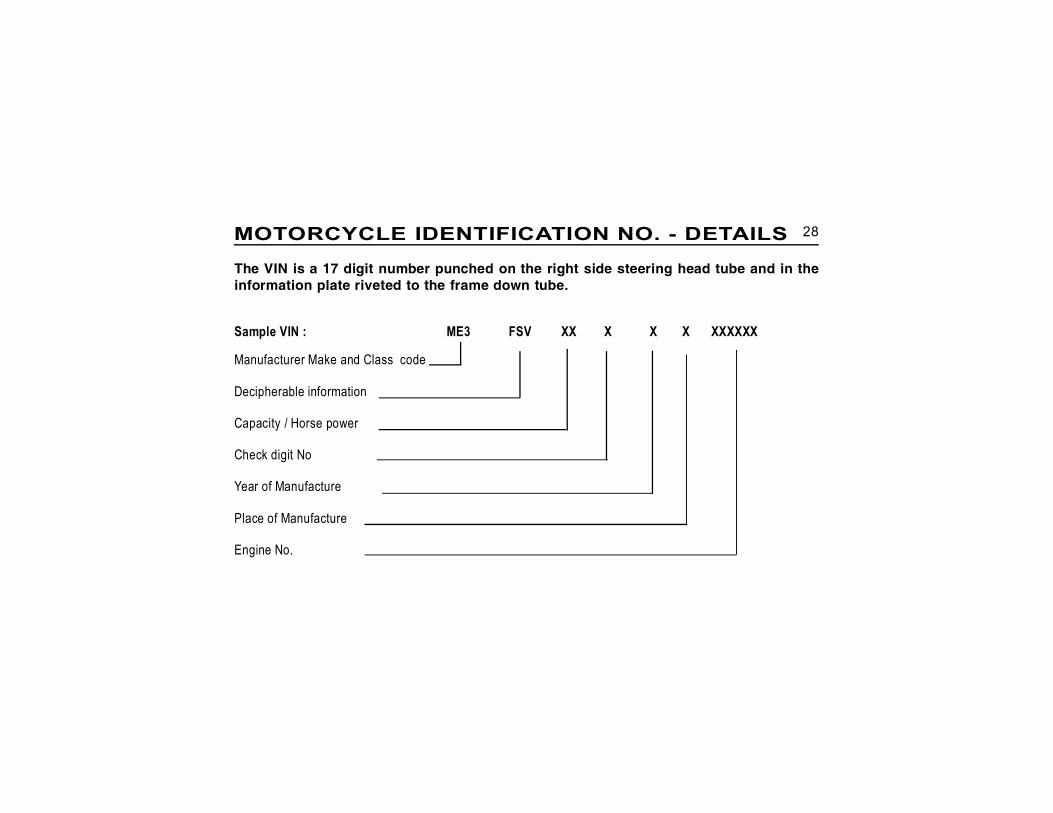
The VIN is a 17 digit number punched on the right side steering head tube and in theinformation plate riveted to the frame down tube.
MOTORCYCLE IDENTIFICATION NO. - DETAILS
Sample VIN : ME3 FSV XX X X X XXXXXX
Manufacturer Make and Class code
Decipherable information
Capacity / Horse power
Check digit No
Year of Manufacture
Place of Manufacture
Engine No.
29
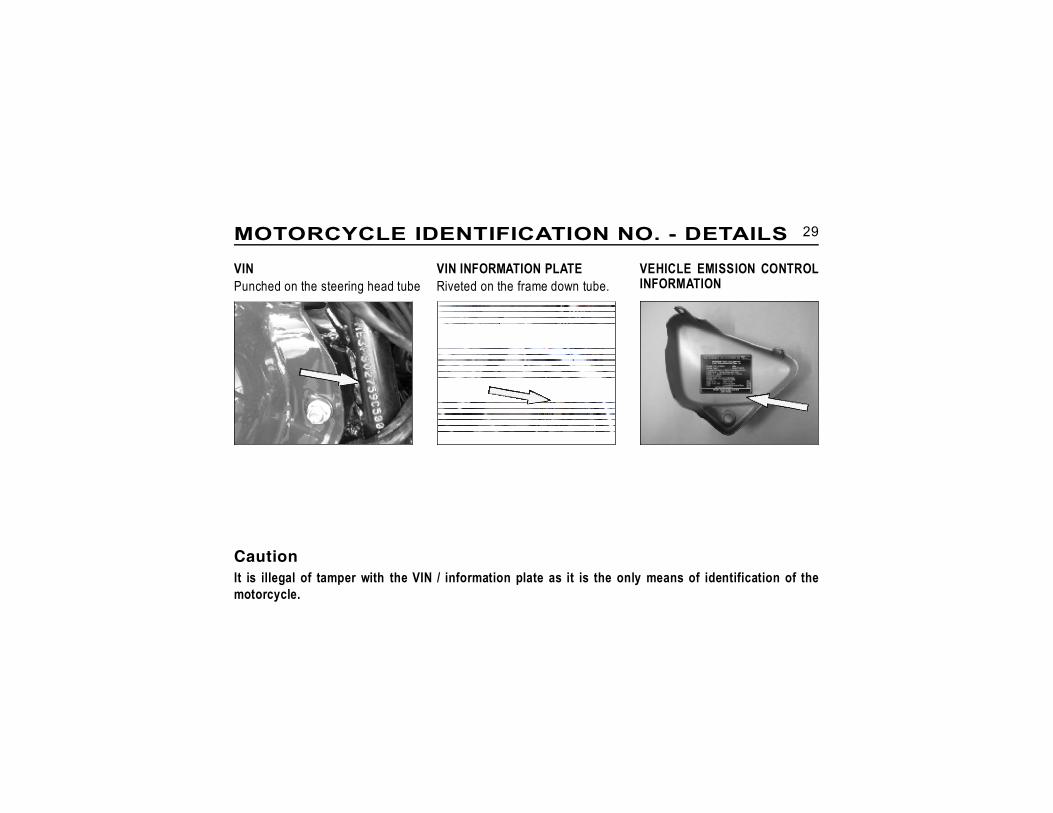
VINPunched on the steering head tube
CautionIt is illegal of tamper with the VIN / information plate as it is the only means of identification of themotorcycle.
MOTORCYCLE IDENTIFICATION NO. - DETAILS
VIN INFORMATION PLATERiveted on the frame down tube.
VEHICLE EMISSION CONTROLINFORMATION
30
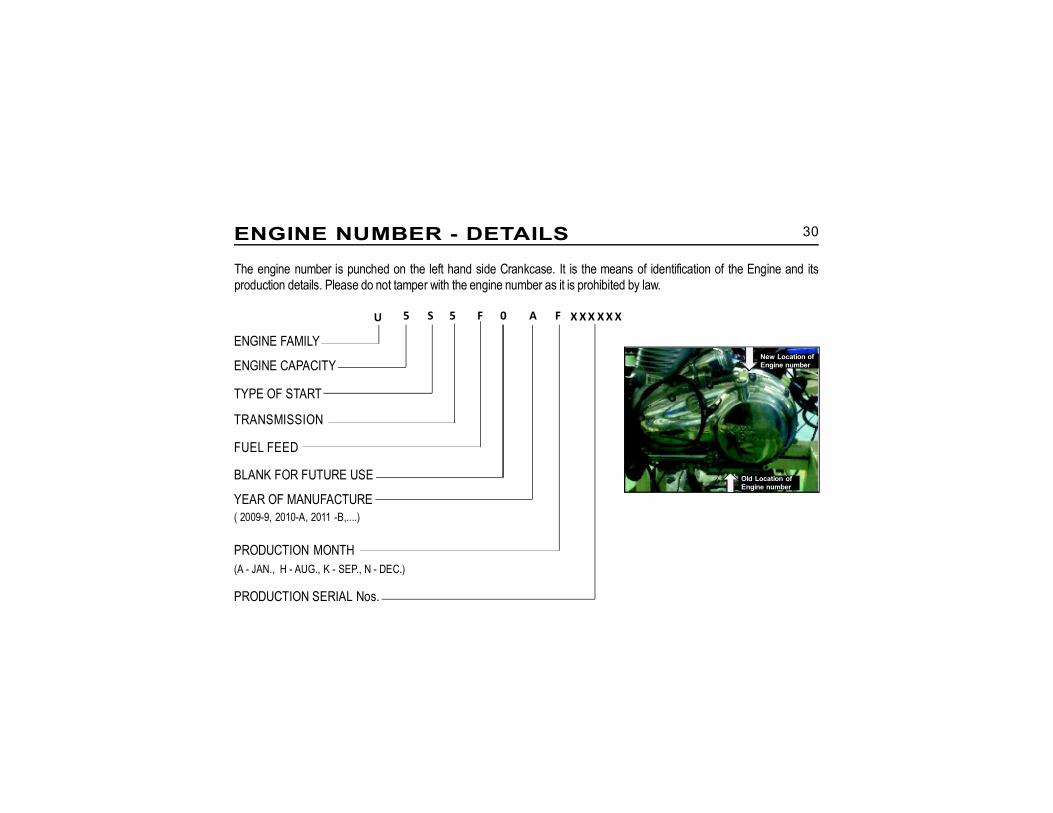
The engine number is punched on the left hand side Crankcase. It is the means of identification of the Engine and itsproduction details. Please do not tamper with the engine number as it is prohibited by law.
ENGINE NUMBER - DETAILS
ENGINE FAMILY
ENGINE CAPACITY
TYPE OF START
TRANSMISSION
FUEL FEED
BLANK FOR FUTURE USE
YEAR OF MANUFACTURE
PRODUCTION MONTH
PRODUCTION SERIAL Nos.
U 5 S 5 F 0 A F X X X X X X
( 2009-9, 2010-A, 2011 -B,....)
(A - JAN., H - AUG., K - SEP., N - DEC.)
New Location ofEngine number
Old Location ofEngine number
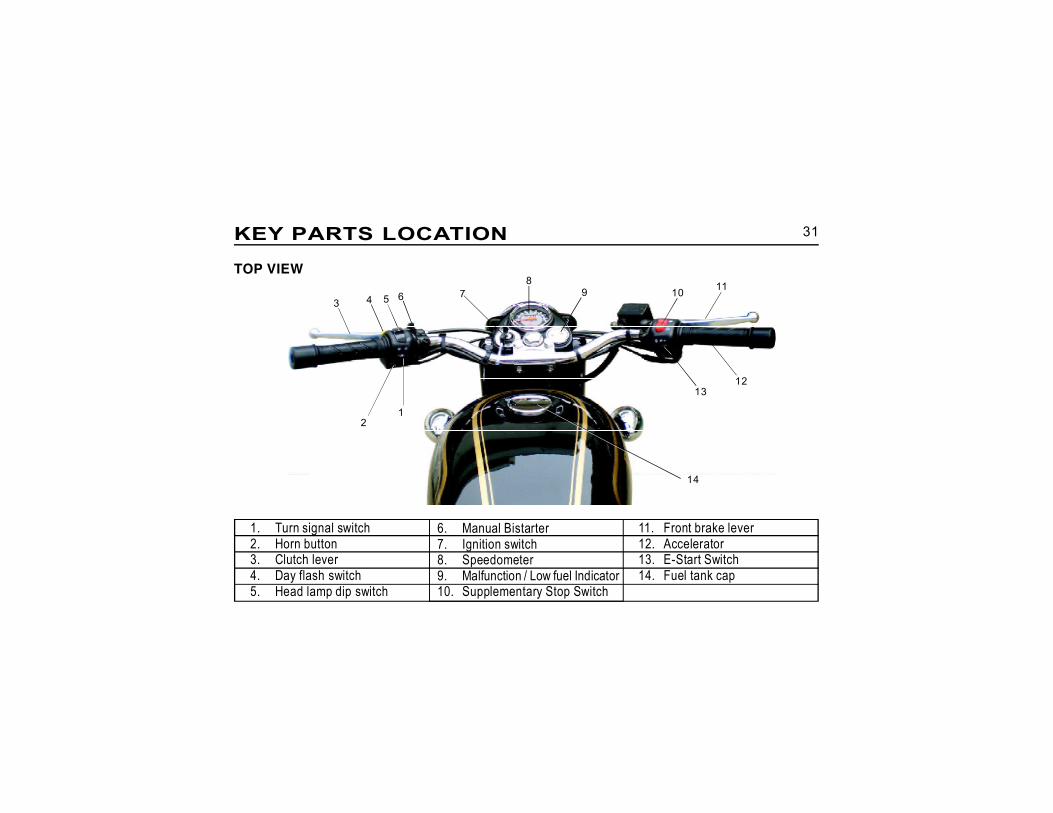
31KEY PARTS LOCATION
1. Turn signal switch2. Horn button3. Clutch lever4. Day flash switch5. Head lamp dip switch
6. Manual Bistarter7. Ignition switch8. Speedometer9. Malfunction / Low fuel Indicator10. Supplementary Stop Switch
11. Front brake lever12. Accelerator13. E-Start Switch14. Fuel tank cap
TOP VIEW
12
78
10
13
14
93 654
11
12
32KEY PARTS LOCATION
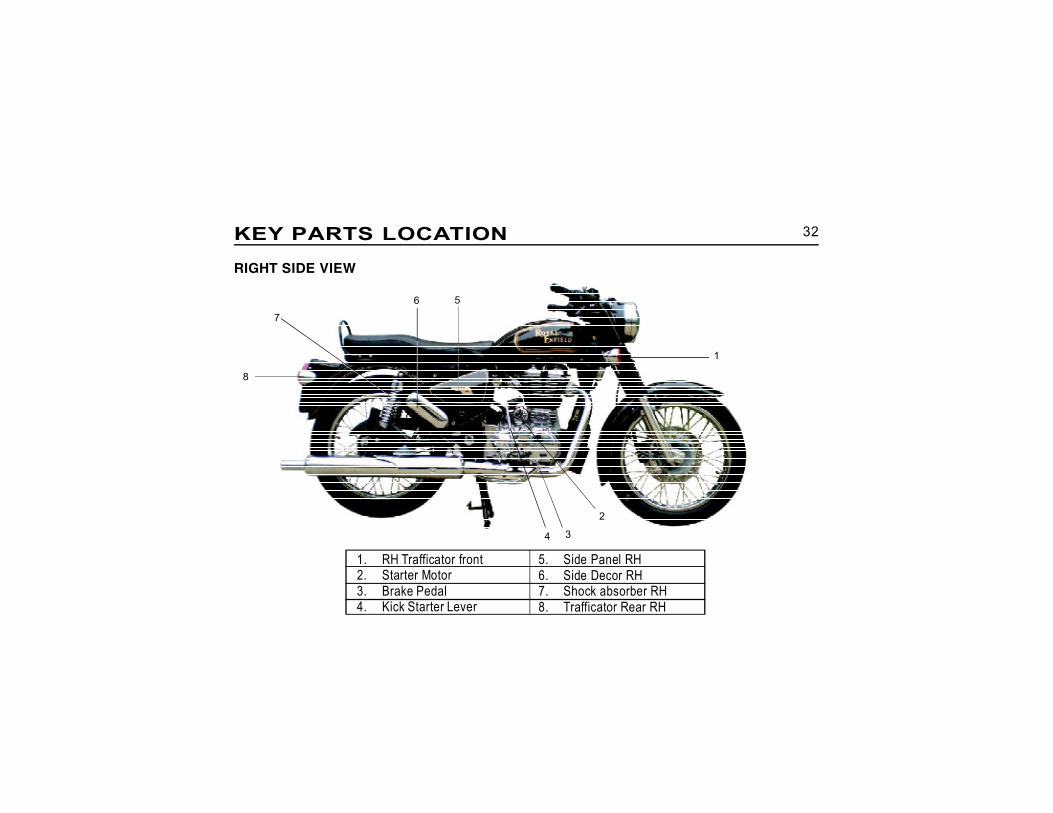
RIGHT SIDE VIEW
1. RH Trafficator front2. Starter Motor3. Brake Pedal4. Kick Starter Lever
5. Side Panel RH6. Side Decor RH7. Shock absorber RH8. Trafficator Rear RH
1
2
3
56
8
4
7
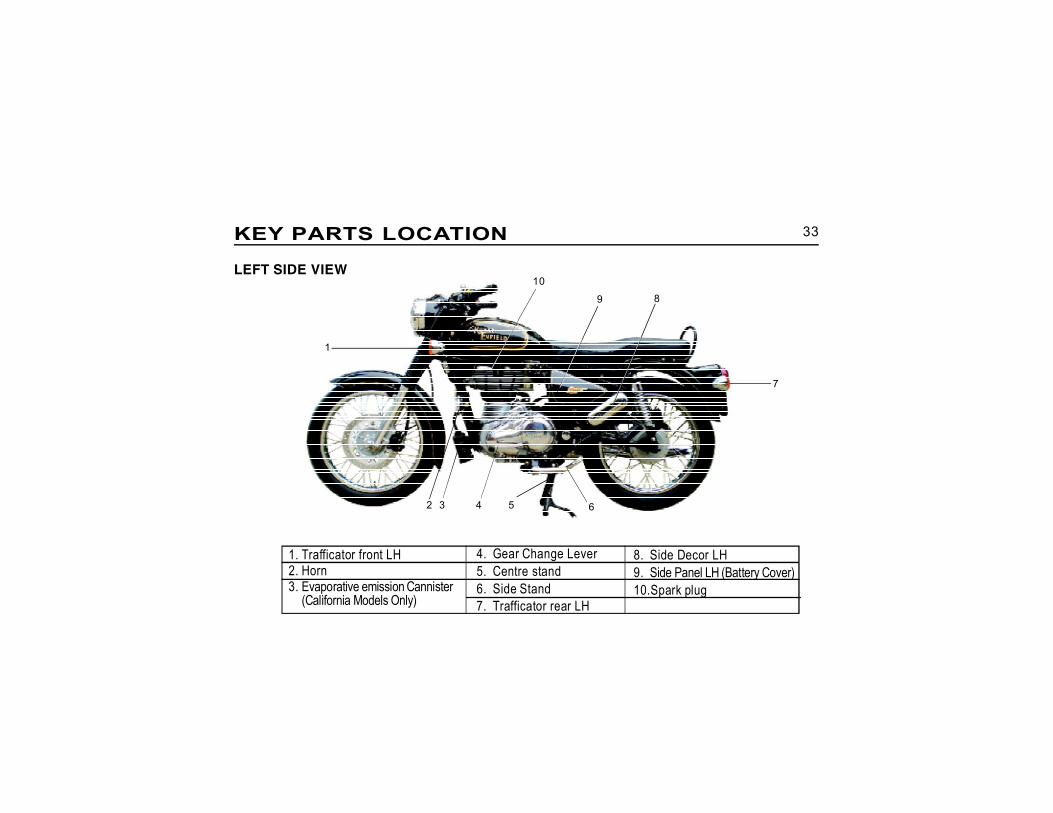
33KEY PARTS LOCATION
1. Trafficator front LH2. Horn3. Evaporative emission Cannister
(California Models Only)
4. Gear Change Lever5. Centre stand6. Side Stand7. Trafficator rear LH
8. Side Decor LH9. Side Panel LH (Battery Cover)10.Spark plug
1
2 3 4
10
9
5
7
6
LEFT SIDE VIEW
8
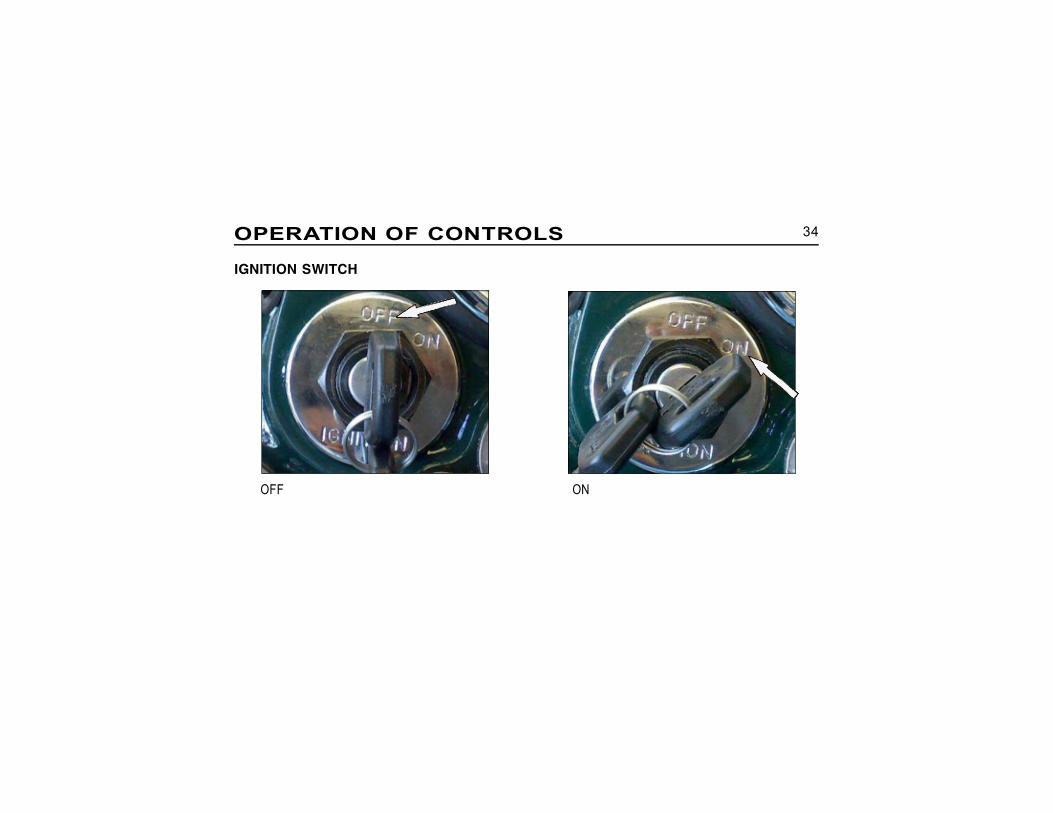
34
IGNITION SWITCH
OPERATION OF CONTROLS
ON OFF
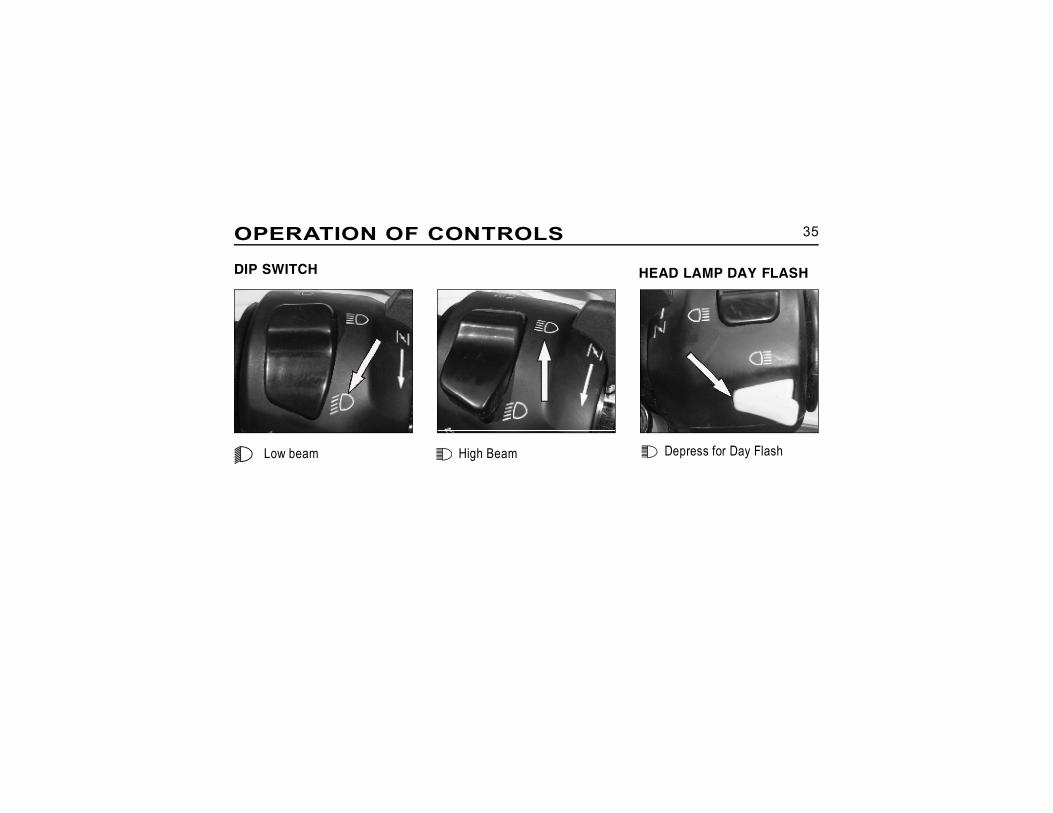
35OPERATION OF CONTROLS
Depress for Day Flash
DIP SWITCH
Low beam High Beam
HEAD LAMP DAY FLASH
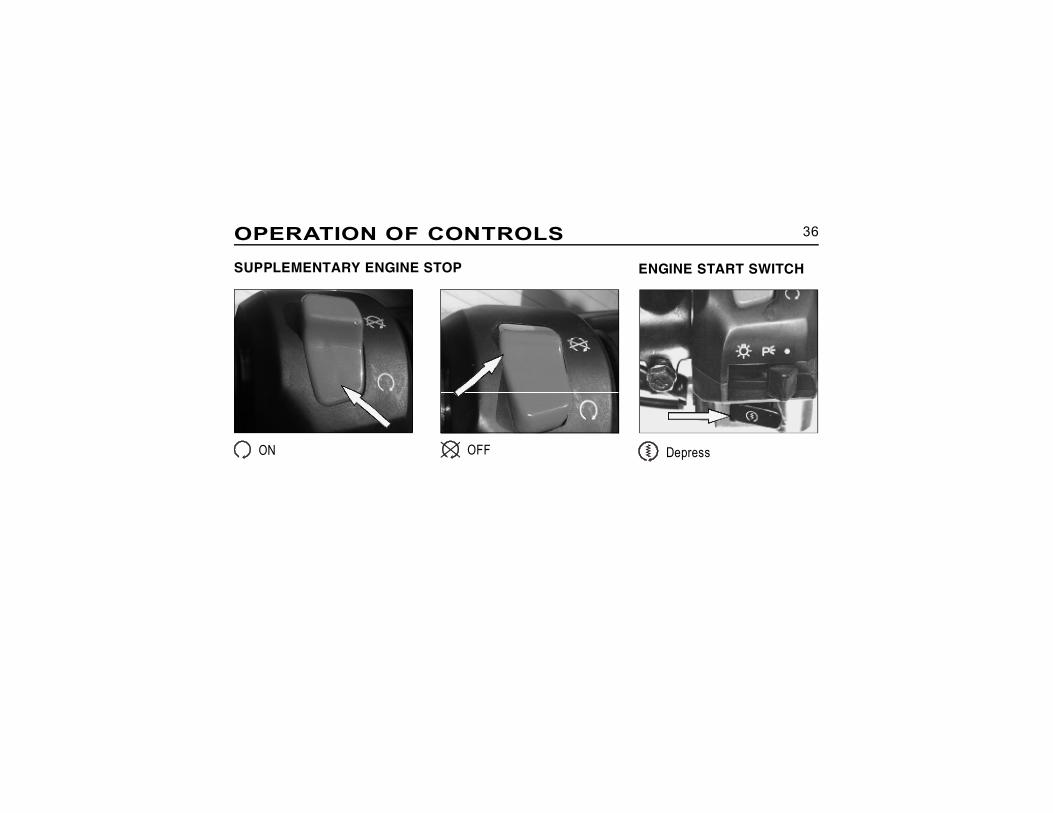
36OPERATION OF CONTROLS
SUPPLEMENTARY ENGINE STOP ENGINE START SWITCH
Depress ON OFF
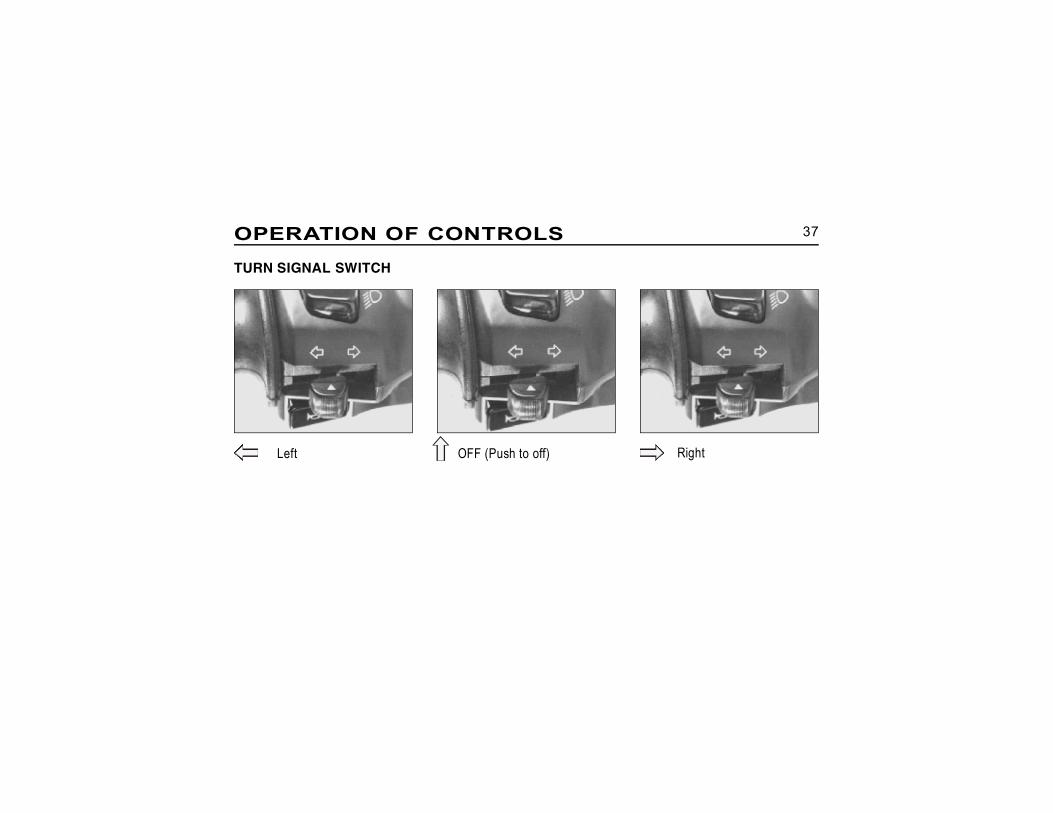
37OPERATION OF CONTROLS
TURN SIGNAL SWITCH
Left OFF (Push to off) Right

38
CAUTIONDo NOT lubricate barrel locks with
petro leum based lubricants or graphite.Inoperative locks may result in damage to yourvehicle.
Lock the steering when leaving motorcycle parked.Steering lock
Turn key clockwise to lock.CautionProtect your motorcycle against theft. Afterparking your motorcycle, remove the ignition keyfrom switch and lock the steering head.
OPERATION OF CONTROLS
HORN
MANUAL BI STARTER

39OPERATION OF CONTROLSOPERATION OF CONTROLS
FUEL TANK CAP (WITH KEY LOCKINGFEATURE)
NOTE:Key can be removed only in locked position.
FUEL TANK CAP (CALIFORNIA MODELS)
To Open: Turn cap anticlockwiseTo Close: Locate cap and turn clockwise t il l cl ick
Sound is heard
To Open: Insert Key and Turn anticlockwise. Cap will springup.To Close: Press cap down with key in position Key will return to locked position. Remove Key.
40SIDE VIEW MIRRORS
Your motorcycle is equipped with convex mirrors and has a curved surface. This type of mirror is designed to givea wider rear view than a flat mirror; however the objects seen in this type of mirror will look smaller and fartheraway than when seen in a flat mirror. Use care when judging the size or distance of objects seen in these mirrors.
NOTE:To help you establish the relative distance of vehicles behind your motorcycle, adjust eachmirror in such a way, that a small portion of your shoulder is visible and a large portionbehind your motorcycle is seen clearly.
WARNINGObjects in mirrors are closer than they appear. Always use caution when judging distances of
objects in mirrors. Failure to judge correctly when seeing the objects on mirrors could cause an accidentresulting in serious injury or loss of life.
41
It is a good practice to check the following before using the motorcycle every time or once in a week
CHECK FOR:1. Adequate fuel in the tank.2. Operation and free play of front and rear brakes.3. Free play and smoothness of all operating cables.4. Free and smooth movement of the steering.5. Battery electrolyte level.6. Correct tire pressures and any cuts, cracks or sharp objects embedded in the tire.7. Oil level: Top up if necessary. Do not overfill.8. Operation of all electrical systems.
CAUTIONFailure to adhere to pre operational checks may cause the motorcycle to stall
when riding and lead to a potentially hazardous situation which, if not avoided, mayresult in an accident and could cause minor or moderate injury.
PRE OPERATIONAL CHECKS
42
Proper running-in is very important for obtaining maximum life and performance of a new motorcycle. The followingguidelines explain proper running-in procedures.
Since the engine is brand new, it should not be loaded excessively for the first 1,000 Kms. (600 Miles). During thefirst few hundred kilometers, the various parts in the engine wear and polish themselves to the correct operatingclearances. Driving with prolonged full throttle operation, or any high speed conditions might result in excessiveheating of the engine and cause abnormal wear of the moving parts and hence must be avoided.
1. 0 - 300Miles (0- 500 Kms):
The recommended speed for the first 300 Miles (500 Kms) is 35 - 40 MPH (50 - 60 Kmph). During this periodavoid riding the motorcycle with full throttle opening. Stop the motorcycle for about 5 to 10 minutes to let itcool down, after every hour of running. Vary the speed of the motorcycle regularly during running but avoidusing the motorcycle above 1/2 throttle opening position.
CautionAfter covering the first 300 Miles.(500 kms), please replace the engine oil and filter.
RUNNING IN
43
2. 300 - 600 Miles (500 - 1000 Kms.):
The recommended speeds are 45 - 50 MPH (80 - 90 Kmph). Avoid riding the motorcycle with full throttleopening. Vary the speed of the motorcycle regularly but avoid using the motorcycle above 3/4 throttle openingposition.
3. 600 Miles (1,000 kms) and beyond
Avoid prolonged full-throttle operation. Vary speed occasionally.
CautionRoyal Enfield engines are air-cooled and consequently require forced air cooling of the cylinder head andbarrel to maintain proper operating temperature. Extended periods of idling may over heat the engine,resulting in serious engine damage.DO NOT run the engine at extremely high RPM with clutch disengaged or transmission in neutral as it cancause serious engine damage.An engine running long distances at high speed must be given close attention to avoid over heating andpossible engine damage.
RUNNING IN

44
California Air Resources Board, EmissionsRegulations (Applicable for motorcycles sold in theState of California)Your Royal Enfield motorcycle is equipped with anevaporative emission control system consisting of aCanister, rubber hoses and connectors to comply withthe stringent California Air Resources Board (CARB)emissions regulations, anti-smog standards.The equipment does not have any serviceable parts forthe user to service. However in order to ensure that themotorcycle is compliant, it is necessary to periodicallyinspect the rubber tubes and connections for any leaks,cracks, cuts or damage. In case any of the above isnoticed, the motorcycle should be taken immediately toa nearest Authorized Royal Enfield dealer for inspectionand necessary correctionThe evaporative emission control system is coveredunder warranty for 18,641 miles (30,000 Kms) OR 5 Yearsfrom the date of sale of the motorcycle to the firstcustomer.As the vehicle owner, it is your responsibility to ensurethat the motorcycle is taken to the nearest Royal Enfielddealer to carry out the required maintenance listed inthe Owner’s Manual. Royal Enfield recommends that
you retain all receipts covering maintenance on yourmotorcycle. It is also your responsibility to present takeyour motorcycle to a Royal Enfield dealer, if a problem inthe evaporative emission system. As the vehicle owner,you should also be aware that Royal Enfield may denyyour warranty coverage if your vehicle or a part has faileddue to abuse, neglect, improper maintenance orunapproved modifications. If you have any questionsregarding your warranty rights and responsibilities or ifan authorized Royal Enfield dealer cannot repair yourmotorcycle or honor yourclaim within a reasonableperiod of time, contactRoyal Enfield forassistance@ 312-569-1075. I f you are notsatisfied with the way inwhich a warranty claim isresolved by Royal Enfield,you may write directly to:
California Air Resources9480 Telstar Ave. Suite 4El Monte, CA 91731
Director of Field OperationsBoardSupport Division (EI4-397F)Environmental Protection Agency401 M Street, S.W. Washington,D.C. 20460
OR
EVAPORATIVE EMISSION IMPORTANT NOTE
45FUEL GAUGE, MALFUNCTION INDICATOR& ROLL OVER SENSOR
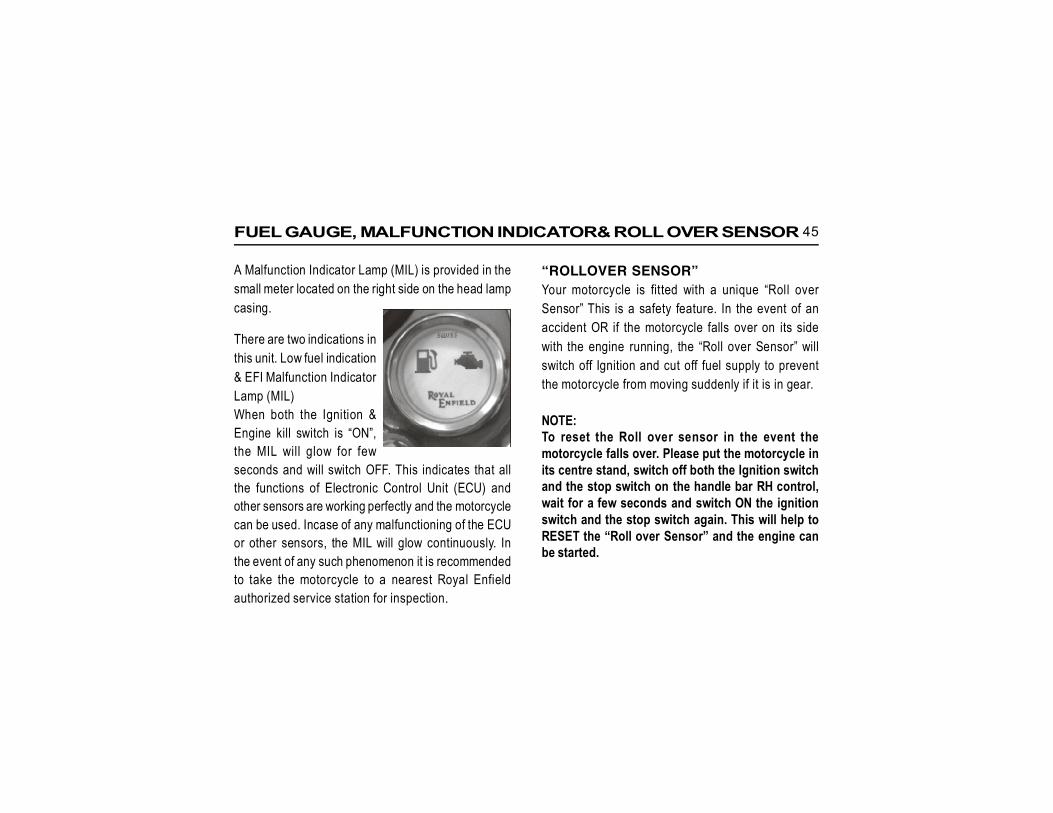
A Malfunction Indicator Lamp (MIL) is provided in thesmall meter located on the right side on the head lampcasing.
There are two indications inthis unit. Low fuel indication& EFI Malfunction IndicatorLamp (MIL)When both the Ignition &Engine kill switch is “ON”,the MIL will glow for fewseconds and will switch OFF. This indicates that allthe functions of Electronic Control Unit (ECU) andother sensors are working perfectly and the motorcyclecan be used. Incase of any malfunctioning of the ECUor other sensors, the MIL will glow continuously. Inthe event of any such phenomenon it is recommendedto take the motorcycle to a nearest Royal Enfieldauthorized service station for inspection.
“ROLLOVER SENSOR”Your motorcycle is fitted with a unique “Roll overSensor” This is a safety feature. In the event of anaccident OR if the motorcycle falls over on its sidewith the engine running, the “Roll over Sensor” willswitch off Ignition and cut off fuel supply to preventthe motorcycle from moving suddenly if it is in gear.
NOTE:To reset the Roll over sensor in the event themotorcycle falls over. Please put the motorcycle inits centre stand, switch off both the Ignition switchand the stop switch on the handle bar RH control,wait for a few seconds and switch ON the ignitionswitch and the stop switch again. This will help toRESET the “Roll over Sensor” and the engine canbe started.
46STARTING
WARNINGBefore starting engine, always shift
gears to neutral.
Caution:Do not force the gear lever whileattempting to shift to neutral with theengine stalled. Move the motorcycle back& forth and simultaneously depress gearlever to select neutral. Ensure neutralindicator l ight comes ‘ON’ in theSpeedometer.
NOTE :
l Depress starter button and release as soon asthe engine starts.
l If the engine does not start on the first attemptin a cold climate, release the starter button, wait
for 30 seconds before depressing the starterbutton again.
l A clutch safety switch is provided in the systemfor the safety of the rider. This will prevent theengine from starting if the gears are engaged.To start the engine, always ensure the gear isshifted to neutral before starting. However if theengine has stalled and has to be started whenthe gears are engaged, pull in the clutch lever,depress starter button to start the engine ingear.
l A side stand ON safety switch is fitted on theside stand of the motorcycle. If the side standis in extended position, it will prevent the enginefrom starting. Please ensure the side stand isretracted fully before attempting to start engine.
47STARTINGSTARTING
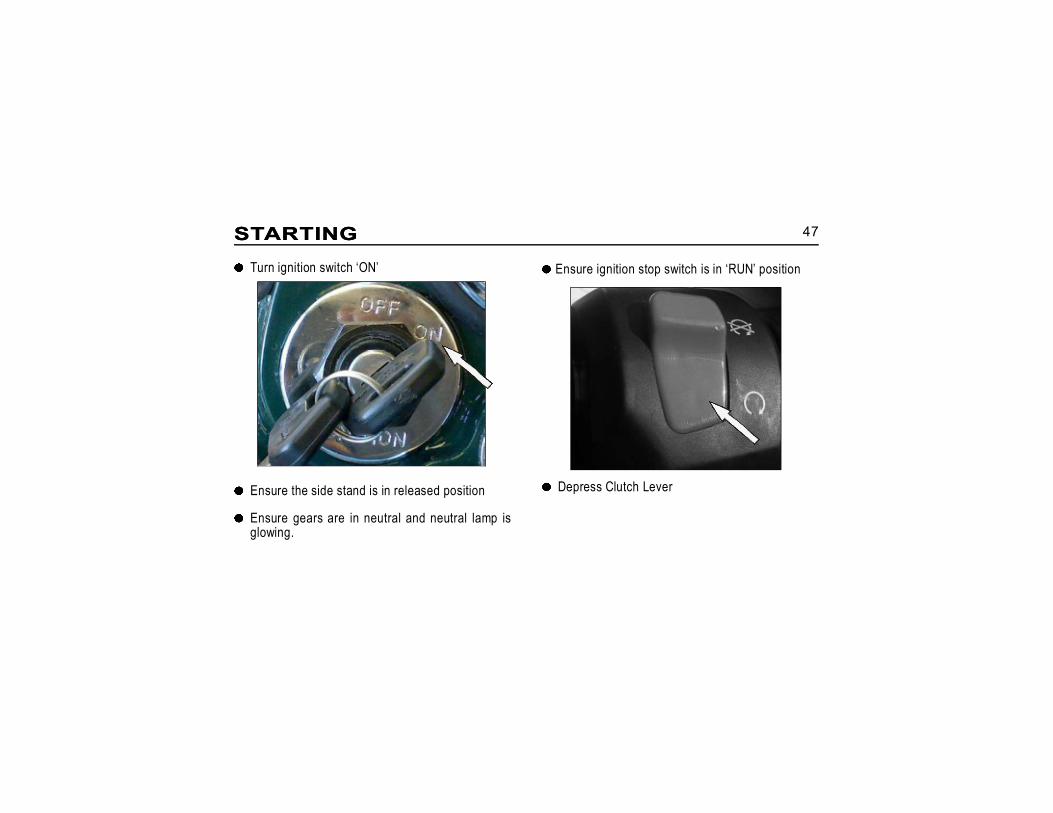
Turn ignition switch ‘ON’ Ensure ignition stop switch is in ‘RUN’ position
Ensure the side stand is in released position
Ensure gears are in neutral and neutral lamp isglowing.
Depress Clutch Lever
48STARTING
CautionNever accelerate the engine immediately aftera cold start. The engine should be allowed tooperate at idling speed for a few minutes. Thiswill not only allow the engine to warm up butwill also help the engine oil to be circulatedand lubricate the moving parts inside theengine. Failure to adhere to this may result indamage to the engine.
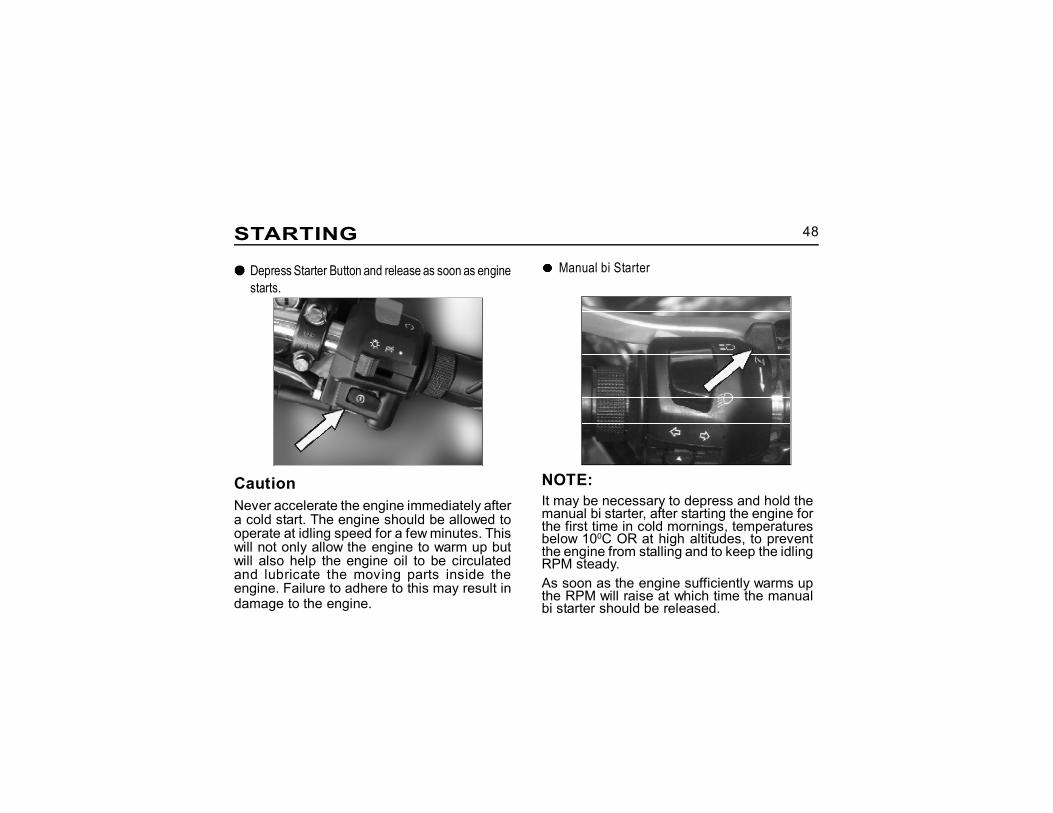
Manual bi StarterDepress Starter Button and release as soon as enginestarts.
NOTE:It may be necessary to depress and hold themanual bi starter, after starting the engine forthe first time in cold mornings, temperaturesbelow 100C OR at high altitudes, to preventthe engine from stalling and to keep the idlingRPM steady.As soon as the engine sufficiently warms upthe RPM will raise at which time the manualbi starter should be released.
49STARTING
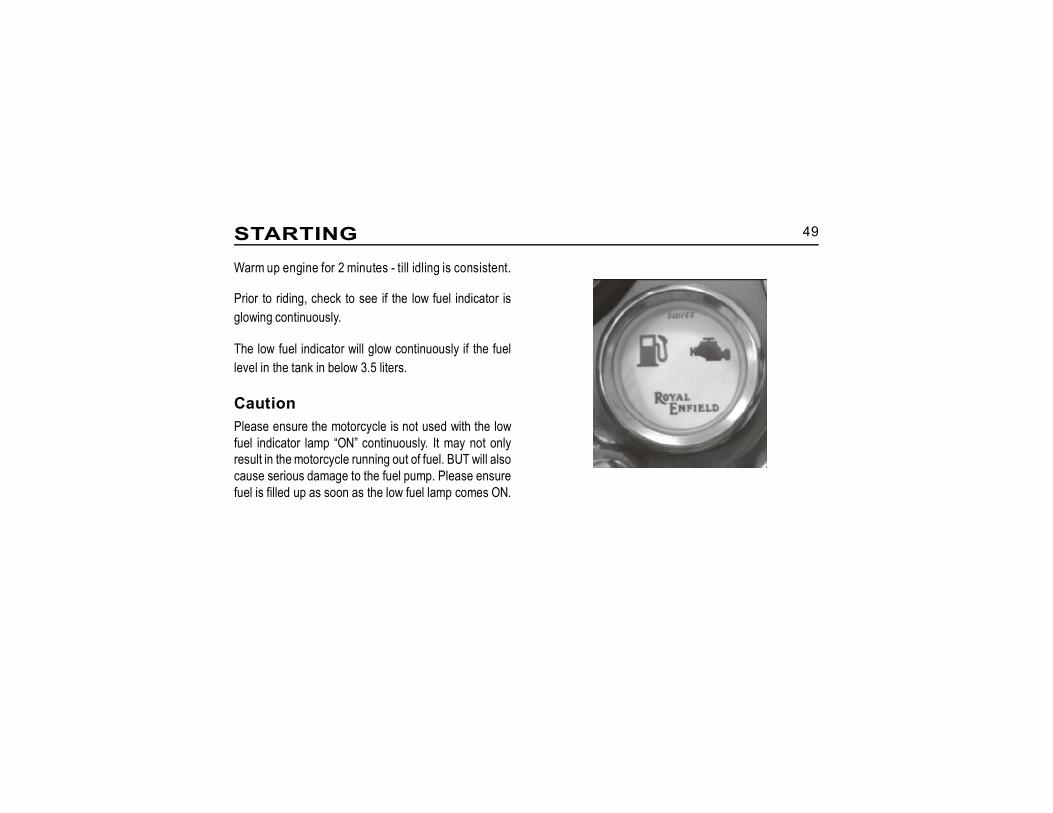
Warm up engine for 2 minutes - till idling is consistent.
Prior to riding, check to see if the low fuel indicator isglowing continuously.
The low fuel indicator will glow continuously if the fuellevel in the tank in below 3.5 liters.
CautionPlease ensure the motorcycle is not used with the lowfuel indicator lamp “ON” continuously. It may not onlyresult in the motorcycle running out of fuel. BUT will alsocause serious damage to the fuel pump. Please ensurefuel is filled up as soon as the low fuel lamp comes ON.

50GEAR SHIFTING
CAUTIONThe clutch must be fully disengaged before attempting to shift gears. Failure to fully disengage the clutch may
cause a jerky start and / OR stalling of the engine besides causing damage to transmission parts.
Warm up engine for 2 minutes - til l idling isconsistent.
Pull clutch lever towards the hand grip.
Depress gear lever with toe to engage 1st gear.
Gently open thrott le and release c lutchsimultaneously. If clutch is released suddenly, theengine may stall and cause a jerky start.
NOTE :Always start motorcycle in neutral. Alwaysmove motorcycle in first gear.
51
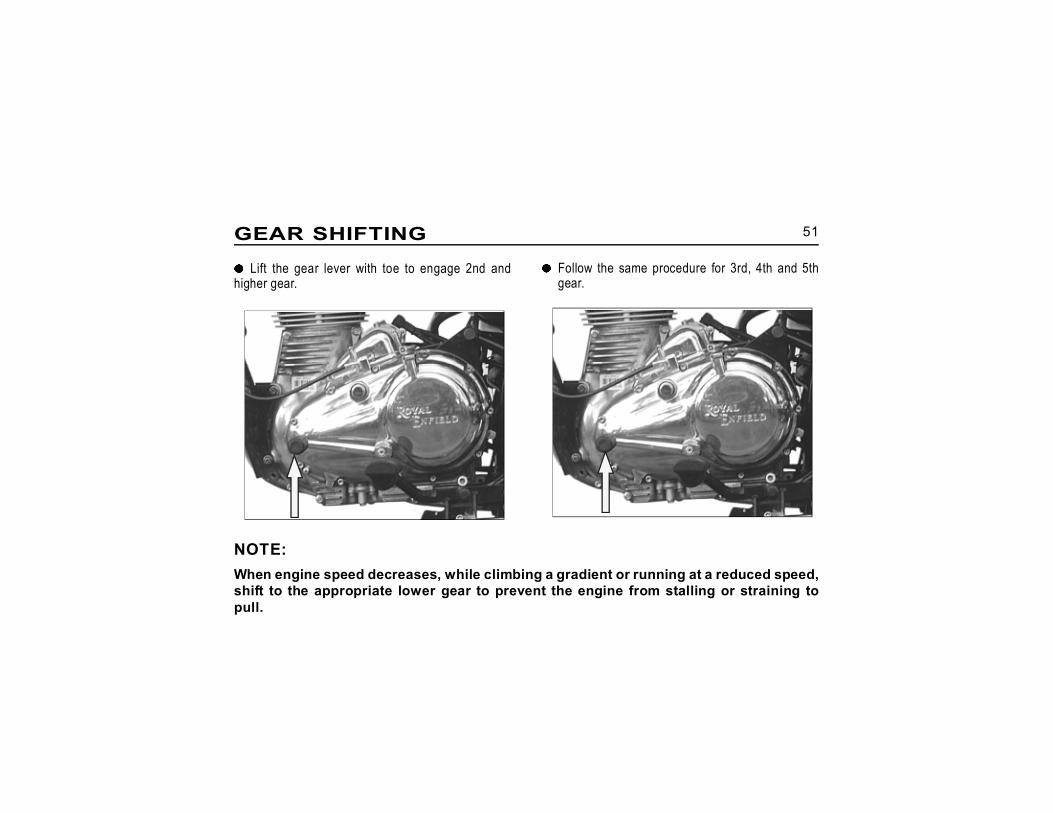
Lift the gear lever with toe to engage 2nd andhigher gear.
Follow the same procedure for 3rd, 4th and 5thgear.
GEAR SHIFTING
NOTE:When engine speed decreases, while climbing a gradient or running at a reduced speed,shift to the appropriate lower gear to prevent the engine from stalling or straining topull.

52GEAR SHIFTING
CAUTIONWhen difficulty of shifting gears is experienced,
do not under any circumstance, attempt to force theshift. The results of such abuse will be a damaged orbroken shifter mechanism, which if not avoided mayresult in minor or moderate injury.
CAUTIONShift gears to neutral before stopping engine.
Shifting mechanism can be damaged by shifting gearswhile engine is stopped.
WARNINGShifting to lower gears when motorcycle speed
is too high, can severely damage the transmission orcause the rear wheel to lose traction resulting inpossible loss of vehicle control and loss of life orserious injury.

53
Select a firm, flat surfaceHold handle bar straightLower center stand, and ensure that both the legsof the stand are resting evenly on firm ground.Apply pressure on the fulcrum lever on the centerstand and pull motorcycle backwards, gently.
PARKING
WARNINGAlways park the motor cycle on a firm and flat surface. Parking in a soft ground may
cause stand to sink and the motorcycle to fall, causing injury to you or to others and damageto the motorcycle parts.
PARKING MOTORCYCLE ON CENTER STAND PARKING MOTORCYCLE ON SIDE STAND
Select a firm, flat surfaceLower Side Stand and gently tilt motorcycle to theleft till it rests firmly.A side stand ON safety switch is fitted on the sidestand of the motorcycle. If the side stand is inextended position, it will prevent the engine fromstarting. Please ensure the side stand is retractedfully before attempting to start engine.
54TOOLS AND SPARES KIT
1. Tool Wallet 12. Tommy bar 13. Tubular spanner (21 x 24mm) 14. Screw driver 15. Double end spanners :
(10 × 13 mm) 2(8 × 10 mm) 1(14 × 15 mm) 1(22 × 24) 1(¼ “ X 5/16”) 1
6. Allen Keys :(5 mm) 1(3 mm) 1
(6 mm) 1
7. Tire Lever 2 Nos
As a fore thought, the following essential parts arealso provided with each motorcycle. Please ensurethat you collect these parts while taking delivery ofyour motorcycle.
1. Speedo cable
2. Clutch cable
3. Pneumatic Tube for tyre

55RECOMMENDED LUBRICANTS
WARNINGDo NOT switch oil brands indiscriminately because some oil interacts chemically
when mixed. Use of inferior oils or non-detergent oils can damage the engine.
Engine oil 15 W 50 API SL GradeGrade JASO MA, ESTER - Semi Synthetic oilCapacity 2.75 LitersFront Fork Fork oilCapacity 200 m / leg.Brake Fluid DOT 3 or DOT 4Capacity 60 ml.
56PRE OPERATIVE CHECKS
A careful check of the following must be carried out every time before riding and especially after long periods ofstorage, to determine if additional maintenance is necessary.1. Tires for correct pressure, abrasions or cuts.
2. Rear chain for proper tension.
3. Brakes, steering and throttle for responsiveness.
4. Cable for fraying or crimping and free operation.
5. Engine oil level.
6. Wheel spoke for proper tightness, no breakage,
7. Headlamp, tail lamp, brake lamp and directional lamps for proper operation.
WARNINGFor your personal welfare and safety, all the points mentioned above should be
performed periodically. Failure to do so may affect safe operation and damage yourmotorcycle and could result in an accident causing serious injury or loss of life.

57
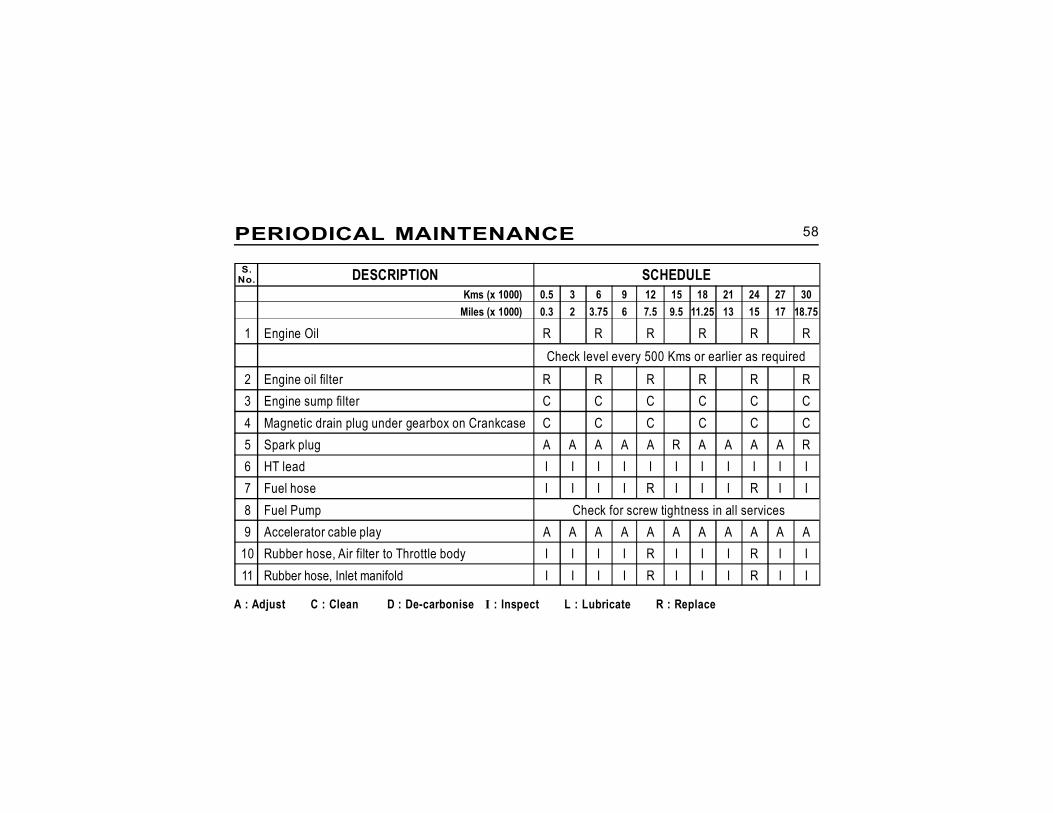
The maintenance schedule detailed here will help you maintain your Royal Enfield motorcyclemeticulously and to get a long trouble free service. The schedule provided herein is based uponaverage riding conditions and indicates the mileage at which regular inspections, adjustments,replacements and lubrications must be carried out. The frequency of the maintenance must beshortened depending upon the severity of the driving condition OR if the motorcycle is used in avery dusty environment, severe climatic cold and hot conditions, bad roads, stagnant water etc.,Contact a nearest Royal Enfield Dealer for expert advice and to carry out the periodical maintenance.
WARNINGFor your personal welfare, all the listed service and maintenance recommendations
should be performed. Lack of regular maintenance at the suggested intervals may affectthe safe operation of your motorcycle causing the motorcycle to malfunction and stallabruptly resulting in an accident and cause serious injury or loss of life.
PERIODICAL MAINTENANCE
58
DESCRIPTION SCHEDULE
A : Adjust C : Clean D : De-carbonise I : Inspect L : Lubricate R : Replace
PERIODICAL MAINTENANCE
Kms (x 1000) 0.5 3 6 9 12 15 18 21 24 27 30Miles (x 1000) 0.3 2 3.75 6 7.5 9.5 11.25 13 15 17 18.75
1 Engine Oil R R R R R RCheck level every 500 Kms or earlier as required
2 Engine oil filter R R R R R R3 Engine sump filter C C C C C C4 Magnetic drain plug under gearbox on Crankcase C C C C C C5 Spark plug A A A A A R A A A A R6 HT lead I I I I I I I I I I I7 Fuel hose I I I I R I I I R I I8 Fuel Pump Check for screw tightness in all services9 Accelerator cable play A A A A A A A A A A A
10 Rubber hose, Air filter to Throttle body I I I I R I I I R I I11 Rubber hose, Inlet manifold I I I I R I I I R I I
S.No.
59
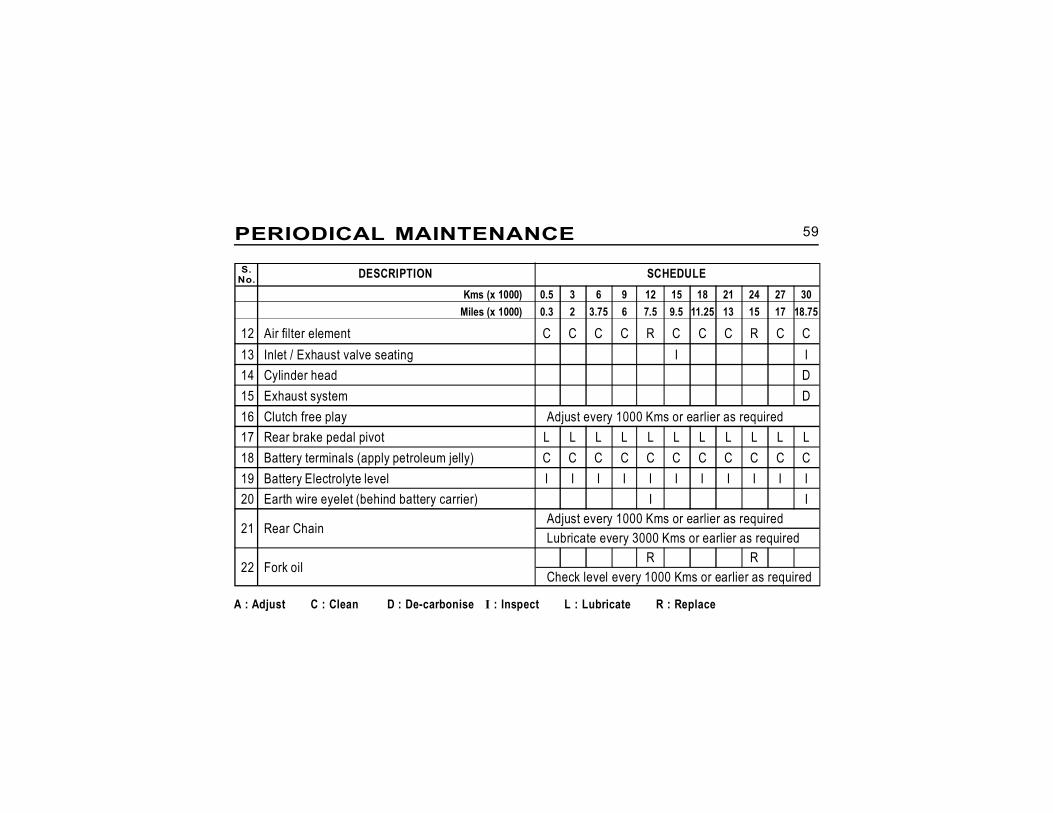
DESCRIPTION SCHEDULE
PERIODICAL MAINTENANCE
Kms (x 1000) 0.5 3 6 9 12 15 18 21 24 27 30Miles (x 1000) 0.3 2 3.75 6 7.5 9.5 11.25 13 15 17 18.75
12 Air filter element C C C C R C C C R C C13 Inlet / Exhaust valve seating I I14 Cylinder head D15 Exhaust system D16 Clutch free play Adjust every 1000 Kms or earlier as required17 Rear brake pedal pivot L L L L L L L L L L L18 Battery terminals (apply petroleum jelly) C C C C C C C C C C C19 Battery Electrolyte level I I I I I I I I I I I20 Earth wire eyelet (behind battery carrier) I I
21 Rear ChainAdjust every 1000 Kms or earlier as requiredLubricate every 3000 Kms or earlier as required
22 Fork oilR R
Check level every 1000 Kms or earlier as required
A : Adjust C : Clean D : De-carbonise I : Inspect L : Lubricate R : Replace
S.No.
60
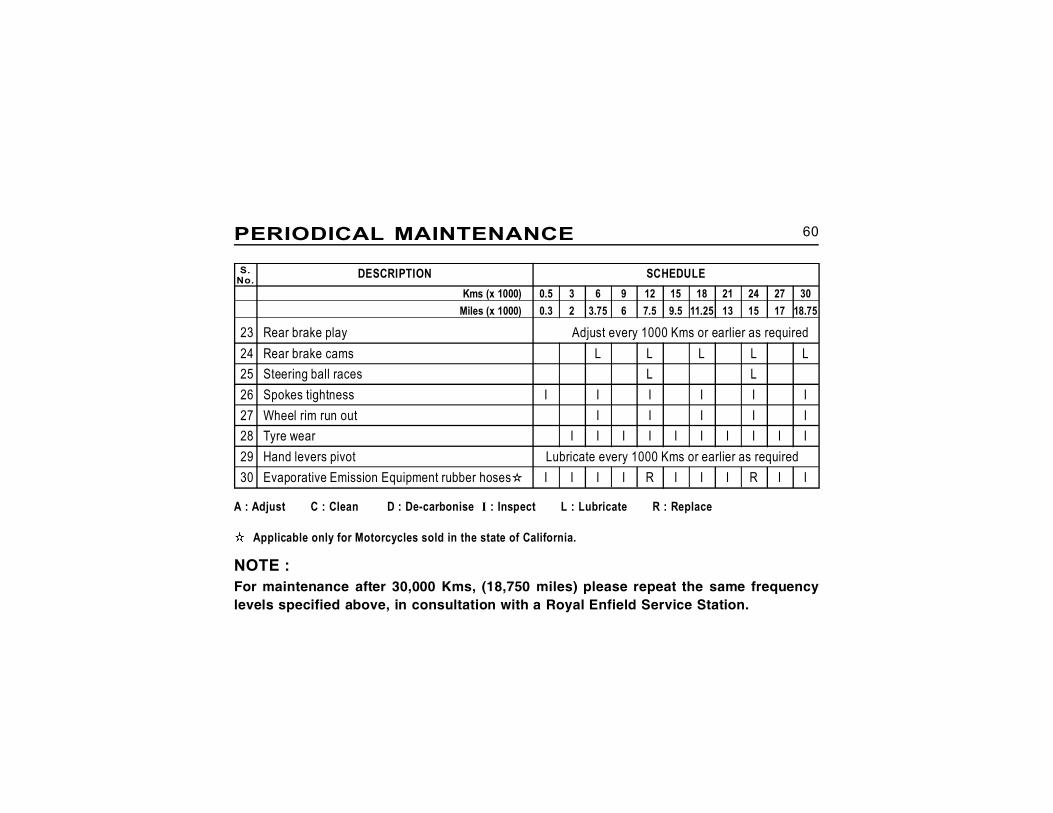
S.No. DESCRIPTION SCHEDULE
A : Adjust C : Clean D : De-carbonise I : Inspect L : Lubricate R : Replace
Applicable only for Motorcycles sold in the state of California.
PERIODICAL MAINTENANCE
NOTE :For maintenance after 30,000 Kms, (18,750 miles) please repeat the same frequencylevels specified above, in consultation with a Royal Enfield Service Station.
Kms (x 1000) 0.5 3 6 9 12 15 18 21 24 27 30Miles (x 1000) 0.3 2 3.75 6 7.5 9.5 11.25 13 15 17 18.75
23 Rear brake play Adjust every 1000 Kms or earlier as required24 Rear brake cams L L L L L25 Steering ball races L L26 Spokes tightness I I I I I I27 Wheel rim run out I I I I I28 Tyre wear I I I I I I I I I I29 Hand levers pivot Lubricate every 1000 Kms or earlier as required30 Evaporative Emission Equipment rubber hoses I I I I R I I I R I I
61MINOR MAINTENANCE TIPS
The following minor maintenance can be carried outeasily with simple tools. However, In case, it is feltthat the adjustments are best done by an expert, werecommend that the motorcycle be taken to a nearestAuthorized Royal Enfield service station.
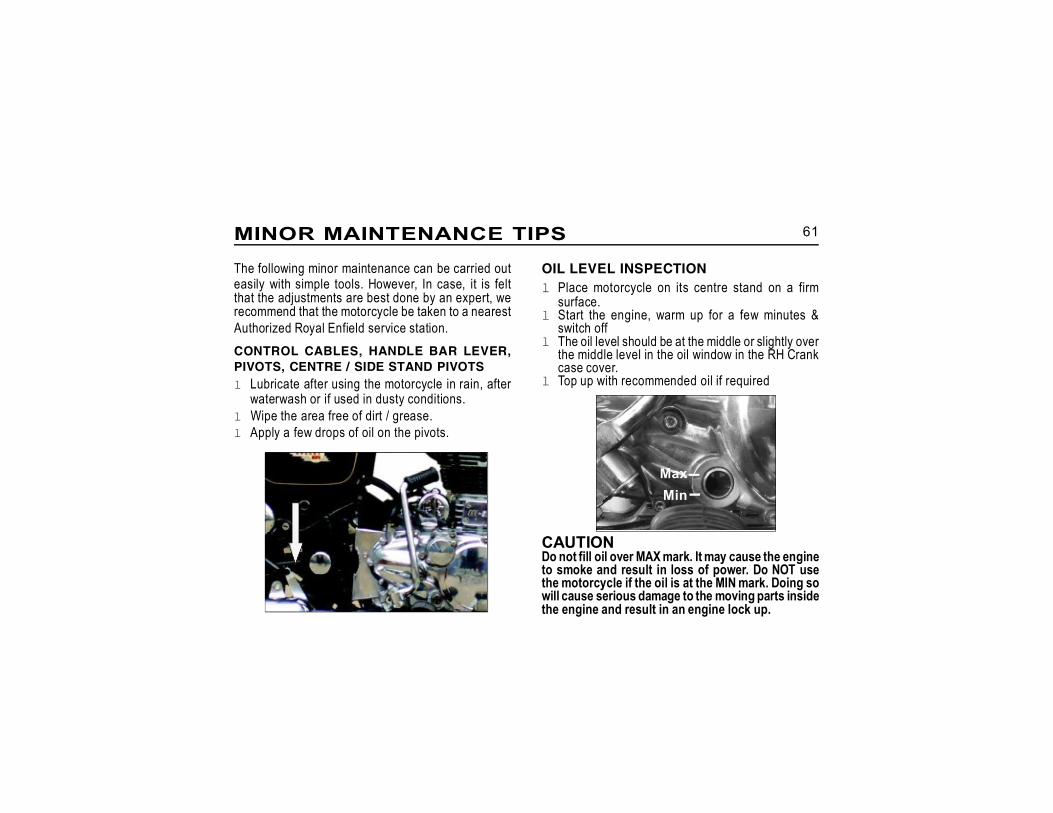
l Place motorcycle on its centre stand on a firmsurface.
l Start the engine, warm up for a few minutes &switch off
l The oil level should be at the middle or slightly overthe middle level in the oil window in the RH Crankcase cover.
l Top up with recommended oil if required
CONTROL CABLES, HANDLE BAR LEVER,PIVOTS, CENTRE / SIDE STAND PIVOTSl Lubricate after using the motorcycle in rain, after
waterwash or if used in dusty conditions.l Wipe the area free of dirt / grease.l Apply a few drops of oil on the pivots.
OIL LEVEL INSPECTION
MaxMin
CAUTIONDo not fill oil over MAX mark. It may cause the engineto smoke and result in loss of power. Do NOT usethe motorcycle if the oil is at the MIN mark. Doing sowill cause serious damage to the moving parts insidethe engine and result in an engine lock up.
62MINOR MAINTENANCE TIPS
NOTE:Replace oil filter whenever oil is replaced.
Caution:Do not fill oil over MAX mark. It may cause theengine to smoke and result in loss of power. DoNOT use the motorcycle if the oil is at the MINmark. Doing so will cause serious damage to themoving parts inside the engine and result in anengine lock up.
WARNINGDo NOT switch oil brands indis-criminately.
Some oils may react chemically when mixed. Useof of wrong grade, inferior OR non detergent oilscan damage the engine and lead to a potentiallyhazardous situation which, if not avoided, couldresult in severe damage to the engine parts andcause the engine to lock up and stop themotorcycle abruptly, which may result in anaccident and cause serious injury or loss of life.
ENGINE - OIL CHANGE(Refer Periodical Maintenance Chart for frequency)- Place motorcycle on its centre on a firm flat surface.- Keep a clean tray below the engine.- Start engine and warm sufficiently so as to help the
oil to drain out quickly.- Remove the oil drain plug and the suction filter at the
bottom of the crankcase.- Remove the oil filter on the RH Crankcase cover.- Allow maximum oil to drain out by tilting the motorcycle
to both sides.- Wash the drain plug and the suction filter thoroughly
and refit on the crankcase- Soak a new filter element in oil and refit on the RH
Crankcase cover.- Fill recommended oil till the oil level is between the
MAX and MIN marks in the oil level window in the RHCrank case cover.
- Start the engine, warm up for a few minutes & switchoff
- Check the oil level after two minutes to see if the oillevel is at the middle or slightly over the middle levelin the oil window.
- Top up with recommended oil if required
63
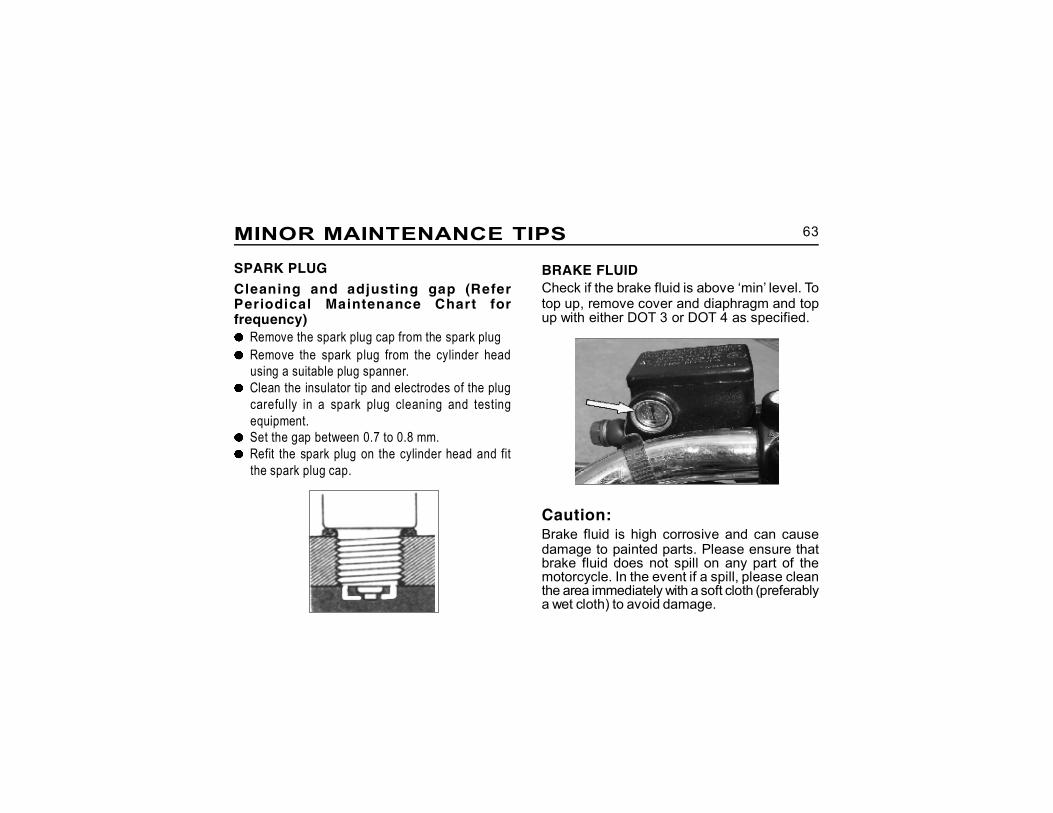
BRAKE FLUIDCheck if the brake fluid is above ‘min’ level. Totop up, remove cover and diaphragm and topup with either DOT 3 or DOT 4 as specified.
Cleaning and adjusting gap (ReferPeriodical Maintenance Chart forfrequency)
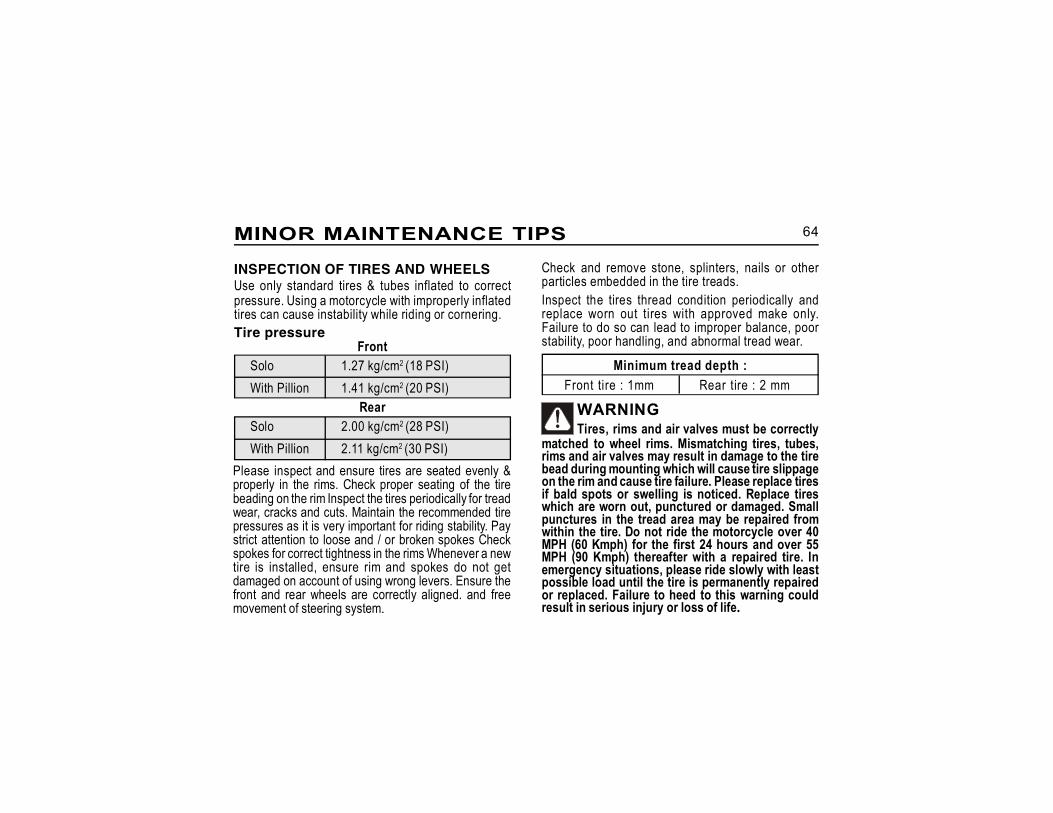
Remove the spark plug cap from the spark plugRemove the spark plug from the cylinder headusing a suitable plug spanner.Clean the insulator tip and electrodes of the plugcarefully in a spark plug cleaning and testingequipment.Set the gap between 0.7 to 0.8 mm.Refit the spark plug on the cylinder head and fitthe spark plug cap.
MINOR MAINTENANCE TIPS
Caution:Brake fluid is high corrosive and can causedamage to painted parts. Please ensure thatbrake fluid does not spill on any part of themotorcycle. In the event if a spill, please cleanthe area immediately with a soft cloth (preferablya wet cloth) to avoid damage.
SPARK PLUG
64
INSPECTION OF TIRES AND WHEELSUse only standard tires & tubes inflated to correctpressure. Using a motorcycle with improperly inflatedtires can cause instability while riding or cornering.
MINOR MAINTENANCE TIPS
WARNINGTires, rims and air valves must be correctly
matched to wheel rims. Mismatching tires, tubes,rims and air valves may result in damage to the tirebead during mounting which will cause tire slippageon the rim and cause tire failure. Please replace tiresif bald spots or swelling is noticed. Replace tireswhich are worn out, punctured or damaged. Smallpunctures in the tread area may be repaired fromwithin the tire. Do not ride the motorcycle over 40MPH (60 Kmph) for the first 24 hours and over 55MPH (90 Kmph) thereafter with a repaired tire. Inemergency situations, please ride slowly with leastpossible load until the tire is permanently repairedor replaced. Failure to heed to this warning couldresult in serious injury or loss of life.
Please inspect and ensure tires are seated evenly &properly in the rims. Check proper seating of the tirebeading on the rim Inspect the tires periodically for treadwear, cracks and cuts. Maintain the recommended tirepressures as it is very important for riding stability. Paystrict attention to loose and / or broken spokes Checkspokes for correct tightness in the rims Whenever a newtire is installed, ensure rim and spokes do not getdamaged on account of using wrong levers. Ensure thefront and rear wheels are correctly aligned. and freemovement of steering system.
Check and remove stone, splinters, nails or otherparticles embedded in the tire treads.Inspect the tires thread condition periodically andreplace worn out tires with approved make only.Failure to do so can lead to improper balance, poorstability, poor handling, and abnormal tread wear.
Minimum tread depth : Front tire : 1mm Rear tire : 2 mm
Tire pressureFront
Solo 1.27 kg/cm2 (18 PSI)With Pillion 1.41 kg/cm2 (20 PSI)
RearSolo 2.00 kg/cm2 (28 PSI)With Pillion 2.11 kg/cm2 (30 PSI)
65
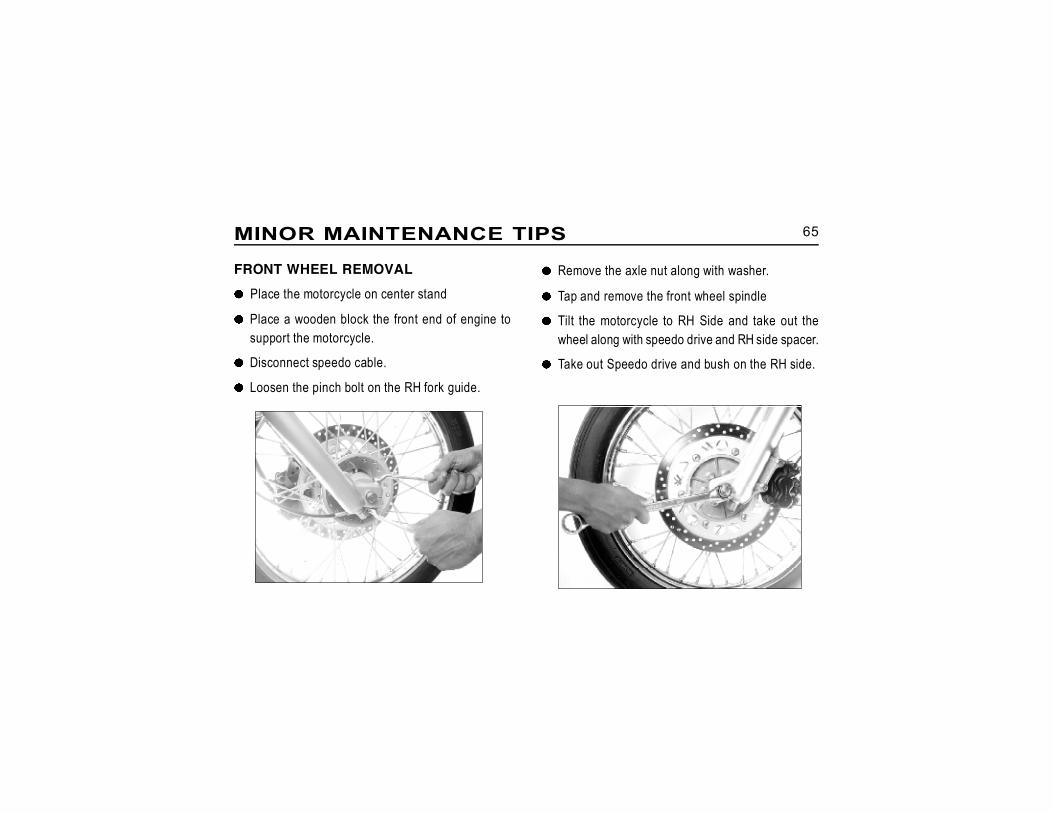
FRONT WHEEL REMOVAL
Place the motorcycle on center stand
Place a wooden block the front end of engine tosupport the motorcycle.
Disconnect speedo cable.
Loosen the pinch bolt on the RH fork guide.
MINOR MAINTENANCE TIPS
Remove the axle nut along with washer.
Tap and remove the front wheel spindle
Tilt the motorcycle to RH Side and take out thewheel along with speedo drive and RH side spacer.
Take out Speedo drive and bush on the RH side.
66
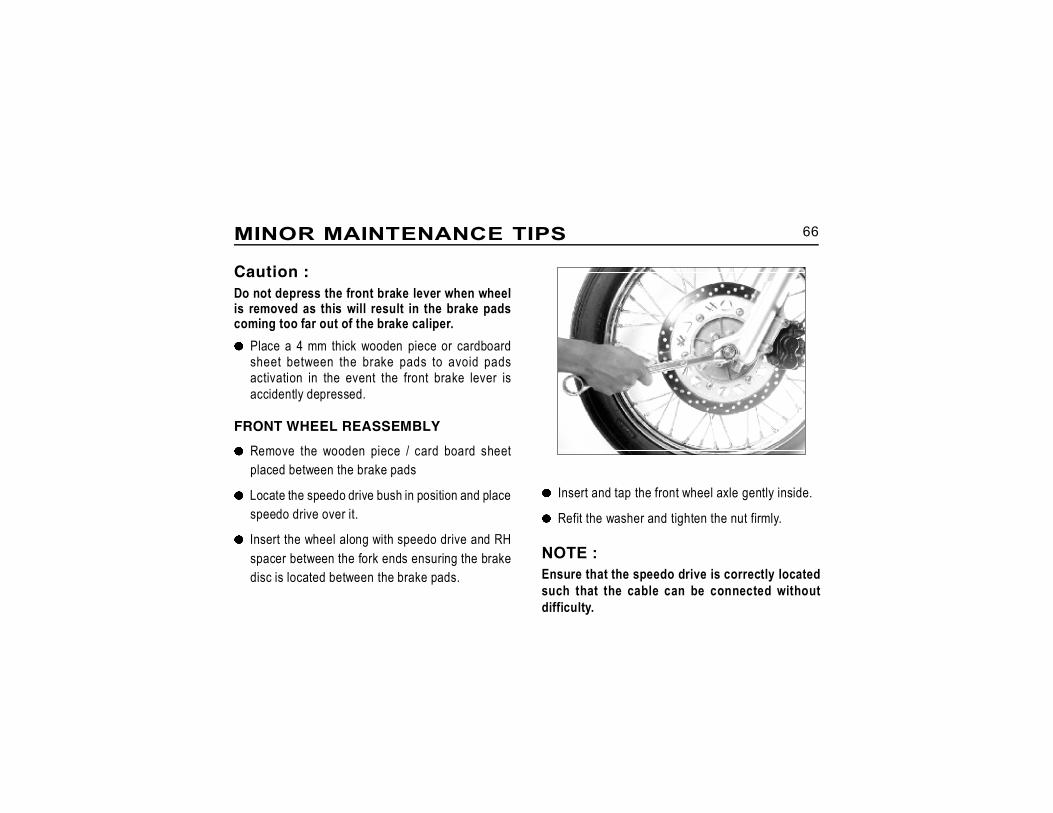
Caution :Do not depress the front brake lever when wheelis removed as this will result in the brake padscoming too far out of the brake caliper.
Place a 4 mm thick wooden piece or cardboardsheet between the brake pads to avoid padsactivation in the event the front brake lever isaccidently depressed.
FRONT WHEEL REASSEMBLY
Remove the wooden piece / card board sheetplaced between the brake pads
Locate the speedo drive bush in position and placespeedo drive over it.
Insert the wheel along with speedo drive and RHspacer between the fork ends ensuring the brakedisc is located between the brake pads.
MINOR MAINTENANCE TIPS
Insert and tap the front wheel axle gently inside.
Refit the washer and tighten the nut firmly.
NOTE :Ensure that the speedo drive is correctly locatedsuch that the cable can be connected withoutdifficulty.

67
Tighten the pinch bolt on the RH fork guide.
Rotate the wheel and check for smooth rotation.
Connect the speedo cable to speedo drive andcheck for proper working of speedo meter.
Depress brake lever 2 or 3 times to check frontbrake efficiency.
MINOR MAINTENANCE TIPS
REAR WHEEL REMOVAL
Place motorcycle on center stand on a firm andflat surface.
Note and mark the position of the chain adjusterbutting with the stopper on the right side.
Remove split pin and castle nut on the RH side.
68
Remove wheel spindle from LH side along withchain adjuster, taking care not to drop the wheelcollar and spacer from the LH side of the wheel.
Tilt motorcycle to RH side and slide out rear wheel.
REAR WHEEL REASSEMBLY
Ensure the four cush rubbers are in position insidethe rear wheel hub.
Tilt motorcycle to right and insert wheel assemblybetween the swing arms.
Position the rear wheel with cush rubber on therear chain sprocket.
Hold wheel collar and spacer in position.
Introduce the wheel spindle along with chainadjuster from the LH side of motorcycle and gentlytap it through the wheel.
Ensure that the chain adjuster notch butts with thestopper as appropriate when both the front & realwheels are aligned.
Tighten the castle nut firmly and ensure that thehole on axle shaft and the slot on castle nut arealigned to enable split pin fitment.
Fit the split pin.
Caution:Do not force the spindle into the wheel as thethreads may get damaged. Tap it through the wheelgently.
WARNINGEnsure the motorcycle does not come off
centre stand while assembling / disassembling thewheel assembly Failure to adhere could result inloss of life or serious injury
MINOR MAINTENANCE TIPS
69
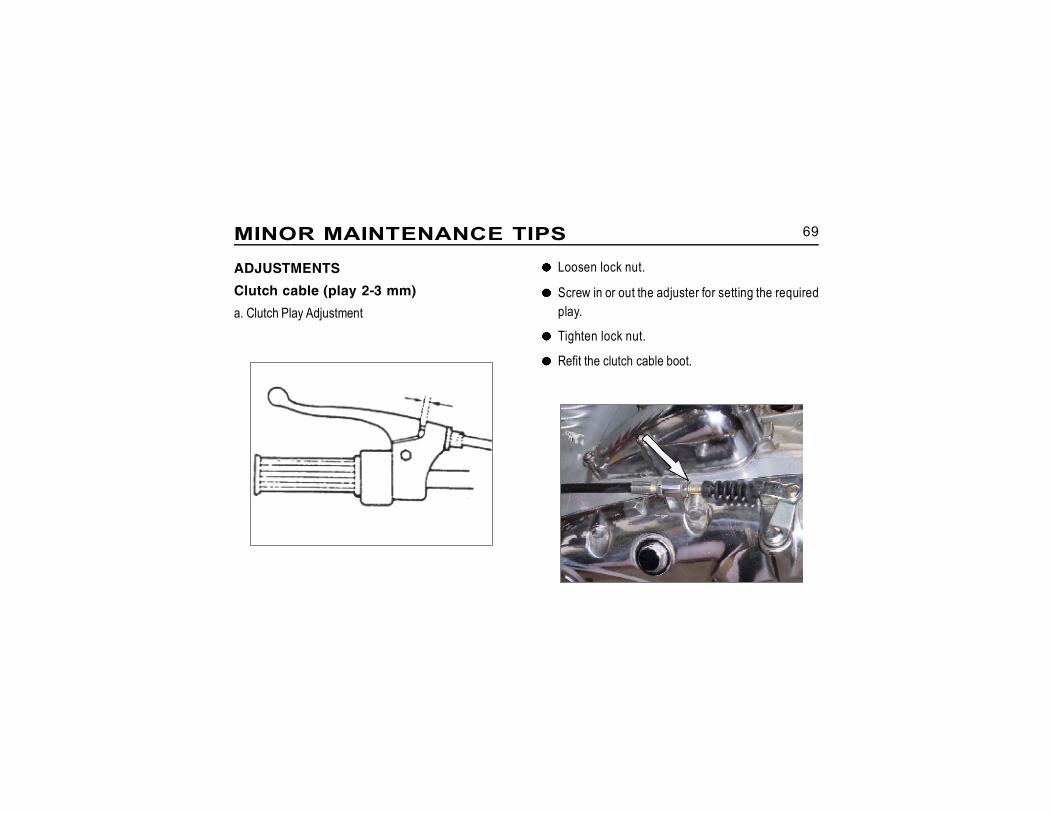
Loosen lock nut.
Screw in or out the adjuster for setting the requiredplay.
Tighten lock nut.
Refit the clutch cable boot.
ADJUSTMENTSClutch cable (play 2-3 mm)a. Clutch Play Adjustment
MINOR MAINTENANCE TIPS
70
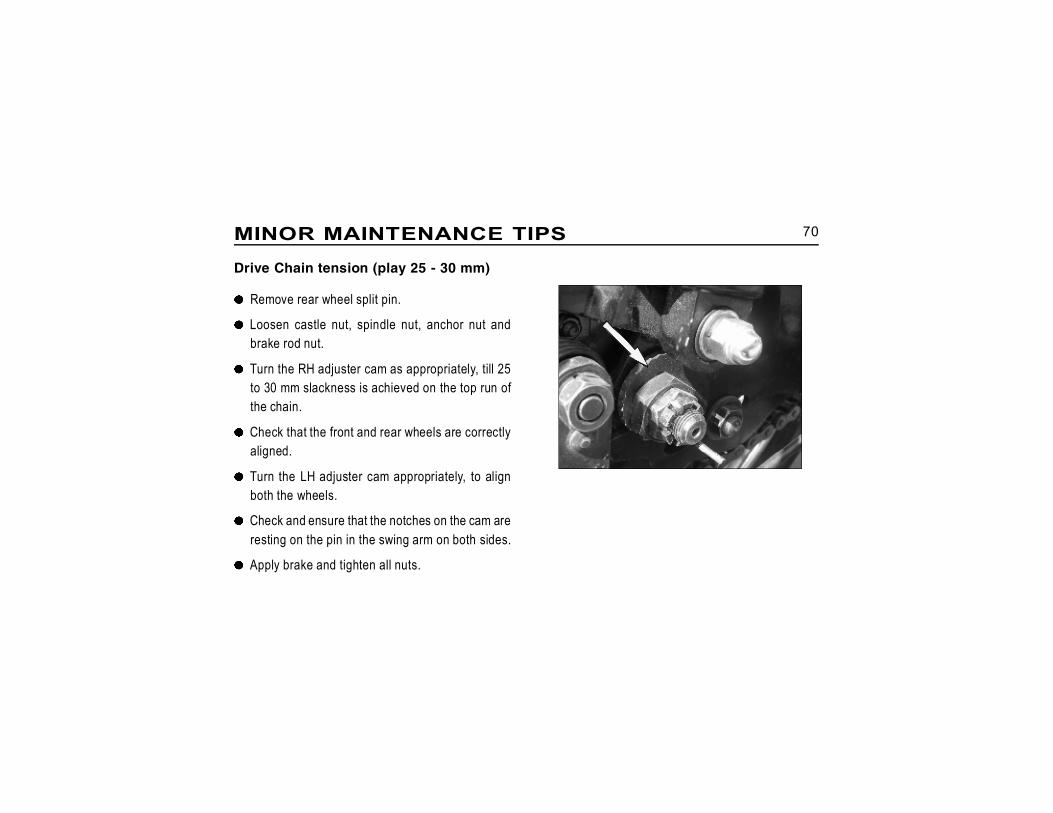
Drive Chain tension (play 25 - 30 mm)
Remove rear wheel split pin.
Loosen castle nut, spindle nut, anchor nut andbrake rod nut.
Turn the RH adjuster cam as appropriately, till 25to 30 mm slackness is achieved on the top run ofthe chain.
Check that the front and rear wheels are correctlyaligned.
Turn the LH adjuster cam appropriately, to alignboth the wheels.
Check and ensure that the notches on the cam areresting on the pin in the swing arm on both sides.
Apply brake and tighten all nuts.
MINOR MAINTENANCE TIPS
71MINOR MAINTENANCE TIPS
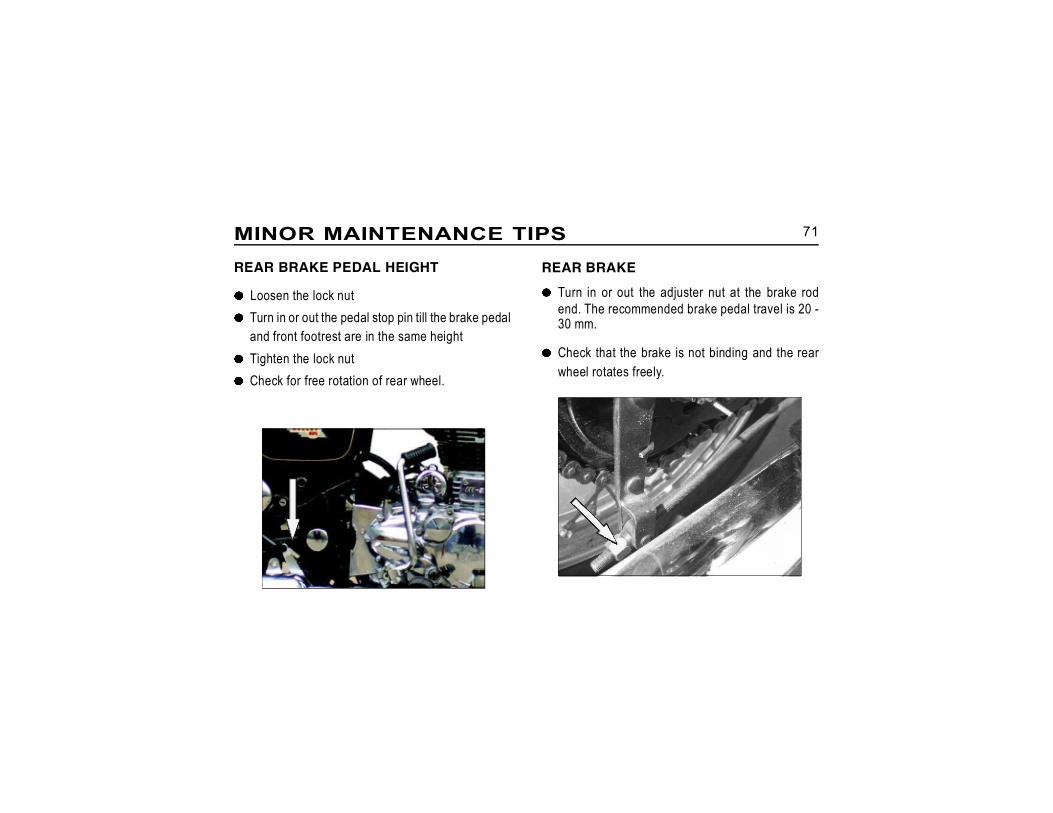
REAR BRAKE PEDAL HEIGHT
Loosen the lock nutTurn in or out the pedal stop pin till the brake pedaland front footrest are in the same heightTighten the lock nutCheck for free rotation of rear wheel.
REAR BRAKE
Turn in or out the adjuster nut at the brake rodend. The recommended brake pedal travel is 20 -30 mm.
Check that the brake is not binding and the rearwheel rotates freely.
72MINOR MAINTENANCE TIPS
WARNINGPlease ensure brakes are adjusted to their
maximum efficiency. Improperly adjusted brakescan result in an accident causing serious injury orloss of life
Please ensure adequate caution while applyingbrakes. Sudden application of brakes can lock thewheel and cause possible loss of control of themotorcycle which can result in an accident causingserious injury or loss of life.
WARNINGBrake shoes must be inspected for wear every
2500 miles (4000 Kms). If you ride under adverseconditions, (steep hills, heavy traffic, etc.) a morefrequent inspection at 1000 miles (1600 Kms) or less,is required.
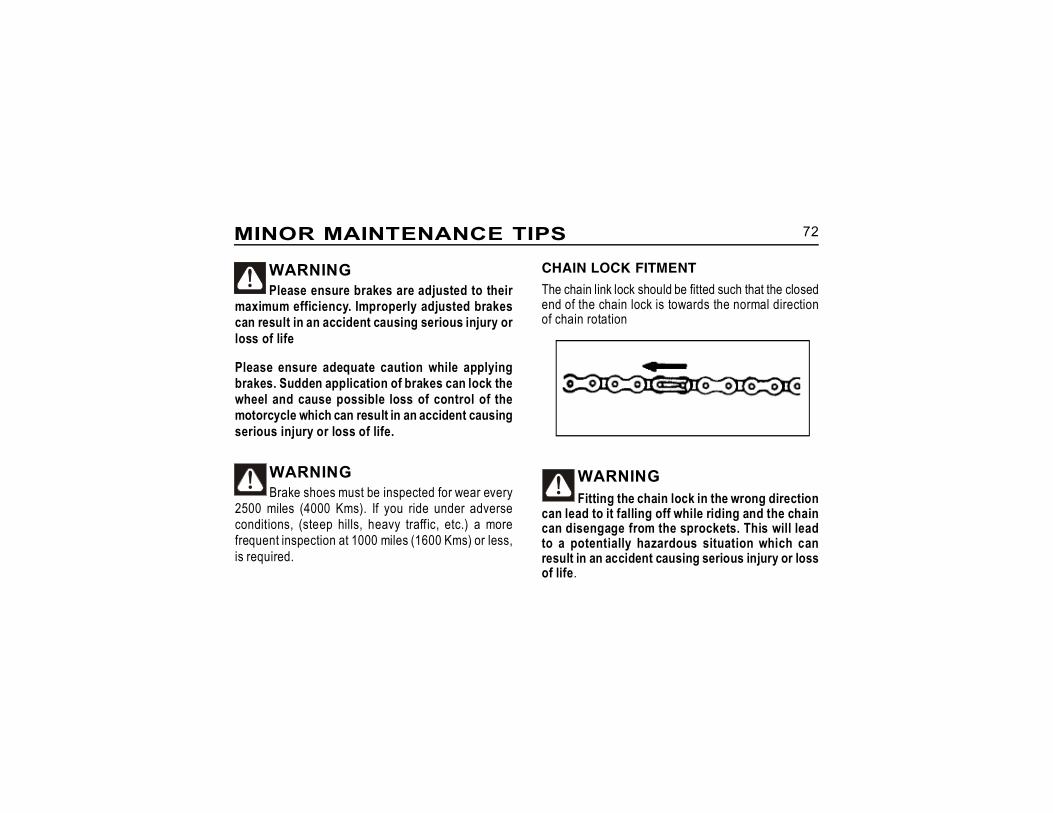
CHAIN LOCK FITMENTThe chain link lock should be fitted such that the closedend of the chain lock is towards the normal directionof chain rotation
WARNINGFitting the chain lock in the wrong direction
can lead to it falling off while riding and the chaincan disengage from the sprockets. This will leadto a potentially hazardous situation which canresult in an accident causing serious injury or lossof life.
73MINOR MAINTENANCE TIPS
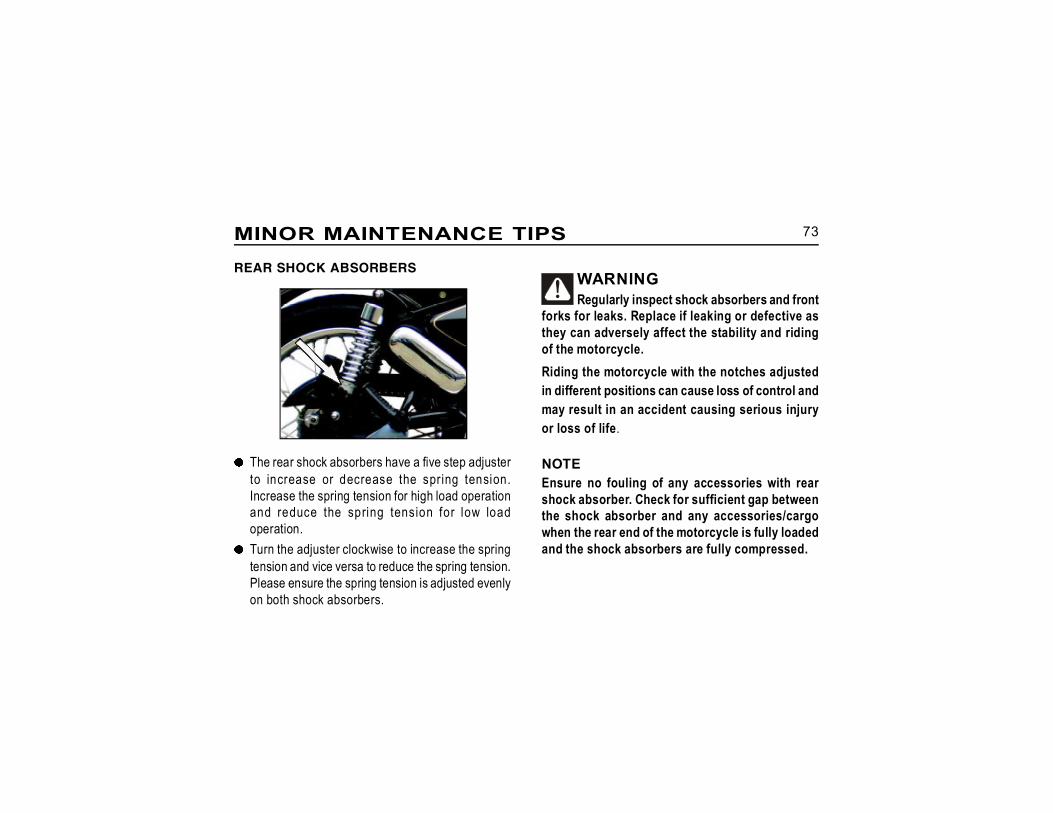
REAR SHOCK ABSORBERSWARNINGRegularly inspect shock absorbers and front
forks for leaks. Replace if leaking or defective asthey can adversely affect the stability and ridingof the motorcycle.Riding the motorcycle with the notches adjustedin different positions can cause loss of control andmay result in an accident causing serious injuryor loss of life.
NOTEEnsure no fouling of any accessories with rearshock absorber. Check for sufficient gap betweenthe shock absorber and any accessories/cargowhen the rear end of the motorcycle is fully loadedand the shock absorbers are fully compressed.
The rear shock absorbers have a five step adjusterto increase or decrease the spring tension.Increase the spring tension for high load operationand reduce the spring tension for low loadoperation.Turn the adjuster clockwise to increase the springtension and vice versa to reduce the spring tension.Please ensure the spring tension is adjusted evenlyon both shock absorbers.
74MINOR MAINTENANCE TIPS
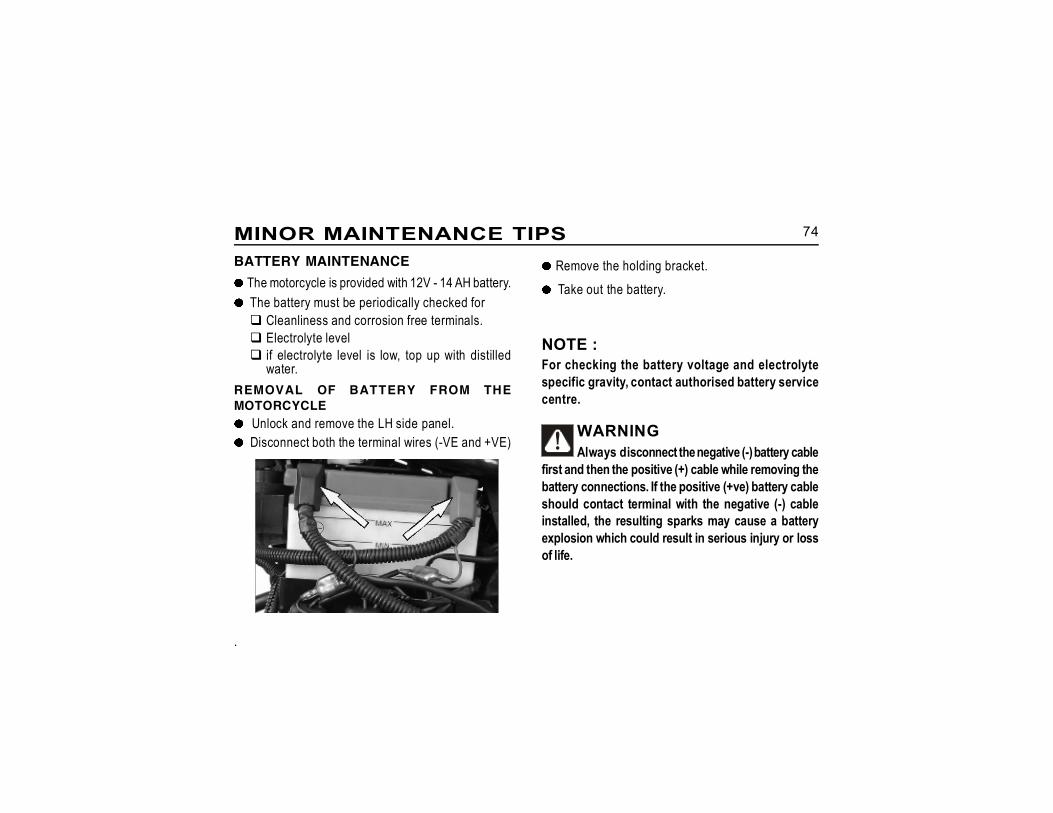
REMOVAL OF BATTERY FROM THEMOTORCYCLE
Unlock and remove the LH side panel.Disconnect both the terminal wires (-VE and +VE)
.
NOTE :For checking the battery voltage and electrolytespecific gravity, contact authorised battery servicecentre.
WARNINGAlways disconnect the negative (-) battery cable
first and then the positive (+) cable while removing thebattery connections. If the positive (+ve) battery cableshould contact terminal with the negative (-) cableinstalled, the resulting sparks may cause a batteryexplosion which could result in serious injury or lossof life.
BATTERY MAINTENANCEThe motorcycle is provided with 12V - 14 AH battery.The battery must be periodically checked for Cleanliness and corrosion free terminals. Electrolyte level if electrolyte level is low, top up with distilled
water.
Remove the holding bracket.Take out the battery.
75MINOR MAINTENANCE TIPS
Caution:Do not use battery with low electrolyte level asthe battery internals will get damaged.Do not overfill the battery electrolyte level as itwill spill out through the overflow pipe andcause corrosion to motorcycle parts.Use only distilled water meant for use inbatteries to avoid damage to battery.
WARNINGBattery terminals and internals contain lead
and lead components, known to cause cancer andbirth defects or other reproductive harm. Washhands after handling the Electrolyte, which is asulphuric acid solution. Electrolyte is highlycorrosive and can cause severe chemical burns,Avoid contact with skin eyes and clothing. Alwayswear approved protective face shield, rubberized
gloves, and protective clothing when working withbatteries or electrolyte solution. KEEP BATTERIESAND ACID OUT OF REACH OF CHILDREN.
REASSEMBLY OF BATTERY ONMOTORCYCLE
Position the battery in the battery carrier such thatthe terminals are facing inside.Connect the positive terminal (Red wire) first.Connect the negative terminal (Black wire) last.Smear the terminals with petroleum jelly. (Do notuse grease).Locate the battery in the battery carrier and securewith the rubber strapsLocate the battery cover in place and lock thecover.
76MINOR MAINTENANCE TIPS
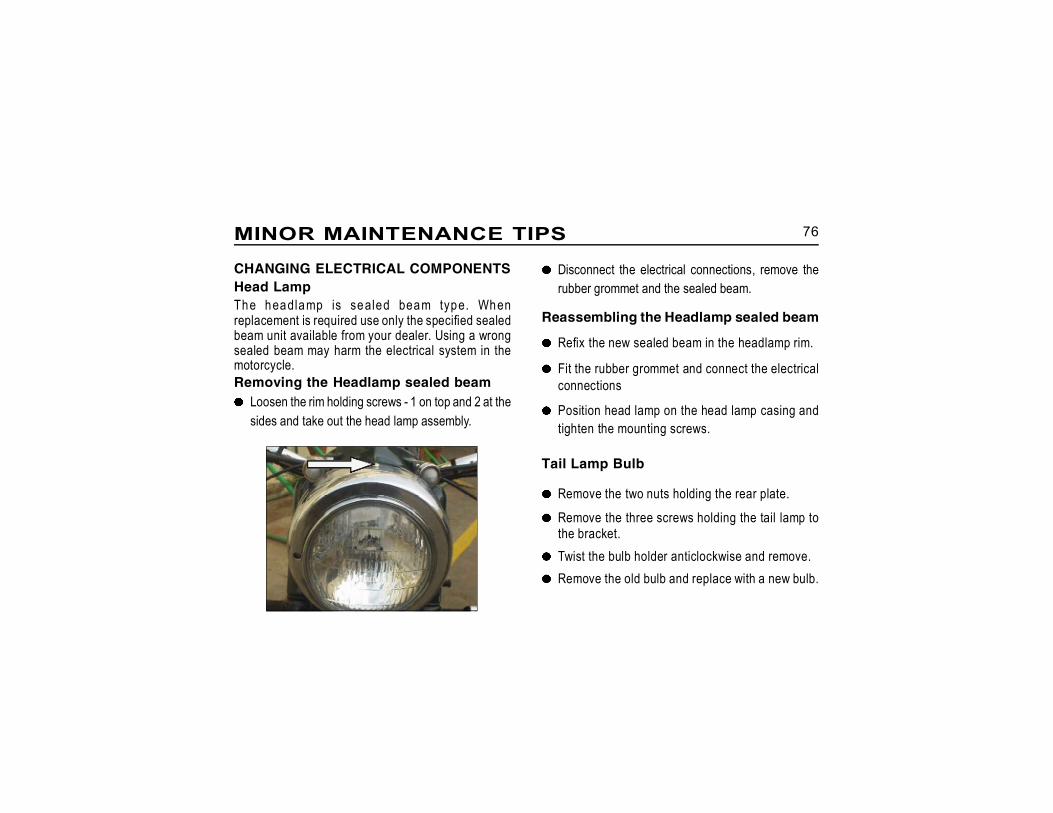
CHANGING ELECTRICAL COMPONENTSHead LampThe headlamp is sealed beam type. Whenreplacement is required use only the specified sealedbeam unit available from your dealer. Using a wrongsealed beam may harm the electrical system in themotorcycle.Removing the Headlamp sealed beam
Loosen the rim holding screws - 1 on top and 2 at thesides and take out the head lamp assembly.
Disconnect the electrical connections, remove therubber grommet and the sealed beam.
Reassembling the Headlamp sealed beam
Refix the new sealed beam in the headlamp rim.
Fit the rubber grommet and connect the electricalconnections
Position head lamp on the head lamp casing andtighten the mounting screws.
Tail Lamp Bulb
Remove the two nuts holding the rear plate.Remove the three screws holding the tail lamp tothe bracket.Twist the bulb holder anticlockwise and remove.Remove the old bulb and replace with a new bulb.
77MINOR MAINTENANCE TIPS
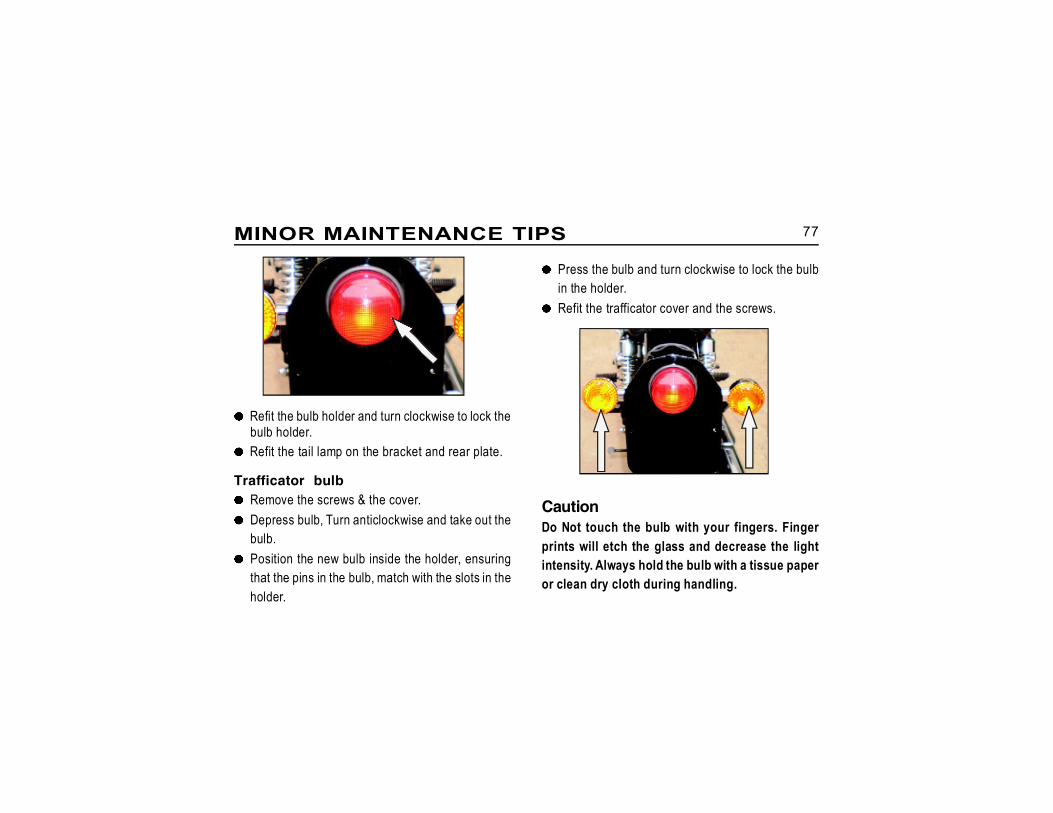
Refit the bulb holder and turn clockwise to lock thebulb holder.Refit the tail lamp on the bracket and rear plate.
Trafficator bulbRemove the screws & the cover.Depress bulb, Turn anticlockwise and take out thebulb.Position the new bulb inside the holder, ensuringthat the pins in the bulb, match with the slots in theholder.
Press the bulb and turn clockwise to lock the bulbin the holder.Refit the trafficator cover and the screws.
CautionDo Not touch the bulb with your fingers. Fingerprints will etch the glass and decrease the lightintensity. Always hold the bulb with a tissue paperor clean dry cloth during handling.
78MINOR MAINTENANCE TIPS
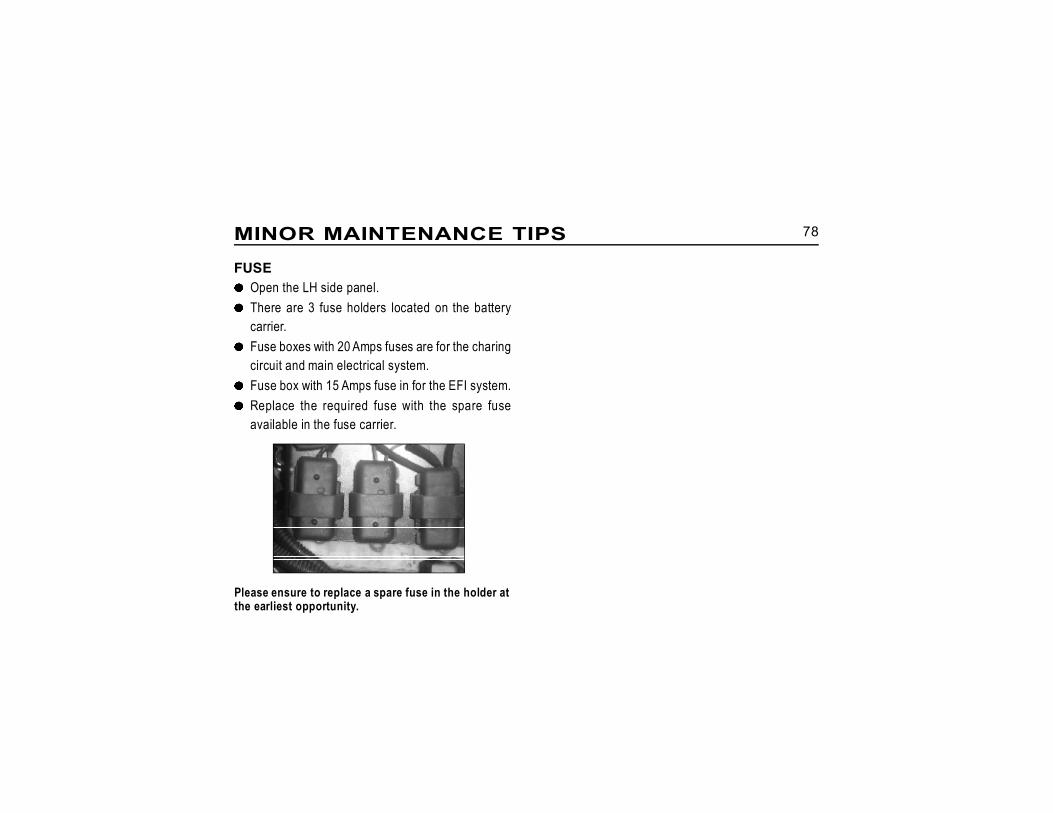
FUSEOpen the LH side panel.There are 3 fuse holders located on the batterycarrier.Fuse boxes with 20 Amps fuses are for the charingcircuit and main electrical system.Fuse box with 15 Amps fuse in for the EFI system.Replace the required fuse with the spare fuseavailable in the fuse carrier.
Please ensure to replace a spare fuse in the holder atthe earliest opportunity.

79
PRECAUTIONS
Wash motorcycle when the engine is cold.Cover the silencer tail end and control switcheswith suitable plastic bags and tie it firmly to preventwater entry into them.Remove ignition key and seal key hole usingadhesive tape.Use a suitable engine degreaser, available withyour local parts store, to remove dirt or grease fromthe engine external parts if required. Follow thedirections in the label carefully before using thedegreaser.Use low pressure jet of water to clean the entiremotorcycle.Never spray water with great force on head lamp,speedometer, flasher lights, front and rear wheelhubs, electrical connections and wires, controlcables, Throttle body, sparkplug, battery, etc.
WASHING PROCEDURE
Use Luke warm water and mild detergent on thepainted components to remove dirt, etc.Rinse motorcycle thoroughly with plain water toremove the detergent and wipe motorcycle dry.If possible, use compressed air and blow off waterparticles from the obscure areas of the motorcycle,electrical connections, etc.
AFTER WASHING
Ensure, the motorcycle is thoroughly dry by wipingwith a clean soft absorbent cloth or chamoisleather.Remove all plastic bags and adhesive tapes.Lubricate control cables, pivot and rear chain withlube oilPolish the painted and plated surfaces usingpolishing wax.
80WASHING PROCEDURE
Start engine and allow to run at idling speed for afew minutes to warm up engine.Drive the motorcycle slowly, applying both brakesintermittently to dry up the brake shoes.
Test brakes for full efficiency.
WARNINGObserve warnings and cautions given on
labels of cleaning compounds.When washing your motorcycle, be careful not toget the brakes, engine, mufflers or air cleaner etc.,too wet. Wet brake shoe and / or brake drum canaffect braking. Ensure brakes and the motorcycleis operating properly before riding in traffic.

81
Incase your Motorcycle is not going to be used for amonth or more, we advice the following precautionsto the taken.
Carryout required repair / adjustments on themotorcycle.Wash the motorcycle thoroughly and lubricate asper the maintenance chart.Start the engine, warm up for a few minutes andswitch off.Drain out the fuel completely from the fuel tank andfuel lines.Remove spark plug. Pour in about 50ml of cleanengine oil through spark plug hole. Close the holeand crank engine several times and refit sparkplug.Clean rear chain thoroughly and apply a thin filmof lube oil.Remove battery from the motorcycle. Clean theterminals free of corrosion.
Maintain electrolyte level between max or minmark, by adding distilled water and wipe the batterydry.Store the battery in a cool, dry and well ventilatedplace.Do not place the battery in direct sun light, nearopen flame or where temperature is above 40oCor below 0oCCover the silencer with plastic bags to preventmoisture entry. Set the motorcycle on its centerstand.Apply anti rust solutions on all plated parts. Takecare not to apply this solution on rubber or paintedparts.Store motorcycle in a clean covered area free - ofmoisture and keep it covered to prevent dustsettling on it.
STORAGE PRECAUTION
82
PREPARING THE MOTORCYCLE FOR REUSE
Remove the anti rust solution from all plated partsand clean the motorcycle well.Inflate the tires to the correct tire pressure.Ensure battery is ful ly charged and properelectrolyte level is maintained.Connect the battery.Lubricate all control cables and pivots.Check proper level of oil in engine.Fill fuel tank with fresh petrol.Check fuel line for any cracks or cuts.Clean the air filter.Remove plastic covering from the silencer.Remove spark plug on cylinder head and pour in afew drops of engine oil. Crank engine a few timesto lubricate cylinder walls and piston. Clean sparkplug and refit
Switch on ignition switch.Start motorcycle and warm up engine for a fewminutes before riding the motorcycle.
NOTE :Do not raise the engine rpm the moment it isstarted, but allow the engine to run at idling speed.
CautionProper long-term storage is important for the safe,trouble-free operation of your Royal Enfieldmotorcycle.
STORAGE PRECAUTION
83SAFETY RIDING TIPS
RIDING DRESSPlease wear a proper riding apparel.A pair of riding boots or shoes.Soft leather gloves.Goggles or spectacles to safe guard eyes.A certified helmet. Affix light reflecting strips ofstickers at the front and rear.
NOTE :A light coloured shirt enables greater visibility toother road users especially during nights.
CautionLoose clothing may get caught on moving partsof your motorcycle.SITTING POSTURE:Correct sitting posture is a pre-requisite for stable and safe riding
Sit Straight with your shoulders completely relaxed.Keep your elbows close to your body.
Keep your toes in straight ahead direction.Slightly grip the petrol tank with both knees.Hold the handle bar grips, close to its inner end.Look extensively ahead, including rear viewmirrors, without turning the head.
BRAKINGApply f ront and rear brakes gent ly andsimultaneously for maximum braking efficiency.
WARNINGApplying any one of the brakes suddenly
may cause the motorcycle to skid. The hydraulicdisc brake fitted on your motorcycle requires veryless effort. High effort or sudden application maylock the wheel. Please use utmost caution whileapplying the brakes.
While riding on wet or bad road conditions usebrakes cautiously.Avoid excessive banking, otherwise footrest maytouch the ground and cause instability.
84
Checks prior to the commencement oflong journey
Service the motorcycle through a Royal Enfieldauthorised service centre as per periodicalmaintenance chart.Ensure there is sufficient quantity of petrol in thefuel tank.Correct tire pressure.Correct oil levels in Engine, brake master cylinder.Good battery condition and electrolyte level.Proper chain tension and correctly adjusted rearbrakes.Check for proper functioning of all lights & hornetc.,
Checks after every 930 miles (1500 kms)of run
Tightness of all fasteners.Tire treads condition and wear of tires.Battery condition and electrolyte level.
Correct level of oil in engine, brake fluid.Working of all lights and horn.Proper chain tension.
Items to be carried
Tool kitFirst aid kit.Bulbs for headlight, trafficator light, rear tail lampand fuse (20 Amps).Accelerator, clutch, and Bi starter cables.Rear chain link lock assembly.Spare tube, t i re puncture repair ki t - co ldvulcanizing type.Foot operated air pump.
Insulation tape.
Spark plug, spark plug cap, fuel hose.
LONG TRIP PRECAUTIONS

85
WIR
ING DIA
GRAM
WIRING DIAGRAM
86
WIR
ING DIA
GRAM
WIRING DIAGRAM
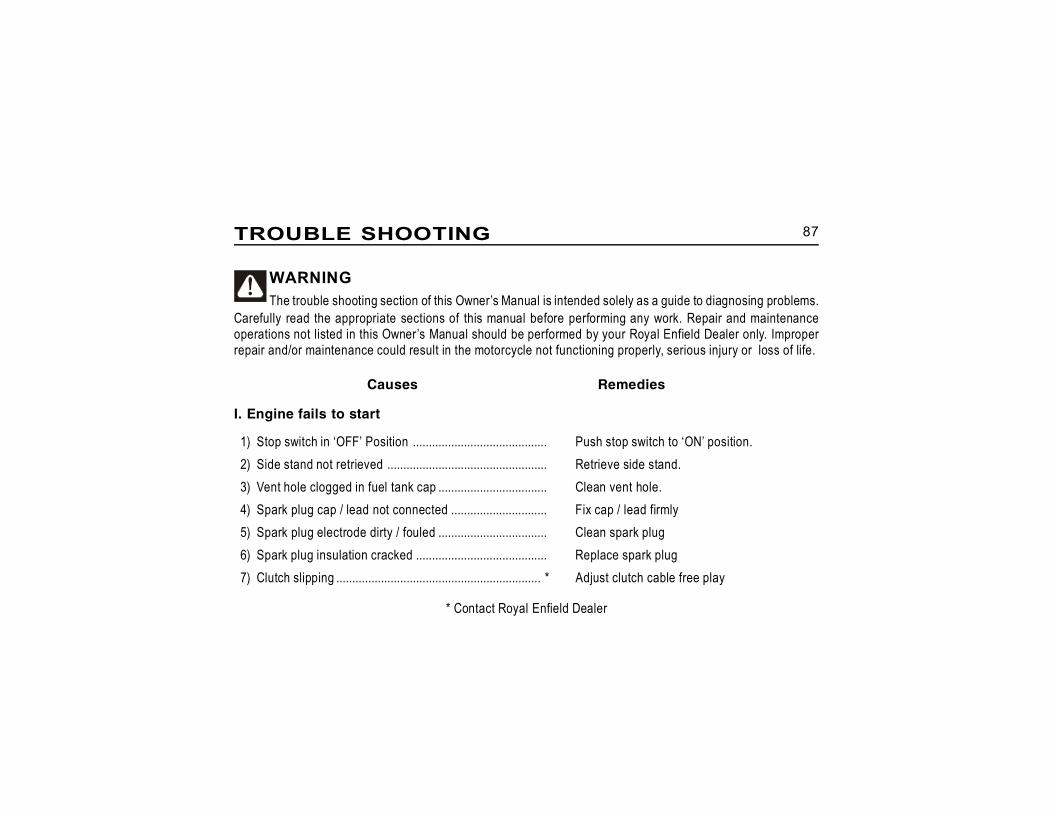
87TROUBLE SHOOTING
WARNINGThe trouble shooting section of this Owner’s Manual is intended solely as a guide to diagnosing problems.
Carefully read the appropriate sections of this manual before performing any work. Repair and maintenanceoperations not listed in this Owner’s Manual should be performed by your Royal Enfield Dealer only. Improperrepair and/or maintenance could result in the motorcycle not functioning properly, serious injury or loss of life.
Causes Remedies
I. Engine fails to start
1) Stop switch in ‘OFF’ Position .......................................... Push stop switch to ‘ON’ position.2) Side stand not retrieved .................................................. Retrieve side stand.3) Vent hole clogged in fuel tank cap .................................. Clean vent hole.4) Spark plug cap / lead not connected .............................. Fix cap / lead firmly5) Spark plug electrode dirty / fouled .................................. Clean spark plug6) Spark plug insulation cracked ......................................... Replace spark plug7) Clutch slipping ................................................................ * Adjust clutch cable free play
* Contact Royal Enfield Dealer

88
II. Engine misfiring
1) Water in petrol tank ........................................................ * Clean petrol tank. Fill tankwith fresh petrol.
2) Loose spark plug cap ....................................................... Fix cap / lead firmly
3) Spark plug fouled ............................................................. Clean spark plug.
III. Engine starts, but runs irregularly & stops
1) Faulty fuel supply .......................................................... * Remove fuel pump & clean.(fuel pump, filter blocked)
Causes Remedies
TROUBLE SHOOTING
* Contact Royal Enfield Dealer
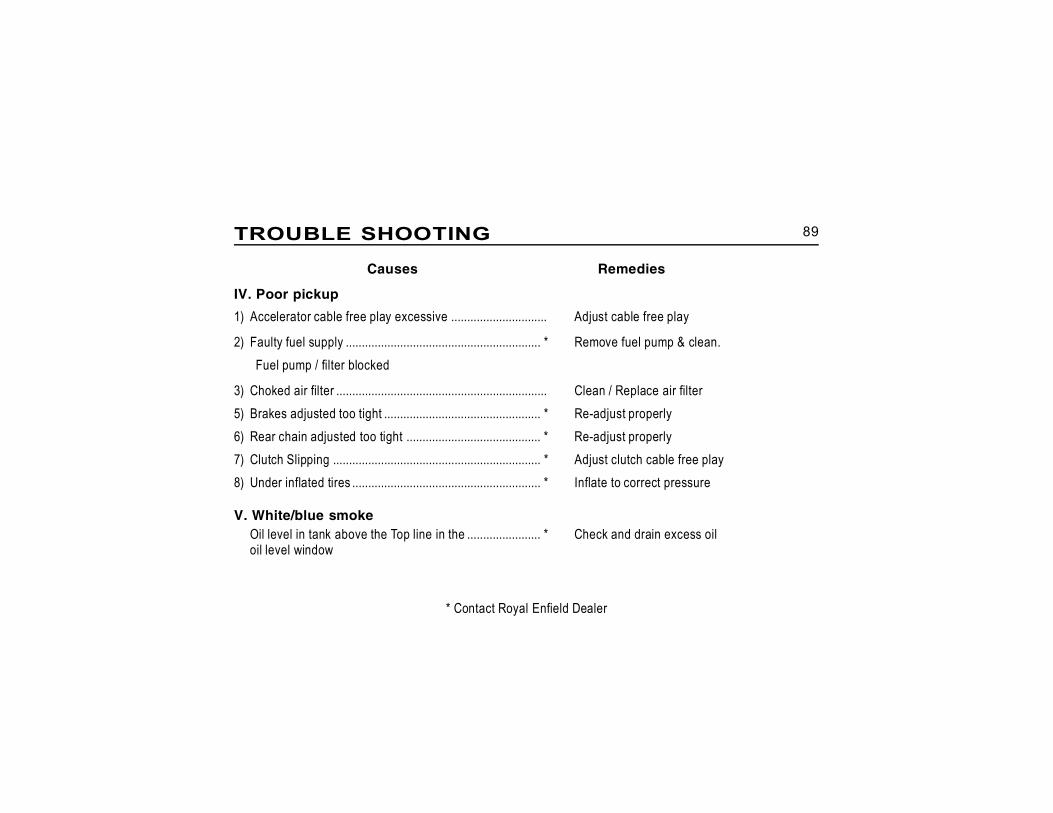
89
IV. Poor pickup1) Accelerator cable free play excessive .............................. Adjust cable free play
2) Faulty fuel supply ............................................................. * Remove fuel pump & clean.Fuel pump / filter blocked
3) Choked air filter .................................................................. Clean / Replace air filter5) Brakes adjusted too tight ................................................. * Re-adjust properly6) Rear chain adjusted too tight .......................................... * Re-adjust properly7) Clutch Slipping ................................................................. * Adjust clutch cable free play8) Under inflated tires ........................................................... * Inflate to correct pressure
V. White/blue smokeOil level in tank above the Top line in the ....................... * Check and drain excess oiloil level window
Causes Remedies
TROUBLE SHOOTING
* Contact Royal Enfield Dealer
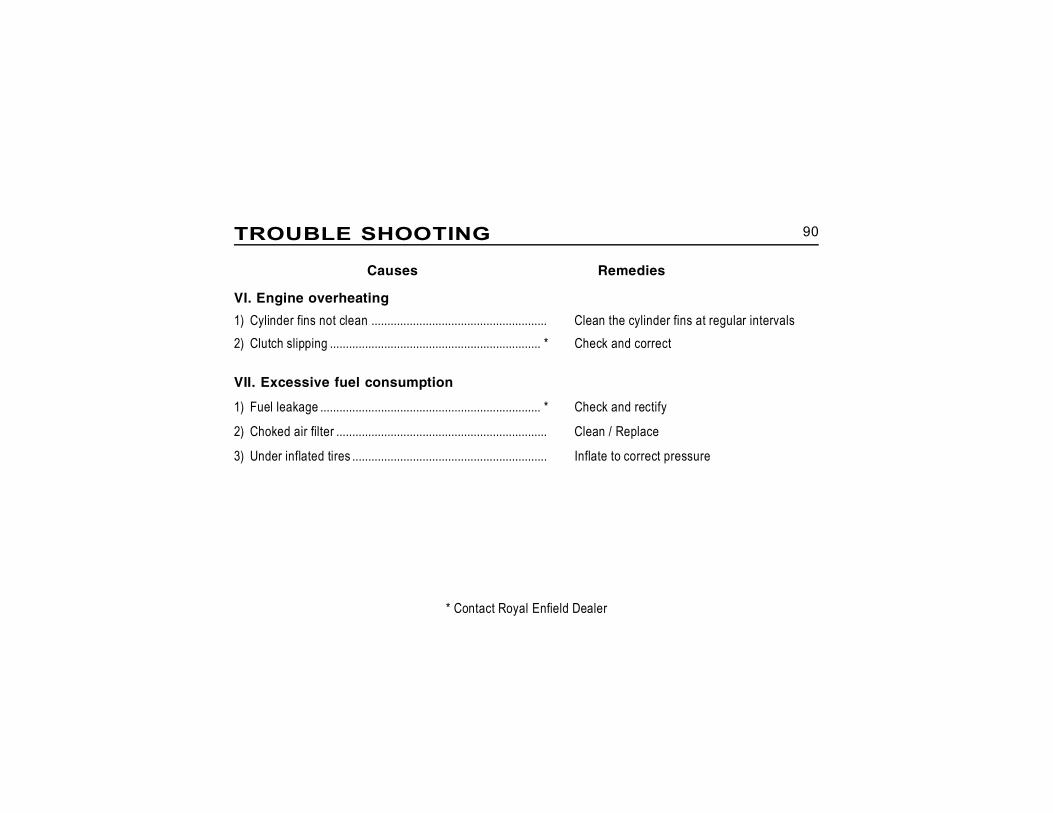
90
VI. Engine overheating1) Cylinder fins not clean ....................................................... Clean the cylinder fins at regular intervals2) Clutch slipping .................................................................. * Check and correct
VII. Excessive fuel consumption
1) Fuel leakage ..................................................................... * Check and rectify
2) Choked air filter .................................................................. Clean / Replace
3) Under inflated tires ............................................................. Inflate to correct pressure
Causes Remedies
TROUBLE SHOOTING
* Contact Royal Enfield Dealer
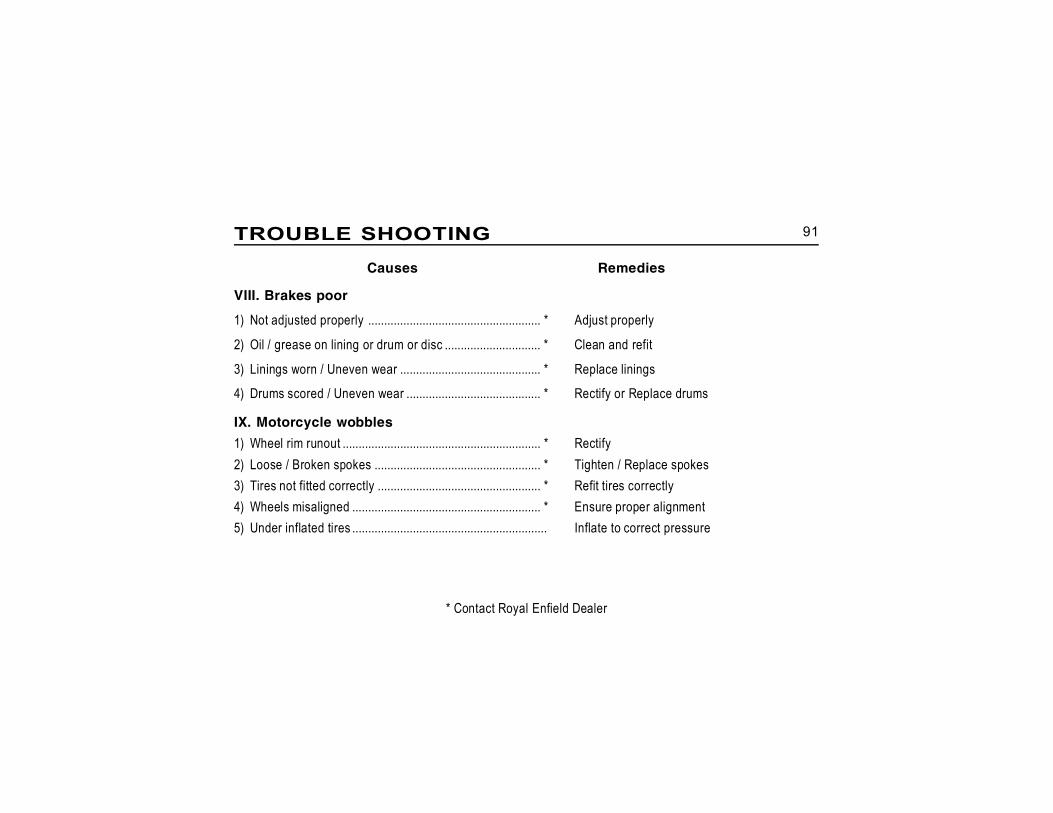
91
VIII. Brakes poor
1) Not adjusted properly ...................................................... * Adjust properly
2) Oil / grease on lining or drum or disc .............................. * Clean and refit
3) Linings worn / Uneven wear ............................................ * Replace linings
4) Drums scored / Uneven wear .......................................... * Rectify or Replace drums
IX. Motorcycle wobbles1) Wheel rim runout .............................................................. * Rectify2) Loose / Broken spokes .................................................... * Tighten / Replace spokes3) Tires not fitted correctly ................................................... * Refit tires correctly4) Wheels misaligned ........................................................... * Ensure proper alignment5) Under inflated tires ............................................................. Inflate to correct pressure
Causes Remedies
TROUBLE SHOOTING
* Contact Royal Enfield Dealer
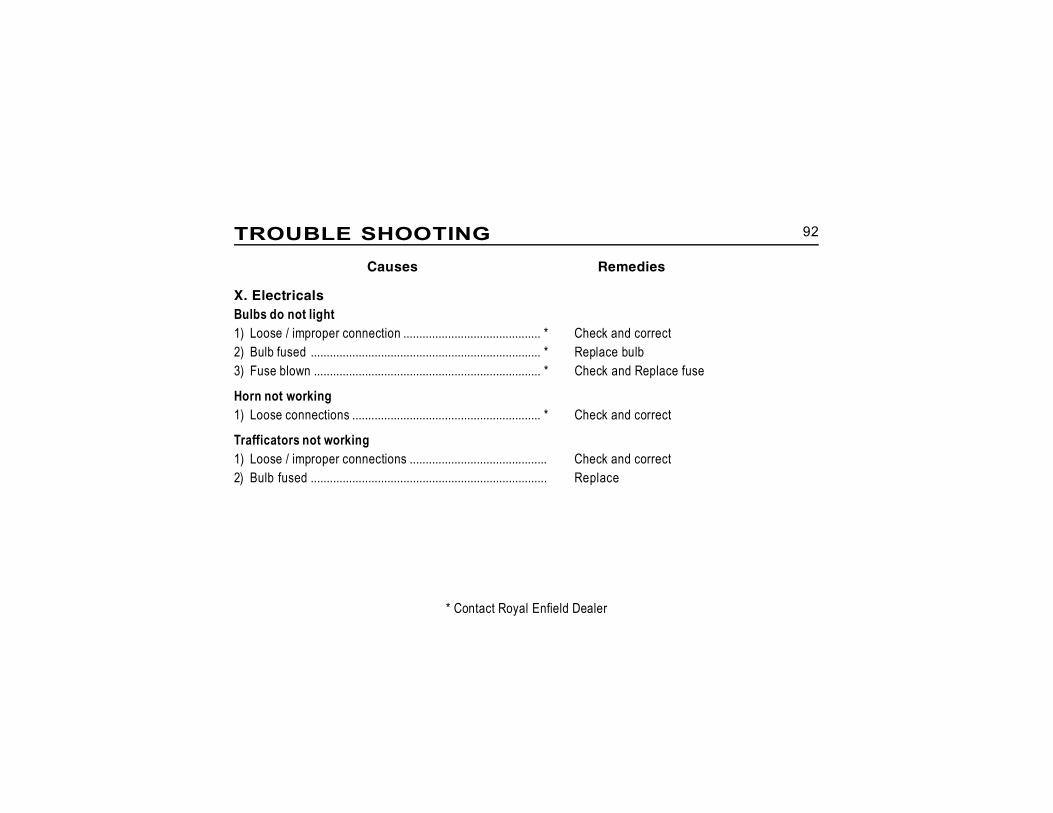
92
X. ElectricalsBulbs do not light1) Loose / improper connection ........................................... * Check and correct2) Bulb fused ........................................................................ * Replace bulb3) Fuse blown ....................................................................... * Check and Replace fuse
Horn not working1) Loose connections ........................................................... * Check and correct
Trafficators not working1) Loose / improper connections ........................................... Check and correct2) Bulb fused .......................................................................... Replace
Causes Remedies
TROUBLE SHOOTING
* Contact Royal Enfield Dealer
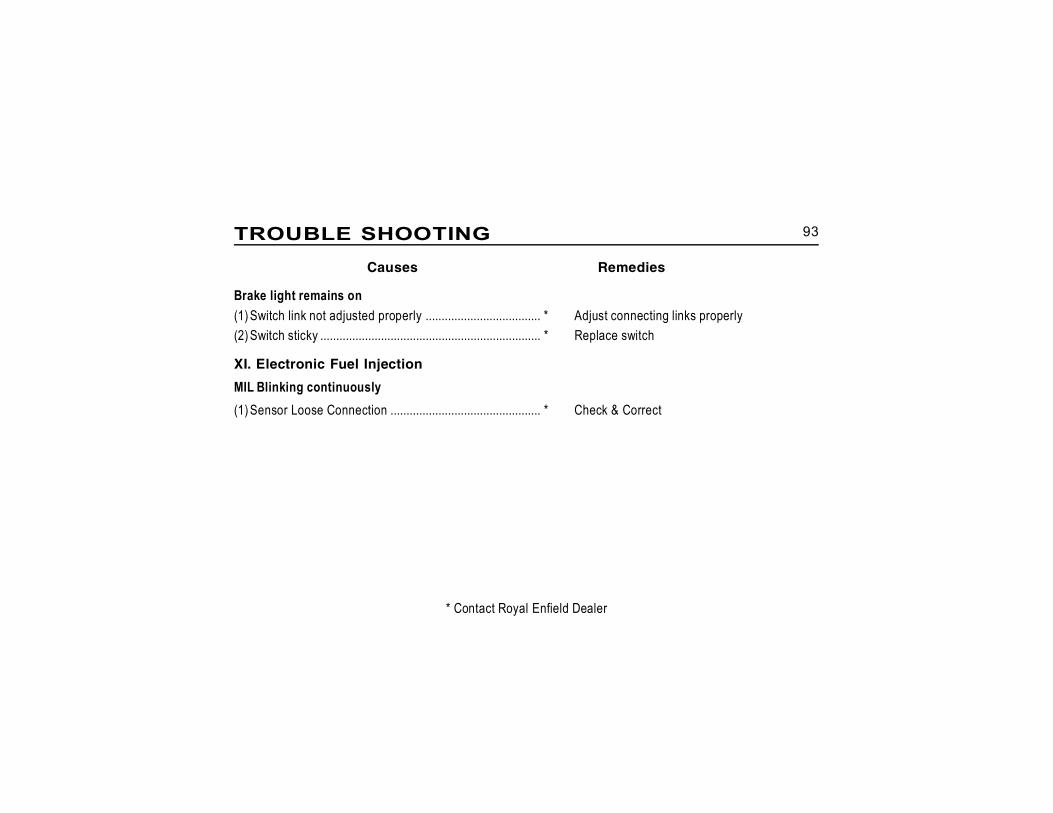
93
Brake light remains on(1) Switch link not adjusted properly .................................... * Adjust connecting links properly(2) Switch sticky ..................................................................... * Replace switch
XI. Electronic Fuel Injection
MIL Blinking continuously(1) Sensor Loose Connection ............................................... * Check & Correct
Causes Remedies
TROUBLE SHOOTING
* Contact Royal Enfield Dealer
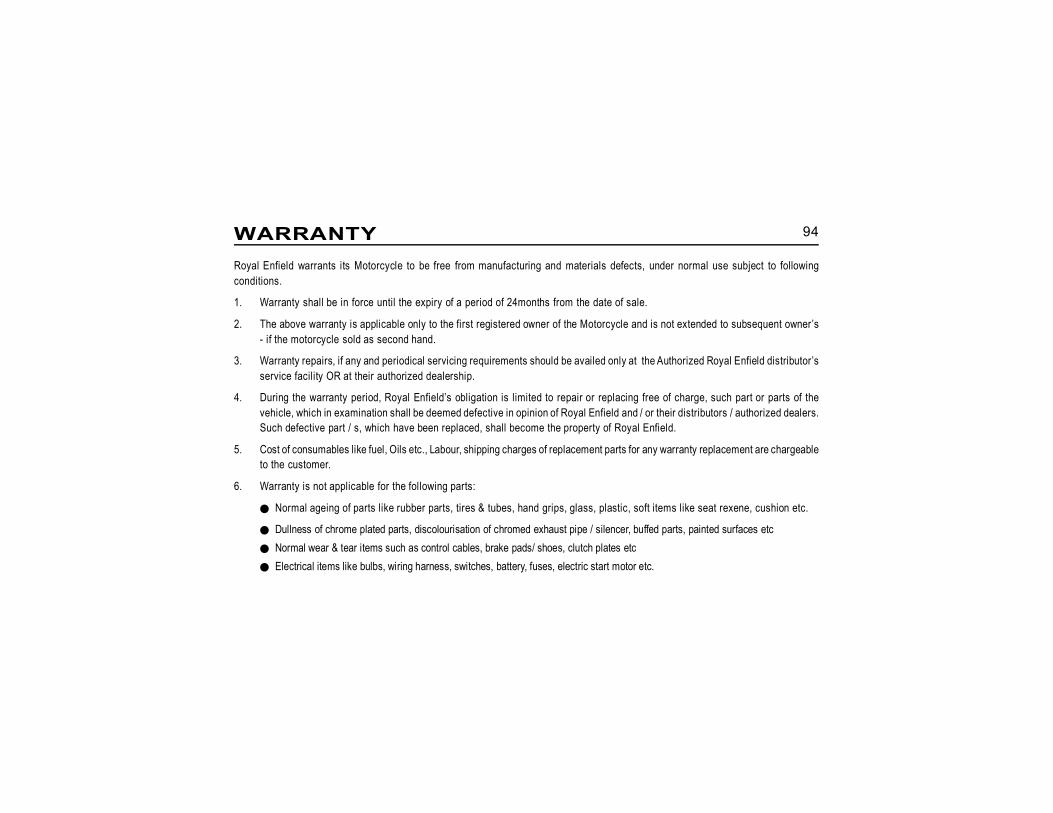
94WARRANTYRoyal Enfield warrants its Motorcycle to be free from manufacturing and materials defects, under normal use subject to followingconditions.
1. Warranty shall be in force until the expiry of a period of 24months from the date of sale.
2. The above warranty is applicable only to the first registered owner of the Motorcycle and is not extended to subsequent owner’s- if the motorcycle sold as second hand.
3. Warranty repairs, if any and periodical servicing requirements should be availed only at the Authorized Royal Enfield distributor’sservice facility OR at their authorized dealership.
4. During the warranty period, Royal Enfield’s obligation is limited to repair or replacing free of charge, such part or parts of thevehicle, which in examination shall be deemed defective in opinion of Royal Enfield and / or their distributors / authorized dealers.Such defective part / s, which have been replaced, shall become the property of Royal Enfield.
5. Cost of consumables like fuel, Oils etc., Labour, shipping charges of replacement parts for any warranty replacement are chargeableto the customer.
6. Warranty is not applicable for the following parts:
Normal ageing of parts like rubber parts, tires & tubes, hand grips, glass, plastic, soft items like seat rexene, cushion etc.
Dullness of chrome plated parts, discolourisation of chromed exhaust pipe / silencer, buffed parts, painted surfaces etc Normal wear & tear items such as control cables, brake pads/ shoes, clutch plates etc Electrical items like bulbs, wiring harness, switches, battery, fuses, electric start motor etc.
95WARRANTY7. Warranty will become void under the following conditions:
Damages due to lack of proper maintenance, periodic services not carried out as per Royal Enfield recommendation etc. Damages caused by any unauthorized repairs carried out in any part of the motorcycle Failures occurred due to use of wrong lubricants, fuel etc Use of non genuine Royal Enfield parts Damages caused due to unauthorized alterations to any part of the motorcycle. Use of accessories not supplied by Royal Enfield Motorcycles fitted with side cars Motorcycles used in rallies, off road, dirt track, races etc Motorcycles involved in accidents, collisions etc. Damages that occur due to extreme operating conditions beyond the limitation or specifications as given by Royal
Enfield, such as Maximum load carrying capacity, engine speed etc. Damages that occur due to long/improper storage, transportation of motorcycle etc.
8. Royal Enfield reserves the right to finally decide on all warranty claims9. Royal Enfield reserves the right to make changes in the motorcycle without any obligation to install these changes on previously sold
motorcycles.10. Royal Enfield authorized distributors and /or their dealers are independently owned and operated. They may hence deal with other
aftermarket products for which Royal Enfield is not responsible for the performance, safety, quality, reliability and suitability of suchproducts. Defects, if any in such parts OR that may arise in the motorcycle due to use of such parts is not liable to be covered by RoyalEnfield and may render this warranty void.
11. There is no other express OR implied warranty in the motorcycle. Any implied warranty of merchantability or fitness is limited to theduration of this warranty.
12. To the fullest extent allowed by law, Royal Enfield and its authorized distributors and/or dealers shall not be liable for loss of use,inconvenience, loss of time, commercial losses or other incidental or consequential damages.
96EMISSION CONTROL SYSTEM WARRANTY
The following warranty applies to the emission control system and is in addition to the LIMITED WARRANTY,NOISE CONTROL SYSTEM WARRANTY & CALIFORNIA AIR RESOURCES BOARD REGULATIONS.EVAPORATIVE EMISSION CONTROL SYSTEM WARRANTY. (Applicable only for motorcycles sold within thestate of California.)Royal Enfield Motors warrants the first owner and each subsequent owner, that this motorcycle is designed andbuilt so as to conform, at the time of sale, with applicable regulations specified by the U.S. Federal EnvironmentalProtection Agency and California Air Resources Board Regulations, that the Emission control system relatedparts fitted to this motorcycle are free from defects in materials and workmanship which may cause this motorcyclenot to meet the U.S. Federal Environmental Protection Agency standards for a period of 5 years OR 18,641 Miles(30,000 Kms.), whichever occurs first, from the date of first use of the motorcycle.The Warranty period shall begin, on the date the motorcycle is delivered to the first retail purchaser OR from thefirst date the motorcycle is used as a demonstrator OR as a display and/or trial motorcycle.
THE FOLLOWING ITEMS ARE NOT COVERED BY THE EMISSION CONTROLSYSTEM WARRANTY:
1. Failures which may arise as a result of misuse, alterations, accidents OR non performance of routinemaintenance, as specified in the Owner’s Manual.
2. Replacement of parts such as Spark plugs, Air filter, fuel filter, Oil filter, fuel injector, lubricating oils etc that arerequired to be replaced during routine maintenance at specified intervals as mentioned in this Owner’s Manual.
3. Loss of time, inconvenience, loss of motorcycle use or any other consequential loss or damages.
97EMISSION CONTROL SYSTEM WARRANTY
4. Any motorcycle in which the Odometer has been tampered with, OR the speedo cable has been disconnectedfor any reason Or is broken and not replaced immediately, due to which the exact distance covered cannot bedetermined.
RECOMMENDATIONS FOR REQUIRED MAINTENANCE
IT IS RECOMMENDED THAT THE ROUTINE MAINTENANCE OF THE MOTORCYCLE BE CARRIED OUT ATSPECIFIED INTERVALS AND ANY MAINTENANCE TO THE EMISSION CONTROL SYSTEMS SHOULD BEPERFORMED ONLY BY AN AUTHORISED ROYAL ENFIELD SERVICE DEALER AND USING ONLY GENUINEROYAL ENFIELD SPARE PARTS.
REPAIRS TO THE EMISSION CONTROL SYSTEM MAY BE PERFORMED BY ANY OTHER QUALIFIED SERVICEOUTLET OR INDIVIDUAL AND USE OF PARTS OTHER THAN GENUINE ROYAL ENFIELD SUPPLIED PARTSIS PERMISSIBLE, ONLY IF SUCH AGENCY OR INDIVIDUALS AND THE NON GENUINE PARTS USED, ARECERTIFIED TO COMPLY WITH THE U.S. ENVIRONMENTAL PROTECTION AGENCY STANDARDS.
98NOISE CONTROL SYSTEM WARRANTY
The following warranty applies to the noise control system and is in addition to the LIMITED WARRANTY,EMISSION CONTROL SYSTEM WARRANTY & CALIFORNIA AIR RESOURCES BOARD REGULATIONS.EVAPORATIVE EMISSION CONTROL SYSTEM WARRANTY. (Applicable only for motorcycles sold within thestate of California.)Royal Enfield Motors warrants the first owner and each subsequent owner, that this motorcycle is designed andbuilt so as to conform, at the time of sale, with applicable regulations specified by the U.S. Federal EnvironmentalProtection Agency and California Air Resources Board Regulations, that the Noise control system emissionrelated parts fitted to this motorcycle are free from defects in materials and workmanship which may cause thismotorcycle not to meet the U.S. Federal Environmental Protection Agency standards for a period of 5 years OR18,641 Miles (30,000 Kms.), whichever occurs first, from the date of first use of the motorcycle.The Warranty period shall begin, on the date the motorcycle is delivered to the first retail purchaser OR from thefirst date the motorcycle is used as a demonstrator OR as a display and/or trial motorcycle.
THE FOLLOWING ITEMS ARE NOT COVERED BY THE NOISE CONTROL SYSTEMWARRANTY:
1. Failures which may arise as a result of misuse, alterations, accidents OR non performance of routinemaintenance, as specified in the Owner’s Manual.
2. Replacing OR removing OR modifying any portion of the NOISE CONTROL SYSTEM (consisting of Exhaust,Air intake/cleaner assembly) with parts not certified to be genuine and noise legal in the USA for street use.
3. Loss of time, inconvenience, loss of motorcycle use or any other consequential loss or damages.
99NOISE CONTROL SYSTEM WARRANTY
4. Any motorcycle in which the Odometer has been tampered with, OR the Speedo cable has been disconnectedfor any reason or is broken and not replaced immediately, due to which the exact distance covered cannot bedetermined.
RECOMMENDATIONS FOR REQUIRED MAINTENANCE
IT IS RECOMMENDED THAT THE ROUTINE MAINTENANCE OF THE MOTORCYCLE BE CARRIED OUT ATSPECIFIED INTERVALS AND ANY MAINTENANCE TO THE NOISE CONTROL SYSTEMS SHOULD BEPERFORMED ONLY BY AN AUTHORISED ROYAL ENFIELD SERVICE DEALER AND USING ONLY GENUINEROYAL ENFIELD SPARE PARTS.
REPAIRS TO THE NOISE CONTROL SYSTEM MAY BE PERFORMED BY ANY OTHER QUALIFIED SERVICEOUTLET OR INDIVIDUAL AND USE OF PARTS OTHER THAN GENUINE ROYAL ENFIELD SUPPLIED PARTSIS PERMISSIBLE, ONLY IF SUCH AGENCY OR INDIVIDUALS AND THE NON GENUINE PARTS USED, ARECERTIFIED TO COMPLY WITH THE U.S. ENVIRONMENTAL PROTECTION AGENCY STANDARDS.
100EVAPORATIVE EMISSION CONTROL SYSTEM WARRANTY
The following warranty applies to the evaporative emission control system and is in addition to the LIMITEDWARRANTY, EMISSION CONTROL SYSTEM WARRANTY & NOISE CONTROL SYSTEM WARRANTY.Royal Enfield Motors warrants the first owner and each subsequent owner, that this motorcycle is designed andbuilt so as to conform, at the time of sale, with applicable regulations specified by the California Air ResourcesBoard AND that the evaporative emission control system related parts fitted to this motorcycle are free fromdefects in materials and workmanship which may cause this motorcycle not to meet applicable regulations of theCalifornia Air Resources Board standards, for a period of 5 years OR 18,641 Miles (30,000 Kms.), whicheveroccurs first, from the date of first use of the motorcycle.The Warranty period shall begin either on the date the motorcycle is delivered to the first retail purchaser ORfrom the first date the motorcycle is used as a demonstrator OR as a display and/or trial motorcycle.
THE FOLLOWING ITEMS ARE NOT COVERED BY THE EVAPORATIVE EMISSION CONTROLSYSTEM WARRANTY:
1. Failures which may arise as a result of misuse, alterations, accidents OR non performance of routinemaintenance, as specified in the Owner’s Manual.
2. Replacing OR removing OR modifying any portion of the EVAPORATIVE EMISSION CONTROL SYSTEM(consisting of Fuel tank, fuel tank cap, Canister, purge valve, throttle body, vapor hoses, fuel hoses and hoseconnectors) with parts not certified to be genuine and approved by California Air Resources Board.
(Applicable only for the state of California)
101
3. Loss of time, inconvenience, loss of motorcycle use or any other consequential loss or damages.4. Any motorcycle in which the Odometer has been tampered with, OR the Speedo cable has been disconnected
for any reason OR is broken and not replaced immediately, due to which the exact distance covered cannotbe determined.
5. Normal ageing of parts such as fuel hoses, vapor hoses, gaskets & rubber components.
RECOMMENDATIONS FOR REQUIRED MAINTENANCE
IT IS RECOMMENDED THAT THE ROUTINE MAINTENANCE OF THE MOTORCYCLE BE CARRIED OUT ATSPECIFIED INTERVALS AND ANY MAINTENANCE TO THE EVAPORATIVE EMISSION CONTROL SYSTEMSSHOULD BE PERFORMED ONLY BY AN AUTHORISED ROYAL ENFIELD SERVICE DEALER AND USINGONLY GENUINE ROYAL ENFIELD SPARE PARTS.
REPAIRS TO THE EVAPORATIVE EMISSION CONTROL SYSTEM MAY BE PERFORMED BY ANY OTHERQUALIFIED SERVICE OUTLET OR INDIVIDUAL AND USE OF PARTS OTHER THAN GENUINE ROYAL ENFIELDSUPPLIED PARTS IS PERMISSIBLE, ONLY IF SUCH AGENCY OR INDIVIDUALS AND THE NON GENUINEPARTS USED, ARE CERTIFIED TO COMPLY WITH THE CALIFORNIA AIR RESOURCES BOARD.
EVAPORATIVE EMISSION CONTROL SYSTEM WARRANTY

102SERVICE MAINTENANCE RECORD
...................................................................... Kms. / Miles ServiceJob Card No. : ....................... Date : .......................Odo Reading : .......................
Brief Work Done :
Dealer’s Stamp & Signature
...................................................................... Kms. / Miles ServiceJob Card No. : ....................... Date : .......................Odo Reading : .......................
Brief Work Done :
Dealer’s Stamp & Signature
...................................................................... Kms. / Miles ServiceJob Card No. : ....................... Date : .......................Odo Reading : .......................
Brief Work Done :
Dealer’s Stamp & Signature
...................................................................... Kms. / Miles ServiceJob Card No. : ....................... Date : .......................Odo Reading : .......................
Brief Work Done :
Dealer’s Stamp & Signature
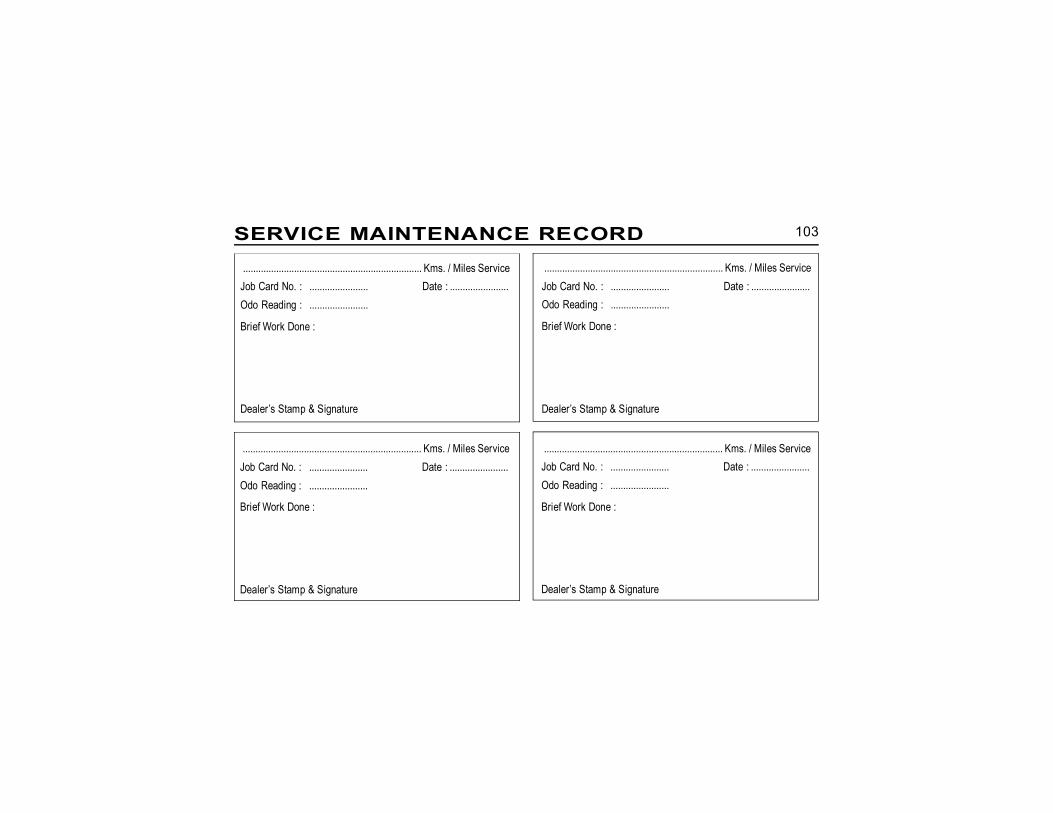
103SERVICE MAINTENANCE RECORD
...................................................................... Kms. / Miles ServiceJob Card No. : ....................... Date : .......................Odo Reading : .......................
Brief Work Done :
Dealer’s Stamp & Signature
...................................................................... Kms. / Miles ServiceJob Card No. : ....................... Date : .......................Odo Reading : .......................
Brief Work Done :
Dealer’s Stamp & Signature
...................................................................... Kms. / Miles ServiceJob Card No. : ....................... Date : .......................Odo Reading : .......................
Brief Work Done :
Dealer’s Stamp & Signature
...................................................................... Kms. / Miles ServiceJob Card No. : ....................... Date : .......................Odo Reading : .......................
Brief Work Done :
Dealer’s Stamp & Signature

104SERVICE MAINTENANCE RECORD
...................................................................... Kms. / Miles ServiceJob Card No. : ....................... Date : .......................Odo Reading : .......................
Brief Work Done :
Dealer’s Stamp & Signature
...................................................................... Kms. / Miles ServiceJob Card No. : ....................... Date : .......................Odo Reading : .......................
Brief Work Done :
Dealer’s Stamp & Signature
...................................................................... Kms. / Miles ServiceJob Card No. : ....................... Date : .......................Odo Reading : .......................
Brief Work Done :
Dealer’s Stamp & Signature
...................................................................... Kms. / Miles ServiceJob Card No. : ....................... Date : .......................Odo Reading : .......................
Brief Work Done :
Dealer’s Stamp & Signature

105SERVICE MAINTENANCE RECORD
...................................................................... Kms. / Miles ServiceJob Card No. : ....................... Date : .......................Odo Reading : .......................
Brief Work Done :
Dealer’s Stamp & Signature
...................................................................... Kms. / Miles ServiceJob Card No. : ....................... Date : .......................Odo Reading : .......................
Brief Work Done :
Dealer’s Stamp & Signature
...................................................................... Kms. / Miles ServiceJob Card No. : ....................... Date : .......................Odo Reading : .......................
Brief Work Done :
Dealer’s Stamp & Signature
...................................................................... Kms. / Miles ServiceJob Card No. : ....................... Date : .......................Odo Reading : .......................
Brief Work Done :
Dealer’s Stamp & Signature

106SERVICE MAINTENANCE RECORD
...................................................................... Kms. / Miles ServiceJob Card No. : ....................... Date : .......................Odo Reading : .......................
Brief Work Done :
Dealer’s Stamp & Signature
...................................................................... Kms. / Miles ServiceJob Card No. : ....................... Date : .......................Odo Reading : .......................
Brief Work Done :
Dealer’s Stamp & Signature
...................................................................... Kms. / Miles ServiceJob Card No. : ....................... Date : .......................Odo Reading : .......................
Brief Work Done :
Dealer’s Stamp & Signature
...................................................................... Kms. / Miles ServiceJob Card No. : ....................... Date : .......................Odo Reading : .......................
Brief Work Done :
Dealer’s Stamp & Signature

107SERVICE MAINTENANCE RECORD
...................................................................... Kms. / Miles ServiceJob Card No. : ....................... Date : .......................Odo Reading : .......................
Brief Work Done :
Dealer’s Stamp & Signature
...................................................................... Kms. / Miles ServiceJob Card No. : ....................... Date : .......................Odo Reading : .......................
Brief Work Done :
Dealer’s Stamp & Signature
...................................................................... Kms. / Miles ServiceJob Card No. : ....................... Date : .......................Odo Reading : .......................
Brief Work Done :
Dealer’s Stamp & Signature
...................................................................... Kms. / Miles ServiceJob Card No. : ....................... Date : .......................Odo Reading : .......................
Brief Work Done :
Dealer’s Stamp & Signature
108NOTES