Embed Size (px)
DESCRIPTION
skladistenje hrane
Citation preview

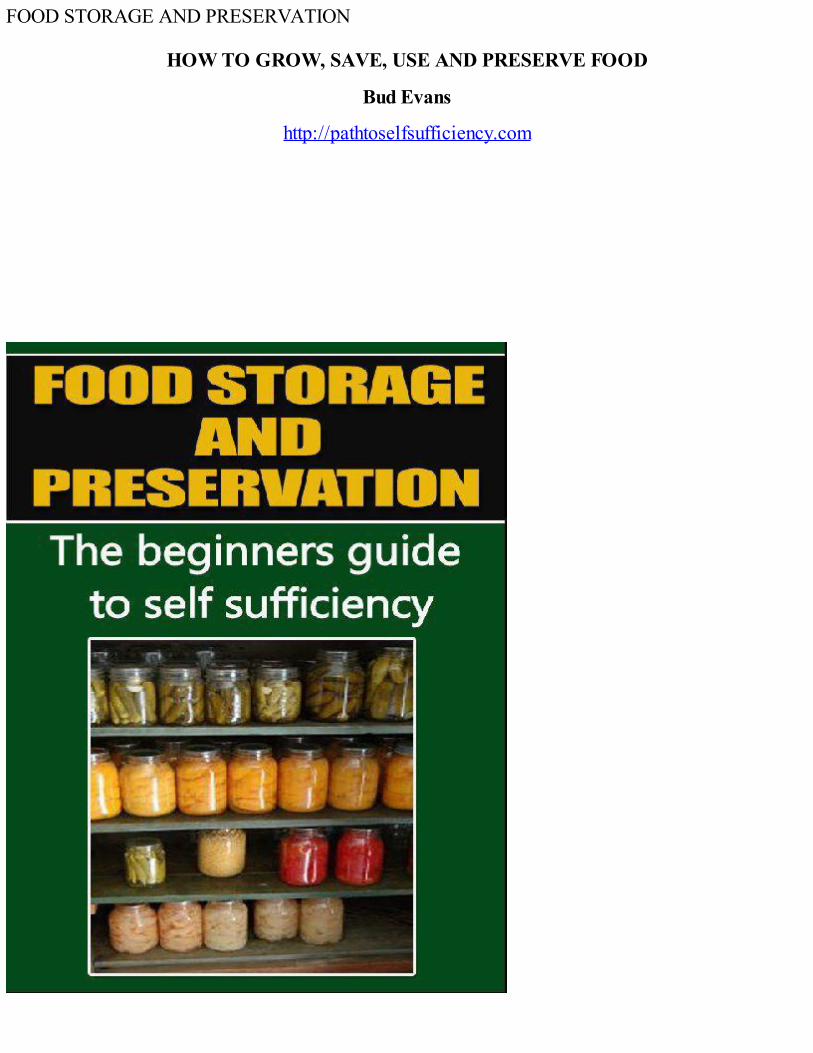
FOOD STORAGE AND PRESERVATION
HOW TO GROW, SAVE, USE AND PRESERVE FOOD
Bud Evans
http://pathtoselfsufficiency.com

InformationCopyright © 2012 by Bud Evans Benton City Consulting LLC. All rights reserved worldwide.
No part of this publication may be replicated, redistributed, or given away in any form without theprior written consent of the author/publisher or the terms relayed to you herein.
Bud Evans Benton City Consulting, Management and Repair LLC
108 Acord Rd, Benton City, Washington, USA
http://pathtoselfsufficiency.com
This publication is designed to provide accurate and authoritative information in regard to the subjectmatter covered. It is sold the understanding that the publisher is not engaged in rendering legal,accounting, or other professional services. If legal advice or other expert assistance is required, theservices of a competent professional person should be sought.
We have attempted to use up to date and correct information, however, do your own research and thedecisions you make are your responsibility. This document may contain links to affiliates that wereceive payment for the referral. To the best of our knowledge this will not result in any addedexpense to the customer.
This is not meant to be a comprehensive guide to emergency preparedness but rather a starting point.Do your research and do the work to be prepared.

Introduction and Who I Am
Charles (Bud) Evans is an old Montana Redneck. I like to write in the first person so most of thisbook will be written as if I was chatting with you. I use lots of I’s not to promote my ego but to definethe source of information.
My childhood was spent in the Snowy Mountains of Montana. My grade school and high school yearswere spent in the Judith Gap Public School System. This is a small school in Central Montana.
My college years (first time) were spent at Montana State University in Bozeman, Montana. Igraduated with a degree in Education, science and industrial arts. Montana State was the local cowcollege as it was primarily an agricultural college and an engineering school.
What does this mean to you the reader? It means that you can complain about my bad grammar all thatyou want and be justified, however that won’t change a thing. That is lesson number one for survivalin the real world. The only thing that changes anything is action.
As you have all ready surmised my approach to life and staying alive is a little different than theviews held by most of the world.
This book is about self sufficiency, personal and family survival. The primary focus is on foodstorage, growing food, and family preparedness. There will be a few other topics thrown in.
My background both as a child and a young adult make me some kind of expert on survival in thecurrent world. I am 70 years old and have experienced 70 years of different things ……………….... Not 70 years of the same thing repeated each year. What this means to you is that I can teach yousomething.
CHAPTER ONE WHY STORE STUFF
Let me tell you a story. In January of about 1948 I was about 6 years old. We lived in the SnowyMountains of Central Montana. The elevation of our home was about 6500 feet. The local peoplereferred to the seasons as July, August and Winter. This year the winter was particularly severe. Wehad several feet of snow on the ground and the road even though they had been plowed they werebarely travelable. One night we got a heavy snow fall, I mean at least three or four feet of new snow.
I went outside the next morning and remember a pillar of show on top of a fence post that was threefeet high. Can you imagine what the roads were like with another four feet of snow? The questionwas, What roads?. We were snow bound. There was no equipment that we had that could cope withthis snow fall. Did we panic not at all we were prepared. We had at least two years supply of stablefoods. Our supply of white gas for the gas lanterns would last at least 6 months. The house and shopwere heated with wood stoves.
In addition we had four head of horses, three cows and calves, two pigs, a couple of dozen chickens adog and four cats. The hay corral had enough hay for the whole winter and the granaries were full. Wewere set no problems just no outside communications.
Life went on as always. We listened to our battery powered radio for news and an occasionalprogram. The rest of Central Montana was not as well off. What bothered my father the most was thatthere was no way to help the folks that needed help. We could not get out. I remember this a fun time.
I think that we were snowed in for about 6 weeks to 2 months. The air was getting warmer during theday and snow was starting to melt. We had been operating the sawmill and cutting bridge timbers allwinter. One day in late February or early March we heard the rumble of heavy machinery. FergusCounty needed bridge timbers because of all the winter snow and heavy runoff as the snow began tomelt. The sent a D8 Caterpillar tractor to plow us out. This was the biggest bulldozer made at thatdate. When the Cat got to our place there was a track about 8 feet wide with snow banks on each sideabout 8 feet high. Fergus County had plowed about five miles of road from the county road to getbridge timbers. We were glad to see them as a couple of months without outside contact wears onyou.
The question that this raises is, How would we have survived without preparation?
Contrast this with the Donner Party. The Donner Party was a group of travelers that got caught in theRocky Mountain in the winter in the 1800’s. They were ill prepared and no one could help them. Thisgroup became the example not to be for all wilderness travelers. The Donner Party even resorted tocannibalism before they died. No a good place to be.
June 2000, Benton City, Washington a raging wildfire came off the Hanford Nuclear reservation andburned homes, buildings and land totaling over 300,000 acres. This could have been prevented butthat is another story. I was in the emergency operations center when I learned that the fire wasthreatening Benton City. My Family left in less than 30 minutes with genealogy, clothes andemergency packs. They were prepared. There were a lot of cars that left the area north of Benton Citythat night with under age drives. We had done enough preparation to save most of what we needed tosave. We lost one house, a new shop 14 vehicles and 4 tractors in this fire as well as all of the fences

to the property. Preparation is important.
News flash family of 13 survives 2 year on what food they can raise and what they have stored. Thepatriarch of the family was retired and several family members were out of work. The food storageprovided the needed extra to allow these three families to survive. Preparedness pays off, foodstorage pays off.
The events that you have just read actually happened. I experienced all of them except for the DonnerParty and my Grand Father who was a scout and trapper was involved with the Donner Party. He toldthe story in graphic detail to my father, who passed it on to me.
I bear witness to you that being prepared is a must. This guide is about food storage and preservation.I sincerely hope that you will grow some of your own food and store food.

CHAPTER 2 WHAT TO STORE
My suggestion is that you need to store enough food, clothes, fuel and medical supplies for one year,at least. I know that this is not always possible as in some places it is illegal or there is just no roomto store that amount. The largest problem that always arises is how I afford that much food. This isagain a matter of preparation. There is a book titled: Succeed: You Can, Use Natural Laws that willhelp you with these questions.
This book is only going to address food storage and preservation with a few suggestions of otherthings to store. The appendix to the book will have some spread sheets with specific suggestions andthey will provide a way for you to keep an inventory on your lap top.
Here are some priority items to store and obtain:
You should store what you family will eat. There are a few exceptions to this rule but generally storewhat you eat. This will allow a rotational plan that will always keep your stores fresh.
Where possible you should store food that does not require refrigeration. We have experiences someextended power outages in this county. I the temperature is in the 60 to 100 degree range frozen foodin a freezer even if it is not opened will not last more than a few days.
Plan to have a generator to run you freezer and other appliances if possible. If you live in the city inan apartment this probably would not be possible. If you have generator you will also need fuel for it.
It is recommended that you store one year’s supply of wheat. This can be ground to flour and wheathas a long storage life. This will require that you have a wheat grinder. You should look for one thatcan be driven either by electricity and also cranked by hand. A general recommendation is that youhave about 300 pounds of wheat for each member of your family.
Most of us are carnivores. We like meat. Fresh meat is a problem to store and the only way to store itis in a freezer. Wheat will provide you with enough protein in a pinch. Meat can be canned andstored. Canned tuna is a good storage item. I can’t tell you how much but if you have a family foodbudget that should give you a good indication of how much meat product you need to store. Anotherway to store meat is live animals such as chickens and rabbit. If you have the room this is an excellentway to get meat for your food storage.
Vegetables are hard to store fresh. Most vegetables can well without a great loss of nutrient in theprocess. Many vegetables can be dried for long term storage. My recommendation is to have at leastthree serving a day of vegetable for every member of your family for one year. How do I afford thatmay vegetables? I suggest that you grow a garden if possible. Small raised beds can be integrated intoany lawn or flower garden. We will cover raising vegetables in some depth later but here is a goodbook on vegetable gardening. VEGETABLE GARDENING FOR FOOD PRODUCTION AND SELFSUFFICIENCY.
Feed for your animals and pets. Many pets can be feed table scraps and kept alive and well. Youshould plan for food for you animals and pets as well as for yourself.
Do you need to store fuel to heat your house if the power goes out for an extended period in the

winter? The answer to this is yes. How do I do this? This is a question that will require you toresearch for the best answer to meet your needs. Believe it or not I am still struggling with thisproblem especially in the changing economic times.
In some areas air conditioning is necessary. This can be particularly trying for the elderly. Plan aheadfor some cooling method for your home besides the power grid.
Do you have a plan to obtain adequate water during an emergency? Water storage is a must. For along term water supply you might need to use your own ingenuity.
It is necessary to store first aid supplies to meet your needs. Those with special medical conditionsshould store those items require to meet these needs.
If you live in the Amazon jungle storing clothing might not be necessary but for the rest of us it is.Store those clothes that you will wear. As time goes on make sure that the sizes are correct. Be sure tostore work clothes as they will meet many situations especially those that arise from disaster and lossof a job.
The greatest thing that can be done to protect your family during times of stress is to be debt free. Youshould not owe any money except for your home and your land. These should be paid off as soon aspossible. Take it from one that has had to deal with debt that debt free is the best answer.
The question now arises, how much should I store? You ought to store enough to meet your family’sneeds for a year. This is not an easy question to answer but I will try to provide some guide lines.
Item
Amount/person
Comments
Grains (wheat,rice,corn)
300 to 350 lbs
Non-Fat DryMilk
75 lb
This must be rotated regularly
Sugar or Honey
60 lb
Salt
5 lb
Might be more than is needed
Fat or oils
20 lb
Canola, lard, vegetable oil
Dried Legumes
60 lb
Beans, peas, etc.
Garden Seeds
Enough to replace foodsupply

Water
2 week each personequals 14 gallons
Bedding
Enough to keep everyonewarm
Clothes
A year’s supply
Plan on changing sizes. Be smart store the clothes thatyou wear on a daily basis.
Medical
As required
Fuel andLighting
One year’s supply forcooking
Emergency Cash
Enough to meet 6 monthsexpenses.
These are the basic items and you should expand them from this point. Please see the appendix foradditional resources.

CHAPTER THREE HOW TO GET STUFF
This is really the question most people ask. I can just barely balance my budget now. The realquestion is do you really have a realistic budget. Enough said about that. You can access help withyour budget in the appendix. If you put your mind to it you can find the things that you need to store. Ifyou start then the opportunities to get what you need will come.
How do I get food to store?
Whenever you buy groceries buy an extra can. For example say that you buy 6 can of soup. Buy 7everybody can afford that. If you do that every time you buy soup you soon will have a few cans instorage. Just add soup to your grocery list when your inventory gets down to you stored size. This is asimple concept but over time it will build food storage.
Grow a garden and can or freeze what you don’t eat. Our goal this year is to produce more than 50percent of our own food. Most of this will come from our garden.
Contact organizations that promote food storage such as the LDS Church.
Shop the internet for dried or canned food items sometime things show up on eBay and Craigs list.
Ask your family to give you food storage items for gifts.
Check out any neighbors that are moving. Many times they can’t move their food or they don’t want to.
If you have a place to do it raise your own live stock. Chickens and rabbits can be raised most anyplace.
Follow the local produce markets as sometime you can get great value here.
What can I store for fuel and light?
This is a difficult question and is dependent upon where you live. If you live in the woods or heatyour home with a wood stove this becomes easier. Just keep a year’s supply of dry wood ahead andyou have the fuel to heat your home. If you are lucky enough to have a wood cook stove then you fuelproblem is solved.

If you don’t have a source of heat such as wood then there are other alternatives. A pellet stove is apretty good way to store heat for you house. It will require a battery backup with an inverter forpower. Pellets can be easily and safely stored in a shed or garage. If you can afford it a solarpowered charge can be use to charge the battery to run the pellet stove.
Cooking fuel is another matter. Here are a few solutions for cooking:
In the summer in most areas you can use solar reflectors as a solar oven the cook your food. You willhave to do your own research in this area as I don’t have a proven method. I do know several peoplethat have used this method successfully.
Propane with a good camp stove can be a solution to cooking your food. WARNING: Propane is anexplosive gas. Propane should not be stored in any living area or even in your garage if it is attachedto your house. Three or four 8 gallon propane tanks will provide a couple of months of cooking fuel isuse sparingly. Use your own judgment on how much you want to store.
These are about the only alternatives for cooking other than cooking over an open fire. This works butis not the best solution in most areas.
For light I recommend camping lanterns and solar powered LED lights. The camping lanterns can befueled either with portable propane cylinders or be gasoline/lantern fuel burning lanterns. Pleaseremember that storage of lantern fuel should meet the same requirements as storage of gasoline.
A backup generator is as almost always a must for rural settings and sometimes for other home sites.How can I afford a backup generator? Check Craigs list and eBay or Amazon for bargains. The firstthing to decide is how large a generator you need. Figure out your critical uses for electricity. Somethings to look at are:
Well pump
Pellet stove
Recharging batteries
Freezers and refrigerators
Find out what the power requirements for each of the units are. Remember that motor such as pumpsrequire a lot more amperage for starting than for running. You must have a large enough generator tostart the largest electric motor that an emergency might require. Generally you can alternate runningdifferent machines at different times to compensate for lack of gross power.
In summary you can obtain the items you need to store by being watchful for sales, people moving andyard sales. Be frugal with your emergency preparedness and storage money.
What clothes should I store and where can I get them.
Many times you can obtain clothes at the thrift shop for storage. I believe that all families ought to beshopping the thrift shops for children’s clothes anyway. If the thrift shop has closes that fit you andthey are something that you will wear than this is a good place to get adult clothes also.
Remember that children clothes size change a lot in a year. Try to be proactive and buy good quality

but inexpensive clothes for your children while estimating how much they will grow in a year. Handme down are a great way to meet your children’s clothing needs. These can be your own family oreven friends and neighbors. Start a neighborhood clothes sharing group.
Don’t forget Craig’s List and eBay.

CHAPTER FOUR GARDENING 101
No book about home storage and beginning preparedness would be complete without a chapter ongardening. Today about 80 percent of the cost of our food is energy related either in the productionstage or transporting the food to our homes. Can a case of home grown produce and save as barrel ofimported oil.
Gardening is not a difficult thing to do. You can grow a very productive garden in a relatively smallspace. Even most apartment dwellers can grow some food in containers. Every little bit helps theenvironment and the economy as well as you bottom line.
RAISED BED INTENSIVE GARDEN: HOW TO BUILD ONE FOR SELF SUFFICIENCY
Charles L (Bud) Evans
Introduction
What this book is. It is a guide to grow more of our own food as easily as possible. It containsinstructions and directions to accomplish that goal. Basically I am a lazy person. Do something once,do it right and enjoy the benefits. This is the secret of intensive bed gardening. They are more work inthe beginning but require less work later on.
Why am I qualified to write about gardening? Let’s start with my education; a master’s degree inbiology (doesn’t mean a darn thing). Grew up on a small farm and sawmill in Central Montana (thismeans something). I have been an avid gardener all of my life. The last sentence tells you why I knowwhat I am talking about. For example we grew all the beets we wanted fresh and canned 38 quarts acouple of years ago from a bed 5 foot by 5 foot. This what intensive gardening can do!
I will show you how to build beds and care for them. I cannot show you how to grow a garden. Youmust learn that for yourself.
This book is not intended to be the end all of gardening books. It is a place to start with raised bedgardening. My focus is to grow the most food with the least long term effort. You can make yourgarden beautiful. I just don’t have the time. We don’t claim that you will grow food like we do. Eachgarden produces according to the efforts and the love of the owner.
Chapter 1 WHAT IS AN INTENSIVE RAISED BED GARDEN?
A raised bed garden is just that. It is a small bed maybe 5 feet wide by 5 feet long. The bed isconstructed to provide maximum growth attributed to the plants. The nutrition is right, the correctamount of light is present, the soil temperature is okay, and the bed always has the correct amount ofwater.

Intensive bed gardening has been around for a long time. There is evidence that this method ofgardening existed in ancient Egypt during the Israelite enslavement. Some researchers have foundevidence of this type of farming in the Late Classic Maya cultures around 300 to 900 AD. There ishistorical relic in the American Southwest that shows the use of intensive bed farming on a fairlylarge scale. My question is why it took so long for people to recognize this very effective way ofgrowing food.
This picture was taken in early January as we were starting to prepare our beds for this year.
The present day evolution of intensive bed gardening is attributed to Chadwick of the University ofCalifornia, Santa Cruz. He took a barren hillside and through the use of what he called Frenchintensive gardening turned it in to a lush hillside full of produce and flowers. John Jeavons continuewith his work on another campus. John Jeavons has written several books on the subject.
So what is an intensive raised bed garden and why is it call intensive. It is a constructed bed, usuallywith sides made of some rot resistant material that is filled with those things that plants like to have togrow the best. The bed can be tailored to a specific plant. I have successfully used this method forfield gardening, however, the word intense takes on a new meaning when using this method in largeplots without walls to contain the beds. These are a lot of work.
My beds are generally built out of scrap materials. The ones that I am constructing this year use oldmetal building siding that was given to me and some old treated 2 X 4 for stakes to hold themtogether. This is a typical raised bed.

You can see that the construction of a raised bed is simple. It is a fair amount of work. Make sure thatyou corner and side stakes are secure as they hold the weight of the dirt. Sometime it is necessary toframe the top of the bed with 2 X 4s. This will hold the sides.
2 PLAN YOUR GARDEN
Planning your garden is important. It is important because a well thought out plan makes constructionand maintenance easier. Here are a few things that you must consider when planning your garden:
What are the total dimensions of your garden area? Make a scaled drawing of where you want to putyour garden. That means measure it, don’t just sketch it out.
Decide what you want to grow in your garden.
How long are your arms? What’s that got to do with anything? How long your arms are determines thewidth of your bed. How far can you comfortably reach? I can reach 2 and half feet easily. If your armsare shorter, then make you beds narrower. This makes working in your beds much easier, after all thisis the lazy person’s way to garden.
Lay out your plan on the ground to see how it looks.
Plan where you will put your pipe for your watering system. This can either be above ground orburied.
Determine how wide you are going to make the pathways between the beds. I recommend about 3feet, however, use your own judgment.

Picture of my messed up garden:
This picture was taken mid-January as I was starting my spring gardening. We will be planting peasby the end of February most years.
3 WHAT TOOLS ARE REQUIRED?
Tools are a special thing to me. I love tools. Good tools, great tools, expensive tools, cheap tools andeverything in between. Most of the tools that I recommend, and tools that you need, you probably allready own. If you must buy tools then buy the best quality that you can afford. Do not believe that onlythe name brand stuff is best. There are a lot of discount tool sources around. I have bought a lot oftools on eBay and Amazon. My favorite discount tool store is Harbor Freight Tools. Unluckily for methat have a store near here. I buy way too much.
Tool List for raised bed gardening:
Shovel round point
Shovel square point
Spading fork
Long handled 3 or four tined hoe or rack
Sledge hammer
Portable electric drill
Portable electric saw.
Flat blade screw driver

Phillips screw driver
Slip joint pliers
Miscellaneous drills
Assorted garden trowels
Garden hoe
Wheel barrow; when it comes to wheel barrows I have a real preference to the kind with two wheelsin front. They are easier to maneuver in a garden and don’t tip over so easily.
Pruning clippers
Claw hammer
Some type of heavy metal bar—to make stake holes. My favorite is a piece of ¾ inch square bar froman old rod weeder.
Hatchet This may be a small hand axe or anything that you can use to sharpen stakes and cut branches.
Garden sprayer—hand held.
Spray bottle
Scissors
Garden Rake
Pitch fork
Miscellaneous small garden tools. Choose what you like.

That four tine rake, in the center, is one of my favorite raised bed gardening tools. It is used for bedpreparation in the spring and a multitude of other tasks.
This is my favorite type of wheel barrow.
That’s quite a list. You probably have most of them. Don’t go out and buy a tool unless you reallyneed it. If it’s expensive and you only need it once—rent it. Tools are BSO for me (Big Shiny Objects—things that I want, don’t really need and cost a lot of money.) Buy what you need. This is all aboutgrowing food and saving money.
4 WHAT MATERIALS ARE REQUIRED?

The intent of this book is to help you to avoid high cost to create your raised beds. If you can affordthe best materials than buy them, however, there is a lot of recyclable stuff that will work just as well.The materials that you will require for the construction of the bed frame and walls fall into thesebroad areas:
Wall material—boards, old cement blocks, cement board, old building siding and so forth. Make surethat any wood is treated to prevent rot.
Material for posts and stakes. This can range from old steel fence post to brand-new ornamentalposts. Again make sure that any wood is treated to prevent rot.
Miscellaneous screws and nails.
Other hardware as needed
This is a picture of various organic materials that I have collected for building intensive beds. Itconsists of old branches, leaves, grass clippings and chips from tree trimming.

Old building metal for bed walls.
Lumber for stakes and supports collected from discarded stuff.
When you are building a lot of beds and have little money being the community collector helps. Icollect old and discarded building materials to build my raised beds. The picture show that thisworks.
5 HOW TO CONSTRUCT A RAISED BED
Raised bed construction is just like any other building project. You need to have a plan. I have neverdrawn a formal plan for raised beds. The sequence of construction goes something like this:
Lay out your individual beds in your garden. This works unless you are like me and don’t geteverything done the first time. My first raised beds (see snow pictures of my garden) were not donewith walls. These beds were just mounds of growing medium constructed to promote maximum plantgrowth. If you need to fix your beds and continue construction from year to year that is okay too.
Dig out the bottom of the beds. I like to dig out my beds two feet below the ground surface and put thedirt to the side. This is the part that takes work. I cheat as I do gardening by John Deere. Our little 20horse power compact tractor with a front bucket does the initial dig when there is room. This is a lotof work but well worth the effort. This first removal of the soil allows you to provide adequatedrainage for the bed. It also provides an easy path for deep rooted plants.
At this point I usually put up the walls. When I use old sheet metal the metal provides a barrier formost of the deep rooted weed and plants that might penetrate the bed. We have lots of grasses here inEastern Washington the spread by their roots. These grasses don’t seem to go under the metal walls.The walls are constructed by driving stakes or posts into the grown at the edge of the beds. The metalis then fastened to the posts. My 5 foot by 5 foot beds have a post at each corner and one in the middleof each panel. The beds that are 5 feet wide and longer have posts or stakes about every four feet. Ifyou feel that you need to put 2 X 4’s to stiffen and support the sides, then use them. This depends a lot

upon what kind of material you are using for the walls. Just be sure that you wall materials have highrot resistance and a long life.
After I have the walls up I fill in the bottom of the bed. Believe it or not most anything can be use inthe bottom foot of the bed. Mine are filled with old limbs, discarded wood, wood chips, hay, strawold paper bags cardboard, small and medium rocks. In general anything that will provide drainageand trap nutrients for the bed.
After the bottom is filled in, the bed is covered with a layer of cardboard, old paper sacks, old feedsacks or anything that will create a decomposable barrier over the bottom layer.
The next 6 inches or so is soil that was removed from the bed.
On top of the soil a layer of organic material is placed. This can be manure, straw, old hay, compost(if you have enough but compost is best used later), grass clippings or even wood chips.
The next layer needs to be compost or manure. You could even buy potting soil for this layer. Some ofthe authors that talk about small raised beds talk about this. This not an option for my bed as it justcosts too much. This layer really needs to be loaded with nutrient. Since I am not an organicgardening purist, many times I will seed this layer with commercial fertilizer.
My next layer is another layer of heavy organic stuff like old hay, straw, wood chips or if I haveenough compost. Rotted manure works well here also. If there is a lot of woody material in this layerit is seeded heavy with a high nitrogen fertilizer.
The top layer of the bed is composed of garden soil, the stuff you dug out and compost. By this timeyou should have a mound above your bed of about 6 inches to a foot. This won’t last long. Put a lot ofwater on your bed and let it set a while. The aging of the bed is why most of my new beds are startedin the fall and finished in late winter before planting begins.
If I am going to plant seeds in a raised bed a little extra preparation might be in order. Screen the toplayer of soil after you have completed your bed. What I use is a frame with quarter inch hardwarecloth on it. It is about 2 and half feet square. This takes out all of the bigger pieces and makes seedingsmall seeds easier.
Raised bed under construction.

6 WATERING SYSTEMS
Everyone has his own preference for watering a garden. It doesn’t seem to make much difference as towhat kind of system is used, if the garden gets the right amount of water. Here lies the secret.Different plants need different amounts of water. My rhubarb takes more water than my herbs andsome dummy planted them next to one another. We are working on that problem. Think I will start anew rhubarb bed this year and dig out the old one next year, all because of a lack of planning.
There are basically three types of watering system:
Overhead sprinklers
Flood irrigation
Drip systems and modified micro irrigation systems.
My favorite is drip irrigation and modified micro irrigation systems. What do I mean by modifiedmicro irrigation systems? This is a system that might use micro sprinkler, in line drippers andperforated hose. Soaker hose also can be used with this type of system. Usually these systems operateon less than 20 pounds per squaring pressure. The real drawback to these systems is that your waterneeds to be quite clean. Our irrigation water, from a pressurized system, is really dirty. A sand filterwill be installed this year and back flushed as necessary. This will provide clean water to our microsystem. This is a lot of extra work but necessary.
Overhead sprinklers are rotating sprinklers on a riser pipe that is generally taller than you tallestplants. I like using this type of irrigation on my field corn. This is one of the simplest irrigationssystems to set up. Just run pipes or a hose to each sprinkler and you are done. I you have tall risers;you may need to stake them to prevent the wind from blowing the risers over. This type of systemworks at line pressure whatever that may be, usually in the 45 psi to 60 psi range.

Flood irrigation is just that, the garden is flooded with water. This does not work too well with raisedbeds.
There is a lot of information on the web about drip irrigation systems. Do your research because Ican’t tell you what is best. Everyone’s garden is different and the way that it gets water is differentalso. Here is a fairly good source on drip irrigation. http://www.dripirrigation.com
7 FENCING
Why do I include fencing in a raise bed gardening book? Well, unless you live in Whims Villa you aregoing to have critters running around. If you have a small farm or just some acreage, you will havecritter problems. The critters I am talking about in general are the one that we raise. These caninclude:
Dogs
Chickens
Sheep
Cows
Deer
Rabbits
Two legged creatures with hands. Sometimes we call them small children.
When you can afford it, my favorite fencing is chain link. I don’t go to all the pains that are exercisedfor commercial chain link security fence. We just put in posts and brace posts. Then the chain linkfabric is stretched up next to the posts. The fabric is rapped on the ends and stapled to the posts. Mypreference is 6 foot chain link because our zoning won’t let us put up a higher fence without a specialpermit and in Benton County Washington they are a pain and expensive.
If you look at the pictures of my gardens you will see that most of the fence is woven wire. Here Isuggest that you use less than four inch square woven wire with all the squares the same from bottomto top. Three might be better if you have a lot of chickens.
Building a fence is simple:
Just lay out the area to be fenced.
Mark your corners
String a line from corner to corner.
Measure the distance that you have decided to separate your post. Get this from the PLAN you made.
Dig post holes for the corner posts and the brace posts.
The other posts for the fence can either be set posts (those you dig a post hole for), or driven posts.

Make sure that you have planned for your gates.
Don’t build your gates until you have your fence built. I don’t know how it happens but my gates neverfit if I build them first. This probably why we don’t buy gates other than the fact that they are darnexpensive.
Install your gates and you are done.
A fence is a very important part of a garden if you are planning to produce a lot of food for yourfamily. My neighbor’s chickens destroyed over 500 pounds of tomatoes in my garden last yearbecause I did not have an adequate fence.
Here is a Fence Line set up to receive the chain link fabric.
This is an example of a woven wire fence.

Old steel fence post salvaged for fencing and building bed side walls.
8 Seeds and Seeding Also Bedding Plants
What you plant in your garden is what you get, if you are lucky. I have had a few humoroushappenings from seed packages. All companies make mistakes. The one that really was funny was thecayenne pepper seed that turned out to be hot thia peppers. I knew that when the peppers started toturn various color that something was wrong. They were hot. We also got some pumpkin seed thatwas supposed to jack o lantern sized pumpkins and they turned out to be giant pumpkins some of themnear 200 pounds.
Getting the wrong seed does not happen very often but enjoy it when it does.
I generally buy my seeds at these stores:
Gurneys
Henry Fields
Burgess
Fred Meyers
Wal-Mart
Local farm stores
Amazon.com
As you can see I am not particular where I get the seeds. When it is large volume seed such as several
pounds of corn seed then it is purchased locally. Some of the seeds that I use are purchased on line.You can get your seeds most anywhere. Most of the seeds I have purchased have had goodgermination rates.
I store emergency seeds in a sealed container in a refrigerator. These are supposed to be good forseveral years.
Hybrid seed and non-hybrid seed, sometimes caller heirloom seeds. Many times the hybrid seed outperforms the open pollinated varieties. Just remember that you can’t save hybrid seed and expect toget good result from the saved seed. If you are saving seed from open pollinated varieties Irecommend that you maintain adequate separation from any hybrid varieties and other varieties of thesame plant, i.e. peppers.
Raised bed gardening is particularly suited to bedding plants. These are those plants that a pre-startedsuch as tomatoes. Most vegetable varieties can be started and transplanted. There are two ways to getbedding plants. You can buy the plants at nearly any garden center in the spring. The other way is tostart your own in containers in the house. My preference is to start the plants myself especiallypeppers and tomatoes.
If you are going to start your own bedding plants then you need to do this six to eight weeks beforeyou plan to plant them in your beds.
It is a lot of fun going to the garden stores and looking for plants in the spring. Unless you are a lotmore resistant to plants than I am you will almost always come home with some. My problem is thatusually I buy too many.
Planting small seeds in your raised beds can be challenging. When you are direct seeding small seedin raised bed it is a must that you follow seed spacing guide lines. I can’t tell you what spacing for allplants but this is the general rule that I follow. Space the seeds one half the recommended distance forordinary row gardening. The spacing should be in all directions from the seed. Place you seedsindividually where you want the plant and no more than two seeds at each location. You may need tothin them as they grow.
The better your job of planting small seeds the less work you will have later on. This is one reasonthat I screen the last layer in my raised beds that will contain things like carrots.
9 WEEDS AND MULCH
Mulching is very important for raised bed gardens. This is your primary barrier to weeds. The bedmust be weeded until the plants are large enough to put down a thick layer of mulch. I use old hay,straw, grass clipping and sometimes cardboard and paper as a mulch.
When the plants are large enough I place a layer of mulch around the plants covering the whole bed.This layer must be thick enough to shut out most of the light that shines on the soil. As you plants getlarger they will provide additional shade and deter weed growth. You will need to pull any weedsthat come through your mulch.
This is where intensive raised beds really begin to pay off. Your weeding time will be about onetenth of that required in a conventional garden. The raised beds bring the weeds up to your level for

easy care. I am about 70 years old and raised beds eliminate a lot of bending. Building raised bedalso provides me with good exercise.
10 SUMMARY
This guide is aimed at those that want to grow a large amount of produce in a small space. This doesnot mean that flowers and other plants grown for their beauty cannot be grown in raised beds. Youcan make you bed a work of art and still have all of the advantages of raised bed. I admit that I have afew flowers planted in some of my garden beds. Every year we plant marigold and asters in our beds.The excuse is that they help keep the bugs out. The real reason probably is that I like the color in thegarden.
We provide vegetables and produce for thirteen people from our garden each year. The gardenprovided salads and vegetable for about 5 months fresh. We preserved 100 quarts of corn, 40 or soquarts of tomatoes, salsa, 30 some quarts of beets and we still have carrots in the ground to be pulledand used the end of January.
11 RESOURCES
This section is for your use to obtain more information. Use it well. Use the grocery store method—take what you can use and leave the rest on the shelf.
Seeds:
http://www.burpee.com/
http://www.heirloomseeds.com/
www.amazon.com
http://www.johnnyseeds.com/
http://gurneys.com/
Information sites:
http://www.dmoz.org/Home/Gardening/Intensive_Planting/
Your local county extension office
Plants
Local garden stores
Many plants can be shipped from online suppliers

Chapter 5 How Can You Preserve Food?
There are really only three ways to preserve food all other methods are derivatives of these methods.
Food may be dried. This may be the oldest and still ranks as one of the best methods to store food.
Canning—this method process the food and seals it in a container. Generally we talk about pressurecanning and wet bath canning.
Freezing of food. This is the new boy on the block. It is less than a century old for general use. This isa great way to store food as long as you can keep it frozen. The problem is, What can you do when thepower goes out for several days?
An additional method of storing food is the root cellar. This method is usually use for storing foodfrom one growing season to the next. It is good for root crops like potatoes, onions, and carrots.Apples can be stored for a time in a root cellar is some precautions are followed.
FOOD DRYING
Food can be dried in all kinds of different ways. The oldest is to just hang it in the hot sun and let itdry. The Native Americans used this method for hundreds of years.
Some advantages of dehydrated foods are:
Long storage life.
Some foods retain a better nutritional value by drying.
Less bulk to store.
You can build your own food drier.
This book does not intend to give a complete course on food drying. Here are some resources foryour dehydration efforts.
How to Dry Foods by Deanna DeLong
Ball Blue Book of preserving
There are a lot of things that must be done correctly to obtain the best quality dried food. Do yourresearch and follow the directions.
HOME CANNING
Canning food at home is a science and as any skill it can be learned. If done incorrectly it can causeyou to become very sick. With that warning we will proceed. Home canning or bottling of food is oneof the best possible ways to increase your food storage. It has a lot of advantages:
Home canned food has 4 or 5 times the shelf life of commercially canned food.

You can grow your own.
It tastes better.
You can save money.
I think it is more nutritious.
The best book to learn to can food is the Ball Blue Book, many consider this the bible of canned food.I won’t begin to try to tell you how to can food. Get the book and read it. It is a reference that youshould have for food preservation and storage anyway.
Some Recommended Resources:
Complete Guide to Home Canning by the United States Department of Agriculture.
Ball Blue Book of preserving
All of these are available from Amazon.com.

Resources:Spread sheets for inventory controlThe spread sheet is available at our Preparedness web site.