Embed Size (px)
Citation preview

Floyd VogtFloyd Vogt
A u s t r a l i a C a n a d a M e x i c o S i n g a p o r e S p a i n U n i t e d K i n g d o m U n i t e d S t a t e s
vog13437_fm.qxd 9/6/02 4:02 PM Page i
NOTICE TO THE READER
Publisher does not warrant or guarantee any of the products described herein or perform any independent analysis in connection with anyof the product information contained herein. Publisher does not assume, and expressly disclaims, any obligation to obtain and includeinformation other than that provided to it by the manufacturer.
The reader is expressly warned to consider and adopt all safety precautions that might be indicated by the activities herein and to avoidall potential hazards. By following the instructions contained herein, the reader willingly assumes all risks in connection with such instruc-tions.
The Publisher makes no representation or warranties of any kind, including but not limited to, the warranties of fitness for particular pur-pose or merchantability, nor are any such representations implied with respect to the material set forth herein, and the publisher takes noresponsibility with respect to such material. The publisher shall not be liable for any special, consequential, or exemplary damages result-ing, in whole or part, from the readers’ use of, or reliance upon, this material.
Residential Construction Academy: Carpentryby Floyd Vogt
Executive Director:Alar Elken
Acquisitions Editor:Christopher Will and Mark Huth
Executive Editor:Sandy Clark
Development Editor:Monica Ohlinger
Editorial Assistant:Jennifer Luck
Executive Marketing Manager:Maura Theriault
Marketing Coordinator:Brian McGrath
Executive Production Manager:Mary Ellen Black
Production Manager:Andrew Crouth
Senior Project Editor:Chris Chien
Senior Art/Design Coordinator:Mary Beth Vought
Full Production Services:Carlisle Publishers Services
COPYRIGHT © 2003 by Delmar Learning, a division of The Thomson Corporation.
Printed in the United States of America1 2 3 4 5 XXX 06 05 04 03 02
For more information contact:Delmar Learning5 Maxwell Dr. Clifton Park, NY 12065
Or find us on the World Wide Web athttp://www.delmarlearning.com
ALL RIGHTS RESERVED. No part of this workcovered by the copyright hereon may be repro-duced or used in any form or by any means—graphic, electronic, or mechanical, includingphotocopying, recording, taping, Web distribu-tion or information storage and retrieval sys-tems—without written permission of thepublisher.
For permission to use material from this textor product, contact us by Tel (800) 730-2214Fax (800) 730-2215www.thomsonrights.com
Library of Congress Cataloging-in-Publication Data
Vogt, Floyd.Residential construction academy : carpentry /
Floyd Vogt. p. cm.Includes bibliographical references and index.ISBN 1-40181-343-71. Carpentry. 2. House construction. I. Title.
TH5606.V64 2003964—dc21
2002031336
vog13437_fm.qxd 9/26/02 3:31 PM Page ii
SECTION 1 Tools and Materials . . . . . . . . . . . . . . 1
Chapter 1 Hand Tools . . . . . . . . . . . . . . . . . . 3Layout Tools . . . . . . . . . . . . . . . . . . . . . . 5Edge-Cutting Tools . . . . . . . . . . . . . . . . . 10Tooth-Cutting Tools . . . . . . . . . . . . . . . . . 13Fastening Tools . . . . . . . . . . . . . . . . . . . 16Dismantling Tools . . . . . . . . . . . . . . . . . . 18Review Questions . . . . . . . . . . . . . . . . . . 21
Chapter 2 Power Tools. . . . . . . . . . . . . . . . . 23General Safety Rules . . . . . . . . . . . . . . . . 25Circular Saws. . . . . . . . . . . . . . . . . . . . . 25Saber Saws . . . . . . . . . . . . . . . . . . . . . . 27Reciprocating Saws . . . . . . . . . . . . . . . . . 28Drills and Drivers . . . . . . . . . . . . . . . . . . 29Cordless Tools . . . . . . . . . . . . . . . . . . . . 31Portable Power Planes . . . . . . . . . . . . . . . 32Routers . . . . . . . . . . . . . . . . . . . . . . . . 32Sanders . . . . . . . . . . . . . . . . . . . . . . . . 34Pneumatic Staplers and Nailers . . . . . . . . . 35Powder-Actuated Drivers . . . . . . . . . . . . . 40Stationary Power Tools . . . . . . . . . . . . . . 40Table Saws . . . . . . . . . . . . . . . . . . . . . . 41Miter Saws . . . . . . . . . . . . . . . . . . . . . . 43Review Questions . . . . . . . . . . . . . . . . . . 44
Chapter 3 Wood and Wood Products . . . . . . . 46Wood . . . . . . . . . . . . . . . . . . . . . . . . . . 48Engineered Panels . . . . . . . . . . . . . . . . . 55Nonstructural Panels . . . . . . . . . . . . . . . . 56Engineered Lumber . . . . . . . . . . . . . . . . . 58Review Questions . . . . . . . . . . . . . . . . . . 62
iii
Table of ContentsTable of Contents
vog13437_fm.qxd 9/6/02 4:03 PM Page iii

Chapter 4 Fasteners . . . . . . . . . . . . . . . . . . 64Nails . . . . . . . . . . . . . . . . . . . . . . . . . . 66Kinds of Nails . . . . . . . . . . . . . . . . . . . . 66Screws . . . . . . . . . . . . . . . . . . . . . . . . . 68Kinds of Screws . . . . . . . . . . . . . . . . . . . 68Bolts . . . . . . . . . . . . . . . . . . . . . . . . . . 69Anchors . . . . . . . . . . . . . . . . . . . . . . . . 70Connectors . . . . . . . . . . . . . . . . . . . . . . 75Adhesives . . . . . . . . . . . . . . . . . . . . . . . 77Review Questions . . . . . . . . . . . . . . . . . . 79
SECTION 2 Rough Carpentry. . . . . . . . . . . . . . . . . 81
Chapter 5 Blueprints, Codes, and Building Layout . . . . . . . . . . . . . . 83Blueprints. . . . . . . . . . . . . . . . . . . . . . . 85Codes. . . . . . . . . . . . . . . . . . . . . . . . . . 94Building Layout . . . . . . . . . . . . . . . . . . . 97Locating the Building . . . . . . . . . . . . . . 105Review Questions . . . . . . . . . . . . . . . . . 113
Chapter 6 Concrete Form Construction . . . . . . . . . . . . . . . 115The Nature of Concrete. . . . . . . . . . . . . . 117Types of Concrete Forms . . . . . . . . . . . . . 118Slabs Forms . . . . . . . . . . . . . . . . . . . . . 120Wall Forms . . . . . . . . . . . . . . . . . . . . . 122Concrete Forming Systems . . . . . . . . . . . 123Stair Forms . . . . . . . . . . . . . . . . . . . . . 124Economy and Conservation in
Form Building. . . . . . . . . . . . . . . . . . 125Concrete Reinforcement . . . . . . . . . . . . . 125Placing Concrete . . . . . . . . . . . . . . . . . . 126Estimating Concrete . . . . . . . . . . . . . . . 129Procedures . . . . . . . . . . . . . . . . . . . . . 130
Constructing Footing Forms. . . . . . . . . . . 130Erecting Wall Forms . . . . . . . . . . . . . . . . 132Constructing Concrete
Stair Forms . . . . . . . . . . . . . . . . . . . 139Review Questions . . . . . . . . . . . . . . . . . 141
iv RESIDENTIAL CONSTRUCTION ACADEMY: CARPENTRY
vog13437_fm.qxd 9/6/02 4:03 PM Page iv

Chapter 7 Floor Framing . . . . . . . . . . . . . . 143Types of Frame Construction . . . . . . . . . . 145Layout and Construction of the
Floor Frame . . . . . . . . . . . . . . . . . . . 152Termites . . . . . . . . . . . . . . . . . . . . . . . 160Procedures . . . . . . . . . . . . . . . . . . . . . 163
Installing Girders . . . . . . . . . . . . . . . . . 163Installing Sills . . . . . . . . . . . . . . . . . . . 164Laying Out Floor Joists and
Floor Openings . . . . . . . . . . . . . . . . . 166Framing Floor Openings . . . . . . . . . . . . . 169Installing Floor Joists . . . . . . . . . . . . . . . . 171Installing the Band Joist . . . . . . . . . . . . . . 173Laying Out and Cutting Wood
Cross-Bridging . . . . . . . . . . . . . . . . . . . 174Installing Bridging . . . . . . . . . . . . . . . . 175Installing Columns . . . . . . . . . . . . . . . . 176Applying Plywood Subflooring . . . . . . . . . 177
Review Questions . . . . . . . . . . . . . . . . . 178
Chapter 8 Wall and Ceiling Framing . . . . . . 180Parts of a Wall Frame . . . . . . . . . . . . . . 183Exterior Wall Framing . . . . . . . . . . . . . . 186Interior Framing. . . . . . . . . . . . . . . . . . 192Ceiling Joists . . . . . . . . . . . . . . . . . . . . 195Steel Framing. . . . . . . . . . . . . . . . . . . . 200Procedures . . . . . . . . . . . . . . . . . . . . . 204
Determining the Length of Studs . . . . . . . 204Determining the Size of Rough Openings . . 206Laying Out Wall Plate . . . . . . . . . . . . . . 207Assembling Wall Sections . . . . . . . . . . . . 210Erecting and Bracing Wall Sections . . . . . . 214Installing Backing and Blocking . . . . . . . . 215Layout and Spacing of Ceiling Joists . . . . . 216Installing Metal Framing. . . . . . . . . . . . . 217Framing a Door Opening
for a Three-Piece Frame . . . . . . . . . . . 218Framing a Door Opening
for a One-Piece Frame. . . . . . . . . . . . . 219Review Questions . . . . . . . . . . . . . . . . . 221
Chapter 9 Scaffolds, Ladders, and Sawhorses . . . . . . . . . . . . . . 223Scaffolds . . . . . . . . . . . . . . . . . . . . . . . 225Metal Tubular Frame Scaffold . . . . . . . . . 225
Table of Contents v
vog13437_fm.qxd 9/6/02 4:03 PM Page v
vi RESIDENTIAL CONSTRUCTION ACADEMY: CARPENTRY
Pump Jack Scaffolds . . . . . . . . . . . . . . . 237Roofing Brackets. . . . . . . . . . . . . . . . . . 238Ladders . . . . . . . . . . . . . . . . . . . . . . . 238Construction Aids . . . . . . . . . . . . . . . . . 240Scaffold Safety . . . . . . . . . . . . . . . . . . . 242Procedures . . . . . . . . . . . . . . . . . . . . . 243
Erecting a Scaffold . . . . . . . . . . . . . . . . 243Review Questions . . . . . . . . . . . . . . . . . 247
Chapter 10 Roof Framing. . . . . . . . . . . . . . . 249Roof Types. . . . . . . . . . . . . . . . . . . . . . 251Gable Roof. . . . . . . . . . . . . . . . . . . . . . 253Gable Studs . . . . . . . . . . . . . . . . . . . . . 260Hip Roof . . . . . . . . . . . . . . . . . . . . . . . 261Valley Rafters. . . . . . . . . . . . . . . . . . . . 264Shed Roof . . . . . . . . . . . . . . . . . . . . . . 266Dormers . . . . . . . . . . . . . . . . . . . . . . . 266Roof Trusses . . . . . . . . . . . . . . . . . . . . 270Roof Sheathing. . . . . . . . . . . . . . . . . . . 275Estimating . . . . . . . . . . . . . . . . . . . . . 276Procedures . . . . . . . . . . . . . . . . . . . . . 278
Common Rafter Layout. . . . . . . . . . . . . . 278Erecting the Gable Roof Frame . . . . . . . . . 282Installing Gable Studs . . . . . . . . . . . . . . 285Hip Rafter Layout . . . . . . . . . . . . . . . . . 286Jack Rafter Layout . . . . . . . . . . . . . . . . 289Valley Rafter Layout . . . . . . . . . . . . . . . 291Truss Installation . . . . . . . . . . . . . . . . . 293
Review Questions . . . . . . . . . . . . . . . . . 294
SECTION 3 Exterior Finish . . . . . . . . . . . . . . . . . . 297
Chapter 11 Windows and Doors . . . . . . . . . . 299Windows . . . . . . . . . . . . . . . . . . . . . . . 301Types of Windows . . . . . . . . . . . . . . . . . 304Window Installation . . . . . . . . . . . . . . . 307Doors . . . . . . . . . . . . . . . . . . . . . . . . . 309Parts of a Door Frame . . . . . . . . . . . . . . 316Setting a Prehung Door Frame. . . . . . . . . 318Door Fitting and Hanging . . . . . . . . . . . . 320Installing Exterior Door Locksets . . . . . . . 320Garage Doors . . . . . . . . . . . . . . . . . . . . 322
vog13437_fm.qxd 9/6/02 4:03 PM Page vi

Table of Contents vii
Procedures . . . . . . . . . . . . . . . . . . . . . 323Installing Windows . . . . . . . . . . . . . . . . 323Hanging Interior Doors . . . . . . . . . . . . . 325
Review Questions . . . . . . . . . . . . . . . . . 337
Chapter 12 Roofing . . . . . . . . . . . . . . . . . . 339Asphalt Shingles. . . . . . . . . . . . . . . . . . 341Roll Roofing. . . . . . . . . . . . . . . . . . . . . 345Flashing . . . . . . . . . . . . . . . . . . . . . . . 345Estimating . . . . . . . . . . . . . . . . . . . . . 350Procedures . . . . . . . . . . . . . . . . . . . . . 352
Installing Asphalt Shingles . . . . . . . . . . . 352Installing Roll Roofing . . . . . . . . . . . . . . 355Woven Valley Method. . . . . . . . . . . . . . . 358Closed Cut Valley Method . . . . . . . . . . . . 358Step Flashing Method . . . . . . . . . . . . . . 359
Review Questions . . . . . . . . . . . . . . . . . 360
Chapter 13 Siding and Decks . . . . . . . . . . . . 362Siding . . . . . . . . . . . . . . . . . . . . . . . . 364Vinyl and Aluminum Siding . . . . . . . . . . 373Cornices . . . . . . . . . . . . . . . . . . . . . . . 377Gutters and Downspouts. . . . . . . . . . . . . 380Decks . . . . . . . . . . . . . . . . . . . . . . . . . 382Stairs and Railings . . . . . . . . . . . . . . . . 384Estimating . . . . . . . . . . . . . . . . . . . . . 386Procedures . . . . . . . . . . . . . . . . . . . . . 387
Installing Horizontal Siding . . . . . . . . . . 387Installing Vertical Tongue-and-Groove . . . . 390Installing Panel Siding . . . . . . . . . . . . . . 392Installing Wood Shingles and Shakes . . . . . 392Applying Horizontal Vinyl Siding . . . . . . . 394Applying Vertical Vinyl Siding . . . . . . . . . 399Installing Gutters . . . . . . . . . . . . . . . . . 400Building a Deck . . . . . . . . . . . . . . . . . . 402
Review Questions . . . . . . . . . . . . . . . . . 407
SECTION4Interior Finish . . . . . . . . . . . . . . . . . . . 409
Chapter 14 Insulation and Wall Finish. . . . . . 411Insulation and Ventilation . . . . . . . . . . . 413Types of Insulation . . . . . . . . . . . . . . . . 414Installing Insulation . . . . . . . . . . . . . . . 417
vog13437_fm.qxd 9/6/02 4:03 PM Page vii

Condensation . . . . . . . . . . . . . . . . . . . . 418Ventilation . . . . . . . . . . . . . . . . . . . . . 420Drywall Construction . . . . . . . . . . . . . . . 421Concealing Fasteners and Joints. . . . . . . . 429Sheet Paneling . . . . . . . . . . . . . . . . . . . 433Estimating . . . . . . . . . . . . . . . . . . . . . 437Procedures . . . . . . . . . . . . . . . . . . . . . 438
Installing Flexible Insulation . . . . . . . . . . 438Cutting and Fitting Gypsum Board . . . . . . 440Making Cutouts in Wall Panels . . . . . . . . . 441Installing Ceiling Drywall . . . . . . . . . . . . 442Installing Horizontal Drywall. . . . . . . . . . 443Applying Joint Compound and Tape . . . . . 444Installing Sheet Paneling . . . . . . . . . . . . 446Installing Solid Wood Paneling. . . . . . . . . 449
Review Questions . . . . . . . . . . . . . . . . . 451
Chapter 15 Interior Finish . . . . . . . . . . . . . . 453Ceiling Finish. . . . . . . . . . . . . . . . . . . . 455Interior Molding . . . . . . . . . . . . . . . . . . 459Door Casings . . . . . . . . . . . . . . . . . . . . 464Base Trim . . . . . . . . . . . . . . . . . . . . . . 466Window Trim . . . . . . . . . . . . . . . . . . . . 467Finish Floors . . . . . . . . . . . . . . . . . . . . 467Estimating . . . . . . . . . . . . . . . . . . . . . 475Procedures . . . . . . . . . . . . . . . . . . . . . 476
Constructing the Grid Ceiling System. . . . . 476Applying Wall Molding . . . . . . . . . . . . . . 482Applying Door Casings . . . . . . . . . . . . . . 484Applying Base Moldings . . . . . . . . . . . . . 486Installing Window Trim . . . . . . . . . . . . . 488Installing Wood Flooring . . . . . . . . . . . . 491
Review Questions . . . . . . . . . . . . . . . . . 493
Chapter 16 Stair Framing and Finish . . . . . . . 495Stairway Design . . . . . . . . . . . . . . . . . . 497Stair Carriage . . . . . . . . . . . . . . . . . . . 504Housed Stringer . . . . . . . . . . . . . . . . . . 512Balustrade . . . . . . . . . . . . . . . . . . . . . 517Review Questions . . . . . . . . . . . . . . . . . 526
Chapter 17 Cabinets and Countertops . . . . . . 528Components of Manufactured Cabinets . . . 530Installing Manufactured Cabinets . . . . . . . 537
viii RESIDENTIAL CONSTRUCTION ACADEMY: CARPENTRY
vog13437_fm.qxd 9/6/02 4:03 PM Page viii

Making a Countertop . . . . . . . . . . . . . . . 537Cabinet Doors . . . . . . . . . . . . . . . . . . . 541Hinges . . . . . . . . . . . . . . . . . . . . . . . . 542Hanging Cabinet Doors . . . . . . . . . . . . . 545Procedures . . . . . . . . . . . . . . . . . . . . . 549
Installing Manufactured Cabinets . . . . . . . 549Review Questions . . . . . . . . . . . . . . . . . 553
Glossary . . . . . . . . . . . . . . . . . . . . . . . . . . . . . 555
Index . . . . . . . . . . . . . . . . . . . . . . . . . . . . . . . 561
Table of Contents ix
vog13437_fm.qxd 9/6/02 4:03 PM Page ix

vog13437_fm.qxd 9/6/02 4:03 PM Page x
About the Residential Construction Academy
One of the most pressing problems confronting the building industry today is the shortage ofskilled labor. The construction industry must recruit an estimated 200,000 to 250,000 new craftworkers each year to meet future needs. This shortage is expected to continue well into thenext decade because of projected job growth and a decline in the number of available workers.At the same time, the training of available labor is becoming an increasing concern through-
out the country. This lack of training opportunities has resulted in a shortage of 65,000 to 80,000 skilledworkers per year. The crisis is affecting all construction trades and is threatening the ability of builders toconstruct quality homes.
These challenges led to the creation of the innovative Residential Construction Academy Series. The Res-idential Construction Academy Series is the perfect way to introduce people of all ages to the building tradeswhile guiding them in the development of essential workplace skills, including carpentry, electrical wiring,HVAC, plumbing, and facilities maintenance. The products and services offered through the Residential Con-struction Academy are the result of cooperative planning and rigorous joint efforts between industry andeducation. The program was originally conceived by the National Association of Home Builders (NAHB)—the premier association of more than 200,000 member groups in the residential construction industry—and its workforce development arm, the Home Builders Institute (HBI).
For the first time, construction professionals and educators created national standards for the con-struction trades. In the summer of 2001, NAHB, through the HBI, began the process of developing resi-dential craft standards in five trades: carpentry, electrical wiring, HVAC, plumbing, and facilities mainte-nance. Groups of carpentry employers from across the country met with an independent research andmeasurement organization to begin the development of new craft training standards. Care was taken toassure representation of builders and remodelers, residential and light commercial, custom single familyand high production builders. The guidelines from the National Skills Standards Board were followed in de-veloping the new standards. In addition, the process met or exceeded American Psychological Associationstandards for occupational credentialing.
Next, through a partnership between HBI and Delmar Learning, learning materials—textbooks, videos,and instructor’s curriculum and teaching tools—were created to teach these standards effectively. A foun-dational tenet of this series is that students learn by doing. Integrated into this colorful, highly illustratedtext are Procedure sections designed to help students apply information through hands-on, active appli-cation. A constant focus of the Residential Construction Academy is teaching the skills needed to be suc-cessful in the construction industry and constantly applying the learning to real-world applications.
Perhaps most exciting to learners and industry is the creation of a national registry of students whohave successfully completed courses in the Residential Construction Academy Series. This registry or tran-script service provides an opportunity for easy access for verification of skills and competencies achieved.The registry links construction industry employers and qualified potential employees in an online data-base facilitating student job searches and the employment of skilled workers.
PrefacePreface
xi
vog13437_fm.qxd 9/6/02 4:04 PM Page xi

xii
About This BookAbout This Book
home is an essential part of human life. It provides protection, security, and privacy to its oc-cupants. It is viewed as the single most important possession a family can own. This book iswritten for students who want to learn how to build a home.
This book is organized in four sections: Tools and Materials, Rough Carpentry, Exterior Fin-ish, and Interior Finish. These sections and the chapters within them are presented in the or-
der in which a home is constructed.We begin with an understanding of the tools and building materials used in residential construction.
Hand and power tools provide the means to shape the material into the desired form. The choices of ma-terial are vast and change as technology provides better products to meet the needs of the industry. Fas-teners hold it all together.
Rough framing creates the outline of the building. The learner will understand how a building growsand seems to come alive where empty space once existed. Carpenters begin where the masons leave off byinstalling the floor and walls. Workers are required to work above the ground using scaffolds and ladders;safety is a constant focus for the learner throughout the book. Once skill at working above ground isachieved, the roof is erected. After the outline of the building is completed, it is ready for the finishesthat make the building weathertight and comfortable.
The learner then moves on to the exterior finish that covers the frame, protecting it from the effectsof weather and seasonal changes. Each locale has its particular climatic influence. Some regions are coldand homes there must be well insulated; others are warm but subject to high winds and hurricanes. Otherareas are somewhere in between. The exterior finish defends the home and makes an architectural state-ment of style.
Interior finish provides flat surfaces ready for decor. It completes the boundary between the outsideand the warmth or coolness of inside. The learner is introduced to many different types of materials thatmay be used for finishing the interior and exterior building surfaces.
This book is designed to present information in a step-by-step fashion. Learners are expected to under-stand the skills and techniques of earlier chapters before going on to new material. The learners’ knowledgeof construction grows with the home. Yet, just as it is OK to cut lumber using your right hand or your left,variations in construction techniques do exist. It should be understood at the outset that there is more thanone way to do most tasks. The techniques adopted for this book are time tested and chosen for their sim-plicity and straightforward approach, making the presentation of this information as easy as possible.
Life as a construction worker is a noble profession. Workers have the opportunity to work with theirhands in a creative manner. Taking materials delivered to the site and generating a structure can bringsomeone’s dream to fruition. Anyone with the desire to do so can learn the skills to accomplish the tasksof home construction. It is to those students who choose to follow our forefathers into the field of con-struction that this book is dedicated.
A
vog13437_fm.qxd 9/9/02 4:07 PM Page xii

About This Book xiii
Features
This innovative series was designed with input from educators and industry professionals and informedby the curriculum and training objectives established by the standards committee. The following featuresaid learning:
Active learning is a core concept of the Residential Construc-tion Academy Series. Information is heavily illustrated to pro-vide a visual of new tools and tasksencountered by learners. Chaptersalso contain a Procedures sectionthat takes the information and ap-plies it so that learning is accom-plished through doing. In the Pro-cedures, various tasks in homeconstruction are grouped in a step-by-step approach. The overall ef-fect is a clear view of the task, mak-ing learning easier.
Procedures
2" X 8"SIDE
1" X 4"STAKE
1" X 4"SPREADER
2" X 4"STAKE
2" X 4"BRACE
OUTSIDEEDGE FORM
LEVEL
INNER EDGEFORM
C
D
CHAPTER 6 Concrete Form Construction 131
Constructing Footing Forms
LINE
BATTER BOARD
SAW KERF
BACK SLOPE
FOOTING TRENCH,SHARP CUT ORUSE FORM BOARDS
SPACE FOR TILING ORWATERPROOFINGWALL
NO FILL
TOPSOIL
PLUMB LINE
WALL LINE
Drive corner stakes to the correctelevation and stretch lines be-tween the stakes if desired.
• Begin forming with the outsideform board using stakes to holdthe sides in position. Spacestakes 4 to 6 feet apart or as nec-essary to hold the form straight.Fasten the sides by driving nailsthrough the stakes. Using duplexnails will speed up form removal.Keep the top inside corner of thisform as close as possible to theline without touching it. Be surethe form does not touch the line.If the form touches the line atany point, the line is moved andis no longer straight. Continueforming the outside of the footingin this manner all around.
• Before erecting the inside forms,cut a number of spreaders.These are nailed to the top edgesof the form. They tie the two sidestogether and keep them the cor-rect distance apart. Their length isthe width of the footing plustwice the form board thickness.
B
A
BATTERBOARD
MOVE BUILDING LINES TO REPRESENT OUTSIDE OF FOOTING
PLUMB BOB
INTERMEDIATESTAKES
EXCAVATED AREALINE
LINE
THICKNESSOFEDGEFORM
INTERMEDIATESTAKE
B
130 SECTION TWO Rough Carpentry
Stretch lines back on the batterboards in line with the outsideedge of the footing. This is doneby measuring from the saw kerf onthe batter board ledger toward theoutside of the building, one-halfthe wall thickness. Suspend aplumb bob from the batter boardlines at each corner.
A Erect the inside forms in a mannersimilar to the outside forms. Placestakes for the inside forms oppo-site those holding the outsideform. Level across from the out-side form to determine the heightof the inside form.
C
Fasten the spreaders across theform at intervals necessary to holdthe form the correct distanceapart. Brace the stakes where nec-essary to hold the forms straight.In many cases, no bracing is nec-essary. Footing forms are some-times braced by shoveling earth orplacing large stones against theoutside of the forms.
• After the footing concrete hashardened sufficiently, remove andclean the footing forms. The sal-vaged forms can be reused. Neverleave any form board behind to beburied because it will draw ter-mites.
D
Learning features such as the Introduction, Objectives,and Glossary set the stage for the coming body of knowledge
and help learners identify key con-cepts and information. Theselearning features serve as a roadmap for continuing through thechapter. Learners also may usethem as an on-the-job reference.
CHAPTER 3 Wood and Wood Products 47
air dried technique of removing wa-ter from lumber using natural windcurrents
annular rings the rings seen whenviewing a cross-section of a treetrunk; each ring constitutes one yearof tree growth
board lumber usually less than 2 inches thick
board foot a measure of lumber vol-ume that equals 1 foot square and 1inch thick or any equivalent lumbervolume. The letter M is used to repre-sent 1000 board feet.
cambium layer a layer just insidethe bark of a tree where new cells areformed
coniferous trees that are cone-bear-ing; also known as evergreen trees
deciduous trees that shed leaveseach year
dimension a term used to define ameasurement of an item; also used torefer to all 2x lumber used in framing
dry kiln large ovens used to removewater from lumber
finger joint a process where shorterlengths are glued together usingdeep, thin V grooves resulting inlonger lengths
header framing members placed atright angles to joists, studs, andrafters to form and support openings
heartwood the wood in the innerpart of a tree, usually darker and con-taining inactive cells
lumber general term for wood thatis cut from a log to form boards,planks, and timbers
medullary rays bands of cells radi-ating from the cambium layer to thepith of a tree to transport nourish-ment toward the center
millwork any wood products thathave been manufactured, such asmoldings, doors, windows, and stairsfor use in building construction;sometimes called joinery
on center (OC) the distance fromthe center of one structural memberto the center of the next one
panel a large sheet of building ma-terial that usually measures 4 � 8 feet
pith the small, soft core at the cen-ter of a tree
plain-sawed a method of sawinglumber that produces flat-grain whereannular rings tend to be parallel tothe width of the board
quarter-sawed a method of sawinglumber that produces a close grainpattern where the annular rings tendto be perpendicular to the width ofthe board
sapwood the outer part of a treejust beneath the bark containing ac-tive cells
sawyer a person whose job is to cutlogs into lumber
tempered treated in a special wayto make a material harder andstronger
timbers large pieces of lumber over5 inches in thickness and width
Glossary of Wood and Wood Product Terms
The construction material most often associated with a carpen-ter is wood. Its flexibility and durability make it the first choicein many applications in home construction. Wood is easy to
tool and work with, pleasing to look at and smell, and strongenough to last a long time.
Lumber is manufactured from the renewable resources of the forest.Trees are harvested and sawn into lumber in many shapes and sizeswith a variety of characteristics. It is necessary to understand thenature of wood to get the best results from its use. With this knowl-edge, the carpenter can protect lumber from decay, select it for ap-propriate use, work it with proper tools, and join and fasten it to thebest advantage.
The industry of engineered lumber has emerged to reduce manu-facturing waste and improve the strength of wood products. Theseimprovements to manufacturing efficiency have led to better stew-ardship of the natural resource. Products have been developed fromreconstituted wood in the form of large panels, commonly called ply-wood, and other shapes for use as structural members of a building.They are collectively referred to as engineered lumber.
The types and styles of wood and wood products are abundant. To beable to use these materials to the best efficiency, the tradespersonmust understand them. This understanding begins with an ability tomeasure and calculate quantities accurately.
After completing this unit, the student should be able to:
X define hardwood and softwood and give examples of some common kinds.
X state the grades and sizes of lumber.
X measure linear foot and compute square foot and board foot measure.
X describe the composition, kinds, sizes, and several uses of: plywood,oriented strand board, particleboard, hardboard, medium-densityfiberboard, and softboard.
X describe the uses and sizes of: laminated veneer lumber, parallelstrand lumber, laminated strand lumber, wood I-beams, and glue-laminated beams.
Chapter 3 Wood and WoodProducts
Wood and WoodProducts
46
OBJECTIVES
vog13437_fm.qxd 9/9/02 4:17 PM Page xiii
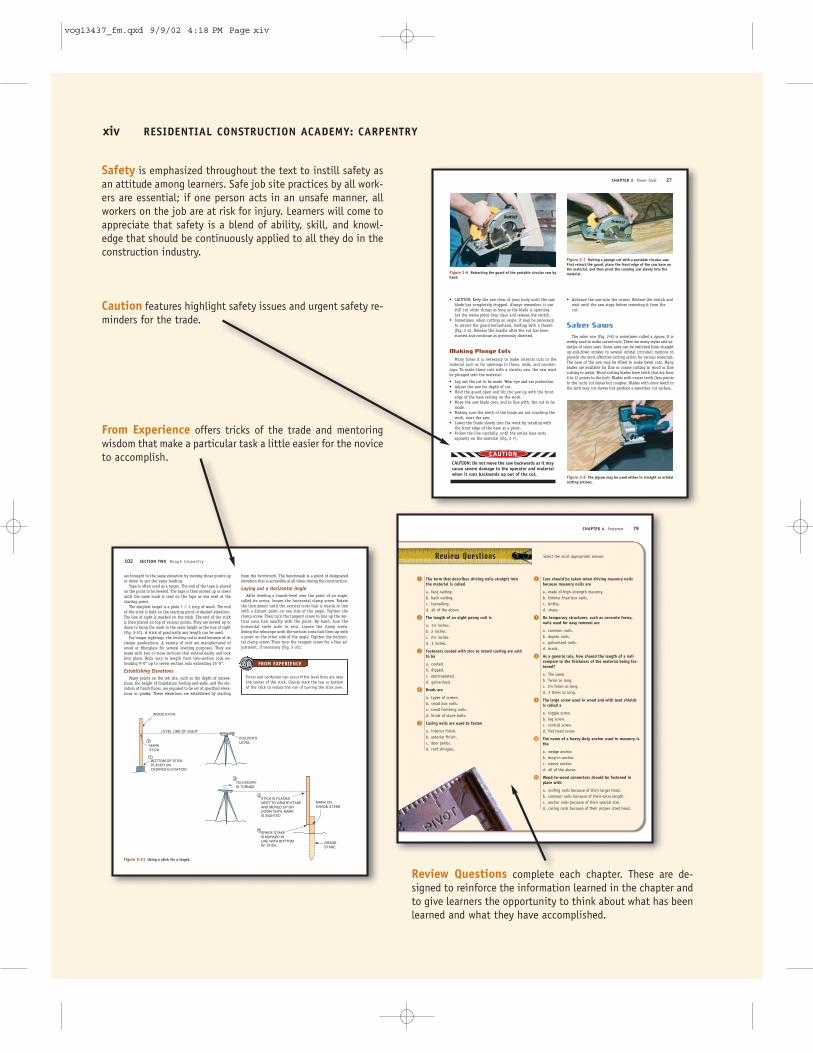
Safety is emphasized throughout the text to instill safety asan attitude among learners. Safe job site practices by all work-ers are essential; if one person acts in an unsafe manner, allworkers on the job are at risk for injury. Learners will come toappreciate that safety is a blend of ability, skill, and knowl-edge that should be continuously applied to all they do in theconstruction industry.
Caution features highlight safety issues and urgent safety re-minders for the trade.
xiv RESIDENTIAL CONSTRUCTION ACADEMY: CARPENTRY
• CAUTION: Keep the saw clear of your body until the sawblade has completely stopped. Always remember, it canstill cut other things as long as the blade is spinning.Let the waste piece drop clear and release the switch.
• Sometimes, when cutting an angle, it may be necessaryto retract the guard beforehand, holding with a thumb(Fig. 2-6). Release the handle after the cut has beenstarted and continue as previously directed.
Making Plunge Cuts
Many times it is necessary to make internal cuts in thematerial such as for openings in floors, walls, and counter-tops. To make these cuts with a circular saw, the saw mustbe plunged into the material.
• Lay out the cut to be made. Wear eye and ear protection.• Adjust the saw for depth of cut.• Hold the guard open and tilt the saw up with the front
edge of the base resting on the work.• Move the saw blade over, and in line with, the cut to be
made.• Making sure the teeth of the blade are not touching the
work, start the saw.• Lower the blade slowly into the work by rotating with
the front edge of the base as a pivot.• Follow the line carefully, until the entire base rests
squarely on the material (Fig. 2-7).
CAUTION: Do not move the saw backwards as it maycause severe damage to the operator and materialwhen it runs backwards up out of the cut.
CHAPTER 2 Power Tools 27
• Advance the saw into the corner. Release the switch andwait until the saw stops before removing it from thecut.
Saber Saws
The saber saw (Fig. 2-8) is sometimes called a jigsaw. It iswidely used to make curved cuts. There are many styles and va-rieties of saber saws. Some saws can be switched from straightup-and-down strokes to several orbital (circular) motions toprovide the most effective cutting action for various materials.The base of the saw may be tilted to make bevel cuts. Manyblades are available for fine or coarse cutting in wood or finecutting in metal. Wood cutting blades have teeth that are from6 to 12 points to the inch. Blades with coarse teeth (less pointsto the inch) cut faster but rougher. Blades with more teeth tothe inch may cut slower but produce a smoother cut surface.
Figure 2-6 Retracting the guard of the portable circular saw byhand.
Figure 2-7 Making a plunge cut with a portable circular saw.First retract the guard, place the front edge of the saw base onthe material, and then pivot the running saw slowly into thematerial.
Figure 2-8 The jigsaw may be used either in straight or orbitalcutting actions.
Review Questions complete each chapter. These are de-signed to reinforce the information learned in the chapter andto give learners the opportunity to think about what has beenlearned and what they have accomplished.
are brought to the same elevation by moving those points upor down to get the same reading.
Tape is often used as a target. The end of the tape is placedon the point to be leveled. The tape is then moved up or downuntil the same mark is read on the tape as was read at thestarting point.
The simplest target is a plain 1 � 2 strip of wood. The endof the stick is held on the starting point of desired elevation.The line of sight is marked on the stick. The end of the stickis then placed on top of various points. They are moved up ordown to bring the mark to the same height as the line of sight(Fig. 5-31). A stick of practically any length can be used.
For longer sightings, the leveling rod is used because of itsclearer graduations. A variety of rods are manufactured ofwood or fiberglass for several leveling purposes. They aremade with two or more sections that extend easily and lockinto place. Rods vary in length from two-section rods ex-tending 9'-0" up to seven-section rods extending 25'-0".
Establishing ElevationsMany points on the job site, such as the depth of excava-
tions, the height of foundation footing and walls, and the ele-vation of finish floors, are required to be set at specified eleva-tions or grades. These elevations are established by starting
102 SECTION TWO Rough Carpentry
from the benchmark. The benchmark is a point of designatedelevation that is accessible at all times during the construction.
Laying out a Horizontal AngleAfter leveling a transit-level over the point of an angle,
called its vertex, loosen the horizontal clamp screw. Rotatethe instrument until the vertical cross hair is nearly in linewith a distant point on one side of the angle. Tighten theclamp screw. Then turn the tangent screw to line up the ver-tical cross hair exactly with the point. By hand, turn thehorizontal circle scale to zero. Loosen the clamp screw.Swing the telescope until the vertical cross hair lines up witha point on the other side of the angle. Tighten the horizon-tal clamp screw. Then turn the tangent screw for a fine ad-justment, if necessary (Fig. 5-32).
Errors and confusion can occur if the level lines are nearthe center of the stick. Clearly mark the top or bottomof the stick to reduce the risk of turning the stick over.
WOOD STICK
LEVEL LINE OF SIGHT
MARKSTICK
BOTTOM OF STICKPLACED ONDESIRED ELEVATION
BUILDER’SLEVEL
TELESCOPEIS TURNED
STICK IS PLACEDNEXT TO GRADE STAKEAND MOVED UP ORDOWN UNTIL MARKIS SIGHTED
GRADE STAKEIS MARKED INLINE WITH BOTTOMOF STICK
MARK ON GRADE STAKE
GRADESTAKE
1
2
3
4
5
Figure 5-31 Using a stick for a target.
FROM EXPERIENCE
CHAPTER 4 Fasteners 79
Review Questions Select the most appropriate answer.
b The term that describes driving nails straight intothe material is called
a. face nailing.b. back nailing.c. toenailing.d. all of the above.
c The length of an eight penny nail is
a. 11⁄2 inches.b. 2 inches.c. 21⁄2 inches.d. 3 inches.
d Fasteners coated with zinc to retard rusting are saidto be
a. coated.b. dipped.c. electroplated.d. galvanized.
e Brads are
a. types of screws.b. small box nails.c. small finishing nails.d. kinds of stove bolts.
f Casing nails are used to fasten
a. interior finish.b. exterior finish.c. door jambs.d. roof shingles.
g Care should be taken when driving masonry nailsbecause masonry nails are
a. made of high-strength masonry.b. thinner than box nails.c. brittle.d. sharp.
h On temporary structures, such as concrete forms,nails used for easy removal are
a. common nails.b. duplex nails.c. galvanized nails.d. brads.
i As a general rule, how should the length of a nailcompare to the thickness of the material being fas-tened?
a. The same.b. Twice as long.c. 21⁄2 times as long.d. 3 times as long.
j The large screw used in wood and with lead shieldsis called a
a. toggle screw.b. lag screw.c. conical screw.d. flat head screw.
1) The name of a heavy-duty anchor used in masonry isthe
a. wedge anchor.b. drop-in anchor.c. sleeve anchor.d. all of the above.
1! Wood-to-wood connectors should be fastened inplace with
a. roofing nails because of their larger head.b. common nails because of their extra length.c. anchor nails because of their special size.d. casing nails because of their proper sized head.
From Experience offers tricks of the trade and mentoringwisdom that make a particular task a little easier for the noviceto accomplish.
vog13437_fm.qxd 9/9/02 4:18 PM Page xiv

Turnkey Curriculum and
Teaching Material Package
We understand that a text is only one part of a complete, turnkey educational system. We also un-derstand that instructors want to spend their time on teaching, not preparing to teach. The ResidentialConstruction Academy Series is committed to providing thorough curriculum and prepatory materials toaid instructors and alleviate some of their heavy preparation commitments. An integrated teaching so-lution is ensured with the text, Instructor’s e.resource™, print Instructor’s Resource Guide, and studentvideos.
e.resource™
Delmar Learning’s e.resource™ is a complete guide to classroom management. The CD-ROM contains lec-ture outlines, notes to instructors with teaching hints, cautions, answers to review questions, and otheraids for instructors using this series. Designed as a complete and integrated package, e.resource also pro-vides suggestions for when and how to use the accompanying PowerPoint, Computerized Test Bank, andVideo package components. An Instructor’s Resource Guide is also available.
PowerPoint
The author has created a series of PowerPoint presentations that give thorough, step-by-step overviewsof the crucial topics of the course. These presentations can be used to introduce or review the topics.
Videos
The Carpentry Video Series is an integrated part of the Residential Construction Academy Carpentry pack-age. This video series steps viewers through the process of constructing a home. The series contains a setof eight, 20-minutes videos that cover everything from the basics of obtaining the building permit to thedetail work of interior trim. Special geographic considerations are addressed to more accurately reflectbuilding practices throughout the United States. In addition, the videos offer such features as Carpenter’sTips and Safety Tips full of practical advice from the experts.
The complete set includes: Video #1–Building Layout; Video #2–Form & Concrete Placement; Video#3–Sub-Flooring & Wood-Bearing Walls; Video #4–Truss Installation; Video #5–Window & Door Installation;Video #6–Interior Trim; Video #7–Interior Partition Framing; Video #8–Stair Construction.
CD Courseware
This package also includes computer-based training that uses video, animation, and testing to intro-duce, teach, or remediate the concepts covered in the videos. Students will be pretested on the materialand then, if needed, provided with suitable remediation to ensure understanding of the concepts. Posttestscan be administered to ensure that students have gained mastery of all material.
About This Book xv
vog13437_fm.qxd 9/6/02 4:08 PM Page xv

he author of this text, Floyd Vogt, is a sixth-generation carpenter/contractor. He was raised in afamily with a small business devoted to all phases of home construction and began working inthe family business at age 15.
After completing a B.A. in chemistry from the State University of New York College at Oneonta,Mr. Vogt returned to the field as a self-employed remodeler. In 1985, he began teaching at SUNY
Delhi College of Technology in Delhi, New York. He is currently an Associate Professor of Carpentry atDelhi, where he has taught many courses, including Light Framing, Advanced Framing, Math, Energy Ef-ficient Construction, Finish Carpentry, and Estimating. Mr. Vogt is a Carpentry regional coordinator for theVocational Industrial Clubs of America (VICA) and serves as a post-secondary VICA student advisor.
Compliance with Apprenticeship, Training,
Employer, and Labor Services (ATELS)
These materials are in full compliance with the Apprenticeship, Training, Employer, and Labor Services(ATELS) requirements for classroom training.
About the AuthorAbout the Author
xvi
T
vog13437_fm.qxd 9/6/02 4:08 PM Page xvi
Carpentry National Skill Standards
The NAHB and HBI would like to thank the many individuals, members, and companies that partici-pated in the creation of the Carpentry National Skill Standards. Special thanks are extended to the fol-lowing individuals and companies:
Karen ButtsVinyl Siding Institute
Kevin EddyLes Eddy & Sons General Contractors, Inc.
Tim FallerField Training Services
Fred HumphreysHome Builders Institute
Bob JenkinsMaryland Correctional Training Center
Eric ListouTop Quality Remodeling
Mark MartinPenobscot Job Corp Center
AcknowledgmentsAcknowledgments
Jack SandersHome Builders Institute
David SittonBeazer Homes
Ed SniderBeazer Homes
David VanCiseIndian River Community College
Floyd VogtDelhi College of Technology
Ray WasdykeWasdyke Associates
In addition to the standards committee, many other people contributed their time and expertise to theproject. They have spent hours attending focus groups, reviewing and contributing to the work. DelmarLearning and the author extend our sincere gratitude to:
Greg FletcherKennebec Valley Technical College
Tim LockleyGeorge Jr. Republic Vo-Tech
Mark MartinPenobscot Job Corp Center
David McCosbyNew Castle School of Trades
Lester StackpoleEastern Maine Technical College
David VanCiseIndian River Community College
xvii
Finally, the author would like to thank Greg Black, for his work on the photos, and Steve Munson ofMunson’s Building Supplies (Oneonta, NY), for his gracious contributions.
vog13437_fm.qxd 9/6/02 4:09 PM Page xvii

vog13437_fm.qxd 9/6/02 4:09 PM Page xviii