Embed Size (px)
Citation preview
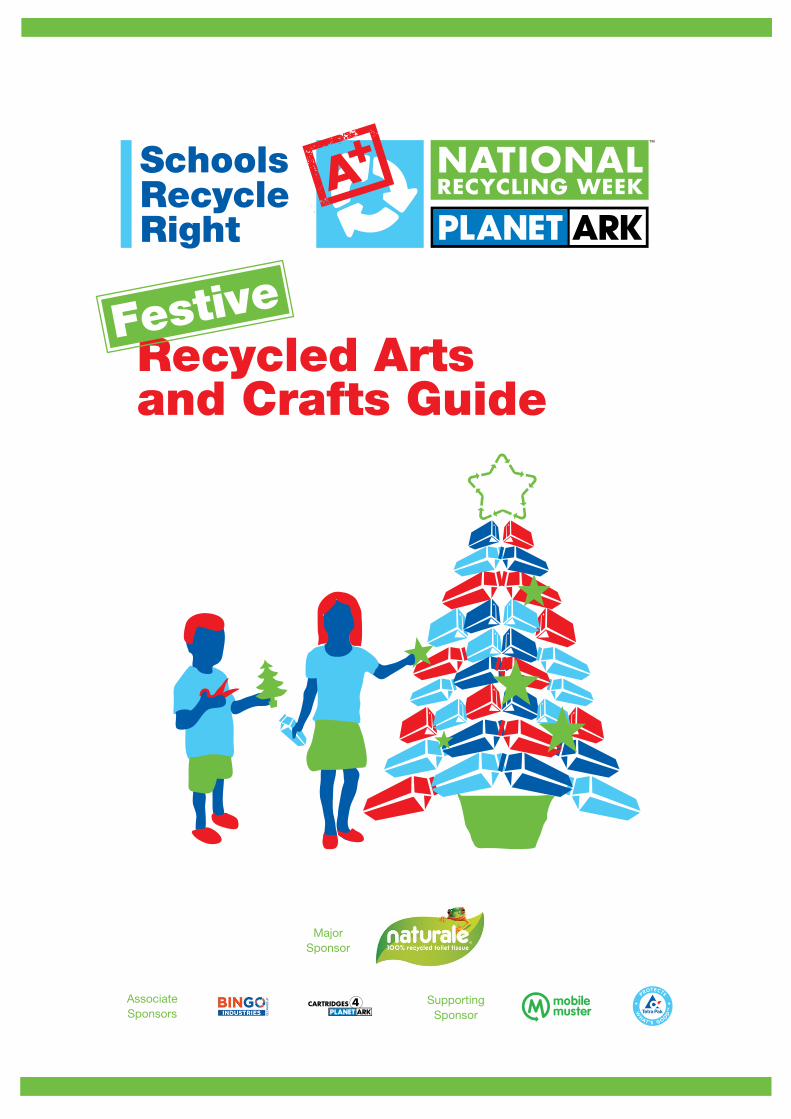
Recycled Arts and Crafts Guide
Festive
Supporting Sponsor
Associate Sponsors
Major Sponsor
2Visit SchoolsRecycle.PlanetArk.org to register your school’s events and get information, updates and free resources to help plan your activities. 2
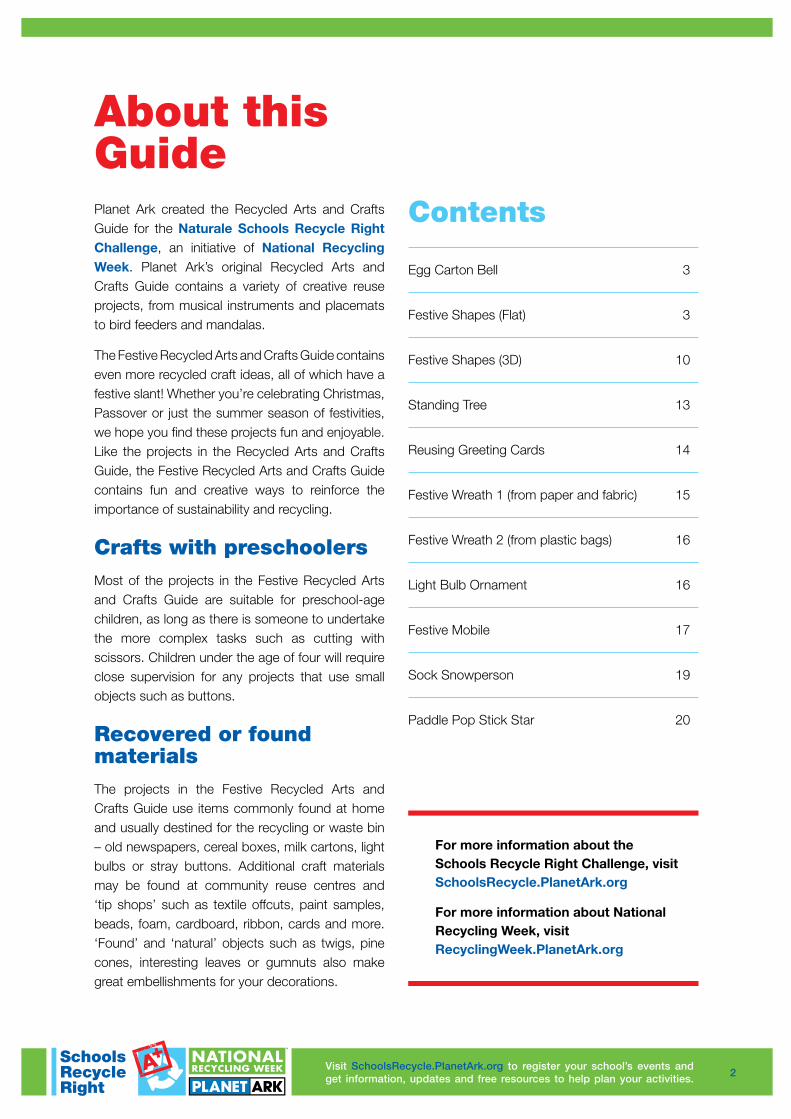
About this GuidePlanet Ark created the Recycled Arts and Crafts Guide for the Naturale Schools Recycle Right Challenge, an initiative of National Recycling Week. Planet Ark’s original Recycled Arts and Crafts Guide contains a variety of creative reuse projects, from musical instruments and placemats to bird feeders and mandalas.
The Festive Recycled Arts and Crafts Guide contains even more recycled craft ideas, all of which have a festive slant! Whether you’re celebrating Christmas, Passover or just the summer season of festivities, we hope you find these projects fun and enjoyable. Like the projects in the Recycled Arts and Crafts Guide, the Festive Recycled Arts and Crafts Guide contains fun and creative ways to reinforce the importance of sustainability and recycling.
Crafts with preschoolersMost of the projects in the Festive Recycled Arts and Crafts Guide are suitable for preschool-age children, as long as there is someone to undertake the more complex tasks such as cutting with scissors. Children under the age of four will require close supervision for any projects that use small objects such as buttons.
Recovered or found materialsThe projects in the Festive Recycled Arts and Crafts Guide use items commonly found at home and usually destined for the recycling or waste bin – old newspapers, cereal boxes, milk cartons, light bulbs or stray buttons. Additional craft materials may be found at community reuse centres and ‘tip shops’ such as textile offcuts, paint samples, beads, foam, cardboard, ribbon, cards and more. ‘Found’ and ‘natural’ objects such as twigs, pine cones, interesting leaves or gumnuts also make great embellishments for your decorations.
Contents
Egg Carton Bell 3
Festive Shapes (Flat) 3
Festive Shapes (3D) 10
Standing Tree 13
Reusing Greeting Cards 14
Festive Wreath 1 (from paper and fabric) 15
Festive Wreath 2 (from plastic bags) 16
Light Bulb Ornament 16
Festive Mobile 17
Sock Snowperson 19
Paddle Pop Stick Star 20
For more information about the Schools Recycle Right Challenge, visit SchoolsRecycle.PlanetArk.org
For more information about National Recycling Week, visit RecyclingWeek.PlanetArk.org
3Visit SchoolsRecycle.PlanetArk.org to register your school’s events and get information, updates and free resources to help plan your activities. 3
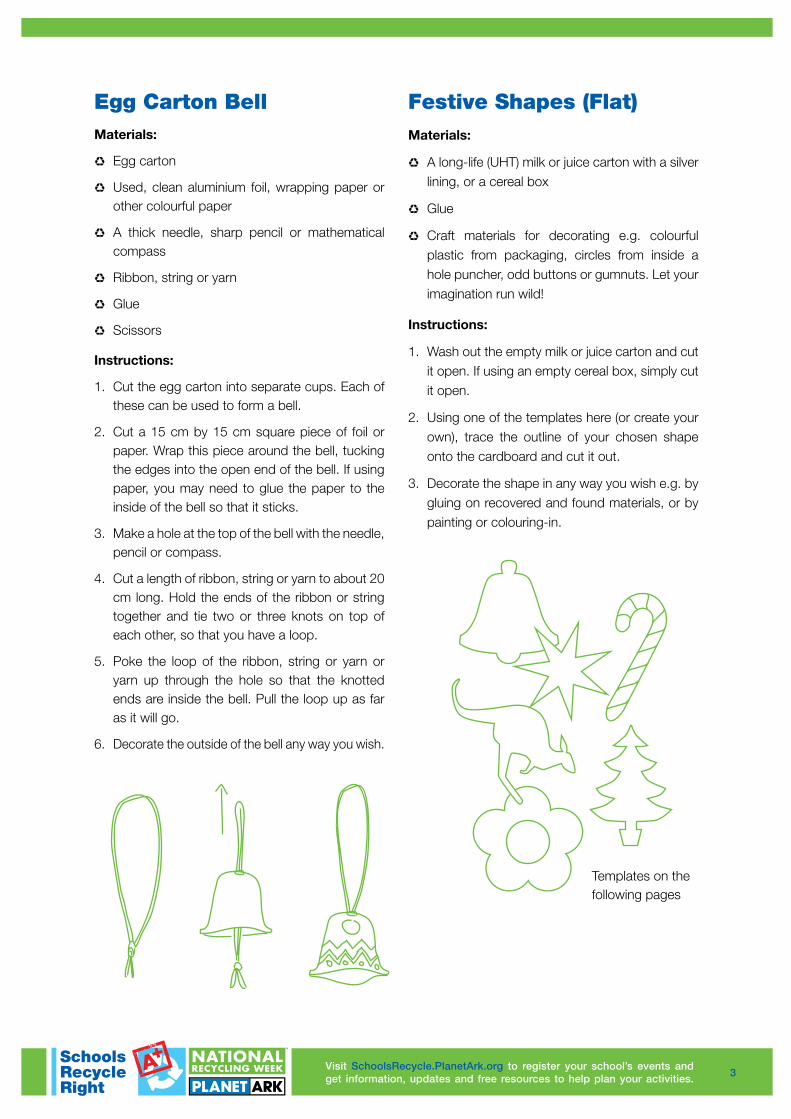
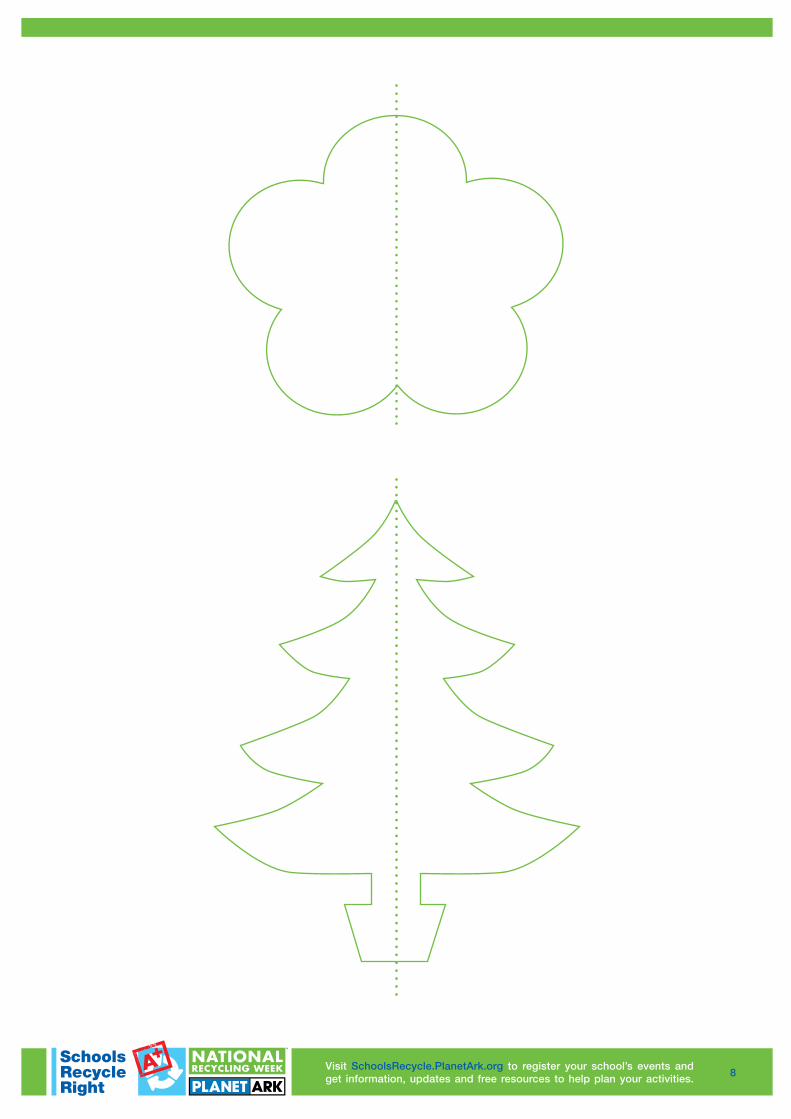
Festive Shapes (Flat)Materials:
♻ A long-life (UHT) milk or juice carton with a silver lining, or a cereal box
♻ Glue
♻ Craft materials for decorating e.g. colourful plastic from packaging, circles from inside a hole puncher, odd buttons or gumnuts. Let your imagination run wild!
Instructions:
1. Wash out the empty milk or juice carton and cut it open. If using an empty cereal box, simply cut it open.
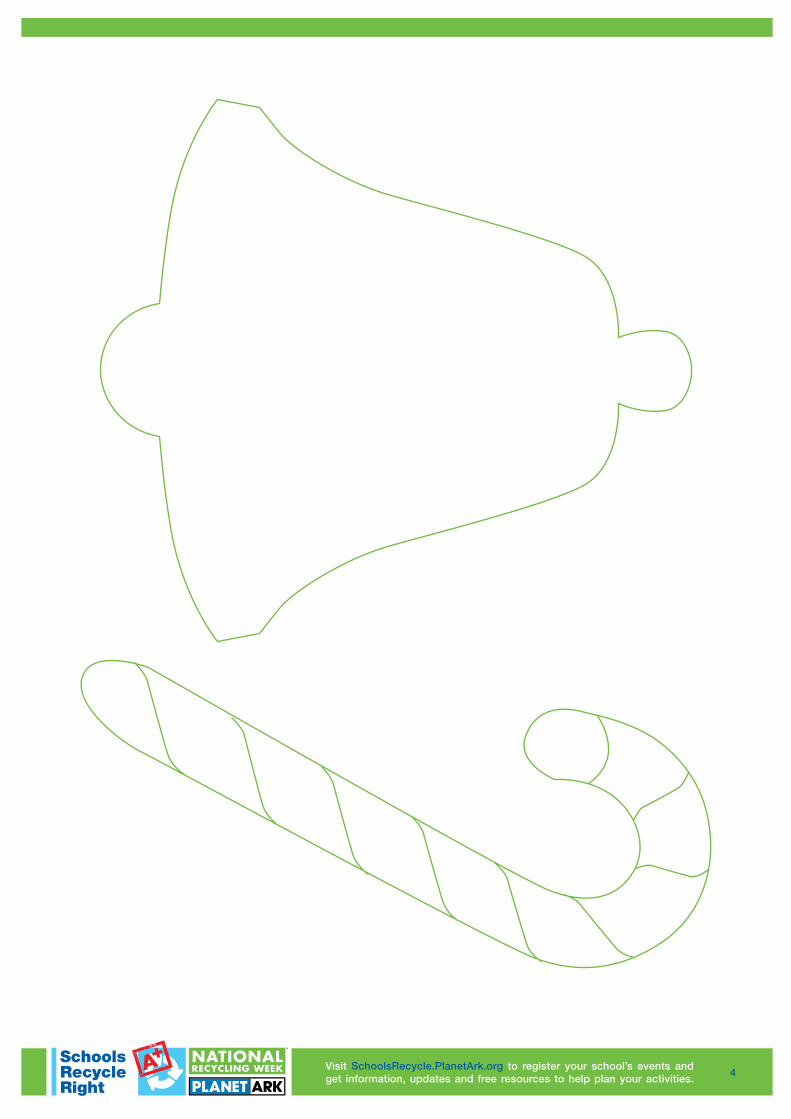
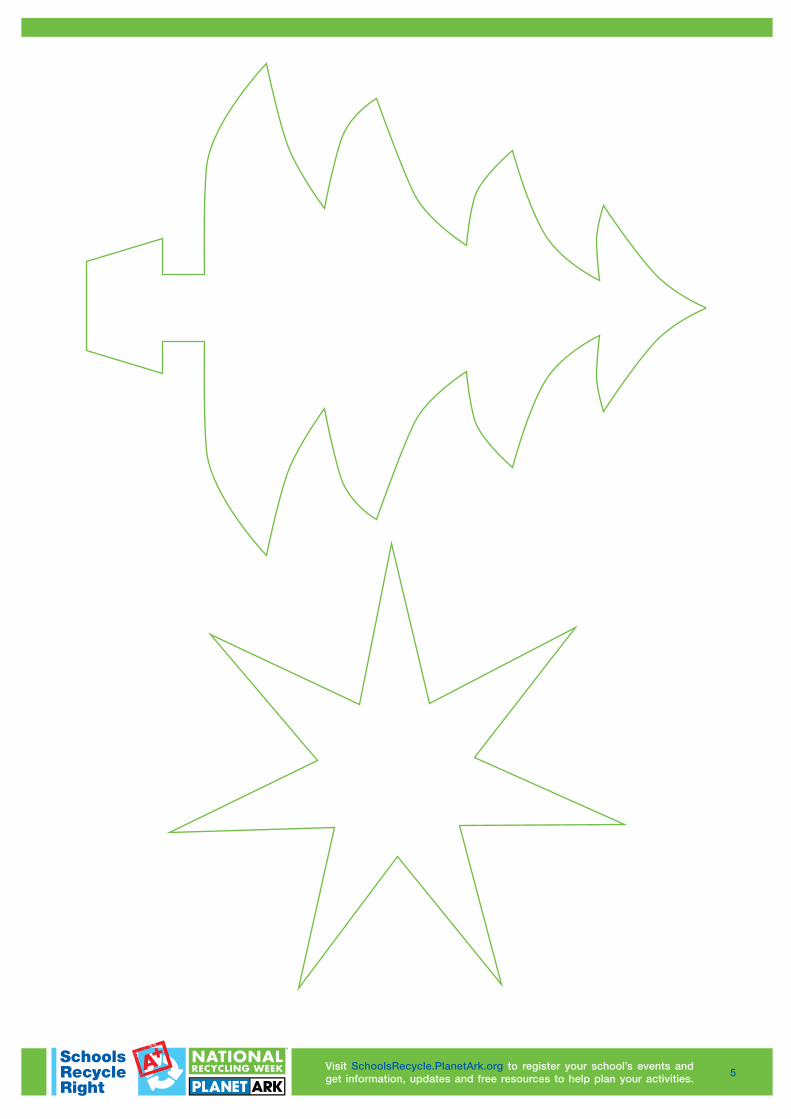
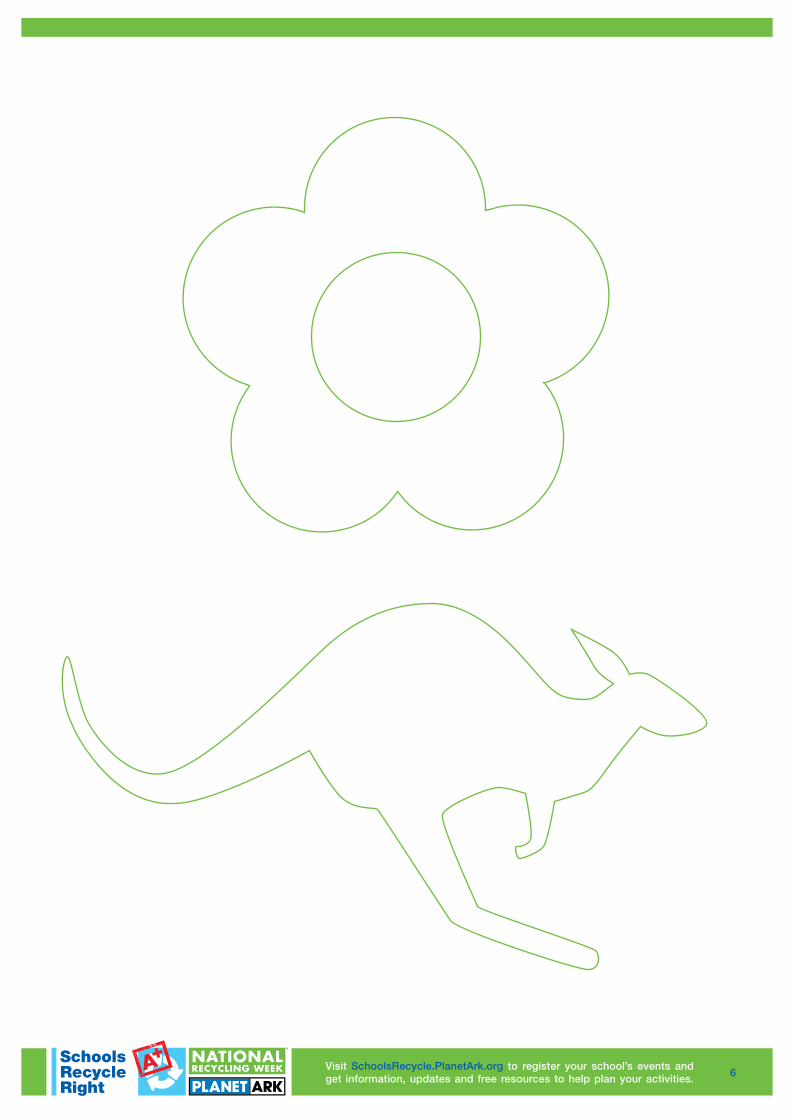
2. Using one of the templates here (or create your own), trace the outline of your chosen shape onto the cardboard and cut it out.
3. Decorate the shape in any way you wish e.g. by gluing on recovered and found materials, or by painting or colouring-in.
Egg Carton BellMaterials:
♻ Egg carton
♻ Used, clean aluminium foil, wrapping paper or other colourful paper
♻ A thick needle, sharp pencil or mathematical compass
♻ Ribbon, string or yarn
♻ Glue
♻ Scissors
Instructions:
1. Cut the egg carton into separate cups. Each of these can be used to form a bell.
2. Cut a 15 cm by 15 cm square piece of foil or paper. Wrap this piece around the bell, tucking the edges into the open end of the bell. If using paper, you may need to glue the paper to the inside of the bell so that it sticks.
3. Make a hole at the top of the bell with the needle, pencil or compass.
4. Cut a length of ribbon, string or yarn to about 20 cm long. Hold the ends of the ribbon or string together and tie two or three knots on top of each other, so that you have a loop.
5. Poke the loop of the ribbon, string or yarn or yarn up through the hole so that the knotted ends are inside the bell. Pull the loop up as far as it will go.
6. Decorate the outside of the bell any way you wish.
Templates on the following pages
4Visit SchoolsRecycle.PlanetArk.org to register your school’s events and get information, updates and free resources to help plan your activities. 4
5Visit SchoolsRecycle.PlanetArk.org to register your school’s events and get information, updates and free resources to help plan your activities. 5
6Visit SchoolsRecycle.PlanetArk.org to register your school’s events and get information, updates and free resources to help plan your activities. 6
7Visit SchoolsRecycle.PlanetArk.org to register your school’s events and get information, updates and free resources to help plan your activities. 7
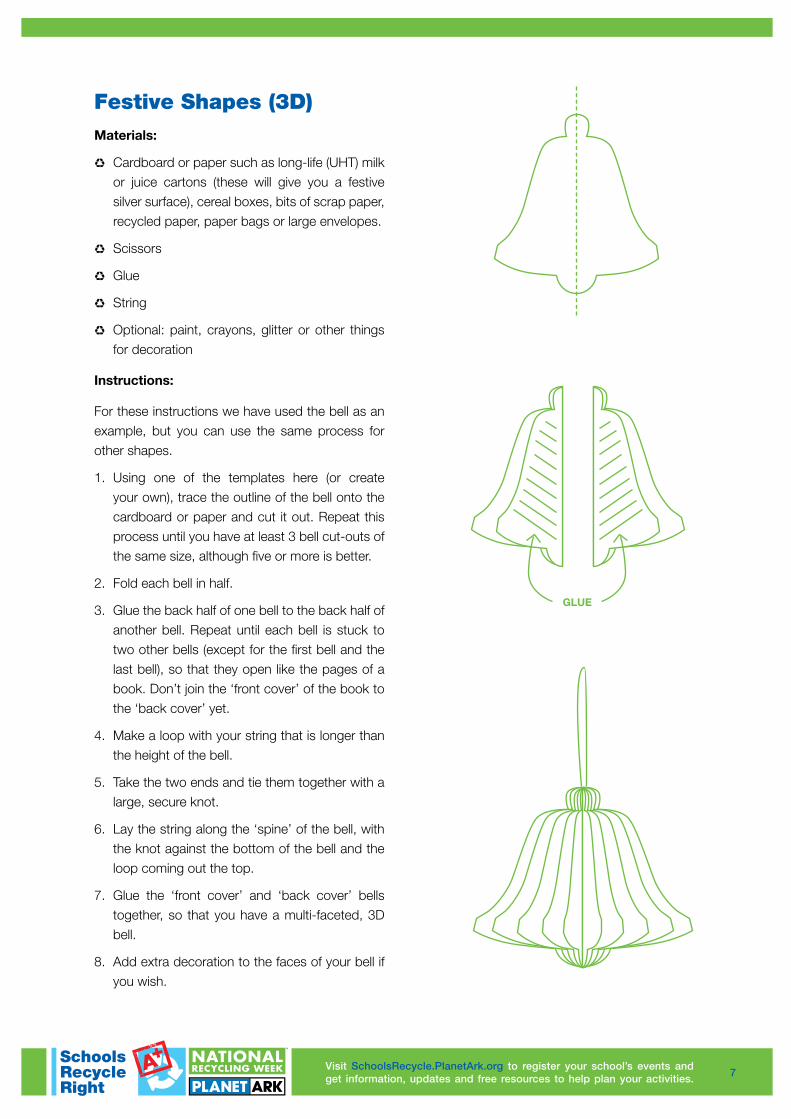
Festive Shapes (3D)Materials:
♻ Cardboard or paper such as long-life (UHT) milk or juice cartons (these will give you a festive silver surface), cereal boxes, bits of scrap paper, recycled paper, paper bags or large envelopes.
♻ Scissors
♻ Glue
♻ String
♻ Optional: paint, crayons, glitter or other things for decoration
Instructions:
For these instructions we have used the bell as an example, but you can use the same process for other shapes.
1. Using one of the templates here (or create your own), trace the outline of the bell onto the cardboard or paper and cut it out. Repeat this process until you have at least 3 bell cut-outs of the same size, although five or more is better.
2. Fold each bell in half.
3. Glue the back half of one bell to the back half of another bell. Repeat until each bell is stuck to two other bells (except for the first bell and the last bell), so that they open like the pages of a book. Don’t join the ‘front cover’ of the book to the ‘back cover’ yet.
4. Make a loop with your string that is longer than the height of the bell.
5. Take the two ends and tie them together with a large, secure knot.
6. Lay the string along the ‘spine’ of the bell, with the knot against the bottom of the bell and the loop coming out the top.
7. Glue the ‘front cover’ and ‘back cover’ bells together, so that you have a multi-faceted, 3D bell.
8. Add extra decoration to the faces of your bell if you wish.
GLUE
8Visit SchoolsRecycle.PlanetArk.org to register your school’s events and get information, updates and free resources to help plan your activities. 8

9Visit SchoolsRecycle.PlanetArk.org to register your school’s events and get information, updates and free resources to help plan your activities. 9
10Visit SchoolsRecycle.PlanetArk.org to register your school’s events and get information, updates and free resources to help plan your activities. 10
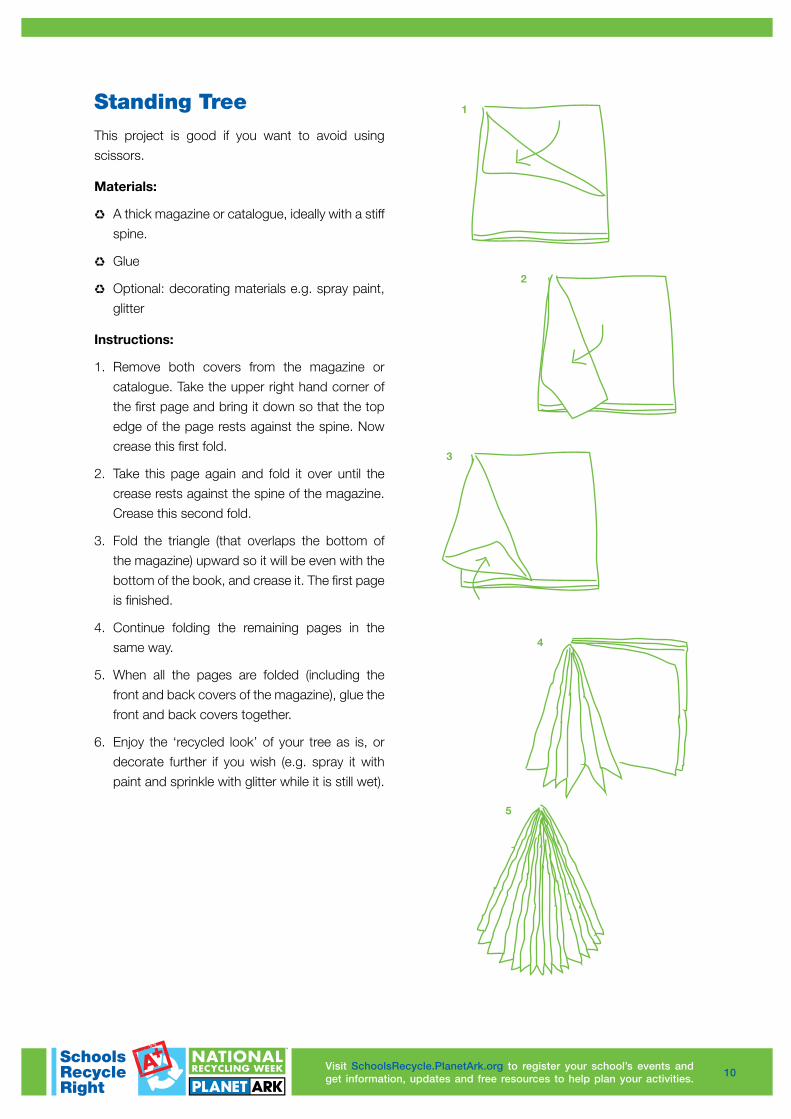
Standing TreeThis project is good if you want to avoid using scissors.
Materials:
♻ A thick magazine or catalogue, ideally with a stiff spine.
♻ Glue
♻ Optional: decorating materials e.g. spray paint, glitter
Instructions:
1. Remove both covers from the magazine or catalogue. Take the upper right hand corner of the first page and bring it down so that the top edge of the page rests against the spine. Now crease this first fold.
2. Take this page again and fold it over until the crease rests against the spine of the magazine. Crease this second fold.
3. Fold the triangle (that overlaps the bottom of the magazine) upward so it will be even with the bottom of the book, and crease it. The first page is finished.
4. Continue folding the remaining pages in the same way.
5. When all the pages are folded (including the front and back covers of the magazine), glue the front and back covers together.
6. Enjoy the ‘recycled look’ of your tree as is, or decorate further if you wish (e.g. spray it with paint and sprinkle with glitter while it is still wet).
1
2
3
4
5
11Visit SchoolsRecycle.PlanetArk.org to register your school’s events and get information, updates and free resources to help plan your activities. 11
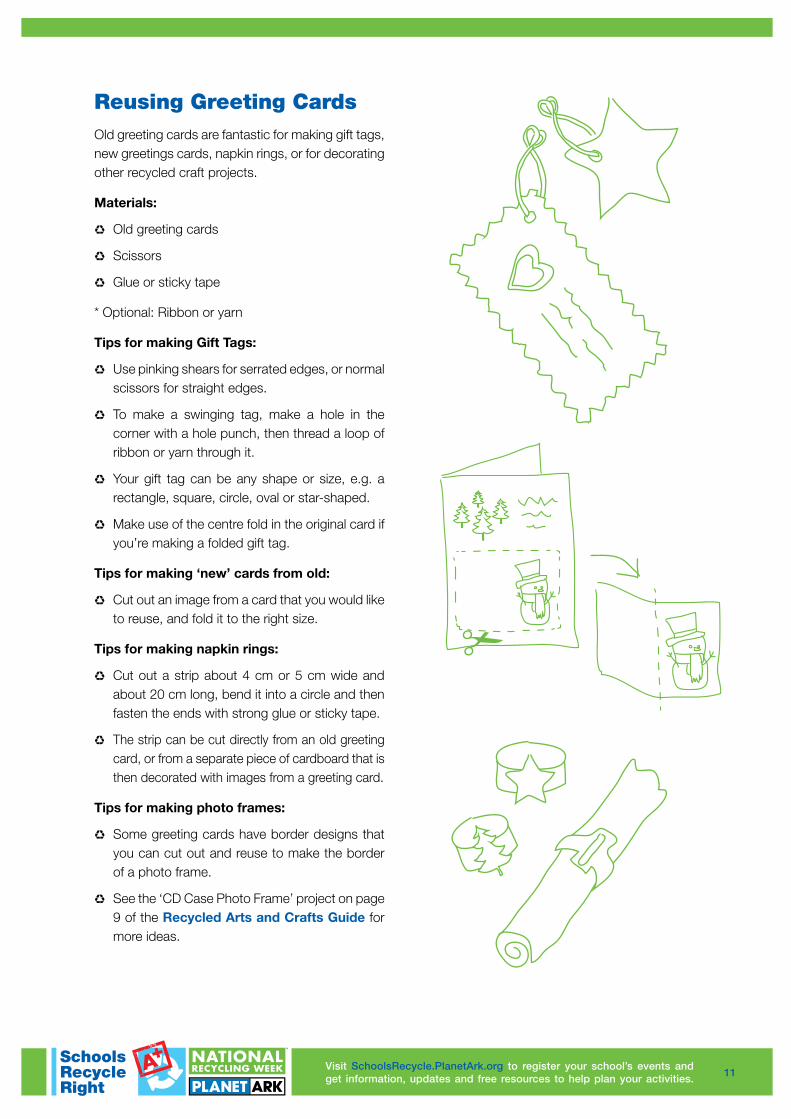
Reusing Greeting CardsOld greeting cards are fantastic for making gift tags, new greetings cards, napkin rings, or for decorating other recycled craft projects.
Materials:
♻ Old greeting cards
♻ Scissors
♻ Glue or sticky tape
* Optional: Ribbon or yarn
Tips for making Gift Tags:
♻ Use pinking shears for serrated edges, or normal scissors for straight edges.
♻ To make a swinging tag, make a hole in the corner with a hole punch, then thread a loop of ribbon or yarn through it.
♻ Your gift tag can be any shape or size, e.g. a rectangle, square, circle, oval or star-shaped.
♻ Make use of the centre fold in the original card if you’re making a folded gift tag.
Tips for making ‘new’ cards from old:
♻ Cut out an image from a card that you would like to reuse, and fold it to the right size.
Tips for making napkin rings:
♻ Cut out a strip about 4 cm or 5 cm wide and about 20 cm long, bend it into a circle and then fasten the ends with strong glue or sticky tape.
♻ The strip can be cut directly from an old greeting card, or from a separate piece of cardboard that is then decorated with images from a greeting card.
Tips for making photo frames:
♻ Some greeting cards have border designs that you can cut out and reuse to make the border of a photo frame.
♻ See the ‘CD Case Photo Frame’ project on page 9 of the Recycled Arts and Crafts Guide for more ideas.
12Visit SchoolsRecycle.PlanetArk.org to register your school’s events and get information, updates and free resources to help plan your activities. 12
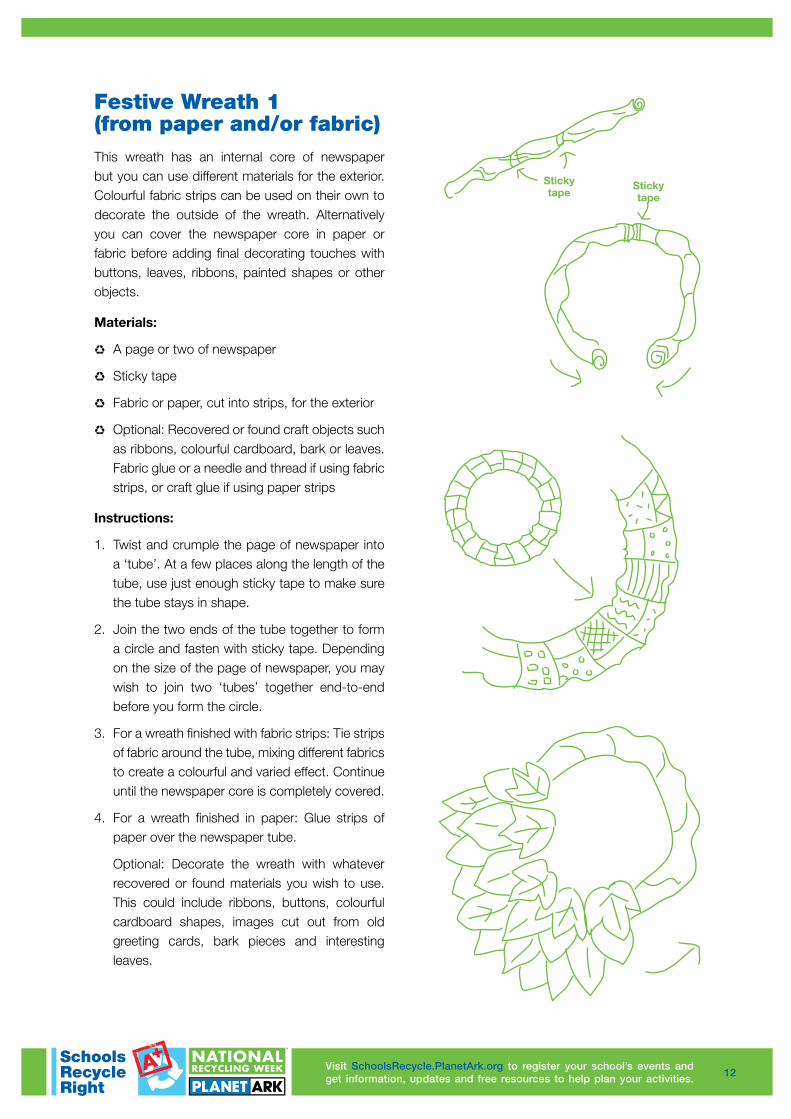
Festive Wreath 1 (from paper and/or fabric)This wreath has an internal core of newspaper but you can use different materials for the exterior. Colourful fabric strips can be used on their own to decorate the outside of the wreath. Alternatively you can cover the newspaper core in paper or fabric before adding final decorating touches with buttons, leaves, ribbons, painted shapes or other objects.
Materials:
♻ A page or two of newspaper
♻ Sticky tape
♻ Fabric or paper, cut into strips, for the exterior
♻ Optional: Recovered or found craft objects such as ribbons, colourful cardboard, bark or leaves. Fabric glue or a needle and thread if using fabric strips, or craft glue if using paper strips
Instructions:
1. Twist and crumple the page of newspaper into a ‘tube’. At a few places along the length of the tube, use just enough sticky tape to make sure the tube stays in shape.
2. Join the two ends of the tube together to form a circle and fasten with sticky tape. Depending on the size of the page of newspaper, you may wish to join two ‘tubes’ together end-to-end before you form the circle.
3. For a wreath finished with fabric strips: Tie strips of fabric around the tube, mixing different fabrics to create a colourful and varied effect. Continue until the newspaper core is completely covered.
4. For a wreath finished in paper: Glue strips of paper over the newspaper tube.
Optional: Decorate the wreath with whatever recovered or found materials you wish to use. This could include ribbons, buttons, colourful cardboard shapes, images cut out from old greeting cards, bark pieces and interesting leaves.
Sticky tape
Sticky tape
13Visit SchoolsRecycle.PlanetArk.org to register your school’s events and get information, updates and free resources to help plan your activities. 13
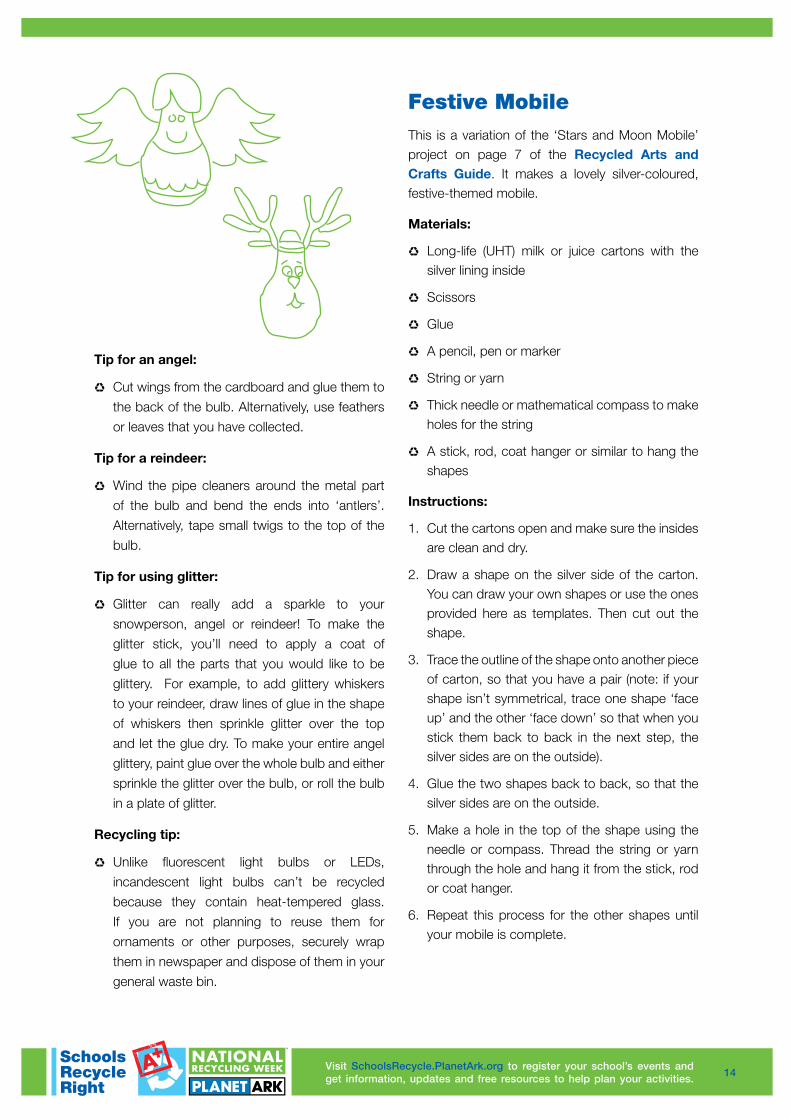
Light Bulb OrnamentsIf you have burnt-out incandescent light bulbs, you can use them to make ornaments! Here we have suggested making a snow-person, an angel and a reindeer, but there is no limit to the variety of ornaments you can create. This project is only suitable for children who are old enough to handle glass bulbs.
Materials:
♻ A burnt-out incandescent light bulb
♻ Acrylic paint and a paintbrush (a piece of sponge can also be used to spread the paint). Use white paint to make a snow-person or an angel, and brown paint to make a reindeer.
♻ For the angel: cardboard and scissors
♻ For the reindeer: two pipe cleaners, or two very small twigs, and sticky tape.
♻ String
♻ Glue
♻ Paint for eyes, noses etc.
General Instructions:
1. Use the acrylic paint to cover the light bulb. Let it dry, then apply a second coat if necessary and dry again.
2. Tie a loop of string around the metal part of the bulb so the ornament can be hung.
3. Your bulb is now ready for decorating. Here are a few tips for the snowperson, angel and reindeer.
Tips for a snowperson:
♻ Make a rumpled ‘hat’ for the snowperson by gluing a scrap of fabric around the metal part of the bulb.
♻ Make a scarf by tying and gluing a strip of fabric around the ‘neck’ of the bulb.
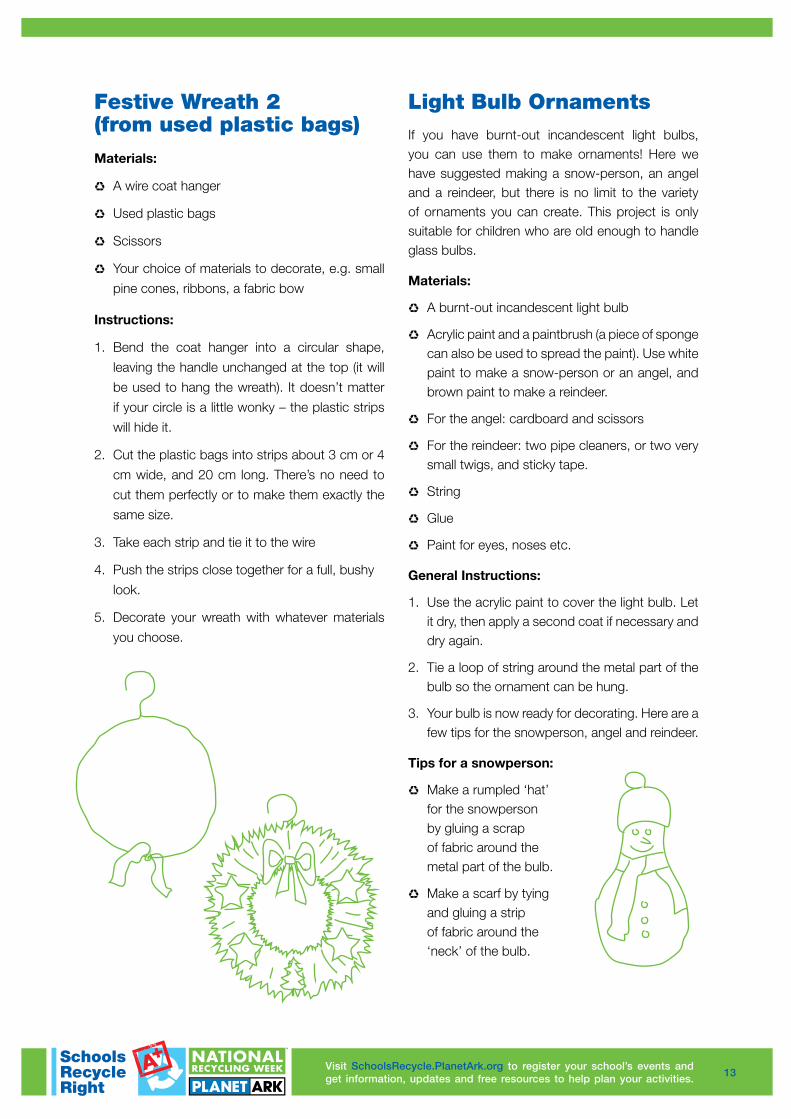
Festive Wreath 2 (from used plastic bags)Materials:
♻ A wire coat hanger
♻ Used plastic bags
♻ Scissors
♻ Your choice of materials to decorate, e.g. small pine cones, ribbons, a fabric bow
Instructions:
1. Bend the coat hanger into a circular shape, leaving the handle unchanged at the top (it will be used to hang the wreath). It doesn’t matter if your circle is a little wonky – the plastic strips will hide it.
2. Cut the plastic bags into strips about 3 cm or 4 cm wide, and 20 cm long. There’s no need to cut them perfectly or to make them exactly the same size.
3. Take each strip and tie it to the wire
4. Push the strips close together for a full, bushy look.
5. Decorate your wreath with whatever materials you choose.
14Visit SchoolsRecycle.PlanetArk.org to register your school’s events and get information, updates and free resources to help plan your activities. 14
Festive MobileThis is a variation of the ‘Stars and Moon Mobile’ project on page 7 of the Recycled Arts and Crafts Guide. It makes a lovely silver-coloured, festive-themed mobile.
Materials:
♻ Long-life (UHT) milk or juice cartons with the silver lining inside
♻ Scissors
♻ Glue
♻ A pencil, pen or marker
♻ String or yarn
♻ Thick needle or mathematical compass to make holes for the string
♻ A stick, rod, coat hanger or similar to hang the shapes
Instructions:
1. Cut the cartons open and make sure the insides are clean and dry.
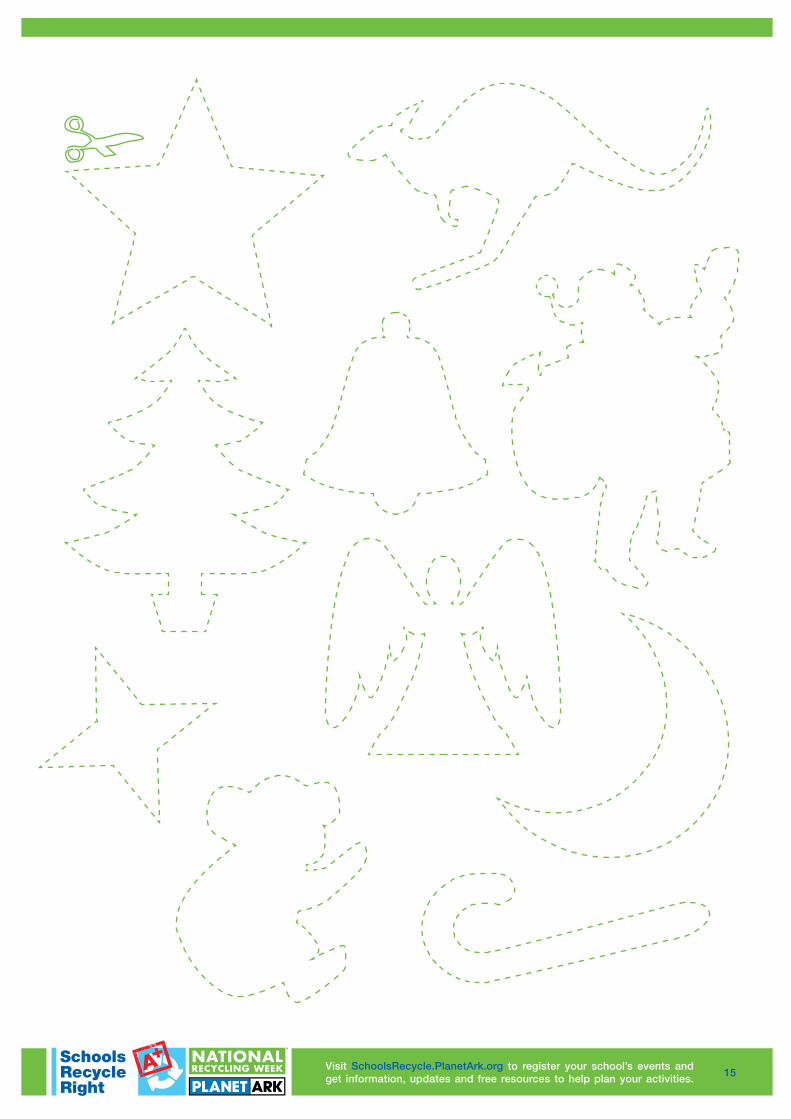
2. Draw a shape on the silver side of the carton. You can draw your own shapes or use the ones provided here as templates. Then cut out the shape.
3. Trace the outline of the shape onto another piece of carton, so that you have a pair (note: if your shape isn’t symmetrical, trace one shape ‘face up’ and the other ‘face down’ so that when you stick them back to back in the next step, the silver sides are on the outside).
4. Glue the two shapes back to back, so that the silver sides are on the outside.
5. Make a hole in the top of the shape using the needle or compass. Thread the string or yarn through the hole and hang it from the stick, rod or coat hanger.
6. Repeat this process for the other shapes until your mobile is complete.
Tip for an angel:
♻ Cut wings from the cardboard and glue them to the back of the bulb. Alternatively, use feathers or leaves that you have collected.
Tip for a reindeer:
♻ Wind the pipe cleaners around the metal part of the bulb and bend the ends into ‘antlers’. Alternatively, tape small twigs to the top of the bulb.
Tip for using glitter:
♻ Glitter can really add a sparkle to your snowperson, angel or reindeer! To make the glitter stick, you’ll need to apply a coat of glue to all the parts that you would like to be glittery. For example, to add glittery whiskers to your reindeer, draw lines of glue in the shape of whiskers then sprinkle glitter over the top and let the glue dry. To make your entire angel glittery, paint glue over the whole bulb and either sprinkle the glitter over the bulb, or roll the bulb in a plate of glitter.
Recycling tip:
♻ Unlike fluorescent light bulbs or LEDs, incandescent light bulbs can’t be recycled because they contain heat-tempered glass. If you are not planning to reuse them for ornaments or other purposes, securely wrap them in newspaper and dispose of them in your general waste bin.
15Visit SchoolsRecycle.PlanetArk.org to register your school’s events and get information, updates and free resources to help plan your activities. 15
16Visit SchoolsRecycle.PlanetArk.org to register your school’s events and get information, updates and free resources to help plan your activities. 16
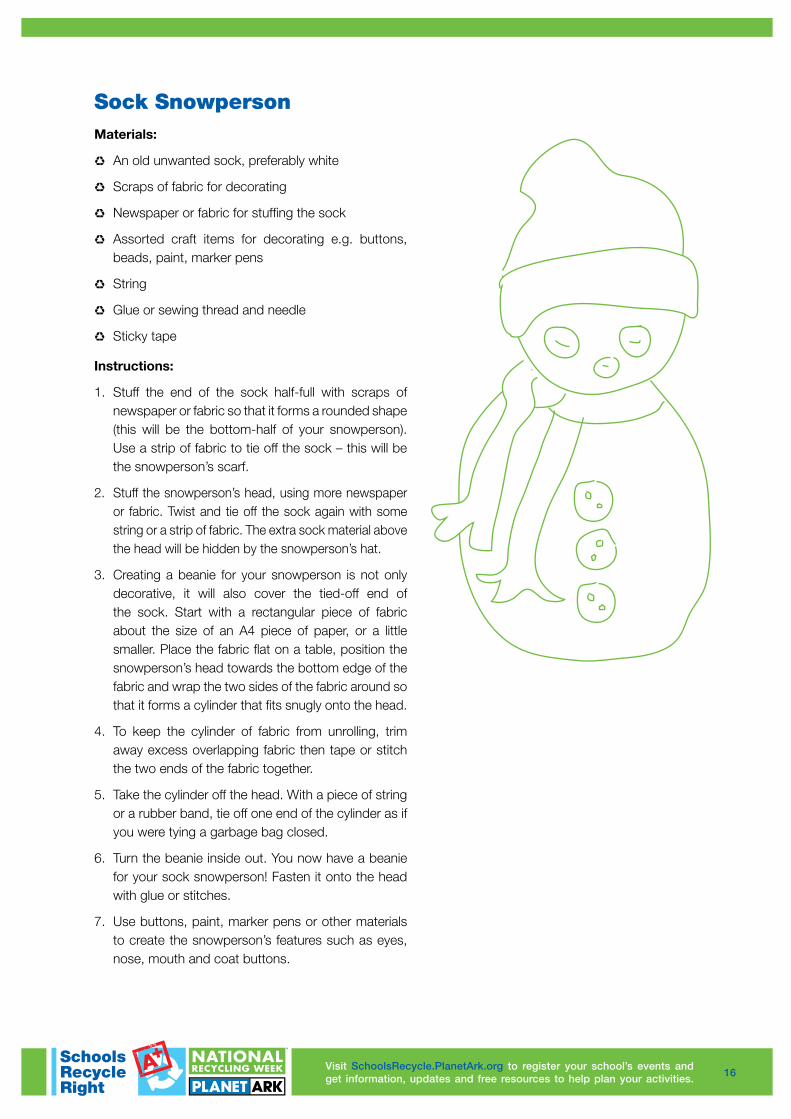
Sock SnowpersonMaterials:
♻ An old unwanted sock, preferably white
♻ Scraps of fabric for decorating
♻ Newspaper or fabric for stuffing the sock
♻ Assorted craft items for decorating e.g. buttons, beads, paint, marker pens
♻ String
♻ Glue or sewing thread and needle
♻ Sticky tape
Instructions:
1. Stuff the end of the sock half-full with scraps of newspaper or fabric so that it forms a rounded shape (this will be the bottom-half of your snowperson). Use a strip of fabric to tie off the sock – this will be the snowperson’s scarf.
2. Stuff the snowperson’s head, using more newspaper or fabric. Twist and tie off the sock again with some string or a strip of fabric. The extra sock material above the head will be hidden by the snowperson’s hat.
3. Creating a beanie for your snowperson is not only decorative, it will also cover the tied-off end of the sock. Start with a rectangular piece of fabric about the size of an A4 piece of paper, or a little smaller. Place the fabric flat on a table, position the snowperson’s head towards the bottom edge of the fabric and wrap the two sides of the fabric around so that it forms a cylinder that fits snugly onto the head.
4. To keep the cylinder of fabric from unrolling, trim away excess overlapping fabric then tape or stitch the two ends of the fabric together.
5. Take the cylinder off the head. With a piece of string or a rubber band, tie off one end of the cylinder as if you were tying a garbage bag closed.
6. Turn the beanie inside out. You now have a beanie for your sock snowperson! Fasten it onto the head with glue or stitches.
7. Use buttons, paint, marker pens or other materials to create the snowperson’s features such as eyes, nose, mouth and coat buttons.

17Visit SchoolsRecycle.PlanetArk.org to register your school’s events and get information, updates and free resources to help plan your activities. 17
Paddle Pop Stick Star Materials for each star:
♻ 3 paddle pop sticks (sometimes also called popsicle sticks)
♻ Coloured cardboard, buttons or beads
♻ Craft glue
♻ Thread or yarn
Instructions:
1. Glue the 3 paddle pop sticks together like this:
2. When the glue has dried, decorate the star with buttons, beads or small circles of coloured cardboard. You can use a bottle cap as a guide to help you draw the circles onto coloured cardboard.
3. Attach a loop of thread to the star for hanging.