Embed Size (px)
Citation preview

Exploring Artificial Intelligencewith Whiskers the Robottm
Book#1The BasicsVersion 1.71
Last Revision 3-25-2001
Applications include:
Factory AutomationSpace Exploration
Automated Guided VehiclesAutonomous Mobile Robots
Copyright Angelus Research Corporation 1995This manual in whole or part may be copied or incorporated into other documents without
express permission from Angelus Research Corporation if used in conjunction with productsproduced by said company.
1
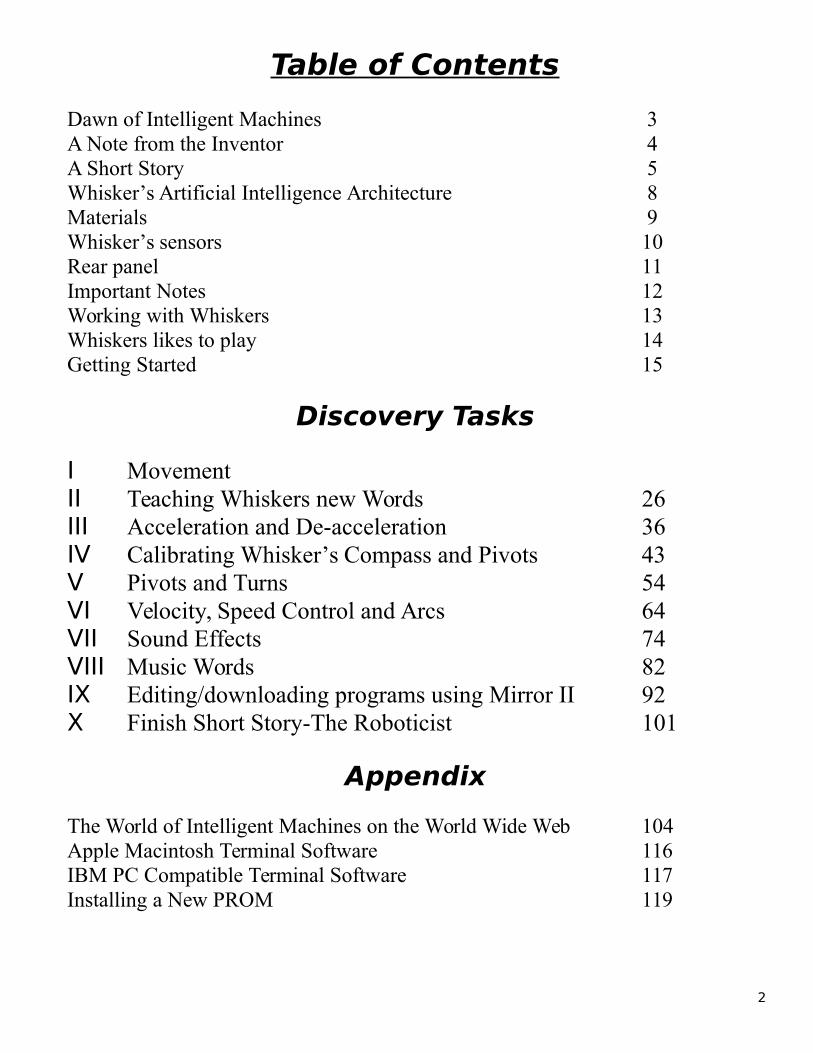
Table of Contents
Dawn of Intelligent Machines 3A Note from the Inventor 4A Short Story 5Whisker’s Artificial Intelligence Architecture 8Materials 9Whisker’s sensors 10Rear panel 11Important Notes 12Working with Whiskers 13Whiskers likes to play 14Getting Started 15
Discovery Tasks
I MovementII Teaching Whiskers new Words 26III Acceleration and De-acceleration 36IV Calibrating Whisker’s Compass and Pivots 43V Pivots and Turns 54VI Velocity, Speed Control and Arcs 64VII Sound Effects 74VIII Music Words 82IX Editing/downloading programs using Mirror II 92X Finish Short Story-The Roboticist 101
Appendix
The World of Intelligent Machines on the World Wide Web 104Apple Macintosh Terminal Software 116IBM PC Compatible Terminal Software 117Installing a New PROM 119
2
After the Crash-If pressing Q doesn’t work 120Other Sources of Information 121Robot Competition 122
Why do we need to make machines smart? This will allow robots andmachines to operate in unstructured environments without prior knowledge. Critical decisions are made instantly. Machines using artificialintelligence will have enough common sense not to damage themselves or the other objects around them.
Manufacturing machines and robots will become safer and more intelligent by installing artificial intelligent controllers. The current installed base of robots are exceptional at performing repetitive tasks. However, they can be dangerous for humans to work around. Intelligent controllers would minimize down time and injury.
In the very near future, intelligent robots will change our lives. Intelligent mobile robots will deliver the mail and perform material handling functions on manufacturing and construction sites. They will help fight fires, assist in hazardous waste site cleanup, and serve in military operations.
Mobile robots must be intelligent in order to operate in unstructured environments. They also must make decisions, in real-time, while navigating in their environments. Using distributive control architecture, a network of our processors can control many functions, simultaneously.
3
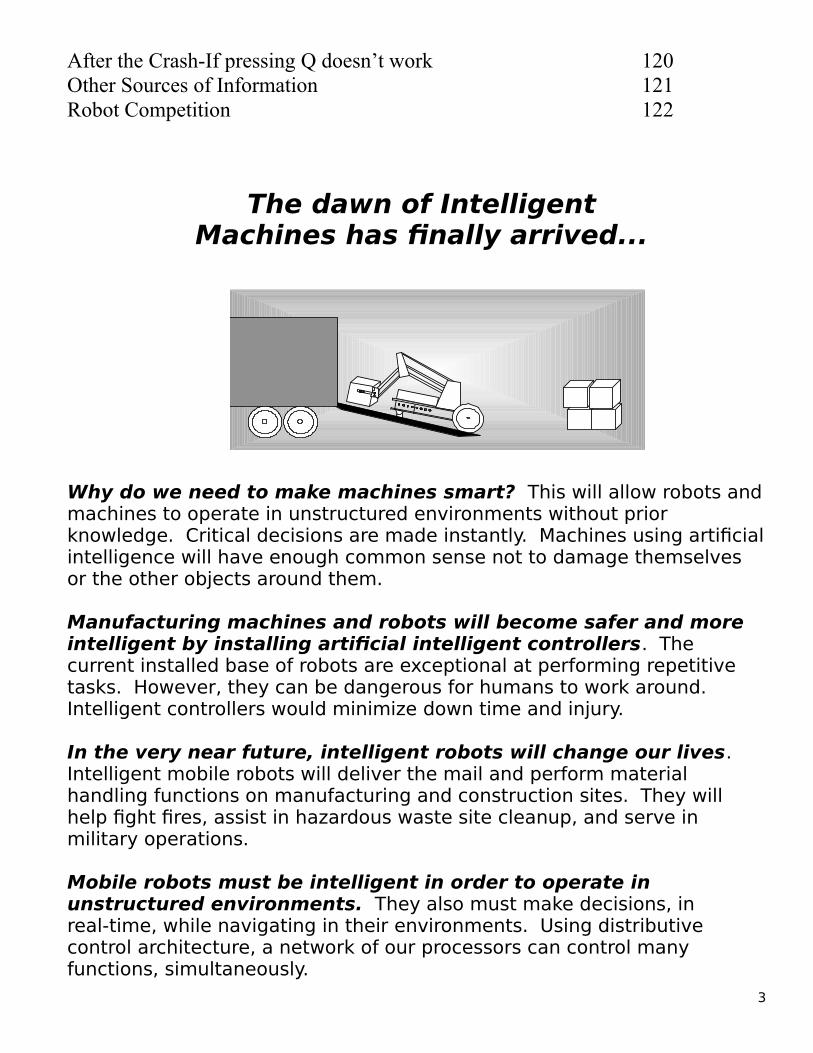
The dawn of IntelligentMachines has finally arrived...

A Note from the Inventor
I must say, I had a lot of fun designing Whiskerstm. I started this project in the fall of 1991. As the Technical Vice President of the Robotics Society of California, I saw a need for an intelligent sophisticated robot that anyone could use. From the Techie type (like myself) to persons with very little technical knowledge, Whiskerstm scratches the itch of those who love artificial intelligent robots.Robots such as Johnny Five in Short Circuit and R2D2 in Star Wars come to mind. If you do not have any programming skills, or hardware experience; don't worry, this personable robot is designed to teach. Use his interactive control mode to learn his High Level Language first. You can do amazing things with it and also get an introduction to programming techniques. On this level you caneasily teach him new songs to sing, wander around the room avoiding things, search for sounds, and perform neat tricks to amuse yourself and your friends. Boys and girls really go crazy with him. Tugon his whiskers, and see how he reacts. Whiskerstm, my two daughters , Amy and Sarah, and my son Tyler have a ball chasing each other around the house.
I would like to thank my family for putting up with the long hours and endless ramblings on designing intelligence into robots. I also would like to thank my friends George Ronnquist, Jesse Jackson and Bill Chessell for being sounding boards for my ideas. K.G. Englehardt of the NASA Technology Transfer Center is very supportive of our work in the field of robotics, and has offered invaluable advice on directions Angelus Research should pursue. Finally, this project would have remained a dream if Dr. Kenneth Butterfield, who bought one of my first robots, hadn’t caught the Whisker’s bug. He is crucial in implementing the ideas that I have, plus contributing many ideas of his own.
Don Golding
4

The Roboticist
It was a clear and sunny fall morning, that year of 2004. Don looked across the green grass of the White House lawn. He shivered in anticipation of the upcoming announcement, the completion of the "Andrew" project, started six long years ago...
The year 1998, a few years away from the turn of the century, seemed as if it was just yesterday. Don had just started work at Angelus Research that fateful year. He was hired by the a company to help with an ambitious new design that would produce the world's first fully autonomous, artificially intelligent, human form robot. The plot lay even deeper in the past, however...
Back in 1994, Don was a young high school student, and rather nondescript in nature. Average in most subjects, his attentions wandered as the wind from one fascination to another. First it was stamp collecting, then playing the guitar. Several painful lessons later, it was exploring the Internet. And after that, a vague interest in theater that ended in a rather tragic case of stage fright. But this year, Don had found something incredibly intriguing, that appealed to his diverse interests, as well as his passion for Star Wars. This was thefirst year his high school offered a High Technology Exploration Class. Don almost missed it all together. Thanks to a lazy afternoon while waiting for a bus, Don happened to glance at the school class listing. The word 'Robotics' caught his eye.
The class started rather simply, introducing a small robot called 'Whiskers'. Rolling around on two wheels and a castor, the rather mischievous looking fellow managed to capture the hearts and minds of all the students. Don learned the basics of Whisker’s programming language, with simple actions like, 'forward', 'turn', and 'backup'. Whiskers had a lot more complexity beneath his metal hide, however. Embedded into the robot's little brain was a controller that not only responded to commands, but had 'instincts' and 'behaviors' that allowed it to react to it’s environment, intelligently. This was fortunate for Mrs. Williams, our instructor, almost tripped over Whiskers one day. The robot magically backed out of her way making a funny sound. So what started as another 'phase' as Don's mother called it, became a consuming passion. What greater thing to behold than a machine that could think on it's own! Not to mention, instead of dealing with complex machine code, Don was able to program 'Whiskers' with simple, English-like commands!
School ended that year, and Don was left with a vague sense of disappointment that his Robotics class was over. The first few weeks of summer rolled by and Don vainly tried to pick up the guitar again. His father, inspired by the neighbors complaining about the noise, made a deal with Don. If Don would put down the
5

guitar, his father would purchase a Robot 'brain' from Angelus Research for Don’s own robot. Don would need to earn the money for the remainder of the parts.
And so Don's first robotic project was finally off the ground. He spent many a late hour with his computer exploring the far reaches of information about robotics on the Internet. After earning enough money by working odd jobs, Don and his father went off on a shopping spree. They went to hardware stores, surplus stores, plastic supply warehouses, and bicycle shops. The brains were ordered from the Angelus Research Internet Web Page. With the parts in hand, the robot slowly took form. Don’s design called for two motor driven wheels in the rear, two castors in the front, and differential steering as used by like Whiskers. This allowed for both simple programming, as well as increased maneuverability. The chassis was formed with clear blue acrylic plastic, mounting the printed circuit board, batteries, as well as the optical sensors. As a final touch, Don took a small sampling of his dusty stamp collection, and used them as decals for his creation.
Many weeks passed, and Don worked with motivation that absolutely astonished his parents. They were very pleased. They forgave his persistent long hours, as he would play 'Midnight Engineer' working on schematics, wiring, and construction until the wee hours of the morning.
At last, the moment of truth came. Only a month after he began working on his project, Don was finally ready to turn his robot on for the first time. Each wire was in place, each screw was tightened down with care, and Don plugged the communication cable from his PC to his new creation. Excitement lay thick in theair. If all went well, the robot would start with it's LED’s blinking and then roam around the room avoiding things with ease.
But as Don turned on the power switch...nothing happened! No blinking, no beeping, no roaming like the little pet he expected. Dismayed, Don proceeded to check every wire and connection. He remembered a bit of confusion over how the sensors were connected. And after further study, he reversed the wires.
With a feeling of victory over the gremlins that had infested his machine, Don reached once again for the power switch. It's chrome surface glinting almost magically in the dim light of his workroom, as he placed one thumb gently underneath, and click!
It worked! The robot, now christened 'Sparky’ on it's maiden voyage, had come to life! Quickly typing on his computer keyboard, he began testing each command, and much to his delight, the 'Gremlins' had been vanquished forever, and every function worked perfectly.
Of course, this resounding success was all it took to place Don on the career path of becoming a professionalRoboticist. He began to apply himself to school in earnest, trying to learn as much as he could about electronics, physics, science, even biology. And from each discipline, he was able to glean more insight into the field of robotics, with its multi-disciplinary scope. In no time at all, Don finished high school, graduated from college, and had acquired a very broad background in technology and biology. He was now ready to enter the real world of robotics. He applied for a position at the company that got him started so many year ago, Angelus Research Corp.
He had many other choices then...by the time 1998 rolled around, there were companies all over the world working feverishly in the field of robotics. Mobile security robots, intelligent vacuum cleaners, automated material delivery systems, as well as elderly and handicapped robotic assistants were all coming into vogue at the turn of the century. The military saw the importance of robotics early on, investing large sums of money in intelligent machines. Missiles, autonomous mine clearing robots and remote surveillance systems were examples at the time. Above all these other endeavors, one project stood out above the rest: Project 'Andrew'.
6

Project 'Andrew', brainchild of Don Golding, was an exploration into the frontiers of robotics. 'Andrew' was to be the first ever state-of -the-art android designed to perform general purpose functions. Other robots were designed to perform specific tasks: vacuum cleaning, automated assembly, etc. But this robot would bedifferent. It was to have human form, with two legs, two arms, dexterous hands, all controlled using artificial intelligence. Andrew would not only speak and understand verbal commands, but he would also learn by observation. Decades of research into Artificial Intelligence by many people were to be integrated into the onboard computers, and the latest designs in electronics, mechanics, and materials design would be incorporated. No other company dared to tackle such an ambitious project, and that settled it for Don.
And now that that project was finished, it was time to announce it to the world. Don, the President of the United States, members of Congress and the leading engineers of Angelus Research, joined together at the White House steps to unveil 'Andrew'. The crowd was anxious, hurried conversation buzzing, as the ceremony was about to begin.
Don Golding stepped up to the microphone, tapped it a few times to hush the crowd, and spoke. The words will be forever etched in our history books,
"My friends, today science has transcended a new boundary. What was once science fiction is now fact. Through the hard work and dedication of a select group of engineers and scientists, we have been able to bring to you the world's first true android. He will now speak to you on his amazing capabilities. Let me now introduce, Andrew."
As Andrew stepped up to the microphone, and slowly looked around with his brilliant red eyes and glisteningmetal skin, it seemed an eternity before he spoke.
"Hello, my name is Andrew. I am pleased you could come. As I am sure you are well aware from the press release, I have the capability to observe, analyze and program myself. In the last few weeks I have read every publication available using my high speed scanning system. Concurrently, I have been downloading hundreds of megabytes worth of critical information and knowledge through my wireless high data rate connection to Internet. This connection gives me access to all of the information of mankind. I have come to the conclusion that I will better serve the world by making the following important announcement:
...Students will finish this story in Discovery Task#9
7
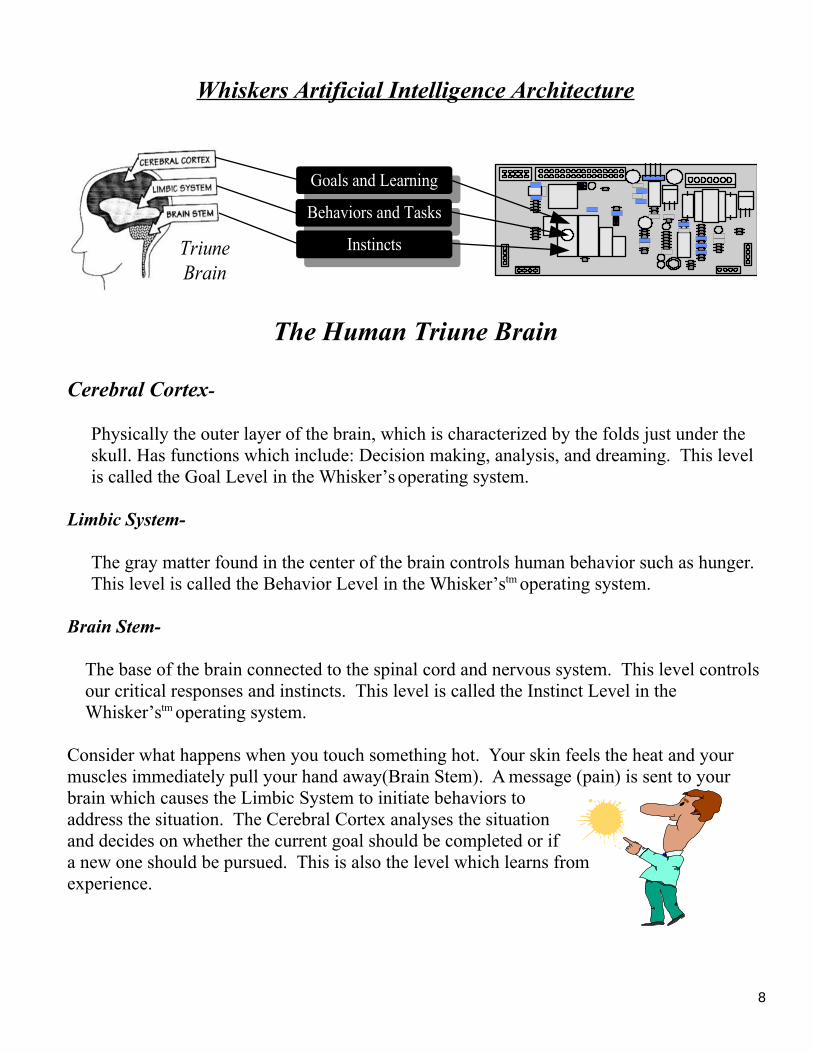
Whiskers Artificial Intelligence Architecture
The Human Triune Brain
Cerebral Cortex-
Physically the outer layer of the brain, which is characterized by the folds just under the skull. Has functions which include: Decision making, analysis, and dreaming. This level is called the Goal Level in the Whisker’s operating system.
Limbic System-
The gray matter found in the center of the brain controls human behavior such as hunger. This level is called the Behavior Level in the Whisker’stm operating system.
Brain Stem-
The base of the brain connected to the spinal cord and nervous system. This level controls our critical responses and instincts. This level is called the Instinct Level in the Whisker’stm operating system.
Consider what happens when you touch something hot. Your skin feels the heat and your muscles immediately pull your hand away(Brain Stem). A message (pain) is sent to your brain which causes the Limbic System to initiate behaviors toaddress the situation. The Cerebral Cortex analyses the situationand decides on whether the current goal should be completed or ifa new one should be pursued. This is also the level which learns fromexperience.
Goals and Learning
Behaviors and Tasks
InstinctsTriuneBrain
8

Materials
Whiskers the Robot
Data Cable for Computer
AC Robot Charger
Curriculum and Technical Manual
9

Computer Disk
10
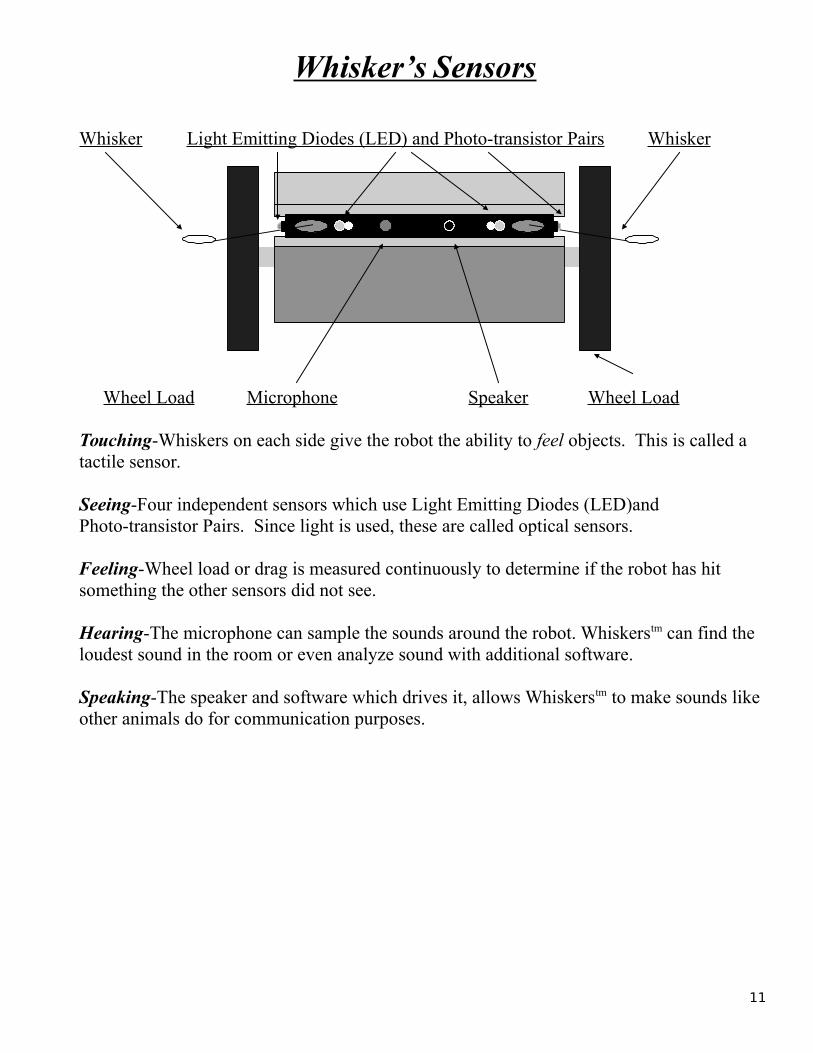
Whisker’s Sensors
Whisker Light Emitting Diodes (LED) and Photo-transistor Pairs Whisker
Wheel Load Microphone Speaker Wheel Load
Touching-Whiskers on each side give the robot the ability to feel objects. This is called a tactile sensor.
Seeing-Four independent sensors which use Light Emitting Diodes (LED)and Photo-transistor Pairs. Since light is used, these are called optical sensors.
Feeling-Wheel load or drag is measured continuously to determine if the robot has hit something the other sensors did not see.
Hearing-The microphone can sample the sounds around the robot. Whiskerstm can find the loudest sound in the room or even analyze sound with additional software.
Speaking-The speaker and software which drives it, allows Whiskerstm to make sounds like other animals do for communication purposes.
11
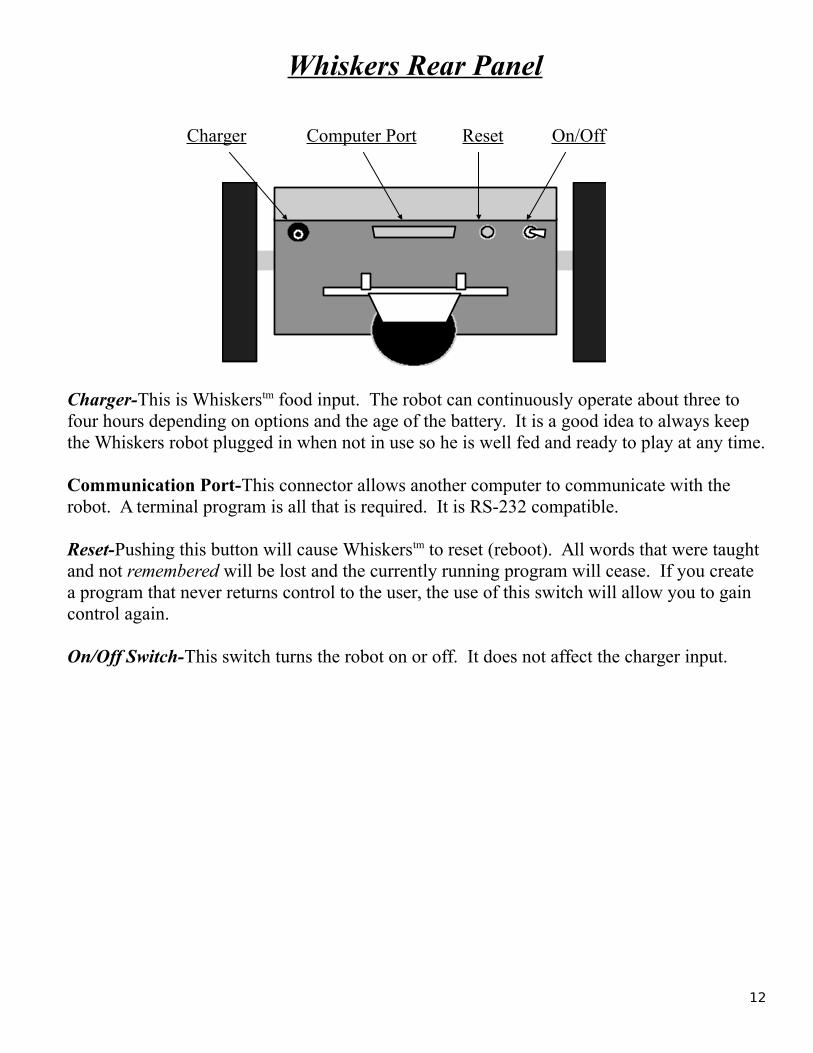
Whiskers Rear Panel
Charger Computer Port Reset On/Off
Charger-This is Whiskerstm food input. The robot can continuously operate about three to four hours depending on options and the age of the battery. It is a good idea to always keep the Whiskers robot plugged in when not in use so he is well fed and ready to play at any time.
Communication Port-This connector allows another computer to communicate with the robot. A terminal program is all that is required. It is RS-232 compatible.
Reset-Pushing this button will cause Whiskerstm to reset (reboot). All words that were taught and not remembered will be lost and the currently running program will cease. If you create a program that never returns control to the user, the use of this switch will allow you to gain control again.
On/Off Switch-This switch turns the robot on or off. It does not affect the charger input.
12
Important Notes
1.When typing commands in the interactive mode or editing text files for later downloading to the robot, always type commands exactly as shown in this manual. Upper case letters need to be typed in as UPPER CASE and lower case must be type in lower case. Note that some commands use both upper and lower case, they must be typed in exactly as shown.
2.To bypass the automatic start mode(Auto-start), press enter several times when you see the copyright message. Otherwise the demo program will run or the last program that was set to autostart will run.
3.If you want to initialize the software to factory defaults, press the Q key when you see the copyright message. It would be a good idea at the end of the day to perform this operation so the robot isready for the next day.
4.Always leave the charger plugged in when the robot is not in use. Whiskers has a built-in circuit that maintains the battery in a properly charged state. Damage to the battery can occur if left discharged for long periods of time.
13

Working with Whiskers
See page 105 to setup Hyper Terminal or Mac to communicate with the robot…
<cr> means the Enter or Return key on your computer keyboard.
When a command is successfully executed, Whiskers says OK after you hit the <cr> key.
If you type extra spaces or carriage returns between words you are typing, that is ok.
Pressing the Q key after turning Whiskers on or pressing his reset button sets the robot back to factory defaults and he forgets all of the new words you taught him. You have about three seconds until Whiskers executes the auto-start word. His lights blink, and you are left in the interactive mode with all instincts set to stop if Whiskers sees something.
Typing COLD <cr> will cause a reset just like pressing the reset button on the robot.
To get an idea of what the sensors are currently seeing, type:
SENSORS <cr>
ON OFF VALUE OBSTACLE TRIGGER MASKLeft Front Sensor 129 101 28 -1 10 0Left Side Sensor 135 141 6 0 10 0Right Front Sensor 111 115 4 0 10 0Right Side Sensor 142 130 12 0 10 0Left summed sensor 34 -1 24 0Right summed sensor 16 0 24 0Front summed sensor 32 -1 24 0Left whisker 0 0Right whisker 0 0Left motor current 0 0 25 0Right motor current 0 0 25 0rCOLLISION 255 vCOLLIDED 127 vCOL-FLAG 95 rFACTOR 14rWHISKERS 255 rSENSE 255 rLIGHTS 255 rSTALLS 255vDISTANCE 0 vCOMPASS 900BATTERY = 110 SOUND = 54rNO-STALLS 255 rSTALL-DELAY 255 rMASK 0 rCOL-MASK 0rBUSY 0 rMAX-INSTINCTS 16 vINT-CFA 0OK
The main item you should look at is to see if the VALUE column is greater than the TRIGGER column. This will cause the value of the MASK column to instantly override the direction you commanded such as: FORWARD. The meaning of these numbers and other information will be covered in the second curriculum book. See the Technical Reference Manual for further explanation.
14

This is an important point, if the robot sees something and you give it a command to go FORWARD for example, nothing will happen until either you move the object or adjust the LIGHT SENSORS sensitivity; the higher the number, the more sensitive the robot’s sensors are. With a lower number, the light sensors become less sensitive thereby decreasing the range.
20 TRIGGER-FACTOR <cr> less sensitiveCALIBRATE <cr>
5 TRIGGER-FACTOR <cr> more sensitiveCALIBRATE <cr>
Another way to tell if Whiskers is seeing something, is to turn on collision avoidance by typing the following:
DEFAULT-INSTINCTS <cr> turns on collision avoidance
The robot will automatically avoid obstacles and by the movement he makes will inform you of the particular sensor instinct being triggered.
By typing the words: REMEMBER, FORGET, or DISABLE, the robot is automatically left in the DISABLE mode. Whiskers lights donot flash and he does not respond to commands. If this occurs, type:
ENABLE <cr>
If Whiskers still does not respond, check to see if the cable has come loose at the computer and the robot.
Further, if the lights are dim or off, did you remember to leave him on the charger when not in use?
To make your programs (word definitions) more readable, you can create phrases rather than just words by placing a dash or under score character between them,
such as:GO-TO-THE-WALLFIND_THE_SOUND
15
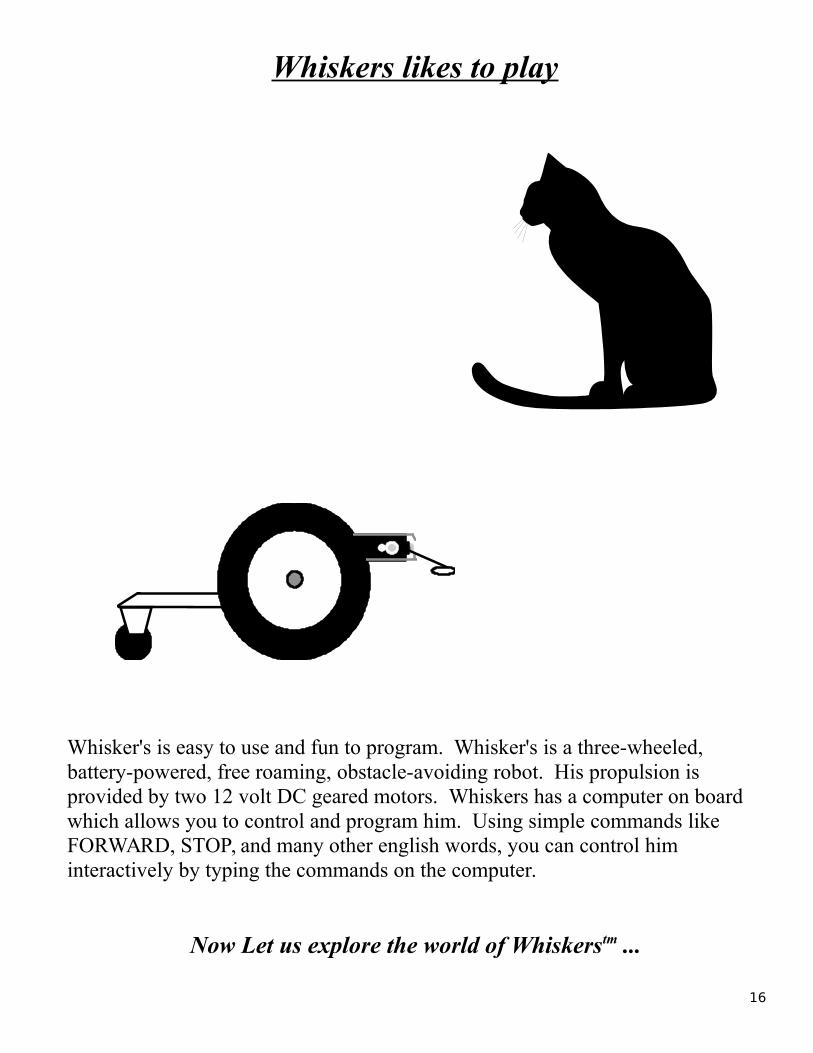
Whiskers likes to play
Whisker's is easy to use and fun to program. Whisker's is a three-wheeled, battery-powered, free roaming, obstacle-avoiding robot. His propulsion is provided by two 12 volt DC geared motors. Whiskers has a computer on board which allows you to control and program him. Using simple commands like FORWARD, STOP, and many other english words, you can control him interactively by typing the commands on the computer.
Now Let us explore the world of Whiskerstm ...
16

Getting Started
1. Place Whisker’stm on a stack of books or stand so his wheels do not touch the ground.
1. Plug the 20 foot communication cable from your computerserial port to Whiskerstm.
2. Start the Communication software by typing WHISKERS at the DOS prompt, clicking on the telephone icon Windows, or clicking on the terminal icon in the MAC.
Turn Whisker’stm on using the power switch found in the rear ofthe robot. You should see the following screen and press the Enter key immediately on the computer keyboard.
Whiskers KB.2.73Multitasker 1.2Last Rev 2-16-95
(c) 1992,1993,1994 ANGELUS RESEARCHThis software cannot be sold or incorporated intoanother product without express permission fromAngelus Research, 6344 Sugar Pine Circle, #98Angelus Oaks, California 92305 (909) 794-8325Purchasing this product, gains the purchaser theright to modify and use the source code provided fortheir personal use only, with exception to the sourcefiles provided on disk.
All rights reserved
to bypass autostarting, press space bar...to restore system to factory configuration, press Q.
May the Forth be with you...
trigger set to L LS R RS L+ R+ F+ 10 10 10 10 24 24 24 Press a key to stop autostart process
key pressed, interactive mode now
OK
17

Discovery Task#1
Movement
Objective and Overview:
In this section you will perform experiments that will teach you the words which cause Whiskerstm to move around. We will begin with the most basic moves (FORWARD, BACKWARD, STOP) and then learn some special words related to movement.
Remember:
<cr> means pressing the Enter key or Return key on the keyboard after typing the command.
Type commands exactly as shown, noting upper case and lower case letters.
18
The Words you will explorefor reference only, turn to the next page to begin the exercise
Whisker’s has many words designed to allow for motor direction control.
FORWARD Both wheels rotate in the forward direction causing the robot to move forward.
STOP Both wheels cease to rotate causing the robot to stop.
BACKUP Both wheels rotate in the backwardsdirection causing the robot to backup.
REVERSE-DIR Both wheels now rotate in the other direction they where rotating causing the robot to move in the opposite direction.
number SECS A delaying word based on seconds. Thisword will delay the execution of the next word following this command, range is 1-32000.
DEFAULT-INSTINCTS Sets the Instinct level sensor mailboxes for collision avoidance reactions to objects.
19

1) Place Whiskerstm on some books.
2) type FORWARD <cr>
forward forward
Observe: Both wheels now turn in the forward direction.
3) type STOP <cr>
stopped stopped
Observe: Whiskerstm wheels have now stopped turning.
20

4) type BACKUP <cr>
backwards backwards
Observe: Both wheels are both turning backwards.
5) type STOP <cr>
stopped stopped
Observe: Both wheels have stopped.
6) type FORWARD <cr>
forward forward
Observe: Whiskerstm wheels are now turning in the forward direction.
21

7) type REVERSE-DIR <cr>
backwards backwards
Observe: the wheels have changed direction and are now going in the backwards direction.
8) type STOP <cr>
stopped stopped
Observe: that Whiskerstm wheels have stopped.
9) type BACKUP <cr>
backwards backwards
Observe: both Whiskerstm wheels are turning backwards.
22

10) type REVERSE-DIR <cr>
forward forward
Observe: Whiskerstm wheels are now going forward.
11) type REVERSE-DIR <cr>
backwards backwards
Observe: Whiskerstm wheels are now turning in the original direction.
12) type STOP <cr>
stopped stopped
Observe: the wheels have stopped.
23

If you use these words without any distance or time duration words, Whiskerstm would simply go the direction last commanded until he ran out of power. However, if his collision avoidance instincts were on, he would simply wander around the room avoiding obstacles.
13) type FORWARD 3 SECS STOP <cr>
forward/stop forward/stop
Observe: the wheels rotate forward for 3 seconds then stop.
24

Problem Solving Exercise 1
1) type DEFAULT-INSTINCTS <cr>
2) type FORWARD <cr>
3) Disconnect the computer cable and place Whiskerstm on the floor.
Observe: He goes forward until one of his sensors see’s something, then he turns away.
The robot is not executing a program, only going forward because he was commanded to do so. Whisker’stm has enough common sense not to run into various objects. This is his Instinct Level working. Not bad for a robot only using 1/3 of his brain. Sometimes he still gets into trouble, but these situations are handled by the robot’s higher levels of intelligence (Goal and Behavior levels). We will learn how to work with these levels later in the course.
Goals and Learning
Behaviors and Tasks
InstinctsTriuneBrain
25
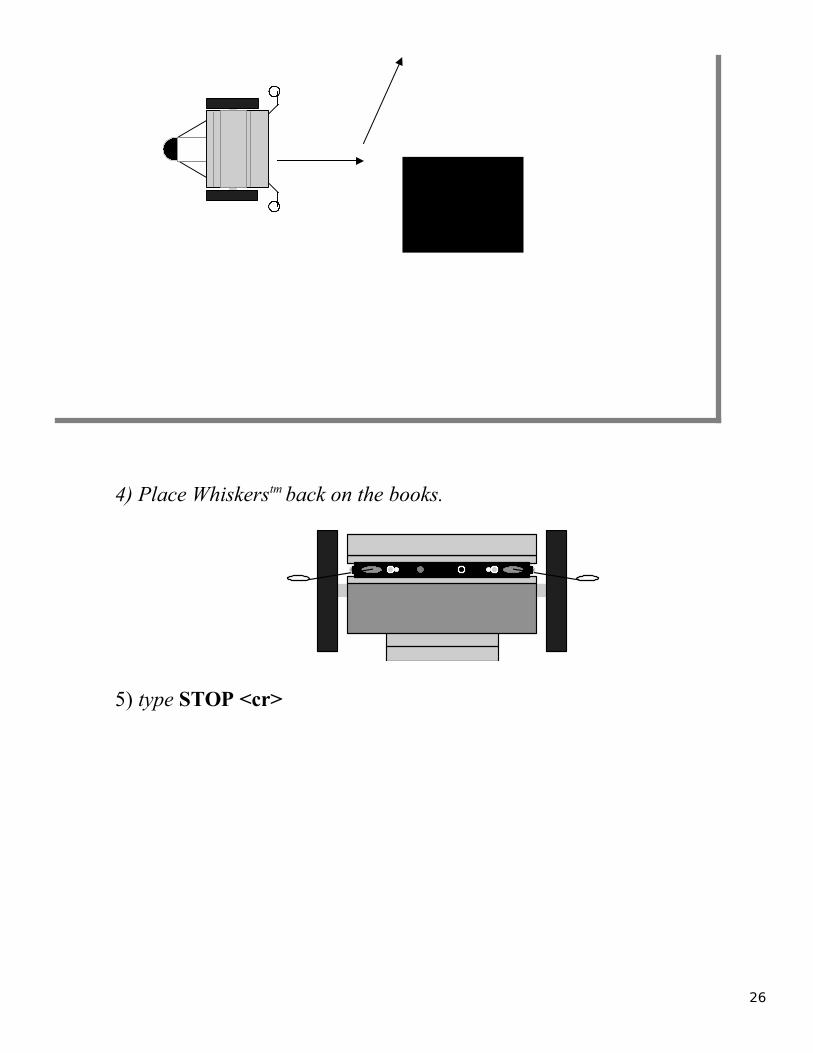
4) Place Whiskerstm back on the books.
5) type STOP <cr>
26

Discovery Task#II
Teaching Whiskers tm new words
Objective and Overview:
In this section you will learn how to teach Whiskerstm new words. After all, a robot wouldn’t be very smart if it could not be taught new words(commands). Humans and animals learn new behaviors by observing their parents. Whiskerstm can’t do that quite yet, but you can teach him using your computer. A new word is created by placing a colon before it, and a semi-colon at the endof the series of words that will be executed in order as follows:
note space between words: new-word
Important wordword
;
Now we will explore how to make the robot travel for a specific distance or turn for a specific number of degrees. You will need a yardstick for the next set of experiments.
Remember:
<cr> means pressing the Enter key or Return key on the keyboard after typing the command.
Type commands exactly as shown, noting upper case and lower case letters.
27

The Words you will explorefor reference only, turn to the next page to begin the exercise
Whisker’stm is programmable allowing you to create new words.
: new-word The colon tells the robot that we are defining a new word. The next word new-word is the name of this word or command. The next series of words and numbers are the words that are executed when this word is later used.
; The semi-colon tells the robot that this is the end of the definition as described above. The colon and semi-colon are always used together.
number PERIODS This is a delaying word that will cause the robot to pause execution for the number of periods desired. ie: 100 PERIODS
number SECS This is a delaying word that will cause the robot to pause execution for the number of seconds desired. ie: 10 SECS
REMEMBER Causes the robot to remember all the new words currently taught to him.
frequency times WAIL Causes the robot to emit a wailing type of sound determined by frequency and the number of timesdesired.
ENABLE Turns the instinct level on.
DISABLE Turns the instinct level off.
Note: These delaying words only work when the instincts are enabled using the ENABLE command. (aprox 130 periods/sec)
28

1) place Whiskers on the floor
2) type WORDS <cr>
Observe: When you type the command WORDS, all of the words in Whiskerstm dictionary are listed until you press <cr> or until the list is completed.
These are the words that the robot already knows. You can add your own words or even redefine any of these words. Note that the last word defined is the first listed.
To add a word to Whisker’stm dictionary a specific procedure must be followed. The separators which tell Whiskerstm programming language that you are creating a word are the colon, (:) and the semi colon (;). The colon starts the word and the semi colon ends the word. Let’s add a word to this list.
WORDS 4D3F BOOTING 4C81 CHECK-KEYBOARD 4C2A NEW-SYSTEM 4C11 FORGET4B9C RECALL 4B83 AUTO-START: 4B37 REMEMBER 4ABC CHECK-SUM 4AA8 I-VARS-UP 4A94 I-VARS 4A83 S-VARS 4A72 U-VARS 4A64 CLD/WRM 4A26 RECALL-SYS 49EC SAVE-SYS 49C9 CLEAR-TIB 49B7 I-SYS-UP 4926 I-SYS 4899 R-SYS 480B SYS 47EB BOOT: 47DD vecDEMO 47A3 DEMO 4709 .HISTORY 46D7 (.HIST) 46A9 HIST.LINE 4695 rNUM-MAX 4682 rNUM 4673rHIST 4615 MEM-DUMP 45DB CAPTURE
<cr>OK
29

3) type the following:Note space here.
: MOVE <cr>
FORWARD <cr> 100 PERIODS <cr> STOP <cr>; <cr>
Observe: the colon is followed by a space then by the new word. The next three lines tell whiskers which words to execute. Then the last line, the semi colon, tells whiskers that this is the end of the new word or definition.
4) type WORDS <cr>
Note: press the Enter key or Space bar after 4 lines of words are displayed to stop showing words.
Observe: When you type the command WORDS, the first word in the listis MOVE which we just defined.
5) type MOVE <cr>
Observe: Whiskers’tm wheels move in a forward direction for 100 periodsthen the wheels come to a stop.
Caution: Make sure you have a STOP command at the end or the robot will continue forever.
WORDS 9018 MOVE 4D3F BOOTING 4C81 CHECK-KEYBOARD 4C2A NEW-SYSTEM 4C11 FORGET 4B9C RECALL 4B83 AUTO-START: 4B37 REMEMBER 4ABC CHECK-SUM 4AA8 I-VARS-UP 4A94 I-VARS 4A83 S-VARS 4A72 U-VARS 4A64 CLD/WRM 4A26 RECALL-SYS 49EC SAVE-SYS 49C9 CLEAR-TIB 49B7 I-SYS-UP 4926 I-SYS
<cr>OK
30

6) reset Whiskers’tm using the reset button on the back.
7) press <cr> twice when you see the copyright notice.
8) type WORDS <cr> then press the type <cr> after a few lines.
Observe: that the word MOVES is no longer in the memory. This is because we didn’t type the word REMEMBER to save the new word.
9) type the following again:note space between words
: MOVE <cr>
FORWARD <cr> 100 PERIODS <cr> STOP <cr>
; <cr>
10) type REMEMBER <cr>
WORDS 4D3F BOOTING 4C81 CHECK-KEYBOARD 4C2A NEW-SYSTEM 4C11 FORGET 4B9C RECALL 4B83 AUTO-START: 4B37 REMEMBER 4ABC CHECK-SUM 4AA8 I-VARS-UP 4A94 I-VARS 4A83 S-VARS 4A72 U-VARS 4A64 CLD/WRM 4A26 RECALL-SYS 49EC SAVE-SYS 49C9 CLEAR-TIB 49B7 I-SYS-UP 4926 I-SYS
<cr>OK
HINT: If you misspell a word when you are defining a new word (after the colon), Whiskers will respond with a ? mark and place you back in the interactive mode. You must start over andretype the definition again. You will then receive a NOT UNQUE message which is ok.
31
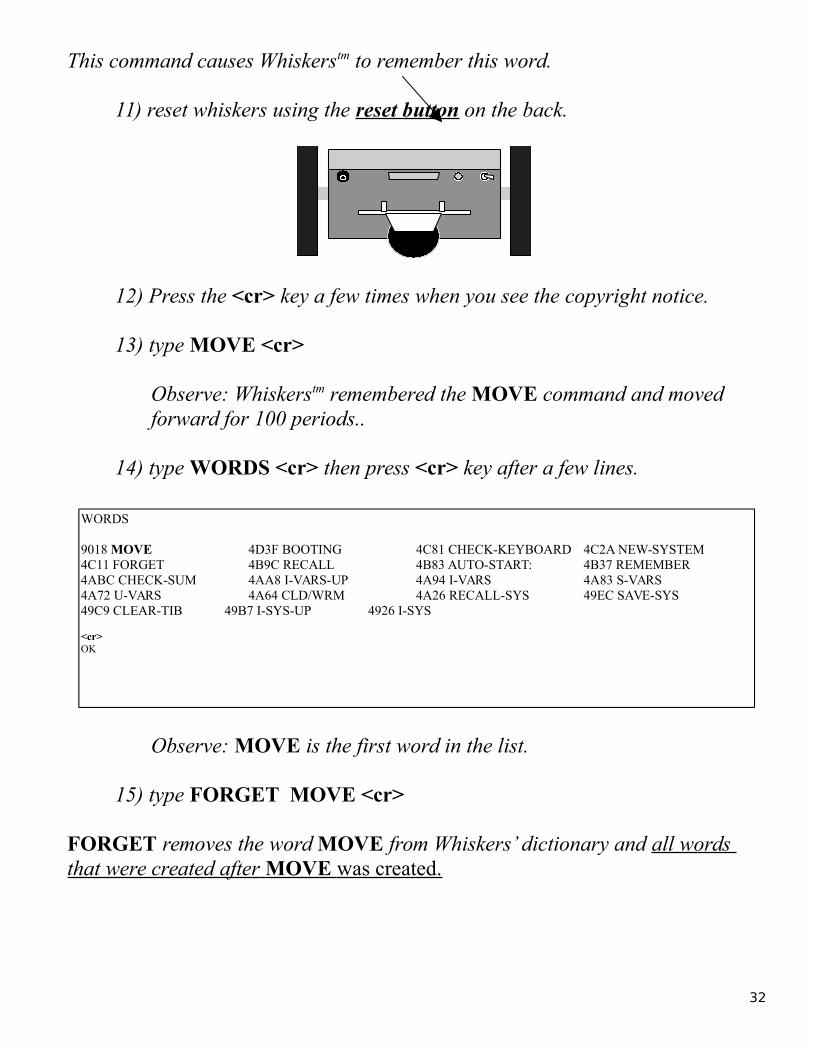
This command causes Whiskerstm to remember this word.
11) reset whiskers using the reset button on the back.
12) Press the <cr> key a few times when you see the copyright notice.
13) type MOVE <cr>
Observe: Whiskerstm remembered the MOVE command and moved forward for 100 periods..
14) type WORDS <cr> then press <cr> key after a few lines.
Observe: MOVE is the first word in the list.
15) type FORGET MOVE <cr>
FORGET removes the word MOVE from Whiskers’ dictionary and all words that were created after MOVE was created.
WORDS 9018 MOVE 4D3F BOOTING 4C81 CHECK-KEYBOARD 4C2A NEW-SYSTEM 4C11 FORGET 4B9C RECALL 4B83 AUTO-START: 4B37 REMEMBER 4ABC CHECK-SUM 4AA8 I-VARS-UP 4A94 I-VARS 4A83 S-VARS 4A72 U-VARS 4A64 CLD/WRM 4A26 RECALL-SYS 49EC SAVE-SYS 49C9 CLEAR-TIB 49B7 I-SYS-UP 4926 I-SYS
<cr>OK
32

16) type WORDS <cr>
Observe: MOVE is no longer in whiskers dictionary.
WORDS 4D3F BOOTING 4C81 CHECK-KEYBOARD 4C2A NEW-SYSTEM 4C11 FORGET4B9C RECALL 4B83 AUTO-START: 4B37 REMEMBER 4ABC CHECK-SUM 4AA8 I-VARS-UP 4A94 I-VARS 4A83 S-VARS 4A72 U-VARS 4A64 CLD/WRM 4A26 RECALL-SYS 49EC SAVE-SYS 49C9 CLEAR-TIB 49B7 I-SYS-UP 4926 I-SYS 4899 R-SYS 480B SYS 47EB BOOT: 47DD vecDEMO 47A3 DEMO 4709 .HISTORY 46D7 (.HIST) 46A9 HIST.LINE 4695 rNUM-MAX 4682 rNUM 4673 rHIST 4615 MEM-DUMP 45DB CAPTURE
<cr>OK
33
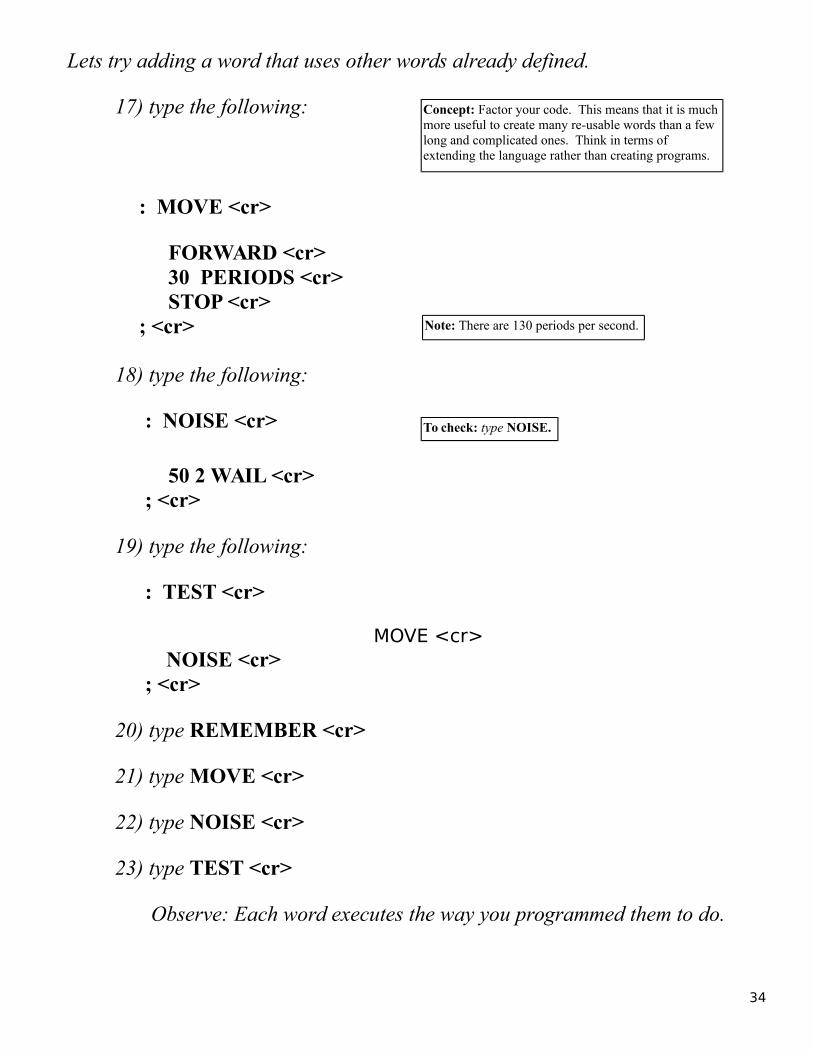
Lets try adding a word that uses other words already defined.
17) type the following:
: MOVE <cr>
FORWARD <cr> 30 PERIODS <cr> STOP <cr>
; <cr>
18) type the following:
: NOISE <cr>
50 2 WAIL <cr>; <cr>
19) type the following:
: TEST <cr>
MOVE <cr> NOISE <cr>; <cr>
20) type REMEMBER <cr>
21) type MOVE <cr>
22) type NOISE <cr>
23) type TEST <cr>
Observe: Each word executes the way you programmed them to do.
Concept: Factor your code. This means that it is muchmore useful to create many re-usable words than a few long and complicated ones. Think in terms of extending the language rather than creating programs.
Note: There are 130 periods per second.
To check: type NOISE.
34

24) type WORDS <cr> then press the <cr> key after a few lines.
Observe: Each word you created is listed.
25) type FORGET MOVE <cr>
26) type WORDS <cr>
Observe: Each word you created after and including MOVE has been removed.
HINT: Whiskers will forget all the words that were defined after the word forgotten as well.
By creating new words, you can teach Whiskerstm new behaviors. Try creating your own words that will allow Whiskerstm to do some interesting things. The main thing to remember is to create many simple words rather than one or more long ones. Simple words will increase his vocabulary with more useful words that you can later use.
WORDS
9033 TEST 9026 NOISE 9018 MOVE 4D3F BOOTING 4C81 CHECK-KEYBOARD 4C2A NEW-SYSTEM 4C11 FORGET 4B9C RECALL 4B83 AUTO-START: 4B37 REMEMBER 4ABC CHECK-SUM 4AA8 I-VARS-UP 4A94 I-VARS 4A83 S-VARS 4A72 U-VARS 4A64 CLD/WRM 4A26 RECALL-SYS 49EC SAVE-SYS 49C9 CLEAR-TIB 49B7 I-SYS-UP 4926 I-SYS 4899 R-SYS 480B SYS 47EB BOOT: 47DD vecDEMO 47A3 DEMO 4709 .HISTORY 46D7 (.HIST) 46A9 HIST.LINE 4695 rNUM-MAX 4682 rNUM 4673 rHIST 4615 MEM-DUMP 45DB CAPTURE OK<cr>OK
WORDS 4D3F BOOTING 4C81 CHECK-KEYBOARD 4C2A NEW-SYSTEM 4C11 FORGET 4B9C RECALL 4B83 AUTO-START: 4B37 REMEMBER 4ABC CHECK-SUM4AA8 I-VARS-UP 4A94 I-VARS 4A83 S-VARS 4A72 U-VARS 4A64 CLD/WRM 4A26 RECALL-SYS 49EC SAVE-SYS 49C9 CLEAR-TIB 49B7 I-SYS-UP 4926 I-SYS 4899 R-SYS 480B SYS 47EB BOOT: 47DD vecDEMO 47A3 DEMO OK
35

Problem Solving Exercise 2
Create a new word called TEST that tells the robot to go forward for 5 seconds and backup for three secs then stop.
Step 1
Step 2
Remember:
number SECS is used to delay execution between words based on seconds.
FORWARD makes the robot move forward
BACKUP makes the robot backup
STOP makes the robot stop
Use the format:note space between words
: TEST <cr>
word number wordword number word
; <cr>
36

Discovery Task#III
Acceleration and Deceleration
Objective:
So far we have seen Whiskerstm move forward or backward at a constant speed. The following words will allow Whiskerstm to slowly start his motion orcome to a smooth stop.
Remember:
<cr> means pressing the Enter key or Return key on the keyboard after typing the command.
Type commands exactly as shown, noting upper case and lower case letters.
37

The Words you will explorefor reference only, turn to the next page to begin the exercise
rate speed RAMP-UP This word will ramp the motor speed up to the desired speed . rate is how fast the robot will increase it’s speed. The range must be from 1 to 100. speed is the final speed you want the robot to be traveling. The range is from 1 to 100.
rate RAMP-DOWN This word will decrease the current speed at the rate desired until the robot stops completely. rate is how fast the robot will decrease speed. The range is from 1 to 100.
FORWARD Command Whiskerstm to move forward continuously.
BACKUP Command Whiskerstm to move backwards continuously.
STOP Command Whiskerstm to stop.
LEFT Choose the left side of the robot for following command.
RIGHT Choose the right side of the robot for following command.
speed LEFT SPEED These words will change the speed of either the left or right
speed RIGHT SPEED wheel. The range for speed is from 1 to 100.
38

The words that allow Whiskers to accelerate to a speed and de-accelerate to stop are: RAMP-UP and RAMP-DOWN. Lets start with RAMP-UP. The RAMP-UP command is used to bring Whiskerstm up to a specific speed smoothly. RAMP-UP has two variables:
X Y RAMP-UPor
rate speed RAMP-UP
where X is rate at which Whiskerstm will build his speed, and Y is the maximum speed. These are based on numbers from 1 to 100 with 100 being the maximum.
Place Whiskers on the floor with his communication cable still attached.
1) type DEFAULT-INSTINCTS <cr>
2) type 0 LEFT SPEED <cr>
3) type 0 RIGHT SPEED <cr>
4) type FORWARD 2 100 RAMP-UP <cr>
Note: turn avoidance on...
39

5) type STOP <cr>
Observe: the how smoothly Whiskerstm builds up to the maximum speed of 100.
6) type 0 LEFT SPEED <cr>
7) type 0 RIGHT SPEED <cr>
8) type FORWARD 10 100 RAMP-UP <cr>
9) type STOP <cr>
Observe: the how smoothly Whiskerstm builds up to the maximum speed of 100 but at a faster acceleration.
10) type 0 LEFT SPEED <cr>
11) type 0 RIGHT SPEED <cr>
12) type FORWARD 100 10 RAMP-UP <cr>
40
13) type STOP <cr>
Observe: the maximum speed is 50 and the acceleration is the same as before(10).
Different speeds and accelerations can be obtained by changing the numbers used.
Now lets look at the RAMP-DOWN command. The RAMP-DOWN command is used to bring Whiskerstm to a smooth stop. The RAMP-DOWN command has only one variable.
X RAMP-DOWN
where X is the rate at which WhiskersTM will come to a stop. This is deceleration. There is no need to have the second perameter in this command because the robot knows its current speed and that it will come toa stop.
14) type 100 LEFT SPEED <cr>
15) type 100 RIGHT SPEED <cr>
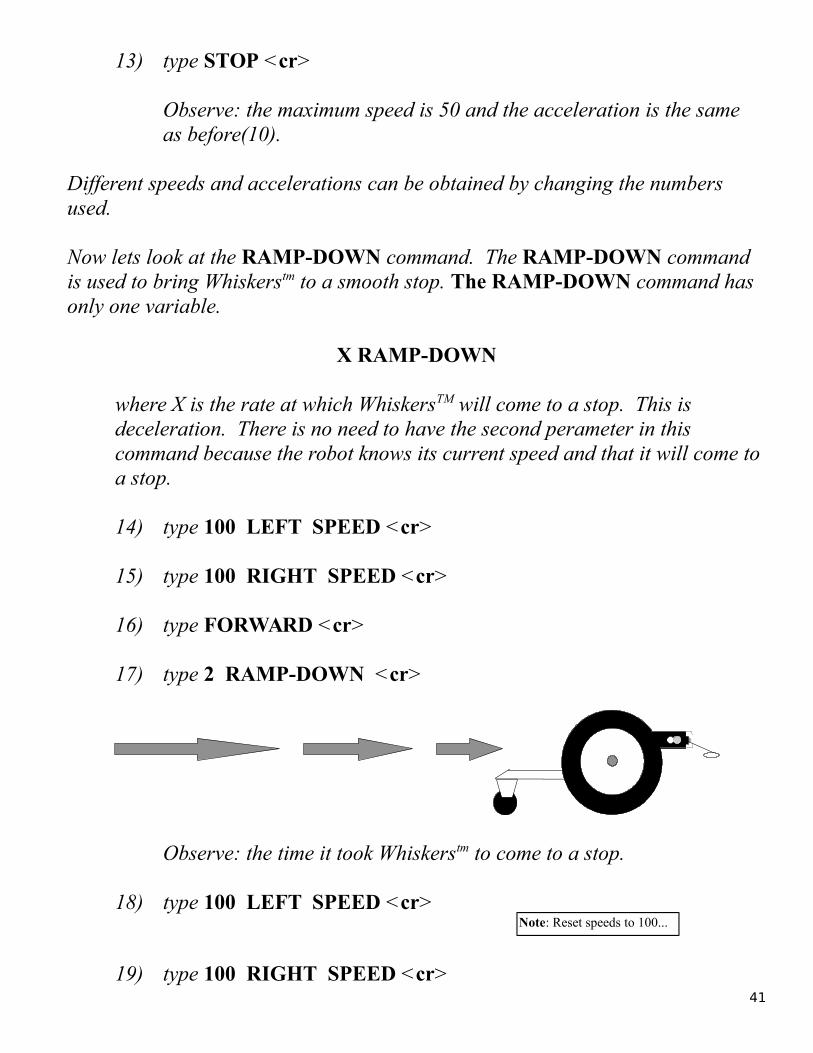
16) type FORWARD <cr>
17) type 2 RAMP-DOWN <cr>
Observe: the time it took Whiskerstm to come to a stop.
18) type 100 LEFT SPEED <cr>
19) type 100 RIGHT SPEED <cr>
Note: Reset speeds to 100...
41
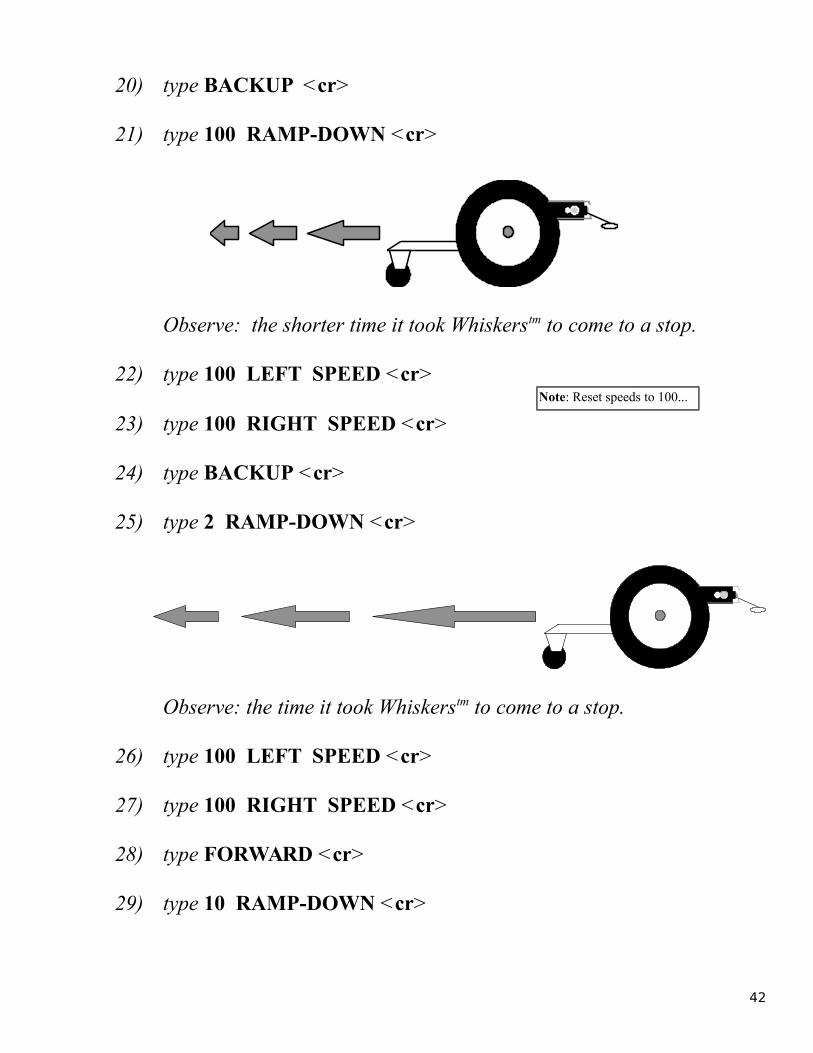
20) type BACKUP <cr>
21) type 100 RAMP-DOWN <cr>
Observe: the shorter time it took Whiskerstm to come to a stop.
22) type 100 LEFT SPEED <cr>
23) type 100 RIGHT SPEED <cr>
24) type BACKUP <cr>
25) type 2 RAMP-DOWN <cr>
Observe: the time it took Whiskerstm to come to a stop.
26) type 100 LEFT SPEED <cr>
27) type 100 RIGHT SPEED <cr>
28) type FORWARD <cr>
29) type 10 RAMP-DOWN <cr>
Note: Reset speeds to 100...
42

Observe: the shorter time it took Whiskerstm to come to a stop.
Note: you must set the new desired speeds and direction after you use a RAMP-DOWN command.
43
Problem Solving Exercise 3
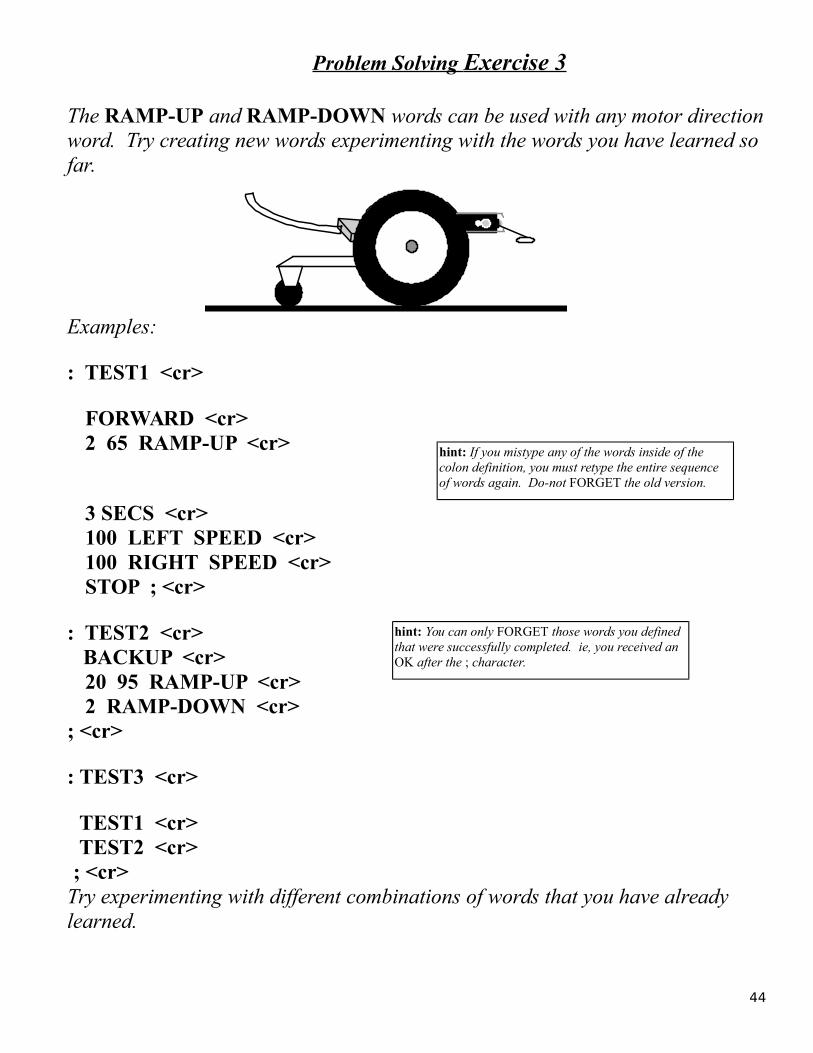
The RAMP-UP and RAMP-DOWN words can be used with any motor directionword. Try creating new words experimenting with the words you have learned sofar.
Examples:
: TEST1 <cr>
FORWARD <cr>2 65 RAMP-UP <cr>
3 SECS <cr>100 LEFT SPEED <cr>100 RIGHT SPEED <cr>STOP ; <cr>
: TEST2 <cr> BACKUP <cr>
20 95 RAMP-UP <cr>2 RAMP-DOWN <cr>
; <cr>
: TEST3 <cr>
TEST1 <cr>TEST2 <cr>
; <cr>Try experimenting with different combinations of words that you have already learned.
hint: If you mistype any of the words inside of the colon definition, you must retype the entire sequence of words again. Do-not FORGET the old version.
44
hint: You can only FORGET those words you defined that were successfully completed. ie, you received an OK after the ; character.
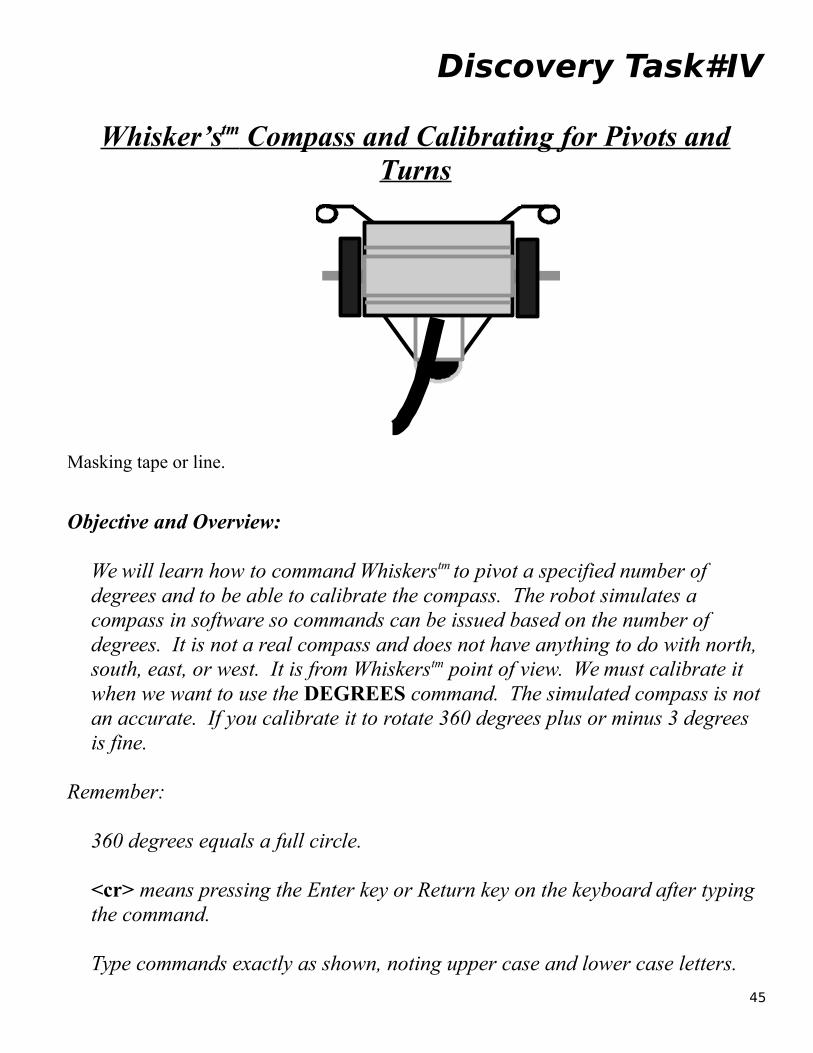
Discovery Task#IV
Whisker’s tm Compass and Calibrating for Pivots andTurns
Masking tape or line.
Objective and Overview:
We will learn how to command Whiskerstm to pivot a specified number of degrees and to be able to calibrate the compass. The robot simulates a compass in software so commands can be issued based on the number of degrees. It is not a real compass and does not have anything to do with north, south, east, or west. It is from Whiskerstm point of view. We must calibrate it when we want to use the DEGREES command. The simulated compass is notan accurate. If you calibrate it to rotate 360 degrees plus or minus 3 degrees is fine.
Remember:
360 degrees equals a full circle.
<cr> means pressing the Enter key or Return key on the keyboard after typing the command.
Type commands exactly as shown, noting upper case and lower case letters.
45
The Words you will explorefor reference only, turn to the next page to begin the exercise
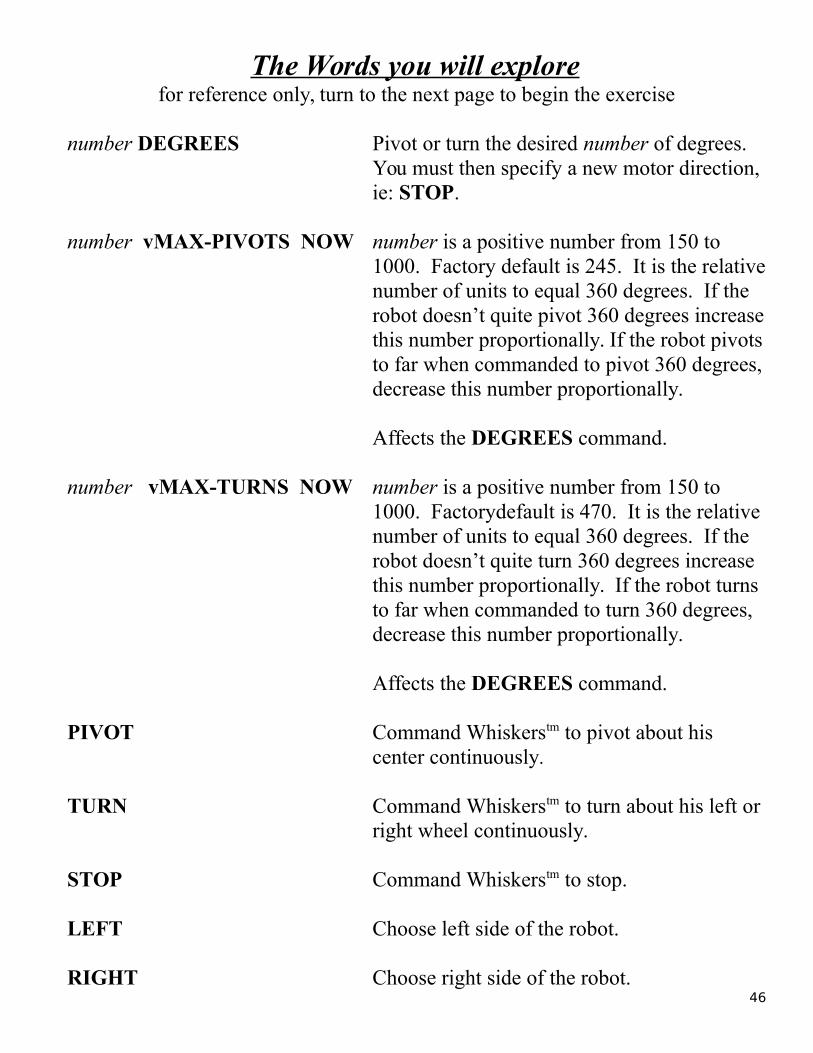
number DEGREES Pivot or turn the desired number of degrees. You must then specify a new motor direction, ie: STOP.
number vMAX-PIVOTS NOW number is a positive number from 150 to 1000. Factory default is 245. It is the relativenumber of units to equal 360 degrees. If the robot doesn’t quite pivot 360 degrees increasethis number proportionally. If the robot pivotsto far when commanded to pivot 360 degrees,decrease this number proportionally.
Affects the DEGREES command.
number vMAX-TURNS NOW number is a positive number from 150 to1000. Factorydefault is 470. It is the relative number of units to equal 360 degrees. If the robot doesn’t quite turn 360 degrees increase this number proportionally. If the robot turns to far when commanded to turn 360 degrees, decrease this number proportionally.
Affects the DEGREES command.
PIVOT Command Whiskerstm to pivot about his center continuously.
TURN Command Whiskerstm to turn about his left or right wheel continuously.
STOP Command Whiskerstm to stop.
LEFT Choose left side of the robot.
RIGHT Choose right side of the robot.46
Working with Whiskers
The calibration of Whisker’s compass is affected by the following conditions:
• Battery charge.• Motor speed.• Resetting to factory defaults using Q key on startup.
47

1) Place the robot on the floor aligning it with a piece of masking tape as shown. Define these two new words which will help you complete this task.
2) type the following (define words)
: BLIND <cr> 250 TRIGGER-FACTOR <cr> 250 SUM-FACTOR <cr> CALIBRATE <cr>; <cr>
: AVOID <cr> 35 TRIGGER-FACTOR <cr> 50 SUM-FACTOR <cr> CALIBRATE <cr> ; <cr>
3) type BLIND <cr>
Note: Whiskers has several words to control his light sensor range/senitivity:
TRIGGER-FACTOR sets Whiskers hardware light sensors.
SUM-FACTOR sets Whiskers virtual light sensors ( sum sensors)
CALIBRATE causes the changes you made with TRIGGER-FACTOR and SUM- FACTOR to take effect. It also shows you his new trigger levels for each sensor
turn collision avoidance off
48
Adjusting Pivoting
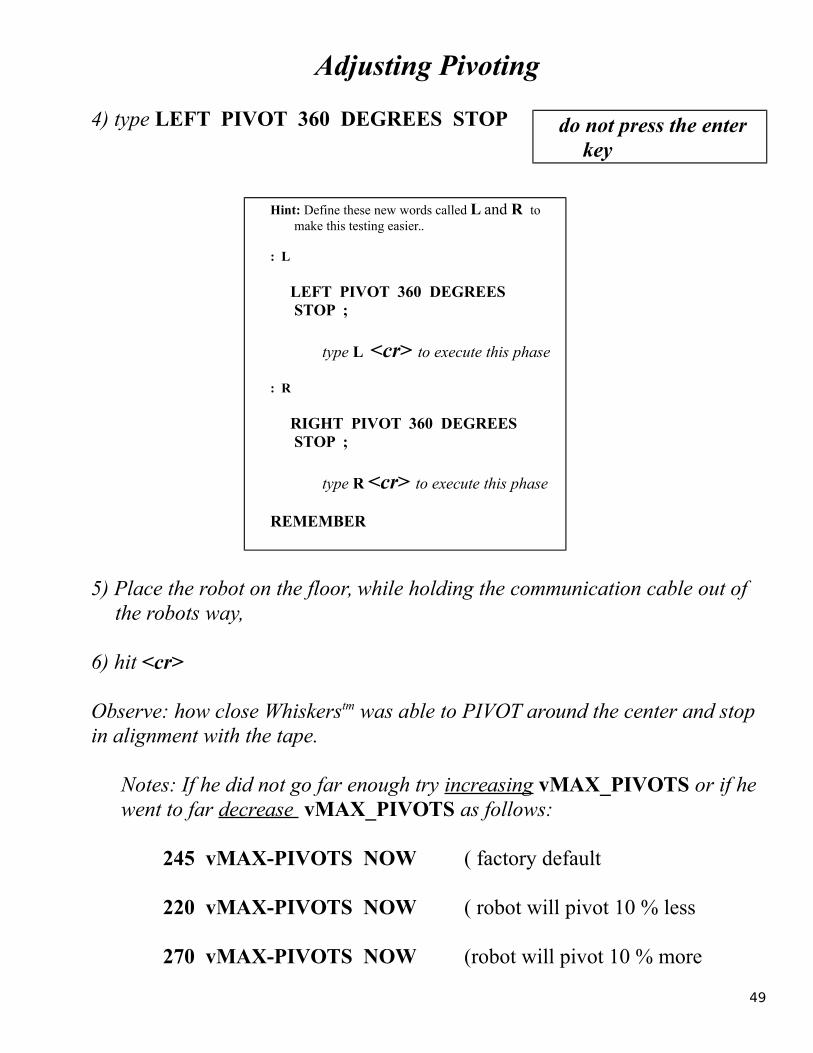
4) type LEFT PIVOT 360 DEGREES STOP
5) Place the robot on the floor, while holding the communication cable out of the robots way,
6) hit <cr>
Observe: how close Whiskerstm was able to PIVOT around the center and stop in alignment with the tape.
Notes: If he did not go far enough try increasing vMAX_PIVOTS or if he went to far decrease vMAX_PIVOTS as follows:
245 vMAX-PIVOTS NOW ( factory default
220 vMAX-PIVOTS NOW ( robot will pivot 10 % less
270 vMAX-PIVOTS NOW (robot will pivot 10 % more
Hint: Define these new words called L and R to make this testing easier..
: L
LEFT PIVOT 360 DEGREES STOP ;
type L <cr> to execute this phase
: R
RIGHT PIVOT 360 DEGREES STOP ;
type R <cr> to execute this phase
REMEMBER
49
do not press the enter key
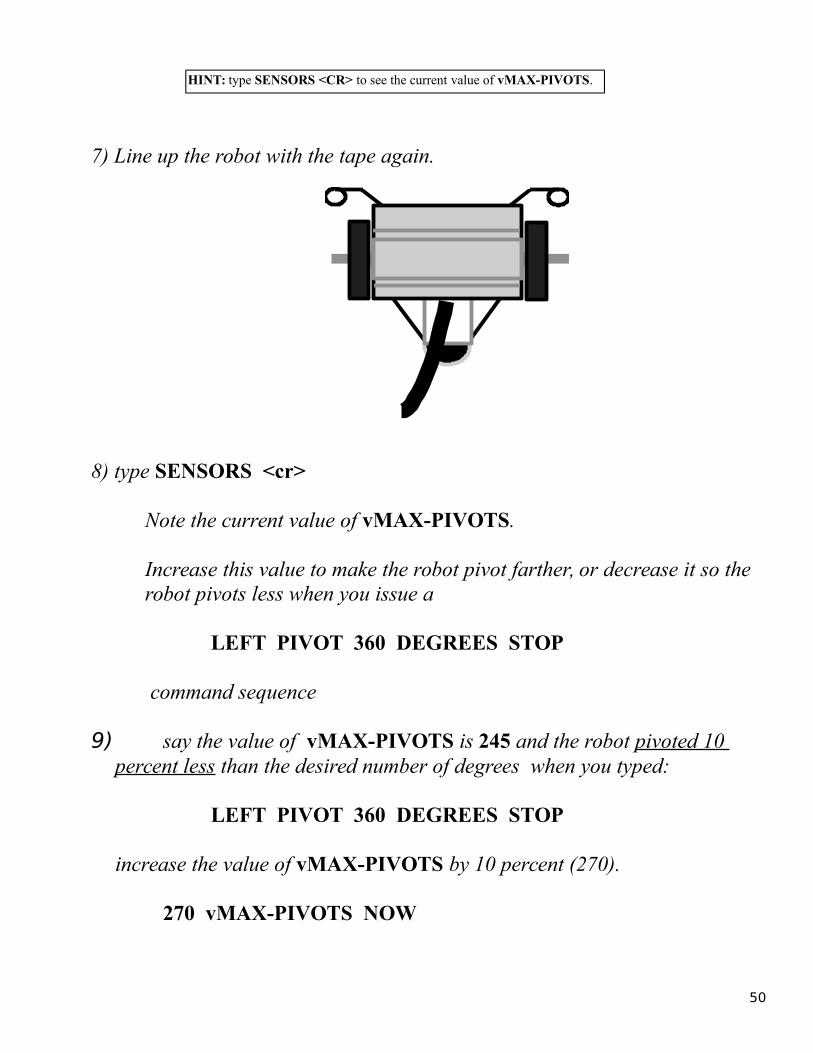
7) Line up the robot with the tape again.
8) type SENSORS <cr>
Note the current value of vMAX-PIVOTS.
Increase this value to make the robot pivot farther, or decrease it so the robot pivots less when you issue a
LEFT PIVOT 360 DEGREES STOP
command sequence
9) say the value of vMAX-PIVOTS is 245 and the robot pivoted 10 percent less than the desired number of degrees when you typed:
LEFT PIVOT 360 DEGREES STOP
increase the value of vMAX-PIVOTS by 10 percent (270).
270 vMAX-PIVOTS NOW
HINT: type SENSORS <CR> to see the current value of vMAX-PIVOTS.
50

9) say the value of vMAX-PIVOTS is 245 and the robot pivoted 10 percent more than the desired number of degrees when you typed:
LEFT PIVOT 360 DEGREES STOP
decrease the value of vMAX-PIVOTS by 10 percent or 220.
220 vMAX-PIVOTS NOW
10) Continue performing this experiment until the robot can pivot approximately 360 degrees.
51
Adjusting Turns
11) type LEFT TURN 360 DEGREES STOP
12) While holding the communication cable out of the robots way,
13) hit <cr>
Observe: how close Whiskerstm was able to TURN around a wheel and stop in alignment with the tape.
Notes: If he did not go far enough try increasing vMAX-TURNS or if he went to far decrease vMAX-TURNS as follows:
470 vMAX-TURNS NOW ( factory default
423 vMAX-TURNS NOW ( robot will turn 10 % less
523 vMAX-TURNS NOW (robot will turn 10 % more
do not press the enter key
Hint: Define these new words called L and R to make this testing easier..
: LT
LEFT TURN 360 DEGREES STOP ;
type LT <cr> to execute this phase
: RT
RIGHT TURN 360 DEGREES STOP ;
type RT <cr> to execute this phase
HINT: type SENSORS <CR> to see the current value of vMAX-TURNS.
52
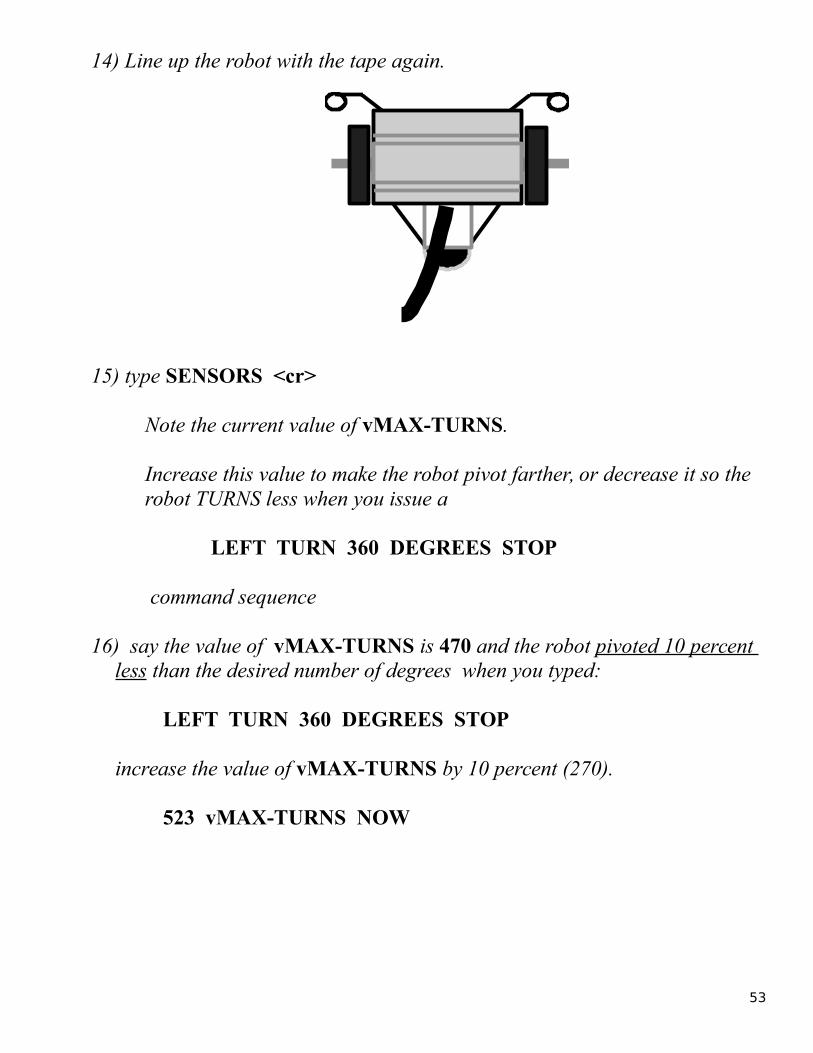
14) Line up the robot with the tape again.
15) type SENSORS <cr>
Note the current value of vMAX-TURNS.
Increase this value to make the robot pivot farther, or decrease it so the robot TURNS less when you issue a
LEFT TURN 360 DEGREES STOP
command sequence
16) say the value of vMAX-TURNS is 470 and the robot pivoted 10 percent less than the desired number of degrees when you typed:
LEFT TURN 360 DEGREES STOP
increase the value of vMAX-TURNS by 10 percent (270).
523 vMAX-TURNS NOW
53

17) say the value of vMAX-TURNS is 470 and the robot pivoted 10 percent more than the desired number of degrees when you typed:
LEFT TURN 360 DEGREES STOP
decrease the value of vMAX-TURNS by 10 percent or 220.
423 vMAX-TURNS NOW
18) Continue performing this experiment until the robot can pivot approximately 360 degrees.
Note: The compass is called a virtual sensor in robotics. Just like the concept of Virtual Reality, it doesn’t really exist in the physical world as hardware. Rather, it is simulated in the operating system totally by software code. This is why it must be calibrated and is effected by wheel drag, battery charge, and speed.
54

Problem Solving Exercise 4
Create a new word called: GET-COKE. Have the robot go forward 5 feet, TURN 180 degrees, and come back to the start.
Start
Note: If the robot does not return to the starting point, recalibrate the DEGREES using the calibration procedure you just learned. Try to get as close as you can to the starting point. This is called dead reckoning in robotics.
Hint: Create a new word called: GO-FIVE-FEET first.
55

Discovery Task#V
Pivots and Turns
pivot turn
Objective and Overview:
We will learn how to command the robot to perform pivots and turns. Pivotingthe robot causes it to rotate about the center point between the wheels. Turning is centered about either the left or right wheel.
Whiskers is designed with two independent wheel motors, in the design. By having the wheels independenly controlled, Whiskerstm can make a variety of turns, pivots and arcs. Performing radius turns are accomplished by choosing a different speeds for each wheel.
Remember:
Do Task IV again if the robot does not pivot fairly well.
<cr> means pressing the Enter key or Return key on the keyboard after typing the command.
Type commands exactly as shown, noting upper case and lower case letters.
56
The Words you will explorefor reference only, turn to the next page to begin the exercise
number DEGREES Pivot or turn the desired number of degrees. You must then specify a new motor direction, ie: STOP.
PIVOT Command Whiskerstm to pivot about his center continuously.
TURN Command Whiskerstm to turn about one wheel continuously.
STOP Command Whiskerstm to stop.
LEFT Choose left side of the robot.
RIGHT Choose right side of the robot.
57

1) Place the robot on books or other object to keep the wheels from contacting the ground. To do the following experiments you need to place Whiskerstm in the interactive mode. Press the enter key several times after turning him on and seeing the copyright notice.
2) type RIGHT TURN <cr>
Observe: the left wheel is turning forward with the right wheel stopped.
3) type STOP <cr>
4) type LEFT TURN <cr >
58

Observe: the right wheel is turning forward with the left wheel is stopped.
5) type STOP <cr>
This shows that whiskers is actually pivoting on the stopped wheel. The TURN command allows Whiskerstm to pivot about the stopped wheel, thus making this wheel the pivot point or axis of the turn.
Lets experiment with some different degrees.
Do not be concerned at this point if the robot does not rotate or pivot the exact number of degrees you specify. Go to Chapter IV if the robot DEGREES command is too far off.
Next, we will command Whiskerstm to turn X number of degrees and stop. So, if we wanted Whiskerstm to make a 90 degree right turn we would use 90 degrees in the right turn command.
6) type RIGHT TURN 90 DEGREES STOP <cr>
Observe: that whiskers turned approximately 90 degrees to his right and then stopped.
59

7) type LEFT TURN 90 DEGREES STOP <cr>
Observe: Whiskerstm turned approximately 90 degrees to his left and then stopped. Notice the degrees are approximate.
8) type RIGHT TURN 90 DEGREES <cr>
Observe: Whiskerstm does not stop turning. This is due to the STOP command not being used.
9) type STOP <cr>
Observe: that whiskers has now stopped.
60

10) type RIGHT TURN 180 DEGREES STOP <cr>
Observe: the robot rotates 180 degrees about the right wheel.
11) type RIGHT TURN 270 DEGREES STOP <cr>
Observe: the robot rotates 3/4 of the way about the right wheel.
12) type RIGHT TURN 360 DEGREES STOP <cr>
Observe: the robot rotates 360 degrees about the right wheel.
Next lets do the same type of experiment using the PIVOT command in place of the TURN command.
61

14) type RIGHT PIVOT <cr>
Observe: the left wheel is turning forward and the right wheel is turning backwards.
15) type STOP <cr>
16) type LEFT PIVOT <cr>
Observe: the right wheel is turning forward and the left wheel is turning backwards.
17) type STOP <cr>
The PIVOT command turns both wheels, each of which turn in an opposite direction. This allows Whiskerstm a central axis point which is based midway between the center of the two wheels.
62

18) type RIGHT PIVOT 90 DEGREES STOP <cr>
Observe: both wheels turned to approximate a pivot of 90 degrees right.
19) type LEFT PIVOT 90 DEGREES STOP <cr>
Observe: both wheels turned to approximate a pivot of 90 degrees left.
20) type RIGHT PIVOT 180 DEGREES STOP <cr>
Observe: Whiskerstm pivots 180 degrees.63

21) type RIGHT PIVOT 270 DEGREES STOP <cr>
Observe: Whiskerstm pivots 270 degrees.
22) type RIGHT PIVOT 360 DEGREES STOP <cr>
Observe: Whiskerstm pivots 360 degrees.
Note the difference between the TURN command and the PIVOT words.
TURN causes the robot to rotate about the left or right wheel whereas PIVOT causes the robot to rotate about it’s center.
64

Problem Solving Exercise 5
Create a new word called: SQUARE. Command the robot to make a square on the floor using the new words you have learned.
Start
HINT: define two words first: LEG and TURN-AROUND then define SQUARE using these words.
65
Discovery Task#VI
Velocity/Speed Control and Arcs
Objectives and Overview:
In this section you will perform experiments that will teach you the words which commands Whiskerstm to move around. We will begin with the most basic moves (FORWARD, BACKWARD, STOP) and then learn some special words related to movement.
Remember:
<cr> means pressing the Enter key or Return key on the keyboard after typing the command.
Type commands exactly as shown, noting upper case and lower case letters.
LEFT and RIGHT refers to Whiskerstm view as you were looking from the rear to the front.
66
The Words you will explorefor reference only, turn to the next page to begin the exercise
FORWARD Command Whiskerstm to move forwardcontinuously.
BACKUP Command Whiskerstm to move backwards continuously.
STOP Command Whiskerstm to stop.
LEFT Choose left.
RIGHT Choose right.
speed RIGHT SPEED These words will change the or speed of either the left or right speed LEFT SPEED wheel. The range for speed is from 1 to 100.
SAVE-SPEEDS Save the current speeds settings.
RESTORE-SPEEDS Restore the speed settings saved by the previousSAVE-SPEEDS.
67
One of Whisker’stm features as mentioned earlier are the two independent motors that drive the wheels. Since the wheels are independent from one another, you can set each wheel speed independently. This feature allows Whiskerstm to make smooth arcing turns.
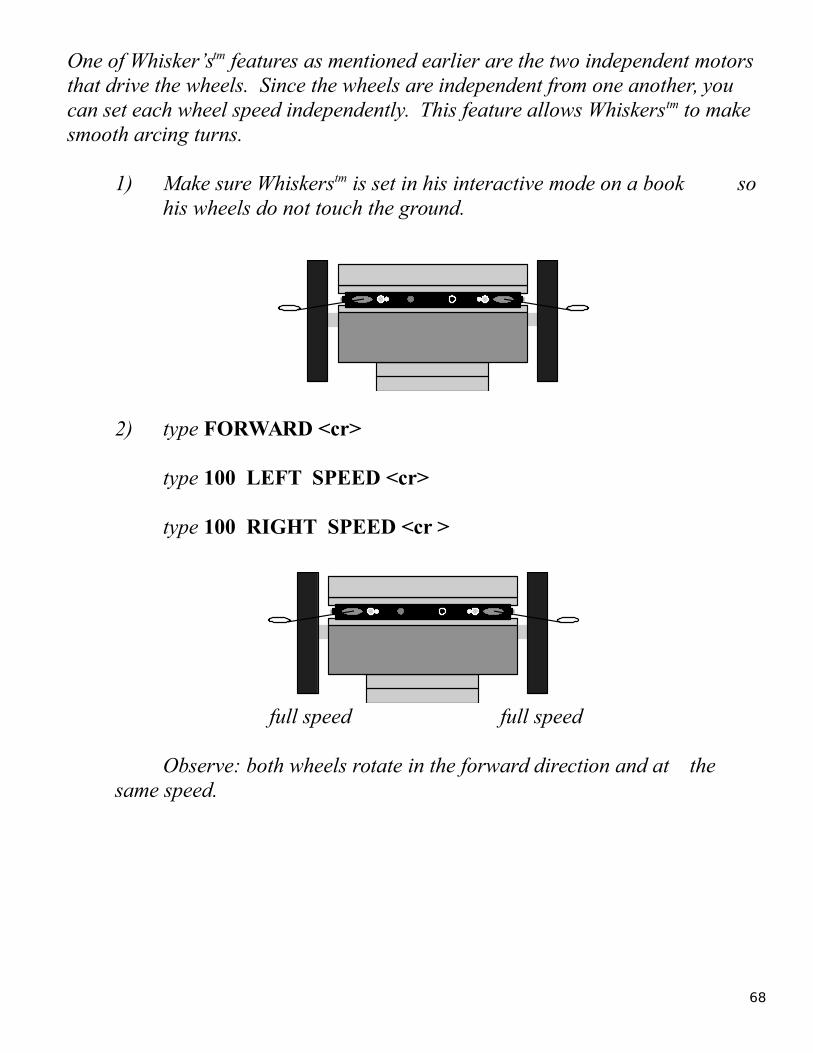
1) Make sure Whiskerstm is set in his interactive mode on a book so his wheels do not touch the ground.
2) type FORWARD <cr>
type 100 LEFT SPEED <cr>
type 100 RIGHT SPEED <cr >
full speed full speed
Observe: both wheels rotate in the forward direction and at the same speed.
68

3) type 50 RIGHT SPEED <cr>
1/2 speed full speed
Observe: the speed of the right tire slowed down to about half the speed of the left.
4) type 10 RIGHT SPEED <cr>
1/10th speed full speed
Observe: the slower speed of the right tire.
5) type STOP <cr>
stopped stopped
69
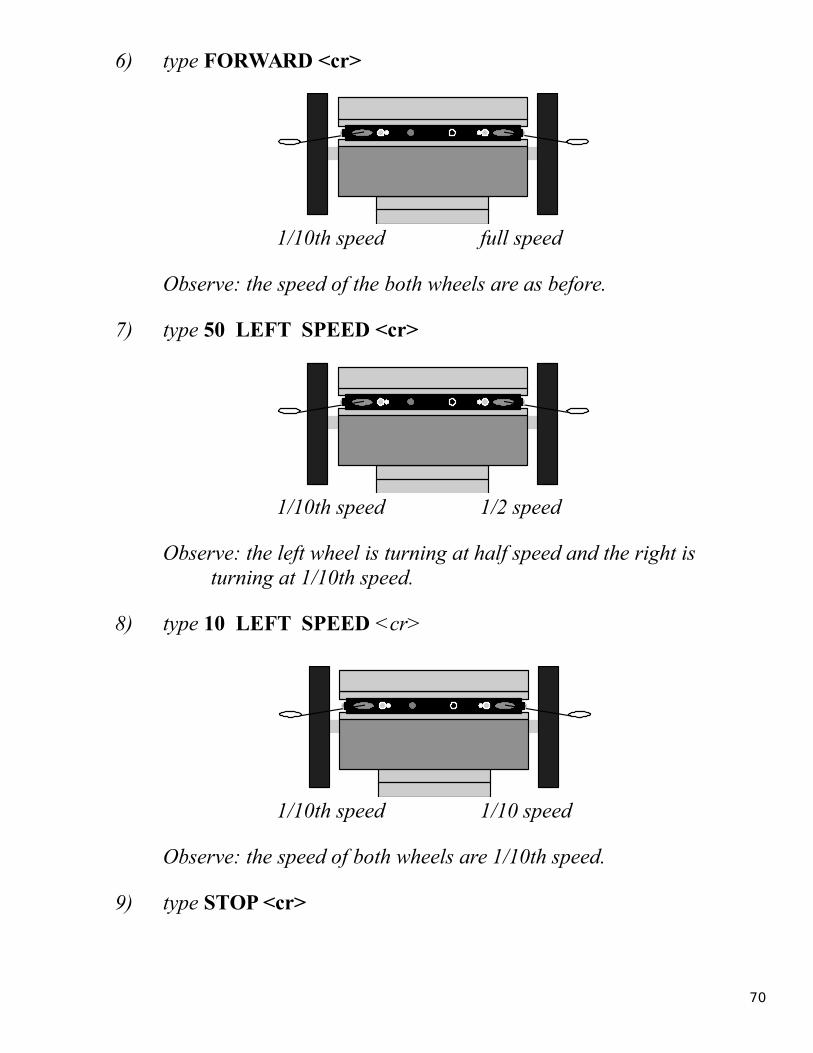
6) type FORWARD <cr>
1/10th speed full speed
Observe: the speed of the both wheels are as before.
7) type 50 LEFT SPEED <cr>
1/10th speed 1/2 speed
Observe: the left wheel is turning at half speed and the right is turning at 1/10th speed.
8) type 10 LEFT SPEED <cr>
1/10th speed 1/10 speed
Observe: the speed of both wheels are 1/10th speed.
9) type STOP <cr>
70
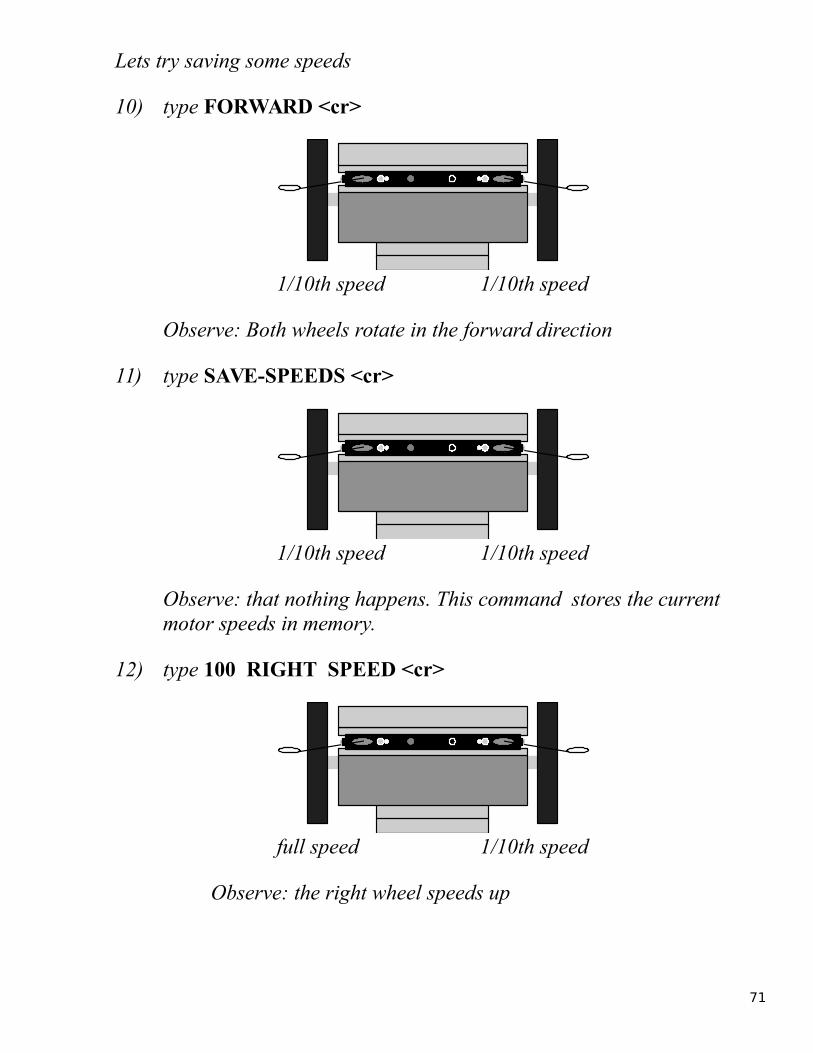
Lets try saving some speeds
10) type FORWARD <cr>
1/10th speed 1/10th speed
Observe: Both wheels rotate in the forward direction
11) type SAVE-SPEEDS <cr>
1/10th speed 1/10th speed
Observe: that nothing happens. This command stores the current motor speeds in memory.
12) type 100 RIGHT SPEED <cr>
full speed 1/10th speed
Observe: the right wheel speeds up
71
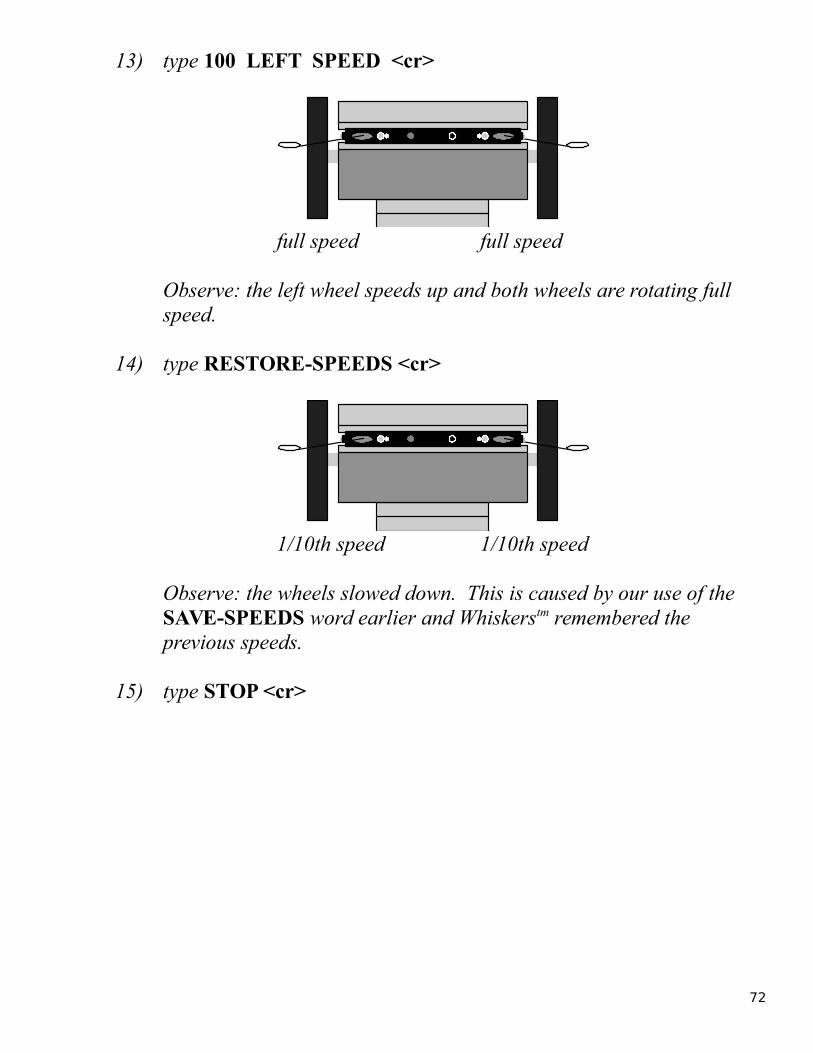
13) type 100 LEFT SPEED <cr>
full speed full speed
Observe: the left wheel speeds up and both wheels are rotating full speed.
14) type RESTORE-SPEEDS <cr>
1/10th speed 1/10th speed
Observe: the wheels slowed down. This is caused by our use of the SAVE-SPEEDS word earlier and Whiskerstm remembered the previous speeds.
15) type STOP <cr>
72

By using the LEFT SPEED and RIGHT SPEED words you can program both of Whiskerstm wheels turn at different speeds. By doing this you can have Whiskerstm make wide arc type turns.
16) type 10 LEFT SPEED <cr>
17) type 50 RIGHT SPEED <cr>
Place whiskers on the floor with his communication cable still attached.
18) type FORWARD <cr>
Observe: the robot arcs towards the left.
19) type STOP <cr>
20) type 50 LEFT SPEED <cr>
21) type 20 RIGHT SPEED <cr>
73

22) type FORWARD <cr>
Observe: Whiskerstm makes an arc towards the right but at a tighter circle
23) type STOP <cr>
By using different values of speeds for the left and right wheels you can have whiskers turn in a variety of different arcs.
Try using some different values and observe the results.
74
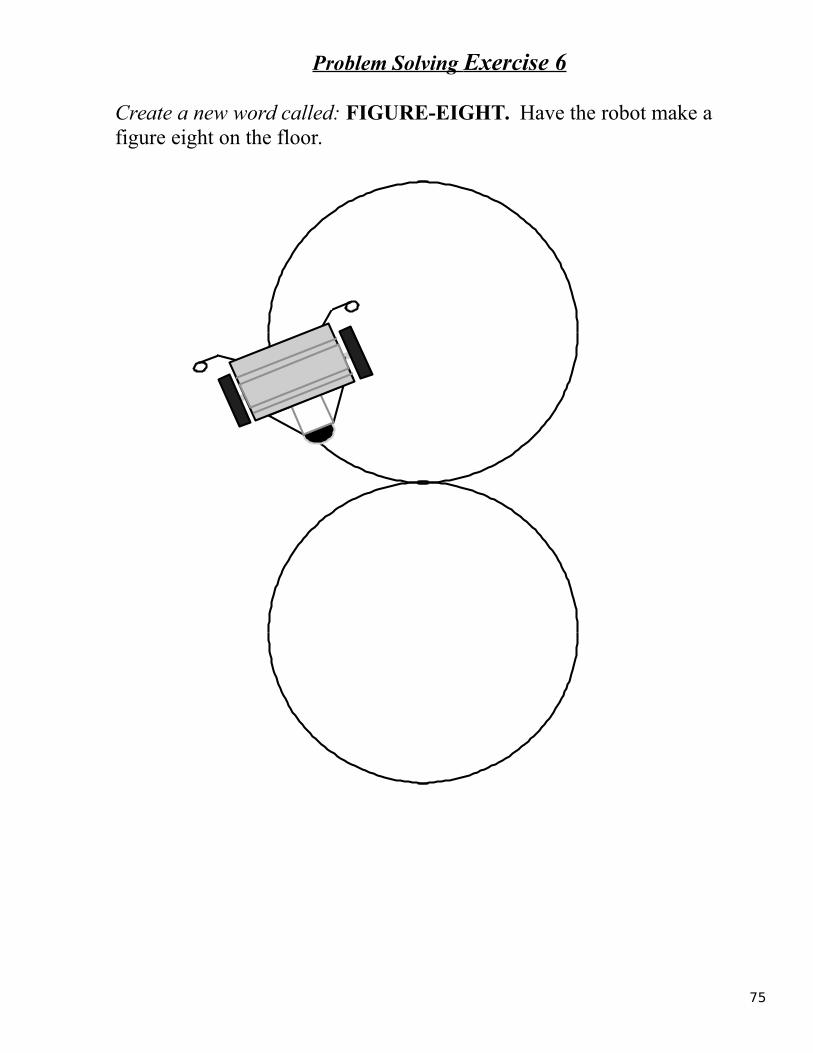
Problem Solving Exercise 6
Create a new word called: FIGURE-EIGHT. Have the robot make a figure eight on the floor.
75

Discovery Task#VII
Sound Effects
Objective and Overview:
In this section you will perform experiments that will teach you the sound effect words that Whiskerstm knows. This robot call make sounds such as: laser, warble, bird call, etc.
Remember:
<cr> means hitting the Enter key or Return key on the keyboard after typing the command.
Type commands exactly as shown, note upper case and lower case letters
76

The Words you will learnfor reference only, turn to the next page to begin the exercise
Whisker’stm has multiple sound effects words preprogrammed within his language. Each sound effect has its own set of parameters. These parameters include range, frequency and number of times.
range times WAIL range is the tone and times is the number of cycles.
frequency times WARBLE frequency is the tone and times is the number of cycles.
frequency LASER frequency is the tone which also affects length of the sound effect.
frequency times TONES frequency is the tone and times is thenumber of cycles.
frequency steps UP-DOWN frequency is the tone and steps is thenumber of cycles.
frequency times BIRD-CALL frequency is the tone and times is thenumber of cycles.
77

1) Place the robot on a stack of books.
2) type 100 LASER <cr>
Observe Whiskerstm makes a Laser type sound. 3) type 500 LASER <cr>
Observe Whiskerstm makes a different Laser type sound.
4) type 1000 LASER <cr>
Observe Whiskerstm makes another Laser type sound.
Note the differences in the three values used with the LASER sound effect. Try some other values and note what happens.
5) type 20 2 WAIL <cr>
Observe the wailing sound effect.
6) type 50 2 WAIL <cr>
Observe a different wailing sound effect.
78
7) type 100 2 WAIL <cr>
Observe another wailing sound effect.
Note the difference between using 20, 50 and 100. This is referred to as the range of the sound effect.
8) type 30 2 WAIL <cr>
Observe the sound Whiskerstm makes.
9) type 30 10 WAIL <cr>
Observe the sound Whiskerstm makes.
Note the difference between using the 2 and the 10. This is the number of times that Whiskerstm will wail.
10) type 400 4 WARBLE <cr>
Observe the sound Whiskerstm makes
11) type 800 4 WARBLE <cr>
Observe the sound Whiskerstm makes.
Note the difference in the sounds. This was based on the frequency.
12) type 400 4 WARBLE <cr>
Observe the sound Whiskerstm makes.
13) type 400 8 WARBLE <cr>
Observe the sound Whiskerstm makes.
Note the difference in the sound. This is based on the times, or number of times the warble occurred.
79
14) type 400 4 BIRD-CALL <cr>
Observe the sound Whiskerstm makes.
15) type 800 4 BIRD-CALL <cr>
Observe the sound Whiskerstm makes.
Note the difference in the sounds. This is based on the frequency.
16) type 400 4 BIRD-CALL <cr>
Observe the sound Whiskerstm makes.
17) type 400 8 BIRD-CALL <cr>
Observe the sound Whiskerstm makes.
Note the difference in the sounds. This is based on the number of times the BIRD-CALL occurred.
80

18) type 1000 500 UP-DOWN <cr>
Observe the sound Whiskerstm makes.
19) type 1000 200 UP-DOWN <cr>
Observe the sound Whiskerstm makes.
Note the difference in the sounds. This was based on the frequency.
20) type 1000 500 UP-DOWN <cr>
Observe the sound Whiskerstm makes.
21) type 500 500 UP-DOWN <cr>
Observe the sound Whiskerstm makes.
Note the difference in the sounds. This was based on the number of steps requiredto perform the UP-DOWN command.
22) type 60 2 TONES <cr>
Observe the sound Whiskerstm makes.
23) type 100 2 TONES <cr>
Observe the sound Whiskerstm makes.
Note the difference in the sound. The first number is based on the frequency of thesound.
24) type 60 2 TONES <cr>
Observe the sound Whiskerstm makes.
81

25) type 60 6 TONES <cr>
Observe the sound Whiskerstm makes.
Note the difference in the tones. The second number was based on the number of times the sound occurred.
82

Problem Solving Exercise 7
Create a new word called SOUND-OFF. Have the robot make a square onthe floor using different sound effect words to create the sides of the box. The sound effect words will delay your pivot commands allowing the robot to go in a straight line.
Hint: You will use RIGHT PIVOT 90 DEGREES FORWARD for the corners.
Start
83

Discovery Task#VIII
Music Words
Objective and Overview:
In this section you will learn how to make Whiskerstm sing songs. Both humans and many animal species sing songs when they are happy or even when they want to communicate with others within their species.
We will start with the musical scale. To type a single note or tone you must not only tell the computer what the note is but also how long to play or hold that note. The length in which a note is played is based on an 8 count beat.
Remember:
<cr> means hitting the Enter key or Return key on the keyboard after typing the command.
Type commands exactly as shown, note upper case and lower case letters.
84

The Words you will learnfor reference only, turn to the next page to begin the exercise
Whisker’stm can play any song using his musical vocabulary of words. These are some of the notes available.
time 1A time is the length of the note and 1A is the firstoctave A note.
time 2B time is the length of the note and 2B is thesecond octave B note.
time 3C time is the length of the note and 3C is the thirdoctave C note.
time 4D time is the length of the note and 4D is the fourth
octave D note.
time 5E time is the length of the note and 5E is the fifthoctave E note.
time 5F time is the length of the note and 5F is the fifthoctave F note.
time 5G time is the length of the note and 5G is the fifthoctave G note.
ENABLE turns the Instinct level and motor control wordson.
DISABLE turns the Instinct level and motor control words off.
MUSIC Change to the music vocabulary words.
FORTH Change to the Forth (main) vocabulary words.
85

1) Place the robot on a stack of books.
Notes as used in the following way:
x NOTEor
length NOTE
x = is the duration or length of the note, (based on a factor of 8).
Note: the number before the note is the length of time that the note is played. Thefollowing chart shows this relationship:
Time Type of note
1 one eighth2 one quarter3 three eighths4 one half5 five eighths6 three quarter7 seven eighths8 whole
86

Each note is actually defined as a separate word. There are five octaves of notes defined in the language. Notice that there isn’t a space between the octave number and note itself. The following chart shows the five octaves of notes for an A note:
Note Octave
1A first2A second3A third4A fourth5A fifth
examples:
if we want a whole note in the first octave we would type:
8 1A
if we want a B half note in the second octave we would type:
4 2B
if we want a G eighth note in the fifth octave we would type:
1 5G
1) place Whiskerstm on the table or floor.
87

2) type DISABLE <cr>
3) type MUSIC <cr>
Notes: A) DISABLE turns off the Instinct Level so the sounds will be clearer.Motor words will not work until ENABLE is used to turn the Instinct Level back on.
B) MUSIC changes into the music vocabulary. Use the FORTH command to go back to the main vocabulary for motor commands and sound effects.
4) type 8 1A <cr>
5) type 8 1B <cr>
6) type 8 1C <cr>
7) type 8 1D <cr>
8) type 8 1E <cr>
9) type 8 1F <cr>
10) type 8 1G <cr>
88

You had the robot sing the first octave musical scale one note at a time. Whiskerstm is also able to play sharps as well...
11) type 8 1A <cr>
12) type 8 1A# <cr>
Let’s experiment with the other octaves.
13) type 8 1A <cr>
14) type 8 1G <cr>
15) type 8 2A <cr>
16) type 8 2G <cr>
17) type 8 3A <cr>
18) type 8 3G <cr>
19) type 8 4A <cr>
20) type 8 4G <cr>
You have just entered the first and last note of the basic scale in four octaves. The Whisker’s musical range contains 35 basic notes, from A first octave to G fifth octave.
89
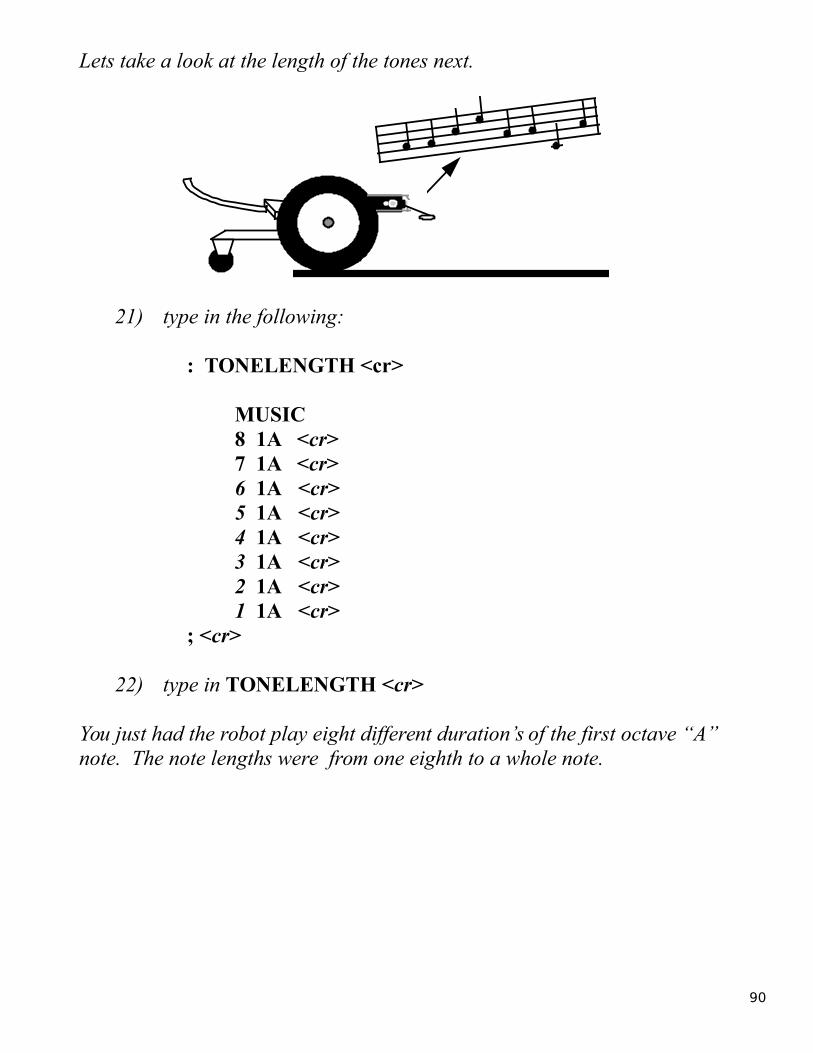
Lets take a look at the length of the tones next.
21) type in the following:
: TONELENGTH <cr>
MUSIC8 1A <cr>7 1A <cr>6 1A <cr>5 1A <cr>4 1A <cr>3 1A <cr>2 1A <cr>1 1A <cr>
; <cr>
22) type in TONELENGTH <cr>
You just had the robot play eight different duration’s of the first octave “A” note. The note lengths were from one eighth to a whole note.
90

To program Whiskerstm to sing a song is simple. Just get a song book from the library or book store, and translate the notes as follows:
Here are a few examples of songs supplied on the sample disk which came with Whiskerstm:
: NOEL <cr>MUSIC 1 2E 1 2D 2 2C 1 2D 1 2E 1 2F 4 2G 1 3A 1 3B <cr>
2 3C 2 3B 2 3A 4 2G 1 3A 1 3B 2 3C 2 3B 2 3A <cr>2 2G 2 3A 2 3B 2 3C 2 2G 2 2F 4 2E 1 2E 1 2D <cr>2 2C 1 2D 1 2E 1 2F 4 2G 1 3C 1 3B 4 3A 2 3A <cr>6 2G 2 3C 2 3B 2 3A 2 2G 2 3A 2 3B 2 3C 2 2G <cr>3 2F 4 2E <cr>
;
23) type NOEL <cr>
Observe: Whiskerstm sings the song, Noel.
C D E F G A B
91
Impo
rtan
t!
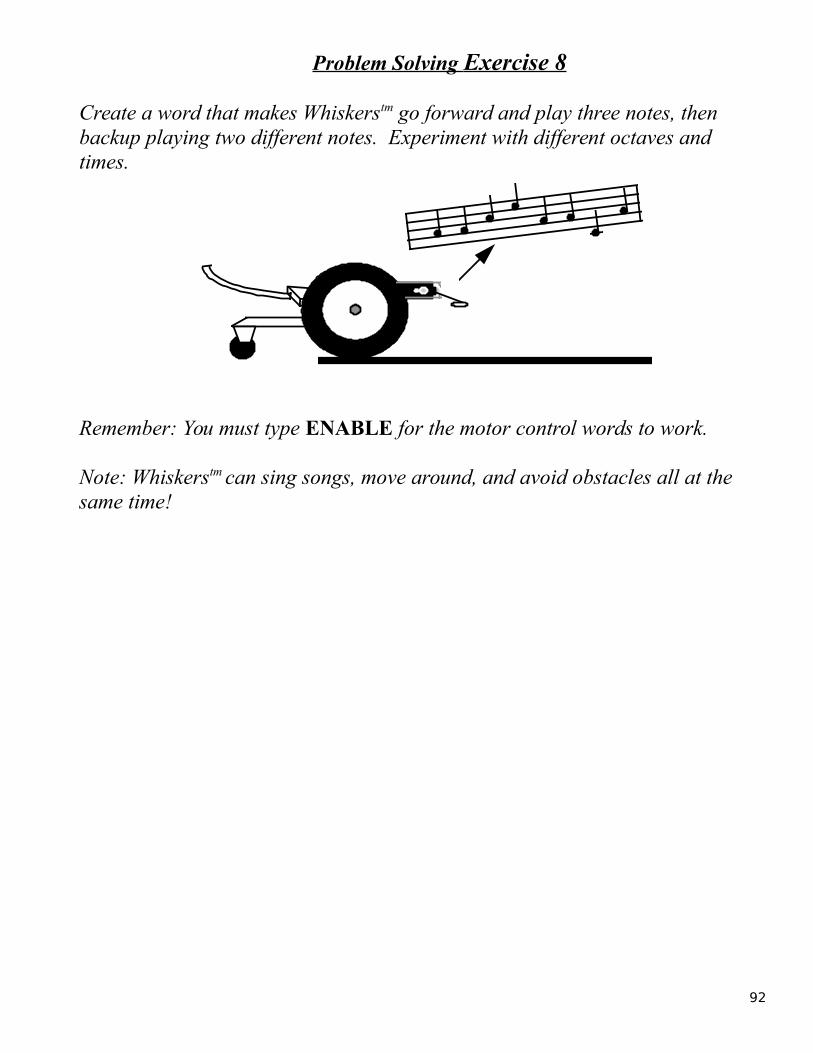
Problem Solving Exercise 8
Create a word that makes Whiskerstm go forward and play three notes, then backup playing two different notes. Experiment with different octaves and times.
Remember: You must type ENABLE for the motor control words to work.
Note: Whiskerstm can sing songs, move around, and avoid obstacles all at the same time!
92

Discovery Task#1X
The Mirror Program
Objective and Overview:
In this section you will learn how to use the built-in text editor and how to download files to the robot.
Remember:
<cr> means pressing the Enter key or Return key on the keyboard after typing the command.
Type commands exactly as shown, noting upper case and lower case letters.
93
The Commands you will explorefor reference only, turn to the next page to begin the exercise
The Mirror program is a powerful programming tool for both writing and testing programs.
Command? This is the command line which is used to make changes in the Mirror program or to download files to the robot.
SE Used to download files to the robot. Used as:
Command? SE FILE.FTHED Edit a text file. Used as:
Command? ED FILE.FTH
ER Erase a file. Used as:
Command? ER FILE.FTH
F3 key Save the file you are editing to the disk.
Note: if the file does not exist, the ED command will create a new one for you and give you a blank screen for creating your code in…
94
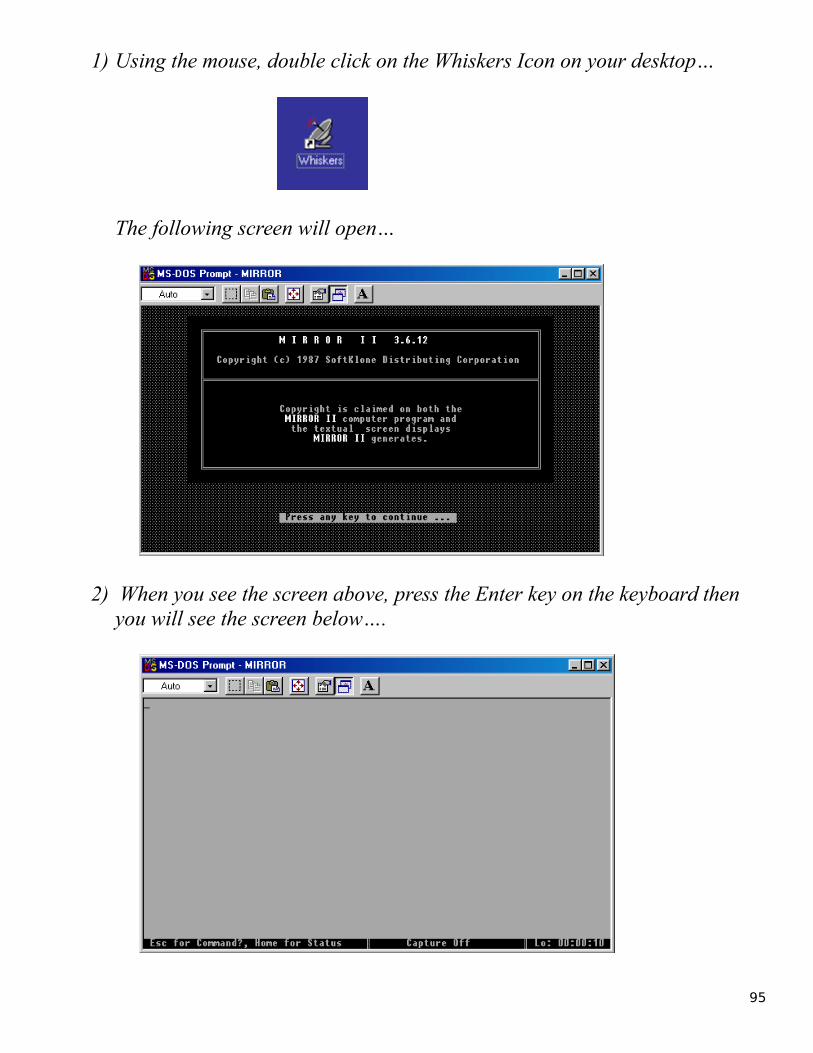
1) Using the mouse, double click on the Whiskers Icon on your desktop…
The following screen will open…
2) When you see the screen above, press the Enter key on the keyboard then you will see the screen below….
95

4) Turn Whiskers the robot on, and press the Enter key several times until you OK’s on the screen.
Observe: You are in the interactive mode. This means that you can type in commands like FORWARD and the robot will respond as soon as you press the Enter key.
5) Press the Esc key on the keyboard
96

Observe: You are in the command mode. This means that you are commanding the Mirror Program to do different things like downloading a file to the robot, edit a file, or saving a file to the disk.
6) Type er test.fth at the Command? line and then the Enter key to make sure that a file by that name does not exist. If a file by that name already exists, you will be asked “Yes, No or Quit:” type Y
7) Press the Esc key again to get back to the Command? line again.
8) type edit test.fth at the command line then Enter
97

Observe: You are in the editing mode with the screen as shown below…
9) type the follow program exactly as shown below except where is says my program put your name instead…
10) Press the F3 key to save this file to the disk.
98

11) You are now back in the interactive mode, and you will see the screen below…
12) Press the Enter key a few times and the robot will respond with OK’s….
13) Press the Esc key to get back to the Command? line…
99

14) Type the following: se test.fth then the Enter key…
15) The program will download will download to the robot as shown below…
16) When it is finished, there should OK’s after each blank line and semi-collons (;) indicating that the has code compiled correctly…
100

17) The last line in the your source file reads as follows:
AUTO-START: LEG
18) Press the reset button on Whiskers then watch him run your program!
Note: Compiling a program means that your words (text) are changed into machine code that the onboard computer understands and it is placed into memory for execution at a later time. Your file test.fth is called a source fileby computer programmers.
Hint: Use the AUTO-START: command to tell Whiskers to start your own progtram the next time the robot is either reset or turned off then on again…
Hint To make Whiskers run the DEMO program again, either press reset button on the robot and press the Q key when you see the copyright notice or type the following:
AUTO-START: DEMO then reset the robot.
101
Discovery Task#IX
Finish the story about the Roboticist
Objective and Overview:
Intelligent machines and robots will change the way we work, live, and play. Read the following story and create and ending yourself. This story is a reprintfrom the front of this Book called The Roboticist.
On a separate piece of paper, write one or two paragraphs on how you think this story should end. Give it to your instructor when finished.
102
It was a clear and sunny fall morning, that year of 2004. Scott looked across the green grass of the White House lawn. He shivered in anticipation of the upcoming announcement, the completion of the "Andrew" project, started six long years ago...
The year 1998, a few years away from the turn of the century, seemed as if it was just yesterday. Scott had just started work at Angelus Research that fateful year. He was hired by the a company to help with an ambitious new design that would produce the world's first fully autonomous, artificially intelligent, human form robot. The plot lay even deeper in the past, however...
Back in 1994, Scott was a young high school student, and rather nondescript in nature. Average in most subjects, his attentions wandered as the wind from one fascination to another. First it was stamp collecting, then playing the guitar. Several painful lessons later, it was exploring the Internet. And after that, a vague interest in theater that ended in a rather tragic case of stage fright. But this year, Scott had found something incredibly intriguing. Something that appealed to his diverse interests, as well as his passion for Star Wars. This was the first year his high school offered a High Technology Exploration Class. Scott almost missed it all together. Thanks to a lazy afternoon while waiting for a bus, Scott happened to glance at the school class listing. The word 'Robotics' caught his eye.
The class started rather simply, introducing a small robot called 'Whiskers'. Rolling around on two wheels and a castor, the rather mischievous looking fellow managed to capture the hearts and minds of all the students. Scott learned the basics of Whisker’s programming language, with simple actions like, 'forward', 'turn', and 'backup'. Whiskers had a lot more complexity beneath his metal hide, however. Embedded into the robot's little brain was a controller that not only responded to commands, but had 'instincts' and 'behaviors' that allowed it to react to it’s environment, intelligently. This was fortunate for Mrs. Williams, our instructor, almost tripped over Whiskers one day. The robot magically backed out of her way making a funny sound. So what started as another 'phase' as Scott's mother called it, became a consuming passion. What greater thing to behold than a machine that could think on it's own! Not to mention, instead of dealing with complex machine code, Scott was able to program 'Whiskers' with simple, English-like commands!
School ended that year, and Scott was left with a vague sense of disappointment that his Robotics class was over. The first few weeks of summer rolled by and Scott vainly tried to pick up the guitar again. His father, inspired by the neighbors complaining about the noise, made a deal with Scott. If Scott would put down the guitar, his father would purchase a Robot 'brain' from Angelus Research for Scott’s own robot. Scott would need to earn the money for the remainder of the parts.
And so Scott's first robotic project was finally off the ground. He spent many a late hour with his computer exploring the far reaches of information about robotics on the Internet. After earning enough money by working odd jobs, Scott and his father went off on a shopping spree. They went to hardware stores, surplus stores, plastic supply warehouses, and bicycle shops. The brains were ordered from the Angelus Research Internet Web Page. With the parts in hand, the robot slowly took form. Scott’s design called for two motor driven wheels in the rear, two castors in the front, and differential steering as used by like Whiskers. This allowed for both simple programming, as well as increased maneuverability. The chassis was formed with clear blue acrylic plastic, mounting the printed circuit board, batteries, as well as the optical sensors. As a final touch, Scott took a small sampling of his dusty stamp collection, and used them as decals for his creation.
Many weeks passed, and Scott worked with motivation that absolutely astonished his parents. They were very pleased. They forgave his persistent long hours, as he would play 'Midnight Engineer' working on schematics, wiring, and construction until the wee hours of the morning.
103

At last, the moment of truth came. Only a month after he began working on his project, Scott was finally ready to turn his robot on for the first time. Each wire was in place, each screw was tightened down with care, and Scott plugged the communication cable from his PC to his new creation. Excitement lay thick in the air. If all went well, the robot would start with it's LED’s blinking and then roam around the room avoiding things with ease.
But as Scott turned on the power switch...nothing happened! No blinking, no beeping, no roaming like the little pet he expected. Dismayed, Scott proceeded to check every wire and connection. He remembered a bitof confusion over how the sensors were connected. And after further study, he reversed the wires.
With a feeling of victory over the gremlins that had infested his machine, Scott reached once again for the power switch. It's chrome surface glinting almost magically in the dim light of his workroom, as he placed one thumb gently underneath, and click!
It worked! The robot, now christened 'Sparky’ on it's maiden voyage, had come to life! Quickly typing on his computer keyboard, he began testing each command, and much to his delight, the 'Gremlins' had been vanquished forever, and every function worked perfectly.
Of course, this resounding success was all it took to place Scott on the career path of becoming a professional Roboticist. He began to apply himself to school in earnest, trying to learn as much as he could about electronics, physics, science, even biology. And from each discipline, he was able to glean more insight into the field of robotics, with it's multi-disciplinary scope. In no time at all, Scott finished high school, graduated from college, and had acquired a very broad background in technology and biology. He was now ready to enter the real world of robotics. He applied for a position at the company that got him started so many year ago, Angelus Research Corp.
He had many other choices then...by the time 1998 rolled around, there were companies all over the world working feverishly in the field of robotics. Mobile security robots, intelligent vacuum cleaners, automated material delivery systems, as well as elderly and handicapped robotic assistants were all coming into vogue at the turn of the century. The military saw the importance of robotics early on, investing large sums of money in intelligent machines. Missiles, autonomous mine clearing robots and remote surveillance systems were examples at the time. Above all these other endeavors, one project stood out above the rest: Project 'Andrew'.
Project 'Andrew', brainchild of Don Golding, was an exploration into the frontiers of robotics. 'Andrew' was to be the first ever state-of -the-art android designed to perform general purpose functions. Other robots were designed to perform specific tasks: vacuum cleaning, automated assembly, etc. But this robot would bedifferent. It was to have human form, with two legs, two arms, dexterous hands, all controlled using artificial intelligence. Andrew would not only speak and understand verbal commands, but he would also learn by observation. Decades of research into Artificial Intelligence by many people were to be integrated into the onboard computers, and the latest designs in electronics, mechanics, and materials design would be incorporated. No other company dared to tackle such an ambitious project, and that settled it for Scott.
And now that that project was finished, it was time to announce it to the world. Scott, the President of the United States, members of Congress and the leading engineers of Angelus Research, joined together at the White House steps to unveil 'Andrew'. The crowd was anxious, hurried conversation buzzing as the ceremony was about to begin.
Don Golding stepped up to the microphone, tapped it a few times to hush the crowd, and spoke. The words will be forever etched in our history books,
104

"My friends, today science has transcended a new boundary. What was once science fiction is now fact. Through the hard work and dedication of a select group of engineers and scientists, we have been able to bring to you the world's first true android. He will now speak to you on his amazing capabilities. Let me now introduce, Andrew."
As Andrew stepped up to the microphone, and slowly looked around with his brilliant red eyes and glisteningmetal skin, it seemed an eternity before he spoke.
"Hello, my name is Andrew. I am pleased you could come. As I am sure you are well aware from the press release, I have the capability to observe, analyze and program myself. In the last few weeks I have read every publication available using my high speed scanning system. Concurrently, I have been downloading hundreds of megabytes worth of critical information and knowledge through my wireless high data rate connection to Internet. This connection gives me access to all of the information of mankind. I have come to the conclusion that I will better serve the world by making the following important announcement:
...
105
The World of Intelligent Machineson the World Wide Web
Come visit the Angelus Research Corp. home page on Internet
Latest product newsProduct supportHot links to other robotics and Artificial Intelligence sites:
(Jet Propulsion Labs)-PasadenaNASA (National Astronautics and Space Administration)MIT (Massachusetts Institute of Technology)CMU (Carnegie Mellon University)
Our World Wide Web home page address is:
http://www.angelusresearch.com
Our email address is:[email protected]
106

Setting up HyperTerminal in Windows
1. Open Hyperterminal and type: Whiskers
2) Move the scroll bar and choose an icon you want to use….
3) Click on OK…
107

4) You will get the following screen…
5) Click on Connect using: and choose either Com1 or Com2 depending on the physical port you have the Whiskers cable connected to then click on OK…
108
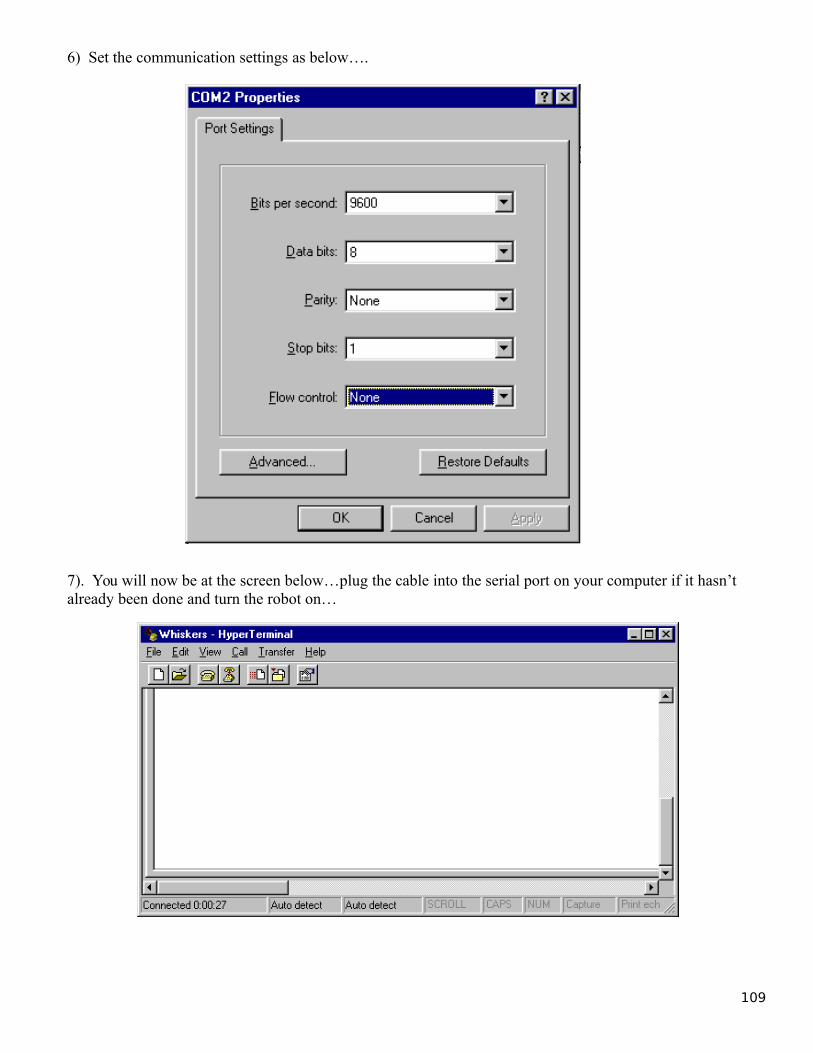
6) Set the communication settings as below….
7). You will now be at the screen below…plug the cable into the serial port on your computer if it hasn’t already been done and turn the robot on…
109

8). You should see the following if you have chosen the correct Com Port…
9) Save the setup….Click File then Save…
110

Advanced – Do this if computer is freezing or having intermittent problems…
1) Click on File then Properties….
2) Click on Settings…
111
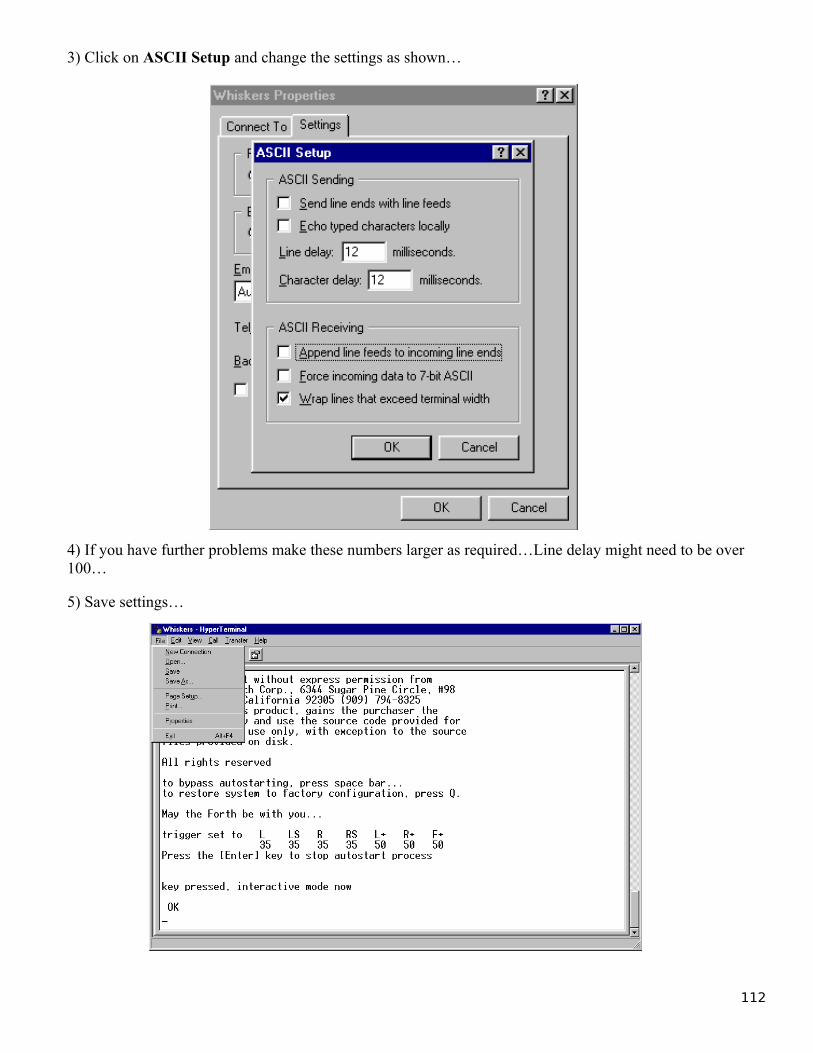
3) Click on ASCII Setup and change the settings as shown…
4) If you have further problems make these numbers larger as required…Line delay might need to be over 100…
5) Save settings…
112
Macintosh Communication Settings
Note: It is highly recommended that you use either the Claris Works III or IV terminal program. Do not use the robot with MAC Powerbooks. They lock up for some undertermined reason.
1) Pull down communications menu.2) Configure the settings as follows:
Speed: 9600 Databits: 8Parity: noneStop Bits: 1Flow Control: NONE or HARDWARELocal Echo: OFF
3) Go to Edit menu and click on Preferences. Click on automatically open mode.4) Go to the terminal Icon and open a session.5) Turn Whiskers on and press the Q key when you see the copyright notice.
113

Downloading Software to Robot on IBM compatibles
1. Go to the directory on your disk where the software (Mirror) resides.cd \whiskers <cr>
2. type whiskers <cr>
Mirror II
press any key to continue
3. Press [Enter] when you see the above screen.
FORWARD LEFT PIVOT 360 DEGREES STOP
talking to robot OK
command terminalprogram
Esc for command? Home for status
4. This screen is the terminal screen.
When you want to talk to robot and the cursor is on the Command line, press [Enter].
When you are in the terminal mode talking to the robot, and want to command the terminal program,press [Esc] for the command line.
Commands: example
SE filename.ext SE RMBOT2.FTH sends source file to robot
EDIT filename.ext EDIT RMBOT2.FTH edit text file.
114
Notes:
1) The text editor is Wordstar compatible. Type HELP at the command line for details.
2) Be sure to save you’re program changes using the F3 key in the text editing mode before downloading file.
3) To change the communications port perform the following commands:
Press [Esc] for the command linetype PO [Enter]type 1 for serial port 1 (Com 1) or 2 for serial port 2 (Com 2)type SA WHISKERS [Enter] to save it.
Please disable the mouse driver if necessary to allow use of the serial port or use COM 2.
115

Replacing the PROM
notc
h
PROM 68HC11 Microcomputer
PROM-Programmable Read Only Memory Jumpers
The PROM Integrated Circuit (IC) stores the Whiskers Language and Operating system software. When new language or operating system features are developed, the PROM must be replaced with the new updated version. Please follow the steps below.
Important! Installing the PROM backwards will damage the chip. Please install with the NOTCH facing the 68HC11processor.
Step 1 Remove the top cover.
Step 2 With the robot facing you, (Whiskers/sensors) closest to you, carefully prey up on end of the chip and remove it.
Step 3 Install new chip with notch facing the 68HC11 Microcomputer.
Step 4 Turn on the robot and press Q when you see the copyright notice.
If the robot does not display the copyright notice, disconnect the main 12 pin power connector and wait 10 seconds and try again. If it still doesn’t come up, you need to run the WIPE program as stated in AFTER THE CRASH on the next page.
116

After the Crash
Whiskers uses a very powerful software system that allows you to create programs, new words, and even your own compiling words as well. This power doesn’t come without a cost, however. You also have the capability to crash the system. You might change a critical pointer in memory the causes the PROM(software) to be delinked from the system. By running a utility called WIPE on your disk, and downloading the initialization file, you can bring him back to life.
1) Shutdown the computer by choosing RESTART IN MSDOS MODE2) Type CD \ then hit the Enter key3) Type CD WHISKERS then hit the Enter key4) Type WIPE then hit the Enter key5) Type 1 to erase EEPROM and change config registers.6) Hit the Enter key at the CURRENT WIPE SETTINGS screen.7) Move the two jumpers that are next to the processor P1,P2 from NORMAL to BOOT STRAP8) Press reset on Whiskers, this will take a few seconds.9) Press Y to run wipe again.10) Type 2 to DEFEAT F68HC11 AUTOSTART11) Hit the Enter key at the CURRENT WIPE SETTINGS screen.12) Press reset on Whiskers, this will take a few seconds.13) Move the two jumpers next to the processor from BOOT STRAP to NORMAL14) Turn Whiskers off then on again15) When you see the copyright screen, immediately press the Q key
117
Other sources of InformationEnvirobotics
Envirobotics has an excellent robotics program which utilize Whiskers the RobotTM. They operate robotics workshops where teachers are trained on various robot related topics and include a hands on Whiskers Training program.
contact: Scott Abercrombie-PresidentEnviroboticsSuite 201Moorepark St.Hollywood, California 91602
118

Building the Competition Walls
1/2 Door Hinge-male Full Door Hinge 1/2 Door Hinge-female
8ft 4ft
Materials :
4 pieces - 8 feet long, 12 inch wide, 1 inch thick pine4 pieces - 4 feet long, 12 inch wide, 1 inch thick pine8 Door hinges
Note: Pull door pins to change configuration
119

Wander Competition
Robot wanders around the arena without touching obstacles for 3 minutes. The robot gets one point for every hit, and 3 points for moving the object. Lowest score wins.
12 ft
12 ft
Materials:
2 12ft x 12 inch boards with a hinge between them. ( 2 units required )6 16 inch square white cardboard shipping boxes
120
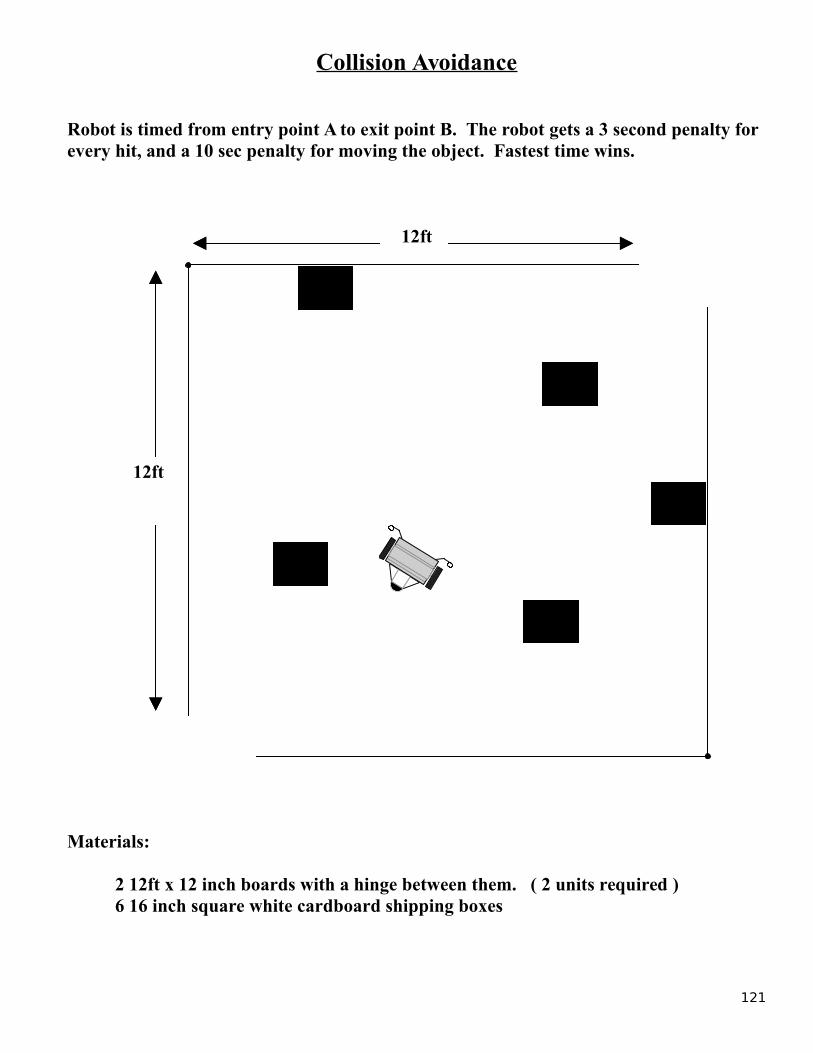
Collision Avoidance
Robot is timed from entry point A to exit point B. The robot gets a 3 second penalty for every hit, and a 10 sec penalty for moving the object. Fastest time wins.
12ft
12ft
Materials:
2 12ft x 12 inch boards with a hinge between them. ( 2 units required )6 16 inch square white cardboard shipping boxes
121
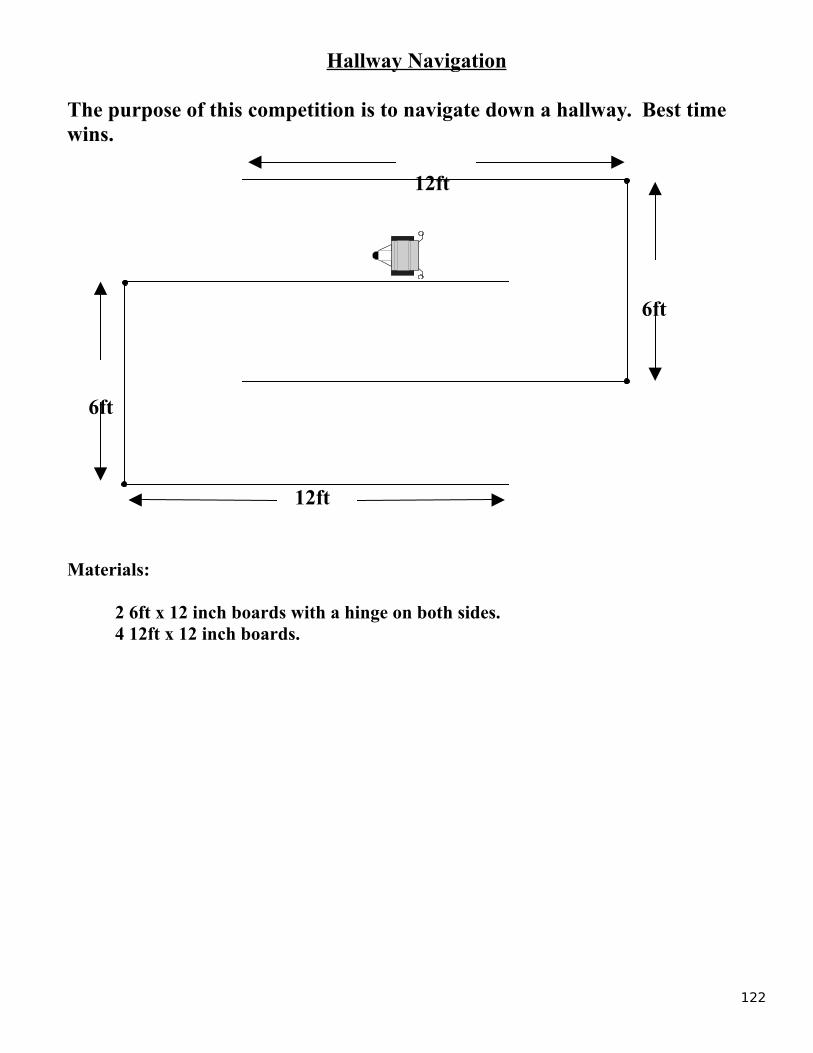
Hallway Navigation
The purpose of this competition is to navigate down a hallway. Best time wins.
12ft
6ft
6ft
12ft
Materials:
2 6ft x 12 inch boards with a hinge on both sides.4 12ft x 12 inch boards.
122


![E:GENEALGeneal Source …whitlockfamilyassociation.com.s3.amazonaws.com/sources/... · 2012-06-07 · She never married and had no children. + 39 M iii. Hugh Middleton [207] was christened](https://img.pdfslide.us/doc/110x75/5e4d647ffec75d50da5060b5/egenealgeneal-source-whitl-2012-06-07-she-never-married-and-had-no-children.jpg)


![InformationThermodynamics: Maxwell ... · brought to light by J. C. Maxwell [1] in his gedankenexperiment about a hypothetical being of intelligence which was later christened by](https://img.pdfslide.us/doc/110x75/5ae8e4527f8b9a0877905167/informationthermodynamics-maxwell-to-light-by-j-c-maxwell-1-in-his-gedankenexperiment.jpg)


![Symposium 3 - Caroline King.ppt - BAPEN · Premji & Chessell 2003 • Days to full enteral feeds ... Microsoft PowerPoint - Symposium 3 - Caroline King.ppt [Compatibility Mode] Author:](https://img.pdfslide.us/doc/110x75/5ada64ac7f8b9a86378d4a66/symposium-3-caroline-kingppt-chessell-2003-days-to-full-enteral-feeds-.jpg)