Embed Size (px)
DESCRIPTION
1) slider with wheel 2) lower 4 mm track 1 • EUROPEAN PATENT N° 1701641 COMPONENTS 2 • EUROPEAN PATENT N° 1701641 1 pre-drilled starting vertical profile 1 carrier bar 3 • EUROPEAN PATENT N° 1701641 2 side tracks 4 • EUROPEAN PATENT N° 1701641 AVAILABLE HEIGHTS H L 5 • EUROPEAN PATENT N° 1701641 AVAILABLE WIDTHS L 6 • EUROPEAN PATENT N° 1701641
Citation preview
1 • EUROPEAN PATENT N° 1701641
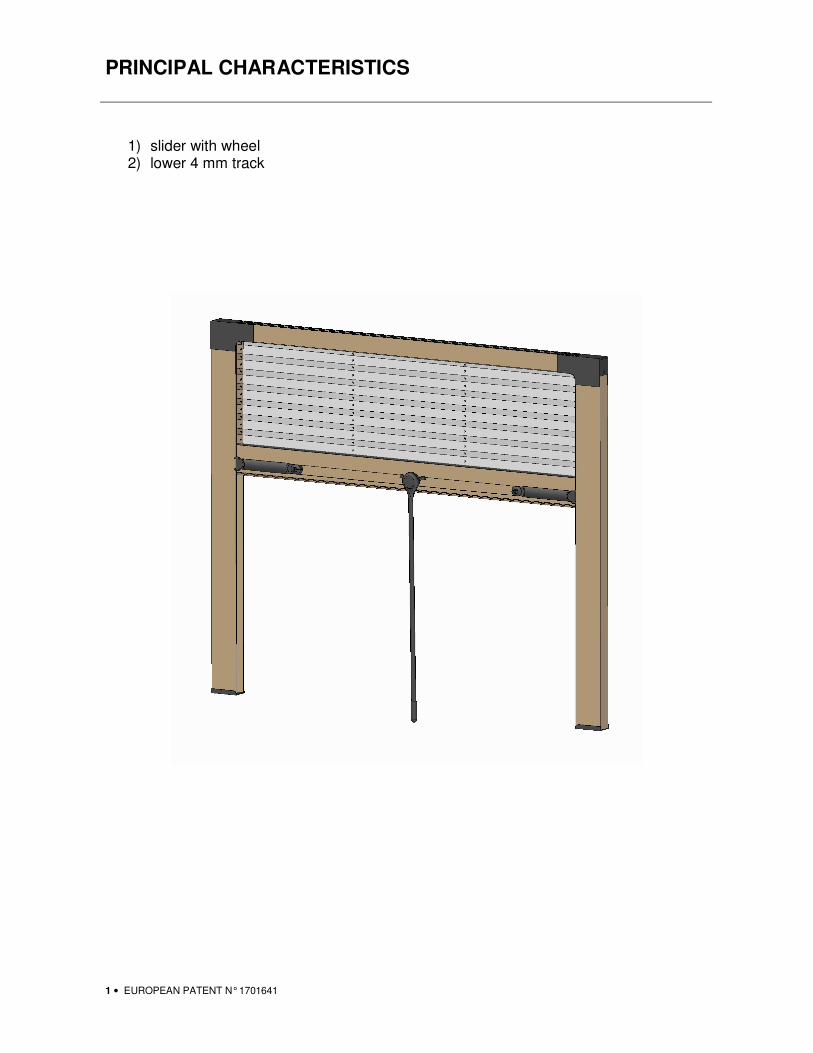
PRINCIPAL CHARACTERISTICS
1) slider with wheel 2) lower 4 mm track

2 • EUROPEAN PATENT N° 1701641
COMPONENTS
3 • EUROPEAN PATENT N° 1701641
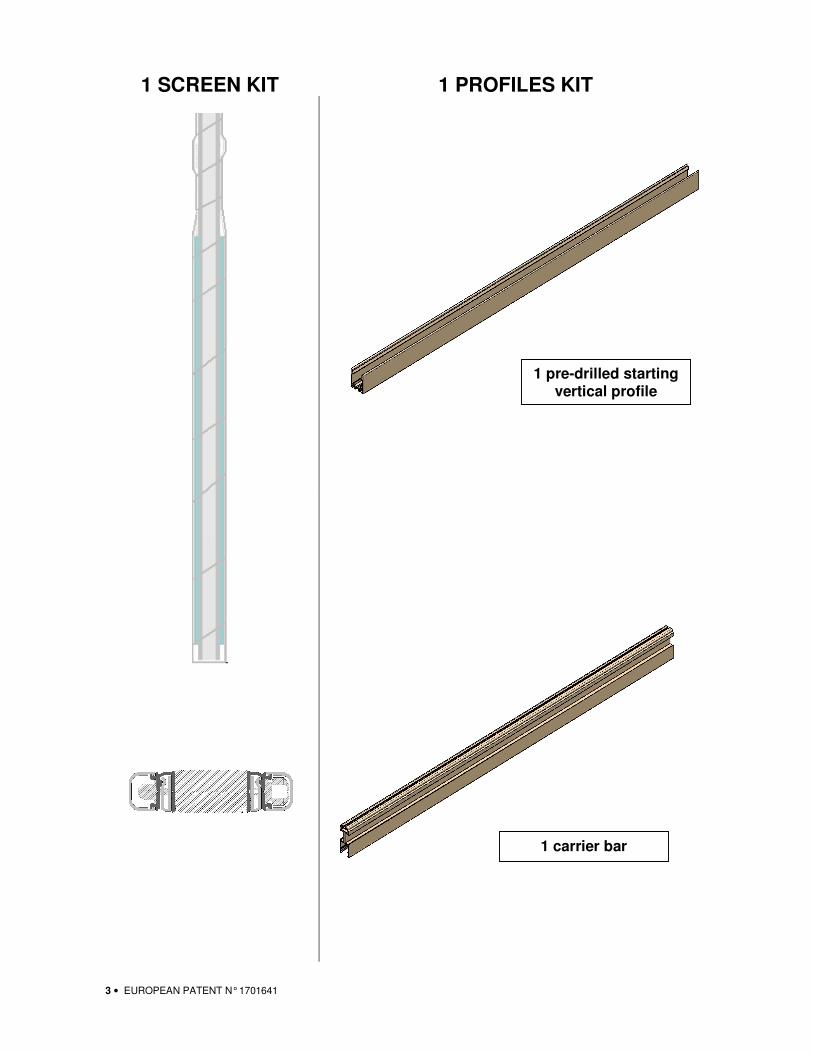
1 SCREEN KIT 1 PROFILES KIT
1 pre-drilled starting vertical profile
1 carrier bar
4 • EUROPEAN PATENT N° 1701641
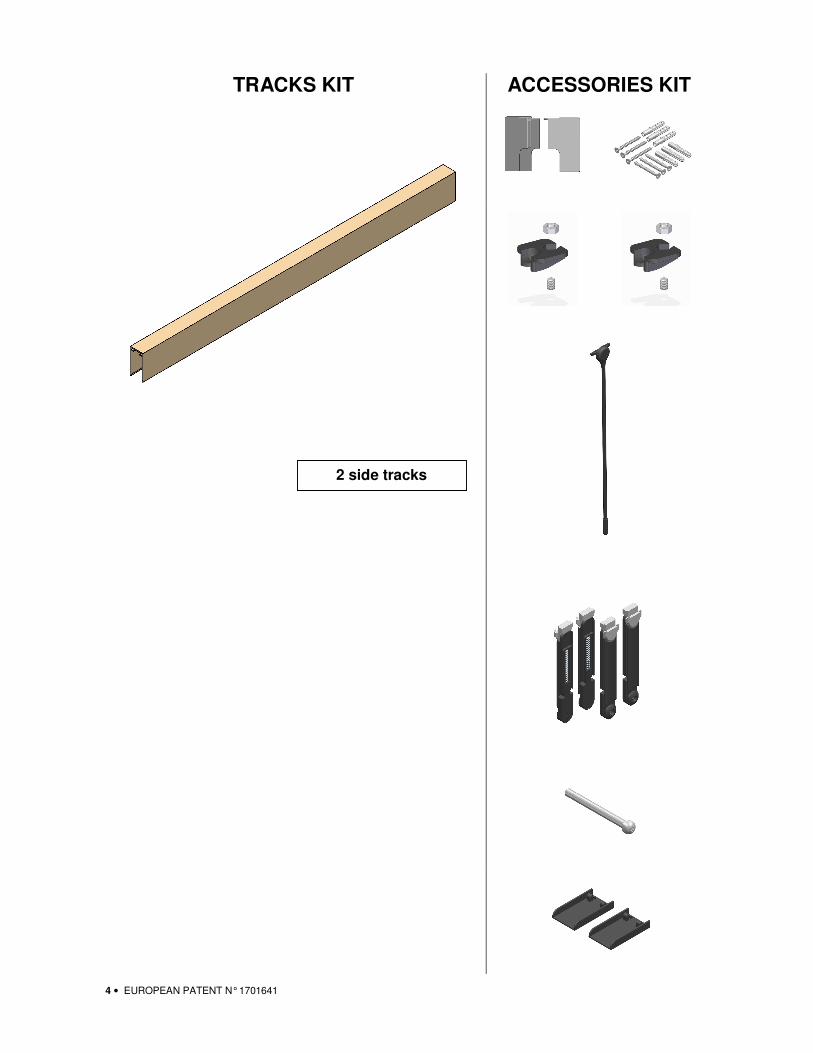
TRACKS KIT ACCESSORIES KIT
2 side tracks
5 • EUROPEAN PATENT N° 1701641
L
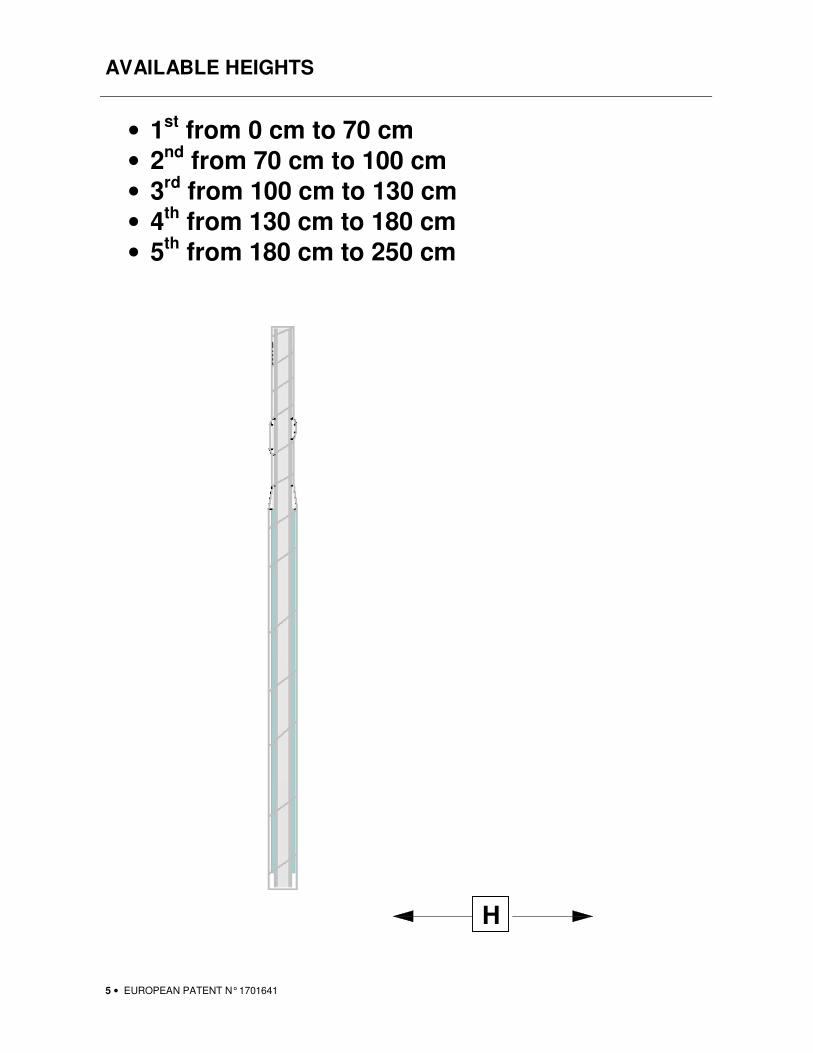
AVAILABLE HEIGHTS
• 1st from 0 cm to 70 cm
• 2nd from 70 cm to 100 cm
• 3rd from 100 cm to 130 cm
• 4th from 130 cm to 180 cm
• 5th from 180 cm to 250 cm
H
6 • EUROPEAN PATENT N° 1701641
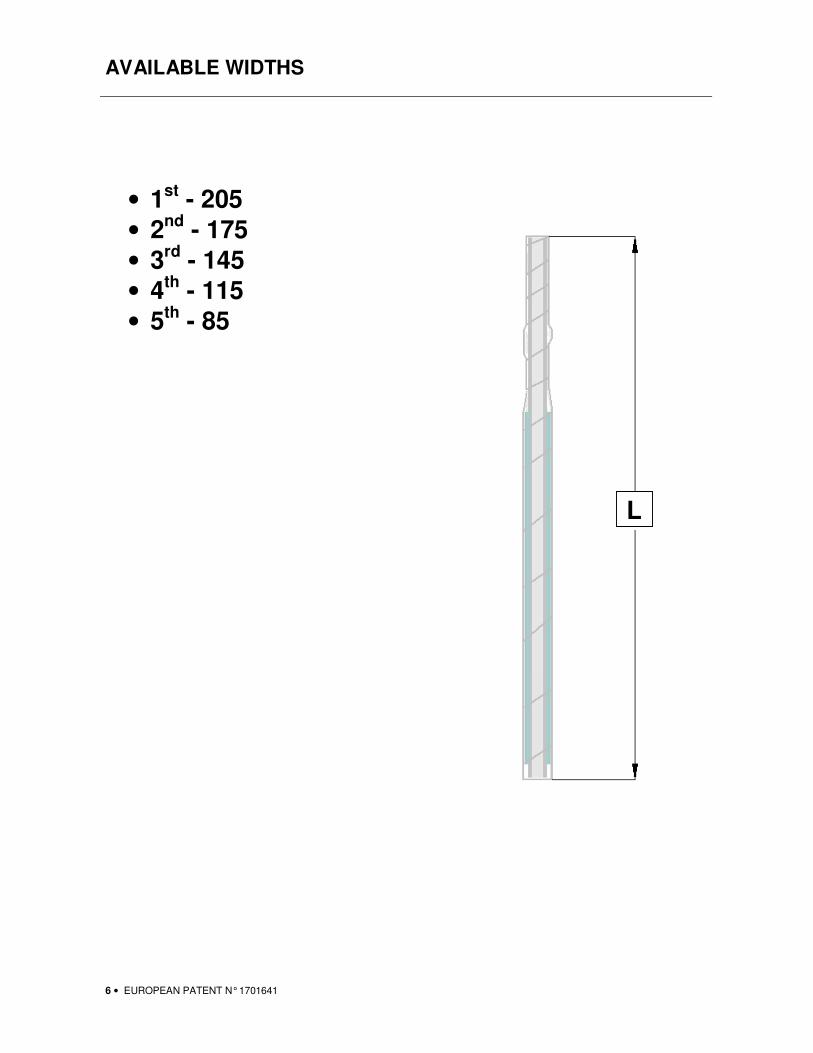
AVAILABLE WIDTHS
• 1st - 205
• 2nd - 175
• 3rd - 145
• 4th - 115
• 5th - 85
L
7 • EUROPEAN PATENT N° 1701641
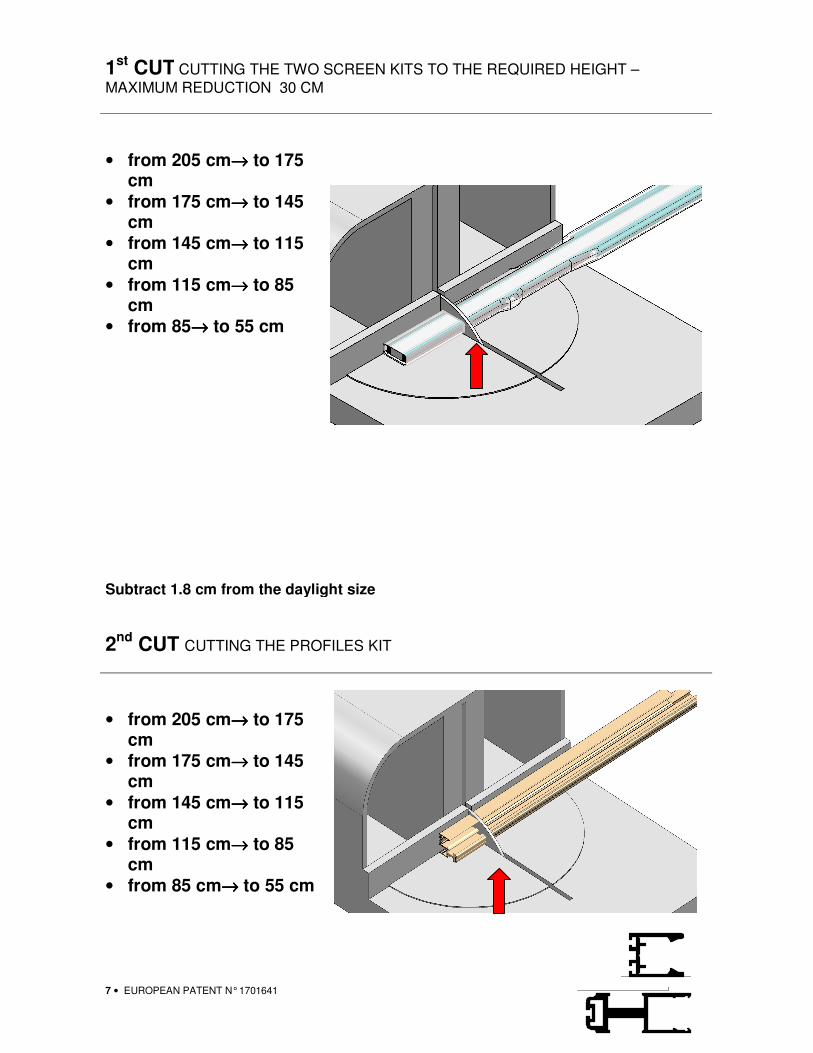
1st CUT CUTTING THE TWO SCREEN KITS TO THE REQUIRED HEIGHT –
MAXIMUM REDUCTION 30 CM
• from 205 cm→→→→ to 175 cm
• from 175 cm→→→→ to 145 cm
• from 145 cm→→→→ to 115 cm
• from 115 cm→→→→ to 85 cm
• from 85→→→→ to 55 cm
Subtract 1.8 cm from the daylight size
2nd CUT CUTTING THE PROFILES KIT
• from 205 cm→→→→ to 175 cm
• from 175 cm→→→→ to 145 cm
• from 145 cm→→→→ to 115 cm
• from 115 cm→→→→ to 85 cm
• from 85 cm→→→→ to 55 cm
8 • EUROPEAN PATENT N° 1701641
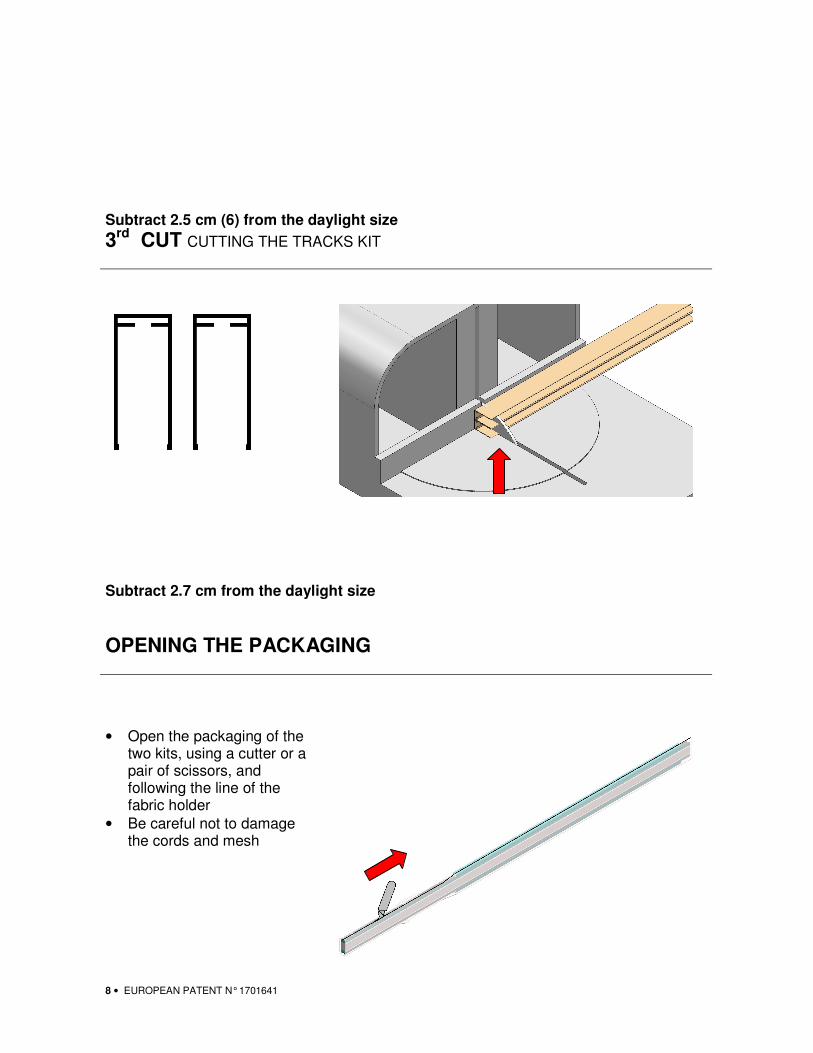
Subtract 2.5 cm (6) from the daylight size
3rd CUT CUTTING THE TRACKS KIT
Subtract 2.7 cm from the daylight size
OPENING THE PACKAGING
• Open the packaging of the two kits, using a cutter or a pair of scissors, and following the line of the fabric holder
• Be careful not to damage the cords and mesh
9 • EUROPEAN PATENT N° 1701641
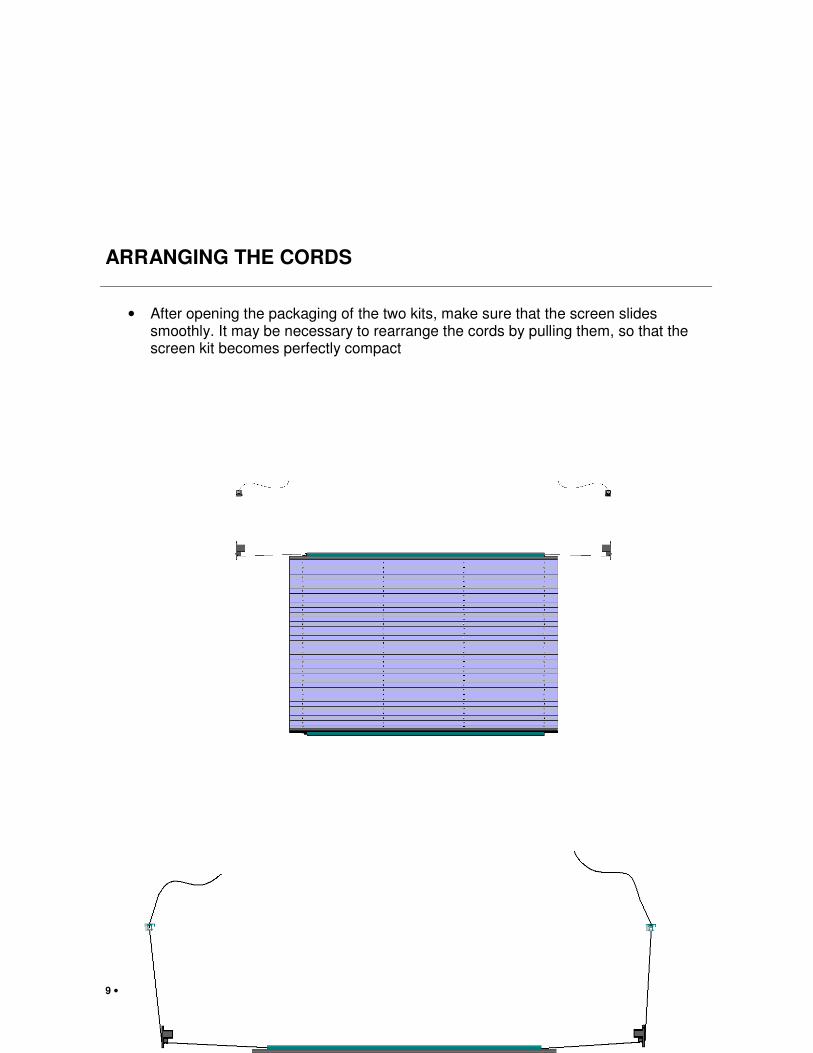
ARRANGING THE CORDS
• After opening the packaging of the two kits, make sure that the screen slides smoothly. It may be necessary to rearrange the cords by pulling them, so that the screen kit becomes perfectly compact
10 • EUROPEAN PATENT N° 1701641
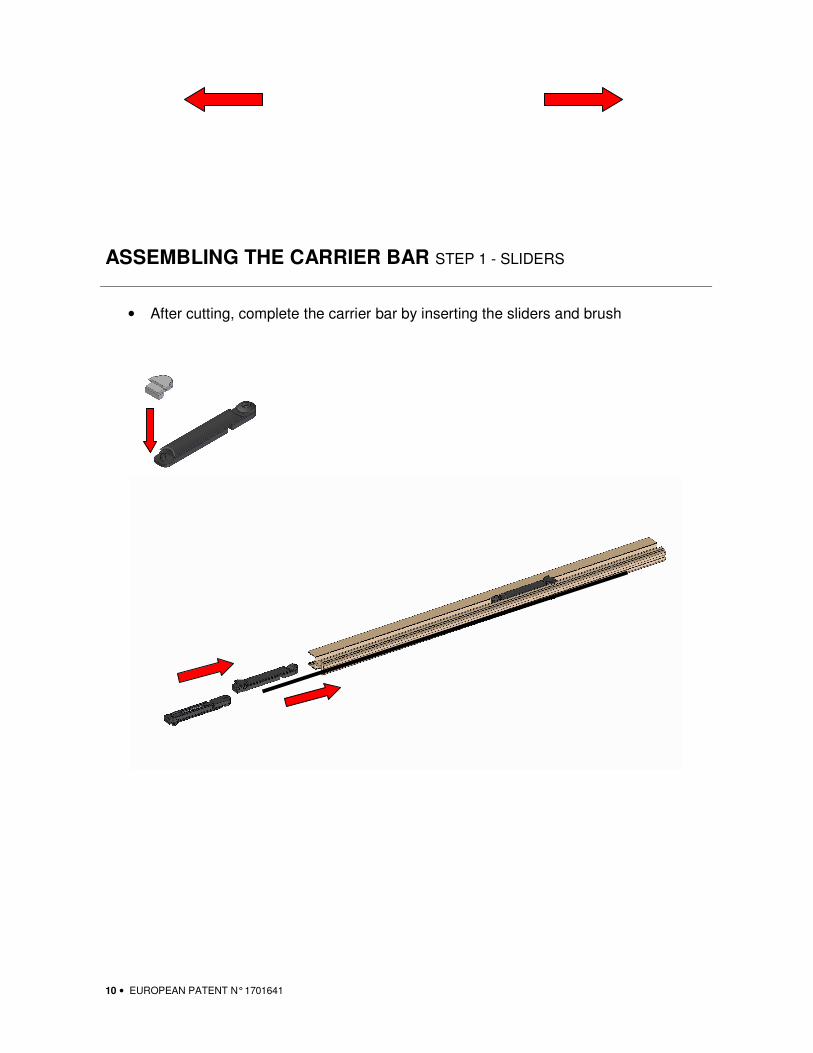
ASSEMBLING THE CARRIER BAR STEP 1 - SLIDERS
• After cutting, complete the carrier bar by inserting the sliders and brush
11 • EUROPEAN PATENT N° 1701641
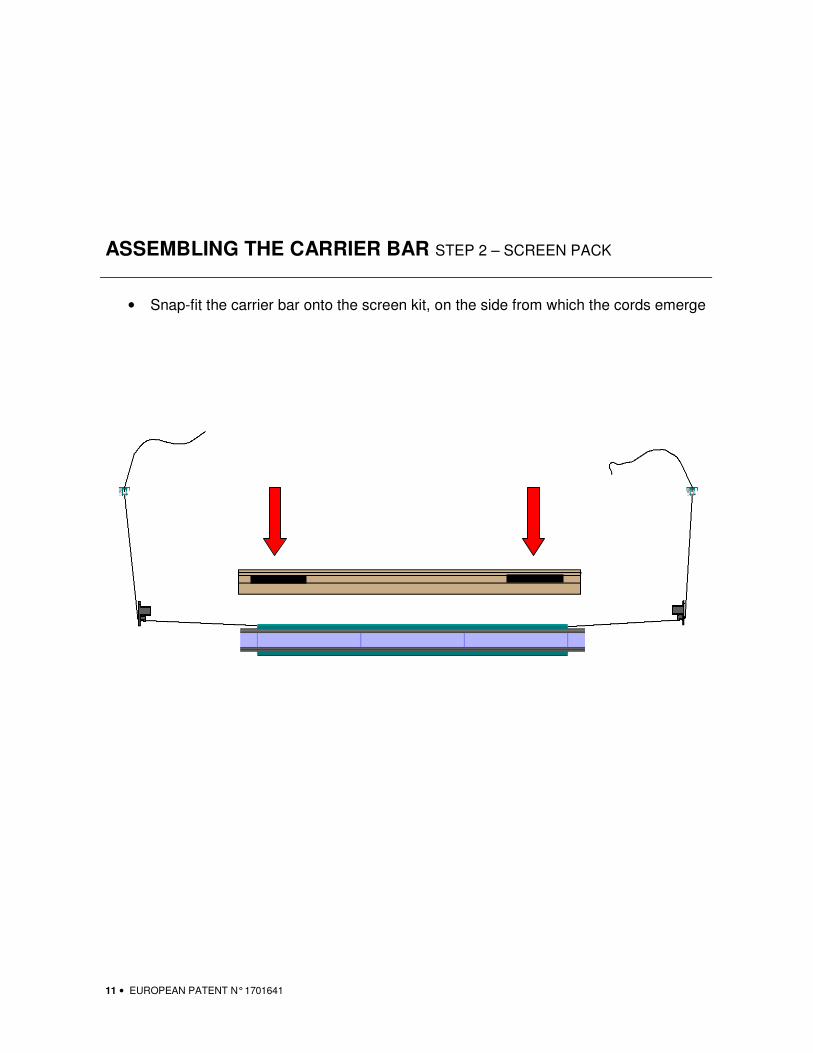
ASSEMBLING THE CARRIER BAR STEP 2 – SCREEN PACK
• Snap-fit the carrier bar onto the screen kit, on the side from which the cords emerge

12 • EUROPEAN PATENT N° 1701641
INSERT THE TERMINAL PULLEYS ONTO THE TWO CARRIER BARS
• Press-fit the terminal pulleys into their respective locations
13 • EUROPEAN PATENT N° 1701641
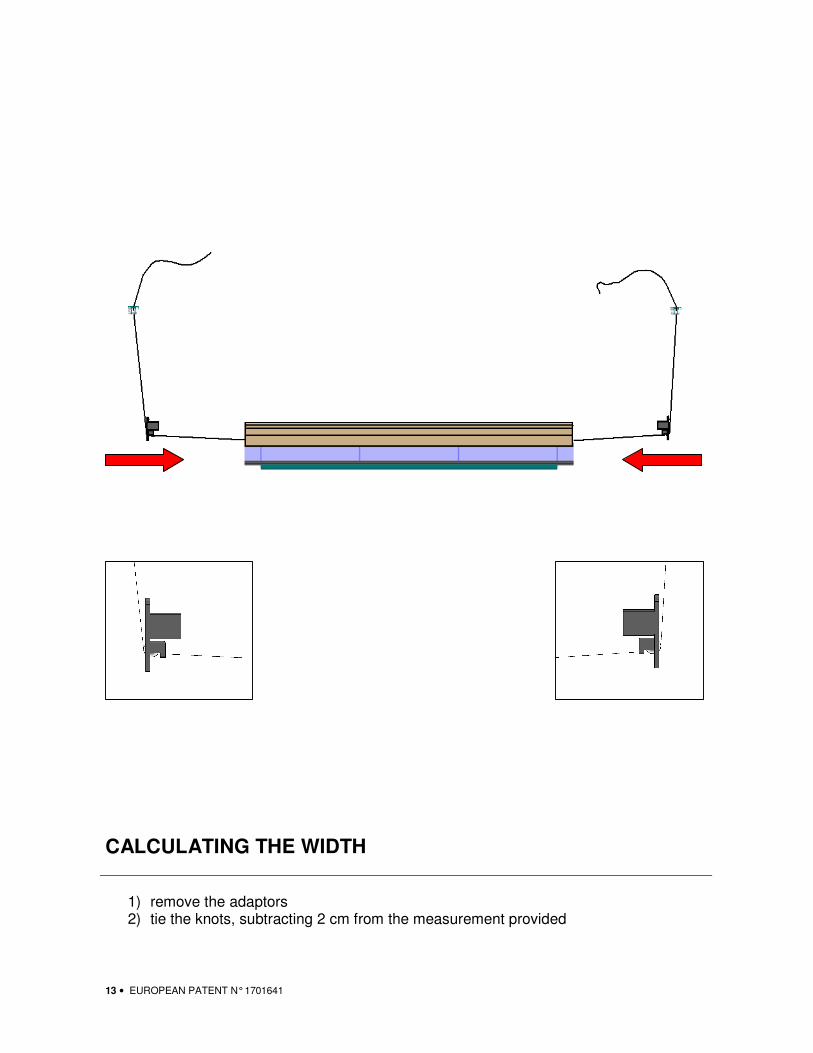
CALCULATING THE WIDTH
1) remove the adaptors 2) tie the knots, subtracting 2 cm from the measurement provided
14 • EUROPEAN PATENT N° 1701641
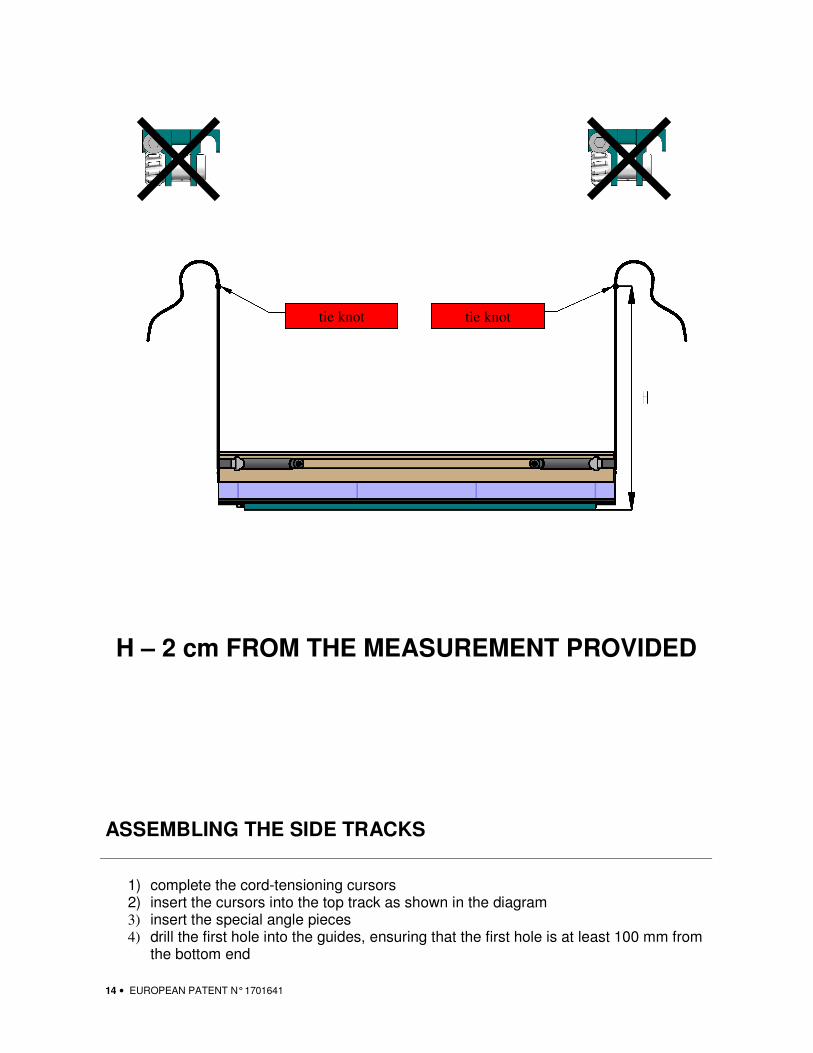
H – 2 cm FROM THE MEASUREMENT PROVIDED
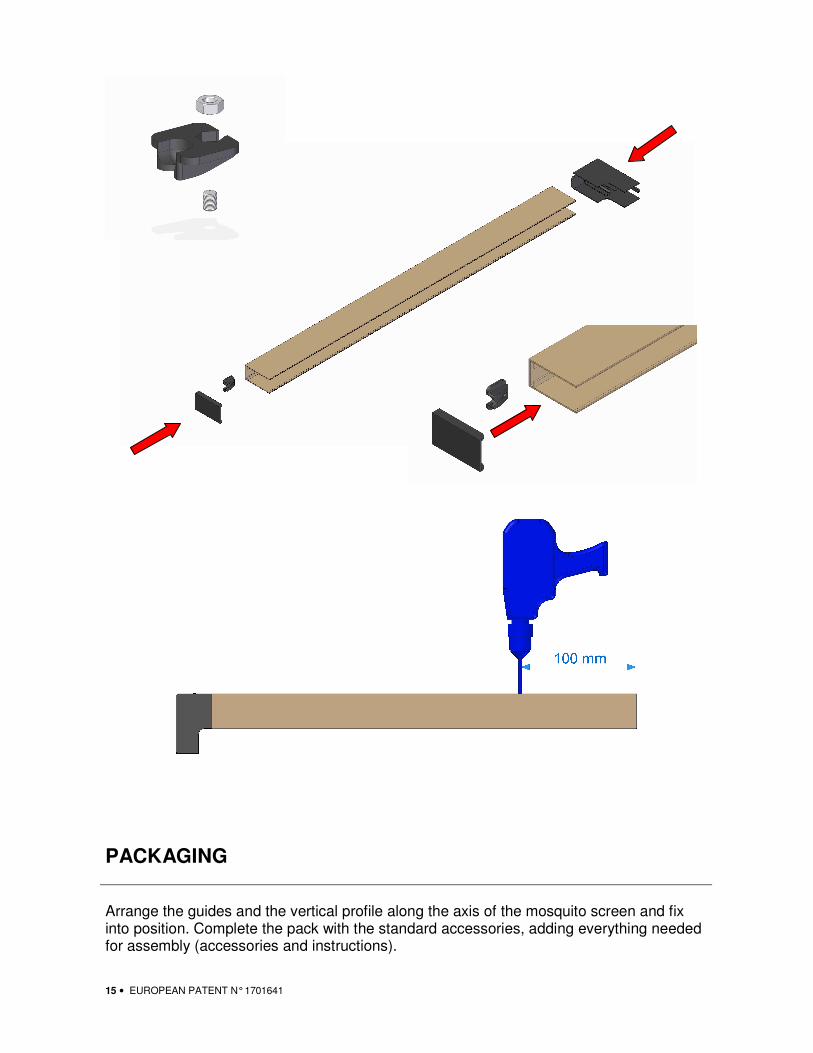
ASSEMBLING THE SIDE TRACKS
1) complete the cord-tensioning cursors 2) insert the cursors into the top track as shown in the diagram 3) insert the special angle pieces
4) drill the first hole into the guides, ensuring that the first hole is at least 100 mm from the bottom end
tie knot tie knot
15 • EUROPEAN PATENT N° 1701641
PACKAGING
Arrange the guides and the vertical profile along the axis of the mosquito screen and fix into position. Complete the pack with the standard accessories, adding everything needed for assembly (accessories and instructions).

16 • EUROPEAN PATENT N° 1701641

17 • EUROPEAN PATENT N° 1701641
INSTALLATION
INSTALLING THE TRACKS
18 • EUROPEAN PATENT N° 1701641
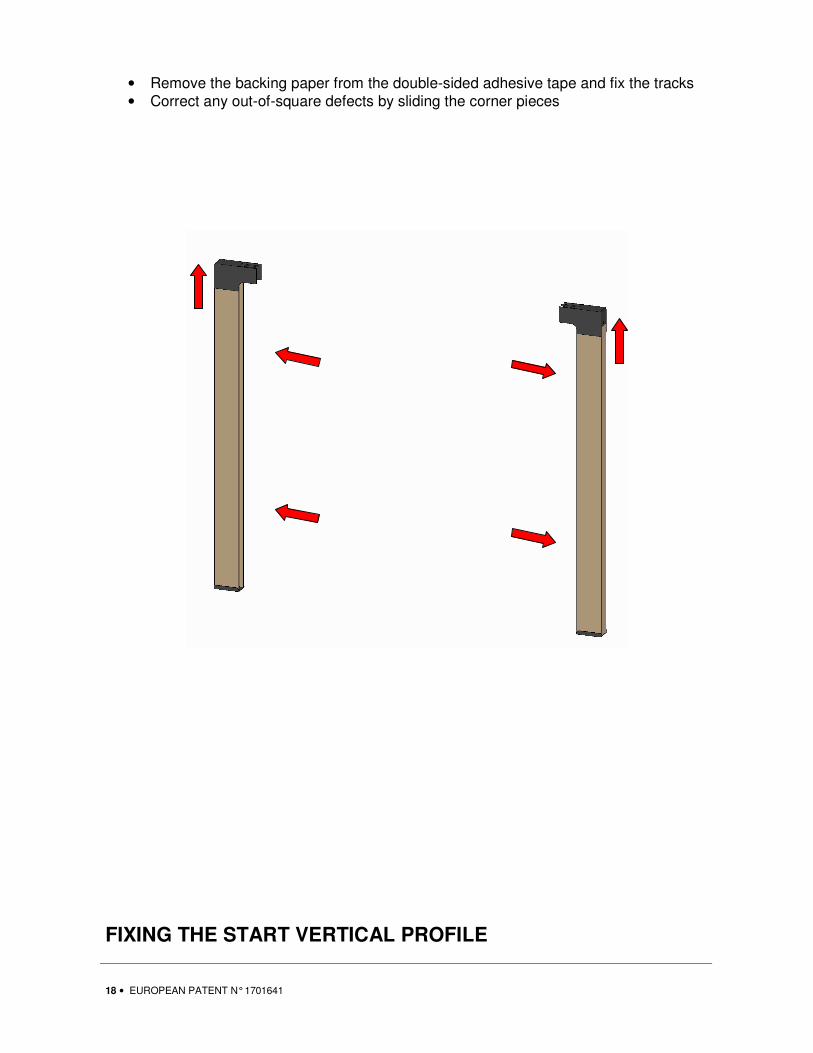
• Remove the backing paper from the double-sided adhesive tape and fix the tracks
• Correct any out-of-square defects by sliding the corner pieces
FIXING THE START VERTICAL PROFILE
19 • EUROPEAN PATENT N° 1701641
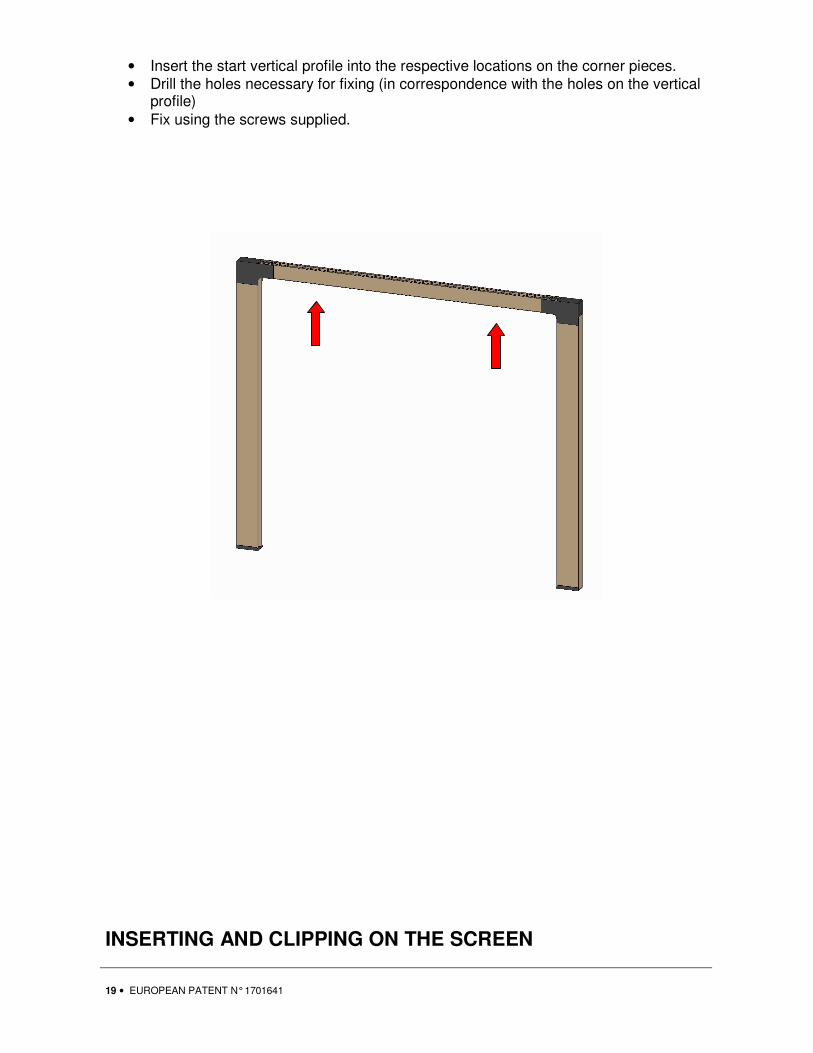
• Insert the start vertical profile into the respective locations on the corner pieces.
• Drill the holes necessary for fixing (in correspondence with the holes on the vertical profile)
• Fix using the screws supplied.
INSERTING AND CLIPPING ON THE SCREEN
20 • EUROPEAN PATENT N° 1701641
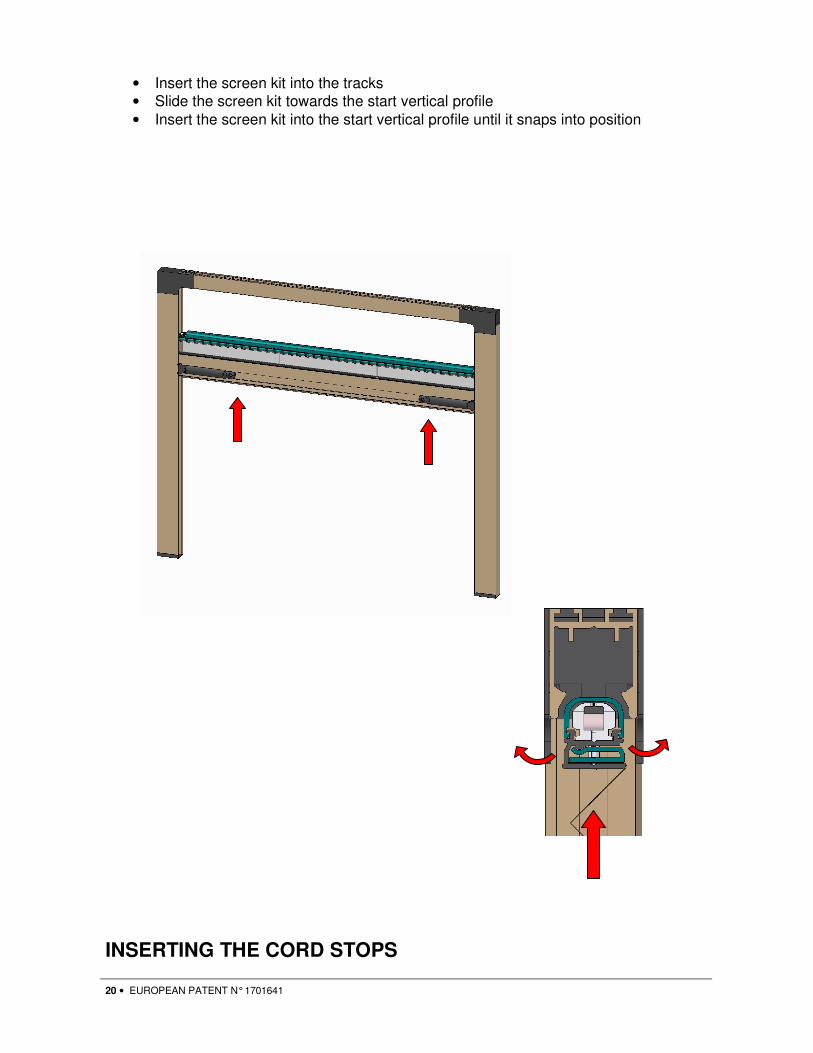
• Insert the screen kit into the tracks
• Slide the screen kit towards the start vertical profile
• Insert the screen kit into the start vertical profile until it snaps into position
INSERTING THE CORD STOPS
21 • EUROPEAN PATENT N° 1701641
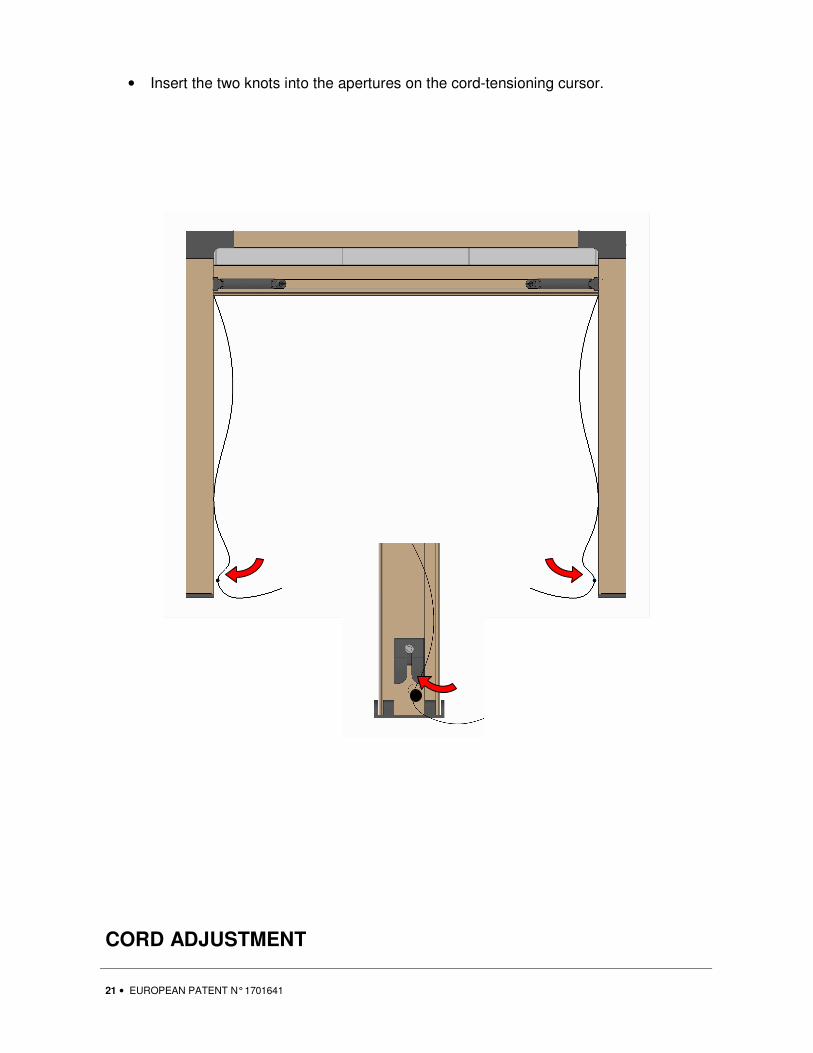
• Insert the two knots into the apertures on the cord-tensioning cursor.
CORD ADJUSTMENT
22 • EUROPEAN PATENT N° 1701641
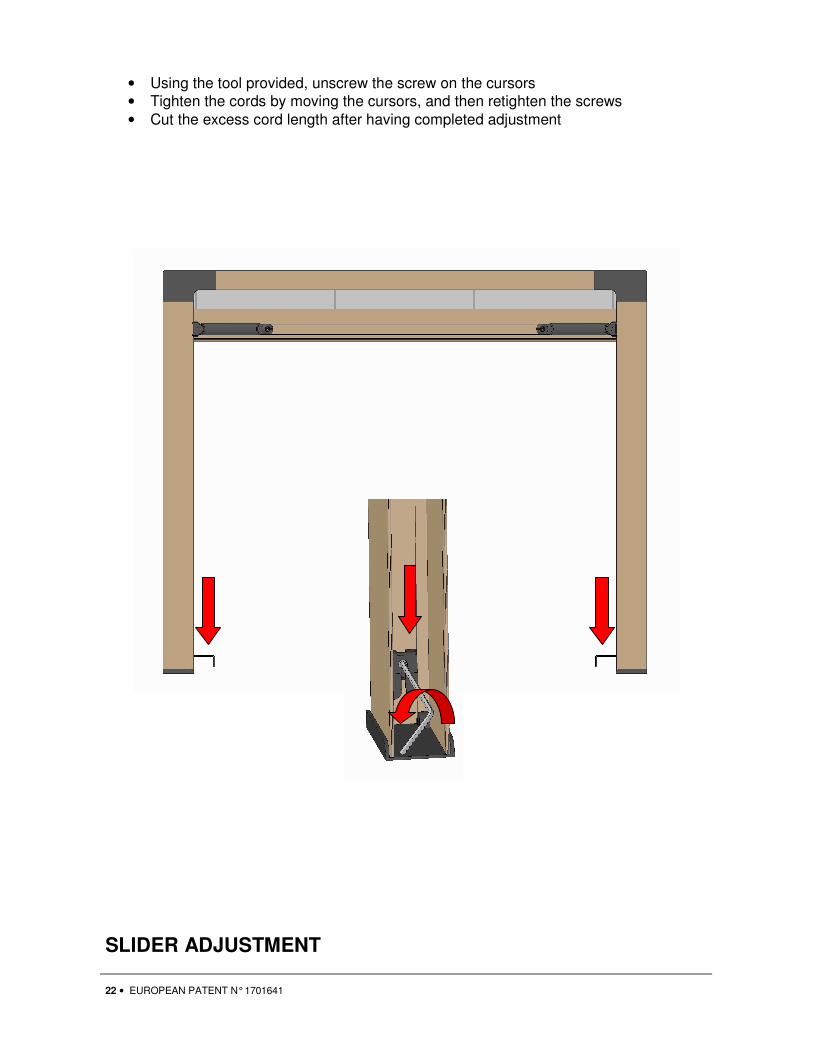
• Using the tool provided, unscrew the screw on the cursors
• Tighten the cords by moving the cursors, and then retighten the screws
• Cut the excess cord length after having completed adjustment
SLIDER ADJUSTMENT
23 • EUROPEAN PATENT N° 1701641
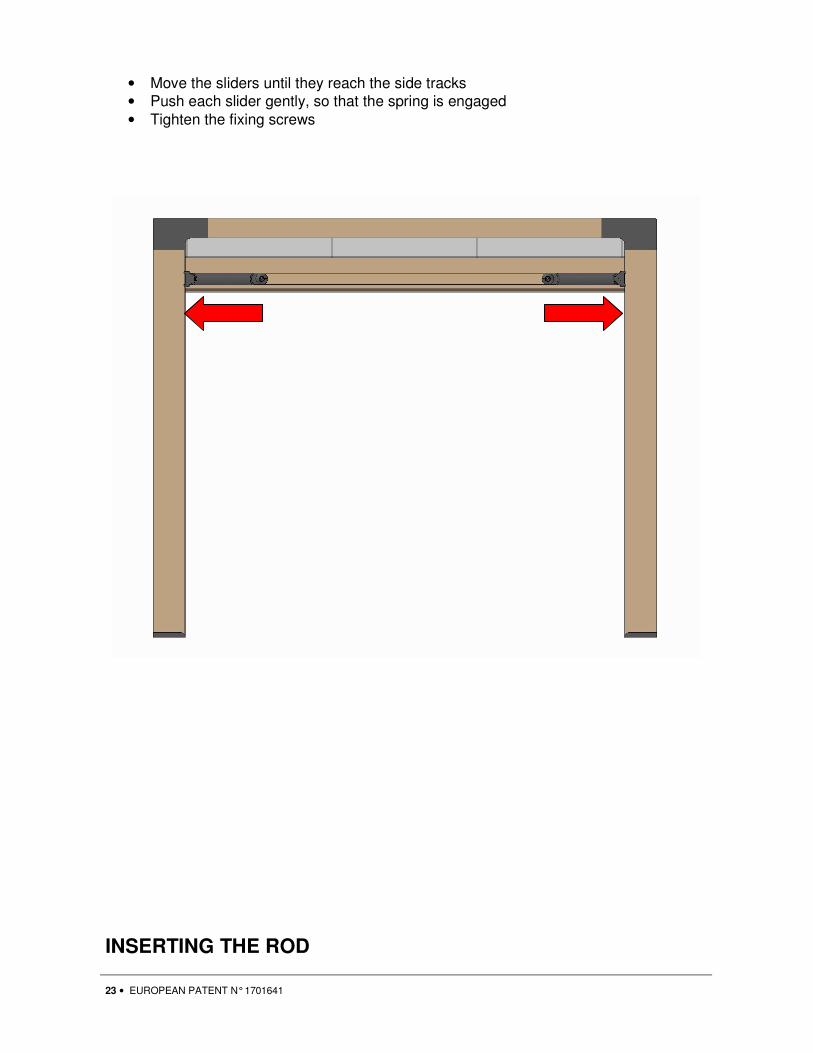
• Move the sliders until they reach the side tracks
• Push each slider gently, so that the spring is engaged
• Tighten the fixing screws
INSERTING THE ROD
24 • EUROPEAN PATENT N° 1701641
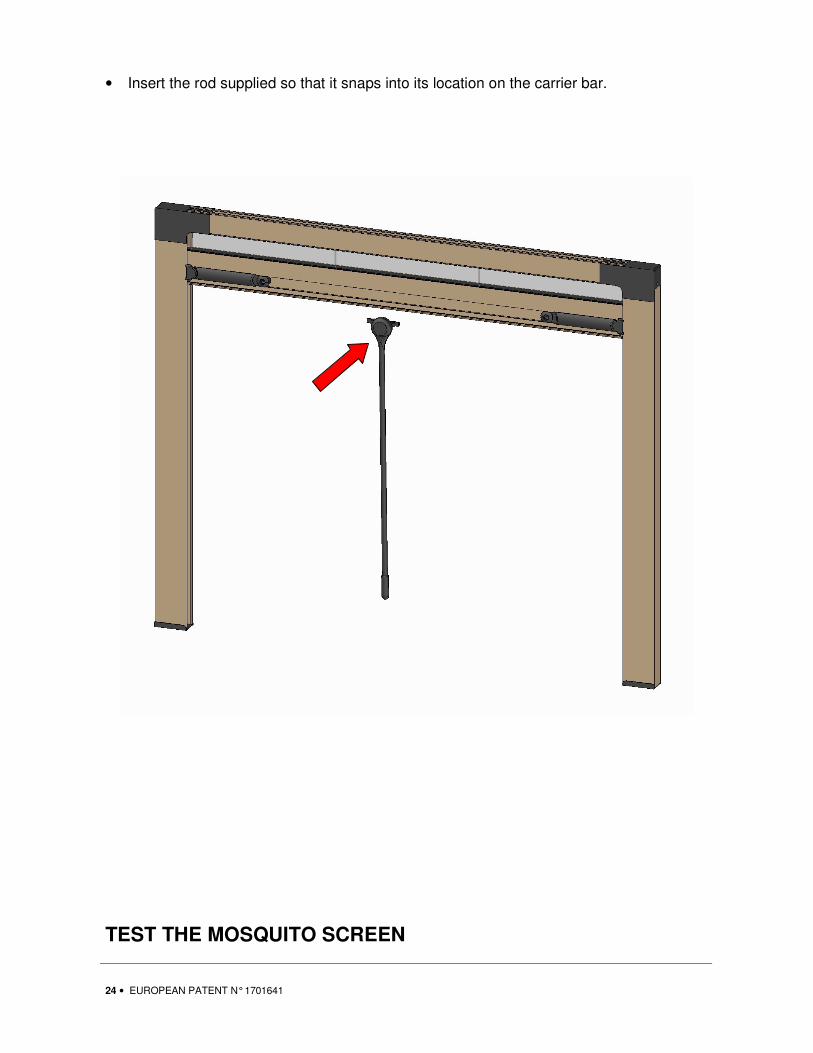
• Insert the rod supplied so that it snaps into its location on the carrier bar.
TEST THE MOSQUITO SCREEN
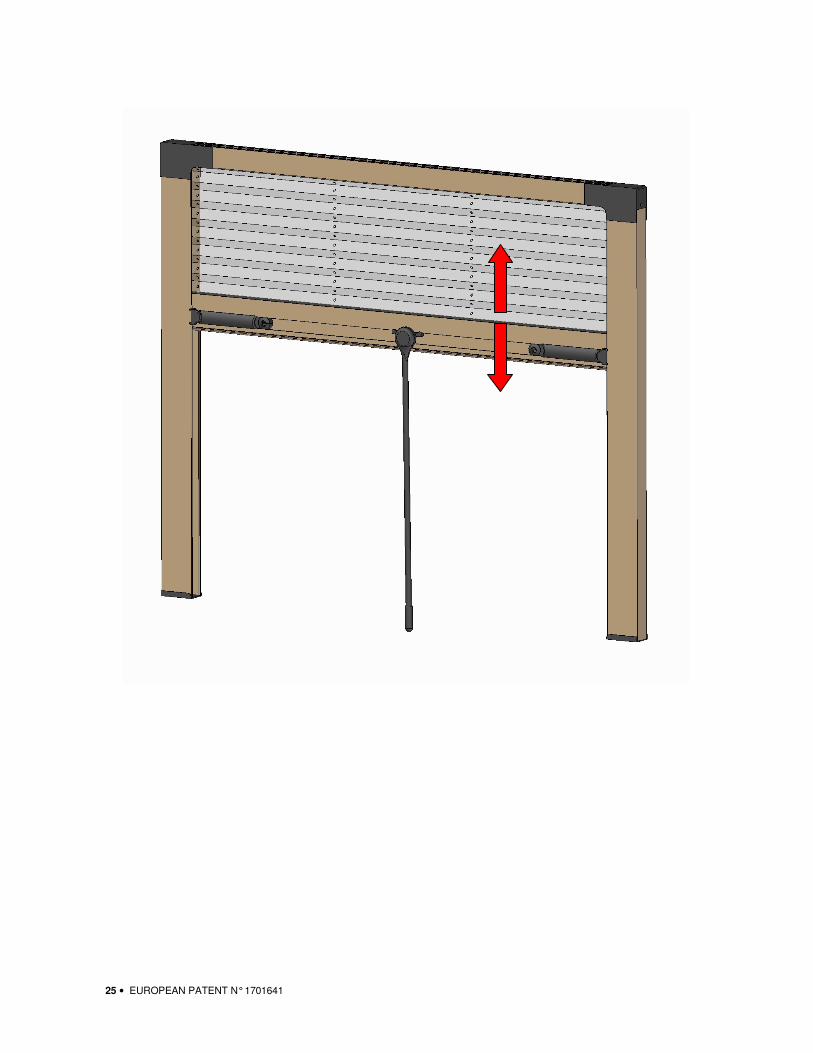
25 • EUROPEAN PATENT N° 1701641


