Embed Size (px)
Citation preview
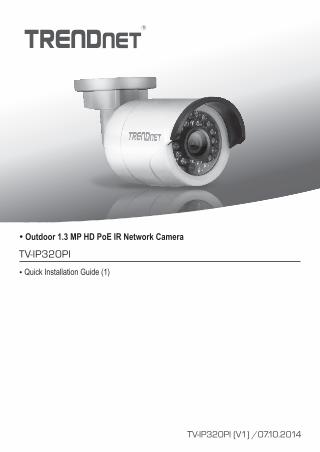
TV-IP320PI
TV-IP320PI (V1) /07.10.2014
Ÿ Outdoor 1.3 MP HD PoE IR Network Camera
Ÿ Quick Installation Guide (1)
1
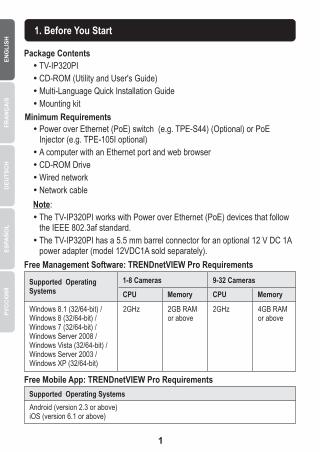
Package Contents
1. Before You Start
Ÿ TV-IP320PI
Ÿ CD-ROM (Utility and User's Guide)
Ÿ Multi-Language Quick Installation Guide
Ÿ Mounting kit
Minimum Requirements
Ÿ Power over Ethernet (PoE) switch (e.g. TPE-S44) (Optional) or PoE Injector (e.g. TPE-105I optional)
Ÿ A computer with an Ethernet port and web browser
Ÿ CD-ROM Drive
ŸWired network
Ÿ Network cable
Note:
Ÿ The TV-IP320PI works with Power over Ethernet (PoE) devices that follow the IEEE 802.3af standard.
Ÿ The TV-IP320PI has a 5.5 mm barrel connector for an optional 12 V DC 1A power adapter (model 12VDC1A sold separately).
Supported Operating Systems
1-8 Cameras
CPU CPU
9-32 Cameras
Memory Memory
Windows 8.1 (32/64-bit) /Windows 8 (32/64-bit) / Windows 7 (32/64-bit) /Windows Server 2008 / Windows Vista (32/64-bit) / Windows Server 2003 / Windows XP (32/64-bit)
2GHz 2GHz2GB RAM or above
4GB RAM or above
Free Management Software: TRENDnetVIEW Pro Requirements
Supported Operating Systems
Android (version 2.3 or above)iOS (version 6.1 or above)
Free Mobile App: TRENDnetVIEW Pro Requirements
2
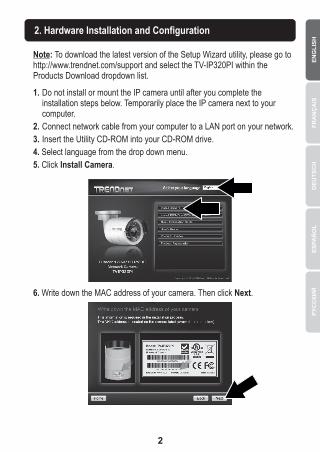
2. Hardware Installation and Configuration
1. Do not install or mount the IP camera until after you complete the installation steps below. Temporarily place the IP camera next to your computer.
2. Connect network cable from your computer to a LAN port on your network.
3. Insert the Utility CD-ROM into your CD-ROM drive.
4. Select language from the drop down menu.
5. Click Install Camera.
6. Write down the MAC address of your camera. Then click Next.
Note: To download the latest version of the Setup Wizard utility, please go to http://www.trendnet.com/support and select the TV-IP320PI within the Products Download dropdown list.
3
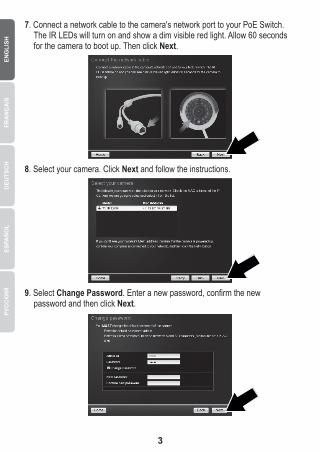
7. Connect a network cable to the camera's network port to your PoE Switch. The IR LEDs will turn on and show a dim visible red light. Allow 60 seconds for the camera to boot up. Then click Next.
8. Select your camera. Click Next and follow the instructions.
9. Select Change Password. Enter a new password, confirm the new password and then click Next.
4
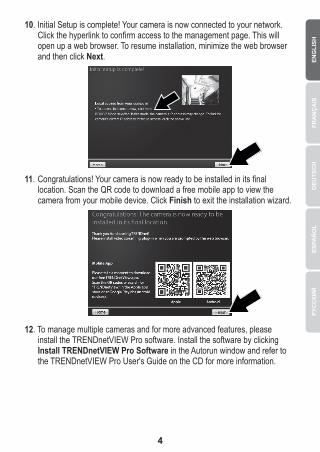
10. Initial Setup is complete! Your camera is now connected to your network. Click the hyperlink to confirm access to the management page. This will open up a web browser. To resume installation, minimize the web browser and then click Next.
11. Congratulations! Your camera is now ready to be installed in its final location. Scan the QR code to download a free mobile app to view the camera from your mobile device. Click Finish to exit the installation wizard.
12. To manage multiple cameras and for more advanced features, please install the TRENDnetVIEW Pro software. Install the software by clicking Install TRENDnetVIEW Pro Software in the Autorun window and refer to the TRENDnetVIEW Pro User's Guide on the CD for more information.
5
Note
Ÿ See User's Guide for advanced management functions.
ŸWhen viewing live video, you may be required to install plug-ins.
Ÿ It is recommended that you setup a dynamic DNS service in order to view your cameras remotely. See your router and IP camera user's guide for instructions.
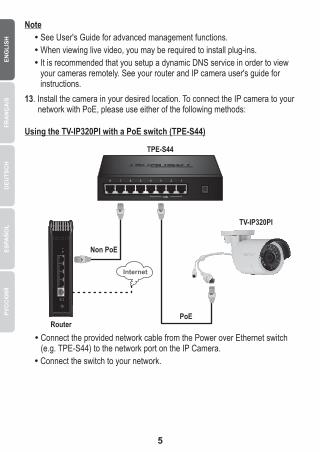
13. Install the camera in your desired location. To connect the IP camera to your network with PoE, please use either of the following methods:
Using the TV-IP320PI with a PoE switch (TPE-S44)
Ÿ Connect the provided network cable from the Power over Ethernet switch (e.g. TPE-S44) to the network port on the IP Camera.
Ÿ Connect the switch to your network.
TPE-S44
TV-IP320PI
PoE
Internet
Router
Non PoE
6
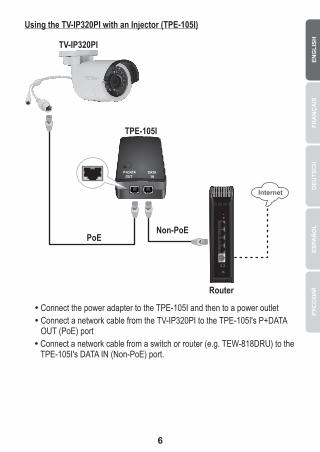
Using the TV-IP320PI with an Injector (TPE-105I)
TV-IP320PI
TPE-105I
DATAIN
P+DATAOUT
Router
PoE
Ÿ Connect the power adapter to the TPE-105I and then to a power outlet
Ÿ Connect a network cable from the TV-IP320PI to the TPE-105I's P+DATA OUT (PoE) port
Ÿ Connect a network cable from a switch or router (e.g. TEW-818DRU) to the TPE-105I's DATA IN (Non-PoE) port.
Non-PoE
Internet

7
Note:
For tips on capturing appropriate camera viewing angle, please refer to the User's Guide.
Mounting the camera
1. Loosen the adjustable nut and manually position the camera as desired.
2. Place the provided template label on the wall or ceiling.
Ceiling Mounting
Hole Hole
Hole
3. Drill holes for the provided screw anchors at each marked position on the template. Make sure the drill bit matches the size of the provided screw anchors.
4. You can run your cable from back of the camera, or route it through the side of the base. Skip to step 6 if you are doing so.
6. Connect the network ethernet cable to the camera. Ensure the camera is not powered.
5. Drill a hole in the wall for the cable.
8
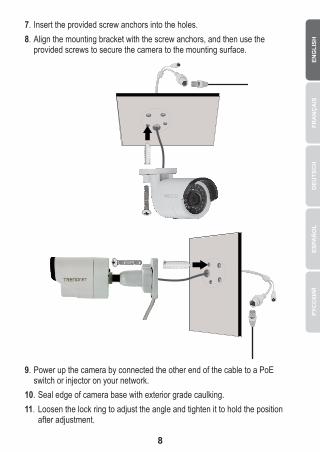
9. Power up the camera by connected the other end of the cable to a PoE switch or injector on your network.
10. Seal edge of camera base with exterior grade caulking.
11. Loosen the lock ring to adjust the angle and tighten it to hold the position after adjustment.
7. Insert the provided screw anchors into the holes.
8. Align the mounting bracket with the screw anchors, and then use the provided screws to secure the camera to the mounting surface.
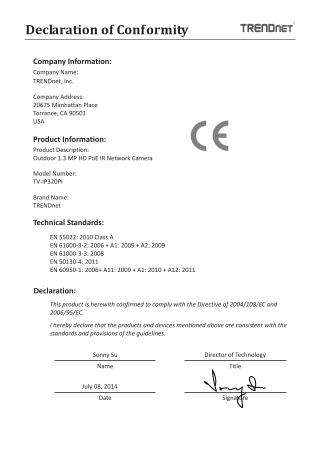
Company Information:Company Name:
TRENDnet, Inc.
Company Address:20675 Manhattan PlaceTorrance, CA 90501USA
Product Information:Product Description:Outdoor 1.3 MP HD PoE IR Network Camera
Model Number:TV-IP320PI
Brand Name:TRENDnet
Technical Standards:
EN 55022: 2010 Class AEN 61000-3-2: 2006 + A1: 2009 + A2: 2009EN 61000-3-3: 2008EN 50130-4: 2011EN 60950-1: 2006+ A11: 2009 + A1: 2010 + A12: 2011
Declaration:
I hereby declare that the products and devices mentioned above are consistent with the standards and provisions of the guidelines.
This product is herewith confirmed to comply with the Directive of 2004/108/EC and 2006/95/EC.
Sonny Su
Name
Date
Director of Technology
Title
Signature
July 08, 2014
Limited Warranty TRENDnet warrants its products against defects in material and workmanship, under normal use and service, for the following length of time from the date of purchase. Warranty: 3 year limited warranty (When Applicable: 1 year warranty for power adapter, power supply, and cooling fan components.) Visit TRENDnet.com to review the full warranty policy, rights, and restrictions for this product.
Garantie Limitée TRENDnet garantit ses produits contre les défauts matériels et de fabrication, dans des conditions normales d’utilisation et de service, pour les durées suivantes, à compter de la date de leur achat. Limitée: 3 ans de garantie limitée (Si applicable: 1 an de garantie sur l’adaptateur secteur, l’alimentation en énergie et les composants du ventilateur de refroidissement.) Visitez TRENDnet.com pour lire la politique complète de garantie, les droits et les restrictions s’appliquant à ce produit.
Begrenzte GarantieTRENDnet garantiert, dass seine Produkte bei normaler Benutzung und Wartung während der nachfolgend genannten Zeit ab dem Kaufdatum keine Material- und Verarbeitungsschäden aufweisen. Garantie: 3-Jahres-Garantie (Soweit zutreffend: 1 Jahr Garantie für Netzteil, Stromkabel und Ventilator.) Alle Garantiebedingungen, Rechte und Einschränkungen für dieses Produkt finden Sie auf TRENDnet.com.
Garantía LimitadaTRENDnet garantiza sus productos contra defectos en los materiales y mano de obra, bajo uso y servicio normales, durante el siguiente periodo de tiempo a partir de la fecha de compra. Garantía: 3 años (Cuando proceda: 1 año de garantía para componentes de adaptadores de corriente, fuente de alimentación y ventiladores de refrigeración.) Visite TRENDnet.com para revisar la política de garantía, derechos y restricciones para este producto.
Ограниченная гарантияГарантия компании TRENDnet распространяется на дефекты, возникшие по вине производителя, при соблюдении условий эксплуатации и обслуживания в течение установленного периода с момента приобретения. (Продукт: Ограниченная гарантия: Трехлетняя ограниченная гарантия (Распространяется: На протяжении 1 года на силовые адаптеры, источники питания и компоненты вентилятора охлаждения) Полную версию гарантийных обязательств, а также права пользователя и ограничения при эксплуатации данного продукта смотрите на вебсайте TRENDnet.com.
Garantia LimitadaTRENDnet garante seus produtos contra defeitos em material e mão de obra, sob condições normais de uso e serviço, pelo seguinte tempo a partir da data da compra. Garantia: Garantia limitada de 3 anos. (Quando aplicável: 1 ano de garantia para adaptador de tensão, fonte e componentes de ventoinhas). Visite TRENDnet.com para conhecer a política de garantia completa, direitos e restrições para este produto.)
Piiratud garantiiTRENDneti tavatingimustes kasutatavatel ja hooldatavatel toodetel on järgmise ajavahemiku jooksul (alates ostukuupäevast) tootmis-ja materjalidefektide garantii. garantii: 3-aastane piiratud garantii. (Garantii kohaldatakse: toiteadapteri, toiteallika ja jahutusventilaatori osadel on 1-aastane garantii.) Täisgarantii põhimõtete, õiguste ja piirangute kohta leiate lisateavet saidilt TRENDnet.com.
NoteThe Manufacturer is not responsible for any radio or TV interference caused by unauthorized modifications to this equipment. Such modifications could void the user’s authority to operate the equipment.
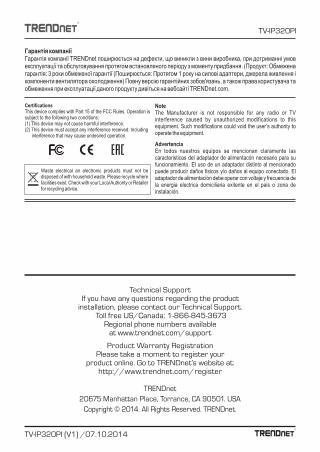
CertificationsThis device complies with Part 15 of the FCC Rules. Operation is subject to the following two conditions:(1) This device may not cause harmful interference.(2) This device must accept any interference received. Including interference that may cause undesired operation.
AdvertenciaEn todos nuestros equipos se mencionan claramente las caracteristicas del adaptador de alimentacón necesario para su funcionamiento. El uso de un adaptador distinto al mencionado puede producir daños fisicos y/o daños al equipo conectado. El adaptador de alimentación debe operar con voltaje y frecuencia de la energia electrica domiciliaria exitente en el pais o zona de instalación.
Waste electrical an electronic products must not be disposed of with household waste. Please recycle where facilities exist. Check with your Local Authority or Retailer for recycling advice.
TV-IP320PI (V1) /07.10.2014
Product Warranty RegistrationPlease take a moment to register your
product online. Go to TRENDnet’s website at: http://www.trendnet.com/register
TRENDnet
20675 Manhattan Place, Torrance, CA 90501. USA
Copyright © 2014. All Rights Reserved. TRENDnet.
Technical SupportIf you have any questions regarding the product
installation, please contact our Technical Support. Toll free US/Canada: 1-866-845-3673
Regional phone numbers availableat www.trendnet.com/support
Гарантія компанії Гарантія компанії TRENDnet поширюється на дефекти, що виникли з вини виробника, при дотриманні умов експлуатації та обслуговування протягом встановленого періоду з моменту придбання. (Продукт: Обмежена гарантія: 3 роки обмеженої гарантії (Поширюється: Протягом 1 року на силові адаптери, джерела живлення і компоненти вентилятора охолодження) Повну версію гарантійних зобов'язань, а також права користувача та обмеження при експлуатації даного продукту дивіться на вебсайті TRENDnet.com.
TV-IP320PI