Embed Size (px)
Citation preview

Elementary setup of a Chamilo serverfor intranet usage
(version 1.9.x)
Table of contents
Introduction
Chapter 1: installation of Debian
Chapter 2: connecting remote
Chapter 3: installing basic packages
Chapter 4: Chamilo RAPID/PowerPoint converter
Chapter 5: Xapian
Chapter 6: Prepare the system
Chapter 7: Getting Chamilo source
Chapter 8: Installing Chamilo via web browser
Appendix: document license & version history
Introduction
This setup guide is neither complete nor does it claim to be the fastest solution available.(indeed, if you really need a fast running server, I would recommend nginx)Also, you will not have video conference, because it is better to run that on a dedicated server.But it shows a good way to create a stable server for running Chamilo :-)
What do you need:• server hardware capable of running Debian or something similar like Virtualbox or VMware • Debian installation cd/image (get one free at http://www.debian.org/CD/ )• elementary knowledge of network design (otherwise you have an admin which will tell you the
needed information)• knowledge how to connect to a server via ssh• at least 3 hours of time :-)
Let's start with the basics:
1. setup Debian (including network basics)2. installing additional software3. do the funny compiling of Xapian (which hopefully will be discontinued in the future)4. configuring services the Debian way5. get mail server running (you should definitely change this to your needs!)6. do some basic server security (at least the basic things)7. setup an elementary backup solution (depends on if you can afford space)8. get a copy of Chamilo and install it
Well, if you have organized a copy of Debian (in our case, we prefer the stable release, which is currently called Squeeze), burn it to a cd or dvd.I usually use the netinstall version, but this means, you need internet connection during installation process.
If you go the virtual way, you can specify it as cd-rom image.(if you do virtualization, i assume you have proper knowledge about this technology)
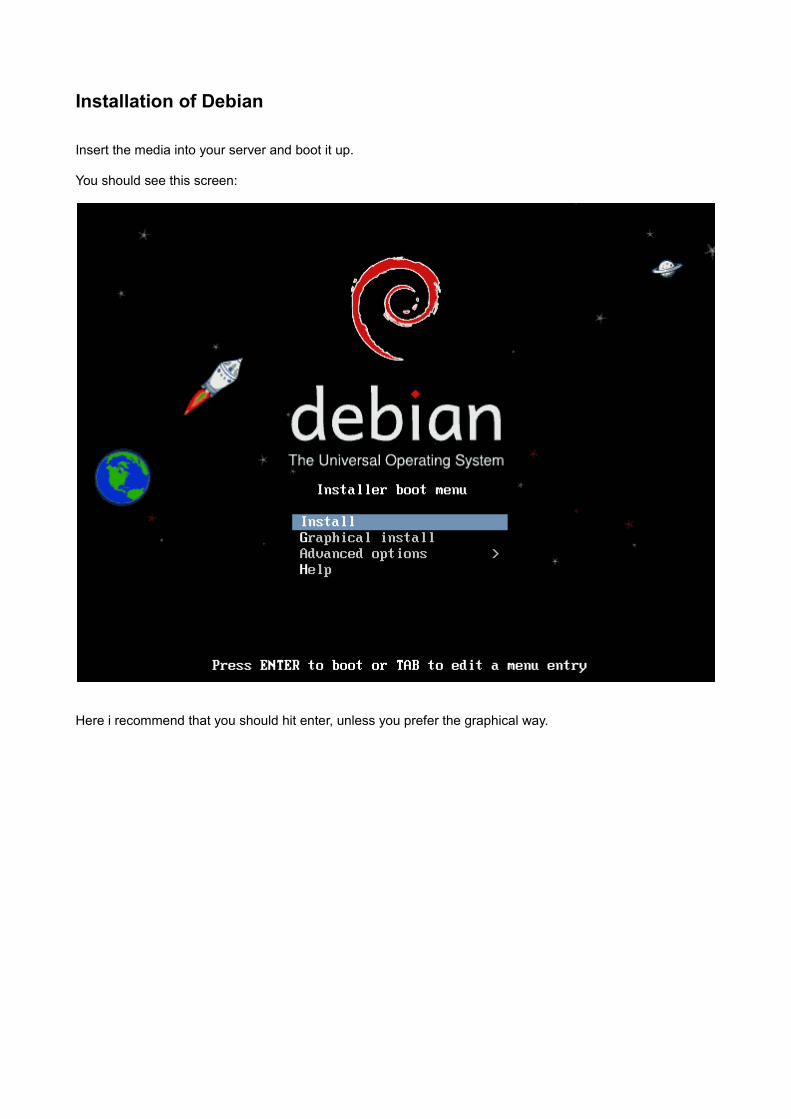
Installation of Debian
Insert the media into your server and boot it up.
You should see this screen:
Here i recommend that you should hit enter, unless you prefer the graphical way.
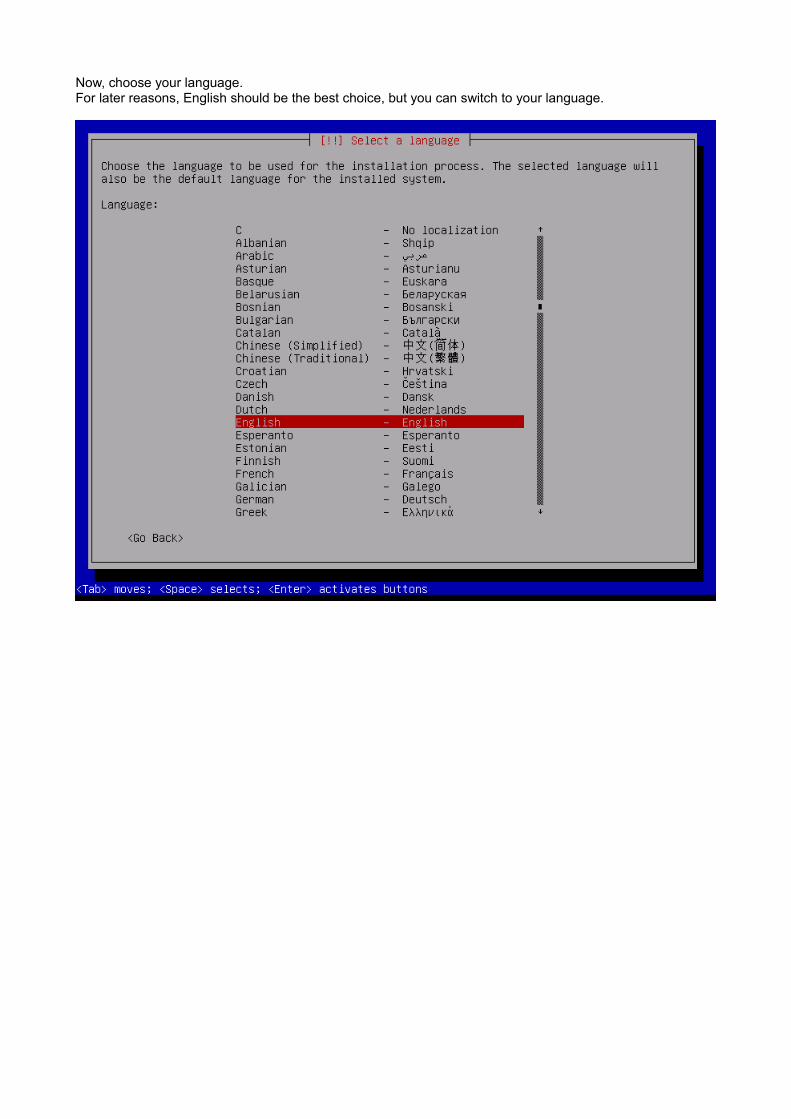
Now, choose your language.For later reasons, English should be the best choice, but you can switch to your language.
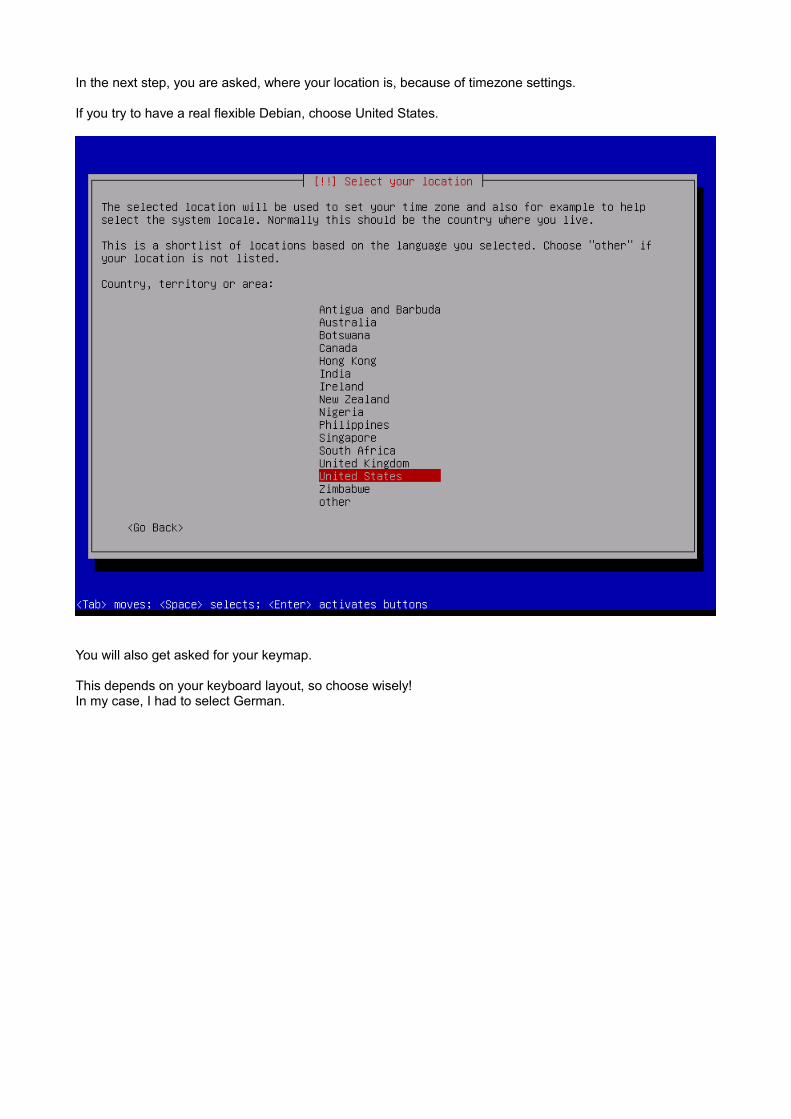
In the next step, you are asked, where your location is, because of timezone settings.
If you try to have a real flexible Debian, choose United States.
You will also get asked for your keymap.
This depends on your keyboard layout, so choose wisely!In my case, I had to select German.
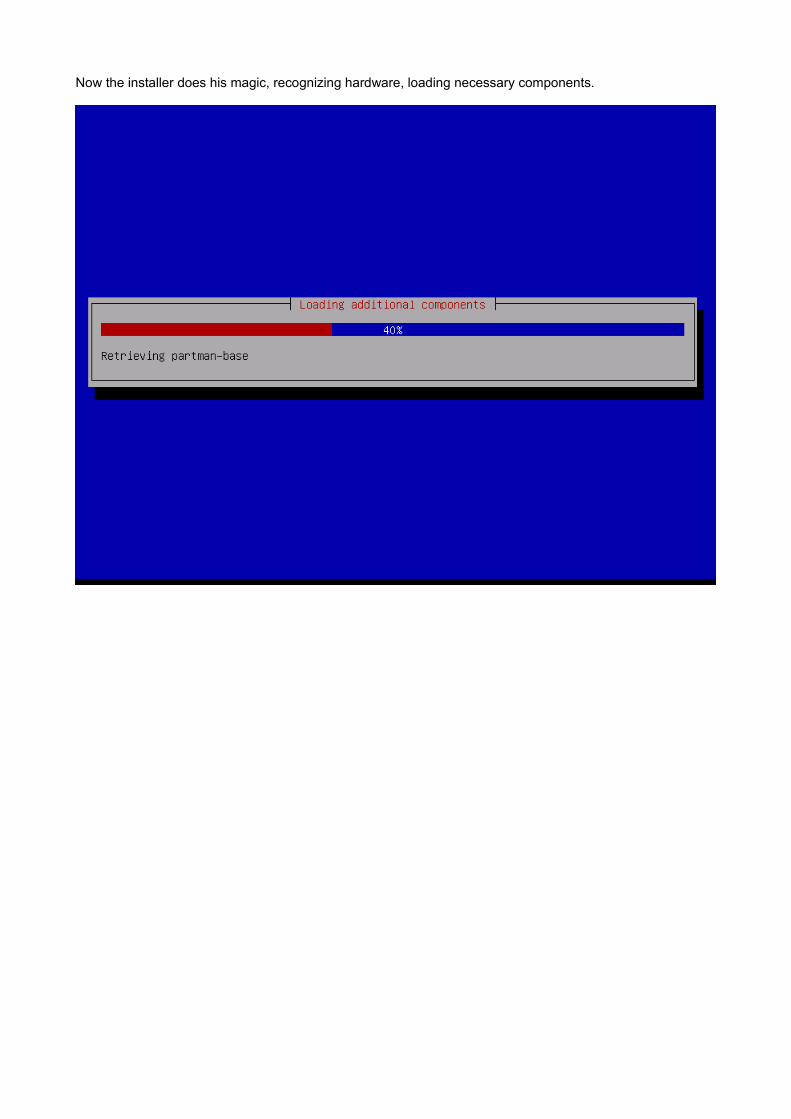
Now the installer does his magic, recognizing hardware, loading necessary components.
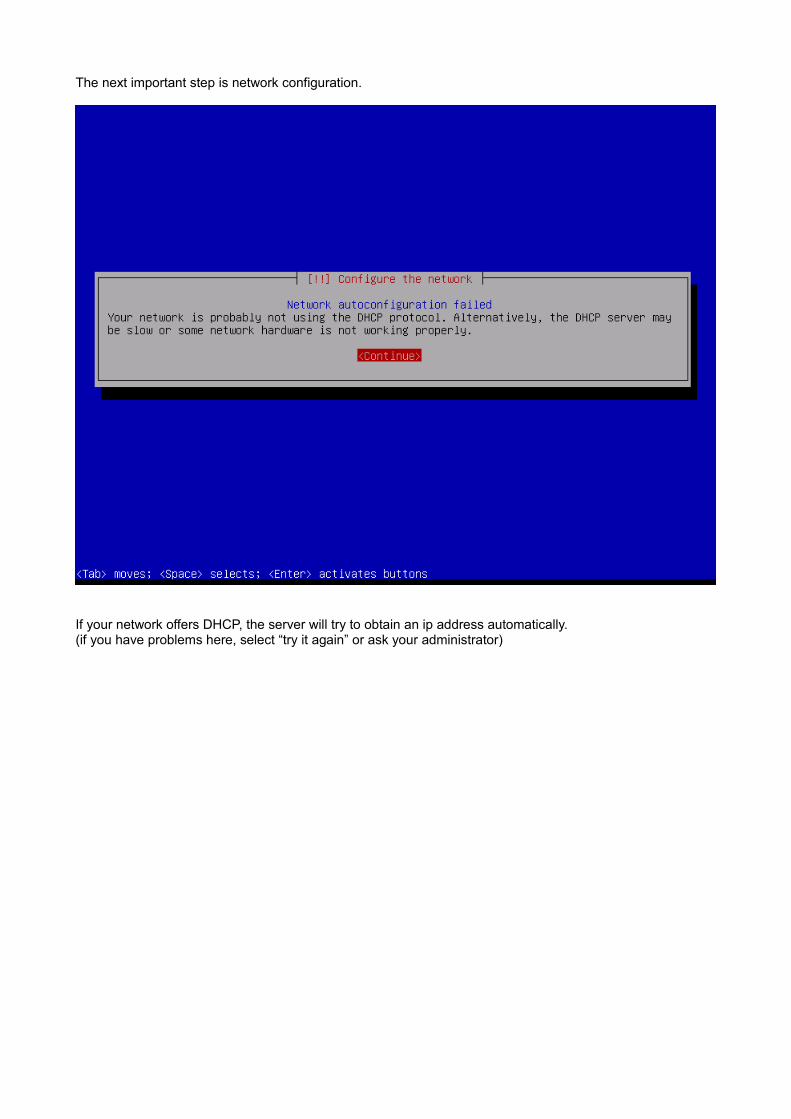
The next important step is network configuration.
If your network offers DHCP, the server will try to obtain an ip address automatically.(if you have problems here, select “try it again” or ask your administrator)
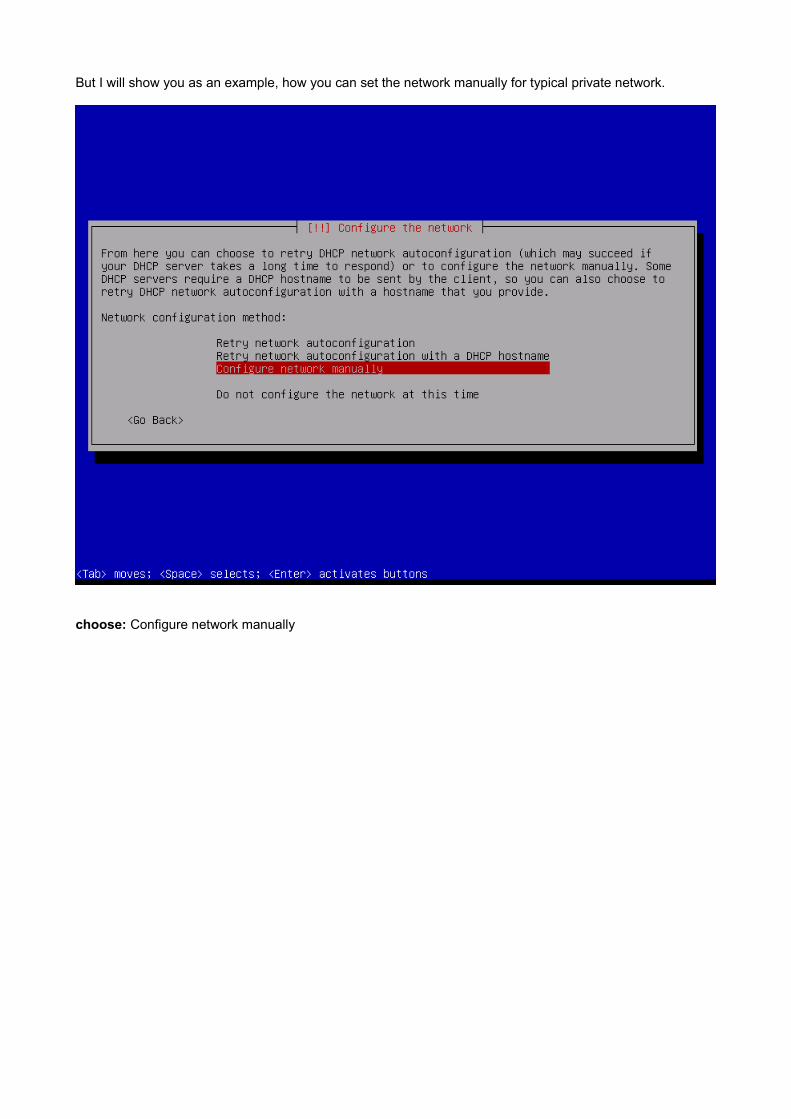
But I will show you as an example, how you can set the network manually for typical private network.
choose: Configure network manually

Enter a valid ip address, like in my case 192.168.0.1
Please adapt this to your network layout.Generally: press the tab key to switch between the available possible select fields, and hit Enter/Space bar to apply.
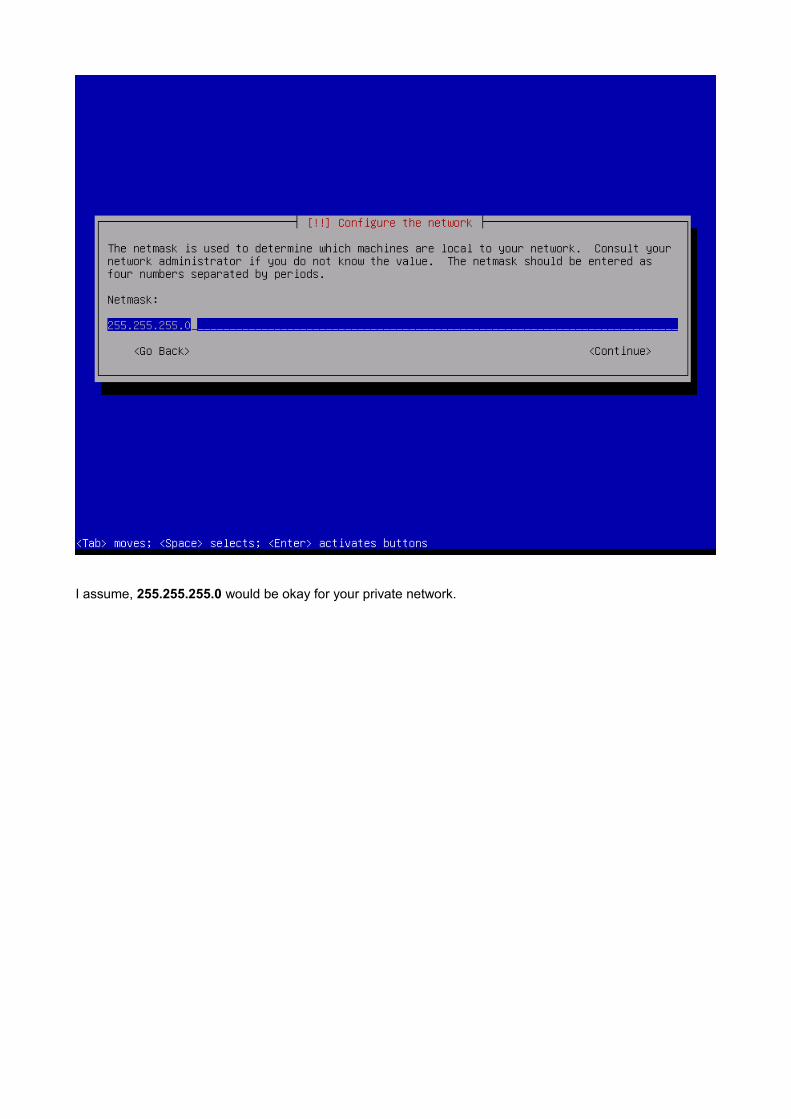
I assume, 255.255.255.0 would be okay for your private network.
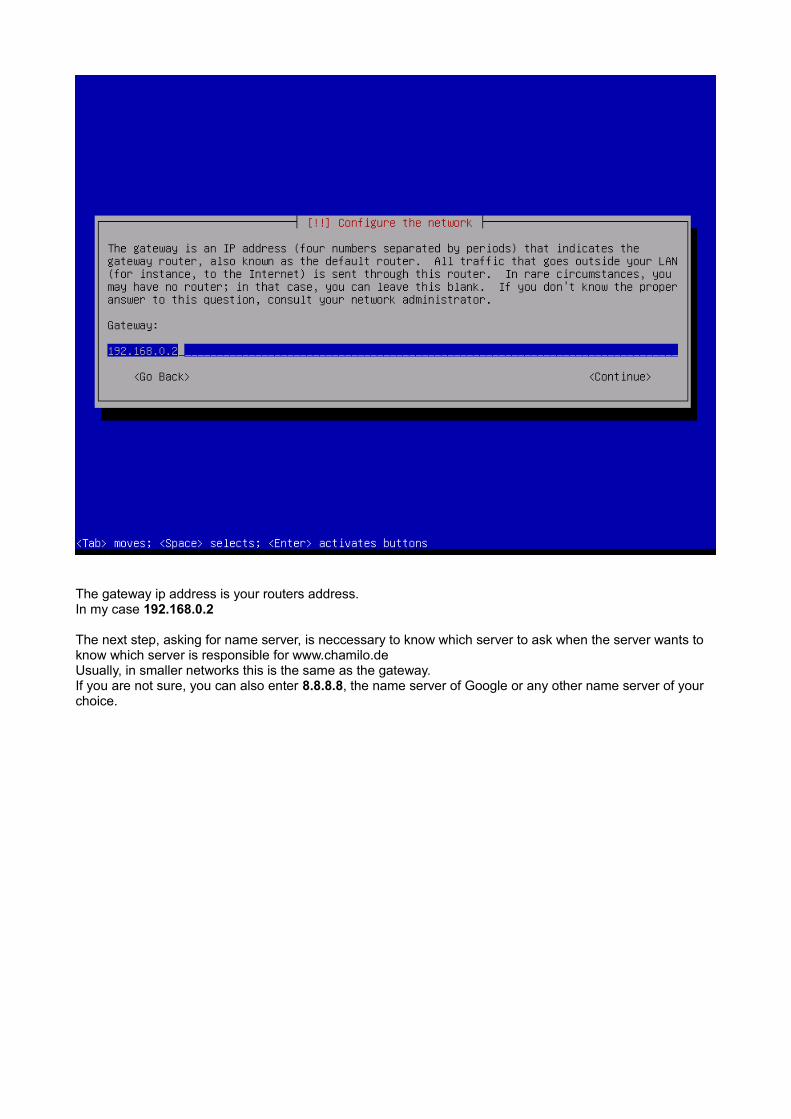
The gateway ip address is your routers address.In my case 192.168.0.2
The next step, asking for name server, is neccessary to know which server to ask when the server wants to know which server is responsible for www.chamilo.deUsually, in smaller networks this is the same as the gateway.If you are not sure, you can also enter 8.8.8.8, the name server of Google or any other name server of your choice.
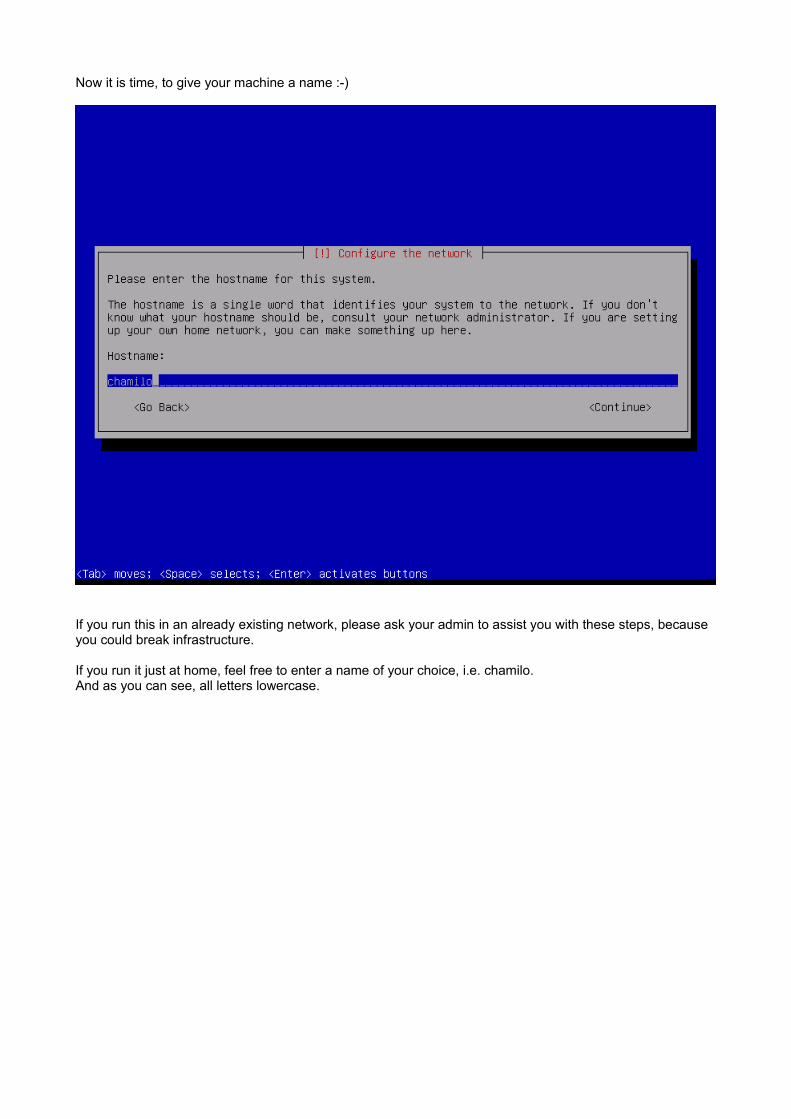
Now it is time, to give your machine a name :-)
If you run this in an already existing network, please ask your admin to assist you with these steps, because you could break infrastructure.
If you run it just at home, feel free to enter a name of your choice, i.e. chamilo.And as you can see, all letters lowercase.
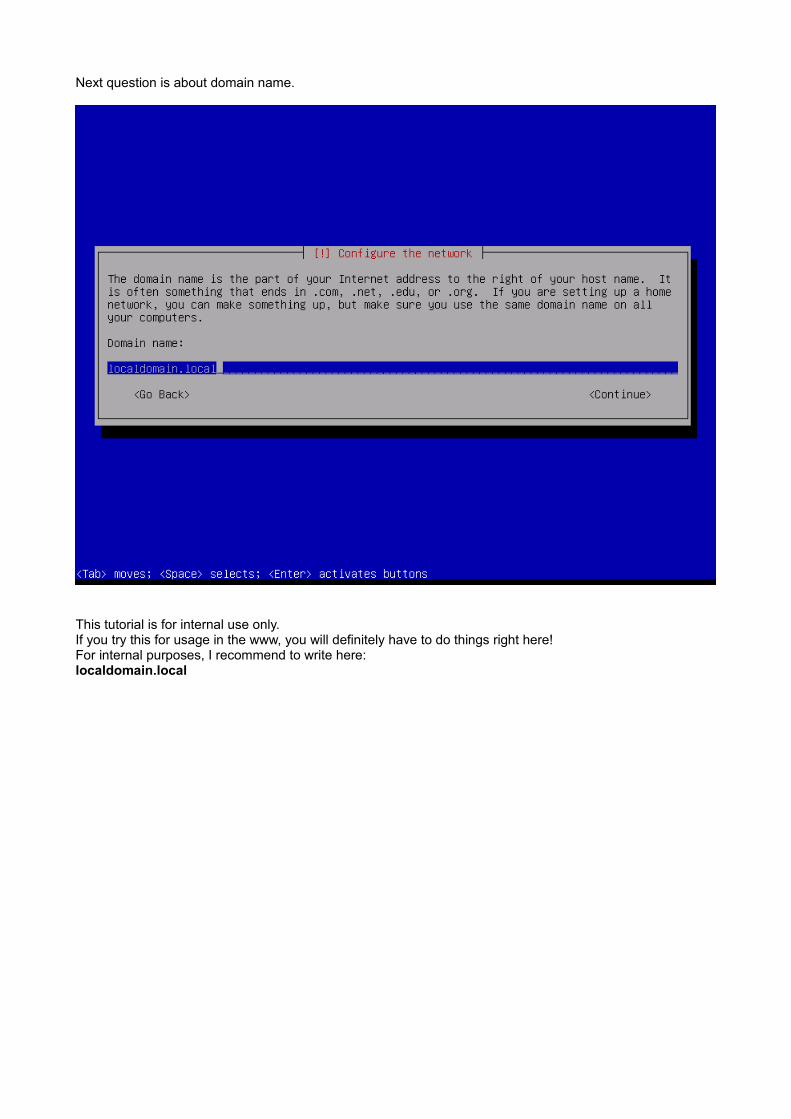
Next question is about domain name.
This tutorial is for internal use only.If you try this for usage in the www, you will definitely have to do things right here!For internal purposes, I recommend to write here:localdomain.local
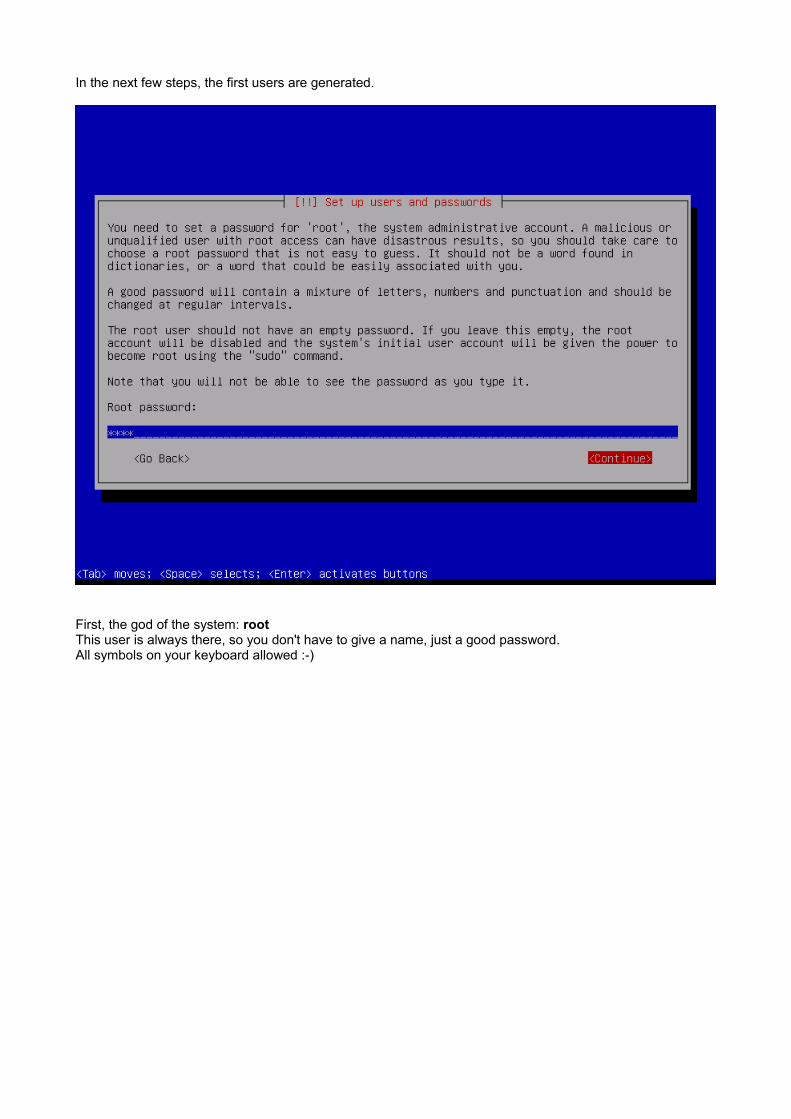
In the next few steps, the first users are generated.
First, the god of the system: rootThis user is always there, so you don't have to give a name, just a good password.All symbols on your keyboard allowed :-)

Please enter the same password again...
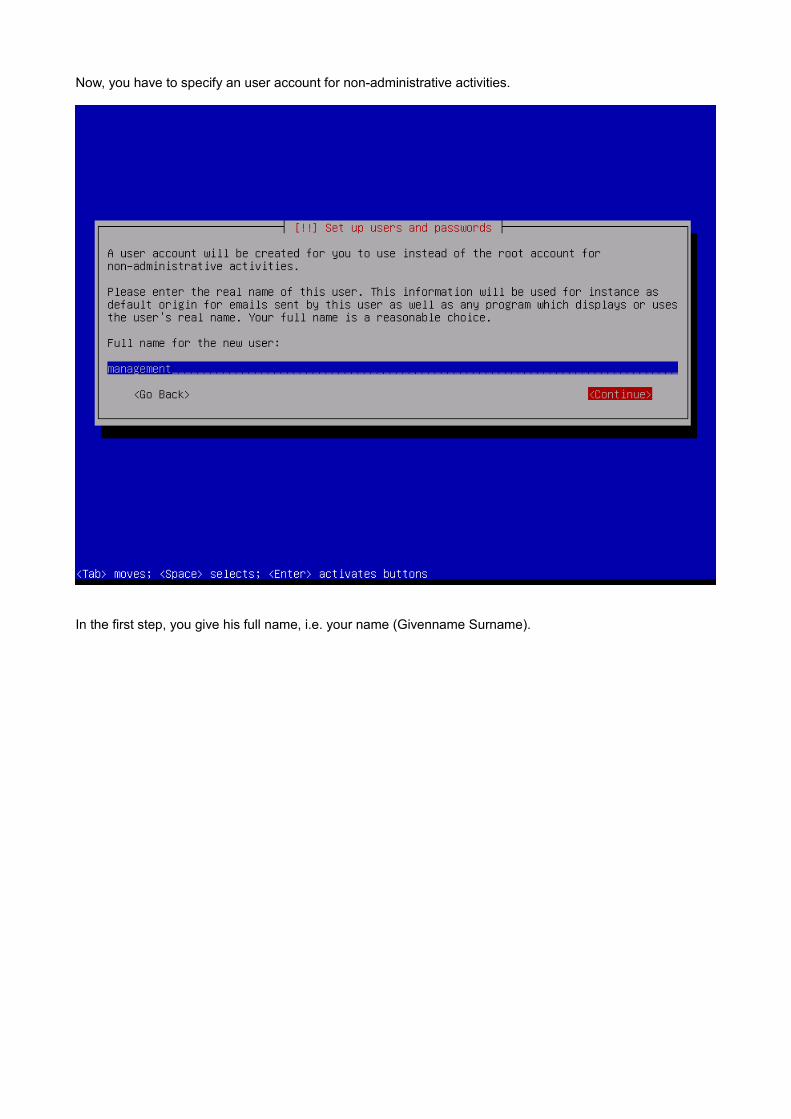
Now, you have to specify an user account for non-administrative activities.
In the first step, you give his full name, i.e. your name (Givenname Surname).
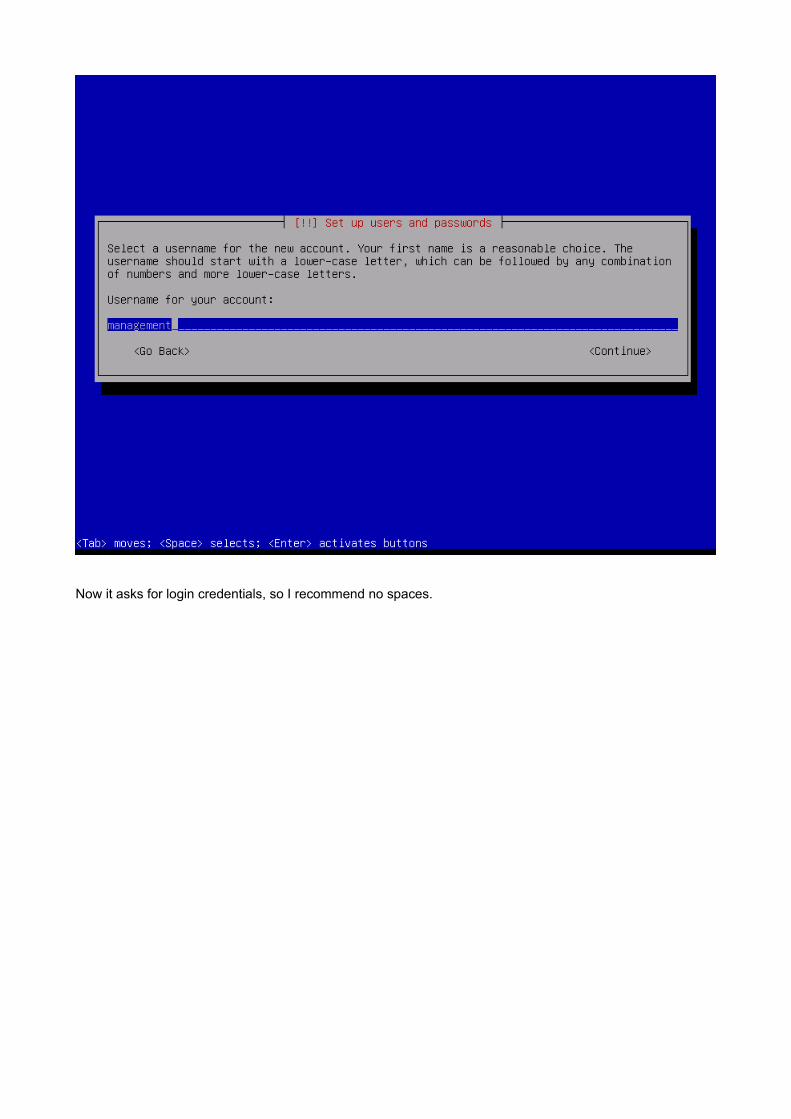
Now it asks for login credentials, so I recommend no spaces.
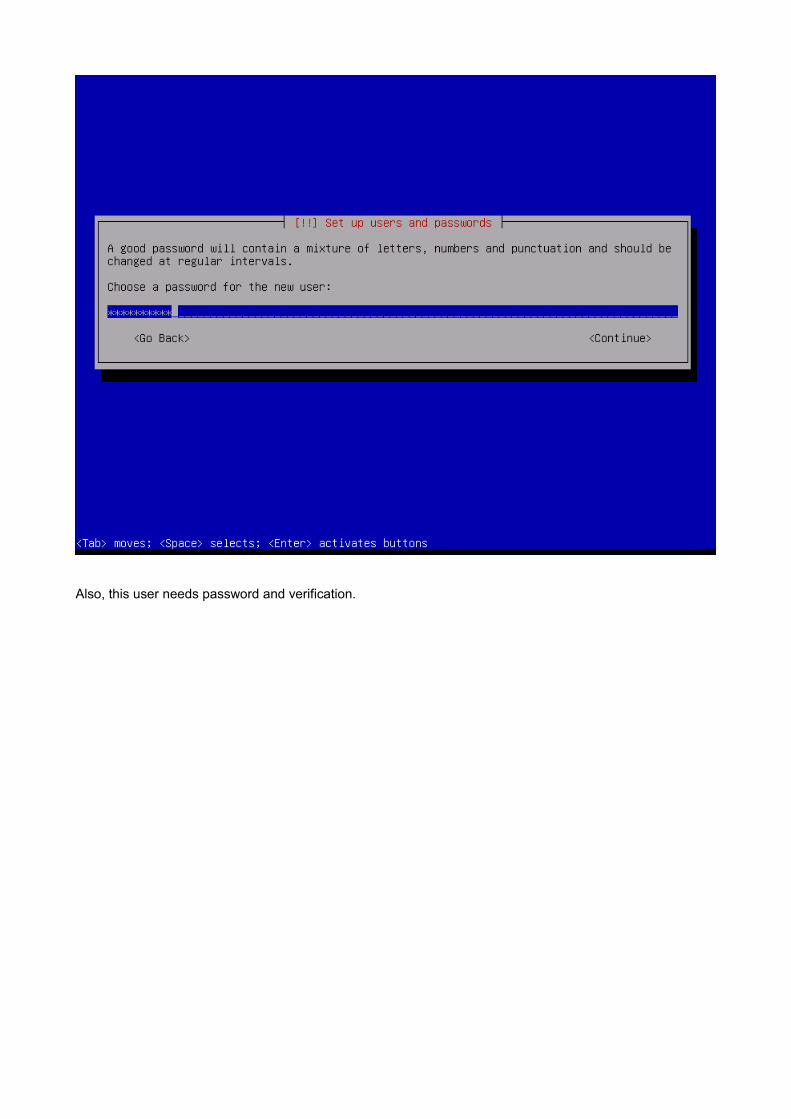
Also, this user needs password and verification.
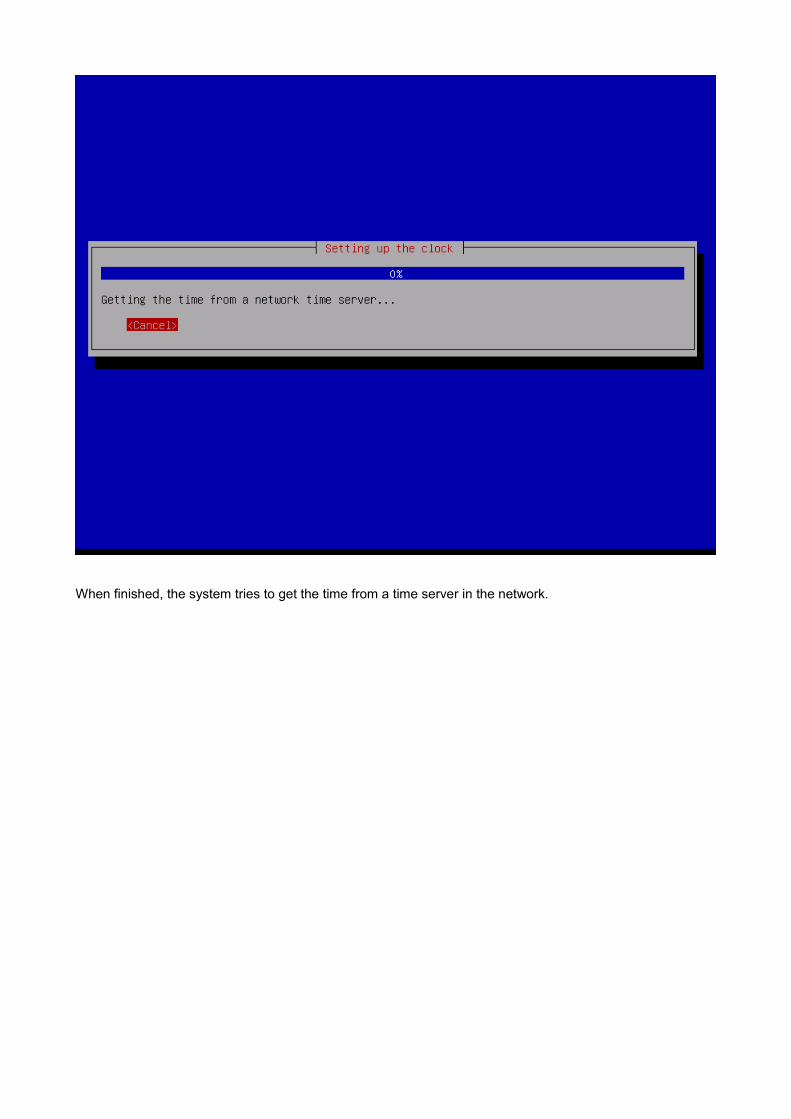
When finished, the system tries to get the time from a time server in the network.
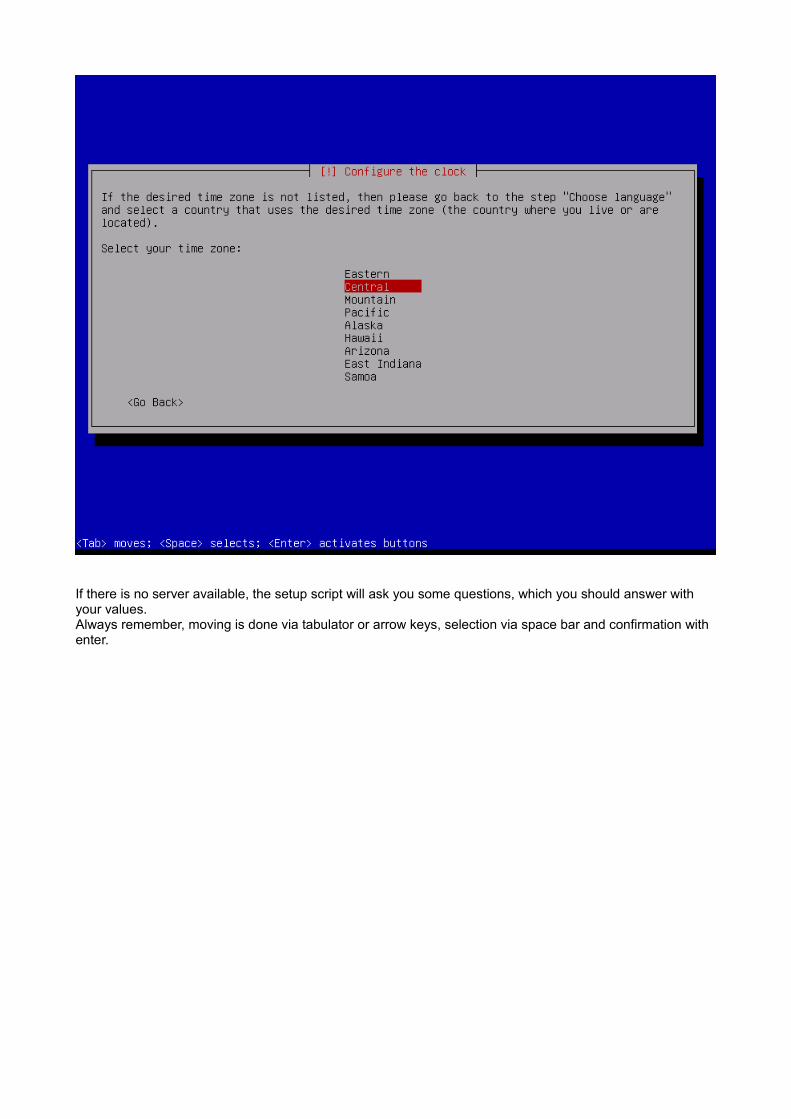
If there is no server available, the setup script will ask you some questions, which you should answer with your values.Always remember, moving is done via tabulator or arrow keys, selection via space bar and confirmation with enter.
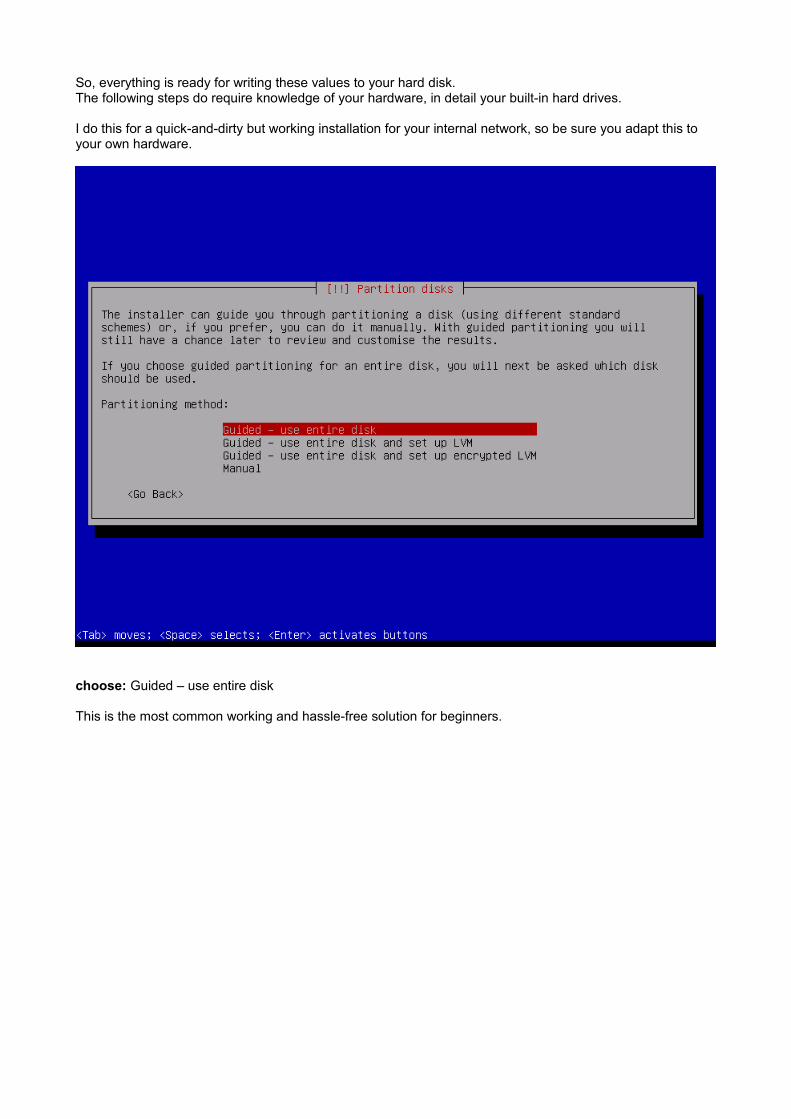
So, everything is ready for writing these values to your hard disk.The following steps do require knowledge of your hardware, in detail your built-in hard drives.
I do this for a quick-and-dirty but working installation for your internal network, so be sure you adapt this to your own hardware.
choose: Guided – use entire disk
This is the most common working and hassle-free solution for beginners.
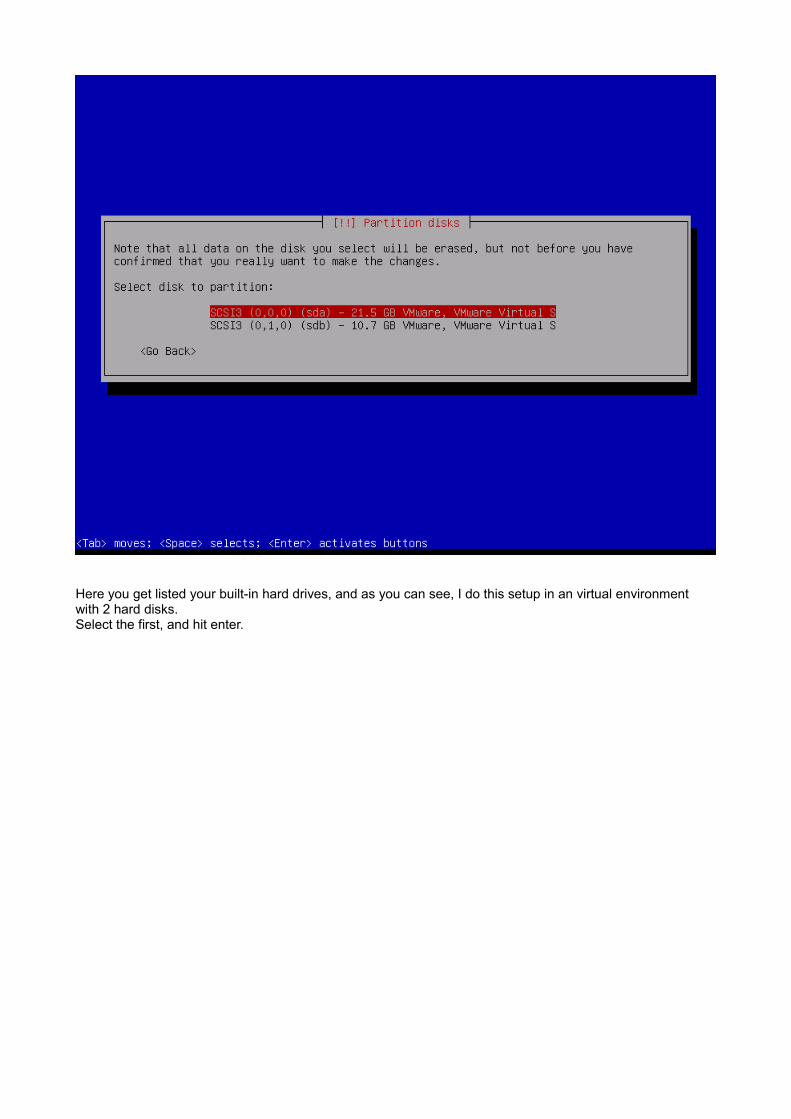
Here you get listed your built-in hard drives, and as you can see, I do this setup in an virtual environment with 2 hard disks.Select the first, and hit enter.
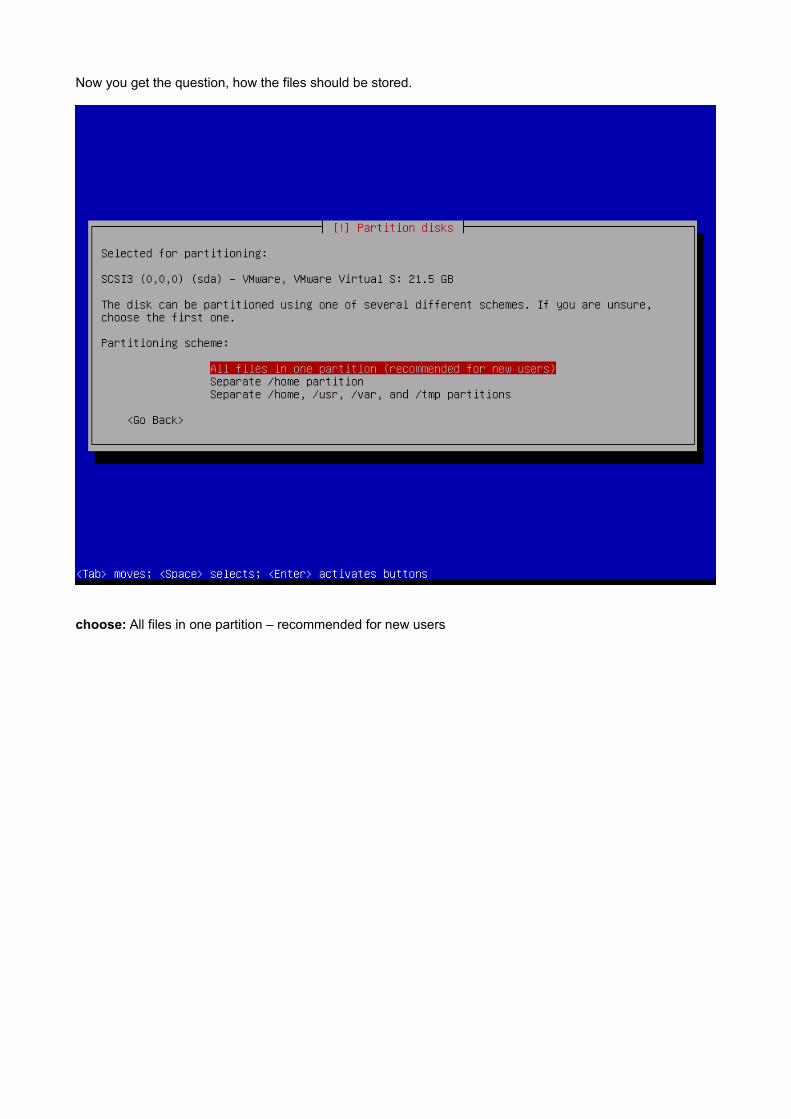
Now you get the question, how the files should be stored.
choose: All files in one partition – recommended for new users
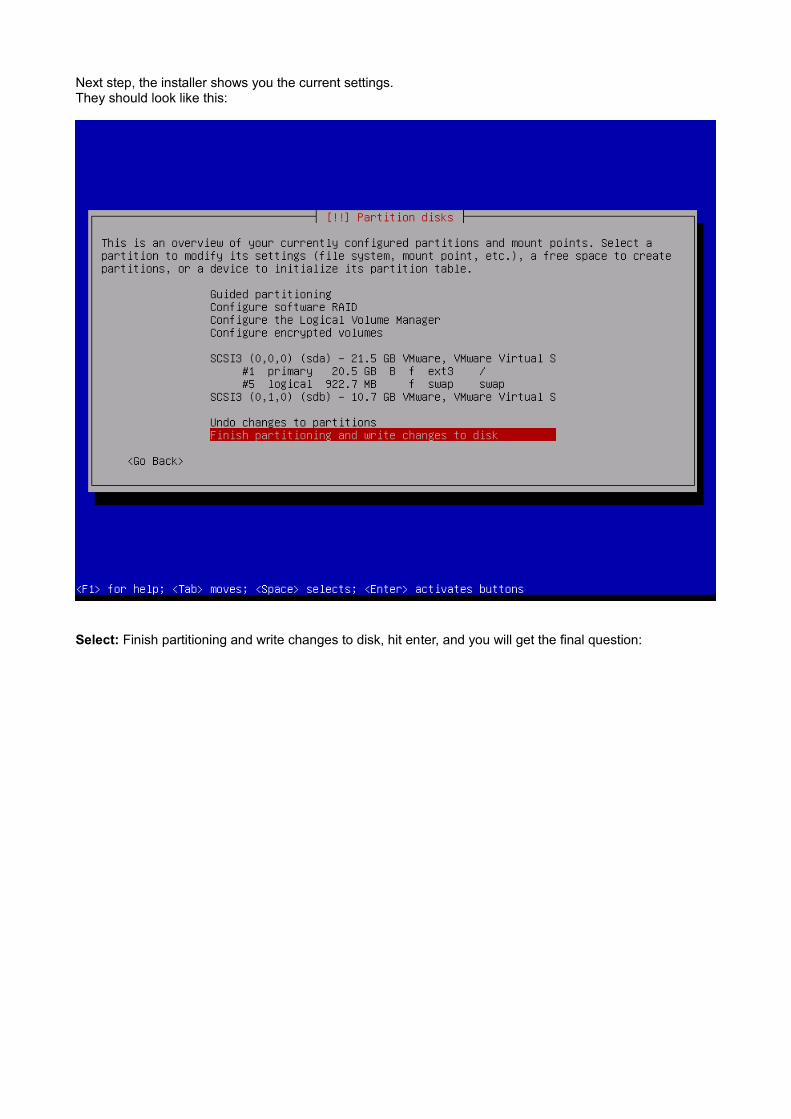
Next step, the installer shows you the current settings.They should look like this:
Select: Finish partitioning and write changes to disk, hit enter, and you will get the final question:
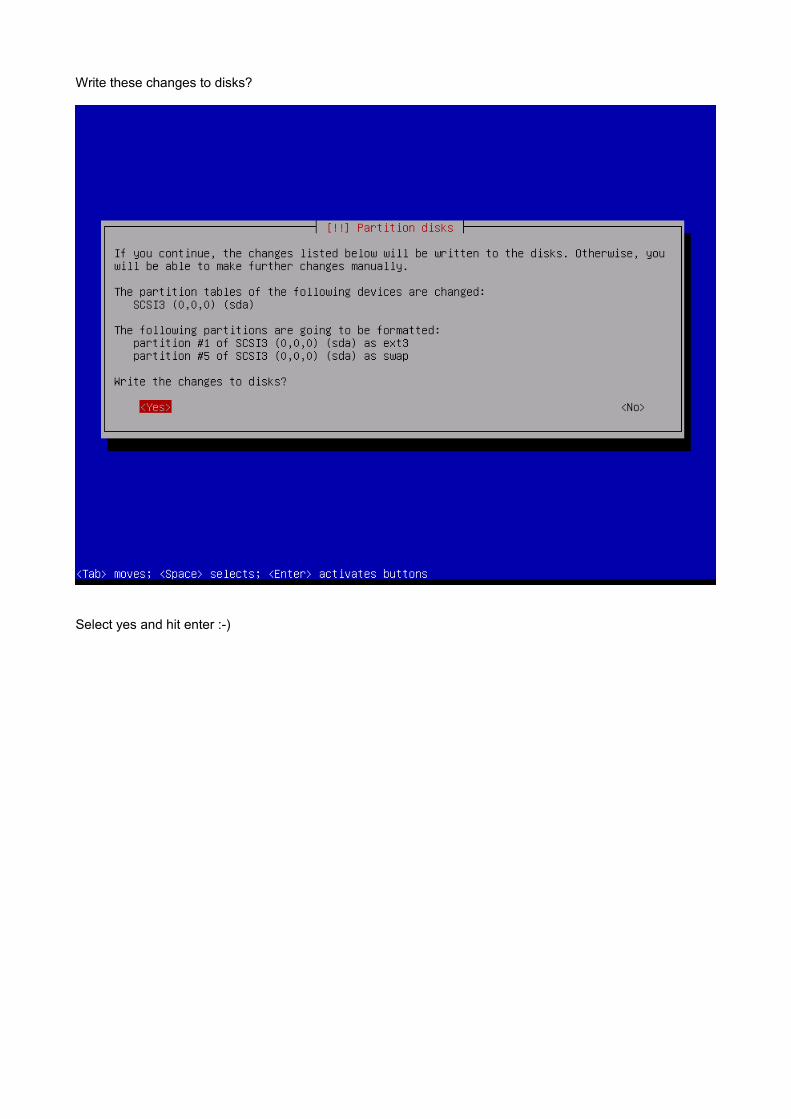
Write these changes to disks?
Select yes and hit enter :-)
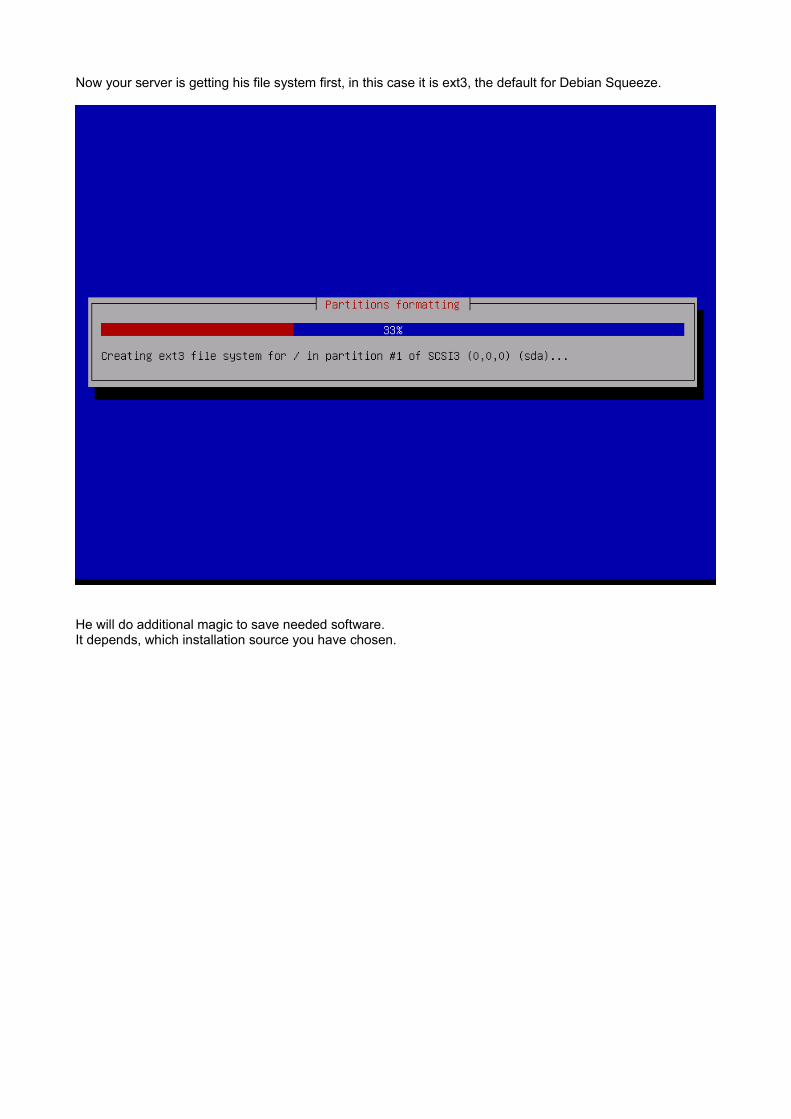
Now your server is getting his file system first, in this case it is ext3, the default for Debian Squeeze.
He will do additional magic to save needed software.It depends, which installation source you have chosen.
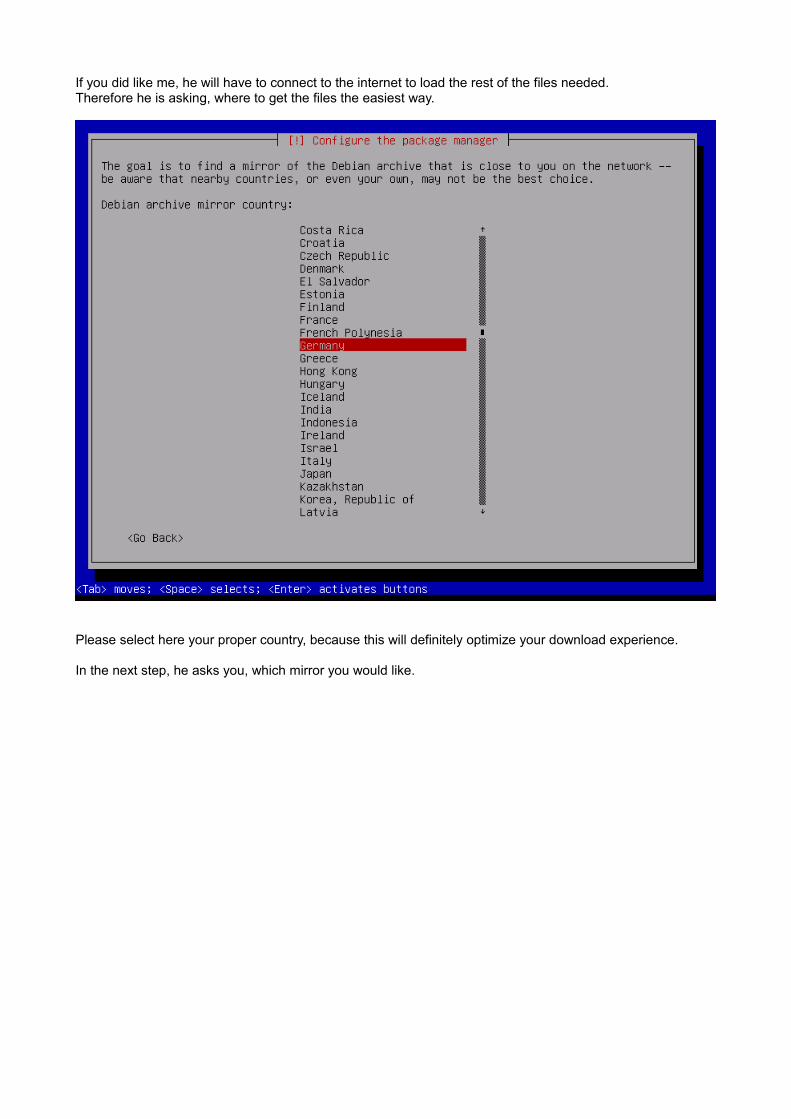
If you did like me, he will have to connect to the internet to load the rest of the files needed.Therefore he is asking, where to get the files the easiest way.
Please select here your proper country, because this will definitely optimize your download experience.
In the next step, he asks you, which mirror you would like.
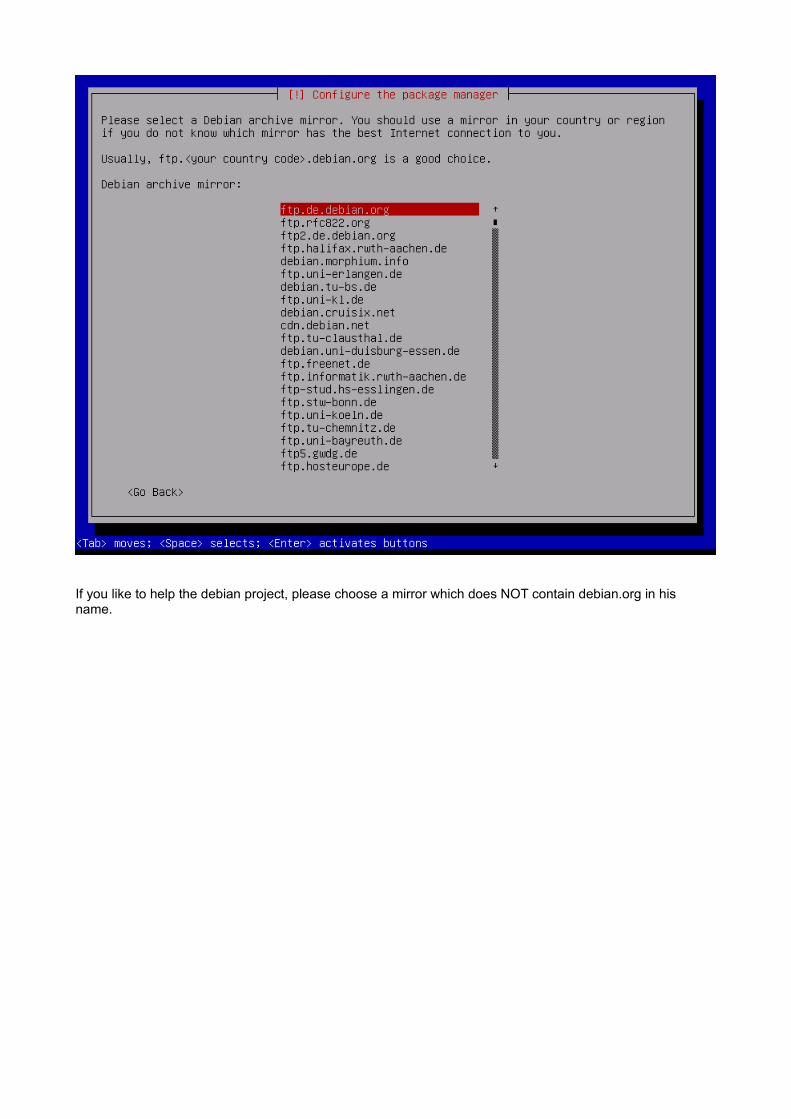
If you like to help the debian project, please choose a mirror which does NOT contain debian.org in his name.
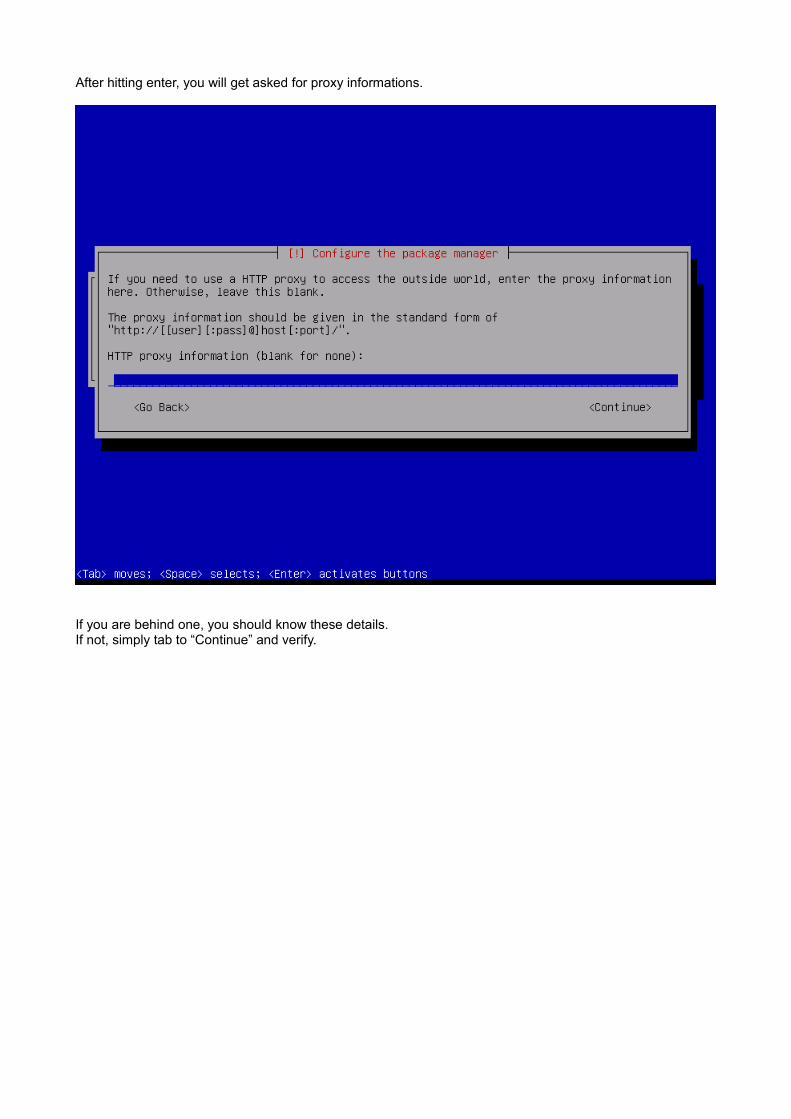
After hitting enter, you will get asked for proxy informations.
If you are behind one, you should know these details.If not, simply tab to “Continue” and verify.
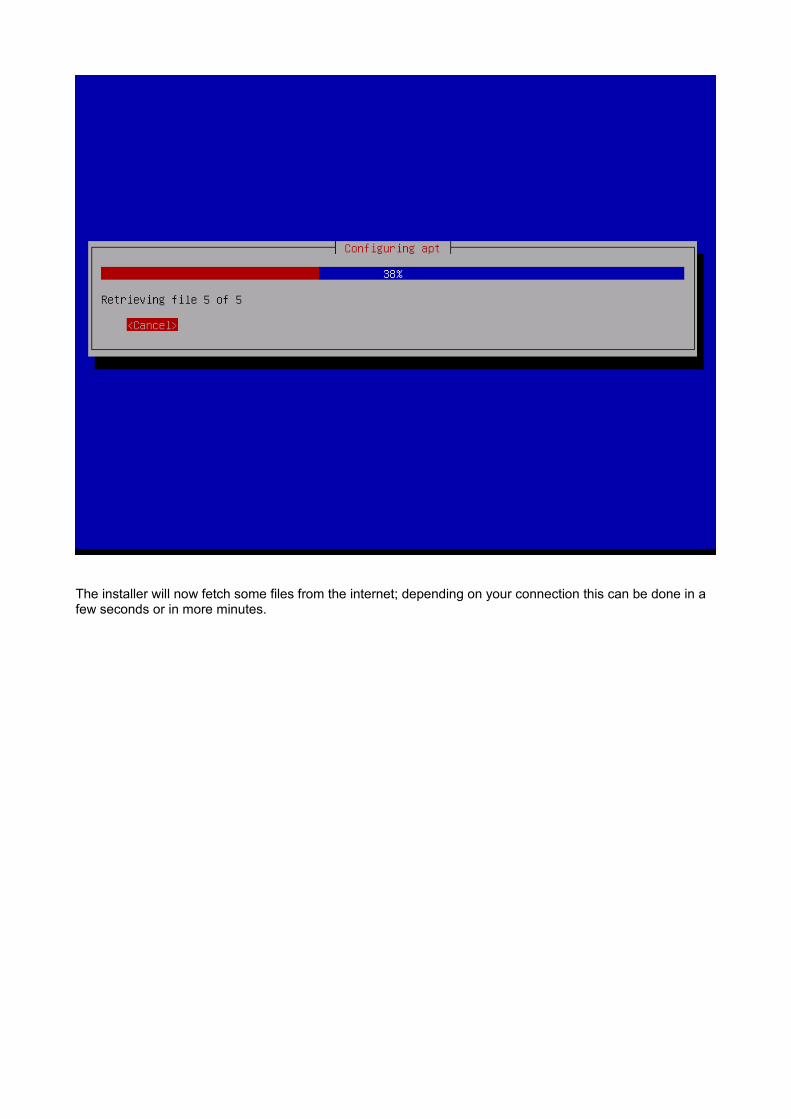
The installer will now fetch some files from the internet; depending on your connection this can be done in a few seconds or in more minutes.
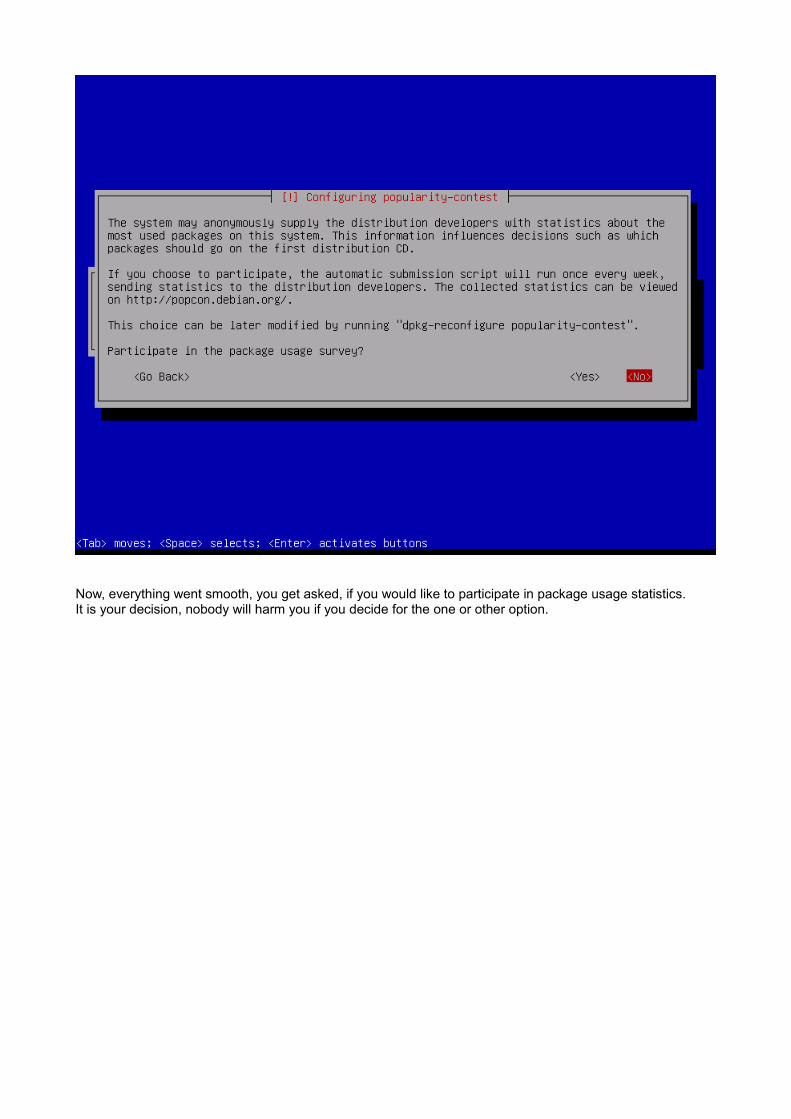
Now, everything went smooth, you get asked, if you would like to participate in package usage statistics.It is your decision, nobody will harm you if you decide for the one or other option.

Some essential selections have now to be made:
Debian offers you with * (asterisks) to mark which packages should be installed automatically.Please select nothing than the ssh server and standard system utilities, otherwise you will have to configure A LOT, what is not really necessary.By default, the “Graphical Desktop Environment” is preselected, navigate to it with arrow keys/tabulator and press Space bar to deselect it.
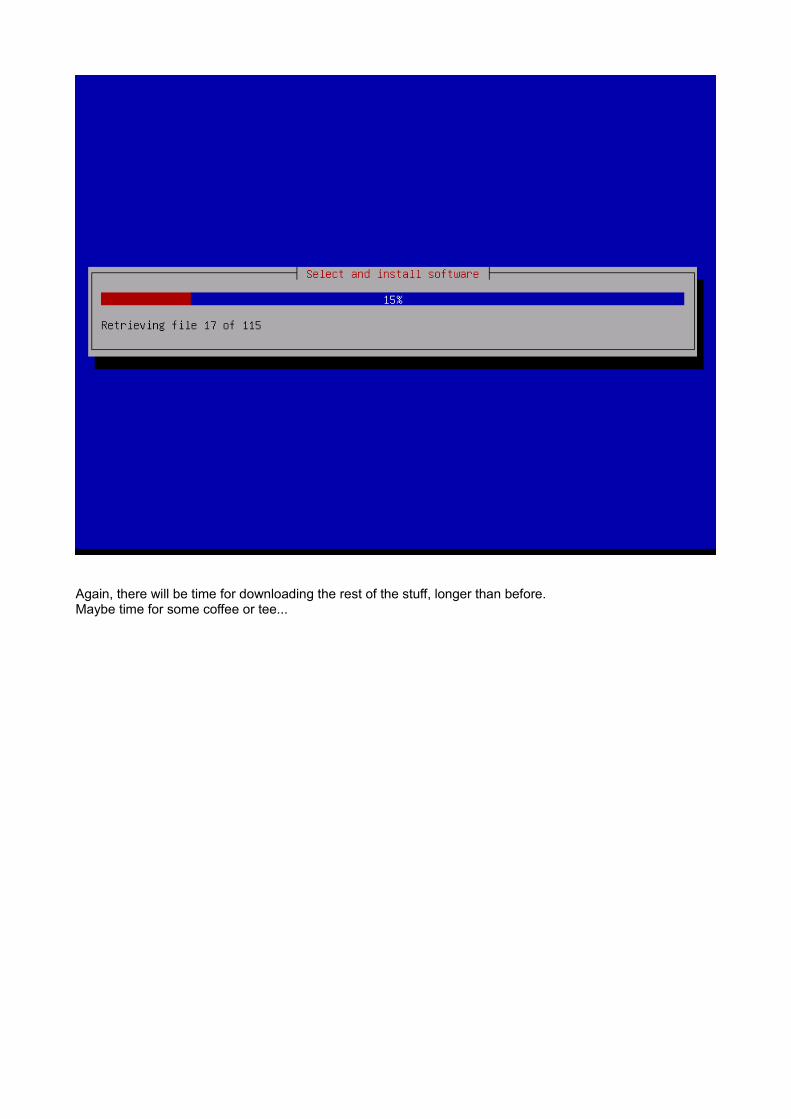
Again, there will be time for downloading the rest of the stuff, longer than before.Maybe time for some coffee or tee...
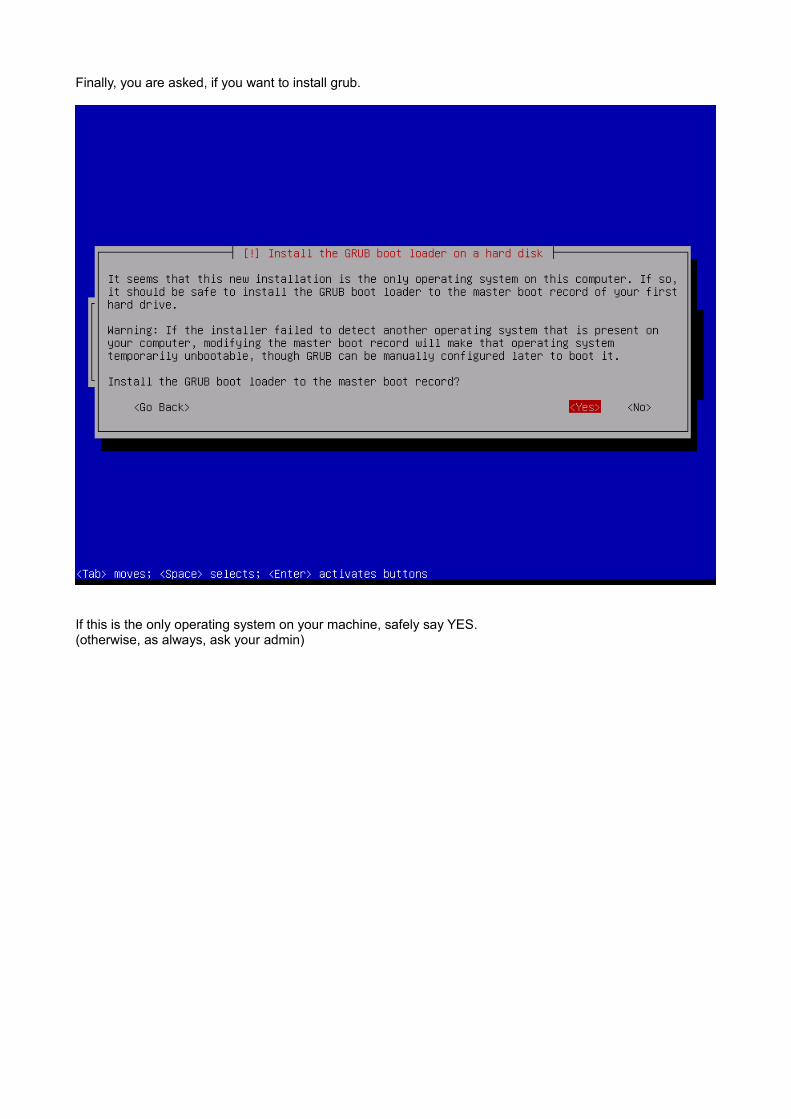
Finally, you are asked, if you want to install grub.
If this is the only operating system on your machine, safely say YES.(otherwise, as always, ask your admin)

Hooray, installation complete, the installer tells you, everything was okay, and you should now remove your install cd and continue.
Your server will boot now Debian for the first time :-)
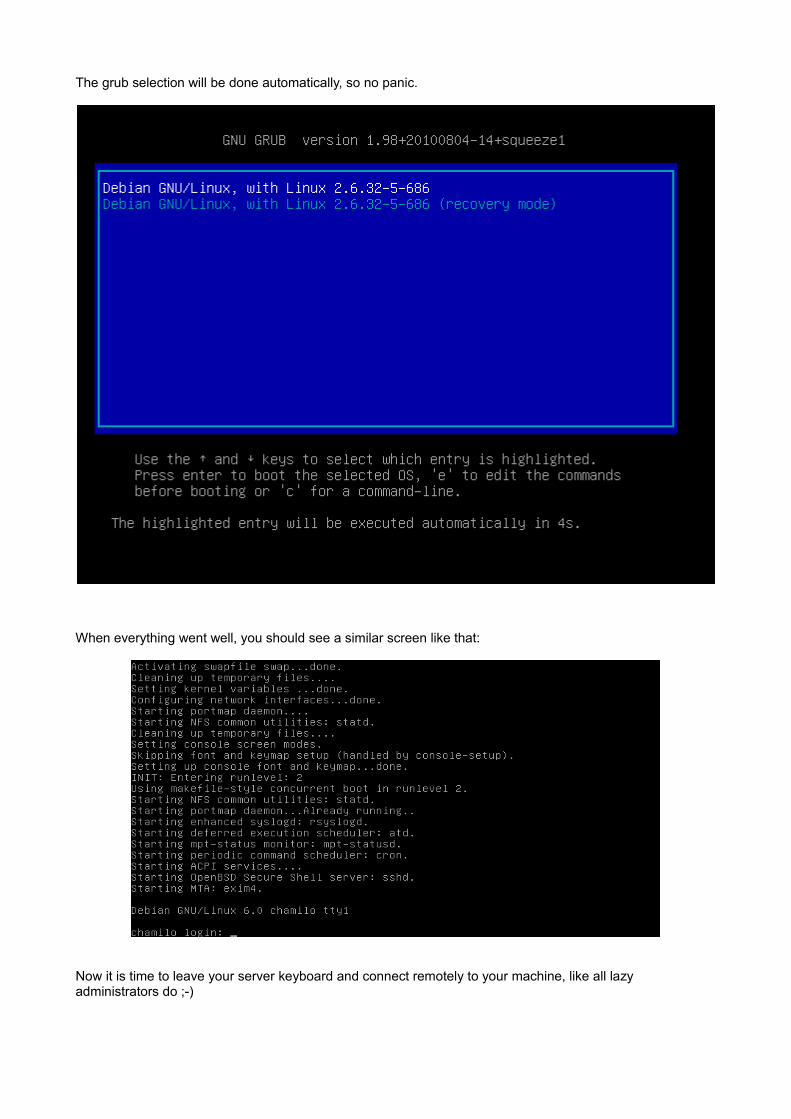
The grub selection will be done automatically, so no panic.
When everything went well, you should see a similar screen like that:
Now it is time to leave your server keyboard and connect remotely to your machine, like all lazy administrators do ;-)
Connecting remote
On windows based systems, your choice of software should go to PuTTY and WinSCP.I assume you have proper skills to install software.
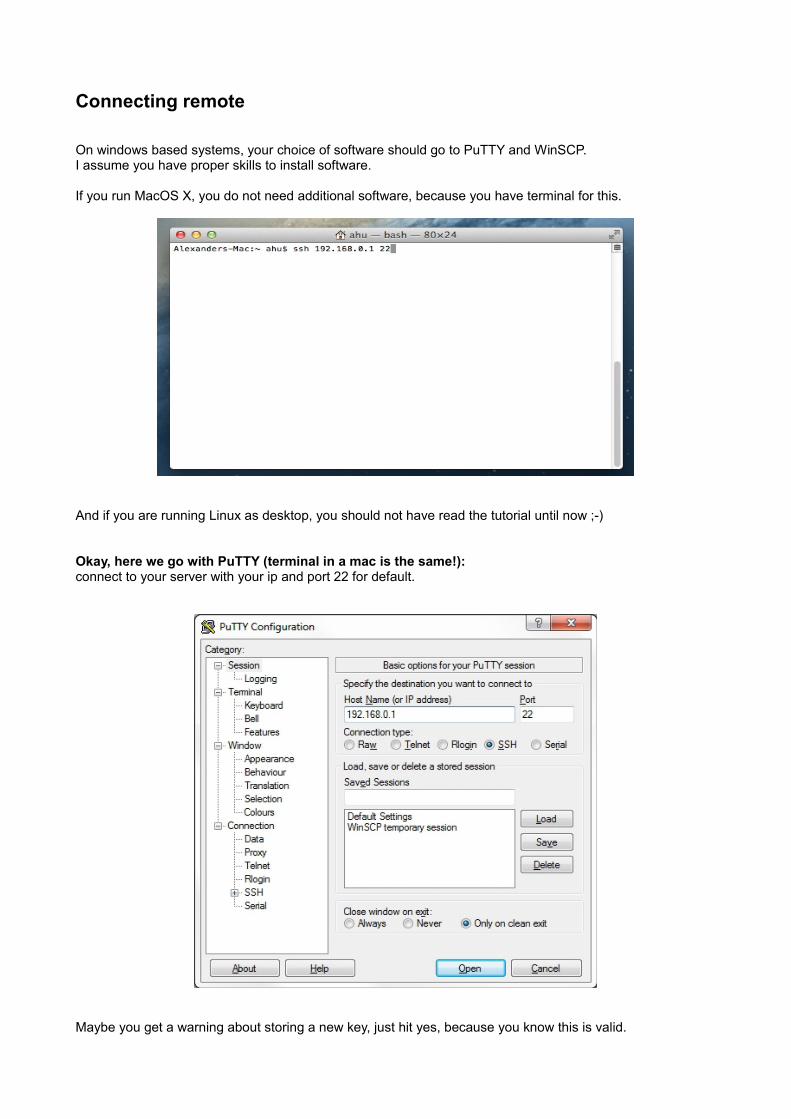
If you run MacOS X, you do not need additional software, because you have terminal for this.
And if you are running Linux as desktop, you should not have read the tutorial until now ;-)
Okay, here we go with PuTTY (terminal in a mac is the same!):connect to your server with your ip and port 22 for default.
Maybe you get a warning about storing a new key, just hit yes, because you know this is valid.
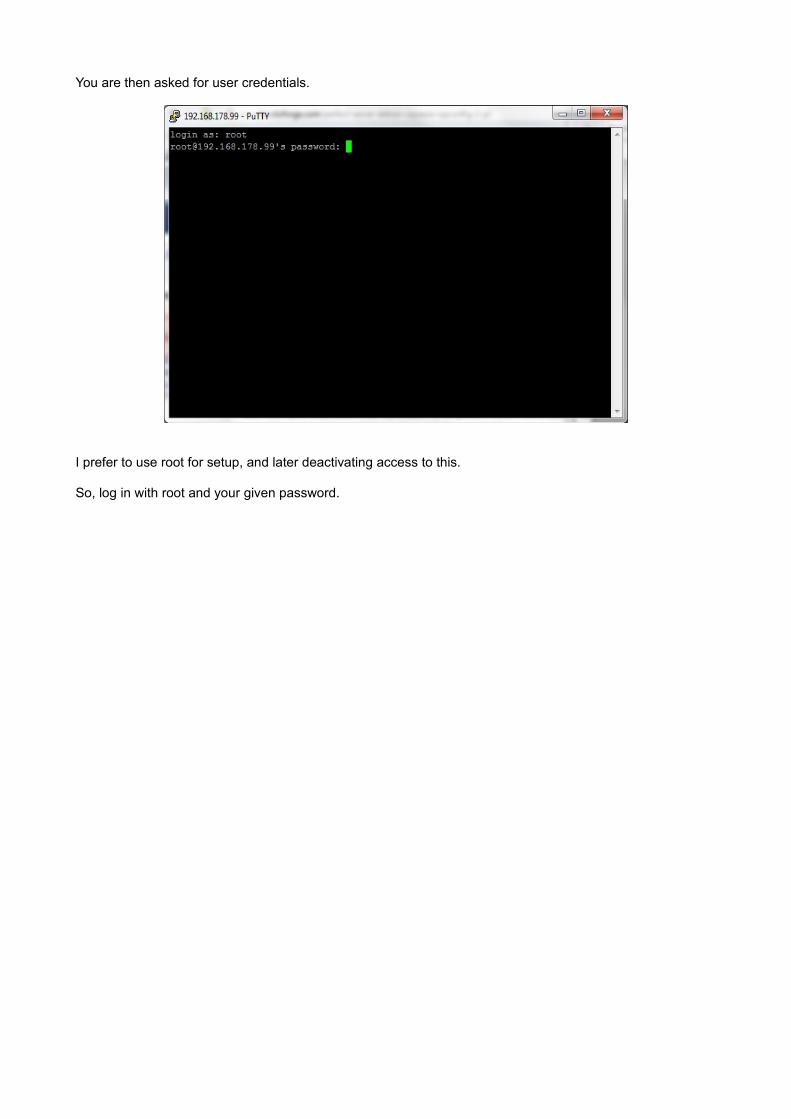
You are then asked for user credentials.
I prefer to use root for setup, and later deactivating access to this.
So, log in with root and your given password.

Installing basic packages
Now, first we are installing some software packages.You can just copy the commands into your console window and hit enter.They are written in a different font, so you can exactly identify them.If there are special configuations, I will describe them in detail.
First, we want a real actual system, so we do:
apt-get update
to update the package database, and then we write an:
apt-get upgrade
to get the most recent version of all packages installed.If there are updates, just answer with yes.
In general, you can send these commands each week or so, keeping your system up to date until the next release of Debian.
After our update, we will modify the default shell of the system back to a more usual one.It is not REALLY necessary, but I have seen more problems not doing so.
dpkg-reconfigure dash
You will get asked, if you want dash as default system shell, please answer with no.
Now, we install some packages for compilation, later administrative tasks and bughunting:
apt-get install binutils cpp fetchmail flex gcc libarchive-zip-perl libc6-dev libcompress-zlib-perl libdb-dev libpcre3 libpopt-dev lynx m4 make ncftp nmap openssl perl perl-modules unzip zip zlib1g-dev autoconf automake1.9 libtool bison autotools-dev g++ build-essential devscripts
Chamilo runs best with PHP and MySQL, so we gonna install the MySQL server:
apt-get install mysql-server mysql-client libmysqlclient-dev
You get asked for MySQL root password, please provide your password.
For running Chamilo, we also need a webserver.The following command also installs ssl support, but if you are sure you don't need it, you can cut of the last word:
apt-get install apache2 apache2-doc apache2-mpm-prefork apache2-utils apache2-suexec libexpat1 ssl-cert
Webserver is installed, so we are ready to get PHP running:
apt-get install libapache2-mod-php5 php5 php5-cli php5-common php5-curl php5-dev php5-gd php5-intl php-pear php5-imagick php5-mcrypt php5-memcache php5-ming php5-mysql php5-pspell php5-recode php5-sqlite php5-suhosin php5-tidy php5-xcache php5-xmlrpc php5-xsl php5-ldap
Sure, you don't need ALL packages, but most of them are handy for performance tuning.

Now, we tell our webserver, that we want to enable certain modules:
a2enmod rewrite && a2enmod suexec && a2enmod include
For getting these active, we have to restart the Apache:
/etc/init.d/apache2 restart
Finally, we want actual time and date, so we install:
apt-get install ntp ntpdate

Chamilo RAPID / Powerpoint converter
If you want the powerpoint converter, you need a java environment, and you need openoffice in headless mode.
Here we go:
apt-get install openjdk-6-jre openjdk-6-jdk openjdk-6-jre-headless
Java is now installed, time to get openoffice.org (beware, this will take some time!):
apt-get install openoffice.org
When the installation of OpenOffice has finished, we have to add typical used fonts.Therefore, you have to use an editor, and change some system settings.No worry, i won't use vi, you will get a nice alternative:
nano /etc/apt/sources.list
You should see something like this:
Please append on each line at the end:
contrib non-free
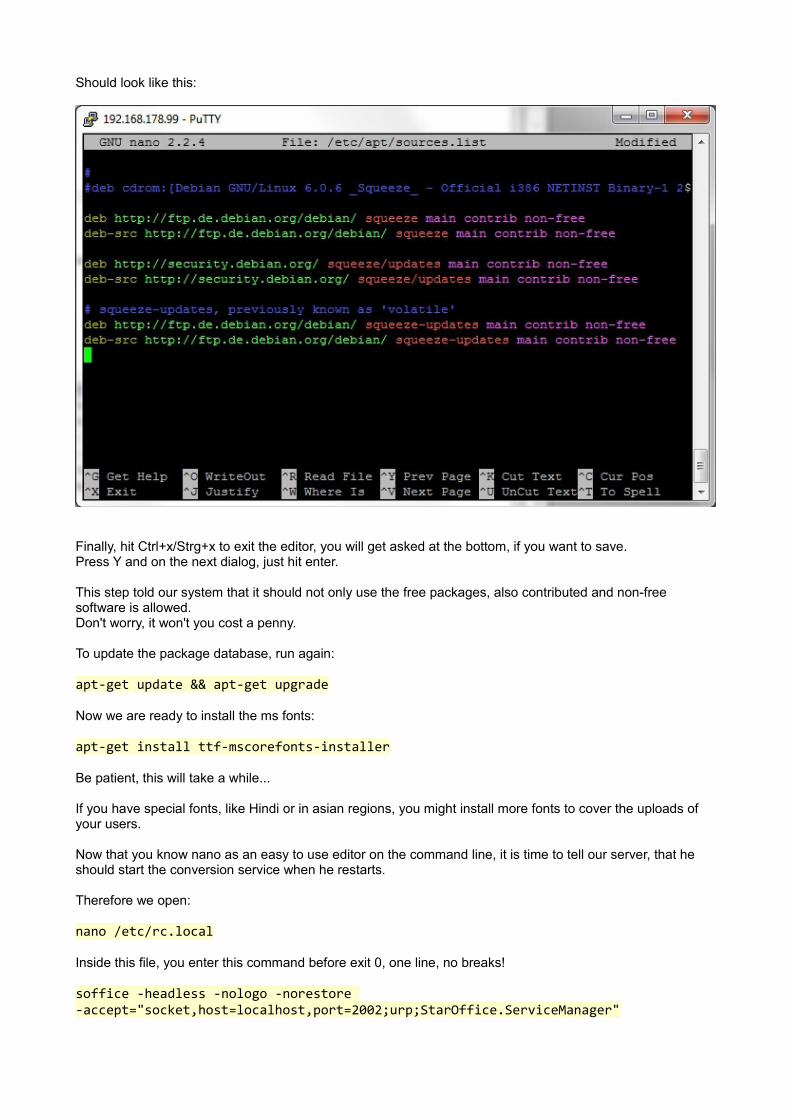
Should look like this:
Finally, hit Ctrl+x/Strg+x to exit the editor, you will get asked at the bottom, if you want to save.Press Y and on the next dialog, just hit enter.
This step told our system that it should not only use the free packages, also contributed and non-free software is allowed.Don't worry, it won't you cost a penny.
To update the package database, run again:
apt-get update && apt-get upgrade
Now we are ready to install the ms fonts:
apt-get install ttf-mscorefonts-installer
Be patient, this will take a while...
If you have special fonts, like Hindi or in asian regions, you might install more fonts to cover the uploads of your users.
Now that you know nano as an easy to use editor on the command line, it is time to tell our server, that he should start the conversion service when he restarts.
Therefore we open:
nano /etc/rc.local
Inside this file, you enter this command before exit 0, one line, no breaks!
soffice -headless -nologo -norestore -accept="socket,host=localhost,port=2002;urp;StarOffice.ServiceManager"
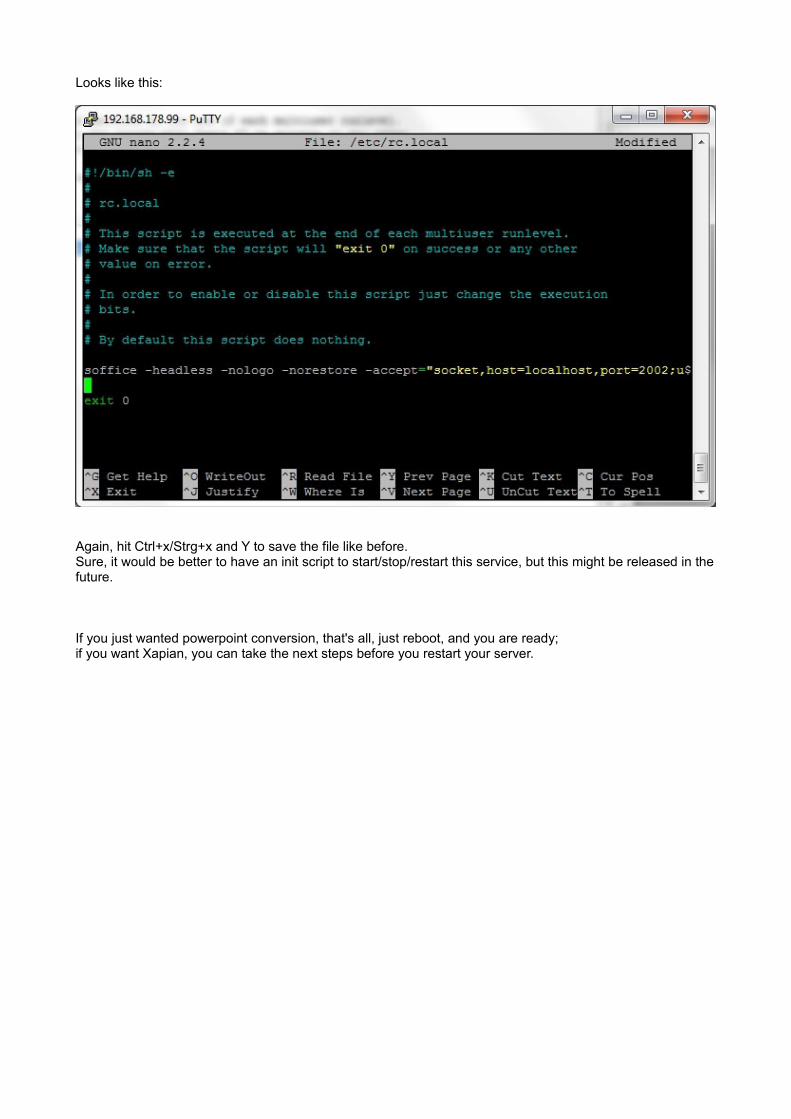
Looks like this:
Again, hit Ctrl+x/Strg+x and Y to save the file like before.Sure, it would be better to have an init script to start/stop/restart this service, but this might be released in the future.
If you just wanted powerpoint conversion, that's all, just reboot, and you are ready;if you want Xapian, you can take the next steps before you restart your server.

Compiling xapian-bindings in Debian Squeeze
Due license problems, the Debian project was not able to integrate Xapian as an easy-to-install package, so we have to do this our own.
The following steps require accuracy, so do exactly what you read, even if there show up error messages :-)
Again, we have to tell our system to add more locations to look for software.
nano /etc/apt/sources.list
At the bottom, end these lines:
# Backportsdeb http://backports.debian.org/debian-backports squeeze-backports main contrib non-freedeb-src http://backports.debian.org/debian-backports squeeze-backports main contrib non-free
Save the file with Ctrl+x/Strg+x Y and with:
apt-get update && apt-get upgrade
your system will know a new location where to look for software.
Now we will compile xapian-core first (be sure to have a pot of tea or something to read):
apt-get install uuid-dev python-dev ruby-dev tcl-dev ruby1.9.1-dev && apt-get source -b xapian-core
Now you have the base packages, which gets installed by:
dpkg -i *.deb
Well, compiling xapian-bindings with user root seems to break some things, so we have to take our previous user with no admin rights and allow him temporary to do so.Therefore we install sudo:
apt-get install sudo && adduser <username> sudo(where <username> should be YOUR username, in my example management)
You will see, this user will be added to the group sudo, which is by default enabled to fire the command sudo.
Let's see how it works:
su - <username>
We have a shell, with no administrative rights, so each time we want to do a system relevant task, we have to prepend the command sudo (you still just have to copy, i prepend this when neccessary).
For prevent later occuring problems, we just call sudo now with a simple command:
sudo apt-get update && sudo apt-get upgrade
You only get this notice once, so read it carefully and understand that you can mess up pretty much, if you don't care.Enter your password, when you have finished reading.
Next, we create a new folder, where we will compile the Xapian packages:
mkdir xapian && cd xapian
Now we get the sources we need:
apt-get source xapian-bindings
Change to the source folder with:
cd xapian-bindings-1.2.*
rm debian/control && env PHP_VERSIONS=5 debian/rules maint
Now the tricky part, why you just can't compile it the debian way like you did with xapian core:
cp php/php5/xapian.php php/
Now it would be nice if you have another sort of tea, because the next step will take a minute or two (or maybe an hour...) ;-)
debuild -e PHP_VERSIONS=5 -us -uc
But finally, you get your xapian-bindings for PHP5 on Debian!To install it, you can do it with sudo, but i prefer just to switch back to root, and do the rest:
exit
You are root again :-)
First, remove sudo, as you usually don't need it.If you do tasks as root, you can always switch to this user.
apt-get –purge remove sudo
dpkg -i /home/<username>/xapian/php5-xapian*.deb
Always cleaning up:
rm -R /home/<username>/xapian && rm -R /root/xapian
Prepare the system
So, let's start configuration.
First, we start with the apache server.The Debian package has some issues which should be fixed, but first clean up unneccessary things:
rm /etc/apache2/conf.d/apache2-doc
nano /etc/apache2/conf.d/security
Here you change ServerTokens to: ProdServerSignature Off
Save the file, and head to the next one:
nano /etc/apache2/ports.conf
Delete the line, or set a # before it:# NameVirtualHost *:80
Now it is time to configure PHP to the needs of your installation:
nano /etc/php5/apache2/php.ini
To navigate quickly through this file, press Ctrl+w/Strg+w
Serch for the following values, and modify them as listed.Also, take care that there is no semicolon as first character of the line!
short_open_tag = Offsafe_mode = Offopen_basedir = /var/www:/usr/bin:/bin/:/usr/local/bin:/usr/share/expose_php = Offmax_execution_time = 3600max_input_time = 3600memory_limit = 256Mdisplay_errors = Offlog_errors = Onpost_max_size = 128Minclude_path = „.:/usr/share/php“file_uploads = Onupload_max_filesize = 128Msendmail_path = /usr/sbin/sendmail -t -i -f [email protected]_httponly = Ondate.timezone = "Europe/Berlin"(match the last one to your own!)

Now we copy these settings:
cp /etc/php5/apache2/php.ini /etc/php5/cli/
There is also an error in the ming module, so we just do a:
nano /etc/php5/conf.d/ming.ini
and replace the first # with a semicolon ;
So, things are ready for Chamilo!

Getting Chamilo source
You just have to decide, if youprefer to have a stable older version, or the newest one with more features.
In my case, i like the nightly builds, because they have more fixed bugs ;-)
So we go to:http://code.google.com/p/chamilo/downloads/list
where we can also get the last stable release, but in my case, i will download the actual nightly:
cd /var/ && wget http://chamilo.googlecode.com/files/chamilo-1.9.4-nightly-2012-12-05.zip -Olatest.zip && unzip latest.zip && rm -R www/ && mv chamilo* www/
Now setting some file permissions:
chown -R www-data:www-data /var/www
That's all, Chamilo is now ready to install via your web browser!
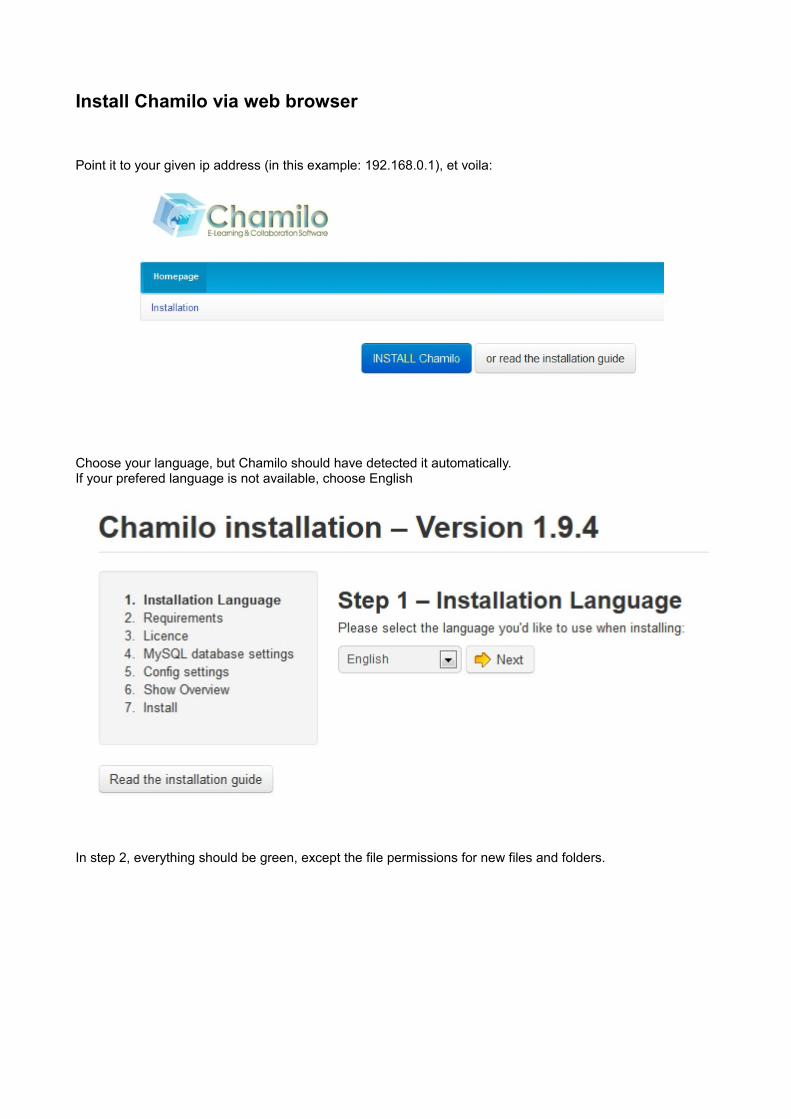
Install Chamilo via web browser
Point it to your given ip address (in this example: 192.168.0.1), et voila:
Choose your language, but Chamilo should have detected it automatically.If your prefered language is not available, choose English
In step 2, everything should be green, except the file permissions for new files and folders.
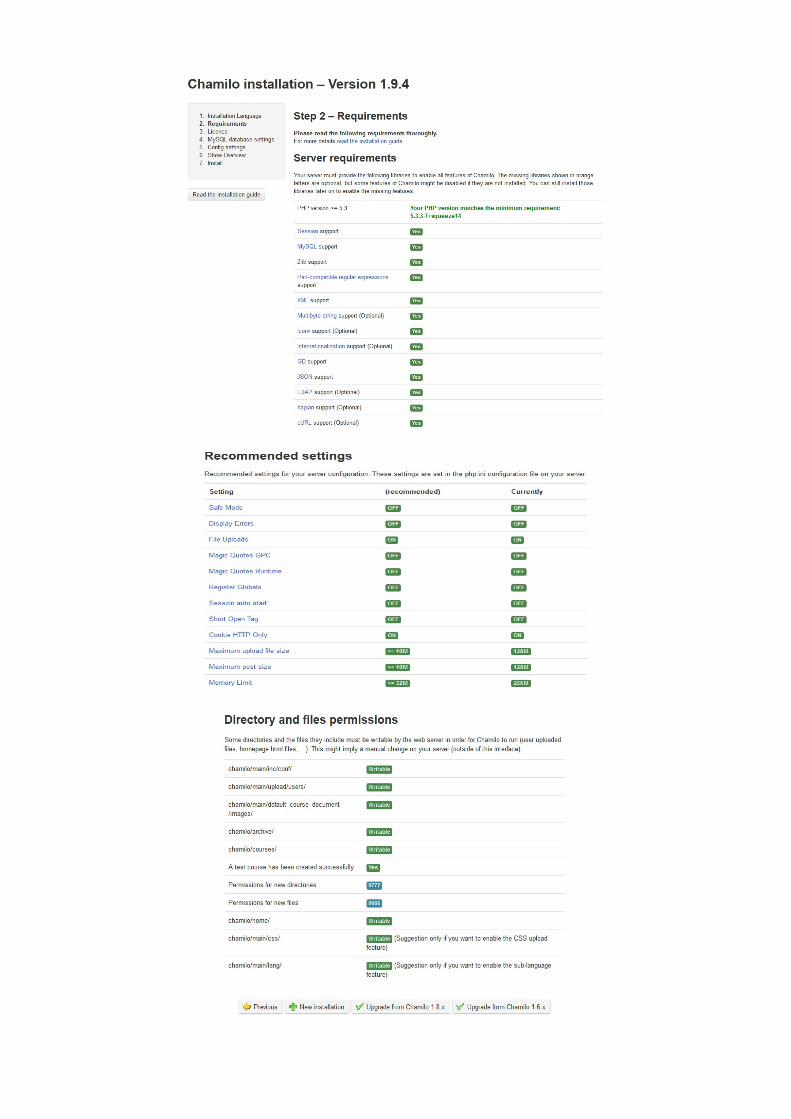

Hit the button [new installation], and you are at step 3:
Chamilo is free software distributed under the GNU General Public licence (GPL), and you can read this license in this frame.Read it thoroughly and if you accept it, check the box below.
Now, scroll down, and you will see a form you can fill and send it.It depends on you if you would do so, but i reccomend you should.
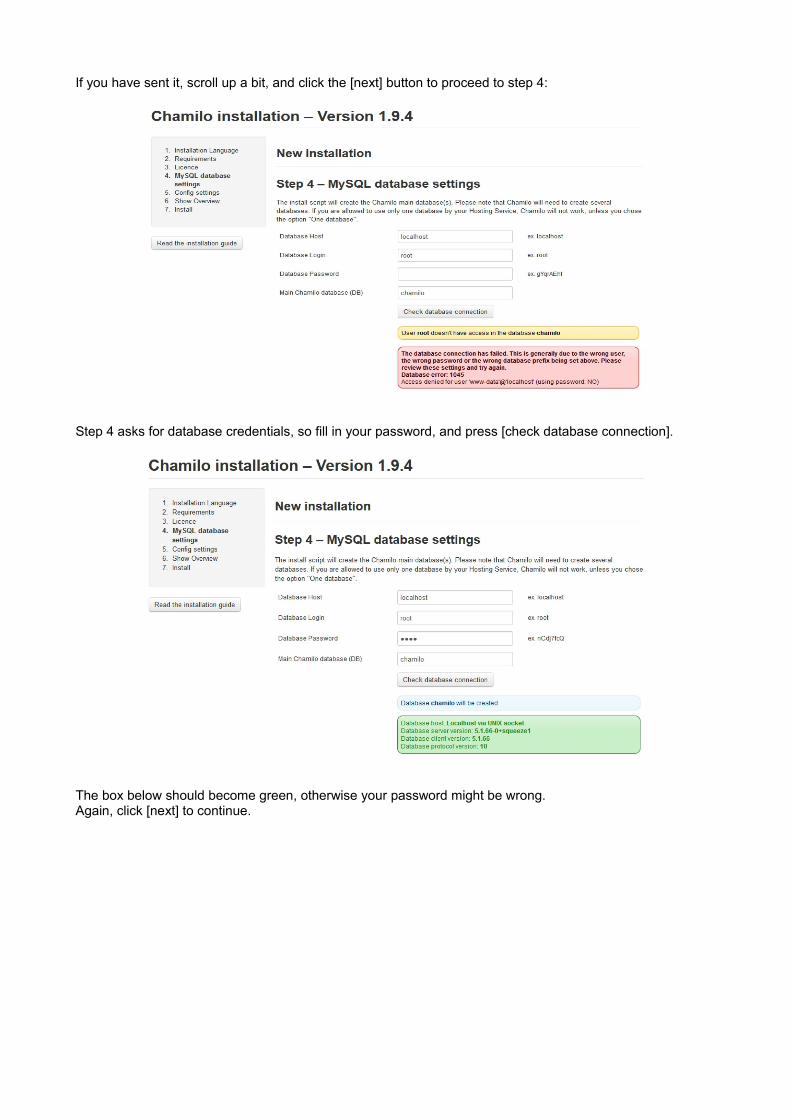
If you have sent it, scroll up a bit, and click the [next] button to proceed to step 4:
Step 4 asks for database credentials, so fill in your password, and press [check database connection].
The box below should become green, otherwise your password might be wrong.Again, click [next] to continue.
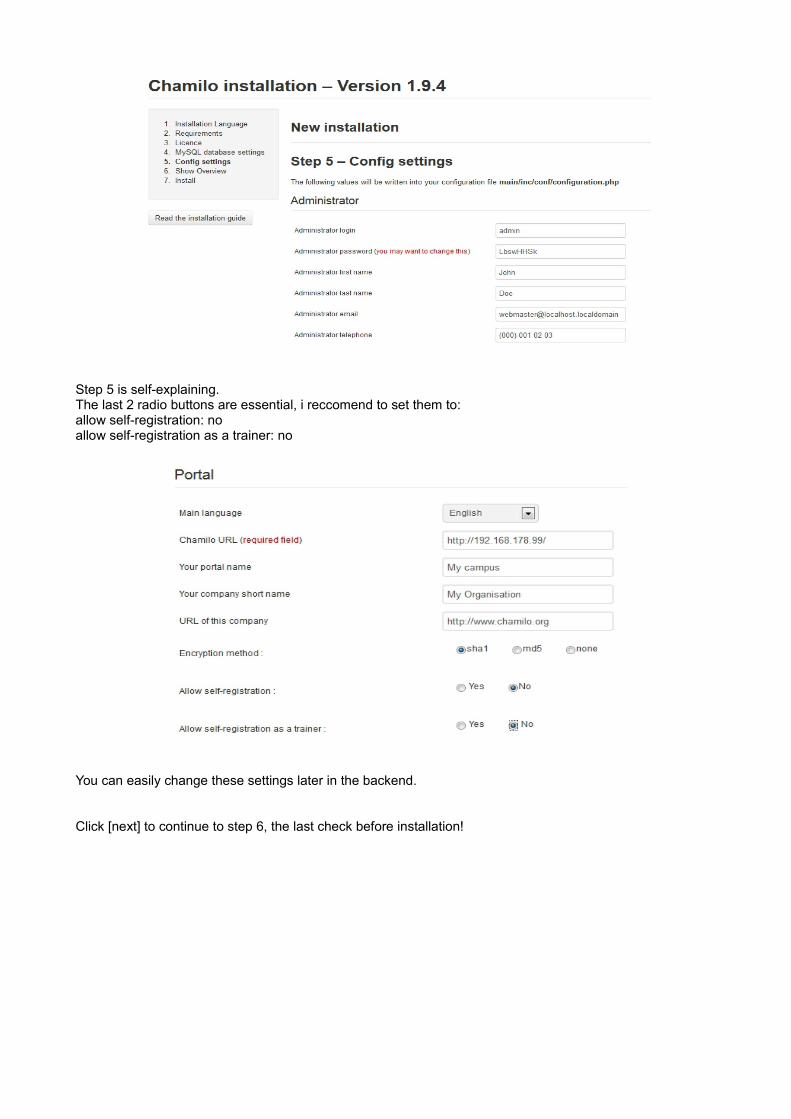
Step 5 is self-explaining.The last 2 radio buttons are essential, i reccomend to set them to:allow self-registration: noallow self-registration as a trainer: no
You can easily change these settings later in the backend.
Click [next] to continue to step 6, the last check before installation!
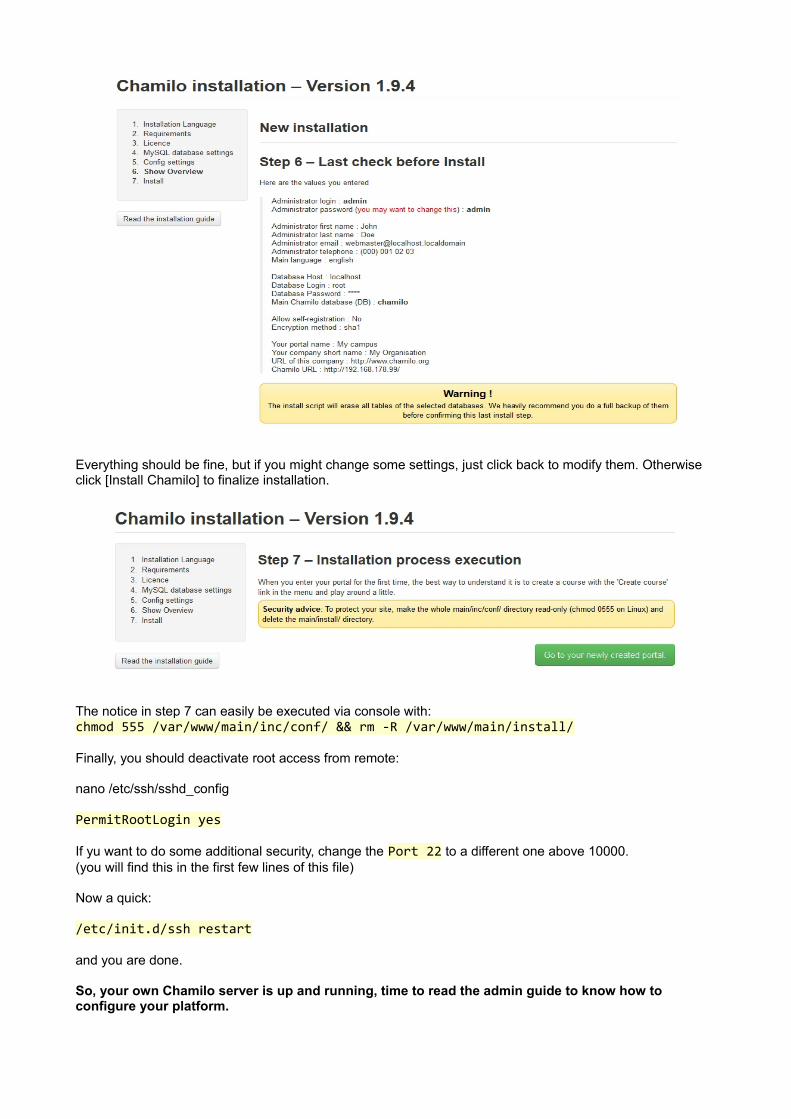
Everything should be fine, but if you might change some settings, just click back to modify them. Otherwise click [Install Chamilo] to finalize installation.
The notice in step 7 can easily be executed via console with:chmod 555 /var/www/main/inc/conf/ && rm -R /var/www/main/install/
Finally, you should deactivate root access from remote:
nano /etc/ssh/sshd_config
PermitRootLogin yes
If yu want to do some additional security, change the Port 22 to a different one above 10000.(you will find this in the first few lines of this file)
Now a quick:
/etc/init.d/ssh restart
and you are done.
So, your own Chamilo server is up and running, time to read the admin guide to know how to configure your platform.
Appendix
Document license
All rights reserved.The permissions given by the copyleft license are indicated below.Copyright (c) 2012 opensource company.Permission is granted to copy, distribute and/or modify this document under the terms of the GNU Free Documentation License, Version 1.2 or any later version publishedby the Free Software Foundation;with no Invariant Sections, no FrontCover Texts, and no BackCover Texts.The contents of this tutorial is available under the copyleft license:GNU FDL: http://www.gnu.org/licenses/fdl.txtandCCBYSA: http://creativecommons.org/licenses/bysa/2.0/en/In the dynamic of a Free and Open community, any corrections or modifications of this tutorial are welcome at [email protected].
Version history
Date Contributor Contact Updates
08.12.12 Alexander Hu [email protected]
Initial release