Embed Size (px)
Citation preview
ELEMENTARY SCIENCE PROGRAM MATH, SCIENCE & TECHNOLOGY EDUCATION
A Collection of Learning Experiences
SIMPLE MACHINES
CATTARAUGUS-ALLEGANY BOCES GRADE 4
1
TABLE OF CONTENTS
Unit Overview .........................................................................................................2 Format & Background Information ..........................................................................2-9 Learning Experience #1 - Inclined Plane ................................................................10-16 Learning Experience #2 - Wedge............................................................................17 Learning Experience #3 - Screw.............................................................................18-19 Learning Experience #4 - Levers ............................................................................20-21 Learning Experience #5 - Pulleys ...........................................................................22-24 Learning Experience #6 - Wheel & Axle .................................................................25-26 Learning Experience #7 - Simple Machine Assessment .........................................27-30 Simple Machines Assessment Key ………..………………………………………...…31-33 More Ideas..............................................................................................................34-35 Inquiry & Process Skills ..........................................................................................36 Glossary..................................................................................................................37-38 Teacher References ...............................................................................................39-40
2
SIMPLE MACHINES GRADE 4
Unit Overview Machines are devices that help make the work of society easier. Machines make work easier by changing the size and/or direction of the force that is applied. There are six simple machines – inclined plane, wedge, screw, lever, pulley, and wheel-and-axle. Simple machines can be combined in all kinds of ways to create the machines we use everyday. The science skills emphasized in Simple Machines are collecting data, manipulating, constructing models, observing, and predicting.
Scheduling
This unit may take from four to six weeks to complete depending upon the goals of the teacher and interests of the students. Use of the section included in this manual called More Ideas may extend the time span of this kit.
Materials to be obtained locally: Please make one student activity book for each student. scissors metric ruler tape crayons copy paper pencils Caution
Remind students to wash their hands after handling any of the materials in the kit. Small objects should be handled with care.
About the Format Each learning experience is numbered and titled. Under each title is the objective for the learning experience.
Each learning experience page has two columns. The column on the left side of the page lists materials, preparations, basic skill processes, evaluation strategy, and vocabulary. The evaluation strategy is for the teacher to use when judging the student’s understanding of the learning experience.
The right column begins with a “Focus Question” which is typed in italicized print. The purpose of the “Focus Question” is to guide the teacher’s instruction toward the main idea of the learning experience. The “Focus Question” is not to be answered by the students. The learning experience includes direction for students, illustrations, and discussion questions. These discussion questions can be used as a basis for class interaction. A Student Assessment has been
3
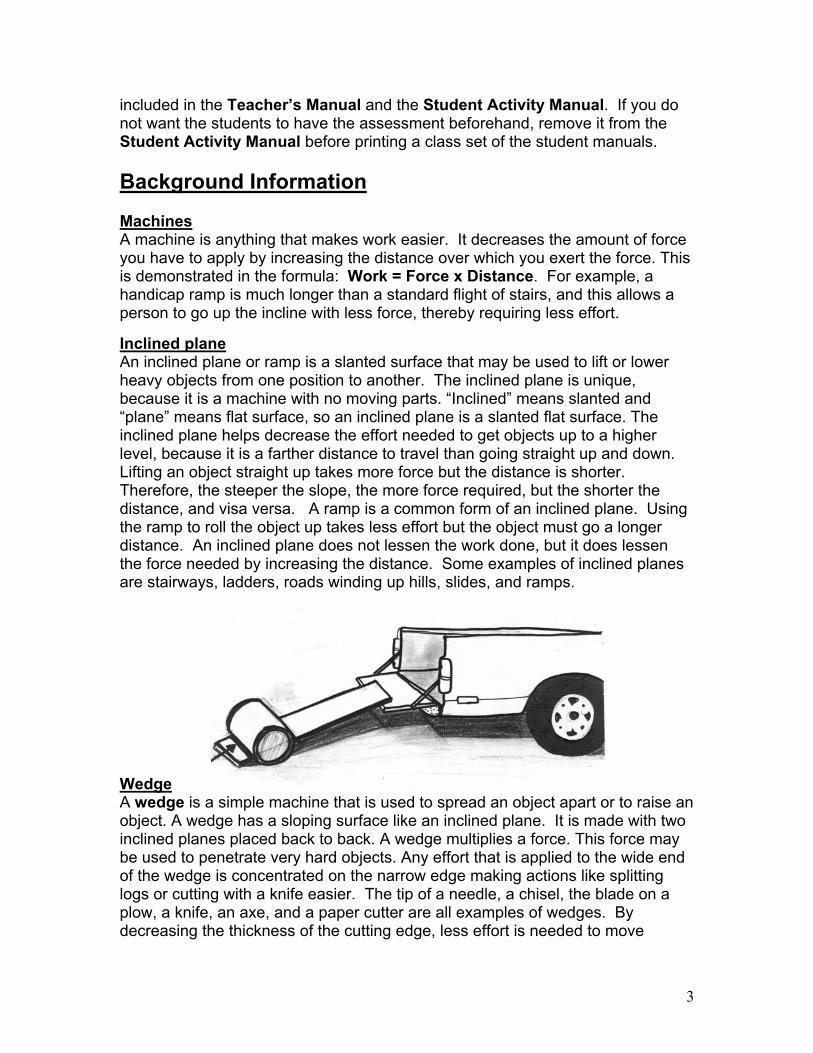
included in the Teacher’s Manual and the Student Activity Manual. If you do not want the students to have the assessment beforehand, remove it from the Student Activity Manual before printing a class set of the student manuals. Background Information Machines A machine is anything that makes work easier. It decreases the amount of force you have to apply by increasing the distance over which you exert the force. This is demonstrated in the formula: Work = Force x Distance. For example, a handicap ramp is much longer than a standard flight of stairs, and this allows a person to go up the incline with less force, thereby requiring less effort. Inclined plane An inclined plane or ramp is a slanted surface that may be used to lift or lower heavy objects from one position to another. The inclined plane is unique, because it is a machine with no moving parts. “Inclined” means slanted and “plane” means flat surface, so an inclined plane is a slanted flat surface. The inclined plane helps decrease the effort needed to get objects up to a higher level, because it is a farther distance to travel than going straight up and down. Lifting an object straight up takes more force but the distance is shorter. Therefore, the steeper the slope, the more force required, but the shorter the distance, and visa versa. A ramp is a common form of an inclined plane. Using the ramp to roll the object up takes less effort but the object must go a longer distance. An inclined plane does not lessen the work done, but it does lessen the force needed by increasing the distance. Some examples of inclined planes are stairways, ladders, roads winding up hills, slides, and ramps. Wedge A wedge is a simple machine that is used to spread an object apart or to raise an object. A wedge has a sloping surface like an inclined plane. It is made with two inclined planes placed back to back. A wedge multiplies a force. This force may be used to penetrate very hard objects. Any effort that is applied to the wide end of the wedge is concentrated on the narrow edge making actions like splitting logs or cutting with a knife easier. The tip of a needle, a chisel, the blade on a plow, a knife, an axe, and a paper cutter are all examples of wedges. By decreasing the thickness of the cutting edge, less effort is needed to move

4
through the object being cut. The tip of a wood screw is a wedge and the edge of the thread is also a wedge. Cutting tools generally contain a wedge. Screw A screw is a simple machine in the form of an inclined plane wrapped around a central shaft. The grooves on a screw are called threads. The wrapped thread is the inclined plane. The distance between the threads is called the pitch. The smaller the pitch, the less force it takes to twist the screw but the distance the screw must be turned is increased. A screw is one of the strongest means of binding two things together. Screws may be found in light bulbs, bolts, wood screws, drill bits, c-clamps, and twist off caps from bottles. A spiral staircase is a large version of a screw.
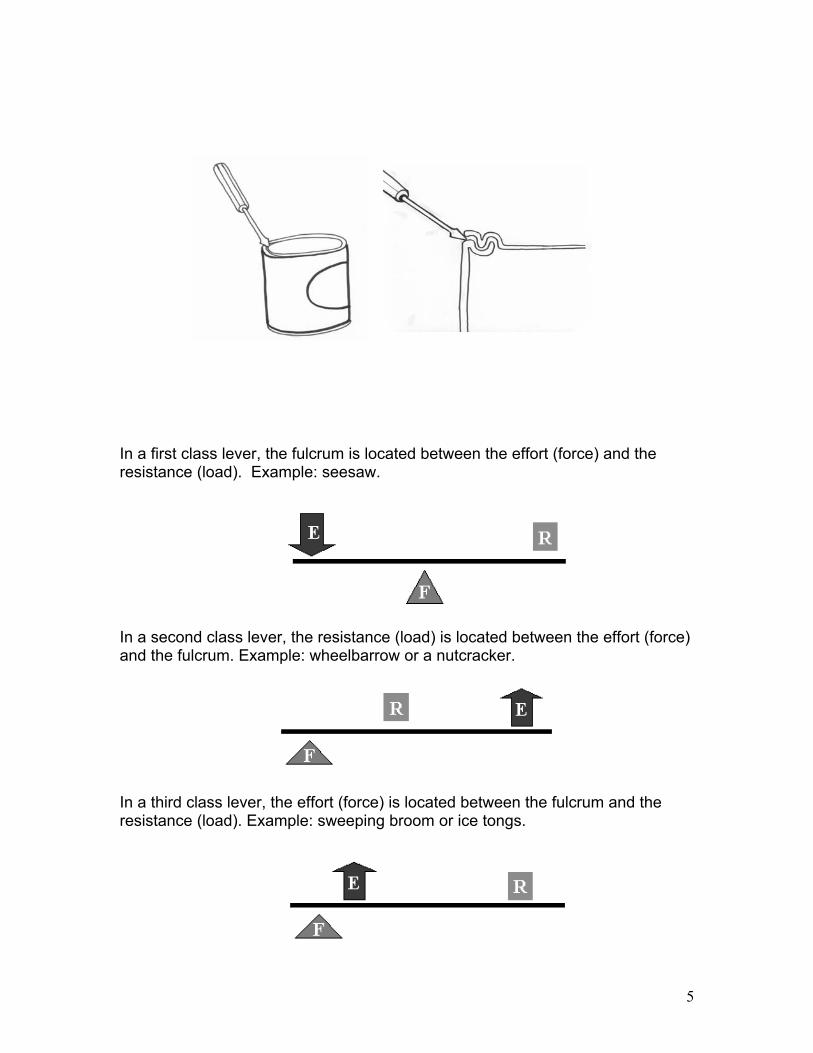
Lever A lever is a bar or rod that is free to move on a fulcrum. A lever is also a simple machine that can help lift a weight with less effort. A fulcrum is the turning point for any lever. The distance from where the force is applied to the fulcrum is called the effort arm. In the example of a simple lever machine (a pry bar) on the next page, the effort from a hand is applied to the effort arm. The lever’s shorter distance from the edge of the paint can to the lid is the resistance arm. A closed can of paint is usually difficult to open. With a pry bar, the lid may be easily removed. The pry bar or lever changes the size and direction of the force needed to remove the lid. Scissors, tin snips, nutcrackers, tongs, a broom, a mop, a baseball bat, and fishing rods are all examples of common levers. Simple levers have one great disadvantage in that the resistance can’t be moved very far upwards or downwards. (See diagram on next page)
5
In a first class lever, the fulcrum is located between the effort (force) and the resistance (load). Example: seesaw. In a second class lever, the resistance (load) is located between the effort (force) and the fulcrum. Example: wheelbarrow or a nutcracker. In a third class lever, the effort (force) is located between the fulcrum and the resistance (load). Example: sweeping broom or ice tongs.
Effort Arm

6
Pulley A pulley is another kind of simple machine. It is simply a wheel with a rope, belt or chain around it. It is used to change the direction of movement or the amount of force. Fixed pulleys only change the direction that something moves. When you pull down, the object is lifted upward. This allows you to use gravity to your advantage. Moveable pulleys move with the resistance forces (load) and are able to multiply the effort force we put in. Because the pulley moves too, it is able to multiply our effort and increase force. What you gain in force you loose in the distance you pull the rope. A block and tackle is a combination of fixed and moveable pulleys. It changes the direction of movement and also multiplies the effect of the effort. That is why it is used to lift heavy loads. Pulleys are used in most cranes, elevators, and exercise equipment. Wheel & Axle A wheel and axle machine results when a spinning lever (wheel) rotates around a center fulcrum (axle). The wheel is a continuous lever. The wheel is always rigidly attached to the axle. The wheel and axle is often confused with the wheels on vehicles, which is a pair of wheels and axles. In the wheel and axle machine, an effort is applied to the wheel. An attached axle turns as a result. The effort at the wheel is multiplied at the axle. The force applied at a doorknob turns around the fulcrum at the axle. The effort is multiplied at the resistance, which is the bolt and the lock. A screwdriver is also a wheel and axle machine. The handle is the wheel and the metal shaft is the axle. The head of the screw is a wheel and the shaft is an axle. Examine the mechanical pencil sharpener in your classroom. The crank handle is attached to an axle that turns a wheel geared to roller blades that sharpen the pencil. The larger the handle or wheel, the easier it is to turn the axle.
7
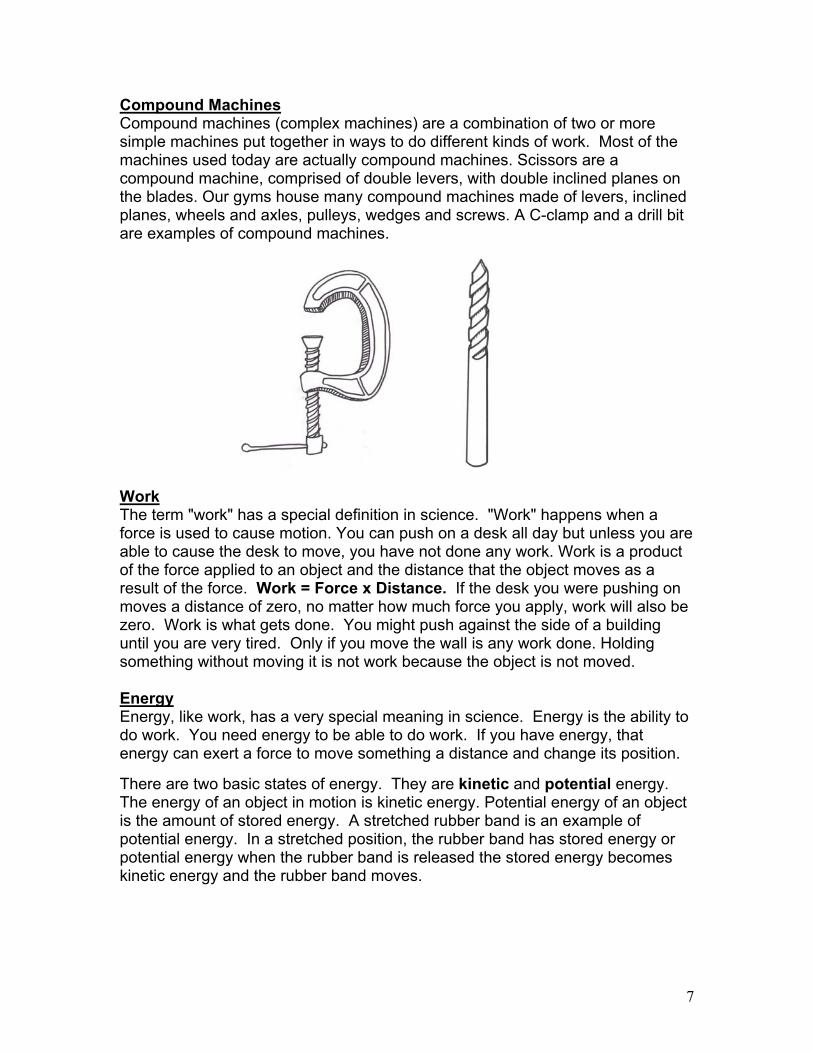
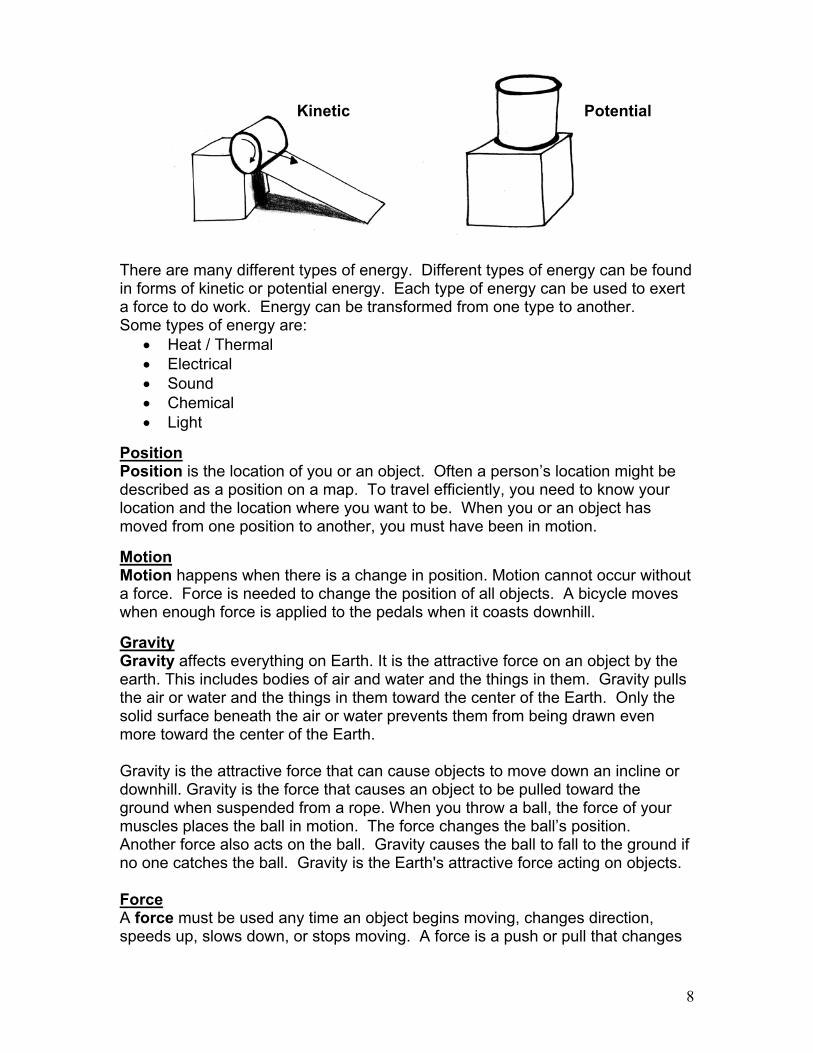
Compound Machines Compound machines (complex machines) are a combination of two or more simple machines put together in ways to do different kinds of work. Most of the machines used today are actually compound machines. Scissors are a compound machine, comprised of double levers, with double inclined planes on the blades. Our gyms house many compound machines made of levers, inclined planes, wheels and axles, pulleys, wedges and screws. A C-clamp and a drill bit are examples of compound machines. Work The term "work" has a special definition in science. "Work" happens when a force is used to cause motion. You can push on a desk all day but unless you are able to cause the desk to move, you have not done any work. Work is a product of the force applied to an object and the distance that the object moves as a result of the force. Work = Force x Distance. If the desk you were pushing on moves a distance of zero, no matter how much force you apply, work will also be zero. Work is what gets done. You might push against the side of a building until you are very tired. Only if you move the wall is any work done. Holding something without moving it is not work because the object is not moved. Energy Energy, like work, has a very special meaning in science. Energy is the ability to do work. You need energy to be able to do work. If you have energy, that energy can exert a force to move something a distance and change its position. There are two basic states of energy. They are kinetic and potential energy. The energy of an object in motion is kinetic energy. Potential energy of an object is the amount of stored energy. A stretched rubber band is an example of potential energy. In a stretched position, the rubber band has stored energy or potential energy when the rubber band is released the stored energy becomes kinetic energy and the rubber band moves.
8
There are many different types of energy. Different types of energy can be found in forms of kinetic or potential energy. Each type of energy can be used to exert a force to do work. Energy can be transformed from one type to another. Some types of energy are:
• Heat / Thermal • Electrical • Sound • Chemical • Light
Position Position is the location of you or an object. Often a person’s location might be described as a position on a map. To travel efficiently, you need to know your location and the location where you want to be. When you or an object has moved from one position to another, you must have been in motion. Motion Motion happens when there is a change in position. Motion cannot occur without a force. Force is needed to change the position of all objects. A bicycle moves when enough force is applied to the pedals when it coasts downhill. Gravity Gravity affects everything on Earth. It is the attractive force on an object by the earth. This includes bodies of air and water and the things in them. Gravity pulls the air or water and the things in them toward the center of the Earth. Only the solid surface beneath the air or water prevents them from being drawn even more toward the center of the Earth. Gravity is the attractive force that can cause objects to move down an incline or downhill. Gravity is the force that causes an object to be pulled toward the ground when suspended from a rope. When you throw a ball, the force of your muscles places the ball in motion. The force changes the ball’s position. Another force also acts on the ball. Gravity causes the ball to fall to the ground if no one catches the ball. Gravity is the Earth's attractive force acting on objects. Force A force must be used any time an object begins moving, changes direction, speeds up, slows down, or stops moving. A force is a push or pull that changes
Kinetic Potential
9
the motion or shape of an object. Force is often called “effort” in reference to simple machines. Friction Friction is a force that resists movement between two surfaces. All moving objects have friction between them when they touch. Rough surfaces have more friction when they rub against each other than smooth surfaces do, and therefore rough surfaces slow down moving objects more than smooth surfaces or liquids do. Liquid materials such as oils or waxes are often used between surfaces to reduce friction. Air also produces fluid friction. This is what slows the leaves down as they fall from the trees, and air slows a child down as they ride their bicycle. Cars are now designed to be more aerodynamic, so the air doesn’t slow them down as much and they can go faster and get better gas mileage.
10
Learning Experience 1: Inclined Plane Objective: Students will explore principles and practical uses of inclined planes and describe factors that effect its use.
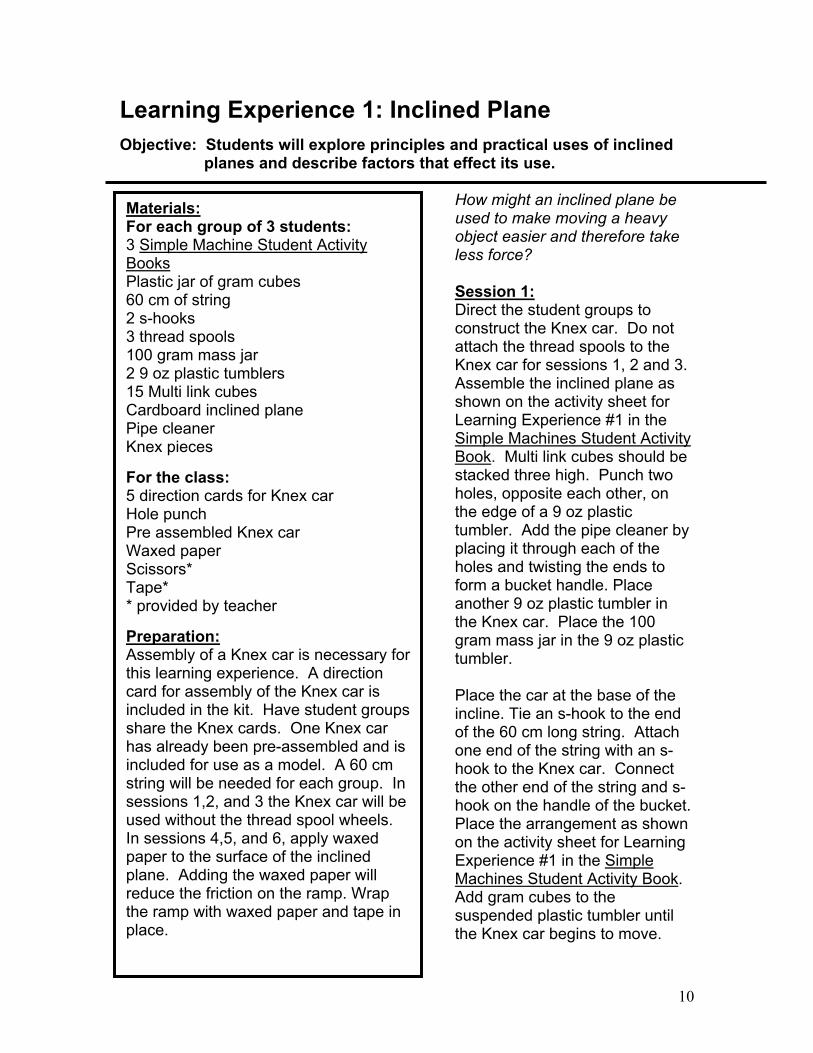
How might an inclined plane be used to make moving a heavy object easier and therefore take less force? Session 1: Direct the student groups to construct the Knex car. Do not attach the thread spools to the Knex car for sessions 1, 2 and 3. Assemble the inclined plane as shown on the activity sheet for Learning Experience #1 in the Simple Machines Student Activity Book. Multi link cubes should be stacked three high. Punch two holes, opposite each other, on the edge of a 9 oz plastic tumbler. Add the pipe cleaner by placing it through each of the holes and twisting the ends to form a bucket handle. Place another 9 oz plastic tumbler in the Knex car. Place the 100 gram mass jar in the 9 oz plastic tumbler. Place the car at the base of the incline. Tie an s-hook to the end of the 60 cm long string. Attach one end of the string with an s-hook to the Knex car. Connect the other end of the string and s-hook on the handle of the bucket. Place the arrangement as shown on the activity sheet for Learning Experience #1 in the Simple Machines Student Activity Book. Add gram cubes to the suspended plastic tumbler until the Knex car begins to move.
Materials: For each group of 3 students: 3 Simple Machine Student Activity Books Plastic jar of gram cubes 60 cm of string 2 s-hooks 3 thread spools 100 gram mass jar 2 9 oz plastic tumblers 15 Multi link cubes Cardboard inclined plane Pipe cleaner Knex pieces For the class: 5 direction cards for Knex car Hole punch Pre assembled Knex car Waxed paper Scissors* Tape* * provided by teacher Preparation: Assembly of a Knex car is necessary for this learning experience. A direction card for assembly of the Knex car is included in the kit. Have student groups share the Knex cards. One Knex car has already been pre-assembled and is included for use as a model. A 60 cm string will be needed for each group. In sessions 1,2, and 3 the Knex car will be used without the thread spool wheels. In sessions 4,5, and 6, apply waxed paper to the surface of the inclined plane. Adding the waxed paper will reduce the friction on the ramp. Wrap the ramp with waxed paper and tape in place.
11
Learning Experience 1 continued Page 2
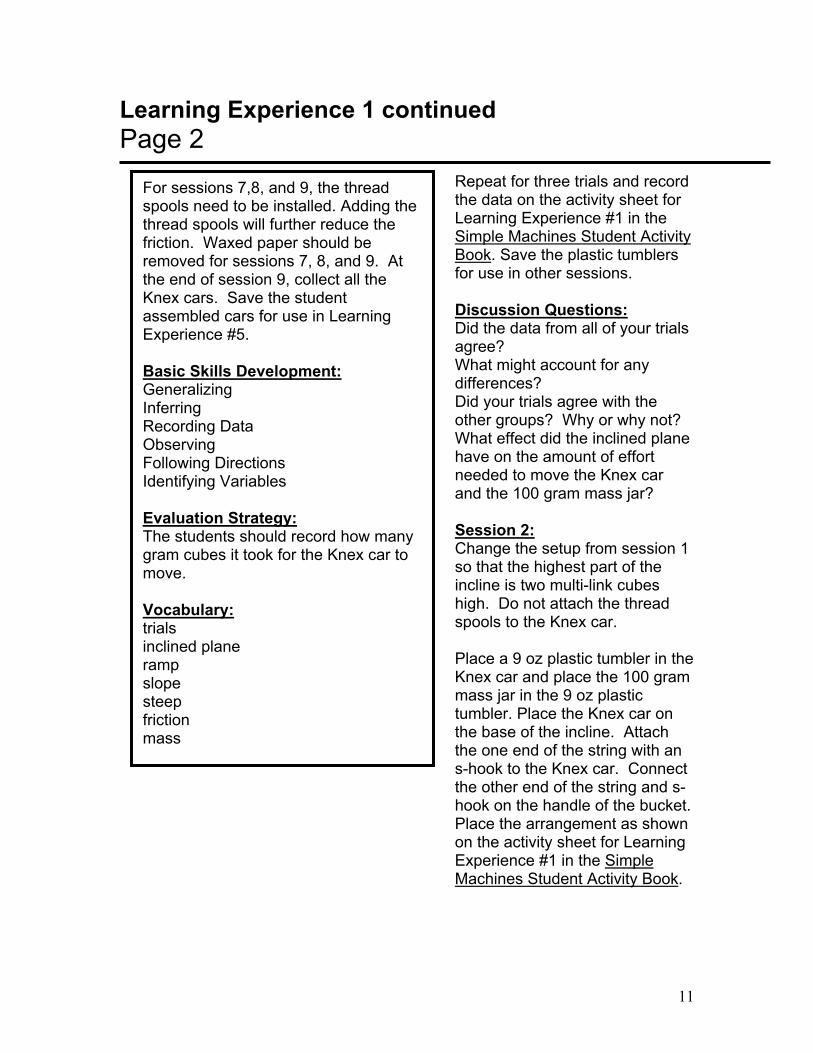
Repeat for three trials and record the data on the activity sheet for Learning Experience #1 in the Simple Machines Student Activity Book. Save the plastic tumblers for use in other sessions.
Discussion Questions: Did the data from all of your trials agree? What might account for any differences? Did your trials agree with the other groups? Why or why not? What effect did the inclined plane have on the amount of effort needed to move the Knex car and the 100 gram mass jar? Session 2: Change the setup from session 1 so that the highest part of the incline is two multi-link cubes high. Do not attach the thread spools to the Knex car. Place a 9 oz plastic tumbler in the Knex car and place the 100 gram mass jar in the 9 oz plastic tumbler. Place the Knex car on the base of the incline. Attach the one end of the string with an s-hook to the Knex car. Connect the other end of the string and s-hook on the handle of the bucket. Place the arrangement as shown on the activity sheet for Learning Experience #1 in the Simple Machines Student Activity Book.
For sessions 7,8, and 9, the thread spools need to be installed. Adding the thread spools will further reduce the friction. Waxed paper should be removed for sessions 7, 8, and 9. At the end of session 9, collect all the Knex cars. Save the student assembled cars for use in Learning Experience #5. Basic Skills Development: Generalizing Inferring Recording Data Observing Following Directions Identifying Variables Evaluation Strategy: The students should record how many gram cubes it took for the Knex car to move. Vocabulary: trials inclined plane ramp slope steep friction mass
12
Learning Experience 1 continued Page 3
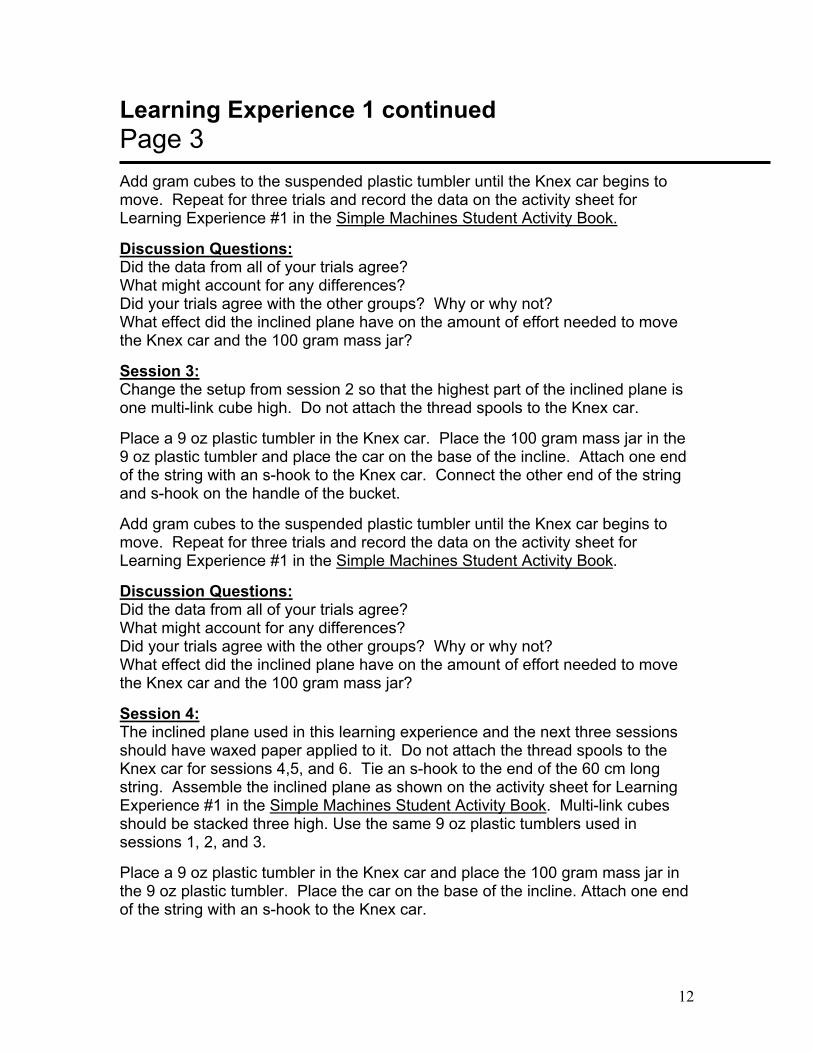
Add gram cubes to the suspended plastic tumbler until the Knex car begins to move. Repeat for three trials and record the data on the activity sheet for Learning Experience #1 in the Simple Machines Student Activity Book. Discussion Questions: Did the data from all of your trials agree? What might account for any differences? Did your trials agree with the other groups? Why or why not? What effect did the inclined plane have on the amount of effort needed to move the Knex car and the 100 gram mass jar?
Session 3: Change the setup from session 2 so that the highest part of the inclined plane is one multi-link cube high. Do not attach the thread spools to the Knex car. Place a 9 oz plastic tumbler in the Knex car. Place the 100 gram mass jar in the 9 oz plastic tumbler and place the car on the base of the incline. Attach one end of the string with an s-hook to the Knex car. Connect the other end of the string and s-hook on the handle of the bucket. Add gram cubes to the suspended plastic tumbler until the Knex car begins to move. Repeat for three trials and record the data on the activity sheet for Learning Experience #1 in the Simple Machines Student Activity Book. Discussion Questions: Did the data from all of your trials agree? What might account for any differences? Did your trials agree with the other groups? Why or why not? What effect did the inclined plane have on the amount of effort needed to move the Knex car and the 100 gram mass jar? Session 4: The inclined plane used in this learning experience and the next three sessions should have waxed paper applied to it. Do not attach the thread spools to the Knex car for sessions 4,5, and 6. Tie an s-hook to the end of the 60 cm long string. Assemble the inclined plane as shown on the activity sheet for Learning Experience #1 in the Simple Machines Student Activity Book. Multi-link cubes should be stacked three high. Use the same 9 oz plastic tumblers used in sessions 1, 2, and 3. Place a 9 oz plastic tumbler in the Knex car and place the 100 gram mass jar in the 9 oz plastic tumbler. Place the car on the base of the incline. Attach one end of the string with an s-hook to the Knex car.
13
Learning Experience 1 continued Page 4
Connect the other end of the string and s-hook on the handle of the bucket. Place the arrangement as shown on the activity sheet for Learning Experience #1 in the Simple Machines Student Activity Book.
Add gram cubes to the suspended plastic tumbler until the Knex car begins to move. Repeat for three trials and record the data in the activity sheet for Learning Experience #1 in the Simple Machines Student Activity Book. Discussion Questions: Did the data from all of your trials agree? What might account for any differences? Did your trials agree with the other groups? Why or why not? What affect did the inclined plane have on the amount of effort needed to move the Knex car and the 100 gram mass jar? Session 5: Change the setup from session 4 so that the highest part of the incline is two multi link cubes high. Do not attach the thread spools to the Knex car. Place a 9 oz plastic tumbler in the Knex car and place the 100 gram mass jar in the 9 oz plastic tumbler. Place the Knex car on the incline at the base of the incline. Attach the one end of the string with an s-hook to the Knex car. Connect the other end of the string and s-hook on the handle of the bucket. Place the arrangement as shown on the activity sheet for Learning Experience #1 in the Simple Machines Student Activity Book.
Add gram cubes to the suspended plastic tumbler until the Knex car begins to move. Repeat for three trials and record the data on the activity sheet for Learning Experience #1 in the Simple Machines Student Activity Book. Discussion Questions: Did the data from all of your trials agree? What might account for any differences? Did your trials agree with the other groups? Why or why not? What effect did the inclined plane have on the amount of effort needed to move the Knex car and the 100 gram mass jar? Session 6: Change the setup from session 5 so that the highest part of the incline is one multi link cube high. Do not attach the thread spools to the Knex car.
14
Learning Experience 1 continued Page 5
Place a 9 oz plastic tumbler in the Knex car and place the 100 gram mass jar in the 9 oz plastic tumbler. Place the Knex car on the base of the incline. Attach the one end of the string with an s-hook to the Knex car. Connect the other end of the string and s-hook on the handle of the bucket. Place the arrangement as shown on the activity sheet for Learning Experience #1 in the Simple Machines Student Activity Book.
Add gram cubes to the suspended plastic tumbler until the Knex car begins to move. Repeat for three trials and record the data on the activity sheet for Learning Experience #1 in the Simple Machines Student Activity Book. Discussion Questions: Did the data from all of your trials agree? What might account for any differences? Did your trials agree with the other groups? Why or why not? What effect did the inclined plane have on the amount of effort needed to move the Knex car and the 100 gram mass jar? Session 7: Remove the waxed paper attached to the incline for sessions 4-6. Attach the thread spools to the Knex car for sessions 7,8 and 9. Tie an S-hook to the end of the 60 cm long string. Multi-link cubes should be stacked three high. Use the same 9 oz plastic tumblers used in sessions 1-6. Place a 9 oz plastic tumbler in the Knex car and place the 100 gram mass jar in the 9 oz plastic tumbler. Place the Knex car on the base of the incline. Attach the one end of the string with an s-hook to the Knex car. Connect the other end of the string and s-hook on the handle of the bucket. Place the arrangement as shown on the activity sheet for Learning Experience #1 in the Simple Machines Student Activity Book.
Add gram cubes to the suspended plastic tumbler until the Knex car begins to move. Repeat for three trials and record the data on the activity sheet for Learning Experience #1 in the Simple Machines Student Activity Book. Discussion Questions: Did the data from all of your trials agree? What might account for any differences? Did your trials agree with the other groups? Why or why not? What effect did the inclined plane have on the amount of effort needed to move the Knex car and the 100 gram mass jar?
15
Learning Experience 1 continued Page 6
Session 8: Change the setup from session 7 so that the highest part of the incline is two multi link cubes high. Attach the thread spools to the Knex car. Place a 9 oz plastic tumbler in the Knex car and place the 100 gram mass jar in the 9 oz plastic tumbler. Place the Knex car on the base of the incline. Attach the one end of the string with an s-hook to the Knex car. Connect the other end of the string and s-hook on the handle of the bucket. Place the arrangement as shown on the activity sheet for Learning Experience #1 in the Simple Machines Student Activity Book.
Add gram cubes to the suspended plastic tumbler until the Knex car begins to move. Repeat for three trials and record the data on the activity sheet for Learning Experience #1 in the Simple Machines Student Activity Book. Discussion Questions: Did the data from all of your trials agree? What might account for any differences? Did your trials agree with the other groups? Why or why not? What effect did the inclined plane have on the amount of effort needed to move the Knex car and the 100 gram mass jar? Session 9: Change the setup from session 8 so that the highest part of the inclined plane is one multi link cube high. Attach the thread spools to the Knex car. Place a 9 oz plastic tumbler in the Knex car and place the 100 gram mass jar in the 9 oz plastic tumbler. Place the Knex car on the base of the incline. Attach the one end of the string with an s-hook to the Knex car. Connect the other end of the string and s-hook on the handle of the bucket. Place the arrangement as shown on the activity sheet for Learning Experience #1 in the Simple Machines Student Activity Book.
Add gram cubes to the suspended plastic tumbler until the Knex car begins to move. Repeat for three trials and record the data on the activity sheet for Learning Experience #1 in the Simple Machines Student Activity Book. Discussion Questions: Did the data from all of your trials agree? What might account for any differences? Did your trials agree with the other groups? Why or why not? What effect did the inclined plane have on the amount of effort needed to move the Knex car and the 100 gram mass jar?
16
Learning Experience 2: Wedge Objective: Students will explore principle and practical uses of wedges, and describe factors that affect their use.
How might a wedge be used to make work easier? How does a wedge decrease the amount of force needed to penetrate a substance? Session 1: After the teacher demonstration, student groups should take turns repeating the demonstration. Observations should be recorded on the activity sheet for Learning Experience #2 in the Simple Machines Student Activity Book. Discussion Questions: Which wooden block is easier to push into the sand? Why do you think that is so? How is a wedge like an inclined plane? What are some tools that use a wedge? How are tools used that have a wedge? How might friction affect a wedge? How could a wedge be changed to make it easier to use?
Materials: For each group of 3 students: 3 Simple Machines Student Activity Books For the class: Bucket of sand Wood block Wood wedge Preparation: A wedge is a simple machine that is used to spread an object apart or to raise an object. Cutting tools generally contain a wedge. This learning experience begins with a demonstration. Demonstrate your attempt to push the wooden block into the sand in the bucket. Then attempt to push the wedge block of wood into the sand. The bucket should be passed to each group and students should repeat the demonstration themselves. Basic Skills Development: Generalizing Inferring Recording Data Observing Following Directions Identifying Variables Evaluation Strategy: The student should draw three simple machines that use a wedge. Vocabulary: wedge inclined plane friction
17
Learning Experience 3: Screws
Objective: Students will develop an understanding of the screw as an inclined plane.
How is a screw like an inclined plane? Session 1: Provide each group of students with a wood screw and a machine screw that have different pitches. Direct the students to observe the characteristics of each screw. Students should find the similarities and differences between each screw. Discussion Questions: How is each screw similar? How is each screw different? How might each screw be used? Provide each group of students access to copy paper. Instruct each group to measure a rectangle 5 x 10 cm. Draw a slanted diagonal line that forms two identical triangles on the 5 x 10 cm rectangle. Color on both sides of the diagonal line. The colored edge is also the edge of an inclined plane. Follow the pictures in the activity sheet for Learning Experience #3 in the Simple Machines Student Activity Book. Wrap the triangle, starting with the wider edge, around a pencil. Carefully tape the rolled up triangle and remove the pencil. Instruct each group to measure a rectangle 5 x 20 cm and repeat the process. Compare the two circular inclined planes. Discussion Questions: What does the colored edge represent? Which distance is greater, the height of the circular inclined plane or the spiraled distance around the rolled paper?
Materials: For each group of 3 students: 3 Simple Machines Student Activity Books Machine screw Wood screw Metric ruler* Scissors* Tape* Crayons* Copy paper* Pencils* For the class: Coarse machine bolt Fine machine bolt *provided by teacher
Preparation: Students will need instructions in making the triangles required for this learning experience. Depending on your groups, you may want to precut 5 x 10 cm and 5 x 20 cm paper strips, one strip for each student.
Basic Skills Development: Generalizing Inferring Observing Following Directions Measuring
Evaluation Strategy: The students should compare the machine screws and the wood screws. Compare the threads of the fine screw and coarse screw.
Vocabulary: inclined plane thread pitch slope steep diagonal coarse fine friction
18
Learning Experience 3 continued Page 2
Session 2: Show the students the large bolts and nuts provided in the kit. Explain that they have a different number of threads and therefore a different pitch. Explain that these two bolts have different advantages. They will investigate to find out more about them. Direct the students to cut five strips of copy paper, lengthwise, 2 cm wide. Join two strips with tape end to end. Join the three other strips end to end. The distance around the bolts is 6 cm. The number of times the thread wraps around the coarse bolt is eight times. Mark off 8 – 6 cm distances of the shorter strip of paper. Draw the diagonal line as shown on the activity sheet for Learning Experience #3 in the Simple Machines Student Activity Book. Cut on the diagonal line as done in session 1.
Repeat the process in reference to the fine thread bolt. The number of times the thread wraps around the fine threaded bolt is thirteen times. Mark off 13-6cm distances on the long strip of paper. Draw the diagonal line and cut on the diagonal line. Compare a strip from the first sample (coarse thread) with the second (fine thread).
Discussion Questions: Which strip of cut paper is longer? Which bolt does it represent? Which strip has the longest incline? Which bolt must be turned more times to tighten it? Which bolt should require less force to move it? Which bolt could be tightened with the fewest number of turns? How, when and why would a screw be preferred to a nail?
19
Learning Experience 4: Levers Objective: Students will explore principle and practical uses of levers and describe factors that effect its use.
How might levers be used to make work easier? Session 1: Students should observe the movement of the load and force applied to the lever. Observations should be recorded on the activity sheet for Learning Experience #4 in the Simple Machines Student Activity Book. Discussion Questions: What did you observe about how far upward the resistance moved on the resistance arm? What did you observe about how far downward the force moved the effort arm? Why did the resistance move in this manner? Session 2: Students should observe the movement of the resistance and force applied to the lever. Observations should be recorded on the activity sheet for Learning Experience #4 in the Simple Machines Student Activity Book. Discussion Questions: What did you observe about how far upward the resistance moved on the resistance arm? What did you observe about how far downward the force moved the effort arm? Why did the resistance move in this manner? Was the effort more or less than in session1?
Materials: For each group of 3 students: 3 Simple Machines Student Activity Books For the class: Bucket of sand Wood lever Wood fulcrum Preparation: Review that a first class lever can consist of a rigid bar resting on a fixed pivot point (fulcrum) and makes work easier. Session 1: The teacher will demonstrate the use of a first class lever. The teacher may need a student to help. Set up the wooden lever with the fulcrum at the mid-point. Have a student place the pail of sand near one end. Remind the students that the sand is the resistance, or load. The student should steady the pail at all times. Move the lever by applying force on the effort arm near the end. Ask the students to record all their observations on the activity sheet for Learning Experience #4 in the Simple Machines Student Activity Book. Session 2: Move the fulcrum to the groove that is about 10 cm from the middle groove. Have a student place the pail of sand near the short end of the lever. The student should steady the pail at all times. Move the lever by applying force on the effort arm near the opposite end.
20
Learning Experience 4 continued Page 2
Session 3: Students should observe the movement of the resistance and force applied to the lever. Observations should be recorded on the activity sheet for Learning Experience #4 in the Simple Machines Student Activity Book.
Discussion Questions: What did you observe about how far upward the resistance moved on the resistance arm? What did you observe about how far downward the force moved the effort arm? Why did the resistance move in this manner? Was the effort more or less than in session 2?
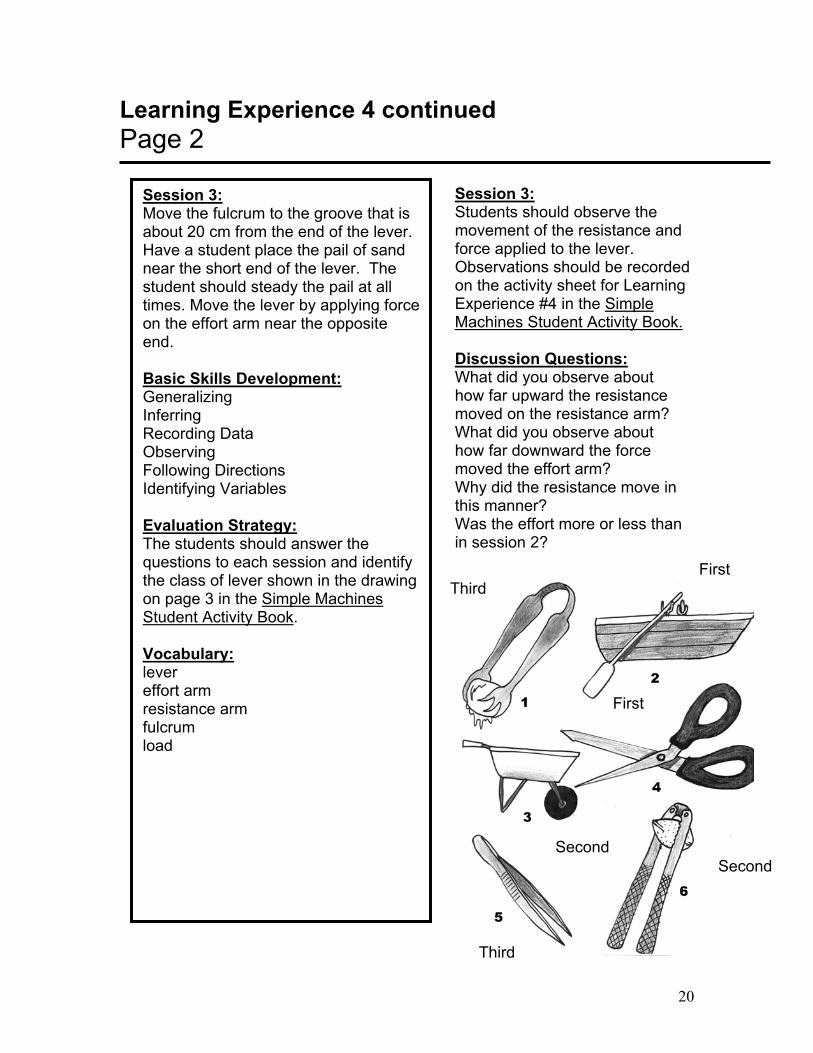
Session 3: Move the fulcrum to the groove that is about 20 cm from the end of the lever. Have a student place the pail of sand near the short end of the lever. The student should steady the pail at all times. Move the lever by applying force on the effort arm near the opposite end. Basic Skills Development: Generalizing Inferring Recording Data Observing Following Directions Identifying Variables Evaluation Strategy: The students should answer the questions to each session and identify the class of lever shown in the drawing on page 3 in the Simple Machines Student Activity Book. Vocabulary: lever effort arm resistance arm fulcrum load
First
First
Third
Second Second
Third
21
Learning Experience 5: Pulleys Objective: Students will explore principles and practical uses of pulleys and a block and tackle, and describe factors that affect their use.
How might pulleys or a block and tackle be used to make work easier? Session 1: The teacher will demonstrate the effect of using a single fixed pulley in lifting a 100 gram mass. Students will record the distance the load or resistance moved verses the force or effort. Observations should be recorded in the Simple Machines Student Activity Book. Discussion Questions: Was there a difference in the force needed to move the 100 gram mass when using the pulley system? Was there a difference in the speed that the 100 gram mass traveled when comparing the effort and the resistance? Was there a difference in the distance that the 100 gram mass traveled when comparing the effort and the resistance? Session 2: The teacher will demonstrate the effect of using a single fixed pulley and a single moveable pulley in lifting a 100 gram mass. Students will record the distance the load or resistance moved verses the force or effort. Observations should be recorded in the Simple Machines Student Activity Book.
Materials: For each group of 3 students: 3 Simple Machines Student Activity Books For the class: Knex materials from Learning Experience #5 ribbons 5 100 gram mass jars 5 s-hooks Kite string Cloth measuring tape Direction cards for block & tackle Note: Each session in this learning experience involves the setup of a block and tackle system. By modifying the Knex cars fromLearning Experience #1, five block and tackle systems maybe created. Direction cards are provided to show how to modify the Knex cars into the block andtackle system. Direction cards are also provided to show how to create a block and tackle. Preparation: This learning experience requires that a block and tackle be connected to the ceiling of the classroom. Extra s-hooks and string have been provided to enable the teacher to arrange a hook to the ceiling or other suitable location. The Knex block and tackle pulleys should be connected to an s-hook suspended about 5 feet from the floor. The Knex block and tackle is not pre-assembled. The teacher will need to arrange the ribbon on the Knex pulley system as illustrated on the activity sheet for Learning Experience #5 in the Simple Machines Student Activity Book.
22
Learning Experience 5 continued Page 2
Discussion Questions: Was there a difference in the force needed to move the 100 gram mass when using the pulley system? Was there a difference in the speed that the 100 gram mass traveled when comparing the effort and the resistance? Was there a difference in the distance that the 100 gram mass traveled when comparing the effort and the resistance? Session 3: The teacher will demonstrate the effect of using a double fixed pulley and a single moveable pulley in lifting a 100 gram mass. Students will record the distance the load or resistance moved verses the force or effort. Observations should be recorded on the activity sheet for Learning Experience #5 in the Simple Machines Student Activity Book. Discussion Questions: Was there a difference in the force needed to move the 100 gram mass when using the pulley system? Was there a difference in the speed that the 100 gram mass traveled when comparing the effort and the resistance? Was there a difference in the distance that the 100 gram mass traveled when comparing the effort and the resistance?
Session1: Arrange the Knex system as a single fixed pulley. Attach the single pulley to the ceiling with an s-hook as illustrated. Thread the ribbon around the spool. Attach the100 gram mass to the ribbon. Measure the distance of the load or resistance moved compared to the distance the force or effort moved. Note that a single fixed pulley provides no gain in force, distance, or speed. The single fixed pulley provides only a change in direction of the force.
Session 2: Arrange the Knex system as a single fixed pulley and a single moveable pulley. Attach the single pulley to the ceiling s-hook as illustrated. Thread the ribbon around the spools as shown. Attach the 100 gram mass to the ribbon. Measure the distance the load or resistance moved verses the distance the force or effort moved. Note that as the moveable pulley moves, less force is needed to move the mass than in session 1. However the ribbon must move farther in distance and the mass moves slower. Only half the force is needed to move the suspended mass.
Session 3: Arrange the Knex system as a double fixed pulley and a single moveable pulley. Attach a double pulley to the ceiling s-hook as illustrated. Thread the ribbon around the spools as shown. Attach the100 gram mass to the ribbon. Measure the distance the load or resistance moved verses the force or effort. Note that as the moveable pulley moves, less force is needed to move the mass than in session 1. However the ribbon must move farther in distance and the mass moves slower.
23
Learning Experience 5 continued Page 3
Session 4: The teacher will demonstrate the effect of using a double fixed pulley and a double moveable pulley in lifting a 100 gram mass. Student will record the distance the load or resistance moved verses the force or effort. Observations should be recorded on the activity sheet for Learning Experience #5 in the Simple Machines Student Activity Book. Discussion Questions: Was there a difference in the force needed to move the 100 gram mass when using the pulley system? Was there a difference in the speed that the 100 gram mass traveled when comparing the effort and the resistance? Was there a difference in the distance that the 100 gram mass traveled when comparing the effort and the resistance?
Only one third of the force is needed to move the suspended mass. Session 4: Arrange the Knex system as a double fixed pulley and a double moveable pulley as illustrated. Attach a double pulley to the ceiling s-hook. Thread the ribbon around the spools as shown. Attach the 100 gram mass to the ribbon. Measure the distance the load or resistance moved verses the force or effort. Note that as the moveable pulley moves, less force is needed to move the mass than in session 1. However the ribbon must move farther in distance and the mass moves slower. Only one quarter of the force is needed to move the suspended mass. Basic Skills Development: Generalizing Inferring Recording Data Observing Following directions Identifying Variables Evaluation Strategy: The student should list three examples of pulley machines, identify the pulley system in each case, and describe how the system works. Vocabulary: gram mass speed distance force pulley block and tackle
24
Learning Experience 6: Wheel And Axle Objective: Students will explore principles and practical uses of a wheel and axle and describe factors that affect its use.
How might a wheel and axle be used to make work easier? Direct the students to observe illustrations of wheel and axle machines on their activity sheets for Learning Experience #6 in the Simple Machines Student Activity Book. Provide the students with the sample wheel and axle. Students should pass the Knex sample around. Direct them to observe the relative motions of the axle and the wheel. Students should test both the small and large wheel. Provide each group of students access to copy paper. Direct the student to cut 1 x 30 cm strips for each student. Wrap a strip around the axle and cut the paper to that distance. Wrap a strip around the wheel and cut the paper to that distance. Measure the two strips and record the data on the activity sheet for Learning Experience #6 in the Simple Machines Student Activity Book. Discussion Questions: How did the two paper strips compare? What do the two paper strips represent? How is a wheel and axle like a lever? What are some tools that use a wheel and axle?
Materials: For each group of 3 students: 3 Simple Machines Student Activity Book Knex wheel and axle machines (small wheel) Knex wheel and axle machines (large wheel) Scissors* Copy paper* *provided by teacher Preparation: Depending on your groups, you may want to precut 1 x 30 cm paper strips, one strip for each student. A wheel and axle machine results when a spinning lever (a wheel) rotates around a center fulcrum. This movement forms a continuous lever. The wheel is always rigidly attached to the axle. This learning experience begins with a teacher demonstration. Demonstrate by turning the wheel of the Knex wheel and axle machine. Have a student resist the motion by having a student hold the axle tightly. The teacher then turns the wheel. The wheel and axle machine should be passed to each group and students should repeat the demonstration themselves. Provide the students with the paper strips to determine the distance that the wheel or the axle moves in one rotation. Basic Skills Development: Following Directions Measuring Comparing Generalizing Decision Making
25
Learning Experience 6 continued Page 2
How are tools used that have a wheel and axle? How could a wheel and axle be changed to make it easier to use?
Evaluation Strategy: The student should list three examples of wheel and axle machines, identify the wheel and the axle in each case and describe how the system works. Vocabulary: wheel axle lever

26
Learning Experience 7: Simple Machine Assessment Objective: Students will participate in simple machine objects and performance assessments.
Direct students to follow the instructions in each assessment.
Materials: For each group of 3 students: 3 Simple Machines Student Activity Book For the class: Square end tweezers (#1) Pointed end tweezers (#2) 1/4" drill bit (#3) Long wood screw (#4) Book ring (#5) Claw hammer (#6) Hand trowel (#7) Lag screw (#8) Plastic knife (#9) Staple remover (#10) Hole punch (#11) C-clamp (#12) Pry bar (#13)
27
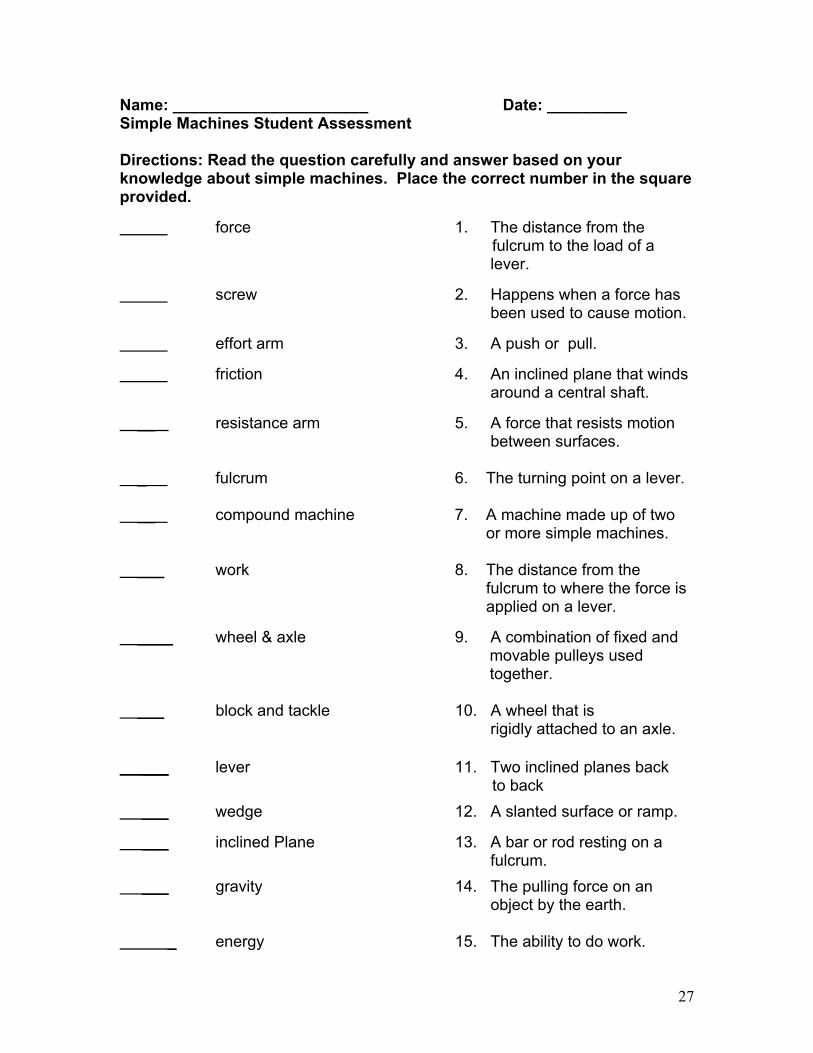
Name: ______________________ Date: _________ Simple Machines Student Assessment Directions: Read the question carefully and answer based on your knowledge about simple machines. Place the correct number in the square provided. force 1. The distance from the fulcrum to the load of a
lever.
screw 2. Happens when a force has been used to cause motion.
effort arm 3. A push or pull. friction 4. An inclined plane that winds
around a central shaft. __ resistance arm 5. A force that resists motion
between surfaces. _ fulcrum 6. The turning point on a lever. __ compound machine 7. A machine made up of two
or more simple machines. ___ work 8. The distance from the
fulcrum to where the force is applied on a lever.
____ wheel & axle 9. A combination of fixed and
movable pulleys used together.
___ block and tackle 10. A wheel that is
rigidly attached to an axle.
___ lever 11. Two inclined planes back to back
___ wedge 12. A slanted surface or ramp. ___ inclined Plane 13. A bar or rod resting on a
fulcrum.
___ gravity 14. The pulling force on an object by the earth.
_ energy 15. The ability to do work.
28
Activity Sheet for Learning Experience #7 Page 2 List through words or pictures as many examples as you can under each heading: Inclined Plane___________________________________________________________ _______________________________________________________________
Wedge__________________________________________________________ ________________________________________________________________ ________________________________________________________________ Screw___________________________________________________________ ________________________________________________________________ ________________________________________________________________ Lever___________________________________________________________ ________________________________________________________________
29
Activity Sheet for Learning Experience #7 Page 3
Pulley___________________________________________________________ ________________________________________________________________ ________________________________________________________________ Wheel and Axle____________________________________________________________ ________________________________________________________________ ________________________________________________________________
30
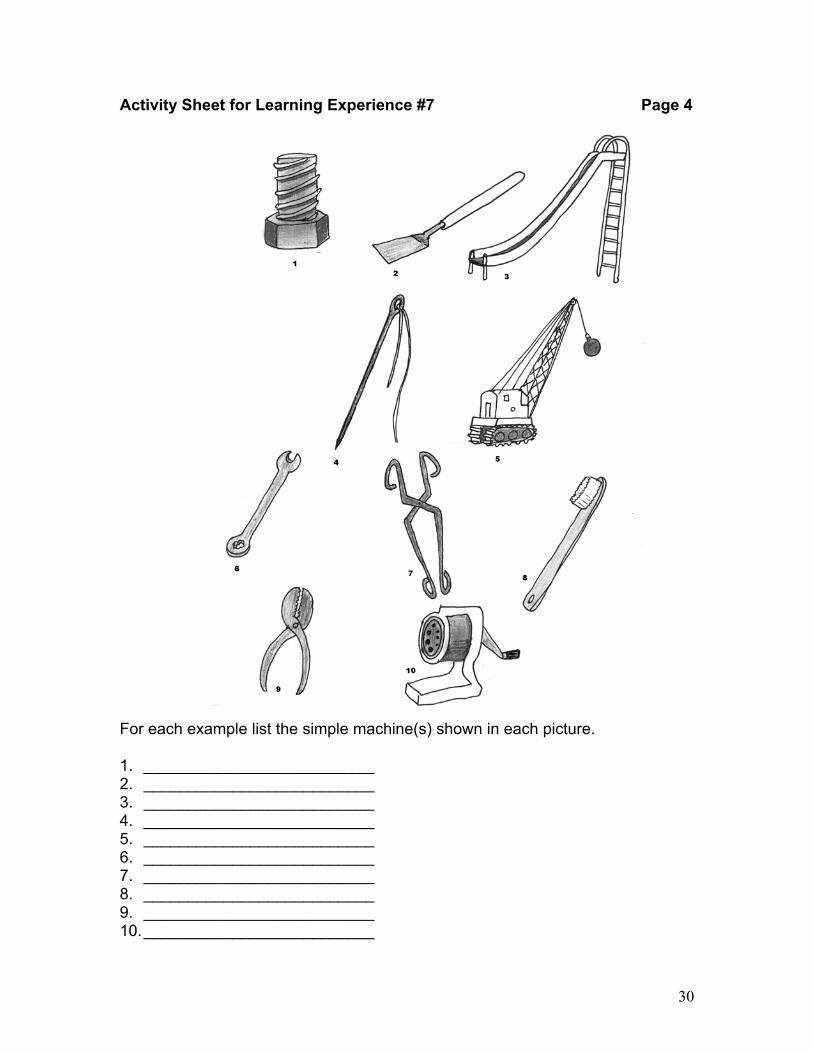
Activity Sheet for Learning Experience #7 Page 4
For each example list the simple machine(s) shown in each picture. 1. __________________________ 2. __________________________ 3. __________________________ 4. __________________________ 5. __________________________ 6. __________________________ 7. __________________________ 8. __________________________ 9. __________________________ 10. __________________________
31
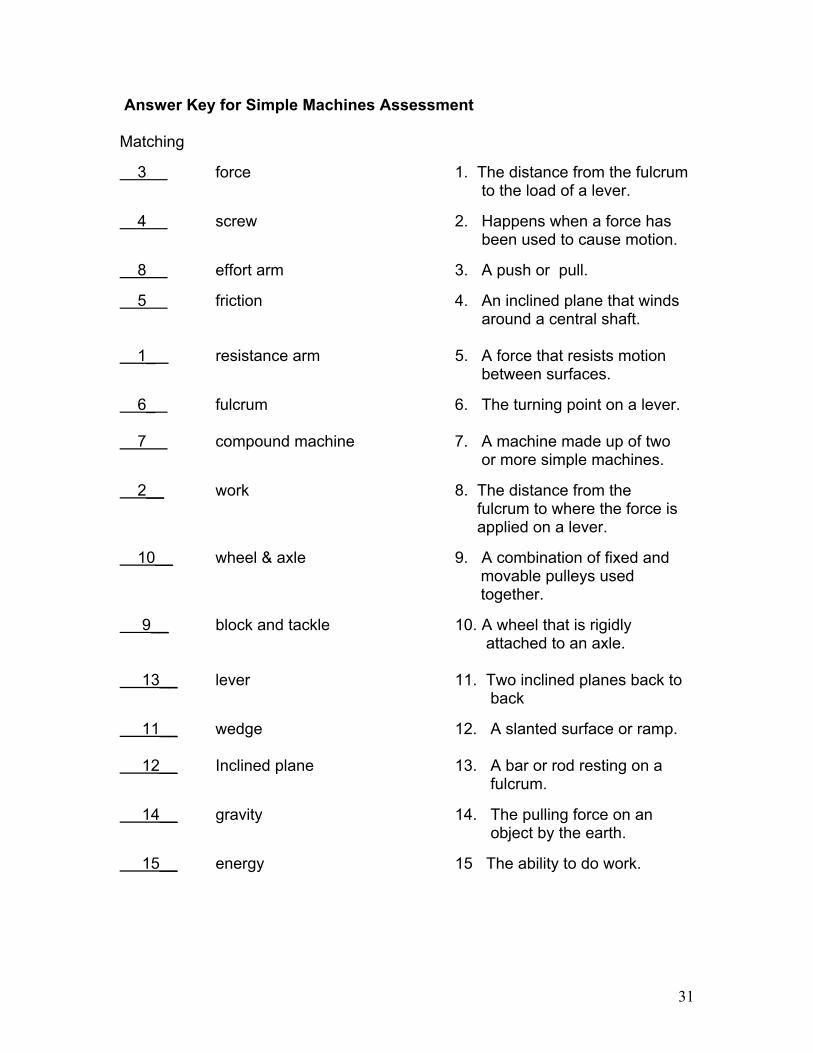
Answer Key for Simple Machines Assessment Matching 3 force 1. The distance from the fulcrum
to the load of a lever.
4 screw 2. Happens when a force has been used to cause motion.
8 effort arm 3. A push or pull. 5 friction 4. An inclined plane that winds
around a central shaft. 1_ resistance arm 5. A force that resists motion
between surfaces. 6_ fulcrum 6. The turning point on a lever. 7 compound machine 7. A machine made up of two
or more simple machines. 2__ work 8. The distance from the
fulcrum to where the force is applied on a lever.
10__ wheel & axle 9. A combination of fixed and
movable pulleys used together.
9__ block and tackle 10. A wheel that is rigidly
attached to an axle. 13__ lever 11. Two inclined planes back to
back 11__ wedge 12. A slanted surface or ramp. 12__ Inclined plane 13. A bar or rod resting on a
fulcrum.
14__ gravity 14. The pulling force on an object by the earth.
15__ energy 15 The ability to do work.
32
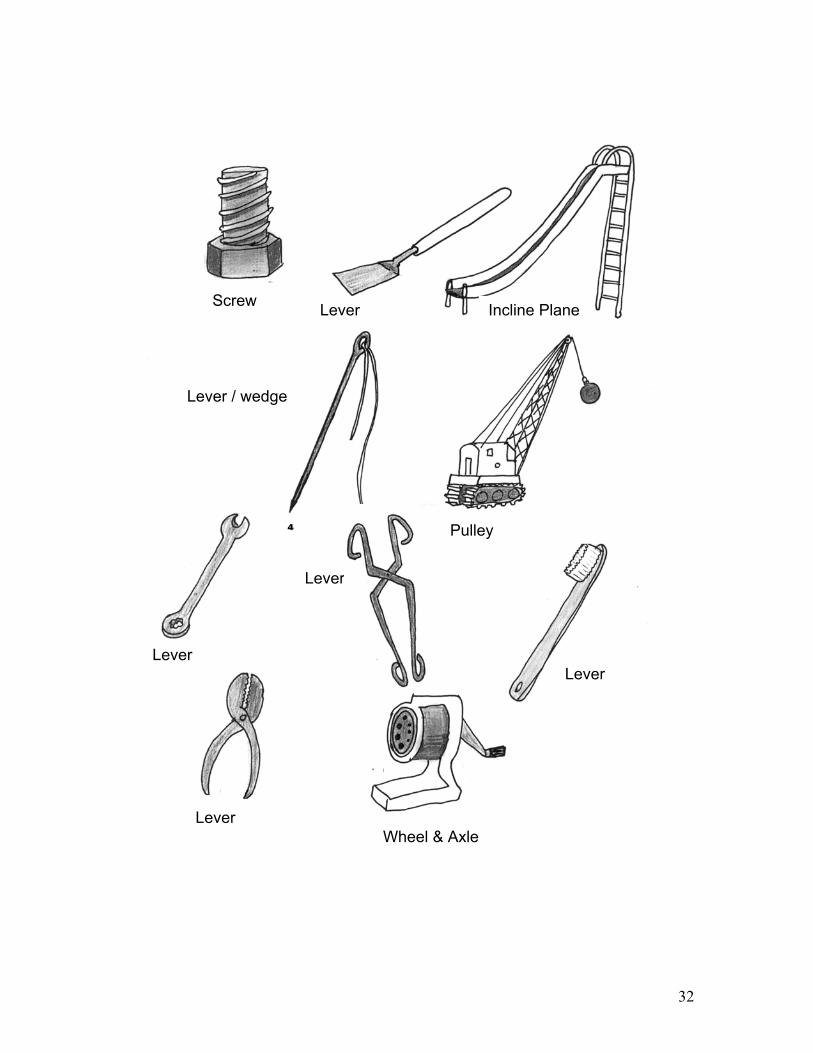
Screw Lever Incline Plane
Lever
Lever
Pulley
Lever
Lever Wheel & Axle
Lever / wedge
33
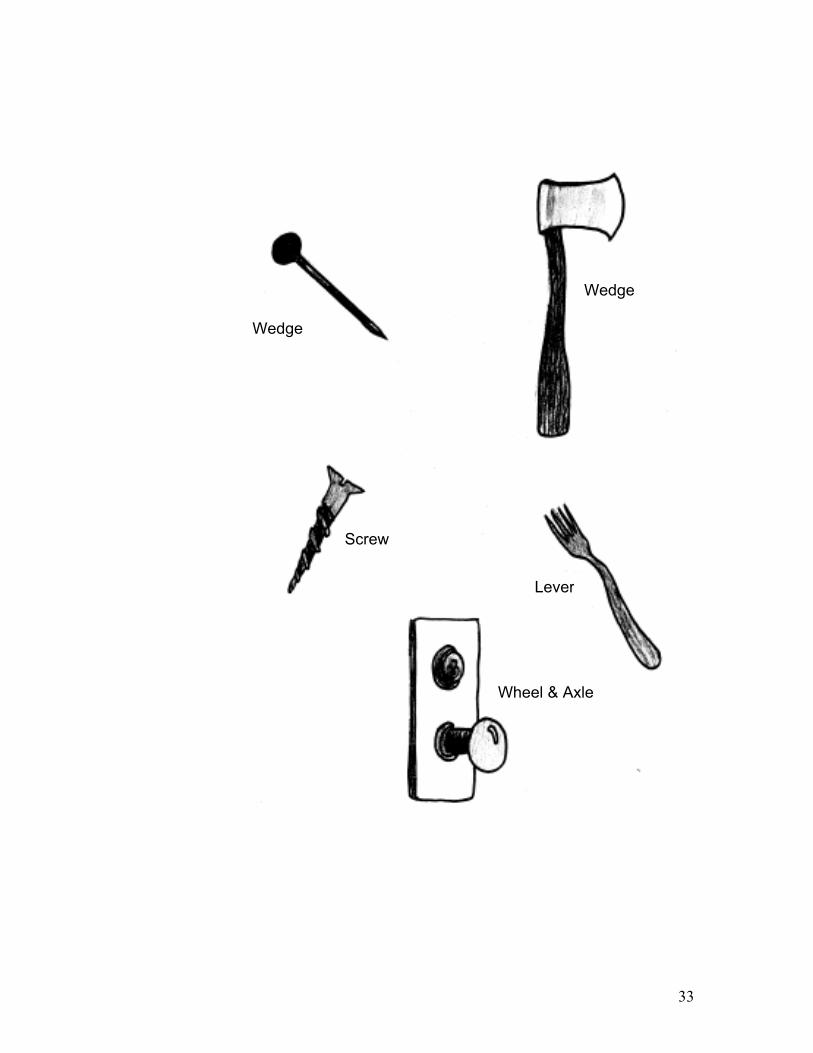
Wedge
Screw
Wheel & Axle
Wedge
Wedge
Lever
34
MORE IDEAS Language Arts ♦ Have students pick one of the simple machines and write a Haiku poem about
it. ♦ Have students write a paragraph about an activity being done from the point
of view of one of the simple machines. ♦ (Dictionary Activity) – Choose several words from the Glossary. Ask students
to locate each of the words in a dictionary. For each word, the students should write the page where they found the word, guide words on that page, write word in syllables, write respelling, write one definition of the word and write an original sentence using the word.
♦ Aster sharing with your class The Best of Rube Goldberg’s Inventions, complied by Charles Keller, have the students invent a wild machine using the Goldberg formula and simple machines.
♦ (Sequencing) – Have students list step by step the commands for screwing in a screw. (i.e. Step 1 – take screwdriver in hand. Step 2 – pick up screw, etc.)
♦ (Categorizing) Have students cut out and bring in magazine pictures of items made up of simple machines and glue them on a large piece of oaktag under proper column.
Book Suggestions:
Book suggestions:. The Simple Facts of Simple Machines by Carol Barkin & Elizabeh James ISBN 0-688-41685-3 Simple Machines and How They Work by Elizabeth N. Sharp Science For The Elementary School by Edward Victor ISBN 0-02-422861-3 Machines and How They Work by Harvey Weiss
Ardley, N. (1995). How things work. New York: Montreal: Reader's Digest. ISBN 089577-694-4 Baker, W. & H. (1994). Machines: Make it work. New York: Scholastic. ISBN 0-590-20587-0 Butzow, C. & Butzow, J. (1989). Science through children's literature. Colorado: Teacher Ideas Press. ISBN 0-87287667-5 Dunn, A. (1993). How things work: Wheels at work. England: Wayland. ISBN 1-56847-014-2 Finch, K. (1992). File folder games. science K-3. North Carolina: Carson-Dellosa. Hirsch, E.D. Jr. (1991). What your second grader needs to know. New York: Double Day. ISBN 0-385-41116-2 Horvatic, A. (1989). Simple machines. New York: Dutton. ISBN 0-525-44492-0 How things work. (1995). Scholastic First Encyclopedia. New York: Scholastic. ISBN 0-590-47529-0
35
How things work. (1995). Science in our world, vol. 12, set I. Danbury, CT: Grolier. ISBN 0-7172-7380-6 Hutchins, J & Zike, D. (1982). Simple tools and machines: Science pocket. Oak Lawn, IL. Ideal. Kalman, B. (1992). Historic communities: Tools and gardens. Canada: Crabtree. Meyer, J. (1958). Machines. New York: World. New Standard Encyclopedia. for copyright and CIP data see vol. 1. Chicago: Standard. Poling, J. (1969). The story of tools: How they built our world and shaped man's life. New York: Grosset & Dunlap. ISBN 0-448-26117-0 Seller, M. Wheels pulleys and levers. New York: Gloucester. ISBN 0-531-17420-4 Sharp, E. (1959). Simple machines and how they work. New York: Random House. Skelly, J. R. & Zim, H. S. (1969). Machines tools. New York: Morrow. VanCleave, J. (1993). Machines mind-boggling experiments you can turn into science fair projects. New York: Wiley. ISBN 0-471-57108-3 Weiss, H. (1983). Machines and how they work. New York: Crowell. ISBN 0-690-04299-X Wiessenthal, E. & Wiessenthal, T. (1969). Let's find out about tools. New York: Franklin.
Art ♦ Draw a picture of a simple machine. Social Studies ♦ Describe different simple machines that were used during the construction of
the Eric Canal. ♦ If any students have old tools, have them bring them in and discuss the
simple machines they are made of. Math ♦ Make up word problems involving work. Work = Force x Distance. Science ♦ Do experiments in science using simple machines.
36
INQUIRY AND PROCESS SKILLS
Classifying Arranging or distributing objects, events, or information in classes according to some method or system.
Communication Giving oral and written explanations or graphic
representations of observations. Creating Models Displaying information by means of graphic illustrations or other multi-sensory representations. Formulating Hypothesis Constructing a proposition or assumption of what is thought likely to be true based on reasoning, which serves as a tentative testable theory. Gathering & Organizing Collecting information about objects and
events which show a specific situation. Generalizing Drawing general conclusions from information. Identifying Variables Recognizing the characteristics of objects or events which are constant or change under different conditions. Inferring Making a statement or conclusion based on
reasoning or prior experience to explain an observation.
Interpreting Data Analyzing information that has been collected and organized by describing apparent patterns or relationships in the information. Making Decisions Choosing an alternative from among several and basing the judgment on defendable reasons. Manipulating Materials Handling or treating materials, equipment or procedures skillfully and effectively. Measuring Making quantitative observations by comparing to a standard. Observing Becoming aware of an object or even by using any of the senses to identify properties. Predicting Making a forecast or estimate of what future events may or conditions occur.
37
GLOSSARY
Axle a rod or shaft on which a wheel turns. Block and Tackle a combination of fixed and movable pulleys used
together.
Compound Machine a machine made up of two or more simple machines.
Distance the space between two objects or a measure of a change in position.
Efficiency the amount of work done by a machine compared to the amount of work put into it.
Effort Arm on a lever, the distance from the force to the fulcrum. Energy the ability to do work. Equal of the same quality, value, degree, or intensity. Fixed Pulley a pulley that stays in place as the load moves. Force a push or a pull. Friction a force that slows the motion of two objects rubbing
against each other. Fulcrum the turning point of lever. Gravity the natural attraction that tends to draw bodies
together. Ex. Bodies are drawn toward the center of the earth.
Inclined Plane slanted surface that connects one level to a higher
level. A simple machine. Increase to become greater in amount, size, degree. Lever a bar or rod resting on a turning point or fulcrum A simple machine. Load object to be moved or lifted by a lever. Machine anything that makes work easier.
38
Movable Pulley a pulley that moves with the load. Multiple having or consisting of many parts. Pitch the distance between two threads in a screw. Position the location of an object. Predict what one believes will happen. Pulley (fixed, movable) a wheel with a rope moving around it. A simple machine. Reduce to lessen in any way, as in size, weight, amount,
value. Resistance the opposition of a thing to movement by a force. Resistance Arm the distance from the fulcrum to the point where the
resistance is exerted or lifted (load arm). Screw an inclined plane that winds around a central core or
shaft. A simple machine. Shaft the rod or axle of the wheel and axle. Simple Machines one of a variety of things used to make work easier. Slope any inclined line, surface position; slant. Spiral circling around a central shaft. Steep sharpness of rise or slope. System a group of things that act together. Threads the spiral ridges of the screw. Unequal not the same quality, degree or value. Wedge two inclined planes back to back. A simple machine. Wheel and Axle machine where a wheel turns a rod or shaft Work what is done when a force moves an object.
39
TEACHER REFERENCES
Ardizzone, E. (1968). Little Tim and the brave sea captain. N.Y.: Scholastic Book Service. The use of pulleys can be pointed out in lifeboat launching and in the rope rescue of Tim and Teh Captain.
Ardley, N. (1984). Force and strength. N.Y.: Franklin Watts.
Bains, R. (1985). Simple machines. Mahwah, N.J.: Troll Associates.
Baker, B. (1981). Worthington Botts and the steam engine. N.Y.: Macmillan. Good stimulus to creative thinking about machines and inventing.
Gibbons, G. (1982). Tools. N.Y.: Holiday House.
Horvatic, A. (1989). Simple machines. N.Y.: E.P. Dutton. Pictures illustrate familiar objects that illustrate simple machines and their principles. Text suitable for weak readers.
Rey, H.A. (1973). Curious George rides a bike. N.Y.: Scholastic Services. a hammer is used as a lever to open a crate. Shows gears, chain and pedals on bike, and pulleys on a circus wagon.
Rockwell, A. & H. (1972). Machines. N.Y.: Macmillan. Simple machines beautifully illustrated in watercolors. Easy reading.
Scarry, R. (1987). Things that go. Racine, WI: Western.
Scarry, R. (1968). What do people do all day? N.Y.: Random House. Funny illustrations show simple machines in use.
Vaughan, J. (1990). Can you believe it?: The world of machines. N.Y.: Derrydale Books.
Wilkin, F. (1986). Machines. N.Y.: Children's Press.
Wyler, R. (1988). Science fun with toy cars and trucks. N.Y.: Simon & Schuster. Simple text. Toys are the basic equipment for investigations with ramps, friction, wheels, and the laws of motion. One demonstrates value of seat belt use.
Zubrowski, B. (1986). Wheels at work. N.Y.: William Morrow. A Boston Children's Museum activity book--directions on building simple wheel devices with inexpensive materials. Media Library Please use the BOCES Instructional Support Website to check out the media available
40
on this science topic. Call the media library to order media materials and to check on new materials that are available. The number to be reached is (716) 376-8260. Web Sites http://www.mos.org/sln/Leonardo/LeoHomePage.html - Leonardo da Vinci http://www.ed.uri.edu/SMART96/ELEMSC/SMARTmachines/machine.html http://www.galaxy.net/~k12/machines/index.shtml http://www.tandl.vt.edu/bentley/Machines.html http://viking.stark.k12.oh.us/~greentown/simpmach.htm http://www.ed.uri.edu/SMART96/ELEMSC/SMARTmachines/machine.html#OVERVIEW