Embed Size (px)
Citation preview
1
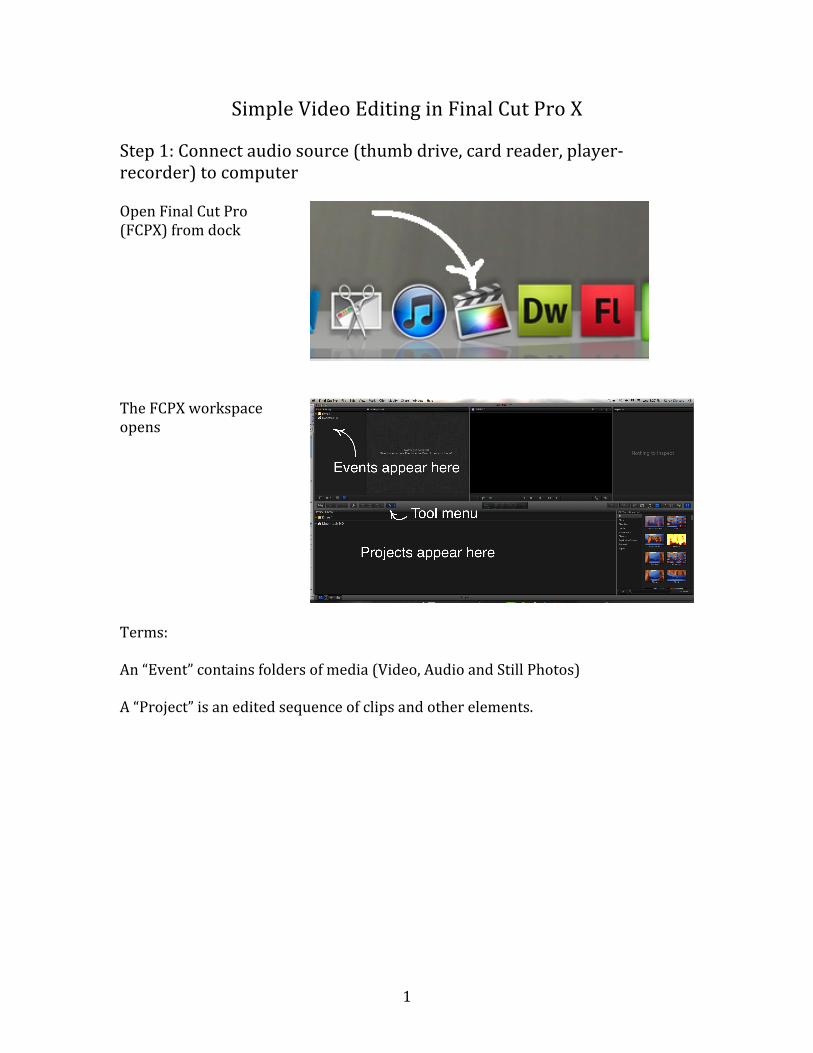
Simple Video Editing in Final Cut Pro X Step 1: Connect audio source (thumb drive, card reader, player-‐recorder) to computer Open Final Cut Pro (FCPX) from dock
The FCPX workspace opens
Terms: An “Event” contains folders of media (Video, Audio and Still Photos) A “Project” is an edited sequence of clips and other elements.
2
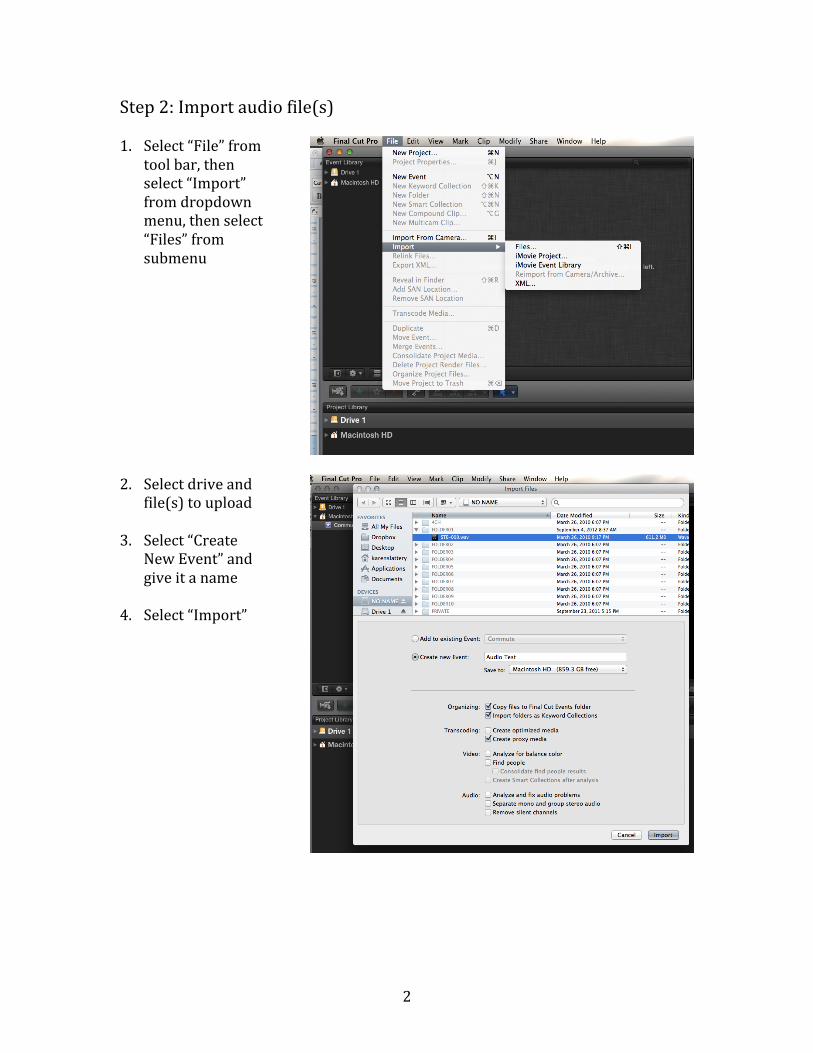
Step 2: Import audio file(s) 1. Select “File” from
tool bar, then select “Import” from dropdown menu, then select “Files” from submenu
2. Select drive and
file(s) to upload
3. Select “Create New Event” and give it a name
4. Select “Import”
3
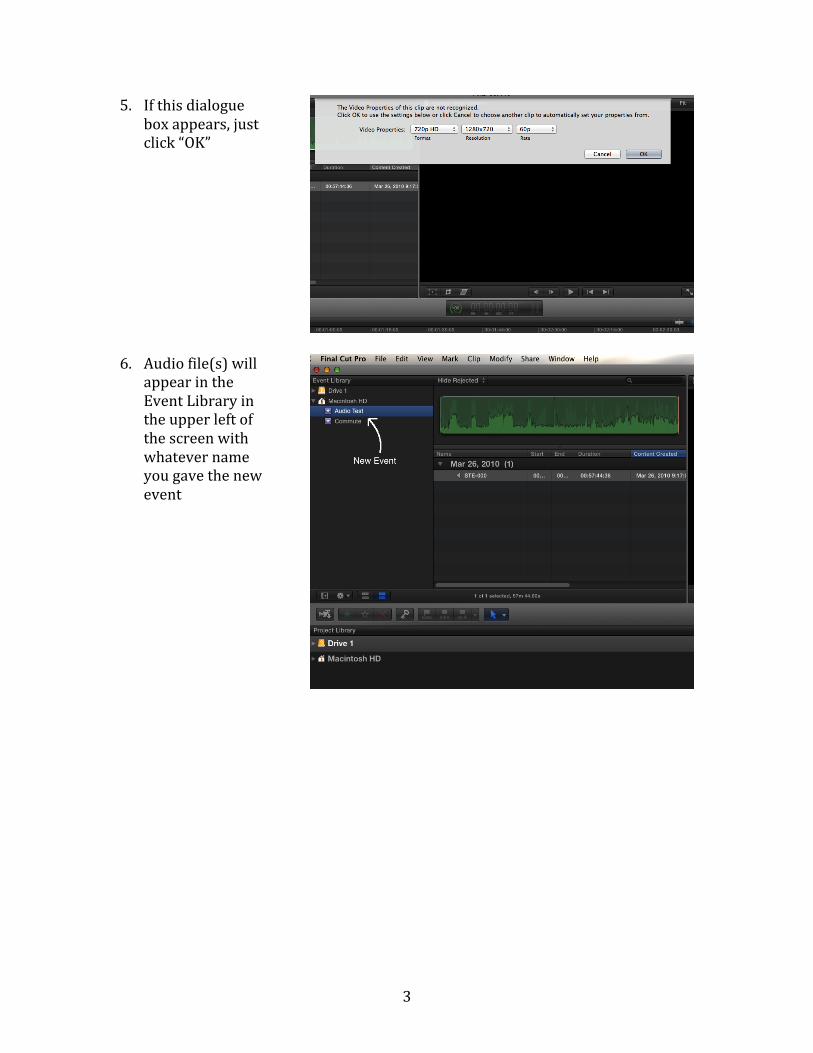
5. If this dialogue box appears, just click “OK”
6. Audio file(s) will
appear in the Event Library in the upper left of the screen with whatever name you gave the new event
4
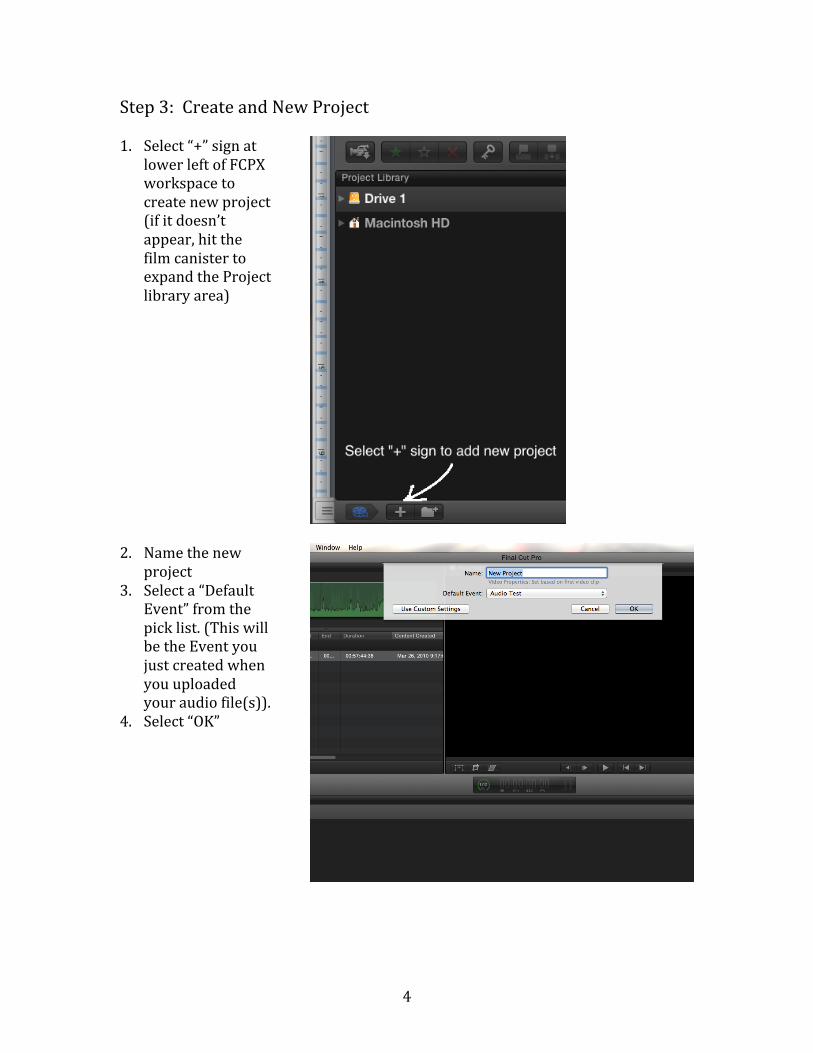
Step 3: Create and New Project 1. Select “+” sign at
lower left of FCPX workspace to create new project (if it doesn’t appear, hit the film canister to expand the Project library area)
2. Name the new
project 3. Select a “Default
Event” from the pick list. (This will be the Event you just created when you uploaded your audio file(s)).
4. Select “OK”
5
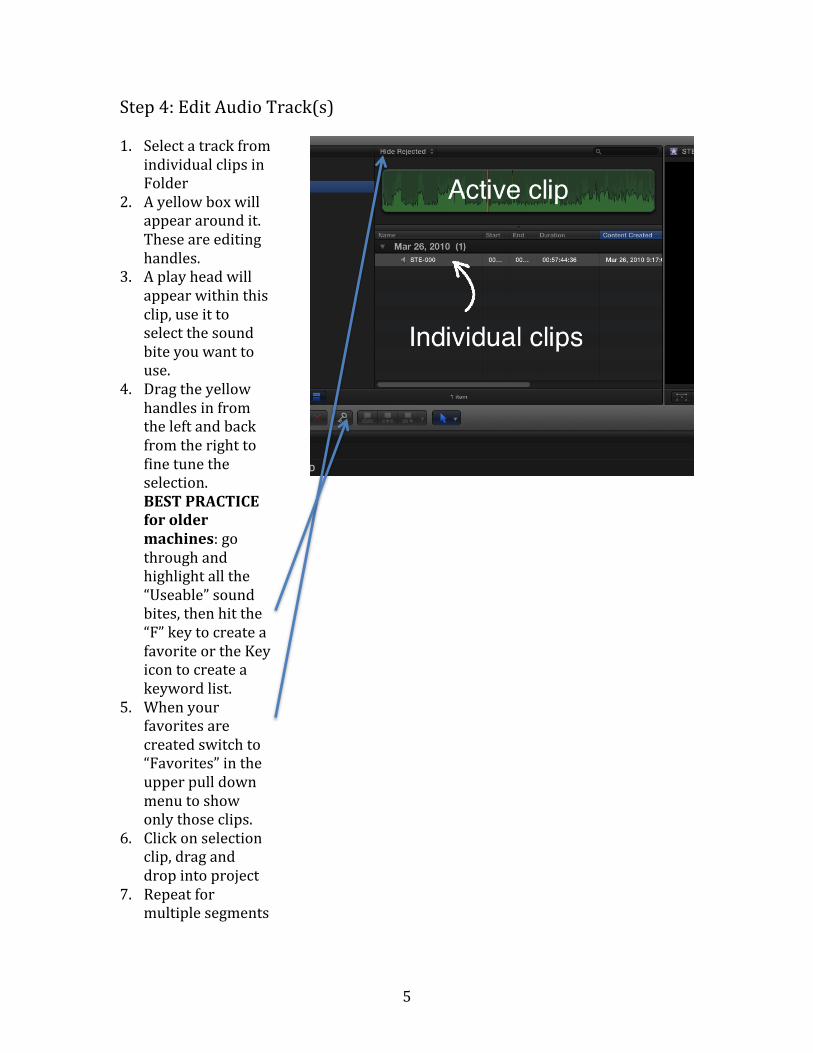
Step 4: Edit Audio Track(s) 1. Select a track from
individual clips in Folder
2. A yellow box will appear around it. These are editing handles.
3. A play head will appear within this clip, use it to select the sound bite you want to use.
4. Drag the yellow handles in from the left and back from the right to fine tune the selection. BEST PRACTICE for older machines: go through and highlight all the “Useable” sound bites, then hit the “F” key to create a favorite or the Key icon to create a keyword list.
5. When your favorites are created switch to “Favorites” in the upper pull down menu to show only those clips.
6. Click on selection clip, drag and drop into project
7. Repeat for multiple segments
6
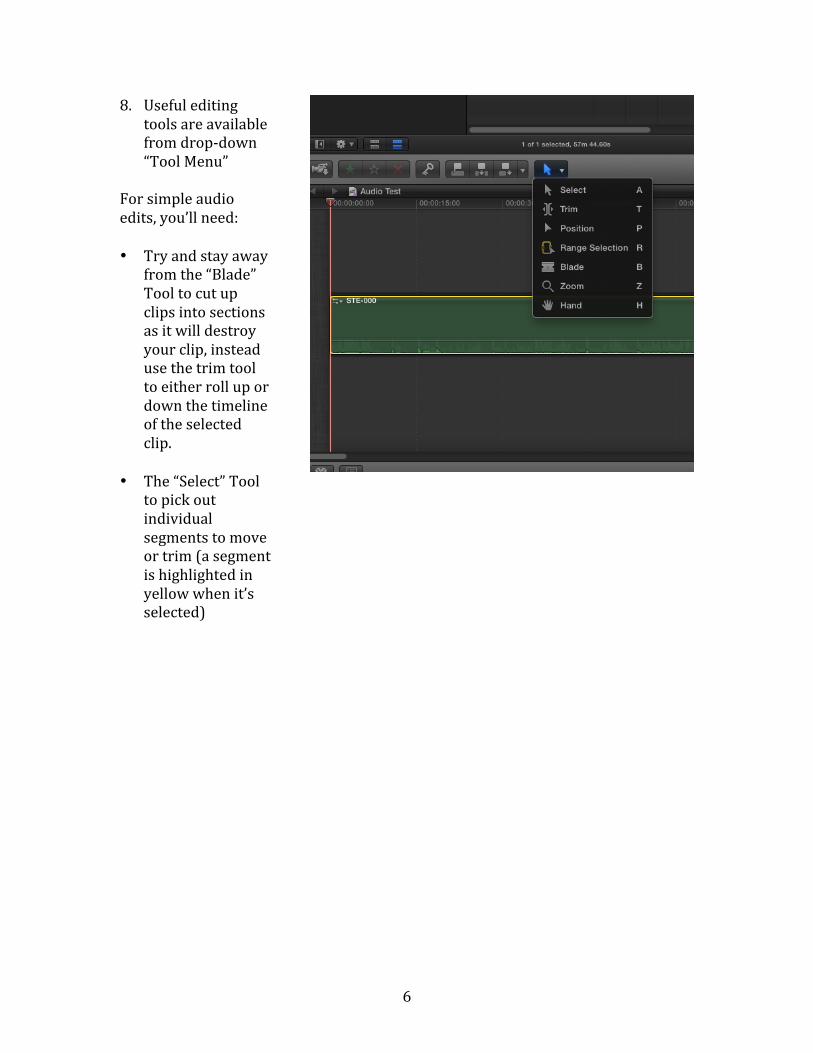
8. Useful editing tools are available from drop-‐down “Tool Menu”
For simple audio edits, you’ll need: • Try and stay away
from the “Blade” Tool to cut up clips into sections as it will destroy your clip, instead use the trim tool to either roll up or down the timeline of the selected clip.
• The “Select” Tool to pick out individual segments to move or trim (a segment is highlighted in yellow when it’s selected)
7
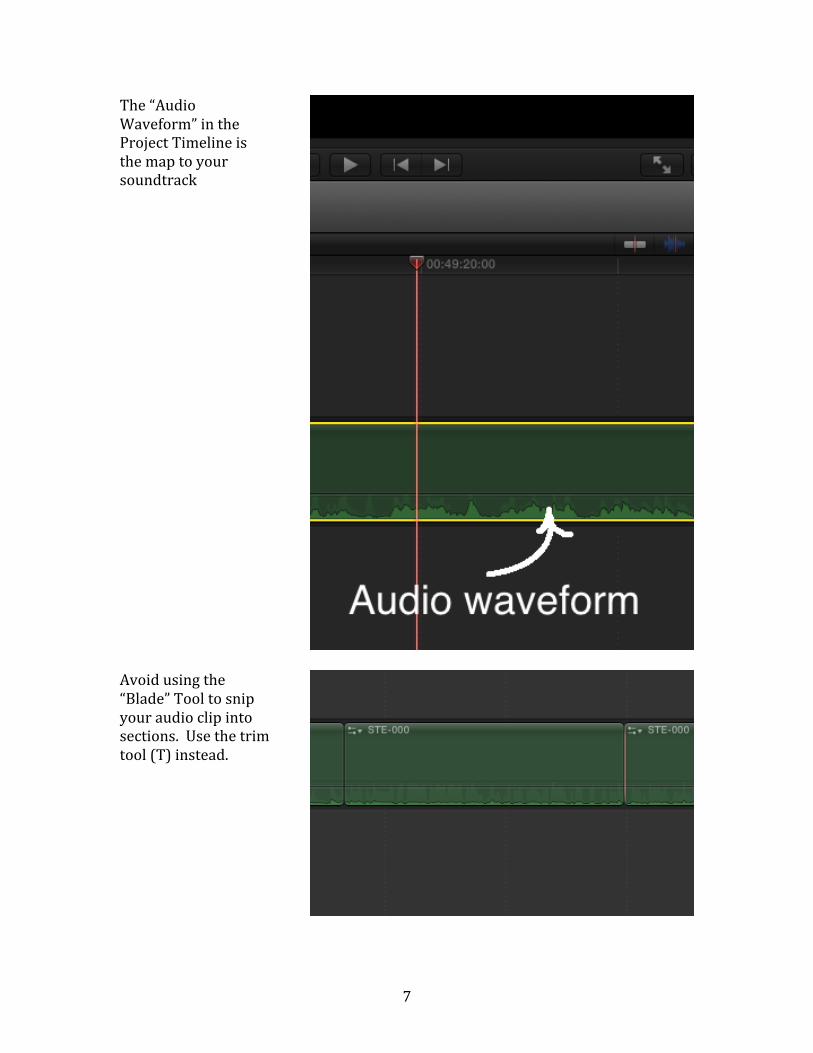
The “Audio Waveform” in the Project Timeline is the map to your soundtrack
Avoid using the “Blade” Tool to snip your audio clip into sections. Use the trim tool (T) instead.
8
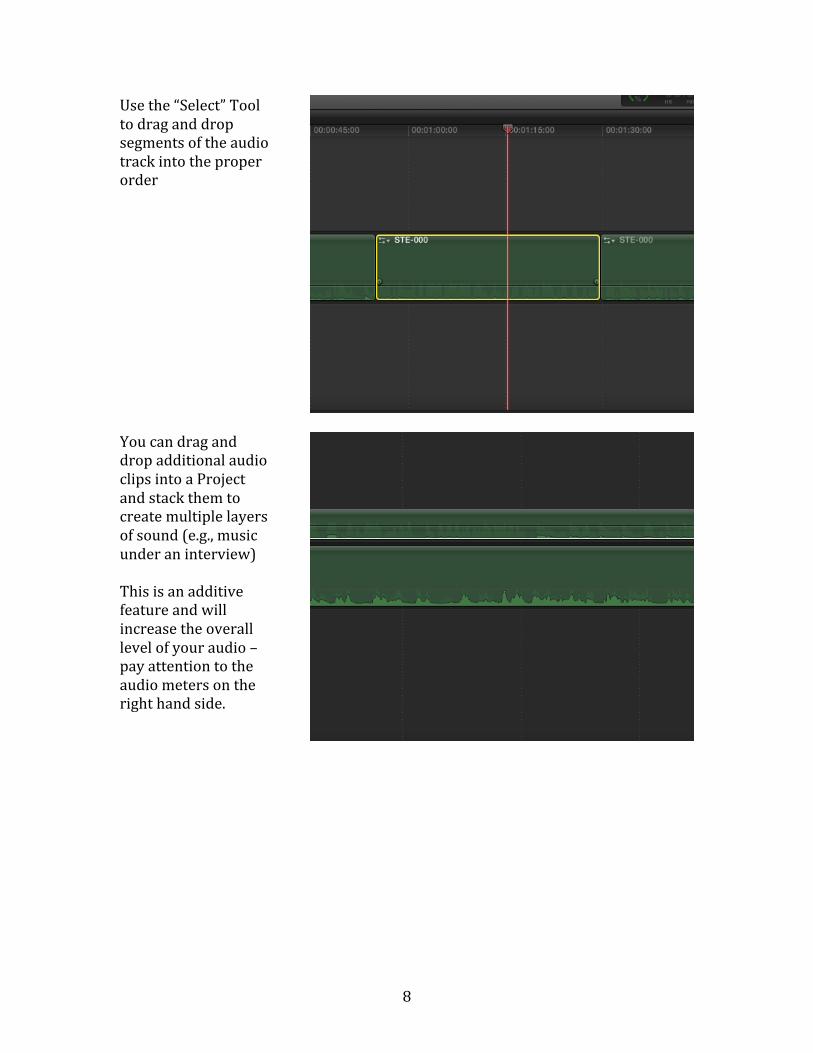
Use the “Select” Tool to drag and drop segments of the audio track into the proper order
You can drag and drop additional audio clips into a Project and stack them to create multiple layers of sound (e.g., music under an interview) This is an additive feature and will increase the overall level of your audio – pay attention to the audio meters on the right hand side.
9
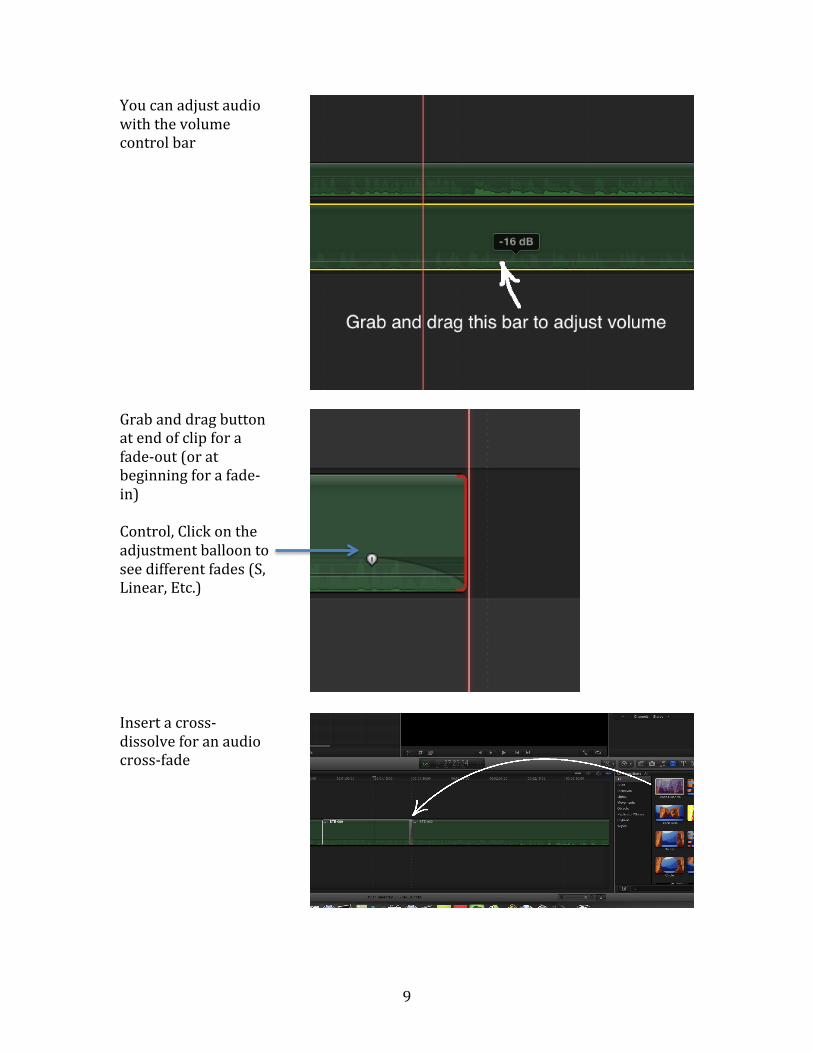
You can adjust audio with the volume control bar
Grab and drag button at end of clip for a fade-‐out (or at beginning for a fade-‐in) Control, Click on the adjustment balloon to see different fades (S, Linear, Etc.)
Insert a cross-‐dissolve for an audio cross-‐fade
10
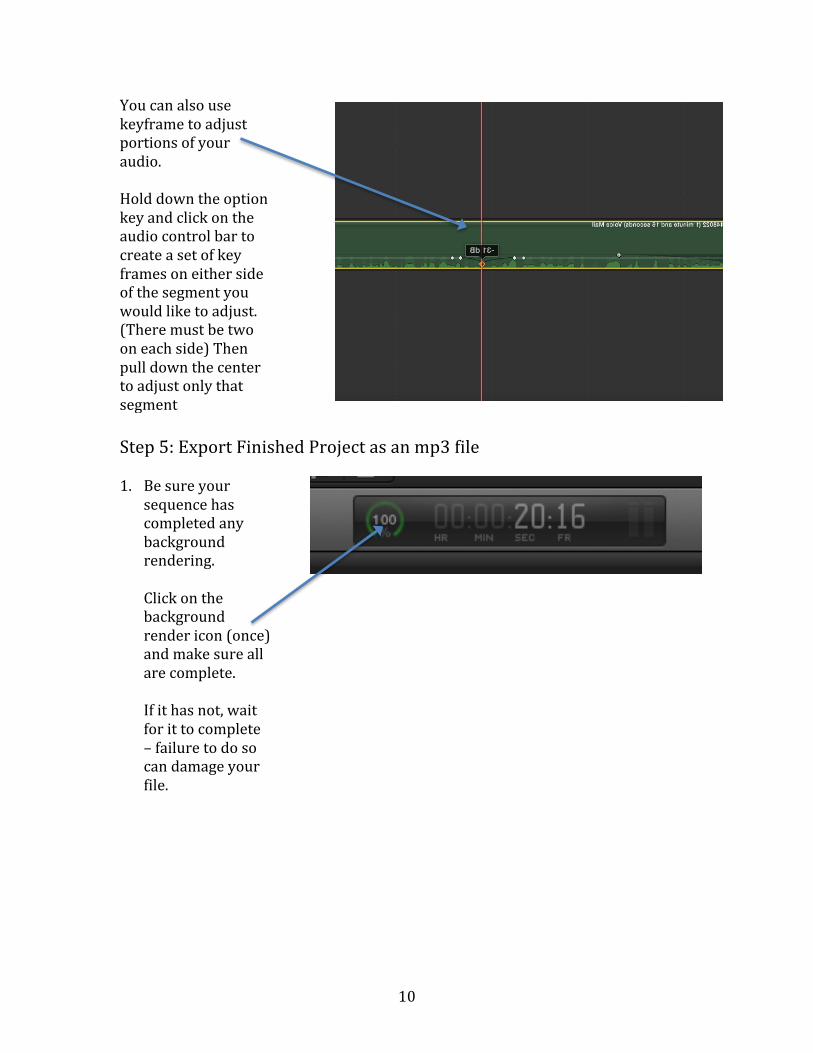
You can also use keyframe to adjust portions of your audio. Hold down the option key and click on the audio control bar to create a set of key frames on either side of the segment you would like to adjust. (There must be two on each side) Then pull down the center to adjust only that segment Step 5: Export Finished Project as an mp3 file 1. Be sure your
sequence has completed any background rendering. Click on the background render icon (once) and make sure all are complete. If it has not, wait for it to complete – failure to do so can damage your file.
11
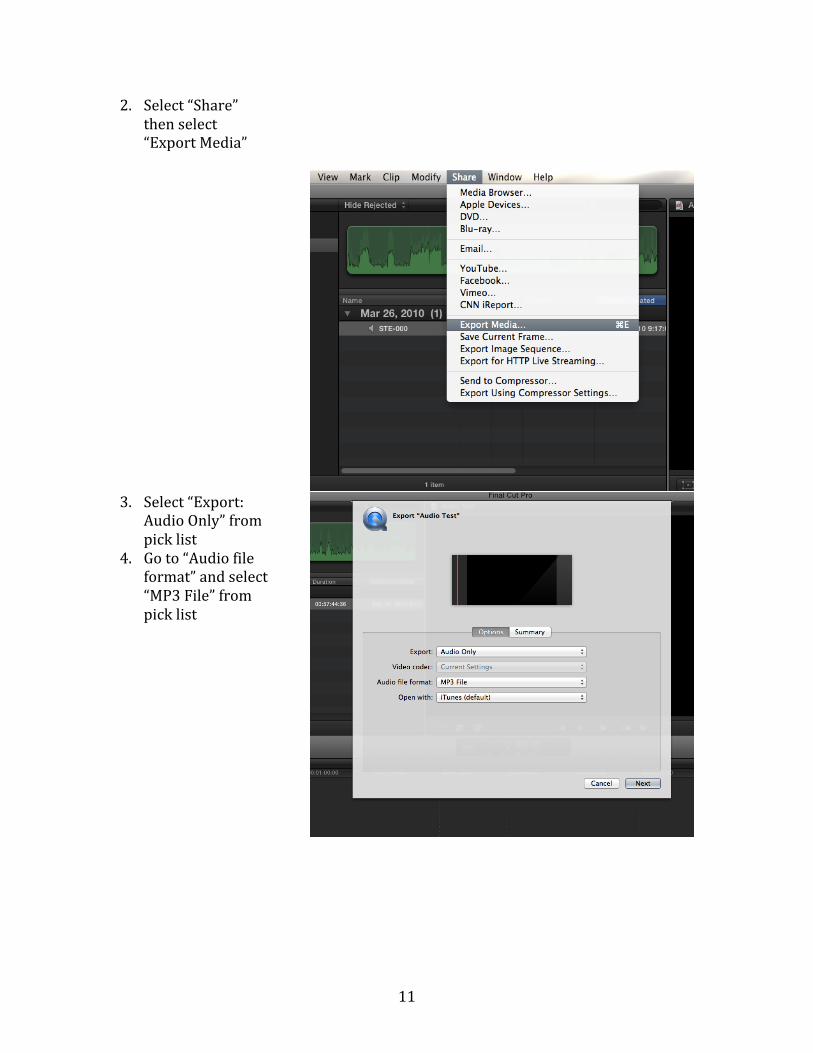
2. Select “Share” then select “Export Media”
3. Select “Export:
Audio Only” from pick list
4. Go to “Audio file format” and select “MP3 File” from pick list
12
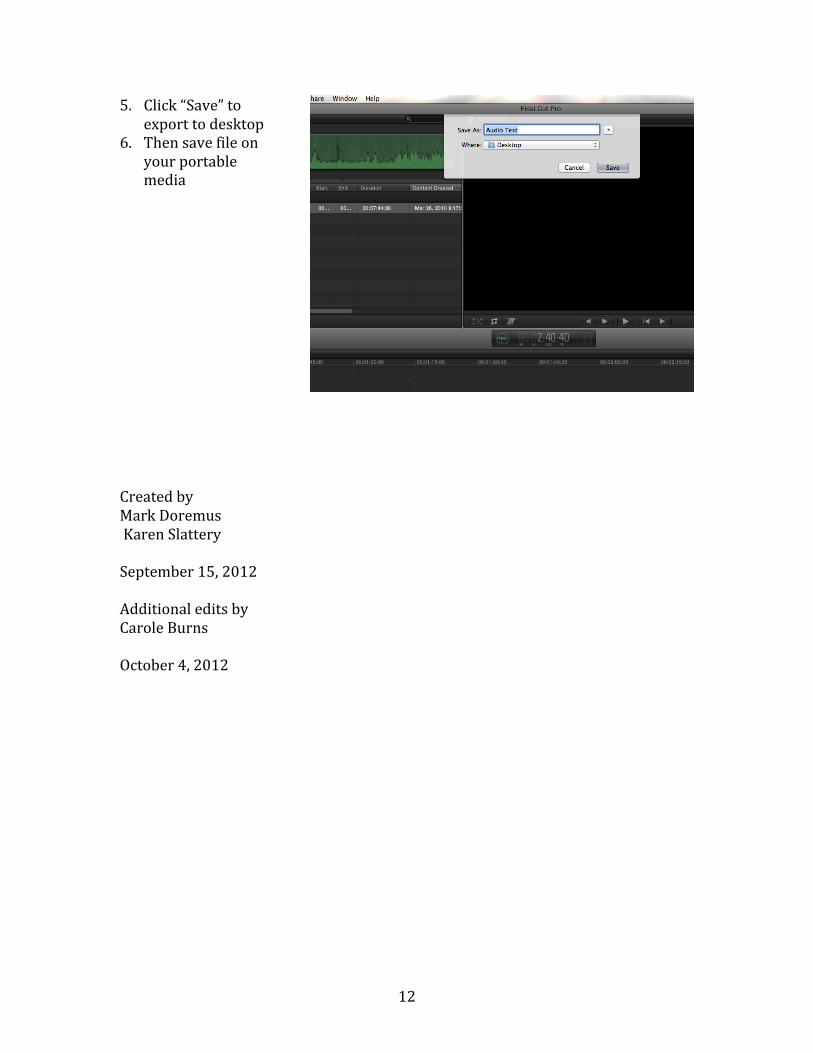
5. Click “Save” to export to desktop
6. Then save file on your portable media
Created by Mark Doremus Karen Slattery September 15, 2012 Additional edits by Carole Burns October 4, 2012