Embed Size (px)
Citation preview

BlisScout Millennium ProHelp File
1. SETUP.........................................................................................................................22. FEATURES.................................................................................................................33. CAPTURE VIDEO......................................................................................................44. BURNING CD/DVD...................................................................................................65. CREATE TEAM GAME.............................................................................................76. EDIT TEAM GAME...................................................................................................77. HOW TO EXAMPLE (STEP BY STEP)....................................................................88. HOW TO CREATE REPORTS................................................................................119. HOW TO EDIT TEAM NOTES...............................................................................1110. HOW TO CHANGE BALL POSITION...................................................................1111. HOW TO CREATE OPPONENTS FORMATION PICTORIAL............................1212. HOW TO MANAGE DROPDOWN LIST BOXES.................................................1213. RECORD/PLAY NAVIGATION PROCESS...........................................................1314. DESCRIBING MAIN ACTION BUTTONS............................................................1315. ACCESSING THE SUITE OF APPLICATIONS....................................................1316. EXPLORING THE TABS.........................................................................................14
a. Scouting Tab..........................................................................................................14b. Reports Tab............................................................................................................15c. Video File Editing Tab..........................................................................................16d. Synopsis Tab..........................................................................................................16
17. EXPLORING THE MENU BAR..............................................................................17a. File.........................................................................................................................17b. Edit.........................................................................................................................17c. Reports...................................................................................................................17d. Tools......................................................................................................................18e. Settings..................................................................................................................19f. Applications...........................................................................................................19g. Help........................................................................................................................19h. About.....................................................................................................................19
18. MENU ACTION BUTTONS....................................................................................20

1. SETUP We assume you have basic knowledge of installing applications. If you
DO NOT, please contact us as you get FREE technical support. Install the application. The application will begin to install and will begin to update your
system with current configurations required for this application to work…mainly video configurations.
There is NO need for additional hardware support if your desire is to break down video files that are CURRENTLY located on your hard drive or CD. The files format supported is AVI, WMV, MPG, MPEG, and ASF. These are the basic file formats that files are normally saved in.
If your desire is to breakdown and extract video from a VCR or DVD that requires to be connected to your PC or Laptop, you MUST have a third party connecter like DAZZLE. We recommend the RED dazzle (DVD RECORDER), DO NOT get the Platinum version.
o Connect the third party connecter to the PC or Laptop. This provides the capability of having VIDEO INPUT to your system.
o Connect your VCR or DVD player (Or any other device like a CAMCORDER) to the DAZZLE device with RCA adapters (the white, red, and yellow adapters). The S-Video connector will also work.
o Typically, all you need to do is connect the RED Dazzle to your computer, and it will install all the drivers you need WITHOUT you installing anything. However, depending on your system, you may need to use Dazzle’s CD’s to install the drivers. Basically, it should be a plug and play component.
o Most analog to computer connectors should work, so long as your computer will recognize the connected device as a video and audio connection.
BlisScout Millennium Pro will NOT breakdown video from a DVD from your internal or external DVD Drive. It will breakdown DVD’s that are

being played in a DVD Player, BUT NOT a DVD Drive. Our software will not recognize a VOB file.
2. FEATURES Capture Video play-by-play.
o Insert Voice Over instructions onto the extracted play.o Insert Text OVERLAY onto the extracted play.
Insert play-by-play results into the Scouting Tab in order to develop statistical scouting reports.
Print and view statistical reports. Create video
enabled statistical reports.
Burn on CD the video reports.
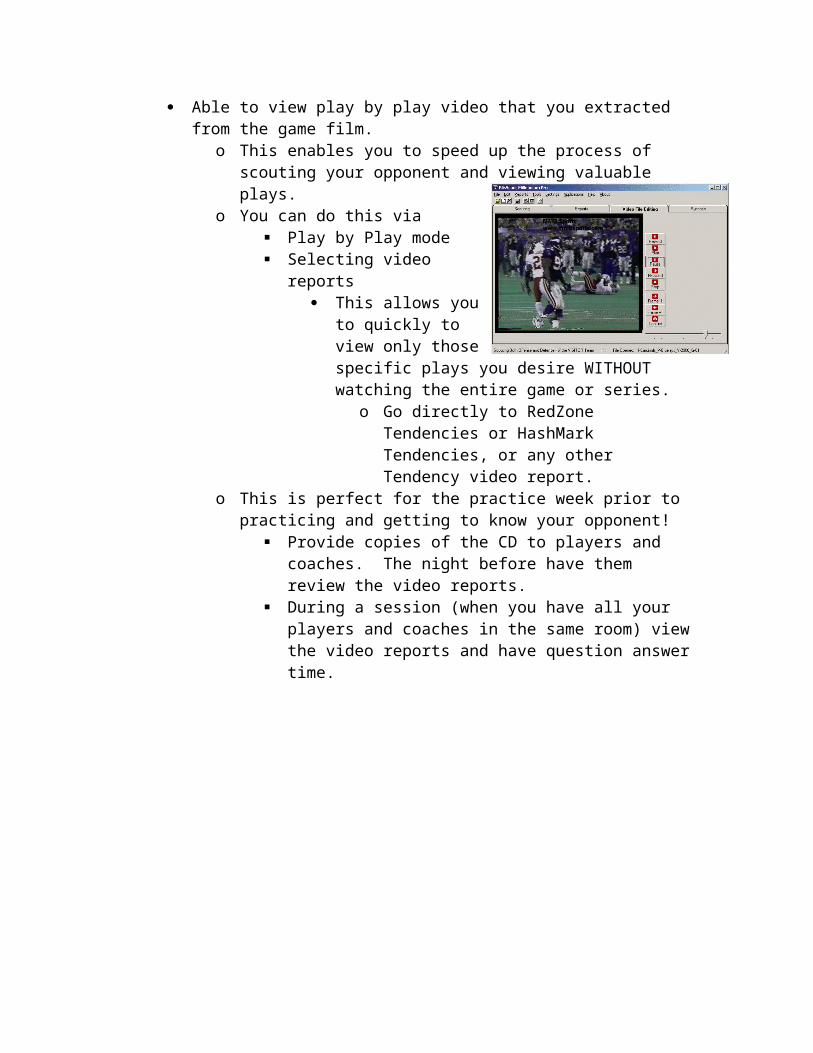
Able to view play by play video that you extracted from the game film.
o This enables you to speed up the process of scouting your opponent and viewing valuable plays.
o You can do this via Play by Play mode Selecting video reports
This allows you to quickly to view only those specific plays you desire WITHOUT watching the entire game or series.
o Go directly to RedZone Tendencies or HashMark Tendencies, or any other Tendency video report.
o This is perfect for the practice week prior to practicing and getting to know your opponent!
Provide copies of the CD to players and coaches. The night before have them review the video reports.
During a session (when you have all your players and coaches in the same room) view the video reports and have question answer time.

3. CAPTURE VIDEO You must FIRST have a team game open in order to get to this feature You have two methods of capturing video.
o External Video Source from a VCR or DVD player or anything else that may be connected to your PC or Laptop via a third party connector like DAZZLE. Also used for live game capturing.
o Internal Video File located on your hard drive. Very basic in nature. Not recommended, but it will get the job done.
The External video source method is the more advanced option. o You have the option of extracting out plays play-by-play while
requiring to enter in the play data BEFORE being able to extract out another play
o You have the option of extracting out plays play-by-play and NOT entering in play data.
This is great to use during LIVE game capturing.
o Which ever style of extracting plays you select, the features are more advanced in this capturing method.
You can voice over your recording. You can add text to your video. The file formats are more advanced when you save the
file. You still get the opportunity to review the play so you can
decide to save it or discard it. Several other advanced features…
o Select “FILE” then “Video Capture” then “External Video Source”
A window will appear that will give you advanced features on breaking down a film play-by-play
See the EXAMPLE for further details. Internal Video File
o Select “FILE” then “Video Capture” then “From File On Computer”
o This gives you the capability of breaking (extracting) down a film play-by-play.
o The file you will breakdown should be located on your hard drive. If it is not, then this is NOT the option you want to break down a film….you will need to use the option to break down a film using the “External Video Source” feature under “FILE” then “Video Capture”.
o This is features much like a VCR player. You can play, stop, record, FF, pause, and Rewind.
o You can also go frame by frame in FF or Rewind mode.
o To start viewing a game, select “FILE”, then “Video Capture”, then “From File On Computer”.
o On screen prompts will lead you along on how to extract a play.o Basically, when you are ready to extract, simply pause the video
and select the “Capture” button. When you are ready to stop capturing, select the button again. You will be given an opportunity to view the extracted video to see if it is exactly what you want. If it is, then save it…if NOT, then discard it and you will be returned back to this tab.
Once a file has been saved, it will be associated with the current play. Make sure that after you save an extracted video, you enter in the play data, and then add a new play…so you can start extracting out a new play. If you fail to do this, you COULD over write a file!!

4. BURNING CD/DVD You can create a CD or DVD (Depends on your hardware capabilities)
which will contain the video reports you want to provide to your players.
You must first generate reports. See the How To Create Reports for further instructions.
To Burn a CD/DVD
o Select “TOOLS” then “Burn CD/DVD”.
o A window will come up that provides you opportunity to add files to the CD tray.
This is fairly straight forward. Your CD/DVD will contain mainly 2 folders called WebParts and Video. From within these folders you will have a couple of subfolders. The nice web layout will be contained in the WebParts folder, and the majority of your video reports will be located in the Video folder.
To insert auto generated pages, select the “Select Reports” button…then select the type of video reports you want. The files will automatically be organized and inserted into the CD Drawer.
You can add additional files if you like by selecting the “Add Additional Files” button.
o After files have been inserted into the tray, you are ready to burn a CD/DVD.
o When you are ready to burn a CD/DVD, simply select the “BURN” action button. This may take some time to complete, so please be patient. A status bar is provided, but may not be accurate…depends on your speed of your computer and the re-fresh rate.

5. CREATE TEAM GAME Select “FILE” then “Team Game” then “New” Make your appropriate selections.
o You can change this once a file has been created; however, it is NOT advisable.
Make sure you name the file something you like, but we do offer an auto-naming feature.
If required, you will be prompted as to who will have first possession of the ball (who is on offense).
Once you are directed to the Scouting Tab, you can then begin entering in your data that you collected from the game film.
o Also, from here you can start watching your game film from the “External Video Source” option.
As you extract a video play-by-play, then that is when you enter in the play data. Once your play data is entered, then you can add a new play and begin extracting out a new play from the game film.
6. EDIT TEAM GAME Open a team game by selecting “File” then “Team Game” then “Open”. Use the Navigational Buttons to navigate to the play you want to edit. Use the dropdown list boxes to change the data, or enter in your user
defined information. If you developed a video, press the Video Clip button to view the play
associated with that specific play. You can also create your opponent’s formation pictorial and associated
it with the formation during edit as well. You can edit the team notes at anytime. It is not related to any one
play, but the entire game. Make sure you save the play by selecting the save button. If a required field is left blank, you will be notified.

7. HOW TO EXAMPLE (STEP BY STEP) Game Creation, Edit, Capture Video, and Create CD/DVD
First, connect your VCR to your external-capturing device (i.e., Dazzle), and then connect the external-capturing device to your PC or Laptop.
Second, start BlisScout Millennium Pro. Click on “Start”, “Programs”, “MMB Sports”, and then “BlisScout Millennium Pro”.
With the application running, you can now create a new team game: Create a New Team Game: Select “File”, “Team Game”, and
then “New”. Or simply click the associated crew new file icon. Select Who to Scout
Home Visitor Home and Visitor
Select What to Scout Offense Defense Offense and Defense
Insert the name of the Home Team (i.e., Vikings)
Insert the name of the Visitor Team (i.e., Cardinals)
Insert desired file name (i.e., Vikings v Cardinals) You will notice that as you fill in the above information, a
suggested file name will be generated for you. To keep your files organized, you can create a folder called
Vikings and store all their games within this folder. Please ensure that you don’t simply highlight a folder, you must OPEN it by double clicking on the requested folder name. Insert desired folder name and select “Create”.
Once you are satisfied with the desired location and file name, select the “OK” button to create the Team Game.
You will notice that some information is automatically inserted for you (i.e., Quarter, Down, Distance, and Yard line).
With the new team created, you can now begin extracting plays from a film and enter the data play-by-play as you “PREVIEW” the game. You

can ALSO do this LIVE during game time. Live game play obviously does not require a VCR:1) Power up your VCR and external-capturing device.2) Video Capture: Select “File”, “Video Capture”, and then “External
Device”. This will allow you to capture video from a VCR and so on.
3) Select the external device from the list provided…if it does not automatically select it for you.
4) IF YOU DO NOT SEE YOUR DEVICE LISTED, PLEASE CONTACT MMB SPORTS. We will need to provide you with the drivers that will allow your product to talk to our application. If you purchase Dazzle, then there should be no issue.
5) A new window would have appeared called “External Video Source Capture”.
6) MAKE SURE YOUR VCR IS TURNED ON.7) You have two options to start capturing: PREVIEW and LIVE.
They are basically the same, except the LIVE option does not require you to complete all the fields when you extract a video play…the PREVIEW option requires you to enter in the data of an extracted file BEFORE you can extract out another play. In this exercise, we’ll use the PREVIEW option.
8) Select the “PREVIEW” button and the Video Screen should pick up your source.
9) Preview the first play, over and over again to ensure you have what you need to capture the correct play.a) To manipulate the FF, REWIND and so on, you can ONLY do
this via your External Source (like a VCR). Our software will NOT communicate with your external device and do this for you. This part is MANUAL.
10)During the PREVIEW, you can do one of two options. During the preview (BEFORE CAPTURE) you can add the data, OR capture the data then ENTER the play data. We recommend PREVIEW then add data BEFORE you attempt to CAPTURE another video clip of that play you have been previewing. You could extract first, then enter play data, but we do not advise it…as you might not enter the data correctly that associates with the play you have been viewing. Not only that, but some VCR’s will shut off automatically if you take too much time away from using them…keep this in mind.
11)After you have entered the play data, you are now ready to capture that play and extract it out of the film as its own video clip.a) DO NOT SELECT THE ADD button at this point. ONLY select
the SAVE button.12)When you entered the play data, do you remember the PLAY
ACTION you entered? It is a good idea to enter THIS data in the TEXT OVERLAY boxes on the “External Video Source Capture” window. You have two lines of text you can enter. After you have

entered the text, YOU MUST select the DRAW TEXT button to make that text show up on the screen.a) After you have entered in the PLAY ACTION information in the
TEXT OVERLAY boxes, you are ready to begin extracting the video.
b) When you get it to the EXACT spot, press “Pause” on your VCR.
c) Select the “CAPTURE” Button on the application.d) Press “Play” on your VCRe) At the end of the play, press “Pause” on your VCR.f) Then, select the “Stop Capture” Button on the application. g) At this point, another window will open..Preview Window. This
is another chance for you to review the data you entered to make sure it is correct…as stated below.
13)Review the extracted video to see if this is what you want.a) If so, select Saveb) If not, select discard and record the play again.
14)With the desired play extracted and saved as you like it, you will automatically be sent back to the Capture window.a) Built in safety features will make sure that you add another play
PRIOR to recording or viewing another play.b) A button will appear reminding you. If you attempt to avoid it, it
will remind you.15)Another feature we can mention here is the “Play the Associated
Video Clip” button. Since the program reminds you to add another play and makes you go back to the SCOUTING tab, you can actually view the previously saved video file of the current play…If you wanted to, you could always enter in your data at this time as well.a) Some coaches will extract out all of their plays at once, and only
select the add button to advance the program. Doing this, they also are forced to MANUALLY update the yardage…basically, to each his own.
b) ALSO, some coaches will start the extraction process and extract out the ENTIRE game, then they will go back and extract out play-by-play clips. This makes the process longer, and you really got to have a large disc space to do this….again, to each his own.
16)Basically, from here on out, you will just repeat the above steps until all the film has been extracted and used according to your wishes.
17)From here, if you follow our original steps, you are now ready to develop your reports. See How to Create Reports for further instructions.

8. HOW TO CREATE REPORTS After ALL plays have been entered; you are now ready to create your
reports. Select “Reports” from the menu bar Select “Generate”.
a. Select the type of reports and by whom (Offense or Defense) (Home or Visitor) and so on.
b. Select the “Generate Reports” command button. From this point, your web enabled reports can be
viewed from the Reports Tab. You can view paper reports:
– From the Reports Tab, select the desired reports tab (home/off, home/def, visitor/off, visitor/def).
You can view the video reports:– From the Reports Tab, select the command button
(view list of video reports) to view a list of reports from the application.
– From the Reports Tab, select the command button (browse latest video reports) to view a web enabled organized list of video pertaining to specific style reports.
a. NOTE: This web enabled list changes EVERYTIME you generate reports.
You can delete reports by selecting them individually and clicking on the command button for delete (icon that resembles a trash can).
9. HOW TO EDIT TEAM NOTES Select the “Team Notes” button. This is for the entire game, and not
related to one specific play. This option is a simple note pad style word processor.
You can print the team notes as well.
10. HOW TO CHANGE BALL POSITION The football icon depicts who has the ball. Click on the “HOME” or “VISITOR” label to change possession of the
ball. You can also select “EDIT” then “Change Ball Possession” to complete this step as well.
You are restricted as to who can have possession according to the style of the game you created. Meaning, if you are scouting a home teams offense ONLY, then you can never change the ball possession to show that they are on defense.
11. HOW TO CREATE OPPONENTS FORMATION PICTORIAL
You must first have a team game open. Select the “Create Opponent Formation” button. A window will appear that will give you the capability to create
formations. You can ONLY create a formation that is listed in the dropdown list
box. If a formation does not show up here, you will need to add the formation by going to the “Manage Dropdown List Boxes” tool (located under: “TOOLS” then “Manage Dropdown Boxes”.
Once you locate a formation in the dropdown list box, select it. Move the X’s or O’s to the desired location, and select “SAVE”. If the desired formation was already selected in the Scouting tab, then
after you select “SAVE” then you will notice that the formation will appear in the “Opponent OFF Formation” window.
If the desired formation was NOT selected in the Scouting tab, once you select it, the “Opponent OFF Formation” window will change to the desired formation pictorial.
As you navigate through the plays, you will notice that the “Opponent OFF Formation” window will change accordingly if you have a saved pictorial.
12. HOW TO MANAGE DROPDOWN LIST BOXES You have the capability of managing certain dropdown list boxes in
order to personalize (use your own words) information that gets entered into the database.
Select “TOOLS” then “Manage Dropdown Boxes” – Opens a window that provides you an opportunity to manage the available editable dropdown boxes. From here you can manage the following dropdown boxes: Offense
o Offensive Key Playero Play Actiono Pass Routeo Formation
Defenseo Blitz/Stunto Coverageo Defenseo Formationo Key Player

13. RECORD/PLAY NAVIGATION PROCESS You have four Navigation Buttons. These are standard buttons for first play, previous play, next play, and
last play. If you are navigating and you have not filled in appropriate required
information, you will be prompted to do so before you can continue. The current play number will appear to the box located with the
navigational buttons. As you navigate, the play information will automatically save.
14. DESCRIBING MAIN ACTION BUTTONS There are four “Action Buttons” The SAVE action button (Floppy Disc) will save the current play The ADD action button (Plus Sign) will add a play The DELETE action button (X) will delete a play and automatically
move you to the next available play. The REPORTS action button (Pie Chart) will start the process of
creating reports.
15. ACCESSING THE SUITE OF APPLICATIONS BlisScout Millennium Pro is primarily a scouting application.
HOWEVER, you also get FREE of charge all of our applications that make up the suite.
o Playbooko Practice Schedulero Contact Managero Team Stats
These applications are NOT combined with this application, but you can access them through this application.
o This means that you need to INSTALL each application separately.
o Once installed, you can access them quickly through the menu bar of BlisScout Millennium Pro.
o You can inform Millennium Pro of the location of the applications if you do not install them in their default directory.
To access these applications select “APPLICATIONS” from the menu bar.
To change the location of an applications start up file, select “APPLICATIONS” then “Change Location of Files” then the desired application.

16. EXPLORING THE TABS
a. Scouting Tab This is the main engine that will create your game plan. You will
enter in the play-by-play data into this tab. The main/basic information is listed below
o Quartero Downo Distanceo Yardlineo Yardageo Hashmarko Strength o Formation Offo Resultso PAT Conv Attempt
There are two sub areas consisting of Offense and Defense. According to what you want to do, and if it is available, these areas will be available to input data.
o Offense Play Action Type (Run, Pass, N/A) Play Action Run Hole Pass Zone Pass Route Offensive Key Player Motion 3rd Down Conversion 4th Down Conversion
o Defense Blitz/Stunt Defense Coverage Defensive Key Player Formation – DEF
Video Clip Informationo A label showing the name of the associated video clip.o A button that you select that will actually play the
associated video clip. Action Buttons
o There are four “Action Buttons” The SAVE action button (Floppy Disc) will save
the current play The ADD action button (Plus Sign) will add a play
The DELETE action button (X) will delete a play and automatically move you to the next available play.
The REPORTS action button (Pie Chart) will start the process of creating reports.
Navigation Buttonso You have four Navigation Buttons.
These are standard buttons for first play, previous play, next play, and last play.
If you are navigating and you have not filled in appropriate required information, you will be prompted to do so before you can continue.
The current play number will appear to the box located with the navigational buttons.
As you navigate, the play information will automatically save.
Opponent’s Formation Pictorialo This feature allows you to have a pictorial of your
opponent’s formation for that specific play.o This is useful because on the formation reports, this
pictorial will be printed out for you. Team Notes
o This is great to add any helpful information you need that will describe your opponent.
Ball Position Icono This is a football, and whoever is on offense will/should
have the football icon next to their label (Home) or (Visitor).
b. Reports Tab Print Button. Select this to print Print View Button. Select this to view what you are about to
print. Page Setup Button. You can modify how the page will print. ACTION BUTTONS
1. Home Offense – shows only the reports for the offense of the home team
2. Home Defense – shows only the reports for the defense of the home team
3. Visitor Offense – shows only the reports for the offense of the visitor team
4. Visitor Defense – shows only the reports fro the defense of the visitor team
5. View Video Reports – shows a list of available video reports. YOU MUST generate paper reports PRIOR to viewing video reports.

6. When one of these action buttons are selected, the label will change to display the location of the reports.
7. If no reports is shown after you select one of these action buttons, then you have either not ran the reports, or there are no reports available.
Reports Window. This will display a web page that depicts the selected report…paper or video.
Please note that in order to take advantage of the video reports, you must FIRST generate reports.
c. Video File Editing Tab This gives you the capability of breaking (extracting) down a
film play-by-play. The file you will breakdown should be located on your hard
drive. If it is not, then this is NOT the option you want to break down a film….you will need to use the option to break down a film using the “External Video Source” feature under “FILE” then “Video Capture”.
This is features much like a VCR player. You can play, stop, record, FF, pause, and Rewind.
You can also go frame by frame in FF or Rewind mode. To start viewing a game, select “FILE”, then “Video Capture”,
then “From File On Computer”. On screen prompts will lead you along on how to extract a
play. Basically, when you are ready to extract, simply pause the
video and select the “Capture” button. When you are ready to stop capturing, select the button again. You will be given an opportunity to view the extracted video to see if it is exactly what you want. If it is, then save it…if NOT, then discard it and you will be returned back to this tab.
1. Once a file has been saved, it will be associated with the current play. Make sure that after you save an extracted video, you enter in the play data, and then add a new play…so you can start extracting out a new play. If you fail to do this, you COULD over write a file!!
d. Synopsis Tab This is our jewel. It is a unique report that provides an
overview of the entire game. This is your main report that you will use during game day. We recommend that you print it out and take it with you during the game.
The features on this tab is much like the reports tab.

17. EXPLORING THE MENU BAR
a. Fileo Team Game
New – Creates a new game Open – Opens a game Delete – Deletes a game Close – Closes the current game
o Video Capture – MUST have a game currently open in order to select from this option
External Video Source – Used to capture video from a VCR or DVD player or other external sources that are connected to your PC or Laptop via a third party connector like DAZZLE. This is the advanced video capture method.
From File On Computer – Used to capture video that is currently located on your computer. This is the basic video capture method, and not recommended, but it will do the job for you.
o Exit – Exits the program.o Last File Opened – Opens the last file you were working on.
b. Edito Add Play – another method to add a play to your team gameo Update Play – another method to save a play after you have
edited it.o Delete Play – another method to delete the current play that you
are viewingo Change Ball Possession – another method that will change who
has the ball (offense). If this is not available, then the game configuration was setup to not allow this feature.
o Notes – this feature allows you to add team notes for the currently opened game.
o Re-Number Plays – if you delete a play, then you may need to have the game plays renumbered. If you do this….YOU MUST re-associate the extracted video’s as well…as they may not be associated with the correct play. Just check to make sure.
o Go to Play Number – a method to advanced to a desired play.
c. Reportso Generates paper and video reports.
d. Toolso Manage Dropdown Boxes – Opens a window that provides you
an opportunity to manage the available editable dropdown boxes. From here you can manage the following dropdown boxes:
Offense Offensive Key Player Play Action Pass Route Formation
Defense Blitz/Stunt Coverage Defense Formation Key Player
Resultso Create Opponents Formation – Provides the means to create
formation pictorials of your opponent’s formations. A window will appear that will give you the capability to
create formations. You can ONLY create a formation that is listed in the
dropdown list box. If a formation does not show up here, you will need to add the formation by going to the “Manage Dropdown List Boxes” tool (located under: “TOOLS” then “Manage Dropdown Boxes”.
Once you locate a formation in the dropdown list box, select it.
Move the X’s or O’s to the desired location, and select “SAVE”.
If the desired formation was already selected in the Scouting tab, then after you select “SAVE” then you will notice that the formation will appear in the “Opponent OFF Formation” window.
If the desired formation was NOT selected in the Scouting tab, once you select it, the “Opponent OFF Formation” window will change to the desired formation pictorial.
o Change Who-What to Scout – If you want to change the configuration of the game…you can do it by using this method.
o Burn CD/DVD – if your PC or laptop has this capability, then you’ll be able to burn CD’s and DVD’s with selected reports.
o Merge Games – This feature will allow you to merge games to make one large, combined game from different games of different years…only limited to your imagination.
NOTE: This has not been implemented yet. This will be available in our next major upgrade.
e. Settingso Capture Quality – this is for the capturing of video from your
Hard Drive. Average – generate small files Fair – generate medium files Good – generate larger files
o Configure Video Objects Register – Certain video objects will need to be
registered on your computer in order for our application to work. During install, this is already completed. However, over time, something may go wrong with your PC, and you’ll need to register objects again. This is your method to do so.
Un-Register – If something is not working on your system to allow video, you may need to un-register and then register objects.
Configure Direct9X – Required components for our video objects.
f. Applicationso This is a shortcut that will open all of our applications that is
contained within the BlisScout Millennium Pro Suite. YOU MUST have installed the applications in order for this to work. If the application does not open up when you select it from the list, then you will need to locate it on your hard drive, or you may not have installed it yet.
o To change the location ID of the applications…select the “Change Location of Files”, and select the application.
g. Helpo Provides access to a help file.
h. Abouto Describes this product.

18. MENU ACTION BUTTONS OPEN – Provides the means of opening a pre-existing game NEW – Provides the means of creating a new game DELETE – Provides the means of deleting a game. SAVE – This will save the current play of an opened game. EXTERNAL VIDEO CAPTURE – This will open a window that will
allow you to begin the process of capturing video from an external source like a VCR or DVD player that is connected to your Laptop or PC via a third party connector like DAZZLE. This feature has a lot of ADVANCED features while extracting video.
INTERNAL VIDEO CAPTURE – As it states, this will allow you to view a file that is located ON YOUR HARD DRIVE. This is NOT the preferred way of breaking down film. This feature is VERY basic, but it will get the job done. A more advanced version is in the works.
BURN CD/DVD – If you have CD or DVD Burning drive, this feature will allow you the capability of gathering up files and burning them to a CD or DVD.


![mmb first lecture HR[1]](https://img.pdfslide.us/doc/110x75/577d2bb91a28ab4e1eab3ba4/mmb-first-lecture-hr1.jpg)

![[SBA] [MMB] [Nov] [2009]](https://img.pdfslide.us/doc/110x75/55cf8e2b550346703b8f4c94/sba-mmb-nov-2009.jpg)