Embed Size (px)
Citation preview

Edible Education A GROW BIOINTENSIVE® Primer
A Sixth Grade Curriculum Resource
Developed for Ecology Action’s Common Ground Garden Project
Developed by
Kathryn Rutti Mia Sasaki
1
Table of Contents
Introduction Why GROW BIOINTENSIVE®? Integrating Edible Education into Existing Units Edible Education Lesson Structure Lesson 1: GROW BIOINTENSIVE® 101 Appendix 1.1
Lesson 2: Understanding the Soil Appendix 2.1
Lesson 3: Planning the Garden Appendix 3.1
Lesson 4: Sewing for the Harvest Lesson 5: Transplanting and Ecosystems Lesson 6: Decomposers and Composting Special Crop Lesson: Potatoes Special Crop Lesson: Fava Beans Special Crop Lesson: Wheat Final Celebration: Making Pizzettes Appendix 11.1 Appendix 11.2
2

Introduction This curriculum has three main focuses:
1. Restoring the soil and environment through the GROW BIOINTENSIVE® Sustainable MiniFarming method
2. Engaging students in California science and Common Core standards in an outdoor, handson learning setting
3. Providing teachers with a clear, straightforward parallel unit that can be integrated into existing units.
The GROW BIOINTENSIVE® method is a way of growing food that revitalizes the soil and all that springs out of the surrounding ecosystem. In terms of youth garden education, this curriculum then serves as a paradigm shift. While organic food and healthy living are important, this unit focuses on both good choices in healthful eating for students and also good choices for the garden’s ecosystem. The curriculum is also flexible to the students’ needs. It can be used on campus with raised garden beds, or it can be used offcampus at local community garden workshops, etc. It can be extended to ninetyminute blocks, but it is designed for the traditional fiftyminute period. It aligns to specifically sixth grade standards used in California, but it can be modified for other grades, depending on the need. This curriculum is also written for teachers who have little time to plan out a gardening unit. While the lessons are fully designed, we encourage teachers to modify the lessons to what is best for individual classes and a teacher’s personal teaching style. While there is some spiraling of standards in the unit, many lessons can stand alone, which allows a teacher to go in whatever order seems best. We hope this GROW BIOINTENSIVE® Primer supports teachers, invigorates students, and creates environmental stewardship. If you have any questions or suggestions for the curriculum, we welcome you to email [email protected] . Enjoy!
3
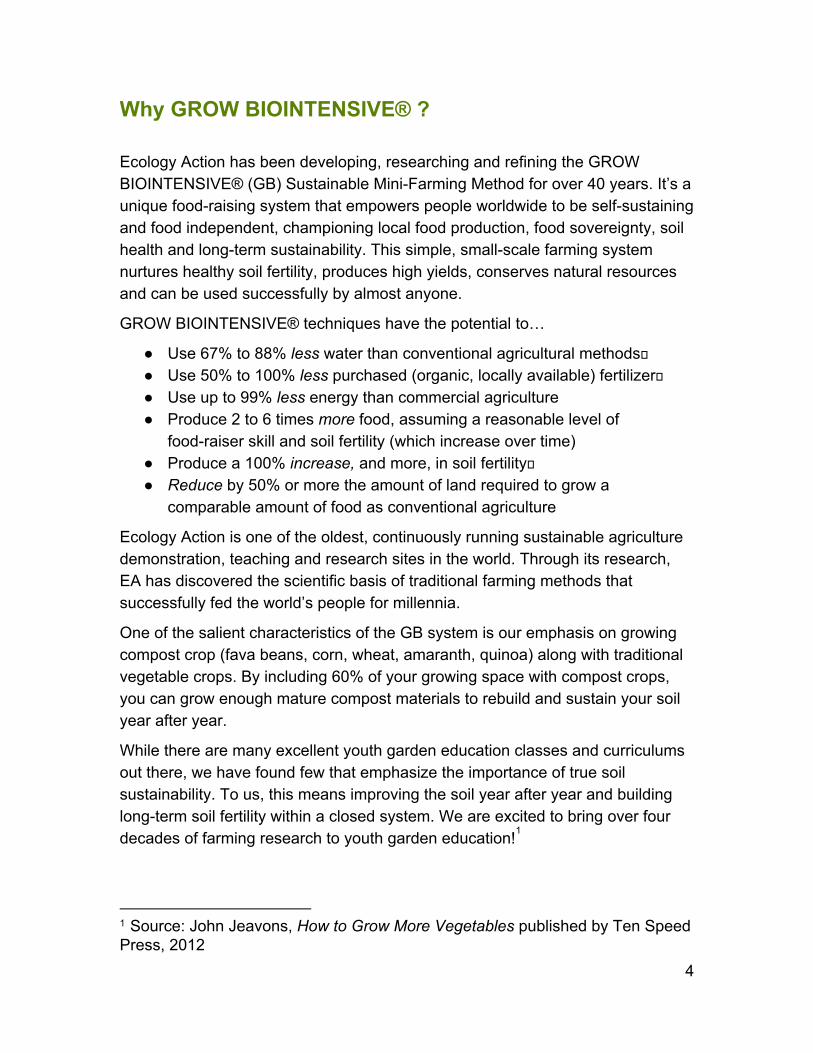
Why GROW BIOINTENSIVE® ? Ecology Action has been developing, researching and refining the GROW BIOINTENSIVE® (GB) Sustainable MiniFarming Method for over 40 years. It’s a unique foodraising system that empowers people worldwide to be selfsustaining and food independent, championing local food production, food sovereignty, soil health and longterm sustainability. This simple, smallscale farming system nurtures healthy soil fertility, produces high yields, conserves natural resources and can be used successfully by almost anyone.
GROW BIOINTENSIVE® techniques have the potential to…
Use 67% to 88% less water than conventional agricultural methods Use 50% to 100% less purchased (organic, locally available) fertilizer Use up to 99% less energy than commercial agriculture Produce 2 to 6 times more food, assuming a reasonable level of
foodraiser skill and soil fertility (which increase over time) Produce a 100% increase, and more, in soil fertility Reduce by 50% or more the amount of land required to grow a
comparable amount of food as conventional agriculture
Ecology Action is one of the oldest, continuously running sustainable agriculture demonstration, teaching and research sites in the world. Through its research, EA has discovered the scientific basis of traditional farming methods that successfully fed the world’s people for millennia.
One of the salient characteristics of the GB system is our emphasis on growing compost crop (fava beans, corn, wheat, amaranth, quinoa) along with traditional vegetable crops. By including 60% of your growing space with compost crops, you can grow enough mature compost materials to rebuild and sustain your soil year after year.
While there are many excellent youth garden education classes and curriculums out there, we have found few that emphasize the importance of true soil sustainability. To us, this means improving the soil year after year and building longterm soil fertility within a closed system. We are excited to bring over four decades of farming research to youth garden education! 1
1 Source: John Jeavons, How to Grow More Vegetables published by Ten Speed Press, 2012
4
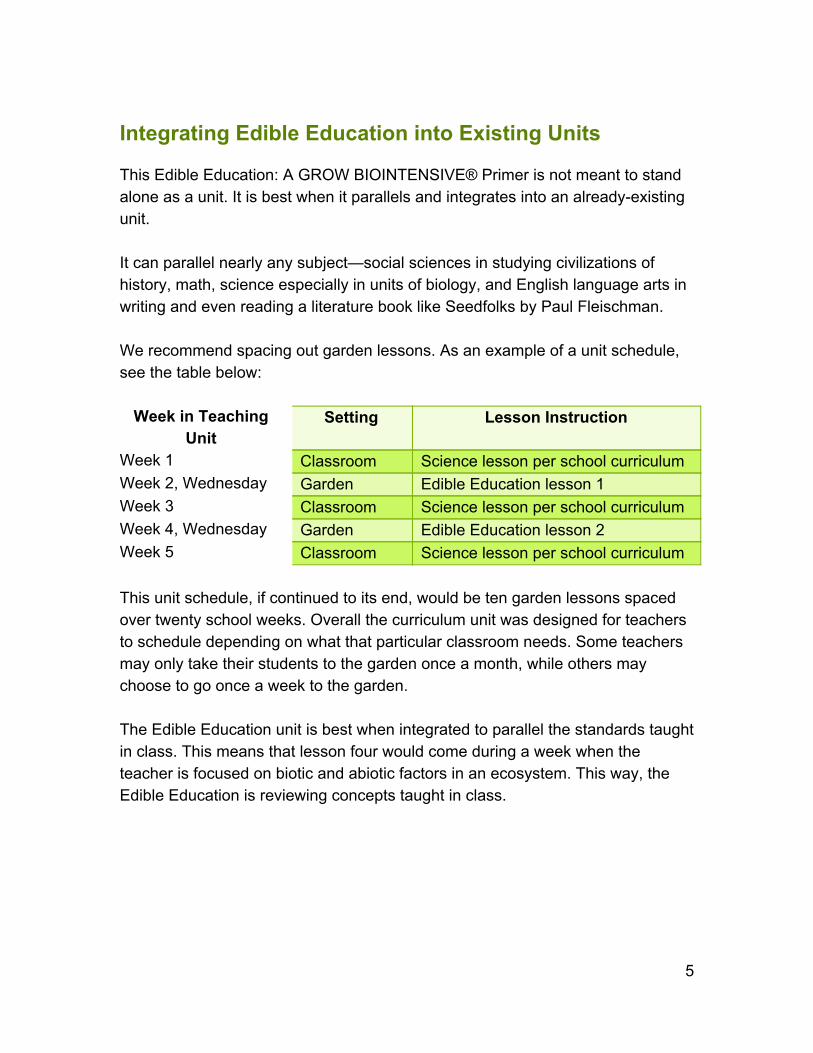
Integrating Edible Education into Existing Units This Edible Education: A GROW BIOINTENSIVE® Primer is not meant to stand alone as a unit. It is best when it parallels and integrates into an alreadyexisting unit. It can parallel nearly any subject—social sciences in studying civilizations of history, math, science especially in units of biology, and English language arts in writing and even reading a literature book like Seedfolks by Paul Fleischman. We recommend spacing out garden lessons. As an example of a unit schedule, see the table below: Week in Teaching
Unit Setting Lesson Instruction
Week 1 Classroom Science lesson per school curriculum Week 2, Wednesday Garden Edible Education lesson 1 Week 3 Classroom Science lesson per school curriculum Week 4, Wednesday Garden Edible Education lesson 2 Week 5 Classroom Science lesson per school curriculum This unit schedule, if continued to its end, would be ten garden lessons spaced over twenty school weeks. Overall the curriculum unit was designed for teachers to schedule depending on what that particular classroom needs. Some teachers may only take their students to the garden once a month, while others may choose to go once a week to the garden. The Edible Education unit is best when integrated to parallel the standards taught in class. This means that lesson four would come during a week when the teacher is focused on biotic and abiotic factors in an ecosystem. This way, the Edible Education is reviewing concepts taught in class.
5

Edible Education Lesson Structure Wendell Berry Moments (5-10 minutes)
Just like the agrarian Wendell Berry, students need time to reflect and write about their garden experiences. After the initial class in the garden, classes can start with this activity of journaling in the garden. While there is only about 57 minutes for writing time, encourage students to write in full sentences (if applicable). Give them the menu of writing choices below:
Students can write creatively, whether a short poem, an installment (short part) of a fictional story, or a guide to a futuristic invention that will help in the garden. There are many creative possibilities for journaling.
If creative writing is not preferred, students can write nonfiction about the garden and their experience. They can write about what they previously learned in the garden, what their senses are taking in for the day, and they can record the weather and planting conditions.
For some students, writing may not fit with their individual education plan or their specific learning targets. If possible, brainstorm with that student what activity they would be invested in accomplishing. That may be drawing crops or taking leaf samplings and keeping them taped in their journal.
Working the Land (30-40 minutes)
This part of the lesson is the handson learning about garden work. There are three aims of this section of the lesson:
These classes are meant to support the existing science lessons that are going on in the classroom by also meeting the California Department of Education science content standards. They also focus on science 2
standards found in the Common Core. Because these lessons are meant to be interdisciplinary, they have the
possibility of incorporating other subjects like math, ELA, and social studies. The section on each lesson called “Interdisciplinary Expansion” gives ideas in how to draw connections to other subjects.
These classes are meant to teach the GROW BIOINTENSIVE® methods developed by John Jeavons. If you want more indepth information about
2 Source: http://www.cde.ca.gov/be/st/ss/documents/sciencestnd.pdf
6
his sustainable agricultural model, please reference his books, The Sustainable Vegetable Garden and How to Grow More Vegetables . 3
Ending the Day (510 minutes)
This is a time for students to regroup and share “aha moments” from their time working the land. This time also flexes to the teacher’s needs. There may be days where there is not enough time for a closing circle. Still, it is best for students to have a moment to review in order to better plant the learned objectives in their memory.
3 https://www.bountifulgardens.org/products/BEA0301%20%20PERFECT
7

Lesson 1: GROW BIOINTENSIVE® 101 Objectives
Students will be able to…
Understand behavioral expectations and values of the garden. Describe basic tools and plants in the garden. Learn about basic GROW BIOINTENSIVE® practices in the garden.
Common Core Standards
CCSS.ELALiteracy.RI.6.7 Integrate information presented in different media or formats (e.g., visually, quantitatively) as well as in words to develop a coherent understanding of a topic or issue.
Preparation
Strategically determine which students will be in the different scavenger hunt groups (five students per group).
Print a set of cards per group (see Appendix 1.1 on page 56). Number the cards 14, making sure every packet goes in a different order.
In order to prepare to show students the composition of soil (next week’s lesson), collect mason jars (one jar to every four students).
Wendell Berry Moments (10 minutes)
As explained earlier (on page 2), there are only 57 minutes in a 50minute session that are setaside for students to journal. Be sure they immediately start journaling as soon as they walk into the garden space. They should be away from neighbors, in a “no talk” zone. See the Edible Education Structure (p. 2) for more about this journaling time.
Working the Land (30 minutes)
1. Explain to students the garden scavenger hunt: a. How: Ground rules are important!
i. Reiterate the ground rule of safety. (Explain that there cannot be running in the garden because of all the tools and stakes in the garden.)
ii. Ask students to respect everything in the garden, not handling tools and plants for today’s activity.
b. Why: Learning is the goal. i. The most important part of the scavenger hunt is to make
deeper connections of why the garden does certain practices.
1. Explain to students that—for example—a question will ask them to find a certain crop. It will also have a certain follow up question asking why the crop may
8

be important in the garden. The second question is a higherlevel question that is important to spend some time investigating (like a detective!)
c. What: Logistics i. Explain that each of the groups will get a packet of cards.
1. These cards are in a specific order, so the students must go in order of their cards.
2. Each card has an activity and a question. Questions must be answered in full sentences in the space provided on the card.
3. A different student should write on every card. 4. Explain to students that one of the questions involves
the white board. Remind them to read all the directions before writing on the white board.
5. Once students are finished, they can meet back at the benches to check their answers and make sure they can present them.
Ending the Day (10 minutes)
1. Read questions, and have students either show their answers or read them.
2. Discuss the higherlevel questions with the students, asking how they made intelligent guesses or “hypothesized” their answers.
3. Wrap up by first adding a tablespoon of laundry detergent to each soil test. (This helps the contents to settle into their three forms of clay, silt, and sand.) Then ask the students stack their mason jars with soil tests stacked out of the way. Explain that next week they will test the soil for its components.
Appendix 1.1
Print one set of the following cards per student group. Number the cards so that every packet is in a different order. (That way,
students are spread throughout the garden.)
9

1. Find the carrot bed and pull
one. 2. On the back of this card, draw
and color what you think a carrot looks like when it is in the soil.
3. Why do you think our garden grows these carrots? (Think about the soil!)
________________________________________________________________________________________________________________________________________________________________________________________________________________________________________________________________________________________________________________________________________________________________________________________________________________________________________________________________________________________________________________________
1. Can you find a garden tool in
the garden beds? 2. Draw it on the back of this card
and write its name. (If you don’t know the tool name, guess!)
3. What purpose does this tool serve?
________________________________________________________________________________________________________________________________________________________________________________________________________________________________________________________________________________________________________________________________________________________________________________________________________________________________________________________________________
10

1. Measure all the sides of a
rectangular garden bed in feet. 2. Label this garden bed diagram
with your measurements.
3. What is the perimeter (in feet) of your garden bed?
____________________________________________________________________
4. What is the area (in square feet) of your garden bed?
____________________________________________________________________________________
1. Go back to the wooden
benches and get a little shovel (called a trowel) and a mason jar.
2. Fill the mason jar 1/3 of the way full with soil.
3. Fill it the rest of the way with water and go see your teacherfor a scoop of detergent.
4. Shake it well and take it back to your teacher.
5. Make your hypothesis (a scientific guess.) What do you think the soil in the jar is going to do?
__________________________________________________________________________________________________________________________________________________________________________________________________________________
11

Lesson 2: Understanding the Soil Objectives
Students will be able to…
Discuss the components of soil using the proper scientific vocabulary Understand and create a written hypothesis
California Science Standards
6.5e Students know the number and types of organisms an ecosystem can support depends on the resources available and on abiotic factors, such as quantities of light and water, a range of temperatures, and soil composition. 6.7 Scientific progress is made by asking meaningful questions and conducting careful investigations. As a basis for understanding this concept and addressing the content in the other three strands, students should develop their own questions and perform investigations. Common Core Standards
CCSS.ELALiteracy.RST.6.3 Follow precisely a multistep procedure when carrying out experiments, taking measurements, or performing technical tasks. Preparation
Have ready the previously made soil/water jars Print the USDA triangle and soil component sizes (Appendix 2.1) If the class is working to prepare a new garden bed (one that has never
been double dug) be sure to water the bed thoroughly for at least two days before you plan to double dig. (This allows the soil to be pliable enough to dig.)
Loosen the soil in the bed with a garden fork. Wendell Berry Moments (5 minutes)
As explained earlier (on page 2), there are only 57 minutes in a 50minute session that are setaside for students to journal. Be sure they immediately start journaling as soon as they walk into the garden space. They should be away from neighbors, in a “no talk” zone. Working the Land (40 minutes)
Break into two groups, switching midway through the class time. 1. One group will go to the minilesson. 2. The other group will learn to double dig. 3. Switch the two groups midway through the class time, in order that each
group experiences both the minilesson and the digging. Group 1: Minilesson and active notetaking (20 minutes)
12

1. Depending on the background knowledge of students, either offer review or direct instruction on what a hypothesis is.
a. A hypothesis is an educated guess that helps lead an experiment. b. Model creating a hypothesis for better student understanding. (e.g.
“My brother’s homemade cookies taste salty. Perhaps my hypothesis could be that he’s confused between teaspoon and tablespoon measurements.” Ask students how they would check this hypothesis through experiment.)
c. Offer a scenario that students can develop many different hypotheses for and open to student answers.
d. Explain that hypotheses are often used in science. 2. Ask students to rewrite their own hypothesis in a complete sentence in
their journal. 3. Ask students to think of all the different adjectives they can to discuss
different types of soil (e.g. sandy, porous, compact, dense, impermeable, etc.)
a. Explain that these characteristics of soil are due to the proportions of three key ingredients that make up soil composition.
4. Allow students to look at the jars (without disturbing the contents) and ask students what they think soil is composed of.
a. Lead the discussion towards the three most basic elements: clay, silt, and sand.
b. Hand out the cutouts made of soil components and ask students to label:
i. Smallest particle as clay ii. Midsized particle as silt iii. Largest particle as sand
c. Explain the varying size differences (sand being the largest, silt being mediumsized, and clay being smallest. Be sure students understand this is proportional, not actual size.) See the diagram below:
13
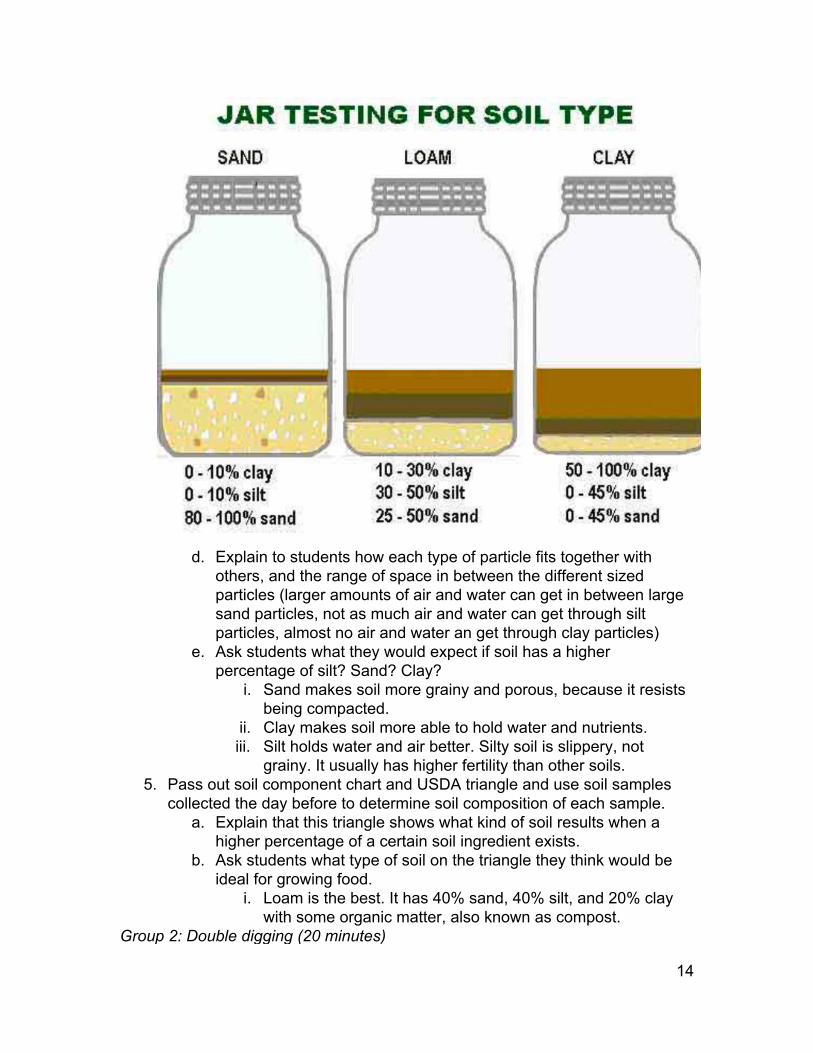
d. Explain to students how each type of particle fits together with others, and the range of space in between the different sized particles (larger amounts of air and water can get in between large sand particles, not as much air and water can get through silt particles, almost no air and water an get through clay particles)
e. Ask students what they would expect if soil has a higher percentage of silt? Sand? Clay?
i. Sand makes soil more grainy and porous, because it resists being compacted.
ii. Clay makes soil more able to hold water and nutrients. iii. Silt holds water and air better. Silty soil is slippery, not
grainy. It usually has higher fertility than other soils. 5. Pass out soil component chart and USDA triangle and use soil samples
collected the day before to determine soil composition of each sample. a. Explain that this triangle shows what kind of soil results when a
higher percentage of a certain soil ingredient exists. b. Ask students what type of soil on the triangle they think would be
ideal for growing food. i. Loam is the best. It has 40% sand, 40% silt, and 20% clay
with some organic matter, also known as compost. Group 2: Double digging (20 minutes)
14

1. Explain to students that double digging is important for soil structure. It allows air into the soil, which students will have a chance to discuss more in other lessons.
a. Stand on a wooden board to displace weight over the soil. b. Across the narrow portion of the bed, dig a trench, (one foot wide
by one foot deep) putting the soil in buckets for the final step of double digging.
c. Using a garden fork, till the soil in the trench an additional foot in depth.
d. For the second trench, dig the next onefoot section to a foot in depth, placing the soil into the first trench.
e. Like the first trench, till the bottom of the second trench with the garden fork.
f. This process repeats until the final trench is dug and tilled. At this point, the reserved buckets of soil can fill in the final trench.
g. Using a rake, mound the soil in the garden bed so that the soil is highest in the center of the bed.
h. Spread a oneinch layer of compost over the bed, carefully using he fork to mix it into the top layer of soil.
Ending the Day (5 minutes)
Review the lesson of the day with students, highlighting the main learning objectives.
Ask students why today’s learning matters. Discuss how it impacts the larger world.
Appendix 2.1
Print enough soil triangle and soil component copies for three students to share one copy.
Cut out the triangle and component circles (or have students cut them out.)
15

Source: http://commons.wikimedia.org/wiki/File:SoilTexture_USDA.png
16

Lesson 3: Planning the Garden Objectives
Students will be able to… Use various math skills to plan the planting plan for the garden
Common Core Standards
CCSS.Mathematics.NS.6.1 Apply and extend previous understandings of multiplication and division to divide fractions by fractions. Preparation
Print out the Winter/Spring Vegetable Planting Guide and Spacing Guide (Appendix 5.15.2)
Measure out garden beds Have rulers/measuring tape for each student
Wendell Berry Moments (10-15 minutes)
As explained earlier (on page 2), there are only 57 minutes in a 50minute session that are setaside for students to journal. Be sure they immediately start journaling as soon as they walk into the garden space. They should be away from neighbors, in a “no talk” zone.
Working the Land (35 minutes)
1. Place students into small groups of 45 students. Each group will be in charge of a certain part of the garden. (This allows for ownership.)
2. Ask students why seasons matter to a farmer. a. Once they explain that the seasons and climate determine what a
farmer can plant and grow, show them the planting calendar (found in Appendix 5.1). Show students how to read the graph in terms of when to plant seeds, where to plant them (immature greenhouse versus outdoors), etc.
b. In groups, have students decide what can be planted in the late fall/early winter months. Have them take notes in a part of their journal that is devoted to their crop plan.
c. Ask students to quickly share what they found could be grown during these months.
d. Explain that students will need to prioritize as a group what they want to grow in the space that they have.
3. Take short trip out to the garden to measure the boxes in order that students can calculate in feet how much planting area they have for their group’s garden space.
a. Make sure they draw out a diagram of their garden area on a full page of their notes and calculate the area on the same page.
17
b. Show students how to draw their garden box to scale in their notes (e.g. 1 inch represents 1 foot).
4. Once the garden is calculated, either take students back to the classroom or be sure to have a teaching space in the garden equipped with a white board.
a. On the white board, draw out a garden bed, asking students to teach how they calculated the area.
b. Then explain to students that every plant likes certain spacing from other plants. This helps the plant grow to its largest size, but it also allows it to grow close to other plants in order to shade the soil. (You can ask students why this is important. They should deduce that the plants’ leaves—if grown close together—will shade the soil, thus retaining water and warmth or shade, depending on the season.)
c. To convert plant spacing for the 1 foot to 1 inch scale, show students how to use fractions:
i. Carrots are supposed to be 3 inches apart. ii. Because there are 12 inches in a foot, the 3 can be put over
the 12 to bring the measurement down to scale. iii. Reduce to ¼ iv.
d. Draw a sample garden plan picture for students like the one below, where corn and beets are interplanted. (Not drawn to scale.)
18
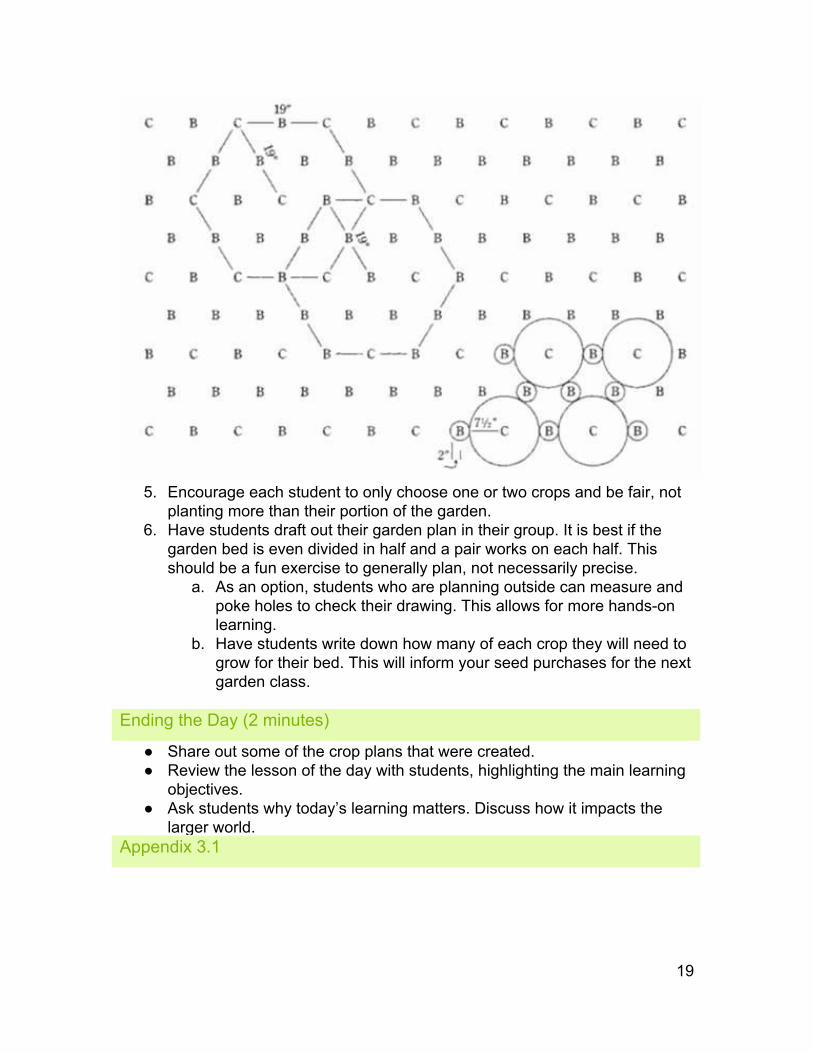
5. Encourage each student to only choose one or two crops and be fair, not planting more than their portion of the garden.
6. Have students draft out their garden plan in their group. It is best if the garden bed is even divided in half and a pair works on each half. This should be a fun exercise to generally plan, not necessarily precise.
a. As an option, students who are planning outside can measure and poke holes to check their drawing. This allows for more handson learning.
b. Have students write down how many of each crop they will need to grow for their bed. This will inform your seed purchases for the next garden class.
Ending the Day (2 minutes)
Share out some of the crop plans that were created. Review the lesson of the day with students, highlighting the main learning
objectives. Ask students why today’s learning matters. Discuss how it impacts the
larger world. Appendix 3.1
19

Various planting guides exist to show students what is in season for planting. For the Bay Area region of northern California, see the below planting guide. 4
4 Source: http://ucanr.edu/sites/ucmgnapa/files/141547.pdf
20
Lesson 4: Sowing for the Harvest Objectives
Students will be able to… Understand how soil composition (and other abiotic factors) affects plants
and the importance of certain plants in replenishing the soil California Science Standards
6.5e Students know the number and types of organisms an ecosystem can support depends on the resources available and on abiotic factors, such as quantities of light and water, a range of temperatures, and soil composition. Common Core Standards
CCSS.ELALiteracy.RST.6.4 Determine the meaning of symbols, key terms, and other domainspecific words and phrases as they are used in a specific scientific or technical context relevant to grade 6 texts and topics.
Preparation
Ready garden beds for digging: water the beds two days in advance to soften the soil
Ensure the proper seeds for seasonal planting are available Wendell Berry Moments (5 minutes)
As explained earlier (on page 2), there are only 57 minutes in a 50minute session that are setaside for students to journal. Be sure they immediately start journaling as soon as they walk into the garden space. They should be away from neighbors, in a “no talk” zone.
Working the Land (40 minutes)
Break into two groups, switching midway through the class time. 1. One group will go to the minilesson. 2. The other group will learn to single dig and flat. 3. Switch the two groups midway through the class time, in order that each
group experiences both the minilesson and the activity. Group 1: Minilesson (20 minutes)
1. Ask students what the root word bio means. a. Once bio is defined as “life,” ask students what the prefix “a”
means. (Drop hints using other words: asymmetrical, atypical, etc.) b. Then ask the students what “abiotic” means. c. Once students have answered that it is anything in the natural
world that is not alive, ask for examples in the garden (i.e. soil, water, sunlight.)
2. Ask students to turn to their notes and review some points about the soil:
21
a. Three main components? b. What do silt, sand, and clay do for the soil’s health? c. And, again, why does this matter?
3. Explain to students that those components are the main parts of the abiotic soil, but soil also combines with other abiotic factors to grow plants.
a. Air is nearly 25% of healthy soil. Explain that this is why the class will “single dig” the beds. This provides good structure (from sand in the soil) making “fluffy” or aerated soil.
b. Ask students how soil interacts with water retention. i. Discuss with students how having clay in the soil allows for
water to be retained. c. Option: also ask about sunlight’s interaction with soil. Sunlight
provides warmth within the soil in the aerated pockets. If soil is not fluffy, then it will not hold warmth as well for plants.
4. Pause for a moment. Ask students to vote: are abiotic factors the only factors that contribute to soil formation?
a. When students decide, explain that there are many biotic factors that contribute (i.e. dying animals/plants)
b. Explain that specific living plants also can add health to the soil. i. Juxtapose that other plants take nutrients from the soil.
Group 2: Garden Activity (25 minutes) 1. Break into two groups that will switch midway through the 25 minutes:
a. Group A will work on flatting b. Group B will single dig the garden beds.
Group A: Flatting (10 minutes) a. Explain that each seed needs an area of one inch from the other seed. b. Demonstrate how to space using oneinch chicken wire as the guide
for spacing the peas, wheat, and favas. c. Allow students to fill their flat with soil, water it lightly, and mound the
soil a bit in the center. d. Allow them to flat their seeds using chicken wire as a guide
i. Recommendation: 23 students can work on one flat together Group B: Single digging (10 minutes)
a. Ask students why it is important to dig the bed. What does it do for the soil? (This allows the air to enter the soil structure.)
b. Show students how to slide the fork into the soil and use body weight to lift the soil.
c. Allow students to single dig. a. If needed, show students how to measure amendments and add
them to the soil. d. Add compost into the soil, forking it into the soil. e. Rake the soil in order that it is slightly mounded in the center.
22
Ending the Day (2 minutes)
Review the lesson of the day with students, highlighting the main learning objectives.
Ask students why today’s learning matters. Discuss how it impacts the larger world.
23

Lesson 5: Transplanting and Ecosystems Objectives
Students will be able to… Understand how a garden hosts a small ecosystem. How composting is an important part of the ecosystem, facilitating both
biotic and abiotic factors, each filling a specific ecosystem niche. California Science Standards
6.5a Students know energy entering ecosystems as sunlight is transferred by producers into chemical energy through photosynthesis and then from organism to organism through food webs. 6.5e Students know the number and types of organisms an ecosystem can support depends on the resources available and on abiotic factors, such as quantities of light and water, a range of temperatures, and soil composition. Common Core Standards
CCSS.ELALiteracy.RST.6.4 Determine the meaning of symbols, key terms, and other domainspecific words and phrases as they are used in a specific scientific or technical context relevant to grade 6 texts and topics.
Preparation
Ensure that students’ previously planted flats are ready for the lesson. Wendell Berry Moments (5 minutes)
As explained earlier (on page 2), there are only 57 minutes in a 50minute session that are setaside for students to journal. Be sure they immediately start journaling as soon as they walk into the garden space. They should be away from neighbors, in a “no talk” zone.
Working the Land (40 minutes)
Break into two groups, switching midway through the class time. a. One group will go to the minilesson. b. The other group will transplant the winter crop flats prepared from
garden lesson 5 c. Switch the two groups midway through the class time, in order that
each group experiences both the minilesson and the transplanting. Group 1: Minilesson and active notetaking (1520 minutes)
1. Explain to students that the root eco comes from the Greek word oikos , meaning “household” or “family.” a. Ask students if anyone can explain what an ecosystem is.
24

b. Define ecosystem as a group of biotic and abiotic organisms/factors interacting with their environment.
i. Make sure to review with students what abiotic and biotic factors are.
c. To help students visualize, show this picture (or draw a simplified version): 5
d. Briefly discuss how various biotic and abiotic parts of this ecosystem interact.
e. Have students call out all the biotic organisms and abiotic factors within the garden. (Sunlight, soil, air, water, worms, insects, squirrels, etc.)
f. Explain that all these organisms and factors play an important role in the ecosystem, which is known as their “niche.”
2. Have students draw a diagram of what the ecosystem in the garden looks like: 6
5 Source: https://zeleniuroci.files.wordpress.com/2013/01/flattened-ecosystem-model.jpg 6 Source: http://www.organicgardeninfo.com/images/soil-life.jpg
25

3. Discuss students’ drawings. If they missed important pieces like microbes
and plant roots, remind them of how these decompose dying matter from plants and animals into the soil, in order that new life can grow. Emphasize the cyclical nature of ecosystems.
a. Extension: Tie in food webs to the ecosystem. An ecosystem displays the need for organisms to produce, consume, and decompose one another.
Group 2: Transplanting (1520 minutes) 1. Gather students around the flatting table.
a. Show students how someone can tell seedlings are ready for transplanting:
i. Leaves should be welldeveloped. ii. Roots should be forking and should be equal or longer than
the leaf growth. b. Take a flat over to the bed to teach about transplanting
i. Explain that the best time to transplant is when it is still cool. Ask students what time this would be in the summer versus the winter.
ii. Show how to carefully transplant the seedling, using either the widger or a hand spade
1. Use the widger to lever the seedling out of the flat soil.
2. Lift by the seedling’s leaves. 3. Use the trowel or widger to open a hole (by inserting
the tool into the soil and pulling towards oneself).
26
4. Drop the seedling in, burying the cotyledons and making sure the root is not bent by the soil.
5. Keep the soil loose around the plant’s roots. iii. Show students how to use a measuring stick to make
hexagonal spacing (picture?) 1. Discuss how hexagonal spacing allows more
seedlings to fit into a bed. 2. Because of even spacing, the bed will also retain
more water. 3. Water bed well
2. Allow students to practice transplanting (15 minutes)
Ending the Day (2 minutes)
Review the lesson of the day with students, highlighting the main learning objectives.
Ask students why today’s learning matters. Discuss how it impacts the larger world.
27
Lesson 6: Decomposers and Composting Objectives
Students will be able to… Understand what producers, consumers, and decomposers are and how
they contribute in an ecosystem. How composting is an important part of the ecosystem, facilitating both
biotic and abiotic factors, each filling a specific ecosystem niche. Understand how to build a compost pile
California Science Standards
6.5b. Students know matter is transferred over time from one organism to others in the food web and between organisms and the physical environment. 6.5c Students know populations of organisms can be categorized by the functions they serve in an ecosystem. 6.5e Students know the number and types of organisms an ecosystem can support depends on the resources available and on abiotic factors, such as quantities of light and water, a range of temperatures, and soil composition. Common Core Standards
CCSS.ELALiteracy.RST.6.4 Determine the meaning of symbols, key terms, and other domainspecific words and phrases as they are used in a specific scientific or technical context relevant to grade 6 texts and topics.
Preparation
Have the needed mature brown (carbonized) materials (e.g. corn stalks, straw, etc.), immature green materials (weeds that have not gone to seed, old plants, etc.) and soil available for the compost pile. It is also possible to add in kitchen scraps (e.g. egg shells, fruit rinds, etc.)
Wendell Berry Moments (5 minutes)
As explained earlier (on page 2), there are only 57 minutes in a 50minute session that are setaside for students to journal. Be sure they immediately start journaling as soon as they walk into the garden space. They should be away from neighbors, in a “no talk” zone.
Working the Land (45 minutes)
1. Now that students have defined what an ecosystem is, ask them to discuss with their neighbors what they think “decomposers” are in an environment.
a. Once they have decided, share out what decomposers are.
28
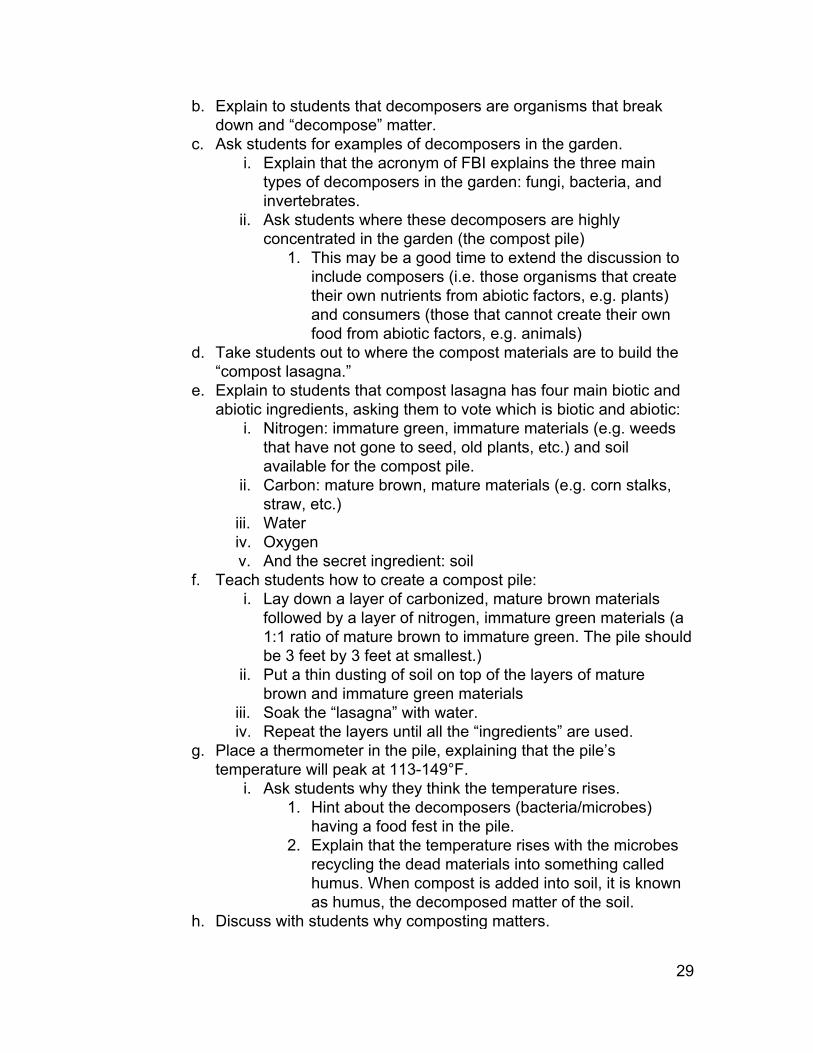
b. Explain to students that decomposers are organisms that break down and “decompose” matter.
c. Ask students for examples of decomposers in the garden. i. Explain that the acronym of FBI explains the three main
types of decomposers in the garden: fungi, bacteria, and invertebrates.
ii. Ask students where these decomposers are highly concentrated in the garden (the compost pile)
1. This may be a good time to extend the discussion to include composers (i.e. those organisms that create their own nutrients from abiotic factors, e.g. plants) and consumers (those that cannot create their own food from abiotic factors, e.g. animals)
d. Take students out to where the compost materials are to build the “compost lasagna.”
e. Explain to students that compost lasagna has four main biotic and abiotic ingredients, asking them to vote which is biotic and abiotic:
i. Nitrogen: immature green, immature materials (e.g. weeds that have not gone to seed, old plants, etc.) and soil available for the compost pile.
ii. Carbon: mature brown, mature materials (e.g. corn stalks, straw, etc.)
iii. Water iv. Oxygen v. And the secret ingredient: soil
f. Teach students how to create a compost pile: i. Lay down a layer of carbonized, mature brown materials
followed by a layer of nitrogen, immature green materials (a 1:1 ratio of mature brown to immature green. The pile should be 3 feet by 3 feet at smallest.)
ii. Put a thin dusting of soil on top of the layers of mature brown and immature green materials
iii. Soak the “lasagna” with water. iv. Repeat the layers until all the “ingredients” are used.
g. Place a thermometer in the pile, explaining that the pile’s temperature will peak at 113149°F.
i. Ask students why they think the temperature rises. 1. Hint about the decomposers (bacteria/microbes)
having a food fest in the pile. 2. Explain that the temperature rises with the microbes
recycling the dead materials into something called humus. When compost is added into soil, it is known as humus, the decomposed matter of the soil.
h. Discuss with students why composting matters.
29

i. Ask what compost does for plants (composers) and then for people and animals (consumers).
1. Explain that humus in the soil makes the soil: a. Hold more water b. Hold more air because of a better structure c. More fertile and nutritious to plants d. Thus the food we eat from plants holds more
vitamins. Ending the Day (2 minutes)
Review the lesson of the day with students, highlighting the main learning objectives.
Ask students why today’s learning matters. Discuss how it impacts the larger world.
30

Lesson 7: Preparation Season Objectives Students will be able to…
Understand the difference between renewable and nonrenewable energy Discuss the materials used to make commonly used objects
California Science Standards 6.6b Students know different natural energy and material resources, including air, soil, rocks, minerals, petroleum, fresh water, wildlife, and forests, and know how to classify them as renewable or nonrenewable. 6.6c Students know the natural origin of the materials used to make common objects. Common Core Standards CCSS.ELALiteracy.RST.6.4 Determine the meaning of symbols, key terms, and other domainspecific words and phrases as they are used in a specific scientific or technical context relevant to grade 6 texts and topics.
Preparation Bring a plastic bag for a prop Know what crops will be harvested and what seed will be saved. Have the
correct tools and harvesting equipment ready for class. Wendell Berry Moments (10-15 minutes) As explained earlier (on page 2), there are only 57 minutes in a 50minute session that are setaside for students to journal. Be sure they immediately start journaling as soon as they walk into the garden space. They should be away from neighbors, in a “no talk” zone.
Working the Land (35 minutes) Break into two groups, switching midway through the class time.
1. One group will go to the minilesson. 2. The other group will learn to seed save and harvest. 3. Switch the two groups midway through the class time, in order that each
group experiences both the minilesson and the activity. Minilesson and active notetaking (10 minutes)
1. Ask students what “renewable” means. (If they need help, lead them to breaking down the word into its principal parts.
a. Hold up a plastic bag, and ask students, “Is this renewable?” b. Explain that nonrenewable energy sources take a long time to
create. This means that the demand/consuming of these sources often exceeds the supply.
31

i. Again, show students the plastic bag. Explain that the bag was made from oil (petroleum) in a different process.
ii. Petroleum (gas) is made from dead organisms (matter) is squashed under layers of sedimentary rock, undergoing intense heat and pressure. This takes a long time to make.
iii. Ask students if this is a form of renewable or nonrenewable energy?
c. Explain that renewable energy sources take a short time to create, and these sources often can be used and reused to make energy. If needed, provide students with the example of water as a renewable source of energy.
i. Ask students to think of various renewable sources. ii. Connect these responses to the garden and cycle of soil,
eating, composting and seed saving and harvest. Garden Activity (25 minutes)
2. Go to bed for seed saving, and explain the process of seed saving. a. Show students how to carefully cut off seeds for drying. b. Ask students why the seeds should be dried. (In order that they not
mold but stay preserved over the months of winter.) 3. Go to next bed for harvesting
a. Show students how to carefully harvest crop chosen. b. Ask students if the harvest shows a renewable/nonrenewable
source of energy. (Renewable) c. Follow up the question with “How do you know that?”
i. They can discuss how it is quickly grown, how it is eaten and gives humans energy, and how the waste can be made into compost
ii. This is also a fun time to talk about composting toilets!
Ending the Day (2 minutes) Review the lesson of the day with students, highlighting the main learning
objectives. Ask students why today’s learning matters. Discuss how it impacts the
larger world.
32

Special Crop Lesson: Potatoes Objectives Students will be able to…
Understand how biodiversity is important to an ecosystem Plant potatoes and recall basic facts about the crop
California Science Standards This lesson provides an introduction to high school level California Science Standard 6a: Students know biodiversity is the sum total of different kinds of organisms and is affected by alterations of habitats. Common Core Standards CCSS.ELALiteracy.RST.6.4 Determine the meaning of symbols, key terms, and other domainspecific words and phrases as they are used in a specific scientific or technical context relevant to grade 6 texts and topics.
Preparation Three days before class, cut different varieties of potatoes into pieces
(each piece should have at least two eyes.) Place these potatoes in a dark and warm place and allow them to cure for
at least 48 hours. Leave one potato whole to show class how to prep potatoes.
Wendell Berry Moments (10-15 minutes) As explained earlier (on page 2), there are only 57 minutes in a 50minute session that are setaside for students to journal. Be sure they immediately start journaling as soon as they walk into the garden space. They should be away from neighbors, in a “no talk” zone.
Working the Land (35 minutes) 7
1. Break into two groups, switching midway through the class time. a. One group will go to the minilesson. b. The other group will learn to plant potatoes. c. Switch the two groups midway through the class time, in order that
each group experiences both the minilesson and the planting. Group 1: Minilecture on potatoes (20 minutes)
2. Break down the word “biodiversity” with students, asking them what –bio means (life) and “diversity” (variety)
7 This lesson plan is adapted from Encinal Elementary School fourth grade garden curriculum. Used with permission.
33
a. Biodiversity: diversity of living organisms, which affects the health of its ecosystem
3. Ask students where they think potatoes originated. (Andes Mountains in South America)
b. Ask students what types of potatoes they have seen. Have students describe color, size, texture.)
c. Explain that the Inca Indians living in South America grew many different potato varieties, which varied by size, color, skin thickness, when they could grow, and amount of starch in them.)
4. Ask students how the potatoes then got to Ireland. (Potatoes took a sea voyage with European explorers.)
d. Explain that Europeans were initially afraid of potatoes, because potatoes are part of the poisonous nightshade family.
e. Eventually potatoes became popular throughout Europe, especially Ireland.
f. Ask students to raise their hands if they have heard of the Irish Potato Famine.
g. Ask if any student knows the reason for the Famine. h. Explain that the 1845 Famine was the result of becoming
dependent on one variety of potato (called a monoculture), which allowed for a fungus to wipe out the entire crop. The shortage of food resulted in one million people starving to death.
5. Ask students what is the most common potato in the U.S. (Drop hints of foods cooked from this potato, like French fries, potato chips, etc.) (Russet potato, or more specifically, the Russet Burbank)
i. Explain to students how largescale farming preps for potatoes: i. They fumigate the soil with heavy chemicals in order to
prevent against potato disease and insect issues. ii. Then farmers plant a variety called “New Leaf,” which kills
the potato beetle by producing its own insecticide. This plant is even registered as a pesticide.
iii. Then more insecticide is sprayed onto the potato leaves while the potatoes are growing.
6. Ask students if this information about American potatoes bothers anyone. j. Explain that what goes into a potato becomes part of it. Just like
what food goes into people becomes a part of their bodies. Pesticides are problematic, because they are poisonous to humans also.
i. On a larger scale, this is problematic because United States farmers are making a similar error as the Irish farmers in not allowing for biodiversity on their farms.
Group 2: Planting potatoes (20 minutes) 1. Ask students what happens if someone leaves a potato too long in their
cupboard. (It starts sprouting.) 2. Explain and demonstrate how to plant potatoes:
34

a. Take one demo potato to show students how to cut between the eyes (two eyes per planting), explaining that the eyes are what someone plants to grow potatoes.
i. Explain that 48 hours before class, the potatoes were cut and cured in order to plant.
b. Dig a trench six to nine inches deep. Reserve the extra soil in buckets.
c. Carefully place potato sprout in the trench and cover the sprout with two inches of soil.
d. For harvest, the potatoes are dug up with a garden fork. Then they just need cleaning and cooking.
3. Ask students to think of foods with high calories. (They should say grains like wheat.)
a. Explain that in comparison to grains, potatoes are much easier to harvest and eat, and they have good nutritional value and provide many calories.
4. Hand out trowels and small bowls of potato starts to students. Allow students to plant potatoes for the rest of the time.
Ending the Day (2 minutes)
Review the lesson of the day with students, highlighting the main learning objectives.
Ask students why today’s learning matters. Discuss how it impacts the larger world.
Extension Activities
It is best if students can taste the crop they are learning about. If at all possible, boil some potatoes ahead of time for students to taste test.
If time allows, watch Michael Pollan’s video excerpt: “Botany of Desire” about potatoes in Peru https://www.youtube.com/watch?v=fKrvp0lKiJ8
35

Special Crop Lesson: Fava Beans Objectives Students will be able to…
Understand how matter and energy transfer from physical environment to organisms
Harvest fava beans and understand the importance of legumes for soil health
California Science Standards 6.5b Students know matter is transferred over time from one organism to others in the food web and between organisms and the physical environment. Common Core Standards
CCSS.ELALiteracy.RST.6.4 Determine the meaning of symbols, key terms, and other domainspecific words and phrases as they are used in a specific scientific or technical context relevant to grade 6 texts and topics.
Preparation This lesson requires a bed of fava beans at maturity. Purchase necessary ingredients for the fava bean tapenade (Appendix)
Wendell Berry Moments (5 minutes) As explained earlier (on page 2), there are only 57 minutes in a 50minute session that are setaside for students to journal. Be sure they immediately start journaling as soon as they walk into the garden space. They should be away from neighbors, in a “no talk” zone.
Working the Land (40 minutes) 8
After doing a group minilesson, break into two groups, switching midway through the class time.
1. One group will prep the veggies for dipping. 2. The other group will learn to harvest and process fava beans. 3. Switch the two groups midway through the class time, in order that each
group experiences both the minilesson and the activity. Minilecture on fava beans (5 minutes)
1. Take students out to the fava bean garden bed. a. Ask students why legumes are farmed. (Both for livestock feed and
for humans to eat) b. Connect everything in order to show how matter and energy are
8 This lesson plan is adapted from Encinal Elementary School fourth grade garden curriculum. Used with permission.
36

transferred between organisms and their physical environment: i. Legumes put nitrogen back into the soil (if they are
harvested in April before the nitrogen is fixed in the plant’s legumes) for other plants to “eat.”
ii. At the same time, the legumes (and other plants) use photosynthesis to become carbon, which is then eaten by animals or people.
iii. Through a special process, humans and animals convert this into energy to fuel their bodies.
iv. Eventually animals and people die, and their bodies decompose into dead organic matter, humus.
v. Humus feeds plants both nitrogen and carbon, and the cycle continues.
Group 1: Prepping veggies (10 minutes) 1. Remember to teach knife safety skills if students have not yet been
trained. 2. Show students how to cut vegetables (e.g. carrots, celery, peppers, etc.)
into dippingsized pieces for eating the hummus. 3. Arrange the washed and cut vegetables on platters.
Group 2: Harvesting and processing fava beans (10 minutes) 4. Have students pick about five fava bean pods each, then come to the
prep table. 5. Make fava bean tapenade with students:
a. Show students how to peel favas from outer shell. b. Then show how to shell the individual fava beans. c. Collect the fava beans in a large bowl. d. Allow students to take turns mashing the beans into a puree. e. Mix with a drizzle of olive oil, a few gratings of lemon zest, and a
dash of salt. f. Serve students the fava bean tapenade on crackers.
Ending the Day (10 minutes)
End class by gathering around the table to enjoy the dip and vegetables and crackers.
Extension Activities
Another option for preparing fava beans is this recipe for roasted fava beans Roasted Fava Beans
Toss whole clean fava pods with olive oil. Spread on a baking sheet in a single layer, roast at 450 degrees for about 25 minutes until tender. (You may need to turn the pods during cooking.) Put the roasted pods in a shallow bowl and sprinkle with coarse sea salt. Eat them by peeling similar to edamame, and if pods are very young and
37

tender, you may be able to eat the whole pod.
38

Special Crop Lesson: Wheat Objectives Students will be able to…
Plant wheat and understand the history and importance of wheat. Common Core Standards
CCSS.ELALiteracy.RST.6.4 Determine the meaning of symbols, key terms, and other domainspecific words and phrases as they are used in a specific scientific or technical context relevant to grade 6 texts and topics.
Preparation Make sure to have sickles and twine ready for harvesting wheat. Ready the threshing area (if more direction is needed, consult this video:
https://www.youtube.com/watch?v=3FXNCNSkdaM Have a grain mill ready to process wheat grains into flour
Wendell Berry Moments (5 minutes) As explained earlier (on page 2), there are only 57 minutes in a 50minute session that are setaside for students to journal. Be sure they immediately start journaling as soon as they walk into the garden space. They should be away from neighbors, in a “no talk” zone.
Working the Land (40 minutes) 9
1. Break into two groups, switching midway through the class time. a. One group will go to the minilesson. b. The other group will learn to harvest and process wheat. c. Switch the two groups midway through the class time, in order that
each group experiences both the minilesson and the planting. Group 1: Minilecture on wheat (20 minutes)
1. Ask students to name the top three grains of production in the world. (rice, corn, wheat)
a. Explain the following facts about wheat: i. In terms of crops, more land area worldwide is designated to
grow wheat. ii. Unlike rice and corn, which need milder temperatures to
grow, wheat can grow in harsher, dryer, and colder environments.
b. Ask students where they think wheat originated in the world. i. Experts believe that wheat originated in southwestern Asia.
9 This lesson plan is adapted from Encinal Elementary School fifth grade garden curriculum. Used with permission.
39

Earliest crops have been found in Syria, Jordan, and Turkey. ii. Ancient wheat relatives have been found in Iraq, and these
date back to 9,000 years ago. iii. Archaeologists have found evidence of bread wheat growing
along the Nile, in India, China, and possibly even England as early as 5000 B.C.
c. Tell students that you are going to shift to talking about the present day wheat production:
i. Ask students how many gallons are in a bushel. (8 gallons=1 bushel)
ii. Have students guess roughly how many bushels are produced in a year. (Over 20 million bushels)
1. Explain that this takes over 500 million acres of growing land. (Make sure to give students a comparison spatially. For instance, that is over 350 million football fields.)
a. Fun fact: an acre of wheat can make 2,500 loaves of bread.
2. Most wheat is grown in Asia (in China and India mostly), and some is grown in Europe and the U.S.
3. Most of the wheat grown in the U.S. is planted is winter wheat (70%) while the rest is spring wheat or durum wheat (24% and 6% respectively).
iii. Take a vote: ask students to raise their hands if they think most wheat is consumed or by livestock or humans. (Humans)
1. Fun fact: average person in the U.S. eats about 53 pounds of bread a year.
iv. Explain that the reason for wheat’s favorability for humans are the following:
1. It has concentrated nutrition, including vitamins, minerals, and protein.
2. It is easily transportable and keeps well. 3. It can be processed into many types of food. 4. It is also full of a certain type of protein, called gluten.
Gluten is important to make bread. (This will be discussed further in the pizzamaking lesson.)
v. Ask students to call out what foods have a main ingredient of wheat.
1. Explain that wheat is used in a vast number of foods and other products:
a. It shows up in foods that we would generally think of: cakes, breads, crackers, muffins, etc. but it also is in sauces as a thickener.
b. Industrially, wheat starch is used for paste,
40

alcohol, and oil, and the straw can be used for newsprint, paperboard, etc.
Group 2: Harvesting and processing wheat (20 minutes) 1. Take students out to the wheat garden bed to harvest wheat:
a. Show students how to use a sickle to cut wheat at its base. b. Then show students how to bundle the wheat and tie with twine. c. Allow students to take turns using the sickle, while others bundle
and tie. 2. Once the wheat is bundled, take to the threshing area.
a. Show students how to first thresh wheat. (This can be done by rubbing wheat heads against a metal mesh screen. For further instructions, see video https://www.youtube.com/watch?v=3FXNCNSkdaM )
b. Then show students how to put wheat into a large bowl or basket and blow away chaff.
3. Once the grains are threshed and winnowed, place grains in the mill and grind into flour. (This flour can be used for making pizzettes. See final lesson for more information.)
Ending the Day (5 minutes)
Explain what the class will make to eat with the wheat flour or brainstorm with students what they would like to make.
41
Final Celebration: Making Pizzettes Objectives Students will be able to…
Enjoy their garden labors by making mini pizzas from their ground wheat flour.
Common Core Standards CCSS.ELALiteracy.RST.6.3 Follow precisely a multistep procedure when carrying out experiments, taking measurements, or performing technical tasks.
Preparation If working with time constraints, mix pizza dough (see recipe in Appendix) for the whole class ahead of time. (If at all possible, use the flour that students milled from the garden bed.) Print pizzette recipes and make sure the following is readied for use: Total ingredients needed:
16 cups wheat flour 8 tablespoons honey (per batch) 4 yeast packets 1 cup olive oil (1/2 cup per batch) 2 tablespoon salt 6 cups warm water (about 90100°F., 3238°C)
One per group of each of the following: Large bowl Large measuring cup (24 cups) Small measuring cups and tablespoon measurer (for oil and honey) Wooden spoon Oiled cookie sheet(s) for baking pizzettes (one or two per group) Clean, nonterry kitchen towels to cover dough while it rises Hot mitts for transporting hot tray of bread back to class
Note: For some schools, this lesson may need to be modified, especially if an oven is unavailable. Please read Appendix for lesson modifications and timing for this lesson. Wendell Berry Moments (5 minutes) As explained earlier (on page 2), there are only 57 minutes in a 50minute session that are setaside for students to journal. Be sure they immediately start journaling as soon as they walk into the garden space. They should be away from neighbors, in a “no talk” zone.
42

Working the Land (40 minutes) 10
As celebration of growing wheat and other crops in the garden, students will get to make pizzettes.
1. Have students go out into the garden to collect any crops that would work well as pizza toppings, including tomatoes, peppers, onions, etc.
2. Have students wash their hands before working with food. 3. Divide students into small groups of four to five students per group and
give each group a printed recipe for pizzettes. 4. Allow small groups to each mix batches of dough (see recipe in Appendix)
for students to understand how pizza dough is made. 5. Students knead their group’s dough in bowls, cover the bowls, and allow
the dough to rise for an hour. a. (Depending on how much time is allotted for the pizzettemaking,
the teacher may not have time for students to learn from the entire doughmaking process. In this case, a teacher will want to bag these dough balls and either use them or freeze them for later use.)
6. Using the alreadymade dough, have students divide their dough into individual pieces.
7. Using their hands or rolling pins, students can flatten their dough into pizzettes, about ½ inch in thickness.
a. Explain that the dough will puff a bit in the oven, so it is good to make it a little thinner than desired.)
i. A fun—albeit messy—activity is to show students how to toss their pizza dough. Make sure that students try to toss about a table, because their dough will probably land on the floor otherwise. As an illustration of how to best toss pizza dough, watch https://www.youtube.com/watch?v=VIJlRXMfW50
8. Preheat oven to 425°F. 9. Allow students to put desired toppings on their pizzettes. 10.Bake until crusts are golden mature brown. Depending on the pizzette
sizes this can range from 1525 minutes. Allow the pizzettes to rest for five minutes and enjoy. Ending the Day (5 minutes)
Explain what the class will make to eat with the wheat flour or brainstorm with students what they would like to make.
Appendix 11.1
If you have a full kitchen and a longer schedule, students can be a part of the whole pizzette baking process. A sample schedule is outlined below:
8:309:30 Mixing and kneading
10 This lesson plan is adapted from Encinal Elementary School fifth grade garden curriculum. Used with permission.
43

9:3010:30 First rising (Students can work on other school activities.) 10:3010:45 Punch down dough, form pizzettes 10:4511:30 Second rising (Students can again work on other activities.) 11:3012 Bake
If you do not have a kitchen to use at school/garden: It is possible to have parent volunteers help with the baking process. Bake the crusts ahead of time and only use fresh ingredients (e.g. pesto,
parmesan, and tomatoes, etc.) to make the pizzettes. (Students can still make the dough in class in order to learn how to make bread.)
If you have a small kitchen with little oven space:
Students can make minute pizzettes in order to fit in the small oven space.
Students can make one large pizza and vote on the toppings. Again, it is possible to have parent volunteers help with the baking
process. Appendix 11.2
Pizzette Recipe It is best to read through all the directions before you begin. That way, you know what you are supposed to do when, and it is less likely you will make a mistake on your pizzette! Ingredients:
1½ cups warm water (about 90100°F., 3238°C) 2 tablespoons honey (per batch) 1 yeast packet ½ cup olive oil ½ tablespoon salt 4 cups wheat flour
Directions:
1. Stir warm water and honey in large bowl. 2. Pour in yeast packet and mix. 3. Let the yeast mixture sit for five minutes. (This allows the yeast, which is
bacteria, to eat the honey’s sugars and enjoy its warm habitat. You can tell it is becoming more “active” when the water gets foamy.
4. Stir in olive oil, salt, and 2 cups of flour. 5. Knead the rest of the flour into the dough. This means one person can
use their clean hands to massage the dough in the bowl. Kneading allows gluten to form. Gluten is a protein found in wheat (and other grains) that helps dough to rise and gives bread shape and chewiness.)
6. When the dough has all the flour mixed in, scrape all the dough into a ball inside your bowl. Pinch a small piece; it should feel as soft as your
44

earlobe. 7. Cover the dough with either a towel or plastic wrap and put the dough in a
warm place. The dough will rise, growing until it is double in size, which takes about one hour. (The yeast makes it grow in size. Because they are alive, they “breathe” out carbon dioxide, making the dough puff. Yeast prefers warm, dark environments best, which is why it is best to cover the dough.)
8. After the dough has risen, punch it down into the bowl. 9. Turn the dough out and divide it evenly amongst everyone in the group. 10.Flatten individual pieces of dough into a round pizza shape, ½ inch thick. 11.Transfer flattened dough onto cookie sheet. 12.Place toppings on pizzettes.
45