Embed Size (px)
Citation preview
Version 1.1.0
DS‐RX1 Printer Firmware Update Manual

DSRX1 Firmware Update Manual
Version Number: 1.10
2
Installing 2x6 Double Cut Software
Contents Installation Flow Chart ...................................................................................................................................... 3
Run the DS-RX1 Version Up Tool execute file (*.EXE). ...................................................................... 4
1. Starting the Update ................................................................................................................................. 4
2. Finishing the update ............................................................................................................................... 5
3. Reboot the computer .............................................................................................................................. 6
Driver Removal .................................................................................................................................................. 7
4. Remove the driver. ................................................................................................................................. 8
4. Turn off the RX1 Printer. ...................................................................................................................... 11
5. Reboot the computer. ............................................................................................................................ 11
Installing the New Driver ................................................................................................................................. 12
1. Open the driver package ....................................................................................................................... 12
6. Finish Install ......................................................................................................................................... 14
7. Turn on the Printer ............................................................................................................................... 15
8. Reboot the computer ............................................................................................................................ 15
Configuring the New Driver ............................................................................................................................ 15
4. Enable 2 Inch Cut ................................................................................................................................. 16
Printing with 2 Inch Cut ................................................................................................................................... 17
DSRX1 Firmware Update Manual
Version Number: 1.10
3
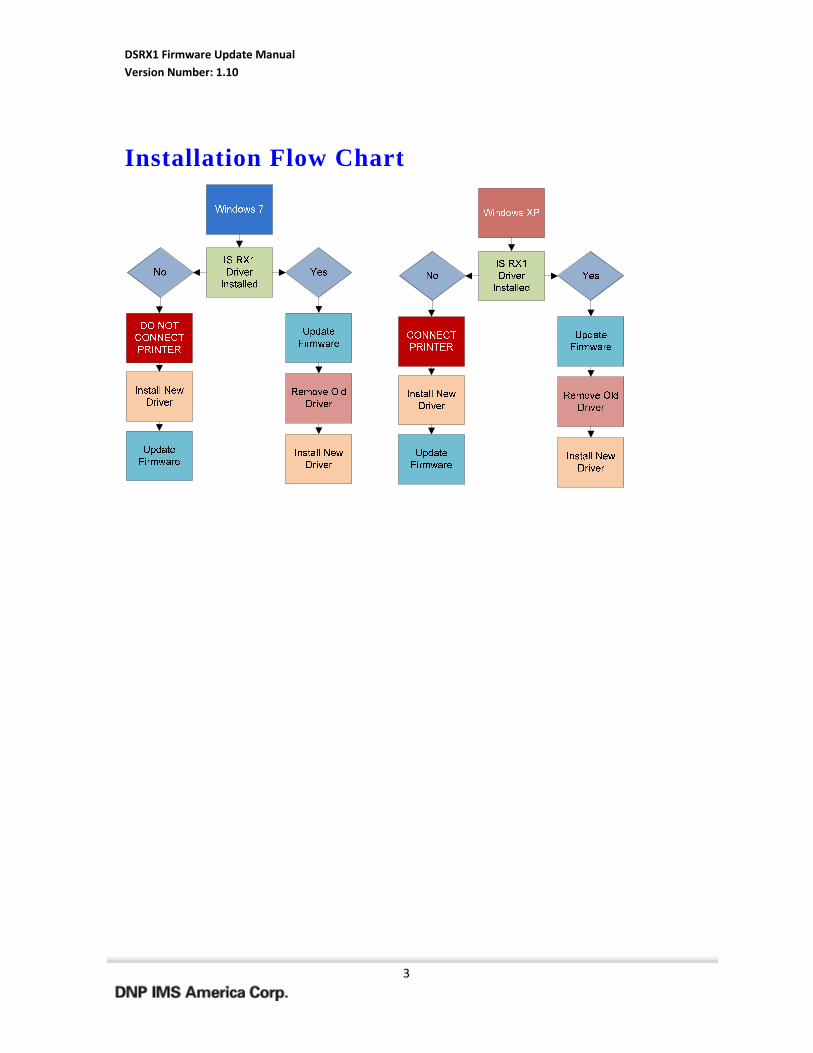
Installation Flow Chart
DSRX1 Firmware Update Manual
Version Number: 1.10
4
Update the RX1 Firmware
***Note, your computer must have already been connected to an RX1 Printer and the driver installed. If it has not, please skip to “Installing the RX1 Driver”, then come back to this section.
To begin with, turn on the printer and connect it to the host computer with the USB cable. Check that there is paper and ribbon set in the printer, the cover is closed, and there are no errors (the printer LED should be green).
Run the DS-RX1 Version Up Tool execute file (*.EXE).
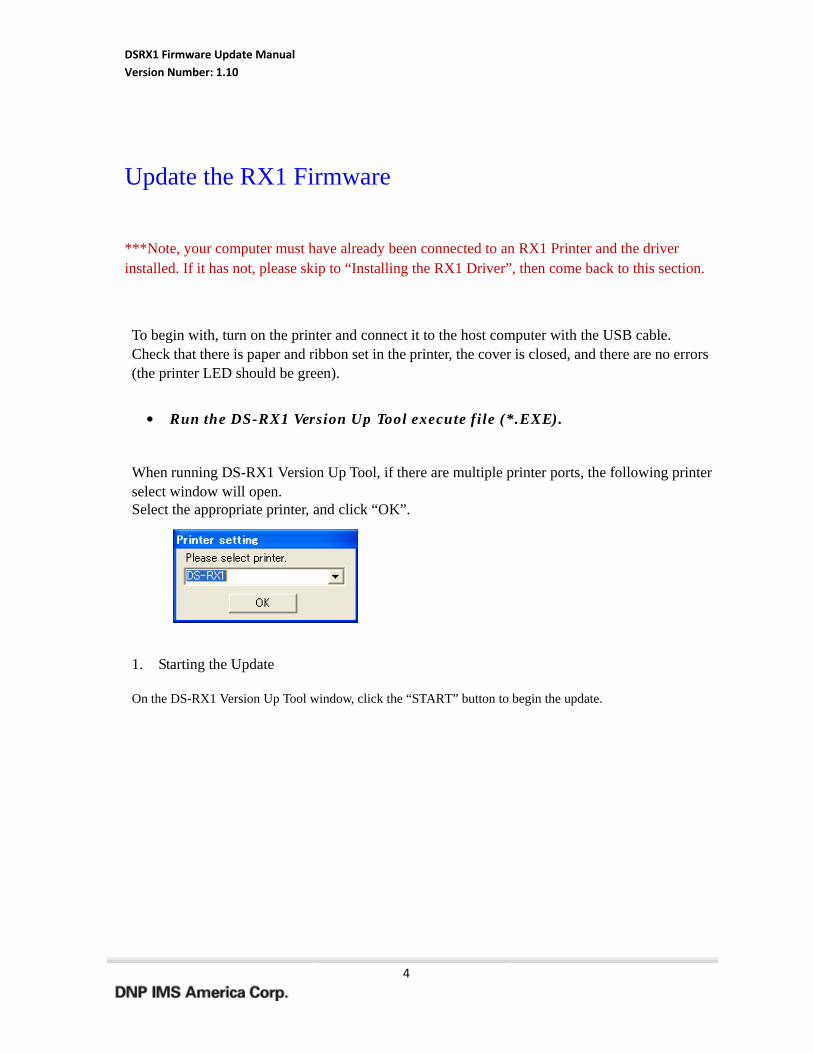
When running DS-RX1 Version Up Tool, if there are multiple printer ports, the following printer select window will open. Select the appropriate printer, and click “OK”.
1. Starting the Update
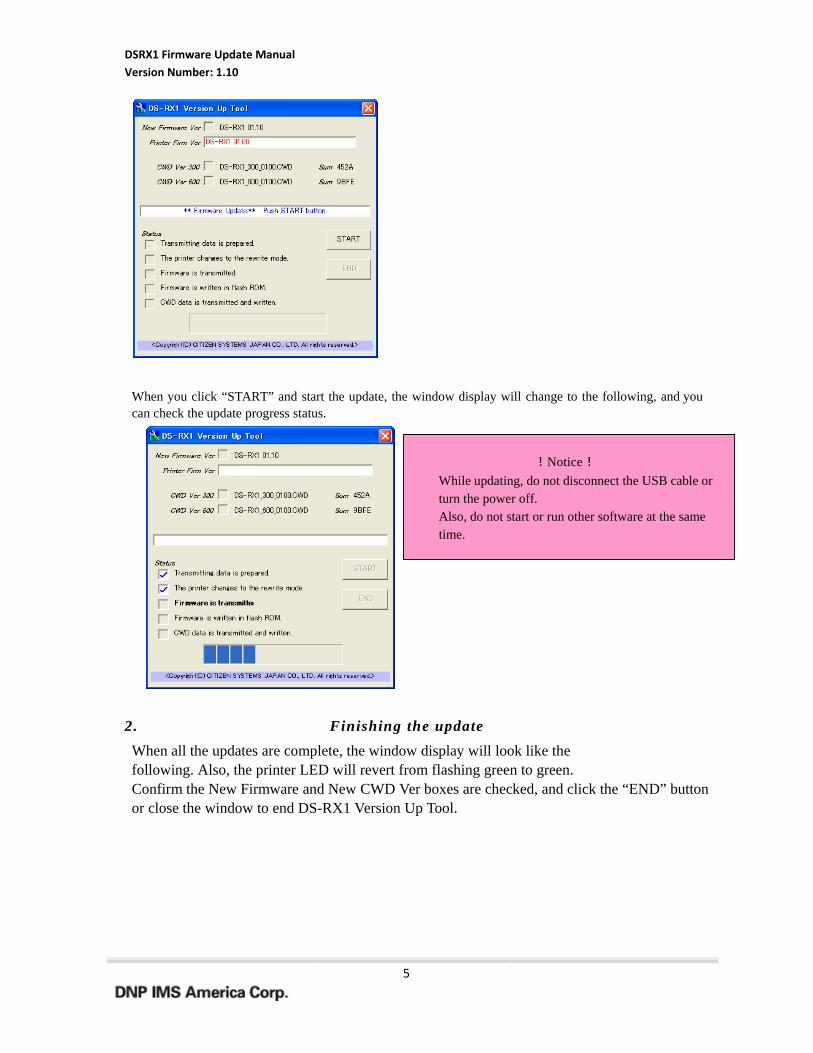
On the DS-RX1 Version Up Tool window, click the “START” button to begin the update.
DSRX1 Firmware Update Manual
Version Number: 1.10
5
When you click “START” and start the update, the window display will change to the following, and you can check the update progress status.
!Notice!
While updating, do not disconnect the USB cable or turn the power off. Also, do not start or run other software at the same time.
2. Finishing the update
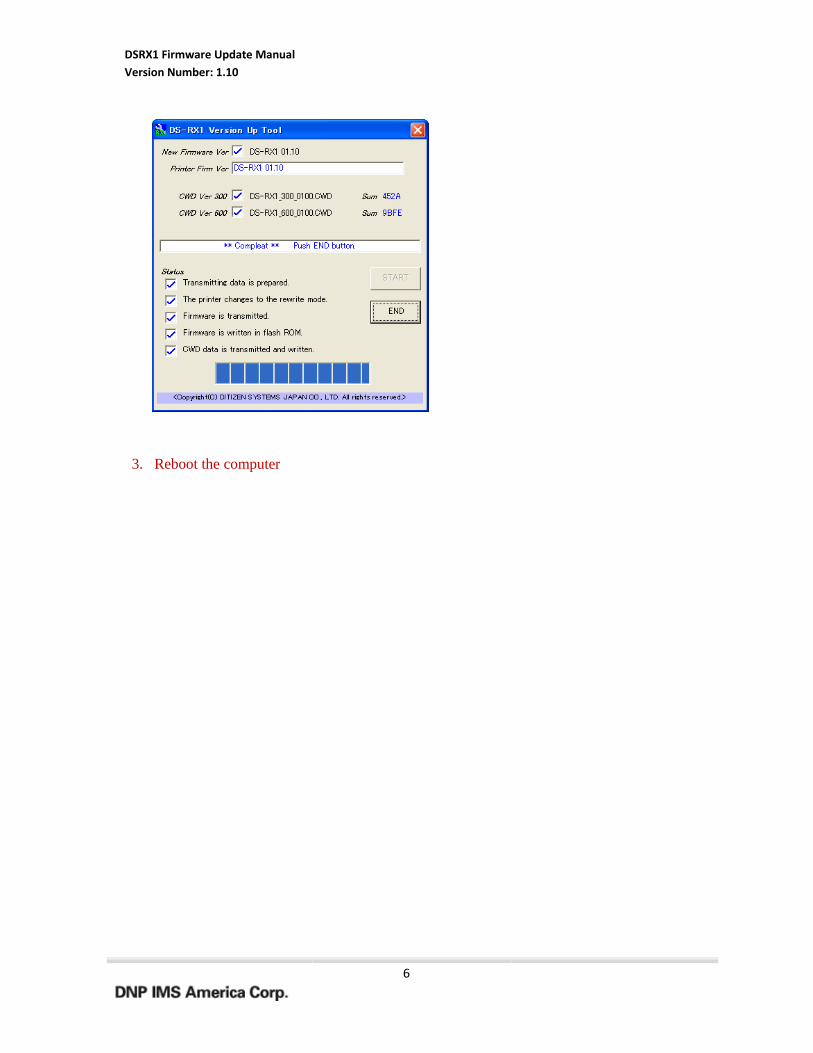
When all the updates are complete, the window display will look like the following. Also, the printer LED will revert from flashing green to green. Confirm the New Firmware and New CWD Ver boxes are checked, and click the “END” button or close the window to end DS-RX1 Version Up Tool.
DSRX1 Firmware Update Manual
Version Number: 1.10
6
3. Reboot the computer

DSRX1 Firmware Update Manual
Version Number: 1.10
7
Driver Removal
***Before removing the printer-driver, shut down all other applications. Also, in the “Devices and Printers” window, select the printer icon of the printer you want to remove, check the bottom of the window that there are no documents in queue, and start removal of the driver.
1. Select “Start”, “Devices and Printers”.
2. From the “Devices and Printers” window, select the DS-RX1 printer, display the pull-down menu with the right click, and click on “Remove device”.

DSRX1 Firmware Update Manual
Version Number: 1.10
8
3. “Are you sure you want to remove this device?” appears, click on “Yes”.
4. Remove the driver. 5. After the DS-RX1 printer has been removed, select another printer (for example:
Fax), and click on “Print server properties” in the menu bar.
6. When the Print Server Properties window appears, click on the Drivers tab. From the list of installed printer drivers, select “DS-RX1”, and click the “Remove”

DSRX1 Firmware Update Manual
Version Number: 1.10
9
button.
7. When the Remove Driver and Package window appears, select “Remove driver only”, and click on ”OK” button.
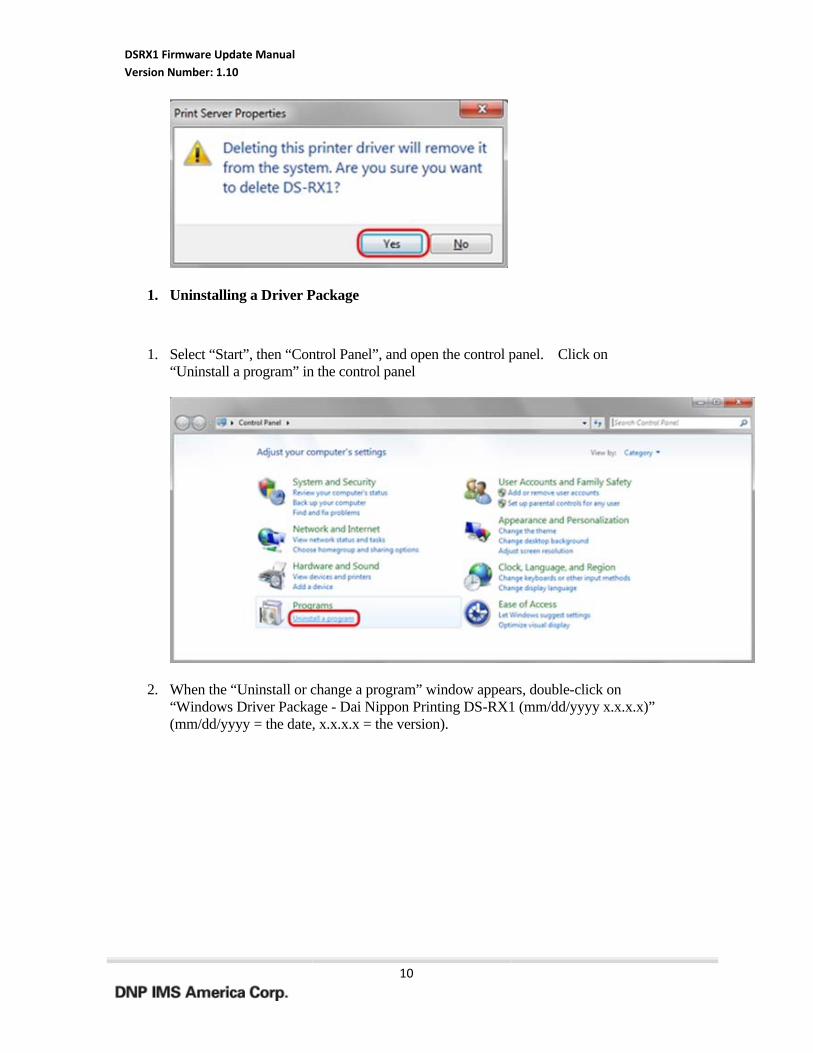
8. When the Print Server Properties confirmation window appears, click on the “Yes” button.
DSRX1 Firmware Update Manual
Version Number: 1.10
10
1. Uninstalling a Driver Package
1. Select “Start”, then “Control Panel”, and open the control panel. Click on “Uninstall a program” in the control panel
2. When the “Uninstall or change a program” window appears, double-click on “Windows Driver Package - Dai Nippon Printing DS-RX1 (mm/dd/yyyy x.x.x.x)” (mm/dd/yyyy = the date, x.x.x.x = the version).

DSRX1 Firmware Update Manual
Version Number: 1.10
11
3. When the “Uninstall Driver Package” window appears, click on “Yes”. The Uninstall will be completed.
4. Turn off the RX1 Printer.
5. Reboot the computer. 6. Do not turn on the printer until the new driver has been installed.

DSRX1 Firmware Update Manual
Version Number: 1.10
12
Installing the New Driver ***Note if Windows 7 DO NOT CONNECT THE PRINTER until the driver is installed. 1. Open the driver package
Start Explorer, and click on the corresponding drive. (If the AutoPlay function is on, select “Open folder to view files - using Windows Explorer”.) Select the following folders from the accessory CD.
Drive of CD:\DS-RX1_Driver\English\7
In the selected folder, double click on the file “DriverInstall.CMD”. (Depending on your operating environment, the .CMD extension may not be shown.)

DSRX1 Firmware Update Manual
Version Number: 1.10
13
The best Driver Package Installer for your operating system (32 or 64 bit) will automatically be selected.
2. If the User Account Control dialog appears, click on “Yes”.
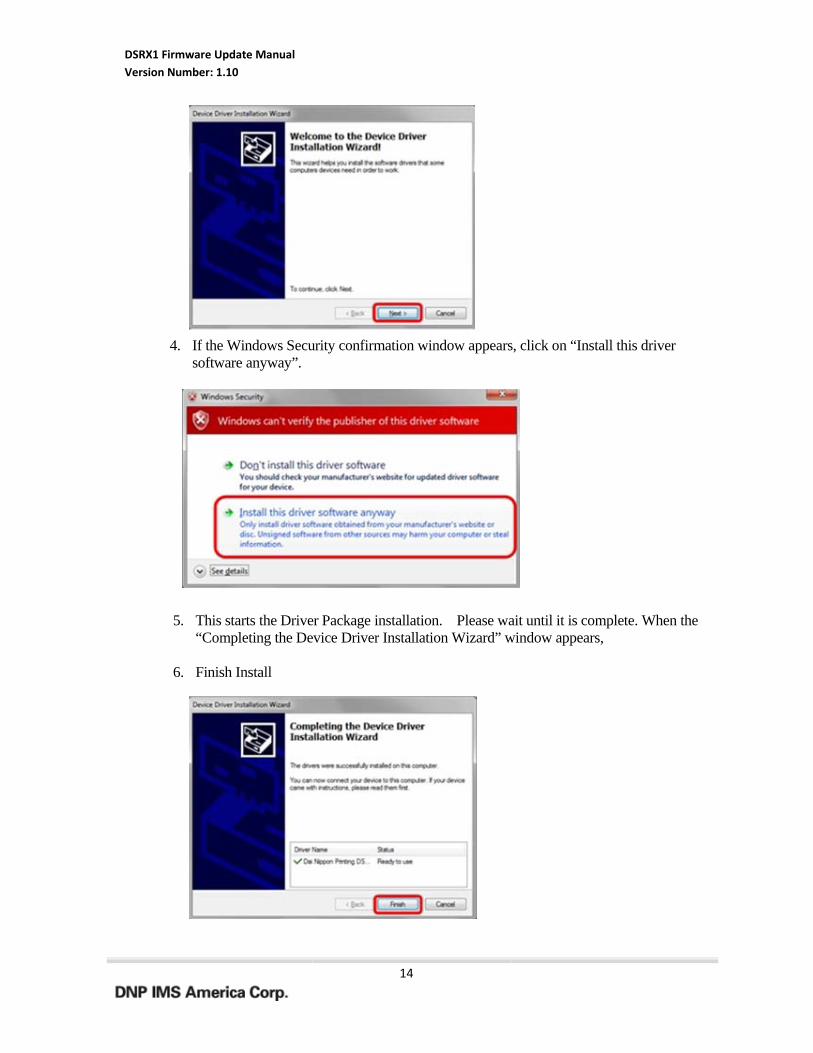
3. When the “Welcome to the Device Driver Installation Wizard!” window appears, click on “Next>”.
DSRX1 Firmware Update Manual
Version Number: 1.10
14
4. If the Windows Security confirmation window appears, click on “Install this driver software anyway”.
5. This starts the Driver Package installation. Please wait until it is complete. When the “Completing the Device Driver Installation Wizard” window appears,
6. Finish Install
DSRX1 Firmware Update Manual
Version Number: 1.10
15
7. Turn on the Printer
8. Reboot the computer
Configuring the New Driver
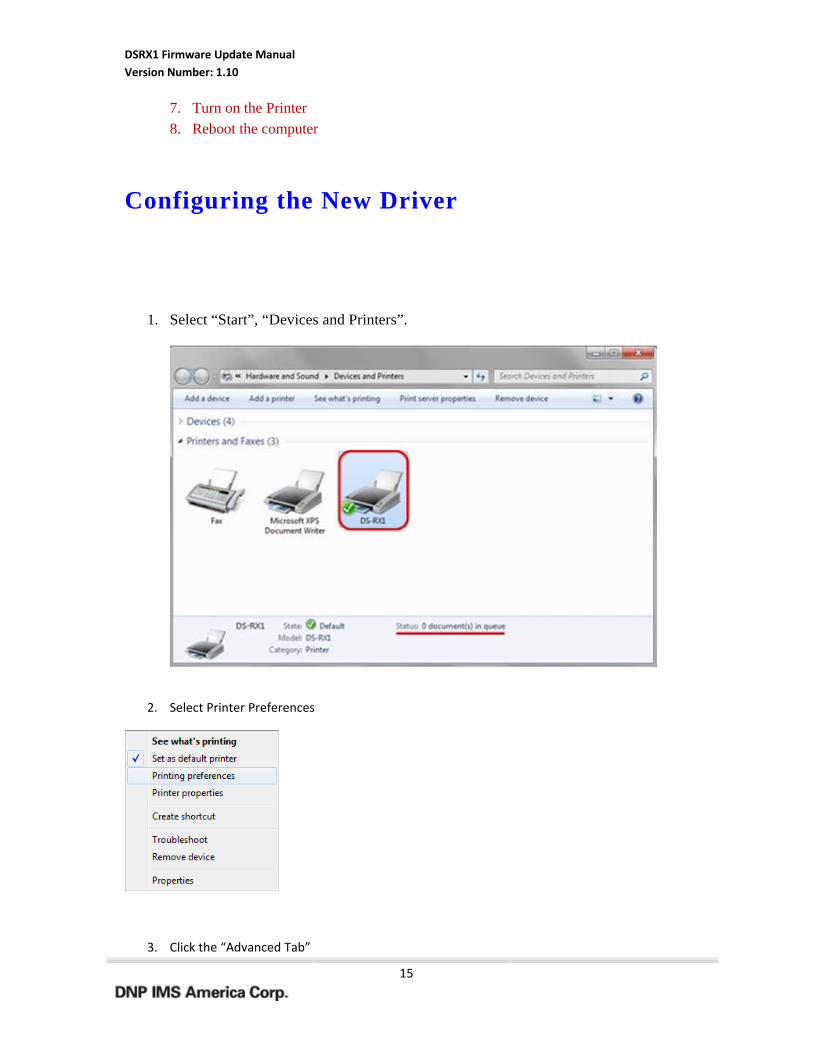
1. Select “Start”, “Devices and Printers”.
2. Select Printer Preferences
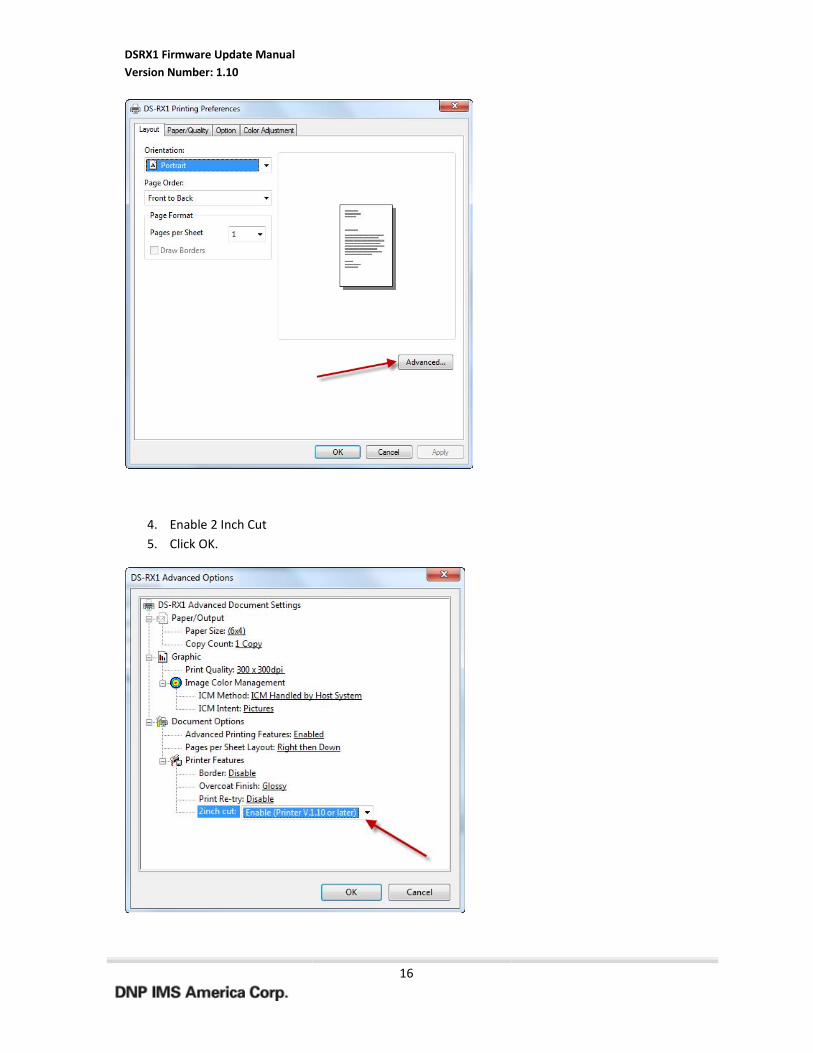
3. Click the “Advanced Tab”
DSRX1 Firmware Update Manual
Version Number: 1.10
16
4. Enable 2 Inch Cut
5. Click OK.

DSRX1 Firmware Update Manual
Version Number: 1.10
17
6. Click Ok
Printing with 2 Inch Cut
1. Open Picture
DSRX1 Firmware Update Manual
Version Number: 1.10
18
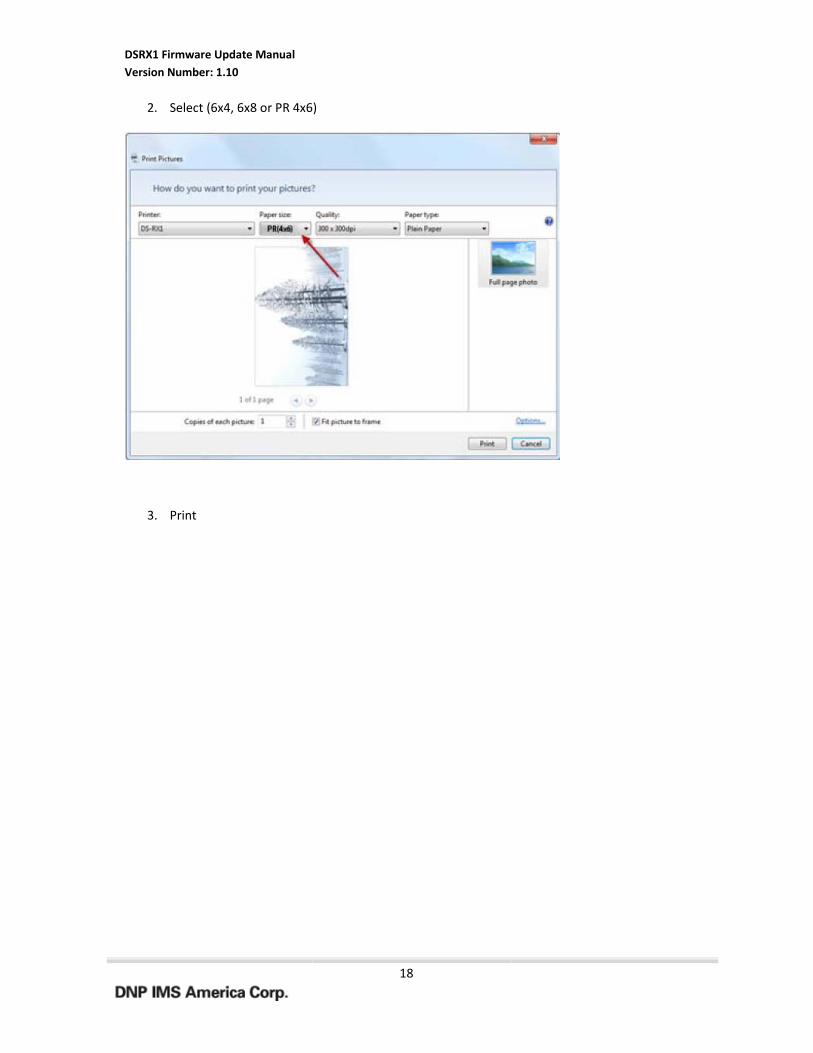
2. Select (6x4, 6x8 or PR 4x6)
3. Print


![Printer Driver Instruction Manual - DNP Photodnpphoto.com/Portals/0/Resources/DSRX1HS_PrinterDriverGuide_Fo… · [DS-RX1 Printer Driver] Instruction Manual for Windows 7,8,and 10](https://img.pdfslide.us/doc/110x75/5fd25767d10ea205e419aca2/printer-driver-instruction-manual-dnp-ds-rx1-printer-driver-instruction-manual.jpg)
![[Conference] Building Websites that Matter - Agent Reboot Boston, Agent Reboot DC, Agent Reboot Austin](https://img.pdfslide.us/doc/110x75/558a27d9d8b42a98578b465c/conference-building-websites-that-matter-agent-reboot-boston-agent-reboot-dc-agent-reboot-austin.jpg)

![OG 2017 - Athena Aftermarket Division · ENGINE CONTROL UNIT [ECU] • RX1 POWER • RX1 EVO BASIC ECU RACING KIT • RX1 EVO • PRO-FACTORY KIT ... Produttore leader di centraline](https://img.pdfslide.us/doc/110x75/5c5f5b0309d3f2581a8b458d/og-2017-athena-aftermarket-engine-control-unit-ecu-rx1-power-rx1.jpg)
![Safety precautions - DNP Imaging - Dye Sublimation … Dai Nippon Printing Co.,Ltd. [DS-RX1 Printer Driver] Instruction Manual for Windows 7, 8 Chapter 1 Install Installation Flow](https://img.pdfslide.us/doc/110x75/5b03758a7f8b9a4e538c590d/safety-precautions-dnp-imaging-dye-sublimation-dai-nippon-printing-coltd.jpg)