Embed Size (px)
Citation preview
DR 500 DRIVING VIDEO RECORDERINSTRUCTION MANUAL
DRIVING VIDEO RECORDERDR 500INSTRUCTION MANUAL
1
DR 500 DRIVING VIDEO RECORDERINSTRUCTION MANUAL
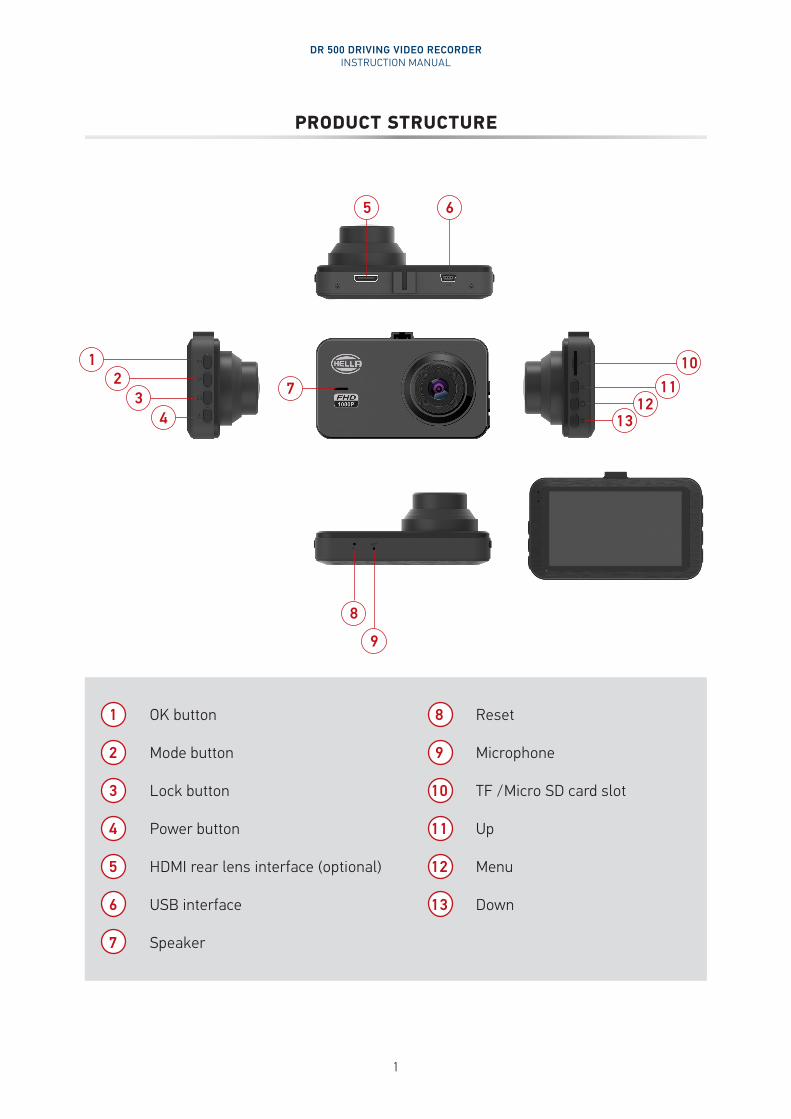
PRODUCT STRUCTURE
1 OK button
2 Mode button
3 Lock button
4 Power button
5 HDMI rear lens interface (optional)
6 USB interface
7 Speaker
8 Reset
9 Microphone
10 TF /Micro SD card slot
11 Up
12 Menu
13 Down
8
7
1 102 11
3 124 13
9
5 6
2
DR 500 DRIVING VIDEO RECORDERINSTRUCTION MANUAL
BUTTON FUNCTION DESCRIPTION
Power button When camera is off, press and hold this button for 3 seconds to turn it on, and press and hold again
to turn it off. In the video / photo / playback mode, short press to turn off the screen.
Lock button In the recording mode, short press this button to manually lock the current video.
Mode button Function switch between recording mode, camera mode, and playback mode.
OK button In the recording interface, short press to start / stop the recording function. In the photo mode, short press to take a photo. In the playback mode, short press to start or pause the video. In the menu, short press to confirm the selection.
USB Port Connect PC to transfer data (storage / PC camera). Connect an external power supply to charge the battery or power supply.
Reset button Press the reset button to reset to default factory settings.
Down button Selecting down in the menu. Short press this button to turn on/off the microphone when cameras is recording. In playback mode, short press this button to select options. While playing back the video, short press this button to speed up the video.
Menu button Short press this button to enter the menu, press this button again to switch to the system setting.
Up button Selecting up in the menu. In playback mode, short press this button to select options. When playing back the video, short press this button to roll back the video.
TF / MicroSD card slot Insert the card, it is recommended that the TF / Micro SD card use Class 10 and above high-speed
cards.
3
DR 500 DRIVING VIDEO RECORDERINSTRUCTION MANUAL
Automatic on / offAfter connecting with the vehicle power supply, the camera starts recording automatically, and shuts down when engine is off.
Motion DetectionOnce movement is detected within the viewing angle of the camera lens, the camera will start recording automatically. The camera will stop recording when no movement is detected within the viewing angle of the camera lens, to save memory space of the TF / MicroSD card.
SPECIAL FUNCTION DESCRIPTION
Power on and offPress and hold power button to turn it on, press and hold the power button again to turn it off.Note: When the battery voltage is low, it will prompt the battery to automatically shut down.
Camera modeShort press the MODE button to switch to the camera mode, and the camera icon is displayed in the upper left corner of the screen.Short press the OK button to start the camera, and a red flash will appear next to the camera icon to indicate the camera is working.
Photo modeShort press the MODE button to switch to the photo mode, and the photo icon is displayed in the upper left corner of the screenPress the OK button to take a photo. A sound will be heard which indicates that the photo taking is complete.
Video / photo playbackShort press the MODE button to switch to the playback mode, and the playback icon is displayed in the upper left corner of the screen Short press to select the photo / video, and short press again to roll back the photo / video. Short press to select the video, and short press again to fast forward the video. Short press OK to play the selected video.
Menu SettingsShort press the MENU button to enter settings; Short press the MENU button again to switch to the system menu, short press the third time to exit the setting.You can short press the switch to navigate in the setting sub-menu and press the OK key to enter the setting sub-menu.
Time SettingsShort press the MENU button to enter the setting, select the date and time option by pressing the button, short press the OK button to enter. You can use the OK button to adjust the year /month / day / hour / minute / second, Press the MENU button again to confirm the modification.
BASIC FUNCTION OPERATING INSTRUCTION

4
DR 500 DRIVING VIDEO RECORDERINSTRUCTION MANUAL
MENU INSTRUCTION
A Recording Video resolution You can choose 1080P FHD, 720P HD and VGA. Loop recording Video recording period is optional, either 1 minute / 3 minutes / 5 minutes. When the selection is off,
the SD card will be full after a period of time. Time-lapse recording Optional: off / 100ms / 200ms / 500ms. WDR Wide dynamic range is optional and can be switched on / off. Exposure It is used to adjust the brightness of the light. When the exposure is high, it will be too bright to
recognize the license plate. The default is 0. Recording You can choose whether to record the sound and check if this option is on when the video has no
sound. Date When the selection is turned on, the computer playback video shows time and date on the display. Gravity sensor This function has high, medium and low options for you to choose. If the sensitivity is too high, you
can choose lower sensitivity accordingly. When an accident is to happen while driving, the last recording will be locked and will not be over-
written by the automatic loop recording (If you find that the memory card is full, please format the memory card. Or you can set this option to low or off).
Parking guard When the recorder detects vibration while engine is shut off, it will automatically starts recording.
This function requires a supply of power from the battery. It will automatically shut down after 29 seconds of recording.
B Photo mode Setting Optional single shot / 2 second / 5 seconds / 10 seconds. Single shot is by default Photo resolution Choice of 12M / 10M / 8M / 5M / 3M / 2M / 1.3M / VGA, 1.3M is by default Burst mode When this function is turned on, camera will take 3 pictures every single shoot. Image Quality High, Medium, Standard Sharpness Strong, Normal, Soft White balance Color setting in different environments (recommended for automatic selection, otherwise it will cause
color distortion). The default is automatic. Color Choice of normal / black and white / classic.
5
DR 500 DRIVING VIDEO RECORDERINSTRUCTION MANUAL
ISO Choice of automatic /100 / 200 /400. Exposure It is used to adjust the brightness of the light. When the exposure is too high, it will be too bright to
recognize the license plate. The default is 0. Anti-shake Choice of on / off. Date label When the selection is turned on, you can check time and date on the display.
C System setting menu function introduction Screen off When this function is enabled, the screen will automatically switch off within the time set while
recorder continues to function. Choice of either immediate switch off or 30 seconds / 1 minute / 2 minutes delay switch off.
Automatic shut-down When camera does not have a TF / Micro SD card and not recording at that moment, it will
automatically shut down at the selected time, choice of either immediate switch off or 1 minute / 3 minutes / 5 minutes delay switch off.
Frequency 50Hz / 60Hz Button sound Choice of on / off. Language selection Set the language (English, Chinese, Japanese). Date / Time Adjust date / time (the camera will reset time by default when there is no power in the battery),
please set it again. Format Format the TF / MicroSD card (recommended to be formatted every 15 days) as when there are too
many locked videos, storage space for new videos will be limited. Note: Use this feature with caution when there is important content in your card. Default setting This will restore the factory setting. Version Software version number.
D Playback mode Delete You can delete the unlocked video or picture. Protection You can manually lock the current or all unlocked videos, as well as unlock the locked video. Slide show Choice of 2 seconds / 5 seconds / 8 seconds.
6
DR 500 DRIVING VIDEO RECORDERINSTRUCTION MANUAL
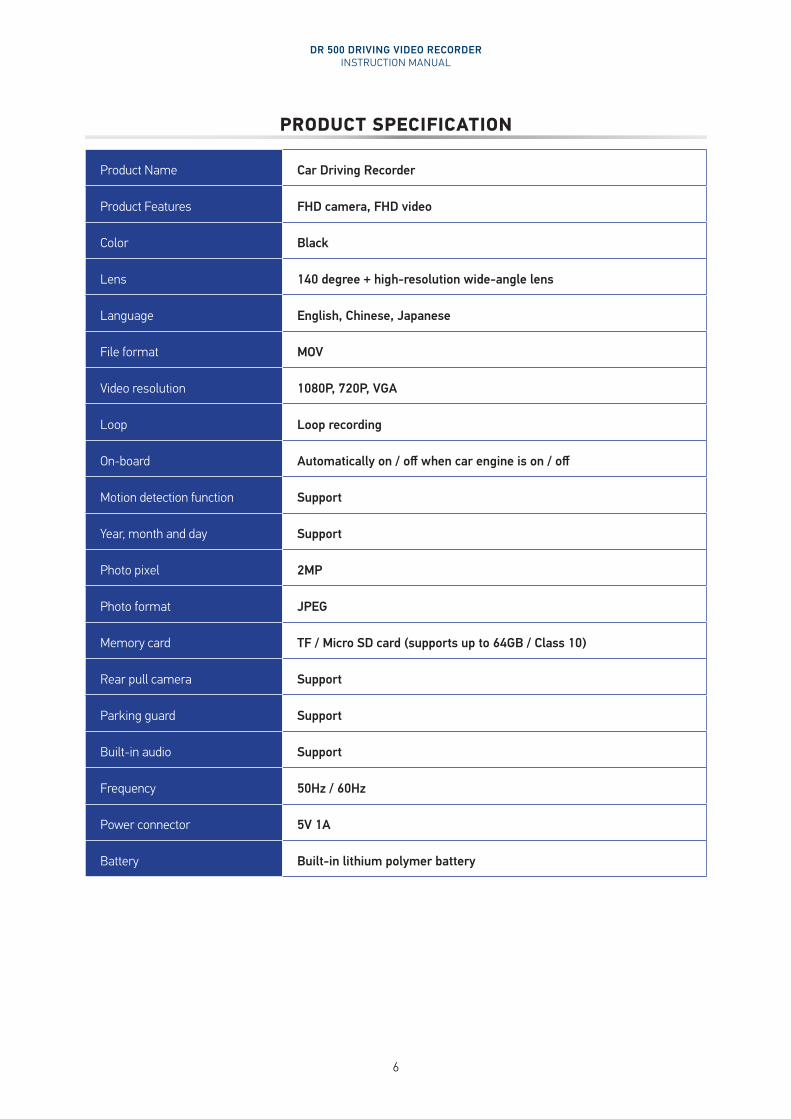
PRODUCT SPECIFICATION
Product Name Car Driving Recorder
Product Features FHD camera, FHD video
Color Black
Lens 140 degree + high-resolution wide-angle lens
Language English, Chinese, Japanese
File format MOV
Video resolution 1080P, 720P, VGA
Loop Loop recording
On-board Automatically on / off when car engine is on / off
Motion detection function Support
Year, month and day Support
Photo pixel 2MP
Photo format JPEG
Memory card TF / Micro SD card (supports up to 64GB / Class 10)
Rear pull camera Support
Parking guard Support
Built-in audio Support
Frequency 50Hz / 60Hz
Power connector 5V 1A
Battery Built-in lithium polymer battery
7
DR 500 DRIVING VIDEO RECORDERINSTRUCTION MANUAL
FAQ
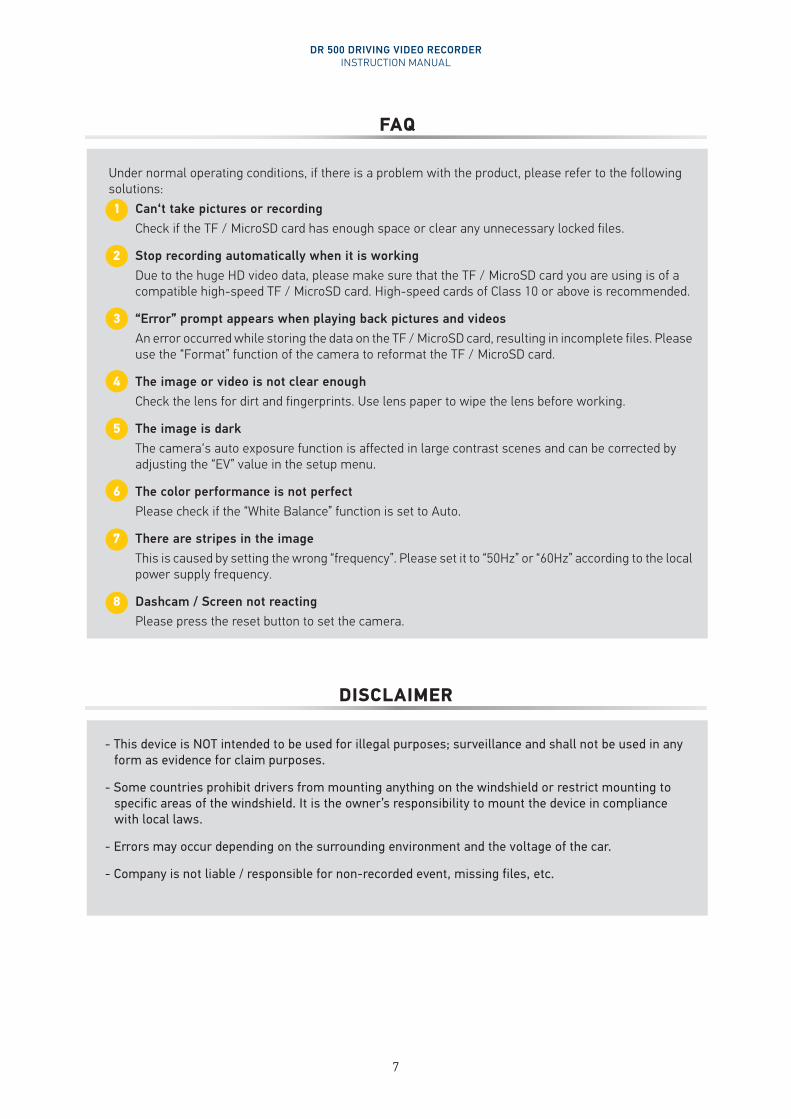
- This device is NOT intended to be used for illegal purposes; surveillance and shall not be used in any form as evidence for claim purposes.
- Some countries prohibit drivers from mounting anything on the windshield or restrict mounting to specific areas of the windshield. It is the owner’s responsibility to mount the device in compliance with local laws.
- Errors may occur depending on the surrounding environment and the voltage of the car.
- Company is not liable / responsible for non-recorded event, missing files, etc.
DISCLAIMER
Under normal operating conditions, if there is a problem with the product, please refer to the following solutions: 1 Can‘t take pictures or recording Check if the TF / MicroSD card has enough space or clear any unnecessary locked files.
2 Stop recording automatically when it is working Due to the huge HD video data, please make sure that the TF / MicroSD card you are using is of a
compatible high-speed TF / MicroSD card. High-speed cards of Class 10 or above is recommended.
3 “Error” prompt appears when playing back pictures and videos An error occurred while storing the data on the TF / MicroSD card, resulting in incomplete files. Please
use the “Format” function of the camera to reformat the TF / MicroSD card.
4 The image or video is not clear enough Check the lens for dirt and fingerprints. Use lens paper to wipe the lens before working.
5 The image is dark The camera‘s auto exposure function is affected in large contrast scenes and can be corrected by
adjusting the “EV” value in the setup menu.
6 The color performance is not perfect Please check if the “White Balance” function is set to Auto.
7 There are stripes in the image This is caused by setting the wrong “frequency”. Please set it to “50Hz” or “60Hz” according to the local
power supply frequency.
8 Dashcam / Screen not reacting Please press the reset button to set the camera.
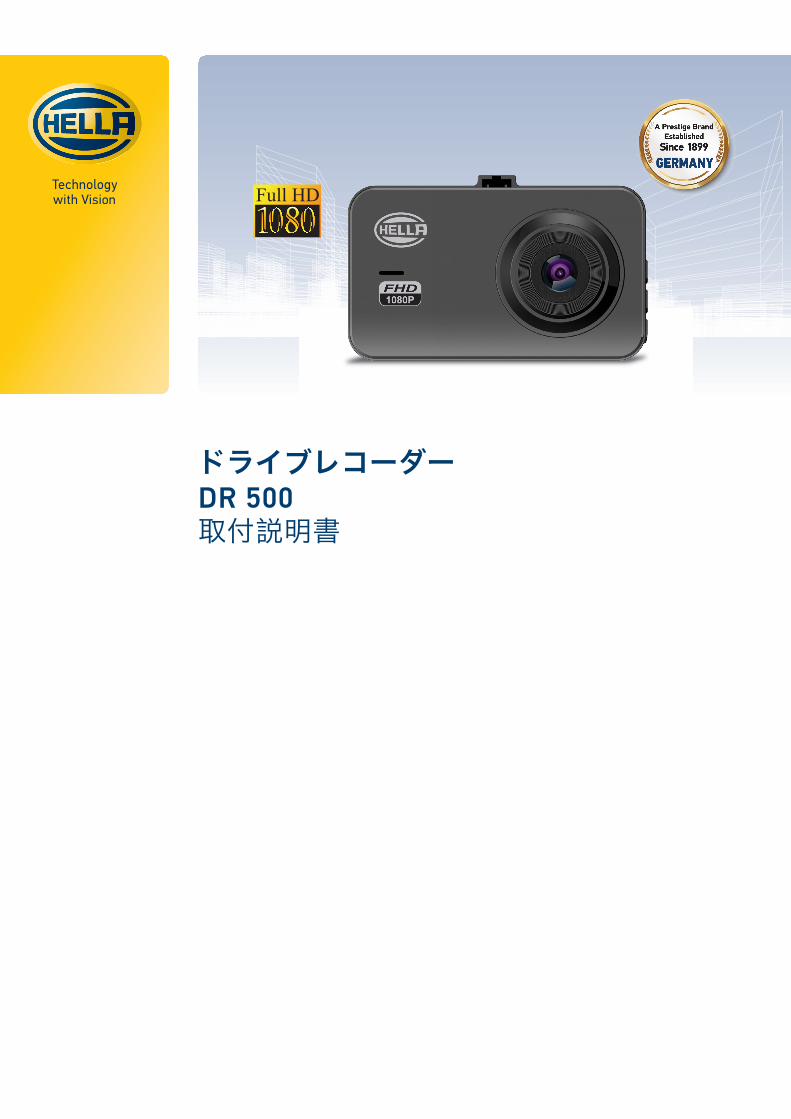
ドライブレコーダー DR 500取付説明書
1
DR 500ドライブレコーダー取付説明書
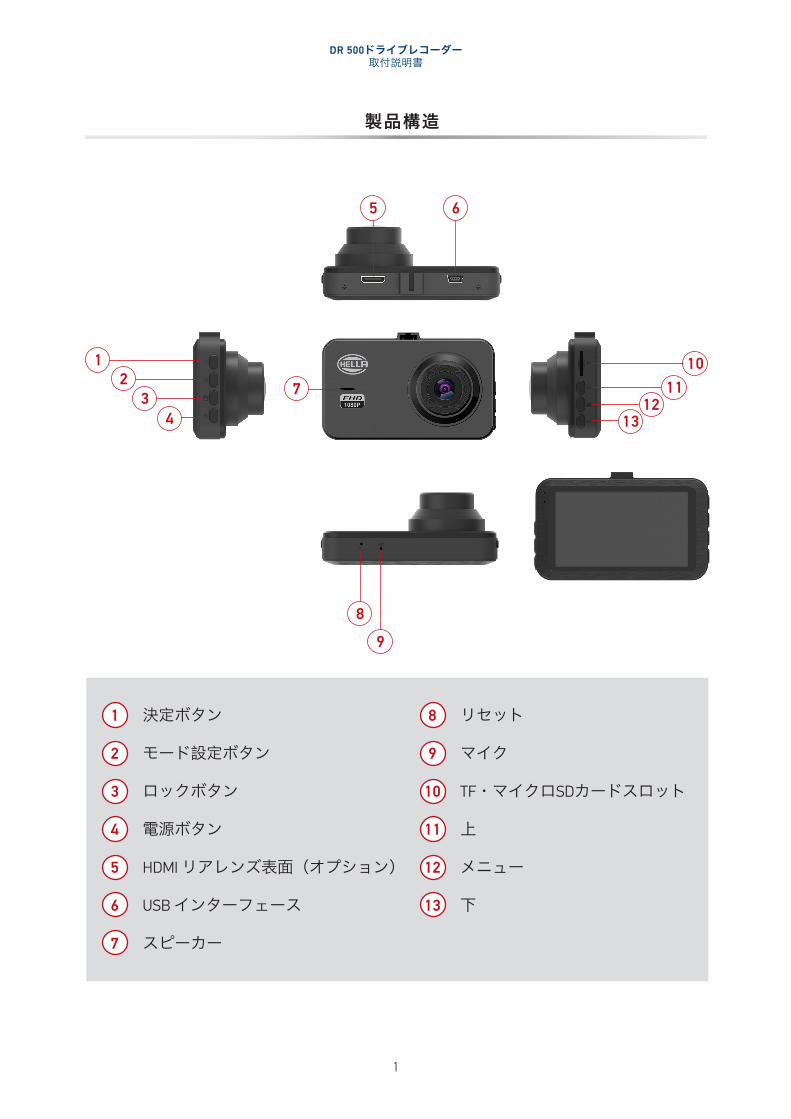
製品構造
1 決定ボタン
2 モード設定ボタン
3 ロックボタン
4 電源ボタン
5 HDMI リアレンズ表面(オプション)
6 USB インターフェース
7 スピーカー
8 リセット
9 マイク
10 TF・マイクロSDカードスロット
11 上
12 メニュー
13 下
8
7
1 102 11
3 124 13
9
5 6
2
DR 500ドライブレコーダー取付説明書
ボタン機能説明
電源ボタン
カメラの電源がオフの時、このボタンを3秒程度押し続けて電源を入れます。また同じように押すことで、電源を切ることができます。 動画・画像・再生モードでは、短く押して画面を切ります。
ロックボタン
録画モードでは、このボタンを押し、手動で動画をロックすることができます。
モード設定ボタン
録画モード、カメラモード、再生モードの機能スイッチ 。
決定ボタン
録画インターフェイスでは、ボタンを短く押して録画機能を開始・停止します。 画像モードでは、短く一度押して写真を取ることができます。 再生モードでは、ボタンを短く押して動画を再生・停止します。メニューでは、一度押すことで選択を決定できます。
USBポート
パソコンをつなぎ、データ(ストレージ・パソコンカメラ)を移行できます。 外付けバッテリーと接続し、バッテリーを充電または電源回路を提供します。
リセットボタン
リセットボタンを押して、初期設定にリセットします。
下ボタン
メニューで下を選択します。 このボタンを短く押すことで、録画中にマイクをオン・オフにすることができます。 再生モードでは、このボタンを押して選択することができます。 動画を再生している間、このボタンを短く押すことで再生速度を上げることができます。
メニューボタン
このボタンを短く押し、メニュー画面に行きます。もう一度このボタンを押すと、システム設定へ移ります。
上ボタン
メニューで上を選択します。 再生モードでは、このボタンを短く押して選択します。 動画を再生している間、このボタンを短く押すことで動画を巻き戻すことができます。
TF・マイクロSDカードスロット
カードを挿入します。TF・マイクロSDカードがクラス10またはそれ以上の高速カードであることを推奨します。
3
DR 500ドライブレコーダー取付説明書
自動オン・オフ
車の電源へ接続後、カメラは自動的に録画をはじめ、エンジンが切られた時にシャットダウンされます。
モーション検出
動きが検出された場合、カメラは自動的に録画を開始します。TF・マイクロSDカード容量をセーブするために、動きを検出しない場合には録画が停止します。
特別機能説明
電源入/切
電源ボタンを長押して 電源を入れ、もう一度長押しすることで電源を切ることができます。注意:バッテリー残量が少ない場合は、バッテリーを自動的にシャットダウンします。
カメラモード
モード ボタンを短く押して、カメラモードを起動させると、カメラのマークが画面の左上に表示されます。
決定 ボタンを押すことで、カメラを起動させ、カメラが起動している時にはカメラマークの横が赤く点灯します。
画像モード
モード ボタンを短く押して、画像モードを起動させると、画像マークが画面の左上に表示されます。
決定 ボタンを押し、写真を撮影します。音がなったら、撮影が完了した証拠です。
動画・画像の再生
モード ボタンを短く押すと、再生モードに移り、再生マークが画面の左上に表示されます。
ボタンを押して、画像・動画を選択し、もう一度押すと画像・動画を巻き戻します。 一度押して動画を選択し、もう一度押して動画を早送りします。 決定 ボタンを押して、選択した動画を再生します。
メニュー設定
メニュー ボタンを押して、設定画面に移ります。メニュー ボタンをもう一度押して、システムメニューへ移行し、さらにボタンを押すと設定を完了します。
設定のサブメニューへ移行するにはスイッチを押して、決定 キーを押してサブメニューへ移行します。
時刻設定
メニュー ボタンを押して設定画面へ移行し、ボタンを押して日時を選択し、決定 ボタンを押して設定を確定します。決定 ボタンから年・月・日・時・分・秒を設定し、もう一度メニューボタンを押すことで変更を確定できます。
基本的な機能使用説明
4
DR 500ドライブレコーダー取付説明書
メニュー説明
A 録画 動画解像度 1080P FHD、720P HD、VGAから選択できます。
ループ録画 録画時間は1分、3分、5分から選択できます。選択されていない場合、SDカードは一定期間後
に容量が無くなります。
低速度録画(タイムラプス) 選択:オフ・100ms、200ms、500ms
WDR ワイドダイナミックレンジ機能はオプションで、スイッチで入/切できます。
露出 ライトの明るさを調節するために使用されます。露出が高い時には、ナンバープレートを認識
するのには明るすぎます。初期設定は0です。
録画 動画に音も録音するかどうか選択可能で、動画に音が入っていない場合には、この選択がオン
になっているかどうかをご確認ください。
日付 選択がオンになっている時、パソコンでの再生動画画面に日時が表示されます。
Gセンサー この機能では、高・中・低からお選びいただけます。感度が高すぎる場合には、必要に応じて
感度を下げてください。 運転中に事故が発生した場合、最新録画が自動ループ録画によって上書きされないよう、ロッ
クがかかります(メモリーカードの容量がない場合、カードを入れ替えるか、このオプションを低またはオフに設定できます)
駐車ガード エンジンが切られている時に、レコーダーが揺れを感知すると自動的に録画が開始されます。
この機能には、バッテリーからの電源確保が必要です。録画は29秒継続してから自動的に終了します。
B 画像モード 設定 シングルショット・2秒・5秒・10秒から選択。初期設定はシングルショットになっています
写真解像度 12M・10M ・8M・5M・3M・2M・1.3M・VGAから選んでいただけます。1.3Mが初期設定です
バーストモード 本機能が起動すると、カメラはシングルショットごとに3枚の写真を撮影します。
画質 高、中、標準画質
シャープネス 強、標準、ソフト
ホワイトバランス 様々な環境下での色彩設定(色の歪曲が発生するため、自動選択推奨)初期設定では自動にな
っています。
色彩 標準、白黒、クラッシックからお選びください。
5
DR 500ドライブレコーダー取付説明書
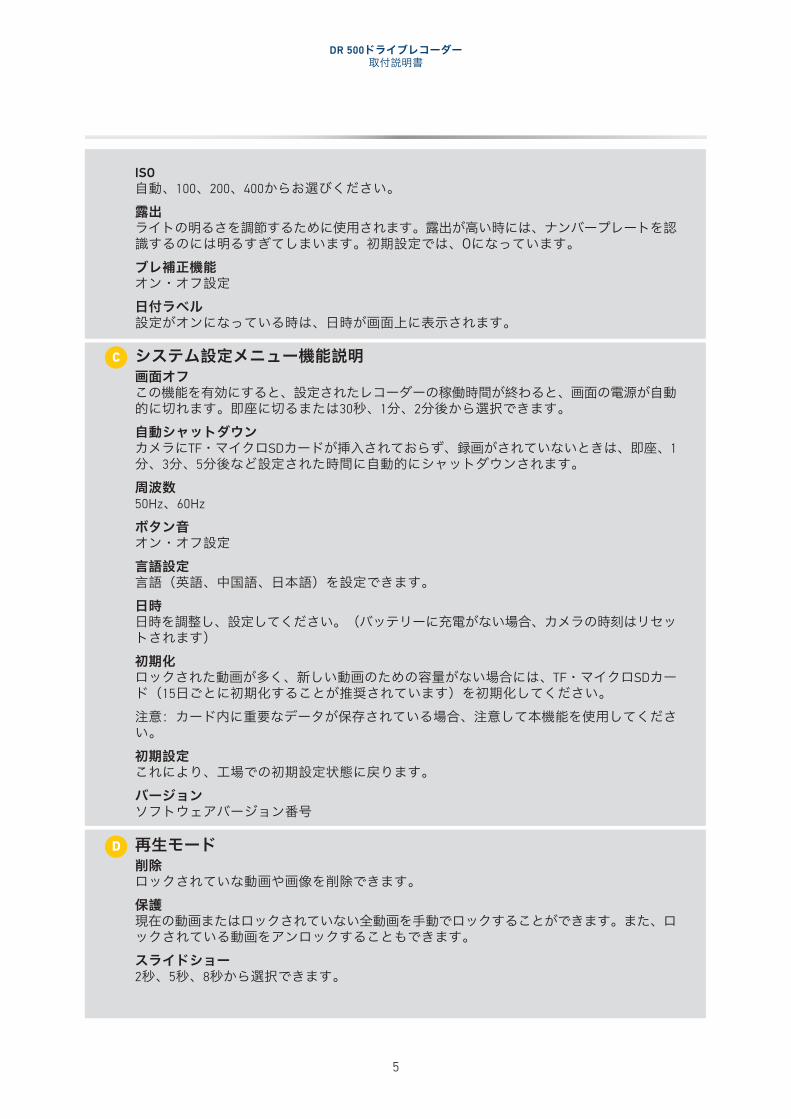
ISO 自動、100、200、400からお選びください。
露出 ライトの明るさを調節するために使用されます。露出が高い時には、ナンバープレートを認
識するのには明るすぎてしまいます。初期設定では、0になっています。
ブレ補正機能 オン・オフ設定
日付ラベル 設定がオンになっている時は、日時が画面上に表示されます。
C システム設定メニュー機能説明 画面オフ この機能を有効にすると、設定されたレコーダーの稼働時間が終わると、画面の電源が自動
的に切れます。即座に切るまたは30秒、1分、2分後から選択できます。
自動シャットダウン カメラにTF・マイクロSDカードが挿入されておらず、録画がされていないときは、即座、1
分、3分、5分後など設定された時間に自動的にシャットダウンされます。
周波数 50Hz、60Hz
ボタン音 オン・オフ設定
言語設定 言語(英語、中国語、日本語)を設定できます。
日時 日時を調整し、設定してください。(バッテリーに充電がない場合、カメラの時刻はリセッ
トされます)
初期化 ロックされた動画が多く、新しい動画のための容量がない場合には、TF・マイクロSDカー
ド(15日ごとに初期化することが推奨されています)を初期化してください。
注意:カード内に重要なデータが保存されている場合、注意して本機能を使用してください。
初期設定 これにより、工場での初期設定状態に戻ります。
バージョン ソフトウェアバージョン番号
D 再生モード 削除 ロックされていな動画や画像を削除できます。
保護 現在の動画またはロックされていない全動画を手動でロックすることができます。また、ロ
ックされている動画をアンロックすることもできます。
スライドショー 2秒、5秒、8秒から選択できます。
6
DR 500ドライブレコーダー取付説明書
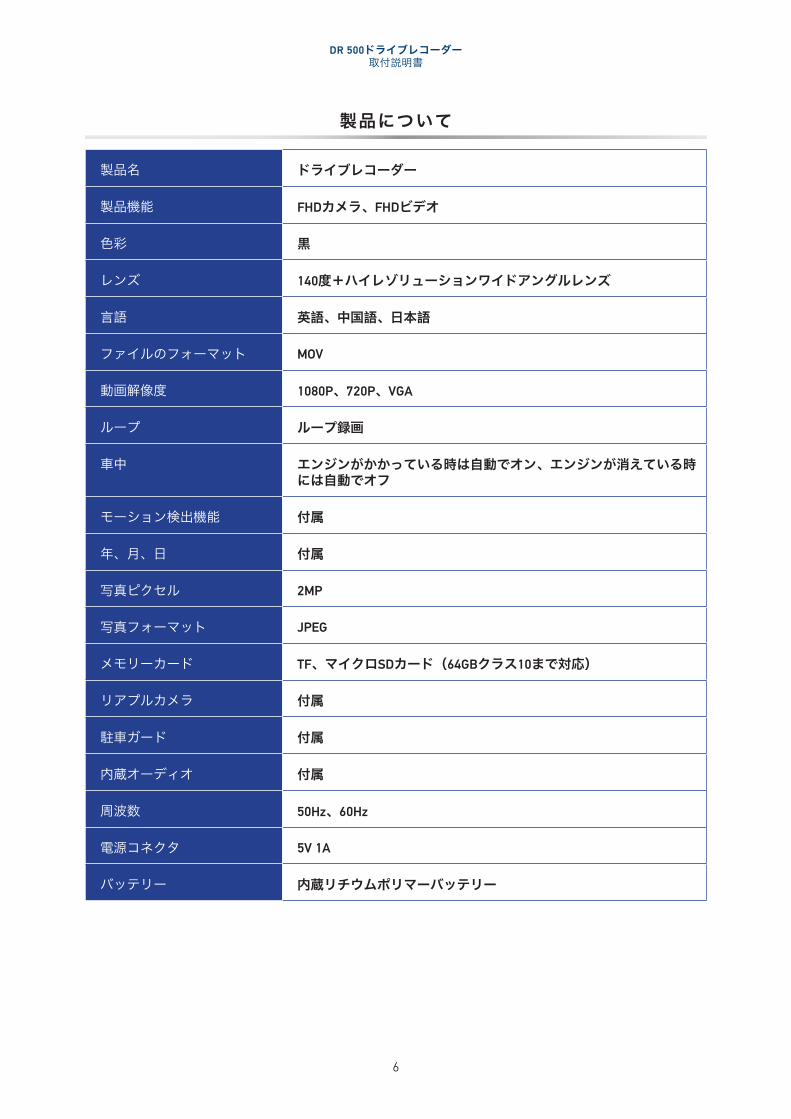
製品について
製品名 ドライブレコーダー
製品機能 FHDカメラ、FHDビデオ
色彩 黒
レンズ 140度+ハイレゾリューションワイドアングルレンズ
言語 英語、中国語、日本語
ファイルのフォーマット MOV
動画解像度 1080P、720P、VGA
ループ ループ録画
車中 エンジンがかかっている時は自動でオン、エンジンが消えている時には自動でオフ
モーション検出機能 付属
年、月、日 付属
写真ピクセル 2MP
写真フォーマット JPEG
メモリーカード TF、マイクロSDカード(64GBクラス10まで対応)
リアプルカメラ 付属
駐車ガード 付属
内蔵オーディオ 付属
周波数 50Hz、60Hz
電源コネクタ 5V 1A
バッテリー 内蔵リチウムポリマーバッテリー
7
DR 500ドライブレコーダー取付説明書
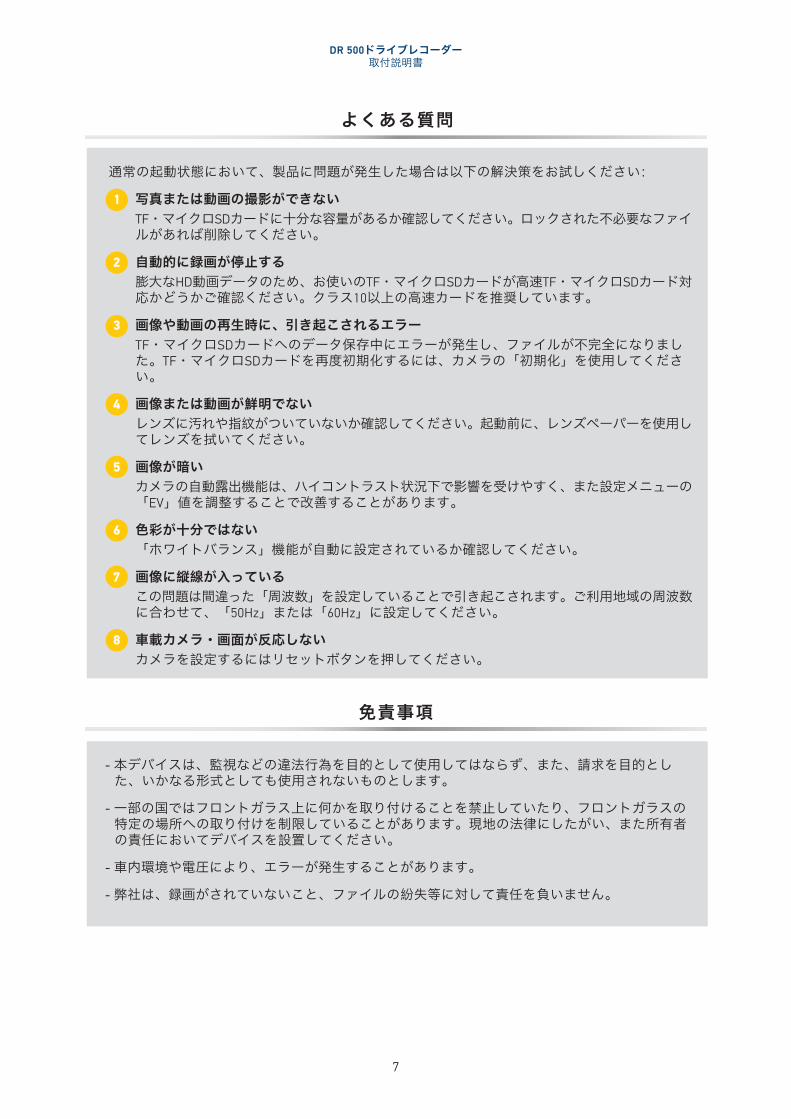
よくある質問
- 本デバイスは、監視などの違法行為を目的として使用してはならず、また、請求を目的とした、いかなる形式としても使用されないものとします。
- 一部の国ではフロントガラス上に何かを取り付けることを禁止していたり、フロントガラスの特定の場所への取り付けを制限していることがあります。現地の法律にしたがい、また所有者の責任においてデバイスを設置してください。
- 車内環境や電圧により、エラーが発生することがあります。
- 弊社は、録画がされていないこと、ファイルの紛失等に対して責任を負いません。
免責事項
通常の起動状態において、製品に問題が発生した場合は以下の解決策をお試しください:
1 写真または動画の撮影ができない TF・マイクロSDカードに十分な容量があるか確認してください。ロックされた不必要なファイ
ルがあれば削除してください。
2 自動的に録画が停止する 膨大なHD動画データのため、お使いのTF・マイクロSDカードが高速TF・マイクロSDカード対
応かどうかご確認ください。クラス10以上の高速カードを推奨しています。
3 画像や動画の再生時に、引き起こされるエラー TF・マイクロSDカードへのデータ保存中にエラーが発生し、ファイルが不完全になりまし
た。TF・マイクロSDカードを再度初期化するには、カメラの「初期化」を使用してください。
4 画像または動画が鮮明でない レンズに汚れや指紋がついていないか確認してください。起動前に、レンズペーパーを使用し
てレンズを拭いてください。
5 画像が暗い カメラの自動露出機能は、ハイコントラスト状況下で影響を受けやすく、また設定メニューの
「EV」値を調整することで改善することがあります。
6 色彩が十分ではない 「ホワイトバランス」機能が自動に設定されているか確認してください。
7 画像に縦線が入っている この問題は間違った「周波数」を設定していることで引き起こされます。ご利用地域の周波数
に合わせて、「50Hz」または「60Hz」に設定してください。
8 車載カメラ・画面が反応しない カメラを設定するにはリセットボタンを押してください。