Embed Size (px)
Citation preview
Drawstring Bag:
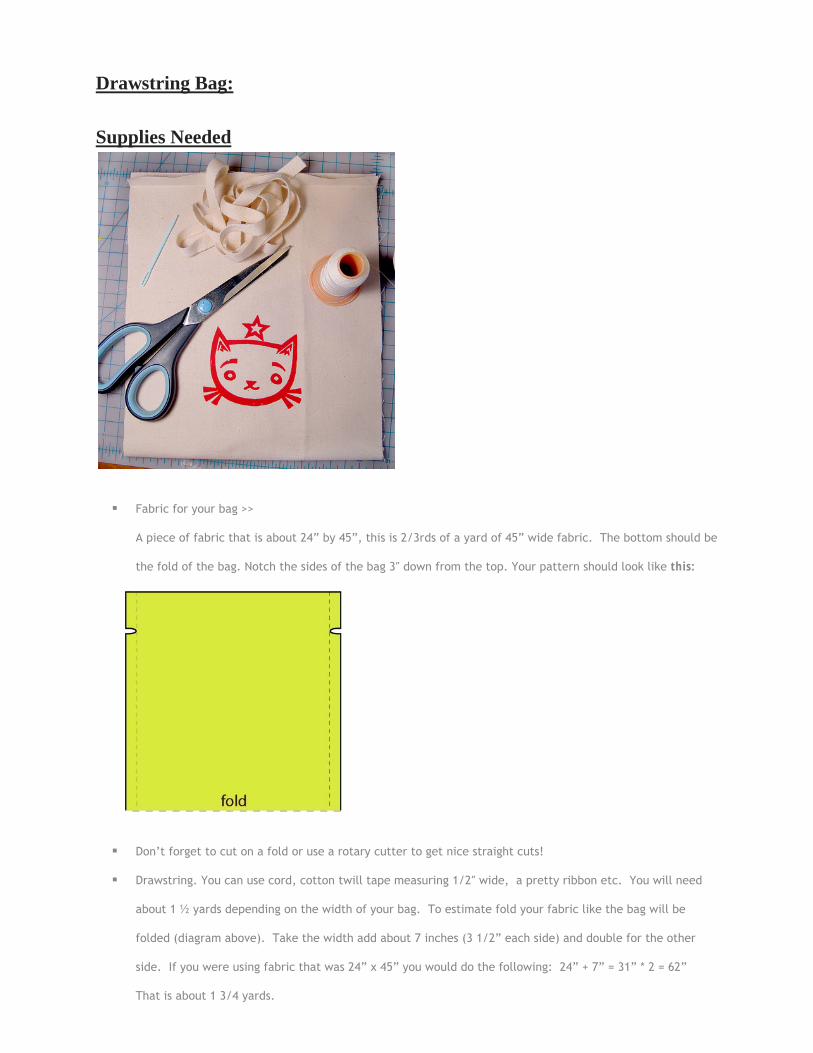
Supplies Needed
Fabric for your bag >>
A piece of fabric that is about 24” by 45”, this is 2/3rds of a yard of 45” wide fabric. The bottom should be
the fold of the bag. Notch the sides of the bag 3″ down from the top. Your pattern should look like this:
Don’t forget to cut on a fold or use a rotary cutter to get nice straight cuts!
Drawstring. You can use cord, cotton twill tape measuring 1/2″ wide, a pretty ribbon etc. You will need
about 1 ½ yards depending on the width of your bag. To estimate fold your fabric like the bag will be
folded (diagram above). Take the width add about 7 inches (3 1/2” each side) and double for the other
side. If you were using fabric that was 24” x 45” you would do the following: 24” + 7” = 31” * 2 = 62”
That is about 1 3/4 yards.
Large eyed needle to thread the drawstring or small safety pin will work.
Thread
Scissors or thread clippers
Sewing machine
OK ready? Now on to the instructions…
Instructions
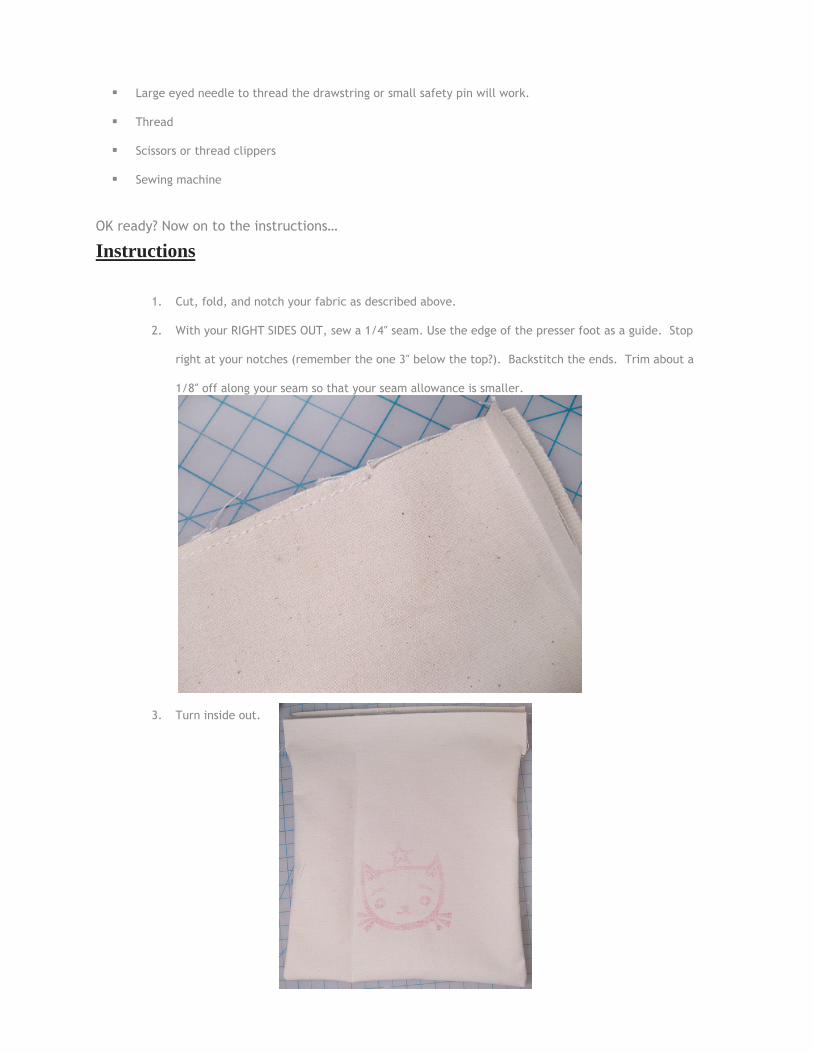
1. Cut, fold, and notch your fabric as described above.
2. With your RIGHT SIDES OUT, sew a 1/4″ seam. Use the edge of the presser foot as a guide. Stop
right at your notches (remember the one 3″ below the top?). Backstitch the ends. Trim about a
1/8″ off along your seam so that your seam allowance is smaller.
3. Turn inside out.
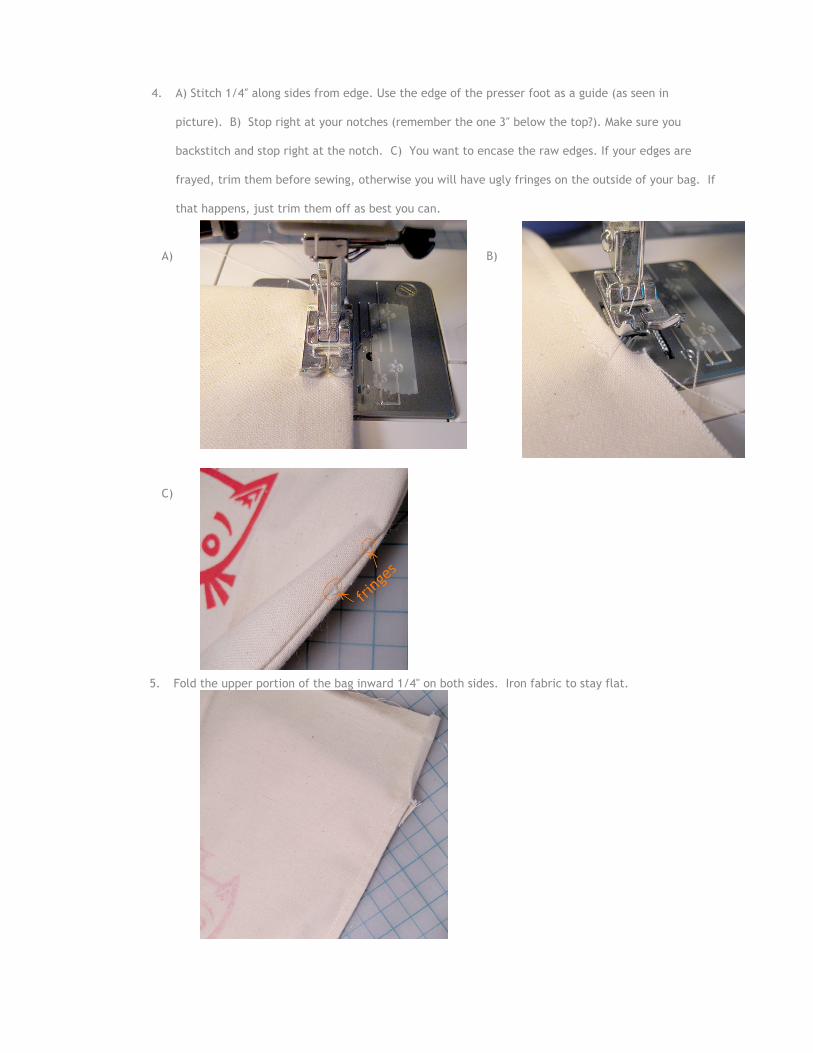
4. A) Stitch 1/4″ along sides from edge. Use the edge of the presser foot as a guide (as seen in
picture). B) Stop right at your notches (remember the one 3″ below the top?). Make sure you
backstitch and stop right at the notch. C) You want to encase the raw edges. If your edges are
frayed, trim them before sewing, otherwise you will have ugly fringes on the outside of your bag. If
that happens, just trim them off as best you can.
A) B)
C)
5. Fold the upper portion of the bag inward 1/4" on both sides. Iron fabric to stay flat.
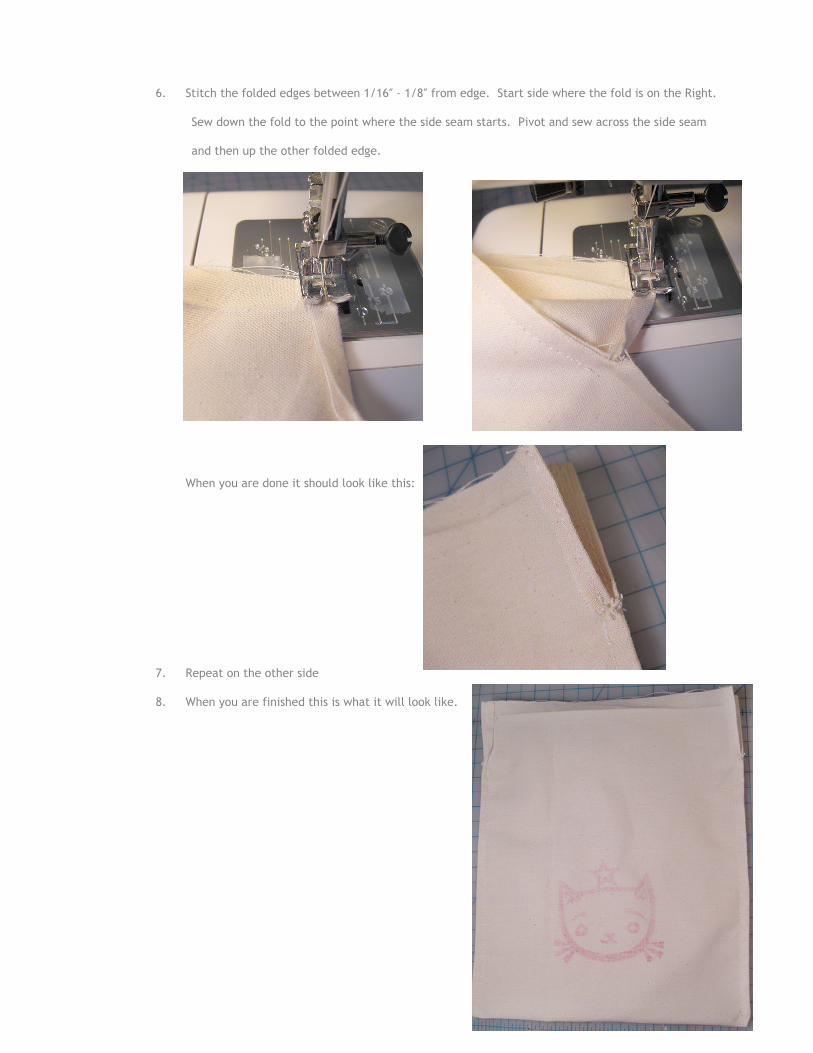
6. Stitch the folded edges between 1/16″ – 1/8″ from edge. Start side where the fold is on the Right.
Sew down the fold to the point where the side seam starts. Pivot and sew across the side seam
and then up the other folded edge.
When you are done it should look like this:
7. Repeat on the other side
8. When you are finished this is what it will look like.
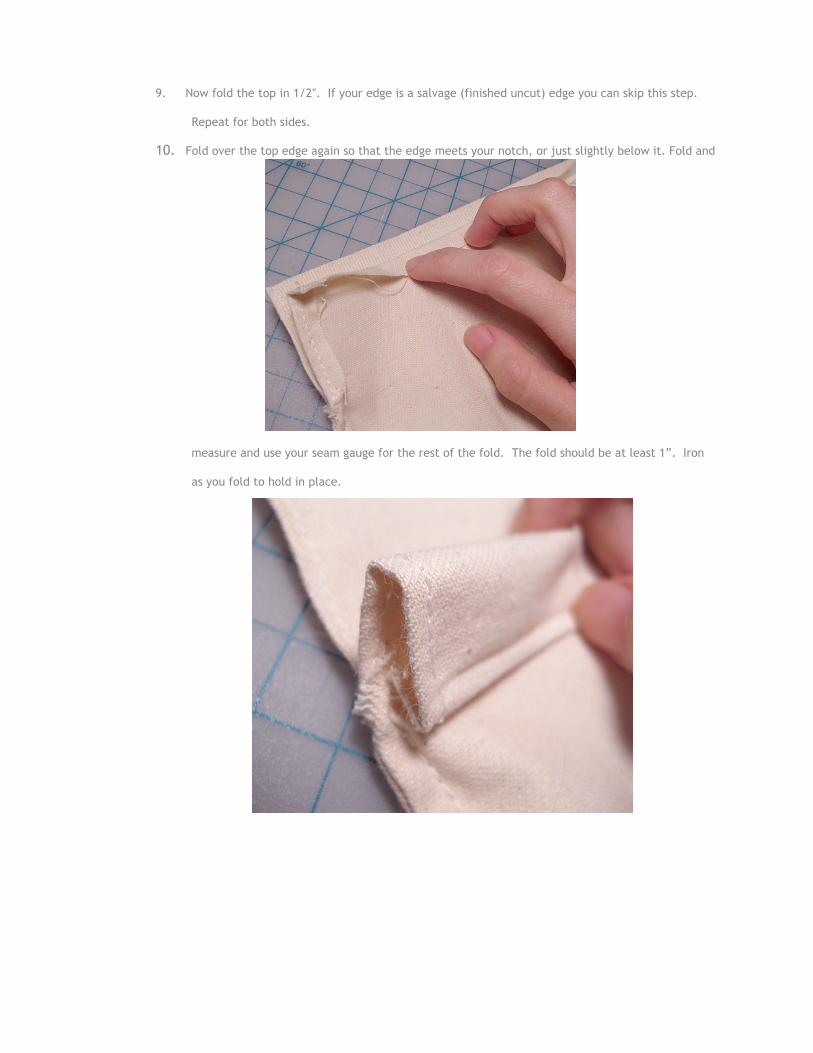
9. Now fold the top in 1/2″. If your edge is a salvage (finished uncut) edge you can skip this step.
Repeat for both sides.
10. Fold over the top edge again so that the edge meets your notch, or just slightly below it. Fold and
measure and use your seam gauge for the rest of the fold. The fold should be at least 1”. Iron
as you fold to hold in place.
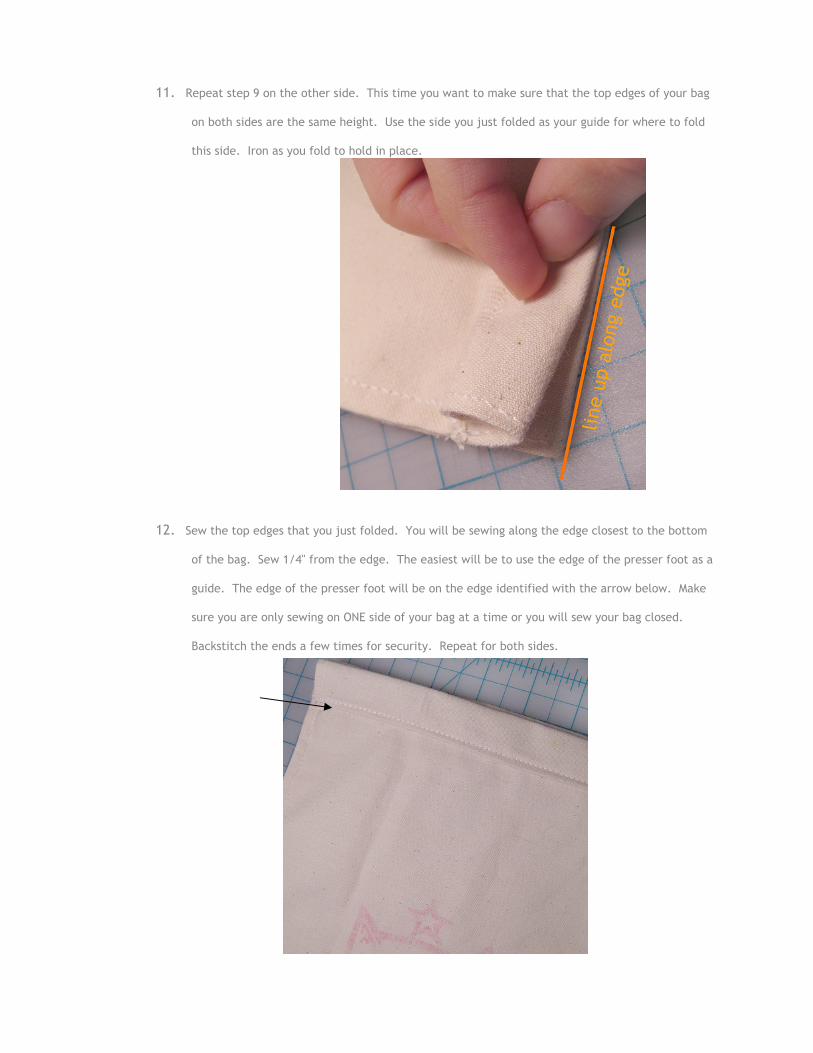
11. Repeat step 9 on the other side. This time you want to make sure that the top edges of your bag
on both sides are the same height. Use the side you just folded as your guide for where to fold
this side. Iron as you fold to hold in place.
12. Sew the top edges that you just folded. You will be sewing along the edge closest to the bottom
of the bag. Sew 1/4" from the edge. The easiest will be to use the edge of the presser foot as a
guide. The edge of the presser foot will be on the edge identified with the arrow below. Make
sure you are only sewing on ONE side of your bag at a time or you will sew your bag closed.
Backstitch the ends a few times for security. Repeat for both sides.
13. Now you have the casings for the drawstring!
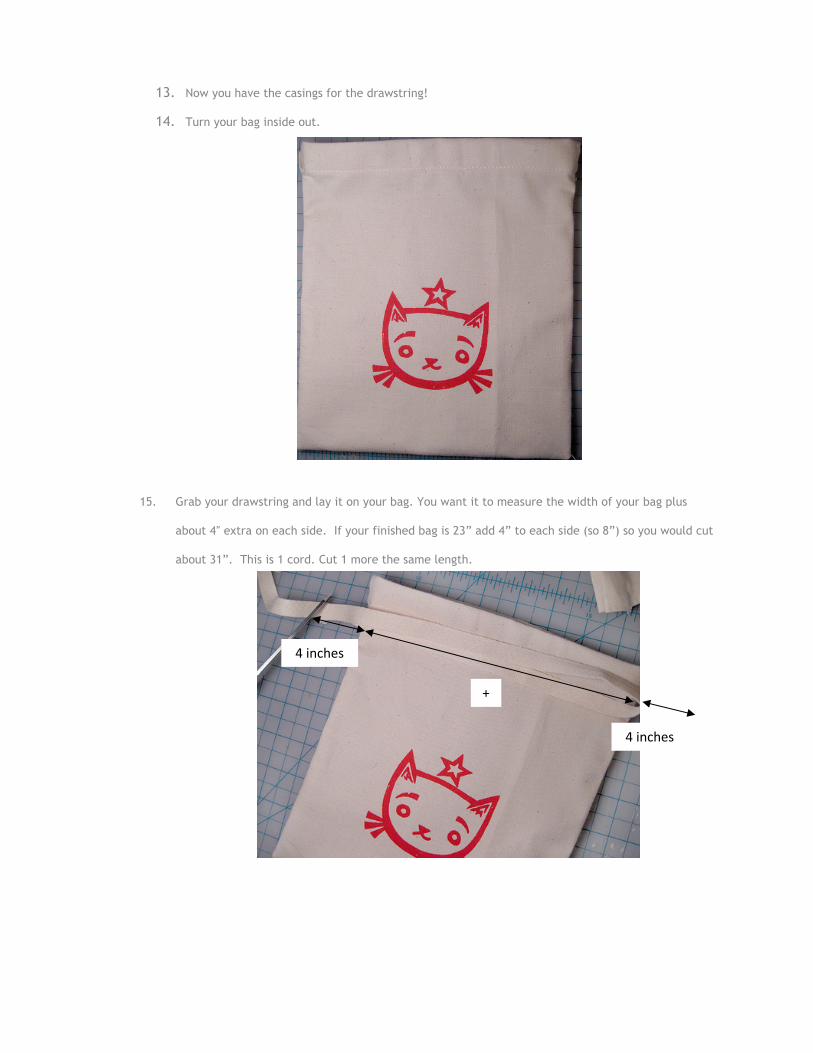
14. Turn your bag inside out.
15. Grab your drawstring and lay it on your bag. You want it to measure the width of your bag plus
about 4″ extra on each side. If your finished bag is 23” add 4” to each side (so 8”) so you would cut
about 31”. This is 1 cord. Cut 1 more the same length.
4 inches
4 inches
+
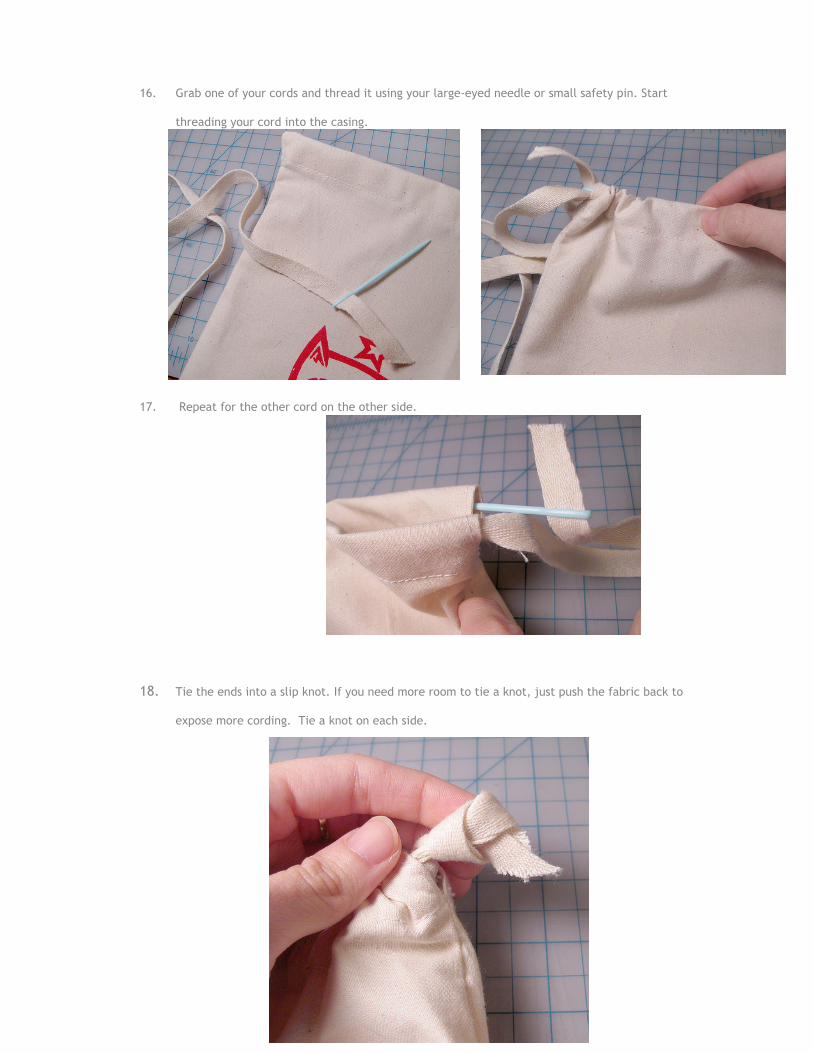
16. Grab one of your cords and thread it using your large-eyed needle or small safety pin. Start
threading your cord into the casing.
17. Repeat for the other cord on the other side.
18. Tie the ends into a slip knot. If you need more room to tie a knot, just push the fabric back to
expose more cording. Tie a knot on each side.
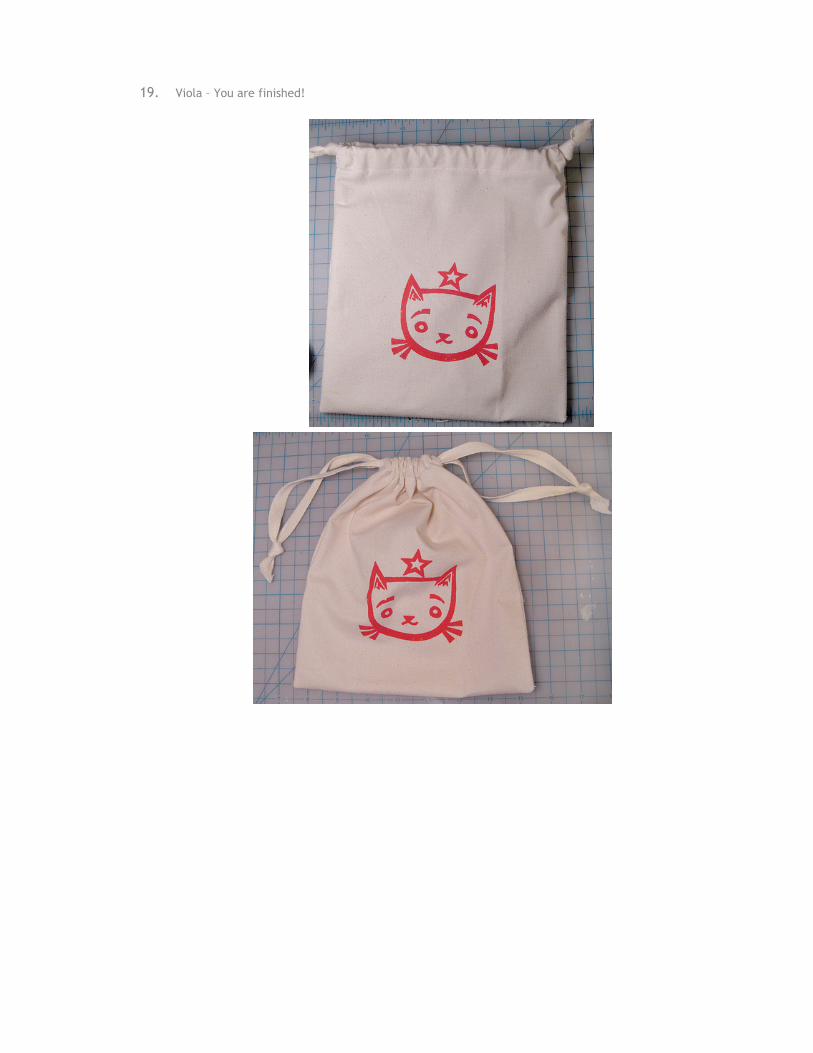
19. Viola – You are finished!


![shop.hkfairtradepower.comshop.hkfairtradepower.com/image/files/hkftp_2011_xmas.pdf · CJW Bangladesh Jute Drawstring Bag Traidcraft Double Chocolate Chunk Cookies [200g] Oxfam Fair-trade](https://img.pdfslide.us/doc/110x75/60530d3b2c6bf66e2e3c5ba5/shop-cjw-bangladesh-jute-drawstring-bag-traidcraft-double-chocolate-chunk-cookies.jpg)