Embed Size (px)
Citation preview

Bathtub Toy Bag
Bathtub Toy Bag
A place for everything, and everything in its place. That's the motto behind this mesh bathtub toy bag. Polyester mosquito mesh allows the water to run out, and tub toys to air dry. Suction cups keep the bag hung out of the way, and a clever rubber duck design adds even more fun. Read on for free project instructions!
Supplies Needed: **18 x 36 inch piece of polyester mosquito mesh **1/4 yard nylon fabric (we used rip-stop nylon) **2 yards cotton or nylon cord (clothesline cord works well) **Extra-wide double-fold bias tape **2 large hook suction cups
file:///F|/Source/ELProjects/html/pr1417.html (1 of 12) [10/8/2010 2:49:02 PM]
1
Bathtub Toy Bag
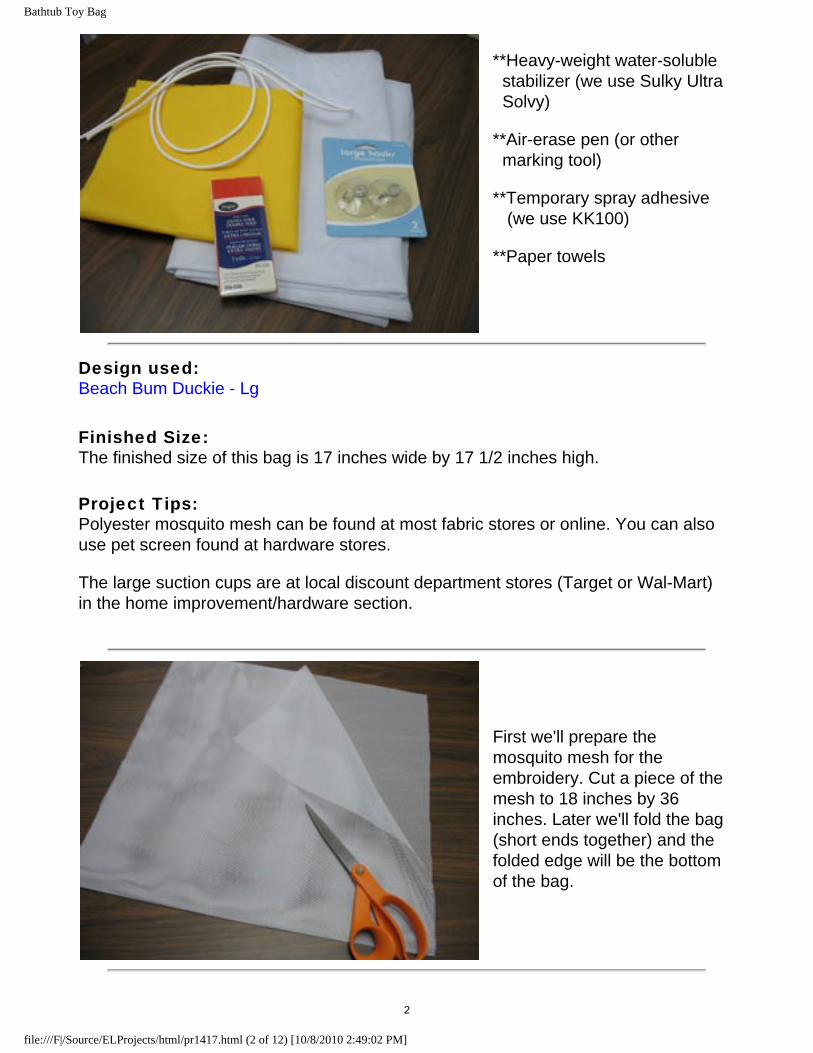
**Heavy-weight water-soluble stabilizer (we use Sulky Ultra Solvy) **Air-erase pen (or other marking tool) **Temporary spray adhesive (we use KK100) **Paper towels
Design used: Beach Bum Duckie - Lg
Finished Size: The finished size of this bag is 17 inches wide by 17 1/2 inches high.
Project Tips: Polyester mosquito mesh can be found at most fabric stores or online. You can also use pet screen found at hardware stores. The large suction cups are at local discount department stores (Target or Wal-Mart) in the home improvement/hardware section.
First we'll prepare the mosquito mesh for the embroidery. Cut a piece of the mesh to 18 inches by 36 inches. Later we'll fold the bag (short ends together) and the folded edge will be the bottom of the bag.
file:///F|/Source/ELProjects/html/pr1417.html (2 of 12) [10/8/2010 2:49:02 PM]
2

Bathtub Toy Bag
Next we'll mark the mesh for where the design will be placed. If you have embroidery software, print a template. Position the center of the template with the top edge of the design 4 1/2 inches from the top edge of the mesh. Center the template horizontally by measuring equal distances between each side of the fabric. Poke a hole in the center of the template, and using an air-erase pen (or other marking tool), mark the mesh. Also, mark the horizontal and vertical axis points.
Remove the template and draw lines connecting the axis points.
file:///F|/Source/ELProjects/html/pr1417.html (3 of 12) [10/8/2010 2:49:02 PM]
3

Bathtub Toy Bag
Next we'll embroider the design onto the mesh. Cut a piece of heavyweight water-soluble stabilizer a bit larger than your hoop. We use Sulky Ultra Solvy.
Spray the water-soluble stabilizer with a very small amount of adhesive, and smooth it onto the backside of the mesh.
Then, hoop both the stabilizer and mesh together firmly.
file:///F|/Source/ELProjects/html/pr1417.html (4 of 12) [10/8/2010 2:49:02 PM]
4

Bathtub Toy Bag
Attach the hoop to the machine and load the embroidery design. Move the hoop so that the needle is right over your marked center point. Then, embroider the design.
After the design has finished, trim the excess stabilizer away from the backside.
Soak the remaining stabilizer away according to package instructions. For Sulky Ultra Solvy, we soak in water hot from the tap for about 15 minutes. Blot the design and mesh with paper towels, and allow to dry completely.
file:///F|/Source/ELProjects/html/pr1417.html (5 of 12) [10/8/2010 2:49:02 PM]
5
Bathtub Toy Bag
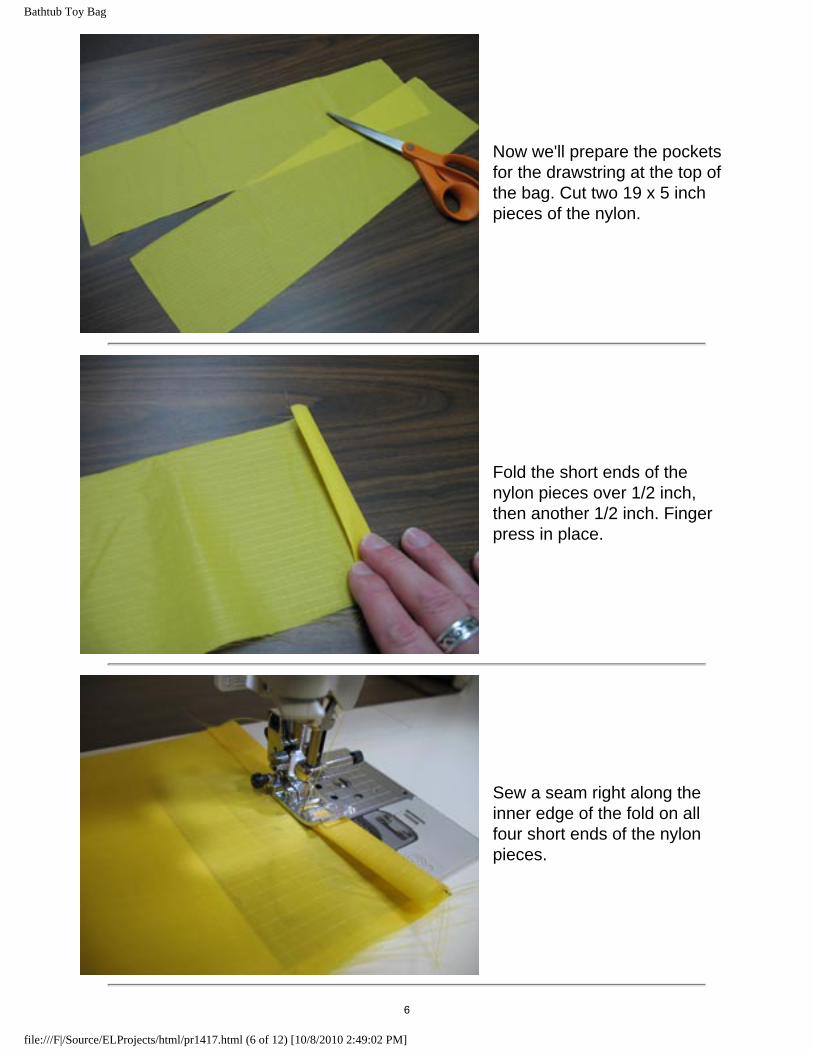
Now we'll prepare the pockets for the drawstring at the top of the bag. Cut two 19 x 5 inch pieces of the nylon.
Fold the short ends of the nylon pieces over 1/2 inch, then another 1/2 inch. Finger press in place.
Sew a seam right along the inner edge of the fold on all four short ends of the nylon pieces.
file:///F|/Source/ELProjects/html/pr1417.html (6 of 12) [10/8/2010 2:49:02 PM]
6

Bathtub Toy Bag
Place the nylon pieces with the folded sides facing up. Fold and finger press the long sides of each nylon piece in 1/2 inch.
Sew a 1/4 inch seam along each long side.
Next, fold the embroidered mesh with the short ends together and the right sides together. Sew a 1/2 inch seam along each side -- but don't sew the top or the bottom.
file:///F|/Source/ELProjects/html/pr1417.html (7 of 12) [10/8/2010 2:49:02 PM]
7
Bathtub Toy Bag
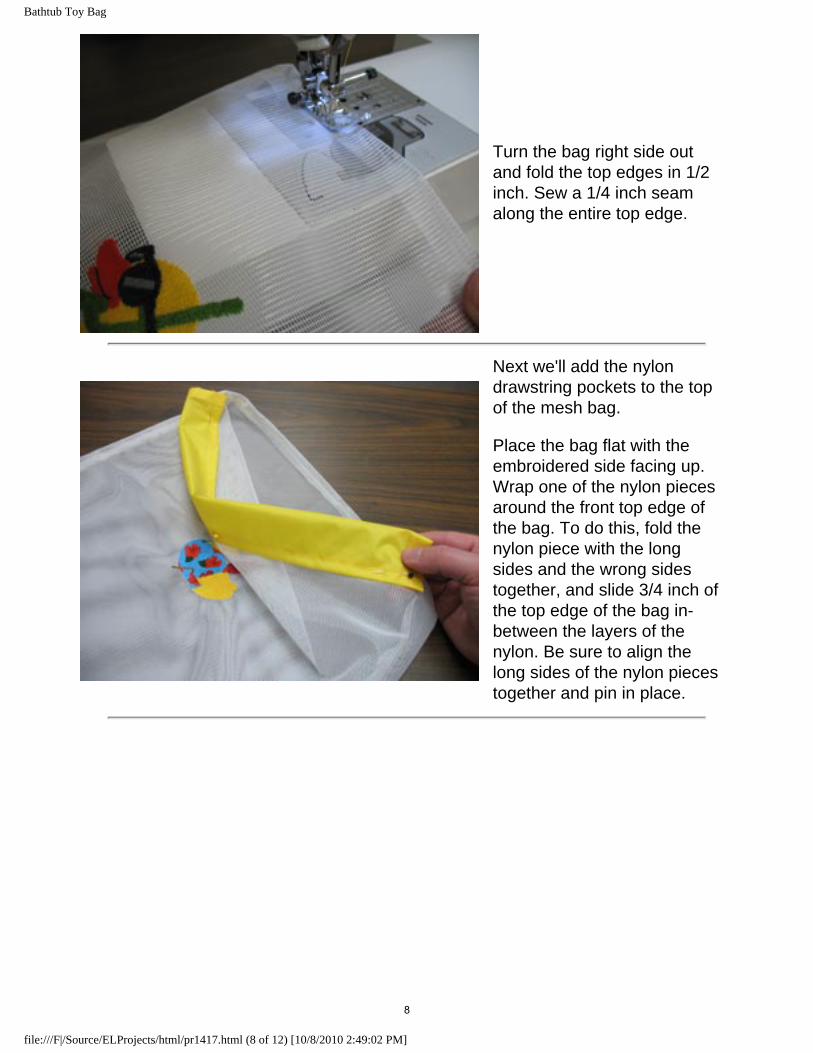
Turn the bag right side out and fold the top edges in 1/2 inch. Sew a 1/4 inch seam along the entire top edge.
Next we'll add the nylon drawstring pockets to the top of the mesh bag. Place the bag flat with the embroidered side facing up. Wrap one of the nylon pieces around the front top edge of the bag. To do this, fold the nylon piece with the long sides and the wrong sides together, and slide 3/4 inch of the top edge of the bag in-between the layers of the nylon. Be sure to align the long sides of the nylon pieces together and pin in place.
file:///F|/Source/ELProjects/html/pr1417.html (8 of 12) [10/8/2010 2:49:02 PM]
8

Bathtub Toy Bag
Sew a 1/4 inch seam along the bottom edge of the nylon.
Add the second nylon piece to the back top edge of the bag, just as you did the first piece.
Add bias tape along both sides of the bag. Wrap the tape around each side and pin in place.
file:///F|/Source/ELProjects/html/pr1417.html (9 of 12) [10/8/2010 2:49:02 PM]
9
Bathtub Toy Bag
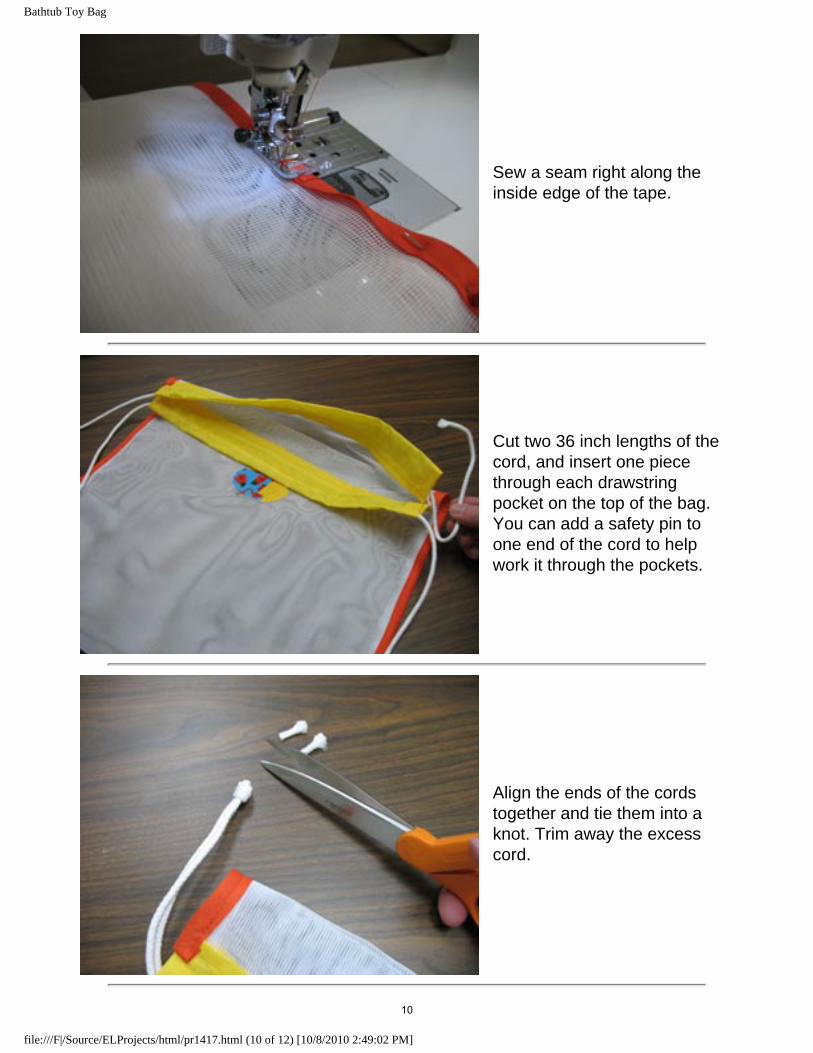
Sew a seam right along the inside edge of the tape.
Cut two 36 inch lengths of the cord, and insert one piece through each drawstring pocket on the top of the bag. You can add a safety pin to one end of the cord to help work it through the pockets.
Align the ends of the cords together and tie them into a knot. Trim away the excess cord.
file:///F|/Source/ELProjects/html/pr1417.html (10 of 12) [10/8/2010 2:49:02 PM]
10

Bathtub Toy Bag
Add the suction cups to the wall above the tub (about 2 feet apart) and then attach the ends of the cords to the hooks. Add fun bathtub toys, and you're ready to rub-a-dub-dub!
file:///F|/Source/ELProjects/html/pr1417.html (11 of 12) [10/8/2010 2:49:02 PM]
11
Bathtub Toy Bag
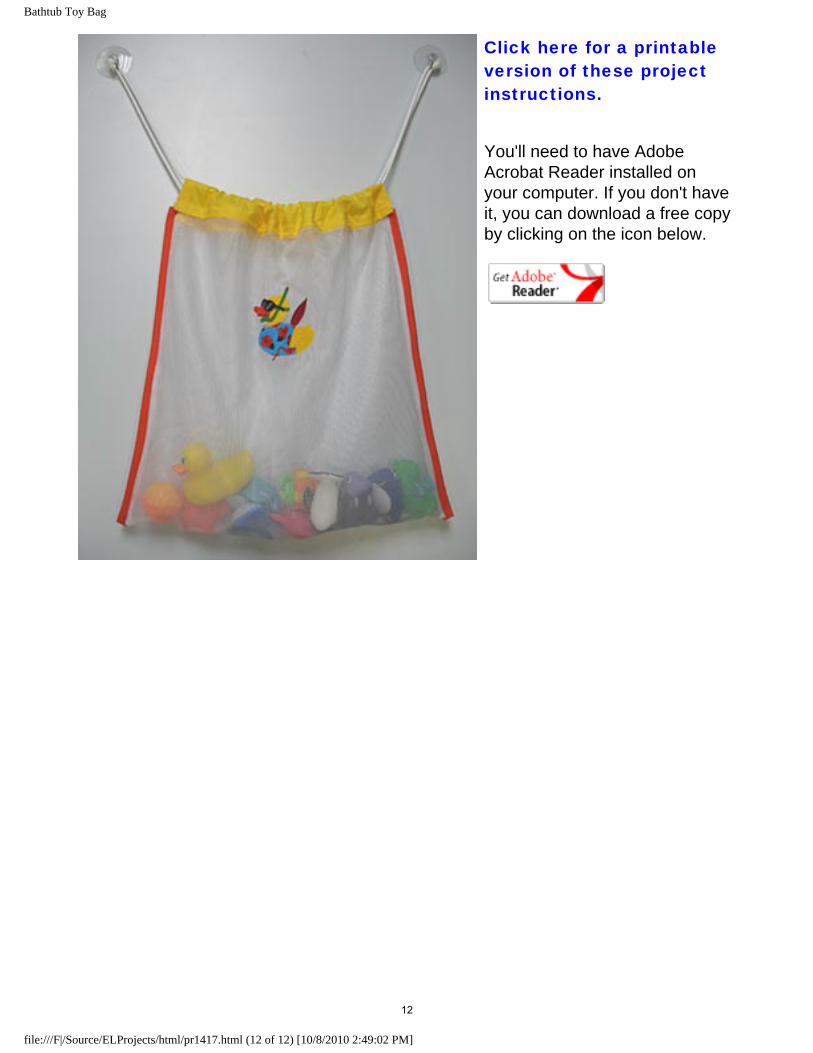
Click here for a printable version of these project instructions. You'll need to have Adobe Acrobat Reader installed on your computer. If you don't have it, you can download a free copy by clicking on the icon below.
file:///F|/Source/ELProjects/html/pr1417.html (12 of 12) [10/8/2010 2:49:02 PM]
12


![shop.hkfairtradepower.comshop.hkfairtradepower.com/image/files/hkftp_2011_xmas.pdf · CJW Bangladesh Jute Drawstring Bag Traidcraft Double Chocolate Chunk Cookies [200g] Oxfam Fair-trade](https://img.pdfslide.us/doc/110x75/60530d3b2c6bf66e2e3c5ba5/shop-cjw-bangladesh-jute-drawstring-bag-traidcraft-double-chocolate-chunk-cookies.jpg)