Embed Size (px)
Citation preview
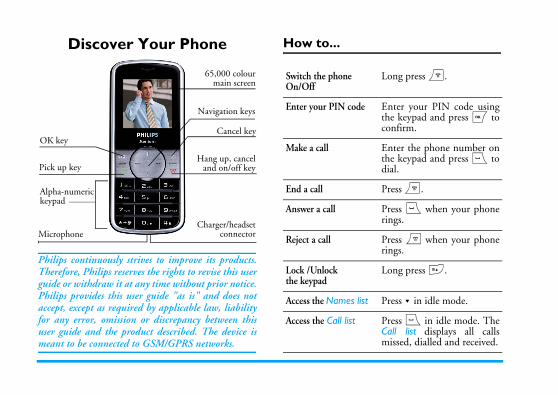
Long press ).
Enter your PIN code usingthe keypad and press , toconfirm.
Enter the phone number onthe keypad and press ( todial.
Press ).
Press ( when your phonerings.
Press ) when your phonerings.
Long press #.
Press - in idle mode.
Press ( in idle mode. TheCall list displays all callsmissed, dialled and received.
Discover Your Phone
Philips continuously strives to improve its products.Therefore, Philips reserves the rights to revise this userguide or withdraw it at any time without prior notice.Philips provides this user guide "as is" and does notaccept, except as required by applicable law, liabilityfor any error, omission or discrepancy between thisuser guide and the product described. The device ismeant to be connected to GSM/GPRS networks.
How to...
Alpha-numeric keypad
Microphone
65,000 colourmain screen
Pick up keyHang up, cancel
and on/off key
Charger/headsetconnector
OK keyCancel key
Navigation keys
Switch the phone On/Off
Enter your PIN code
Make a call
End a call
Answer a call
Reject a call
Lock /Unlock the keypad
Access the Names list
Access the Call list

1
ss the Menu when in idle mode, thenavigation key — which directions aree present guide with the +, -, < or >se the icons and lists. g in a list, a scroll bar located on the of the screen shows your currentlist. Within lists, press , to accessed to the selected item, press C tol.
Multimedia Settngs
page 30 page 27
Messages Games & apps
page 20 page 35
Address Book Applications
page 44 page 42
Main MenuThe Main Menu gives you access to all the differentfeatures of your mobile phone presented in the formof a grid. The table below summarises thearrangement of the Menu, the meanings of the variousicons found there, and the page in this manual wheremore detailed information concerning the subject canbe found.
Press , to acceuse the central nrepresented in thsigns — to browWhen navigatinright hand sideposition in the the options relatgo back one leve
Access the Main Menu Press , or in idle mode.
Go to previous menu Press C when available.
Quickly returnto idle
Long press on C.
Call Info
page 14
Op. services
page 32
WAP
page 39
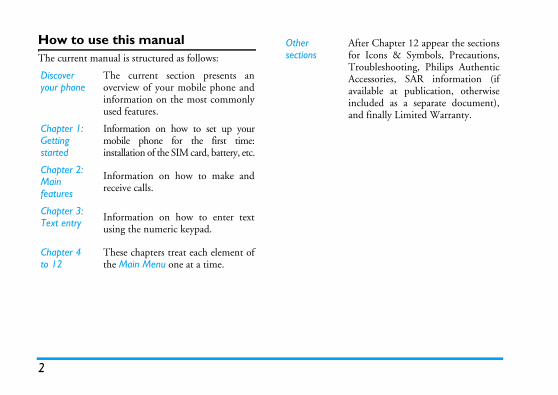
How to use this manual Chapter 12 appear the sectionscons & Symbols, Precautions,bleshooting, Philips Authenticssories, SAR information (ifble at publication, otherwiseded as a separate document),inally Limited Warranty.
2
The current manual is structured as follows:
Discover your phone
The current section presents anoverview of your mobile phone andinformation on the most commonlyused features.
Chapter 1: Getting started
Information on how to set up yourmobile phone for the first time:installation of the SIM card, battery, etc.
Chapter 2: Main features
Information on how to make andreceive calls.
Chapter 3: Text entry Information on how to enter text
using the numeric keypad.
Chapter 4 to 12
These chapters treat each element ofthe Main Menu one at a time.
Other sections
Afterfor ITrouAcceavailaincluand f
3
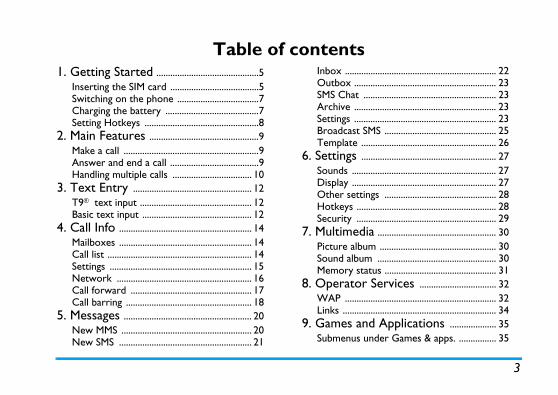
....................................................... 22
....................................................... 23
....................................................... 23
....................................................... 23
....................................................... 23MS ................................................ 25....................................................... 26....................................................... 27....................................................... 27....................................................... 27gs ................................................ 28....................................................... 28....................................................... 29a ................................................... 30m .................................................. 30 ................................................... 30
tus ................................................ 31Services ................................. 32....................................................... 32....................................................... 34d Applications .................... 35nder Games & apps. ................ 35
Table of contents1. Getting Started ............................................5
Inserting the SIM card ......................................5Switching on the phone ...................................7Charging the battery ........................................7Setting Hotkeys .................................................8
2. Main Features ...............................................9Make a call ..........................................................9Answer and end a call ......................................9Handling multiple calls .................................. 10
3. Text Entry ................................................... 12T9® text input ................................................ 12Basic text input ............................................... 12
4. Call Info ......................................................... 14Mailboxes ......................................................... 14Call list .............................................................. 14Settings ............................................................. 15Network .......................................................... 16Call forward .................................................... 17Call barring ...................................................... 18
5. Messages ....................................................... 20New MMS ........................................................ 20New SMS ......................................................... 21
Inbox ..........Outbox ......SMS Chat ..Archive ......Settings ......Broadcast STemplate ...
6. Settings ...Sounds .......Display .......Other settinHotkeys .....Security .....
7. MultimediPicture albuSound albumMemory sta
8. Operator WAP ..........Links ...........
9. Games anSubmenus u
Table of Contents
Java Applications ............................................. 35 Specific Absorption Rate Informationndards .............................. 56
y............................................ 57
onformity....................... 60
4
Games ............................................................... 35Settings ............................................................. 37
10. WAP ............................................................. 39Homepage ........................................................ 39Bookmarks ....................................................... 39Go to URL ....................................................... 39Settings ............................................................. 40Push inbox ....................................................... 40Options ............................................................ 41
11. Applications ............................................. 42Calculator ........................................................ 42Alarm clock ..................................................... 42Organiser ......................................................... 43
12. Address Book ......................................... 44Select Address Book ..................................... 44Add a Contact ................................................ 44Edit and Manage Contacts ........................... 44
Icons & symbols ............................................. 47
Precautions ....................................................... 48
Troubleshooting ............................................ 52
Philips Authentic Accessories .............. 54
Trademark Declaration ............................ 55
International staLimited warrantDeclaration of c
5
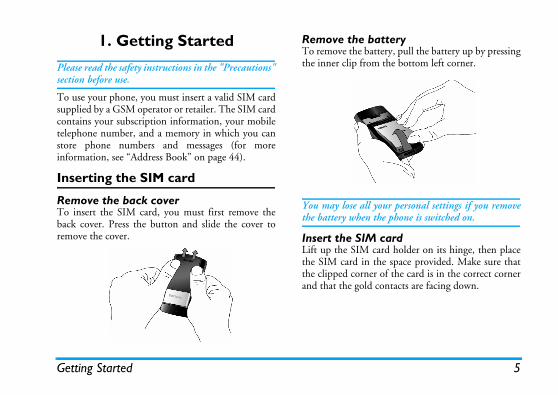
batteryattery, pull the battery up by pressingm the bottom left corner.
l your personal settings if you remove the phone is switched on.
card card holder on its hinge, then place the space provided. Make sure thater of the card is in the correct corner contacts are facing down.
Getting Started
1. Getting Started
Please read the safety instructions in the "Precautions"section before use.
To use your phone, you must insert a valid SIM cardsupplied by a GSM operator or retailer. The SIM cardcontains your subscription information, your mobiletelephone number, and a memory in which you canstore phone numbers and messages (for moreinformation, see “Address Book” on page 44).
Inserting the SIM card
Remove the back coverTo insert the SIM card, you must first remove theback cover. Press the button and slide the cover toremove the cover.
Remove the To remove the bthe inner clip fro
You may lose althe battery when
Insert the SIMLift up the SIMthe SIM card inthe clipped cornand that the gold
Getting Started
coverver by sliding it down into its
e film covering the screen before
6
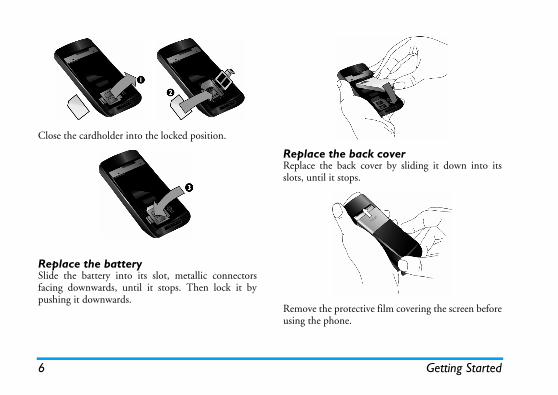
Close the cardholder into the locked position.
Replace the batterySlide the battery into its slot, metallic connectorsfacing downwards, until it stops. Then lock it bypushing it downwards.
Replace the backReplace the back coslots, until it stops.
Remove the protectivusing the phone.
7
e batteryowered by a rechargeable battery. Artially charged and a sound alert willhe battery reaches low, if the battery
and battery cover are back in placehe phone. Plug in the connector ashen plug the other end into a main.
ress ,. Then select On or Off forallpaper. A list of picture files
ppears. Select the one you want andress , again. The word activateds displayed.
ress ,. Then choose either In SIMard or In phone. Press , again.he words Customization Completed
s then displayed.
Getting Started
Switching on the phoneTo switch on the phone, long-press the ) key.Enter the PIN code if required. A PIN code is a 4- to8-digit secret code for your SIM card. It ispreconfigured and communicated to you by youroperator or retailer.
If you enter an incorrect PIN code three times, yourSIM card will be blocked. To unblock it, you mustrequest the PUK code from your operator.
When you switch on your mobile phone with yournew SIM for the first time, you will be asked for thefollowing:
Charging thYour phone is pnew battery is pawarn you when talert is On.Once the batteryyou can charge tshown below. TAC power socket
Customize your mobile easily?
Press , to accept customization.
Select your melody for incoming calls
Press ,. A list of melodies appears.Select the one you want and press, again.
Select your wallpaper?
Pwapi
Select your address book (SIM or phone)
PcTi
Getting Started
Setting Hotkeyse numeric keys 2 to 9 to
features simply by long-pressing number of hotkey shortcuts are
8
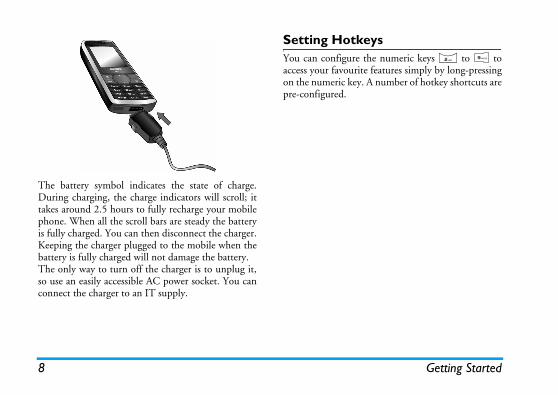
The battery symbol indicates the state of charge.During charging, the charge indicators will scroll; ittakes around 2.5 hours to fully recharge your mobilephone. When all the scroll bars are steady the batteryis fully charged. You can then disconnect the charger.Keeping the charger plugged to the mobile when thebattery is fully charged will not damage the battery. The only way to turn off the charger is to unplug it,so use an easily accessible AC power socket. You canconnect the charger to an IT supply.
You can configure thaccess your favouriteon the numeric key. Apre-configured.
9
d end a calla call, the number of the caller may beding on whether or not the personen to display his or her ID. If the in the selected phonebook, then the
name is displayed instead of the
ll: press (.: press ). If you have activated Callall is diverted to a number or voice
er: press c. This only switches theout rejecting or accepting the call.s ).
ot ring if in Silent mode.
ted Any Key Answer, you can accept any key except ).
rpiece volumepress the + or - navigation key toase the volume.
Main Features
2. Main FeaturesMake a call
From the idle screen1. In idle mode, enter the phone number using the
keypad. To correct an error, press c.2. Press ( to dial.3. Press ) to hang up.For an international call, long press * to enter the"+" sign for the international prefix.
Using the phonebook1. Press - in idle mode.2. Select a contact in the list. If you are using the
onboard phone book and the selected contactfeatures more than one number, the numberidentified as the default will automatically beselected. To select a different number, press < or> (see “Address Book” on page 44 for moreinformation).
3. Press ( the selected number is dialled.4. Press ) to hang up.
Answer anWhen receiving displayed, depencalling has chosnumber is storedcorresponding number.• Answer the ca• Reject the call
forward, the cmail.
• Mute the ringsound off with
• Hang up: pres
The phone will n
If you have seleccall by pressing a
Adjust the eaDuring a call, increase or decre
Main Features
Call options Making a second callnd call during an active call or. While on the phone, dial acontact in the phonebook) andall is put on hold (the number isom of the screen) and the secondou can then press , to accesshich are:gle between calls (you can alsoh calls).ect the two calls. You are the transfer is completed.duce the caller into a conference
nd callecond call while being already inphone emits a beep alert and theaiting. You can then:
ll, you must have deactivated thece calls (and activated the Call
answer the call (the first one is on hold).
reject the call.
10
You can access the following options by pressing the, key during a call:
Handling multiple callsThe ability to handle two or more calls at one timeand to make conference calls is dependent on youroperator and/or subscription.
You can make a secowith a call on holdnumber (or select a press (. The first cdisplayed on the bottnumber is dialled. Ythe options among w• Switch calls to tog
press < or > to switc• Transfer to conn
disconnected when• Conference to intro
call.
Answering a secoWhen you receive a scommunication, the screen displays Call w
To receive a second caCall forward for voiwaiting).
Mute To mute a call.
Address Book To go to the address book.
SMS Allows you to Archive an SMS,send a new SMS, view yourincoming SMS, and view yourSMS outbox.
Call list To access the list of outgoing andincoming calls made in the past.
Organiser To go to the organiser.
Notepad To use the notepad to enter aphone number given to you and tosave the number.
End Call To end the call.Press ( To
put
Press ) To
11
ve party to disconnect a member ofnce, or select Private call to have al with this member only (othere put on hold). disconnect all calls at once.oming call during the conference calls than five members, you can accept add this member to the Conferencebers are already connected, you can
but not add it to the conference).
Main Features
Answering a third callIf you are in a call and have one call on hold, you can alsoreceive a third call. To do so, you must either end one ofthe calls or introduce the new caller to a conference.
This service is limited to two current communications(one active and one on hold).
Conference callSubscription dependent.
A conference call is activated by making severaloutgoing calls or from a multiple call context. Itallows you to speak with up to five people at the sametime. 1. Make a first call with someone, then a second
one (see above).2. Press , and select Conference. Repeat the
process until five members are connected.
3. Select Remothe confereprivate calmembers ar
4. Press ) toIf there is an incand there are lesthis new call andcall (if five memanswer the call,
Press ) To reject the call.
Press , To open the options list. You canselect Accept to answer theincoming call, or End call to end thecurrent call, then answer theincoming call.
Text Entry
nter the word "home": 3. The screen displays the
st: Good.and select Home.o confirm selection of the word
utom T9® to basic text input. Thisltiple key presses to reach the letter "h" is the second letter onmust press it twice to enter "h".ear one entry, long press to clear
Press this key to insert the selected wordd by a space.
press to backspace, long press tol text.
ft letter case: Standard, lower orRCASE letters.
ew the table of symbols andation. Then press < or > to browsevailable tables.
ft mode from T9® to basic texto numeric.
12
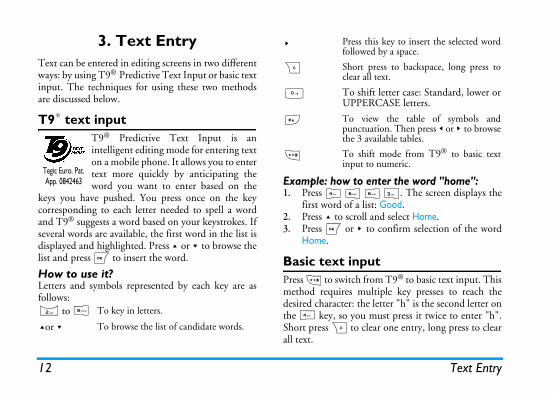
3. Text EntryText can be entered in editing screens in two differentways: by using T9® Predictive Text Input or basic textinput. The techniques for using these two methodsare discussed below.
T9® text inputT9® Predictive Text Input is anintelligent editing mode for entering texton a mobile phone. It allows you to entertext more quickly by anticipating theword you want to enter based on the
keys you have pushed. You press once on the keycorresponding to each letter needed to spell a wordand T9® suggests a word based on your keystrokes. Ifseveral words are available, the first word in the list isdisplayed and highlighted. Press + or - to browse thelist and press , to insert the word.
How to use it?Letters and symbols represented by each key are asfollows:
Example: how to e1. Press 4 6 6
first word of a li2. Press + to scroll 3. Press , or > t
Home.
Basic text inpPress * to switch frmethod requires mudesired character: thethe 4 key, so you Short press C to clall text.
2 to 9 To key in letters.
+or - To browse the list of candidate words.
Tegic Euro. Pat. App. 0842463
>followe
C Short clear al
0 To shiUPPE
# To vipunctuthe 3 a
* To shiinput t
13
t letter case: Standard,r UPPERCASE letters. 0
pen symbols andtion mode. Then press < browse the 3 available
Changes the language
used for text edition
mode: T9®, basic or.
Also shifts mode
Text Entry
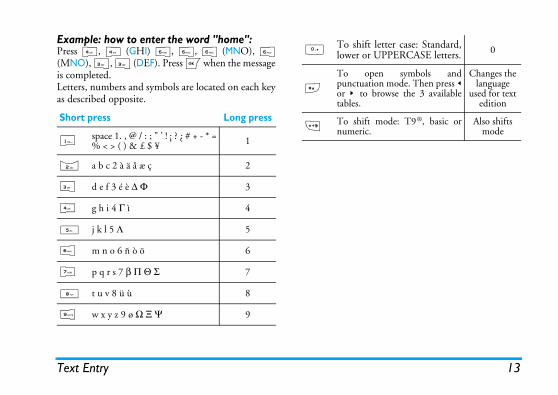
Example: how to enter the word "home":Press 4, 4 (GHI) 6, 6, 6 (MNO), 6(MNO), 3, 3 (DEF). Press , when the messageis completed.Letters, numbers and symbols are located on each keyas described opposite.
Short press Long press
1space 1. , @ / : ; " ’ ! ¡ ? ¿ # + - * =% < > ( ) & £ $ ¥ 1
2 a b c 2 à ä å æ ç 2
3 d e f 3 é è ∆ Φ 3
4 g h i 4 Γ ì 4
5 j k l 5 Λ 5
6 m n o 6 ñ ò ö 6
7 p q r s 7 β Π Θ Σ 7
8 t u v 8 ü ù 8
9 w x y z 9 ø Ω Ξ Ψ 9
0To shiflower o
#
To opunctuaor > totables.
* To shiftnumeric
Call Info
Phone, Fax, and Data. Make your selection and
ail number is stored.
ng Voicemail Number voicemail number, select the
. A screen appears showing thetype of the voicemail number.ailboxes screen appears to access
you with the list of All calls,d calls, and Outgoing calls. Theyonological order with the most correspondent is stored in yourame is displayed.ess , to enter the main menu. > Call list and press , tof all calls. key to go back to the previous
lows you to delete theicemail number.
ows you to change the voiceil number.
14
4. Call Info
The menus described in this section are used formanaging how your mobile phone handles calls andtheir related costs.
MailboxesThis menu allows you to add or edit a voicemailnumber.1. In idle mode, press , to enter the main menu.2. Select Call info > Mailboxes and press , to
access the options.
Adding a New Voicemail Number1. To add a new voicemail number, select <New>
and press ,. 2. An Enter Name: input screen appears to allow
you to input the name for the voicemailnumber. Press , when done.
3. An Enter Number: input screen appears to allowyou to enter the number of the voicemail. Press, when done.
4. A Number Type screen appears to allow you toselect the type of number. The choices are
press ,.5. The new voicem
Editing an ExistiTo edit an existingnumber and press ,name, number and Press , again. A Mthe options:
Call listThis menu providesMissed calls, Receiveare displayed in chrrecent on top. If thecontacts, the stored n1. In idle mode, pr2. Select Call info
display the list oYou can press the Cmenu.
Delete Alvo
Change Allma
15
et On or Off the sounding of a beep
set On or Off the notification of a call. When this option is active, you
meone tries to call you while you are. Select the Status option to find outing waiting feature is active or not.
t On or Off the automatic redial of aOn, if the person you are calling is
e will automatically redial the numberul connection is made or until theber of attempts is reached (10). Thethe beginning of each attempt and
beep if the connection is successful.n redials increases with each attempt.
used to keep track of the cost andur incoming and outgoing calls.l duration and Reset duration.
Call Info
Redialing a callTo redial a number that is already in the call list,simply select the number, and press ( to redial thenumber.
Accessing the optionsTo access the options, press the , key to access theoptions:
SettingsThis menu allows you to set all the options related tocalling: call forwarding, call waiting, etc.
Minute alertAllows you to sduring a call.
Call WaitingAllows you to second incominghear a beep if soalready on a callwhether the call
Auto redialAllows you to senumber. When busy, your phonuntil a successfmaximum numphone beeps at emits a special The time betwee
CountersThis feature is duration of yoOptions are Tota
Send Message Allows you to send either SMS orMMS to the number in the list.Select either Send message > NewSMS or Send message > NewMMS.
Details To give details of date and time forthis call.
Call To call the selected number.
Delete To delete the selected call.
Reset To reset the whole list at once anddelete all listed calls.
Call Info
Caller ID Access settingsu to create different data profilesonnecting to various services: for WAP or when sending MMS,will be used to connect to theork.
below are operator and/ordent. Error messages duringnly due to incorrect parameters:r before first use, in order to havengs, which you may receive by. Some pre-configured profilesreventing re-programming and
list and press , to access the
display all parameters of theected profile.
rename the selected profile.
16
To Show or Hide your identity (i.e. your phonenumber) to your correspondent. The Status willinform you on which option is activated.
NetworkThis menu allows you to connect to the network tosend or receive information (e.g. SMS, MMS, etc.)Contact your phone operator to have full informationabout GPRS availability over its network and for anappropriate subscription. You might also need toconfigure your phone with the GPRS settingssupplied by your operator, by using the menusdescribed in this section. Then select the bearer (GSMor GPRS) in the menus of each application to be used(e.g. WAP, MMS, etc.)
Preferred listThis menu allowsyou to build a network list in orderof preference. Once defined, the phone will try toregister on the network, according to your preferences.
Register againProvides you with a list of the networks available inthe area when the Manual mode is selected. Select thenetwork you want to register with and press , toconfirm.
This menu allows yothat can be used for cexample, when usingthe selected profile GSM or GPRS netwOptions described subscription depenconnections are maicontact your operatothe appropriate settiSMS in some casesmight be blocked, prenaming.Select an item in thefollowing options:
Show Tosel
Change name To
17
dles you to activate or deactivate call
e, press , to enter the main menu.Info > Call Forward and press ,ne of three types of calls to forward:ax calls, and Data calls.
sing the type of call, press , tollowing options:
Your phone automatically connectsto the GPRS service (if available.This option allows quicker accessto GPRS features, but increasesenergy consumption.
Your phone will connect to theGPRS service only when required.This option reduces energyconsumption, but increases theconnection delay.
Systematic forwarding of all yourcalls. The + icon is displayed on theidle screen.
Only if you do not answer.
Call Info
GPRS connectThis menu allows you to define how your mobilephone connects to the GPRS service.
Call forwarThis menu enabforwarding. 1. In idle mod2. Select Call
to choose oVoice calls, F
3. After chooaccess the fo
GSM Settings To change the GSM settings:• Login & Password• Phone number needed to
establish the connection andprovided by your operator(ISDN or Analogue)
• Inactivity time, a value of over30 seconds after which thephone disconnects automatically(if a connection was in progress).
GPRS settings To change the GPRS settings:• Login, Password, Inactivity time• The APN menu allows you to
enter the addressof the externaldata network you want toconnect to, a text string used toestablish the connection.
Always on
For data calls
Unconditional
If no reply
Call Info
Conditional option, the incoming call will beis busy, if you are unreachable, or
s the status of all your call
ou to restrict the phone fromg calls. You need to enter the your service provider before you
ess , to enter the main menu.> Call barring and press , toe of call to bar (Outgoing ormodify Settings for barring calls.the type of call, press , to.
g callsd press , to access the
18
UnconditionalThis option will forward all your incoming calls to adesignated phone number. If you activate this option,you will not be able to receive any calls on your phoneuntil you have deactivated it.
If no replyThe incoming call will be forwarded if there is noreply.
If unreachableThe incoming call will be forwarded if your number isunreachable.
If busyThe incoming call will be forwarded if your line isbusy.
When you select thisforwarded if the line if there is no reply.
StatusThis menu displayforwarding.
Call barringThis menu allows ymaking and receivinpassword supplied bycan use this feature. 1. In idle mode, pr2. Select Call Info
choose the typIncoming), or to
3. After choosing select the option
Barring OutgoinSelect Outgoing anfollowing options:
If unreachable Only if you are outside the range ofthe network.
If busy Only if your line is busy.
Conditional If your line is busy, if you do notanswer, if you are outside thenetwork range.
Status See the actual setting.
19
Settings and press , to access thens:
r a barring code before you can cancelither incoming or outgoing calls.
Press , to select On or Off foractivating or deactivating callbarring for all incoming calls.Select Status to view the status ofcall barring for all incoming calls.Press , to select On or Off foractivating or deactivating callbarring for incoming calls when theuser is roaming abroad. SelectStatus to view the status of callbarring for such calls.
Press , to cancel call barrings forall outgoing calls.Press , to cancel call barrings forall incoming calls.Press , to change the passwordfor call barring.
Call Info
Barring Incoming CallsSelect Incoming and press , to access thefollowing options:
Working withSelect Settings following optio
You have to entecall barring for e
All Press , to select On or Off foractivating or deactivating callbarring for all outgoing calls. SelectStatus to view the status of callbarring for all outgoing calls.
International Press , to select On or Off foractivating or deactivating callbarring for outgoing internationalcalls. Select Status to view thestatus of call barring forinternational calls.
Intl. Exc. Home
Press , to select On or Off foractivating or deactivating callbarring for outgoing internationalcalls except those to your countryof subscription. Select Status toview the status of call barring forsuch calls.
All
When roaming
Cancel outgoingCancel incomingBarring code
Messages
it or not. Once the MMS is downloaded, it is availablebelow).
S to download is bigger than then your phone, you must freeata (picture, sounds, etc.).
nd an MMS, follow the steps
ess , to enter the main menu.s > New MMS and press ,w MMS. hone no., Enter address, or select.promoted to <Create MMS>.get the MMS creation screen.ation screen, five icons allow you, add Text, add Sound, Send thess the MMS options. Use + or -ne option to the next and presse menu.ssage: add a Picture, a Text and/ > to create more slides. the left-hand side lets you accesss (see below).send the MMS to the selected
20
5. Messages
The Messages menu allows you to read, write, sendand receive SMS messages and to share them withother mobile phones.Similarly, you can also send and receive MMSmessages (multimedia messages), featuring texts,pictures, sounds, or memos that you have recorded.A multimedia message can be made of one slideincluding text, sound, and image, or of several. In thelater case, the message is displayed in a slide show.
New MMSYour mobile phone can also send and receive MMS(Multimedia Messaging Service) messages. WithMMS you can send messages that contain pictures,sounds, and text.When sending MMS messages, your recipient mustalso have an MMS-enabled phone in order to be ableto view your message.Receiving MMSIf someone sends you an MMS, an icon and a soundalert will inform. If the sender of the message hasasked for a Read report, a prompt will ask you to send
in Inbox > MMS (see
If the size of the MMmemory available imemory by deleting d
New MMSTo compose and sedetailed below:1. In idle mode, pr2. Select Message
to to create a ne3. You can Enter p
From contact list4. You can then
Press ,. You 5. In the MMS cre
to add a Picturemessage or acceto move from o, to access th
6. Design your meor a Sound. Press
7. The last icon onthe MMS option
8. Select Send to recipient(s).
21
s you to send text messages using the Service (SMS) and to manage thed and receive.d send an SMS, follow the steps
e, press , to enter the main menu.ages > New SMS and press , toew SMS. xt of the SMS message and press ,. presented with the following options:
to two attachments of two differentith your SMS. Images and animationse exclusive: if you first select anhen an image, only the image will bent and vice-versa.
o <Add contact> or Send now.
o enter a <New> recipient or selectn entry from the Address book.
o store the current message and itsttachments in the Archive menu.
o attach an image or an animation.
o attach a melody.
Messages
Pictures are chosen from the Picture album. Copyrightprotected pictures cannot be sent via MMS.Sounds can be chosen from the Sound Albummelodies. MMS OptionsThe following options are available when creatingnew MMS messages:
Once your message is completed, select Send now andpress ,. A progress bar allows you to follow thesending of your message, press c if you wish tocancel the sending. If you saved the MMS as a draft,it will be available in the Drafts menu. If you have sentthe MMS, it is available in the Outbox.
New SMSThis menu allowShort Messagingmessages you senTo compose andetailed below:1. In idle mod2. Select Mess
to create a n3. Enter the te
You are then
You can send uptypes together wand pictures aranimation and ttaken into accou
Edit subject To edit and change or enter thesubject of your message.
Saveas template
To save your message as a template,that you can use as a basis for otherMMS (e.g. "Happy birthday" typeof message.
Slide duration To change the value of slideduration set in Settings > Applicationsettings (see page 24), and to set adelay between each slide.
Several recipient
T
Send SMS Ta
Save Ta
Add graphic T
Add sound T
Messages
MMS Inboxs all the Read and Unread MMS,y and Read reports. To read ad press ,. Press Options toptions:
o switch back to automaticode: the MMS is then played ascontinuous slide show.
o move to the next or previouside. You can also press < or >hen viewing the MMS inanual mode. Note that thistion only appears if the MMSntains more than one slide.
o detach the picture of therrent slide and save it in thecture album.
o detach the sound of therrent slide and save it in theund album.
o close the MMS and go back toe list of options.
22
Copyright protected pictures and sounds cannot besent by SMS.
InboxThis menu allows you to read SMS and MMSmessages you have received.
SMS InboxThis menu allows you to read SMS messages you havereceived. The messages are displayed in a list.When a message is displayed, press the , key toaccess the menu options listed below.
You MMS inbox listNotifications, Delivermessage, select it anaccess the following o
Reply To reply to the sender.
Forward to To forward the selected message.Note that attachments cannot beforwarded.
Delete To delete the selected message.
Call back To call the sender of the message(operator- dependent).
Move to phone
To move SMS to archive menu.
Reset To reset the Inbox to empty state.
Play Tma
Next / previousslide
Tslwmopco
Save picture TcuPi
Save sound TcuSo
Close Tth
23
SMS while you are reading one, you first one before reading the second.u can press Back to exit the firstcond message then appears on your
ws you to consult all the messagesone’s memory using the Auto save
to archive options. The <Delete allws you to delete all SMS at once. is displayed, press , or Options towing options: Delete, Edit SMS,
back.
s you to configure the SMS settings.
When On, this option will informyou via SMS whether your own SMSwas received or not. This feature is subscriptiondependent.
Messages
Do NOT delete notifications before you have retrievedthe MMS, or you will not be able to retrieve the MMS.Notifications are automatically deleted once you havereceived the full MMS.
OutboxLists the messages you have Sent or created but Notsent yet. You can Play, Delete or view the Details of allthese messages, Send or Forward them to someone.Messages not sent are saved as draft in the outbox. Ifyou quit the MMS menu before saving or sendingyour MMS, it will be saved as a draft automatically.
Messages you have saved can only be sent from theOutbox folder. You can NOT recover an item(whether message, notification or report) that youhave deleted. Press Back to cancel deletion.
SMS ChatWhen On, allows you to display received SMS on theidle screen. You can then quickly reply to a messagereceived by pressing ,, entering your message in theedit screen, and pressing , again.
If you receive ancan reply to theAlternatively, yomessage. The sescreen.
ArchiveThis menu allostored in the phSMS or Move SMS> item alloWhen a messageaccess the folloForward to, Call
Settings
SMS settingsThis menu allowThe options are:
Delivery report
Messages
e been pre-configured to directlyred. If not, contact your operatormation items described in theenter them as given. With somemeters can be set «over the air».
file in the list and select Modifyg settings.s
n On, this option willatically save messages sent in
utbox menu.
ou to choose from:al: you connect manually to the by selecting a notification inInbox, selecting Read to
load, then Play.atic: new MMS are directly in the Inbox. Select the MMS
ress > to play it.
de is deactivated when roaming.
24
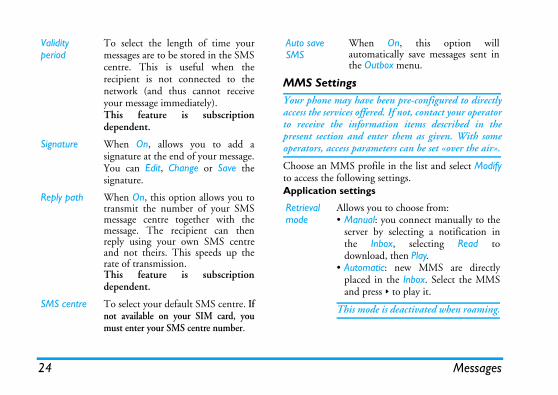
MMS SettingsYour phone may havaccess the services offeto receive the inforpresent section and operators, access para
Choose an MMS proto access the followinApplication setting
Validity period
To select the length of time yourmessages are to be stored in the SMScentre. This is useful when therecipient is not connected to thenetwork (and thus cannot receiveyour message immediately). This feature is subscriptiondependent.
Signature When On, allows you to add asignature at the end of your message.You can Edit, Change or Save thesignature.
Reply path When On, this option allows you totransmit the number of your SMSmessage centre together with themessage. The recipient can thenreply using your own SMS centreand not theirs. This speeds up therate of transmission. This feature is subscriptiondependent.
SMS centre To select your default SMS centre. Ifnot available on your SIM card, youmust enter your SMS centre number.
Auto save SMS
Wheautomthe O
Retrieval mode
Allows y• Manu
serverthe down
• Automplacedand p
This mo
25
gs
SMSws you to manage the reception ofts regularly transmitted to alle network. It gives you access to thes:
on of cell broadcast messages On or Off.
To choose a connection profile fromthe ones you have set.
To select the type of network usedwhen launching a connection: GSM,GPRS or GPRS first.
To enter the MMS address of theserver you will connect to.
To enter the IP and Port numbers ofthe server’s gateway.
Messages
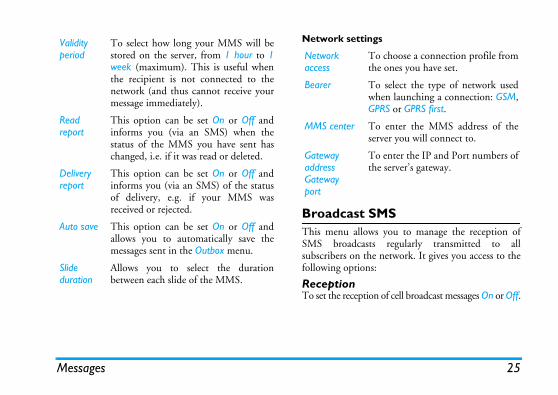
Network settin
Broadcast This menu alloSMS broadcassubscribers on thfollowing option
ReceptionTo set the recepti
Validity period
To select how long your MMS will bestored on the server, from 1 hour to 1week (maximum). This is useful whenthe recipient is not connected to thenetwork (and thus cannot receive yourmessage immediately).
Read report
This option can be set On or Off andinforms you (via an SMS) when thestatus of the MMS you have sent haschanged, i.e. if it was read or deleted.
Delivery report
This option can be set On or Off andinforms you (via an SMS) of the statusof delivery, e.g. if your MMS wasreceived or rejected.
Auto save This option can be set On or Off andallows you to automatically save themessages sent in the Outbox menu.
Slide duration
Allows you to select the durationbetween each slide of the MMS.
Network access
Bearer
MMS center
Gatewayaddress Gatewayport

Messages
Topics
26
To define the type of messages you want to receive.To configure a topic, select <New>, enter the codeprovided by the operator, and, if desired, associate aname. You can also select an existing topic in the list,which you can rename or delete.
You can enter up to 15 different topics in the list. Toobtain the codes corresponding to the different topics,contact your operator.
TemplateContains a list of system-supplied MMS and SMSmessages.
27
is always Off when you connect theigarette Lighter Adapter.
gert On or Off an alert for each time youessage. When On, you can select theice from the ringers list.
itch the key tones On or Off.
t On or Off an alert sound when theg low.
s you to configure how the menus areeen.ess , to enter the main menu.
t the wallpaper of the main screen On
Settings
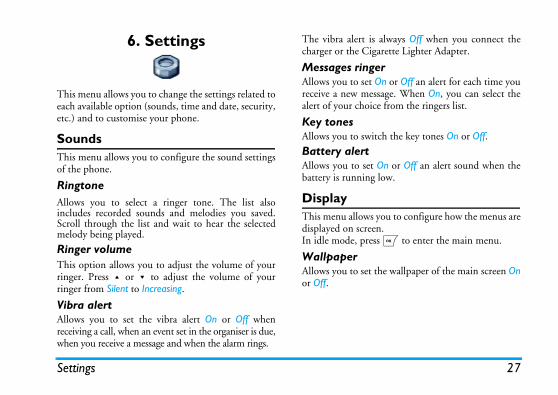
6. Settings
This menu allows you to change the settings related toeach available option (sounds, time and date, security,etc.) and to customise your phone.
SoundsThis menu allows you to configure the sound settingsof the phone.
RingtoneAllows you to select a ringer tone. The list alsoincludes recorded sounds and melodies you saved.Scroll through the list and wait to hear the selectedmelody being played.
Ringer volumeThis option allows you to adjust the volume of yourringer. Press + or - to adjust the volume of yourringer from Silent to Increasing.
Vibra alertAllows you to set the vibra alert On or Off whenreceiving a call, when an event set in the organiser is due,when you receive a message and when the alarm rings.
The vibra alert charger or the C
Messages rinAllows you to sereceive a new malert of your cho
Key tonesAllows you to sw
Battery alertAllows you to sebattery is runnin
DisplayThis menu allowdisplayed on scrIn idle mode, pr
WallpaperAllows you to seor Off.
Settings
Backlight Languageyou to choose the language inill be displayed.
n or off.
ypad is automatically unlockedll.
irect access to a specific functiong it to a key. A long press on thel then automatically activate thessociated number (Flash dial).ys have been preconfigured, butem (keys from 2 to 9). Theked:
service provider, other hotkeysd locked.
mailbox.
national call.
ock keypad.
28
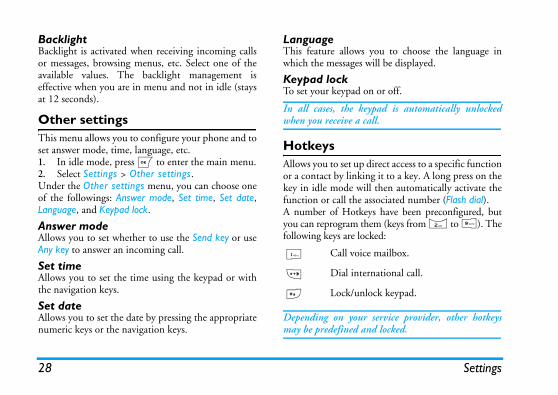
Backlight is activated when receiving incoming callsor messages, browsing menus, etc. Select one of theavailable values. The backlight management iseffective when you are in menu and not in idle (staysat 12 seconds).
Other settingsThis menu allows you to configure your phone and toset answer mode, time, language, etc. 1. In idle mode, press , to enter the main menu.2. Select Settings > Other settings.Under the Other settings menu, you can choose oneof the followings: Answer mode, Set time, Set date,Language, and Keypad lock.
Answer modeAllows you to set whether to use the Send key or useAny key to answer an incoming call.
Set timeAllows you to set the time using the keypad or withthe navigation keys.
Set dateAllows you to set the date by pressing the appropriatenumeric keys or the navigation keys.
This feature allows which the messages w
Keypad lockTo set your keypad o
In all cases, the kewhen you receive a ca
HotkeysAllows you to set up dor a contact by linkinkey in idle mode wilfunction or call the aA number of Hotkeyou can reprogram thfollowing keys are loc
Depending on your may be predefined an
1 Call voice
* Dial inter
# Lock/unl
29
ng PIN2 code 3 times, your SIM card isck it, request the PUK2 code from yourr. If you enter an incorrect PUK code 10 the SIM card will be blocked andappens, contact your operator or retailer.
nstrict the calls to the Public names listly is selected. You can disable theection No restriction.
bscription dependent and requires a option might also apply to WAP andns over GPRS.
manage a specific names list calledt, and restrict calls to this list via thetion.
bscription dependent and requires a
lows you to consult, edit and modifyur Public Names list via a PIN2 code.
lows you to restrict the calls to the Publicmes list when Public only is selected.
Settings
1. In the list, select a key from 2 to 9 andpress ,. If the key was already programmed,select Change.
2. Browse the list to select the function you wish toassociate with this key and press ,.
3. To use a hotkey, press and hold the programmedkey when in idle mode.
SecurityThis menu allows you access the features relating tothe security of your mobile phone and the data youstore there.
PIN protectionThis allows you to set the PIN protection On or Off.When On, you will be asked to enter your PIN codewhen switching your phone on.
You cannot change your PIN code if this option is Off.
Change PIN2Allows you to change your PIN 2 code as well as thecall Barring code. Depending on your SIM card, somefeatures or options may require a PIN2 secret codegiven to you by your operator.
If you enter a wroblocked. To unblooperator or retailetimes in a row,unusable. If this h
Call restrictioAllows you to rewhen Public onrestriction by sel
This feature is suPIN2 code. Thise-mail connectio
Public namesAllows you to Public Names lisCall restriction op
This feature is suPIN2 code.
Publicnames
Alyo
Callrestriction
Alna
Multimedia
When you are browing images in full screen mode,enu options by pressing >.
to manage and listen to soundbile phone. s , to enter the main menu. > Sound album and press
e sound files or to listen tos.
h sound filen select a sound file and press options listed below.
set the selected sound asone.
set the selected sound as thesage ringer. This option musttivated in the menu Settings >ds.
end the selected sound file inMS message.
ename the selected sound file.
elete the selected sound file.
30
7. Multimedia
Picture albumThis menu allows you to manage and display theimages stored in your mobile phone.1. In idle mode, press , to enter the main menu.2. Select Multimedia > Picture album and press
, to view a picture image.3. Use the + / - keys to view the previous or next
image in the list.
Working with each picture fileOnce in a list, you can select a image file and press ,to access the menu options listed below.
you can switch to the m
Sound albumThis menu allows youfiles stored in your mo1. In idle mode, pres2. Select Multimedia
, to get morexisting sound file
Working with eacOnce in a list, you ca, to access the menu
MMS To send the selected picture in anMMS message.
Set as wallpaper
To set the selected picture as wallpaper.
Rename To Rename the selected picture.
Delete To Delete the selected picture.
Delete all To Delete all the picture files atonce (not valid for pictures that areprotected).
As ringtone To ringt
As SMS/MMS ringer
To Mesbe acSoun
MMS To san M
Rename To R
Delete To D

31
MultimediaMemory statusThis menu allows you to display the percentage ofmemory available in your phone. Various featuresshare the memory capacity: pictures, sounds, recordedmemos and voice tags for voice commands, storedmessages, phonebook and organiser entries, games,etc.1. In idle mode, press , to enter the main menu.2. Select Multimedia > Memory status and press
, to to check the memory status. The displayshows you the percentage of memory free, thepercentage of memory used, and the totalmemory in Kilobytes (KB).
3. Press , again to check the actual percentage ofmemory used by each of the following sixfeatures: Picture album, Sound album, SMS,MMS, In phone, Java, and Miscellaneous.
4. Press , again from on of the above feature willdisplay the memory used (in KB) by that feature,the percentage of memory used, and the numberof files using the memory.
Delete all To Delete all the sound files at once(not valid for sound that areprotected).

Operator Services
press ( Options to access the WAP options (see
e first WAP site you access whenssion. In most cases, this menued and will connect to your
epage. To change this defaultns” on page 34.
u to store your favourite WAPe them and access them quickly
rowsing, then select Bookmarks:ields will be automatically filledon of the page you are browsing. and start entering the new name appear. Press ,, then proceedr the URL address.rks menu allows you to Delete ormark.
to enter a WAP site address andhen selecting it (a quick way to
sses without saving them as
32
8. Operator Services
WAPThis menu allows you to access services supplied withyour network, such as news, sports, weather, etc.
If your phone was pre-configured, it isn’t necessary foryou to change the settings described in this section.With some operators, settings can be set remotely.
To launch a WAP session, select Operator > WAP >Homepage.
Your mobile phone connects to the networkaccording to the Access settings you have defined inthe menu Settings > Network (see page 27). In case ofa connection error, the screen displays "Go to menu":
page 34).
HomepageThis is the link to thlaunching a WAP seitem is preconfiguroperator’s WAP homhomepage see “Optio
BookmarksThis menu allows yosite addresses, renamfrom the list.Press Options while bthe name and URL fin with the informatiSelect Add bookmarkfor the edit screen tothe same way to enteThe Manage bookmaEdit the selected book
Go to URLThis menu allows youto connect directly waccess WAP addrebookmarks).
Use + or - To browse the on-line pages.
Press , To select a highlighted item.
Press C Back To return to the previous page.
Press ) or select Options > Exit
To end the WAP session.
33
o change the homepage name andentering the new name for the editar).s allows you to select one of the datahave defined in Settings > Accessge 27).ou to select the type of network used profile when launching a connection
and Proxy port allow you to define ass and port number to be used when
AP connection using the selected
isplay the list of installed securityen display its details or delete it), the the Current certificate.
s you to read and manage messagesnt to you by the network and / or by
red "@" sign will be displayed on theyou that you have received a new push
Read to read it or Back to go back
Operator Services
All the addresses you enter in this menu and connectto at least once, will appear in a list. Select one of theitems and press , to reconnect to the correspondingpage, without having to re-enter its complete address.
SettingsIn order to access WAP sites, you must first configurea WAP connection profile.Select profileTo select one of the available profiles, then define theconnection settings for each of them.
All connection settings described below apply to theselected profile.
Browser optionsTo activate or deactivate the downloading of imagesattached to WAP pages.
Selecting Off will speed up the global downloadingtime of the pages browsed.
Rename profileTo rename the currently selected profile (startentering the new name for the edit screen to appear).CacheTo empty an area of the phone’s memory where thepages browsed during a WAP session are stored.
Network• Homepage: T
address (start screen to appe
• Network accesprofiles you settings (see pa
• Bearer allows yby the selected(see page 27).
• Proxy address gateway addrelaunching a Wprofile.
• Security: To dCertificates (thSession info or
Push inboxThis menu allowautomatically seyour operator.
In some cases, a screen to inform message. Press ,to idle.
Operator Services
Push messages include URL links for quick access to
links for the URLs.
d a WAP session.
age 32 for description of thesens.
34
the corresponding WAP services: a single click on thelink will connect to the WAP site for browsing ordownloading multimedia files into your handset.
If your push inbox is full, a message will advise you todelete some messages in WAP > Push Inbox.
OptionsWhile browsing, press Options to access:
LinksThis menu contains
Homepage To access the default homepage.
Back To go back to the previously browsedpage.
Forward To go to the next browsed page.
Refresh To reload the currently browsed pagefrom its original server.
Set as homepage
To save the currently browsed WAPpage as the default homepage.
Save as... To save images embedded in thepages that are displayed in the Picturealbum.
Exit To en
BookmarksGo to URLSettingsPush inbox
See poptio
35
Java Applications:AP browser. website with the desired Java files.utomatically launch Java to start upad/installation process.application is then stored in the the installation process begins. ion does not start automatically,wing steps:
a application:pplications folder, then press the ( to access the Menu.ll and press ,. The non installed will be listed.pplication you want to install andhe non-installed applications will be
ne you want to install and press 0.oose the folder where you want to
tion.
games you can play: Brick game,ermind.ame you want to play. launch the game.
Games and Applications
9. Games and Applications
This menu allows you to access Java applications aswell as games.1. In idle mode, press , to enter the main menu.2. Select Games & apps.
Submenus under Games & apps.Under the Games & apps. menu, you can choose oneof the followings:• Java applications — goes to the downloaded Java
applications stored in your folder.• Settings — configures the parameters for all games
and Java downloads.• Games — goes to the embedded games.To exit, press ). To go to the menu, press (.
Java ApplicationsTo use a new java application, you must downloadand install it. You can then store the downloadedapplication in the folder.
Downloading1. Start the W2. Browse to a
WAP will athe downlo
3. The Java product and
If the installatperform the folloInstalling a Jav1. Open the A
key in order2. Select Insta
applications3. Select the a
press ,. Tlisted.
4. Select the oYou can now chstore the applica
GamesThere are threeSnake, and Mast1. Select the g2. Press , to

Games and Applications
Brick game
e is to guess the combination ofms.combination of shapes using theer keys and confirm by pressing
n the left of the screen after each
is not in the final combination. is in the final combination but
on.rm is in the final combinationation.hen the player has guessed thether attempts are allowed. levely levels you can select using the
orms + location of correctione pawn’s location.
move the snake up.
move the snake down.
pause the game.
36
The goal of this game is to destroy bricks by hittingthem with a ball and racket. Destroying all bricks giveyou access to the next level.Keys used are the following:
SnakeThe goal of this game is to move a snake around to eatas many eggs as possible. The tail of the snake growslonger each time an egg is eaten. The player needs totake care not to hit the snake body or the edges of theplay zone.Keys used are the following:
MastermindThe goal of this gamvarious geometric forThe player guesses a scroll keys and numbthe , key.Pawns are displayed oguess:• no pawn: the form • red pawn: the form
at a different locati• green pawn: the fo
and at the same locThe game is over wcombination or no oSelecting difficultyThere are 3 difficult# key.• easy: 6 possible f
pawns matching th
4 To move the racket left.
6 To move the racket right.
* To start the game by throwing theball left.
# To start the game by throwing theball right.
0 To pause the game.
4 To move the snake left.
6 To move the snake right.
2 To
8 To
0 To
37
It allows you to select the type ofnetwork used by the selected profilewhen launching a connection.• GSM or GPRS — your mobile will
only use the GSM or the GPRSnetwork for WAP connections.
• GPRS first — your mobile will firsttry to connect to the GPRSnetwork, then to the GSMnetwork if the GPRS network isn’tavailable when connecting.
It allows you to enter the DNSaddress of the external data netowrkyou want to connect to. Press , toconfirm.
Games and Applications
• average: 6 possible forms + location of correctionpawns not matching the pawn’s location.
• difficult: 7 possible forms + location of correctionpawns not matching the pawn’s location.
To pause, press the 0 key.
SettingsThere are two Java settings available::
Options under Network access:There are four submenus under Network access:
Auto launch Allows you to automatically launch aJava application.
Network access
There are four submenus underNetwork access: Network account,Bearer, DNS address, and Proxy.
Network account
It allows you to select one of the dataprofiles you have defined in CallServices > Network. In the list thatappears, select the connection settingof your choice and press , toconfirm.
Bearer
DNS address
Games and Applications
38Proxy The http proxy settings are used toconfigure Java network settings foroperators that do not offer a directInternet connection. These settingsare defined as follows:• Proxy — you can select On or Off
to decide whether to use a proxyserver for Java networkconnections.
• Proxy address — IP address of theproxy server. It should be providedby the operator.
• Proxy port — port number of theproxy server. It should be providedby the operator.
• Login — user name to log in to thesystem so as to establish a networkconnection through the proxyserver.
• Password — user password to beused with the user name.
It is not always necessary to use alogin and password to establish anetwork connection through theproxy server.
39
o the first WAP site you access whenP session. In most cases, this menu
figured and will connect to your homepage. To change this defaultptions” on page 41.
ss you to store your favourite WAP
name them and access them quickly
ile browsing, then select Bookmarks:RL fields will be automatically filledmation of the page you are browsing.ark and start entering the new name
n to appear. Press ,, then proceed enter the URL address.kmarks menu allows you to Delete or
bookmark.
s you to enter a WAP site address andtly when selecting it (a quick way toddresses without saving them as
WAP
10. WAP
This menu allows you to access services supplied withyour network, such as news, sports, weather, etc.
If your phone was pre-configured, it isn’t necessary foryou to change the settings described in this section.With some operators, settings can be set remotely.
To launch a WAP session, select Operator > WAP >Homepage.
Your mobile phone connects to the networkaccording to the Access settings you have defined inthe menu Settings > Network. In case of a connectionerror, the screen displays "Go to menu": press ( orOptions to access the WAP options (see page 41).
HomepageThis is the link tlaunching a WAitem is preconoperator’s WAPhomepage see “O
BookmarkThis menu allowsite addresses, refrom the list.Press Options whthe name and Uin with the inforSelect Add bookmfor the edit screethe same way toThe Manage booEdit the selected
Go to URLThis menu allowto connect direcaccess WAP abookmarks).
Use + or - To browse the on-line pages.
Press , To select a highlighted item.
Press C Back To return to the previous page.
Press ) or select Options > Exit
To end the WAP session.
WAP
All the addresses you enter in this menu and connect Cache the phone’s memory where theg a WAP session are stored.
you to change the homepage(start entering the new name forppear).ows you to select one of the data defined in Settings > Access
to select the type of networkted profile when launching a
Proxy port: allow you to define ad port number to be used when connection using the selected
y the list of installed securityisplay its details or delete it), theurrent certificate.
u to read and manage messages you by the network and / or by
40
to at least once, will appear in a list. Select one of theitems and press , to reconnect to the correspondingpage, without having to re-enter its complete address.
SettingsIn order to access WAP sites, you must first configurea WAP connection profile.
Select profileTo select one of the available profiles, then define theconnection settings for each of them.
All connection settings described below apply to theselected profile.
Browser optionsTo activate or deactivate the downloading of imagesattached to WAP pages.
Selecting Off will speed up the global downloadingtime of the pages browsed.
Rename profileTo rename the currently selected profile (startentering the new name for the edit screen to appear).
To empty an area ofpages browsed durin
Network• Homepage: allows
name and address the edit screen to a
• Network access: allprofiles you havesettings.
• Bearer: allows youused by the selecconnection.
• Proxy address and gateway address anlaunching a WAPprofile.
• Security: to displaCertificates (then dSession info or the C
Push inboxThis menu allows yoautomatically sent toyour operator.
41
o save images embedded in theages that are displayed in the Picturelbum.
o end a WAP session.
ee page 39 for description of theseptions.
WAP
In some cases, a red "@" sign will be displayed on thescreen to inform you that you have received a new pushmessage. Press , or Read to read it or Back to goback to idle.
Push messages include URL links for quick access tothe corresponding WAP services: a single click on thelink will connect to the WAP site for browsing ordownloading multimedia files into your handset.
If your push inbox is full, a message will advise you todelete some messages in WAP > Push Inbox.
OptionsWhile browsing, press Options to access:
Homepage To access the default homepage.
Back To go back to the previously browsedpage.
Forward To go to the next browsed page.
Refresh To reload the currently browsed pagefrom its original server.
Set as homepage
To save the currently browsed WAPpage as the default homepage.
Save as... Tpa
Exit T
BookmarksGo to URLSettingsPush inbox
So
Applications
Alarm clockas a built-in alarm clock with an set up to three separate alarmsr not the alarm should repeat.
w the steps below:d set it On.e and press the , key.frequency: Once, Daily, On
type of alarm: the Buzzer or aounds album and press the ,
set other alarms.
ing even if your mobile phone ise ringer volume is set to Silent., press any key to stop it (exceptn, see below).
to set the snooze mode On orings and the snooze mode is On:ept Stop) to stop the ringingarm will ring again around 7
the ringing and the alarm
42
11. Applications
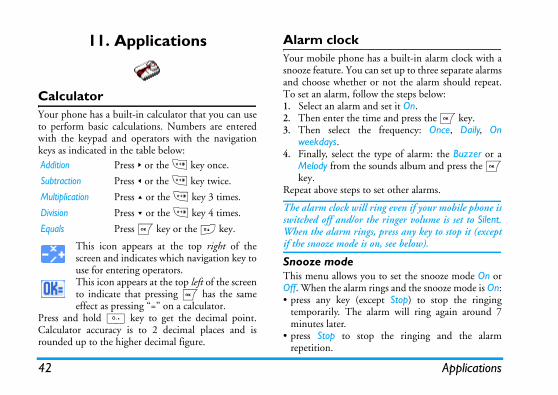
CalculatorYour phone has a built-in calculator that you can useto perform basic calculations. Numbers are enteredwith the keypad and operators with the navigationkeys as indicated in the table below:
This icon appears at the top right of thescreen and indicates which navigation key touse for entering operators.This icon appears at the top left of the screento indicate that pressing , has the sameeffect as pressing “=” on a calculator.
Press and hold 0 key to get the decimal point.Calculator accuracy is to 2 decimal places and isrounded up to the higher decimal figure.
Your mobile phone hsnooze feature. You caand choose whether oTo set an alarm, follo1. Select an alarm an2. Then enter the tim3. Then select the
weekdays.4. Finally, select the
Melody from the skey.
Repeat above steps to
The alarm clock will rswitched off and/or thWhen the alarm ringsif the snooze mode is o
Snooze modeThis menu allows youOff. When the alarm r• press any key (exc
temporarily. The alminutes later.
• press Stop to stoprepetition.
Addition Press > or the * key once.
Subtraction Press < or the * key twice.
Multiplication Press + or the * key 3 times.
Division Press - or the * key 4 times.
Equals Press , key or the # key.
43
ventss you to delete past events. Enter thet or future) from which all previousleted and press the , key twice toreceding this date.
ents set in your organiser, enter aeveral years ahead (e.g. 31st of to make sure all events preceding thist once.
ntsn the list and press the , key or the options described below.
ating event modifies all instances of
your organiser can be displayed inview and Month view. Select a views the , key, then use < or > tous or next day, week or month.
delete the selected event.
change the selected event.
Applications
The snooze mode is automatically deactivated after 9alarm repetitions.
The snooze mode setting applies to all the alarms youhave set.
OrganiserThis menu allows to create, store and manage eventsin your organiser. When the organiser alert is On, abeep alerts you when an event is due.
The organiser shares the mobile memory capacity withother features (phonebook, picture album, sound,etc.). To check the memory available in your phone,select Multimedia > Memory status.
Creating a new event1. In Events, select <New>, then the type of event
to create (Holiday, Meeting, To Do).2. Enter the starting and ending date and time of the
event and name it (e.g. "Meeting with Smith").3. Set a reminder and a frequency: alerts will be
triggered at the chosen time.
The reminder only applies to Meeting and To Doevents. It will be updated when changing time zones.
Deleting old eThis menu allowstarting date (pasevents will be dedelete all events p
To delete all evstarting date sDecember 2010)date are deleted a
Managing eveSelect an event iOptions to access
Changing a repethis event.
Events viewsEvents stored inDay view, Week format and presdisplay the previo
Delete To
Change To
Address Book
3. Enter the contact number and press ,.Number type (Phone, Fax, and
(note and e-mail) can only be
to the SIM Phone Bookd press , to create a new
and the number of your choice, number allocated to the nameata) and press , to store thisnebook.
to 40 digits, depending on yournternational prefix, country andu to dial a number from any
ge Contactsidle mode to access the phonef the selected contact will appear at the bottom of the screen. To
e:
44
12. Address Book
Contacts are stored in one of the two available phonebooks: in your SIM card (number of entriesdepending on capacity) or on your phone (up to 999names). When entering new contacts, they will onlybe added to the phone book you have selected.
Select Address Book1. In idle mode, press , to enter the main menu.2. Select Address book > Settings > Select
Contact to select whether to store contacts in theSIM phone book or the phone address book.
3. Select either In SIM card or In phone.4. Press , to make your selection.
Add a ContactAdding Contacts to the Onboard PhoneBook1. Select Address book > Address book > <New
contact> in the list.2. Enter the first, then last name (up to 20 latin
characters); one of the two fields can be empty,but not both. Press ,.
4. Then select the Data etc.).
Alphanumeric fieldschanged or deleted.
Adding Contacts1. Select <New> an
contact.2. Enter the name
then the type of(Phone, Fax or Dname in your pho
A number is limitedSIM card. Entering iarea codes allows yolocation.
Edit and ManaPress , when in book. The number oin a highlighted line,search for a given nam
45
ess the following options:
e number and press , to access aitional options, among which are:
DeleteMemory statusShow
call the number listed in the phoneok.
send an SMS to the contact listed ine phone book.
change the name of the contactted in the phone book.
lect the contact group. Note you cane Groups setting to assign ring tonesd pictures for each contact group.
elete the selected contact from theone book.
delete all contacts at once. Thistion only applies to the onboardonebook, not to the SIMonebook.
Address Book
In the SIM Phone BookChoose a contact in your SIM phonebook and press, to access the following options:
In the Onboard Phone BookChoose a contact of your phone phonebook. Whenthe selected name features several numbers or fields(see below), simply press < or > to go from a field toanother (the information of the selected field willappear, highlighted in the bottom of the screen).
Press , to acc
Select one of thsecond set of add
1 to 9and #
Press the key for the letter that youwant to go to in the list (e.g. press8 twice to access the letter "U").The first record starting with thisletter is selected in the list.
# Press this key then enter the firstletters of the name you aresearching, and press , to godirectly to that name.
DetailsFlash DialSend SMSChange
CallDeleteCopy to Phone
CallSend SMSChange nameSelect group
Call Tobo
Send SMS Toth
Change name
Tolis
Select group
Seusan
Delete Dph
Delete all Toopphph
Address Book
46Copy to phone
This option will copy the content ofyour SIM card into your phone. If youcancelled or aborted the automaticcopy of your SIM phonebook whenyou first switch on your phone, you cando it manually with this option.
Selecting this option twice willduplicate all the names.
Memory status
Display the memory storage capacity ofyour phone.
Groups setting
Allows you to manage the settings ofthe contact group. You can Selectmelody, Select picture, or Change nameof the group.
Show Display the details of the selectedcontact (name, phone number, officenumber, mobile phone number, etc.)
Icons & symbols 47
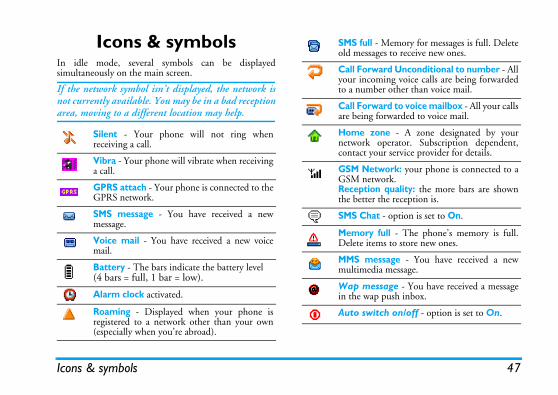
Icons & symbolsIn idle mode, several symbols can be displayedsimultaneously on the main screen.
If the network symbol isn’t displayed, the network isnot currently available. You may be in a bad receptionarea, moving to a different location may help.
Silent - Your phone will not ring whenreceiving a call.
Vibra - Your phone will vibrate when receivinga call.
GPRS attach - Your phone is connected to theGPRS network.
SMS message - You have received a newmessage.
Voice mail - You have received a new voicemail.
Battery - The bars indicate the battery level (4 bars = full, 1 bar = low).
Alarm clock activated.
Roaming - Displayed when your phone isregistered to a network other than your own(especially when you’re abroad).
SMS full - Memory for messages is full. Deleteold messages to receive new ones.
Call Forward Unconditional to number - Allyour incoming voice calls are being forwardedto a number other than voice mail.
Call Forward to voice mailbox - All your callsare being forwarded to voice mail.
Home zone - A zone designated by yournetwork operator. Subscription dependent,contact your service provider for details.
GSM Network: your phone is connected to aGSM network.Reception quality: the more bars are shownthe better the reception is.
SMS Chat - option is set to On.
Memory full - The phone’s memory is full.Delete items to store new ones.
MMS message - You have received a newmultimedia message.
Wap message - You have received a messagein the wap push inbox.
Auto switch on/off - option is set to On.
Keep your phone in a safe place and keep it children's reach.g down your PIN code. Try to instead. nd remove the battery if you are
ed for a long time.de after purchasing the phone
striction options.of your phone complies with allaws and regulations. However may cause interference withnic devices. Consequently youlocal recommendations andng your cellular phone both aty. Regulations on the use of vehicles and aircraft are.en focused for some time on theor users of cellular phones. Thedio wave technology, including, has been reviewed and safetydrawn up to ensure protectiondio wave energy. Your cellular
with all applicable safetye Radio Equipment andTerminal Equipment Directive
48
PrecautionsRadio Waves
Your cellular mobile phone is a low powerradio transmitter and receiver. When it isoperating, it sends and receives radio waves.The radio waves carry your voice or data
signal to a base station that is connected to thetelephone network. The network controls the powerat which the phone transmits.• Your phone transmits/receives radio waves in the
GSM frequency (900 / 1800 MHz).• The GSM network controls transmission power
(0.01 to 2 watts).• Your phone complies with all relevant safety
standards.• The CE mark on your phone shows compliancy
with European electromagnetic compatibility (Ref.89/336/EEC) and low voltage directives (Ref. 73/23/EEC).
Your cellular mobile phone is your responsibility. Toavoid damage to yourself, to others or to the phoneitself, read and follow all the safety instructions andmake them known to anyone borrowing your phone.Furthermore to prevent unauthorised use of yourphone:
out of smallAvoid writinremember it
Switch off the phone agoing to leave it unusChange your PIN coand to activate call re
The design applicable lyour phoneother electro
should follow all regulations when usihome and when awacellular phones inparticularly stringentPublic concern has bepossible health risks fcurrent research on rathe GSM technologystandards have been from exposure to ratelephone complies standards and thTelecommunications 1999/5/EC.
49
with the vehicle manufacturer thatnic equipment used in your vehiclet be affected by radio energy.
scemaker:e phone more than 15 cm from youren the phone is switched on, in ordertial interference.he phone in a breastpocket.posite to the pacemaker to minimiseterference.our phone if you suspect thattaking place.
sser of a hearing aid, consult yourhearing aid manufacturer to learnparticular device is susceptible toterference.
erformanceove the performance of your phone,energy emission, reduce batteryd ensure safe operation adhere to thelines:
Always switch off your phone...Inadequately protected or sensitive electronicequipment may be affected by radio energy. Thisinterference can lead to accidents.
Before boarding an aircraft and/or whenpacking the phone in your luggage: the useof mobile phones in an aircraft may be
dangerous for the operation of the aircraft, disrupt themobile phones network and may be illegal.
In hospitals, clinics, other health carecentres and anywhere else where you may bein the close vicinity of medical equipment.
In areas with a potentially explosiveatmosphere (e.g. petrol stations and alsoareas where the air contains dust particles,such as metal powders).
In a vehicle transporting flammable products (even ifthe vehicle is parked) or a vehicle powered by liquefiedpetroleum gas (LPG), check first that the vehiclecomplies with the applicable safety rules.In areas where you are requested to turn off radiotransmitting devices, such as quarries or other areaswhere blasting operations are in progress.
Check electrowill no
PacemakerIf you have a pa• Always keep th
pacemaker whto avoid poten
• Do not carry t• Use the ear op
the potential in• Switch off y
interference is
Hearing aidIf you are a uphysician and whether your cellular phone in
Improved pIn order to imprreduce radio consumption anfollowing guide

For the optimal and satisfactory operation of Battery informationered by a rechargeable battery.er only.
pen the battery.al objects (such as keys in yourcuit the battery contacts.o excessive heat (>60° C orr caustic environments.
d only use Philips Authentic as the use of any other
ay damage your phone and willarantees for your Philips phoneid.arts are replaced immediately by and that they are replaced withcement parts.
hone and your care shown that speaking on thewhile driving lowers your
on, which can be dangerous.he following guidelines:tion to driving. Pull off the roadng the phone.
50
the phone you are recommended to use thephone in the normal operating position(when not using in hands-free mode or witha hands-free accessory).
• Do not expose your phone to extremetemperatures.
• Treat the phone with care. Any misuse will void theInternational Guarantee.
• Do not immerse the phone in any liquid; if yourphone is damp, switch it off, remove the batteryand let them dry for 24hrs before using them again.
• To clean the phone, wipe it with a soft cloth.• Placing and receiving calls consumes the same
amount of battery energy. However, the mobileconsumes less energy in idle screen when kept inthe same place. When in idle screen and while youare moving, your phone consumes energy totransmit updated location information to thenetwork. Setting the backlight for a shorter periodof time as well as avoiding unnecessary navigatingin the menus will also help to save the battery’senergy for longer phoning and stand-byperformances.
• Your phone is pow• Use specified charg• Do not incinerate.• Do not deform or o• Do not allow met
pocket) to short cir• Avoid exposure t
140° F), moisture oYou shoulAccessories,accessories mmake all gunull and vo
Make sure damaged pa qualified techniciangenuine Philips repla
Your mobile pStudies havtelephone concentratiAdhere to t
• Give your full attenand park before usi
51
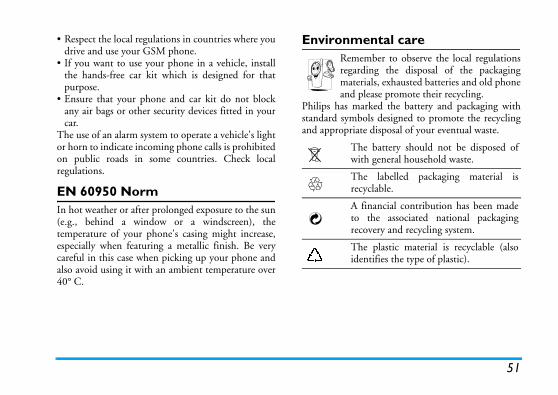
ntal careber to observe the local regulations
ng the disposal of the packagingls, exhausted batteries and old phonease promote their recycling.ked the battery and packaging withls designed to promote the recycling disposal of your eventual waste.
battery should not be disposed of general household waste.
labelled packaging material isclable.
ancial contribution has been madehe associated national packagingvery and recycling system.
plastic material is recyclable (alsotifies the type of plastic).
• Respect the local regulations in countries where youdrive and use your GSM phone.
• If you want to use your phone in a vehicle, installthe hands-free car kit which is designed for thatpurpose.
• Ensure that your phone and car kit do not blockany air bags or other security devices fitted in yourcar.
The use of an alarm system to operate a vehicle's lightor horn to indicate incoming phone calls is prohibitedon public roads in some countries. Check localregulations.
EN 60950 NormIn hot weather or after prolonged exposure to the sun(e.g., behind a window or a windscreen), thetemperature of your phone's casing might increase,especially when featuring a metallic finish. Be verycareful in this case when picking up your phone andalso avoid using it with an ambient temperature over40° C.
EnvironmeRememregardimateriaand ple
Philips has marstandard symboand appropriate
Thewith
Therecy
A finto treco
Theiden
place if your mobile has an external antenna, orork operator for assistance/
nt respond (or the slowly) to key pressesds more slowly at very low normal and does not affect thene. Take the phone to a warmern other cases please contact your
ms to over heata charger that was not intendede sure you always use the Philipshipped with your phone.
nt display the phone ing calls
rk and subscription dependent.’t send the caller’s number, thell 1 or Withheld instead. Contact
ailed information on this subject.
ext messages’t allow message exchanges withst check that you entered the centre, or contact your operatorion on this subject.
52
TroubleshootingThe phone does not switch onRemove/reinstall the battery. Then charge the phoneuntil the battery icon stops scrolling. Unplug fromcharger and try to switch the mobile on.
The display shows BLOCKED when you switch onSomebody tried to use your phone but didn’t knowthe PIN code nor the unblocking code (PUK).Contact your service provider.
The display shows IMSI failureThis problem is related to your subscription. Contactyour operator.
Your phone doesnt return to the idle screenLong press the hangup key or switch off the phone,check that the SIM card and the battery are installedcorrectly and switch it on again.
The network symbol is not displayedThe network connection is lost. Either you are in aradio shadow (in a tunnel or between tall buildings) oryou are outside the network coverage area. Try fromanother place, try to reconnect to the network(especially when abroad), check that the antenna is in
contact your netwinformation.
The display doesdisplay respondsThe display respontemperatures. This isoperation of the phoplace and try again. Iphone supplier.
Your battery seeYou might be using for your phone. Makauthentic accessory s
Your phone doesnumbers of incomThis feature is netwoIf the network doesnphone will display Cayour operator for det
You cant send tSome networks donother networks. Firnumber of your SMSfor detailed informat

53
hows INSERT YOUR SIM
IM card has been inserted in the right problem remains, your SIM carded. Contact your operator.
y of your phone seems lower d in the user guides linked to your settings (e.g., ringert duration) and the features you use.
autonomy, and whenever possible,vate features you do not use.
oesnt work well in your car many metallic parts that absorbwaves which can affect the phone’s car kit is available to provide youantenna and enables you to make andlls without handling the handset.
l authorities if you are allowed to use driving.
s not charging completely flat, it might take severalharge (up to 5 minutes in some cases)ing icon is displayed on the screen.
You cant receive and/or store picturesA picture may not be accepted by your mobile phoneif it is too large, if its name is too long, or if it doesn’thave the correct file format.
You have the feeling that you miss some callsCheck your call divert options.
During battery charge, the battery icon shows no bar and the outline is flashingOnly charge the battery in an environment where thetemperature does not go below 0°C (32°F) or above50°C (113°F).In other cases please contact your phone supplier.
The display shows SIM failureCheck that the SIM card has been inserted in the rightposition. If the problem remains, your SIM card maybe damaged. Contact your operator.
When attempting to use a feature in the menu, the mobile displays NOT ALLOWEDSome features are network dependent. They are onlyavailable, therefore, if the network or yoursubscription supports them. Contact your operatorfor detailed information on this subject.
The display sCARDCheck that the Sposition. If themight be damag
The autonomthat indicateThe autonomy ivolume, backlighTo increase theyou must deacti
Your phone dA car containselectromagnetic performances. Awith an external receive phone ca
Check with locathe phone whilst
Your phone iIf your battery isminutes of pre-cbefore the charg
54
Philips Authentic Accessories
Some accessories, such as a battery and a charger, areincluded as standard in the package of your mobilephone. Additional accessories may also be provided orsold separately. Package contents may therefore vary.
To maximise the performance of your Philips mobilephone and not to void the warranty, always purchasePhilips Authentic Accessories that are speciallydesigned for use with your phone. Philips ConsumerElectronics cannot be held liable for any damage dueto use with non authorised accessories.
ChargerCharges your battery in any AC outlet. Small enoughto carry in a briefcase/handbag.
Carry caseProtects your phone from nicks and scratches.
HeadsetAllows you to talk handsfree. This is especially usefulwhen you drive.

55
Trademark Declaration
JAVA is a trademark of SunMicrosystems, Inc.
T9® is a trademark of TegicCommunications Inc.
Tegic Euro. Pat. App. 0842463
bsorption Rate Information
mation
TIONS FOR EXPOSURE TO
tured not to exceed the limits forese recommendations have been
ion (ICNIRP) and, the Instituteorcast a substantial safety margin
n as the Specific Absorption Rate by the general public is 2,0 W/for the head.
h the mobile phone transmittingAR is determined at the highestre generally below the maximumevels so as to use only the powernna, the lower the power output.
t various positions, they all meet
compliance against the standard. phone call duration or to use a the head and the body.
56 Specific A
Specific Absorption Rate InforInternational standards
THIS MOBILE PHONE MEETS THE INTERNATIONAL RECOMMENDARADIO WAVES
Your mobile phone is a radio transmitter and receiver. It is designed and manufacexposure to radio frequency (RF) energy defined by the international standards. Thestablished by the International Commission on Non-Ionizing Radiation Protectof Electrical and Electronics Engineers - Standards Associations (IEEE-SA) that ffor assuring the protection of all persons, regardless of age and health.
The exposure recommendations for mobile phones use a measurement unit know(SAR). The SAR limit recommended by the ICNIRP for the mobile phones usedkg in 10g of tissue and, is 1,6W/kg in 1g of tissue by IEEE-SA (IEEE Std 1528)
Tests for SAR have been conducted using recommended operating positions witat its highest certified power level in all tested frequency bands. Although the Scertified power level, the actual SAR levels of the mobile phone while operating aSAR value. This is because the phone is designed to operate at multiple power lrequired to reach the network. In general, the closer you are to a base station ante
While there may be differences between the SAR levels of various phones and athe international protection standards for exposure to radio waves.
The highest SAR value for this Philips Xenium 9@9f model phone when tested forwas 0.839 W/kg for ICNIRP recommendation and 1.20W/kg for IEEE standardFor limiting the radio waves exposure, it is recommended to reduce the mobileheadset. The purpose of those precautions is to take the mobile phone away from

57
ip During The Limited Warranty
limited warranty period, Philips or itsservice representative will, at itsr repair or replace, without charge forour, a materially defective Productr refurbished parts or Product and repaired or replaced Product to thein working condition. Philips willtive parts, modules or equipment.
replaced Product will be covered by warranty for the balance of theited warranty period or ninety (90)the date of repair or replacement
is longer. Repair or replacement of Philips’ option is your exclusive
t Covered By This Limited Warranty?
warranty does not cover::
t that has been subjected to misuse,t, shipping or other physical damage,er installation, abnormal operationg, neglect, inundation, fire, water orquid intrusion; or
Limited warranty1. What Does This Limited Warranty Cover?
Philips warrants to the original retail purchaser(“Consumer” or “You”) that this Philips cellularproduct and all accessories originally provided byPhilips in the sales package (“Product”) are freefrom defects in materials, design andworkmanship under normal use in accordancewith the operating instructions and pursuant tothe following terms and conditions. This limitedwarranty extends only to the Consumer forProducts purchased and used in the originalcountry of purchase. The limited warranty isvalid only in Philips’ intended country of sales ofthe product.
2. How Long is The Limited Warranty Period?
The limited warranty period for the Productextends for ONE (1) YEAR from the date ofpurchase of the Product, documented by validproof of purchase. The limited warranty fororiginal Philips rechargeable battery extends forsix (6) months from the date of purchase.
3. What Will Philips Do if The Product is Not FreeFrom Material Defects in Materials and
WorkmanshPeriod?
During the authorized option eitheparts or labwith new oreturn suchConsumer retain defec
Repaired orthis limitedoriginal limdays from whichever Product, atremedy.
4. What is No
This limited
a) Producaccidenimprophandlinother li

b) Product that has been damaged due to b) The SIM card must be removed from theore it is given to Philips. Philips liability for damaged or loss ofd or the data contained therein.ct failure is not covered by this
ranty, or this limited warranty is, void or invalid due to anyconditions stated herein, the
will be charged for the cost oflacement of the Product and all
d cost incurred in repairing ore Product.NT - you are required to returnt together with a valid proof ofhich must identify the point ofate of purchase, Product modelt serial number clearly.
: This Warranty is The Entire
OR THE EXPRESS SET FORTH ABOVE ANDIED BY LAW AND WHICHEXCLUDED OR MODIFIEDNT, PHILIPS PROVIDES NOANTY WHETHER EXPRESS(WHETHER BY STATUTE,OPERATION OF LAW OR
AND SPECIALLY DISCLAIMS
58
repair, alteration, or modification by anyonenot authorized by Philips; or
c) Product that has reception or operationproblems caused by signal conditions,network reliability or cable or antennasystems; or
d) Product defects or problems caused by useswith non-Philips products or accessories; or
e) Product which warranty/quality stickers,product serial number or electronic serialnumber has been removed, altered orrendered illegible; or
f) Product purchased, used, serviced, orshipped for repair from outside the originalcountry of purchase, or used for commercialor institutional purposes (including but notlimited to Products used for rentalpurposes); or
g) Product returned without valid proof ofpurchase or which proof of purchase hasbeen altered or is illegible.
h) Normal wear and tear or Force Majeure.
5. How Do You Get Warranty Service?
a) Return the Product to an authorized servicecenter of Philips. You may contact the localPhilips office for the location of the nearestauthorized service center.
Product befassumes nothe SIM car
c) If the Produlimited warinapplicableterms and Consumer repair or repother relatereplacing th
d) IMPORTAthe Producpurchase wpurchase, dand Produc
6. Other LimitationAgreement.
EXCEPT FWARRANTIESTHOSE IMPLCANNOT BE BY AGREEMEOTHER WARROR IMPLIED UNDER THE OTHERWISE)

59
OF THE POSSIBILTY OF SUCH. THESE LIMITATIONS SHALLNOTWITHSTANDING THEOF THE ESSENTIAL PURPOSEIMITED REMEDY.
d warranty represents the completee agreement between the Consumer
with respect to this cellular Productrcedes all prior agreements between, oral or written, and all othertions between the parties relating tomatter of this limited warranty. Noiler, agent, dealer, employee, thereof,e of Philips is authorized to makens to this limited warranty and yourely on any such representation.
ed warranty does not affect the statutory rights under applicables in force.
ANY WARRANTY OF SATISFACTORYQUALITY MERCHANTABILITY ORFITNESS FOR A PARTICULAR PURPOSE.PHILIPS’ TOTAL LIABILITY FORDAMAGES RELATING TO OR ARISINGOUT OF THE PURCHASE OR USE OF THEPRODUCT, REGARDLESS OF THE TYPEOR CAUSE OF SUCH DAMAGE OR THEFORM OR CHARACTERISATION OF THECLAIM ASSERTED (E.G. CONTRACT ORTOPIT), SHALL NOT EXCEED THEORIGINAL PURCHASE PRICE PAID FORTHE PRODUCT.
HOWEVER IN NO EVENT SHALL PHILIPSBE LIABLE FOR ANY PUNITIVE, SPECIAL,INCIDENTAL, INDIRECT ORCONSEQUENTIAL DAMAGES (INCLUDINGBUT NOT LIMITED TO THE LOSS OFUSE, LOSS OF TIME, INCONVENIENCE,COMMERIAL LOSS, LOST PROFITS, LOSTBUSINESS OPPORTUNITIES, COST OFSUBSTITUTION OF GOODS ORSERVICES, INVESTMENTS, DAMAGE TOGOODWILL OR REPUTATION, OR LOSSOF DATA AND CLAIMS BY THIRDPARTIES) RESULTING FROM PURCHASEOR USE OF THE PRODUCT, TO THEFULLEST EXTENT ALLOWED BY LAW,WHETHER OR NOT PHILIPS HAS BEEN
ADVISED DAMAGESAPPLY FAILURE OF ANY L
This limiteand exclusivand Philipsand it supethe partiescommunicathe subject carrier, retaor employemodificatioshould not
This limitConsumer’snational law

We hereby declare that all essential radio test suitesut and that the above namedformity to all the essentialctive 1999/5/EC.ssment procedure referred to ind in Annex V of Directive 1999/ed related to articles 3.1 and 3.2
t of the following Notified Body:se, Churchfield Road, Walton- KT12 2TD, UK0168
Quality Manager
Declaration of conformity
We, Philips Electronics Hong Kong Ltd Business Group Mobile Phone5/F, Philips Electronics Building 5 Science Park AvenueShatin New Territories Hong Kong
declare under our sole responsibility that the productCT9A9FCellular Mobile Radio GSM 900/1800TAC: 358231 00
to which this declaration relates, is in conformity withthe following Standards:
EN 60950, EN 50360 and EN 301 489-07 EN 301 511 v 9.0.2
have been carried oproduct is in conrequirements of DireThe conformity asseArticle 10 and detaile5/EC has been followwith the involvemenBABT, Belfour HouOn-Thames, Surrey,Identification mark:
Oct 31st, 2006