Embed Size (px)
Citation preview

Digital Electric Smoker
Owner’s Manual
FOR OUTDOOR USE ONLY
THIS IS YOUR ASSEMBLY, CARE & USE MANUAL WITH IMPORTANT WARNING & SAFETY INFORMATION.
PLEASE SAVE THESE INSTRUCTIONS.Approximate assembly time: 20 minutes
Tools needed for assembly: Phillips head screwdriver
For Models: 3016DE / 3016DES/ 3016DER
Owner’s Manual
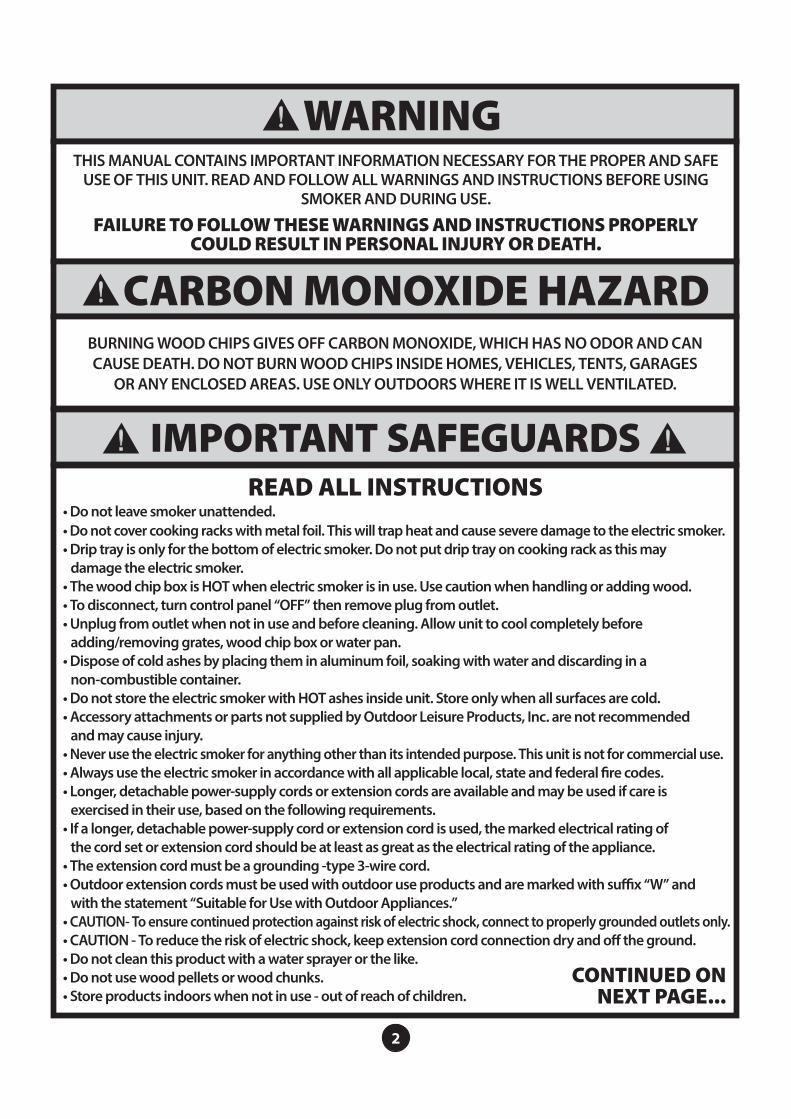
• Do not leave smoker unattended.• Do not cover cooking racks with metal foil. This will trap heat and cause severe damage to the electric smoker.• Drip tray is only for the bottom of electric smoker. Do not put drip tray on cooking rack as this may damage the electric smoker.• The wood chip box is HOT when electric smoker is in use. Use caution when handling or adding wood.• To disconnect, turn control panel “OFF” then remove plug from outlet.• Unplug from outlet when not in use and before cleaning. Allow unit to cool completely before adding/removing grates, wood chip box or water pan.• Dispose of cold ashes by placing them in aluminum foil, soaking with water and discarding in a non-combustible container.• Do not store the electric smoker with HOT ashes inside unit. Store only when all surfaces are cold.• Accessory attachments or parts not supplied by Outdoor Leisure Products, Inc. are not recommended and may cause injury.• Never use the electric smoker for anything other than its intended purpose. This unit is not for commercial use.• Always use the electric smoker in accordance with all applicable local, state and federal fire codes.• Longer, detachable power-supply cords or extension cords are available and may be used if care is exercised in their use, based on the following requirements.• If a longer, detachable power-supply cord or extension cord is used, the marked electrical rating of the cord set or extension cord should be at least as great as the electrical rating of the appliance.• The extension cord must be a grounding -type 3-wire cord.• Outdoor extension cords must be used with outdoor use products and are marked with suffix “W” and with the statement “Suitable for Use with Outdoor Appliances.”• CAUTION- To ensure continued protection against risk of electric shock, connect to properly grounded outlets only.• CAUTION - To reduce the risk of electric shock, keep extension cord connection dry and off the ground.• Do not clean this product with a water sprayer or the like.• Do not use wood pellets or wood chunks.• Store products indoors when not in use - out of reach of children.
IMPORTANT SAFEGUARDSREAD ALL INSTRUCTIONS
THIS MANUAL CONTAINS IMPORTANT INFORMATION NECESSARY FOR THE PROPER AND SAFE USE OF THIS UNIT. READ AND FOLLOW ALL WARNINGS AND INSTRUCTIONS BEFORE USING
SMOKER AND DURING USE.
FAILURE TO FOLLOW THESE WARNINGS AND INSTRUCTIONS PROPERLY COULD RESULT IN PERSONAL INJURY OR DEATH.
BURNING WOOD CHIPS GIVES OFF CARBON MONOXIDE, WHICH HAS NO ODOR AND CAN CAUSE DEATH. DO NOT BURN WOOD CHIPS INSIDE HOMES, VEHICLES, TENTS, GARAGES
OR ANY ENCLOSED AREAS. USE ONLY OUTDOORS WHERE IT IS WELL VENTILATED.
WARNING
CARBON MONOXIDE HAZARD
CONTINUED ON NEXT PAGE...
2

When using electrical appliances, basic safety precautions should always be followed including the following:• For outdoor use only. Do not operate in an enclosed areas (example, porch or garage).• Unit MUST be on the ground. Do not place unit on tables or counters. Do NOT move unit across uneven surfaces.• Do not lift unit by rear handle.• Do not plug in the electric smoker until fully assembled and ready for use.• Use only an approved grounded electrical outlet.• Do not use during an electrical storm.• Do not expose the electric smoker to rain or water at anytime.• CAUTION- To ensure continued protection against risk of electric shock, connect to properly grounded outlets only.• To protect against electrical shock do not immerse cord, plug or control panel in water or other liquid.• Do not operate any appliance with a damaged cord or plug, or after appliance malfunctions or has
been damaged in any manner. Contact OLPI Customer Service for assistance at 1-866-475-5180.• Keep a fire extinguisher accessible at all times while operating the electric smoker.• Do not let cord touch hot surfaces.• Do not place on or near a hot gas or electric burner, or in a heated oven.• Keep children and pets away from electric smoker at all times. Do not allow children to use electric smoker.
Close supervision is necessary should children or pets be in area where the electric smoker is being used.• Fuel, such as charcoal briquettes or heat pellets, are not to be used in the electric smoker.• Never use the electric smoker as a heater (READ CARBON MONOXIDE HAZARD ON PAGE 2).• Use the electric smoker only on a level, stable surface to prevent tipping.• The electric smoker is HOT while in use and will remain HOT for a period of time afterwards. Use caution.• Do not touch HOT surfaces. Use handles or knobs.• Do not allow anyone to conduct activities around the electric smoker during or following its use until
the unit has cooled.• The use of alcohol, prescription or non-prescription drugs may impair the user’s ability to
properly assemble or safely operate the electric smoker.• Avoid bumping or impacting the electric smoker.• Never move the electric smoker when in use. Allow the smoker to cool completely before moving or storing.• Be careful when removing food from the electric smoker. All surfaces are HOT and may cause burns.
Use protective gloves or long, sturdy cooking tools.• Avoid using the smoker on wooden or flammable surfaces.• Store products indoors when not in use - out of reach of children.
CALIFORNIA PROPOSITION 65
WARNING
IMPORTANT SAFEGUARDS
SAVE THESE INSTRUCTIONS
3
This product contains, or the use of this product releases, chemicals known tothe State of California to cause cancer and birth defects or other reproductive harm. For more information go to www.P65Warnings.ca.gov.

Congratulations on your purchase of your new
Smoke Hollow® Digital Electric Smoker. With proper set-up, operation and maintenance, this appliance will provide you with years of delicious food and cooking enjoyment.
IMPORTANTWhen you un-pack your smoker, remove all parts and
packaging material from the box and inside the smoker. Make sure you have all the items on the parts list. Carefully
check the unit and make sure there is no damage.
IF YOU HAVE ANY PROBLEMS WITH THIS PRODUCT OR THERE ARE MISSING OR DAMAGED PARTS , PLEASE CALL CUSTOMER SERVICE TOLL FREE
1-866-475-5180 (Monday–Friday, 8:30 am–4:30 pm, CST).
NOTE : DO NOT RETURN UNIT TO THE STORE BEFORE CALLING THE TOLL FREE NUMBER. Do not dispose of your cartons until you are completely satisfied with your new Smoke Hollow smoker.
4

Parts and Tool List
5
Parts and Tool List
Tools needed for assembly: Phillips head screwdriver
5

Parts and Tool ListNote: For assistance, including missing or damaged parts, call
toll free 1- 866-475-5180 from 8:30 am - 4:30 pm Central Time, Monday - Friday
6
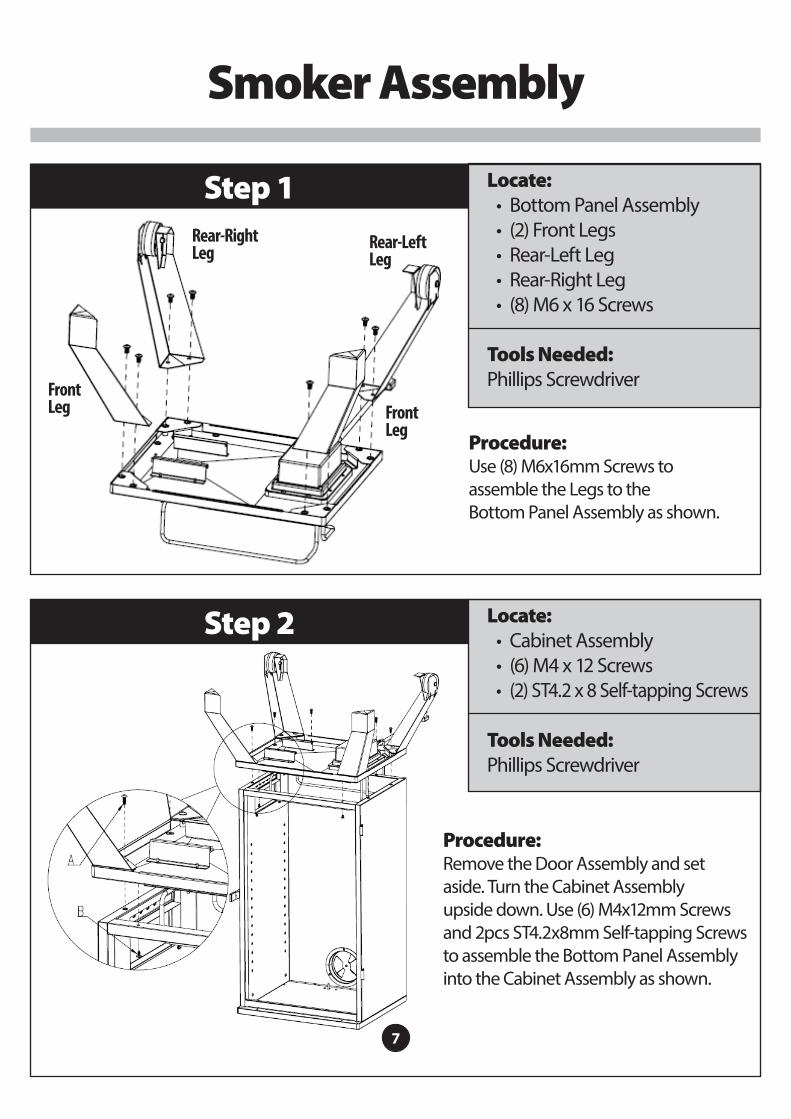
Smoker Assembly
Locate: • Bottom Panel Assembly• (2) Front Legs • Rear-Left Leg• Rear-Right Leg • (8) M6 x 16 Screws
Tools Needed:Phillips Screwdriver
Locate: • Cabinet Assembly• (6) M4 x 12 Screws • (2) ST4.2 x 8 Self-tapping Screws
Tools Needed:Phillips Screwdriver
Step 1
Step 2
Procedure:Use (8) M6x16mm Screws toassemble the Legs to theBottom Panel Assembly as shown.
7
SmokerAssembly Locate: • Bottom Panel Assembly (29)• 2 Front Legs (2), Rear Left‐Leg(1), Rear‐Right Leg (6)
• 8pcs M6x16mm Screws (C)
Tools Needed: Phillips Screwdriver
Step 1
RearVentKnob
RearHandle
Procedure: Use (8) M6x16mm Screws to assemble the 2 Front Leg, Rear‐Left Leg and Rear‐Right Leg to the Bottom Panel Assembly as shown.
Locate: Cabinet Assembly (16)
• 6pcs M4x12mm Screws (A) & 2pcs ST4.2x8mm Self‐tapping Screws (B)
Tools Needed: Phillips Screwdriver
Step 2
RearVentKnob
RearHandle
Procedure: Remove the Door Assembly and set aside. Turn the Cabinet Assembly upside down. Use (6) M4x12mm Screws and 2pcs ST4.2x8mm Self‐tapping Screws to assemble the Bottom Panel Assembly into the Cabinet Assembly as shown.
Rear-Left Leg
Rear-Right Leg
Front Leg Front
Leg
Procedure:Remove the Door Assembly and setaside. Turn the Cabinet Assemblyupside down. Use (6) M4x12mm Screws and 2pcs ST4.2x8mm Self-tapping Screws to assemble the Bottom Panel Assembly into the Cabinet Assembly as shown.
7

Smoker Assembly
Locate: • Cabinet• Control Panel Assembly• Cable Cover• (12) ST4.2 x 8 Self Tapping
Screws
Tools Needed:Phillips Screwdriver
Procedure:Turn the Smoker Cabinet rightside up and put your smokerstand on the floor. Place twohooks of Control Panel onto theCabinet square holes and pushback into place as shown. Use (2)ST4.2x8mm Self-tapping Screwsto assemble the Control PanelAssy into the Cabinet as shown.Use (10) ST4.2x8mm Self-tappingScrews to assemble the CableCover into the Cabinet as shown.
Step 3
8
SmokerAssembly
Step 3 Locate: • Cabinet (16)• Control Panel Assy (15)• Cable Cover (14)• 12pcs ST4.2x8mm Self‐tappingScrews (B)
Tools Needed: Phillips Screwdriver
Procedure: Turn the Smoker Cabinet right side up and put your smoker stand on the floor. Place two hooks of Control Panel onto the Cabinet square holes and push back into place as shown. Use (2) ST4.2x8mm Self‐tapping Screws to assemble the Control Panel Assy into the Cabinet as shown. Use (10) ST4.2x8mm Self‐tapping Screws to assemble the Cable Cover into the Cabinet as shown.
8

Smoker Assembly
Locate: • Rear Handle• (4) M6 x 16 Screws
Tools Needed:Phillips Screwdriver
Locate: • Door Latch Assembly• Door Handle• (4) M4 x 12 Screws
Tools Needed:Phillips Screwdriver
Procedure:Use (4) M6x16mm Screws to assemble the Rear Handle as shown.
Procedure:Now attach the Door Assembly on the Smoker Cabinet.Use (4) M4x12mm Screws to assemble the Door Latch Assy and Door Handle as shown.
Step 4
Step 5
9
SmokerAssembly
Locate:• Rear Handle (13)• 4pcs M6x16mm Screws (C)
Tools Needed:Phillips Screwdriver
Step 4
RearVentKnob
RearHandle
Procedure:Use (4)M6x16mmScrews toassemble the Rear Handle as shown.
Locate:• Door Latch Assy (12)• Door Handle (19)• 4pcs M4x12mm Screws (A)
Tools Needed:Phillips Screwdriver
Procedure:Use (4) M4x12mm Screws to assemble the Door Latch Assy and Door Handle as shown.
Step 5
DoorHandle
9
SmokerAssembly
Locate:• Rear Handle (13)• 4pcs M6x16mm Screws (C)
Tools Needed:Phillips Screwdriver
Step 4
RearVentKnob
RearHandle
Procedure:Use (4)M6x16mmScrews toassemble the Rear Handle as shown.
Locate:• Door Latch Assy (12)• Door Handle (19)• 4pcs M4x12mm Screws (A)
Tools Needed:Phillips Screwdriver
Procedure:Use (4) M4x12mm Screws to assemble the Door Latch Assy and Door Handle as shown.
Step 5
Door Handle
9

Smoker Assembly
Locate: • Wood Chip Box Back Bracket• Left Rail• Right Rail• (7) M4 x 8 Screws
Tools Needed:Phillips Screwdriver
Procedure:Use (7) M4x8mm Screws to assemble the Wood Chip Box Back Bracket, Left Rail and Right Rail as shown.
Step 6
10
SmokerAssembly
Step 6
Wood
ChipBoxRails
WoodChipBoxCover
Locate:• Wood Chips Box Back Bracket(25), Left Rail (27) & Right Rail (28)• 7pcs M4x8mm Screws (D)
Tools Needed:Phillips Screwdriver
Procedure:Use (7) M4x8mm Screws to assemble theWoodChipsBoxBackBracket, Left
t Rail andRight Rail as shown.I
C C
S
Connect the Control Panel Electric Wires Connector into the Heating ElementConnector as shown. Now attach the Door Assembly on theSmoker Cabinet
Left
Right
10
SmokerAssembly
Step 6
Wood
ChipBoxRails
WoodChipBoxCover
Locate:• Wood Chips Box Back Bracket(25), Left Rail (27) & Right Rail (28)• 7pcs M4x8mm Screws (D)
Tools Needed:Phillips Screwdriver
Procedure:Use (7) M4x8mm Screws to assemble theWoodChips BoxBackBracket, Left
t Rail andRight Rail as shown.I
C C
S
Connect the Control Panel Electric WiresConnector into the Heating ElementConnector as shown. Now attach the Door Assembly on theSmoker Cabinet
Left
Right
10
SmokerAssembly
Step 6
Wood
ChipBoxRails
WoodChipBoxCover
Locate:• Wood Chips Box Back Bracket(25), Left Rail (27) & Right Rail (28)• 7pcs M4x8mm Screws (D)
Tools Needed:Phillips Screwdriver
Procedure:Use (7) M4x8mm Screws to assemble theWoodChipsBoxBackBracket, Left
t Rail andRight Rail as shown.I
C C
S
Connect the Control Panel Electric Wires Connector into the Heating ElementConnector as shown. Now attach the Door Assembly on theSmoker Cabinet
Left
Right
Connect Control Panel Cableand Power Box Cabletogether by aligning the twoarrows on top of theconnectors and pushing themtogether. Once connection ismade, firmly tightenconnector nut as shown.
Left
Left
Wood Chip Box Back Bracket
Left Rail
Right Rail
10
SmokerAssembly
Step 6
Wood
ChipBoxRails
WoodChipBoxCover
Locate:• Wood Chips Box Back Bracket(25), Left Rail (27) & Right Rail (28)• 7pcs M4x8mm Screws (D)
Tools Needed:Phillips Screwdriver
Procedure:Use (7) M4x8mm Screws to assemble theWoodChipsBoxBackBracket, Left
t Rail andRight Rail as shown.I
C C
S
Connect the Control Panel Electric Wires Connector into the Heating ElementConnector as shown. Now attach the Door Assembly on theSmoker Cabinet
Left
RightRight
Left Rail
Right Rail
10
Power Box Cable Connector
Control Panel Cable Connector
____
__
___
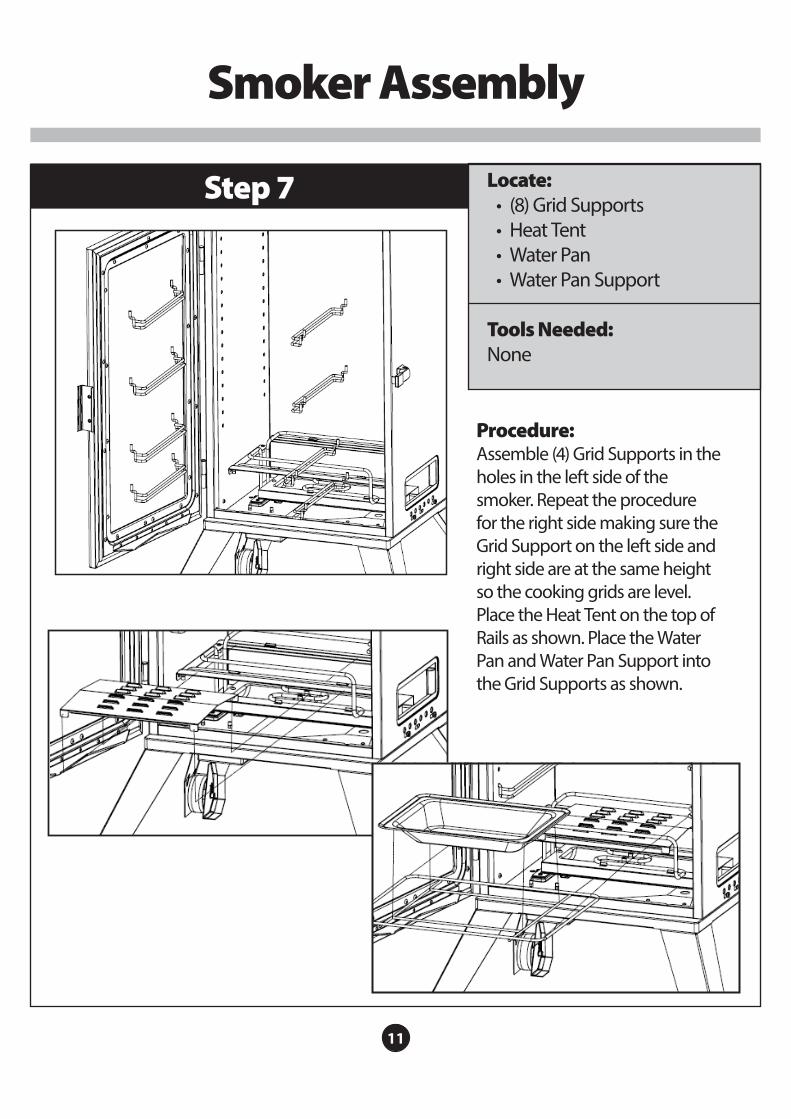
Step 7
Smoker Assembly
Locate: • (8) Grid Supports• Heat Tent• Water Pan• Water Pan Support
Tools Needed:None
Procedure:Assemble (4) Grid Supports in theholes in the left side of the smoker. Repeat the procedure for the right side making sure the Grid Support on the left side and right side are at the same height so the cooking grids are level.Place the Heat Tent on the top ofRails as shown. Place the WaterPan and Water Pan Support intothe Grid Supports as shown.
SmokerAssembly
11
Step 7
Grid
Supports
Locate:• 8pcs Grid Supports (17)• Heat Tent (23) & Water Pan(21) & Water Pan Support (22)
Tools Needed:None
Procedure:Assemble (4) Grid Supports in the
h holes in the left side of the smoker. R Repeat the procedure for the right s side making sure the Grid Support p on the left side and right side are t at the sameheight so the cooking g grids are level.
Place the Heat Tent on the top ofRails as shown. Place the Water
a Pan and Water Pan Support into he the Grid Supports as shown.
11

SmokerAssembly
12
Step 8 Locate:• 3 pcs Cooking Grids (20)
ToolsNeeded:None
Procedure:Place the (3) Cooking Grids intothe Cooking Grid Supports asshown.Make sure the angled portion of thegrid is slid in first.
Step 9 Locate:• Wood Chips Box (9) & Lid (11)• Grease Tray(7), Vent Knob(10)
ToolsNeeded:None
Procedure:Slide theWood Chip Box & LidAssembly into the Rails in the smoker.Slide the GreaseTray into the smoker as shown.Screw the Vent Knob to the FrontVent as shown.
Step 8
Step 9
Smoker Assembly
Locate: • (3) Cooking Grids
Tools Needed:None
Locate: • Wood Chip Box• Wood Chip Box Lid• Grease Tray• Vent Knob
Tools Needed:None
Procedure:Place the (3) Cooking Grids intothe Cooking Grid Supports asshown. Make sure the angled portion of the grid is slid in first.
SmokerAssembly
12
Step 8 Locate:• 3 pcs Cooking Grids (20)
ToolsNeeded:None
Procedure:Place the (3) Cooking Grids intothe Cooking Grid Supports asshown.Make sure the angled portion of thegrid is slid in first.
Step 9 Locate:• Wood Chips Box (9) & Lid (11)• Grease Tray(7), Vent Knob(10)
ToolsNeeded:None
Procedure:Slide theWood Chip Box & LidAssembly into the Rails in the smoker.Slide the GreaseTray into the smoker as shown.Screw the Vent Knob to the FrontVent as shown.
Procedure:Slide the Wood Chip Box & Lid Assembly into the Rails in the smoker. Slide the Grease Tray into the smoker as shown. Screw the Vent Knob to the Front Vent as shown.
12

ASSEMBLY OF YOUR SMOKER IS NOW COMPLETE.
FOR YOUR SAFETY, FOLLOW ALL SAFE GUARDS AND INSTRUCTIONS.
Smoker AssemblySmokerAssembly
13
ASSEMBLY OF YOUR SMOKER IS NOW COMPLETE.FORYOURSAFETY,FOLLOWALLSAFEGUARDS
AND INSTRUCTIONS.
13

SEASON YOUR SMOKER PRIOR TO ITS FIRST USE.SOME SMOKE MAY APPEAR DURING THIS TIME. THIS IS NORMAL
DURING THE SEASONING PROCESS.
1. Make sure water pan is in place with NO WATER.2. Set the temperature to 275°F, set the time for 3 hours and turn the smoker on.3. To complete the seasoning process, add wood chips to the wood chip pan during the last 45 minutes.
Caution: Never overfill the wood chip box. Make sure the wood chip box lid closes completely on the wood chip box.4. Shut the unit off and allow to cool.
1. Before starting the unit, open the lid and fill the wood chip box with wood chips.
Caution: Never overfill the wood chip box. Make sure the wood chip box lid closes completely on the wood chip box.2. Never use wood chunks or wood pellets in the wood chip box.3. Insert the wood chip box into the opening in the smoker.4. Check the wood chip box periodically to see if the wood has burned down by sliding the wood chip
box out about half way and looking through the slots in the wood chip box lid to see if the wood has burned down.
5. If the wood chips have completely burned in the wood chip box, remove the box from the smoker.Caution: The wood chip box and lid will be HOT, even if the handle is not.6. Dump the burned wood chips from the wood chip box. The wood chip box lid will stay attached to
the wood chip box during this process. Always dump the burned wood chips in a metal pan with water to extinguish the wood chips.
7. With the wood chip box lid open, fill the wood chip box with wood chips. Close the lid.Caution: Never overfill the wood chip box. Make sure the wood chip box lid closes completely on the wood chip box.8. Insert the wood chip box into the opening in the smoker
CAUTION:• Keep the smoker door closed when dumping or adding wood chips.• The wood chip box and lid will be HOT even if the handle is not. • Never use wood pellets or wood chunks.
Seasoning Instructions
How to Use The Wood Chip Box
WHEN DOOR IS OPENED A FLARE UP MAY OCCUR. SHOULD WOOD CHIPS FLARE UP,
IMMEDIATELY CLOSE DOOR, WAIT FOR WOOD CHIPS TO BURN DOWN THEN OPEN DOOR
AGAIN. DO NOT SPRAY WITH WATER.
CAUTION
14
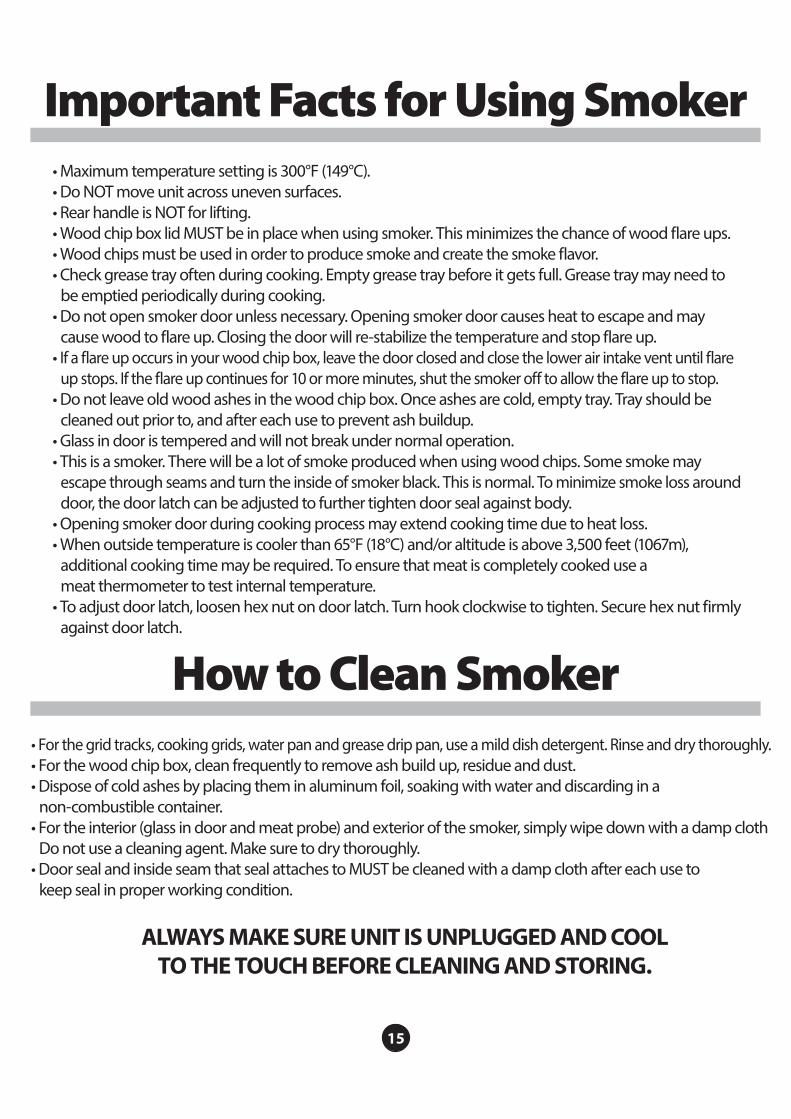
• Maximum temperature setting is 300°F (149°C).• Do NOT move unit across uneven surfaces.• Rear handle is NOT for lifting.• Wood chip box lid MUST be in place when using smoker. This minimizes the chance of wood flare ups.• Wood chips must be used in order to produce smoke and create the smoke flavor.• Check grease tray often during cooking. Empty grease tray before it gets full. Grease tray may need to be emptied periodically during cooking.• Do not open smoker door unless necessary. Opening smoker door causes heat to escape and may cause wood to flare up. Closing the door will re-stabilize the temperature and stop flare up.• If a flare up occurs in your wood chip box, leave the door closed and close the lower air intake vent until flare
up stops. If the flare up continues for 10 or more minutes, shut the smoker off to allow the flare up to stop.• Do not leave old wood ashes in the wood chip box. Once ashes are cold, empty tray. Tray should be cleaned out prior to, and after each use to prevent ash buildup.• Glass in door is tempered and will not break under normal operation.• This is a smoker. There will be a lot of smoke produced when using wood chips. Some smoke may
escape through seams and turn the inside of smoker black. This is normal. To minimize smoke loss around door, the door latch can be adjusted to further tighten door seal against body.• Opening smoker door during cooking process may extend cooking time due to heat loss.• When outside temperature is cooler than 65°F (18°C) and/or altitude is above 3,500 feet (1067m),
additional cooking time may be required. To ensure that meat is completely cooked use a meat thermometer to test internal temperature.• To adjust door latch, loosen hex nut on door latch. Turn hook clockwise to tighten. Secure hex nut firmly
against door latch.
• For the grid tracks, cooking grids, water pan and grease drip pan, use a mild dish detergent. Rinse and dry thoroughly.• For the wood chip box, clean frequently to remove ash build up, residue and dust.• Dispose of cold ashes by placing them in aluminum foil, soaking with water and discarding in a non-combustible container.• For the interior (glass in door and meat probe) and exterior of the smoker, simply wipe down with a damp cloth Do not use a cleaning agent. Make sure to dry thoroughly.• Door seal and inside seam that seal attaches to MUST be cleaned with a damp cloth after each use to keep seal in proper working condition.
ALWAYS MAKE SURE UNIT IS UNPLUGGED AND COOLTO THE TOUCH BEFORE CLEANING AND STORING.
Important Facts for Using Smoker
How to Clean Smoker
15
Operating Instructions
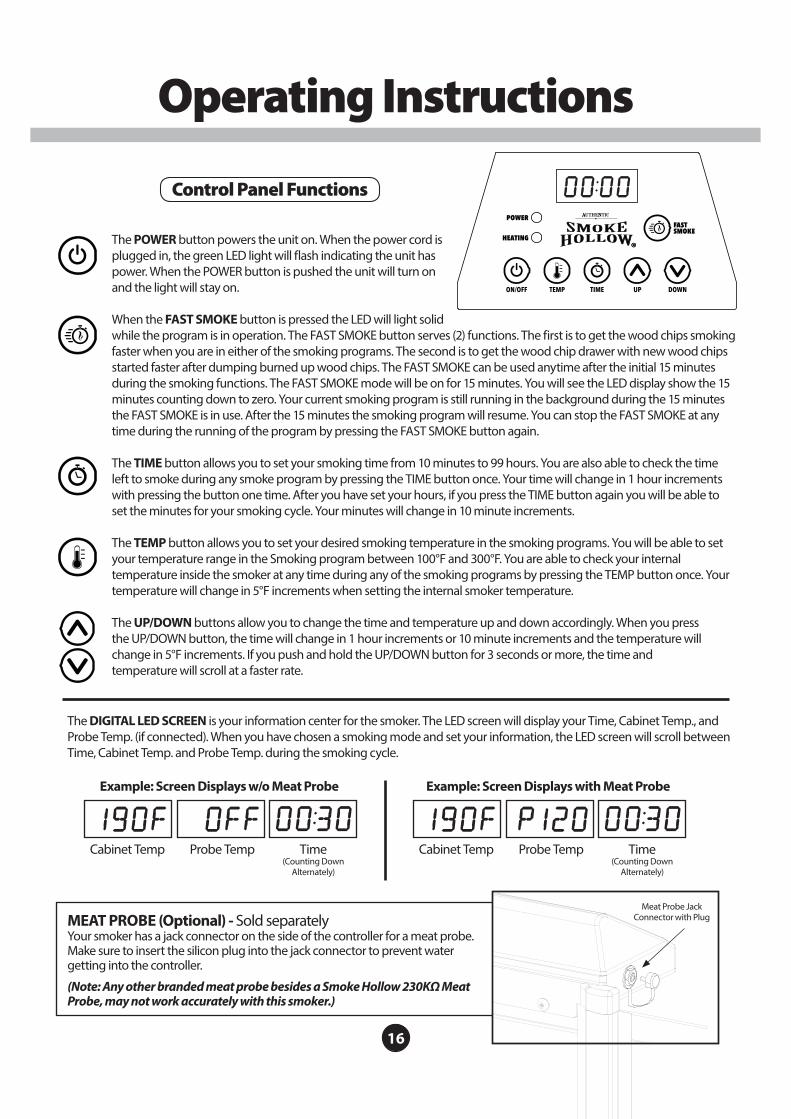
The POWER button powers the unit on. When the power cord is plugged in, the green LED light will flash indicating the unit has power. When the POWER button is pushed the unit will turn on and the light will stay on. When the FAST SMOKE button is pressed the LED will light solid while the program is in operation. The FAST SMOKE button serves (2) functions. The first is to get the wood chips smoking faster when you are in either of the smoking programs. The second is to get the wood chip drawer with new wood chips started faster after dumping burned up wood chips. The FAST SMOKE can be used anytime after the initial 15 minutes during the smoking functions. The FAST SMOKE mode will be on for 15 minutes. You will see the LED display show the 15 minutes counting down to zero. Your current smoking program is still running in the background during the 15 minutes the FAST SMOKE is in use. After the 15 minutes the smoking program will resume. You can stop the FAST SMOKE at any time during the running of the program by pressing the FAST SMOKE button again.
The TIME button allows you to set your smoking time from 10 minutes to 99 hours. You are also able to check the timeleft to smoke during any smoke program by pressing the TIME button once. Your time will change in 1 hour incrementswith pressing the button one time. After you have set your hours, if you press the TIME button again you will be able toset the minutes for your smoking cycle. Your minutes will change in 10 minute increments.
The TEMP button allows you to set your desired smoking temperature in the smoking programs. You will be able to setyour temperature range in the Smoking program between 100°F and 300°F. You are able to check your internaltemperature inside the smoker at any time during any of the smoking programs by pressing the TEMP button once. Yourtemperature will change in 5°F increments when setting the internal smoker temperature.
The UP/DOWN buttons allow you to change the time and temperature up and down accordingly. When you pressthe UP/DOWN button, the time will change in 1 hour increments or 10 minute increments and the temperature willchange in 5°F increments. If you push and hold the UP/DOWN button for 3 seconds or more, the time andtemperature will scroll at a faster rate.
The DIGITAL LED SCREEN is your information center for the smoker. The LED screen will display your Time, Cabinet Temp., and Probe Temp. (if connected). When you have chosen a smoking mode and set your information, the LED screen will scroll between Time, Cabinet Temp. and Probe Temp. during the smoking cycle.
MEAT PROBE (Optional) - Sold separatelyYour smoker has a jack connector on the side of the controller for a meat probe. Make sure to insert the silicon plug into the jack connector to prevent water getting into the controller.
(Note: Any other branded meat probe besides a Smoke Hollow 230KΩ Meat Probe, may not work accurately with this smoker.)
Control Panel Functions
17
Operating Instructions
The TIME button allows you to set your smoking time from 10 minutes to 99 hours. You are also able to check the time left to smoke during any smoke program by pressing the TIME button once. Your time will change in 1 hour increments with pressing the button one time. After you have set your hours, if you press the TIME button again you will be able to set the minutes for your smoking cycle. Your minutes will change in 10 minute increments.
The TEMP button allows you to set your desired smoking temperature in the smoking programs. You will be able to set your temperature range in the Smoking program between 100°F and 300°F. You are able to check your internal temperature inside the smoker at any time during any of the smoking programs by pressing the TEMP button once. Your temperature will change in 5°F increments when setting the internal smoker temperature.
The UP/DOWN buttons allow you to change the time and temperature up and down accordingly. When you press the UP/DOWN button, the time will change in 1 hour increments or 10 minute increments and the temperature will change in 5°F increments. If you push and hold the UP/DOWN button for 3 seconds or more, the time and temperature will scroll at a faster rate.
MEAT PROBE (Optional) Your smoker has a jack connector on the side of controller, but the Meat Probe is NOT come with the smoker, you will need to buy the meat probe from OLPI.
Note: Any other unauthorized meat probe may not workable for this smoker, the temperature readings could be inaccurate.
Note: When meat probe is disconnected, please insert the silicon plug into the jack connector to prevent water getting into the controller.
The DIGITAL LED SCREEN is your information center for the smoker. The LED screen will display your Time and Temperature you have set. When you have chosen a smoking mode and set your information, the LED screen will scroll between Time and Temperature during the smoking cycle.
While smoker is in working, and the MEAT PROBE is NOT connected, the digital LED would diplay :***F (Cabinet Tmperature)/OFF (Probe Temperature)/Time counting down alternately. For example, the LED may diplay 190F/OFF/00:30
While smoker is in working, and the MEAT PROBE is connected, the digital LED would diplay :***F (Cabinet Tmperature)/P*** (Probe Temperature)/Time counting down alternately. For example, the LED may diplay 190F/P120/00:30
190F oFF oo:3o 190F P120 oo:3oExample: Screen Displays w/o Meat Probe Example: Screen Displays with Meat Probe
Cabinet Temp Cabinet TempProbe Temp Probe Temp
Meat Probe Jack Connector with Plug
Time (Counting Down
Alternately)
Time (Counting Down
Alternately)
oo:0o
16
Operating Instructions
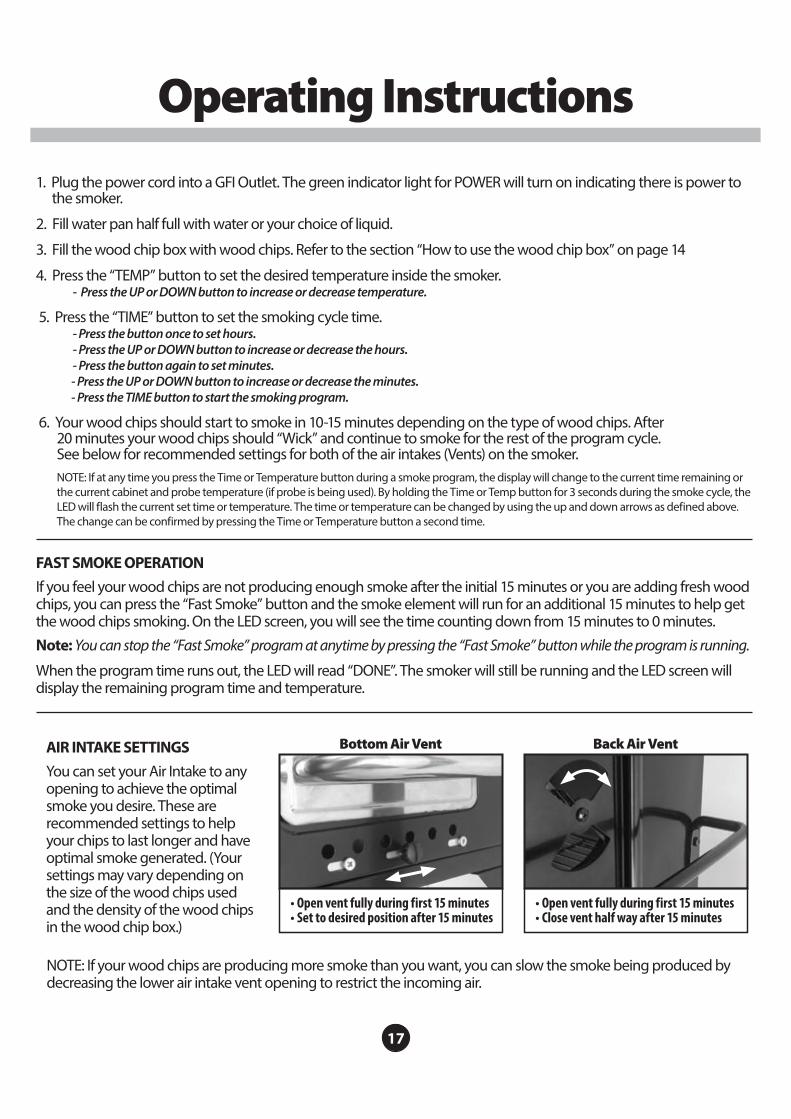
1. Plug the power cord into a GFI Outlet. The green indicator light for POWER will turn on indicating there is power to the smoker.
2. Fill water pan half full with water or your choice of liquid.
3. Fill the wood chip box with wood chips. Refer to the section “How to use the wood chip box” on page 14
4. Press the “TEMP” button to set the desired temperature inside the smoker. - Press the UP or DOWN button to increase or decrease temperature.
5. Press the “TIME” button to set the smoking cycle time. - Press the button once to set hours. - Press the UP or DOWN button to increase or decrease the hours. - Press the button again to set minutes. - Press the UP or DOWN button to increase or decrease the minutes. - Press the TIME button to start the smoking program.
6. Your wood chips should start to smoke in 10-15 minutes depending on the type of wood chips. After 20 minutes your wood chips should “Wick” and continue to smoke for the rest of the program cycle. See below for recommended settings for both of the air intakes (Vents) on the smoker. NOTE: If at any time you press the Time or Temperature button during a smoke program, the display will change to the current time remaining or
the current cabinet and probe temperature (if probe is being used). By holding the Time or Temp button for 3 seconds during the smoke cycle, the LED will flash the current set time or temperature. The time or temperature can be changed by using the up and down arrows as defined above. The change can be confirmed by pressing the Time or Temperature button a second time.
FAST SMOKE OPERATIONIf you feel your wood chips are not producing enough smoke after the initial 15 minutes or you are adding fresh wood chips, you can press the “Fast Smoke” button and the smoke element will run for an additional 15 minutes to help get the wood chips smoking. On the LED screen, you will see the time counting down from 15 minutes to 0 minutes.
Note: You can stop the “Fast Smoke” program at anytime by pressing the “Fast Smoke” button while the program is running.
When the program time runs out, the LED will read “DONE”. The smoker will still be running and the LED screen will display the remaining program time and temperature.
AIR INTAKE SETTINGSYou can set your Air Intake to any opening to achieve the optimal smoke you desire. These are recommended settings to help your chips to last longer and have optimal smoke generated. (Your settings may vary depending on the size of the wood chips used and the density of the wood chips in the wood chip box.)
NOTE: If your wood chips are producing more smoke than you want, you can slow the smoke being produced by decreasing the lower air intake vent opening to restrict the incoming air.
• Open vent fully during first 15 minutes • Set to desired position after 15 minutes
Bottom Air Vent
• Open vent fully during first 15 minutes • Close vent half way after 15 minutes
Back Air Vent
17
Troubleshooting Guide
19
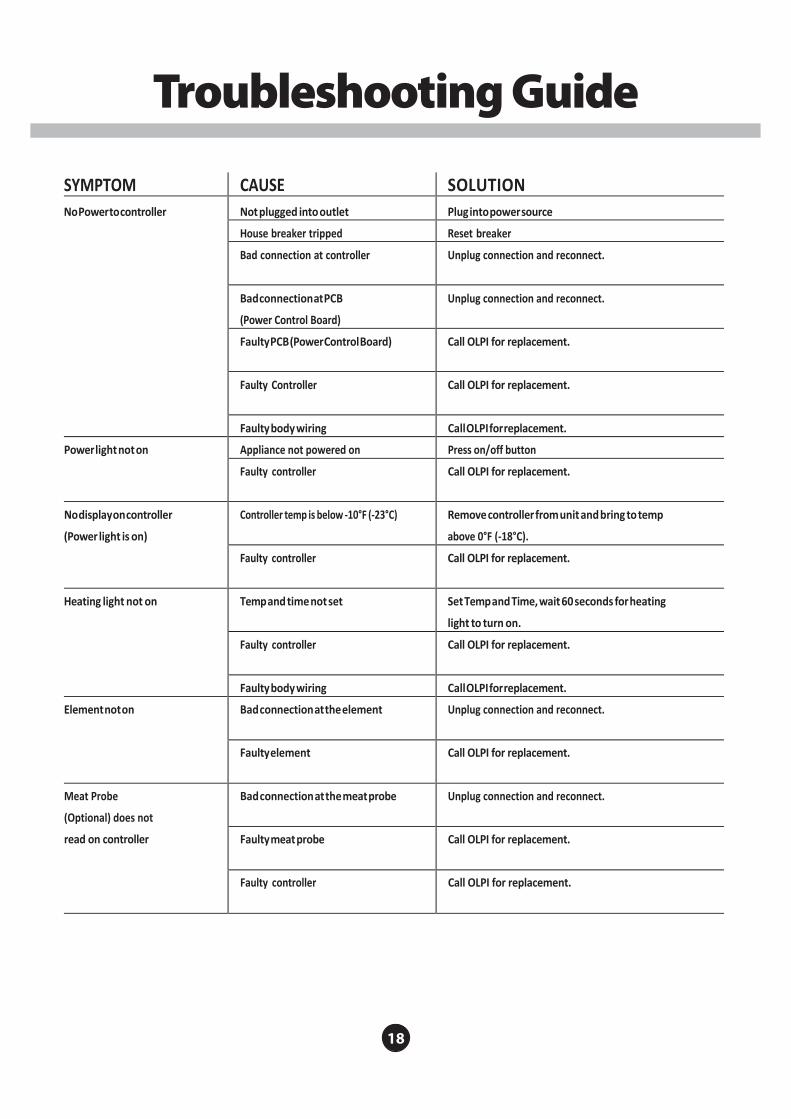
Troubleshooting GuideSYMPTOM CAUSE SOLUTIONNo Power to controller Not plugged into outlet Plug into power source
House breaker tripped Reset breaker Bad connection at controller Unplug connection and reconnect.
Bad connection at PCB (Power Control Board)
Unplug connection and reconnect.
Faulty PCB (Power Control Board) Call OLPI for replacement.
Faulty Controller Call OLPI for replacement.
Faulty body wiring Call OLPI for replacement. Power light not on Appliance not powered on Press on/off button
Faulty controller Call OLPI for replacement.
No display on controller (Power light is on)
Controller temp is below ‐10°F (‐23°C) Remove controller from unit and bring to temp above 0°F (‐18°C).
Faulty controller Call OLPI for replacement.
Heating light not on Temp and time not set Set Temp and Time, wait 60 seconds for heating light to turn on.
Faulty controller Call OLPI for replacement.
Faulty body wiring Call OLPI for replacement. Element not on Bad connection at the element Unplug connection and reconnect.
Faulty element Call OLPI for replacement.
Meat Probe (Optional) does not read on controller
Bad connection at the meat probe Unplug connection and reconnect.
Faulty meat probe Call OLPI for replacement.
Faulty controller Call OLPI for replacement.
18

Troubleshooting Guide
20
Troubleshooting GuideSYMPTOM CAUSE SOLUTION
Cabinet Temp is inaccurate Faulty Temp Sensor Call OLPI for replacement.
Faulty controller Call OLPI for replacement.
Appliance takes excessive amount of time to heat
Climate Temps below 65°F (18°C) may extend heating time
Appliance plugged into an extension cord
Plug appliance directly into power source. Maximum length ext. cord 25ft, min. gauge 12/3.
Door not closed properly Close door and adjust latch so door seals completely Waterbowl/ Drip deflector not properly located
Locate waterbowl/drip deflector properly on supports. See assembly steps for proper installation
Faulty controller Call OLPI for replacement.
Gap between the door
and smoker Door alignment Adjust door hinges Damaged door seal Call OLPI for replacement door kit
Grease leaking from smoker Door not closed properly Close door and adjust latch so door seals completely around appliance.
Appliance not level Move appliance to level surface and adjust height Drip pan not in proper location Align drip pan so drain hole in pan and smoker align Grease tray is full Empty grease tray and reinstall under smoker Drain tube is clogged Clean drain tube
No smoke No wood chips Add wood chips. (See adding wood chips guide) Element not staying on long enough to heat chips due to climate
1. Open vent fully. 2. Open door briefly to allow smoker temp to drop approx. 5°F (2.78°C) below set temp then close door.
Damaged smoke box Call OLPI for replacement. Controller will not adjust temp Faulty controller Call OLPI for replacement.
Controller will not adjust time Faulty controller Call OLPI for replacement.
Error Code: Err2 Cabinet temperature>370F The Heat Element will automatically shut off when the temperature is higher than the setting temperature. Call OLPI for replacement
Error Code: Err Thermostat probe is damaged/short circuited
Call OLPI for replacement
19
Smoking Tips
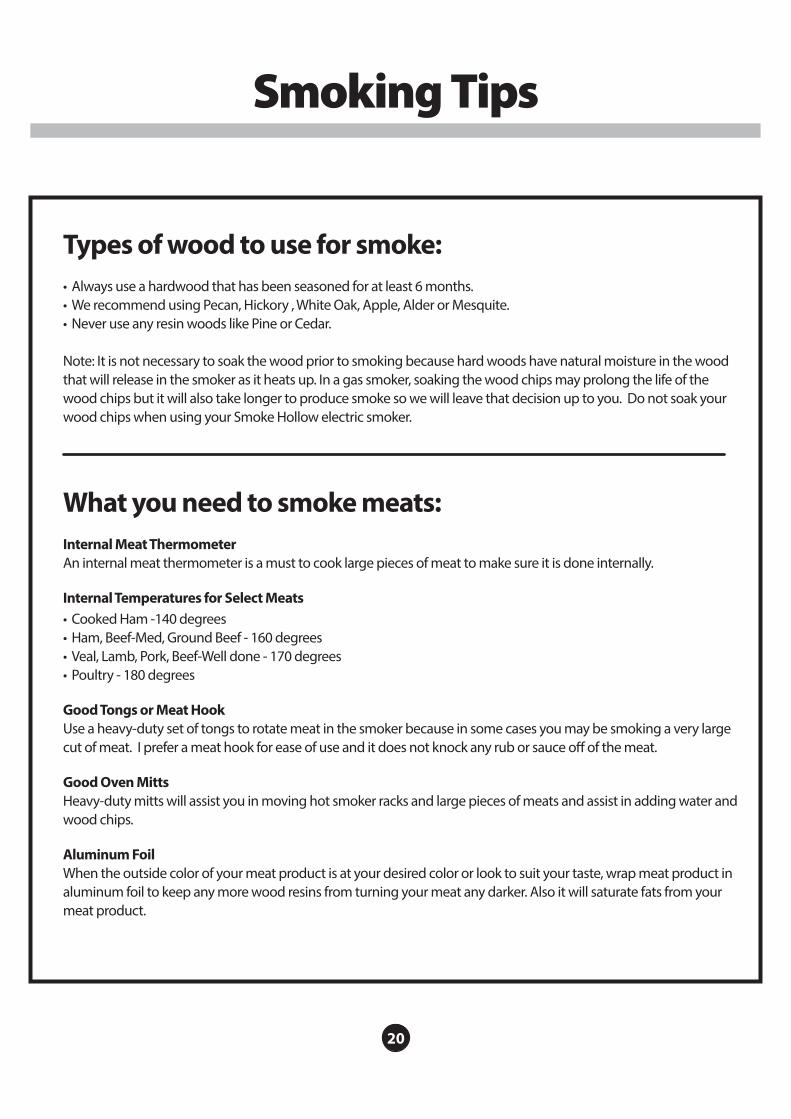
Types of wood to use for smoke:• Always use a hardwood that has been seasoned for at least 6 months.• We recommend using Pecan, Hickory , White Oak, Apple, Alder or Mesquite.• Never use any resin woods like Pine or Cedar.
Note: It is not necessary to soak the wood prior to smoking because hard woods have natural moisture in the wood that will release in the smoker as it heats up. In a gas smoker, soaking the wood chips may prolong the life of the wood chips but it will also take longer to produce smoke so we will leave that decision up to you. Do not soak your wood chips when using your Smoke Hollow electric smoker.
What you need to smoke meats:Internal Meat ThermometerAn internal meat thermometer is a must to cook large pieces of meat to make sure it is done internally.
Internal Temperatures for Select Meats• Cooked Ham -140 degrees• Ham, Beef-Med, Ground Beef - 160 degrees• Veal, Lamb, Pork, Beef-Well done - 170 degrees• Poultry - 180 degrees
Good Tongs or Meat HookUse a heavy-duty set of tongs to rotate meat in the smoker because in some cases you may be smoking a very large cut of meat. I prefer a meat hook for ease of use and it does not knock any rub or sauce off of the meat.
Good Oven MittsHeavy-duty mitts will assist you in moving hot smoker racks and large pieces of meats and assist in adding water and wood chips.
Aluminum FoilWhen the outside color of your meat product is at your desired color or look to suit your taste, wrap meat product in aluminum foil to keep any more wood resins from turning your meat any darker. Also it will saturate fats from your meat product.
20

Smoked Pork TenderloinTake outside wrapper off of meat and wash thoroughly in cold water. Place tenderloin on a paper towel to soak up excess water. Rub your favorite pork rub on the loin (we recommend Head Country Pork seasoning). Preheat smokers to 225 degrees and place loin in the center of the smoker. Cook until internal meat temperature reaches 165 degrees. Take out of smoker and let stand on the cutting platter until meat reaches 170 degrees serving temperature. Slice like bread in ¼” pieces and it will melt in your mouth.
Pork Ribs- Baby Backs or Spare RibsTake ribs out of wrapper and drain all liquid off of the ribs and then wash in cold water. Place on cutting board and cut away any excess fat or skin from the bottom of ribs. Turn ribs with bone side up and peel the membrane from the back of the bone until all is gone. Rub your favorite pork rub on both sides of the ribs (we recommend Head Country Pork seasoning). Preheat smoker until it reaches 225 degrees and place rib bone side down in smoker. After one hour, turn the rib over with bone side up and cook for one hour. After 2 1/2 hours, depending on the color of the rib you like, pour a one inch wide strip of your favorite BBQ sauce down the length of the rib and wrap tightly in aluminum foil. Place back in smoker and check every 15 to 20 minutes to see if the rib bones separate by using your finger to pull them apart. If they pull apart with ease your ribs are done. Note: Make sure your internal temperature of your ribs are at 170°F. Take out of smoker and let stand on serving platter until cool enough to eat.
Smoked Beef BrisketSelect a 6 to 8 lb. packer trimmed brisket that has a little marble to it but not too much. Feel free to trim as much fat as desired. Use your favorite beef rub (we recommend using Head Country All-Purpose rub) and rub it on liberally. Heat the smoker to 225 degrees and place the brisket in the smoker for 3 hours. Place brisket in an aluminum foil pan and pour approximately 8oz. of Allegro over the brisket. Cover the pan tightly with aluminum foil and continue cooking until internal meat temperature reaches 165 to 170 degrees. Take pan out of the smoker and let brisket stand. Remove brisket from pan and cut ¼” slices against the grain. Use juice from pan to poor over sliced meat or for dipping.
Prime RibSelect a 6 to 8 lb prime rib (we like the bone on). Rub the prime rib with your favorite beef rub (we recommend using Head Country All-Purpose rub). Pre-heat the smoker to 225 degrees and place the prime rib in the smoker. After 3 hours, place the prime rib in aluminum foil pan and cover with aluminum foil. When internal meat temperature reaches 145 degrees take out of smoker and let stand until your desired doneness is reached. Medium rare is 155 to 160 degrees. While standing, the temperature of the meat will rise internally up to 10 degrees. Slice prime rib to desired thickness and serve with juice from the pan in which it was cooked.
Smoking Techniques
POULTRY BEEFFISHPORK
POULTRY BEEFFISHPORK
21
Smoking Techniques
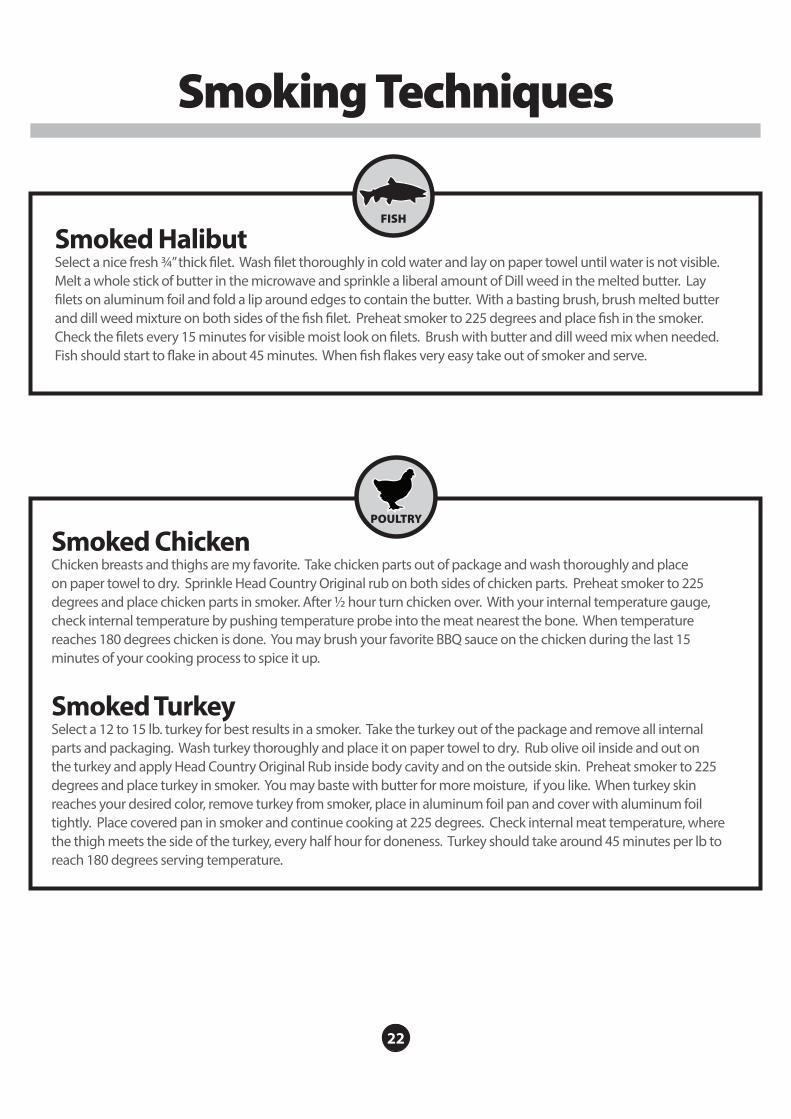
Smoked ChickenChicken breasts and thighs are my favorite. Take chicken parts out of package and wash thoroughly and place on paper towel to dry. Sprinkle Head Country Original rub on both sides of chicken parts. Preheat smoker to 225 degrees and place chicken parts in smoker. After ½ hour turn chicken over. With your internal temperature gauge, check internal temperature by pushing temperature probe into the meat nearest the bone. When temperature reaches 180 degrees chicken is done. You may brush your favorite BBQ sauce on the chicken during the last 15 minutes of your cooking process to spice it up.
Smoked TurkeySelect a 12 to 15 lb. turkey for best results in a smoker. Take the turkey out of the package and remove all internal parts and packaging. Wash turkey thoroughly and place it on paper towel to dry. Rub olive oil inside and out on the turkey and apply Head Country Original Rub inside body cavity and on the outside skin. Preheat smoker to 225 degrees and place turkey in smoker. You may baste with butter for more moisture, if you like. When turkey skin reaches your desired color, remove turkey from smoker, place in aluminum foil pan and cover with aluminum foil tightly. Place covered pan in smoker and continue cooking at 225 degrees. Check internal meat temperature, where the thigh meets the side of the turkey, every half hour for doneness. Turkey should take around 45 minutes per lb to reach 180 degrees serving temperature.
Smoked HalibutSelect a nice fresh ¾” thick filet. Wash filet thoroughly in cold water and lay on paper towel until water is not visible. Melt a whole stick of butter in the microwave and sprinkle a liberal amount of Dill weed in the melted butter. Lay filets on aluminum foil and fold a lip around edges to contain the butter. With a basting brush, brush melted butter and dill weed mixture on both sides of the fish filet. Preheat smoker to 225 degrees and place fish in the smoker. Check the filets every 15 minutes for visible moist look on filets. Brush with butter and dill weed mix when needed. Fish should start to flake in about 45 minutes. When fish flakes very easy take out of smoker and serve.
POULTRY BEEFFISHPORK
POULTRY BEEFFISHPORK
22
Cold Smoking Recipes
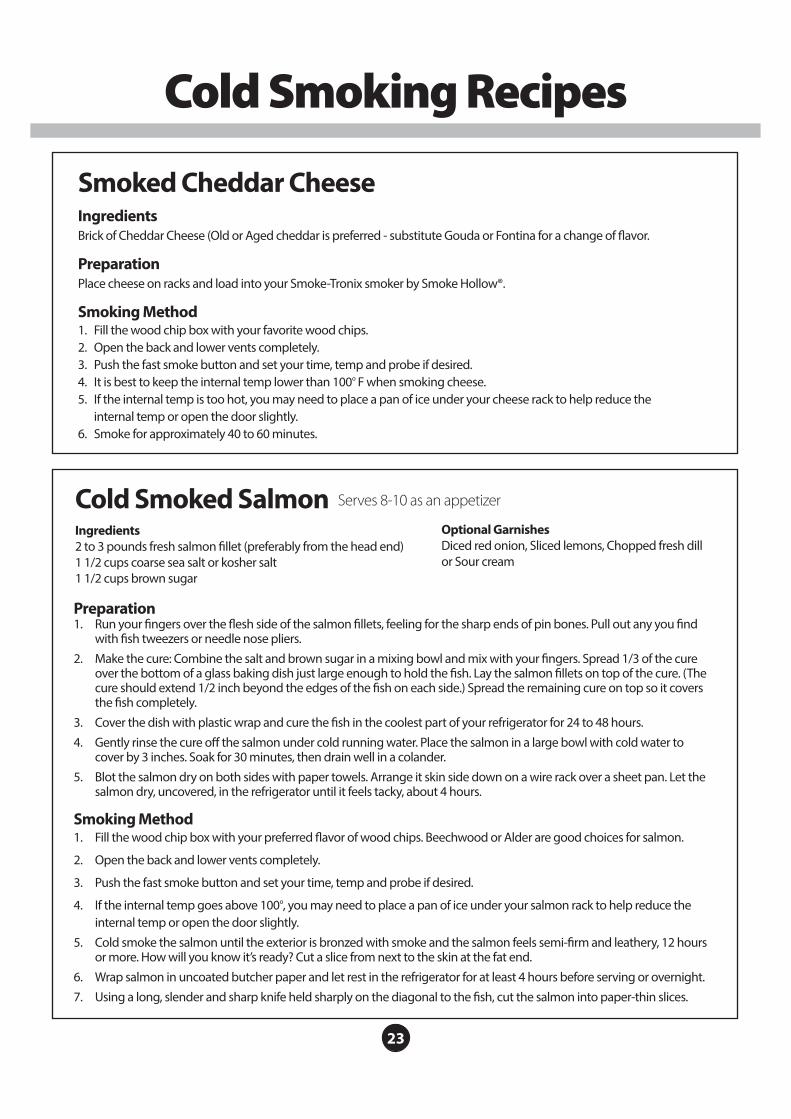
Smoked Cheddar CheeseIngredientsBrick of Cheddar Cheese (Old or Aged cheddar is preferred - substitute Gouda or Fontina for a change of flavor.
PreparationPlace cheese on racks and load into your Smoke-Tronix smoker by Smoke Hollow®.
Smoking Method1. Fill the wood chip box with your favorite wood chips.2. Open the back and lower vents completely.3. Push the fast smoke button and set your time, temp and probe if desired.4. It is best to keep the internal temp lower than 100° F when smoking cheese.5. If the internal temp is too hot, you may need to place a pan of ice under your cheese rack to help reduce the
internal temp or open the door slightly.6. Smoke for approximately 40 to 60 minutes.
Cold Smoked SalmonIngredients2 to 3 pounds fresh salmon fillet (preferably from the head end)1 1/2 cups coarse sea salt or kosher salt1 1/2 cups brown sugar
Optional GarnishesDiced red onion, Sliced lemons, Chopped fresh dillor Sour cream
Serves 8-10 as an appetizer
Preparation1. Run your fingers over the flesh side of the salmon fillets, feeling for the sharp ends of pin bones. Pull out any you find
with fish tweezers or needle nose pliers. 2. Make the cure: Combine the salt and brown sugar in a mixing bowl and mix with your fingers. Spread 1/3 of the cure
over the bottom of a glass baking dish just large enough to hold the fish. Lay the salmon fillets on top of the cure. (The cure should extend 1/2 inch beyond the edges of the fish on each side.) Spread the remaining cure on top so it covers the fish completely.
3. Cover the dish with plastic wrap and cure the fish in the coolest part of your refrigerator for 24 to 48 hours. 4. Gently rinse the cure off the salmon under cold running water. Place the salmon in a large bowl with cold water to
cover by 3 inches. Soak for 30 minutes, then drain well in a colander. 5. Blot the salmon dry on both sides with paper towels. Arrange it skin side down on a wire rack over a sheet pan. Let the
salmon dry, uncovered, in the refrigerator until it feels tacky, about 4 hours.
Smoking Method1. Fill the wood chip box with your preferred flavor of wood chips. Beechwood or Alder are good choices for salmon.
2. Open the back and lower vents completely.
3. Push the fast smoke button and set your time, temp and probe if desired.
4. If the internal temp goes above 100°, you may need to place a pan of ice under your salmon rack to help reduce the internal temp or open the door slightly.
5. Cold smoke the salmon until the exterior is bronzed with smoke and the salmon feels semi-firm and leathery, 12 hours or more. How will you know it’s ready? Cut a slice from next to the skin at the fat end.
6. Wrap salmon in uncoated butcher paper and let rest in the refrigerator for at least 4 hours before serving or overnight. 7. Using a long, slender and sharp knife held sharply on the diagonal to the fish, cut the salmon into paper-thin slices.
23

Limited Warranty
This Smoke Hollow ® smoker is guaranteed against broken or damaged parts at time of purchase. All parts carry a 1-year limited warranty. Paint is guaranteed to be free of defects for 90 days except for rust, which may appear after repeated use.
This warranty does not cover damage or issues related to neglect, abuse, or modifications to the product. Repair labor is not covered.
All parts that meet the warranty requirements will be shipped at no-charge via the discretion of the Customer Service Department (ground shipments, US Mail, or Parcel Post Only). Any special handling charges (i.e. Second Day, Overnight, etc.) will be the responsibility of the consumer.
All warranty claims apply only to the original purchaser and require a proof of purchase verifying purchase date. Do not return parts to our address without first obtaining a return authorization number from our customer service.
This service is available by calling 866-475-5180, 8:30am to 4:30pm, Central Time, Monday through Friday, or write to Outdoor Leisure Products, Inc., 5400 Doniphan Drive, Neosho, MO 64850. This warranty may give you specific legal rights that vary by state.
Outdoor Leisure Products, Inc5400 Doniphan Drive
Neosho, MO 64850www.olp-inc.com
© 2016 Outdoor Leisure Products, Inc. No part of this work may be reproduced, modified, distributed, or otherwise used without prior written permission. Smoke Hollow is a trademark of Outdoor Leisure Products, Inc.
06092017