Embed Size (px)
Citation preview

Rhonda J. LayfieldSr. Deployment Architect
Deploy Windows 7 Using Microsoft’s FREE Deployment Tools
Sr. Deployment ArchitectDeployment Done Right
•I live in Washington DC in the States…
•Been in the IT industry for 30 years
•US Navy for 7 years
•Write for Windows IT Pro magazine
•Setup and Deployment MVP
Rhonda Layfield
•Setup and Deployment MVP
•Desktop Deployment Product Specialist (DDPS)
•I am self employed
•The name of my company is Deployment Done Right

Get In Touch With Me…
•Let me know how your deployments are going:
•Follow me on Twitter
•Sign up for one of my hands-on deployment classes•Sign up for one of my hands-on deployment classes
•September 2011 in Washington DC
•Contact me for details
•Bring me into your organization to hear more about deployment
•For short term consulting and in-house training
The Goal For This Session
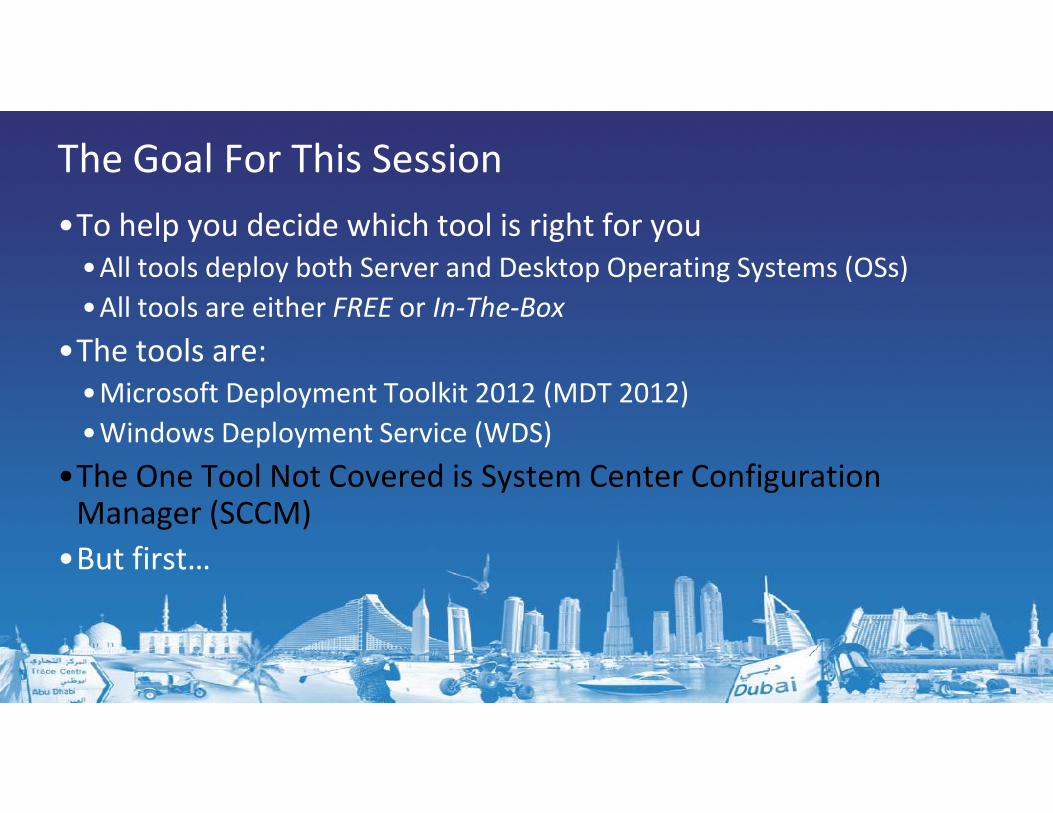
•To help you decide which tool is right for you
•All tools deploy both Server and Desktop Operating Systems (OSs)
•All tools are either FREE or In-The-Box
•The tools are:
•Microsoft Deployment Toolkit 2012 (MDT 2012)•Microsoft Deployment Toolkit 2012 (MDT 2012)
•Windows Deployment Service (WDS)
•The One Tool Not Covered is System Center Configuration Manager (SCCM)
•But first…

Overview
•Image Formats and Scenarios
•MDT
•Installation
•Configuration•Configuration
•Network deployments
•XP migrations
•MDT advanced features

Overview
•WDS
•Installation
•Configuration
•Multicast traffic•Multicast traffic
•MDT & WDS integration
•Differences between MDT & WDS

Windows Image Formats
•There are two
• Windows Image
• .Wim
•Virtual hard disk
• .Vhd
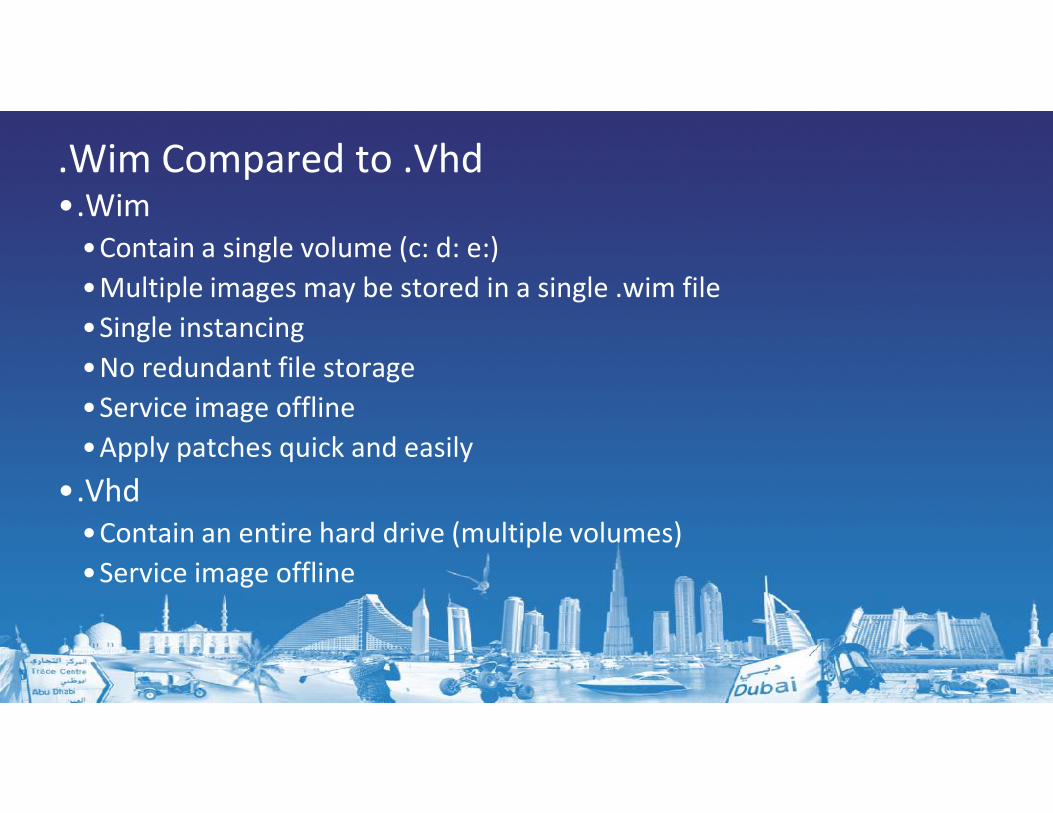
.Wim Compared to .Vhd•.Wim
•Contain a single volume (c: d: e:)
•Multiple images may be stored in a single .wim file
•Single instancing
•No redundant file storage
•Service image offline•Service image offline
•Apply patches quick and easily
•.Vhd
•Contain an entire hard drive (multiple volumes)
•Service image offline

Three Types of Images:Thick, Thin, Hybrid
•Thick images contain an OS and all applications
•More difficult to make changes to later
•Thin images usually contain only the OS
•Applications are deployed after the OS
• Group Policy deployment• Group Policy deployment
• MDT 2010 U1
• Manually
•Hybrid images contain OS and corporate approved applications
•Like line of business (LOB) applications created in-house

4 Deployment Scenarios
Scenario Description
Bare Metal New machines
RefreshKeeping the old hardware installing a new OS on the
existing machine
Replacing existing computer with a new computerReplace
Replacing existing computer with a new computer
while maintaining user’s settings and data
UpgradeUnless your upgrading from Vista there is no direct
upgrade path

MICROSOFT DEPLOYMENT TOOLKIT 2010 MICROSOFT DEPLOYMENT TOOLKIT 2010 UPDATE 1 (MDT 2010 U1)
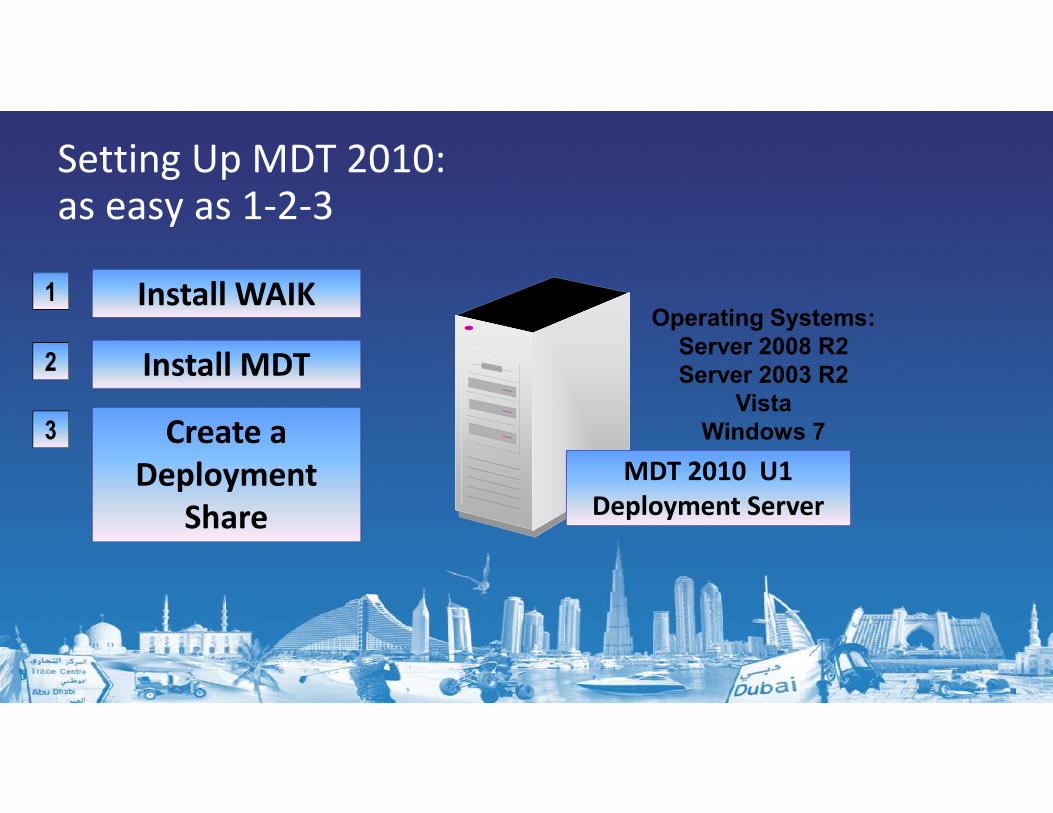
Setting Up MDT 2010:as easy as 1-2-3
Install WAIK1
Install MDT2
Operating Systems:
Server 2008 R2
Server 2003 R2
Vista
MDT 2010 U1
Deployment Server
Create a
Deployment
Share
3Vista
Windows 7

Create a Deployment ShareOpen Deployment ShareOpen Deployment Share

W7 DVD
MDT 2010 U1
Deployment
ServerW7 DVD
11Add an OS
22Deploy OS
33
SYSPREP
W7 DVD
Windows Server 2003 R2
Windows Server 2008 & R2
XP SP3
Vista SP1
Windows 7 & SP1
ServerW7 DVD
Add an OS
Create A ReferenceStore Image
33

Add Components
•Applications
•Office 2010
•Adobe Reader
•Drivers
•3rd party•3rd party
•Packages
•OS patches
•Language packs

Over Time You Will Have Multiple Images To Deploy:
•Multiple OSs
•Windows 7 SP1 base DVD
•Windows 7 custom Hybrid .wim image
•Windows Server 2008 R2
•Drivers for different models of machines•Drivers for different models of machines
•Applications for different groups of users
•So you will need a way to group components together for a specific deployment
•This is called a Task Sequence

Then You Need To Update The Deployment Share
•Updating the deployment share creates a custom MDT Windows Pre Installation Environment (WinPE)
•This WinPE is very intelligent
•Pre-configured to know who the MDT server is and the name of the Deployment Share
•Pre-configured to know who the MDT server is and the name of the Deployment Share

Add an OS, Application, DriversCreate a Task SequenceUpdate the Deployment ShareUpdate the Deployment Share

Then, Get MDT Ready To Deploy The Custom .wimImage
•Import the Custom .wim
•Create a task sequence
•Deploy

MDT WinPE
11 Copy WinPE
Boot Target22
Deployment Server
MDT 2010 U1
Deployment Server 33Connect to MDT
Server and
Download Image

Boot Client With WinPEWalk Through The Deployment WizardWalk Through The Deployment Wizard

Automate The Client

Automate the Clients Experience
•When you run the Deployment Wizard
•Choose which screens are displayed during the deployment
•Suppress the ones you don’t want anyone to see or change like:• Product Key
• Administrator’s password• Administrator’s password
•Customize the words displayed on the pages

Automate The Client Deployment
•BootStrap.ini
•CustomSettings.ini
•If you make changes to the Boostrap.ini you will need to update the deployment share again to reflect those changes
•For Help on variables to add to these files:•For Help on variables to add to these files:
•Help
•Microsoft Deployment Toolkit Reference
• Properties
• Property Definitions
Automate A Deployment ShareAutomate A Deployment Share
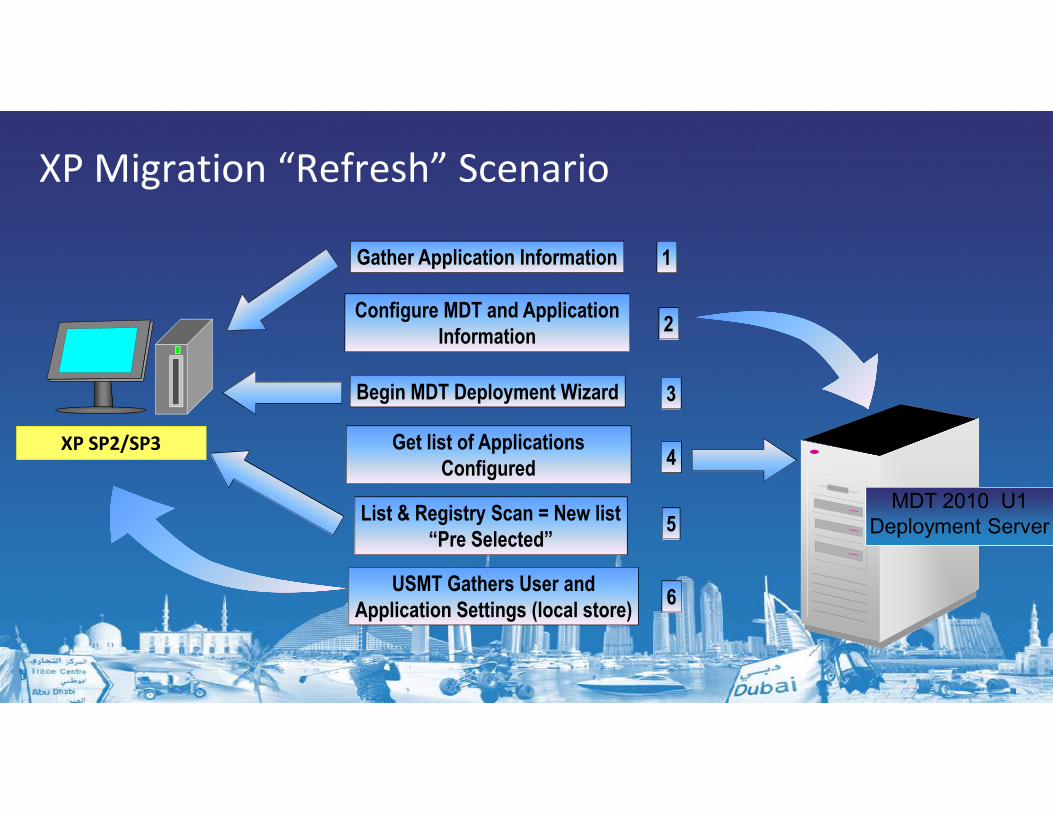
XP Migration “Refresh” Scenario
1Gather Application Information
Begin MDT Deployment Wizard 3
Configure MDT and Application
Information2
MDT 2010 U1
Deployment Server
XP SP2/SP3 Get list of Applications
Configured4
List & Registry Scan = New list
“Pre Selected”5
USMT Gathers User and
Application Settings (local store)6

XP Migration “Refresh” Scenario
7Boots to WinPE - Win 7 is Installed
Applications are Installed from MDT Applications are Installed from MDT
Deployment Share8
Windows 7XP SP2/SP3
USMT Applies User and Application
Settings (local store)9 MDT 2010 U1
Deployment Server

MDT Network DeploymentMDT Network Deployment

Get MDT Deployment Server Ready
•Add an Operating System
•Windows 7
•Add Drivers
•Create a Task Sequence•Create a Task Sequence

Get MDT Deployment Server ReadyGet MDT Deployment Server Ready

XP Migration With Applications
•Performing Refresh scenario
•Currently running XP
•Migrate to Windows 7
•Applications that are currently installed on XP should •Applications that are currently installed on XP should automatically be re-installed on Windows 7
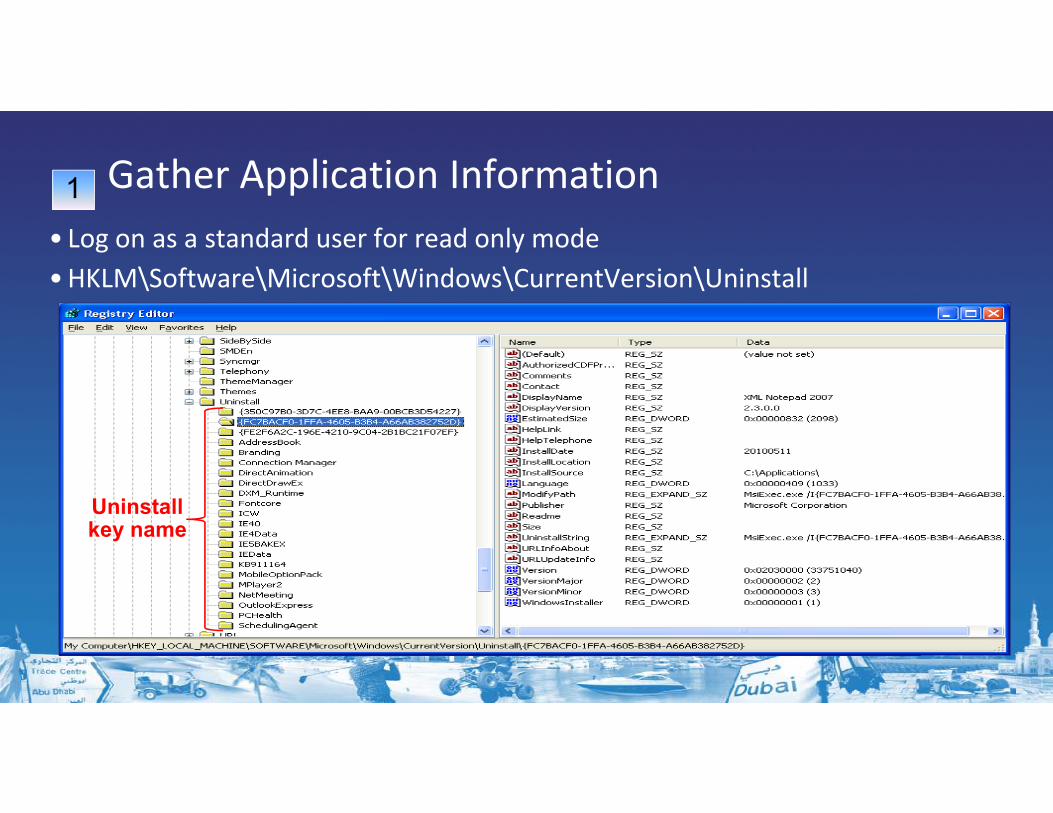
Gather Application Information
• Log on as a standard user for read only mode
• HKLM\Software\Microsoft\Windows\CurrentVersion\Uninstall
1
Uninstall key name
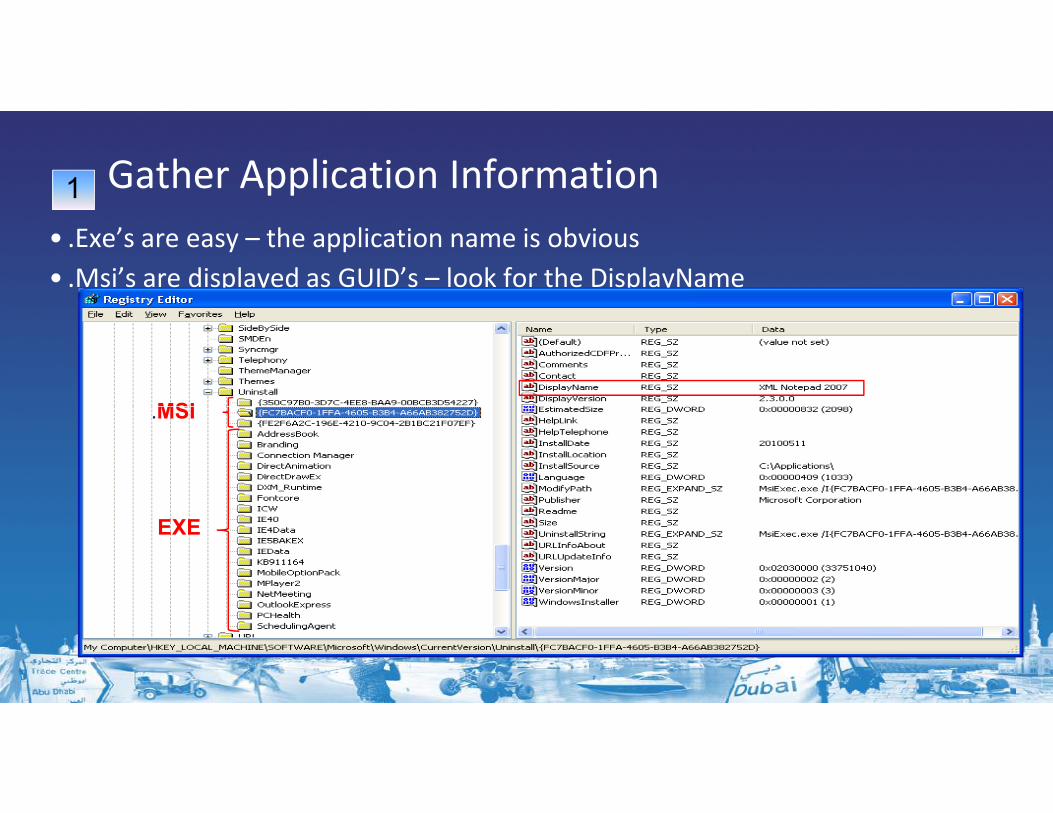
• .Exe’s are easy – the application name is obvious
• .Msi’s are displayed as GUID’s – look for the DisplayName
.MSI
Gather Application Information1
EXE
.MSI

Copy Key
1
Copy Key Name to Notepad

•This is what you will get:
•HKEY_LOCAL_MACHINE\SOFTWARE\Microsoft\Windows\CurrentVersion\Uninstall\{FC7BACF0-1FFA-4605-B3B4-A66AB382752D}
•This is the piece you want:
•HKEY_LOCAL_MACHINE\SOFTWARE\Microsoft\Windows\CurrentVersio
1
•HKEY_LOCAL_MACHINE\SOFTWARE\Microsoft\Windows\CurrentVersion\Uninstall\{FC7BACF0-1FFA-4605-B3B4-A66AB382752D}
•If your doing a lot of applications at one time:XMLNotepad = {FC7BACF0-1FFA-4605-B3B4-A66AB382752D}
NetMon 3.3 = {365C5A10-6561-454F-B975-56EA878D0A06}
Office 2007 = {90120000-002A-0000-1000-0000000FF1CE}

Gather Application InformationGather Application Information
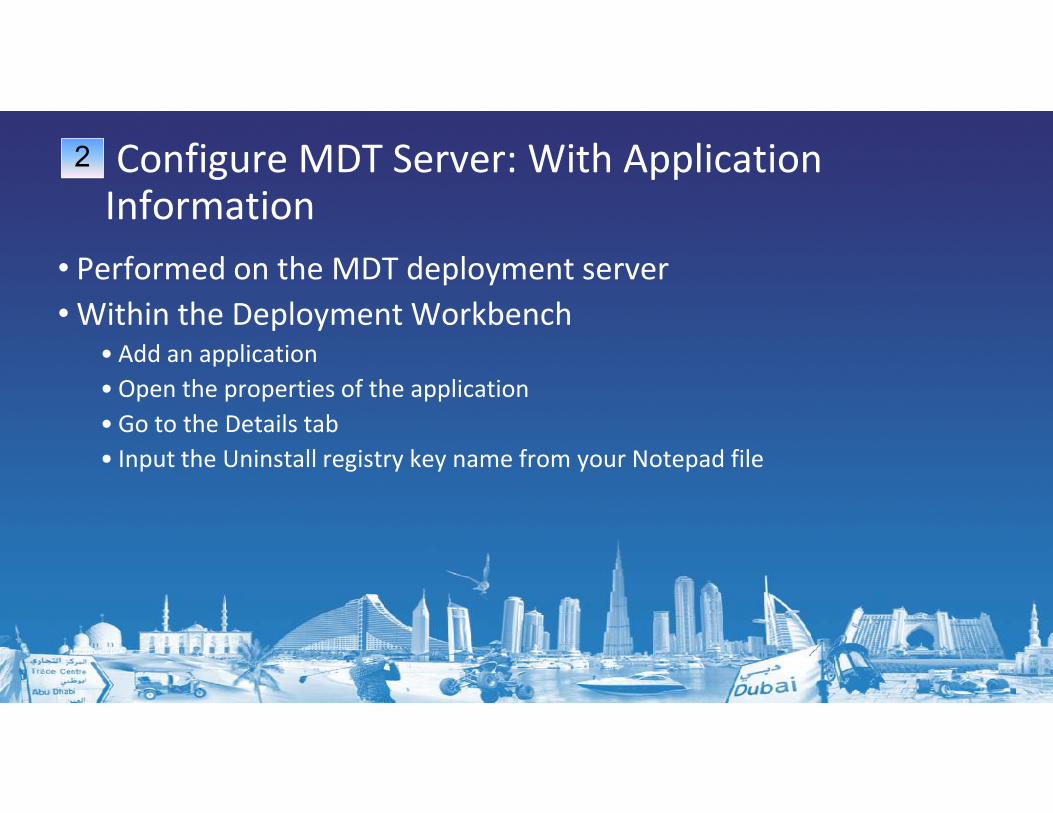
Configure MDT Server: With Application Information
• Performed on the MDT deployment server
•Within the Deployment Workbench• Add an application
• Open the properties of the application
2
• Go to the Details tab
• Input the Uninstall registry key name from your Notepad file

Add Application data to MDT ServerAdd Application data to MDT Server

•Create the script that will search for applications
•Create LTIAppDetect.vbs script
•Download LTIAppDetect.vbs from• http://www.deploymentdr.com/Download.html
2
• http://www.deploymentdr.com/Download.html
•Copy the LTIAppDetect.vbs script to your deployment share’s Scripts folder
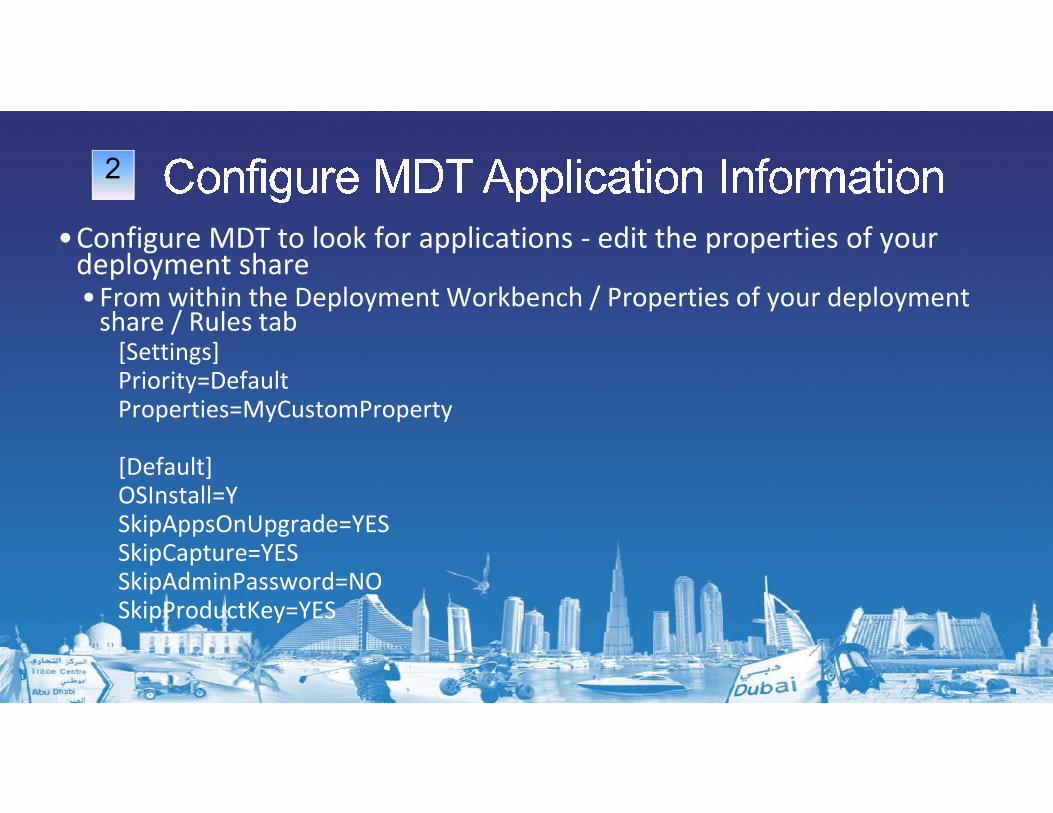
•Configure MDT to look for applications - edit the properties of your deployment share• From within the Deployment Workbench / Properties of your deployment
share / Rules tab[Settings]Priority=DefaultProperties=MyCustomProperty
2
Properties=MyCustomProperty
[Default]OSInstall=YSkipAppsOnUpgrade=YESSkipCapture=YESSkipAdminPassword=NOSkipProductKey=YES

• Add LTIAppDetect.vbs
[Settings]
Priority=Default
Properties=MyCustomProperty
[Default]
2
[Default]
UserExit=LTIAppDetect.vbs
OSInstall=Y
SkipAppsOnUpgrade=YES
SkipCapture=YES
SkipAdminPassword=NO
SkipProductKey=YES

Configure Deployment Workbench With ScriptScript

Begin MDT Deployment Wizard
•Launch LiteTouch.vbs from the XP workstation• Map a drive to your deployment server:
• Net use P: \\ServerName\DeploymentShareName\Scripts
• Deployment server = DeploySrv
• Deployment share = DeploymentShare$
• Net use P: \\Deploysrv\DeploymentShare$\Scripts
3
• Net use P: \\Deploysrv\DeploymentShare$\Scripts
• Then from the P: drive double click on LiteTouch.vbs
•OR• Start / Run /

Steps 4 and 5 – You won’t see these
Get a list of Applications Configured
These are the applications you configured on the deployment server in the deployment workbench
List & Registry Scan = New list “Pre Selected”
4
5
The list of configured applications on the deployment server and the list of applications from the XP registry are compared to create a third list
The third list is the list of applications displayed as pre selected during the deployment process
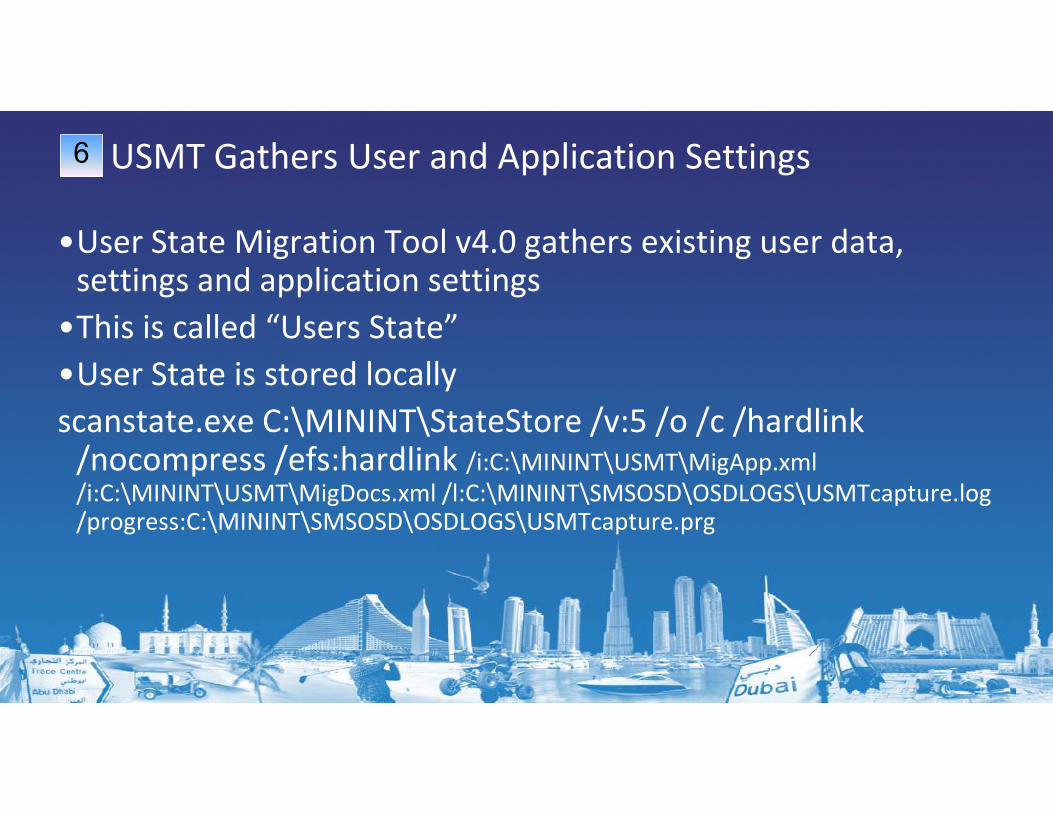
USMT Gathers User and Application Settings
•User State Migration Tool v4.0 gathers existing user data, settings and application settings
•This is called “Users State”
•User State is stored locally
scanstate.exe C:\MININT\StateStore /v:5 /o /c /hardlink
6
scanstate.exe C:\MININT\StateStore /v:5 /o /c /hardlink/nocompress /efs:hardlink /i:C:\MININT\USMT\MigApp.xml
/i:C:\MININT\USMT\MigDocs.xml /l:C:\MININT\SMSOSD\OSDLOGS\USMTcapture.log /progress:C:\MININT\SMSOSD\OSDLOGS\USMTcapture.prg

Steps 7 and 8 – Task Sequence Performs These:Steps 7 and 8 – Task Sequence Performs These:
Boots to WinPE - Windows 7 is Installed
Windows 7 is installed7
Applications are Installed from MDT Deployment Share
Applications selected from the “Select one or more applications to install” page (Windows Deployment Wizard) are installed
8

USMT Applies Locally Stored Settings
•USMT applies previously gathered user data, settings and application settings
loadstate.exe /v:5 /c /lac /hardlink /nocompress/i:C:\MININT\USMT\MigApp.xml
9
/i:C:\MININT\USMT\MigApp.xml /i:C:\MININT\USMT\Migdocs.xml /l:C:\MININT\SMSOSD\OSDLOGS\USMTrestore.log C:\MININT\StateStore /progress:C:\MININT\SMSOSD\OSDLOGS\USMTrestore.prg

Mandatory Applications

Make Applications Mandatory
•If you don’t want a person to be able to de-select an application during deployment…
•Edit LTIAppDetect.vbs script
•Set oApplications = oEnvironment.ListItem("Applications")
To:To:
•Set oApplications = oEnvironment.ListItem("MandatoryApplications")

Clean Up Active Directory Users and Computers
•If you rename your newly migrated machine the old name still exists in AD
•So, you might want to clean that up by deleting the old machine namemachine name
What We Covered
•4 Deployment Scenarios
•Migrated an XP machine to Windows 7 while also maintaining:
•User’s data
•User’s Settings•User’s Settings
• IE Favorites
• Desktop settings
•Application Installations and Settings

Selection Profiles

MDT Components
•The MDT components are:
•Operating Systems
•Applications
•Drivers
•Packages
•Task Sequences•Task Sequences
•To use some of the Advanced Features of MDT you will need to group MDT components together
•The way you group MDT components is by creating a “Selection Profile”

MDT’s Selection Profiles
•The MDT components you group will determine what you can do with the selection profile:
•Group drivers and packages to inject into the MDT generated Windows Pre Installation Environments (WinPEs)
•Group drivers to inject into an OS task sequence•Group drivers to inject into an OS task sequence
•Control which MDT components are included in “Media”
•Group MDT components to replicate (and keep in sync) to linked deployment shares
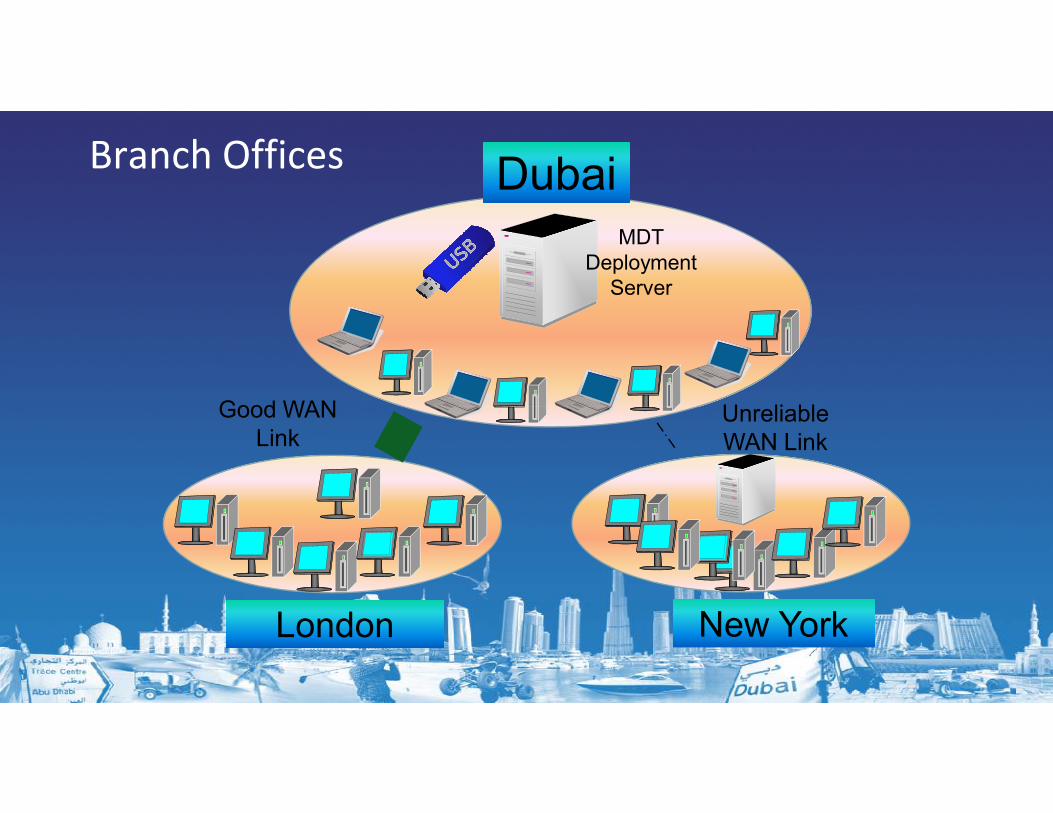
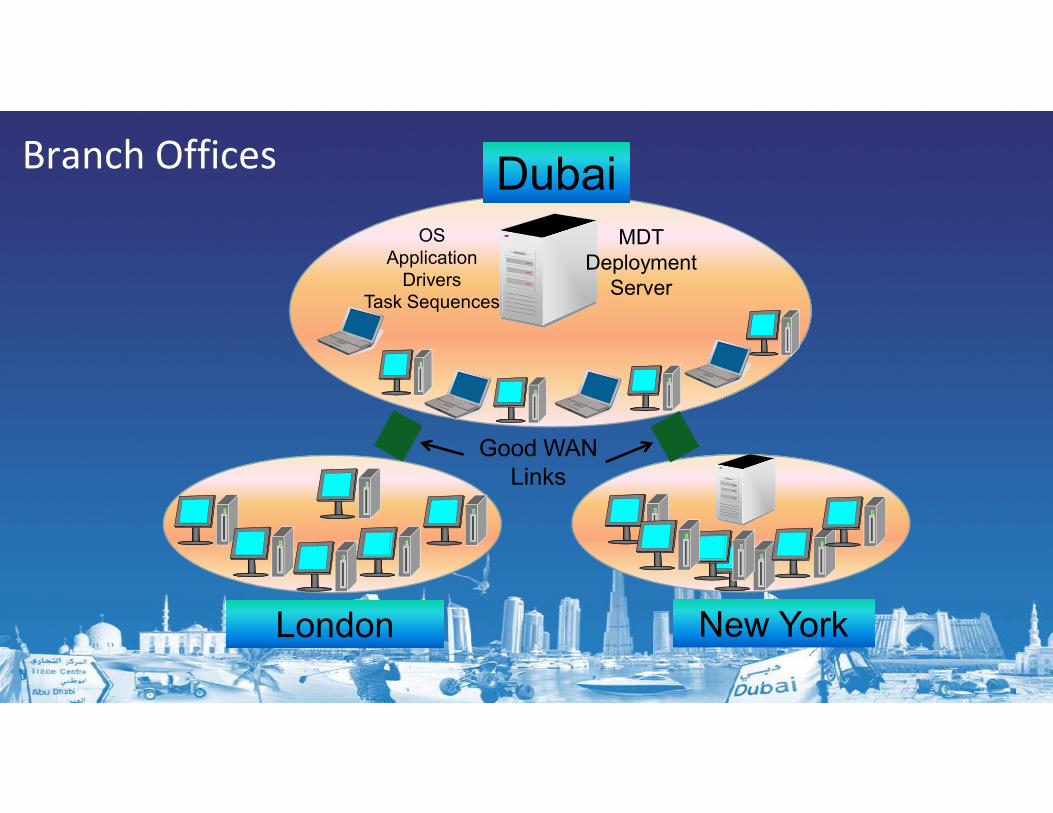
Branch Offices
MDT
Deployment
Server
Dubai
Good WAN Unreliable
London New York
Good WAN
LinkUnreliable
WAN Link
MDTs Media Feature
•Media allows you create a fully deployable image
•OS
•Applications
•Drivers•Drivers
•Packages
•Task sequences

MDT Media Deployment
Bare Bare
MetalMetal
Pro No Network Connectivity
Con No Version Control

Storage Options
•If you choose a DVD burn the .ISO file to the DVD
•If you choose:
•External hard drive
•UFD (USB flash drive)•UFD (USB flash drive)
•You will need to prepare the media first
Steps For Media
•Create a selection profile
•Run the New Media Wizard
•Update the Media
•Prepare the media•Prepare the media
•Deploy

Create a Selection ProfileCreate MediaCreate Media

•Open an elevated command prompt
•DISKPART
• List disk (record the number of the external device)
• Select disk N (N is the disk number
• Select disk 2
• Clean
Preparing Media
• Clean
• create partition primary
• select partition 1
• Active
• format fs=ntfs
• Assign
• exit
• Close the command prompt

•Open Windows Explorer
•Turn on show hidden files
•Navigate to the Media “Content” folder
•Copy the entire Content folder
•Boot folder
Preparing Media Completed
•Boot folder
•Deploy folder
•EFI folder
•Autorun.inf
•Bootmgr
•Bootmgr.efi
Linked Deployment Shares (LDS)
Branch Offices
MDT
Deployment
Server
DubaiOS
Application
Drivers
Task Sequences
London New York
Good WAN
Links

Linked Deployment Shares (LDS)
•LDS allows you to copy a subset (or all if you choose) of components to another machine
•Even Windows 7 can host a LDS
•To create a LDS
•Begin on the target computer•Begin on the target computer

On The Target Computer
•This is the computer you want to copy the LDS to…
•Create a folder
•Ensure there is enough hard drive space
•MDT will not check this for you•MDT will not check this for you
•Share the folder
•Now you are ready to create the LDS on the MDT server

Create A LDS on The MDT Server
•Create a selection profile containing all the MDT components you would like copied (replicated) to the target computer
•Create a new LDS
•Type in the UNC path to where you want the new LDS•Type in the UNC path to where you want the new LDS
• Example \\server\share
• \\W7\LondonDS
•Choose your selection profile

Create A LDS on The MDT Server - Continued
•Select one of the options:
•Merge the selected contents into the target deployment share
•OR
•Replace the contents of the target deployment share folders with those selected
•Rename the LDS•Rename the LDS
•R-click the LDS and choose Replicate Content
•The contents you selected in your selection profile will be copied to the new LDS via ROBOCopy

Create a LDSCreate a LDS

When You Make Changes
•The changes need to be replicated to the target computer
•You can either right-click the LDS and choose “Replicate”
•This will replicate EVERYTHING again even things that have not changed
•OR
•Change the replication technology to use Distributed File System-•Change the replication technology to use Distributed File System-Replication (DFS-R)
•Create a scheduled task that will replicate changes whenever you want them replicated
•Only what has changed will be replicated

MDT Database
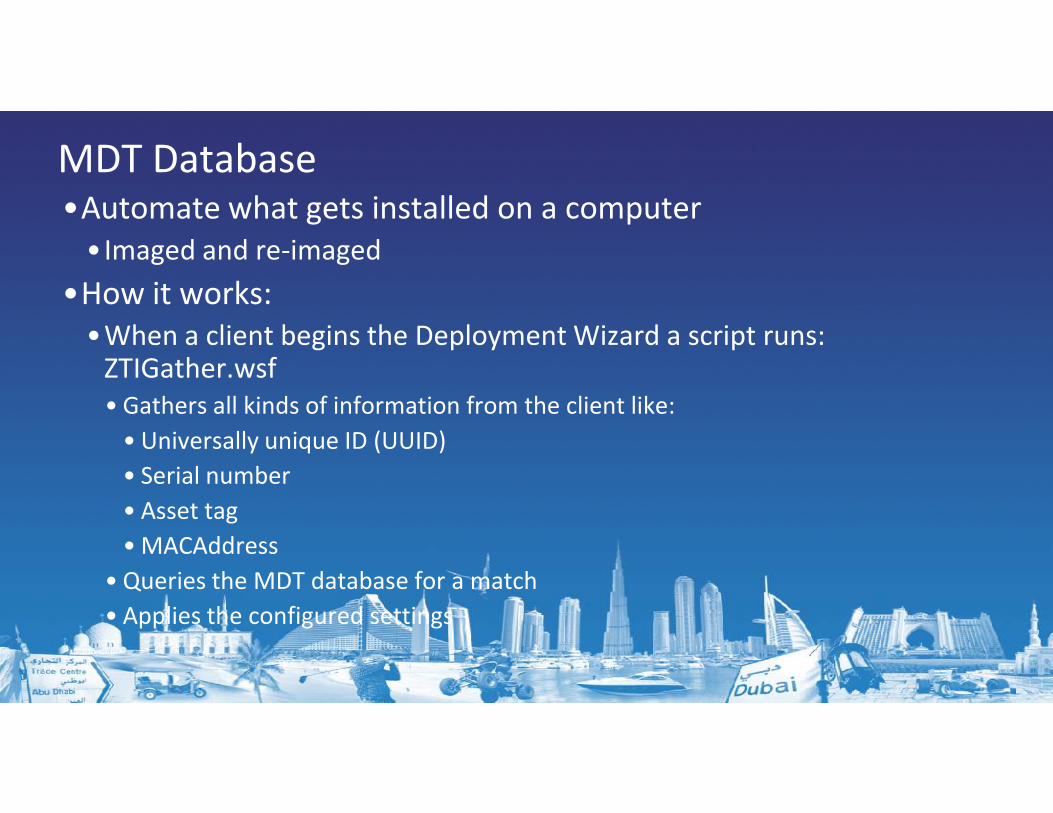
MDT Database•Automate what gets installed on a computer
•Imaged and re-imaged
•How it works:
•When a client begins the Deployment Wizard a script runs: ZTIGather.wsf
• Gathers all kinds of information from the client like:• Gathers all kinds of information from the client like:
• Universally unique ID (UUID)
• Serial number
• Asset tag
• MACAddress
• Queries the MDT database for a match
• Applies the configured settings

Set Up MDT Database
•SQL is not supported on DCs
•You’ll need a member server
•Install SQL (Express will work)
•Configure the database with the computer identifier
•The computer will check in with the database and perform whatever steps you choose

Johan Arwidmarkmikael nystrom

What We Covered:
Create a Master image
Automate the Deployment
Group MDT Components
Put a complete deployment on a USB flash drivePut a complete deployment on a USB flash drive
Create multiple deployment shares and keep them current
MDT Database feature

Windows Deployment Service (WDS)(WDS)

Windows Deployment Service
•WDS replaces Remote Installation Services (RIS)
•Provides both boot and installation images from the WDS server
•Supports .WIM and .VHD technology

WDS Requirements
DHCP
AD/DNS
1
2
WDS
AD/DNS
Bare-
Metal
2
3

Installing WDS
•In the box with Server products, well kind of
•Install WDS on a 2003 SP1 Server •Install RIS
•Install patch from the WAIK: windows_deployment_services_update.exe
•Install WDS on a 2003 SP2 Server•Install WDS on a 2003 SP2 Server• Control Panel / Add/Remove Programs / Windows Components / WDS
•Install WDS on a 2008 (& R2) server•Server Manager
•Add Roles
•Select Windows Deployment Services from the list of roles

Configuring WDS
WDS snap-in
Right-click Servers
Add Server –
defaults to local
serverserver
Right-click your
server and choose
Configure Server.

Store Your Images
Store your images on a drive other than where the OS resides

WDS Server also a DHCP Server?
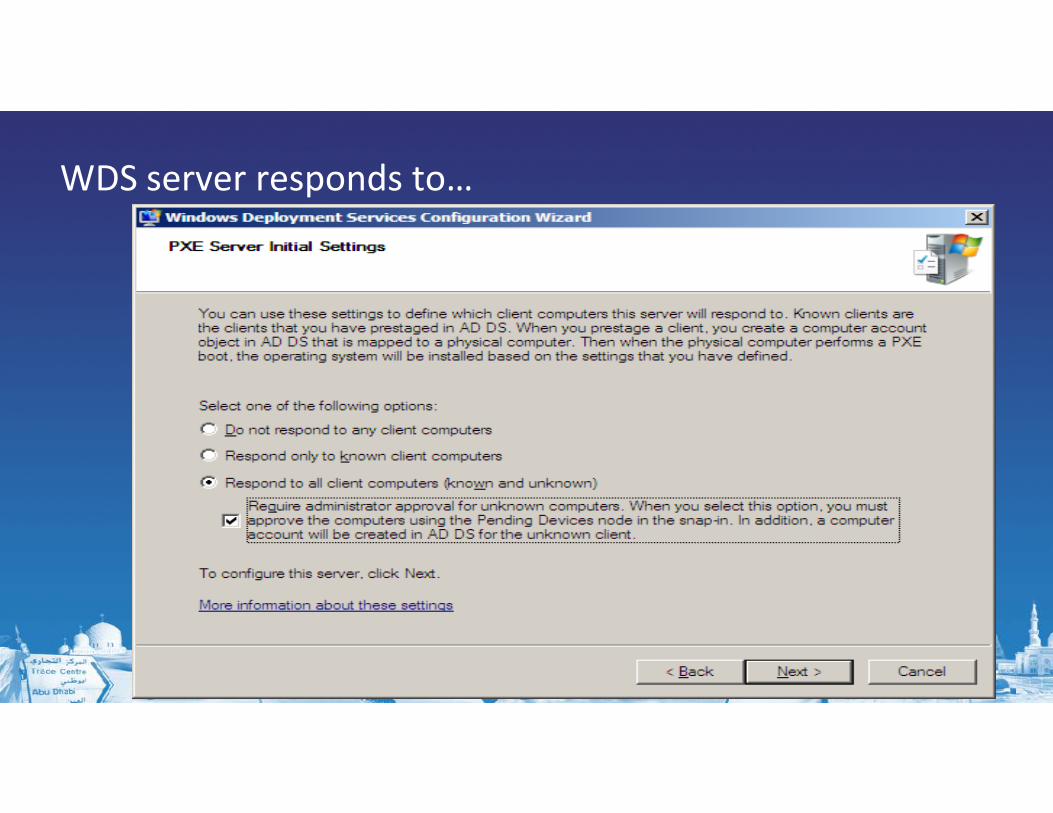
WDS server responds to…
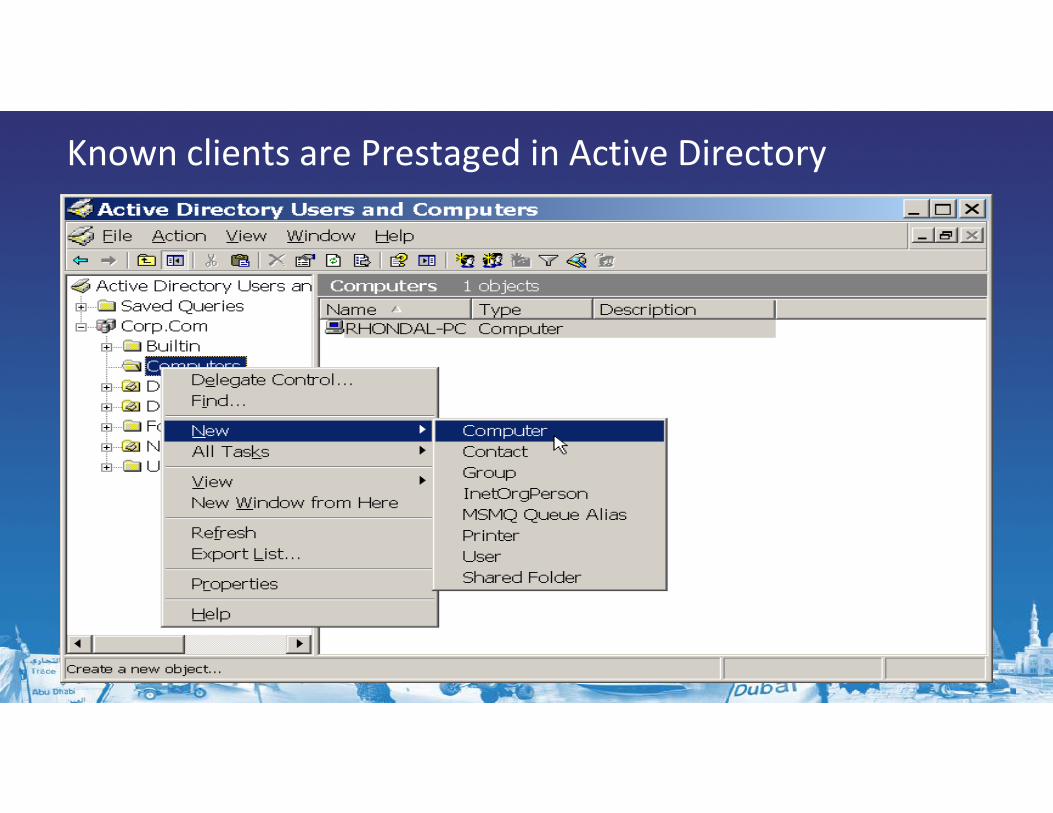
Known clients are Prestaged in Active Directory

Prestaging and The GUID
564D49219C768546A956C310ED7D2BF6

Use a Specific WDS Server

Add a Boot Image
•A boot image is a Windows Pre Installation Environment (WinPE)
•The most current will always be best
•Windows 7 SP1 Boot.wim can deploy
•Vista SP1 – Windows 7 – Windows 7 SP1
•Windows Server 2003 R2, 2008 and 2008 R2•Windows Server 2003 R2, 2008 and 2008 R2
•Use an older WinPE will produce undesired results

Add an OS Image•Both .wim and .vhd are supported
•Adding a .wim
•Right–click Install Images
• Add Install Image
• Image Groups• Image Groups
•Adding a .vhd
•Elevated command prompt
•WDSUTIL /Add-Image /ImageFile:\\Server\Share \Win7.vhd /Server:WDSServer /ImageType:Install /ImageGroup:Windows7 /Filename:"Windows7.vhd"

Add Drivers & Applications
•3rd party drivers only
•No Applications can be deployed from WDS
•Only a Thick image containing your applications•Only a Thick image containing your applications
From The Client
•Perform a Network Boot
•Sometimes called a Pre Execution Boot Process
•OR
•PXE Boot•PXE Boot
WDS And Network DeploymentsNetwork Deployments

Multicast Transmissions
Server1 sends packet 1 to client1
Server1 sends packet 1 to client2
Server1 sends packet 1 to client3
Server1 sends packet 1 to all clients Server1 sends packet 1 to all clients
Server1 sends packet 1 to client1, client2, client3

Windows Deployment Services Multicast Enhancements
Multiple streams of trafficOptimized rates based on
client connection
Client Auto RemovalSlower clients can be dropped to
FastFastSlower clients can be dropped to
unicast or entirely (only in standard multicast)
Boot Image MulticastWindows PE boot
images can use multicast (clients with EFI)
MediumMedium
SlowSlow

Multicast
WDS Server
First client joins
“transmission”

WDS Server
Multicast
Fast Medium Slow Medium

WDS Server
Multicast
FastMedium Slow Medium FastMedium Medium

WDS Server
Multicast
Medium MediumSlow

WDS Server
Multicast
The Best of Both Worlds
Integrating MDT & WDS Together
WDS Server
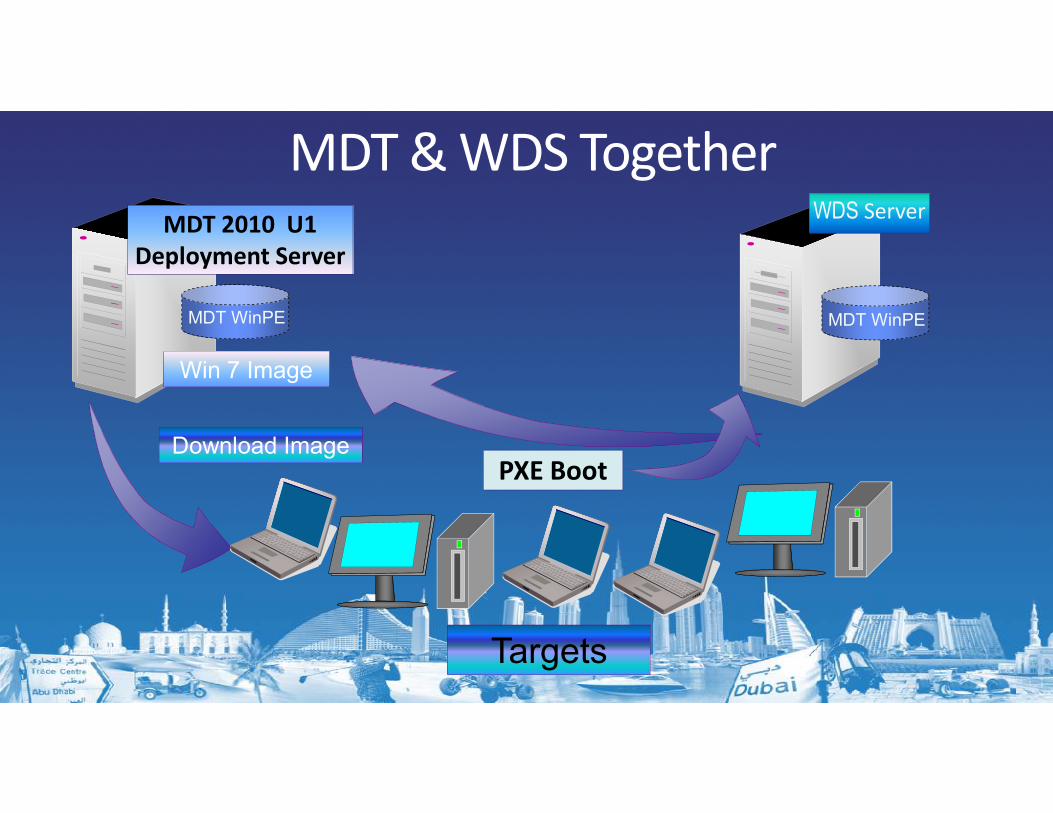
MDT & WDS Together
MDT WinPE MDT WinPE
MDT 2010 U1
Deployment Server
Win 7 Image
Download Image
Targets
PXE Boot
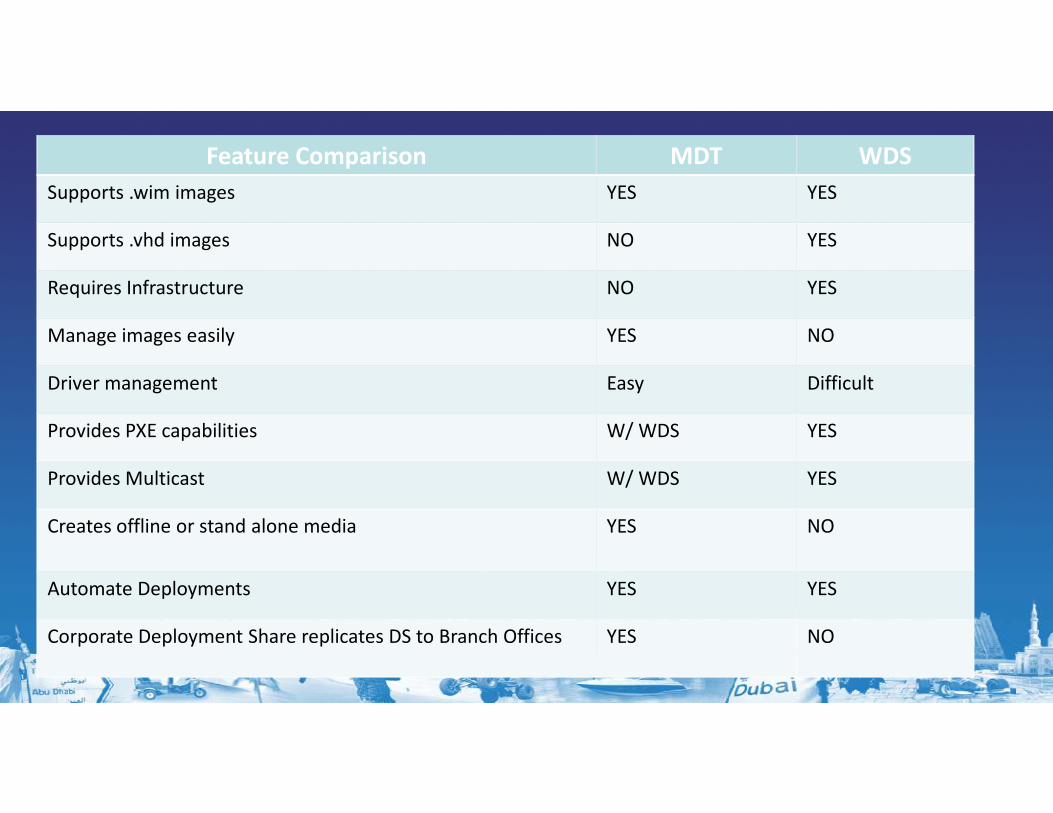
Feature Comparison MDT WDS
Supports .wim images YES YES
Supports .vhd images NO YES
Requires Infrastructure NO YES
Manage images easily YES NO
Driver management Easy Difficult
Provides PXE capabilities W/ WDS YES
Provides Multicast W/ WDS YES
Creates offline or stand alone media YES NO
Automate Deployments YES YES
Corporate Deployment Share replicates DS to Branch Offices YES NO
What We Covered
•Image Formats and Scenarios
•MDT
•Installation
•Configuration•Configuration
•Network deployments
•XP migrations
•MDT advanced features

•WDS
•Installation
•Configuration
•Multicast traffic•Multicast traffic
•MDT & WDS integration
•Differences between MDT & WDS

Thank you for attending my session!
•Let me help-
•WWW.DeploymentDr.Com
•AND TrainSignal Deployment Training DVD Set
•I’ll tweet about new products as they are released:•I’ll tweet about new products as they are released: