Embed Size (px)
Citation preview
no. 3
3 |
mar
ch 2
019dental
3MSM Health Care Academy
magazine
04
young talentSaving treatment time in direct posterior procedures
08
product news3M™ simplifies single-shade restorations with a new member to the Filtek™ family of composites
Meet the future of the crown: 3M™ Pediatric Esthetic Crown to be launched
New 3M™ Chairside Zirconia offers optimized strength, esthetics and process speed
16
ask the expertMIH – management approaches across regions and cultures
Reconsidering preparation design and composite use in direct restorative procedures
26 clinical excellenceMonolithic zirconia crowns in the anterior region?
Diastema closure with direct composite
Taking the guesswork out of direct anterior restoration procedures
42clinical adviceHow to improve the quality of the cure
MIH: Practice-based treatment recommendations
Bonding to MIH-affected teeth – an update
Composite or ceramics in the anterior region?
64
3M Science. Applied to Life. The role of science in the development of dental adhesives
Polyether polymer: from dentistry to the automotive industry
76
scientific activitiesExcellere 2018: Esthetic and interdisciplinary orthodontic treatment approaches
82 outside the boxWhat if your roof could clean the air?
86
3M around the world Supporting programs that improve oral health
Mitsuko O’Neill 3M Oral Care
do you wonder sometimes what your professional life would be like if certain treatment procedures were less complex and time-consuming? Do you wish that shade selection became child’s play or your chairside CAD/CAM system delivered a lifelike and strong zirconia restoration before you know it? 3M listens to those ideas and desires, and applies science to life to develop appropriate solutions. These solutions come in the form of products, procedures and treatment techniques designed to make your life easier without compromising the treatment outcomes. While the product innovations are in-house developments, 3M has established a number of strategic partnerships with expert groups and companies like StyleItaliano and Bioclear to present optimized treatment concepts. Training courses and webinars are available to obtain the information and knowledge needed to leverage them in the best possible way.
You will find answers on if and how the latest 3M product developments and innovative treatment techniques respond to your personal ideas and desires in this issue of the 3MSM Health Care Academy dental magazine. Even more details will be revealed at the IDS 2019 in Cologne, where 3M showcases its new products. Product specialists, pilot users and partners will be happy to share their experience and answer individual questions. We look forward to seeing you in Cologne!
Enjoy reading!
Mitsuko O’Neill
dear
read
er,
dental magazine | editorial 3dental magazine | content
Cover: Night view of Cologne Cathedral and Hohenzollern Bridge in Cologne, Germany
young
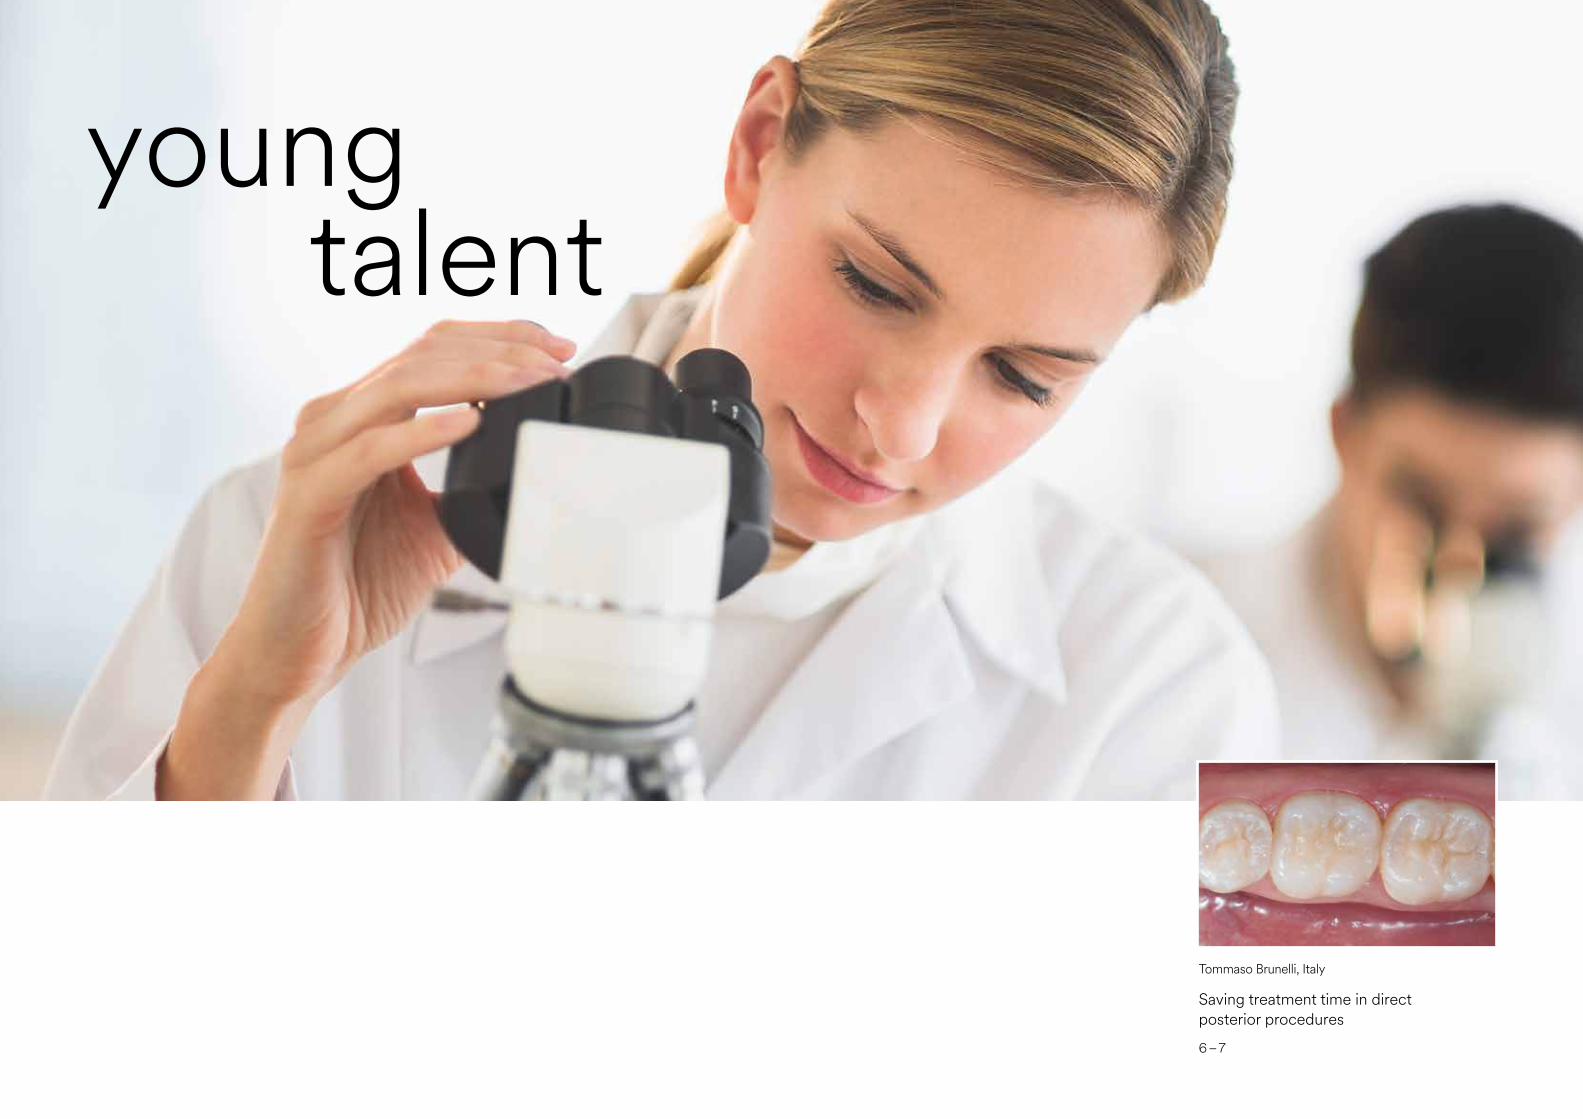
Tommaso Brunelli, Italy
Saving treatment time in direct posterior procedures
6 – 7
talent
6 7dental magazine | young talentdental magazine | young talent
Tommaso Brunelli graduated in Dentistry from the University of Brescia in October 2016. Since then, he has been working in different private practices in Bergamo and Brescia, with a focus on restorative dentistry and endodontics. In June 2018, he became the first prize winner of the OneAndOnlyBulkContest powered by StyleItaliano and 3M.
cont
act
Tommaso [email protected]
Tommaso Brunelli, Italy
Saving treatment time in direct posterior procedures
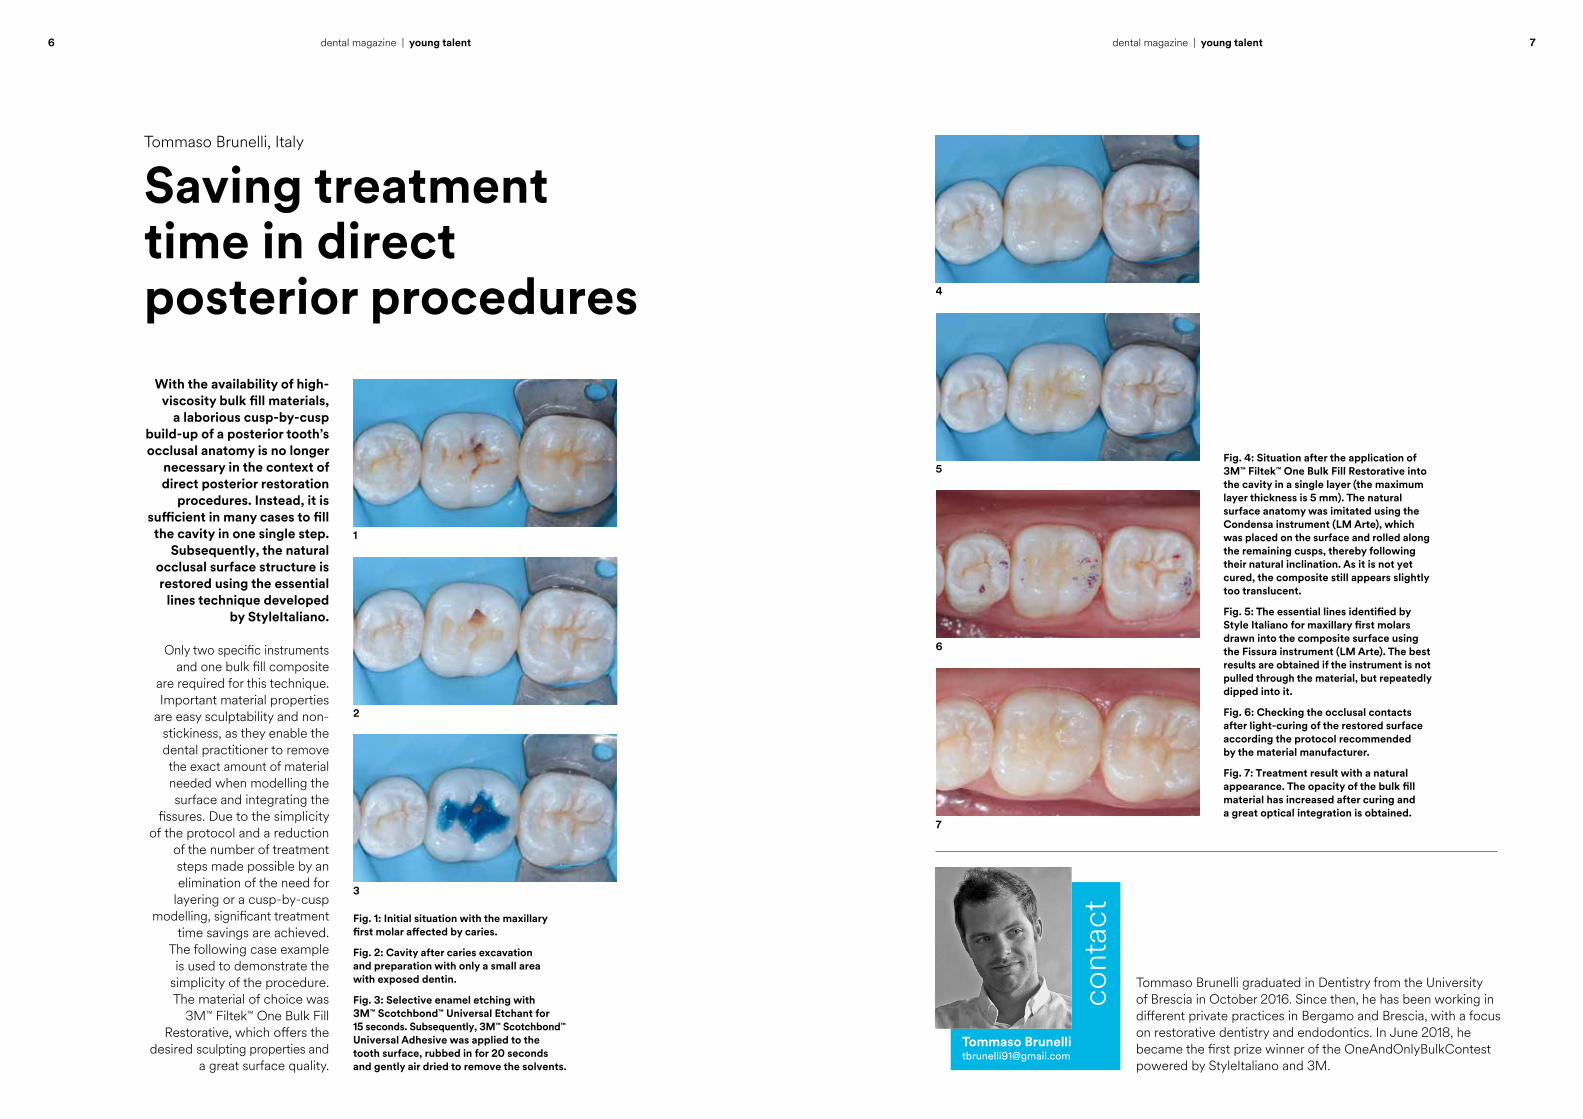
With the availability of high-viscosity bulk fill materials,
a laborious cusp-by-cusp build-up of a posterior tooth’s occlusal anatomy is no longer
necessary in the context of direct posterior restoration
procedures. Instead, it is sufficient in many cases to fill
the cavity in one single step. Subsequently, the natural
occlusal surface structure is restored using the essential
lines technique developed by StyleItaliano.
Only two specific instruments and one bulk fill composite
are required for this technique. Important material properties
are easy sculptability and non-stickiness, as they enable the dental practitioner to remove the exact amount of material needed when modelling the surface and integrating the
fissures. Due to the simplicity of the protocol and a reduction
of the number of treatment steps made possible by an elimination of the need for
layering or a cusp-by-cusp modelling, significant treatment
time savings are achieved. The following case example is used to demonstrate the
simplicity of the procedure. The material of choice was
3M™ Filtek™ One Bulk Fill Restorative, which offers the
desired sculpting properties and a great surface quality.
Fig. 1: Initial situation with the maxillary first molar affected by caries.
Fig. 2: Cavity after caries excavation and preparation with only a small area with exposed dentin.
Fig. 3: Selective enamel etching with 3M™ Scotchbond™ Universal Etchant for 15 seconds. Subsequently, 3M™ Scotchbond™ Universal Adhesive was applied to the tooth surface, rubbed in for 20 seconds and gently air dried to remove the solvents.
Fig. 4: Situation after the application of 3M™ Filtek™ One Bulk Fill Restorative into the cavity in a single layer (the maximum layer thickness is 5 mm). The natural surface anatomy was imitated using the Condensa instrument (LM Arte), which was placed on the surface and rolled along the remaining cusps, thereby following their natural inclination. As it is not yet cured, the composite still appears slightly too translucent.
Fig. 5: The essential lines identified by Style Italiano for maxillary first molars drawn into the composite surface using the Fissura instrument (LM Arte). The best results are obtained if the instrument is not pulled through the material, but repeatedly dipped into it.
Fig. 6: Checking the occlusal contacts after light-curing of the restored surface according the protocol recommended by the material manufacturer.
Fig. 7: Treatment result with a natural appearance. The opacity of the bulk fill material has increased after curing and a great optical integration is obtained.
6
7
1
3
2
4
5
8 9dental magazine | young talentdental magazine | young talent
productnews
3M™ simplifies single-shade restorations with a new member to the Filtek™ family of composites
10 – 11
Meet the future of the crown: 3M™ Pediatric Esthetic Crown to be launched
12 – 13
New 3M™ Chairside Zirconia offers optimized strength, esthetics and process speed
14 – 15
10 11dental magazine | product news dental magazine | product news
3M™ simplifies single-shade restorations with a new member to the Filtek™ family of composites
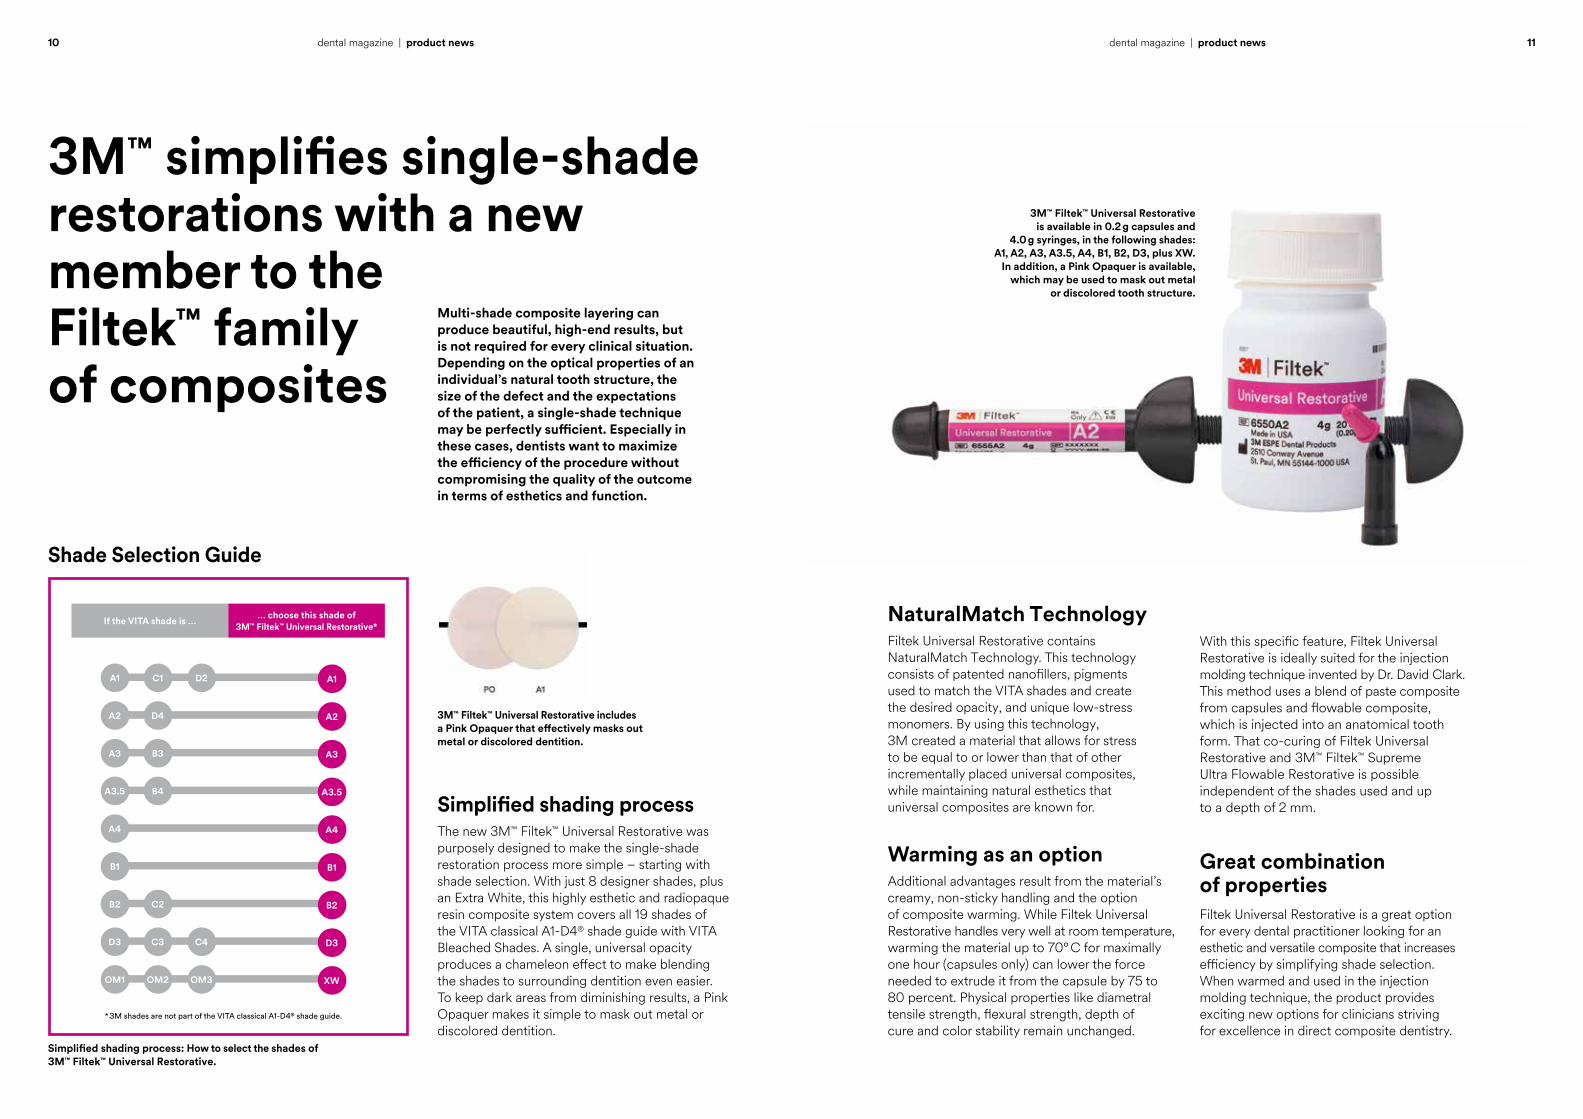
3M™ Filtek™ Universal Restorative is available in 0.2 g capsules and
4.0 g syringes, in the following shades: A1, A2, A3, A3.5, A4, B1, B2, D3, plus XW.
In addition, a Pink Opaquer is available, which may be used to mask out metal
or discolored tooth structure.
3M™ Filtek™ Universal Restorative includes a Pink Opaquer that effectively masks out metal or discolored dentition.
NaturalMatch TechnologyFiltek Universal Restorative contains NaturalMatch Technology. This technology consists of patented nanofillers, pigments used to match the VITA shades and create the desired opacity, and unique low-stress monomers. By using this technology, 3M created a material that allows for stress to be equal to or lower than that of other incrementally placed universal composites, while maintaining natural esthetics that universal composites are known for.
Warming as an optionAdditional advantages result from the material’s creamy, non-sticky handling and the option of composite warming. While Filtek Universal Restorative handles very well at room temperature, warming the material up to 70° C for maximally one hour (capsules only) can lower the force needed to extrude it from the capsule by 75 to 80 percent. Physical properties like diametral tensile strength, flexural strength, depth of cure and color stability remain unchanged.
With this specific feature, Filtek Universal Restorative is ideally suited for the injection molding technique invented by Dr. David Clark. This method uses a blend of paste composite from capsules and flowable composite, which is injected into an anatomical tooth form. That co-curing of Filtek Universal Restorative and 3M™ Filtek™ Supreme Ultra Flowable Restorative is possible independent of the shades used and up to a depth of 2 mm.
Great combination of propertiesFiltek Universal Restorative is a great option for every dental practitioner looking for an esthetic and versatile composite that increases efficiency by simplifying shade selection. When warmed and used in the injection molding technique, the product provides exciting new options for clinicians striving for excellence in direct composite dentistry.
Simplified shading process: How to select the shades of 3M™ Filtek™ Universal Restorative.
… choose this shade of 3M™ Filtek™ Universal Restorative*If the VITA shade is …
A1 C1 D2 A1
D3 C3 C4 D3
OM1 OM2 OM3 XW
A2 D4 A2
A3 B3 A3
A3.5 B4 A3.5
B2 C2 B2
A4 A4
B1 B1
* 3M shades are not part of the VITA classical A1-D4® shade guide.
Shade Selection Guide
Simplified shading processThe new 3M™ Filtek™ Universal Restorative was purposely designed to make the single-shade restoration process more simple – starting with shade selection. With just 8 designer shades, plus an Extra White, this highly esthetic and radiopaque resin composite system covers all 19 shades of the VITA classical A1-D4® shade guide with VITA Bleached Shades. A single, universal opacity produces a chameleon effect to make blending the shades to surrounding dentition even easier. To keep dark areas from diminishing results, a Pink Opaquer makes it simple to mask out metal or discolored dentition.
Multi-shade composite layering can produce beautiful, high-end results, but is not required for every clinical situation. Depending on the optical properties of an individual’s natural tooth structure, the size of the defect and the expectations of the patient, a single-shade technique may be perfectly sufficient. Especially in these cases, dentists want to maximize the efficiency of the procedure without compromising the quality of the outcome in terms of esthetics and function.
12 13dental magazine | product news dental magazine | product news
Convincing handlingThe new product, 3M™ Pediatric Esthetic Crown, will be introduced to the dental market in mid-2019. In-vitro tests confirm that it is very durable, showing survival rates on par with stainless steel and zirconia crowns. The innovative composite crown is available in a range of standard and slim sizes for primary molars and requires less healthy tooth structure removal than zirconia. The ease with which the crown’s margin may be adjusted and the material’s flexibility contribute to a forgiving procedure; with an ideal preparation, a “snap fit” may be realized.
Natural appearanceOnce placed, 3M Pediatric Esthetic Crown offers additional esthetic and functional advantages. No finishing and polishing steps are required, and, thanks to the smooth surface of the composite crown, plaque removal is easy. Similar to its stainless steel alternative, it was designed for excellent strength to withstand chewing forces and even bruxing. Finally, 3M Pediatric Esthetic Crown looks beautiful and natural.
Tooth-colored, strong and easy to use: 3M™ Pediatric Esthetic Crown.
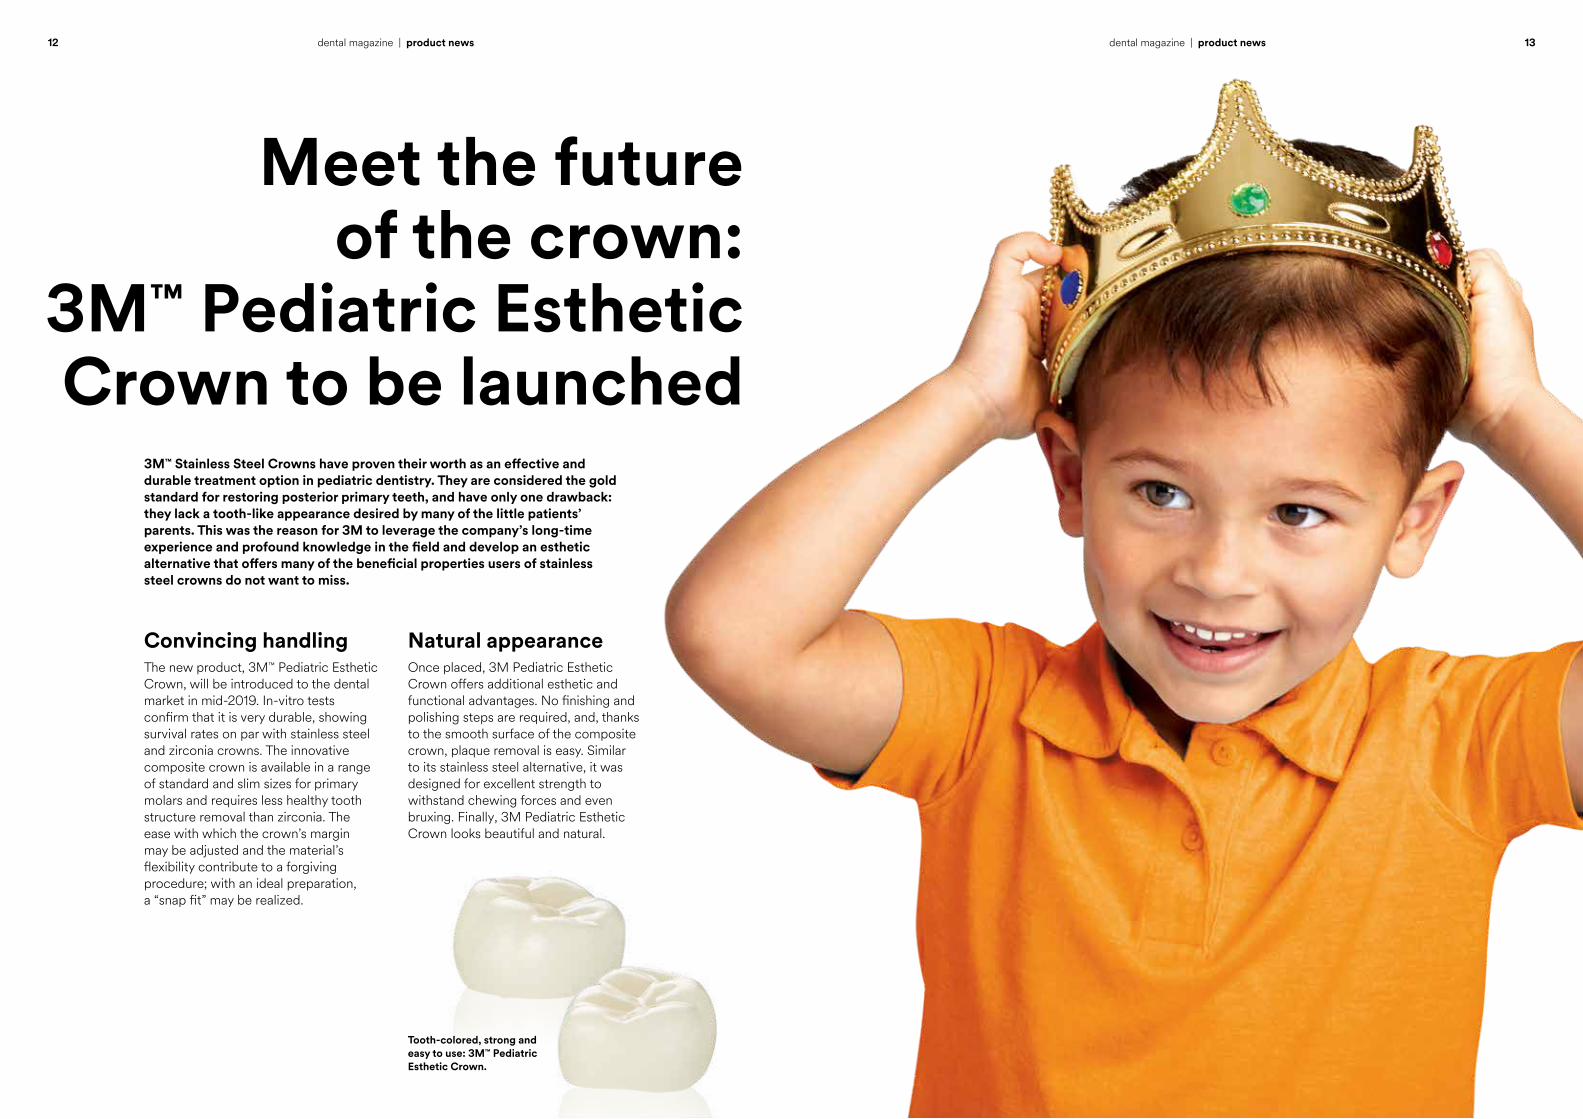
3M™ Stainless Steel Crowns have proven their worth as an effective and durable treatment option in pediatric dentistry. They are considered the gold standard for restoring posterior primary teeth, and have only one drawback: they lack a tooth-like appearance desired by many of the little patients’ parents. This was the reason for 3M to leverage the company’s long-time experience and profound knowledge in the field and develop an esthetic alternative that offers many of the beneficial properties users of stainless steel crowns do not want to miss.
Meet the future of the crown:
3M™ Pediatric Esthetic Crown to be launched
14 15dental magazine | product news dental magazine | product news
New: 3M™ Chairside Zirconia.
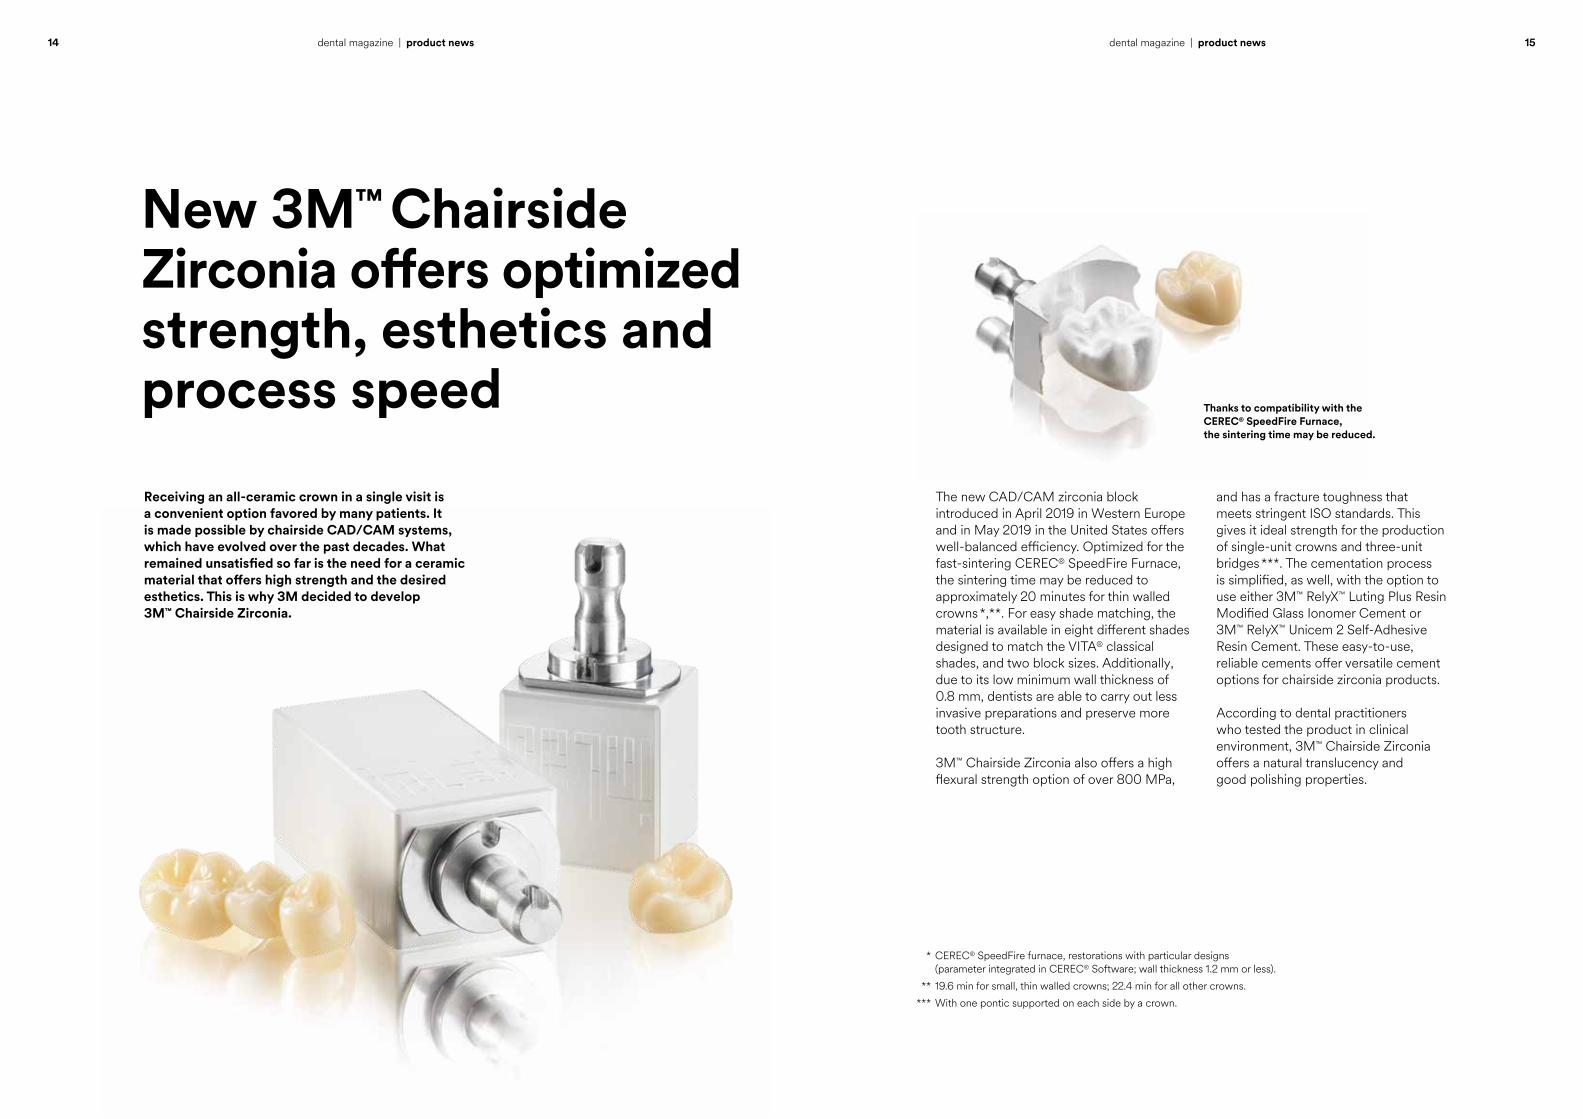
Thanks to compatibility with the CEREC® SpeedFire Furnace, the sintering time may be reduced.
New 3M™ Chairside Zirconia offers optimized strength, esthetics and process speed
Receiving an all-ceramic crown in a single visit is a convenient option favored by many patients. It is made possible by chairside CAD/CAM systems, which have evolved over the past decades. What remained unsatisfied so far is the need for a ceramic material that offers high strength and the desired esthetics. This is why 3M decided to develop 3M™ Chairside Zirconia.
The new CAD/CAM zirconia block introduced in April 2019 in Western Europe and in May 2019 in the United States offers well-balanced efficiency. Optimized for the fast-sintering CEREC® SpeedFire Furnace, the sintering time may be reduced to approximately 20 minutes for thin walled crowns *,**. For easy shade matching, the material is available in eight different shades designed to match the VITA® classical shades, and two block sizes. Additionally, due to its low minimum wall thickness of 0.8 mm, dentists are able to carry out less invasive preparations and preserve more tooth structure.
3M™ Chairside Zirconia also offers a high flexural strength option of over 800 MPa,
and has a fracture toughness that meets stringent ISO standards. This gives it ideal strength for the production of single-unit crowns and three-unit bridges ***. The cementation process is simplified, as well, with the option to use either 3M™ RelyX™ Luting Plus Resin Modified Glass Ionomer Cement or 3M™ RelyX™ Unicem 2 Self-Adhesive Resin Cement. These easy-to-use, reliable cements offer versatile cement options for chairside zirconia products.
According to dental practitioners who tested the product in clinical environment, 3M™ Chairside Zirconia offers a natural translucency and good polishing properties.
* CEREC® SpeedFire furnace, restorations with particular designs (parameter integrated in CEREC® Software; wall thickness 1.2 mm or less).
** 19.6 min for small, thin walled crowns; 22.4 min for all other crowns.
*** With one pontic supported on each side by a crown.

ask theexpert
Christiane Stein, Germany
MIH – management approaches across regions and cultures
18 – 21
Jean Madden, USA
Reconsidering preparation design and composite use in direct restorative procedures
22 – 25

MIH – management approaches across regions and cultures
Christiane Stein, Germany
3M Symposium: Organizers and speakers.
During the 14th European Academy of Paediatric Dentistry (EAPD) Congress that was held in Lugano, Switzerland in June 2018, a 3M Symposium attracted the interest of many of the approximately 1,000 congress participants. They gathered at the main conference room to learn more about “MIH – Management approaches across regions and cultures”.
Four experts – Chairman Prof. Monty Duggal (Singapore) and the lecturers Dr. Richard Steffen (Basel), Prof. Dr. Katrin Bekes (Vienna) and Dr. Dina Debaybo (Dubai) – shared their perspectives regarding the prevention and management of molar incisor hypomineralization (MIH) with the audience. As the topic seems to be of very high relevance for every dental practitioner, we have asked the experts to summarize their key messages for us.
Prof. Duggal, you mentioned that extraction of MIH- affected permanent first molars may be an option. Please explain.My statement is meant to be provocative, but it is true that extraction is sometimes a good idea. We have to take into account that children with MIH have a huge treatment need with increasingly invasive restorative measures required over time. This life-long disease burden can be eradicated by extraction of the affected permanent first molars. This measure is usually highly successful if carried out at the right point in time, namely when the second molar bifurcation is beginning to form and you can see the crypts of the third molar. At that moment, space closure and the mesial drift of the second molar are reasonably predictable. There is a good chance (80 to 90 percent) that the second molar will come into the right place, with even better predictability in the maxilla than in the mandible. By doing this, you eradicate the disease burden from this patient and improve the child’s quality of life.
Prof. Bekes, in your lecture, you presented the “Würzburg MIH Concept”. What is this concept about?Together with Dr. Richard Steffen, I was part of the working group that developed a new MIH-Treatment Need Index (MIH-TNI) 1 and corresponding treatment recommenda-tions, which were shaped during a meeting in Würzburg. The MIH-TNI is used to assign patients to one of five groups from Index 0 – no MIH – to Index 4 – substance defect and hypersensitivity. Index 1 stands for teeth with MIH showing neither a lesion nor hyper sensitivity. Patients assigned to Index 2 show a defect, those assigned to Index 3 hypersensitivity only. The indexes with defects present are subdivided into three levels depending on the size of the defect (MIH-TNI 2 or 4 a, b and c). Once the index is defined, a dental practitioner can check what specific treatment is available.
Examples of MIH-TNI 1: The teeth show neither a defect nor hypersensitivity. (Image courtesy of Dr. Richard Steffen)
Example of MIH-TNI 3: There is no structural defect, but hypersensitivity is present. A clear visual sign of hypersensitivity is plaque on the affected tooth in a patient with generally good oral hygiene. (Image courtesy of Dr. Richard Steffen)
Participants at the 3M Symposium.
18 19dental magazine | ask the expert dental magazine | ask the expert
Dr. Steffen, you focused on preventive measures and the treatment of hypersensitivity related to MIH. What is the essence of your lecture?To date, we do not know much about MIH-specific preventive measures. One reason is that the causes of the multifactorial condition MIH are still unclear. Factors such as a perinatal exposure to bisphenol A or dioxin and a vitamin D deficit are on the list of suspects, but strong evidence is missing so far. Nevertheless, it seems useful to make use of caries-preventive measures like products e.g. containing fluoride and tri-calcium phosphate. In MIH- affected teeth with no defect located in the fissures, fissure sealing is recommended. When an MIH patient enters my office with hypersensitivity issues, I usually treat the affected teeth with 3M™ Clinpro™ XT Varnish Durable Fluoride Releasing Coating. This varnish forms a protective layer on the tooth surface that provides immediate sensi-tivity relief. Study results show that products containing arginine will also do the trick 2.
Prof. Bekes, what are your treatment recommendations for MIH-affected teeth?Teeth with defects may be restored with glass ionomer restorative or – depending on the defect location – an additional orthodontic band for short-term temporization. If there is a need to cover a longer time span, a stainless steel crown (SSC) may be the best solution. Suitable permanent treatment options are directly placed composite fillings and composite onlays produced in the laboratory. In this context, the establishing of a strong and long- lasting bond to MIH-affected enamel is still a challenge. For teeth with a lesion that affects more than two thirds of their structure and/or is close to the pulp, extraction may be an option.
Dr. Debaybo, why do you strongly support the use of stainless steel crowns for the treatment of MIH-affected teeth?According to my own experience and scientific data from my own clinical study carried out between 2011 and 2016, stainless steel crowns will never fail if used properly. We included 277 MIH-affected molars in the study, 34 of which were restored with SSC. The other teeth received different treatments from monitoring to extractions. The children included in the study were high-risk patients between six and ten years of age. The stainless steel crowns performed very well. In two cases, periodontal health was compromised. However, it was never the SSC, but either a misdiagnosis or a shortage of the clinician’s skills that caused the problems. Based on these results, I recommend to place SSC on MIH-affected teeth, even if there is no catchy infective lesion present. The reasons are that in this way, it is possible to prevent the demineralized enamel breakdown in order to safeguard the mesio-distal width of the crown, and to ensure that the defect will remain clean so that the tooth will be maintained longer.
Prof. Duggal, what is your conclusion? We see that there are many suitable treatment options available for MIH-affected teeth, but that indeed, manage-ment approaches vary across regions and cultures. To date, there is a lack of official guidelines that tell us what needs to be done when children suffer from MIH, and we see a huge need among pediatric and general dental practitioners alike for guidance on this topic. Consequently, we will need to find out more about the causes of the disease in order to develop effective preventive measures and more standard-ized treatment approaches in the years to come. In addition, we will continue to focus on remaining challenges such as the question of proper bonding to MIH- affected enamel.
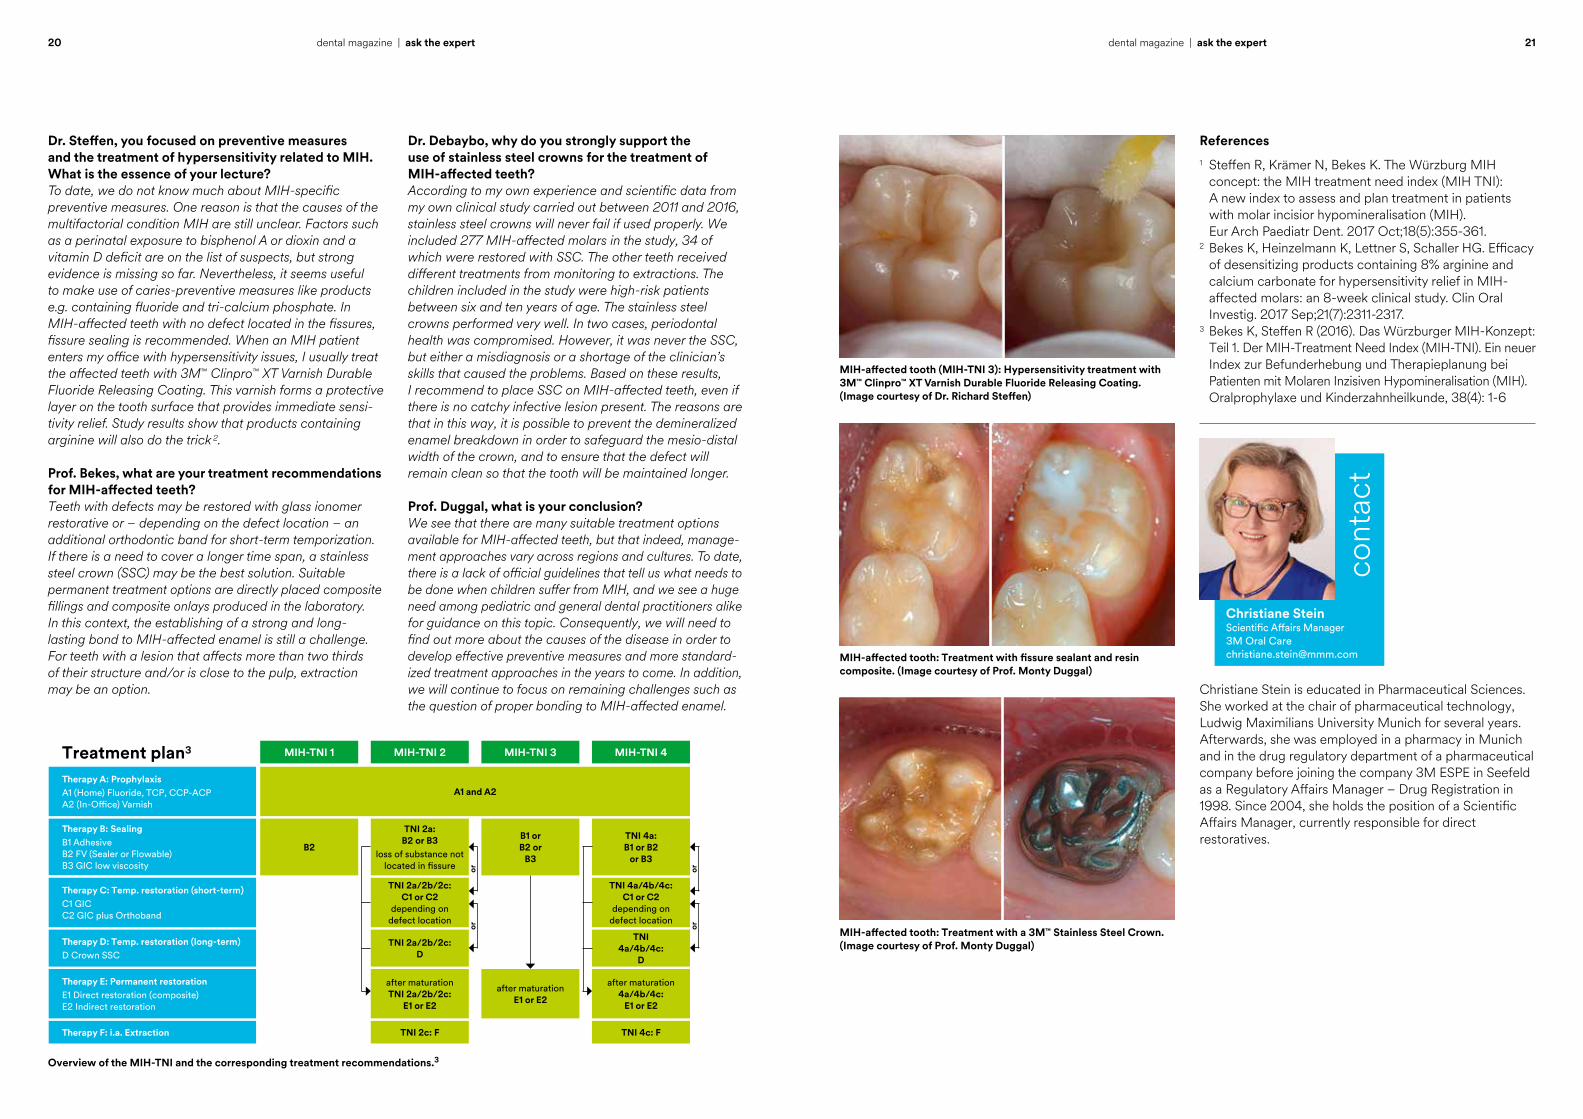
Overview of the MIH-TNI and the corresponding treatment recommendations.3
MIH-TNI 1Treatment plan3 MIH-TNI 2 MIH-TNI 3 MIH-TNI 4
B2
TNI 2a: B2 or B3
loss of substance not located in fissure
B1 or B2 or
B3
TNI 4a: B1 or B2
or B3
Therapy B: SealingB1 Adhesive B2 FV (Sealer or Flowable) B3 GIC low viscosity
after maturation TNI 2a/2b/2c:
E1 or E2
after maturation E1 or E2
after maturation 4a/4b/4c:
E1 or E2
Therapy E: Permanent restorationE1 Direct restoration (composite) E2 Indirect restoration
TNI 2c: F TNI 4c: FTherapy F: i.a. Extraction
TNI 2a/2b/2c: D
TNI 4a/4b/4c:
D
Therapy D: Temp. restoration (long-term)D Crown SSC
TNI 2a/2b/2c: C1 or C2
depending on defect location
TNI 4a/4b/4c: C1 or C2
depending on defect location
Therapy C: Temp. restoration (short-term)C1 GIC C2 GIC plus Orthoband
Therapy A: ProphylaxisA1 (Home) Fluoride, TCP, CCP-ACP A2 (In-Office) Varnish
A1 and A2
oror
oror
Christiane Stein is educated in Pharmaceutical Sciences. She worked at the chair of pharmaceutical technology, Ludwig Maximilians University Munich for several years. Afterwards, she was employed in a pharmacy in Munich and in the drug regulatory department of a pharmaceutical company before joining the company 3M ESPE in Seefeld as a Regulatory Affairs Manager – Drug Registration in 1998. Since 2004, she holds the position of a Scientific Affairs Manager, currently responsible for direct restoratives.
MIH-affected tooth: Treatment with fissure sealant and resin composite. (Image courtesy of Prof. Monty Duggal)
MIH-affected tooth (MIH-TNI 3): Hypersensitivity treatment with 3M™ Clinpro™ XT Varnish Durable Fluoride Releasing Coating. (Image courtesy of Dr. Richard Steffen)
MIH-affected tooth: Treatment with a 3M™ Stainless Steel Crown. (Image courtesy of Prof. Monty Duggal)
Christiane SteinScientific Affairs Manager 3M Oral Care [email protected]
cont
act
References1 Steffen R, Krämer N, Bekes K. The Würzburg MIH concept: the MIH treatment need index (MIH TNI): A new index to assess and plan treatment in patients with molar incisior hypomineralisation (MIH). Eur Arch Paediatr Dent. 2017 Oct;18(5):355-361.2 Bekes K, Heinzelmann K, Lettner S, Schaller HG. Efficacy of desensitizing products containing 8% arginine and calcium carbonate for hypersensitivity relief in MIH- affected molars: an 8-week clinical study. Clin Oral Investig. 2017 Sep;21(7):2311-2317.3 Bekes K, Steffen R (2016). Das Würzburger MIH-Konzept: Teil 1. Der MIH-Treatment Need Index (MIH-TNI). Ein neuer Index zur Befunderhebung und Therapieplanung bei Patienten mit Molaren Inzisiven Hypomineralisation (MIH). Oralprophylaxe und Kinderzahnheilkunde, 38(4): 1-6
20 21dental magazine | ask the expert dental magazine | ask the expert
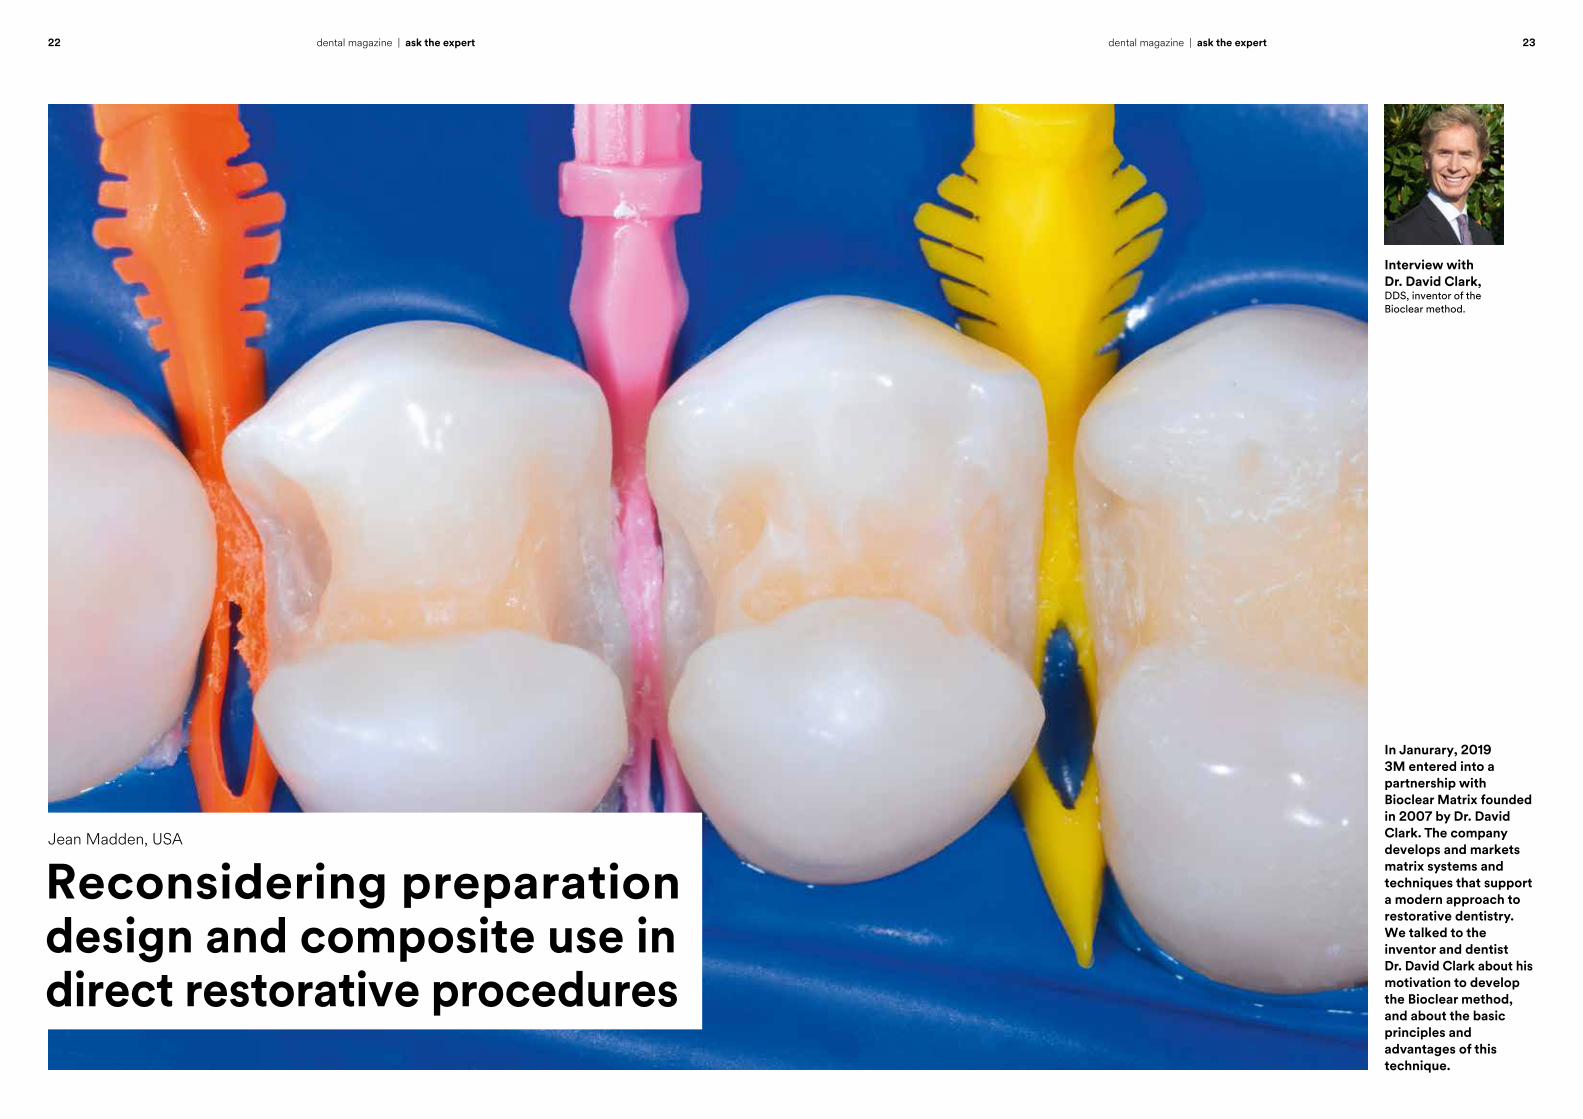
In Janurary, 2019 3M entered into a partnership with Bioclear Matrix founded in 2007 by Dr. David Clark. The company develops and markets matrix systems and techniques that support a modern approach to restorative dentistry. We talked to the inventor and dentist Dr. David Clark about his motivation to develop the Bioclear method, and about the basic principles and advantages of this technique.
Interview with Dr. David Clark, DDS, inventor of the Bioclear method.
22 23dental magazine | ask the expert dental magazine | ask the expert
Reconsidering preparation design and composite use in direct restorative procedures
Jean Madden, USA

Dr. Clark, what made you decide to develop a new method and matrix system for direct composite restorations?Several years ago, I started using microscopes in my clinical procedures. Under the microscope I could see that teeth restored with composite sometimes developed cracks and fractures ultimately leading to failures. With 24X magnification, I was also perplexed at the widespread micro-leakage and stain that seemed to happen regardless of mainstream materials or techniques. Over time it occurred to me that the classical cavity preparation design (according to G.V. Black), which works well for amalgam, might be inadequate for composite. The reason is that composite resins have a high compressive strength, but a lower diametral tensile strength. In traditional GV Black cavity preparations, a tension joint is created. So, I altered my cavity preparations to incorporate engineering principles with the goal of creating compression joints rather than tension joints at the tooth/composite interface.
How is a compression joint produced using the Bioclear method?We need two different things to create this compression joint, the right preparation design and a specific method of placing the material. The idea is that we repair the tooth instead of restoring it. In this context, we try to avoid long, narrow cuts and opt for a wide, round bottomed cavity design. Sharp margins are avoided; we prefer to create infinity edge margins, which also offers the benefit of a large amount of enamel available for bonding. On top of the prepared tooth structure, a blend of flowable and heated paste composite is applied. More precisely, the material is injection molded into anatomic forms created with Bioclear’s specific clear anatomic matrices. In this way, a monolithic shrink wrap of composite resin is created around the tooth instead of simply filling a hole. This results in the desired compression joint.
Would you please describe the entire treatment procedure? The Bioclear method is based on four pillars. Initially, the biofilm needs to be removed to ensure that we will establish a strong bond to enamel. We recommend the use of Al(OH3 ) powder for blasting, which is an effective method of cleaning without being too abrasive. Afterwards, the Bioclear anatomic matrices are placed around the tooth and phosphoric acid is injected, followed by thorough rinsing and drying, and the application of a universal adhesive. What follows is the injection molding of 3M™ Filtek™ Supreme Ultra Flowable Restorative followed immediately with heated 3M™ Filtek™ Universal Restorative paste from capsules. The materials are then cured together rather than curing the materials in increments. For sculpting, shaping and finishing, we recommend the use of a large 3M™ Sof-Lex™ Extra Thin Contouring and Polishing Disc coarse, while for the pre-polishing procedure, Bioclear Magic Mix should be used with a disposable cup. A mirror finish is obtained with the Bioclear RS (Rock Star) Polisher.
What are the advantages of this technique for the dental practitioner deciding to use it?The Bioclear method is a treatment option that combines the advantages of direct composite restorations – low financial and biological cost, simplicity (of a single-shade technique) and a single-visit treatment – with high esthetics and strength. The technique may be used for a broad range of treatments from single tooth repair to full-mouth rehabilitations. Another advantage is that the gingival half of the tooth is treated predictably without negative clinical consequences or unnecessary removal of tooth structure. The method is taught in lectures, hands-on courses and at the Bioclear Learning Centers (USA, UK, Sweden).
To sum up, Bioclear is about preserving the good, replacing the missing or deficient using a repeatable method developed for modern dental materials.
Classical cavity preparation design (Class II) described by G.V. Black around 1880.
Modern cavity preparation design (Class II) described by Dr. Clark around 2005.
Jean Madden obtained her Bachelor of Science degree in Biology combined with a minor in Secondary Education. She joined the 3M’s Oral Care Division in 2005 as a Scientific Marketing Communications Manager. She has experience in Integrated Communications, Technical Service and Key Opinion Leader Management with a strong emphasis on Medical Education and eMarketing. She started her current position as a Scientific Affairs Manager in March 2017.
Jean MaddenScientific Affairs Manager 3M Oral Care [email protected]
cont
act
24 25dental magazine | ask the expert dental magazine | ask the expert
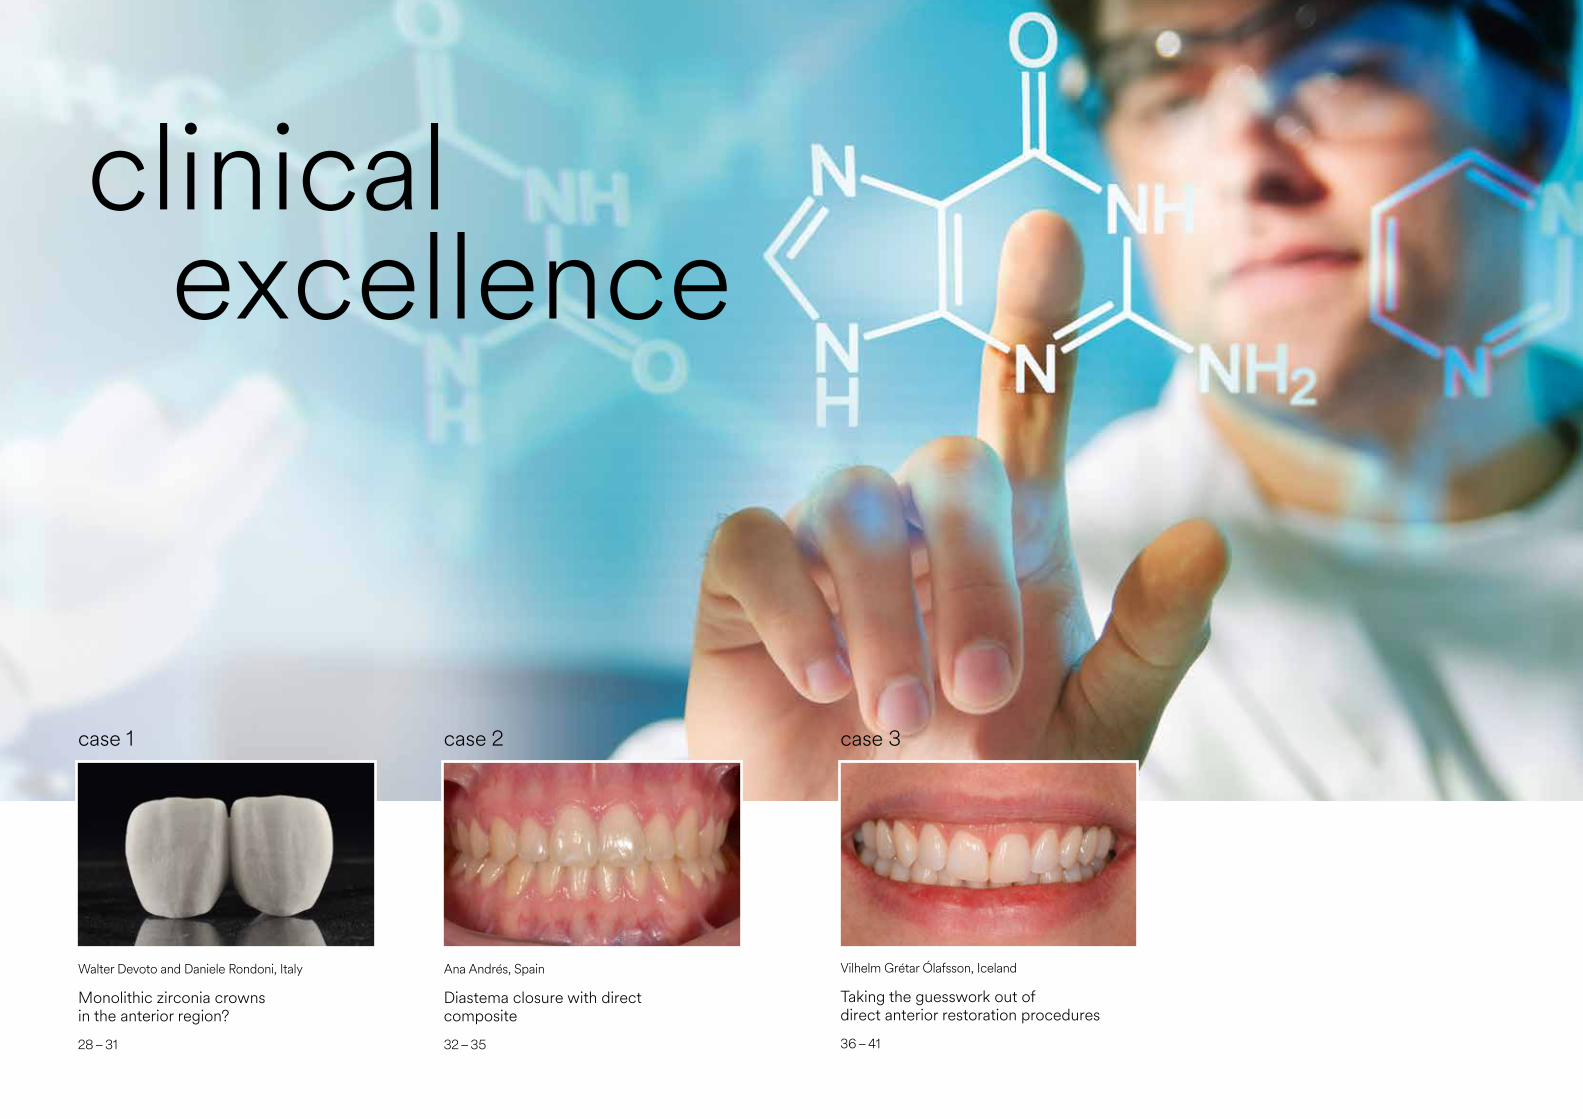
case 1
Walter Devoto and Daniele Rondoni, Italy
Monolithic zirconia crowns in the anterior region?
28 – 31
case 2
Ana Andrés, Spain
Diastema closure with direct composite
32 – 35
case 3
Vilhelm Grétar Ólafsson, Iceland
Taking the guesswork out of direct anterior restoration procedures
36 – 41
clinicalexcellence
28 29dental magazine | clinical excellencedental magazine | clinical excellence
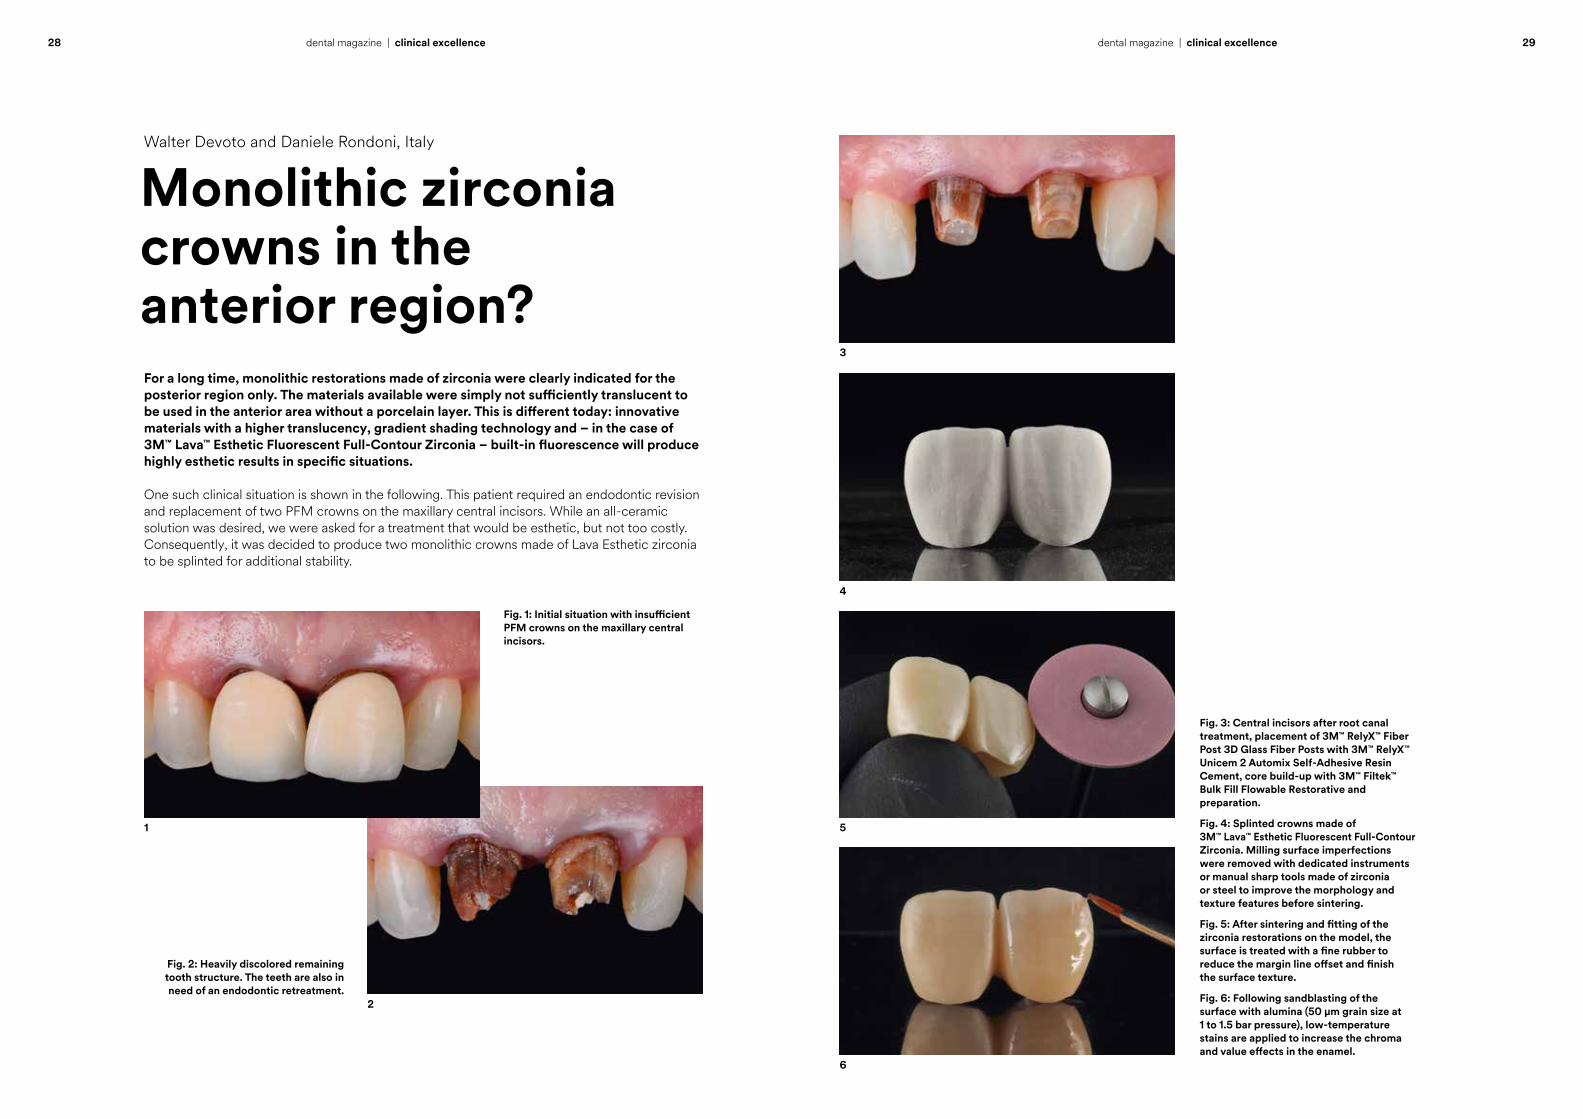
For a long time, monolithic restorations made of zirconia were clearly indicated for the posterior region only. The materials available were simply not sufficiently translucent to be used in the anterior area without a porcelain layer. This is different today: innovative materials with a higher translucency, gradient shading technology and – in the case of 3M™ Lava™ Esthetic Fluorescent Full-Contour Zirconia – built-in fluorescence will produce highly esthetic results in specific situations.
One such clinical situation is shown in the following. This patient required an endodontic revision and replacement of two PFM crowns on the maxillary central incisors. While an all-ceramic solution was desired, we were asked for a treatment that would be esthetic, but not too costly. Consequently, it was decided to produce two monolithic crowns made of Lava Esthetic zirconia to be splinted for additional stability.
Fig. 2: Heavily discolored remaining tooth structure. The teeth are also in need of an endodontic retreatment.
Fig. 1: Initial situation with insufficient PFM crowns on the maxillary central incisors.
1
2
Monolithic zirconia crowns in the anterior region?
Walter Devoto and Daniele Rondoni, Italy
Fig. 3: Central incisors after root canal treatment, placement of 3M™ RelyX™ Fiber Post 3D Glass Fiber Posts with 3M™ RelyX™ Unicem 2 Automix Self-Adhesive Resin Cement, core build-up with 3M™ Filtek™ Bulk Fill Flowable Restorative and preparation.
Fig. 4: Splinted crowns made of 3M™ Lava™ Esthetic Fluorescent Full-Contour Zirconia. Milling surface imperfections were removed with dedicated instruments or manual sharp tools made of zirconia or steel to improve the morphology and texture features before sintering.
Fig. 5: After sintering and fitting of the zirconia restorations on the model, the surface is treated with a fine rubber to reduce the margin line offset and finish the surface texture.
Fig. 6: Following sandblasting of the surface with alumina (50 µm grain size at 1 to 1.5 bar pressure), low-temperature stains are applied to increase the chroma and value effects in the enamel.
4
3
5
6
30 31dental magazine | clinical excellencedental magazine | clinical excellence
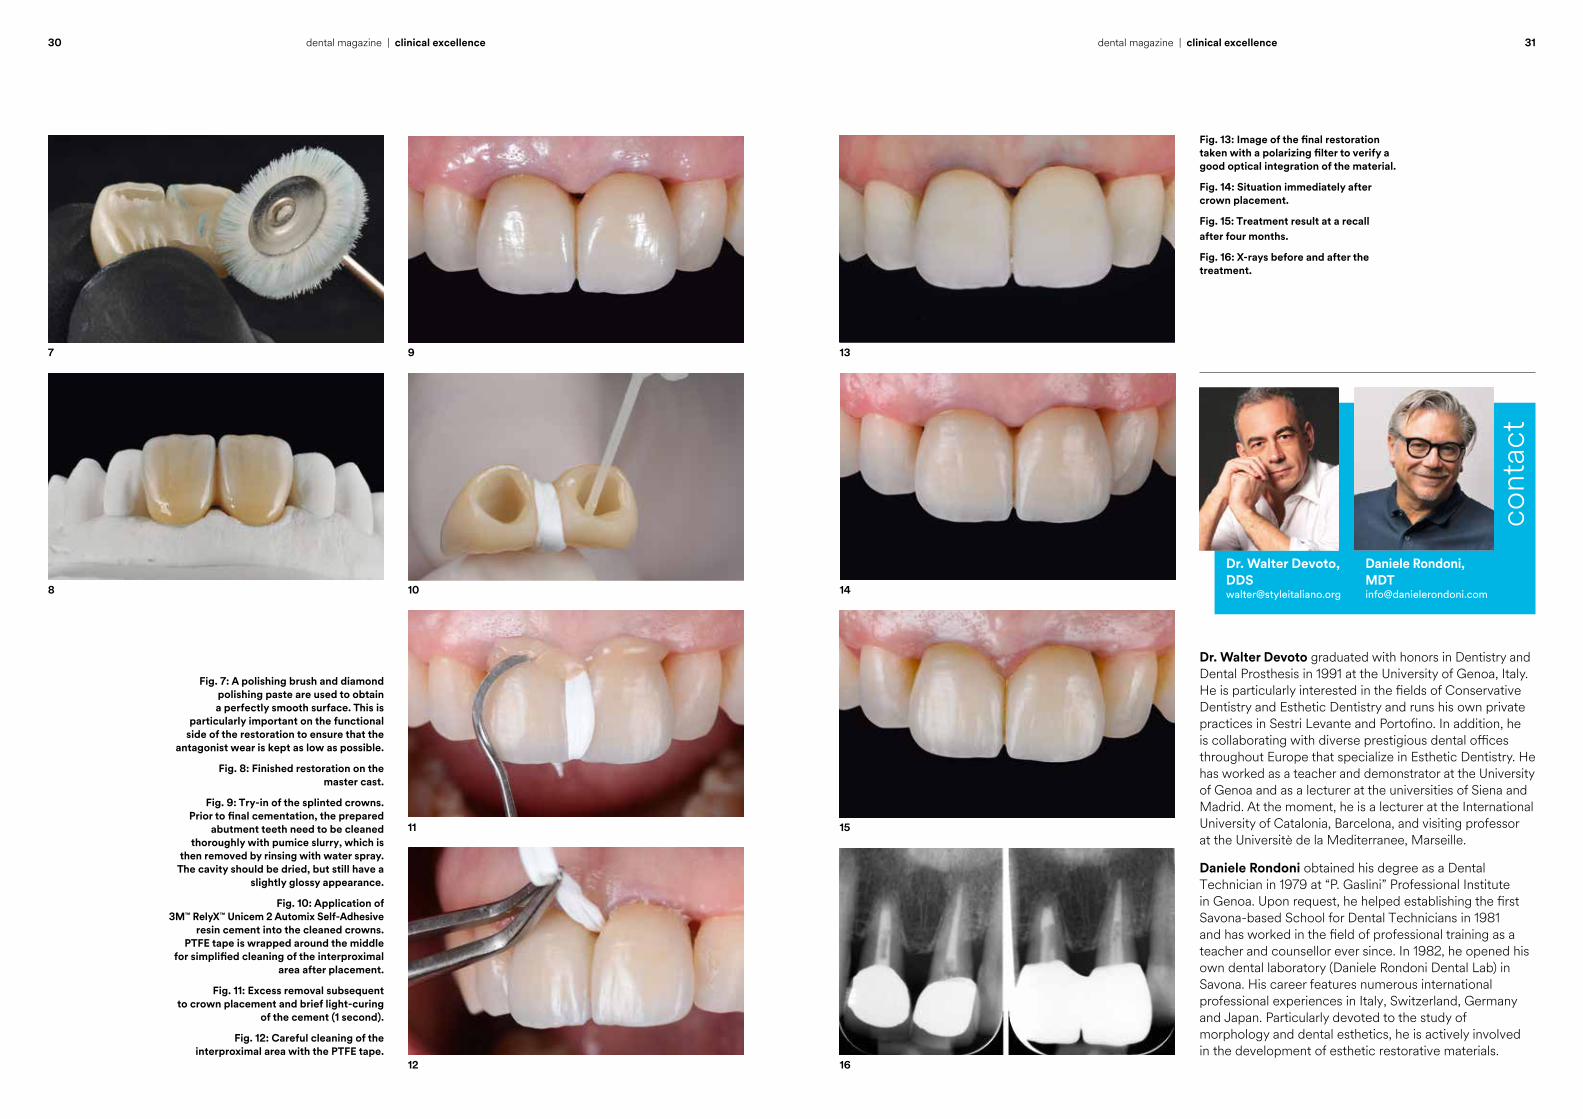
Fig. 7: A polishing brush and diamond polishing paste are used to obtain a perfectly smooth surface. This is
particularly important on the functional side of the restoration to ensure that the
antagonist wear is kept as low as possible.
Fig. 8: Finished restoration on the master cast.
Fig. 9: Try-in of the splinted crowns. Prior to final cementation, the prepared
abutment teeth need to be cleaned thoroughly with pumice slurry, which is
then removed by rinsing with water spray. The cavity should be dried, but still have a
slightly glossy appearance.
Fig. 10: Application of 3M™ RelyX™ Unicem 2 Automix Self-Adhesive
resin cement into the cleaned crowns. PTFE tape is wrapped around the middle
for simplified cleaning of the interproximal area after placement.
Fig. 11: Excess removal subsequent to crown placement and brief light-curing
of the cement (1 second).
Fig. 12: Careful cleaning of the interproximal area with the PTFE tape.
7 9
11
8 10
12
Dr. Walter Devoto graduated with honors in Dentistry and Dental Prosthesis in 1991 at the University of Genoa, Italy. He is particularly interested in the fields of Conservative Dentistry and Esthetic Dentistry and runs his own private practices in Sestri Levante and Portofino. In addition, he is collaborating with diverse prestigious dental offices throughout Europe that specialize in Esthetic Dentistry. He has worked as a teacher and demonstrator at the University of Genoa and as a lecturer at the universities of Siena and Madrid. At the moment, he is a lecturer at the International University of Catalonia, Barcelona, and visiting professor at the Universitè de la Mediterranee, Marseille.
Daniele Rondoni obtained his degree as a Dental Technician in 1979 at “P. Gaslini” Professional Institute in Genoa. Upon request, he helped establishing the first Savona-based School for Dental Technicians in 1981 and has worked in the field of professional training as a teacher and counsellor ever since. In 1982, he opened his own dental laboratory (Daniele Rondoni Dental Lab) in Savona. His career features numerous international professional experiences in Italy, Switzerland, Germany and Japan. Particularly devoted to the study of morphology and dental esthetics, he is actively involved in the development of esthetic restorative materials.
Fig. 13: Image of the final restoration taken with a polarizing filter to verify a good optical integration of the material.
Fig. 14: Situation immediately after crown placement.
Fig. 15: Treatment result at a recall after four months.
Fig. 16: X-rays before and after the treatment.
13
16
15
14
Daniele Rondoni, MDT [email protected]
Dr. Walter Devoto, [email protected]
cont
act

32 33dental magazine | clinical excellencedental magazine | clinical excellence
Personal experience shows that diastema closure with direct composite is most predictable and successful when an analysis of the initial situation and precise planning of the desired result are carried out. This task may be accomplished by taking several frontal and lateral photographs, measuring the height and width of the teeth, and virtually designing the planned restorations. In this context, it must be taken into consideration that both central incisors should be symmetrical, and that the maxillary dental midline should be coincident with the facial midline. For planning, however, the distal aspect of the canines should be the reference, and not the dental midline.
The following case is used as an example to demonstrate the procedure. This patient came for diastema closure after orthodontic treatment. Photographs were taken and a digital design was created. Subsequently, a wax up and a mock up were produced. With the aid of a silicone key, the definitive restorations were finally created.
Fig. 2: Digital Smile Design: The ideal shape and proportions of the teeth are
determined and the treatment outcome is planned.
Fig. 1: Initial situation after orthodontic treatment with open space between the central and lateral incisors.
1
2
Diastema closure with direct composite
Ana Andrés, Spain
Fig. 3: Shade determination using the VITA classical A1 – D4 shade guide. It is essential to carry out this step before isolation for a realistic result. In order to ensure a precise match of the selected shades, a small amount of the selected composite may be placed on the tooth to see how it mimics the natural color.
Fig. 4: For isolation, a rubber dam medium or heavy is used in combination with thick waxed floss. In this case, the rubber dam is fixed with floss that is tied up in the cervical area.
Fig. 5: This technique ensures that the cervical and proximal areas of the teeth are fully available for bonding and restorative procedures while the risk of contamination with blood or saliva is minimized. In addition, a clamp may be used on the first premolars for fixation. In this case, however, the maxillary right premolar was not retentive enough for a clamp.
Fig. 6: Removal of the aprismatic enamel with a 3M™ Sof-Lex™ Extra Thin Contouring and Polishing Disc (Coarse) at slow speed. The surface should be roughened instead of trimmed. Tooth preparation is not required.
4
3
5
6
7 9
11
8 10
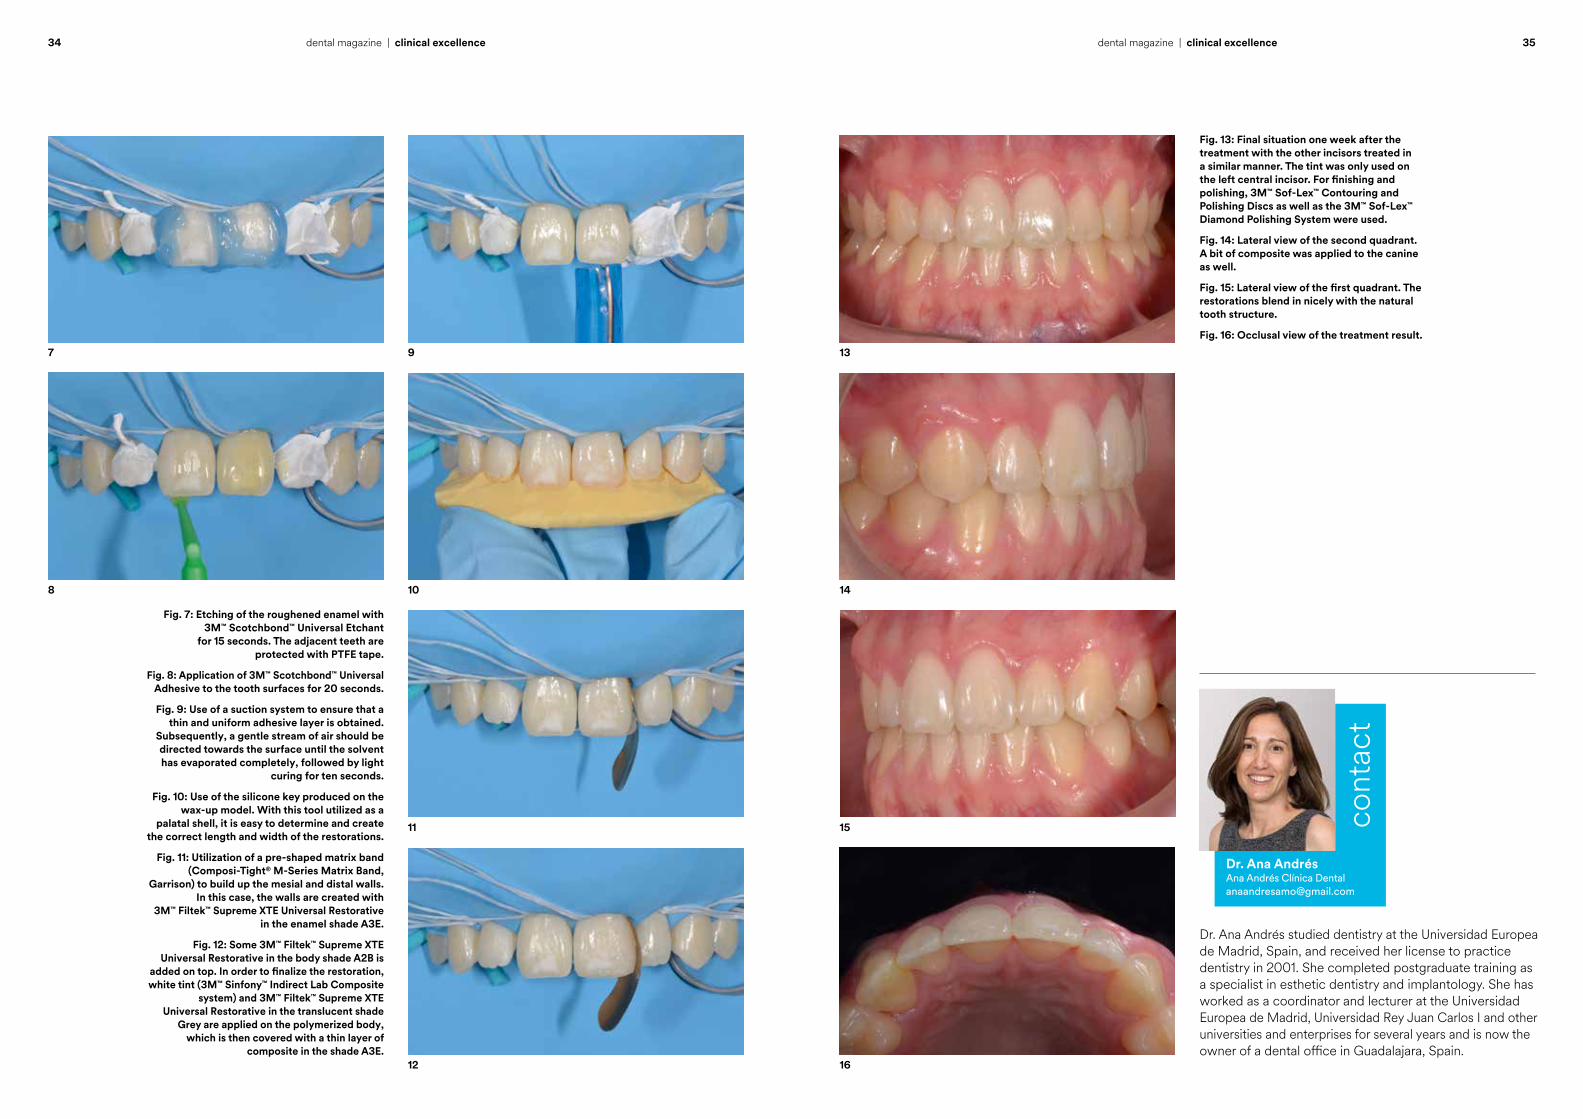
Fig. 7: Etching of the roughened enamel with 3M™ Scotchbond™ Universal Etchant
for 15 seconds. The adjacent teeth are protected with PTFE tape.
Fig. 8: Application of 3M™ Scotchbond™ Universal Adhesive to the tooth surfaces for 20 seconds.
Fig. 9: Use of a suction system to ensure that a thin and uniform adhesive layer is obtained.
Subsequently, a gentle stream of air should be directed towards the surface until the solvent has evaporated completely, followed by light
curing for ten seconds.
Fig. 10: Use of the silicone key produced on the wax-up model. With this tool utilized as a
palatal shell, it is easy to determine and create the correct length and width of the restorations.
Fig. 11: Utilization of a pre-shaped matrix band (Composi-Tight® M-Series Matrix Band,
Garrison) to build up the mesial and distal walls. In this case, the walls are created with
3M™ Filtek™ Supreme XTE Universal Restorative in the enamel shade A3E.
Fig. 12: Some 3M™ Filtek™ Supreme XTE Universal Restorative in the body shade A2B is
added on top. In order to finalize the restoration, white tint (3M™ Sinfony™ Indirect Lab Composite
system) and 3M™ Filtek™ Supreme XTE Universal Restorative in the translucent shade
Grey are applied on the polymerized body, which is then covered with a thin layer of
composite in the shade A3E.12
Fig. 13: Final situation one week after the treatment with the other incisors treated in a similar manner. The tint was only used on the left central incisor. For finishing and polishing, 3M™ Sof-Lex™ Contouring and Polishing Discs as well as the 3M™ Sof-Lex™ Diamond Polishing System were used.
Fig. 14: Lateral view of the second quadrant. A bit of composite was applied to the canine as well.
Fig. 15: Lateral view of the first quadrant. The restorations blend in nicely with the natural tooth structure.
Fig. 16: Occlusal view of the treatment result.
13
16
15
14
Dr. Ana Andrés studied dentistry at the Universidad Europea de Madrid, Spain, and received her license to practice dentistry in 2001. She completed postgraduate training as a specialist in esthetic dentistry and implantology. She has worked as a coordinator and lecturer at the Universidad Europea de Madrid, Universidad Rey Juan Carlos I and other universities and enterprises for several years and is now the owner of a dental office in Guadalajara, Spain.
cont
act
Dr. Ana AndrésAna Andrés Clínica [email protected]
34 35dental magazine | clinical excellencedental magazine | clinical excellence
36 37dental magazine | clinical excellencedental magazine | clinical excellence
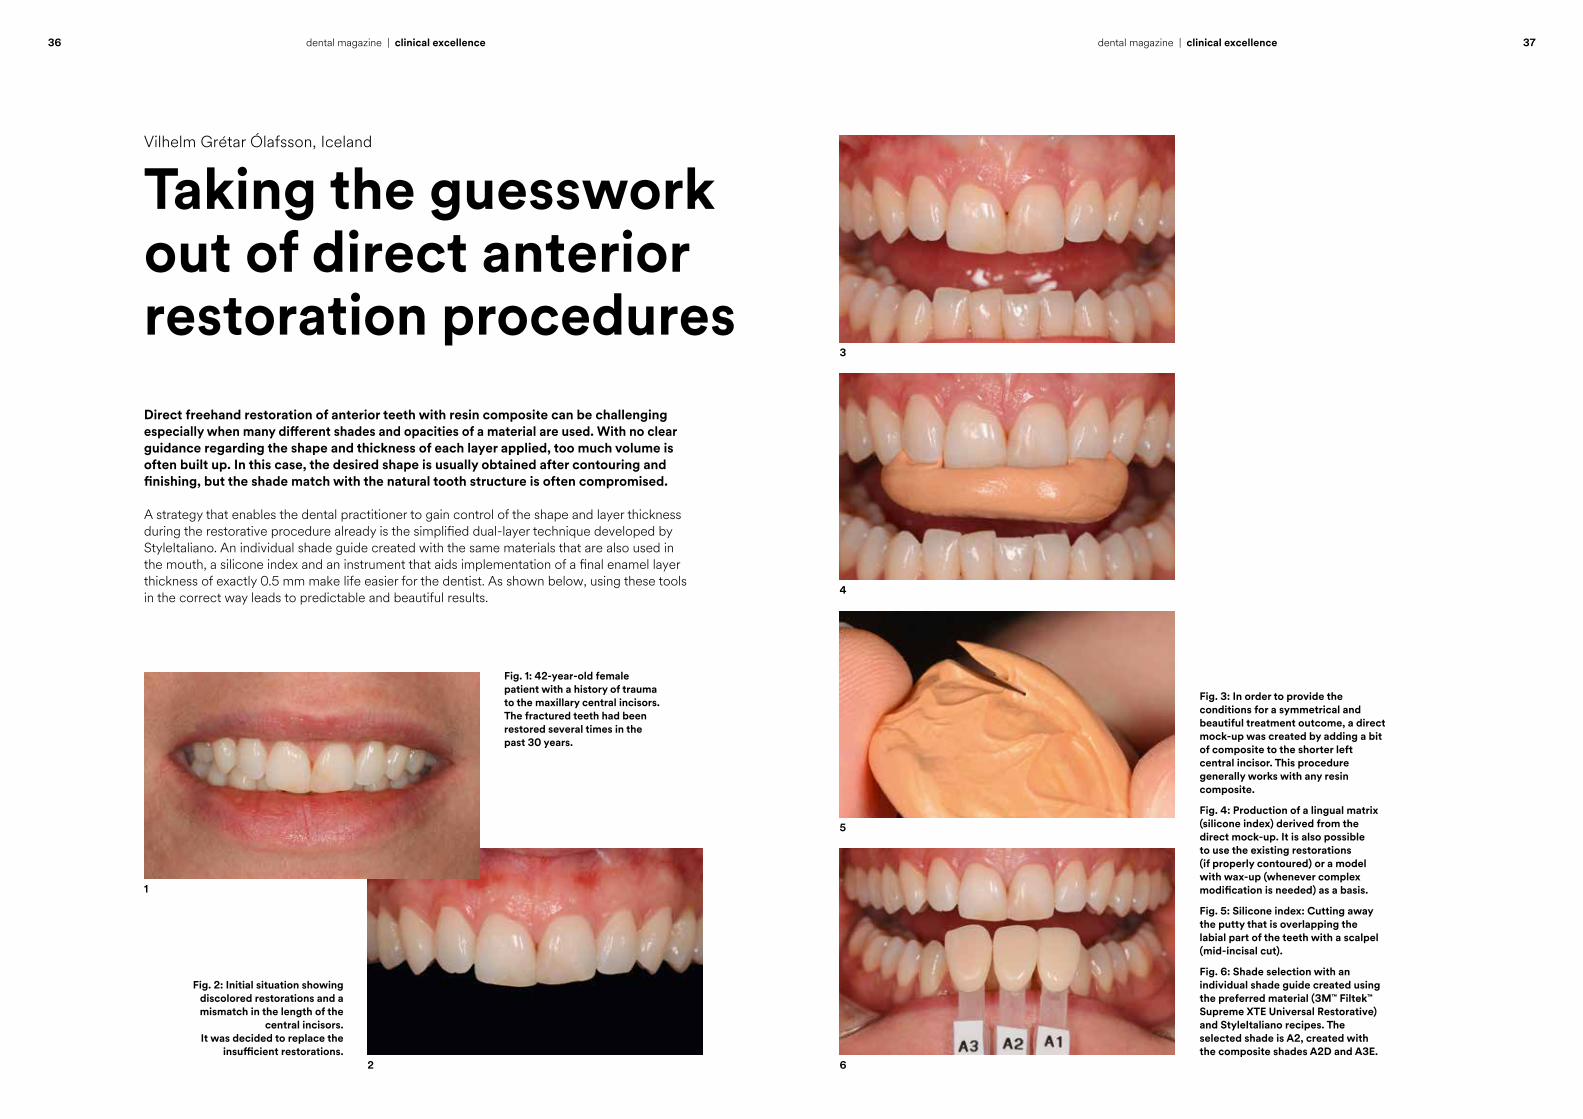
Direct freehand restoration of anterior teeth with resin composite can be challenging especially when many different shades and opacities of a material are used. With no clear guidance regarding the shape and thickness of each layer applied, too much volume is often built up. In this case, the desired shape is usually obtained after contouring and finishing, but the shade match with the natural tooth structure is often compromised.
A strategy that enables the dental practitioner to gain control of the shape and layer thickness during the restorative procedure already is the simplified dual-layer technique developed by StyleItaliano. An individual shade guide created with the same materials that are also used in the mouth, a silicone index and an instrument that aids implementation of a final enamel layer thickness of exactly 0.5 mm make life easier for the dentist. As shown below, using these tools in the correct way leads to predictable and beautiful results.
Fig. 2: Initial situation showing discolored restorations and a mismatch in the length of the
central incisors. It was decided to replace the
insufficient restorations.
Fig. 1: 42-year-old female patient with a history of trauma to the maxillary central incisors. The fractured teeth had been restored several times in the past 30 years.
1
2
Taking the guesswork out of direct anterior restoration procedures
Vilhelm Grétar Ólafsson, Iceland
Fig. 3: In order to provide the conditions for a symmetrical and beautiful treatment outcome, a direct mock-up was created by adding a bit of composite to the shorter left central incisor. This procedure generally works with any resin composite.
Fig. 4: Production of a lingual matrix (silicone index) derived from the direct mock-up. It is also possible to use the existing restorations (if properly contoured) or a model with wax-up (whenever complex modification is needed) as a basis.
Fig. 5: Silicone index: Cutting away the putty that is overlapping the labial part of the teeth with a scalpel (mid-incisal cut).
Fig. 6: Shade selection with an individual shade guide created using the preferred material (3M™ Filtek™ Supreme XTE Universal Restorative) and StyleItaliano recipes. The selected shade is A2, created with the composite shades A2D and A3E.
4
3
5
6
38 39dental magazine | clinical excellencedental magazine | clinical excellence
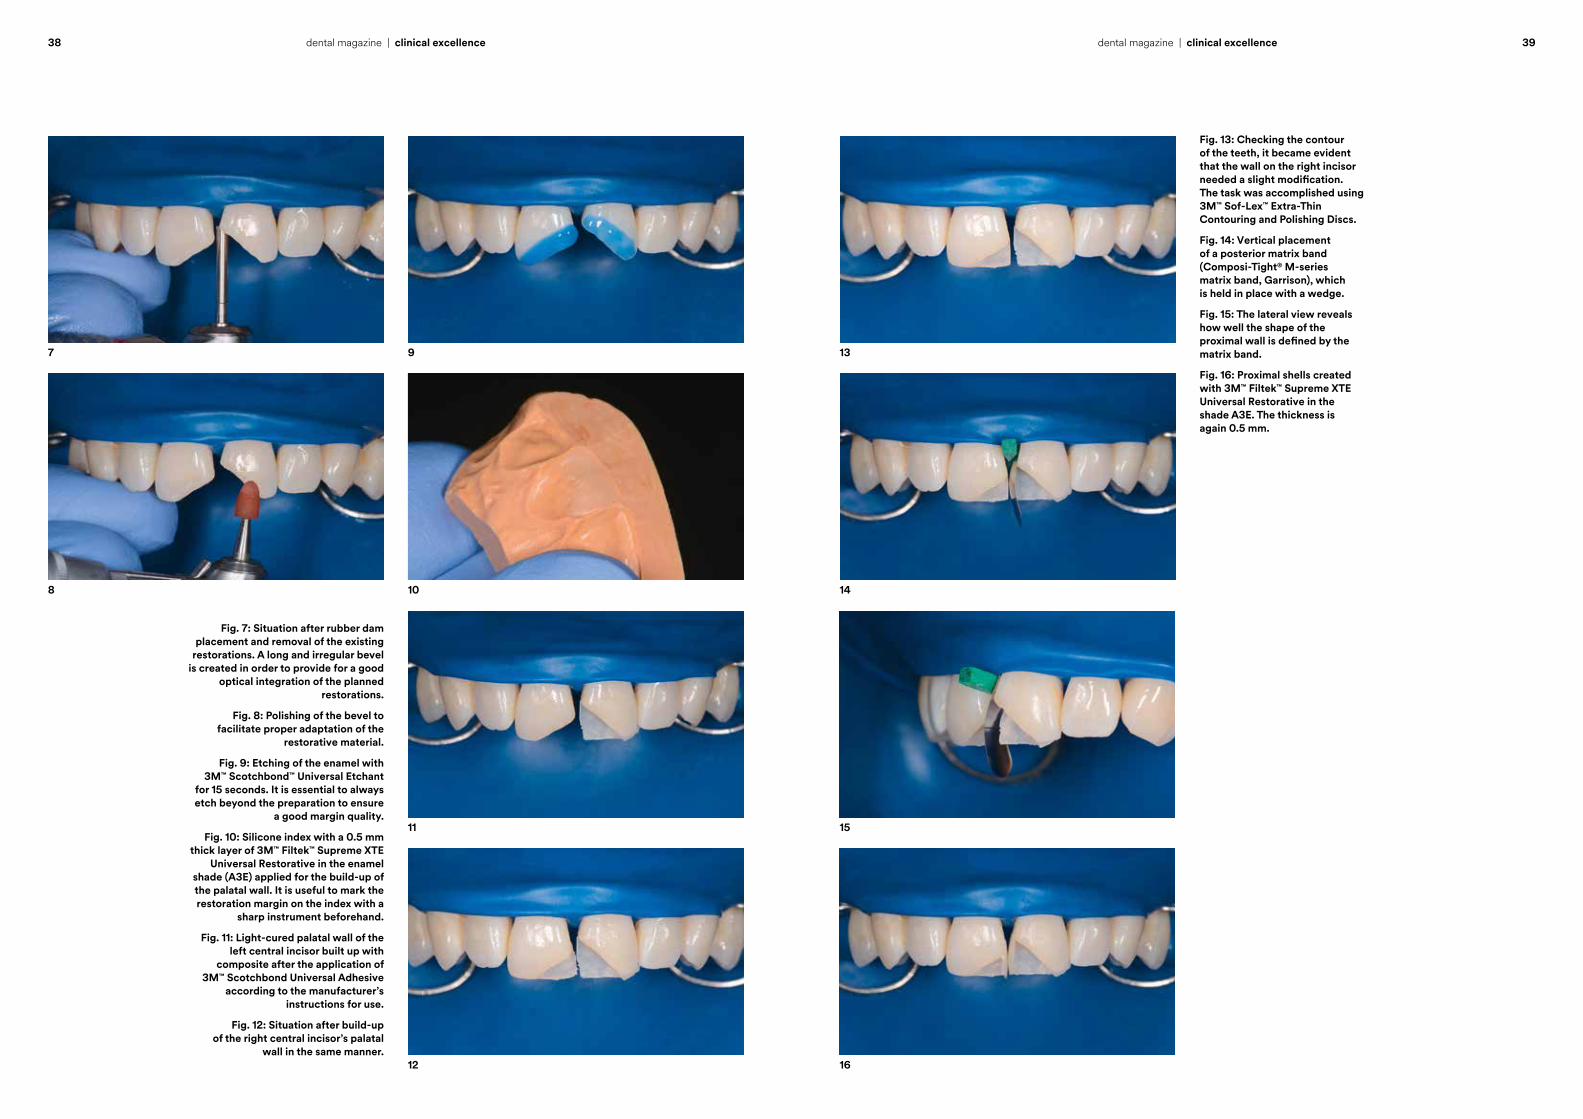
Fig. 7: Situation after rubber dam placement and removal of the existing
restorations. A long and irregular bevel is created in order to provide for a good
optical integration of the planned restorations.
Fig. 8: Polishing of the bevel to facilitate proper adaptation of the
restorative material.
Fig. 9: Etching of the enamel with 3M™ Scotchbond™ Universal Etchant
for 15 seconds. It is essential to always etch beyond the preparation to ensure
a good margin quality.
Fig. 10: Silicone index with a 0.5 mm thick layer of 3M™ Filtek™ Supreme XTE
Universal Restorative in the enamel shade (A3E) applied for the build-up of the palatal wall. It is useful to mark the restoration margin on the index with a
sharp instrument beforehand.
Fig. 11: Light-cured palatal wall of the left central incisor built up with
composite after the application of 3M™ Scotchbond Universal Adhesive
according to the manufacturer’s instructions for use.
Fig. 12: Situation after build-up of the right central incisor’s palatal
wall in the same manner.
7 9
11
8 10
12
Fig. 13: Checking the contour of the teeth, it became evident that the wall on the right incisor needed a slight modification. The task was accomplished using 3M™ Sof-Lex™ Extra-Thin Contouring and Polishing Discs.
Fig. 14: Vertical placement of a posterior matrix band (Composi-Tight® M-series matrix band, Garrison), which is held in place with a wedge.
Fig. 15: The lateral view reveals how well the shape of the proximal wall is defined by the matrix band.
Fig. 16: Proximal shells created with 3M™ Filtek™ Supreme XTE Universal Restorative in the shade A3E. The thickness is again 0.5 mm.
13
16
15
14

40 41dental magazine | clinical excellencedental magazine | clinical excellence
Fig. 17: Build-up of the dentin core with 3M™ Filtek™ Supreme XTE Universal
Restorative in the shade A2D.
Fig. 18: Use of the Misura instrument (LM-Instruments) to create the space
needed for a final enamel layer of exactly 0.5 mm thickness.
Fig. 19: Thickness calibration on the right central incisor.
Fig. 20: Dentin cores with mamelons ready to be covered by enamel material.
Fig. 21: result of the layering procedure with only one dentin and one enamel
shade of 3M™ Filtek™ Supreme XTE Universal Restorative.
Fig. 22: Preparations for finishing and polishing: After the removal of
gross excess with coarse diamonds, the line angles, incisal edges, incisal embrasures and texture are marked
on the labial surfaces.
17 19
21
18 20
22
Fig. 23: Result of the contouring procedure with Sof-Lex™ Extra-Thin Contouring and Polishing Discs coarse/medium, a fine flame-shaped diamond and medium-grit blunt rubber-based polishers, and polishing with the 3M™ Sof-Lex™ Diamond Polishing System.
Fig. 24: Treatment outcome immediately after finishing and polishing.
Fig. 25: Situation after two weeks with recovered soft tissues and rehydrated tooth structure resulting in a very good optical integration of the restorations.
Fig. 26: Final frontal view.
23
26
25
24
cont
act
Vilhelm Grétar Ólafsson obtained his Icelandic dental license in 2007. Between 2007 and 2012 he worked as a general dental practitioner in Iceland. Subsequently, he enrolled in specialty program in Operative Dentistry at the School of Dentistry, University of North Carolina at Chapel Hill, where he was awarded a master’s degree in 2015. In the same year he obtained a license as a specialist in Operative Dentistry and Cariology in Iceland. Today, he is a generalist practitioner in Reykjavík, an Assistant Professor in Operative Dentistry and Cariology in the Faculty of Odontology at the University of Iceland, Reykjavik, and an Adjunct Assistant Professor in the Department of Operative Dentistry at the University of North Carolina at Chapel Hill, United States.
Vilhelm Grétar Ólafsson, DDS, MSSpecialist in Operative Dentistry and [email protected]
clinicaladvice
Paulo Monteiro, Portugal
How to improve the quality of the cure
44 – 48
Patricia Gatón Hernández and Esther Ruiz de Castañeda Regojo, Spain
MIH: Practice-based treatment recommendations
50 – 53
Norbert Krämer, Germany
Bonding to MIH-affected teeth – an update
54 – 57
Ajay Juneja, Dubai
Composite or ceramics in the anterior region?
58 – 63
44 45dental magazine | clinical advicedental magazine | clinical advice
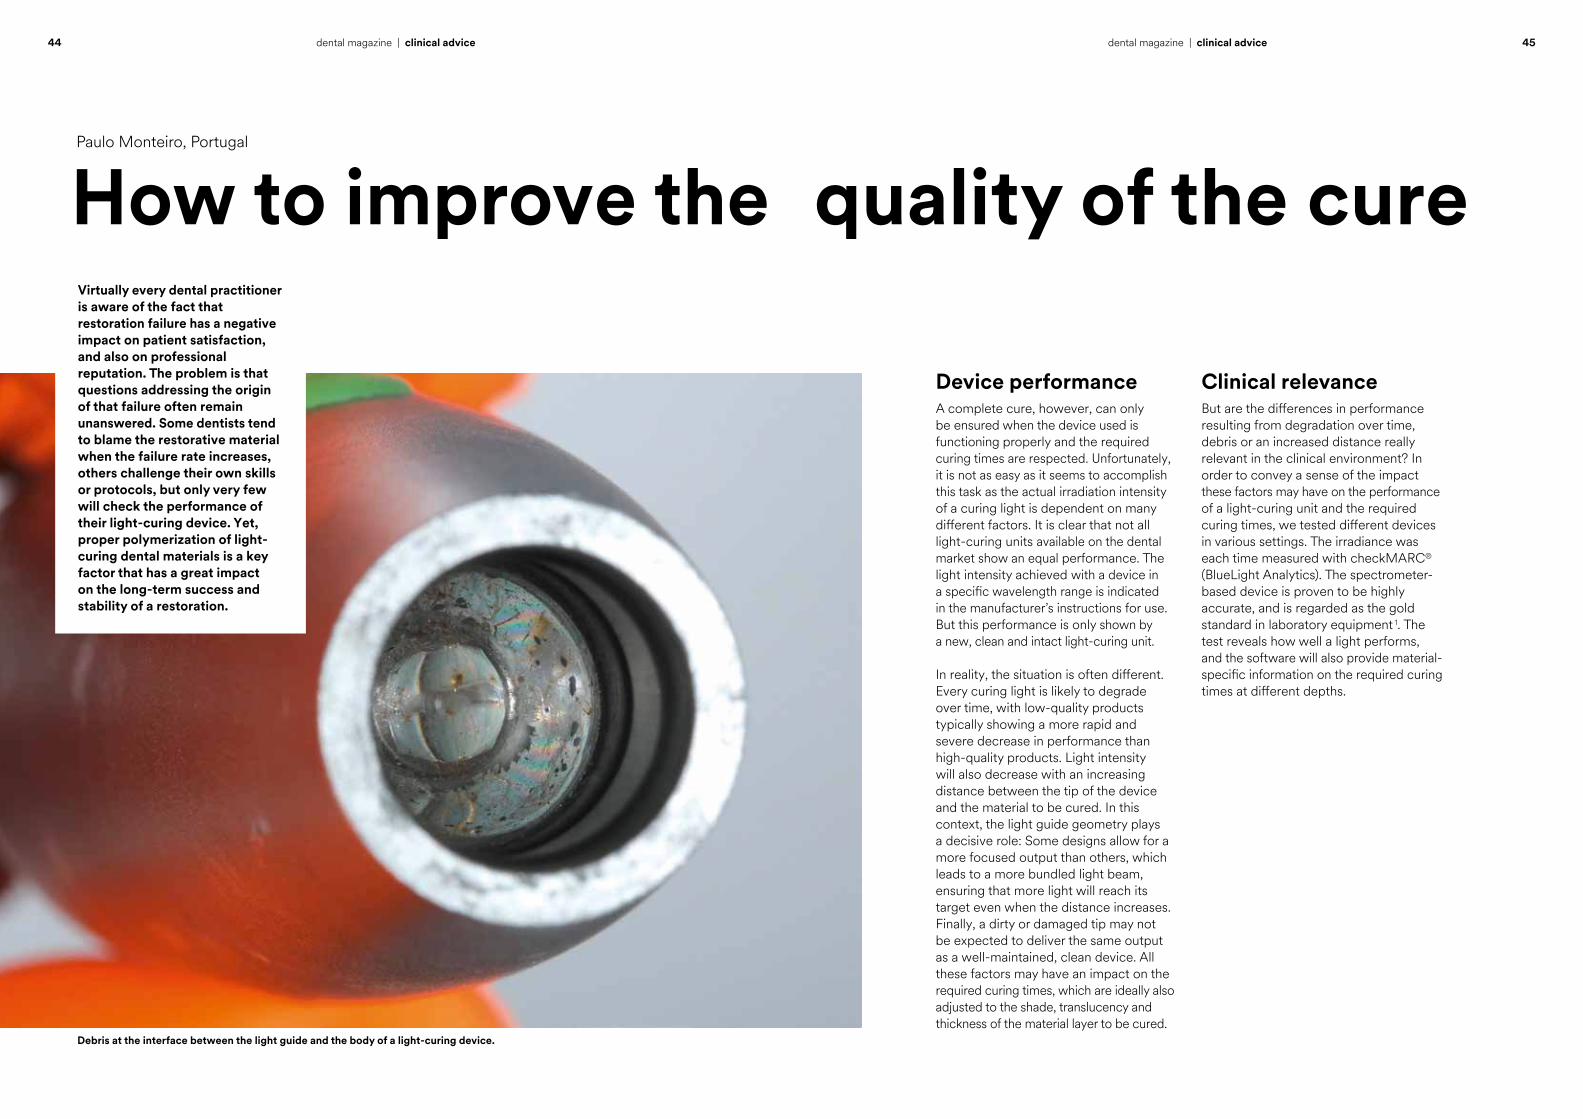
Virtually every dental practitioner is aware of the fact that restoration failure has a negative impact on patient satisfaction, and also on professional reputation. The problem is that questions addressing the origin of that failure often remain unanswered. Some dentists tend to blame the restorative material when the failure rate increases, others challenge their own skills or protocols, but only very few will check the performance of their light-curing device. Yet, proper polymerization of light-curing dental materials is a key factor that has a great impact on the long-term success and stability of a restoration.
Paulo Monteiro, Portugal
Debris at the interface between the light guide and the body of a light-curing device.
How to improve the quality of the cure
Device performanceA complete cure, however, can only be ensured when the device used is functioning properly and the required curing times are respected. Unfortunately, it is not as easy as it seems to accomplish this task as the actual irradiation intensity of a curing light is dependent on many different factors. It is clear that not all light-curing units available on the dental market show an equal performance. The light intensity achieved with a device in a specific wavelength range is indicated in the manufacturer’s instructions for use. But this performance is only shown by a new, clean and intact light-curing unit.
In reality, the situation is often different. Every curing light is likely to degrade over time, with low-quality products typically showing a more rapid and severe decrease in performance than high-quality products. Light intensity will also decrease with an increasing distance between the tip of the device and the material to be cured. In this context, the light guide geometry plays a decisive role: Some designs allow for a more focused output than others, which leads to a more bundled light beam, ensuring that more light will reach its target even when the distance increases. Finally, a dirty or damaged tip may not be expected to deliver the same output as a well-maintained, clean device. All these factors may have an impact on the required curing times, which are ideally also adjusted to the shade, translucency and thickness of the material layer to be cured.
Clinical relevanceBut are the differences in performance resulting from degradation over time, debris or an increased distance really relevant in the clinical environment? In order to convey a sense of the impact these factors may have on the performance of a light-curing unit and the required curing times, we tested different devices in various settings. The irradiance was each time measured with checkMARC® (BlueLight Analytics). The spectrometer-based device is proven to be highly accurate, and is regarded as the gold standard in laboratory equipment 1. The test reveals how well a light performs, and the software will also provide material-specific information on the required curing times at different depths.
46 47dental magazine | clinical advicedental magazine | clinical advice
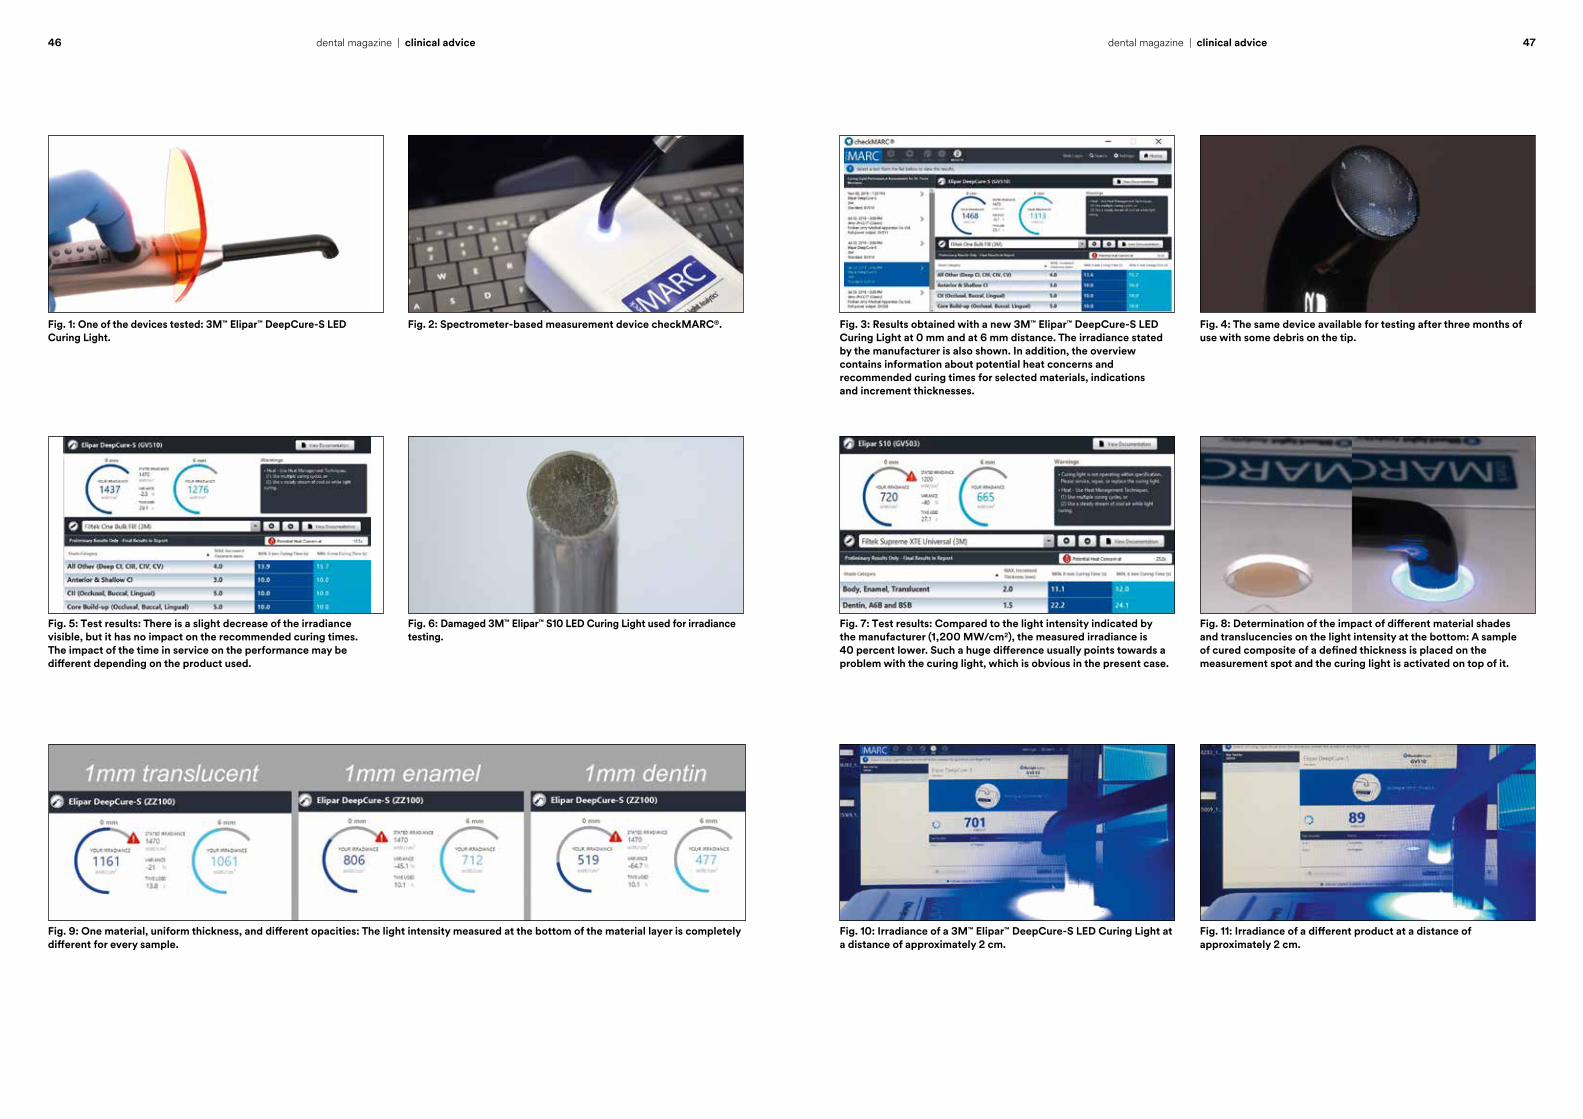
Fig. 6: Damaged 3M™ Elipar™ S10 LED Curing Light used for irradiance testing.
Fig. 2: Spectrometer-based measurement device checkMARC®.
Fig. 9: One material, uniform thickness, and different opacities: The light intensity measured at the bottom of the material layer is completely different for every sample.
Fig. 5: Test results: There is a slight decrease of the irradiance visible, but it has no impact on the recommended curing times. The impact of the time in service on the performance may be different depending on the product used.
Fig. 1: One of the devices tested: 3M™ Elipar™ DeepCure-S LED Curing Light.
Fig. 7: Test results: Compared to the light intensity indicated by the manufacturer (1,200 MW/cm2), the measured irradiance is 40 percent lower. Such a huge difference usually points towards a problem with the curing light, which is obvious in the present case.
Fig. 8: Determination of the impact of different material shades and translucencies on the light intensity at the bottom: A sample of cured composite of a defined thickness is placed on the measurement spot and the curing light is activated on top of it.
Fig. 10: Irradiance of a 3M™ Elipar™ DeepCure-S LED Curing Light at a distance of approximately 2 cm.
Fig. 11: Irradiance of a different product at a distance of approximately 2 cm.
Fig. 3: Results obtained with a new 3M™ Elipar™ DeepCure-S LED Curing Light at 0 mm and at 6 mm distance. The irradiance stated by the manufacturer is also shown. In addition, the overview contains information about potential heat concerns and recommended curing times for selected materials, indications and increment thicknesses.
Fig. 4: The same device available for testing after three months of use with some debris on the tip.
References1 Price RB, Labrie D, Kazmi S, Fahey J, Felix CM, Intra- and inter-brand accuracy of four dental radiometers. Clin Oral Invest (2012) 16:707-717
48 dental magazine | clinical advice
Clinical recommendationsThese test results show that most of the factors mentioned above will have an impact on the quality of the cure obtained intraorally. Based on these findings, the following measures can be recommended:
⋅ Inspect the tip of the light guide for any contaminants or damage to the surface. Surface barriers can decrease the energy delivered.
⋅ Stabilize the light when curing and watch what you are doing to ensure that the light guide is in the right position.
⋅ Adjust the position of the light guide to achieve proximity to the surface to be cured. Place the tip at square angles to the tooth surface. Begin curing at a distance of 1 mm and then move as close as possible within 1 second.
⋅ Increase the curing time in preparations greater than 2 mm to 3 mm in depth.
⋅ Air-cool the tooth and restoration or wait for three seconds between each light-curing cycle.
⋅ Check the performance of your light-curing unit on a regular basis.
Performance testing by 3MWith regard to the last point, 3M can be of great help: The company has entered into a global partnership with BlueLight Analytics to offer customers the opportunity of assessing the performance of their curing lights. If desired, a 3M Sales Representative will visit your dental office with checkMARC® testing equipment, which is proven to be more precise than any radiometer available on the market. With this device, the available light-curing units are tested and individual curing times for each light-curing material used in the practice determined. Testing can be repeated e.g. every six months to lay the foundation for long-lasting restorations. The service is available in many countries around the globe and free of charge.
Capture every detail in 2 minutes? Yes, it can.
3M™ Impregum™ Super QuickPolyether Impression Material
Ideal for smaller cases with superfast 2-minute setting.
A brand new chemistry unites world-class polyether precision with the speed of a VPS material.
A significantly improved taste and less time in the mouth make a better patient experience.
3M.com/Impregum
3M and Impregum are trademarks of 3M Company or 3M Deutschland GmbH. Used under license in Canada. © 3M 2019. All rights reserved.
Heavy Bodynow available!Best for the1-step technique
Professor Paulo Monteiro obtained his degree as a Doctor of Dental Medicine at the Instituto Superior de Ciências da Saúde in Caparica (ISCSEM), Portugal. Here, he started to develop a passion for esthetic dentistry. In 2005, the author completed post-graduation programs in Esthetic and Restorative Dentistry at the ISCSEM. He also obtained a Master’s degree in Dental Medicine at the same Institute. He is a Coordinator and Professor of the Restorative post-graduation program Aesthetic and Restorative Dentistry at Instituto Universitário Egas Moniz and has an exclusive dental practice in Lisbon that focuses on esthetic and cosmetic dental treatments.
cont
act
Dr. Paulo Monteiro, DMD, [email protected]
50 51dental magazine | clinical advicedental magazine | clinical advice
MIH: Patricia Gatón Hernández and Esther Ruiz de Castañeda Regojo, Spain
Molar incisor hypomineralization (MIH) is a qualitative developmen-
tal defect of the enamel, which can have a negative impact on general health and a patient’s
quality of life. Treatment is usually demanding to both, the patient and the clinician. Affected teeth often
develop advanced carious lesions, and they usually require immediate
therapeutic measures as well as repeated restorative treatment.
Based on years of experience in managing MIH, we have established standardized protocols used when-
ever a patient suffering from the condition presents in our clinic. As official treatment guidelines are yet
to be developed, we provide detailed information on our concept here,
which can be used as a guidance on how to successfully manage MIH. Depending on the severity of the
case (mild, moderate or severe) and the developmental stage of the teeth,
a multi-step approach is usually selected. It consists of three steps.
1. Therapeutic temporary coverage
Immediate treatment is particularly important in patients with hypersensitivity issues. In the dental office, the teeth are cleaned carefully with an excavator and 3M™ Clinpro™ Glycine Prophy Powder to remove the biofilm. Afterwards, a two-percent sodium hypochlorite solution is applied to the cavities, followed by rinsing with water. Whenever dentin is exposed, we make use of a glass ionomer restorative. Enamel defects are covered with a site-specific, light-cured, durable varnish (3M™ Clinpro™ XT Varnish).
2. Remineralization The remineralization protocol is typically
carried out at home. It includes toothbrushing with 3M™ Clinpro™ Tooth Creme at least twice per day, application of a product with CPP-ACP (GC Mi Paste plus) once (in mild to moderate cases) or twice per day (in severe cases), and rinsing with fluoride mouth rinse after night toothbrushing.
3. Definitive restorative treatment
Depending on the severity of the case, an esthetic composite restoration or an indirect restoration is finally placed. We recommend to wait with this kind of treatment until the tooth is fully developed and the apex is closed. In many cases, this gives us the time needed for an extended remineralization phase.
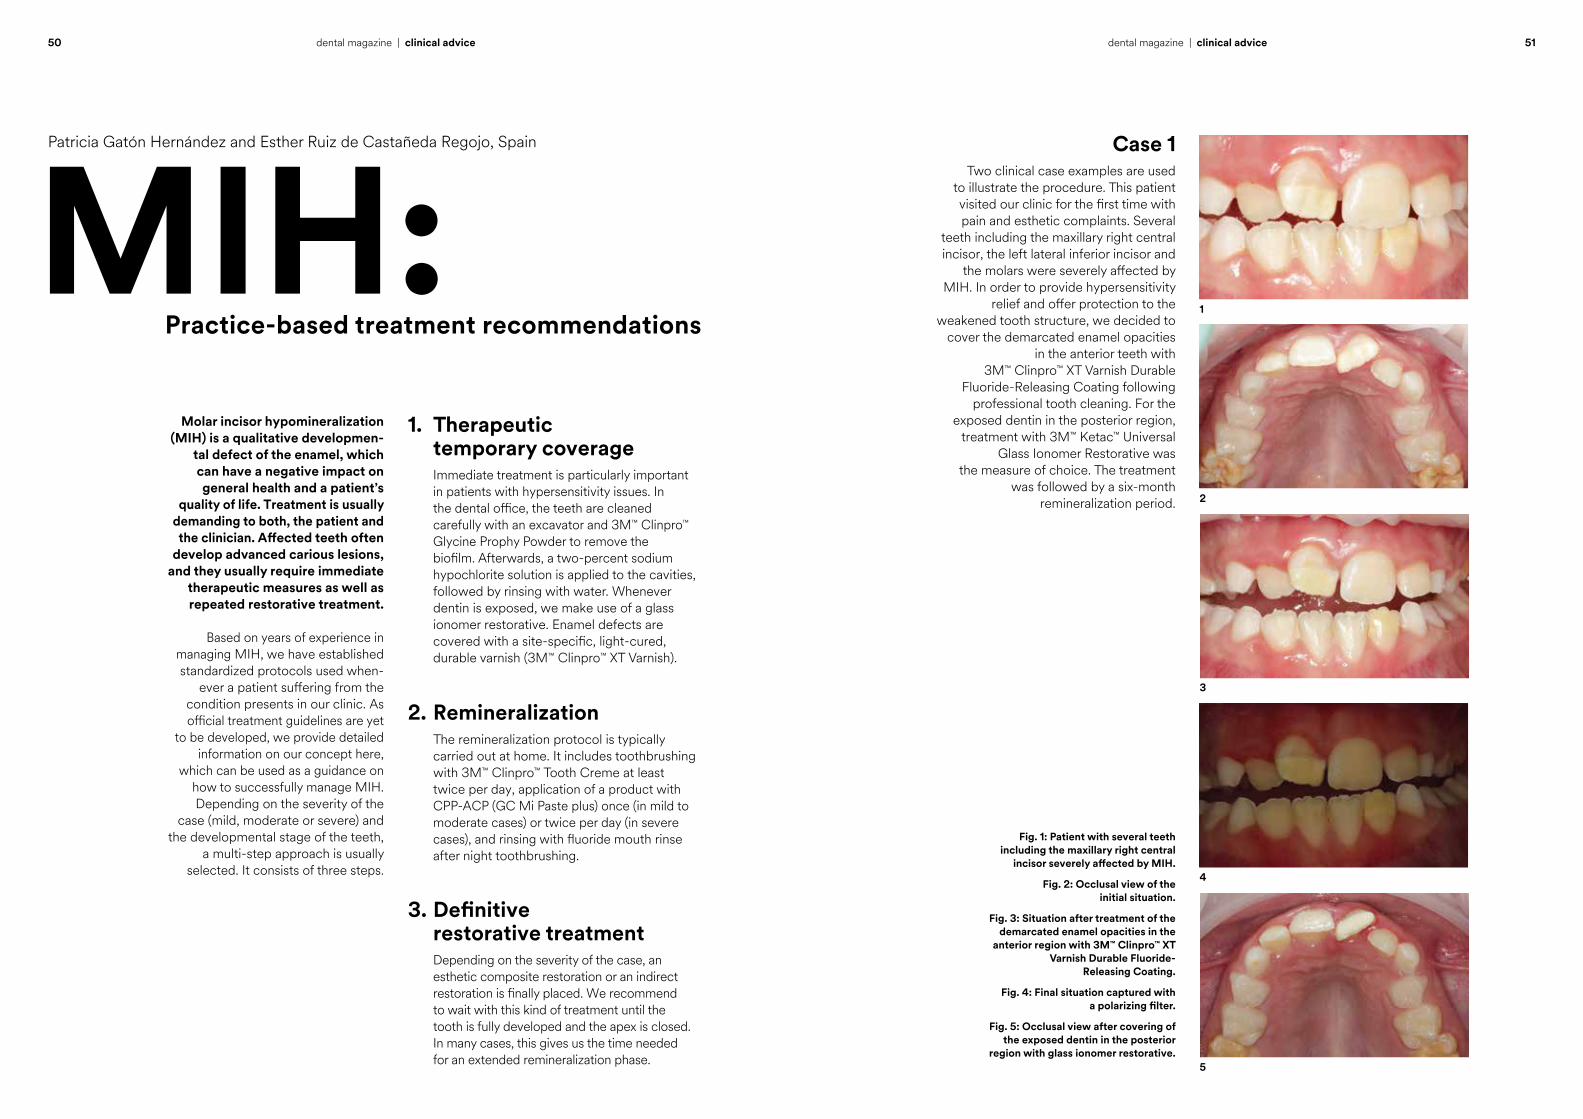
Case 1Two clinical case examples are used
to illustrate the procedure. This patient visited our clinic for the first time with pain and esthetic complaints. Several
teeth including the maxillary right central incisor, the left lateral inferior incisor and
the molars were severely affected by MIH. In order to provide hypersensitivity
relief and offer protection to the weakened tooth structure, we decided to
cover the demarcated enamel opacities in the anterior teeth with
3M™ Clinpro™ XT Varnish Durable Fluoride-Releasing Coating following
professional tooth cleaning. For the exposed dentin in the posterior region,
treatment with 3M™ Ketac™ Universal Glass Ionomer Restorative was
the measure of choice. The treatment was followed by a six-month
remineralization period.
1
2
3
4
5
Practice-based treatment recommendations
Fig. 1: Patient with several teeth including the maxillary right central
incisor severely affected by MIH.
Fig. 2: Occlusal view of the initial situation.
Fig. 3: Situation after treatment of the demarcated enamel opacities in the
anterior region with 3M™ Clinpro™ XT Varnish Durable Fluoride-
Releasing Coating.
Fig. 4: Final situation captured with a polarizing filter.
Fig. 5: Occlusal view after covering of the exposed dentin in the posterior
region with glass ionomer restorative.
52 53dental magazine | clinical advicedental magazine | clinical advice
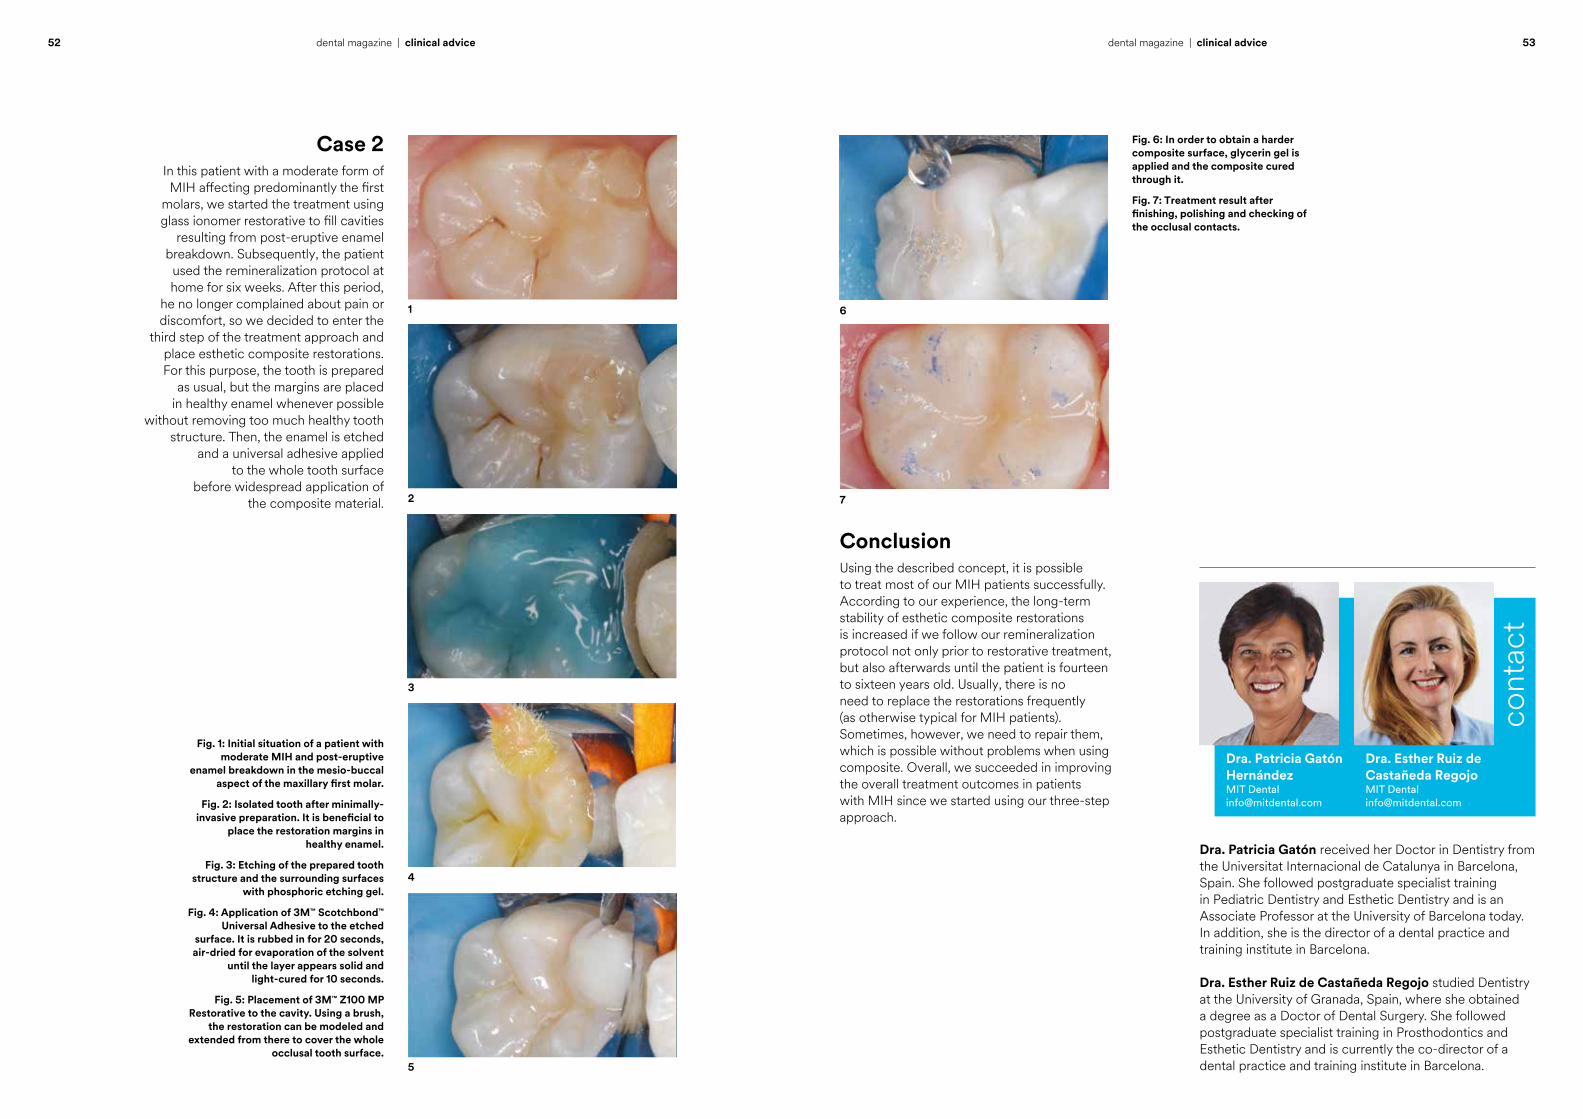
Case 2In this patient with a moderate form of MIH affecting predominantly the first
molars, we started the treatment using glass ionomer restorative to fill cavities
resulting from post-eruptive enamel breakdown. Subsequently, the patient
used the remineralization protocol at home for six weeks. After this period,
he no longer complained about pain or discomfort, so we decided to enter the
third step of the treatment approach and place esthetic composite restorations. For this purpose, the tooth is prepared
as usual, but the margins are placed in healthy enamel whenever possible
without removing too much healthy tooth structure. Then, the enamel is etched
and a universal adhesive applied to the whole tooth surface
before widespread application of the composite material.
1
2
3
4
5
Dra. Patricia Gatón received her Doctor in Dentistry from the Universitat Internacional de Catalunya in Barcelona, Spain. She followed postgraduate specialist training in Pediatric Dentistry and Esthetic Dentistry and is an Associate Professor at the University of Barcelona today. In addition, she is the director of a dental practice and training institute in Barcelona. Dra. Esther Ruiz de Castañeda Regojo studied Dentistry at the University of Granada, Spain, where she obtained a degree as a Doctor of Dental Surgery. She followed postgraduate specialist training in Prosthodontics and Esthetic Dentistry and is currently the co-director of a dental practice and training institute in Barcelona.
Dra. Esther Ruiz de Castañeda RegojoMIT [email protected]
Dra. Patricia Gatón Hernández MIT [email protected]
cont
act
ConclusionUsing the described concept, it is possible to treat most of our MIH patients successfully. According to our experience, the long-term stability of esthetic composite restorations is increased if we follow our remineralization protocol not only prior to restorative treatment, but also afterwards until the patient is fourteen to sixteen years old. Usually, there is no need to replace the restorations frequently (as otherwise typical for MIH patients). Sometimes, however, we need to repair them, which is possible without problems when using composite. Overall, we succeeded in improving the overall treatment outcomes in patients with MIH since we started using our three-step approach.
6
7
Fig. 1: Initial situation of a patient with moderate MIH and post-eruptive
enamel breakdown in the mesio-buccal aspect of the maxillary first molar.
Fig. 2: Isolated tooth after minimally-invasive preparation. It is beneficial to
place the restoration margins in healthy enamel.
Fig. 3: Etching of the prepared tooth structure and the surrounding surfaces
with phosphoric etching gel.
Fig. 4: Application of 3M™ Scotchbond™ Universal Adhesive to the etched
surface. It is rubbed in for 20 seconds, air-dried for evaporation of the solvent
until the layer appears solid and light-cured for 10 seconds.
Fig. 5: Placement of 3M™ Z100 MP Restorative to the cavity. Using a brush,
the restoration can be modeled and extended from there to cover the whole
occlusal tooth surface.
Fig. 6: In order to obtain a harder composite surface, glycerin gel is applied and the composite cured through it.
Fig. 7: Treatment result after finishing, polishing and checking of the occlusal contacts.
54 55dental magazine | clinical advicedental magazine | clinical advice
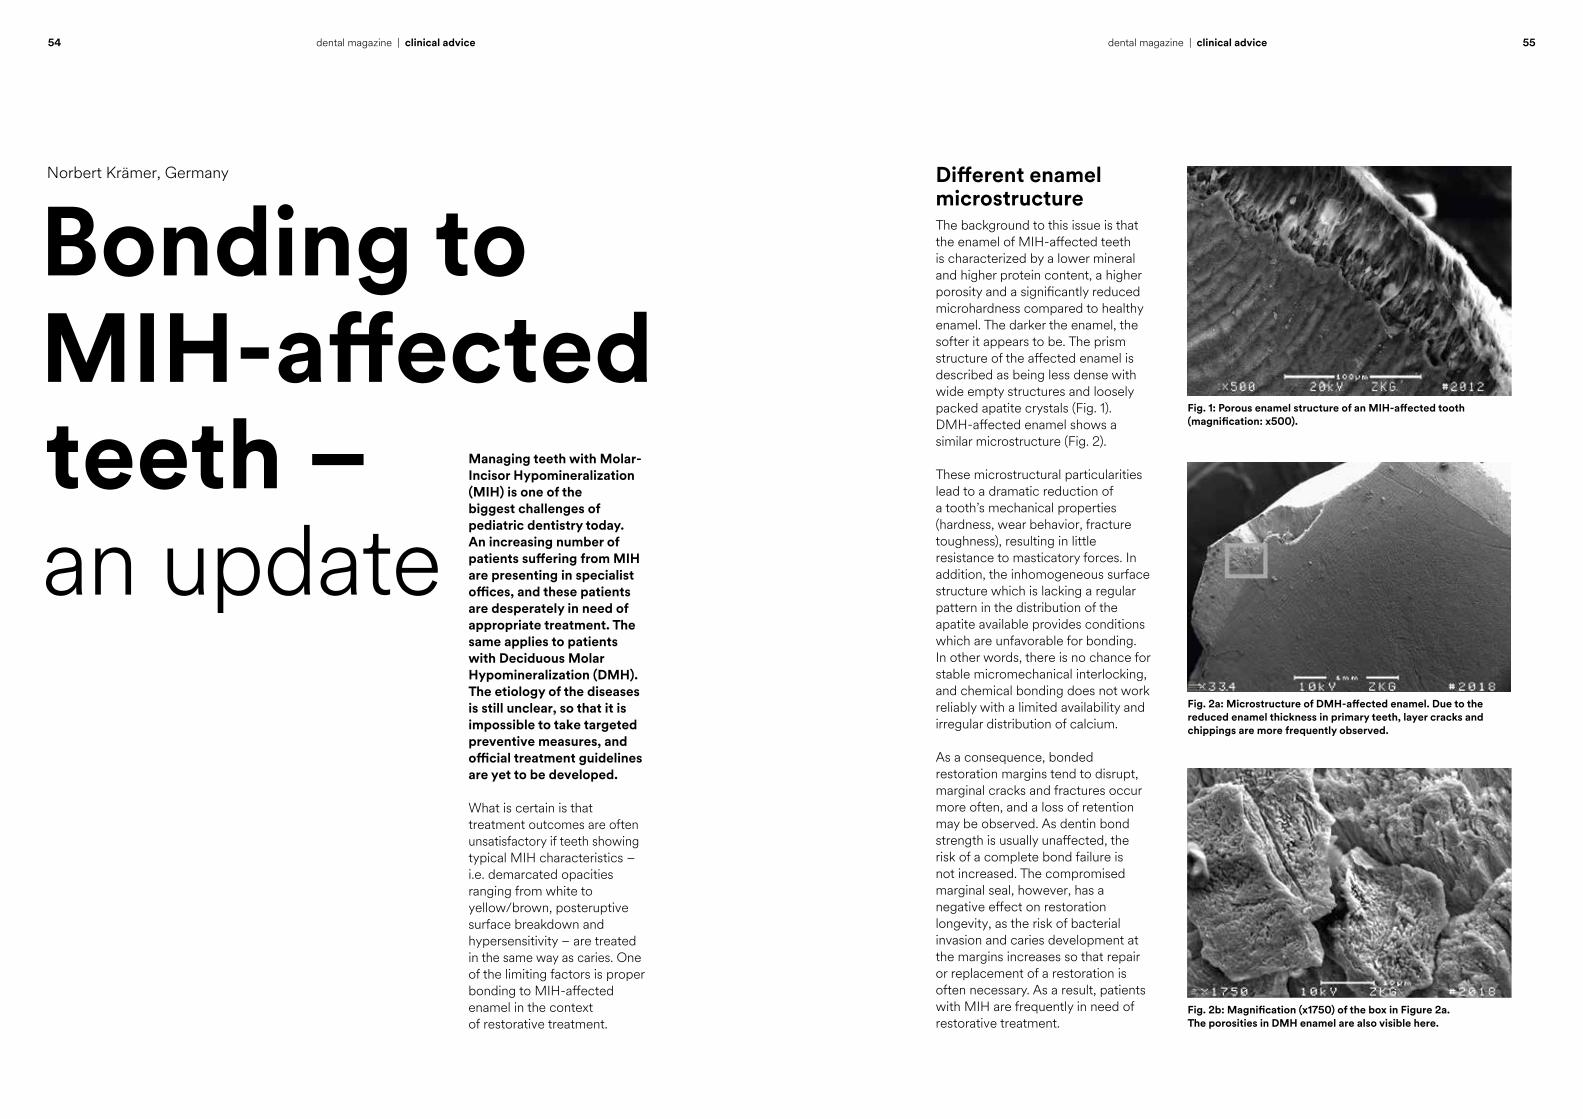
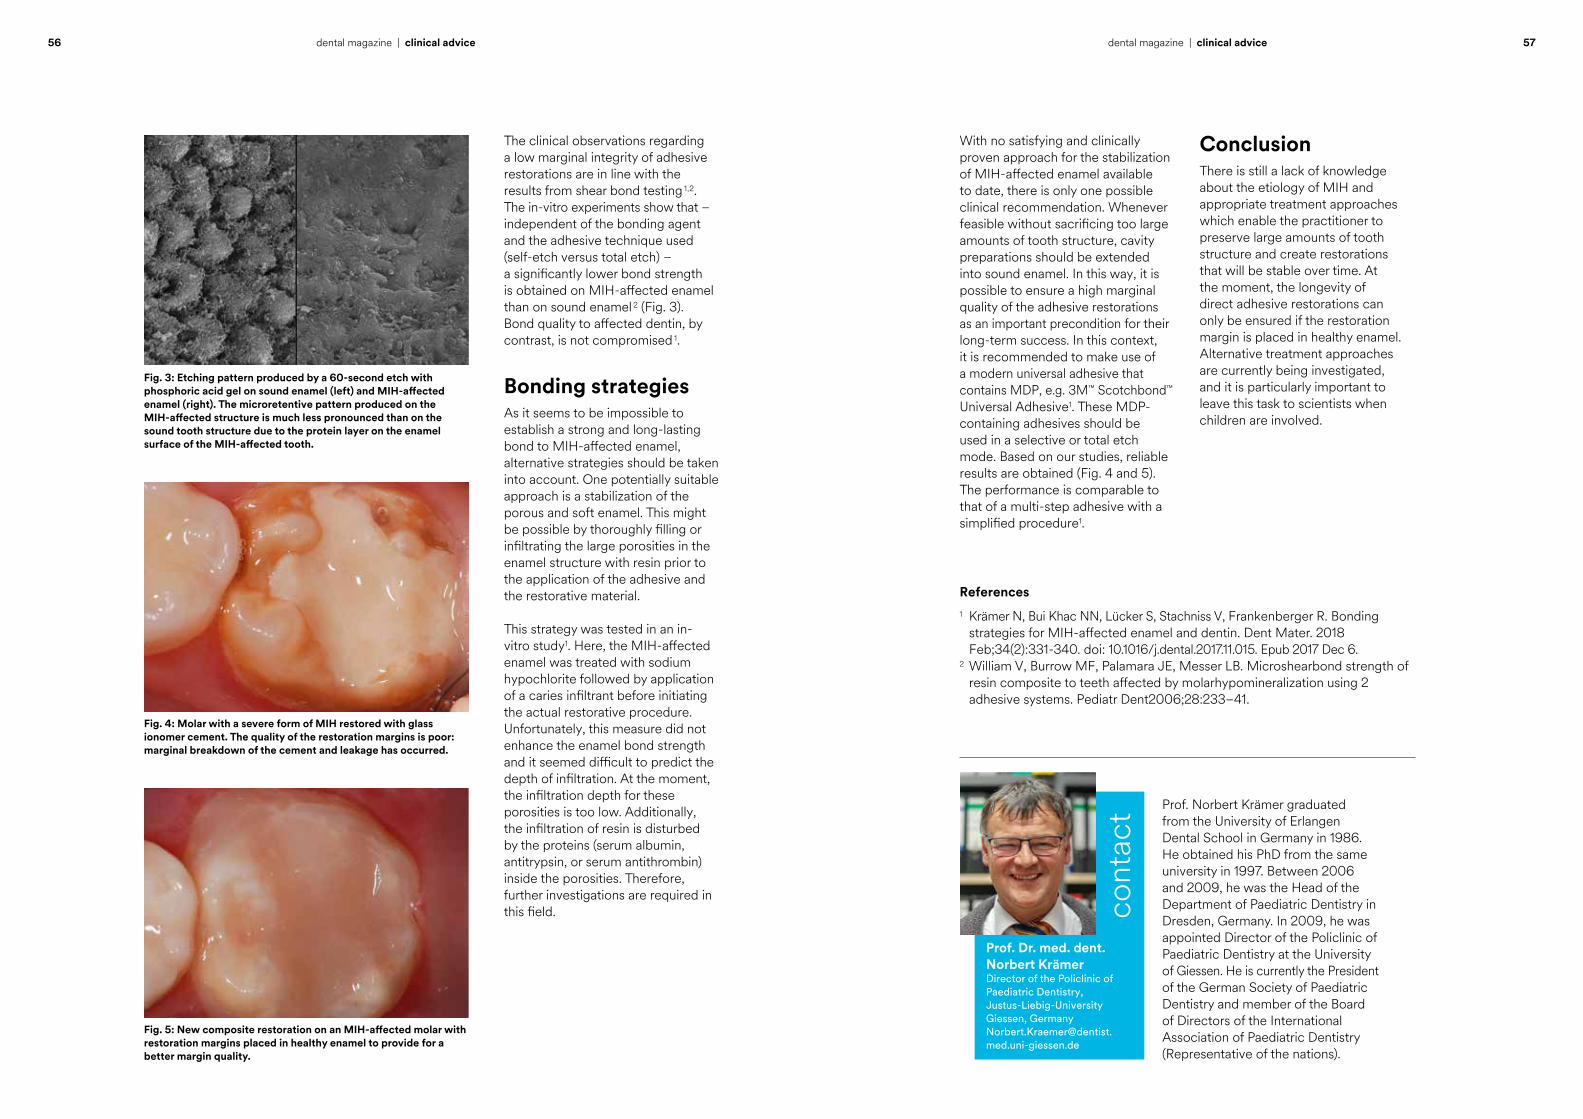
Norbert Krämer, Germany Different enamel microstructureThe background to this issue is that the enamel of MIH-affected teeth is characterized by a lower mineral and higher protein content, a higher porosity and a significantly reduced microhardness compared to healthy enamel. The darker the enamel, the softer it appears to be. The prism structure of the affected enamel is described as being less dense with wide empty structures and loosely packed apatite crystals (Fig. 1). DMH-affected enamel shows a similar microstructure (Fig. 2).
These microstructural particularities lead to a dramatic reduction of a tooth’s mechanical properties (hardness, wear behavior, fracture toughness), resulting in little resistance to masticatory forces. In addition, the inhomogeneous surface structure which is lacking a regular pattern in the distribution of the apatite available provides conditions which are unfavorable for bonding. In other words, there is no chance for stable micromechanical interlocking, and chemical bonding does not work reliably with a limited availability and irregular distribution of calcium.
As a consequence, bonded restoration margins tend to disrupt, marginal cracks and fractures occur more often, and a loss of retention may be observed. As dentin bond strength is usually unaffected, the risk of a complete bond failure is not increased. The compromised marginal seal, however, has a negative effect on restoration longevity, as the risk of bacterial invasion and caries development at the margins increases so that repair or replacement of a restoration is often necessary. As a result, patients with MIH are frequently in need of restorative treatment.
Fig. 1: Porous enamel structure of an MIH-affected tooth (magnification: x500).
Fig. 2a: Microstructure of DMH-affected enamel. Due to the reduced enamel thickness in primary teeth, layer cracks and chippings are more frequently observed.
Fig. 2b: Magnification (x1750) of the box in Figure 2a. The porosities in DMH enamel are also visible here.
Bonding to MIH-affected teeth – an update
Managing teeth with Molar-Incisor Hypomineralization (MIH) is one of the biggest challenges of pediatric dentistry today. An increasing number of patients suffering from MIH are presenting in specialist offices, and these patients are desperately in need of appropriate treatment. The same applies to patients with Deciduous Molar Hypomineralization (DMH). The etiology of the diseases is still unclear, so that it is impossible to take targeted preventive measures, and official treatment guidelines are yet to be developed.
What is certain is that treatment outcomes are often unsatisfactory if teeth showing typical MIH characteristics – i.e. demarcated opacities ranging from white to yellow/brown, posteruptive surface breakdown and hypersensitivity – are treated in the same way as caries. One of the limiting factors is proper bonding to MIH-affected enamel in the context of restorative treatment.
56 57dental magazine | clinical advicedental magazine | clinical advice
The clinical observations regarding a low marginal integrity of adhesive restorations are in line with the results from shear bond testing 1,2. The in-vitro experiments show that – independent of the bonding agent and the adhesive technique used (self-etch versus total etch) – a significantly lower bond strength is obtained on MIH-affected enamel than on sound enamel 2 (Fig. 3). Bond quality to affected dentin, by contrast, is not compromised 1.
Bonding strategiesAs it seems to be impossible to establish a strong and long-lasting bond to MIH-affected enamel, alternative strategies should be taken into account. One potentially suitable approach is a stabilization of the porous and soft enamel. This might be possible by thoroughly filling or infiltrating the large porosities in the enamel structure with resin prior to the application of the adhesive and the restorative material.
This strategy was tested in an in-vitro study1. Here, the MIH-affected enamel was treated with sodium hypochlorite followed by application of a caries infiltrant before initiating the actual restorative procedure. Unfortunately, this measure did not enhance the enamel bond strength and it seemed difficult to predict the depth of infiltration. At the moment, the infiltration depth for these porosities is too low. Additionally, the infiltration of resin is disturbed by the proteins (serum albumin, antitrypsin, or serum antithrombin) inside the porosities. Therefore, further investigations are required in this field.
With no satisfying and clinically proven approach for the stabilization of MIH-affected enamel available to date, there is only one possible clinical recommendation. Whenever feasible without sacrificing too large amounts of tooth structure, cavity preparations should be extended into sound enamel. In this way, it is possible to ensure a high marginal quality of the adhesive restorations as an important precondition for their long-term success. In this context, it is recommended to make use of a modern universal adhesive that contains MDP, e.g. 3M™ Scotchbond™ Universal Adhesive1. These MDP-containing adhesives should be used in a selective or total etch mode. Based on our studies, reliable results are obtained (Fig. 4 and 5). The performance is comparable to that of a multi-step adhesive with a simplified procedure1.
References1 Krämer N, Bui Khac NN, Lücker S, Stachniss V, Frankenberger R. Bonding strategies for MIH-affected enamel and dentin. Dent Mater. 2018 Feb;34(2):331-340. doi: 10.1016/j.dental.2017.11.015. Epub 2017 Dec 6.2 William V, Burrow MF, Palamara JE, Messer LB. Microshearbond strength of resin composite to teeth affected by molarhypomineralization using 2 adhesive systems. Pediatr Dent2006;28:233–41.
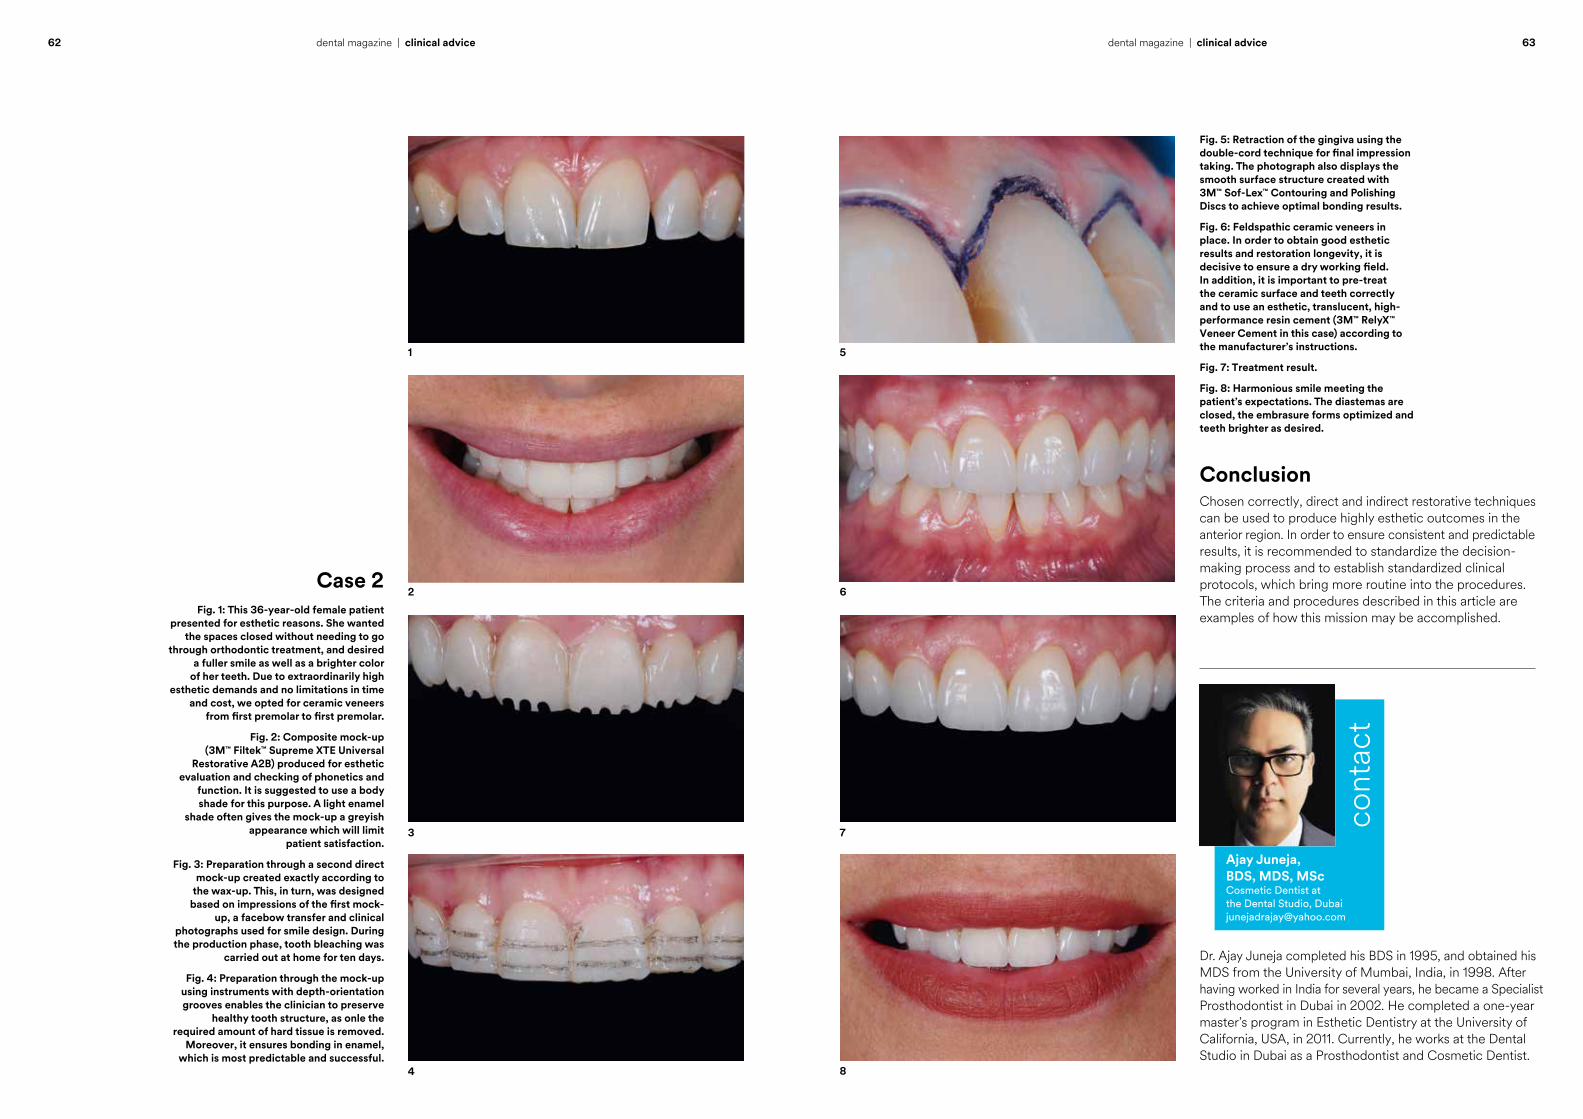
Prof. Norbert Krämer graduated from the University of Erlangen Dental School in Germany in 1986. He obtained his PhD from the same university in 1997. Between 2006 and 2009, he was the Head of the Department of Paediatric Dentistry in Dresden, Germany. In 2009, he was appointed Director of the Policlinic of Paediatric Dentistry at the University of Giessen. He is currently the President of the German Society of Paediatric Dentistry and member of the Board of Directors of the International Association of Paediatric Dentistry (Representative of the nations).
Prof. Dr. med. dent. Norbert KrämerDirector of the Policlinic of Paediatric Dentistry, Justus-Liebig-University Giessen, [email protected]
cont
act
ConclusionThere is still a lack of knowledge about the etiology of MIH and appropriate treatment approaches which enable the practitioner to preserve large amounts of tooth structure and create restorations that will be stable over time. At the moment, the longevity of direct adhesive restorations can only be ensured if the restoration margin is placed in healthy enamel. Alternative treatment approaches are currently being investigated, and it is particularly important to leave this task to scientists when children are involved.
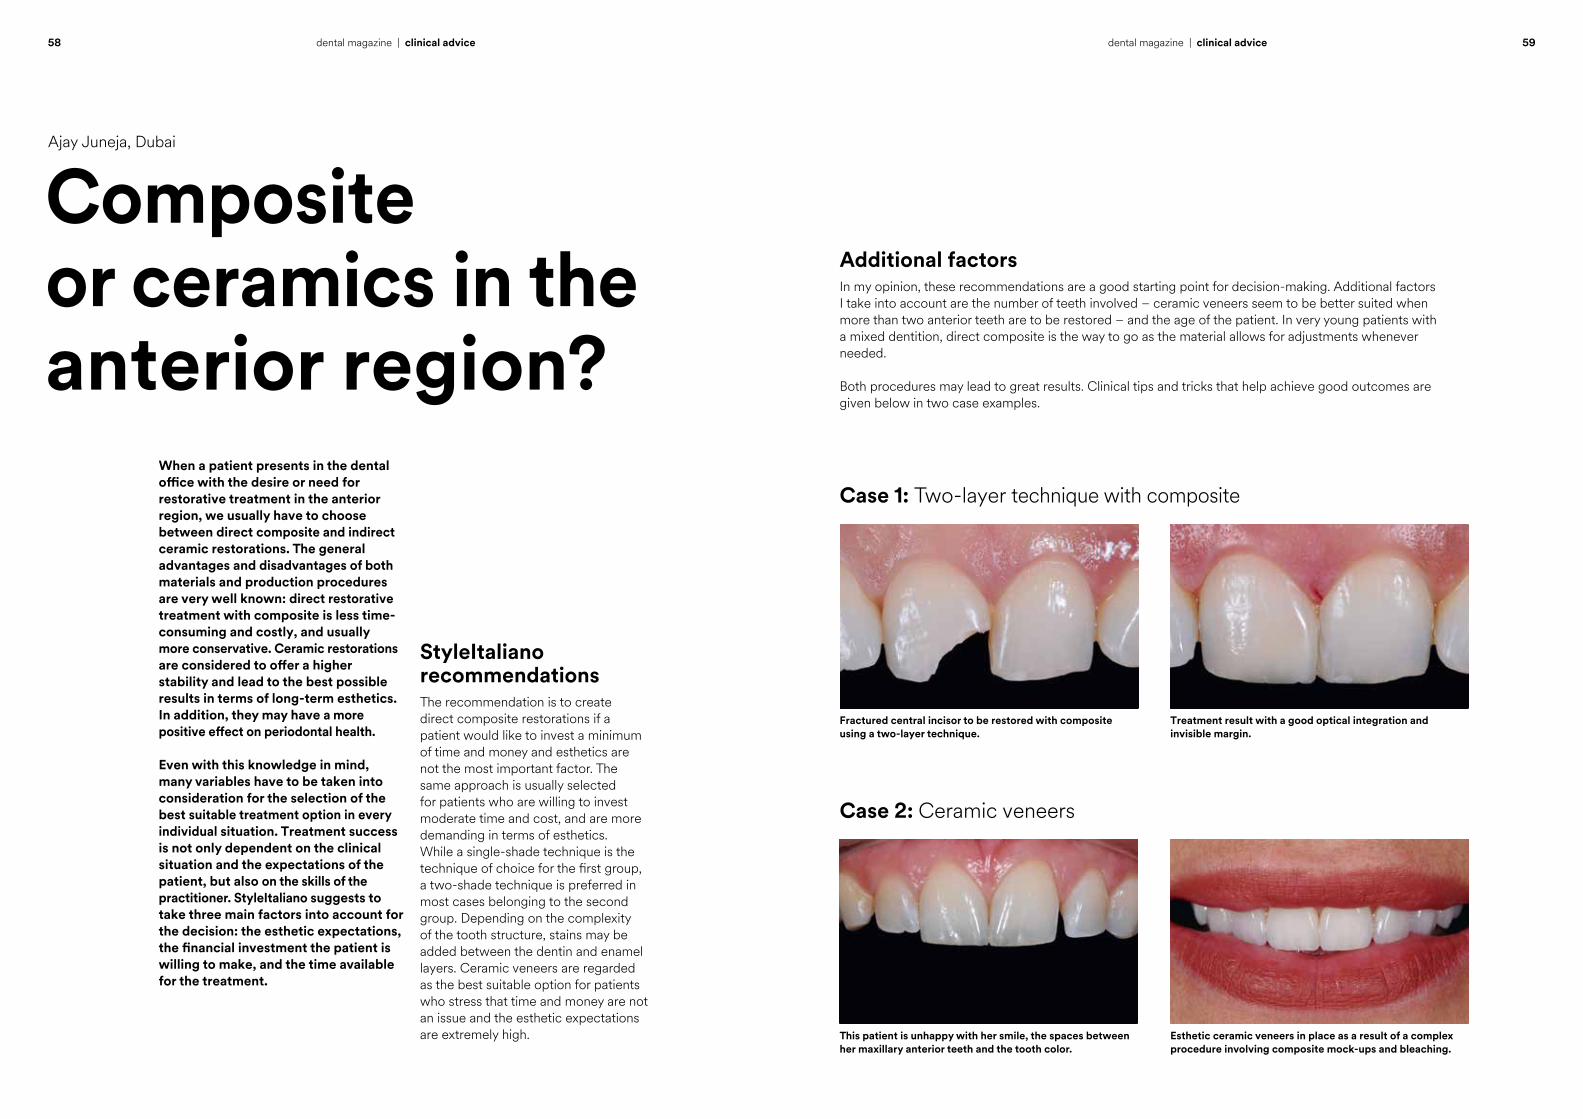
Fig. 4: Molar with a severe form of MIH restored with glass ionomer cement. The quality of the restoration margins is poor: marginal breakdown of the cement and leakage has occurred.
Fig. 3: Etching pattern produced by a 60-second etch with phosphoric acid gel on sound enamel (left) and MIH-affected enamel (right). The microretentive pattern produced on the MIH-affected structure is much less pronounced than on the sound tooth structure due to the protein layer on the enamel surface of the MIH-affected tooth.
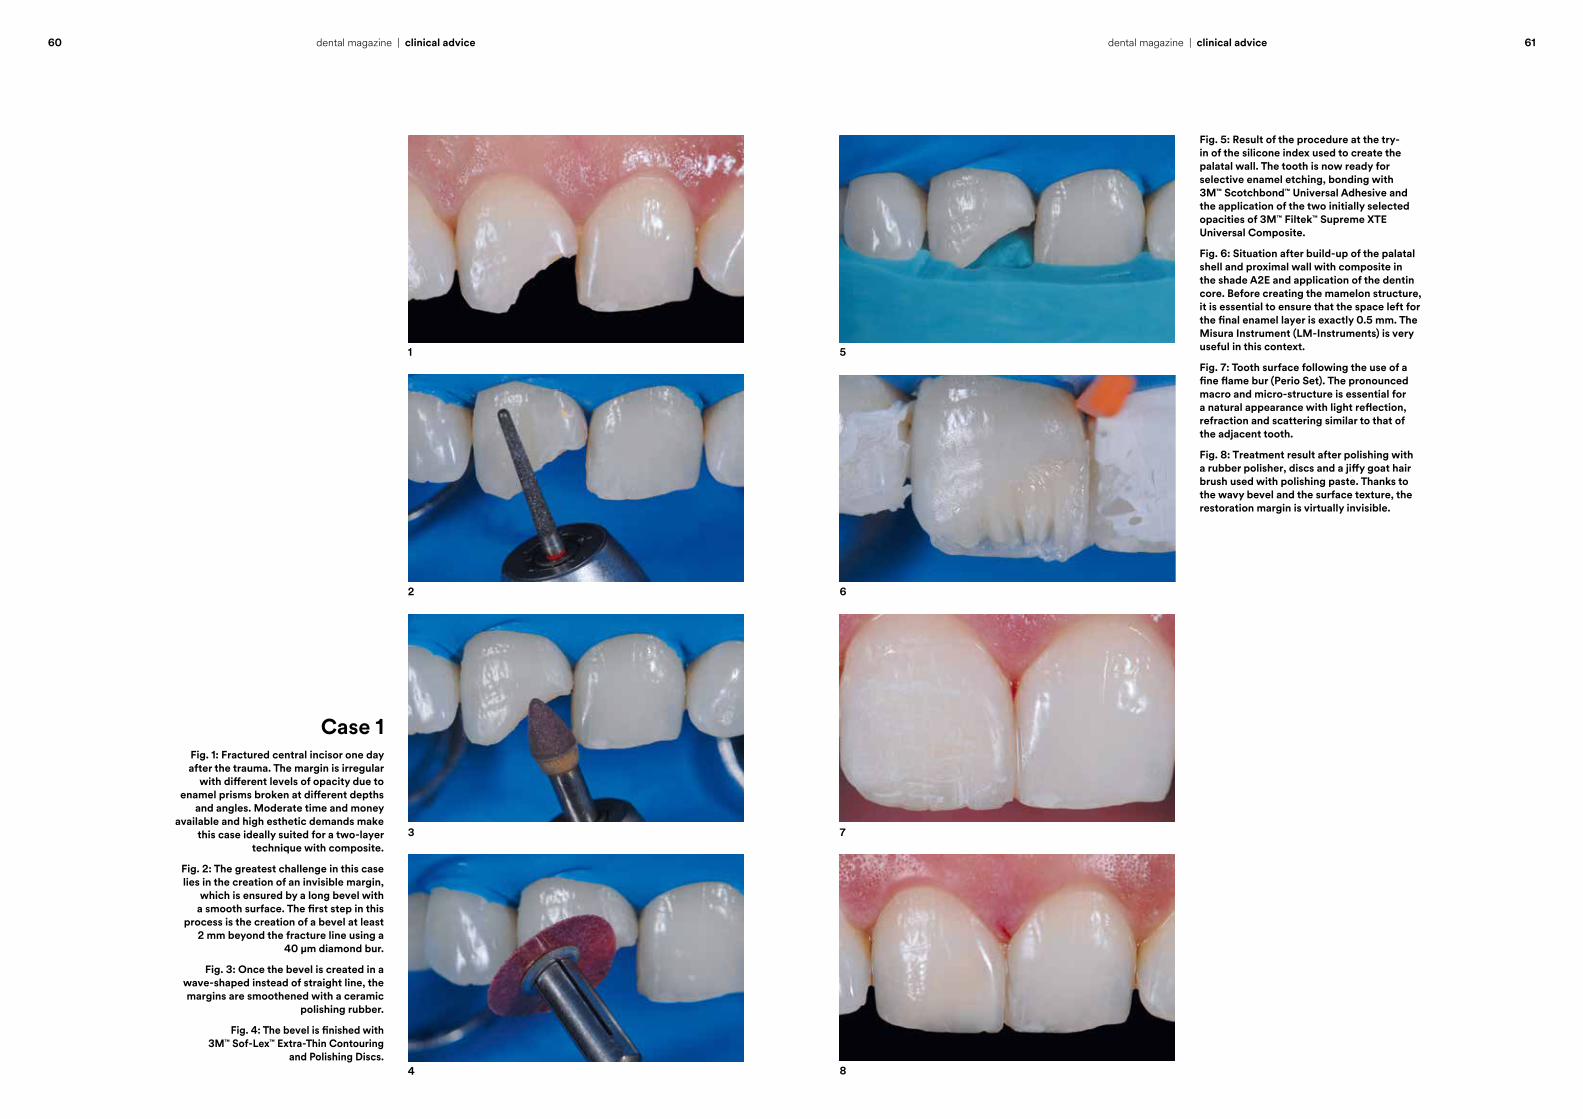
Fig. 5: New composite restoration on an MIH-affected molar with restoration margins placed in healthy enamel to provide for a better margin quality.
58 59dental magazine | clinical advicedental magazine | clinical advice
When a patient presents in the dental office with the desire or need for restorative treatment in the anterior region, we usually have to choose between direct composite and indirect ceramic restorations. The general advantages and disadvantages of both materials and production procedures are very well known: direct restorative treatment with composite is less time-consuming and costly, and usually more conservative. Ceramic restorations are considered to offer a higher stability and lead to the best possible results in terms of long-term esthetics. In addition, they may have a more positive effect on periodontal health.
Even with this knowledge in mind, many variables have to be taken into consideration for the selection of the best suitable treatment option in every individual situation. Treatment success is not only dependent on the clinical situation and the expectations of the patient, but also on the skills of the practitioner. StyleItaliano suggests to take three main factors into account for the decision: the esthetic expectations, the financial investment the patient is willing to make, and the time available for the treatment.
Composite or ceramics in the anterior region?
Ajay Juneja, Dubai
StyleItaliano recommendationsThe recommendation is to create direct composite restorations if a patient would like to invest a minimum of time and money and esthetics are not the most important factor. The same approach is usually selected for patients who are willing to invest moderate time and cost, and are more demanding in terms of esthetics. While a single-shade technique is the technique of choice for the first group, a two-shade technique is preferred in most cases belonging to the second group. Depending on the complexity of the tooth structure, stains may be added between the dentin and enamel layers. Ceramic veneers are regarded as the best suitable option for patients who stress that time and money are not an issue and the esthetic expectations are extremely high.
Case 1: Two-layer technique with composite
Case 2: Ceramic veneers
Additional factorsIn my opinion, these recommendations are a good starting point for decision-making. Additional factors I take into account are the number of teeth involved – ceramic veneers seem to be better suited when more than two anterior teeth are to be restored – and the age of the patient. In very young patients with a mixed dentition, direct composite is the way to go as the material allows for adjustments whenever needed.
Both procedures may lead to great results. Clinical tips and tricks that help achieve good outcomes are given below in two case examples.
Fractured central incisor to be restored with composite using a two-layer technique.
This patient is unhappy with her smile, the spaces between her maxillary anterior teeth and the tooth color.
Treatment result with a good optical integration and invisible margin.
Esthetic ceramic veneers in place as a result of a complex procedure involving composite mock-ups and bleaching.
60 61dental magazine | clinical advicedental magazine | clinical advice
5
6
7
8
Fig. 5: Result of the procedure at the try-in of the silicone index used to create the palatal wall. The tooth is now ready for selective enamel etching, bonding with 3M™ Scotchbond™ Universal Adhesive and the application of the two initially selected opacities of 3M™ Filtek™ Supreme XTE Universal Composite.
Fig. 6: Situation after build-up of the palatal shell and proximal wall with composite in the shade A2E and application of the dentin core. Before creating the mamelon structure, it is essential to ensure that the space left for the final enamel layer is exactly 0.5 mm. The Misura Instrument (LM-Instruments) is very useful in this context.
Fig. 7: Tooth surface following the use of a fine flame bur (Perio Set). The pronounced macro and micro-structure is essential for a natural appearance with light reflection, refraction and scattering similar to that of the adjacent tooth.
Fig. 8: Treatment result after polishing with a rubber polisher, discs and a jiffy goat hair brush used with polishing paste. Thanks to the wavy bevel and the surface texture, the restoration margin is virtually invisible.
1
2
3
4
Case 1Fig. 1: Fractured central incisor one day after the trauma. The margin is irregular
with different levels of opacity due to enamel prisms broken at different depths
and angles. Moderate time and money available and high esthetic demands make
this case ideally suited for a two-layer technique with composite.
Fig. 2: The greatest challenge in this case lies in the creation of an invisible margin,
which is ensured by a long bevel with a smooth surface. The first step in this
process is the creation of a bevel at least 2 mm beyond the fracture line using a
40 µm diamond bur.
Fig. 3: Once the bevel is created in a wave-shaped instead of straight line, the margins are smoothened with a ceramic
polishing rubber.
Fig. 4: The bevel is finished with 3M™ Sof-Lex™ Extra-Thin Contouring
and Polishing Discs.
62 63dental magazine | clinical advicedental magazine | clinical advice
Dr. Ajay Juneja completed his BDS in 1995, and obtained his MDS from the University of Mumbai, India, in 1998. After having worked in India for several years, he became a Specialist Prosthodontist in Dubai in 2002. He completed a one-year master’s program in Esthetic Dentistry at the University of California, USA, in 2011. Currently, he works at the Dental Studio in Dubai as a Prosthodontist and Cosmetic Dentist.
cont
act
Ajay Juneja, BDS, MDS, MScCosmetic Dentist at the Dental Studio, [email protected]
Fig. 5: Retraction of the gingiva using the double-cord technique for final impression taking. The photograph also displays the smooth surface structure created with 3M™ Sof-Lex™ Contouring and Polishing Discs to achieve optimal bonding results.
Fig. 6: Feldspathic ceramic veneers in place. In order to obtain good esthetic results and restoration longevity, it is decisive to ensure a dry working field. In addition, it is important to pre-treat the ceramic surface and teeth correctly and to use an esthetic, translucent, high-performance resin cement (3M™ RelyX™ Veneer Cement in this case) according to the manufacturer’s instructions.
Fig. 7: Treatment result.
Fig. 8: Harmonious smile meeting the patient’s expectations. The diastemas are closed, the embrasure forms optimized and teeth brighter as desired.
ConclusionChosen correctly, direct and indirect restorative techniques can be used to produce highly esthetic outcomes in the anterior region. In order to ensure consistent and predictable results, it is recommended to standardize the decision-making process and to establish standardized clinical protocols, which bring more routine into the procedures. The criteria and procedures described in this article are examples of how this mission may be accomplished.
Fig. 1: This 36-year-old female patient presented for esthetic reasons. She wanted
the spaces closed without needing to go through orthodontic treatment, and desired
a fuller smile as well as a brighter color of her teeth. Due to extraordinarily high
esthetic demands and no limitations in time and cost, we opted for ceramic veneers
from first premolar to first premolar.
Fig. 2: Composite mock-up (3M™ Filtek™ Supreme XTE Universal
Restorative A2B) produced for esthetic evaluation and checking of phonetics and
function. It is suggested to use a body shade for this purpose. A light enamel
shade often gives the mock-up a greyish appearance which will limit
patient satisfaction.
Fig. 3: Preparation through a second direct mock-up created exactly according to
the wax-up. This, in turn, was designed based on impressions of the first mock-
up, a facebow transfer and clinical photographs used for smile design. During the production phase, tooth bleaching was
carried out at home for ten days.
Fig. 4: Preparation through the mock-up using instruments with depth-orientation grooves enables the clinician to preserve
healthy tooth structure, as onle the required amount of hard tissue is removed.
Moreover, it ensures bonding in enamel, which is most predictable and successful.
Case 2
5
6
7
8
1
2
3
4
3M Science.
to Life.Applied
Miryam Schuckar, Germany
The role of science in the development of dental adhesives
66 – 70
Frédéric van Vliet, Germany
Polyether polymer: from dentistry to the automotive industry
72 – 75
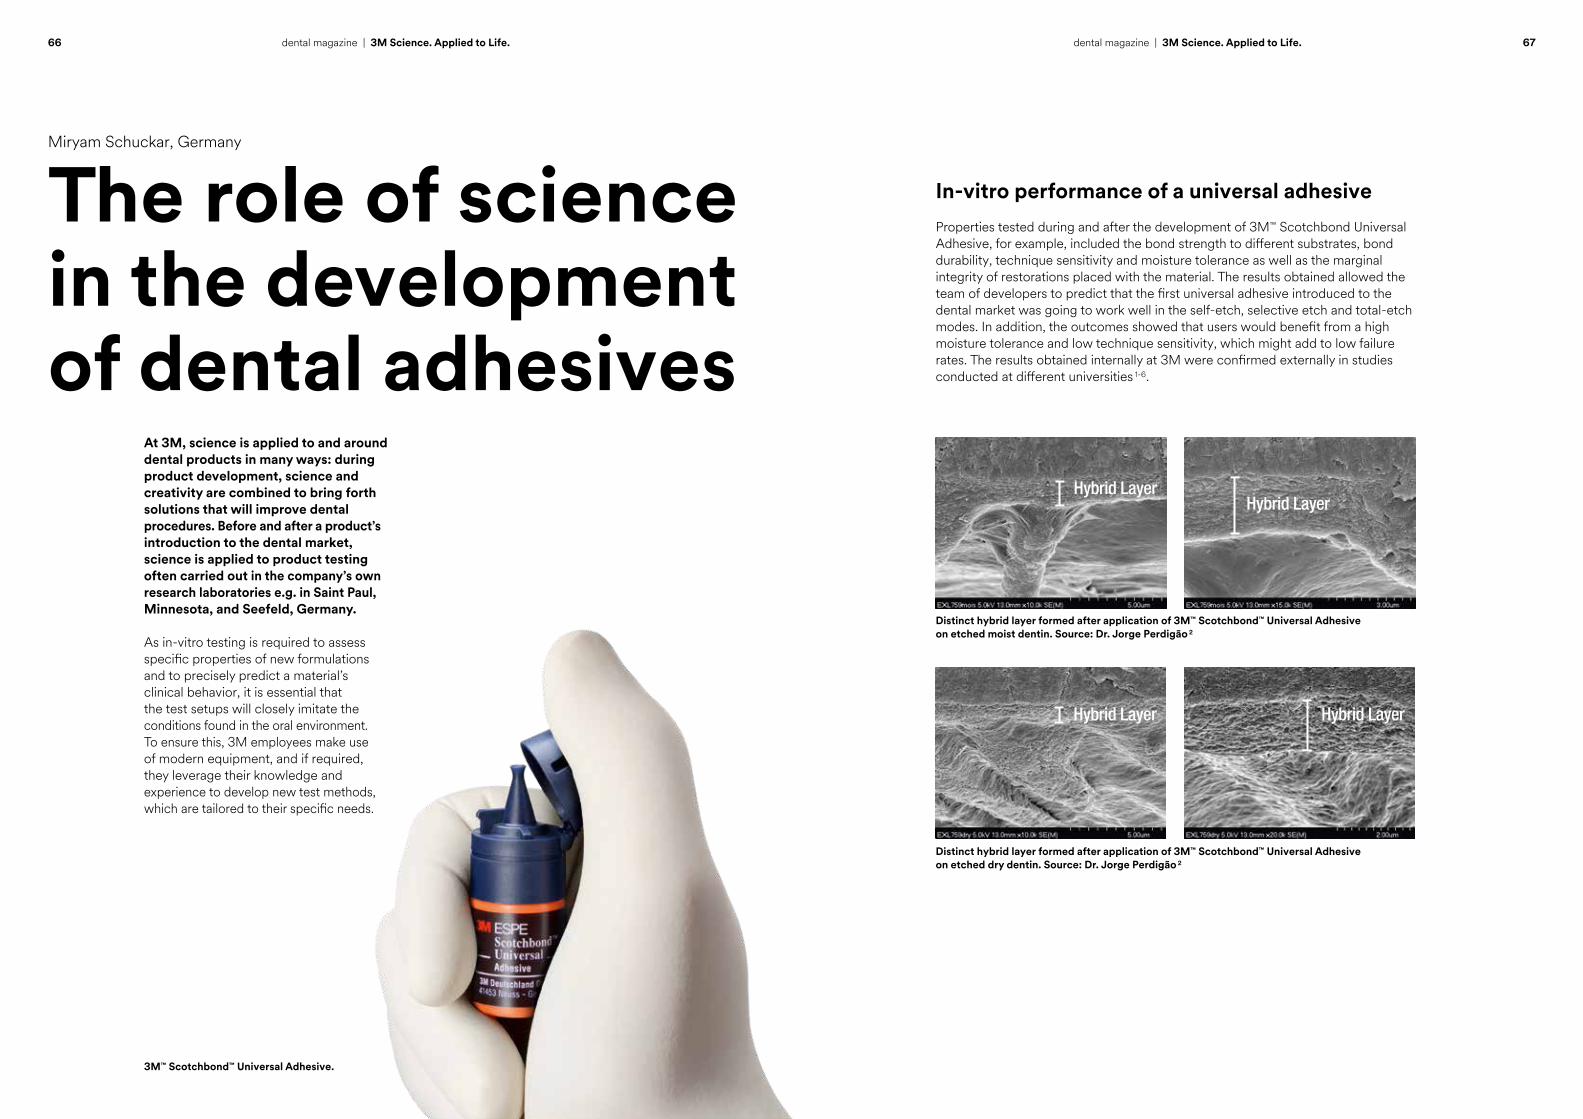
66 67dental magazine | 3M Science. Applied to Life. dental magazine | 3M Science. Applied to Life.
Miryam Schuckar, Germany
The role of science in the development of dental adhesives
At 3M, science is applied to and around dental products in many ways: during product development, science and creativity are combined to bring forth solutions that will improve dental procedures. Before and after a product’s introduction to the dental market, science is applied to product testing often carried out in the company’s own research laboratories e.g. in Saint Paul, Minnesota, and Seefeld, Germany.
As in-vitro testing is required to assess specific properties of new formulations and to precisely predict a material’s clinical behavior, it is essential that the test setups will closely imitate the conditions found in the oral environment. To ensure this, 3M employees make use of modern equipment, and if required, they leverage their knowledge and experience to develop new test methods, which are tailored to their specific needs.
3M™ Scotchbond™ Universal Adhesive.
Distinct hybrid layer formed after application of 3M™ Scotchbond™ Universal Adhesive on etched moist dentin. Source: Dr. Jorge Perdigão 2
Distinct hybrid layer formed after application of 3M™ Scotchbond™ Universal Adhesive on etched dry dentin. Source: Dr. Jorge Perdigão 2
In-vitro performance of a universal adhesiveProperties tested during and after the development of 3M™ Scotchbond Universal Adhesive, for example, included the bond strength to different substrates, bond durability, technique sensitivity and moisture tolerance as well as the marginal integrity of restorations placed with the material. The results obtained allowed the team of developers to predict that the first universal adhesive introduced to the dental market was going to work well in the self-etch, selective etch and total-etch modes. In addition, the outcomes showed that users would benefit from a high moisture tolerance and low technique sensitivity, which might add to low failure rates. The results obtained internally at 3M were confirmed externally in studies conducted at different universities 1-6.
Hybrid LayerHybrid Layer
Hybrid Layer Hybrid Layer

Research on Universal Adhesives: Peer Reviewed Publications
317
59
256
2029
131 7
231 2 0 1
0
50
100
150
200
250
300
350
2011 2012 2012 2013 2014 2014 2014 2015 2015 2016 2016 2017 2017 2017
Lorem ipsum
Peer – reviewed publications in Scopus Database (Sep 25, 2018)
Scot
chbo
nd U
nive
rsal
/ S
ingl
e Bo
nd U
nive
rsal
(3M
)
All
Bond
Uni
vers
al(B
isco
)
Prim
e&Bo
nd E
lect
(Den
tspl
y)
Xeno
Sel
ect
(Den
tspl
y)
Cle
arfil
Uni
vers
al B
ond
(Kur
aray
-Nor
itake
)
Futu
rabo
nd U
, M, M
+(V
oco)
Adh
eSE
Uni
vers
al(Iv
ocla
r-V
ivad
ent)
iBon
d U
nive
rsal
(Kul
zer)
One
Coa
t 7 U
nive
rsal
(Col
tene
)
G-P
rem
io B
ond
(GC
)
Prim
e&Bo
nd A
ctiv
e /
Prim
e&Bo
nd U
nive
rsal
(D
ents
ply)
Cle
arfil
Uni
vers
al B
ond
Qui
ck(K
urar
ay)
Opt
ibon
d U
nive
rsal
(Ker
r)
Uni
vers
al B
ond
/ Bo
ndm
er L
ight
less
(Tok
uyam
a)
68 69dental magazine | 3M Science. Applied to Life. dental magazine | 3M Science. Applied to Life.
Clinical evidenceMeanwhile, clinical proof for an excellent performance of Scotchbond Universal Adhesive is available as well. The material is backed by a wealth of scientific studies. The results available today shed light on the product’s clinical performance over a time span of up to five years. Most of them focus on the performance of the universal adhesive applied in different etching modes.
One example is a practice-based clinical evaluation with composite restorations placed with Scotchbond Universal Adhesive either in the total-etch or in the self-etch mode 7. The three-year results published by the UK-based PREP Panel in 2017 reveal that the bonding agent performs well regardless of the adhesive technique used. Similarly good results are obtained in primary teeth, where there are some hints suggesting that the self-etch strategy might be preferable 8.
While in these studies, the restorations were subjected to occlusal loading, three other studies focused on the universal adhesive’s behavior when used to restore non-carious cervical lesions 9-11. In the cervical area of the tooth, conditions are particularly challenging in that a retentive preparation design is missing and the material’s adhesive properties are put to a severe test.
Loguercio et al. published positive results after three years, and confirmed that the material performs reliably independent of the selected etching technique and independent of the moisture level of the dentin when using the etch-and-rinse technique 9. Schneider et al. examined the restorations clinically and by use of optical coherence tomography after two years 10. The results are promising, with Scotchbond Universal Adhesive showing fewer total failures than a proven etch-and-rinse adhesive. Finally, Robles et al. presented five-year results of their clinical study on the performance of Scotchbond Universal Adhesive 11. They concluded that, used in the self-etch or in the total-etch mode, the universal adhesive performs as well as or even better than a proven two-bottle total-etch system.
These clinical study results confirm that Scotchbond Universal Adhesive is a reliable product that works very well in the context of direct restorative treatment. Similarly good results are obtained in indirect procedures when the universal adhesive is combined with 3M™ RelyX™ Ultimate Adhesive Resin Cement 12, 13.
Fig. 1: Clinical example for direct composite placement with 3M™ Scotchbond™ Universal Adhesive: Isolated and prepared tooth.
Fig. 2: Selective etching: the etchant is applied to the enamel for 15 seconds.
Fig. 3: Situation after rinsing of the etchant and light drying of the cavity.
Fig 4: Application of 3M™ Scotchbond™ Universal Adhesive to the surface. The adhesive should be rubbed in for 20 seconds, air-dried for five seconds and light-cured for 10 seconds.
Fig. 5: Final restoration after contouring and finishing.
Photos courtesy of Dr. Mario deGoes
1 4
52
3
ConclusionScience plays an important role at 3M not only during development of dental products, but throughout the life cycle of these materials. Scientific testing carried out in the laboratories and in the clinical environment is taken seriously to provide the proof clinicians need to use a product with confidence. For Scotchbond Universal Adhesive, the desired clinical evidence is now available and supports its users in their striving for simplified procedures in adhesive dentistry.
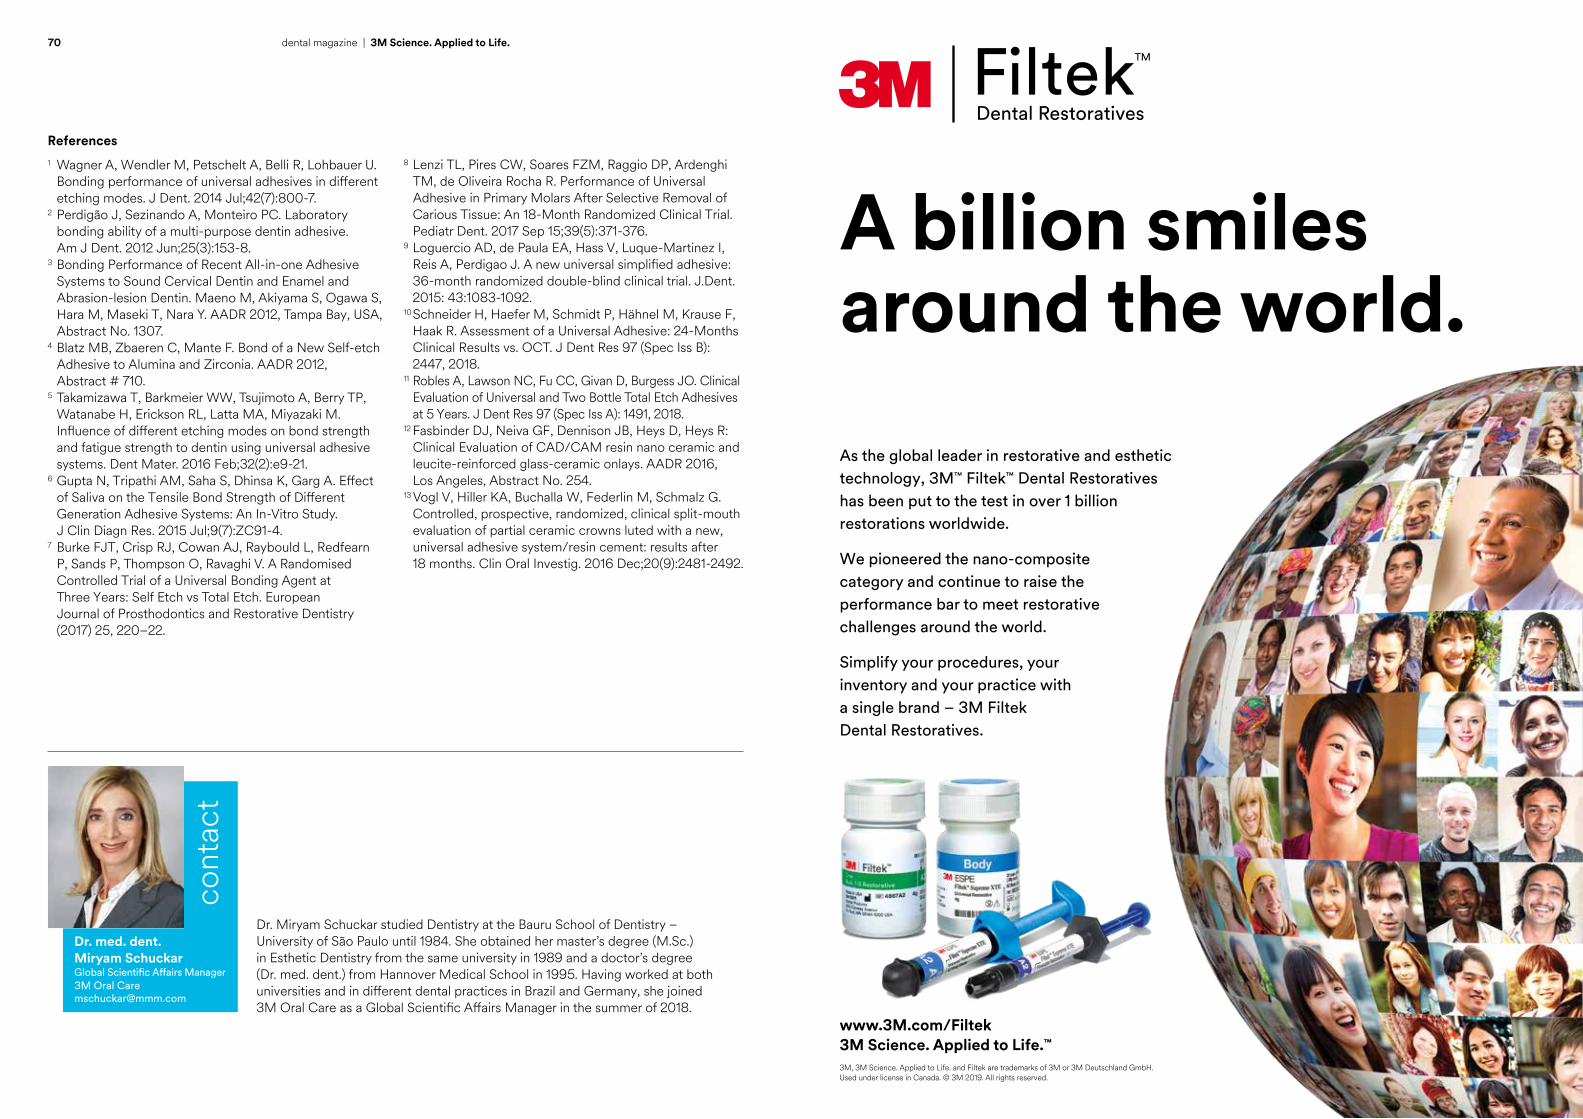
Dr. Miryam Schuckar studied Dentistry at the Bauru School of Dentistry – University of São Paulo until 1984. She obtained her master’s degree (M.Sc.) in Esthetic Dentistry from the same university in 1989 and a doctor’s degree (Dr. med. dent.) from Hannover Medical School in 1995. Having worked at both universities and in different dental practices in Brazil and Germany, she joined 3M Oral Care as a Global Scientific Affairs Manager in the summer of 2018.
Dr. med. dent. Miryam Schuckar Global Scientific Affairs Manager 3M Oral Care [email protected]
cont
act
References1 Wagner A, Wendler M, Petschelt A, Belli R, Lohbauer U. Bonding performance of universal adhesives in different etching modes. J Dent. 2014 Jul;42(7):800-7.2 Perdigão J, Sezinando A, Monteiro PC. Laboratory bonding ability of a multi-purpose dentin adhesive. Am J Dent. 2012 Jun;25(3):153-8.3 Bonding Performance of Recent All-in-one Adhesive Systems to Sound Cervical Dentin and Enamel and Abrasion-lesion Dentin. Maeno M, Akiyama S, Ogawa S, Hara M, Maseki T, Nara Y. AADR 2012, Tampa Bay, USA, Abstract No. 1307.4 Blatz MB, Zbaeren C, Mante F. Bond of a New Self-etch Adhesive to Alumina and Zirconia. AADR 2012, Abstract # 710.5 Takamizawa T, Barkmeier WW, Tsujimoto A, Berry TP, Watanabe H, Erickson RL, Latta MA, Miyazaki M. Influence of different etching modes on bond strength and fatigue strength to dentin using universal adhesive systems. Dent Mater. 2016 Feb;32(2):e9-21.6 Gupta N, Tripathi AM, Saha S, Dhinsa K, Garg A. Effect of Saliva on the Tensile Bond Strength of Different Generation Adhesive Systems: An In-Vitro Study. J Clin Diagn Res. 2015 Jul;9(7):ZC91-4.7 Burke FJT, Crisp RJ, Cowan AJ, Raybould L, Redfearn P, Sands P, Thompson O, Ravaghi V. A Randomised Controlled Trial of a Universal Bonding Agent at Three Years: Self Etch vs Total Etch. European Journal of Prosthodontics and Restorative Dentistry (2017) 25, 220–22.
8 Lenzi TL, Pires CW, Soares FZM, Raggio DP, Ardenghi TM, de Oliveira Rocha R. Performance of Universal Adhesive in Primary Molars After Selective Removal of Carious Tissue: An 18-Month Randomized Clinical Trial. Pediatr Dent. 2017 Sep 15;39(5):371-376.9 Loguercio AD, de Paula EA, Hass V, Luque-Martinez I, Reis A, Perdigao J. A new universal simplified adhesive: 36-month randomized double-blind clinical trial. J.Dent. 2015: 43:1083-1092.10 Schneider H, Haefer M, Schmidt P, Hähnel M, Krause F, Haak R. Assessment of a Universal Adhesive: 24-Months Clinical Results vs. OCT. J Dent Res 97 (Spec Iss B): 2447, 2018.11 Robles A, Lawson NC, Fu CC, Givan D, Burgess JO. Clinical Evaluation of Universal and Two Bottle Total Etch Adhesives at 5 Years. J Dent Res 97 (Spec Iss A): 1491, 2018.12 Fasbinder DJ, Neiva GF, Dennison JB, Heys D, Heys R: Clinical Evaluation of CAD/CAM resin nano ceramic and leucite-reinforced glass-ceramic onlays. AADR 2016, Los Angeles, Abstract No. 254.13 Vogl V, Hiller KA, Buchalla W, Federlin M, Schmalz G. Controlled, prospective, randomized, clinical split-mouth evaluation of partial ceramic crowns luted with a new, universal adhesive system/resin cement: results after 18 months. Clin Oral Investig. 2016 Dec;20(9):2481-2492.
70 dental magazine | 3M Science. Applied to Life.
™
Dental RestorativesFiltek
A billion smiles around the world.
As the global leader in restorative and esthetic technology, 3M™ Filtek™ Dental Restoratives has been put to the test in over 1 billion restorations worldwide.
We pioneered the nano-composite category and continue to raise the performance bar to meet restorative challenges around the world.
Simplify your procedures, your inventory and your practice with a single brand – 3M Filtek Dental Restoratives.
www.3M.com/Filtek3M Science. Applied to Life.™
3M, 3M Science. Applied to Life. and Filtek are trademarks of 3M or 3M Deutschland GmbH. Used under license in Canada. © 3M 2019. All rights reserved.

72 73dental magazine | 3M Science. Applied to Life. dental magazine | 3M Science. Applied to Life.
Frédéric van Vliet, Germany
Polyether polymer: from dentistry to the automotive industry
Polyether impression materials come from Seefeld in Upper Bavaria, Germany. This is the place where they were invented in 1965, where the basic raw materials are developed, the pastes are produced, and innovation and optimization is driven forward. The R&D team’s continuous striving for improvement not only relates to the development of new materials like 3M™ Impregum™ Super Quick Polyether Impression Material with its two-minute setting time introduced in 2018. The team also focuses on existing processes, which can be streamlined in some cases to reduce resource consumption and increase the efficiency of the procedures.
The new 3M™ Impregum™ Super Quick Polyether Impression Material (Heavy Body and Light Body). Packaging of polyether impression materials.
... at 3M in Seefeld.
Production of polyether impression material ...
Purification process redeveloped“When the production of polyether impression materials started in Seefeld more than 50 years ago, the technical capabilities were completely different from what is available today. For this reason, it is necessary to continuously observe the existing processes with a critical eye and to identify those in need of optimization”, explains Dr. Peter Bissinger, Division Scientist at 3M Oral Care in Seefeld. As the Head of Basic Chemical Research and Research & Development Analytics, he is one of the employees responsible for this kind of process evaluation and optimization. In 2017, he won the 3M Circle of Technical Excellence and Innovation Award at Corporate Level for his latest project, the invention of a new process to purify a polyether polymer.
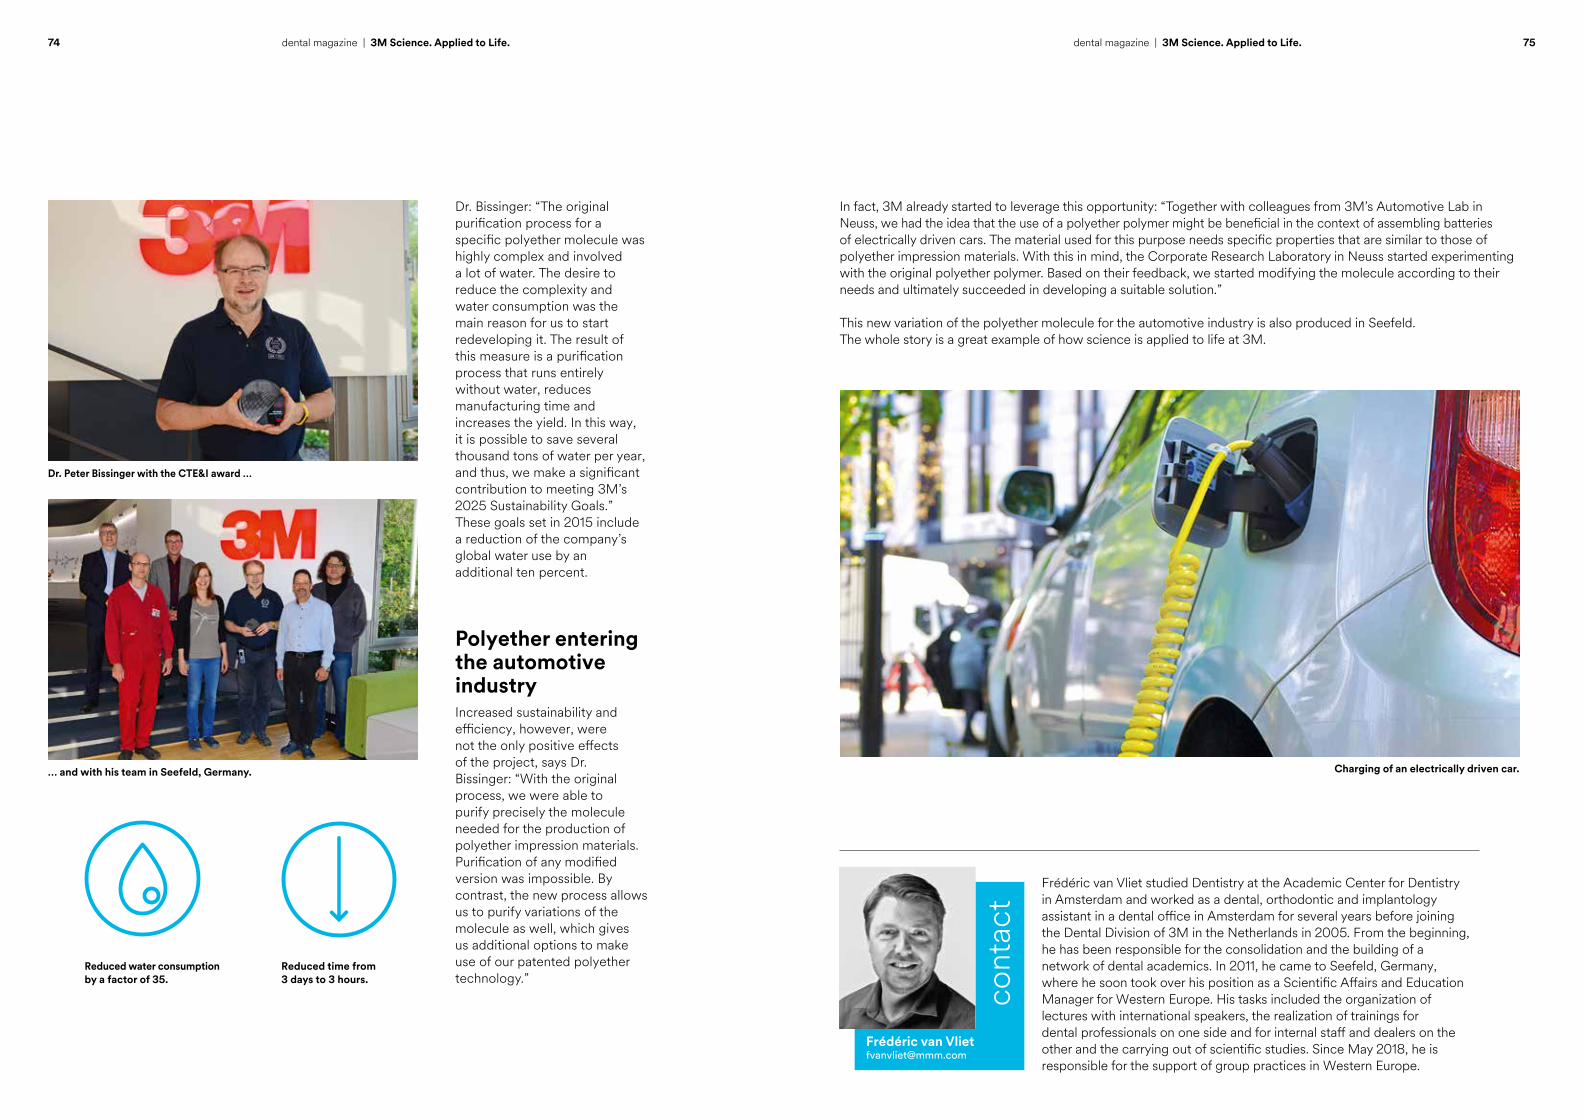
74 75dental magazine | 3M Science. Applied to Life. dental magazine | 3M Science. Applied to Life.
Polyether entering the automotive industry Increased sustainability and efficiency, however, were not the only positive effects of the project, says Dr. Bissinger: “With the original process, we were able to purify precisely the molecule needed for the production of polyether impression materials. Purification of any modified version was impossible. By contrast, the new process allows us to purify variations of the molecule as well, which gives us additional options to make use of our patented polyether technology.”
Dr. Peter Bissinger with the CTE&I award …
… and with his team in Seefeld, Germany.
Dr. Bissinger: “The original purification process for a specific polyether molecule was highly complex and involved a lot of water. The desire to reduce the complexity and water consumption was the main reason for us to start redeveloping it. The result of this measure is a purification process that runs entirely without water, reduces manufacturing time and increases the yield. In this way, it is possible to save several thousand tons of water per year, and thus, we make a significant contribution to meeting 3M’s 2025 Sustainability Goals.” These goals set in 2015 include a reduction of the company’s global water use by an additional ten percent.
Reduced time from 3 days to 3 hours.
Reduced water consumption by a factor of 35.
Charging of an electrically driven car.
Frédéric van Vliet studied Dentistry at the Academic Center for Dentistry in Amsterdam and worked as a dental, orthodontic and implantology assistant in a dental office in Amsterdam for several years before joining the Dental Division of 3M in the Netherlands in 2005. From the beginning, he has been responsible for the consolidation and the building of a network of dental academics. In 2011, he came to Seefeld, Germany, where he soon took over his position as a Scientific Affairs and Education Manager for Western Europe. His tasks included the organization of lectures with international speakers, the realization of trainings for dental professionals on one side and for internal staff and dealers on the other and the carrying out of scientific studies. Since May 2018, he is responsible for the support of group practices in Western Europe.
cont
act
Frédéric van Vliet [email protected]
In fact, 3M already started to leverage this opportunity: “Together with colleagues from 3M’s Automotive Lab in Neuss, we had the idea that the use of a polyether polymer might be beneficial in the context of assembling batteries of electrically driven cars. The material used for this purpose needs specific properties that are similar to those of polyether impression materials. With this in mind, the Corporate Research Laboratory in Neuss started experimenting with the original polyether polymer. Based on their feedback, we started modifying the molecule according to their needs and ultimately succeeded in developing a suitable solution.”
This new variation of the polyether molecule for the automotive industry is also produced in Seefeld. The whole story is a great example of how science is applied to life at 3M.

scientificactivities
David Moreno, Spain
Excellere 2018: Esthetic and interdisciplinary orthodontic treatment approaches
78 – 81

78 79dental magazine | scientific activities dental magazine | scientific activities
The lecture hall of the beautiful event location Casa del Lector in Madrid.
Excellere 2018: Esthetic and interdisciplinary orthodontic treatment approaches
David Moreno, Spain
A highly esthetic smile is the ultimate goal of every orthodontic treatment. In the past, however, most orthodontic appliances available tended to compromise smile esthetics throughout the treatment phase. Hence, patients – especially adults – needed to suffer first in order to obtain the outcomes they were dreaming of. Fortunately, highly esthetic fixed and removable appliance systems have been developed and introduced to the market in recent years. 3M is one of the driving forces behind these developments. The company currently offers different types of ceramic braces, a lingual appliance system and – in the United States – also aligners.
Concepts of how to integrate and use these systems in the everyday orthodontic office were introduced by various internationally renowned speakers at the orthodontic congress “Excellere 2018” in September in Madrid, Spain. The lecturers revealed how to leverage the available innovations to increase the quality of treatment in the orthodontic office. Often, the experts make use of digital planning technologies and work with an interdisciplinary team to be able to offer treatments which are tailored to the individual patients’ needs.
Dr. Federico Hernández Alfaro from Barcelona, Spain, focused on the improvement of facial and smile esthetics with the aid of ortho-facial surgery, often carried out in combination with orthodontic treatment.
Orthodontic treatment of patients with periodontal disease is often challenging, but esthetic results are possible, as demonstrated by Dr. Silvestre Ripoll Cabo from Seville and Dr. Chaqués Asensi. Working hand in hand with each other, the periodontist and the orthodontist are able to treat patients even with severe periodontal problems, as shown using various case examples.
Chairman of the first part of the program: Dr. José Chaqués Asensi from Seville, Spain.
Dr. Juan Carlos Pérez Varela from Santiago de Compostela, Spain, revealed that an open bite may be corrected in different ways, including the use of temporary anchorage devices depending on the case.

80 81dental magazine | scientific activities dental magazine | scientific activities
According to Dr. Riccardo Riatti from Reggio nell’Emilia, Italy, digital smile design can be very
useful in orthodontic treatment planning. The speaker demonstrated how the desired treatment
outcome is visualized, a corresponding orthodontic setup is developed and additional surgical or
restorative treatment is planned if necessary before bonding the first bracket.
Three different types of esthetic orthodontic appliances are sufficient to satisfy individual
treatment needs: Dr. Adam Schulhof from New Jersey in the US uses aligners, ceramic braces and
the lingual appliance system from 3M and often combines them to offer patients what they desire with respect to comfort, esthetics, lifestyle, cost
and time.
The 3M™ Incognito™ Appliance System, a fully customized lingual orthodontic appliance, took
center stage in the afternoon session chaired by Dr. Germain Becker from Luxemburg. In this
session, Dr. Skander Ellouze from Tunis, Tunisia, Dr. Robert Lawson from Edinburgh, UK, and Dr.
Leandro Fernández from Malaga, Spain, focused on interdisciplinary treatment planning and strategies used to gain total control for predictable results. In
the picture: David Moreno (3M), Dr. Germain Becker, Dr. Robert Lawson, and Dr. Leandro Fernández.
The workflow of indirect bonding tray production with the new Digital Flash-Free Indirect Bonding
System offered by 3Shape and 3M was described by Dr. Itamar Michael Friedländer from Barcelona,
Spain. He uses the system as it allows for particularly efficient and predictable bracket bonding and
increases patient comfort.
The breaks were used for a personal chat or an update on new 3M products and technologies for esthetic orthodontic procedures.
SummaryWith their focus on innovative esthetic appliances, digital technologies and interdisciplinary treatment approaches, the speakers gave the participants ample food for thought regarding the future orientation of their orthodontic offices. Many of them are already planning to collaborate more closely with their colleagues from other dental specialties and to promote esthetic orthodontic solutions in order to differentiate their businesses and better serve the needs of their patients.
The congress was attended by approximately 300 dental professionals specializing in orthodontics.
David Moreno Garcia de Marina joined 3M in 1995 as a Sales Representative for the orthodontic business. Since then, he has held various positions in sales and marketing at 3M Unitek and 3M Oral Care. Today, he is a Scientific Affairs & Education Manager Orthodontic Procedures EMEA at 3M Oral Care.
David Moreno Garcia de Marina Education & Scientific Affairs Manager Orthodontic [email protected]
cont
act

outsidethe box
Frank Klink, USA
What if your roof could clean the air?
84 – 85
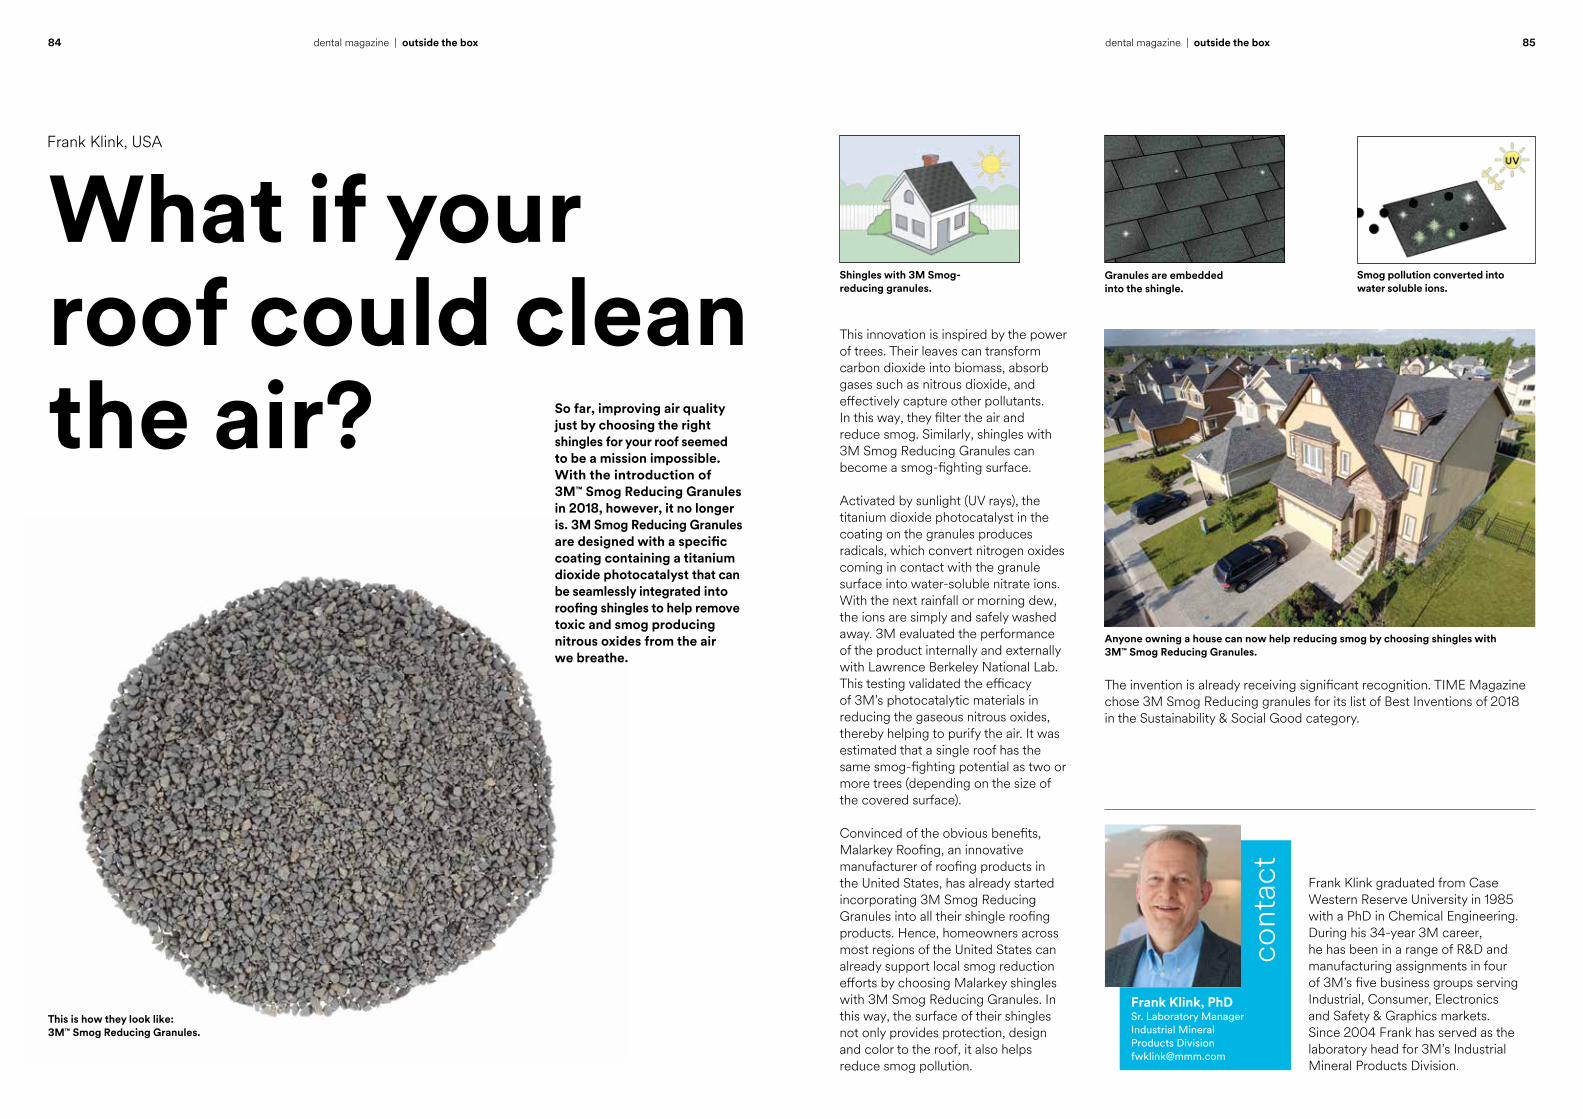
84 85dental magazine | outside the box dental magazine | outside the box
What if your roof could clean the air?
Frank Klink, USA
So far, improving air quality just by choosing the right shingles for your roof seemed to be a mission impossible. With the introduction of 3M™ Smog Reducing Granules in 2018, however, it no longer is. 3M Smog Reducing Granules are designed with a specific coating containing a titanium dioxide photocatalyst that can be seamlessly integrated into roofing shingles to help remove toxic and smog producing nitrous oxides from the air we breathe.
This is how they look like: 3M™ Smog Reducing Granules.
Frank Klink graduated from Case Western Reserve University in 1985 with a PhD in Chemical Engineering. During his 34-year 3M career, he has been in a range of R&D and manufacturing assignments in four of 3M’s five business groups serving Industrial, Consumer, Electronics and Safety & Graphics markets. Since 2004 Frank has served as the laboratory head for 3M’s Industrial Mineral Products Division.
Frank Klink, PhDSr. Laboratory ManagerIndustrial Mineral Products [email protected]
cont
act
This innovation is inspired by the power of trees. Their leaves can transform carbon dioxide into biomass, absorb gases such as nitrous dioxide, and effectively capture other pollutants. In this way, they filter the air and reduce smog. Similarly, shingles with 3M Smog Reducing Granules can become a smog-fighting surface.
Activated by sunlight (UV rays), the titanium dioxide photocatalyst in the coating on the granules produces radicals, which convert nitrogen oxides coming in contact with the granule surface into water-soluble nitrate ions. With the next rainfall or morning dew, the ions are simply and safely washed away. 3M evaluated the performance of the product internally and externally with Lawrence Berkeley National Lab. This testing validated the efficacy of 3M’s photocatalytic materials in reducing the gaseous nitrous oxides, thereby helping to purify the air. It was estimated that a single roof has the same smog-fighting potential as two or more trees (depending on the size of the covered surface).
Convinced of the obvious benefits, Malarkey Roofing, an innovative manufacturer of roofing products in the United States, has already started incorporating 3M Smog Reducing Granules into all their shingle roofing products. Hence, homeowners across most regions of the United States can already support local smog reduction efforts by choosing Malarkey shingles with 3M Smog Reducing Granules. In this way, the surface of their shingles not only provides protection, design and color to the roof, it also helps reduce smog pollution.
Anyone owning a house can now help reducing smog by choosing shingles with 3M™ Smog Reducing Granules.
The invention is already receiving significant recognition. TIME Magazine chose 3M Smog Reducing granules for its list of Best Inventions of 2018 in the Sustainability & Social Good category.
Shingles with 3M Smog- reducing granules.
Granules are embedded into the shingle.
Smog pollution converted into water soluble ions.
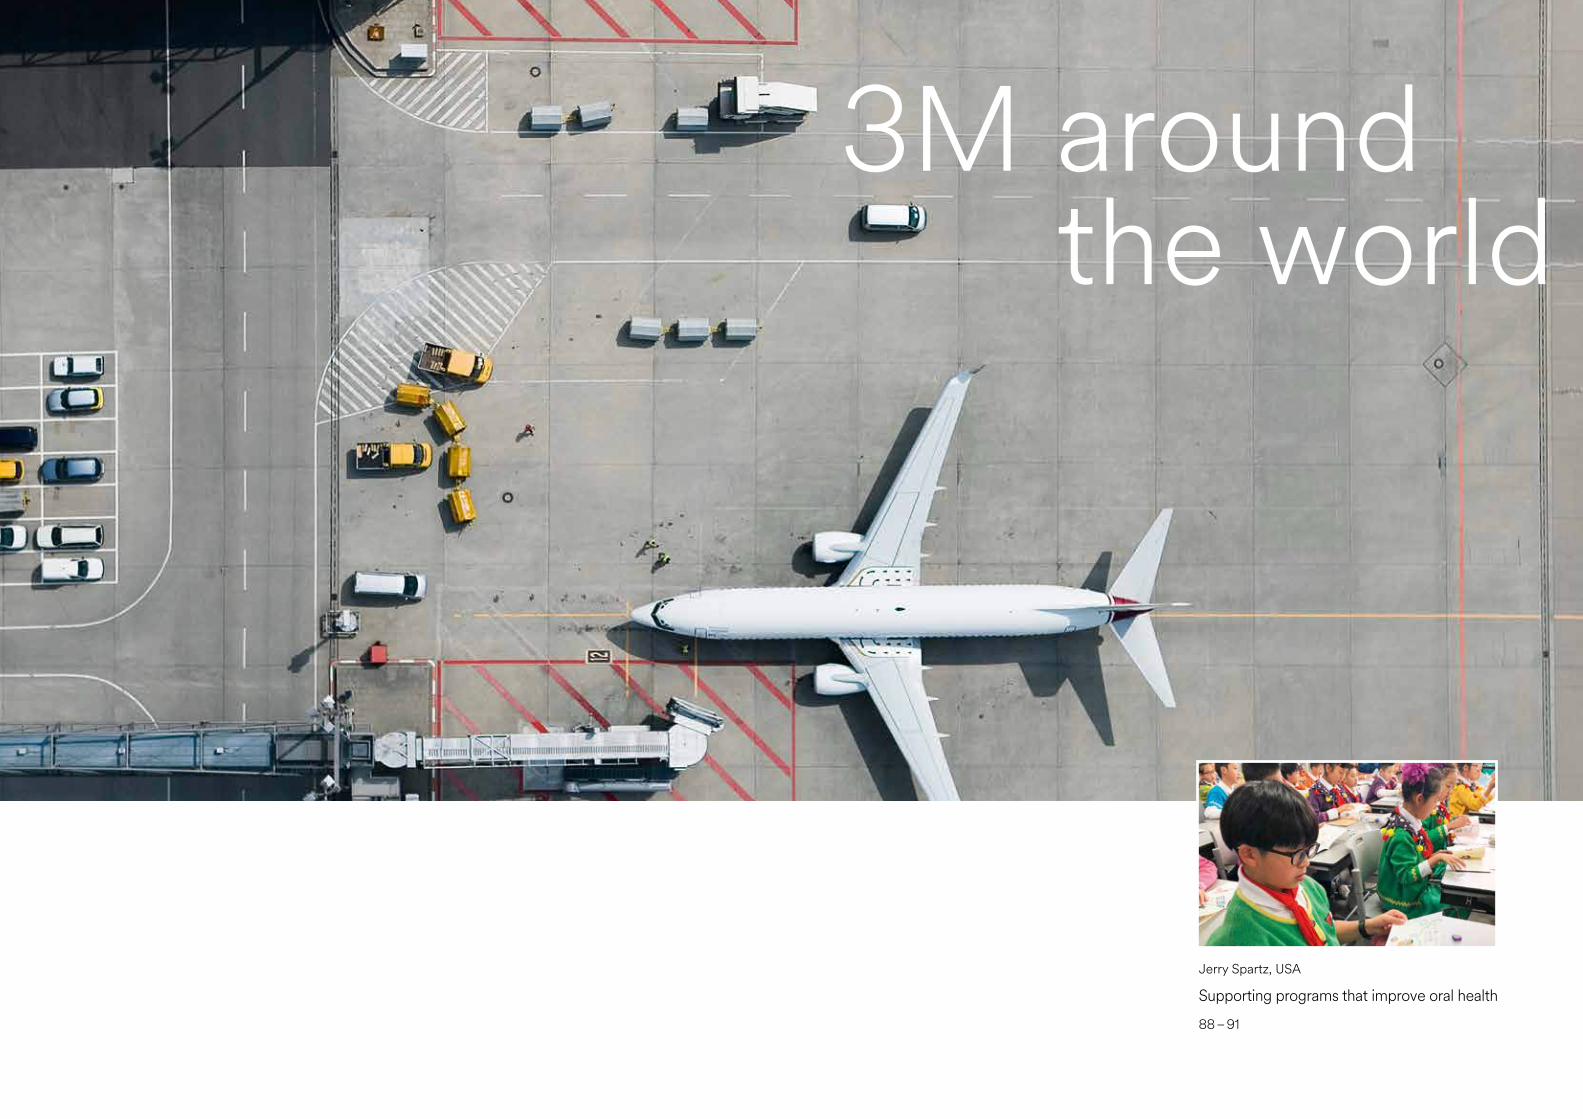
3M aroundthe world
Jerry Spartz, USA
Supporting programs that improve oral health
88 – 91
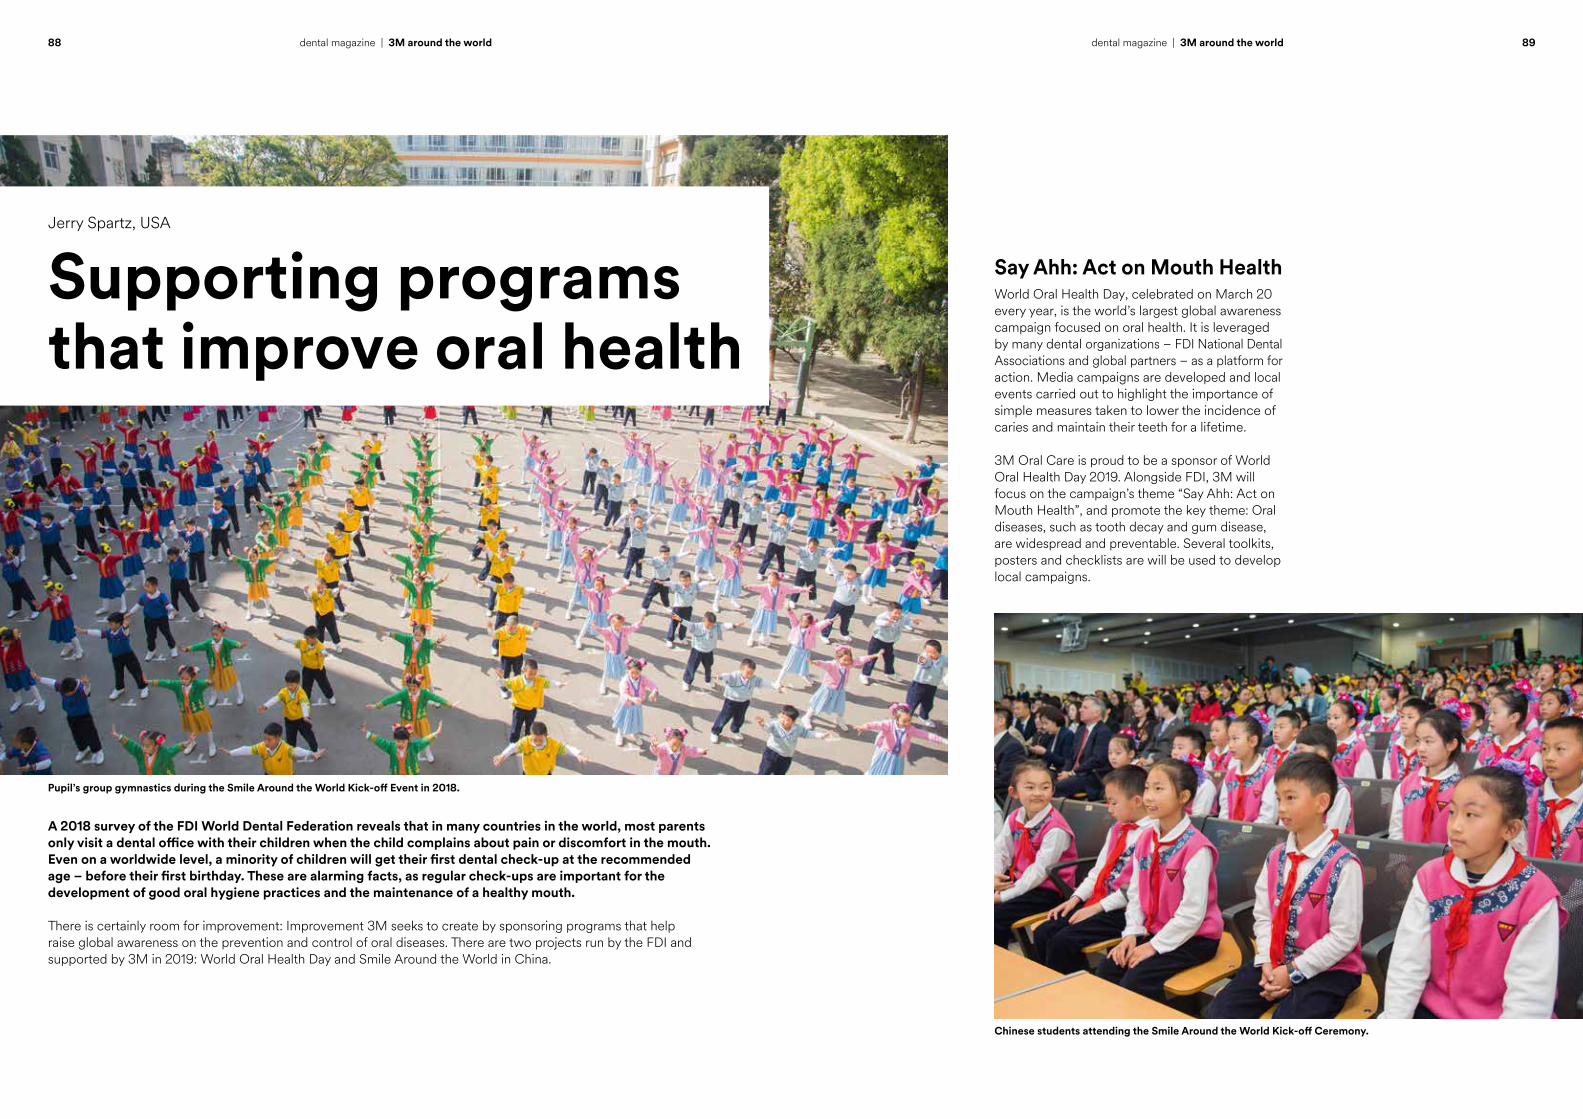
88 89dental magazine | 3M around the world dental magazine | 3M around the world
A 2018 survey of the FDI World Dental Federation reveals that in many countries in the world, most parents only visit a dental office with their children when the child complains about pain or discomfort in the mouth. Even on a worldwide level, a minority of children will get their first dental check-up at the recommended age – before their first birthday. These are alarming facts, as regular check-ups are important for the development of good oral hygiene practices and the maintenance of a healthy mouth.
There is certainly room for improvement: Improvement 3M seeks to create by sponsoring programs that help raise global awareness on the prevention and control of oral diseases. There are two projects run by the FDI and supported by 3M in 2019: World Oral Health Day and Smile Around the World in China.
Jerry Spartz, USA
Supporting programs that improve oral health
Pupil’s group gymnastics during the Smile Around the World Kick-off Event in 2018.
Chinese students attending the Smile Around the World Kick-off Ceremony.
Say Ahh: Act on Mouth HealthWorld Oral Health Day, celebrated on March 20 every year, is the world’s largest global awareness campaign focused on oral health. It is leveraged by many dental organizations – FDI National Dental Associations and global partners – as a platform for action. Media campaigns are developed and local events carried out to highlight the importance of simple measures taken to lower the incidence of caries and maintain their teeth for a lifetime.
3M Oral Care is proud to be a sponsor of World Oral Health Day 2019. Alongside FDI, 3M will focus on the campaign’s theme “Say Ahh: Act on Mouth Health”, and promote the key theme: Oral diseases, such as tooth decay and gum disease, are widespread and preventable. Several toolkits, posters and checklists are will be used to develop local campaigns.
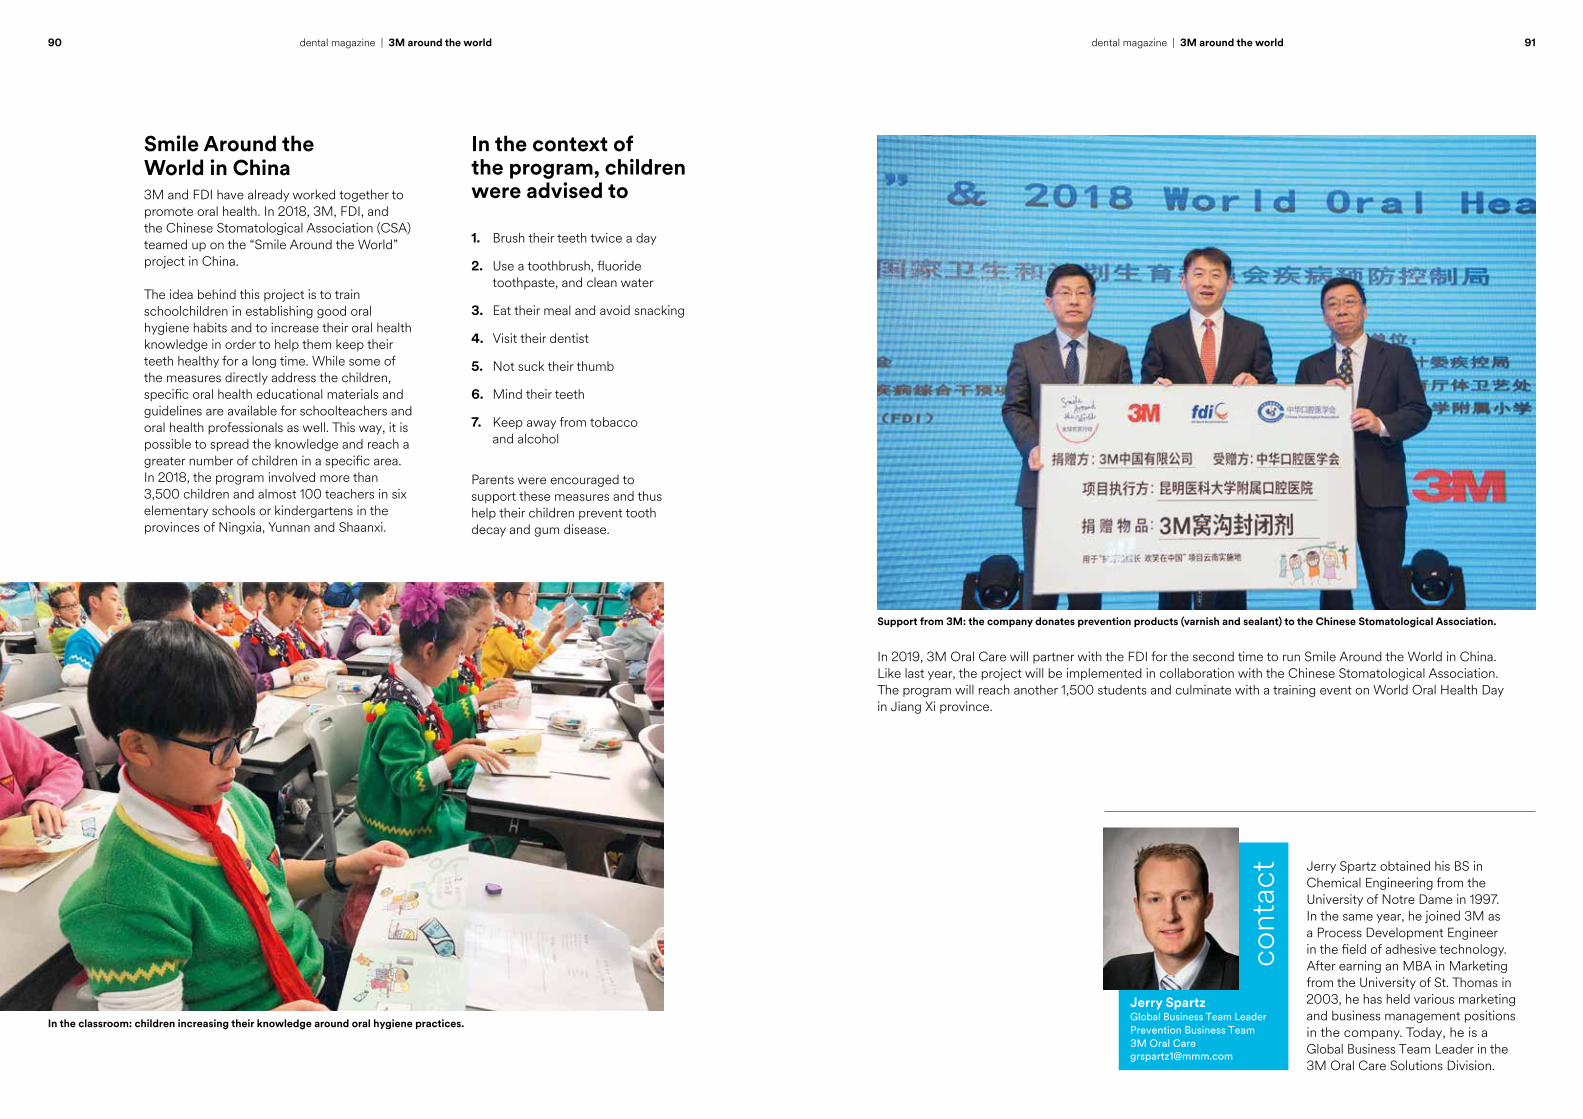
91dental magazine | 3M around the world
Jerry Spartz obtained his BS in Chemical Engineering from the University of Notre Dame in 1997. In the same year, he joined 3M as a Process Development Engineer in the field of adhesive technology. After earning an MBA in Marketing from the University of St. Thomas in 2003, he has held various marketing and business management positions in the company. Today, he is a Global Business Team Leader in the 3M Oral Care Solutions Division.
Jerry Spartz Global Business Team Leader Prevention Business Team 3M Oral [email protected]
cont
act
Support from 3M: the company donates prevention products (varnish and sealant) to the Chinese Stomatological Association.
In 2019, 3M Oral Care will partner with the FDI for the second time to run Smile Around the World in China. Like last year, the project will be implemented in collaboration with the Chinese Stomatological Association. The program will reach another 1,500 students and culminate with a training event on World Oral Health Day in Jiang Xi province.
90 dental magazine | 3M around the world
In the classroom: children increasing their knowledge around oral hygiene practices.
In the context of the program, children were advised to
1. Brush their teeth twice a day
2. Use a toothbrush, fluoride toothpaste, and clean water
3. Eat their meal and avoid snacking
4. Visit their dentist
5. Not suck their thumb
6. Mind their teeth
7. Keep away from tobacco and alcohol
Parents were encouraged to support these measures and thus help their children prevent tooth decay and gum disease.
Smile Around the World in China3M and FDI have already worked together to promote oral health. In 2018, 3M, FDI, and the Chinese Stomatological Association (CSA) teamed up on the “Smile Around the World” project in China.
The idea behind this project is to train schoolchildren in establishing good oral hygiene habits and to increase their oral health knowledge in order to help them keep their teeth healthy for a long time. While some of the measures directly address the children, specific oral health educational materials and guidelines are available for schoolteachers and oral health professionals as well. This way, it is possible to spread the knowledge and reach a greater number of children in a specific area. In 2018, the program involved more than 3,500 children and almost 100 teachers in six elementary schools or kindergartens in the provinces of Ningxia, Yunnan and Shaanxi.
3M Oral CareESPE Platz82229 Seefeld · [email protected]
3M, Clinpro, Elipar, Filtek, Impregum, Incognito, Ketac, Lava, RelyX, Scotchbond, Sinfony and Sof-Lex are trademarks of 3M Company or 3M Deutschland GmbH. Used under license in Canada. All other trademarks are owned by other companies.
© 3M 2019. All rights reserved.
edito
rial i
nfor
mat
ion
Please note that not all products are available in all countries. Product name and package may vary from country to country. For more information, please contact your local 3M Representative.
3M.com/Dental
editorMitsuko O’Neill
editorial teamDavid Moreno Garcia de MarinaJean MaddenAurelio López MuñozBerit RinghoffKaren L. SullivanChristiane SteinClaire SutterFrédéric van VlietAlbert WaningShira Zary
project managementOlivia Besten
designeleven eyes GmbH · www.eleveneyes.de
productionEberl Print GmbH · www.eberl.de
We accept no liability for unsolicited manuscripts or photographs. Court of Jurisdiction: Munich
published by3M Deutschland GmbH ESPE Platz 82229 Seefeld · Germany [email protected] www.3mespe.com