Embed Size (px)
Citation preview
Data ONTAP® 8.2
Commands: Manual Page Reference
For 7-Mode, Volume 1
Updated for 8.2.2
NetApp, Inc.495 East Java DriveSunnyvale, CA 94089U.S.
Telephone: +1 (408) 822-6000Fax: +1 (408) 822-4501Support telephone: +1 (888) 463-8277Web: www.netapp.comFeedback: [email protected]
Part number: 215-08872_B0June 2014

Table of Contents...................... 1 ..... 3About the Data ONTAP Commands: Manual Page Reference, Volume 1... 5Manual Pages by Section in This Volume and Complete Index of Both Volumes................... 18acpadmin..................... 20aggr..................... 41arp................... 43autosupport................ 46autosupport_destinations................. 47autosupport_history................. 51autosupport_manifest................. 55autosupport_trigger..................... 59awa.................... 62backup..................... 64bmc.................... 66bootfs..................... 67cdpd..................... 70cf.................... 73charmap..................... 75cifs................... 77cifs_access.................. 79cifs_adupdate................... 80cifs_audit.................. 81cifs_branchcache.................. 83cifs_broadcast................. 84cifs_changefilerpwd.................. 85cifs_comment.................. 86cifs_domaininfo.................... 88cifs_help................... 89cifs_homedir................... 90cifs_lookup................... 91cifs_nbalias................... 92cifs_prefdc................... 94cifs_resetdc................... 95cifs_restart................... 96cifs_sessions................... 100cifs_setup................... 101cifs_shares................... 110cifs_sidcache.................... 112cifs_stat.................. 114cifs_terminate................... 115cifs_testdc.................... 118cifs_top.................... 120clone.................... 122config................. 126coredump_segment
Data ONTAP® 8.2 Commands: Manual Page Reference for 7-Mode, Volume 1 i

................. 127coredump_segment_config
................. 129coredump_segment_delete
................ 130coredump_segment_delete-all
................. 131coredump_segment_show
................. 133coredump_segment_start
................. 134coredump_segment_status
................. 135coredump_segment_stop
...................... 136date
...................... 138dcb
...................... 140dd
....................... 141df
...................... 144disk
................... 154disk_fw_update
..................... 158disktest
...................... 162dlm
...................... 163dns
..................... 165download
...................... 166du
...................... 168dump
...................... 174echo
...................... 175ems
...................... 180enable
...................... 181license
..................... 183environ
.................... 186environment
..................... 189exportfs
..................... 197fcadmin
...................... 203fcdiag
...................... 204fcnic
...................... 205fcp
...................... 212fcstat
...................... 218fctest
...................... 221fcvi
...................... 222file
..................... 224flexcache
..................... 226floppyboot
...................... 229fpolicy
..................... 236fsecurity
................... 237fsecurity_apply
................... 238fsecurity_cancel
.................... 239fsecurity_help
................. 240fsecurity_remove-guard
.................... 241fsecurity_show
................... 243fsecurity_status
...................... 244ftp
...................... 246ftpd
...................... 250halt
...................... 252help
ii Data ONTAP® 8.2 Commands: Manual Page Reference for 7-Mode, Volume 1

..................... 254hostname
..................... 255httpstat
....................... 259ic
................... 260if_addr_filter_info
..................... 261ifconfig
...................... 268ifgrp
...................... 275ifinfo
...................... 276ifstat
...................... 277igroup
...................... 280ipsec
..................... 281ipspace
...................... 283iscsi
...................... 297iswt
.................... 298key_manager
..................... 305keymgr
...................... 308l2ping
...................... 310lock
...................... 325logger
...................... 327logout
...................... 328lun
...................... 337man
..................... 338maxfiles
..................... 339memerr
...................... 340mt
..................... 342nbtstat
..................... 344ndmpcopy
..................... 350ndmpd
...................... 352ndp
..................... 355netdiag
...................... 357netstat
...................... 363nfs
...................... 365nfsstat
...................... 376nis
..................... 378options
..................... 467orouted
..................... 470partner
..................... 472passwd
...................... 474ping
...................... 476ping6
...................... 479pktt
..................... 483portset
..................... 485priority
...................... 488priv
...................... 490qtree
...................... 495quota
...................... 499radius
...................... 502rdate
...................... 503rdfile
Data ONTAP® 8.2 Commands: Manual Page Reference for 7-Mode, Volume 1 iii
..................... 504reallocate
...................... 509reboot
..................... 511restore
................... 516restore_backup
..................... 517revert_to
...................... 519rlm
...................... 521route
...................... 525routed
..................... 531rshstat
...................... 533rtsold
...................... 535san
..................... 538sasadmin
...................... 549sasstat
..................... 550savecore
..................... 552sectrace
.................... 555secureadmin
...................... 557setup
...................... 559sftp
..................... 560shelfchk
....................... 562sis
..................... 570smtape
...................... 573snap
..................... 584snaplock
.................... 587snapmirror
..................... 600snapvault
...................... 614snmp
..................... 621software
...................... 623source
....................... 624sp
...................... 626stats
..................... 632storage
..................... 642sysconfig
...................... 644sysstat
.................... 651system_health
.................. 652system_health_alert
................. 657system_health_autosupport
.................. 660system_health_config
.................. 663system_health_policy
.................. 666system_health_status
................. 667system_health_subsystem
................ 669system_node_service_processor
..................... 680timezone
..................... 681traceroute
.................... 684traceroute6
..................... 687ucadmin
..................... 690uptime
..................... 691useradmin
..................... 699version
iv Data ONTAP® 8.2 Commands: Manual Page Reference for 7-Mode, Volume 1

...................... 700vfiler
...................... 706vif
...................... 713vlan
..................... 716vmservices
...................... 717vol
...................... 748vscan
..................... 752wafl_aac
...................... 755wcc
...................... 757wrfile
...................... 759ypcat
..................... 760ypgroup
..................... 761ypmatch
..................... 762ypwhich
Data ONTAP® 8.2 Commands: Manual Page Reference for 7-Mode, Volume 1 v

Legal Information
Copyright Trademarks
Copyright
Copyright © 1994-2014 NetApp, Inc. All rights reserved. Printed in the U.S.
Portions copyright © 2014 IBM Corporation. All rights reserved. Printed in the U.S.
U.S. Government Users Restricted RightsUse, duplication, or disclosure restricted by GSA ADPSchedule Contract with IBM Corporation.
No part of this document covered by copyright may be reproduced in any form or by any meansgraphic,electronic, or mechanical, including photocopying, recording, taping, or storage in an electronicretrieval systemwithout prior written permission of the copyright owner.
References in this documentation to IBM products, programs, or services do not imply that IBM intendsto make these available in all countries in which IBM operates. Any reference to an IBM product,program, or service is not intended to state or imply that only IBM’s product, program, or service maybe used. Any functionally equivalent product, program, or service that does not infringe any of IBMs orNetApp’s intellectual property rights may be used instead of the IBM or NetApp product, program, orservice. Evaluation and verification of operation in conjunction with other products, except thoseexpressly designated by IBM and NetApp, are the user’s responsibility.
No part of this document covered by copyright may be reproduced in any form or by any meansgraphic,electronic, or mechanical, including photocopying, recording, taping, or storage in an electronicretrieval systemwithout prior written permission of the copyright owner.
Software derived from copyrighted NetApp material is subject to the following license and disclaimer:
THIS SOFTWARE IS PROVIDED BY NETAPP "AS IS" AND WITHOUT ANY EXPRESS ORIMPLIED WARRANTIES, INCLUDING, BUT NOT LIMITED TO, THE IMPLIED WARRANTIESOF MERCHANTABILITY AND FITNESS FOR A PARTICULAR PURPOSE, WHICH AREHEREBY DISCLAIMED. IN NO EVENT SHALL NETAPP BE LIABLE FOR ANY DIRECT,INDIRECT, INCIDENTAL, SPECIAL, EXEMPLARY, OR CONSEQUENTIAL DAMAGES(INCLUDING, BUT NOT LIMITED TO, PROCUREMENT OF SUBSTITUTE GOODS ORSERVICES; LOSS OF USE, DATA, OR PROFITS; OR BUSINESS INTERRUPTION) HOWEVERCAUSED AND ON ANY THEORY OF LIABILITY, WHETHER IN CONTRACT, STRICTLIABILITY, OR TORT (INCLUDING NEGLIGENCE OR OTHERWISE) ARISING IN ANY WAYOUT OF THE USE OF THIS SOFTWARE, EVEN IF ADVISED OF THE POSSIBILITY OF SUCH DAMAGE.
NetApp reserves the right to change any products described herein at any time, and without notice.NetApp assumes no responsibility or liability arising from the use of products described herein, exceptas expressly agreed to in writing by NetApp. The use or purchase of this product does not convey alicense under any patent rights, trademark rights, or any other intellectual property rights of NetApp.
Data ONTAP® 8.2 Commands: Manual Page Reference for 7-Mode, Volume 1 1
The product described in this manual may be protected by one or more U.S. patents, foreign patents, orpending applications.
RESTRICTED RIGHTS LEGEND: Use, duplication, or disclosure by the government is subject torestrictions as set forth in subparagraph (c)(1)(ii) of the Rights in Technical Data and ComputerSoftware clause at DFARS 252.277-7103 (October 1988) and FAR 52-227-19 (June 1987).
Trademarks
NetApp, the NetApp logo, Network Appliance, the Network Appliance logo, Akorri, ApplianceWatch,ASUP, AutoSupport, BalancePoint, BalancePoint Predictor, Bycast, Campaign Express,ComplianceClock, Customer Fitness, Cryptainer, CryptoShred, CyberSnap, Data Center Fitness, DataONTAP, DataFabric, DataFort, Decru, Decru DataFort, DenseStak, Engenio, Engenio logo, E-Stack,ExpressPod, FAServer, FastStak, FilerView, Fitness, Flash Accel, Flash Cache, Flash Pool, FlashRay,FlexCache, FlexClone, FlexPod, FlexScale, FlexShare, FlexSuite, FlexVol, FPolicy, GetSuccessful,gFiler, Go further, faster, Imagine Virtually Anything, Lifetime Key Management, LockVault, ManageONTAP, Mars, MetroCluster, MultiStore, NearStore, NetCache, NOW (NetApp on the Web), Onaro,OnCommand, ONTAPI, OpenKey, PerformanceStak, RAID-DP, ReplicatorX, SANscreen, SANshare,SANtricity, SecureAdmin, SecureShare, Select, Service Builder, Shadow Tape, Simplicity, SimulateONTAP, SnapCopy, Snap Creator, SnapDirector, SnapDrive, SnapFilter, SnapIntegrator, SnapLock,SnapManager, SnapMigrator, SnapMirror, SnapMover, SnapProtect, SnapRestore, Snapshot, SnapSuite,SnapValidator, SnapVault, StorageGRID, StoreVault, the StoreVault logo, SyncMirror, Tech OnTap,The evolution of storage, Topio, VelocityStak, vFiler, VFM, Virtual File Manager, VPolicy, WAFL,Web Filer, and XBB are trademarks or registered trademarks of NetApp, Inc. in the United States, othercountries, or both.
IBM, the IBM logo, and ibm.com are trademarks or registered trademarks of International BusinessMachines Corporation in the United States, other countries, or both. A complete and current list of otherIBM trademarks is available on the web at www.ibm.com/legal/copytrade.shtml.
Apple is a registered trademark and QuickTime is a trademark of Apple, Inc. in the United States and/orother countries. Microsoft is a registered trademark and Windows Media is a trademark of MicrosoftCorporation in the United States and/or other countries. RealAudio, RealNetworks, RealPlayer,RealSystem, RealText, and RealVideo are registered trademarks and RealMedia, RealProxy, andSureStream are trademarks of RealNetworks, Inc. in the United States and/or other countries.
All other brands or products are trademarks or registered trademarks of their respective holders andshould be treated as such.
NetApp, Inc. is a licensee of the CompactFlash and CF Logo trademarks. NetApp, Inc. NetCache iscertified RealSystem compatible.
2 Data ONTAP® 8.2 Commands: Manual Page Reference for 7-Mode, Volume 1
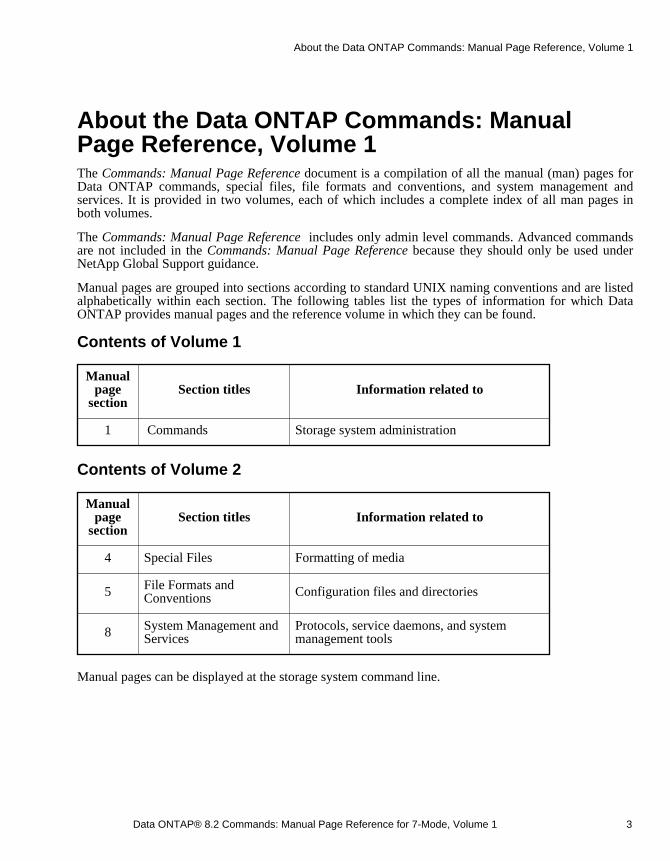
About the Data ONTAP Commands: ManualPage Reference, Volume 1The Commands: Manual Page Reference document is a compilation of all the manual (man) pages forData ONTAP commands, special files, file formats and conventions, and system management andservices. It is provided in two volumes, each of which includes a complete index of all man pages inboth volumes.
The Commands: Manual Page Reference includes only admin level commands. Advanced commandsare not included in the Commands: Manual Page Reference because they should only be used underNetApp Global Support guidance.
Manual pages are grouped into sections according to standard UNIX naming conventions and are listedalphabetically within each section. The following tables list the types of information for which DataONTAP provides manual pages and the reference volume in which they can be found.
Contents of Volume 1
Manualpage
sectionSection titles Information related to
1 Commands Storage system administration
Contents of Volume 2
Manualpage
sectionSection titles Information related to
4 Special Files Formatting of media
5 File Formats and Conventions Configuration files and directories
8 System Management and Services
Protocols, service daemons, and systemmanagement tools
Manual pages can be displayed at the storage system command line.
Data ONTAP® 8.2 Commands: Manual Page Reference for 7-Mode, Volume 1 3
About the Data ONTAP Commands: Manual Page Reference, Volume 1

Terminology
Storage systems that run Data ONTAP are sometimes also referred to as filers, appliances, storage appliances, or systems.
The na prefix for manual page names
All Data ONTAP manual pages are stored on the storage system in files whose names are prefixed withthe string "na_" to distinguish them from client manual pages. The prefixed names are used to refer tostorage system manual pages from other manual pages and sometimes appear in the NAME field of themanual page, but the prefixes do not need to be part of commands.
Viewing manual pages at the command line
To view a manual page for a command at your storage system command line (console), enter the following:
man command
Note: Data ONTAP commands are case sensitive.
To see a list of all commands from the storage system command line, enter a question mark (?) after thehost prompt.
Manual pages about using manual pages
Useful manual pages about using manual pages are the help(1) and the man(1) manual pages. You canuse the man help command to view information about how to display the manual page for aparticular command. You can use the man man command to view information about how to use the man command.
4 Data ONTAP® 8.2 Commands: Manual Page Reference for 7-Mode, Volume 1
About the Data ONTAP Commands: Manual Page Reference, Volume 1
Manual Pages by Section in This Volume andComplete Index of Both VolumesManual Pages By Section
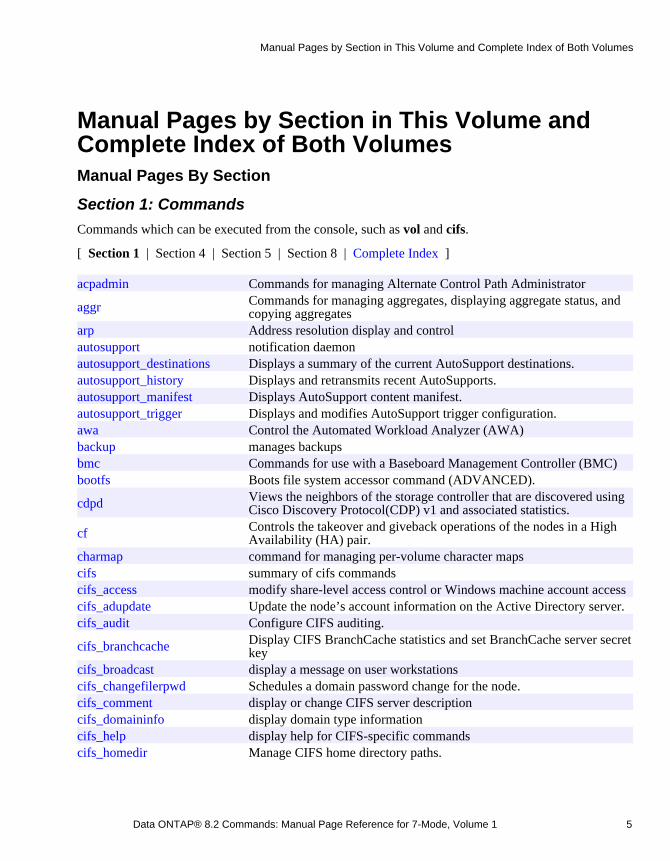
Section 1: Commands
Commands which can be executed from the console, such as vol and cifs.
[ Section 1 | Section 4 | Section 5 | Section 8 | Complete Index ]
acpadmin Commands for managing Alternate Control Path Administrator
aggr Commands for managing aggregates, displaying aggregate status, andcopying aggregates
arp Address resolution display and control autosupport notification daemon autosupport_destinations Displays a summary of the current AutoSupport destinations. autosupport_history Displays and retransmits recent AutoSupports. autosupport_manifest Displays AutoSupport content manifest. autosupport_trigger Displays and modifies AutoSupport trigger configuration. awa Control the Automated Workload Analyzer (AWA) backup manages backups bmc Commands for use with a Baseboard Management Controller (BMC) bootfs Boots file system accessor command (ADVANCED).
cdpd Views the neighbors of the storage controller that are discovered usingCisco Discovery Protocol(CDP) v1 and associated statistics.
cf Controls the takeover and giveback operations of the nodes in a HighAvailability (HA) pair.
charmap command for managing per-volume character maps cifs summary of cifs commands cifs_access modify share-level access control or Windows machine account access cifs_adupdate Update the node’s account information on the Active Directory server. cifs_audit Configure CIFS auditing.
cifs_branchcache Display CIFS BranchCache statistics and set BranchCache server secretkey
cifs_broadcast display a message on user workstations cifs_changefilerpwd Schedules a domain password change for the node. cifs_comment display or change CIFS server description cifs_domaininfo display domain type information cifs_help display help for CIFS-specific commands cifs_homedir Manage CIFS home directory paths.
Data ONTAP® 8.2 Commands: Manual Page Reference for 7-Mode, Volume 1 5
Manual Pages by Section in This Volume and Complete Index of Both Volumes
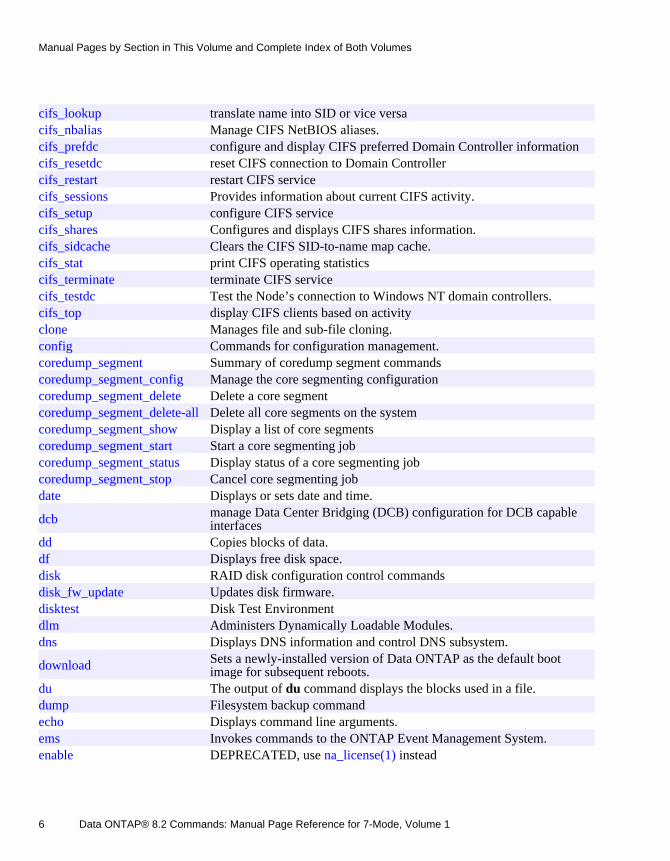
cifs_lookup translate name into SID or vice versa cifs_nbalias Manage CIFS NetBIOS aliases. cifs_prefdc configure and display CIFS preferred Domain Controller information cifs_resetdc reset CIFS connection to Domain Controller cifs_restart restart CIFS service cifs_sessions Provides information about current CIFS activity. cifs_setup configure CIFS service cifs_shares Configures and displays CIFS shares information. cifs_sidcache Clears the CIFS SID-to-name map cache. cifs_stat print CIFS operating statistics cifs_terminate terminate CIFS service cifs_testdc Test the Node’s connection to Windows NT domain controllers. cifs_top display CIFS clients based on activity clone Manages file and sub-file cloning. config Commands for configuration management. coredump_segment Summary of coredump segment commands coredump_segment_config Manage the core segmenting configuration coredump_segment_delete Delete a core segment coredump_segment_delete-all Delete all core segments on the system coredump_segment_show Display a list of core segments coredump_segment_start Start a core segmenting job coredump_segment_status Display status of a core segmenting job coredump_segment_stop Cancel core segmenting job date Displays or sets date and time.
dcb manage Data Center Bridging (DCB) configuration for DCB capableinterfaces
dd Copies blocks of data. df Displays free disk space. disk RAID disk configuration control commands disk_fw_update Updates disk firmware. disktest Disk Test Environment dlm Administers Dynamically Loadable Modules. dns Displays DNS information and control DNS subsystem.
download Sets a newly-installed version of Data ONTAP as the default bootimage for subsequent reboots.
du The output of du command displays the blocks used in a file. dump Filesystem backup command echo Displays command line arguments. ems Invokes commands to the ONTAP Event Management System. enable DEPRECATED, use na_license(1) instead
6 Data ONTAP® 8.2 Commands: Manual Page Reference for 7-Mode, Volume 1
Manual Pages by Section in This Volume and Complete Index of Both Volumes
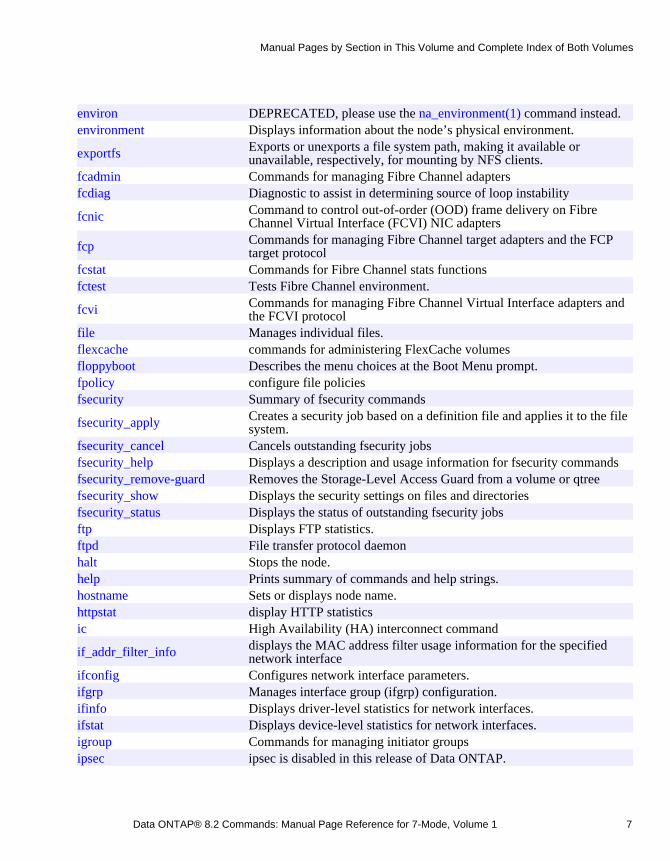
environ DEPRECATED, please use the na_environment(1) command instead. environment Displays information about the node’s physical environment.
exportfs Exports or unexports a file system path, making it available orunavailable, respectively, for mounting by NFS clients.
fcadmin Commands for managing Fibre Channel adapters fcdiag Diagnostic to assist in determining source of loop instability
fcnic Command to control out-of-order (OOD) frame delivery on FibreChannel Virtual Interface (FCVI) NIC adapters
fcp Commands for managing Fibre Channel target adapters and the FCPtarget protocol
fcstat Commands for Fibre Channel stats functions fctest Tests Fibre Channel environment.
fcvi Commands for managing Fibre Channel Virtual Interface adapters andthe FCVI protocol
file Manages individual files. flexcache commands for administering FlexCache volumes floppyboot Describes the menu choices at the Boot Menu prompt. fpolicy configure file policies fsecurity Summary of fsecurity commands
fsecurity_apply Creates a security job based on a definition file and applies it to the filesystem.
fsecurity_cancel Cancels outstanding fsecurity jobs fsecurity_help Displays a description and usage information for fsecurity commands fsecurity_remove-guard Removes the Storage-Level Access Guard from a volume or qtree fsecurity_show Displays the security settings on files and directories fsecurity_status Displays the status of outstanding fsecurity jobs ftp Displays FTP statistics. ftpd File transfer protocol daemon halt Stops the node. help Prints summary of commands and help strings. hostname Sets or displays node name. httpstat display HTTP statistics ic High Availability (HA) interconnect command
if_addr_filter_info displays the MAC address filter usage information for the specifiednetwork interface
ifconfig Configures network interface parameters. ifgrp Manages interface group (ifgrp) configuration. ifinfo Displays driver-level statistics for network interfaces. ifstat Displays device-level statistics for network interfaces. igroup Commands for managing initiator groups ipsec ipsec is disabled in this release of Data ONTAP.
Data ONTAP® 8.2 Commands: Manual Page Reference for 7-Mode, Volume 1 7
Manual Pages by Section in This Volume and Complete Index of Both Volumes
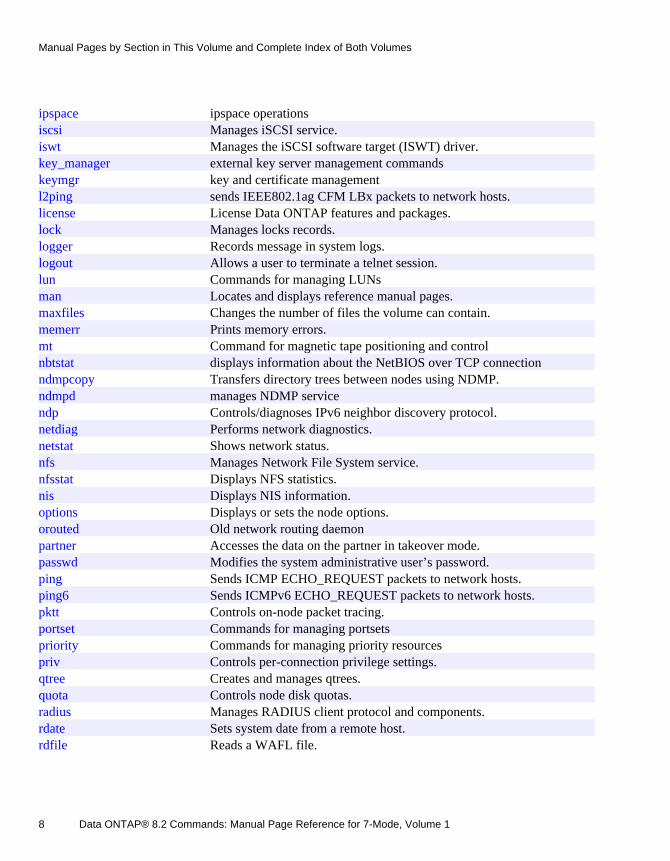
ipspace ipspace operations iscsi Manages iSCSI service. iswt Manages the iSCSI software target (ISWT) driver. key_manager external key server management commands keymgr key and certificate management l2ping sends IEEE802.1ag CFM LBx packets to network hosts. license License Data ONTAP features and packages. lock Manages locks records. logger Records message in system logs. logout Allows a user to terminate a telnet session. lun Commands for managing LUNs man Locates and displays reference manual pages. maxfiles Changes the number of files the volume can contain. memerr Prints memory errors. mt Command for magnetic tape positioning and control nbtstat displays information about the NetBIOS over TCP connection ndmpcopy Transfers directory trees between nodes using NDMP. ndmpd manages NDMP service ndp Controls/diagnoses IPv6 neighbor discovery protocol. netdiag Performs network diagnostics. netstat Shows network status. nfs Manages Network File System service. nfsstat Displays NFS statistics. nis Displays NIS information. options Displays or sets the node options. orouted Old network routing daemon partner Accesses the data on the partner in takeover mode. passwd Modifies the system administrative user’s password. ping Sends ICMP ECHO_REQUEST packets to network hosts. ping6 Sends ICMPv6 ECHO_REQUEST packets to network hosts. pktt Controls on-node packet tracing. portset Commands for managing portsets priority Commands for managing priority resources priv Controls per-connection privilege settings. qtree Creates and manages qtrees. quota Controls node disk quotas. radius Manages RADIUS client protocol and components. rdate Sets system date from a remote host. rdfile Reads a WAFL file.
8 Data ONTAP® 8.2 Commands: Manual Page Reference for 7-Mode, Volume 1
Manual Pages by Section in This Volume and Complete Index of Both Volumes
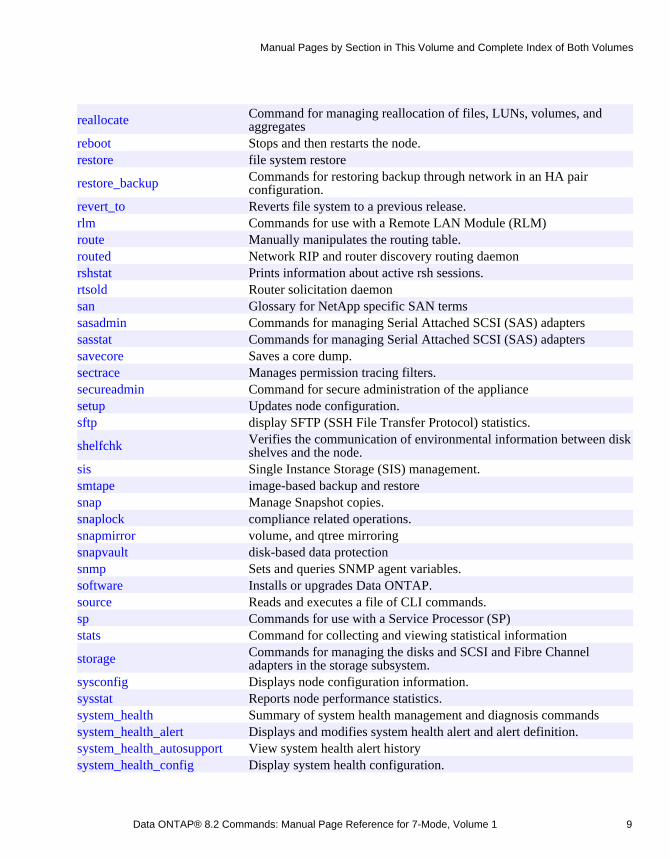
reallocate Command for managing reallocation of files, LUNs, volumes, andaggregates
reboot Stops and then restarts the node. restore file system restore
restore_backup Commands for restoring backup through network in an HA pairconfiguration.
revert_to Reverts file system to a previous release. rlm Commands for use with a Remote LAN Module (RLM) route Manually manipulates the routing table. routed Network RIP and router discovery routing daemon rshstat Prints information about active rsh sessions. rtsold Router solicitation daemon san Glossary for NetApp specific SAN terms sasadmin Commands for managing Serial Attached SCSI (SAS) adapters sasstat Commands for managing Serial Attached SCSI (SAS) adapters savecore Saves a core dump. sectrace Manages permission tracing filters. secureadmin Command for secure administration of the appliance setup Updates node configuration. sftp display SFTP (SSH File Transfer Protocol) statistics.
shelfchk Verifies the communication of environmental information between diskshelves and the node.
sis Single Instance Storage (SIS) management. smtape image-based backup and restore snap Manage Snapshot copies. snaplock compliance related operations. snapmirror volume, and qtree mirroring snapvault disk-based data protection snmp Sets and queries SNMP agent variables. software Installs or upgrades Data ONTAP. source Reads and executes a file of CLI commands. sp Commands for use with a Service Processor (SP) stats Command for collecting and viewing statistical information
storage Commands for managing the disks and SCSI and Fibre Channeladapters in the storage subsystem.
sysconfig Displays node configuration information. sysstat Reports node performance statistics. system_health Summary of system health management and diagnosis commands system_health_alert Displays and modifies system health alert and alert definition. system_health_autosupport View system health alert history system_health_config Display system health configuration.
Data ONTAP® 8.2 Commands: Manual Page Reference for 7-Mode, Volume 1 9
Manual Pages by Section in This Volume and Complete Index of Both Volumes
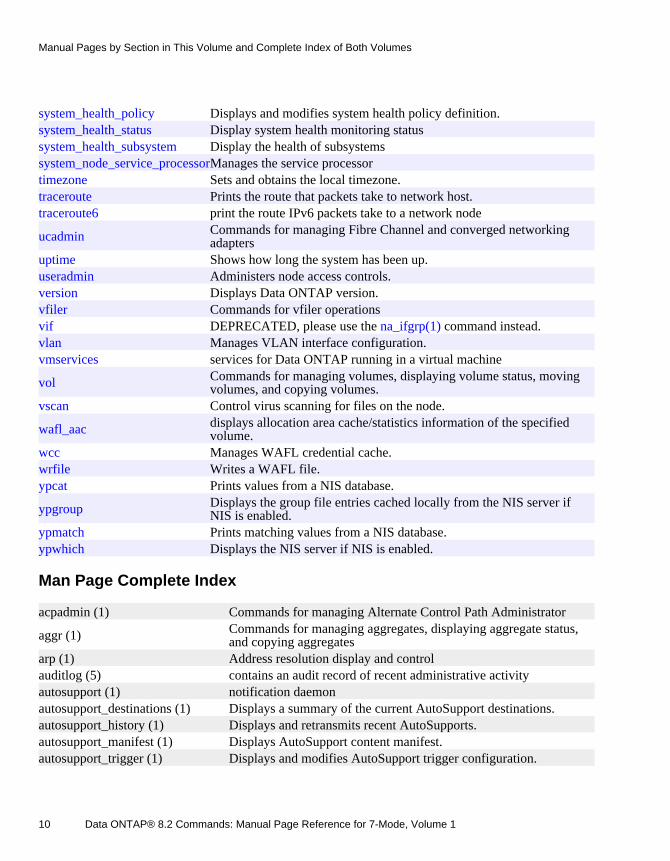
system_health_policy Displays and modifies system health policy definition. system_health_status Display system health monitoring status system_health_subsystem Display the health of subsystems system_node_service_processor Manages the service processor timezone Sets and obtains the local timezone. traceroute Prints the route that packets take to network host. traceroute6 print the route IPv6 packets take to a network node
ucadmin Commands for managing Fibre Channel and converged networkingadapters
uptime Shows how long the system has been up. useradmin Administers node access controls. version Displays Data ONTAP version. vfiler Commands for vfiler operations vif DEPRECATED, please use the na_ifgrp(1) command instead. vlan Manages VLAN interface configuration. vmservices services for Data ONTAP running in a virtual machine
vol Commands for managing volumes, displaying volume status, movingvolumes, and copying volumes.
vscan Control virus scanning for files on the node.
wafl_aac displays allocation area cache/statistics information of the specifiedvolume.
wcc Manages WAFL credential cache. wrfile Writes a WAFL file. ypcat Prints values from a NIS database.
ypgroup Displays the group file entries cached locally from the NIS server ifNIS is enabled.
ypmatch Prints matching values from a NIS database. ypwhich Displays the NIS server if NIS is enabled.
Man Page Complete Index
acpadmin (1) Commands for managing Alternate Control Path Administrator
aggr (1) Commands for managing aggregates, displaying aggregate status,and copying aggregates
arp (1) Address resolution display and control auditlog (5) contains an audit record of recent administrative activity autosupport (1) notification daemon autosupport_destinations (1) Displays a summary of the current AutoSupport destinations. autosupport_history (1) Displays and retransmits recent AutoSupports. autosupport_manifest (1) Displays AutoSupport content manifest. autosupport_trigger (1) Displays and modifies AutoSupport trigger configuration.
10 Data ONTAP® 8.2 Commands: Manual Page Reference for 7-Mode, Volume 1
Manual Pages by Section in This Volume and Complete Index of Both Volumes
awa (1) Control the Automated Workload Analyzer (AWA) backup (1) manages backups
backuplog (5) captures significant events during file system or volume backup andrecovery activities.
bmc (1) Commands for use with a Baseboard Management Controller(BMC)
boot (5) Directory of Data ONTAP executables bootfs (1) Boots file system accessor command (ADVANCED).
cdpd (1) Views the neighbors of the storage controller that are discoveredusing Cisco Discovery Protocol(CDP) v1 and associated statistics.
cf (1) Controls the takeover and giveback operations of the nodes in aHigh Availability (HA) pair.
charmap (1) command for managing per-volume character maps cifs (1) summary of cifs commands cifs (8) Common Internet File System (CIFS) Protocol
cifs_access (1) modify share-level access control or Windows machine accountaccess
cifs_adupdate (1) Update the node’s account information on the Active Directoryserver.
cifs_audit (1) Configure CIFS auditing.
cifs_branchcache (1) Display CIFS BranchCache statistics and set BranchCache serversecret key
cifs_broadcast (1) display a message on user workstations cifs_changefilerpwd (1) Schedules a domain password change for the node. cifs_comment (1) display or change CIFS server description cifs_domaininfo (1) display domain type information cifs_help (1) display help for CIFS-specific commands cifs_homedir (1) Manage CIFS home directory paths. cifs_homedir.cfg (5) configuration file for CIFS home directories cifs_lookup (1) translate name into SID or vice versa cifs_nbalias (1) Manage CIFS NetBIOS aliases. cifs_nbalias.cfg (5) configuration file for CIFS NetBIOS aliases
cifs_prefdc (1) configure and display CIFS preferred Domain Controllerinformation
cifs_resetdc (1) reset CIFS connection to Domain Controller cifs_restart (1) restart CIFS service cifs_sessions (1) Provides information about current CIFS activity. cifs_setup (1) configure CIFS service cifs_shares (1) Configures and displays CIFS shares information. cifs_sidcache (1) Clears the CIFS SID-to-name map cache. cifs_stat (1) print CIFS operating statistics
Data ONTAP® 8.2 Commands: Manual Page Reference for 7-Mode, Volume 1 11
Manual Pages by Section in This Volume and Complete Index of Both Volumes
cifs_terminate (1) terminate CIFS service cifs_testdc (1) Test the Node’s connection to Windows NT domain controllers. cifs_top (1) display CIFS clients based on activity cli (8) Data ONTAP command language interperter (CLI) clone (1) Manages file and sub-file cloning. clone (5) Log of clone activities cloned_tapes (5) List of non-qualified tape drives attached to the node config (1) Commands for configuration management. coredump_segment (1) Summary of coredump segment commands coredump_segment_config (1) Manage the core segmenting configuration coredump_segment_delete (1) Delete a core segment coredump_segment_delete-all (1) Delete all core segments on the system coredump_segment_show (1) Display a list of core segments coredump_segment_start (1) Start a core segmenting job coredump_segment_status (1) Display status of a core segmenting job coredump_segment_stop (1) Cancel core segmenting job crash (5) Directory of system core files date (1) Displays or sets date and time.
dcb (1) manage Data Center Bridging (DCB) configuration for DCBcapable interfaces
dd (1) Copies blocks of data. df (1) Displays free disk space. dgateways (5) Default gateways list disk (1) RAID disk configuration control commands disk_fw_update (1) Updates disk firmware. disktest (1) Disk Test Environment dlm (1) Administers Dynamically Loadable Modules. dns (1) Displays DNS information and control DNS subsystem. dns (8) Domain Name System
download (1) Sets a newly-installed version of Data ONTAP as the default bootimage for subsequent reboots.
du (1) The output of du command displays the blocks used in a file. dump (1) Filesystem backup command dumpdates (5) Data base of filesystem dump times echo (1) Displays command line arguments. ems (1) Invokes commands to the ONTAP Event Management System. enable (1) DEPRECATED, use na_license(1) instead
environ (1) DEPRECATED, please use the na_environment(1) commandinstead.
environment (1) Displays information about the node’s physical environment.
12 Data ONTAP® 8.2 Commands: Manual Page Reference for 7-Mode, Volume 1
Manual Pages by Section in This Volume and Complete Index of Both Volumes
exportfs (1) Exports or unexports a file system path, making it available orunavailable, respectively, for mounting by NFS clients.
exports (5) A list of export entries for all file system paths that Data ONTAPexports automatically when NFS starts up.
fcadmin (1) Commands for managing Fibre Channel adapters fcdiag (1) Diagnostic to assist in determining source of loop instability
fcnic (1) Command to control out-of-order (OOD) frame delivery on FibreChannel Virtual Interface (FCVI) NIC adapters
fcp (1) Commands for managing Fibre Channel target adapters and the FCPtarget protocol
fcstat (1) Commands for Fibre Channel stats functions fctest (1) Tests Fibre Channel environment.
fcvi (1) Commands for managing Fibre Channel Virtual Interface adaptersand the FCVI protocol
file (1) Manages individual files. flexcache (1) commands for administering FlexCache volumes floppyboot (1) Describes the menu choices at the Boot Menu prompt. fpolicy (1) configure file policies fsecurity (1) Summary of fsecurity commands fsecurity (5) Definition file for an fsecurity job
fsecurity_apply (1) Creates a security job based on a definition file and applies it to thefile system.
fsecurity_cancel (1) Cancels outstanding fsecurity jobs
fsecurity_help (1) Displays a description and usage information for fsecuritycommands
fsecurity_remove-guard (1) Removes the Storage-Level Access Guard from a volume or qtree fsecurity_show (1) Displays the security settings on files and directories fsecurity_status (1) Displays the status of outstanding fsecurity jobs ftp (1) Displays FTP statistics. ftpd (1) File transfer protocol daemon ftpusers (5) file listing users to be disallowed ftp login privileges group (5) group file halt (1) Stops the node. help (1) Prints summary of commands and help strings. hostname (1) Sets or displays node name. hosts (5) Host name data base hosts.equiv (5) List of hosts and users with rsh permission http (8) HyperText Transfer Protocol httpd.access (5) authentication controls for HTTP access httpd.group (5) Names of HTTP access groups and their members httpd.hostprefixes (5) configuration of HTTP root directories for virtual hosts
Data ONTAP® 8.2 Commands: Manual Page Reference for 7-Mode, Volume 1 13
Manual Pages by Section in This Volume and Complete Index of Both Volumes
httpd.log (5) Log of HTTP httpd.mimetypes (5) map of file suffixes to MIME ContentType httpd.passwd (5) file of passwords required for HTTP access httpd.translations (5) URL translations to be applied to incoming HTTP requests httpstat (1) display HTTP statistics ic (1) High Availability (HA) interconnect command
if_addr_filter_info (1) displays the MAC address filter usage information for the specifiednetwork interface
ifconfig (1) Configures network interface parameters. ifgrp (1) Manages interface group (ifgrp) configuration. ifinfo (1) Displays driver-level statistics for network interfaces. ifstat (1) Displays device-level statistics for network interfaces. igroup (1) Commands for managing initiator groups ipsec (1) ipsec is disabled in this release of Data ONTAP. ipspace (1) ipspace operations iscsi (1) Manages iSCSI service. iswt (1) Manages the iSCSI software target (ISWT) driver. key_manager (1) external key server management commands keymgr (1) key and certificate management l2ping (1) sends IEEE802.1ag CFM LBx packets to network hosts. license (1) License Data ONTAP features and packages. lock (1) Manages locks records. logger (1) Records message in system logs. logout (1) Allows a user to terminate a telnet session. lun (1) Commands for managing LUNs man (1) Locates and displays reference manual pages. maxfiles (1) Changes the number of files the volume can contain. memerr (1) Prints memory errors. messages (5) record of recent console messages mt (1) Command for magnetic tape positioning and control nbtstat (1) displays information about the NetBIOS over TCP connection ndmpcopy (1) Transfers directory trees between nodes using NDMP. ndmpd (1) manages NDMP service ndp (1) Controls/diagnoses IPv6 neighbor discovery protocol. netdiag (1) Performs network diagnostics. netgroup (5) Network groups data base netstat (1) Shows network status. networks (5) Network name data base nfs (1) Manages Network File System service. nfs (8) Network File System (NFS) Protocol
14 Data ONTAP® 8.2 Commands: Manual Page Reference for 7-Mode, Volume 1
Manual Pages by Section in This Volume and Complete Index of Both Volumes
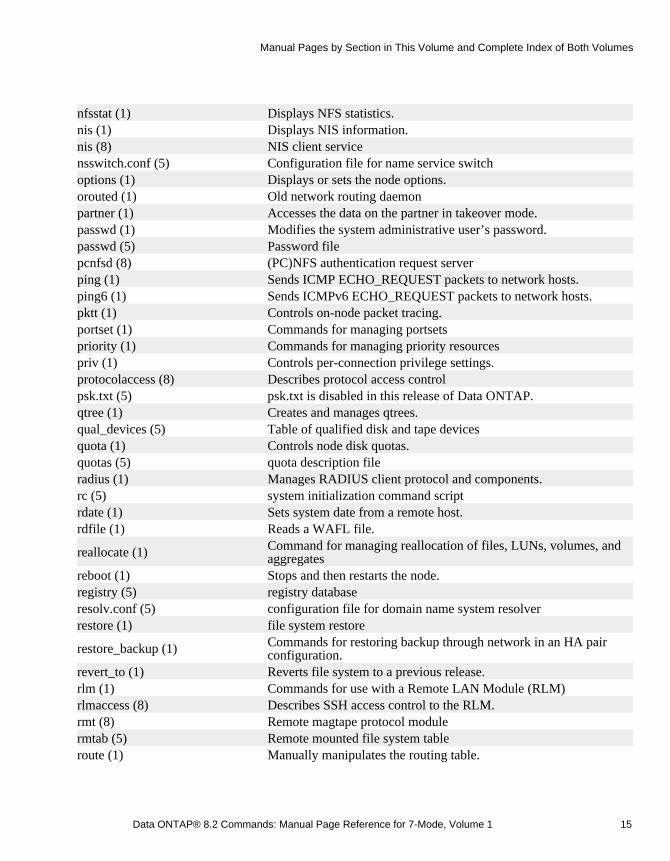
nfsstat (1) Displays NFS statistics. nis (1) Displays NIS information. nis (8) NIS client service nsswitch.conf (5) Configuration file for name service switch options (1) Displays or sets the node options. orouted (1) Old network routing daemon partner (1) Accesses the data on the partner in takeover mode. passwd (1) Modifies the system administrative user’s password. passwd (5) Password file pcnfsd (8) (PC)NFS authentication request server ping (1) Sends ICMP ECHO_REQUEST packets to network hosts. ping6 (1) Sends ICMPv6 ECHO_REQUEST packets to network hosts. pktt (1) Controls on-node packet tracing. portset (1) Commands for managing portsets priority (1) Commands for managing priority resources priv (1) Controls per-connection privilege settings. protocolaccess (8) Describes protocol access control psk.txt (5) psk.txt is disabled in this release of Data ONTAP. qtree (1) Creates and manages qtrees. qual_devices (5) Table of qualified disk and tape devices quota (1) Controls node disk quotas. quotas (5) quota description file radius (1) Manages RADIUS client protocol and components. rc (5) system initialization command script rdate (1) Sets system date from a remote host. rdfile (1) Reads a WAFL file.
reallocate (1) Command for managing reallocation of files, LUNs, volumes, andaggregates
reboot (1) Stops and then restarts the node. registry (5) registry database resolv.conf (5) configuration file for domain name system resolver restore (1) file system restore
restore_backup (1) Commands for restoring backup through network in an HA pairconfiguration.
revert_to (1) Reverts file system to a previous release. rlm (1) Commands for use with a Remote LAN Module (RLM) rlmaccess (8) Describes SSH access control to the RLM. rmt (8) Remote magtape protocol module rmtab (5) Remote mounted file system table route (1) Manually manipulates the routing table.
Data ONTAP® 8.2 Commands: Manual Page Reference for 7-Mode, Volume 1 15
Manual Pages by Section in This Volume and Complete Index of Both Volumes
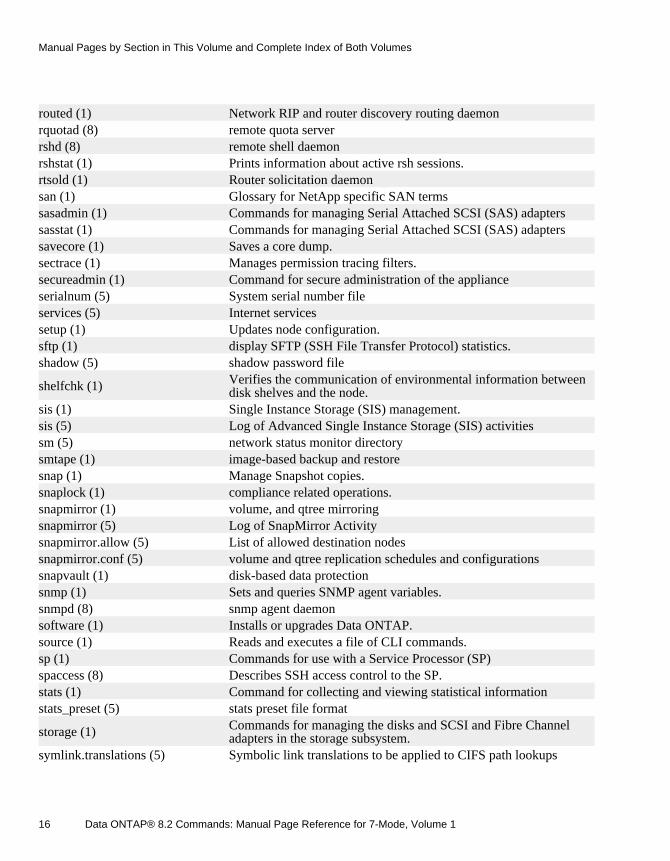
routed (1) Network RIP and router discovery routing daemon rquotad (8) remote quota server rshd (8) remote shell daemon rshstat (1) Prints information about active rsh sessions. rtsold (1) Router solicitation daemon san (1) Glossary for NetApp specific SAN terms sasadmin (1) Commands for managing Serial Attached SCSI (SAS) adapters sasstat (1) Commands for managing Serial Attached SCSI (SAS) adapters savecore (1) Saves a core dump. sectrace (1) Manages permission tracing filters. secureadmin (1) Command for secure administration of the appliance serialnum (5) System serial number file services (5) Internet services setup (1) Updates node configuration. sftp (1) display SFTP (SSH File Transfer Protocol) statistics. shadow (5) shadow password file
shelfchk (1) Verifies the communication of environmental information betweendisk shelves and the node.
sis (1) Single Instance Storage (SIS) management. sis (5) Log of Advanced Single Instance Storage (SIS) activities sm (5) network status monitor directory smtape (1) image-based backup and restore snap (1) Manage Snapshot copies. snaplock (1) compliance related operations. snapmirror (1) volume, and qtree mirroring snapmirror (5) Log of SnapMirror Activity snapmirror.allow (5) List of allowed destination nodes snapmirror.conf (5) volume and qtree replication schedules and configurations snapvault (1) disk-based data protection snmp (1) Sets and queries SNMP agent variables. snmpd (8) snmp agent daemon software (1) Installs or upgrades Data ONTAP. source (1) Reads and executes a file of CLI commands. sp (1) Commands for use with a Service Processor (SP) spaccess (8) Describes SSH access control to the SP. stats (1) Command for collecting and viewing statistical information stats_preset (5) stats preset file format
storage (1) Commands for managing the disks and SCSI and Fibre Channeladapters in the storage subsystem.
symlink.translations (5) Symbolic link translations to be applied to CIFS path lookups
16 Data ONTAP® 8.2 Commands: Manual Page Reference for 7-Mode, Volume 1
Manual Pages by Section in This Volume and Complete Index of Both Volumes
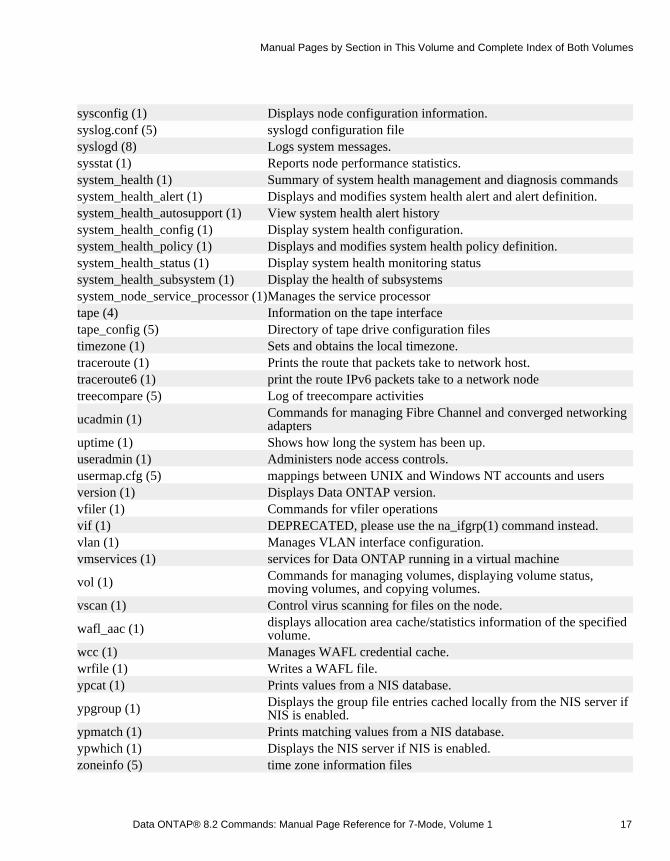
sysconfig (1) Displays node configuration information. syslog.conf (5) syslogd configuration file syslogd (8) Logs system messages. sysstat (1) Reports node performance statistics. system_health (1) Summary of system health management and diagnosis commands system_health_alert (1) Displays and modifies system health alert and alert definition. system_health_autosupport (1) View system health alert history system_health_config (1) Display system health configuration. system_health_policy (1) Displays and modifies system health policy definition. system_health_status (1) Display system health monitoring status system_health_subsystem (1) Display the health of subsystems system_node_service_processor (1) Manages the service processor tape (4) Information on the tape interface tape_config (5) Directory of tape drive configuration files timezone (1) Sets and obtains the local timezone. traceroute (1) Prints the route that packets take to network host. traceroute6 (1) print the route IPv6 packets take to a network node treecompare (5) Log of treecompare activities
ucadmin (1) Commands for managing Fibre Channel and converged networkingadapters
uptime (1) Shows how long the system has been up. useradmin (1) Administers node access controls. usermap.cfg (5) mappings between UNIX and Windows NT accounts and users version (1) Displays Data ONTAP version. vfiler (1) Commands for vfiler operations vif (1) DEPRECATED, please use the na_ifgrp(1) command instead. vlan (1) Manages VLAN interface configuration. vmservices (1) services for Data ONTAP running in a virtual machine
vol (1) Commands for managing volumes, displaying volume status,moving volumes, and copying volumes.
vscan (1) Control virus scanning for files on the node.
wafl_aac (1) displays allocation area cache/statistics information of the specifiedvolume.
wcc (1) Manages WAFL credential cache. wrfile (1) Writes a WAFL file. ypcat (1) Prints values from a NIS database.
ypgroup (1) Displays the group file entries cached locally from the NIS server ifNIS is enabled.
ypmatch (1) Prints matching values from a NIS database. ypwhich (1) Displays the NIS server if NIS is enabled. zoneinfo (5) time zone information files
Data ONTAP® 8.2 Commands: Manual Page Reference for 7-Mode, Volume 1 17
Manual Pages by Section in This Volume and Complete Index of Both Volumes

acpadminNAMEna_acpadmin - Commands for managing Alternate Control Path Administrator
SYNOPSISacpadmin command argument ...
OVERVIEWThe acpadmin utility commands manage the ACP administrator and ACP processors used by thestorage subsystem.
USAGEacpadmin [configure | list_all]
DESCRIPTIONThe acpadmin configure command allows the user to configure or reconfigure the ACP. The usersupplies or uses the default values for the following configurable elements of the ACP via prompts fromthe command line: -network interface: The ethernet port that will be used by the ACP _NF_NF_ -network domain: The IP address used by the ACP _NF_NF_ -netmask: The netmask used by the ACP
The acpadmin list_all command lists all the ACP processors in view with their corresponding IP address, MAC address, protocol version, Assigner ACPA’s system ID, Shelf serial number, Inband expander...
_NF_NF_ node> acpadmin list_all IP MAC Reset Last Contact Protocol Assigner Shelf Current Inband IOM Address Address Cnt (seconds ago) Version ACPA ID S/N State ID Type ---------------------------------------------------------------------------------------------------------------------- 192.168.2.60 00:50:cc:62:60:04 001 40 1.2.2.1 118050804 1006SZ00195 0x5 7c.2.A IOM6 192.168.3.77 00:50:cc:62:61:4e 000 21 1.1.1.15 118050804 SHX0987124G019M 0x5 5a.1.B IOM3 192.168.1.78 00:50:cc:14:05:a4 000 76 1.2.2.1 118050804 1006SZ00194 0x5 7c.2.B IOM6 192.168.3.83 00:50:cc:62:61:da 001 498 1.1.1.15 118050804 SHX0931422G003M 0x5 5a.1.A IOM3
This command output contains one row for each ACPP connected to the storage controller.
The IP Address column displays the IP address assigned to the ACPP.
The MAC Address column displays the ipv4 MAC address of the ACPP.
The Reset Cnt column displays the number of times the corresponding expander has been reset throughthe ACPP. This count does not persist across storage controller boots.
The Last Contact column displays the number of seconds elapsed since the ACP administratorreceived the last bootp request from the ACPP.
The Protocol Version displays the protocol version of the ACPP.
The Assigner ACPA ID column displays the system ID of the storage controller from which the IPaddress of the ACPP was originally assigned.
The Shelf S/N displays the disk shelf serial number of the shelf in which ACPP is located.
The Current State gives the state code of the ACPP. More details can be displayed using the storage show acp command. Possible values are:
18 Data ONTAP® 8.2 Commands: Manual Page Reference for 7-Mode, Volume 1
acpadmin
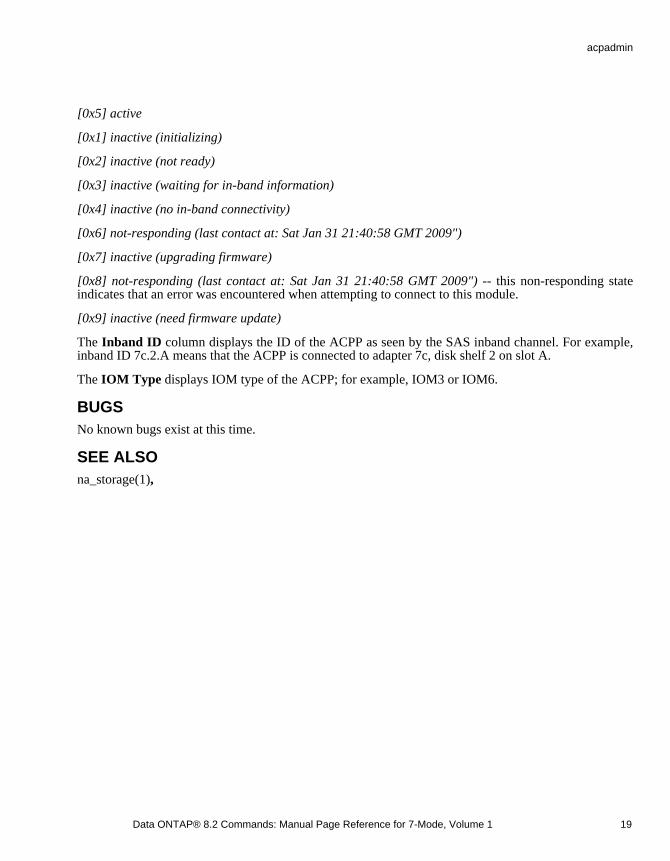
[0x5] active
[0x1] inactive (initializing)
[0x2] inactive (not ready)
[0x3] inactive (waiting for in-band information)
[0x4] inactive (no in-band connectivity)
[0x6] not-responding (last contact at: Sat Jan 31 21:40:58 GMT 2009")
[0x7] inactive (upgrading firmware)
[0x8] not-responding (last contact at: Sat Jan 31 21:40:58 GMT 2009") -- this non-responding stateindicates that an error was encountered when attempting to connect to this module.
[0x9] inactive (need firmware update)
The Inband ID column displays the ID of the ACPP as seen by the SAS inband channel. For example,inband ID 7c.2.A means that the ACPP is connected to adapter 7c, disk shelf 2 on slot A.
The IOM Type displays IOM type of the ACPP; for example, IOM3 or IOM6.
BUGSNo known bugs exist at this time.
SEE ALSOna_storage(1),
Data ONTAP® 8.2 Commands: Manual Page Reference for 7-Mode, Volume 1 19
acpadmin

aggrNAMEna_aggr - Commands for managing aggregates, displaying aggregate status, and copying aggregates
SYNOPSISaggr command argument ...
DESCRIPTIONThe aggr command family manages aggregates. The aggr commands can create new aggregates,destroy existing ones, undestroy previously destroyed aggregate, manage plexes within a mirroredaggregate, change aggregate status, apply options to an aggregate, copy one aggregate to another, anddisplay their status. Aggregate commands often affect the volume(s) contained within aggregates.
The aggr command family is new in Data ONTAP 7.0. The vol command family provided control overthe traditional volumes that fused a single user-visible file system and a single RAID-level storagecontainer (aggregate) into an indivisible unit, and still does. To allow for more flexible use of storage,aggregates now also support the ability to contain multiple, independent user-level file systems named flexible volumes.
Data ONTAP 7.0 fully supports both traditional and flexible volumes. The aggr command family is thepreferred method for managing a node’s aggregates, including those that are embedded in traditionalvolumes.
Note that most of the aggr commands apply equally to both the type of aggregate that contains flexiblevolumes and the type that is tightly bound to form a traditional volume. Thus, the term aggregate isoften used here to refer to both storage classes. In those cases, it provides a shorthand for the longer andmore unwieldy phrase "aggregates and traditional volumes".
Aggregates may either be mirrored or unmirrored. A plex is a physical copy of the WAFL storagewithin the aggregate. A mirrored aggregate consists of two plexes; unmirrored aggregates contain asingle plex. In order to create a mirrored aggregate, you must have a node configuration that supportsRAID-level mirroring. When mirroring is enabled on the node, the spare disks are divided into two diskpools. When an aggregate is created, all of the disks in a single plex must come from the same diskpool, and the two plexes of a mirrored aggregate must consist of disks from separate pools, as thismaximizes fault isolation. This policy can be overridden by using the -f option in the aggr create, aggr add and aggr mirror commands, however, it is not recommended.
An aggregate name can contain letters, numbers, and the underscore character (_), but the first charactermust be a letter or underscore. A maximum of 100 aggregates (including those embedded in traditionalvolumes) can be created on each node. In an HA pair, this limit applies to each node individually, so theoverall limit for the pair is doubled that is combined total of up to 200 aggregates for the pair.
A plex may be online or offline. If it is offline, it is not available for read or write access. Plexes can bein combinations of the following states:
20 Data ONTAP® 8.2 Commands: Manual Page Reference for 7-Mode, Volume 1
aggr
normal All RAID groups in the plex are functional.
failed At least one of the RAID groups in the plex has failed.
empty The plex is part of an aggregate that is being created, and one or more of the disks targeted to theaggregate need to be zeroed before being added to the plex.
active The plex is available for use.
inactiveThe plex is not available for use.
resyncingThe plex’s contents are currently out of date and are in the process of being resynchronized with thecontents of the other plex of the aggregate (applies to mirrored aggregates only).
adding disksDisks are being added to the plex’s RAID group(s).
out-of-dateThis state only occurs in mirrored aggregates where one of the plexes has failed. A functional plex is inthis state only if it needs to be resynchronized when the other plexes fail.
A plex is named using the name of the aggregate, a slash character delimiter, and the name of the plex.The system automatically selects plex names at creation time. For example, the first plex created inaggregate aggr0 would be aggr0/plex0.
An aggregate may be online, restricted, iron_restricted, or offline. When an aggregate is offline, no reador write access is allowed. When an aggregate is restricted, certain operations are allowed (such asaggregate copy, parity recomputation or RAID reconstruction) but data access is not allowed.Aggregates that are not a part of a traditional volume can only be restricted or taken offline if they donot contain any flexible volumes. When an aggregate is iron_restricted, wafliron is running in optionalcommit mode on the aggregate and data access is not allowed.
Aggregates can be in combinations of the following states:
aggr The aggregate is a modern-day aggregate; it is capable of containing zero or more flexiblevolumes.
copyingThe aggregate is currently the target aggregate of an active aggr copy operation.
degradedThe aggregate contains at least one degraded RAID group that is not being reconstructed.
foreignThe disks that the aggregate contains were moved to the current node from another node.
growingDisks are in the process of being added to the aggregate.
Data ONTAP® 8.2 Commands: Manual Page Reference for 7-Mode, Volume 1 21
aggr
initializingThe aggregate is in the process of being initialized.
invalidThe aggregate does not contain any volume and no volume can be added to it. Typically this happensafter an aborted aggregate copy operation.
ironingA WAFL consistency check is being performed on this aggregate.
mirror degradedThe aggregate is a mirrored aggregate, and one of its plexes is offline or resyncing.
mirroredThe aggregate is mirrored and all of its RAID groups are functional.
needs checkA WAFL consistency check needs to be performed on the aggregate.
partialThe aggregate contains at least one disk, however, two or more disks are missing.
raid0 The aggregate consists of RAID-0 (no parity) RAID groups (V-Series and NetCache only).
raid4 The aggregate consists of RAID-4 RAID groups.
raid_dpThe aggregate consists of RAID-DP (Double Parity) RAID groups.
reconstructAt least one RAID group in the aggregate is being reconstructed.
redirectAggregate reallocation or file reallocation with the -p option has been started on the aggregate. Readperformance to volumes in the aggregate may be degraded.
resyncingOne of the plexes of a mirrored aggregate is being resynchronized.
snapmirroredThe aggregate is a snapmirrored replica of another aggregate. This state can only arise if the aggregateis part of a traditional volume.
trad The aggregate is fused with a single volume. This is also referred to as a traditional volume and isexactly equivalent to the volumes that existed before Data ONTAP 7.0. Flexible volumes cannot becreated inside this aggregate.
verifyingA RAID mirror verification operation is currently being run on the aggregate.
22 Data ONTAP® 8.2 Commands: Manual Page Reference for 7-Mode, Volume 1
aggr
wafl inconsistentThe aggregate has been marked corrupted. Please contact Customer Support if you see an aggregate inthis state.
USAGEThe following commands are available in the aggr suite:
add mirror restrict undestroy copy offline scrub verify create online show_space destroy options split media_scrub rename status
aggr add aggrname[ -f ][ -n ][ -g {raidgroup | new | all} ][ -c checksum-style ][ -T disk-type ][ -64bit-upgrade {check | normal} ] [ -t {raid4 | raid_dp} ]{ ndisks[@size]
| -d disk1 [ disk2 ... ] [ -d diskn [ diskn+1 ... ] ] }
Adds disks to the aggregate named aggrname. Specify the disks in the same way as for the aggr createcommand. If the aggregate is mirrored, then the -d argument must be used twice (if at all).
If the size option is used, it specifies the disk size in GB. Disks that are within approximately 20% ofthe specified size will be selected. If the size option is not specified, existing groups are appended withdisks that are the best match by size for the largest disk in the group, that is, equal or smaller disks areselected first, then larger disks. When starting new groups, disks that are the best match by size for thelargest disk in the last raidgroup are selected. The size option is ignored if a specific list of disks isspecified.
If the -g option is not used, the disks are added to the most recently created RAID group until it is full,and then one or more new RAID groups are created and the remaining disks are added to new groups.Any other existing RAID groups that are not full remain partially filled.
The -g option allows specification of a RAID group (for example, rg0) to which the indicated disksshould be added, or a method by which the disks are added to new or existing RAID groups.
If the -g option is used to specify a RAID group, that RAID group must already exist. The disks areadded to that RAID group until it is full. Any remaining disks are ignored.
If the -g option is followed by new, Data ONTAP creates one or more new RAID groups and adds thedisks to them, even if the disks would fit into an existing RAID group. Any existing RAID groups thatare not full remain partially filled. The names of the new RAID groups are selected automatically. It isnot possible to specify the names for the new RAID groups.
Data ONTAP® 8.2 Commands: Manual Page Reference for 7-Mode, Volume 1 23
aggr
If the -g option is followed by all, Data ONTAP adds the specified disks to existing RAID groups first.Disks are added to an existing RAID group until it reaches capacity as defined by raidsize. After allexisting RAID groups are full, it creates one or more new RAID groups and adds the remaining disks tothe new groups. If the disk type or checksum style or both is specified then the command would operateonly on the RAID groups with matching disk type or checksum style or both.
The -n option can be used to display the command that the system will execute, without actuallymaking any changes. This is useful for displaying the automatically selected disks, for example.
The -c checksum-style argument specifies the checksum style of disks to use when adding disks to anexisting aggregate. Possible values are: block for Block Checksum and advanced_zoned for AdvancedZoned Checksum (azcs). By default, ONTAP selects disks with same checksum style. This parametermust be used to add disks of different checksum style to the aggregate, which converts the aggregate toa mixed checksum aggregate. The only checksum styles that can be combined in the same aggregate are block and advanced_zoned.
The -T disk-type argument specifies the type of the disk that is to be added. Possible values are: ATA, BSAS, FCAL, FSAS, LUN, MSATA, SAS, SATA and SSD. This option must be used when numberof disks to add is specified when adding disks to a Flash Pool. This option is required when addingSSDs to an aggregate to convert it to a Flash Pool. Only the aggregates marked as hybrid_enabled canbe converted to Flash Pools. Use aggr options to mark the aggregate as hybrid_enabled.
Disk type identifies disk technology and connectivity type. ATA identifies ATA disks with either IDEor serial ATA interface in shelves connected in FC-AL (Fibre Channel Arbitrated Loop). BSAS(bridged SAS) and FSAS (fat SAS) identify high capacity SAS disks, i.e. SATA disks that support SAScommands. FCAL identifies FC disks in shelves connected in FC-AL. LUN identifies virtual disksexported from external storage arrays. MSATA identifies SATA disks in a multi-disk carrier. SASidentifies Serial Attached SCSI disks in matching shelves. SATA identifies serial ATA disks in SASshelves. SSD identifies Solid State disks.
If the -64bit-upgrade option is followed by check, Data ONTAP displays a summary of the spaceimpact which would result from upgrading the aggregate to 64-bit. This summary includes the spaceusage of each contained volume after the volume is upgraded to 64-bit and the amount of space thatmust be added to the volume to successfully complete the 64-bit upgrade. This option does not result inan upgrade to 64-bit or addition of disks.
If the -64bit-upgrade option is followed by normal, Data ONTAP upgrades the aggregate to 64-bit ifthe total aggregate size after adding the specified disks exceeds 16TB. This option does not allow DataONTAP to automatically grow volumes if they run out of space due to the 64-bit upgrade.
The -t raidtype argument specifies the type for new RAID groups created when adding disks to theaggregate. Use this parameter when you add the first RAID group comprised of SSDs to ahybridenabled aggregate. Possible values are raid4 for RAID 4 and raid_dp for RAID DP. The defaultvalue is type of existing RAID groups of the aggregate.
By default, the node fills up one RAID group with disks before starting another RAID group. Supposean aggregate currently has one RAID group of 12 disks and its RAID group size is 14. If you add 5disks to this aggregate, it will have one RAID group with 14 disks and another RAID group with 3disks. The node does not evenly distribute disks among RAID groups.
24 Data ONTAP® 8.2 Commands: Manual Page Reference for 7-Mode, Volume 1
aggr
You cannot add disks to a mirrored aggregate if one of the plexes is offline.
The disks in a plex are not permitted to span disk pools. This behavior can be overridden with the -f flagwhen used together with the -d argument to list disks to add. The -f flag, in combination with -d, canalso be used to force adding disks that have a rotational speed that does not match that of the majority ofexisting disks in the aggregate.
aggr copy abort [ -h] operation_number | all
Terminates aggregate copy operations. The operation_number parameter specifies which operation toterminate. If you specify all, all aggregate active copy operations are terminated.
aggr copy start[ -p { inet | inet6 } ] [ -S | -s snapshot ] [ -C ] source destination
Copies all data, including snapshots and flexible volumes, from one aggregate to another. If the -S flagis used, the command copies all snapshots in the source aggregate to the destination aggregate. Tospecify a particular snapshot to copy, use the -s flag followed by the name of the snapshot. If you useneither the -S nor -s flag in the command, the node creates a snapshot at the time when the aggr copy start command is executed and copies only that snapshot to the destination aggregate.
The -C flag is required if the source aggregate has had free-space defragmentation performed on it, or ifthe destination aggregate will be free-space defragmented. Free-space defragmentation can beperformed on an aggregate using the reallocate command.
The -p option is used for selecting the IP connection mode. The value for this argument can be inet or inet6. When the value is inet6, the connection will be established using IPv6 addresses only. If there isno IPv6 address configured for the destination, then the connection will fail. When the value is inet, theconnection will be established using IPv4 addresses only. If there is no IPv4 address configured on thedestination, then the connection will fail. When this argument is not specified, then the connection willbe tried using both IPv6 and IPv4 addresses. inet6 mode will have higher precedence than inet mode. Ifa connection request using inet6 mode fails, the connection will be retried using inet mode.
This option is not meaningful when an IP address is specified instead of a hostname. If the IP addressformat and connection mode doesn’t match, the operation prints an error message and aborts.
Aggregate copies can only be performed between aggregates that host flexible volumes. Aggregates thatare embedded in traditional volumes cannot participate.
The source and destination aggregates can be on the same node or different nodes. If the source ordestination aggregate is on a node other than the one on which you enter the aggr copy start command,specify the aggregate name in the node_name: aggregate_name format.
The nodes involved in an aggregate copy must meet the following requirements for the aggr copy startcommand to be completed successfully:
The source aggregate must be online and the destination aggregate must be restricted.
If the copy is between two nodes, each node must be defined as a trusted host of the other node. That is,the node’s name must be in the /etc/hosts.equiv file of the other node.
Data ONTAP® 8.2 Commands: Manual Page Reference for 7-Mode, Volume 1 25
aggr
If the copy is on the same node, localhost must be included in the node’s /etc/hosts.equiv file. Also, theloopback address must be in the node’s /etc/hosts file. Otherwise, the node cannot send packets to itselfthrough the loopback address when trying to copy data.
The usable disk space of the destination aggregate must be greater than or equal to the usable disk spaceof the source aggregate. Use the df -A pathname command to see the amount of usable disk space of aparticular aggregate.
If the source or destination is comprised of more than one disk type, you should not use the aggr copycommand. Use a volume-based copy, such as ndmpcopy or vol copy instead.
Each aggr copy start command generates two aggregate copy operations: one for reading data from thesource aggregate and one for writing data to the destination aggregate. Each node supports up to foursimultaneous aggregate copy operations.
aggr copy status [ operation_number ]
Displays the progress of one or all aggr copy operations. The operations are numbered from 0 through3.
Restart checkpoint information for all transfers is also displayed.
aggr copy throttle [ operation_number ] value
Controls the performance of the aggr copy operation. The value ranges from 10 (full speed) to 1(one-tenth of full speed). The default value is maintained in the node’s aggr.copy.throttle option and isset 10 (full speed) at the factory. You can apply the performance value to an operation specified by the operation_number parameter. If you do not specify an operation number in the aggr copy throttlecommand, the command applies to all aggr copy operations.
Use this command to limit the speed of the aggr copy operation if you suspect that the aggr copyoperation is causing performance problems on your node. In particular, the throttle is designed to helplimit the CPU usage of the aggr copy operation. It cannot be used to fine-tune network bandwidthconsumption patterns.
The aggr copy throttle command only enables you to set the speed of an aggr copy operation that is inprogress. To set the default aggr copy speed to be used by future copy operations, use the optionscommand to set the aggr.copy.throttle option.
aggr create aggrname[ -f ][ -m ][ -n ][ -p { 0 | 1 } ][ -t raidtype ][ -r raidsize ][ -c checksum-style ][ -T disk-type ][ -R rpm ][ -L [compliance | enterprise] ][ -v [ -l language-code ] ]{ ndisks[@size]
26 Data ONTAP® 8.2 Commands: Manual Page Reference for 7-Mode, Volume 1
aggr
| -d disk1 [ disk2 ... ] [ -d diskn [ diskn+1 ... ] ] }
Creates a new aggregate named aggrname. The aggregate name can contain letters, numbers, and theunderscore character (_), but the first character must be a letter or underscore. A maximum of 100aggregates (including aggregates those embedded in traditional volumes) can be created on each node.In an HA pair, this limit applies to each node individually, so the overall limit for the pair is doubledthat is combined total of up to 200 aggregates for the pair.
An embedded aggregate can be created as part of a traditional volume using the -v option. It cannotcontain any flexible volumes.
A regular aggregate, created without the -v option, can contain only flexible volumes. It cannot beincorporated into a traditional volume, and it contains no volumes immediately after creation. Newflexible volumes can be created using the vol create command.
The -t raidtype argument specifies the type of RAID group(s) to be used to create the aggregate. Thepossible RAID group types are raid4 for RAID-4, raid_dp for RAID-DP (Double Parity), and raid0for simple striping without parity protection. The default raidtype for aggregates and traditionalvolumes on nodes is raid_dp. Setting the raidtype is not permitted on V-Series systems; the default of raid0 is always used.
The -r raidsize argument specifies the maximum number of disks in each RAID group in the aggregate.The maximum and default values of raidsize are platform-dependent, based on performance andreliability considerations. See aggr options raidsize for more details.
The -c checksum-style argument specifies the checksum style of disks to use when creating a newaggregate. Possible values are: block for Block Checksum and advanced_zoned for Advanced ZonedChecksum (azcs).
The -T disk-type argument specifies the type of disks to use when creating a new aggregate. It is neededonly on systems connected to disks of different types. Possible disk types are: ATA, BSAS, FC-AL, FSAS, LUN, MSATA, SAS, SATA and SSD. Mixing disks of different types in one aggregate is notallowed by default, but the option raid.disktype.enable can be used to relax that rule. -T cannot beused together with -d.
Disk type identifies disk technology and connectivity type. ATA identifies ATA disks with either IDEor serial ATA interface in shelves connected in FC-AL (Fibre Channel Arbitrated Loop). BSAS(bridged SAS) and FSAS (fat SAS) identify high capacity SAS disks, that is, SATA disks that supportSAS commands. FCAL identifies FC disks in shelves connected in FC-AL. LUN identifies virtualdisks exported from external storage arrays. MSATA identifies SATA disks in a multi-disk carrier. SAS identifies Serial Attached SCSI disks in matching shelves. SATA identifies serial ATA disks inSAS shelves. SSD identifies Solid State disks.
The -R rpm argument specifies the type of disks to use based on their rotational speed in revolutions perminute (rpm). It is needed only on systems having disks with different rotational speeds. Typical valuesfor rotational speed are 5400, 7200, 10000, and 15000. The rules for mixing disks with differentrotational speed within one aggregate can be changed using options raid.rpm.ata.enable and raid.rpm.fcal.enable. -R cannot be used together with -d.
Data ONTAP® 8.2 Commands: Manual Page Reference for 7-Mode, Volume 1 27
aggr

ndisks is the number of disks in the aggregate, including the parity disks. The disks in this newly createdaggregate come from the pool of spare disks. The smallest disks in this pool join the aggregate first,unless you specify the @size argument. size is the disk size in GB, and disks that are within 10% of thespecified size will be selected for use in the aggregate.
The -m option can be used to specify that the new aggregate be mirrored (have two plexes) uponcreation. If this option is given, then the indicated disks will be split across the two plexes. By default,the new aggregate will not be mirrored.
The -n option can be used to display the command that the system will execute, without actuallymaking any changes. This is useful for displaying the automatically selected disks, for example.
The -p option specifies the pool from which the disks are selected for the new aggregate. The possiblepool values are: 0, 1. The -p option is not allowed if a list of disks is specified. The -p can not becombined with the -m option.
If you use the -d disk1 [ disk2 ... ] argument, the node creates the aggregate with the specified sparedisks disk1, disk2, and so on. You can specify a space-separated list of disk names. Two separate listsmust be specified if the new aggregate is mirrored. In the case that the new aggregate is mirrored, theindicated disks must result in an equal number of disks on each new plex.
The disks in a plex are not permitted to span spare pools. This behavior can be overridden with the -foption. The same option can also be used to force using disks that do not have matching rotationalspeed. The -f option has effect only when used with the -d option specifying disks to use.
To create a SnapLock aggregate, specify the -L flag with the aggr create command. This flag is onlysupported if either SnapLock Compliance or SnapLock Enterprise is licensed. The type of theSnapLock aggregate created, either Compliance or Enterprise, is determined by the installed SnapLocklicense. If both SnapLock Compliance and SnapLock Enterprise are licensed, use -L compliance or -L enterprise to specify the desired aggregate type.
The -l language_code argument may be used only when creating a traditional volume using option -v.The node creates the traditional volume with the language specified by the language code. The default isthe language used by the node’s root volume. See the na_vol (1) man page for a list of language codes.
aggr destroy { aggrname | plexname } [ -f ]
Destroys the aggregate named aggrname, or the plex named plexname. Note that if the specifiedaggregate is tied to a traditional volume, then the traditional volume itself is destroyed as well.
If an aggregate is specified, all plexes in the aggregate are destroyed. The named aggregate must alsonot contain any flexible volumes, regardless of their mount state (online, restricted, or offline). If a plexis specified, the plex is destroyed, leaving an unmirrored aggregate or traditional volume containing theremaining plex. Before destroying the aggregate, traditional volume or plex, the user is prompted toconfirm the operation. The -f flag can be used to destroy an aggregate, traditional volume or plexwithout prompting the user.
The disks originally in the destroyed object become spare disks. Only offline aggregates, traditionalvolumes and plexes can be destroyed.
28 Data ONTAP® 8.2 Commands: Manual Page Reference for 7-Mode, Volume 1
aggr

aggr media_scrub status [ aggrname | plexname | groupname ][ -v ]
Prints the media scrubbing status of the named aggregate, plex, or group. If no name is given, thenstatus is printed for all RAID groups currently running a media scrub. The status includes apercent-complete and whether it is suspended.
The -v flag displays the date and time at which the last full media scrub completed, the date and time atwhich the current instance of media scrubbing started, and the current status of the named aggregate,plex, or group. If no name is given, this more verbose status is printed for all RAID groups with activemedia scrubs.
aggr mirror aggrname[ -f ][ -n ][ -v victim_aggrname ][ -d disk1 [ disk2 ... ] ]
Turns an unmirrored aggregate into a mirrored aggregate by adding a plex to it. The plex is eithernewly-formed from disks chosen from a spare pool, or, if the -v option is specified, is taken fromanother existing unmirrored aggregate. Aggregate aggrname must currently be unmirrored. Use aggr create to make a new, mirrored aggregate from scratch.
Disks may be specified explicitly using -d in the same way as with the aggr create and aggr addcommands. The number of disks indicated must match the number present on the existing aggregate.The disks specified are not permitted to span disk pools. This behavior can be overridden with the -foption. The -f option, in combination with -d, can also be used to force using disks that have a rotationalspeed that does not match that of the majority of existing disks in the aggregate.
If disks are not specified explicitly, then disks are automatically selected to match those in theaggregate’s existing plex.
The -v option can be used to join victim_aggrname back into aggrname to form a mirrored aggregate.The result is a mirrored aggregate named aggrname which is otherwise identical to aggrname before theoperation. Victim_aggrname is effectively destroyed. Victim_aggrname must have been previouslymirrored with aggrname, and then separated via the aggr split command. Victim_aggrname must beoffline. Combined with the -v option, the -f option can be used to join aggrname andvictim_aggrname without prompting the user.
The -n option can be used to display the command that the system will execute without actually makingany changes. This is useful for displaying the automatically selected disks, for example.
aggr offline { aggrname | plexname }[ -t cifsdelaytime ]
Takes the aggregate named aggrname (or the plex named plexname) offline. The command takes effectbefore returning. If the aggregate is already in restricted or iron_restricted state, then it is alreadyunavailable for data access, and much of the following description does not apply.
Data ONTAP® 8.2 Commands: Manual Page Reference for 7-Mode, Volume 1 29
aggr
If the aggregate contains any flexible volumes, then the operation is aborted unless the node is inmaintenance mode.
Except in maintenance mode, the aggregate containing the current root volume may not be takenoffline. An aggregate containing a volume that has been marked to become root (using vol options volname root) also cannot be taken offline.
If the aggregate is embedded in a traditional volume that has CIFS shares, users should be warnedbefore taking the aggregate (and hence the entire traditional volume) offline. Use the -t switch for this.The cifsdelaytime argument specifies the number of minutes to delay before taking the embeddedaggregate offline, during which time CIFS users of the traditional volume are warned of the pendingloss of service. A time of 0 means take the aggregate offline immediately with no warnings given. CIFSusers can lose data if they are not given a chance to terminate applications gracefully.
If a plexname is specified, the plex must be part of a mirrored aggregate and both plexes must be online.Prior to taking a plex offline, the system will flush all internally-buffered data associated with the plexand create a snapshot that is written out to both plexes. The snapshot allows for efficientresynchronization when the plex is subsequently brought back online.
A number of operations being performed on the aggregate’s traditional volume can prevent aggr offlinefrom succeeding, for various lengths of time. If such operations are found, there will be a one-secondwait for such operations to finish. If they do not, the command is aborted.
A check is also made for files in the aggregate’s associated traditional volume opened by internalONTAP processes. The command is aborted if any are found.
aggr online { aggrname | plexname }
Brings the aggregate named aggrname (or the plex named plexname) online. This command takes effectimmediately. If the specified aggregate is embedded in a traditional volume, the volume is also alsobrought online.
If an aggrname is specified, it must be currently offline, restricted, or foreign. If the aggregate isforeign, it will be made native before being brought online. A ‘‘foreign’’ aggregate is an aggregate thatconsists of disks moved from another node and that has never been brought online on the current node.Aggregates that are not foreign are considered ‘‘native.’’
Inconsistent aggregates cannot be brought online without assistance from technical support.
If a plexname is specified, the plex must be part of an online mirrored aggregate. The system willinitiate resynchronization of the plex as part of online processing.
aggr options aggrname [ optname optval ]
Displays the options that have been set for aggregate aggrname, or sets the option named optname ofthe aggregate named aggrname to the value optval. The command remains effective after the node isrebooted, so there is no need to add aggr options commands to the /etc/rc file. Some options havevalues that are numbers. Some options have values that may be on (which can also be expressed as yes, true, or 1 ) or off (which can also be expressed as no, false, or 0). A mixture of uppercase andlowercase characters can be used when typing the value of an option. The aggr status commanddisplays the options that are set per aggregate.
30 Data ONTAP® 8.2 Commands: Manual Page Reference for 7-Mode, Volume 1
aggr
The following describes the options and their possible values:
free_space_realloc on | no_redirect | off
This option specifies whether free space reallocation is enabled on the aggregate. Free spacereallocation optimizes the free space in an aggregate immediately before Data ONTAP writes data tothe blocks in that aggregate. The default setting is off. no_redirect is available at the diagnosticprivilege level. Use the no_redirect option only under the guidance of support personnel.
fs_size_fixed on | off
This option only applies to aggregates that are embedded in traditional volumes. It causes the filesystem to remain the same size and not grow or shrink when a SnapMirrored volume relationship isbroken, or an aggr add is performed on it. This option is automatically set to be on when a traditionalvolume becomes a SnapMirrored volume. It will remain on after the snapmirror break command isissued for the traditional volume. This allows a traditional volume to be SnapMirrored back to thesource without needing to add disks to the source traditional volume. If the traditional volume size islarger than the file system size, turning off this option will force the file system to grow to the size ofthe traditional volume. The default setting is off.
ha_policy cfo | sfo
This option is used to change the HA policy of the given aggregate. Use of cfo causes aggregate tofollow controller failover policy and use of sfo causes aggregate to follow storage failover policy duringtakeover and giveback. This option cannot be changed in non-HA deployments of Data ONTAP.Changing the HA policy of an aggregate from SFO to CFO is allowed only in Maintenance mode.
ignore_inconsistent on | off
This command can only be used in maintenance mode. If this option is set to on, it allows the aggregatecontaining the root volume to be brought online on booting, even though it is inconsistent. However,you should not bring an inconsistent aggregate online without assistance from technical support; doingso may result in further file system corruption and data loss.
nosnap on | off
If this option is on, it disables automatic snapshots on the aggregate. The default setting is off.
raidsize number
The value of this option is the maximum size of a RAID group that can be created in the aggregate. ForFlash Pools, this option controls the maximum size of the HDD RAID groups. Changing the value ofthis option will not cause existing RAID groups to grow or shrink; it will only affect whether moredisks can be added to existing RAID groups and how large new RAID groups will be.
Legal values for this option depend on raidtype. For example, raid_dp allows larger RAID groups than raid4. Limits and default values are also different for different types of storage appliances and differenttypes of disks. Please refer to the Storage Management Guide for default and maximum RAID groupsizes.
Data ONTAP® 8.2 Commands: Manual Page Reference for 7-Mode, Volume 1 31
aggr
cache_raid_group_size number
The option controls the maximum size of the SSD RAID groups for a Flash Pools. This option valuecan only be modified for Flash Pool. Changing the value of this option does not cause existing RAIDgroups to grow or shrink; it only affects whether more disks can be added to existing RAID groups andhow large new RAID groups can be.
Legal values for this option depend on the raid-type used for the affected RAID groups. See the StorageManagement Guide for default and maximum RAID group sizes.
hybrid-enabled
If the hybrid-enabled option is set to "true", the aggregate is marked as hybrid_enabled, that is, theaggregate can contain a mix of SSDs and HDDs (Hard Disk Drives, e.g., SAS, SATA, and/or FC).
By default, aggregates cannot be marked "hybrid_enabled" if the aggregate contains FlexVols thatcannot be write cached. A FlexVol cannot be write-cached if it is part of an aggregate created in DataONTAP 7. Use -f parameter to over-ride this behavior.
raidtype raid4 | raid_dp | raid0 [ -T disk-type ]
Sets the type of RAID used to protect against disk failures. Use of raid4 provides one parity disk perRAID group, while raid_dp provides two. Changing this option immediately changes the RAID type ofall RAID groups within the aggregate. When upgrading RAID groups from raid4 to raid_dp, eachRAID group begins a reconstruction onto a spare disk allocated for the second ‘dparity’ parity disk.
Changing this option also changes raidsize to a more suitable value for new raidtype. When upgradingfrom raid4 to raid_dp, raidsize will be increased to the default value for raid_dp. When downgradingfrom raid_dp to raid4, raidsize will be decreased to the size of the largest existing RAID group if it isbetween the default value and the limit for raid4. If the largest RAID group is above the limit for raid4,the new raidsize will be that limit. If the largest RAID group is below the default value for raid4, thenew raidsize will be that default value. If raidsize is already below the default value for raid4, it willbe reduced by 1.
The -T parameter can be specified to change the RAID type of the HDD RAID groups or the SSD cacheof a Flash Pool. To specify the SSD cache, use -T SSD. To specify the HDD RAID groups, specify anyData ONTAP disk type used in the HDD RAID groups of the Flash Pool.
resyncsnaptime number
This option is used to set the mirror resynchronization snapshot frequency (in minutes). The defaultvalue is 60 minutes. The allowed values are from 1 to 2147483646.
root
If this option is set on a traditional volume, then the effect is identical as that defined in na_vol (1) manpage. Otherwise, if this option is set on an aggregate capable of containing flexible volumes, then thataggregate is marked as being the one that will also contains the root flexible volume on the next reboot.This option can be used on only one aggregate or traditional volume at any given time. The existing rootaggregate or traditional volume will become a non-root entity after the reboot.
32 Data ONTAP® 8.2 Commands: Manual Page Reference for 7-Mode, Volume 1
aggr
Until the system is rebooted, the original aggregate and/or traditional volume will continue to show rootas one of its options, and the new root aggregate or traditional volume will show diskroot as an option.In general, the aggregate that has the diskroot option is the one that will contain the root flexiblevolume following the next reboot.
The only way to remove the root status of an aggregate or traditional volume is to set the root option onanother aggregate or traditional volume.
snaplock_compliance
This read only option indicates that the aggregate is a SnapLock Compliance aggregate. Aggregates canonly be designated SnapLock Compliance aggregates at creation time.
snaplock_enterprise
This read only option indicates that the aggregate is a SnapLock Enterprise aggregate. Aggregates canonly be designated SnapLock Enterprise aggregates at creation time.
snapmirrored off
If SnapMirror is enabled for a traditional volume (SnapMirror is not supported for aggregates thatcontain flexible volumes), the node automatically sets this option to on. Set this option to off ifSnapMirror is no longer to be used to update the traditional volume mirror. After setting this option to off, the mirror becomes a regular writable traditional volume. This option can only be set to off; onlythe node can change the value of this option from off to on.
percent_snapshot_space percent
This option is used to set the space reserved for Snapshot copies to the specified value.
aggr rename aggrname newname
Renames the aggregate named aggrname to newname. If this aggregate is embedded in a traditionalvolume, then that volume’s name is also changed.
aggr restrict aggrname[ -t cifsdelaytime ]
Put the aggregate named aggrname in restricted state, starting from either online or offline state. Thecommand takes effect before returning.
If the aggregate contains any flexible volumes, the operation is aborted unless the node is inmaintenance mode.
If the aggregate is embedded in a traditional volume that has CIFS shares, users should be warnedbefore restricting the aggregate (and hence the entire traditional volume). Use the -t switch for this. The cifsdelaytime argument specifies the number of minutes to delay before taking the embedded aggregateoffline, during which time CIFS users of the traditional volume are warned of the pending loss ofservice. A time of 0 means take the aggregate offline immediately with no warnings given. CIFS userscan lose data if they are not given a chance to terminate applications gracefully.
Data ONTAP® 8.2 Commands: Manual Page Reference for 7-Mode, Volume 1 33
aggr
aggr scrub resume [ aggrname | plexname | groupname ]
Resumes parity scrubbing on the named aggregate, plex, or group. If no name is given, resume allRAID groups currently undergoing a parity scrubbing that has been suspended.
aggr scrub start [ aggrname | plexname | groupname ]
Starts parity scrubbing on the named online aggregate. Parity scrubbing compares the data disks to theparity disk(s) in their RAID group, correcting the parity disk’s contents as necessary. If no name isgiven, parity scrubbing is started on all online aggregates. If an aggregate name is given, scrubbing isstarted on all RAID groups contained in the aggregate. If a plex name is given, scrubbing is started onall RAID groups contained in the plex.
aggr scrub status [ aggrname | plexname | groupname ] [ -v ]
Prints the status of parity scrubbing on the named aggregate, plex, or group; all RAID groups currentlyundergoing parity scrubbing if no name is given. The status includes a percent-complete, and thescrub’s suspended status.
The -v flag displays the date and time at which the last full scrub completed along with the currentstatus on the named aggregate, plex, or group; all RAID groups if no name is given.
aggr scrub stop [ aggrname | plexname | groupname ]
Stops parity scrubbing on the named aggregate, plex, or group; if no name is given, on all RAID groupscurrently undergoing a parity scrubbing.
aggr scrub suspend [ aggrname | plexname groupname ]
Suspends parity scrubbing on the named aggregate, plex, or group; if no name is given, on all RAIDgroups currently undergoing parity scrubbing.
aggr show_space [ -h | -k | -m | -g | -t | -b ] < aggrname >
This command has been deprecated in Data ONTAP 8.2 and later. Please use aggr status -S foraggregate space usage details and vol status -S and vol status -F for volume space usage details.
aggr split aggrname/plexname new_aggrname
Removes plexname from a mirrored aggregate and creates a new unmirrored aggregate named new_aggrname that contains the plex. The original mirrored aggregate becomes unmirrored. The plex tobe split from the original aggregate must be functional (not partial), but it could be inactive, resyncing,or out-of-date. Aggr split can therefore be used to gain access to a plex that is not up to date withrespect to its partner plex, if its partner plex is currently failed.
If the aggregate in which plexname resides is embedded in a traditional volume, aggr split behavesidentically to vol split. The new aggregate is embedded in a new traditional volume of the same name.
The aggregate in which plexname resides must contain exactly one flexible volume, aggr split will bydefault rename the flexible volume image in the split-off plex to be the same as the new aggregate.
34 Data ONTAP® 8.2 Commands: Manual Page Reference for 7-Mode, Volume 1
aggr
If the original aggregate is restricted at the time of the split, the resulting aggregate will also berestricted. If the restricted aggregate is hosting flexible volumes, they are not renamed at the time of thesplit. Flexible volumes will be renamed later, when the name conflict is detected while bringing anaggregate online. Flexible volumes in the aggregate that is brought online first keep their names. Thataggregate can be either the original aggregate, or the aggregate resulting from the split. When the otheraggregate is brought online later, flexible volumes in that aggregate will be renamed.
If the plex of an aggregate embedded within a traditional volume is offline at the time of the split, theresulting aggregate will be offline. When splitting a plex from an aggregate that hosts flexible volumes,if that plex is offline, but the aggregate is online, the resulting aggregate will come online, and itsflexible volumes will be renamed. It is not allowed to split a plex from an offline aggregate.
A split mirror can be joined back together via the -v option to aggr mirror.
aggr status [ aggrname ][ -r | -R | -v | -d | -c | -b | -s | -f -i | -S ]
Displays the status of one or all aggregates on the node. If aggrname is used, the status of the specifiedaggregate is printed; otherwise the status of all aggregates in the node is printed. By default, it prints aone-line synopsis of the aggregate which includes the aggregate name, whether it contains a single traditional volume or some number of flexible volumes, if it is online or offline, other states (forexample, partial, degraded, wafl inconsistent, and so on) and per-aggregate options. Per-aggregateoptions are displayed only if the options have been changed from the system default values by using the aggr options command, or by the vol options command if the aggregate is embedded in a traditionalvolume. If the wafl inconsistent state is displayed, please contact Customer Support.
The -v flag shows the on/off state of all per-aggregate options and displays information about eachvolume, plex and RAID group contained in the aggregate.
The command output includes the "RAID Write Signature" status of the aggregate which can be any offollowing:
"rlw_on" - The aggregate is "RAID Write Signature" protected and the "RAID Write Signature" scrubcompleted successfully on all RAID groups in this aggregate.
"rlw_off" - "RAID Write Signature" protection and scrub are disabled on this aggregate.
"rlw_upgrading" - The "RAID Write Signature" scrub is still not completed or not yet started on atleast one of the RAID groups in this aggregate.
"rlw_aborted" - The "RAID Write Signature" scrub is no longer running and was aborted on all RAIDgroups in this aggregate, possibly due to an error.
"rlw_partial" - The "RAID Write Signature" scrub completed successfully on some of the RAIDgroups in this aggregate, but was aborted on at least one of the RAID groups.
"rlw_upgrade_part" - The "RAID Write Signature" scrub is still in progress on some of the RAIDgroups in this aggregate and was aborted on atleast one of RAID groups.
"rlw_illegal" - The aggregate contains RAID groups with "RAID Write Signature" disabled and otherRAID groups with "RAID Write Signature" enabled. This is an invalid state.
Data ONTAP® 8.2 Commands: Manual Page Reference for 7-Mode, Volume 1 35
aggr
"rlw_inoperative" - The "RAID Write Signature" scrub is allowed on the aggregate, but it cannot startbecause the system-wide "RAID Write Signature" option is set to "off".
"rlw_unknown" - The "RAID Write Signature" scrub status could not be determined.
The -r flag displays a list of the RAID information for that aggregate. If no aggrname is specified, itprints RAID information about all aggregates, information about file system disks, spare disks, andfailed disks. For more information about failed disks, see the -f switch description below.
The -R flag displays the name, model number and serial number, as well as the VBN start and endaddresses for all disks in the specified aggregate. If no aggrname is specified, it prints the informationabout all aggregates and about all file system disks.
The -d flag displays information about the disks in the specified aggregate. The types of diskinformation are the same as those from the sysconfig -d command.
The -c flag displays the upgrade status of the Block Checksums data integrity protection feature.
The -b is used to get the size of source and destination aggregates for use with aggr copy. The outputcontains the storage in the aggregate and the possibly smaller size of the aggregate. The aggregate copycommand uses these numbers to determine if the source and destination aggregate sizes are compatible.The size of the source aggregate must be equal or smaller than the size of the destination aggregate.
The -s flag displays a listing of the spare disks on the node.
The -f flag displays a list of the failed disks on the node. The command output includes the disk failurereason which can be any of following:
unknown Failure reason unknown. failed Data ONTAP failed disk due to a fatal disk error. admin failed User issued a ’disk fail’ command for this disk. labeled broken Disk was failed under Data ONTAP 6.1.X or an earlier version. init failed Disk initialization sequence failed. admin removed User issued a ’disk remove’ command for this disk. not responding Disk not responding to requests. missing Disk was removed, or no data path exists on which to access the disk. testing Disk is undergoing maintenance testing. admin testing User initiated maintenance testing on this disk. predict failure Disk reported a predictive failure. label version Disk has a label with an unsupported version. bad label Disk has a label with unexpected or missing data. rawsize shrank Disk’s stored rawsize is greater than the physical size of the disk. LUN resized The raw size of an array LUN that is being used in an aggregate does not match the physical size of the LUN.
36 Data ONTAP® 8.2 Commands: Manual Page Reference for 7-Mode, Volume 1
aggr
recovering A filesystem disk has failed to respond to requests. SFO Disk Disk has an HA policy of SFO, which is not supported on a 7-Mode system.
The -i flag displays a list of the flexible volumes contained in an aggregate.
The -S flag displays information about the space utilization within aggregates. Space usage is brokendown in the specified aggregates by feature. Depending on aggregate state, a variety of relevant,nonzero rows will be displayed. Output rows that are not self-explanatory are detailed below. All sizesare reported in units automatically scaled for best readability unless a specific measurement unit isrequested by specifying one of the following flags: -k, -m, -g, or -t. Volume Footprints: This is the sumof FlexVol volume footprints in the aggregate. Snapshot Reserve: This is the space that is reserved forSnapshot copies and is not available to volumes or aggregate data and metadata. It is set to 0 by default.The percentage is based on volume size. Total Used: This is the total space used in the volume. For thisvalue, the entire Snapshot reserve is treated as used space since it is not available for use by the activefile system.
aggr undestroy [ -n ] < aggrname >
Undestroy a partially intact or previously destroyed aggregate or traditional volume. The commandprints a list of candidate aggregates and traditional volumes matching the given name, which can bepotentially undestroyed.
The -n option prints the list of disks contained by the aggregate or by the traditional volume, which canbe potentially undestroyed. This option can be used to display the result of command execution, withoutactually making any changes.
aggr verify resume [ aggrname ]
Resumes RAID mirror verification on the named aggregate; if no aggregate name is given, on allaggregates currently undergoing a RAID mirror verification that has been suspended.
aggr verify start [ aggrname ] [ -f plexnumber ]
Starts RAID mirror verification on the named online mirrored aggregate. If no name is given, thenRAID mirror verification is started on all online mirrored aggregates. Verification compares the data inboth plexes of a mirrored aggregate. In the default case, all blocks that differ are logged, but no changesare made. If the -f flag is given; the plex specified is fixed to match the other plex when mismatches arefound. A name must be specified with the -f plexnumber option.
aggr verify stop [ aggrname ]
Stops RAID mirror verification on the named aggregate; if no aggregate name is given, on allaggregates currently undergoing a RAID mirror verification.
aggr verify status [ aggrname ]
Prints the status of RAID mirror verification on the named aggregate; on all aggregates currentlyundergoing RAID mirror verification if no aggregate name is given. The status includes apercent-complete, and the verification’s suspended status.
Data ONTAP® 8.2 Commands: Manual Page Reference for 7-Mode, Volume 1 37
aggr
aggr verify suspend [ aggrname ]
Suspends RAID mirror verification on the named aggregate; if no aggregate name is given, on allaggregates currently undergoing RAID mirror verification.
HA CONSIDERATIONSAggregates on different nodes in an HA pair can have the same name. For example, both nodes in anHA pair can have an aggregate named aggr0.
However, having unique aggregate names in an HA pair makes it easier to migrate aggregates betweenthe nodes in the HA pair.
EXAMPLESaggr create aggr1 -r 10 20
Creates an aggregate named aggr1 with 20 disks. The RAID groups in this aggregate can contain up to10 disks, so this new aggregate has two RAID groups. The node adds the current spare disks to the newaggregate, starting with the smallest disk.
aggr create aggr1 20@9
Creates an aggregate named aggr1 with 20 9-GB disks. Because no RAID group size is specified, thedefault size (8 disks) is used. The newlycreated aggregate contains two RAID groups with 8 disks and athird group with four disks.
aggr create aggr1 -d 8a.1 8a.2 8a.3
Creates an aggregate named aggr1 with the specified three disks.
aggr create aggr1 10aggr options aggr1 raidsize 5
The first command creates an aggregate named aggr1 with 10 disks which belong to one RAID group.The second command specifies that if any disks are subsequently added to this aggregate, they will notcause any current RAID group to have more than five disks. Each existing RAID group will continue tohave 10 disks and no more disks will be added to that RAID group. When new RAID groups arecreated, they will have a maximum size of five disks.
aggr show_space -h ag1
Displays the space usage of the aggregate ‘ag1’ and scales the unit of space according to the size.
Aggregate ’ag1’
Total space WAFL reserve Snap reserve Usable space BSR NVLOG A-SIS 66GB 6797MB 611MB 59GB 65KB 8192
Space allocated to volumes in the aggregate
Volume Allocated Used Guarantee vol1 14GB 11GB volume vol2 8861MB 8871MB file vol3 6161MB 6169MB none
38 Data ONTAP® 8.2 Commands: Manual Page Reference for 7-Mode, Volume 1
aggr
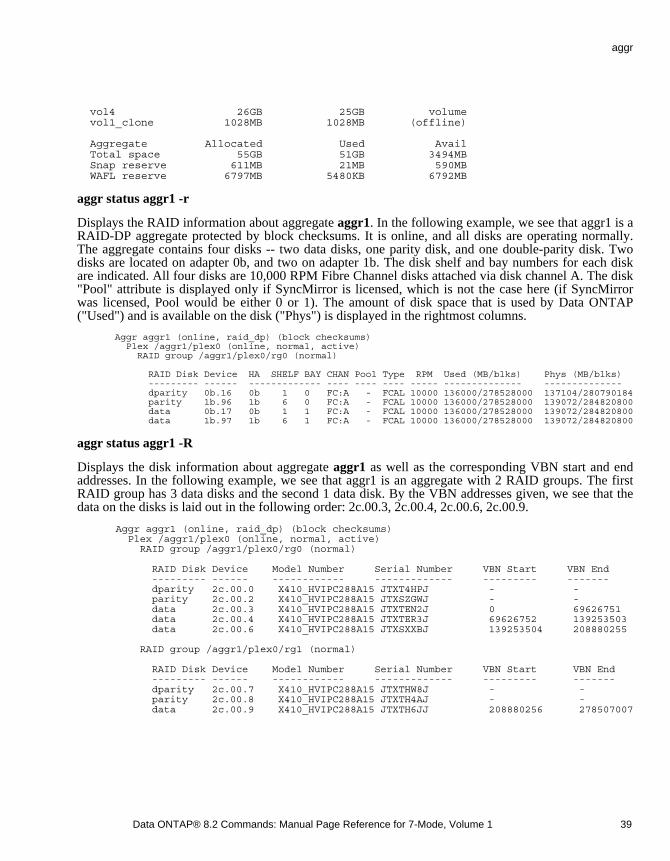
vol4 26GB 25GB volume vol1_clone 1028MB 1028MB (offline)
Aggregate Allocated Used Avail Total space 55GB 51GB 3494MB Snap reserve 611MB 21MB 590MB WAFL reserve 6797MB 5480KB 6792MB
aggr status aggr1 -r
Displays the RAID information about aggregate aggr1. In the following example, we see that aggr1 is aRAID-DP aggregate protected by block checksums. It is online, and all disks are operating normally.The aggregate contains four disks -- two data disks, one parity disk, and one double-parity disk. Twodisks are located on adapter 0b, and two on adapter 1b. The disk shelf and bay numbers for each diskare indicated. All four disks are 10,000 RPM Fibre Channel disks attached via disk channel A. The disk"Pool" attribute is displayed only if SyncMirror is licensed, which is not the case here (if SyncMirrorwas licensed, Pool would be either 0 or 1). The amount of disk space that is used by Data ONTAP("Used") and is available on the disk ("Phys") is displayed in the rightmost columns.
Aggr aggr1 (online, raid_dp) (block checksums) Plex /aggr1/plex0 (online, normal, active) RAID group /aggr1/plex0/rg0 (normal)
RAID Disk Device HA SHELF BAY CHAN Pool Type RPM Used (MB/blks) Phys (MB/blks) --------- ------ ------------- ---- ---- ---- ----- -------------- -------------- dparity 0b.16 0b 1 0 FC:A - FCAL 10000 136000/278528000 137104/280790184 parity 1b.96 1b 6 0 FC:A - FCAL 10000 136000/278528000 139072/284820800 data 0b.17 0b 1 1 FC:A - FCAL 10000 136000/278528000 139072/284820800 data 1b.97 1b 6 1 FC:A - FCAL 10000 136000/278528000 139072/284820800
aggr status aggr1 -R
Displays the disk information about aggregate aggr1 as well as the corresponding VBN start and endaddresses. In the following example, we see that aggr1 is an aggregate with 2 RAID groups. The firstRAID group has 3 data disks and the second 1 data disk. By the VBN addresses given, we see that thedata on the disks is laid out in the following order: 2c.00.3, 2c.00.4, 2c.00.6, 2c.00.9.
Aggr aggr1 (online, raid_dp) (block checksums) Plex /aggr1/plex0 (online, normal, active) RAID group /aggr1/plex0/rg0 (normal)
RAID Disk Device Model Number Serial Number VBN Start VBN End --------- ------ ------------ ------------- --------- ------- dparity 2c.00.0 X410_HVIPC288A15 JTXT4HPJ - - parity 2c.00.2 X410_HVIPC288A15 JTXSZGWJ - - data 2c.00.3 X410_HVIPC288A15 JTXTEN2J 0 69626751 data 2c.00.4 X410_HVIPC288A15 JTXTER3J 69626752 139253503 data 2c.00.6 X410_HVIPC288A15 JTXSXXBJ 139253504 208880255
RAID group /aggr1/plex0/rg1 (normal)
RAID Disk Device Model Number Serial Number VBN Start VBN End --------- ------ ------------ ------------- --------- ------- dparity 2c.00.7 X410_HVIPC288A15 JTXTHW8J - - parity 2c.00.8 X410_HVIPC288A15 JTXTH4AJ - - data 2c.00.9 X410_HVIPC288A15 JTXTH6JJ 208880256 278507007
Data ONTAP® 8.2 Commands: Manual Page Reference for 7-Mode, Volume 1 39
aggr

SEE ALSOna_vol (1), na_partner (1), na_snapmirror (1), na_sysconfig (1).
40 Data ONTAP® 8.2 Commands: Manual Page Reference for 7-Mode, Volume 1
aggr
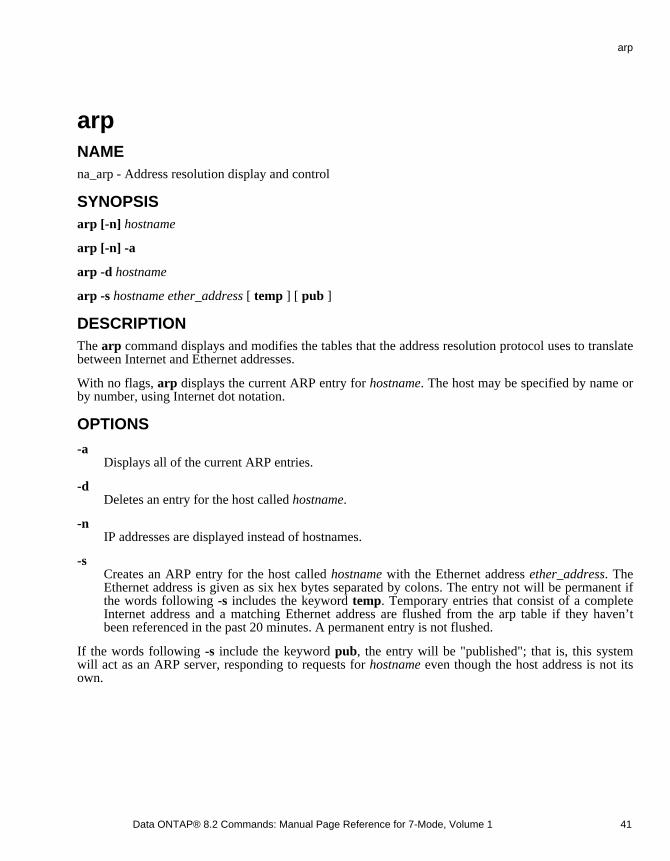
arpNAMEna_arp - Address resolution display and control
SYNOPSISarp [-n] hostname
arp [-n] -a
arp -d hostname
arp -s hostname ether_address [ temp ] [ pub ]
DESCRIPTIONThe arp command displays and modifies the tables that the address resolution protocol uses to translatebetween Internet and Ethernet addresses.
With no flags, arp displays the current ARP entry for hostname. The host may be specified by name orby number, using Internet dot notation.
OPTIONS
-a Displays all of the current ARP entries.
-d Deletes an entry for the host called hostname.
-n IP addresses are displayed instead of hostnames.
-s Creates an ARP entry for the host called hostname with the Ethernet address ether_address. TheEthernet address is given as six hex bytes separated by colons. The entry not will be permanent ifthe words following -s includes the keyword temp. Temporary entries that consist of a completeInternet address and a matching Ethernet address are flushed from the arp table if they haven’tbeen referenced in the past 20 minutes. A permanent entry is not flushed.
If the words following -s include the keyword pub, the entry will be "published"; that is, this systemwill act as an ARP server, responding to requests for hostname even though the host address is not itsown.
Data ONTAP® 8.2 Commands: Manual Page Reference for 7-Mode, Volume 1 41
arp
HA CONSIDERATIONSIn takeover mode, each node in an HA pair maintains its own ARP table. You can make changes to theARP table on the live node, or you can make changes to the ARP table on the failed node using the arpcommand in partner mode. However, the changes you make in partner mode are lost after a giveback.
VFILER CONSIDERATIONSWhen run from a vfiler context, (for example, via the vfiler run command), arp operates on theconcerned vfiler. As currently all vfilers in an ipspace share an arp table, arp operates on the arp tableof the concerned vfiler’s ipspace.
SEE ALSOna_ipspace(1), na_vfiler(1), RFC1483.
42 Data ONTAP® 8.2 Commands: Manual Page Reference for 7-Mode, Volume 1
arp
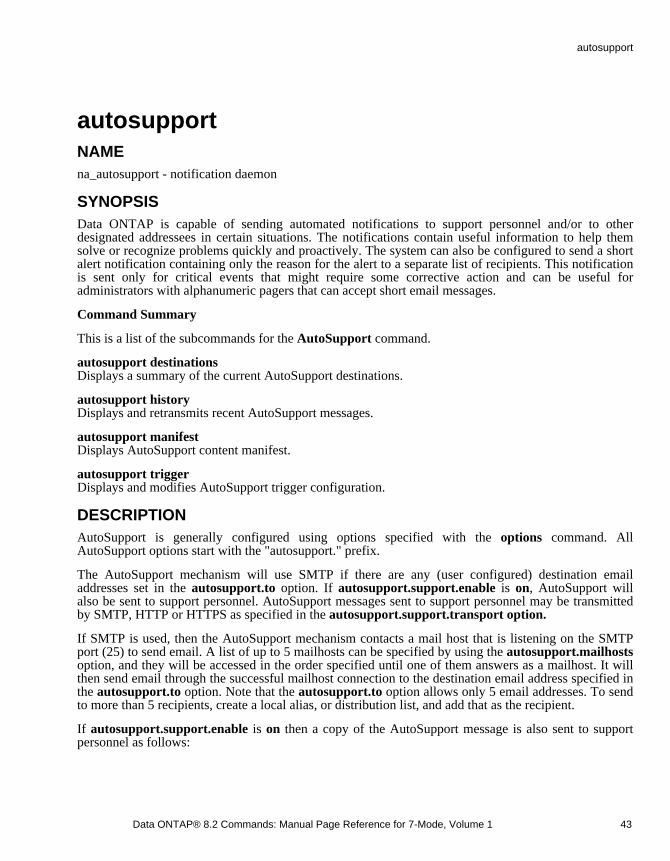
autosupportNAMEna_autosupport - notification daemon
SYNOPSISData ONTAP is capable of sending automated notifications to support personnel and/or to otherdesignated addressees in certain situations. The notifications contain useful information to help themsolve or recognize problems quickly and proactively. The system can also be configured to send a shortalert notification containing only the reason for the alert to a separate list of recipients. This notificationis sent only for critical events that might require some corrective action and can be useful foradministrators with alphanumeric pagers that can accept short email messages.
Command Summary
This is a list of the subcommands for the AutoSupport command.
autosupport destinationsDisplays a summary of the current AutoSupport destinations.
autosupport historyDisplays and retransmits recent AutoSupport messages.
autosupport manifestDisplays AutoSupport content manifest.
autosupport triggerDisplays and modifies AutoSupport trigger configuration.
DESCRIPTIONAutoSupport is generally configured using options specified with the options command. AllAutoSupport options start with the "autosupport." prefix.
The AutoSupport mechanism will use SMTP if there are any (user configured) destination emailaddresses set in the autosupport.to option. If autosupport.support.enable is on, AutoSupport willalso be sent to support personnel. AutoSupport messages sent to support personnel may be transmittedby SMTP, HTTP or HTTPS as specified in the autosupport.support.transport option.
If SMTP is used, then the AutoSupport mechanism contacts a mail host that is listening on the SMTPport (25) to send email. A list of up to 5 mailhosts can be specified by using the autosupport.mailhostsoption, and they will be accessed in the order specified until one of them answers as a mailhost. It willthen send email through the successful mailhost connection to the destination email address specified inthe autosupport.to option. Note that the autosupport.to option allows only 5 email addresses. To sendto more than 5 recipients, create a local alias, or distribution list, and add that as the recipient.
If autosupport.support.enable is on then a copy of the AutoSupport message is also sent to supportpersonnel as follows:
Data ONTAP® 8.2 Commands: Manual Page Reference for 7-Mode, Volume 1 43
autosupport

If autosupport.support.transport is smtp then the copy of the AutoSupport is emailed to thedestination specified in autosupport.support.to and the same mailhost picking algorithm is used asabove.
If autosupport.support.transport is http or https then a direct connection to the location specified in autosupport.support.put_url or autosupport.support.url is made and the AutoSupport message istransmitted to support personnel by using HTTP PUT/POST. If a proxy is required to use HTTP orHTTPS, configure proxy settings with the autosupport.support.proxy option.
The AutoSupport mechanism is automatically triggered periodically by the kernel to send information.It can also be invoked on-demand by the System Administrator. AutoSupport messages will also be senton events that require corrective action from the System Administrator or support personnel.
To accommodate multiple delivery methods and destinations and to preserve time dependent values, theoutgoing AutoSupport messages are spooled in /etc/log/autosupport. AutoSupport processing willattempt to deliver all (currently undelivered) messages until the autosupport.retry.count has beenreached or until subsequent AutoSupport messages "fill the spool" such that the oldest (undelivered)messages are forced to be dropped. The spool size is currently 50 messages.
The subject line of the mail sent by the AutoSupport mechanism contains a text string to identify thereason for the notification. The subject also contains a relative prioritization of the message, usingsyslog severity levels from DEBUG to EMERGENCY (see na_syslog.conf(5)). The messages and otherinformation in the notification should be used to check on the problem being reported.
The setup command tries to configure AutoSupport as follows:
If a mailhost is specified, it adds an entry for mailhost to the /etc/hosts file.
Setup also queries for autosupport.from information.
HA CONSIDERATIONSThe AutoSupport messages from a node in an HA pair are different from the AutoSupport messagesfrom a standalone node in the following ways:
The AutoSupport messages from a node in an HA pair contains information about its partner, such asthe partner system ID and the partner host name.
In takeover mode, if you reboot the live node, two AutoSupport messages notify the email recipients ofthe reboot: one is from the live node, and one is from the failed node.
The live node sends an AutoSupport message after it finishes the takeover process.
EXAMPLES The following examples show how to modify AutoSupport URLs when using IPv6 address literals:
node-1> options autosupport.mailhost [2620:10a:4002:6004::bbbb]:25
node-1> options autosupport.support.proxy username:password@[2620:10a:4002:6004::bbbb]:8080
44 Data ONTAP® 8.2 Commands: Manual Page Reference for 7-Mode, Volume 1
autosupport

SEE ALSOna_autosupport_history(1),
na_autosupport_trigger(1), na_hosts(5), RFC821
Data ONTAP® 8.2 Commands: Manual Page Reference for 7-Mode, Volume 1 45
autosupport

autosupport_destinationsNAMEna_autosupport_destinations - Displays a summary of the current AutoSupport destinations.
SYNOPSISautosupport destinations show
DESCRIPTIONThis command displays a list of all message destinations used by AutoSupport. The command providesyou with a quick summary of all addresses and URLs that receive AutoSupport messages. To changeAutoSupport destinations, modify the related AutoSupport options for these destinations.
EXAMPLES The following example displays all the message destinations used by AutoSupport.
node> autosupport destinations show
Destinations ------------------------------------------------------------ https://testbed.netapp.com/put/AsupPut https://testbed.netapp.com/asupprod/post/1.0/postAsup
SEE ALSO
46 Data ONTAP® 8.2 Commands: Manual Page Reference for 7-Mode, Volume 1
autosupport_destinations

autosupport_historyNAMEna_autosupport_history - Displays and retransmits recent AutoSupports.
DESCRIPTIONautosupport history show - Displays recent AutoSupport messages.
autosupport history retransmit - Selectively retransmits previously collected AutoSupports.
USAGEautosupport history show [ -fields ] [ -delivery ] [ -detail ] [ -instance ] [ -seq-num ] [ -destination ][ -trigger ] [ -last-update ] [ -status ] [ -attempt-count ] [ -subject ] [ -uri ] [ -error ]
This command displays information about the 50 most recent AutoSupport messages sent by nodes inthe cluster.
{ [-fields <fieldname>, ...]
With -fields <fieldname>, ... parameter, the command only displays the fields that you specify.
| [-delivery]
Displays destination information about each AutoSupport message.
| [-detail]
Displays trigger and subject information about each AutoSupport message.
| [-instance] }
Displays detailed information about all entries.
[-seq-num] <Sequence Number>] - AutoSupport Sequence Number
Displays only AutoSupport messages with the sequence number specified. Sequence numbers areunique to a node.
[-destination] {smtp|http|noteto|retransmit}] Destination for this AutoSupport
Displays only AutoSupport messages that were sent to the destination type specified.
[-trigger <Message Name>] - Trigger Event
Displays only AutoSupport messages that match the trigger event specified.
[-last-update <"MM/DD/YYYY HH:MM:SS">]- Time of Last Update
Data ONTAP® 8.2 Commands: Manual Page Reference for 7-Mode, Volume 1 47
autosupport_history
Displays only AutoSupport messages that were updated most recently at the time specified. Specifiestime in "MM/DD/YYYY HH:MM:SS" format.
[-status <AutoSupport general status>] - Status of Delivery
Displays only AutoSupport messages with the status specified. Possible statuses are:
initializing - The AutoSupport message request is being processed.
collection-failed - The AutoSupport collection failed. View the ‘Last Error’ field of this message formore information.
collection-in-progress - The AutoSupport collection is in progress.
queued - The AutoSupport message is queued for delivery.
transmitting - The AutoSupport message transmission is in progress.
sent-successful - The AutoSupport message was sent successfully.
ignore - The AutoSupport message was processed successfully, but the trigger event is not configuredfor delivery to the current destination type.
re-queued - The AutoSupport message transmission failed, has been re-queued, and will be retried.
transmission-failed - The AutoSupport message transmission failed, and the retry limit was exceeded.
[-attempt-count <integer>] - Delivery Attempts
Displays only AutoSupport messages that the system has attempted to send for the number of timesspecified. This parameter is most useful when given a range, such as ">5".
[-subject <text>] - AutoSupport Subject
Displays only AutoSupport messages of the type specified.
[-uri <text>] - Delivery URI
Displays only AutoSupport messages sent to the destination URI specified.
[-error <text>] - Last Error
Displays only AutoSupport messages that failed with the "Last Error" description specified. LP
autosupport history retransmit [ -seq-num ] [ -size-limit ] [ -uri ]
This command retransmits a locally stored AutoSupport message.
Support personnel might ask you to run this command to retransmit an AutoSupport message. Youmight also retransmit an AutoSupport message if you run the autosupport history show command andnotice that a message was not delivered.
48 Data ONTAP® 8.2 Commands: Manual Page Reference for 7-Mode, Volume 1
autosupport_history
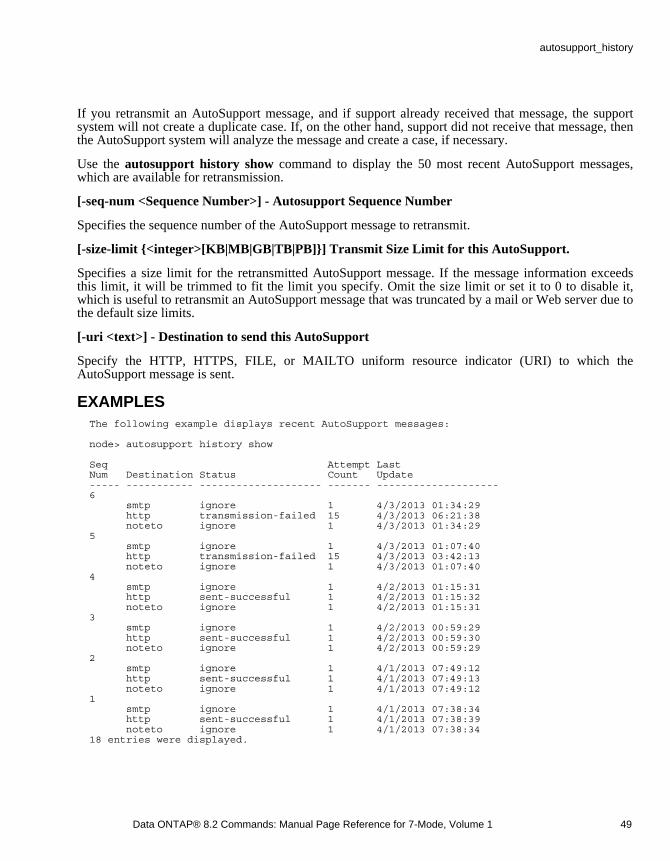
If you retransmit an AutoSupport message, and if support already received that message, the supportsystem will not create a duplicate case. If, on the other hand, support did not receive that message, thenthe AutoSupport system will analyze the message and create a case, if necessary.
Use the autosupport history show command to display the 50 most recent AutoSupport messages,which are available for retransmission.
[-seq-num <Sequence Number>] - Autosupport Sequence Number
Specifies the sequence number of the AutoSupport message to retransmit.
[-size-limit {<integer>[KB|MB|GB|TB|PB]}] Transmit Size Limit for this AutoSupport.
Specifies a size limit for the retransmitted AutoSupport message. If the message information exceedsthis limit, it will be trimmed to fit the limit you specify. Omit the size limit or set it to 0 to disable it,which is useful to retransmit an AutoSupport message that was truncated by a mail or Web server due tothe default size limits.
[-uri <text>] - Destination to send this AutoSupport
Specify the HTTP, HTTPS, FILE, or MAILTO uniform resource indicator (URI) to which theAutoSupport message is sent.
EXAMPLES The following example displays recent AutoSupport messages:
node> autosupport history show
Seq Attempt Last Num Destination Status Count Update ----- ----------- -------------------- ------- -------------------- 6 smtp ignore 1 4/3/2013 01:34:29 http transmission-failed 15 4/3/2013 06:21:38 noteto ignore 1 4/3/2013 01:34:29 5 smtp ignore 1 4/3/2013 01:07:40 http transmission-failed 15 4/3/2013 03:42:13 noteto ignore 1 4/3/2013 01:07:40 4 smtp ignore 1 4/2/2013 01:15:31 http sent-successful 1 4/2/2013 01:15:32 noteto ignore 1 4/2/2013 01:15:31 3 smtp ignore 1 4/2/2013 00:59:29 http sent-successful 1 4/2/2013 00:59:30 noteto ignore 1 4/2/2013 00:59:29 2 smtp ignore 1 4/1/2013 07:49:12 http sent-successful 1 4/1/2013 07:49:13 noteto ignore 1 4/1/2013 07:49:12 1 smtp ignore 1 4/1/2013 07:38:34 http sent-successful 1 4/1/2013 07:38:39 noteto ignore 1 4/1/2013 07:38:34 18 entries were displayed.
Data ONTAP® 8.2 Commands: Manual Page Reference for 7-Mode, Volume 1 49
autosupport_history

This example selectively retransmits a previously collected AutoSupport to the given URI:
node> autosupport history retransmit -seq-num 6 -uri mailto:[email protected]
SEE ALSO
50 Data ONTAP® 8.2 Commands: Manual Page Reference for 7-Mode, Volume 1
autosupport_history

autosupport_manifestNAMEna_autosupport_manifest - Displays AutoSupport content manifest.
SYNOPSISautosupport manifest show [ -fields ] [ -content ] [ -instance ] [ -seq-num ] [ -prio-num ] [ -subsys ][ -cmdtgt ] [ -body-file ] [ -cmd ] [ -query ] [ -size-collected ] [ -time-collected ] [ -status ] [ -error ] [ -contenttype ]
DESCRIPTIONThis command displays information that is contained in AutoSupport messages. The name and size ofeach file collected for the message is reported, along with any errors.
OPTIONS{ [-fields <fieldname>, ...]
With -fields <fieldname>, ... parameter, the command only displays the fields that you specify.
| [-content]
Displays detailed information about the content of the files contained in the report.
| [-instance] }
Displays detailed information about all entries.
[-seq-num] <Sequence Number>] - AutoSupport Sequence Number
Displays information about only AutoSupport message content with the sequence number specified.Sequence numbers are unique to a node.
[-prio-num] <integer>] - Collection Order
Displays information about only AutoSupport message content with the collection priority specified.Content is collected in order by priority number.
[-subsys <AutoSupport collection subsystems>] - Subsystem
Displays information about only AutoSupport message content collected by the AutoSupport subsystemspecified.
[-cmd-tgt <Execution domain of AutoSupport content>] Execution domain for command
Displays information about only AutoSupport message content produced in the execution domainspecified.
Data ONTAP® 8.2 Commands: Manual Page Reference for 7-Mode, Volume 1 51
autosupport_manifest

[-body-file <text>] - The AutoSupport Content filename for this data
Displays information about only AutoSupport message content stored in the body file with the file namespecified.
[-cmd <text>] - The actual data being collected: D-blade CLI OR BSD command OR XML table OR filename
Displays information about only AutoSupport message content produced by the D-Blade command,BSD command, file, or XML table specified.
[-query <text>] - Query for XML collection
Displays information about only AutoSupport message content produced by the table query specified.
[-size-collected {<integer>[KB|MB|GB|TB|PB]}] - Number of bytes collected
Displays information about only AutoSupport message content collected in files with the file sizespecified.
[-time-collected <integer>] - Collection time for this data item (ms)
Displays information about only AutoSupport message content collected in the amount of timespecified, in milliseconds.
[-status <AutoSupport manifest collection status>] - The status of this data item
Displays information about only AutoSupport message content with the collection status specified.Possible statuses are:
requested - The AutoSupport request has been added to the queue and is waiting processing by thecollector.
working - The AutoSupport collector is actively gathering the needed data.
file-not-found - AutoSupport data collection failed because a necessary file is missing.
no-such-table - The AutoSupport collector was unable to find the requested SMF table.
collection-truncated-size-limit - AutoSupport data was truncated due to size limits, but partial data isavailable.
collection-skipped-size-limit - AutoSupport data was skipped due to size limits, and no data isavailable.
collection-truncated-time-limit - AutoSupport data was truncated due to time limits, but partial data isavailable.
collection-skipped-time-limit - AutoSupport data was skipped due to time limits, and no data isavailable.
52 Data ONTAP® 8.2 Commands: Manual Page Reference for 7-Mode, Volume 1
autosupport_manifest

delivery-skipped-size-limit - AutoSupport data was skipped at delivery time due to size limits.
general-error - AutoSupport data collection failed. Additional information (if any) is in the ErrorString field.
completed - AutoSupport data collection is complete, and the AutoSupport message is ready fordelivery.
content-not-collected-mode - AutoSupport content was not collected due to an incompatibleoperational mode.
content-not-collected-precheck - AutoSupport content was not collected due to precheck functionviolation.
content-not-collected-privacy - AutoSupport content was not collected because the operation isdisabled in privacy mode.
content-empty - AutoSupport content was collected successfully, but the output was empty.
collection-aborted - AutoSupport data collection was aborted.
[-error <text>] - The textual description of error
Displays information about only AutoSupport message content with the error text specified. If datacollection has failed, the error text contains a description of the failure. If data collection completessuccessfully, this field is empty.
[-content-type <Type of AutoSupport content>] - The AutoSupport content type for this data
Displays information about only AutoSupport message content of the type specified. Types supportedare:
basic - Configuration data about this subsystem
troubleshooting - Detailed diagnostic data about this subsystem
EXAMPLES The following example displays the content of AutoSupport message number 5.
node> autosupport manifest show -seq-num 5
AutoSupport Collected Sequence Body Filename Size Status Error --------- -------------- ----------- --------- ----------- 5 SYSCONFIG-A.txt 6.84KB completed SYSCONFIG-R.txt 3.11KB completed OPTIONS.txt 23.35KB completed software_image.xml 6.91KB completed CLUSTER-INFO.xml - content-not-collected-mode effective-cluster-version.xml - content-not-collected-mode cluster-version-replicated.xml - content-not-collected-mode autosupport.xml 12.35KB completed autosupport_budget.xml 8.68KB completed autosupport_history.xml 10.80KB completed autosupport-triggers.xml - content-not-collected-precheck Content not collected due to non-weekly AutoSupport. X-HEADER-DATA.TXT 701B completed SYSTEM-SERIAL-NUMBER.TXT 36B completed cluster_licenses.xml - content-not-collected-mode licenses.xml 4.20KB completed managed-feature.xml 6.54KB completed vserver-info.xml - content-not-collected-mode cm_hourly_stats.gz 273.1KB completed cm_stats_hourly_info.xml - content-not-collected-mode cm_stats_hourly_data.xml - content-not-collected-mode rdb_txn_latency_stats_hrly.xml - content-not-collected-mode rdb_voting_latency_stats_hrly.xml - content-not-collected-mode ndosmb3-stats.xml - content-not-collected-mode xfer_engine_stats.xml - content-not-collected-mode stats_all_view.xml - content-not-collected-mode ucore_reports.tar - content-not-collected-precheck Content not collected due to non-weekly AutoSupport.
Data ONTAP® 8.2 Commands: Manual Page Reference for 7-Mode, Volume 1 53
autosupport_manifest

26 entries were displayed.
The following example shows how to use parameters to limit output to specific fields of a specific AutoSupport message. This is helpful when troubleshooting.
node> autosupport manifest show -seq-num 5 -fields body-file,status,size-collected,time-collected,cmd,cmd-tgt,subsys
seq-num prio-num subsys cmd-tgt body-file cmd size-collected time-collected status ------- -------- --------- ------- --------------- -------------- -------------- -------------- --------- 5 0 mandatory dblade SYSCONFIG-A.txt "sysconfig -a" 6.84KB 466 completed 5 1 mandatory dblade SYSCONFIG-R.txt "sysconfig -r" 3.11KB 8 completed 5 2 mandatory dblade OPTIONS.txt options 23.35KB 1011 completed 5 3 mandatory smf_table software_image.xml software_image 6.91KB 240 completed 5 4 mandatory smf_table CLUSTER-INFO.xml asup_cluster_info - - content-not-collected-mode 5 5 mandatory smf_table effective-cluster-version.xml effective_cluster_version - - content-not-collected-mode 5 6 mandatory smf_table cluster-version-replicated.xml cluster_version_replicated - - content-not-collected-mode 5 7 mandatory smf_table autosupport.xml autosupport 12.35KB 230 completed 5 8 mandatory smf_table autosupport_budget.xml autosupport_budget 8.68KB 179 completed 5 9 mandatory smf_table autosupport_history.xml autosupport_history 10.80KB 172 completed 5 10 mandatory smf_table autosupport-triggers.xml autosupport_triggers - - content-not-collected-precheck 5 11 mandatory custom_fx X-HEADER-DATA.TXT "Custom function" 701B 6 completed 5 12 mandatory custom_fx SYSTEM-SERIAL-NUMBER.TXT "Custom function" 36B 3 completed 5 13 mandatory smf_table cluster_licenses.xml cluster_licenses - - content-not-collected-mode 5 14 mandatory smf_table licenses.xml cluster_licenses_v2 4.20KB 389 completed 5 15 mandatory smf_table managed-feature.xml managed_feature_Xml 6.54KB 165 completed 5 16 mandatory smf_table vserver-info.xml vserver_sorted_byname - - content-not-collected-mode 5 17 performance_asup file cm_hourly_stats.gz /mroot/etc/log/.cm_stats_hourly_done 273.1KB 444 completed 5 18 performance_asup smf_table cm_stats_hourly_info.xml perf_asup_info - - content-not-collected-mode 5 19 performance_asup smf_table cm_stats_hourly_data.xml perf_asup_hourly_data - - content-not-collected-mode 5 20 performance_asup smf_table rdb_txn_latency_stats_hrly.xml rdb_tran_aggregate_ui - - content-not-collected-mode 5 21 performance_asup smf_table rdb_voting_latency_stats_hrly.xml qmstats_ui - - content-not-collected-mode 5 22 performance_asup smf_table ndosmb3-stats.xml stats_all_view - - content-not-collected-mode 5 23 performance_asup smf_table xfer_engine_stats.xml xfer_engine_stats - - content-not-collected-mode 5 24 performance_asup smf_table stats_all_view.xml stats_all_view - - content-not-collected-mode 5 25 mandatory custom_fx ucore_reports.tar "Custom function" - - content-not-collected-precheck 26 entries were displayed.
SEE ALSO
54 Data ONTAP® 8.2 Commands: Manual Page Reference for 7-Mode, Volume 1
autosupport_manifest
autosupport_triggerNAMEna_autosupport_trigger - Displays and modifies AutoSupport trigger configuration.
DESCRIPTIONautosupport trigger show - Displays AutoSupport trigger configuration.
autosupport trigger modify - Modifies AutoSupport trigger configuration.
USAGEautosupport trigger show [ -fields ] [ -basic ] [ -troubleshooting ] [ -instance ] [ -autosupport-message ] [ -to ] [ -noteto ] [ -basic-default ] [ -troubleshootingdefault ] [ -additional-content ] [ -basic-additional ] [ -troubleshooting-additional ]
This command displays which system events trigger AutoSupport messages. When a trigger eventoccurs, the node might send an AutoSupport message to a predefined destination, and a short note toanother destination. The full AutoSupport message contains detail for troubleshooting. The node sendsthe short message to pagers or as SMS text messages.
{ [-fields <fieldname>, ...]
With -fields <fieldname>, ... parameter, the command only displays the fields that you specify.
| [-basic]
Displays which subsystem information is included as basic information when the AutoSupport messageis triggered.
| [-troubleshooting]
Displays which subsystem information is included as troubleshooting information when theAutoSupport message is triggered.
| [-instance] }
Displays detailed information about all entries.
[-autosupport-message] <Autosupport Message>] - EMS Message
Displays only AutoSupport triggers with the name specified. AutoSupport triggers are EMS messageswhose names begin with "callhome.". However, for the purposes of this command, "callhome." isimplied, does not need to be entered, and will not be displayed in command output.
[-to {enabled|disabled}] - Whether to deliver to options autosupport.to addresses
If -to is set to "enabled," displays only AutoSupport messages that send full messages to the "to"address when triggered.
Data ONTAP® 8.2 Commands: Manual Page Reference for 7-Mode, Volume 1 55
autosupport_trigger

[-noteto {enabled|disabled}] - Whether to deliver to options autosupport.noteto addresses
If -noteto is set to "enabled," displays only AutoSupport messages that send short notes to the "noteto"address when triggered.
[-basic-default <AutoSupport collection subsystems>, ...] - Default subsystems reporting basic info
Displays only AutoSupport triggers that include in their messages, by default, basic configurationcontent from the subsystems specified.
[-troubleshooting-default <AutoSupport collection subsystems>, ...] - Default subsystems reporting troubleshooting info
Displays only AutoSupport triggers that include in their messages, by default, detailed diagnosticcontent from the subsystems specified.
[-additional-content <Type of AutoSupport content>, ...] - Additional content flag
Displays only AutoSupport triggers that have been configured to include additional basic ortroubleshooting content.
[-basic-additional <AutoSupport collection subsystems>, ...] - Additional subsystems reporting basic info
Displays only AutoSupport triggers that have been configured to include additional basic configurationcontent from the subsystems specified.
[-troubleshooting-additional <AutoSupport collection subsystems>, ...] - Additional subsystems reporting troubleshooting info
Displays only AutoSupport triggers that have been configured to include additional detailed diagnosticcontent from the subsystems specified. Partner Hostname (if HA) CFO Node Status (if HA) cf monitorall output (if HA) ic stats performance output (if HA with VIA) ic stats error -v output (if HA with VIA)snet stats -v output (if HA with SNET) REBOOT (CF TAKEOVER)
autosupport trigger modify [ -autosupport-message ] [ -to ] [ -noteto ] [ -basic-additional ] [ -troubleshootingadditional ]
This command enables and disables AutoSupport messages for individual triggers, and specifiesadditional subsystem reports to include if an individual trigger sends an AutoSupport message.
[-autosupport-message <Autosupport Message>] - EMS Message
Specifies the AutoSupport trigger to modify. AutoSupport triggers are EMS messages whose namesbegin with "callhome.". However, for the purposes of this command, "callhome." is implied, does notneed to be entered, and will not be displayed in command output.
56 Data ONTAP® 8.2 Commands: Manual Page Reference for 7-Mode, Volume 1
autosupport_trigger
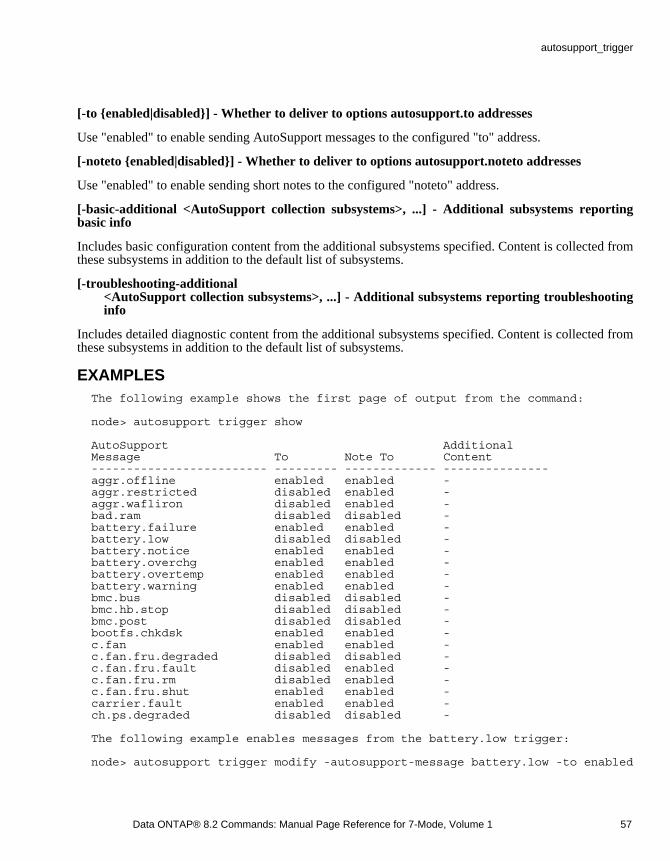
[-to {enabled|disabled}] - Whether to deliver to options autosupport.to addresses
Use "enabled" to enable sending AutoSupport messages to the configured "to" address.
[-noteto {enabled|disabled}] - Whether to deliver to options autosupport.noteto addresses
Use "enabled" to enable sending short notes to the configured "noteto" address.
[-basic-additional <AutoSupport collection subsystems>, ...] - Additional subsystems reporting basic info
Includes basic configuration content from the additional subsystems specified. Content is collected fromthese subsystems in addition to the default list of subsystems.
[-troubleshooting-additional <AutoSupport collection subsystems>, ...] - Additional subsystems reporting troubleshooting info
Includes detailed diagnostic content from the additional subsystems specified. Content is collected fromthese subsystems in addition to the default list of subsystems.
EXAMPLES The following example shows the first page of output from the command:
node> autosupport trigger show
AutoSupport Additional Message To Note To Content ------------------------- --------- ------------- --------------- aggr.offline enabled enabled - aggr.restricted disabled enabled - aggr.wafliron disabled enabled - bad.ram disabled disabled - battery.failure enabled enabled - battery.low disabled disabled - battery.notice enabled enabled - battery.overchg enabled enabled - battery.overtemp enabled enabled - battery.warning enabled enabled - bmc.bus disabled disabled - bmc.hb.stop disabled disabled - bmc.post disabled disabled - bootfs.chkdsk enabled enabled - c.fan enabled enabled - c.fan.fru.degraded disabled disabled - c.fan.fru.fault disabled enabled - c.fan.fru.rm disabled enabled - c.fan.fru.shut enabled enabled - carrier.fault enabled enabled - ch.ps.degraded disabled disabled -
The following example enables messages from the battery.low trigger:
node> autosupport trigger modify -autosupport-message battery.low -to enabled
Data ONTAP® 8.2 Commands: Manual Page Reference for 7-Mode, Volume 1 57
autosupport_trigger

SEE ALSO
58 Data ONTAP® 8.2 Commands: Manual Page Reference for 7-Mode, Volume 1
autosupport_trigger
awaNAMEawa - Control the Automated Workload Analyzer (AWA)
SYNOPSISawa start aggr
awa print [ aggr ] [ -l intervals ]
awa stop [ aggr ] [ -q ]
DESCRIPTIONThe awa command controls the Automated Workload Analyzer (AWA), a Data ONTAP capability thatestimates the Flash Pool cache size and estimates the cache hit rates across reads and writes.
AWA can be enabled on any Flash Pool or HDD aggregate. It monitors the throughput and accesspatterns for the workload happening on an aggregate. By analyzing the statistics collected, itsummarizes the key characters of the workload. It also models Flash Pool cache to estimate the potentialeffect of implementing a Flash Pool aggregate with various cache sizes using the default cachingpolicies.
AggregatesThe AWA modeling does not take the effect of existing Flash Pool cache into consideration so it iscapable of estimating the potential benefit of a larger SSD tier size.
IntervalsAWA employees a coarse-grained time unit as the workload statistics measuring unit as well as theprecision of statistics maintained. AWA maintains statistics for each interval for a history of up to 1000of them. The interval is 10 minutes. The values from the summary output of AWA are based on themaximum values observed during each interval considered.
Summary OutputsThe AWA CLI command awa print generates the summary output. AWA Summary Output is a set ofstatistics that captures the key characters of the workload being observed. There are two tablespresented in the Summary Output. The first one is the Workload Character Table which presents thegeneral workload statistics. The other one is the Cache Size Effect Table which captures hit rates forvarious cache sizes. Below are the descriptions for each field.
Workload Character TableSummary of the past ‘n‘ intervals:
Read Throughput Read throughput from the storage disks
Write Throughput Write throughput to the storage disks
Data ONTAP® 8.2 Commands: Manual Page Reference for 7-Mode, Volume 1 59
awa
Cacheable Read Non-sequential reads: percentage of data reads that could have been cached
Cacheable Write Random overwrites: percentage of disk writes that could have been cached
Projected Cache Size Projected Flash Pool cache usage
Projected Read Offload Percentage of blocks that could be read from the Flash Pool cache instead of HDDs
Projected Write Offload Percentage of block overwrites that could go to the Flash Pool cache instead of HDDs
Cache Size Effect TableSummary Cache Hit Rate vs. Cache Size
Size Percentage of the "Projected Cache Size". The cache sizes are in 20% increments.
Read Hit Estimated read hit rate when cache size is a fraction of the optimal one.
Write Hit Estimated write hit rate when cache size is a fraction of the optimal one.
USAGEawa start aggrawa start enables awa on the specified aggregate. Resources are allocated and statistics start gettingcollected.
awa print [ aggr ] [ -l intervals]awa print outputs the statistics summary of the running awa on the specified aggregate. This commandby default summarizes the entire monitoring period up to AWA’s monitoring limit of 1024 intervals.When the number of intervals is being supplied by the -l option, only that number of intervals into thepast will be covered by the summary. (To have the AWA readings of any specific interval, thiscommand needs to be supplied with -l 1 periodically at the end of each interval.)
awa stop [ aggr ] [ -q ]awa stop stops the awa and generates the summary output, then releases all of the resources. The -qoption suppresses the default summary output when stopping AWA.
EXAMPLESSample Summary Output
### FP AWA Stats ###
Host lyra22a Memory 16706 MB ONTAP Version NetApp Release R8_2_1x Cluster-Mode AWA Version 1
60 Data ONTAP® 8.2 Commands: Manual Page Reference for 7-Mode, Volume 1
awa
Layout Version 1 CM Version 1
Basic Information
Aggregate aggr1 Current-time Wed Nov 13 08:26:05 GMT 2013 Start-time Tue Nov 5 13:46:37 GMT 2013 Total runtime (sec) 671970 Interval length (sec) 600 Total intervals 1120 In-core Intervals 1024
Summary of the past 1023 intervals max Read Throughput 1.283 MB/s Write Throughput 3.239 MB/s Cacheable Read (%) 100.000 % Cacheable Write (%) 81.064 % Max Projected Cache Size 119.937 GB Projected Read Offload 96.000 % Projected Write Offload 84.000 %
Summary Cache Hit Rate vs. Cache Size
Size 20% 40% 60% 80% 100% Read Hit 19.000 38.000 57.000 77.000 96.000 Write Hit 47.000 56.000 64.000 72.000 84.000
The entire results and output of Automated Workload Analyzer (AWA) are estimates. The format, syntax, CLI, results and output of AWA may change in future Data ONTAP releases. AWA reports the projected cache size in capacity. It does not make recommendations regarding the number of data SSDs required. Please follow the guidelines for configuring and deploying Flash Pool; that are provided in tools and collateral documents. These include verifying the platform cache size maximums and minimum number and maximum number of data SSDs.
### FP AWA Stats End ###
CAVEATSThis disclaimer is attached at the end of the AWA Summary Output:
The entire results and output of Automated Workload Analyzer (AWA) are estimates. The format,syntax, CLI, results and output of AWA may change in future Data ONTAP releases. AWA reports theprojected cache size in capacity. It does not make recommendations regarding the number of data SSDsrequired. Please follow the guidelines for configuring and deploying Flash Pool; that are provided intools and collateral documents. These include verifying the platform cache size maximums andminimum number and maximum number of data SSDs.
Data ONTAP® 8.2 Commands: Manual Page Reference for 7-Mode, Volume 1 61
awa
backupNAMEna_backup - manages backups
SYNOPSISbackup status [ <ID> ]
backup terminate <ID>
DESCRIPTIONThe backup commands provide facilities to list and manipulate backups on a node.
A backup job runs on a node as a process that copies a file system or a subset of it to secondary media,usually tapes. Data can be restored from the secondary media in case the original copy is lost. There areseveral types of backup processes that run on the nodes:
dump runs natively on the node.
NDMP driven by a 3rd party client through NDMP protocol.
RESTARTABLE A failed dump that can be restarted.
USAGEbackup status [ <ID> ]displays all active instances of backup jobs on the node. For each backup, the backup status commandlists the following information:
ID The unique ID that is assigned to the backup and persists across reboots until the backup completessuccessfully or is terminated. After that, the ID can be recycled for another backup.
State The state can either be ACTIVE or RESTARTABLE. ACTIVE state indicates that the process iscurrently running; RESTARTABLE means the process is suspended and can be resumed.
Type Either dump or NDMP.
Device The current device. It is left blank for RESTARTABLE dumps since they are not running and thusdo not have a current device.
62 Data ONTAP® 8.2 Commands: Manual Page Reference for 7-Mode, Volume 1
backup
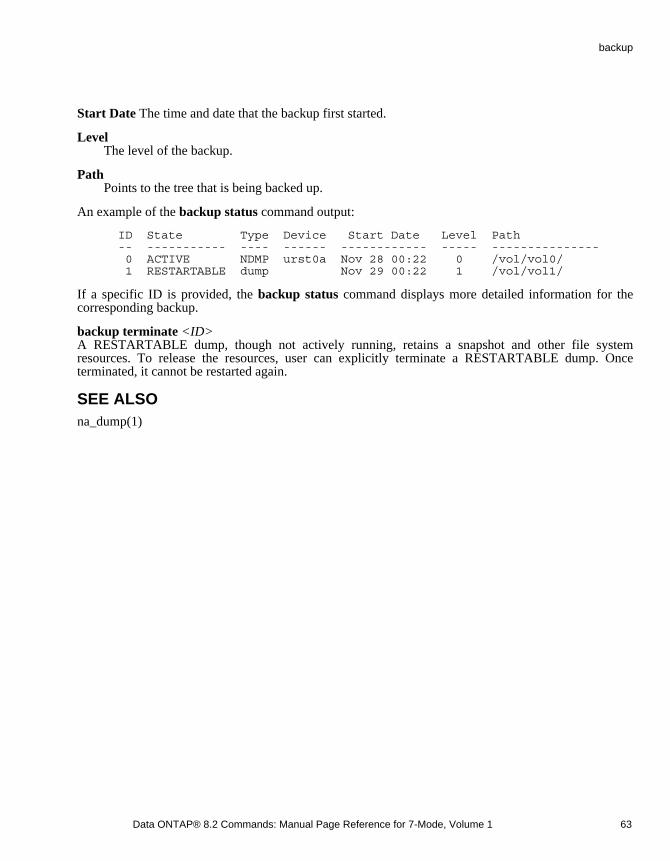
Start Date The time and date that the backup first started.
Level The level of the backup.
Path Points to the tree that is being backed up.
An example of the backup status command output:
ID State Type Device Start Date Level Path -- ----------- ---- ------ ------------ ----- --------------- 0 ACTIVE NDMP urst0a Nov 28 00:22 0 /vol/vol0/ 1 RESTARTABLE dump Nov 29 00:22 1 /vol/vol1/
If a specific ID is provided, the backup status command displays more detailed information for thecorresponding backup.
backup terminate <ID>A RESTARTABLE dump, though not actively running, retains a snapshot and other file systemresources. To release the resources, user can explicitly terminate a RESTARTABLE dump. Onceterminated, it cannot be restarted again.
SEE ALSOna_dump(1)
Data ONTAP® 8.2 Commands: Manual Page Reference for 7-Mode, Volume 1 63
backup

bmcNAMEna_bmc - Commands for use with a Baseboard Management Controller (BMC)
SYNOPSISbmc help
bmc reboot
bmc setup
bmc status
bmc test autosupport
DESCRIPTIONThe bmc command is used to manage and test a Baseboard Management Controller (BMC), if one ispresent.
OPTIONS
help Display a list of Baseboard Management Controller (BMC) commands.
reboot The reboot command forces the BMC to reboot itself and perform a self-test. If your consoleconnection is through the BMC it will be dropped.
setup Interactively configure the BMC local-area network (LAN) settings.
status Display the current status of the BMC.
test autosupport Test the BMC autosupport by commanding the BMC to send a test autosupport to all autosupportemail addresses in the option lists autosupport.to,
autosupport.noteto, and autosupport.support.to.
HA CONSIDERATIONSThis command only acts upon the Baseboard Management Controller (BMC) that is local to the system.
64 Data ONTAP® 8.2 Commands: Manual Page Reference for 7-Mode, Volume 1
bmc
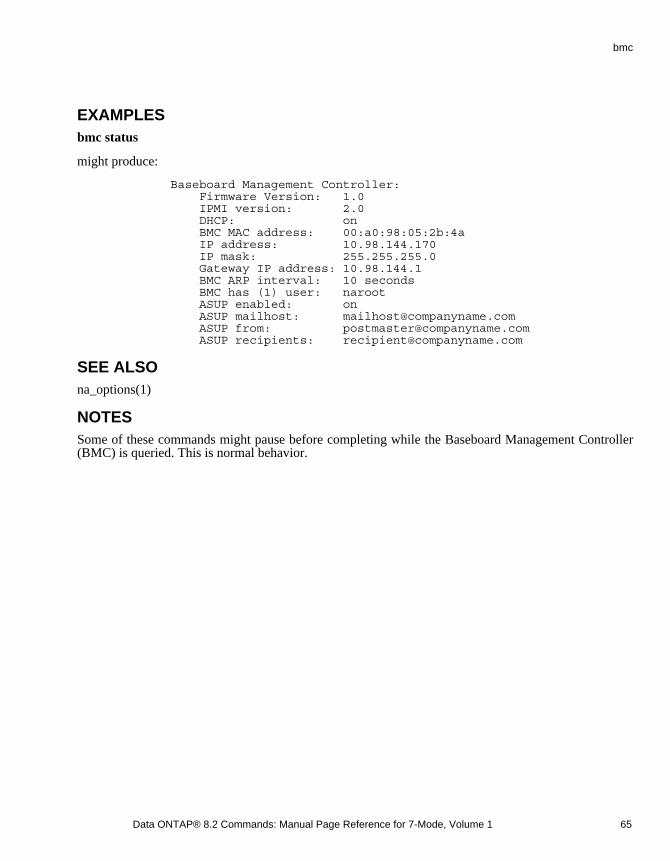
EXAMPLESbmc status
might produce:
Baseboard Management Controller: Firmware Version: 1.0 IPMI version: 2.0 DHCP: on BMC MAC address: 00:a0:98:05:2b:4a IP address: 10.98.144.170 IP mask: 255.255.255.0 Gateway IP address: 10.98.144.1 BMC ARP interval: 10 seconds BMC has (1) user: naroot ASUP enabled: on ASUP mailhost: [email protected] ASUP from: [email protected] ASUP recipients: [email protected]
SEE ALSOna_options(1)
NOTESSome of these commands might pause before completing while the Baseboard Management Controller(BMC) is queried. This is normal behavior.
Data ONTAP® 8.2 Commands: Manual Page Reference for 7-Mode, Volume 1 65
bmc

bootfsNAMEna_bootfs - Boots file system accessor command (ADVANCED).
SYNOPSISbootfs dir [ -r ] path
bootfs sync
DESCRIPTIONThe bootfs command allows content viewing of the boot device.
Using the bootfs command, you may perform the following functions. You may view the contents ofyour boot device via the dir subcommand. You may sync all in memory contents to the physical mediavia the sync subcommand.
-r Recursively lists directories and files.
path A path starts with a /, may contain optional directories and an optional file name. Directories areseparated by a /.
HA CONSIDERATIONSThe bootfs command cannot be used on an HA system’s partner.
EXAMPLESThe dir subcommand lists all files and subdirectories contained in the path provided. The informationpresented for each file and subdirectory is (in this column order) name, size, date, time, and cluster.
bootfs dir /env
+env Oct 29 2009 16:28:00 12287152 | |env 2900 Oct 29 2009 17:00:10 12287155
66 Data ONTAP® 8.2 Commands: Manual Page Reference for 7-Mode, Volume 1
bootfs
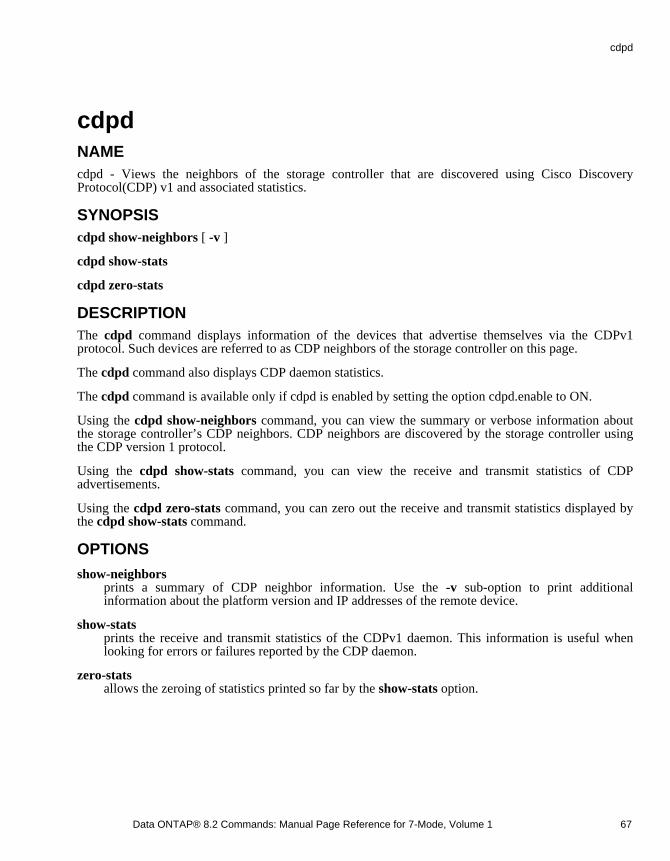
cdpdNAMEcdpd - Views the neighbors of the storage controller that are discovered using Cisco DiscoveryProtocol(CDP) v1 and associated statistics.
SYNOPSIScdpd show-neighbors [ -v ]
cdpd show-stats
cdpd zero-stats
DESCRIPTIONThe cdpd command displays information of the devices that advertise themselves via the CDPv1protocol. Such devices are referred to as CDP neighbors of the storage controller on this page.
The cdpd command also displays CDP daemon statistics.
The cdpd command is available only if cdpd is enabled by setting the option cdpd.enable to ON.
Using the cdpd show-neighbors command, you can view the summary or verbose information aboutthe storage controller’s CDP neighbors. CDP neighbors are discovered by the storage controller usingthe CDP version 1 protocol.
Using the cdpd show-stats command, you can view the receive and transmit statistics of CDPadvertisements.
Using the cdpd zero-stats command, you can zero out the receive and transmit statistics displayed bythe cdpd show-stats command.
OPTIONS
show-neighbors prints a summary of CDP neighbor information. Use the -v sub-option to print additionalinformation about the platform version and IP addresses of the remote device.
show-stats prints the receive and transmit statistics of the CDPv1 daemon. This information is useful whenlooking for errors or failures reported by the CDP daemon.
zero-stats allows the zeroing of statistics printed so far by the show-stats option.
Data ONTAP® 8.2 Commands: Manual Page Reference for 7-Mode, Volume 1 67
cdpd
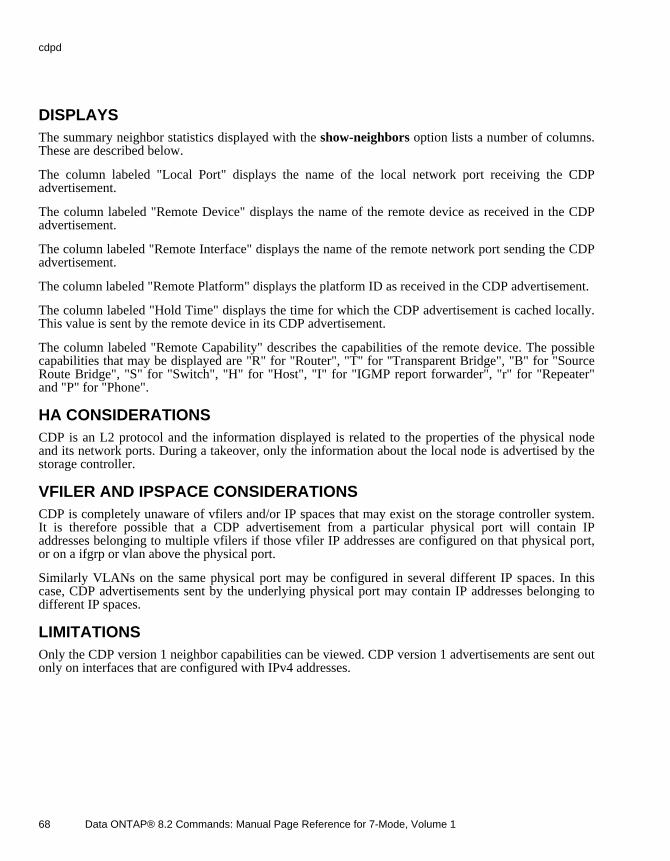
DISPLAYSThe summary neighbor statistics displayed with the show-neighbors option lists a number of columns.These are described below.
The column labeled "Local Port" displays the name of the local network port receiving the CDPadvertisement.
The column labeled "Remote Device" displays the name of the remote device as received in the CDPadvertisement.
The column labeled "Remote Interface" displays the name of the remote network port sending the CDPadvertisement.
The column labeled "Remote Platform" displays the platform ID as received in the CDP advertisement.
The column labeled "Hold Time" displays the time for which the CDP advertisement is cached locally.This value is sent by the remote device in its CDP advertisement.
The column labeled "Remote Capability" describes the capabilities of the remote device. The possiblecapabilities that may be displayed are "R" for "Router", "T" for "Transparent Bridge", "B" for "SourceRoute Bridge", "S" for "Switch", "H" for "Host", "I" for "IGMP report forwarder", "r" for "Repeater"and "P" for "Phone".
HA CONSIDERATIONSCDP is an L2 protocol and the information displayed is related to the properties of the physical nodeand its network ports. During a takeover, only the information about the local node is advertised by thestorage controller.
VFILER AND IPSPACE CONSIDERATIONSCDP is completely unaware of vfilers and/or IP spaces that may exist on the storage controller system.It is therefore possible that a CDP advertisement from a particular physical port will contain IPaddresses belonging to multiple vfilers if those vfiler IP addresses are configured on that physical port,or on a ifgrp or vlan above the physical port.
Similarly VLANs on the same physical port may be configured in several different IP spaces. In thiscase, CDP advertisements sent by the underlying physical port may contain IP addresses belonging todifferent IP spaces.
LIMITATIONSOnly the CDP version 1 neighbor capabilities can be viewed. CDP version 1 advertisements are sent outonly on interfaces that are configured with IPv4 addresses.
68 Data ONTAP® 8.2 Commands: Manual Page Reference for 7-Mode, Volume 1
cdpd
DIAGNOSTICSThe cdpd show-stats command is useful for diagnosing network level connectivity if the cdpd show-neighbors command does not display the expected set of CDP compliant devices.
NOTESCDPv1 is a proprietary Cisco protocol. The storage controller advertises its capabilities using theCDPv1 protocol on each of its physical ports. Therefore, the storage controller system can bediscovered by other CDP compliant devices in the network. Conversely, the storage controller systemlearns about CDP compliant devices on the network by processing the CDPv1 advertisements that itreceives from its neighbors.
The options cdpd.holdtime command can be used to alter the holdtime value advertised by the storagecontroller via the CDPv1 protocol.
The options cdpd.interval command can be used to alter the interval at which CDPv1 advertisementsare sent by the storage controller.
SEE ALSOna_options(1)
Data ONTAP® 8.2 Commands: Manual Page Reference for 7-Mode, Volume 1 69
cdpd

cfNAMEna_cf - Controls the takeover and giveback operations of the nodes in a High Availability (HA) pair.
SYNOPSIScf [ disable | enable | forcegiveback | forcetakeover [ -df ] | giveback [ -f ] | hw_assist [ status | test stats [ clear ] ] | monitor | partner | status [ -t ] takeover [ -f ] | [ -n ]]
DESCRIPTIONThe cf command controls the controller failover monitor, which determines when takeover andgiveback operations take place within an HA pair.
OPTIONS
disable Disables the takeover capability of both nodes in the HA pair.
enable Enables the takeover capability of both nodes in the HA pair.
forcegiveback forcegiveback is dangerous and can lead to data corruption; in almost all cases, use cf giveback -finstead.
Forces the live node to give back the resources of the failed node, even though the live node determinesthat doing so might result in data corruption or cause other severe problems. giveback will refuse togiveback under these conditions. Using the forcegiveback option forces a giveback. When the failednode reboots as a result of a forced giveback, it displays the following message:
partner giveback incomplete, some data may be lost
forcetakeover [-f] forcetakeover is dangerous and can lead to data corruption; in almost all cases, use cf takeover instead.
Forces one node to take over its partner, even though the node detects an error that would otherwiseprevent a takeover. For example, normally, if a detached or faulty Infiniband cable between the nodescauses the nodes’ NVRAM contents to be unsynchronized, takeover is disabled. However, if you enterthe cf forcetakeover command, the node takes over its partner despite the unsynchronized NVRAMcontents. This command might cause the node being taken over to lose client data. If you use the -foption, the cf command allows such a forcetakeover to proceed without requiring confirmation by theoperator.
forcetakeover -d[f] Forces a node to take over its partner in all cases where a forcetakeover wouldfail. In addition it will force a takeover even if some partner mailbox disks are inaccessible. It can onlybe used when cf_remote is licensed.
70 Data ONTAP® 8.2 Commands: Manual Page Reference for 7-Mode, Volume 1
cf
forcetakeover -d is very dangerous. Not only can it cause data corruption, if not used carefully, it canalso lead to a situation where both the node and its partner are operational (split brain). As such, itshould only be used as a means of last resort when the takeover and forcetakeover commands areunsuccessful in achieving a takeover. The operator must ensure that the partner node does not becomeoperational at any time while a node is in a takeover mode initiated by the use of this command. Inconjunction with RAID mirroring, it can allow recovery from a disaster when the two nodes in the HApair are located at two distant sites. The use of -f option allows this command to proceed withoutrequiring confirmation by the operator.
giveback [ -f ] Initiates a giveback of partner resources. If the system ID of the partner has changed while thelocal node is in takeover mode, the ownership of the partner’s disks will be updated to the newsystem ID while giving back. Once the giveback is complete, the automatic takeover capability isdisabled until the partner is rebooted. A giveback fails if outstanding CIFS sessions, active systemdump processes, or other node operations make a giveback dangerous or disruptive. If you use the -f option, the cf command allows such a giveback to proceed as long as it would not result in datacorruption or node error.
hw_assist [ status | test | stats [ clear ] ] Displays information related to the
hardware-assisted takeover functionality. Use the cf hw_assist status command to display the hardware-assistedfunctionality status of the local as well as the partner node. If hardware-assisted status is inactive,the command displays the reason and if possible, a corrective action. Use the cf hw_assist testcommand to validate the hardwareassisted takeover configuration. An error message is printed ifhardwareassisted takeover configuration cannot be validated. Use the cf hw_assist stats commandto display the statistics for all hw_assist alerts received by the node. Use cf hw_assist stats clearto clear hardware-assisted functionality statistics.
monitor Displays the time, the state of the local node and the time spent in this state, the host name of thepartner and the state of controller failover monitor (whether enabled or disabled). If the partner hasnot been taken over currently, the status of the partner and that of the interconnect are displayedand any ongoing giveback or scheduled takeover operations are reported.
partner Displays the host name of the partner. If the name is unknown, the cf command displays ‘‘partner.’’
status Displays the current status of the local node and the HA pair. If you use the -t option, displays thestatus of the node as time master or slave.
takeover [ -f ] | [ -n ]Initiates a takeover of the partner. If you use the -f option, the cf command allows a takeover to proceedeven if it will abort a coredump on the other node. This option results in an immediate takeover whichdoes not do a clean shutdown. In case of NDU this can result in a NDU failure.
If you use the -n option, the cf command allows a takeover to proceed even if the partner node wasrunning an incompatible version of Data ONTAP. This is used as part of a nondisruptive upgradeprocess.
Data ONTAP® 8.2 Commands: Manual Page Reference for 7-Mode, Volume 1 71
cf

SEE ALSOna_partner(1)
72 Data ONTAP® 8.2 Commands: Manual Page Reference for 7-Mode, Volume 1
cf
charmapNAMEna_charmap - command for managing per-volume character maps
SYNOPSIScharmap [ volname [ mapspec ] ]
DESCRIPTIONThe charmap command can be used to manage a character map which is used to allow CIFS clients toaccess files with NFS names that would otherwise not be valid for CIFS. Without a mapping, in such acase the CIFS client will see and must use the 8.3 format name that ONTAP generates for these names.
USAGEcharmap volname mapspec
This form of the command associates the mapspec with the named volume. The format of the mapspecis as follows:
hh:hhhh[,hh:hhhh]...
Each "hh" represents a hexadecimal value. It does not have to be zero-padded, and upper- or lowercasehex "A"-"F" are accepted. The first value of each colon-separated pair is the hex value of the NFS byteto be translated, and the second value is the Unicode value to be substituted for CIFS use. See the"Examples" section below to see how this is done.
charmap volname ""
This command will remove any existing mapping from the named volume.
charmap [volname]
Without a mapspec, the existing character map for the named volume is displayed. If no volume isnamed, the character map, if any, for each volume is displayed.
EXAMPLEScharmap desvol 3e:ff76,3c:ff77,2a:ff78,3a:ff79
This command will map a set of characters (>, <, *, and :) into Japanese Unicode characters that are notnormally used as normal characters in filenames. This mapping will apply to the volume named"desvol".
Data ONTAP® 8.2 Commands: Manual Page Reference for 7-Mode, Volume 1 73
charmap
NOTESThe NFS characters that can be remapped are restricted to those that are invalid for Windows: " (22 =double quote), * (2A = asterisk), : (3A = colon), < (3C = less than), > (3E = greater than), ? (3F =question mark), \ (5C = backslash), and (7C = pipe). Values from 01 to 1F can also be mapped.
It is important to note that the Unicode characters must not appear normally in existing filenames,because otherwise unwanted mappings would occur, resulting in loss of the ability to access mappedfiles. For example, if ":" were mapped to "-", but "-" appeared in files normally, a Windows client usingthe mapped share to access a file named "a-b" would have its request mapped to the NFS name "a:b",which is not the desired file.
Note also that only CIFS client accesses will have this mapping. The on-disk names are the same asthey would be if an NFS client were creating/operating using the mapped file names. If the mapping islater changed, the UNIX names and DOS 8.3 names will not be affected.
If a volume is read-only, it is still possible to assign a charmap to it. However the value will not bepersistent.
BUGSThe characters of the NFS name are considered one byte at a time. that means that multi-byte charactersets may have false substitutions. In general it is advisable to avoid multi-byte character sets in thenames of files to be mapped.
LIMITATIONSCase sensitivity
Because the mapped Windows names turn into NFS names, the lookup of the names follows NFSsemantics. That includes the fact that NFS lookups are case-sensitive. That means the applicationsaccessing mapped shares must not rely on Windows case-insensitive behavior. However the 8.3 name isavailable, and that is case-insensitive.
Partial or invalid mappings
After mapping a name to return to clients doing directory enumeration ("dir"), the resulting Unicodename is checked for Windows validity. If that name still has invalid characters in it, or if it is otherwiseinvalid for Windows (e.g. it ends in "." or blank) the 8.3 name is returned instead of the invalid name.
74 Data ONTAP® 8.2 Commands: Manual Page Reference for 7-Mode, Volume 1
charmap
cifsNAMEna_cifs - summary of cifs commands
SYNOPSISCommand Summary
This is a list of the subcommands of the cifs command.
cifs access Modifies share-level Access Control List (ACL) entries.
cifs audit Configures CIFS auditing.
cifs branchcache Display CIFS BranchCache statistics and set BranchCache server secret key.
cifs broadcast Display a message on user workstations.
cifs changefilerpwdSchedules a domain password change for the node.
cifs comment Displays/modifies the CIFS server description.
cifs help Display a list of CIFS commands.
cifs homedir Manage CIFS home directory paths.
cifs lookup Translates user/group names into SIDs, and vice versa.
cifs gpresult Displays the resultant set of group policy for this node.
cifs gpupdate Refreshes group policy settings.
cifs nbalias Manage CIFS NetBIOS aliases.
cifs restart Restarts CIFS or reactivates CIFS service for a single volume if either has been shut down with cifs terminate.
Data ONTAP® 8.2 Commands: Manual Page Reference for 7-Mode, Volume 1 75
cifs

cifs sessions Displays current configuration and current connections.
cifs setup Configures CIFS service.
cifs shares Displays/modifies the CIFS exports.
cifs stat Displays operational statistics.
cifs terminate Shuts down CIFS, ends CIFS service for a volume, or logs off a single station.
cifs testdc Tests the node’s connection to domain controllers.
cifs adupdate Updates the node’s account information on the Active Directory server.
VFILER CONSIDERATIONSWhen run from a vfiler context, (e.g. via the vfiler run command), cifs operates on the concernedvfiler.
SEE ALSO
na_cifs_audit(1),
na_cifs_broadcast(1), na_cifs_homedir(1), na_cifs_restart(1), na_cifs_shares(1), na_cifs_adupdate(1), na_vfiler(1)
76 Data ONTAP® 8.2 Commands: Manual Page Reference for 7-Mode, Volume 1
cifs
cifs_accessNAMEna_cifs_access - modify share-level access control or Windows machine account access
SYNOPSIScifs access share [ -g ] user rights
cifs access -delete share [ -g ] user
cifs access share -m
cifs access -delete share -m
DESCRIPTIONThe cifs access command sets or modifies the share-level Access Control List (‘‘ACL’’) of one or moreshares. It may also be used to set Windows machine account access to the shares when Kerberos isused.
The share argument specifies the share whose ACL or Windows machine account access is to bemodified. If share contains the wildcard characters * or ? , then the access all the shares matching thespecified pattern are modified. The user argument specifies the user or group of the ACL entry. user canbe an NT user or group, if the node is using NT domain authentication, or it can be a Unix user orgroup, or it can be the special allencompassing group everyone. The rights argument can be specified ineither NT or Unix style. NT-style rights are:
No Access
Read
Change
Full Control
Unix-style rights are a combination of r for read, w for write, and x for execute.
If a share-level ACL entry for user already exists on the specified share, cifs access updates that ACLentry.
To display the current share-level ACL of a share, use Windows Server Manager or the cifs sharescommand.
If Kerberos is used, Windows machine accounts can authenticate with the node. Windows machineaccounts are specified with the -m option and access can only be allowed or denied. cifs access mayalso be used to add Windows machine account access to home directories by specifying cifs.homedir asthe share.
Data ONTAP® 8.2 Commands: Manual Page Reference for 7-Mode, Volume 1 77
cifs_access
To determine if Windows machine accounts can access share, use the cifs shares command.
OPTIONS
-m Specifies that access is being modified for Windows machine accounts.
-g Specifies that user is the name of a Unix group. Use this option when you have a Unix group and aUnix user or NT user or group with the same name.
-delete Deletes the ACL entry for user on share or denys Windows machine account access to share.
EXAMPLESThe following example grants NT Read access to the NT user ENGINEERING\mary on the share releases.
toaster> cifs access releases ENGINEERING\mary Read
The following example grants Unix read and execute access to the user john on the share accounting.
toaster> cifs access accounting john rx
The following example grants full access to the Unix group wheel on the share sysadmins.
toaster> cifs access sysadmins -g wheel Full Control
The following example deletes the ACL entry for ENGINEERING\mary on the share releases.
toaster> cifs access -delete releases ENGINEERING\mary
The following example permits Windows machine account access to home directories
toaster> cifs access cifs.homedir -m
EFFECTIVEAny changes take effect immediately
PERSISTENCEChanges are persistent across system reboots.
SEE ALSOna_cifs_shares(1)
78 Data ONTAP® 8.2 Commands: Manual Page Reference for 7-Mode, Volume 1
cifs_access
cifs_adupdateNAMEna_cifs_adupdate - Update the node’s account information on the Active Directory server.
SYNOPSIScifs adupdate
DESCRIPTIONcifs adupdate updates the node’s account information on the Active Directory server. This command isonly valid when the node is part of an Active Directory domain. The command will fail if the nodeaccount in the Active Directory does not have sufficient privileges to perform this operation.
SEE ALSOna_cifs_testdc(1)
Data ONTAP® 8.2 Commands: Manual Page Reference for 7-Mode, Volume 1 79
cifs_adupdate
cifs_auditNAMEna_cifs_audit - Configure CIFS auditing.
SYNOPSIScifs audit save [ -f ]
cifs audit clear
DESCRIPTIONThe cifs audit save command saves the audit records stored internally by CIFS to an NT-formatted filereadable by the NT Event Viewer application. The name of the file to which records are saved isspecified by the cifs.audit.saveas option. If the file exists, it will not be overwritten unless the -f optionis specified to force the save.
The cifs audit clear command clears the internal CIFS audit log. It does not affect the NT-formattedaudit log file specified by the option cifs.audit.saveas.
80 Data ONTAP® 8.2 Commands: Manual Page Reference for 7-Mode, Volume 1
cifs_audit
cifs_branchcacheNAMEna_cifs_branchcache - Display CIFS BranchCache statistics and set BranchCache server secret key
SYNOPSIScifs branchcache hash stat [ -flush ] [ -size ]
cifs branchcache set key pass-phrase
DESCRIPTIONDisplaying BranchCache statisticsTo display BranchCache statistics, use the command cifs branchcache hash stat.
If you specify the "-flush" option, it reports the number of hashes that were flushed in multiples of5-minute intervals. If hashes are getting flushed frequently then increase the hash timeout value usingthe option "cifs.smb2_1.branch_cache.hash_time_out".
If you specify the "-size" option, it reports the number of files in various sizes ranges for which hasheswere requested for. File size ranges are <10K, 11K-100K, 101K-250K, 251K-1M, 1.1M-10M,11M-100M, and >100M. BranchCache is based on Peer Content Caching and Retrieval framework. Itprovides information about BranchCache deployment.
If you specify without arguments, it reports the cumulative output of the "-flush" and "-size" options.The command reports the number of hashes that were flushed in multiples of 5-minute intervals and thenumber of file size ranges for which hashes were requested for. If hashes are getting flushed frequentlythen either increase the hash timeout value using the option "cifs.smb2_1.branch_cache.hash_time_out"or adjust the client side configurations to use BranchCache for smaller file sizes.
Setting BranchCache server secret keyTo set the BranchCache server secret key, use the command cifs branchcache set key pass-phrase.
pass-phraseA string that provides cryptographic data used by the BranchCache content server to generate hashes.Content servers that are serving the same data and are expected to provide the same hash values mustuse the same key. After changing this value, any existing cached content will be identified as stale andretrieved from the content server again.
EXAMPLESThe following example displays the number of hashes that were flushed by Data ONTAP in the last few hours:
storage_system>cifs branchcache hash stat -flush
Number of hashes flushed in duration of 600 seconds = 5Number of hashes flushed in duration of 900 seconds = 8Number of hashes flushed in duration of 1200 seconds = 11Number of hashes flushed in duration of 1500 seconds = 14
Data ONTAP® 8.2 Commands: Manual Page Reference for 7-Mode, Volume 1 81
cifs_branchcache
Number of hashes flushed in duration of more than 1800 seconds = 22
The following example displays the number of files for which hashes were requested for organized by file size range:
storage_system>cifs branchcache hash stat -size
Number of files (size <= 10KB) for which hashes were asked for = 5Number of files (10KB < size <= 100KB) for which hashes were asked for = 7Number of files (100KB < size <= 250k) for which hashes were asked for = 120Number of files (250KB < size <= 1MB) for which hashes were asked for = 9Number of files (1MB < size <= 10MB) for which hashes were asked for = 1245Number of files (10MB < size <= 100MB) for which hashes were asked for = 9Number of files (size > 100MB) for which hashes were asked for = 27
The following example displays the output for both the -flush and -size parameters:
storage_system>cifs branchcache hash stat
Number of hashes flushed in duration of 600 seconds = 5Number of hashes flushed in duration of 900 seconds = 8Number of hashes flushed in duration of 1200 seconds = 11Number of hashes flushed in duration of 1500 seconds = 14Number of hashes flushed in duration of more than 1800 seconds = 22Number of files (size <= 10KB) for which hashes were asked for = 5Number of files (10KB < size <= 100KB) for which hashes were asked for = 7Number of files (100KB < size <= 250k) for which hashes were asked for = 120Number of files (250KB < size <= 1MB) for which hashes were asked for = 9Number of files (1MB < size <= 10MB) for which hashes were asked for = 1245Number of files (10MB < size <= 100MB) for which hashes were asked for = 9Number of files (size > 100MB) for which hashes were asked for = 28
The following example sets the BranchCache server secret key to my secret server key phrase :
storage_system>cifs branchcache set key "my secret server key phrase"
EFFECTIVE
PERSISTENCEChanges are persistent across system reboots.
SEE ALSOna_options(1).
82 Data ONTAP® 8.2 Commands: Manual Page Reference for 7-Mode, Volume 1
cifs_branchcache
cifs_broadcastNAMEna_cifs_broadcast - display a message on user workstations
SYNOPSIScifs broadcast { wsname | -v volname } message
DESCRIPTIONThe cifs broadcast command displays a message on user workstations.
A message may be sent to a specific workstation, named by the wsname parameter.
message is enclosed in double quotes.
A message may be sent to all workstations that have active sessions open on a specified volume, namedby the volname parameter.
EXAMPLES FAS> cifs broadcast danw-nt "CIFS Shutting Down in 10 Minutes!!!" FAS> FAS> vol status Volume State Status Options vol0 online normal root, checksum_blocks=on(active) FAS> FAS> cifs broadcast -v vol0 "CIFS SHUTTING DOWN IN 5 MINUTES!!!" FAS>
Data ONTAP® 8.2 Commands: Manual Page Reference for 7-Mode, Volume 1 83
cifs_broadcast

cifs_changefilerpwdNAMEna_cifs_changefilerpwd - Schedules a domain password change for the node.
SYNOPSIScifs changefilerpwd
DESCRIPTIONThe cifs changefilerpwd command schedules a domain password change for the node in a Windows2000 or Windows NT 4 domain. For Windows 2000 domains with multiple DCs, a password changemay inhibit CIFS connections for a short time while the new password is propagated among the DCs.
EFFECTIVEAny changes take effect within 1 minute
PERSISTENCEChanges are persistent across system reboots.
SEE ALSOna_options(1)
84 Data ONTAP® 8.2 Commands: Manual Page Reference for 7-Mode, Volume 1
cifs_changefilerpwd
cifs_commentNAMEna_cifs_comment - display or change CIFS server description
SYNOPSIScifs comment [ newcomment ]
DESCRIPTIONThe cifs comment command displays or changes the CIFS server description. CIFS clients see the CIFSserver description when browsing servers on the network.
If no command-line arguments are given, cifs comment displays the current CIFS server description. Ifyou enter a string for the newcomment parameter, the current CIFS server description is changed to newcomment. If newcomment contains spaces, enclose it in double quotation marks.
EFFECTIVEAny changes take effect immediately
PERSISTENCEChanges are persistent across system reboots.
Data ONTAP® 8.2 Commands: Manual Page Reference for 7-Mode, Volume 1 85
cifs_comment
cifs_domaininfoNAMEcifs domaininfo - display domain type information
SYNOPSIScifs domaininfo [ domain ]
DESCRIPTIONThe cifs domaininfo command determines whether the specified domain is an NT4 or Windows 2000domain. The domain option is not required if CIFS is running, and the node is a member of a domain. Inall other cases domain must be specified.
When CIFS is running, additional information about current domain controller connections and knowndomain controller addresses for the specified domain is displayed. In addition, the current ActiveDirectory LDAP server connection and known Active Directory LDAP servers are also displayed forthe specified domain.
EXAMPLESIn this example CIFS is running, and information about the current domain is sought:
FAS> cifs domaininfo NetBios Domain: MYDOMAIN Windows 2000 Domain Name: my.domain.mycompany.com Type: Windows 2000 Filer AD Site: Default-First-Site-Name
Current Connected DCs: \\DC-A7-4 Preferred Addresses: None Favored Addresses: 172.18.1.28 DC-A7-4 PDC 172.18.1.29 PDC Other Addresses: None
Connected AD LDAP Server: \\dc-a7-4.my.domain.mycompany.com Preferred Addresses: None Favored Addresses: 172.18.1.28 dc-a7-4.my.domain.mycompany.com 172.18.1.29 dc-a7-5.my.domain.mycompany.com Other Addresses: None
86 Data ONTAP® 8.2 Commands: Manual Page Reference for 7-Mode, Volume 1
cifs_domaininfo

The DNS form of the domain name can also be used:
FAS> cifs domaininfo other.dom.mycompany.com NetBios Domain: OTHERDOM Windows 2000 Domain Name: other.dom.mycompany.com Type: Windows 2000 Filer AD Site: Default-First-Site-Name
Data ONTAP® 8.2 Commands: Manual Page Reference for 7-Mode, Volume 1 87
cifs_domaininfo
cifs_helpNAMEna_cifs_help - display help for CIFS-specific commands
SYNOPSIScifs help [ cmd ]
cifs help detail
DESCRIPTIONThe cifs help command displays information about specific commands available in the CIFS subsystemon the node. It allows one to obtain usage information for specific CIFS commands, or a usage list forall CIFS commands may be generated ( cifs help detail ).
If no command-line arguments are given, cifs help displays an alphabetized list of CIFS commands byname.
There are two ways to get usage help for a specific command:
cifs help cmd
or
cifs cmd ?
where cmd is any CIFS specific command.
88 Data ONTAP® 8.2 Commands: Manual Page Reference for 7-Mode, Volume 1
cifs_help
cifs_homedirNAMEna_cifs_homedir - Manage CIFS home directory paths.
SYNOPSIScifs homedir
cifs homedir load [-f]
cifs homedir showuser username
DESCRIPTIONThe cifs homedir command lists out the current paths used by the node to search for users’ CIFS homedirectories. These paths are kept in a configuration file at /etc/cifs_homedir.cfg. After creating orchanging the entries in the file, the command cifs homedir load [-f] will cause the node to process thefile. Normally the node will not load new paths if changing the list affects a user who has open files. Ifthe -f flag is set, the new set of paths is forced into use. Data loss for users with open files is possible ifthe force flag is used. The command cifs homedir showuser username causes the node to look up agiven user’s CIFS home directory and print out its path. This command may be useful if there aremultiple CIFS home directory paths and it is desired to learn which of the paths holds the user’s CIFShome directory. The node’s CIFS home directory name style can be displayed with the command options cifs.home_dir_namestyle. Note that if the node is set to use the "domain" home directory namestyle, username must be entered in the form domain/user. If the node is set to use the "mapped" homedirectory name style, the mapped user name must be entered. Given an NT user name, the mappedUNIX name can be obtained with the wcc command. If the "hidden" home directory name style is inuse, enter username with no dollar sign.
EFFECTIVEAny changes take effect immediately
PERSISTENCEChanges are persistent across system reboots.
SEE ALSOna_cifs_homedir.cfg(5)
Data ONTAP® 8.2 Commands: Manual Page Reference for 7-Mode, Volume 1 89
cifs_homedir
cifs_lookupNAMEna_cifs_lookup - translate name into SID or vice versa
SYNOPSIScifs lookup name
cifs lookup domain\name
cifs lookup textual_sid_S-x-y-z
DESCRIPTIONThe cifs lookup command translates a Windows NT user or group name into its corresponding textualWindows NT SID (Security ID), or a textual NT SID into its corresponding Windows NT user or groupname.
domain\name is the name of an account in a specified Windows domain. If the domain is omitted, thenthe name is looked up in the domain in which the Node is a member server.
Conversely, given a Windows Security ID (SID), cifs lookup will return the corresponding accountname.
EXAMPLES toaster> cifs lookup mday SID = S-1-5-21-39724982-1647982808-1376457959-1221
toaster> cifs lookup NT-DOMAIN\mday SID = S-1-5-21-39724982-1647982808-1376457959-1221
toaster> cifs lookup BUILTIN\Administrators SID = S-1-5-32-544
toaster> cifs lookup S-1-5-32-544 name = BUILTIN\Administrators
toaster> cifs lookup nonexistentuser lookup failed
90 Data ONTAP® 8.2 Commands: Manual Page Reference for 7-Mode, Volume 1
cifs_lookup
cifs_nbaliasNAMEna_cifs_nbalias - Manage CIFS NetBIOS aliases.
SYNOPSIScifs nbalias
cifs nbalias load
DESCRIPTIONThe cifs nbalias command lists out the current NetBIOS aliases for the node. These alternative nodenames are kept in a configuration file at /etc/cifs_nbalias.cfg. After creating or changing the entries inthe file, the command cifs nbalias load will cause the node to process the file. In past releases of DataONTAP, the CIFS NetBIOS aliases were managed with the options cifs.netbios_aliases name[,name]command. That command is deprecated.
EFFECTIVEAny changes take effect immediately
PERSISTENCEChanges are persistent across system reboots.
SEE ALSOna_cifs_nbalias.cfg(5)
Data ONTAP® 8.2 Commands: Manual Page Reference for 7-Mode, Volume 1 91
cifs_nbalias
cifs_prefdcNAMEna_cifs_prefdc - configure and display CIFS preferred Domain Controller information
SYNOPSIScifs prefdc print [ domain ]
cifs prefdc add domain address [ address ... ]
cifs prefdc delete domain
DESCRIPTIONcifs prefdc allows control over the order in which CIFS chooses Domain Controllers for domainauthentication. cifs prefdc displays one or more preferred Domain Controller (DC) lists, adds apreferred DC list for a domain, or deletes a preferred DC list for a domain.
When CIFS needs a Domain Controller to authenticate domain users it uses a combination of WINS andDNS to discover a set of candidate DCs. It then orders the DCs based on site membership (if Windows2000), and local vs. remote subnet. When a preferred DC list has been specified for the matchingdomain, those addresses are appended to the front of the list in the order specified, and are tried first. Ifno preferred DCs can be contacted, then the remaining discovered DCs are tried.
This preferred list is also used to control the order in which Active Directory LDAP servers are chosen.
Listing preferred DCsTo display preferred DC lists, use the print option:
cifs prefdc print [ domain ]
domain name of the domain whose preferred DC list to print. If not present, print preferred DC lists of alldomains.
Adding a preferred DC listTo specify a preferred DC list for a domain, use the add option:
cifs prefdc add domain address [ address ... ]
domain the domain whose preferred DC list is being set.
address IP address for a Domain Controller. At least one address must be specified. Multiple addressesmust be separated by spaces.
92 Data ONTAP® 8.2 Commands: Manual Page Reference for 7-Mode, Volume 1
cifs_prefdc
Deleting a preferred DC listTo delete a deferred DC list for a domain, use the delete option:
cifs prefdc delete domain
EXAMPLES toaster> cifs prefdc add mydom 10.10.10.10 10.10.10.20 Preferred DC list for domain MYDOM: 1. 10.10.10.10 2. 10.10.10.20
toaster> cifs prefdc add otherdomain 10.10.30.10 Preferred DC list for domain OTHERDOMAIN: 1. 10.10.30.10
toaster> cifs prefdc print Preferred DC lists per domain:
MYDOM: 1. 10.10.10.10 2. 10.10.10.20
OTHERDOMAIN: 1. 10.10.30.10
EFFECTIVEAny changes take effect after a ‘cifs resetdc’ command or after a domain controller discovery (within 4hours).
PERSISTENCEChanges are persistent across system reboots.
SEE ALSOna_cifs_testdc(1)
Data ONTAP® 8.2 Commands: Manual Page Reference for 7-Mode, Volume 1 93
cifs_prefdc
cifs_resetdcNAMEna_cifs_resetdc - reset CIFS connection to Domain Controller
SYNOPSIScifs resetdc [ domain ]
DESCRIPTIONcifs resetdc resets the CIFS connection to Domain Controllers for the specified domain. Currentconnections to DCs for the domain are terminated, and a new connection is established. In addition, idleActive Directory LDAP connections are also terminated and a new connection is established. Thiscommand may be used in concert with the cifs prefdc command to change the Domain Controller CIFSuses for authentication.
SEE ALSOna_cifs_testdc(1)
94 Data ONTAP® 8.2 Commands: Manual Page Reference for 7-Mode, Volume 1
cifs_resetdc
cifs_restartNAMEna_cifs_restart - restart CIFS service
SYNOPSIScifs restart
DESCRIPTIONcifs restart restarts CIFS service if it has been terminated by cifs terminate.
SEE ALSOna_cifs_terminate(1).
Data ONTAP® 8.2 Commands: Manual Page Reference for 7-Mode, Volume 1 95
cifs_restart
cifs_sessionsNAMEna_cifs_sessions - Provides information about current CIFS activity.
SYNOPSIScifs sessions [ -p smb|smb2 ] [-i ipv4|ipv6 ] [ -s -c ] [ user | machine_IP_address | * | machine_name ]
cifs sessions -t [ -c ]
DESCRIPTIONThe cifs sessions command displays information about CIFS users who are connected to the node. Ifyou omit the argument, the command displays a summary of information about the node and lists theusers who are connected to the node.
It is also possible to ask for session information by specifying the user’s machine_name.
One can always specify the user’s client machine_IP_address to the cifs sessions command. However,if the node has not been provided the machine name and session information is asked for using the machine_name argument, the cifs sessions command will fail with the message "User (or PC) notlogged in".
The -p option filters sessions based on the version of the SMB protocol used. When the -p option isused with ‘smb’ as the argument, only SMB 1.0 sessions are displayed. When the -p option is used with‘smb2’ as the argument, only SMB 2.0 sessions are displayed. When the -p option is not used, bothSMB 1.0 and SMB 2.0 sessions are displayed. The -p option can be used along with -c and -s options.
The -i option filters the sessions on the basis of the IP protocol used. When -i option is used with ‘ipv4’as the argument, only sessions established over IPv4 protocol are displayed. When -i option is used with‘ipv6’ as the argument, only sessions established over IPv6 protocol are displayed. When -i option isnot used, all the sessions established over IPv4 and IPv6 are displayed. The -i option can be used alongwith -c and -s options.
The -t option displays the total count of CIFS sessions, open shares and open files.
The -c option displays information about open directories and the number of active ChangeNotifyrequests. When used with the -t option, the total count of open directories and active ChangeNotifyrequests is also shown. When no other option or argument is present, the -c option shows, for each user,the number of open directories and number of active ChangeNotify requests.
A CIFS client connected to the node is displayed under the PC IP (PC Name) column as an IP addressfollowed by a NetBIOS name (if available) within parentheses. If NetBIOS name is unavailable, thename is displayed as an IP address followed by empty parentheses.
96 Data ONTAP® 8.2 Commands: Manual Page Reference for 7-Mode, Volume 1
cifs_sessions
EXAMPLES cifs sessions Server Registers as ’HAWLEYR-TOKYO’ in group ’NT-DOMAIN’ Filer is using ja for DOS users WINS Server: 10.10.10.55 Selected domain controller \NT-DOMAIN-BDC for authentication ==================================================== PC IP(PC Name) (user) #shares #files 132.170.108.1(HAWLEY-PC) (hawleyr - root) 1 4 192.123.34.56() (foo - userBar) 2 5
cifs sessions -c Server Registers as ’HAWLEYR-TOKYO’ in group ’NT-DOMAIN’ Filer is using ja for DOS users WINS Server: 10.10.10.55 Selected domain controller \NT-DOMAIN-BDC for authentication =============================================================================== PC IP (PC Name) (user) #shares #files #dirs #ChangeNotifies 132.170.108.1(HAWLEY-PC) (hawleyr - root) 1 4 1 2 192.123.34.56() (foo - userBar) 5 12 10 10
If you include the user argument, the command displays information about the specified user; alongwith the names and access level of files that user has opened. If you use * as the specified user, thecommand lists all users.
Executing the command for user sam might produce output as follows:
cifs sessions sam users shares/files opened
172.18.34.11(HAWLEY-HOME1) (sam) ENG-USERS Read-denyW - \SAM\SRC\TEST\test_pgm.c
132.170.108.1(HAWLEY-PC) (sam) ENG-USERS
Specifying the -c option with a user argument, will display the names of open directories and thenumber of active ChangeNotify requests against the directory.
cifs sessions -c sam users shares/files and directories opened
172.18.34.11(HAWLEY-HOME1) (sam) (using security signatures) ENG-USERS Read-denyW - \SAM\SRC\TEST\test_pgm.c 2 ChgNfys - \SAM\SRC\TEST
Data ONTAP® 8.2 Commands: Manual Page Reference for 7-Mode, Volume 1 97
cifs_sessions
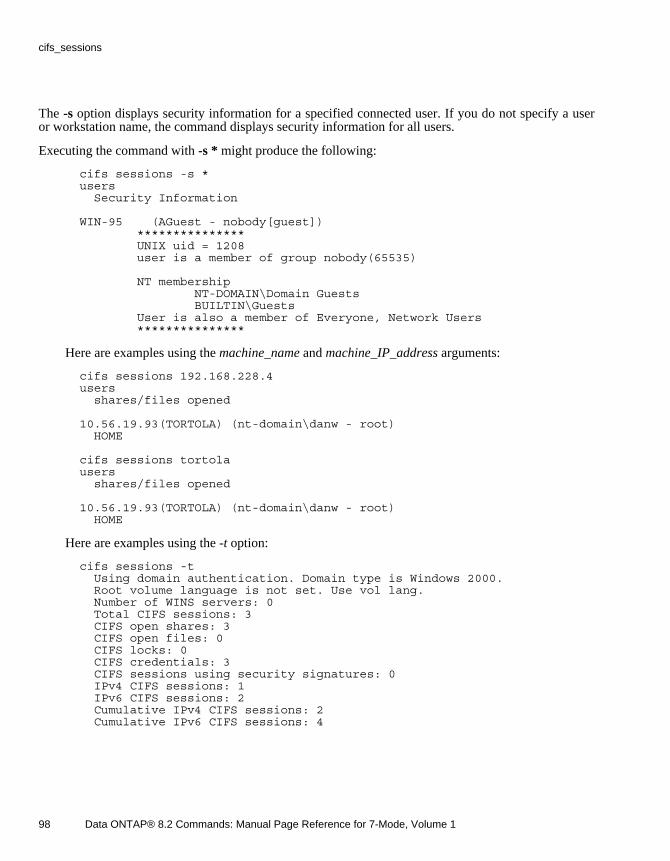
The -s option displays security information for a specified connected user. If you do not specify a useror workstation name, the command displays security information for all users.
Executing the command with -s * might produce the following:
cifs sessions -s * users Security Information
WIN-95 (AGuest - nobody[guest]) *************** UNIX uid = 1208 user is a member of group nobody(65535)
NT membership NT-DOMAIN\Domain Guests BUILTIN\Guests User is also a member of Everyone, Network Users ***************
Here are examples using the machine_name and machine_IP_address arguments:
cifs sessions 192.168.228.4 users shares/files opened
10.56.19.93(TORTOLA) (nt-domain\danw - root) HOME
cifs sessions tortola users shares/files opened
10.56.19.93(TORTOLA) (nt-domain\danw - root) HOME
Here are examples using the -t option:
cifs sessions -t Using domain authentication. Domain type is Windows 2000. Root volume language is not set. Use vol lang. Number of WINS servers: 0 Total CIFS sessions: 3 CIFS open shares: 3 CIFS open files: 0 CIFS locks: 0 CIFS credentials: 3 CIFS sessions using security signatures: 0 IPv4 CIFS sessions: 1 IPv6 CIFS sessions: 2 Cumulative IPv4 CIFS sessions: 2 Cumulative IPv6 CIFS sessions: 4
98 Data ONTAP® 8.2 Commands: Manual Page Reference for 7-Mode, Volume 1
cifs_sessions
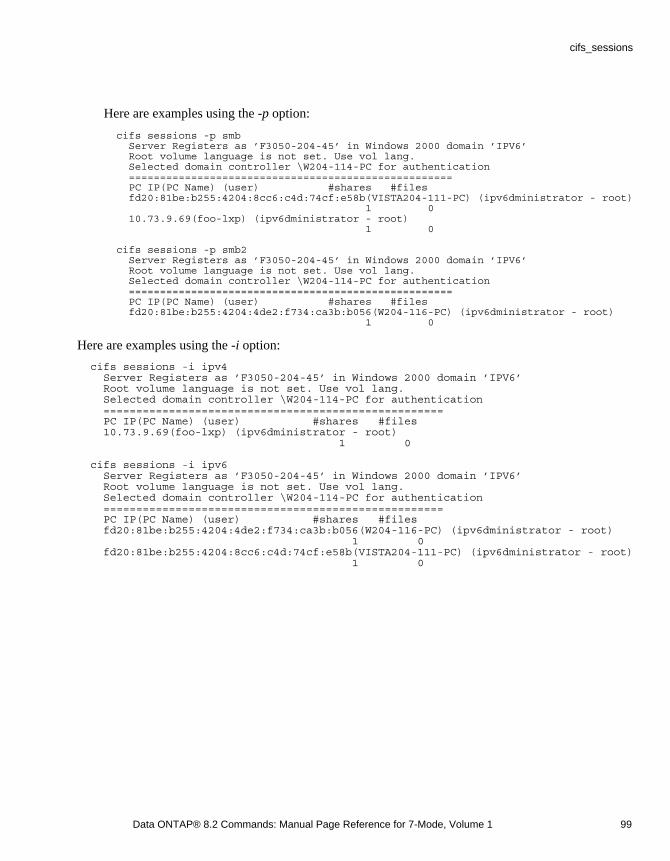
Here are examples using the -p option:
cifs sessions -p smb Server Registers as ’F3050-204-45’ in Windows 2000 domain ’IPV6’ Root volume language is not set. Use vol lang. Selected domain controller \W204-114-PC for authentication ==================================================== PC IP(PC Name) (user) #shares #files fd20:81be:b255:4204:8cc6:c4d:74cf:e58b(VISTA204-111-PC) (ipv6dministrator - root) 1 0 10.73.9.69(foo-lxp) (ipv6dministrator - root) 1 0
cifs sessions -p smb2 Server Registers as ’F3050-204-45’ in Windows 2000 domain ’IPV6’ Root volume language is not set. Use vol lang. Selected domain controller \W204-114-PC for authentication ==================================================== PC IP(PC Name) (user) #shares #files fd20:81be:b255:4204:4de2:f734:ca3b:b056(W204-116-PC) (ipv6dministrator - root) 1 0
Here are examples using the -i option:
cifs sessions -i ipv4 Server Registers as ’F3050-204-45’ in Windows 2000 domain ’IPV6’ Root volume language is not set. Use vol lang. Selected domain controller \W204-114-PC for authentication ==================================================== PC IP(PC Name) (user) #shares #files 10.73.9.69(foo-lxp) (ipv6dministrator - root) 1 0
cifs sessions -i ipv6 Server Registers as ’F3050-204-45’ in Windows 2000 domain ’IPV6’ Root volume language is not set. Use vol lang. Selected domain controller \W204-114-PC for authentication ==================================================== PC IP(PC Name) (user) #shares #files fd20:81be:b255:4204:4de2:f734:ca3b:b056(W204-116-PC) (ipv6dministrator - root) 1 0 fd20:81be:b255:4204:8cc6:c4d:74cf:e58b(VISTA204-111-PC) (ipv6dministrator - root) 1 0
Data ONTAP® 8.2 Commands: Manual Page Reference for 7-Mode, Volume 1 99
cifs_sessions
cifs_setupNAMEna_cifs_setup - configure CIFS service
SYNOPSIScifs setup
DESCRIPTIONThe cifs setup command performs the initial configuration of the node for CIFS. You must haveinstalled the CIFS license before you enter this command. You must run the cifs setup command fromthe console or from a telnet connection; you can’t enter the command through rsh.
FILES/etc/cifsconfig_setup.cfg setup configuration information/etc/cifsconfig_share.cfg share configuration information
/etc/cifssec.cfg NT domain machine account information
/etc/filersid.cfg local machine SID /etc/lclgroups.cfg local NT group information
/etc/usermap.cfg multiprotocol user map file
HA CONSIDERATIONSThe values for domain controllers and WINS servers need not match on both storage systems in an HApair. However, if you have a multiprotocol environment and use UID-to-SID mapping, the UNIXsecurity information must be compatible between the two domains.
EFFECTIVEAny changes take effect immediately
PERSISTENCEChanges are persistent across system reboots.
SEE ALSOna_group(5), na_passwd(5).
100 Data ONTAP® 8.2 Commands: Manual Page Reference for 7-Mode, Volume 1
cifs_setup

cifs_sharesNAMEna_cifs_shares - Configures and displays CIFS shares information.
SYNOPSIScifs shares [ sharename ]
cifs shares -add sharename path[ -f ][ -comment description ][ -maxusers userlimit ][ -forcegroup groupname ][ -nosymlink_strict_security ][ -widelink ][ -umask mask ][ -dir_umask mask ][ -file_umask mask ][ -nobrowse ][ -novscan ][ -novscanread ][ -no_caching | -auto_document_caching -auto_program_caching | -branchcache ] [ -accessbasedenum ]
cifs shares -change sharename{ -comment description | -nocomment } { -maxusers userlimit | -nomaxusers } { -forcegroup groupname | -noforcegroup }
{ -nosymlink_strict_security -symlink_strict_security } { -widelink | -nowidelink } { -umask mask | -noumask } { -dir_umask mask | -nodir_umask } { -file_umask mask | -nofile_umask }{ -nobrowse | -browse } { -novscan | -vscan } { -novscanread | -vscanread } { -no_caching | -manual_caching -auto_document_caching | -auto_program_caching -branchcache } { -accessbasedenum | -noaccessbasedenum }
cifs shares -delete [ -f ] sharename
cifs shares -t
DESCRIPTIONcifs shares displays one or more shares, edits one or more shares, creates a share, deletes a share, ordisplays a total summary of the shares.
Listing sharesTo list the shares and their access control lists, use the command cifs shares followed by the name ofthe share to display. If the name contains the wildcard characters * or ? , then all the shares matchingthe specified name are displayed.
Data ONTAP® 8.2 Commands: Manual Page Reference for 7-Mode, Volume 1 101
cifs_shares
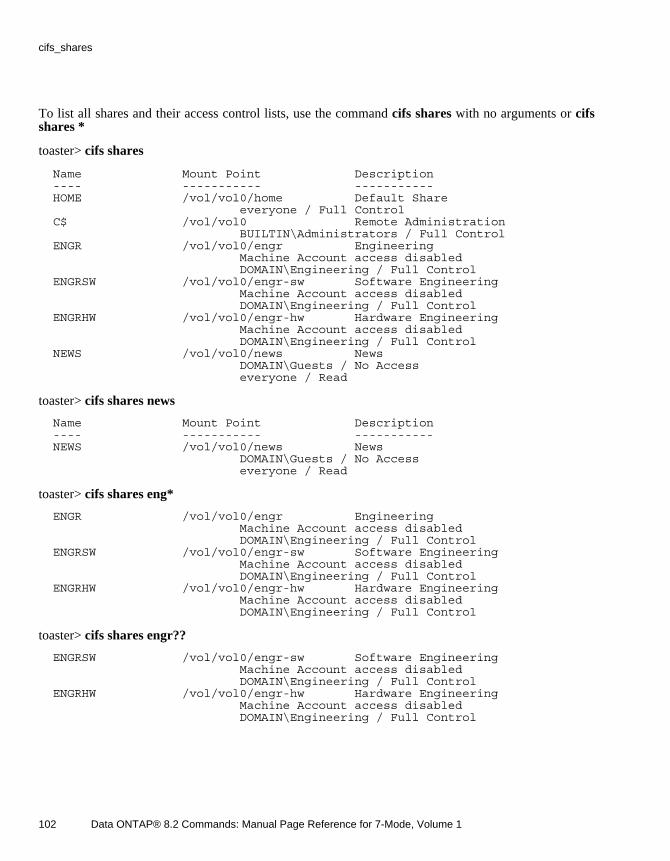
To list all shares and their access control lists, use the command cifs shares with no arguments or cifs shares *
toaster> cifs shares
Name Mount Point Description ---- ----------- ----------- HOME /vol/vol0/home Default Share everyone / Full Control C$ /vol/vol0 Remote Administration BUILTIN\Administrators / Full Control ENGR /vol/vol0/engr Engineering Machine Account access disabled DOMAIN\Engineering / Full Control ENGRSW /vol/vol0/engr-sw Software Engineering Machine Account access disabled DOMAIN\Engineering / Full Control ENGRHW /vol/vol0/engr-hw Hardware Engineering Machine Account access disabled DOMAIN\Engineering / Full Control NEWS /vol/vol0/news News DOMAIN\Guests / No Access everyone / Read
toaster> cifs shares news
Name Mount Point Description ---- ----------- ----------- NEWS /vol/vol0/news News DOMAIN\Guests / No Access everyone / Read
toaster> cifs shares eng*
ENGR /vol/vol0/engr Engineering Machine Account access disabled DOMAIN\Engineering / Full Control ENGRSW /vol/vol0/engr-sw Software Engineering Machine Account access disabled DOMAIN\Engineering / Full Control ENGRHW /vol/vol0/engr-hw Hardware Engineering Machine Account access disabled DOMAIN\Engineering / Full Control
toaster> cifs shares engr??
ENGRSW /vol/vol0/engr-sw Software Engineering Machine Account access disabled DOMAIN\Engineering / Full Control ENGRHW /vol/vol0/engr-hw Hardware Engineering Machine Account access disabled DOMAIN\Engineering / Full Control
102 Data ONTAP® 8.2 Commands: Manual Page Reference for 7-Mode, Volume 1
cifs_shares
Creating new sharesTo create a new share, use the -add option:
cifs shares -add sharename path[ -f ][ -comment description ][ -maxusers userlimit ][ -forcegroup groupname ][ -nosymlink_strict_security ] [ -widelink ][ -umask mask ][ -dir_umask mask ][ -file_umask mask ][ -nobrowse ][ -novscan ][ -novscanread ][ -no_caching | -auto_document_caching -auto_program_caching | -branchcache ] [ -accessbasedenum ]
sharename Is the name of the new share; clients use this name to access the share. The share name cannotexceed 256 characters. Note that the following 15 characters are invalid characters for a sharename: " / \ [ ] : | < > + ; , ? * =
path Full path name of the directory on the node that corresponds to the root of the new share.
-f Suppresses confirmation dialogs, if any. This option will be deprecated in future releases. Awarning will be issued when share-names exceed 8 characters.
-comment descriptionDescription of the new share. CIFS clients see this description when browsing the nodes’s shares.If the description includes spaces, it must be enclosed in double quotation marks. If you do notspecify a description, the description is blank.
-maxusers userlimitMaximum number of simultaneous connections to the new share. userlimit must be a positiveinteger. If you do not specify a number, the node does not impose a limit on the number ofconnections to the share.
-forcegroup groupnameName of the group to which files to be created in the share belong. The groupname is the name ofa group in the UNIX group database.
-nosymlink_strict_securityAllows clients to follow symbolic links to destinations on this node but outside of the currentshare. Do not check that the client is authenticated to the symbolic link’s destination.
-widelink Allows clients to follow absolute symbolic links outside of this share, subject to NT security. Thisfeature requires an entry in the /etc/symlink.translations file and it requires that the client supportsMicrosoft’s Distributed File System (Dfs).
Data ONTAP® 8.2 Commands: Manual Page Reference for 7-Mode, Volume 1 103
cifs_shares
-umask mask Sets file mode creation mask for shares in qtrees with UNIX or mixed security styles. The mask is anoctal value which restricts the initial permissions setting of a newly created file or directory. Thismask may be overridden by dir_umask or file_umask.
-dir_umask maskSets file mode creation mask for shares in qtrees with UNIX or mixed security styles. The mask isan octal value which restricts the initial permissions setting of a newly created directory.
-file_umask maskSets file mode creation mask for shares in qtrees with UNIX or mixed security styles. The mask isan octal value which restricts the initial permissions setting of a newly created file.
-nobrowse Disables enumeration of this share by browsing tools such as Server Manager or Active DirectoryUsers and Computers.
-novscan Does not perform a virus scan when clients open files on this share.
-novscanreadDoes not perform a virus scan when clients open files on this share for read access.
-no_caching Disallows Windows clients from caching any files on this share.
-auto_document_cachingAllows Windows clients to cache user documents on this share. The actual caching behaviordepends upon the Windows client.
-auto_program_cachingAllows Windows clients to cache programs on this share. The actual caching behavior dependsupon the Windows client.
-branchcacheAllows Windows clients to cache data on this share. When another client requests for the samecontent, it can access the cached copy without having to read the data over the WAN. It alsoenables manual caching for the share. The actual BranchCache behavior depends upon theWindows client.
-accessbasedenumEnables the ability to hide the folders and files underneath this share when the user has nopermissions to read them.
By default, machine accounts have access to a newly created share.
Deleting existing sharesTo delete a share, use the -delete option:
cifs shares -delete sharename
104 Data ONTAP® 8.2 Commands: Manual Page Reference for 7-Mode, Volume 1
cifs_shares
sharename is the name of the share to be deleted. A share cannot be deleted if it is in use unless the -foption is used, in which case all current opens of the share are immediately forced closed first.
Changing the settings of existing sharesTo change the settings of an existing share, use the -change option:
cifs shares -change sharename{ -comment description | -nocomment } { -maxusers userlimit | -nomaxusers } { -forcegroup groupname | -noforcegroup }
{ -nosymlink_strict_security -symlink_strict_security } { -widelink | -nowidelink } { -umask mask | -noumask } { -dir_umask mask | -nodir_umask } { -file_umask mask | -nofile_umask }{ -nobrowse | -browse } { -novscan | -vscan } { -novscanread | -vscanread } { -no_caching | -manual_caching -auto_document_caching -auto_program_caching | -branchcache } { -accessbasedenum | -noaccessbasedenum }
The settings of a share can be changed at any time, even if the share is in use.
sharename, if fully specified, is the name of the existing share that is to be changed. If the namecontains the wildcard characters * or ? , then all the shares matching the specified name are to bechanged.
-comment descriptionChanges the description of the share. For more information about the share description setting, seethe Creating new shares section above.
-nocomment Changes the description of the share to an empty string.
-maxusers userlimitChanges the user limit on the share. For more information about the user limit setting, see the Creating new shares section above.
-nomaxusers -Removes the user limit on the share.
-forcegroup groupnameChanges the forcegroup setting. For more information about the forcegroup setting, see the Creating new shares section above.
-noforcegroupSpecifies that files to be created in the share do not belong to a particular UNIX group. That is,each file belongs to the same group as the owner of the file.
-nosymlink_strict_securityDisables the symlink_strict_security setting. For more information about thesymlink_strict_security setting, see the Creating new shares section above.
-symlink_strict_securityEnables the symlink_strict_security setting for this share.
Data ONTAP® 8.2 Commands: Manual Page Reference for 7-Mode, Volume 1 105
cifs_shares

-widelink Changes the widelink setting. For more information about the widelink setting, see the Creating new shares section above.
-nowidelink Disables the widelink setting for this share.
-umask mask Changes the umask setting. For more information about the umask setting, see the Creating new sharessection above.
-noumask Resets the umask value to 0.
-dir_umask maskChanges the dir_umask setting. For more information about the dir_umask setting, see the Creating new shares section above.
-nodir_umaskRemoves the dir_umask.
-file_umask maskChanges the file_umask setting. For more information about the file_umask setting, see the Creating new shares section above.
-nofile_umaskRemoves the file_umask.
-nobrowse Disables enumeration of this share by browsers. For more information about the browse setting,see the Creating new shares section above.
-browse Enables enumeration of this share by browsers.
-novscan Changes the share’s virus scan setting. For more information about the vscan setting, see the Creating new shares section above.
-vscan Enables virus scanning for this share.
-novscanreadChanges the virus scan setting on this share for read access. For more information about thenovscanread setting, see the Creating new shares section above.
-vscanread Specifies that files opened on this share for read access should be scanned for viruses.
-no_caching Disallows Windows clients from caching any files on this share.
106 Data ONTAP® 8.2 Commands: Manual Page Reference for 7-Mode, Volume 1
cifs_shares
-manual_cachingAllows users on Windows clients to manually select files to be cached.
-auto_document_cachingAllows Windows clients to cache user documents on this share. The actual caching behaviordepends upon the Windows client.
-auto_program_cachingAllows Windows clients to cache programs on this share. The actual caching behavior dependsupon the Windows client.
-branchcacheAllows Windows clients to cache data on this share. When another client requests for the samecontent, it can access the cached copy without having to read the data over the WAN. It alsoenables manual caching for the share. The actual BranchCache behavior depends upon theWindows client.
-accessbasedenumEnables the ability to hide the folders and files underneath this share when the user has nopermissions to read them.
-noaccessbasedenumDisables the ability to hide the folders and files underneath this share when the user has nopermissions to read them.
CIFS Home DirectoriesIt is possible for some share settings to be applied to users’ CIFS home directories. The share settingwill apply to all user home directories. It is not possible to specify per user settings. Similarly, if thenode has multiple CIFS homedir paths, it is not possible to specify a setting that is per CIFS homedirpath. To apply a share setting to all CIFS home directories use the share name cifs.homedir whenentering a command. For example, to disable virus scanning for all CIFS access to home directories, asysadmin would use the command:
FAS> cifs shares -change CIFS.HOMEDIR -novscan
To display the settings on CIFS home directories use the command:
FAS> cifs shares CIFS.HOMEDIR
The following share settings can be applied to CIFS home directories:
-widelink
-nowidelink
-symlink_strict_security
-nosymlink_strict_security
-browse
Data ONTAP® 8.2 Commands: Manual Page Reference for 7-Mode, Volume 1 107
cifs_shares

-nobrowse
-vscan
-novscan
-vscanread
-novscanread
-umask
-noumask
-dir_umask
-nodir_umask
-file_umask
-nofile_umask
-no_caching
-manual_caching
-auto_document_caching
-auto_program_caching
-branchcache
-accessbasedenum
-noaccessbasedenum
Total Summary for sharesTo display the summary of all the shares, use the -t option:
cifs shares -t
EFFECTIVEAny changes take effect immediately
PERSISTENCEChanges are persistent across system reboots.
108 Data ONTAP® 8.2 Commands: Manual Page Reference for 7-Mode, Volume 1
cifs_shares

SEE ALSOna_cifs_access(1)
Data ONTAP® 8.2 Commands: Manual Page Reference for 7-Mode, Volume 1 109
cifs_shares
cifs_sidcacheNAMEna_cifs_sidcache - Clears the CIFS SID-to-name map cache.
SYNOPSIScifs sidcache clear all
cifs sidcache clear domain [ domain ]
cifs sidcache clear user username
cifs sidcache clear sid textualsid
DESCRIPTIONcifs sidcache clear clears CIFS SID-to-name map cache entries. When SID-to-name map caching isenabled, CIFS maintains a local cache that maps a SID to a user or group name. Entries in this cachehave a limited life span that is controlled by the cifs.sidcache.lifetime option. Use this command whencache entries must be deleted before they become stale. Deleted entries are refreshed when next neededand retrieved from a domain controller.
Clearing all cache entriesTo clear all SID-to-name cache entries, use the all option:
cifs sidcache clear all
Clearing a single Windows domainTo clear entries for a domain, use the domain option:
cifs sidcache clear domain [ domain ]
domain Name of the Windows domain to clear. If not specified, cache entries for the node’s home domainare cleared.
Clearing a single userTo clear SID-to-name cache entry for a user, use the user option:
cifs sidcache clear user username
username Name of the Windows user or group to clear from the cache. The username can be specified as anyof ‘domain\username’, ‘username@domain’, or simply ‘username’. When username is specifiedwithout a domain, the node’s home domain is assumed.
Clearing a single SIDTo clear SID-to-name cache entry for a SID, use the sid option:
110 Data ONTAP® 8.2 Commands: Manual Page Reference for 7-Mode, Volume 1
cifs_sidcache

cifs sidcache clear sid textualsid
textualsid textual form of the SID to clear from the cache. The SID should be specified using standardsyntax; for example S-1-5-21-4503-17821-16848-500
EFFECTIVEAny changes take effect immediately
PERSISTENCEChanges are persistent across system reboots.
SEE ALSOna_options(1).
Data ONTAP® 8.2 Commands: Manual Page Reference for 7-Mode, Volume 1 111
cifs_sidcache
cifs_statNAMEna_cifs_stat - print CIFS operating statistics
SYNOPSIScifs stat [ -u user ] [ -h host ] [ -v[v] ] [ interval ]
cifs stat -c
cifs stat -z
DESCRIPTIONThe cifs stat command has two main forms. If you specify the interval, the command continuesdisplaying a summary of CIFS activity until interrupted. The information is for the preceding intervalseconds. (The header line is repeated periodically.) The interval must be >= 1.
If you do not specify the interval, the command displays counts and percentages of all CIFS operationsas well as a number of internal statistics that may be of use when diagnosing performance and otherproblems.
By default, the statistics displayed are cumulative for all clients. However, if the cifs.per_client_stats.enable option is on, a subset of the clients may be selected using the -u and/or -hoptions.
OPTIONS
-u <user> If per-client stats are being gathered, selects a user account to match for stats reporting. More thanone -u <user> option may be supplied. If more than one client matches the user, the valuesreported are the sum of all matching clients.
The user specified may have a domain, which restricts matching to that domain, or the domain may be"*" or left blank to match any domain. The user account may be specified, or may be "*" to match anyuser.
-h <host> If per-client stats are being gathered, specifies a host to match for stats reporting. More than one -h <host> option may be supplied. If more than one client matches the host, the values reported arethe sum of all matching clients.
The host may be an IP address in dot notation, or it may be any host name found using DNS if that isenabled on the node.
-v[v] If per-client stats are being reported using the -u or -h options, it may be desirable to know whichclients contributed to the total stats being reported. If -v is given, the count of the number ofmatching clients is printed prior to the stats themselves. If -vv is given, the actual matching clients
112 Data ONTAP® 8.2 Commands: Manual Page Reference for 7-Mode, Volume 1
cifs_stat
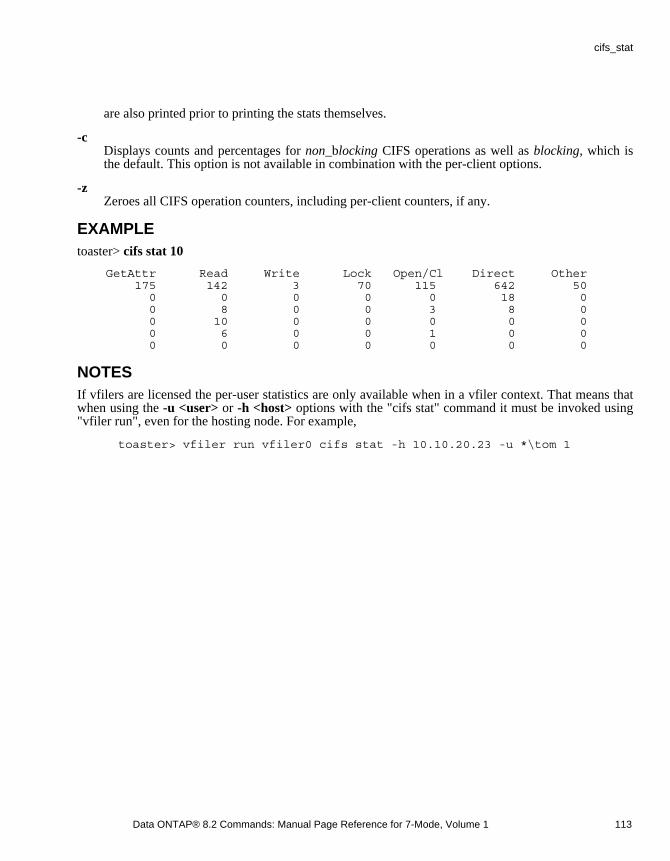
are also printed prior to printing the stats themselves.
-c Displays counts and percentages for non_blocking CIFS operations as well as blocking, which isthe default. This option is not available in combination with the per-client options.
-z Zeroes all CIFS operation counters, including per-client counters, if any.
EXAMPLEtoaster> cifs stat 10
GetAttr Read Write Lock Open/Cl Direct Other 175 142 3 70 115 642 50 0 0 0 0 0 18 0 0 8 0 0 3 8 0 0 10 0 0 0 0 0 0 6 0 0 1 0 0 0 0 0 0 0 0 0
NOTESIf vfilers are licensed the per-user statistics are only available when in a vfiler context. That means thatwhen using the -u <user> or -h <host> options with the "cifs stat" command it must be invoked using"vfiler run", even for the hosting node. For example,
toaster> vfiler run vfiler0 cifs stat -h 10.10.20.23 -u *\tom 1
Data ONTAP® 8.2 Commands: Manual Page Reference for 7-Mode, Volume 1 113
cifs_stat
cifs_terminateNAMEna_cifs_terminate - terminate CIFS service
SYNOPSIScifs terminate [ -t minutes ] [ workstation | IP_address ]
DESCRIPTIONThe cifs terminate command is used to terminate CIFS service. If the workstation operand is specified,then all CIFS sessions open by that workstation will be terminated. It is also possible to terminate asession using the client IP_address. If workstation or IP_address is not specified, then all CIFS sessionswill be terminated and CIFS service will be shut down completely. To restart CIFS service after it hasbeen shut down, use the cifs restart command (see na_cifs_restart(1)).
If CIFS service is terminated for a workstation that has a file open, then that workstation will not beable to save any changes that it may have cached for that file, which could result in the loss of data.Therefore, it is very important to warn users before terminating CIFS service. The -t option, describedbelow, can be used to warn users before terminating CIFS service.
If you run cifs terminate without the -t option and the affected workstations have open files, then you’llbe prompted to enter the number of minutes that you’d like to delay before terminating. If you execute cifs terminate from rsh(1) you will be required to supply the -t option since commands executed with rsh(1) are unable to prompt for user input.
OPTIONS
-t minutes Specifies the number of minutes to delay before terminating CIFS service. During the delay thesystem will periodically send notices of the impending shutdown to the affected workstations.(Note: workstations running Windows95/98 or Windows for Workgroups won’t see thenotification unless they’re running WinPopup.) If the specified number of minutes is zero, thenCIFS service will be terminated immediately.
SEE ALSOna_reboot(1), rsh(1).
114 Data ONTAP® 8.2 Commands: Manual Page Reference for 7-Mode, Volume 1
cifs_terminate
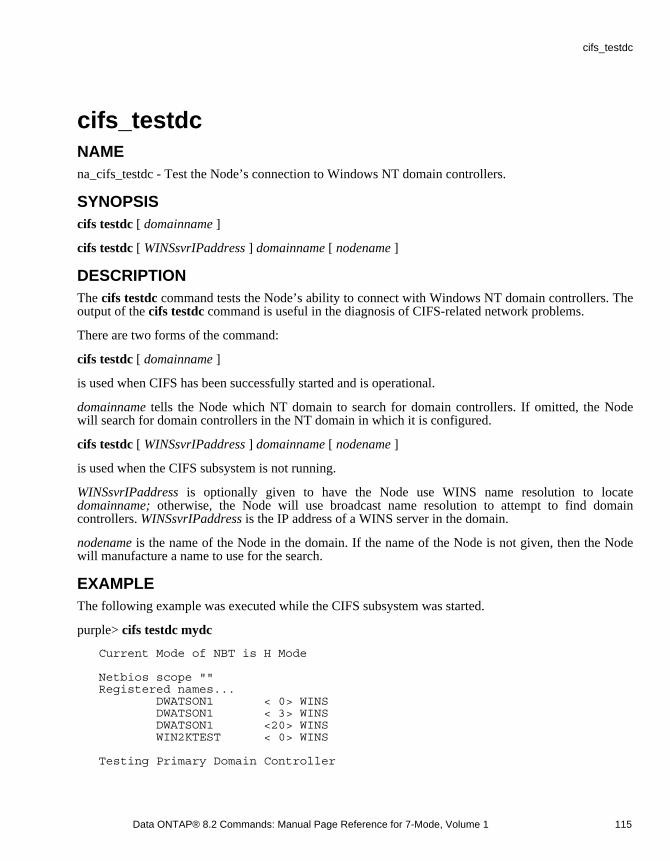
cifs_testdcNAMEna_cifs_testdc - Test the Node’s connection to Windows NT domain controllers.
SYNOPSIScifs testdc [ domainname ]
cifs testdc [ WINSsvrIPaddress ] domainname [ nodename ]
DESCRIPTIONThe cifs testdc command tests the Node’s ability to connect with Windows NT domain controllers. Theoutput of the cifs testdc command is useful in the diagnosis of CIFS-related network problems.
There are two forms of the command:
cifs testdc [ domainname ]
is used when CIFS has been successfully started and is operational.
domainname tells the Node which NT domain to search for domain controllers. If omitted, the Nodewill search for domain controllers in the NT domain in which it is configured.
cifs testdc [ WINSsvrIPaddress ] domainname [ nodename ]
is used when the CIFS subsystem is not running.
WINSsvrIPaddress is optionally given to have the Node use WINS name resolution to locate domainname; otherwise, the Node will use broadcast name resolution to attempt to find domaincontrollers. WINSsvrIPaddress is the IP address of a WINS server in the domain.
nodename is the name of the Node in the domain. If the name of the Node is not given, then the Nodewill manufacture a name to use for the search.
EXAMPLEThe following example was executed while the CIFS subsystem was started.
purple> cifs testdc mydc
Current Mode of NBT is H Mode
Netbios scope "" Registered names... DWATSON1 < 0> WINS DWATSON1 < 3> WINS DWATSON1 <20> WINS WIN2KTEST < 0> WINS
Testing Primary Domain Controller
Data ONTAP® 8.2 Commands: Manual Page Reference for 7-Mode, Volume 1 115
cifs_testdc
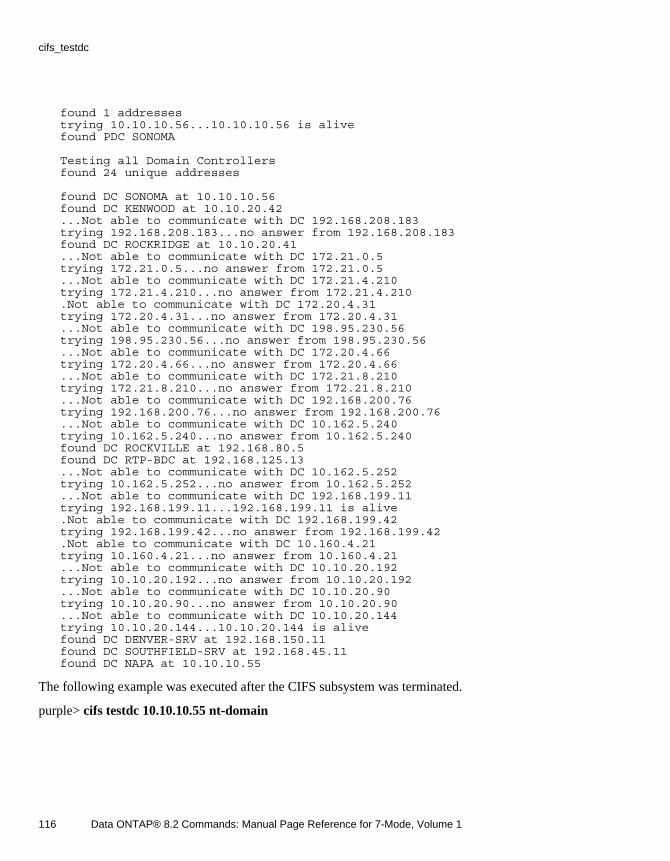
found 1 addresses trying 10.10.10.56...10.10.10.56 is alive found PDC SONOMA
Testing all Domain Controllers found 24 unique addresses
found DC SONOMA at 10.10.10.56 found DC KENWOOD at 10.10.20.42 ...Not able to communicate with DC 192.168.208.183 trying 192.168.208.183...no answer from 192.168.208.183 found DC ROCKRIDGE at 10.10.20.41 ...Not able to communicate with DC 172.21.0.5 trying 172.21.0.5...no answer from 172.21.0.5 ...Not able to communicate with DC 172.21.4.210 trying 172.21.4.210...no answer from 172.21.4.210 .Not able to communicate with DC 172.20.4.31 trying 172.20.4.31...no answer from 172.20.4.31 ...Not able to communicate with DC 198.95.230.56 trying 198.95.230.56...no answer from 198.95.230.56 ...Not able to communicate with DC 172.20.4.66 trying 172.20.4.66...no answer from 172.20.4.66 ...Not able to communicate with DC 172.21.8.210 trying 172.21.8.210...no answer from 172.21.8.210 ...Not able to communicate with DC 192.168.200.76 trying 192.168.200.76...no answer from 192.168.200.76 ...Not able to communicate with DC 10.162.5.240 trying 10.162.5.240...no answer from 10.162.5.240 found DC ROCKVILLE at 192.168.80.5 found DC RTP-BDC at 192.168.125.13 ...Not able to communicate with DC 10.162.5.252 trying 10.162.5.252...no answer from 10.162.5.252 ...Not able to communicate with DC 192.168.199.11 trying 192.168.199.11...192.168.199.11 is alive .Not able to communicate with DC 192.168.199.42 trying 192.168.199.42...no answer from 192.168.199.42 .Not able to communicate with DC 10.160.4.21 trying 10.160.4.21...no answer from 10.160.4.21 ...Not able to communicate with DC 10.10.20.192 trying 10.10.20.192...no answer from 10.10.20.192 ...Not able to communicate with DC 10.10.20.90 trying 10.10.20.90...no answer from 10.10.20.90 ...Not able to communicate with DC 10.10.20.144 trying 10.10.20.144...10.10.20.144 is alive found DC DENVER-SRV at 192.168.150.11 found DC SOUTHFIELD-SRV at 192.168.45.11 found DC NAPA at 10.10.10.55
The following example was executed after the CIFS subsystem was terminated.
purple> cifs testdc 10.10.10.55 nt-domain
116 Data ONTAP® 8.2 Commands: Manual Page Reference for 7-Mode, Volume 1
cifs_testdc
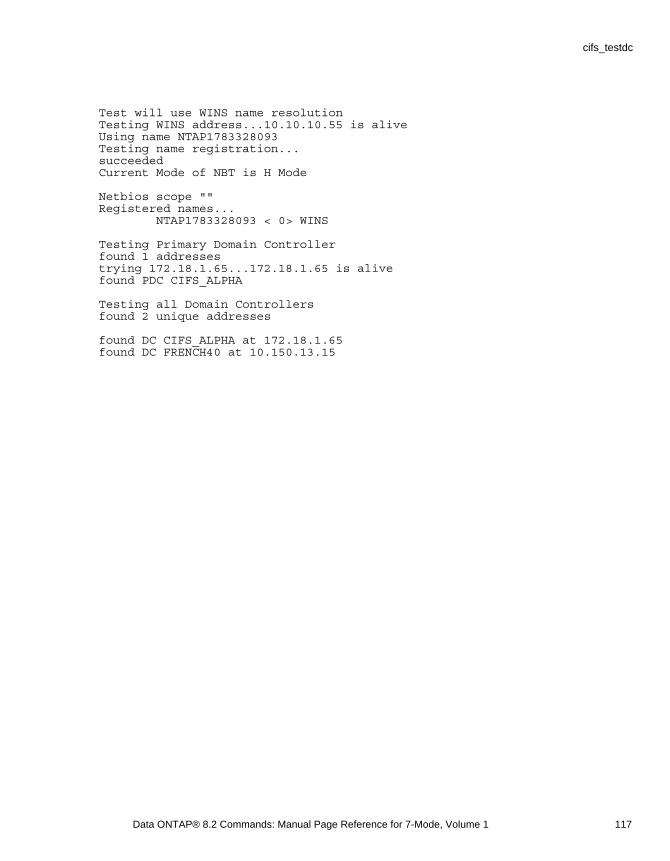
Test will use WINS name resolution Testing WINS address...10.10.10.55 is alive Using name NTAP1783328093 Testing name registration... succeeded Current Mode of NBT is H Mode
Netbios scope "" Registered names... NTAP1783328093 < 0> WINS
Testing Primary Domain Controller found 1 addresses trying 172.18.1.65...172.18.1.65 is alive found PDC CIFS_ALPHA
Testing all Domain Controllers found 2 unique addresses
found DC CIFS_ALPHA at 172.18.1.65 found DC FRENCH40 at 10.150.13.15
Data ONTAP® 8.2 Commands: Manual Page Reference for 7-Mode, Volume 1 117
cifs_testdc
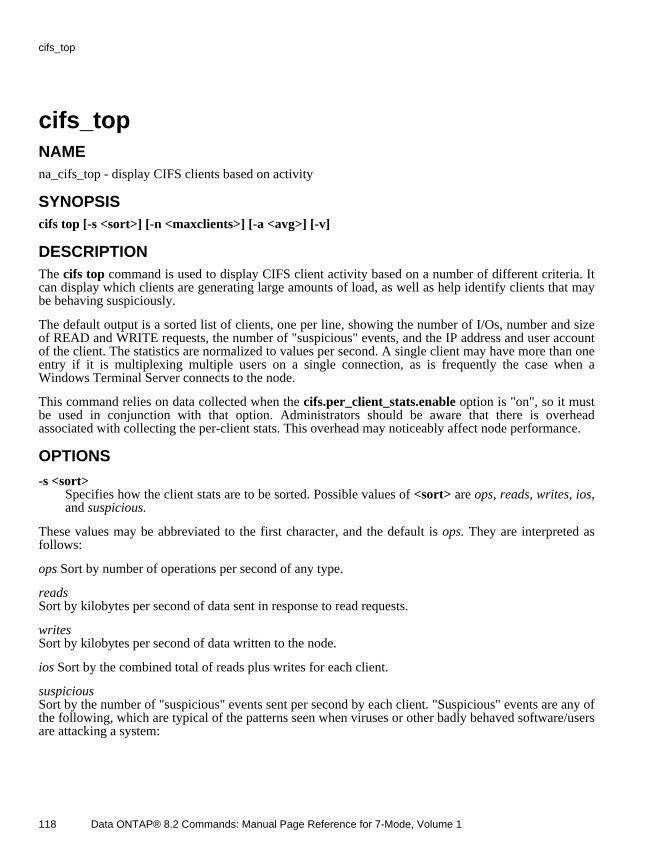
cifs_topNAMEna_cifs_top - display CIFS clients based on activity
SYNOPSIScifs top [-s <sort>] [-n <maxclients>] [-a <avg>] [-v]
DESCRIPTIONThe cifs top command is used to display CIFS client activity based on a number of different criteria. Itcan display which clients are generating large amounts of load, as well as help identify clients that maybe behaving suspiciously.
The default output is a sorted list of clients, one per line, showing the number of I/Os, number and sizeof READ and WRITE requests, the number of "suspicious" events, and the IP address and user accountof the client. The statistics are normalized to values per second. A single client may have more than oneentry if it is multiplexing multiple users on a single connection, as is frequently the case when aWindows Terminal Server connects to the node.
This command relies on data collected when the cifs.per_client_stats.enable option is "on", so it mustbe used in conjunction with that option. Administrators should be aware that there is overheadassociated with collecting the per-client stats. This overhead may noticeably affect node performance.
OPTIONS
-s <sort> Specifies how the client stats are to be sorted. Possible values of <sort> are ops, reads, writes, ios,and suspicious.
These values may be abbreviated to the first character, and the default is ops. They are interpreted asfollows:
ops Sort by number of operations per second of any type.
readsSort by kilobytes per second of data sent in response to read requests.
writesSort by kilobytes per second of data written to the node.
ios Sort by the combined total of reads plus writes for each client.
suspiciousSort by the number of "suspicious" events sent per second by each client. "Suspicious" events are any ofthe following, which are typical of the patterns seen when viruses or other badly behaved software/usersare attacking a system:
118 Data ONTAP® 8.2 Commands: Manual Page Reference for 7-Mode, Volume 1
cifs_top
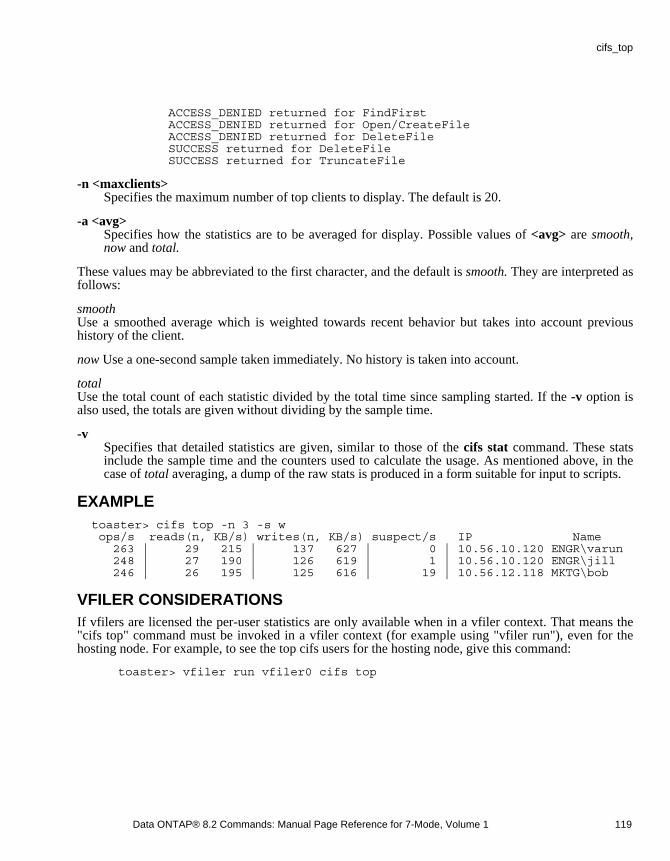
ACCESS_DENIED returned for FindFirst ACCESS_DENIED returned for Open/CreateFile ACCESS_DENIED returned for DeleteFile SUCCESS returned for DeleteFile SUCCESS returned for TruncateFile
-n <maxclients>Specifies the maximum number of top clients to display. The default is 20.
-a <avg> Specifies how the statistics are to be averaged for display. Possible values of <avg> are smooth, now and total.
These values may be abbreviated to the first character, and the default is smooth. They are interpreted asfollows:
smoothUse a smoothed average which is weighted towards recent behavior but takes into account previoushistory of the client.
now Use a one-second sample taken immediately. No history is taken into account.
totalUse the total count of each statistic divided by the total time since sampling started. If the -v option isalso used, the totals are given without dividing by the sample time.
-v Specifies that detailed statistics are given, similar to those of the cifs stat command. These statsinclude the sample time and the counters used to calculate the usage. As mentioned above, in thecase of total averaging, a dump of the raw stats is produced in a form suitable for input to scripts.
EXAMPLE toaster> cifs top -n 3 -s w ops/s reads(n, KB/s) writes(n, KB/s) suspect/s IP Name 263 | 29 215 | 137 627 | 0 | 10.56.10.120 ENGR\varun 248 | 27 190 | 126 619 | 1 | 10.56.10.120 ENGR\jill 246 | 26 195 | 125 616 | 19 | 10.56.12.118 MKTG\bob
VFILER CONSIDERATIONSIf vfilers are licensed the per-user statistics are only available when in a vfiler context. That means the"cifs top" command must be invoked in a vfiler context (for example using "vfiler run"), even for thehosting node. For example, to see the top cifs users for the hosting node, give this command:
toaster> vfiler run vfiler0 cifs top
Data ONTAP® 8.2 Commands: Manual Page Reference for 7-Mode, Volume 1 119
cifs_top
cloneNAMEna_clone - Manages file and sub-file cloning.
SYNOPSISclone start <src_path> <dest_path> [-n] [-l] <-s <snap_name>> |
clone start <src_path> [dest_path] [-n] [-l] <-r <src_fbn>:<dest_fbn>:<fbn_cnt> ...>
clone stop <vol_name> <ID>
clone status [vol_name [ID]]
clone clear <vol_name> <ID>
DESCRIPTIONClone command can be used to manage file and sub-file clone operations. The cloning feature is basedon constant time sis cloning storage (SIS) implementation and is the block sharing infrastructureprovided by Data ONTAP. The feature allows for the cloning from either a file or a LUN. Also the usercan clone the entire file or LUN (full range) or a portion of the file or LUN (sub range). In case of fullrange cloning, a new file/LUN will always be created in the same volume where the source file/LUNexists. In case of sub range cloning, the destination file can either be same as the source file/LUN or canbe a different file/LUN within the same volume where the source file/LUN exists. Constant time SIScloning supersedes the implementation of cloning in versions older than Data ONTAP 8.1. In DataONTAP 8.0 the cloning implementation is an asynchronous operation. The clone-start API is used tostart a clone operation. It returns a clone-id which is used for polling to get the status of the cloneoperation using the clone-list-status API. If this API returns success, the user can consider that cloneoperation has completed; if it returns failure, the user should clear the status of clone operation usingclone-clear API. A clone operation in progress can be aborted using the clone-stop API. In DataONTAP 8.1 the cloning implementation is a synchronous operation. The APIs to manage ongoingasynchronous operations are deprecated, but retained for backwards compatibility.
This feature requires the flex_clone license enabled. See na_license(1) for more details.
The clone subcommands are:
start <src_path> <dest_path> [-n] [-l] <-s <snap_name>>
start [dest_path] [-n] [-l] <-r <src_fbn>:<dest_fbn>:<fbn_cnt> ...>
Starts a clone operation. On success it returns a clone ID, which is used to see status, stop or clear aclone operation. In Data ONTAP 8.1 and later, this API performs a file/LUN or sub-file/sub-LUN cloneoperation synchronously. When this API returns successfully, the destination file is ready for use. Theclone ID is maintained for compatibility.
120 Data ONTAP® 8.2 Commands: Manual Page Reference for 7-Mode, Volume 1
clone
src_path : Source path in format /vol/vol_name/filename. dest_path : Destination path in format /vol/vol_name/filename. -s : In case clone needs to be done from file in snapshot snap_name : Snapshot name -n : Do not use temporary snapshot for cloning. (Deprecated.) -l : Do change logging for clone blocks. (Deprecated.) -r : Specify block ranges for sub-file and sub-lun cloning. -o : Skip space reservation on the clone when cloning entire file/LUN. src_fbn : Starting fbn of the source block range. dest_fbn : Starting fbn of the destination block range. fbn_cnt : Number of blocks to be cloned.
stop <vol_name> <ID>
Aborts the currently active clone operation in the volume. (Deprecated.)
vol_name : volume in which clone operation is running. ID : ID of the clone operation.
status [vol_name [ID]]
Reports the status of running or failed clone operation for the particular ID in the specified volume. Ifno ID is specified, it reports status of all running and failed clone operations in the specified volume. Ifvol_name is also not specified, it reports status of all running and failed clone operations on the node.(Deprecated.)
vol_name : volume in which clone operation is running. ID : ID of the clone operation.
clear <vol_name> <ID>
Clears information of a failed clone operation. (Deprecated.)
vol_name : volume in which clone operation is running. ID : ID of the clone operation.
SEE ALSOna_license(1)
Data ONTAP® 8.2 Commands: Manual Page Reference for 7-Mode, Volume 1 121
clone
configNAMEna_config - Commands for configuration management.
SYNOPSISconfig clone <node_name> <remote_user>
config diff [-o <output_file>] <config_file1> [ <config_file2> ]
config dump [-f] [-v] <config_file>
config restore [-v] <config_file>
DESCRIPTIONThe config command is used for managing the configuration of a node. It allows the user to backup,restore and clone the configuration of a node.
The config clone <node_name> <remote_user> command is used to clone the configuration of a node, node. Cloning operation reverts back the node to the old configuration, if something goes wrong. Nodeinstance specific information like network interface information (ip address, netmask and so on), /etc/rcfile, license codes and serial number and so on are not cloned. The registry key"default.options.clone.exclude" lists the set of prefixes that are not cloned. At present, we are notcloning the keys, whose prefixes match one of the following prefixes: file.contents.rc,file.contents.hosts, options.if, options.hosts, options.license,
options.system.hostname, options.vfconfig, state.license_SSN. We are also not cloning the volume specific configuration(keys in the options.vols.* namespace). After running this command, reboot the node for theconfiguration changes to take effect.
The argument remote_user is specified in the following format: username:passwd, where username isthe name of the remote user account and passwd is the password of the remote user account.
The config diff [-o <output_file>] <config_file1> [ <config_file2> ] command finds out the differencesbetween the specified configuration files config_file1 and config_file2. It prints out all the key-valuepair mismatches in alphabetical order. This command helps the administrators in configuration auditing.This is also useful to compare the configuration files of the partners in a controller failover setup todetect configuration mismatches. Use -o option to redirect the output of this command to a file output_file.
The config dump [-f] [-v] <config_file> command backs up the node configuration into the specified config_file. Configuration is stored as a set of name-value pairs in the backup file. By default, thiscommand backs up only the node specific (head-specific) configuration. Use -v option for backing upthe volume specific configuration also. Use -f option for overriding an existing backup file forcefully.
122 Data ONTAP® 8.2 Commands: Manual Page Reference for 7-Mode, Volume 1
config
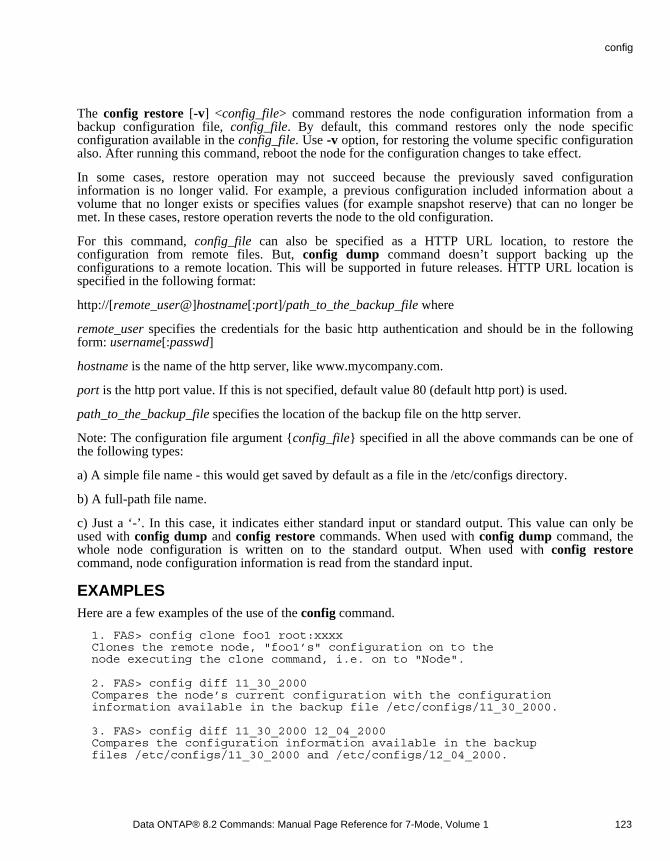
The config restore [-v] <config_file> command restores the node configuration information from abackup configuration file, config_file. By default, this command restores only the node specificconfiguration available in the config_file. Use -v option, for restoring the volume specific configurationalso. After running this command, reboot the node for the configuration changes to take effect.
In some cases, restore operation may not succeed because the previously saved configurationinformation is no longer valid. For example, a previous configuration included information about avolume that no longer exists or specifies values (for example snapshot reserve) that can no longer bemet. In these cases, restore operation reverts the node to the old configuration.
For this command, config_file can also be specified as a HTTP URL location, to restore theconfiguration from remote files. But, config dump command doesn’t support backing up theconfigurations to a remote location. This will be supported in future releases. HTTP URL location isspecified in the following format:
http://[remote_user@]hostname[:port]/path_to_the_backup_file where
remote_user specifies the credentials for the basic http authentication and should be in the followingform: username[:passwd]
hostname is the name of the http server, like www.mycompany.com.
port is the http port value. If this is not specified, default value 80 (default http port) is used.
path_to_the_backup_file specifies the location of the backup file on the http server.
Note: The configuration file argument {config_file} specified in all the above commands can be one ofthe following types:
a) A simple file name - this would get saved by default as a file in the /etc/configs directory.
b) A full-path file name.
c) Just a ‘-’. In this case, it indicates either standard input or standard output. This value can only beused with config dump and config restore commands. When used with config dump command, thewhole node configuration is written on to the standard output. When used with config restorecommand, node configuration information is read from the standard input.
EXAMPLESHere are a few examples of the use of the config command.
1. FAS> config clone foo1 root:xxxx Clones the remote node, "foo1’s" configuration on to the node executing the clone command, i.e. on to "Node".
2. FAS> config diff 11_30_2000 Compares the node’s current configuration with the configuration information available in the backup file /etc/configs/11_30_2000.
3. FAS> config diff 11_30_2000 12_04_2000 Compares the configuration information available in the backup files /etc/configs/11_30_2000 and /etc/configs/12_04_2000.
Data ONTAP® 8.2 Commands: Manual Page Reference for 7-Mode, Volume 1 123
config
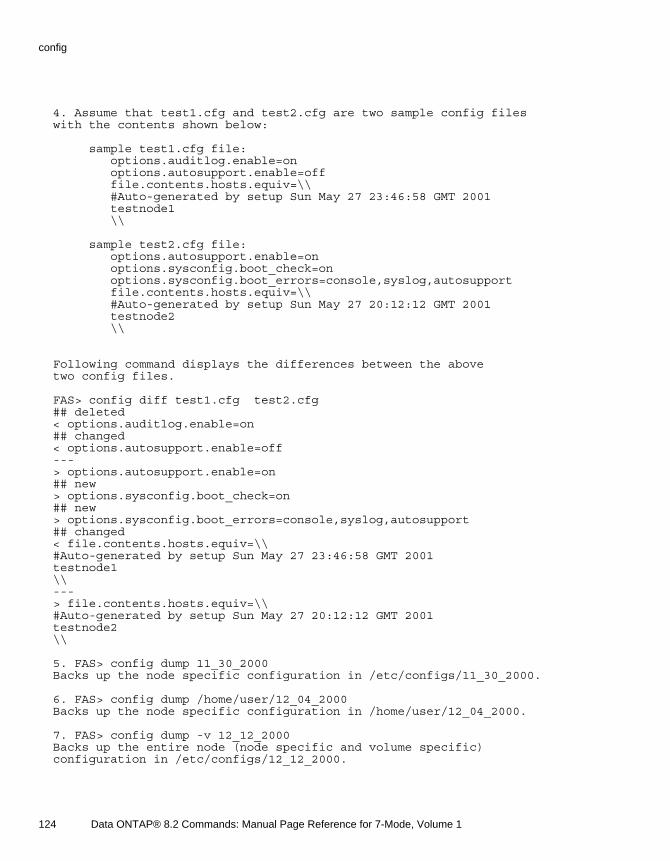
4. Assume that test1.cfg and test2.cfg are two sample config files with the contents shown below:
sample test1.cfg file: options.auditlog.enable=on options.autosupport.enable=off file.contents.hosts.equiv=\\ #Auto-generated by setup Sun May 27 23:46:58 GMT 2001 testnode1 \\
sample test2.cfg file: options.autosupport.enable=on options.sysconfig.boot_check=on options.sysconfig.boot_errors=console,syslog,autosupport file.contents.hosts.equiv=\\ #Auto-generated by setup Sun May 27 20:12:12 GMT 2001 testnode2 \\
Following command displays the differences between the above two config files.
FAS> config diff test1.cfg test2.cfg ## deleted < options.auditlog.enable=on ## changed < options.autosupport.enable=off --- > options.autosupport.enable=on ## new > options.sysconfig.boot_check=on ## new > options.sysconfig.boot_errors=console,syslog,autosupport ## changed < file.contents.hosts.equiv=\\ #Auto-generated by setup Sun May 27 23:46:58 GMT 2001 testnode1 \\ --- > file.contents.hosts.equiv=\\ #Auto-generated by setup Sun May 27 20:12:12 GMT 2001 testnode2 \\
5. FAS> config dump 11_30_2000 Backs up the node specific configuration in /etc/configs/11_30_2000.
6. FAS> config dump /home/user/12_04_2000 Backs up the node specific configuration in /home/user/12_04_2000.
7. FAS> config dump -v 12_12_2000 Backs up the entire node (node specific and volume specific) configuration in /etc/configs/12_12_2000.
124 Data ONTAP® 8.2 Commands: Manual Page Reference for 7-Mode, Volume 1
config
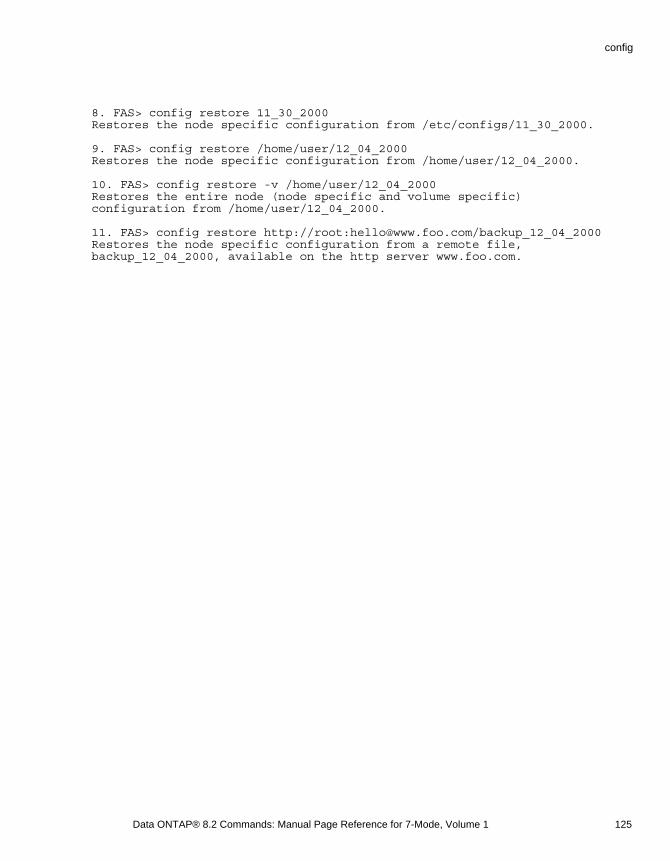
8. FAS> config restore 11_30_2000 Restores the node specific configuration from /etc/configs/11_30_2000.
9. FAS> config restore /home/user/12_04_2000 Restores the node specific configuration from /home/user/12_04_2000.
10. FAS> config restore -v /home/user/12_04_2000 Restores the entire node (node specific and volume specific) configuration from /home/user/12_04_2000.
11. FAS> config restore http://root:[email protected]/backup_12_04_2000 Restores the node specific configuration from a remote file, backup_12_04_2000, available on the http server www.foo.com.
Data ONTAP® 8.2 Commands: Manual Page Reference for 7-Mode, Volume 1 125
config
coredump_segmentNAMEna_coredump_segment - Summary of coredump segment commands
SYNOPSISCommand Summary
This is a list of the subcommands of the coredump segment command.
coredump segment helpDisplays a list of coredump segment commands or provides additional information about a specifiedcoredump segment command.
coredump segment configManage the core segmenting configuration.
coredump segment delete-allDelete all core segments on a node.
coredump segment deleteDelete a core segment.
coredump segment showDisplay a list of core segments.
coredump segment startStart a core segmenting job.
coredump segment statusDisplay status of a core segmenting job.
coredump segment stopCancel core segmenting job.
SEE ALSOna_coredump_segment_deleteall(1), na_coredump_segment_delete(1),na_coredump_segment_start(1), na_coredump_segment_stop(1)
126 Data ONTAP® 8.2 Commands: Manual Page Reference for 7-Mode, Volume 1
coredump_segment
coredump_segment_configNAMEna_coredump_segment_config - Manage the core segmenting configuration
SYNOPSIScoredump segment config help
coredump segment config show
coredump segment config modify[ -auto-delete {true|false} ][ -auto-segment {true|false} ]
DESCRIPTIONThe coredump segment config command set is used to manage the core segmenting configuration.
SUBCOMMANDS
help Displays a list of coredump segment config commands or provides additional information about aspecified command.
show Displays basic information about a systems’s core segmenting configuration, such as whetherautomatic segmenting is enabled and whether the full core file is deleted afterward.
modify Controls automatic core file segmenting.
The -auto-delete {true|false} parameter specifies whether the core file is deleted after automaticsegmentation. The default setting is false, meaning the core file in not deleted.
The -auto-segment {true|false} parameter specified whether the core file is automatically segmentedafter it is saved. For some systems, the default setting is false. For all other platforms, the default settingis true , and the system will automatically segment the full core file after the core has been saved.
EXAMPLE This enables automatic core file segmenting.
toaster> coredump segment modify -auto-segment true
Data ONTAP® 8.2 Commands: Manual Page Reference for 7-Mode, Volume 1 127
coredump_segment_config

SEE ALSOna_coredump_segment(1)
128 Data ONTAP® 8.2 Commands: Manual Page Reference for 7-Mode, Volume 1
coredump_segment_config
coredump_segment_deleteNAMEna_coredump_segment_delete - Delete a core segment
SYNOPSIScoredump segment delete -segment Core Segment
DESCRIPTIONThis command deletes a core segment. The -segment parameter specifies the core segment to delete.The pathname is relative to the coredump directory. If a directory is specified, all core segment fileswithin it are deleted. If the directory is empty, it is deleted.
EXAMPLESThis deletes all core segments in the directory, core.151708240.2012-01-11.05_56_52.
toaster> coredump segment delete -segment core.151708240.2012-01-11.05_56_52
SEE ALSOna_coredump_segment(1)
Data ONTAP® 8.2 Commands: Manual Page Reference for 7-Mode, Volume 1 129
coredump_segment_delete
coredump_segment_delete-allNAMEna_coredump_segment_delete-all - Delete all core segments on the system
SYNOPSIScoredump segment delete-all
DESCRIPTIONThis command deletes all the core segments on the system.
EXAMPLESThis deletes all the core segments on the system.
toaster> coredump segment delete-all
SEE ALSOna_coredump_segment(1)
130 Data ONTAP® 8.2 Commands: Manual Page Reference for 7-Mode, Volume 1
coredump_segment_delete-all
coredump_segment_showNAMEna_coredump_segment_show - Display a list of core segments
SYNOPSIScoredump segment show[ -instance ][ -segment Core Segment ]
DESCRIPTIONThis command displays basic information about core segments. The following fields are available:
The name of the core segment directory
The time of the panic that generated the coresegment
The total number of core segment files
The core segment file name
OPTIONS
-instance Displays detailed information. The following fields are displayed:
Core segment file name
Node that owns the core segment file
System Id of the node that generated thecore
MD5 checksum of the compressed data ofthe core segment file
Name of the core segment
Total number of core segments for thecore file
Timestamp of the panic that triggered thecore segment
-segment Core SegmentDisplays information about the specified core segment. If segment is a directory, the commanddisplays the information for the first core segment file. If segment is a file, the command displaysthe file information. Otherwise, all core segments for the node are displayed.
Data ONTAP® 8.2 Commands: Manual Page Reference for 7-Mode, Volume 1 131
coredump_segment_show
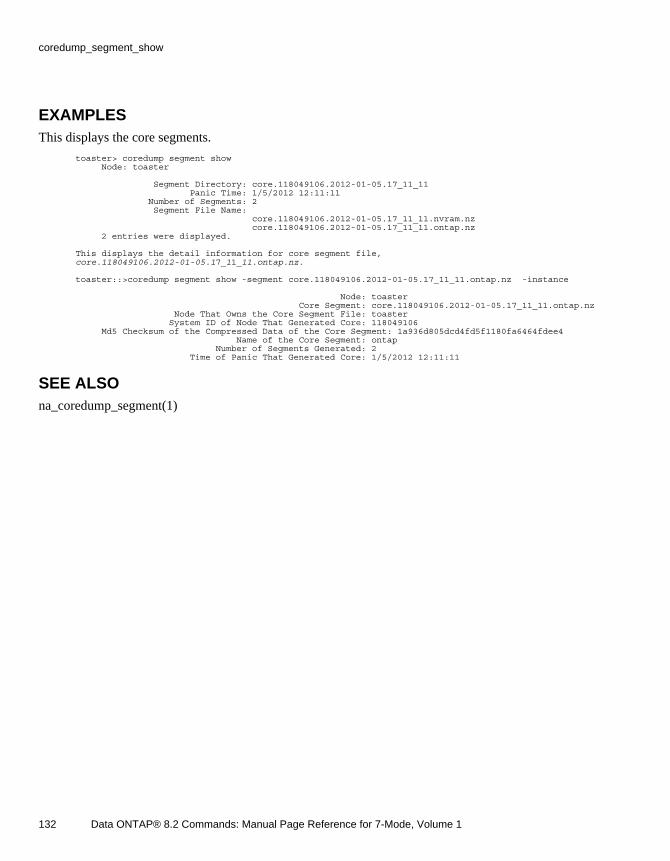
EXAMPLESThis displays the core segments.
toaster> coredump segment show Node: toaster
Segment Directory: core.118049106.2012-01-05.17_11_11 Panic Time: 1/5/2012 12:11:11 Number of Segments: 2 Segment File Name: core.118049106.2012-01-05.17_11_11.nvram.nz core.118049106.2012-01-05.17_11_11.ontap.nz 2 entries were displayed.
This displays the detail information for core segment file, core.118049106.2012-01-05.17_11_11.ontap.nz.
toaster::>coredump segment show -segment core.118049106.2012-01-05.17_11_11.ontap.nz -instance
Node: toaster Core Segment: core.118049106.2012-01-05.17_11_11.ontap.nz Node That Owns the Core Segment File: toaster System ID of Node That Generated Core: 118049106 Md5 Checksum of the Compressed Data of the Core Segment: 1a936d805dcd4fd5f1180fa6464fdee4 Name of the Core Segment: ontap Number of Segments Generated: 2 Time of Panic That Generated Core: 1/5/2012 12:11:11
SEE ALSOna_coredump_segment(1)
132 Data ONTAP® 8.2 Commands: Manual Page Reference for 7-Mode, Volume 1
coredump_segment_show
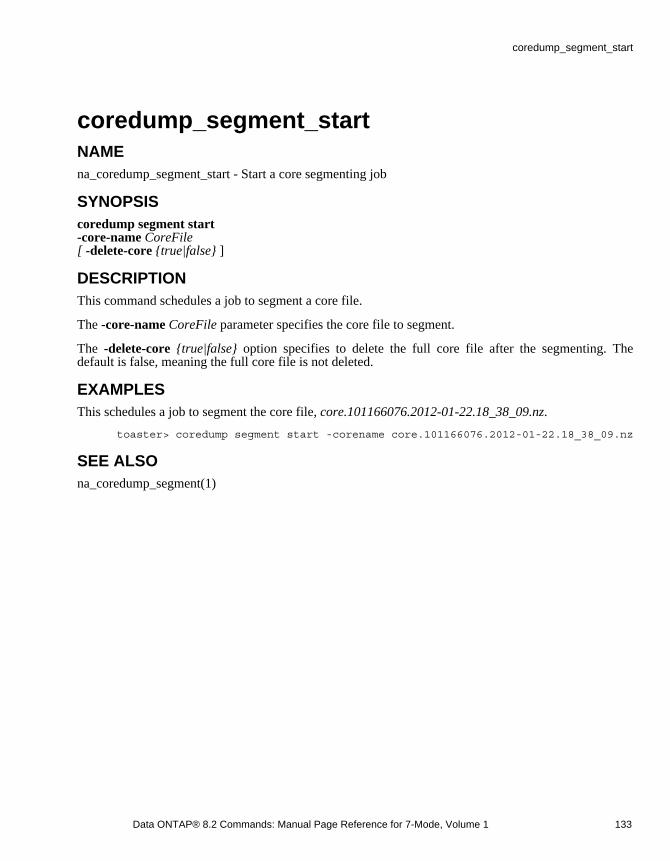
coredump_segment_startNAMEna_coredump_segment_start - Start a core segmenting job
SYNOPSIScoredump segment start-core-name CoreFile[ -delete-core {true|false} ]
DESCRIPTIONThis command schedules a job to segment a core file.
The -core-name CoreFile parameter specifies the core file to segment.
The -delete-core {true|false} option specifies to delete the full core file after the segmenting. Thedefault is false, meaning the full core file is not deleted.
EXAMPLESThis schedules a job to segment the core file, core.101166076.2012-01-22.18_38_09.nz.
toaster> coredump segment start -corename core.101166076.2012-01-22.18_38_09.nz
SEE ALSOna_coredump_segment(1)
Data ONTAP® 8.2 Commands: Manual Page Reference for 7-Mode, Volume 1 133
coredump_segment_start
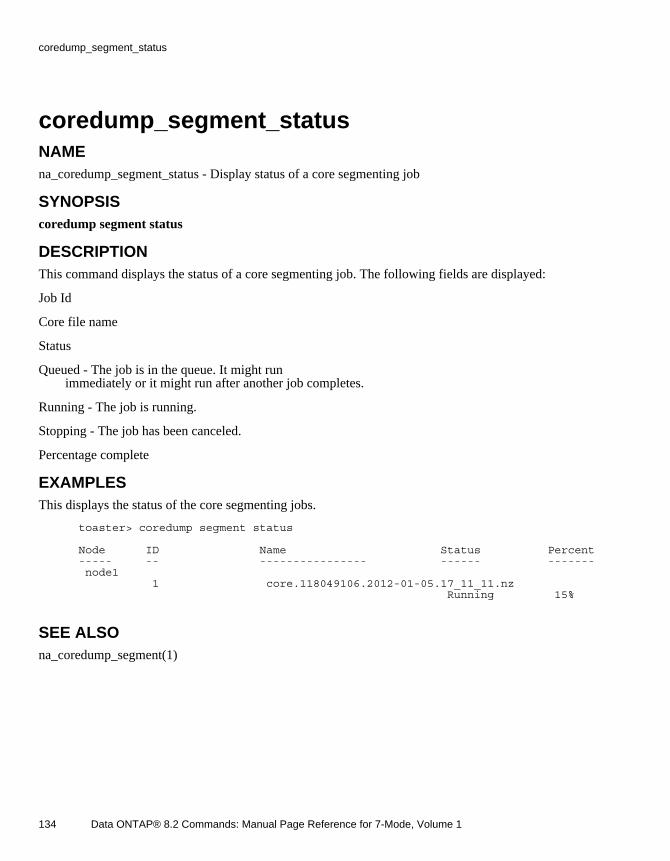
coredump_segment_statusNAMEna_coredump_segment_status - Display status of a core segmenting job
SYNOPSIScoredump segment status
DESCRIPTIONThis command displays the status of a core segmenting job. The following fields are displayed:
Job Id
Core file name
Status
Queued - The job is in the queue. It might runimmediately or it might run after another job completes.
Running - The job is running.
Stopping - The job has been canceled.
Percentage complete
EXAMPLESThis displays the status of the core segmenting jobs.
toaster> coredump segment status
Node ID Name Status Percent ----- -- ---------------- ------ ------- node1 1 core.118049106.2012-01-05.17_11_11.nz Running 15%
SEE ALSOna_coredump_segment(1)
134 Data ONTAP® 8.2 Commands: Manual Page Reference for 7-Mode, Volume 1
coredump_segment_status
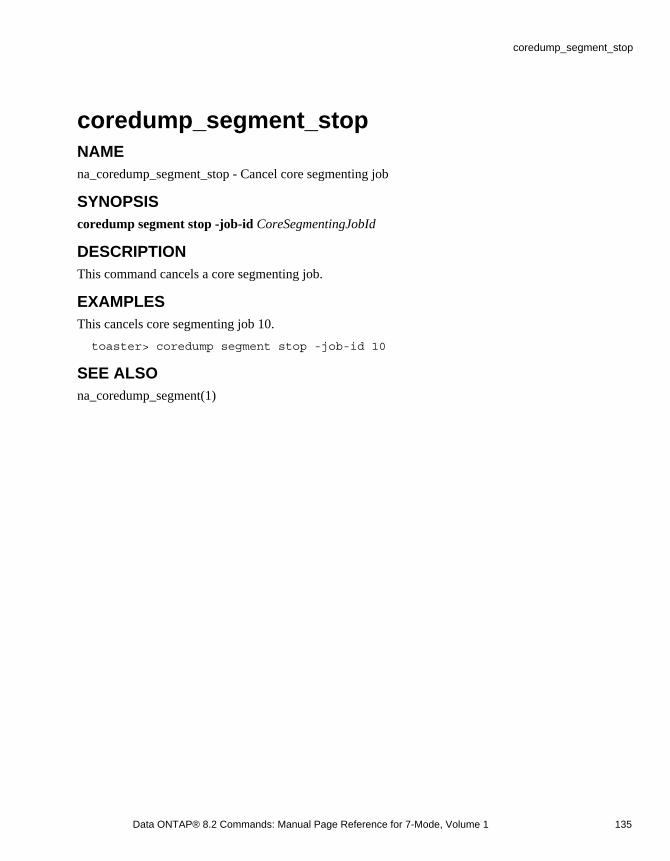
coredump_segment_stopNAMEna_coredump_segment_stop - Cancel core segmenting job
SYNOPSIScoredump segment stop -job-id CoreSegmentingJobId
DESCRIPTIONThis command cancels a core segmenting job.
EXAMPLESThis cancels core segmenting job 10.
toaster> coredump segment stop -job-id 10
SEE ALSOna_coredump_segment(1)
Data ONTAP® 8.2 Commands: Manual Page Reference for 7-Mode, Volume 1 135
coredump_segment_stop
dateNAMEna_date - Displays or sets date and time.
SYNOPSISdate [ -u ] [ [[[[<cc>]<yy>]<mm>]<dd>]<hhmm>[.<ss>] ]
date [ -u ] -c
date [ -f ] -c initialize
DESCRIPTIONdate displays the current date and time of the system clock when invoked without arguments.
When invoked with an argument, date sets the current date and time of the system clock; the argumentfor setting the date and time is interpreted as follows:
cc First 2 digits of the year (for example, 19 for 1999).
yy Next 2 digits of the year (for example, 99 for 1999).
mm Numeric month, a number from 01 to 12.
dd Day, a number from 01 to 31.
hh Hour, a number from 00 to 23.
mm Minutes, a number from 00 to 59.
ss Seconds, a number from 00 to 59.
If the first 2 digits of the year are omitted, and the 2nd 2 digits are > 68, a date in the 1900s is used,otherwise a date in the 2000s will be assumed. If all 4 digits of the year are omitted, they default to thecurrent year. If the month or day is omitted, they default to the current month and day, respectively. Ifthe seconds are omitted, they default to 0.
Time changes for Daylight Saving and Standard time, and for leap seconds and years, are handledautomatically.
136 Data ONTAP® 8.2 Commands: Manual Page Reference for 7-Mode, Volume 1
date
OPTIONS
-u Displays or sets the date in GMT (universal time) instead of local time.
-c Displays or sets the date and time for the compliance clock instead of the system clock. This optionmay be used only if one has installed a SnapLock Compliance or SnapLock Enterprise license.
Setting the compliance clock is indicated by -c initialize. This will initialize the compliance clock to thecurrent value of the system clock. It should be ensured that the system clock is appropriately set beforerunning -c initialize because the compliance clock can be set only once; there is no mechanism forresetting the compliance clock.
-f Suppress the interactive confirmations that occur when using -c initialize.
HA CONSIDERATIONSYou cannot use the date command in partner mode to set the date on the failed node.
EXAMPLESTo set the current time to 21:00:
date 2100
To set the current time to 21:00, and the current day to the 6th of the current month:
date 062100
To set the current time to 21:00, and the current day to December 6th of the current year:
date 12062100
To set the current time to 21:00, and the current day to December 6th, 1999:
date 9912062100
To set the current time to 21:00, and the current day to December 6th, 2002:
date 200212062100
SEE ALSOna_timezone(1)
Data ONTAP® 8.2 Commands: Manual Page Reference for 7-Mode, Volume 1 137
date
dcbNAMEna_dcb - manage Data Center Bridging (DCB) configuration for DCB capable interfaces
SYNOPSISdcb show [ interface [ pgid ] ]
dcb priority show [ interface [ 0...7 ] ]
DESCRIPTIONData center bridging (DCB) refers to enhancements to Ethernet local area networks (LAN) for use indata center environments. DCB adds extensions to Link Layer Discovery Protocol (LLDP) to providehigher granularity in control of bandwidth allocation and to ensure it is used more effectively. Beyondthe benefits to traditional application traffic, DCB makes Ethernet a viable transport for storage andserver cluster traffic in data center environments.
The dcb command is used to manage the DCB configuration for DCB capable adapters installed on acontroller. The DCB configuration includes:
PGID : Priority Group ID. A priority group is group of priorities bound together by management for thepurpose of bandwidth allocation. All priorities in a single group are expected to have similar traffichandling requirements (latency, frame loss and so on).
Bandwidth : Bandwidth assigned to a priority group.
Application : Application assigned to a specified priority group.
Flow control : The flow control is either enabled or disabled on a specific priority.
OPTIONS
show Displays the dcb configuration indexed by pgid for the specified DCB capable interface or for allDCB capable interfaces if no interface is specified. If users are interested in the DCB configurationon a particular priority group, the pgid argument can be used.
priority showDisplays the dcb configuration indexed by the priority for the specified DCB capable interface or for allDCB capable interfaces if no interface is specified. If users are interested in the DCB configuration on aparticular priority, a priority value can be specified. The valid priority value ranges from 0 to 7.
EXAMPLES
dcb show
dcb show e2a
138 Data ONTAP® 8.2 Commands: Manual Page Reference for 7-Mode, Volume 1
dcb

dcb show e2a 1
dcb priority show
dcb priority show e2a
dcb priority show e2a 1
LIMITATIONS
SEE ALSO
Data ONTAP® 8.2 Commands: Manual Page Reference for 7-Mode, Volume 1 139
dcb
ddNAMEna_dd - Copies blocks of data.
SYNOPSISdd [-c][ [if= file ] | [ din= disknum bin= blocknum ] ] [ [of= file ] | [ dout= disknum bout= blocknum ] ] count= number_of_blocks
DESCRIPTIONdd copies the specified number of blocks from source to destination. Source and destination may bespecified as either a file that is a fully qualified pathname, or as a starting block on a disk. Theparameter blocknum may range from zero to the maximum number reported by na_sysconfig (1) -r.When indicating a starting block on a disk, both disknum and blocknum parameters must be specified. Ifthe source is missing, input is taken from standard input; if the destination is missing, output is sent tostandard output. If the number of blocks exceeds the size of the file, copying stops upon reaching EOF.
By default, dd copies data and checksum data for block checksum disks, and treats all blocks as datablocks for a disk in a zoned aggregate or advanced_zoned checksum (AZCS) RAID group. When the -cflag is specified, dd copies both data and checksum data for a disk in an AZCS RAID group. The -c flaghas no effect on a disk in a zoned checksum aggregate.
SEE ALSOna_sysconfig(1)
140 Data ONTAP® 8.2 Commands: Manual Page Reference for 7-Mode, Volume 1
dd
dfNAMEna_df - Displays free disk space.
SYNOPSISdf [ -i | -r | -s | -S | -x ][ -h | -k | -m | -g | -t ][ -A | -V ][ -L ][ pathname | aggrname ]
DESCRIPTIONdf displays statistics about the amount of free disk space in one or all volumes or aggregates on a node.All sizes are reported in 1024-byte blocks, unless otherwise requested by one of the -h, -k, -m, -g, or -toptions.
The pathname parameter is the pathname to a volume. If it is specified, df reports only on thecorresponding volume; otherwise, it reports on every online volume. The -V option allows the defaultscope (volume) to be specified explicitly.
When the -A option is used, then aggrname should instead be the name of an aggregate; when the -Aoption is used and no aggrname is specified, df reports on every online aggregate. This option displaysthe space used by the aggregates in the system, including those embedded in traditional volumes.
If the volume being displayed is a FlexCache volume (see na_flexcache(1) ), then the values displayedwill be those of the volume being cached. This acts exactly as if the user had issued the df command onthe origin node itself. If the remote source volume is unavailable, the relevant values will be displayedas ‘---’. If a mix of FlexCache and non-FlexCache volumes is being displayed, then the non-FlexCachevolumes will display local state.
To view information of the local storage of FlexCache volumes, the -L flag can be used. All flags otherthan -A are valid in conjunction with -L, as FlexCache operates on a volume level and consequentlyaggregate information is unavailable. Use of -L does not cause any traffic to the origin node.
For each volume or aggregate, df displays statistics about snapshots on a separate line from statisticsabout the active file system. The snapshot line reports the amount of space consumed by all thesnapshots in the system. Blocks that are referenced by both the active file system and by one or moresnapshots are counted only in the active file system line, not in the snapshot line.
If snapshots consume more space than has been reserved for them by the snap reserve command (see na_snap (1)), then the excess space consumed by snapshots is reported as used by the active file systemas well as by snapshots. In this case, it may appear that more blocks have been used in total than areactually present in the file system.
Data ONTAP® 8.2 Commands: Manual Page Reference for 7-Mode, Volume 1 141
df
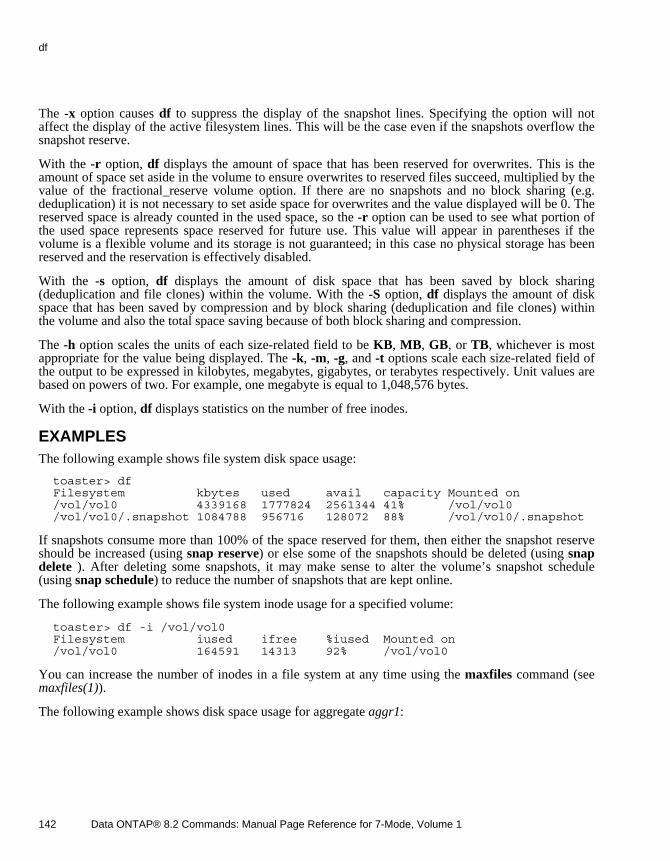
The -x option causes df to suppress the display of the snapshot lines. Specifying the option will notaffect the display of the active filesystem lines. This will be the case even if the snapshots overflow thesnapshot reserve.
With the -r option, df displays the amount of space that has been reserved for overwrites. This is theamount of space set aside in the volume to ensure overwrites to reserved files succeed, multiplied by thevalue of the fractional_reserve volume option. If there are no snapshots and no block sharing (e.g.deduplication) it is not necessary to set aside space for overwrites and the value displayed will be 0. Thereserved space is already counted in the used space, so the -r option can be used to see what portion ofthe used space represents space reserved for future use. This value will appear in parentheses if thevolume is a flexible volume and its storage is not guaranteed; in this case no physical storage has beenreserved and the reservation is effectively disabled.
With the -s option, df displays the amount of disk space that has been saved by block sharing(deduplication and file clones) within the volume. With the -S option, df displays the amount of diskspace that has been saved by compression and by block sharing (deduplication and file clones) withinthe volume and also the total space saving because of both block sharing and compression.
The -h option scales the units of each size-related field to be KB, MB, GB, or TB, whichever is mostappropriate for the value being displayed. The -k, -m, -g, and -t options scale each size-related field ofthe output to be expressed in kilobytes, megabytes, gigabytes, or terabytes respectively. Unit values arebased on powers of two. For example, one megabyte is equal to 1,048,576 bytes.
With the -i option, df displays statistics on the number of free inodes.
EXAMPLESThe following example shows file system disk space usage:
toaster> df Filesystem kbytes used avail capacity Mounted on /vol/vol0 4339168 1777824 2561344 41% /vol/vol0 /vol/vol0/.snapshot 1084788 956716 128072 88% /vol/vol0/.snapshot
If snapshots consume more than 100% of the space reserved for them, then either the snapshot reserveshould be increased (using snap reserve) or else some of the snapshots should be deleted (using snap delete ). After deleting some snapshots, it may make sense to alter the volume’s snapshot schedule(using snap schedule) to reduce the number of snapshots that are kept online.
The following example shows file system inode usage for a specified volume:
toaster> df -i /vol/vol0 Filesystem iused ifree %iused Mounted on /vol/vol0 164591 14313 92% /vol/vol0
You can increase the number of inodes in a file system at any time using the maxfiles command (see maxfiles(1)).
The following example shows disk space usage for aggregate aggr1:
142 Data ONTAP® 8.2 Commands: Manual Page Reference for 7-Mode, Volume 1
df

toaster> df -A aggr1 Aggregate kbytes used avail capacity aggr1 4339168 1777824 2561344 41% aggr1/.snapshot 1084788 956716 128072 88%
The following example shows the statistics of block sharing on volumes.
toaster> df -s Filesystem used saved %saved /vol/vol0 2294520 0 /vol/dense_vol 169708 81996 32% /vol/dedup_vol 19640 3620 15%
The disk space savings generated by the shared space is shown in the saved column. The space usedplus the space saved would be the total disk space usage, if no space was shared. The %saved iscalculated as [saved / (used + saved)].
The following example shows the statistics of compression and block sharing on volumes.
toaster> df -S Filesystem used compressed a-sis %saved /vol/vol0/ 21440 0 0 0% /vol/vol_1/ 52464 0 9008 15% /vol/vol_2/ 54936 24892 0 31% /vol/vol_3/ 45204 20984 2184 34%
The disk space savings generated by compression is shown in the compressed column. The disk spacesavings generated by the shared space is shown in the a-sis column. The space used plus the space compressed plus the space saved by a-sis would be the total disk space usage without compression andblock sharing. The %saved is calculated as [(compressed + a-sis) / (used + compressed + a-sis)].
VFILER CONSIDERATIONSWhen run from a vfiler context, (e.g. via the vfiler run command), df displays information about onlythose filesystems that are owned by the concerned vfiler.
SEE ALSOna_vol(1)
BUGSOn some NFS clients, the df command does not follow the NFS protocol specification correctly andmay display incorrect information about the size of large file systems. Some versions report negativefile system sizes; others report a maximum file system size of 2 GB, no matter how large the file systemactually is.
Data ONTAP® 8.2 Commands: Manual Page Reference for 7-Mode, Volume 1 143
df
diskNAMEna_disk - RAID disk configuration control commands
SYNOPSISdisk assign { <disk_name> | all | [-T <storage type> -shelf <shelf name>] [-n <count>] | auto } [-p <pool>] [-o <ownername>] [-s {<sysid>|unowned}] [-c {block|zoned}] [-f]
disk encrypt show <disk_list>
disk encrypt lock <disk_list>
disk encrypt rekey <new_key_id> <disk_list>
disk encrypt sanitize { -all | <disk_list> }
disk encrypt destroy <disk_list>
disk fail [-i] [-f] <disk_name>
disk maint start [-t test_list] [-c cycle_count] [-f] [-i] -d <disk_list>
disk maint abort <disk_list>
disk maint list
disk maint status [-v] [ <disk_list>]
disk reassign {-o old_name | -s old_sysid} [-n new_name] [-d new_sysid]
disk remove [-w] <disk_name>
disk replace start [-f] [-m] <disk_name> <spare_disk_name>
disk replace stop <disk_name>
disk sanitize start [-p <pattern1> |-r [-p <pattern2> |-r [-p <pattern3> |-r]]] [-c <number_of_cycles> <disk_list>
disk sanitize abort <disk_list>
disk sanitize status [ <disk_list>]
disk sanitize release <disk_name>
disk scrub start
disk scrub stop
144 Data ONTAP® 8.2 Commands: Manual Page Reference for 7-Mode, Volume 1
disk
disk show [ -o <ownername> | -s <sysid> | -u | -n | -v -a ]
disk swap
disk unswap
disk zero spares
DESCRIPTIONThe disk fail command forces a file system disk to fail. The disk reassign command is used inmaintenance mode to reassign disks after the NVRAM card has been swapped. The disk removecommand unloads a spare disk so that you can physically remove the disk from the node. The disk replace command can be used to replace a file system disk with a more appropriate spare disk.
The disk scrub command causes the node to scan disks for media errors. If a media error is found, thenode tries to fix it by reconstructing the data from parity and rewriting the data. Both commands reportstatus messages when the operation is initiated and return completion status when an operation hascompleted.
The node’s ‘‘hot swap’’ capability allows removal or addition of disks to the system with minimalinterruption to file system activity. Before you physically remove or add a SCSI disk, use the disk swapcommand to stall I/O activity. After you removed or added the disk, file system activity automaticallycontinues. If you should type the disk swap command accidentally, or you choose not to swap a disk atthis time, use disk unswap to cancel the swap operation and continue service.
If you want to remove or add a Fibre Channel disk, there is no need to enter the disk swap command.
Before you swap or remove a disk, it is a good idea to run syconfig -r to verify which disks are where.
The disk zero spares command zeroes out all non-zeroed RAID spare disks. The command runs in thebackground and can take much time to complete, possibly hours, depending on the number of disks tobe zeroed and the capacity of each disk. Having zeroed spare disks available helps avoid delay increating or extending an aggregate. Spare disks that are in the process of zeroing are still eligible for useas creation, extension, or reconstruct disks. After invoking the command, the aggr status -s commandcan be used to verify the status of the spare disk zeroing.
The disk assign and disk show commands are available only on systems with software-based diskownership, and are used to assign, or display disk ownership.
The disk sanitize start, disk sanitize abort, and disk sanitize status commands are used to start, abort,and obtain status of the disk sanitization process. This process runs in the background and sanitizes thedisk by writing the entire disk with each of the defined patterns. The set of all pattern writes defines acycle; both pattern and cycle count parameters can be specified by the user. Depending on the capacityof the disk and the number of patterns and cycles defined, this process can take several hours tocomplete. When the process has completed, the disk is in the sanitized state. The disk sanitize releasecommand and the disk unfail command allow the user to return a sanitized disk to the spare pool.
The disk maint start, disk maint abort, and disk maint status commands are used to start, abort, andobtain status of the disk maintenance test process from the command line. This test process can beinvoked by the user through this command or invoked automatically by the system when it encounters adisk that is returning nonfatal errors. The goal of disk maintenance is to either correct the errors or
Data ONTAP® 8.2 Commands: Manual Page Reference for 7-Mode, Volume 1 145
disk

remove the disk from the system. The disk maintenance command executes either a set of predefinedtests defined for the disk type or the user specified tests. Depending on the capacity of the disk and thenumber of tests and cycles defined, this process can take several hours to complete.
The disk encrypt show, disk encrypt lock, and disk encrypt rekey commands are used to show, lock,and rekey selfencrypting disks on a Storage Encryption enabled system. These disks are manufacturedwith special circuitry to automatically encrypt and decrypt all data read to and written from the diskmedia.
The disk encrypt sanitize command cryptographically erases self-encrypting disks on a StorageEncryption enabled system. Because the internal disk encryption key (DEK) is changed to a new value,all data encrypted with the previous DEK becomes irretrievable. This command is extremely fast (onthe order of seconds) compared to the traditional disk wipe techniques provided by disk sanitize.Sanitized drives may be reused.
The disk encrypt destroy command cryptographically destroys self-encrypting disks on a StorageEncryption enabled system. Data ONTAP changes the internal disk encryption key (DEK) as in the disk encrypt sanitize command, and then issues commands to the disk to render all data on the diskpermanently inaccessible. Destroyed disks cannot be recovered or reused. Use this command withextreme care.
USAGEdisk assign {<disk_name> | all | [-T <storage type> -shelf <shelf name>] [-n <count>] | auto } [-p <pool>][-o <ownername>][-s {<sysid>|unowned}][-c {block|zoned}] [-f]
Used to assign ownership of a disk to the specified system. Available only on systems withsoftware-based disk ownership. The disk_name or -shelf <shelf name> [-n <count>] or all or [-T <storage_type>] -n count or auto option is required. The option -shelf <shelf name> will assign allcurrently unassigned disks of the specified shelf. The shelf name is available in the output of the"storage show shelf" command. An example of a valid shelf name is 0a.shelf1 or switch:4.shelf11. If thesystem is not configured properly, then this command might not be able to find the shelf. An example ofmisconfigured system is, same shelf id is given in a stack.
The keyword all will cause all unassigned disks to be assigned. The -n count option will cause thenumber of unassigned disks specified by count to be assigned. If the -T {ATA | BSAS | FCAL | FSAS | LUN | SAS | SATA | SSD} option is specified along with the -n count option only disks with thespecified type are selected up to count. The auto option will cause any disks eligible forauto-assignment to be immediately assigned, regardless of the setting of the disk.auto_assign option.Unowned disks which are on loops where only 1 node owns the disks and the pool information is thesame will be assigned. The pool value can be either 0 or 1. If the disks are unowned and are beingassigned to a non-local node, either the ownername and/or sysid parameters need to be specified toidentify the node. The -c option is used to specify the checksum type for a disk or an array LUN. It canalso be used to modify the checksum type of certain disks. For some disks (for example, FCAL, SSD,SAS), the checksum type cannot be modified. For more information on modifying the checksum type,please refer to the Storage Management Guide. The -f option needs to be specified if the node alreadyowns the disk.
146 Data ONTAP® 8.2 Commands: Manual Page Reference for 7-Mode, Volume 1
disk

To make an owned disk unowned, use the ‘-s unowned’ option. The local node should own this disk.Use -f option if the disk is not owned by the local node and may result in data corruption if the currentowner of the disk is up.
This command can be used on subset of disks using wildcard character ("*") in the disk_nameparameter. For example:
disk assign XX.* -p 0
For direct attached disks, all the disks connected to port XX will be assigned to pool0.
disk assign swY:X.* -p 1
For switch attached disks, all the disks connected to port X of switch swY are assigned to pool1.
disk encrypt show <disk_list>
On a Storage Encryption enabled system, this command displays the status of self-encrypting disks.
Disks shown with a key ID value of "0x0" are currently keyed to MSID (Manufacturer Secure ID), thedefault authentication key set by the manufacturer. The MSID value is electronically readable from thedrive and is not secret.
Disks shown in the "locked" state require authentication at the next disk power-on or powercycle event.
Disks that are locked but set to MSID are automatically authenticated by Data ONTAP (or by anattacker who steals the disk) by simply using the MSID value as the authentication key.
Disks that are locked with a specific key ID require the authentication key associated with that key ID.All authentication key / key ID pairs are maintained in an external key server management system. Seethe key_manager command for more information.
Note that disk_list supports basic wildcard matching as found in most UNIX shells. The disk_listwildcard pattern may include *, ?, and []. Use "*" to match many characters, use "?" to match a singlecharacter, and use "[]" to match a set or range of characters. Character sets may be negated using "!" asthe first character of the set.
The disk_list parameter contains no spaces or commas. Only one pattern is accepted on the command,but it may contain several wildcards.
As an example, to match all disk names that do not end with 0,
disk encrypt show *.?[1-9]
or the alternatives,
disk encrypt show *.?[!0]disk encrypt show *[!0]
disk encrypt lock <disk_list>
Data ONTAP® 8.2 Commands: Manual Page Reference for 7-Mode, Volume 1 147
disk
On a Storage Encryption enabled system, this command configures self-encrypting disks to requireauthentication at the next disk power-on or powercycle event.
A self-encrypting disk that requires authentication at power-on or power-cycle is said to be "locked".
Note that a "locked" disk does not necessarily mean a "protected" disk. The authentication key must bechanged from MSID to another value in order for a locked disk to be considered protected fromattackers who might steal the disk. The metaphor to consider is this: an attacker can easily open alocked door if you have failed to remove the factory default key from the door knob. Changing theauthentication key to something other than MSID (and locking the disk) removes this simple attackagainst a disk still keyed at MSID.
A disk power-on or power-cycle event does not reset the locked flag in the disk firmware. Once locked,the disk will require authentication on subsequent power-cycles until the lock control is reset. This canbe accomplished with the disk encrypt sanitize command.
This command supports the same <disk_list> and wildcard matching as the disk encrypt showcommand.
disk encrypt rekey <new_key_id> <disk_list>
On a Storage Encryption enabled system, this command configures self-encrypting disks to use theauthentication key associated with new_key_id. The act of changing the authentication key is known as"rekeying" the disk.
A key ID is a unique string of 64 hexadecimal characters that is associated with a specific authenticationkey value. The authentication key is secret, and is used as the passphrase to authenticate a locked disk atthe next disk poweron or power-cycle event.
New authentication key / key ID pairs are created using the key_manager rekey command.
If new_key_id is the special value "0x0" then the disk is rekeyed back to the factory defaultauthentication key known as MSID.
Rekeying the disk to MSID sets the disk to an unprotected state. You must assume an attacker wouldattempt the obvious simple authentication of a stolen (but locked) disk by trying the disk’s factorydefault MSID value as the authentication key.
This command does not affect data access, since it does not alter the disk encryption key (DEK) used toencrypt or decrypt disk data. This command simply changes the authentication key (AK) that the diskwill require when authentication is needed to perform certain encryption-related actions on the disk,such as clearing the data protect error or changing the AK.
Note that the authentication key is effectively a passphrase for permission to change other encryptionsettings. Another key, called the disk encryption key (DEK), is the actual key used to encrypt anddecrypt data and is known only to the disk. To change the DEK requires the use of the disk encrypt sanitize command.
This command supports the same <disk_list> and wildcard matching as the disk encrypt showcommand.
148 Data ONTAP® 8.2 Commands: Manual Page Reference for 7-Mode, Volume 1
disk
disk encrypt sanitize { -all | <disk_list> }
On a Storage Encryption enabled system, this command cryptographically erases self-encrypting disks,resulting in total and permanent data loss on the affected disk. The disks themselves may be redeployed.
This command instructs the disk to change the existing encryption key (DEK) to a new value. Data onthe disk that has been encrypted with a previous DEK will no longer be accessible because it cannot bedecrypted correctly.
No disk contents are read or written by this command. By design of the disk manufacturer, the DEKnever leaves the disk. The storage system cannot access the DEK, and there is no mechanism to tell thedisk to revert to a previous DEK.
After a disk is cryptographically erased, the disk is unlocked and rekeyed to MSID, and made availablefor reuse. The disk can be restored to service with disk sanitize release.
Note that since cryptographic erase also erases the labels on the disk, you will need the advancedcommand disk unfail -s to rewrite the labels and make the disk a spare. If it needs to be assigned, youwill need to do a disk assign command before the disk unfail -s.
This command is extremely fast (on the order of seconds) compared to the traditional disk wipetechniques provided by disk sanitize.
Unless -all is specified, disk names matched by disk_list must be spare disks.
The -all option will issue a warning and prompt you to type a confirmation code. If this confirmation isentered more than 60 seconds after the prompt, the sanitize request is cancelled.
The -all option is mutually exclusively with disk_list. Use -all in a situation where normal checks, suchas ensuring the disk is spare, should be bypassed.
The -all option is available when privilege is "advanced" or higher, and when in maintenance mode. Itcauses all available disks, including those still in aggregates, to be cryptographically sanitized.
This command does not use the shell wildcard matching used by disk encrypt show. The disk_listparameter may be a single disk name or series of space-separated disk names.
disk encrypt destroy <disk_list>
On a Storage Encryption enabled system, this command cryptographically destroys self-encryptingdisks, resulting in end-of-life for the disk. A destroyed disk cannot be recovered or reused.
Data ONTAP first instructs the disk drive to cryptographically erase all data, then issues commands tothe disk to render further I/O with the disk impossible.
Disk names matched by disk_list must be spare disks.
This command should be used with extreme caution; there is no prompt for confirmation before thedestroy operation begins.
Data ONTAP® 8.2 Commands: Manual Page Reference for 7-Mode, Volume 1 149
disk
This command does not use the shell wildcard matching used by disk encrypt show. The disk_listparameter may be a single disk name or series of space-separated disk names.
disk fail [-i] [-f] <disk_name>Force a file system disk to be failed. The disk fail command is used to remove a file system disk thatmay be logging excessive errors and requires replacement.
If disk fail is used without options, the disk will first be marked as ‘‘prefailed’’. If an appropriate spareis available, it will be selected for Rapid RAID Recovery. In that process, the prefailed disk will becopied to the spare. At the end of the copy process, the prefailed disk is removed from the RAIDconfiguration. The node will spin that disk down, so that it can be removed from the shelf. (disk swapmust be used when physically removing SCSI disks.)
The disk being removed is marked as ‘‘broken’’, so that if it remains in the disk shelf, it will not be usedby the node as a spare disk. If the disk is moved to another node, that node will use it as a spare. This isnot a recommended course of action, as the reason that the disk was failed may have been because itneeded to be replaced.
Option -i can be used to avoid Rapid RAID Recovery and remove the disk from the RAID configurationimmediately. Note that when a file system disk has been removed in this manner, the RAID group towhich the disk belongs will enter degraded mode (meaning, a disk is missing from the RAID group). Ifa suitable spare disk is available, the contents of the disk being removed will be reconstructed onto thatspare disk.
If used without options, disk fail issues a warning and waits for confirmation before proceeding. Option -f can be used to skip the warning and force execution of the command without confirmation.
disk maint start[-t test_list] [-c cycle_count] [-f] [-i] -d disk_list
Used to start the Maintenance Center tests on the disks listed. The -t option defines the tests that are tobe run. The available tests are displayed using the disk maint list command. If no tests are specified,the default set of tests for the particular disk type are run. The -c option specifies the number of cyclesof the test set to run. The default is 1 cycle.
If a filesystem disk is selected and the -i option is not specified, the disk will first be marked as pending.If an appropriate spare is available, it will be selected for Rapid RAID Recovery. In that process, thedisk will be copied to the spare. At the end of the copy process, the disk is removed from the RAIDconfiguration and begins Maintenance Center testing. The -i option avoids Rapid RAID Recovery andremoves the disk immediately from the RAID configuration to start Maintenance Center testing. Notethat when a filesystem disk has been removed in this manner, the RAID group to which the disk belongswill enter degraded mode (meaning, a disk is missing from the RAID group). If a suitable spare disk isavailable, the contents of the disk being removed will be reconstructed onto that spare disk.
If used without the -f option on filesystem disks, disk maint start issues a warning and waits forconfirmation before proceeding. The -f option can be used to skip the warning and force execution ofthe command without confirmation.
The testing may be aborted with the disk maint abort command.
150 Data ONTAP® 8.2 Commands: Manual Page Reference for 7-Mode, Volume 1
disk
disk maint abort disk_list
Used to terminate the maintenance testing process for the specified disks. If the testing was started bythe user, the disk will be returned to the spare pool provided that the tests have passed. If any tests havefailed, the disk will be failed.
disk maint status [-v] [ disk_list]
Return the percent of the testing that has completed for either the specified list of disks or for all of thetesting disks. The -v option returns an expanded list of the test status.
disk maint list
List the tests that are available.
disk reassign [-o <old_name> | -s <old_sysid>] [-n <new_name>] -d <new_sysid>Used to reassign disks. This command can only be used in maintenance mode after an NVRAM cardswap. Available only on systems with software-based disk ownership.
disk remove [-w] <disk_name>
Remove the specified spare disk from the RAID configuration, spinning the disk down when removal iscomplete.
This command does not remove disk ownership information from the disk. Therefore, if you plan toreuse the disk in a different storage system, you should use the disk remove_ownership (advanced)command instead. Refer to the "Storage Management Guide" for the complete procedure.
NOTE: For systems with multi-disk carriers, it is important to ensure that none of the disks in thecarrier are filesystem disks before attempting removal. To convert a filesystem disk to a spare disk, see disk replace.
The option -w is valid only for V-Series systems. It wipes out the label of the disk being removed.
disk replace start [-f] [-m] <disk_name> <spare_disk_name>
This command uses Rapid RAID Recovery to copy data from the specified file system disk to thespecified spare disk. At the end of that process, roles of disks are reversed. The spare disk will replacethe file system disk in the RAID group and the file system disk will become a spare. The option -f canbe used to skip the confirmation. The option -m allows mixing disks with different characteristics. Itallows using the target disk with rotational speed that does not match that of the majority of disks in theaggregate. It also allows using the target disk from the opposite spare pool.
disk replace stop <disk_name>
This command can be used to abort disk replace, or to prevent it if copying did not start.
disk sanitize start[-p <pattern> |-r [-p <pattern> |-r [-p <pattern> |-r]]] [-c <cycles> <disk_list>
Data ONTAP® 8.2 Commands: Manual Page Reference for 7-Mode, Volume 1 151
disk

This command is used to start the sanitization process on the disks listed.
The -p option defines the byte pattern(s) that will be written to the disk during one of the passes of eachcycle. The user may define up to 3 patterns, which may include a random pattern. If no pattern optionsare specified, the following 3 patterns are defined as the default: 0x55 on the first pass, 0xaa on thesecond pass, and 0x3c on the third pass.
The -r option may be used instead of a pattern option to generate a write pass of random data instead ofa defined byte pattern. The random data generated will be the same data for each of the disks for eachcycle. If the -r option is used as one or more of the patterns, there is a limit of 100 disks that can besanitized simultaneously.
The -c option specifies the number of cycles of pattern writes. The default is 1 cycle.
All sanitization process information is written to the log file at /etc/log/sanitization.log. The serialnumbers of all sanitized disks are written to /etc/log/sanitized_disks. The log files are written at 15minute intervals.
Note: If both of the SES disks of a shelf are being sanitized, you may receive a warning and theenclosure services will be limited.
disk sanitize abort <disk_list>
Used to terminate the sanitization process for the specified disks. If the disk is in the format stage, theprocess will be aborted when the format is complete. A message will be displayed when the format iscomplete and when an abort is complete.
disk sanitize status [ <disk_list>]
Return the percent of the process that has completed for either the specified list of disks or for all of thecurrently sanitizing disks.
disk sanitize release <disk_name>
Modifies the state of the disk from sanitized to spare, and returns the disk to the spare pool.
Note: If the disk is not returned to the spare pool, you will need the advanced command disk unfail -sto rewrite the labels and make the disk a spare. If it needs to be assigned, you will need to do a disk assign before the disk unfail -s.
disk scrub start
Start a RAID scrubbing operation on all RAID groups. The raid.scrub.enable option is ignored;scrubbing will be started regardless of the setting of that option (The option is applicable only toscrubbing that gets started periodically by the system.).
disk scrub stop
Stop a RAID scrubbing operation.
152 Data ONTAP® 8.2 Commands: Manual Page Reference for 7-Mode, Volume 1
disk
disk show [ -o <ownername> | -s <sysid> | -n | -v | -a]
Used to display information about the ownership of the disks. Available only on systems withsoftware-based disk ownership. -o lists all disks owned by the node with the name <ownername>. -slists all disks owned by the node with the serial number <sysid>. -n lists all unassigned disks. -v lists alldisks. -a lists all assigned disks.
The wildcard character ("*") can be used with this command to get information about a subset of thedisks attached to the storage system. The wildcard character can be combined with other commandoptions also. For example:
disk show XX.*
For direct attached disks, all the disks connected to port XX will be displayed.
disk show -a swY:X.*
For switch attached disks, all the disks assigned to port X of switch swY will be displayed.
disk show -o ZZ swY:*
For switch attached disks, all the disks owned by storage system ZZ and connected to switch swY willbe displayed.
disk swap
Applies to SCSI disks only. It stalls all I/O on the node to allow a disk to be physically added orremoved from a disk shelf. Typically, this command would be used to allow removal of a failed disk, orof a file system or spare disk that was prepared for removal using the disk fail or disk removecommand. Once a disk is physically added or removed from a disk shelf, system I/O will automaticallycontinue.
NOTE: It is important to issue the disk swap command only when you have a disk that you want tophysically remove or add to a disk shelf, because all I/O will stall until a disk is added or removed fromthe shelf.
disk unswap
Used to undo a disk swap command, cancel the swap operation, and continue service.
disk zero spares
Zero all non-zeroed RAID spare disks.
SEE ALSOna_key_manager(1)
Data ONTAP® 8.2 Commands: Manual Page Reference for 7-Mode, Volume 1 153
disk
disk_fw_updateNAMEna_disk_fw_update - Updates disk firmware.
SYNOPSISdisk_fw_update [-R] < disk_list >
DESCRIPTIONUse the disk_fw_update command to manually update firmware on all disks or a specified list of diskson a node. Each node is shipped with a /etc/disk_fw directory that contains the latest firmware versions.Because this command makes disks inaccessible for up to five minutes after the start of its execution,network sessions that use the node must be closed down before running the disk_fw_update command.This is particularly true for CIFS sessions that might be terminated while this command is executed.
For Data ONTAP 6.0 and later, the firmware is downloaded automatically to disks with previousversions of firmware. For information on automatic firmware update downloads, see AUTOMATIC vs.MANUAL FIRMWARE DOWNLOAD.
On configurations using software-based disk ownership both automatic and manual downloads updatefirmware only for those disks owned by the local node. Disks owned by the partner node are updatedwhen the automatic download or the manual disk_fw_update command is executed on that particularnode. Disks that are owned by neither node are not updated. To update all disks, you must assignownership to the unowned disks before running the disk_fw_update command.
Ignore any warning messages issued while the disk firmware is being updated.
To download the firmware to every disk, use the disk_fw_update command without arguments. Todownload the firmware to a particular list of disks, specify the disk names in the command. The disknames are in the form of channel_name.disk_ID. For example, if you want to update firmware on diskID 0, 1 and 3 on adapter 8, enter the following command:
disk_fw_update 8.0 8.1 8.3
The command applies to both SCSI disks and Fibre Channel disks.
If you need to view the current firmware versions, enter the sysconfig -v command. The followingexample displays a partial output from the sysconfig -v command, where the firmware version for thedisk is NA01:
slot 8: Fibre Channel Host Adapter 8 (QLogic 2200 rev. 5, 64-bit, L-port, ) Firmware rev: 2.1.20 Host Loop Id: 7 FC Node Name: 2:000:00e08b:00c702 Cacheline size: 8 FC Packet size: 2048 SRAM parity: Yes External GBIC: Yes 0: NETAPP X225_ST336704FC NA01 34.5GB ( 71687368 512B/sect)
154 Data ONTAP® 8.2 Commands: Manual Page Reference for 7-Mode, Volume 1
disk_fw_update
The firmware files are stored in the /etc/disk_fw directory. The firmware file name is in the form of product-ID.revision.LOD For example, if the firmware file is for Seagate disks with product IDX225_ST336704FC and the firmware version is NA02, the file name is X225_ST336704FC.NA02.LOD. The revision part of the file name is the number against which thenode compares each disk’s current firmware version. If the node in this example contains disks withfirmware version NA01, the /etc/disk_fw/X225_ST336704FC.NA02.LOD file is downloaded to everydisk when you execute this command.
OPTIONS
-R Reverts firmware to the version shipped with the current Data ONTAP release.
AUTOMATIC versus MANUAL FIRMWARE DOWNLOADFor Data ONTAP 6.0 or later, firmware is automatically downloaded to those disks with previousversions of firmware following a system boot or disk insertion. The firmware:
- Manual download is a disruptive operation, that makes disks inaccessible for up to five minutes after the start of its execution, network sessions that use the node must be closed down before running the disk_fw_update command.
- Is not automatically downloaded to the node’s partner node in an HA pair.
- Is not automatically downloaded to unowned disks on nodes configured to use software-based disk ownership.
- For Data ONTAP 7.0.1 or later a new registry entry controls how the automatic firmware download feature works:
If raid.background_disk_fw_update.enable is set to off, disk_fw_update will run as in previous releases of Data ONTAP.
If raid.background_disk_fw_update.enable is set to on, disk_fw_update will only automatically update to filesystem disks contained in RAID4 volumes. Firmware updates for spares and filesystem disks contained within RAID-DP, mirrored RAID-DP and mirrored RAID4 volumes will be done in a non-disruptive manner in the background after boot. Firmware download for these disks will be done sequentially by temporarily taking them offline one at a time for the duration of the download. Once firmware is updated, the disk will be made online and restored back to normal operation mode.
During an automatic download to an HA environment, the firmware is not downloaded to an HApartner’s disk.
Automatic downloads in HA environments are unsuccessful with certain disk drives. In such cases,you may need to manually execute the disk_fw_update command to update the disks in an HAenvironment.
When you manually key in the disk_fw_update command, the firmware is:
Data ONTAP® 8.2 Commands: Manual Page Reference for 7-Mode, Volume 1 155
disk_fw_update
- Updated on every disk regardless of whether it is on the A-loop, the B-loop, or in an HA environment.
- If the node is configured in a software-based disk ownership system, only disks owned by this node are updated.
Follow the instructions in HOW TO UPDATE FIRMWARE FOR AN HA PAIR to ensure that theupdating process is successful.
Data ONTAP 6.1 and later supports redundant path configurations for disks in a non-HAconfiguration. Firmware is automatically downloaded to disks on the A-loop or B-loop ofredundant configurations that are not configured in an HA pair and are not configured to usesoftware-based disk ownership.
AUTOMATIC BACKGROUND FIRMWARE UPDATEIn Data ONTAP 7.0.1 or later, firmware can be updated in the background so clients are notimpacted by the firmware update process. This functionality is controlled by the registry entry raid.background_disk_fw_update.enable. The default value for this option is on.
When disabled or set to "off", disk_fw_update will update firmware in automated mode just likeon previous releases of Data ONTAP. Namely all disks which are downrev will be updatedregardless of whether they are SPARE or filesystem disks.
When enabled or set to "on", background disk_fw_update will update firmware in automatedmode only to disks which can be offlined successfully from active filesystem raid groups and fromthe spare pool. For filesystem disks, this capability currently exists within volumes of typeRAIDDP, mirrored RAID-DP, and mirrored RAID4. To ensure a faster boot process, no firmwarewill be downloaded to spares and filesystem disks contained in the above volume types. However,firmware updates for disks within RAID4 volumes will be done at boot. RAID4 volumes can betemporarily (or permanently) upgraded to RAID-DP to automatically enable background firmwareupdate capability.
This provides the highest degree of safety available, without the cost of copying data from eachdisk in the system twice. Disks are taken offline one at a time and then firmware is updated onthem. The disk is made online after the firmware update and a mini/optimized reconstruct happensfor any writes which occurred while the disk was offline. Background disk firmware update willnot occur for a disk if its containing raid group or the volume is not in a normal state (for example,if the volume/plex is offline or the raid group is degraded). However, due to the continuous pollingnature of background disk firmware update, firmware updates will resume once the raidgroup/plex/volume is restored to a normal mode. Similarly, background disk firmware updates aresuspended for the duration of any reconstruction within the system.
HA CONSIDERATIONSWhen you are running an HA configuration, do not attempt takeovers or givebacks during theexecution of the disk_fw_update command.
If you use the manual disk_fw_update command on a node that belongs to an HA pair, the nodedownloads the firmware to its disks and its partner’s disks, unless the nodes are configured forsoftware-based disk ownership. In that configuration firmware is only downloaded to disks thenode owns.
156 Data ONTAP® 8.2 Commands: Manual Page Reference for 7-Mode, Volume 1
disk_fw_update
The automatic firmware download only takes place on a node’s local disks.
For controller failover configurations, CFO must be enabled and the CFO interconnect must belinked.
HOW TO UPDATE FIRMWARE FOR AN HA PAIRThe automatic download of firmware updates can lead to problems when nodes are configured inan HA environment.
Known disk manufacturer limitations on certain disks further contribute to problems with firmwareupdates. For this reason, Data ONTAP does not allow firmware updates by automatic download to diskmodels with known limitations when a node is configured in an HA environment.
Disks with known limitations can only accept firmware updates if the disk_fw_update commandis executed manually. You may need to enter and run the command yourself. However, no matter whichdisks your HA configured nodes use, it’s safest to update firmware this way.
Use the following procedure to successfully update your disk firmware in an HA environment:
1. Make sure that the nodes are not in takeover or giveback mode.
2. Install the new disk firmware on Node A’s disks by issuing the disk_fw_update command on Node A.
3. Wait until the disk_fw_update command completes on Node A, and then install the new disk firmware on Node B’s disks by issuing the disk_fw_update command on Node B.
Alternatively, if the registry entry raid.background_disk_fw_update is enabled then one simply needs to allow the HA partners to update firmware one disk at a time in automated background mode.
SEE ALSOna_partner(1)
Data ONTAP® 8.2 Commands: Manual Page Reference for 7-Mode, Volume 1 157
disk_fw_update
disktestNAMEdisktest - Disk Test Environment
SYNOPSISdisktest [ -B ] [ -t minutes ] [ -v ] [ adapter ]
disktest -T [ -t minutes ] [ -v ] adapter
disktest [ -R ] [ -W ] [ -A ] [ -WV ] [ -V ] [ -B ] [ -t minutes ] [ -n sects ] [ -v ] [ -s <shelf-list> ] [ -d <disk-list> ] [ -a <adapter-list> ]
DESCRIPTIONUse the disktest command to test all types of disks on an appliance. This command provides a report ofthe integrity of your storage environment. It is only available in maintenance mode. By default, it takesabout 5 minutes to complete.
The -R option executes a sequential read test with optionally specified large block size (default is 1024kb per I/O).
The -W option executes a sequential write test with optionally specified large block size (default is 1024kb per I/O).
The -A option executes a test that alternates between writes and reads with optionally specified largeblock size (default is 1024 kb per I/O). No data verification is performed.
The -WV option executes a sequential write verify test which uses 4 kb per I/O operation. This isidentical to the way disktest would function with -V option on previous releases.
The -V option executes a sequential SCSI verify test which uses 10 MB per operation. This test will runfor one complete pass to verify all sectors on the disk regardless of -T option.
The -T option executes a test that alternates between writes and reads with varying I/O sizes. It alsosteps through permutations of shelves on the specified loop. If -t minutes is specified, each iteration ofthe test will run for the specified time. This test is a continuous test and will run until stopped via ^C.
The -n option is used to optionally specify the number of sectors to be read for each I/O of the -R,-A, or-W option. The number of sectors used by the -WV command is fixed at 8 (4 kb) and cannot be altered.The number of sectors used by the -V command is fixed at 20480 (10 MB) to increase throughput andcannot be altered.
The -d option allows for running disktest over a specific set of disks in the system by specifying a disklist of the form: <disk-name1> <disk-name2>
The -s option allows for running disktest over all disks contained in a specific shelf by specifying ashelf list of the form: <a>:<m> [<b>:<n> ...] where <m> and <n> are integer shelf ids and <a> and <b>are the PCI slot numbers of the Adapter(s) the shelves are connected to (On board adapter is slot 0a.).Hint: Use fcadmin device_map to get slot locations.
158 Data ONTAP® 8.2 Commands: Manual Page Reference for 7-Mode, Volume 1
disktest
The -a option allows for running disktest over a specific set of adapters in the system by specifying anadapter list of the form: <slot1> <slot2> ... <slotN>.
If the -v option is specified, the output is verbose.
If the -B option is specified, disks attached to a Fibre Channel loop via their B ports will also be tested.
By default, the test runs for about 5 minutes. However, if the [ -t minutes ] option is used, the test willrun for the specified duration. If [ -t 0 ] is specified, the test will run CONTINUOUSLY until stoppedwith a ^C.
If the adapter or disk-list, adapter-list and shelf-list arguments are missing, all adapters and disks in thesystem are tested. Otherwise, only the specified adapter and disks attached to it are tested.
When finished, disktest prints out a report of the following values for each Fibre Channel adaptertested:
1. Number of times loss of synchronization was detected in that adapter’s Fibre Channel loop.
2. Number of CRC errors found in Fibre Channel packets.
3. The total number of inbound and outbound frames seen by the adapter.
4. A "confidence factor" on a scale from 0 to 1 that indicates the health of your disk system as computedby the test. A value of 1 indicates that no errors were found. Any value less than 1 indicates there areproblems in the Fibre Channel loop that are likely to interfere with the normal operation of yourappliance.
If the confidence factor is reported as less than 1, please run the Config Advisor tool to verify thecabling and contact NetApp technical support.
The actual arithmetic that is used to compute the confidence factor is as follows:
The number of errors is obtained by adding the number of underrun, CRC, Synchronization and linkfailure errors with all errors weighted the same.
The allowable number of errors by the Fibre Channel protocol is calculated by adding Fibre Channelframes (inbound + outbound) and then multiplying by 2048 bytes per frame and dividing by the BER of1e-12 converted to bytes at 1e-11.
The confidence factor is calculated as follows:
If total errors = 0, then confidence factor = 1.0
If total errors < allowable errors, then confidence factor = 0.99
If total errors > allowable errors, then confidence factor is decremented by .01 for each error seen whichthe protocol error rate does not allow.
When finished, disktest prints out a report of the following values for each adapter tested:
Data ONTAP® 8.2 Commands: Manual Page Reference for 7-Mode, Volume 1 159
disktest
1. Number of Write operations performed on an adapter.
2. Number of Read operations performed on an adapter.
3. IOPS (I/O’s per second) performed on an adapter.
4. Data rate in MB/S of the adapter.
5. Data transfer size per I/O operation on the adapter.
6. Number of soft (recovered) errors on the adapter.
7. Number of hard (unrecoverable) errors on the adapter.
8. A "confidence factor" on a scale from 0 to 1 that indicates the health of your disk system as computedby the test. A value of 1 indicates that no errors were found. Any value less than 1 indicates there areproblems in the loop or bus or disk that are likely to interfere with the normal operation of yourappliance. For more information see the Easy Installation Instructions for your specific node or yourstorage shelf guide.
If the confidence factor is reported as less than 1, and a disk is reporting hard errors, you may want toproactively fail that disk or call your Customer Support telephone number.
The actual arithmetic that is used to compute the confidence factor is as follows:
The number of errors is obtained by adding the number of hard and soft errors from the disk with allerrors weighted the same.
The allowable number of errors is zero for SCSI devices.
The confidence factor is calculated as follows:
if total errors = 0 then confidence factor = 1.0
if total errors > 0 then confidence factor is decremented by .01 for each error seen.
HA CONSIDERATIONSIn an HA configuration, only disks on a node’s FC-AL primary loop (the A loop) are tested, unless the-B option is specified. If -B is specified, disks on the B loop are tested as well.
EXAMPLESThe following command runs disktest for 5 minutes doing a sequential alternating write and read test inverbose mode on all adapters in the system, while testing only those disks which are attached via their Aports:
disktest -v
The following command runs disktest for an hour doing a sequential write test in verbose mode, using1024 kb I/O blocks while testing disks attached to adapter 8 via both A and B ports:
160 Data ONTAP® 8.2 Commands: Manual Page Reference for 7-Mode, Volume 1
disktest
disktest -W -v -B -t 60 -a 8
The following command runs disktest for 5 minutes doing a sequential read test on all disks in shelf 0on adapter 7.
disktest -R -s 7:0
The following command runs disktest continuously (until stopped) doing a sequential write test of 512kb I/O’s to all disks on shelf 1 on adapter 7, shelf 2 on adapter 7, disks 7.0 and 7.1 and all disks onadapter 8.
disktest -W -n 1024 -t 0 -d 7.0 7.1 -s 7:1 7:2 -a 8
The following command runs disktest continuously (until stopped) doing an alternating sequentialwrite/read test with varying I/O sizes across all shelf permutations in the loop attached to adapter 7 for 4minutes on each iteration.
disktest -T -t 4 7
Data ONTAP® 8.2 Commands: Manual Page Reference for 7-Mode, Volume 1 161
disktest
dlmNAMEdlm - Administers Dynamically Loadable Modules.
SYNOPSISdlm [ list | load objectfile | unload objectfile ]
DESCRIPTIONThe dlm command administers dynamically loadable modules (DLMs). A DLM is an independentsection of Data ONTAP code (an object file) implementing a particular optional orconfiguration-dependent functional component.
OPTIONS
list Lists the names of currently loaded modules and their base addresses. The Data ONTAP kernelitself is treated as a module and this is always listed first. For example:
kernel at 0x0xfffffc0000200000 /etc/modules/foo.mod at 0x0x00000004444900b8
load Instructs the system to load a module identified by the name objectfile. See below for the form ofthis name.
unload Requests the system to unload the module objectfile. This may fail if the module is in use.
Note: in normal use, there should never be a need to use the load or unload options since modules areloaded automatically when required.
FILESModules are object files which reside in the root filesystem in the /etc/modules directory. The full objectfile name of a module is of the form /etc/modules/foo.mod
162 Data ONTAP® 8.2 Commands: Manual Page Reference for 7-Mode, Volume 1
dlm
dnsNAMEdns - Displays DNS information and control DNS subsystem.
SYNOPSISdns info
dns flush
DESCRIPTIONThe dns family of commands provides a means to monitor and control DNS name resolution.
USAGEdns info
Displays the status of the DNS resolver. If DNS is not enabled, dns info will display a message to thateffect. Otherwise dns info displays a list of all DNS servers configured in the resolv.conf file, whetherthe appliance believes the server to be operational, when the server was last polled, the average time inmilliseconds for a DNS query, how many DNS queries were made, and how many queries resulted inerrors. Following the list of servers is the appliance’s default domain (that is, a node named toaster witha default domain of mycompany.com thinks its fully qualified name is toaster.mycompany.com) and alist of domains that are appended to unqualified names during lookup. Here is a sample output:
DNS is enabled
DNS caching is enabled
5 cache hits 4 cache misses 4 cache entries 0 expired entries 0 cache replacements
IP Address State Last Polled Avg RTT Calls Errs ------------------------------------------------------------------------------- 172.19.2.30 UP Mon Oct 22 20:30:05 PDT 2001 2 12 0 172.19.3.32 ?? 0 0 0
Default domain: lab.mycompany.com Search domains: lab.mycompany.com mycompany.com
The first line of output indicates whether DNS is enabled (via the dns.enable option). If DNS isdisabled, there will be no more output. The next line indicates whether DNS caching is enabled (via the dns.cache.enable option). If DNS caching is disabled, the next line of output will be the "IP Address..."heading. If DNS caching is enabled (as in the above example), the caching statistics will follow. Thestatistics cache hits and cache misses are the number of DNS requests that were found in the cache andthe number which were not found and needed to issue a DNS request, respectively. The number ofentries currently in the cache follows. Each cache miss inserts a new entry in the cache until the cache isfull. Cache entries will expire and be discarded when they have reached the end of their Time to Live
Data ONTAP® 8.2 Commands: Manual Page Reference for 7-Mode, Volume 1 163
dns
(TTL) as indicated by the DNS server. When the cache is full old entries will be replaced in a leastrecently used fashion.
The table of DNS servers indicated the IP address, last known status, date of last DNS request, averageround trip time (RTT) in milliseconds, number of requests, and number of errors reported per server. Ifa server has never been queried it will have a "??" in its status field. If the server responded to its lastquery it will have "UP" in in its status field, and if it never responded to the last query sent or had anyother error condition it will have "DOWN" in its status field. Down servers will not be retried for 10minutes.
The default domain listed should be the same as the value of the dns.domainname option. The searchdomains are the domain suffixes used to convert unqualified domain names in fully qualified domainnames (FQDNs). They are read from the search directive in /etc/resolv.conf.
dns flush
Removes all entries from the DNS cache. This command has no effect if the DNS cache is not enabled.All responses from a DNS server have a TTL (Time to Live) value associated with them. Cache entrieswill normally expire at the end of their time to live and a new value will be acquired from the DNSserver. However if a DNS record changes before it has expired the DNS cache has no way of knowingthat its information is up to date. In this case name resolutions on the node will incorrectly return the oldrecord and you must flush the DNS cache to force the node to get the new DNS record. If some of yourDNS records change very often you should make sure that your DNS server transmits them with a lowTTL. You can also disable DNS caching on the node via the dns.cache.enable option, but this mayhave an adverse performance impact.
VFILER CONSIDERATIONSWhen run from a vfiler context, (for example, via the vfiler run command), dns only reflects theconcerned vfiler.
FILESna_resolv.conf(5)
Configures the DNS resolver
LIMITATIONSThe dns info command may list servers as DOWN when they are not in fact down, if the resolver hasnot polled the server since it came back up. If all DNS servers are down, dns info may list the lastserver in the list as UP when it is in fact down. This is because the DNS resolver will always try at leastone server when trying to resolve a name, even if it has reason to believe that all servers are down.
SEE ALSOna_dns(8)
164 Data ONTAP® 8.2 Commands: Manual Page Reference for 7-Mode, Volume 1
dns
downloadNAMEna_download - Sets a newly-installed version of Data ONTAP as the default boot image for subsequentreboots.
SYNOPSISdownload [ -d ]
DESCRIPTIONThis command is deprecated. Use software update instead.
If a version of Data ONTAP was previously installed using the software command, the downloadcommand sets that version as the default boot image during the next clean shutdown.
After the node reboots, the version of the newly-installed software can be verified with the versioncommand.
HA CONSIDERATIONSThe download command only applies to the node on which the command is entered. The downloadcommand is explicitly not allowed in takeover mode.
When using the download command on an HA system, the command must be entered on each node sothat all nodes will boot with the same version of Data ONTAP.
OPTIONS
-d This option is available at the "advanced" privilege level and may be used to install a service imagepackage. Depending on system load, the operation may take several minutes to finish. If executingthe command from the console, the console will be unavailable until the command finishes. Thedownload operation may be cancelled with Ctrl-C in the first 6 seconds.
SEE ALSOna_boot(5).
Data ONTAP® 8.2 Commands: Manual Page Reference for 7-Mode, Volume 1 165
download
duNAMEna_du - The output of du command displays the blocks used in a file.
SYNOPSISdu [ -u ] [ -h | -k | -m] [ -r {start_offset:end_offset} ] { file_path }
DESCRIPTIONThe du command displays the number of blocks that are used in a file.
The file_path parameter is the pathname to a regular file in a volume or pathname of a NetApp LUN.By default the command displays "total blocks" held in a file as 1K blocks. The -h option scales theunits of each sizerelated field to be KB, MB, or GB, whichever is most appropriate for the value beingdisplayed. The -k, -m options scale each size-related field of the output to be expressed in kilobytes ormegabytes respectively. Unit values are based on powers of two. For example, one megabyte is equal to1,048,576 bytes.
The -u option of the command displays the number of "unique blocks" held in a file. "unique blocks"are the blocks that are referenced only once. Deduplication and FlexClone files and LUNs, share blocksand create multiple references to a single block. Smaller the "unique blocks" value compared to "totalblocks", better is the "storage savings". Deleting a file will return back "unique blocks" worth of space.This does not include space trapped in Snapshot copies.
With the -r option, the command takes in a range and displays "total_blocks" in this range. Range isspecified as begin offset’:’end offset. The -u option displays "unique blocks" in that range (in additionto total blocks). start_offset is specified with 0 as the starting offset. end_offset is not inclusive. In otherwords, range is described by the interval [start_offset, end_offset).
EXAMPLESThe following example illustrates du command without any options.
toaster> du /vol/vol1/file_2t 2690385704 /vol/vol1/file_2t
This shows that the file ‘/vol/vol1/file_2t’ has "total blocks" worth 2690385704KB.
The following example shows du command with -u option.
toaster> du -u /vol/vol1/file_2t 2690385704 10551824 /vol/vol1/file_2t
The first column specifies "total blocks" and second column "unique blocks". File ‘/vol/vol1/file_2t’ has"total blocks" worth 2690385704KB and "unique blocks" worth 10551824KB. About 2679833880KBworth blocks have more than one reference. Deleting this file will return back only 10551824KB.
166 Data ONTAP® 8.2 Commands: Manual Page Reference for 7-Mode, Volume 1
du
The following example shows du command with -u option with -m/-h options.
toaster> du -mu /vol/vol1/file_2t 2627329 10304 /vol/vol1/file_2t
toaster> du -hu /vol/vol1/file_2t 2565GB 10GB /vol/vol1/fi
The following example shows du command with -u option with -r option. _FI_FI_
toaster> du -ur 12121:12121212 /vol/vol1/file_2t 11872 40 /vol/vol1/file_2t
This says that there are 11872 1KB blocks between offsets 12121 and 12121212. Out of that, 40 are unique.
CAVEAT Even though "unique blocks" refer to minimum amount of space that can be reclaimed by deleting a file, it does not include blocks that are part of a Snapshot copy and hence the actual amount of space reclaimed could be lower.
12 June 2012 na_df(1)
Data ONTAP® 8.2 Commands: Manual Page Reference for 7-Mode, Volume 1 167
du
dumpNAMEna_dump - Filesystem backup command
SYNOPSISdump options [ arguments ... ] tree
DESCRIPTIONThe dump command examines files in tree and writes to tape the files that need to be backed up.
Data ONTAP dump can write to its standard output (most useful with rsh(1) from a UNIX system), to aremote tape device on a host that supports the rmt(8) remote tape protocol, or to a local tape driveconnected directly to the system (see na_tape(4)).
The tree argument specifies a volume, qtree, or other path name to be dumped. The specified tree maybe in the active file system (for example: /vol/vol0/home) or in a snapshot (for example: /vol/vol0/.snapshot/weekly.0/home). If the tree is in the active file system, dump creates a snapshotnamed snapshot_for_dump.X where X is a sequentially incrementing integer. This naming conventionprevents conflicts between concurrently executing dumps. The dump is run on this snapshot so that itsoutput will be consistent even if the node is active. If dump does create a snapshot, it automaticallydeletes the snapshot when it completes.
If you do not explicitly name the volume of the dump (with the /vol prefix on the tree argument), theroot volume is assumed to be specified.
OPTIONSIf characters in the options string take arguments, the arguments (which follow the options string) arespecified in the order of the letters which apply to them. For example:
dump 0ufb - 63 /vol/vol0
Here, dump uses two letters which take arguments: the ‘f’ and ‘b’ options. In this case, the ‘‘-’’argument applies to ‘f’, and the ‘‘63’’ argument applies to ‘b’. (The ‘‘/vol/vol0’’ argument is, of course,the tree to be dumped.)
The following characters may be used to determine the behavior of dump.
0-9 Dump levels. A level 0, full backup, guarantees that entire file system is copied. A level numberabove 0, incremental backup, tells dump to copy all files new or modified since the last dump of alower level.
The default dump level is 0.
168 Data ONTAP® 8.2 Commands: Manual Page Reference for 7-Mode, Volume 1
dump

A Ignore Access Control Lists (ACLs) metadata during dump. Ordinarily, dump writes out metadatarelated to Windows ACLs (And restore recovers those properties when creating shares, files, anddirectories). This option prevents dump from writing out this information to the dump file.
B blocksSet the size of the dump file to the specified number of 1024-byte blocks. If this amount is exceeded, dump closes the current file and opens the next file in the list specified by the f option. If there are nomore files in that list, dump re-opens the last file in the list, and prompts for a new tape to be loaded.
It is recommended to be a bit conservative when using this option.
The ‘B’ flag is one way to allow dump to work with remote tape devices that are limited to 2 GB ofdata per tape file.
Q Ignore files and directories in qtrees. If you create qtrees with the qtree command, the Q optionmakes it so that any files and/or directories under these qtrees will not be dumped.
This option only works on a level-0 dump.
X filelistSpecifies an exclude list, which is a commaseparated list of strings. During a backup, a file is excludedfrom the backup, if its name matches one of the strings in the exclude list. The following list describesthe rules for specifying the exclude list:
The name of the file must exactly match the string in the exclude list.
An asterisk is considered a wildcard character.
The wildcard character must be the first or last character of the string. Each string can contain up to twowildcard characters.
You cannot have a comma in the file name or pattern.
You can specify up to 32 strings in the exclude list.
b factorSet the tape blocking factor in k-bytes. The default is 63 KB. NOTE: Some systems support blockingfactors greater than 63 KB by breaking requests into 63-KB chunks or smaller using variable sizedrecords; other systems do not support blocking factors greater than 63 KB at all. When using largeblocking factors, always check the system(s) where the potential restore might occur to ensure that theblocking factor specified in dump is supported. Data ONTAP restricts the blocking factor for local tapedevices to less than or equal to 256 KB. Therefore larger blocking factors should not be used on remotetape devices if you may want to restore the data on the tape from a local tape device.
f files
Write the backup to the specified files. files may be:
Data ONTAP® 8.2 Commands: Manual Page Reference for 7-Mode, Volume 1 169
dump
A list of the names of local tape devices, in the form specified in na_tape(4).
A list of the names of tape devices on a remote host, in the format host:devices. Host can be one of thefollowing - the host name or IP address. An IP address can either be an IPv4 or IPv6 address. An IPv6address, if used, must be enclosed in square brackets.
The standard output of the dump command, specified as -.
If the user specifies a list of devices, the list may have a single device or a comma-separated list ofdevices; note that the list must either contain only local devices or only devices on a remote host. In thelatter case, the list must refer to devices on one particular remote host, for example:
tapemachine:/dev/rst0,/dev/rst1
Each file in the list will be used for one dump volume in the order listed; if the dump requires morevolumes than the number of names given, the last file name will be used for all remaining volumes. Inthis case, the dump command at the console will prompt the user for media changes.
Use sysconfig -t for a list of local tape devices. See the EXAMPLES section below for an example of adump to local tape.
For a dump to a tape device on a remote host, the host must support the standard UNIX rmt(8) remotetape protocol.
By default, dump writes to standard output.
l Specifies that this is a multi-subtree dump. The directory that is the common root of all thesubtrees to be dumped must be specified as the last argument. The subtrees are specified by pathnames relative to this common root. The list of subtrees is provided from standard in. The listshould have one item on each line, with a blank line to terminate the list.
If you use this option, you must also use option n.
n dumpnameSpecifies the dumpname for a multi-subtree dump. Mandatory for multi-subtree dumps.
u Update the file /etc/dumpdates after a successful dump. The format of /etc/dumpdates is readableby people. It consists of one free format record per line: subtree, increment level and ctime(3)format dump date. There can be only one entry per subtree at each level. The dump date is definedas the creation date of the snapshot being dumped. The file /etc/dumpdates may be edited tochange any of the fields, if necessary. See na_dumpdates(5) for details.
v Verbose mode. The dump command prints out detailed information during the dump.
R Restarts a dump that failed. If a dump fails in the middle and certain criteria are met, it becomesrestartable. A restarted dump continues the dump from the beginning of the tapefile on which itpreviously failed. The tree argument should match the one in the failed dump. Alternatively, use ID, which is provided in the backup status command output, in place of the tree argument.
170 Data ONTAP® 8.2 Commands: Manual Page Reference for 7-Mode, Volume 1
dump

When restarting a dump, only the f option is allowed. All other options are inherited from the originaldump.
All restartable dumps are listed by the backup status command.
EXAMPLESTo make a level 0 dump of the entire file system of volume ‘‘vol0’’ to a remote tape device with eachtape file in the dump being less than 2 GB in size, use:
toaster> dump 0ufbB adminhost:/dev/rst0 63 2097151 /vol/vol0
To make a level 0 dump of the /home directory on volume ‘‘users’’ on a 2 GB tape to a remote tapedevice, use:
toaster> dump 0ufbB adminhost:/dev/rst0 63 2097151 /vol/users/home
To make a level 0 dump of the /home directory on volume ‘‘users’’ to a remote tape device using IPv4address, use:
toaster> dump 0ufbB aa.bb.cc.dd:/dev/rst0 63 2097151 /vol/users/home
To make a level 0 dump of the /home directory on volume ‘‘users’’ to a remote tape device using IPv6address, use:
toaster> dump 0ufbB [xx:xx:xx:xx:xx:xx:xx:xx]:/dev/rst0 63 2097151 /vol/users/home
To make a level 0 dump of the /home directory on volume ‘‘web’’ on a 2 GB tape to a local tape drive(no rewind device, unit zero, highest density) use:
toaster> dump 0ufbB nrst0a 63 2097151 /vol/web/home
To make a level 0 dump of the entire file system of the root volume to a local tape drive (no rewinddevice, unit zero, highest density), with each tape file in the dump being less than 2 GB in size, withoutoperator intervention, using a tape stacker, with four tape files written per tape, assuming that the dumprequires no more than 10 GB, use:
toaster> dump 0ufbB nrst0a,nrst0a,nrst0a,urst0a,rst0a 63 2097151 /
This will:
Write the first three files to the norewind device, so that they, and the next dump done after them, willappear consecutively on the tape.
Write the next file to the unload/reload device. This will cause the stacker to rewind and unload the tapeafter the file has been written and then load the next tape.
Write the last file to the rewind device, so that the tape will be rewound after the dump is complete.
To back up all files and directories in a volume named engineering that are not in a qtree you created,use:
Data ONTAP® 8.2 Commands: Manual Page Reference for 7-Mode, Volume 1 171
dump
toaster> dump 0ufQ rst0a /vol/engineering
To run the dump command through rsh, enter the following command on a trusted host:
adminhost# rsh toaster dump 0ufbB adminhost:/dev/rst0 63 2097151 /home
To restart a dump on /vol/vol0/home, use:
toaster> dump Rf rst0a,rst1a,rst2a /vol/vol0/home
HA CONSIDERATIONSIn takeover mode, the failed node does not have access to its tape devices. You can, however, back upthe failed node by entering the dump command in partner mode on the live node. The dump commandwrites the data to the tape devices on the live node.
FILES
/etc/dumpdates dump date record
SEE ALSOna_restore(1), na_dumpdates(5), na_backup(1)
BUGSDeleting or renaming a snapshot that is currently being backed up is not supported and will lead to dump errors.
NOTESRestoreThe node supports a local restore command (see na_restore(1)), so the restoration process can beperformed on the node.
Client Dump and Restore CapabilityIf a client is to be used for performing node dump and/or restore, it is important to check what themaximum dump and restore capabilities of your client system are before setting up a dump schedule.There are some client systems which do not support dump and restore of greater than 2 GB while othersmay support very large dumps and restores. It is especially important to check the restore capability ofyour system when using the node local tape dump since the node supports dumps that are greater than 2GB.
Tape Capacity and Dump SchedulingAlong with the potential 2-GB restriction of dump or restore on a client system, it is important toconsider your tape capacity when planning a dump schedule. For the node local tape option, theExabyte 8505 supports an approximate maximum capacity of 10 GB per tape using compression. If aclient system is used as the target for your dump, the capacity of that tape drive should be checked fordump planning.
172 Data ONTAP® 8.2 Commands: Manual Page Reference for 7-Mode, Volume 1
dump
If your node file system exceeds the capacity of the local tape drive or the client system dump/restore,or you choose to dump multiple file system trees to parallelize the restore process with multiple tapedrives, you must segment your dump to meet these restrictions.
One way to plan a dump schedule with a UNIX client system is to go to the root mount point of yournode and use the du command to obtain sizes of underlying subtrees on your node file system.Depending on the restrictions of your client’s dump and restore capability or recording capacity of thetape device being used, you should specify a dump schedule that fits these restrictions. If you choose tosegment your dump, the norewind device (see na_tape(4)) can be used to dump multiple tape files toone physical tape (Again, choose a dump size which meets the criteria of your client restore andcapacity of your tape drive.).
The following example shows the du output from a node file system on a client that supports dump andrestore that are greater than 2 GB:
client% du -s * 4108 etc 21608 finance 5510100 home 3018520 marketing 6247100 news 3018328 users
You can use a tape device with approximately 10 GB on each tape to back up this node. The dumpschedule for this system can use the norewind tape device to dump the news and marketing subtrees toone tape volume, then load another tape and use the norewind tape device to dump etc, finance, homeand users subtrees to that tape volume.
CIFS DataThe Data ONTAP dump command dumps the CIFS attributes and 8.3 name data for each file that isbacked up. This data will not be backed up by a dump run on an NFS client machine. This data will notbe restored by a restore run on an NFS client machine. This data will only be restored if a local restoreis done of a backup created by the Data ONTAP dump command.
Data ONTAP® 8.2 Commands: Manual Page Reference for 7-Mode, Volume 1 173
dump
echoNAMEecho - Displays command line arguments.
SYNOPSISecho
echo [ <string>... ]
DESCRIPTIONThe echo utility writes its arguments, separated by blanks and terminated by a newline, to the standardoutput. If there are no arguments, only the newline character will be written.
echo is useful within scripts such as /etc/rc to display text to the console.
EXAMPLESTo mark the beginning or end of some scripted operation, include echo commands like these in thescript that controls the sequence of commands to be executed on the node:
echo Start the operation... : (do the operation) : echo Stop the operation.
When this sequence is executed, the following will be displayed on the console:
Start the operation... : (other console output) : Stop the operation.
SEE ALSO
174 Data ONTAP® 8.2 Commands: Manual Page Reference for 7-Mode, Volume 1
echo
emsNAMEna_ems - Invokes commands to the ONTAP Event Management System.
SYNOPSISems [ event | log ] status
ems log dump value
DESCRIPTIONThe Event Management System (EMS) collects event data from various parts of the ONTAP kernel andprovides a set of filtering and event forwarding mechanisms. EMS views three distinct entities:
An event producer recognizes the existence of an event and generates an event indication.
An event consumer describes events that it wants to receive based on filtering information within theevent indication (type of message, contents within message).
The EMS engine receives indications from event producers and forwards to event consumers based onfiltering descriptions.
EMS supports the following event consumers:
The logging consumer receives events from the engine and writes out event indication descriptionsusing a generic text-based log format.
The syslog consumer receives events from the engine and forwards to the kernel syslog facility.
The SNMP trap consumer receives events from the engine and forwards to the kernel SNMP trap generator.
An EMS event has a name, typically expressed in a dot notation format, and a collection of namedattributes. Attribute values are either strings or integers. An EMS event has a priority associated with it.The following priority levels are defined:
node_fault A data corruption has been detected or the node is unable to provide client service.
svc_fault A temporary loss of service has been detected, typically a transient software fault.
node_error A hardware error has been detected which is not immediately fatal.
svc_error A software error has been detected which is not immediately fatal.
Data ONTAP® 8.2 Commands: Manual Page Reference for 7-Mode, Volume 1 175
ems
warning A high-priority message, does not indicate a fault.
notice A normal-priority message, does not indicate a fault.
info A low-priority message, does not indicate a fault.
debug A debugging message, typically suppressed.
OPTIONSlog dump valueDump the contents of the log over a period of time. The value argument is specified as a time quantityof hours [nh] or days [nd].
log statusReturn the status of the EMS log.
event statusReturn the status describing events that have been processed by the EMS engine.
status Return a terse version of the EMS engine status.
LOG FILE INFORMATIONEMS supports a built-in logging facility that logs all EMS events. The log is kept in /etc/log/ems, and isrotated weekly.
Rotated log files are identified by an integer suffix. For example, the first rotated file would normally be/etc/log/ems.0, the second /etc/log/ems.1, and so on.
The log file format is based on Extensible Markup Language (XML) fragments and containsinformation describing all of the data associated with the event indication. The following is an examplelog record associated with an event describing a state transition in the CF monitor:
<LR d="28Nov2005 16:24:59" n="toaster1" t="1133195099" id="1133194781/198" p="4" s="OK" o="fm_main" vf="">
<cf_fsm_stateTransit_1oldState="UP"newState="TAKEOVER"elem="S100_18 (Noop)"/>
</LR>
Events are identified by a type described as an XML element (cf_fsm_stateTransit_1), version, date (d),node name (n), system time (t), generation and sequence (id), priority (p), status (s), owning ONTAPprocess (o) and vFiler name (o). The remaining information is associated with an event of this particulartype: the old and new states of the CF monitor (oldState, newState), and an internal identifier for thestate transition (elem).
176 Data ONTAP® 8.2 Commands: Manual Page Reference for 7-Mode, Volume 1
ems
The format of the EMS log file is subject to change in a future release.
STATUSThe ems command can be used to return status of the EMS log and EMS event processing facility.
To get event processing information, the ems event status command is issued. Here is an example of itsoutput:
Current time: 27Jan2006 15:21:36 Engine status: indications 20, drops 0, suppr (dup 0, timer 0, auto 0) Event:Priority Last Time Indications Drops DupSuppr TimerSuppr AutoSuppr
ems.engine.endReplay:INFO 27Jan2006 15:21:25 1 0 0 0 0 ems.engine.startReplay:INFO 27Jan2006 15:21:25 1 0 0 0 0 kern.rc.msg:NOTICE 27Jan2006 15:21:26 2 0 0 0 0 kern.syslog.msg:console_login:INFO 27Jan2006 15:21:31 1 0 0 0 0 kern.syslog.msg:httpd:WARN 27Jan2006 15:21:26 1 0 0 0 0 kern.syslog.msg:init:WARN 27Jan2006 15:21:24 1 0 0 0 0 kern.syslog.msg:main:DEBUG boot 0 0 0 0 0 kern.syslog.msg:rc:DEBUG 27Jan2006 15:21:29 2 0 0 0 0 kern.syslog.msg:rc:NOTICE 27Jan2006 15:21:24 1 0 0 0 0 raid.vol.state.online:NOTICE 27Jan2006 15:21:29 1 0 0 0 0 wafl.vol.loading:DEBUG 27Jan2006 15:21:20 2 0 0 0 0
The fields have the following meanings:
Event:PriorityThe name of the event followed by its priority.
Last TimeThis field contains timestamp header information associated with the last event received of this type. Avalue of local indicates that the event was received by EMS on behalf of the local node. A value of partner indicates that the event was received by EMS on behalf of an HA partner node.
IndicationsThe number of event indications of this type that have been received.
Drops The number of times an event indication of this type was dropped due to resource constraints.
Data ONTAP® 8.2 Commands: Manual Page Reference for 7-Mode, Volume 1 177
ems
DupSupprThe number of times an event indication of this type was suppressed by duplicate suppression.
TimerSupprThe number of times an event indication of this type was suppressed by timer suppression.
AutoSupprThe number of times an event indication of this type was suppressed by auto suppression.
To get log status, the ems log status command is issued. Here is an example of its output:
EMS log data: [LOG_default] save 5, rotate weekly, size 26155 file /etc/log/ems, format xml level debug indications 73, drops 0 last update: 27Jan2006 15:25:25
The first field indicates the name of the log (LOG_default). The remaining fields have the followingmeanings:
save The number of rotated files that are saved.
rotate The file rotation policy.
size The amount of data written to the currently active log file.
file The name of the log file.
format The encoding format of the log file.
level The priority level filtering.
indications Number of event indications received.
drops The number of events that were dropped due to resource constraints.
last update The time at which the last event indication was processed.
Remaining fields contain data associated with the last event indication.
178 Data ONTAP® 8.2 Commands: Manual Page Reference for 7-Mode, Volume 1
ems
REGISTRY USAGEEMS uses the system registry to store its persistent configuration. All of the EMS configurationvariables are collected under the options.ems branch of the registry.
HA CONSIDERATIONSEMS supports per-node configurations in an HA environment. However, events that are specific to thesystem configuration of the surviving node in a takeover are sent only to the EMS consumers for thatnode.
SEE ALSOna_syslogd(8)
BUGSSupport for configurable EMS forwarding of SNMP, autosupport, and syslog is not contained in thisrelease.
Data ONTAP® 8.2 Commands: Manual Page Reference for 7-Mode, Volume 1 179
ems
enableNAMEna_enable - DEPRECATED, use na_license(1) instead
SYNOPSISenable
DESCRIPTIONThe enable command is a deprecated command that does nothing other than return. It is provided forbackward compatibility only. Please use the na_license(1) command if you need to enable services onyour node.
SEE ALSOna_license(1),
180 Data ONTAP® 8.2 Commands: Manual Page Reference for 7-Mode, Volume 1
enable
licenseNAMEna_license - License Data ONTAP features and packages.
SYNOPSISlicense
license add [ -license-code ] <License Key V2> ...
license delete [ -package ] <Package Name> ...
license show [ -instance ] [ [ -package ] <Package Name> ] [ -expiration <text> ] [ -description <text> ] [ -type [ license | site | demo ] ] [ -legacy [ yes | no ] ] [ -customer-id <text> ]
DESCRIPTIONThe license command enables you to add new version 2 (V2) license keys for specific Data ONTAPfeatures or packages. The V2 keys are either 28 or 42 characters in length. The previous (V1) keys (7characters) are no longer supported and cannot be added to the system. The existing V1 keys wereconverted to their V2 equivalents on upgrade.
With no arguments, the license command is the equivalent of license show.
The storage system is shipped with license keys for all purchased features and packages, so you need toenter the license command only after you have purchased a new feature/package or if you reinstall thefile system.
To install a license, use "license add <License Key V2>".
To remove a license, use "license delete <Package Name>".
All license keys are case-insensitive, as are the <Package Name> parameters to the "license delete"command.
EXAMPLESThe following example enables NFS:
node> license add abcdefghijklmnopqrstuvwxyzab
license add: successfully added license key "ABCDEFGHIJKLMNOPQRSTUVWXYZAB"
The following examples show the two forms the display output:
node> license show
Serial Number: 123456 Owner: toaster Package Type Description Expiration ----------------- ------- --------------------- --------------------
Data ONTAP® 8.2 Commands: Manual Page Reference for 7-Mode, Volume 1 181
license
NFS demo NFS License 6/2/2014 08:00:00 CIFS site CIFS License - iSCSI demo iSCSI License 6/2/2014 08:00:00 FCP demo FCP License 3/12/2012 08:00:00 CDMI demo CDMI License 6/2/2014 08:00:00 SnapMirror site SnapMirror License - FlexClone site FlexClone License - SnapVault license SnapVault License - SnapLock site SnapLock License -
node> license show -instance
Serial Number: 123456 Package: NFS Owner: toaster Expiration Date: 6/2/2014 08:00:00 Description: NFS License Type: demo Legacy: no Customer ID: none
The following example shows how to delete the CIFS license:
node> license delete cifs
license delete: successfully deleted "cifs".
HA CONSIDERATIONSYou must enable the licenses for the same Data ONTAP features/packages on both nodes of an HApair. During takeover only the host system licenses are in use and the license add and license deletecommands will not be available in the partner context.
EXIT STATUS
0 The command completed successfully.
1 The command failed due to unusual circumstances.
2 There was a syntax error in the command.
3 There was an invalid argument provided.
182 Data ONTAP® 8.2 Commands: Manual Page Reference for 7-Mode, Volume 1
license
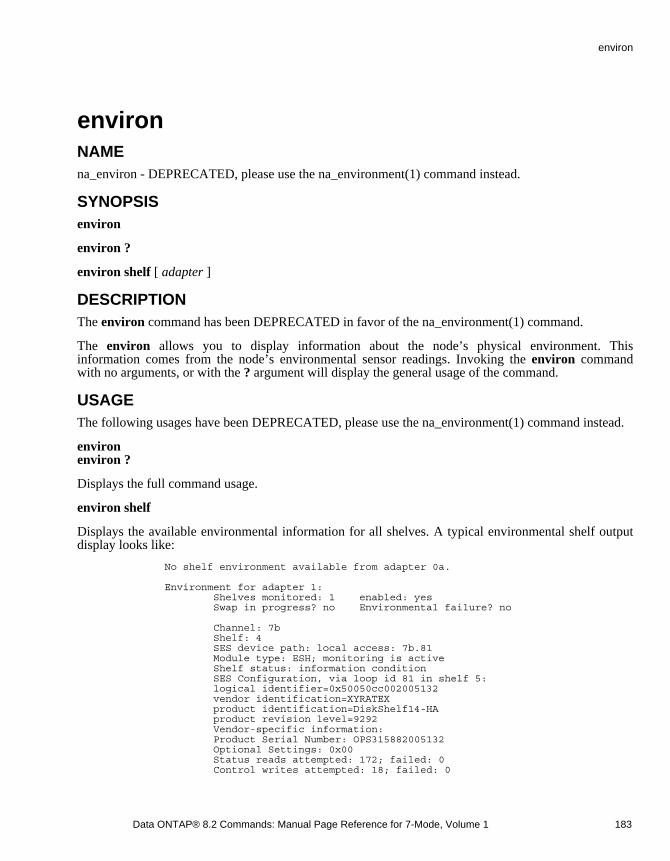
environNAMEna_environ - DEPRECATED, please use the na_environment(1) command instead.
SYNOPSISenviron
environ ?
environ shelf [ adapter ]
DESCRIPTIONThe environ command has been DEPRECATED in favor of the na_environment(1) command.
The environ allows you to display information about the node’s physical environment. Thisinformation comes from the node’s environmental sensor readings. Invoking the environ commandwith no arguments, or with the ? argument will display the general usage of the command.
USAGEThe following usages have been DEPRECATED, please use the na_environment(1) command instead.
environenviron ?
Displays the full command usage.
environ shelf
Displays the available environmental information for all shelves. A typical environmental shelf outputdisplay looks like:
No shelf environment available from adapter 0a.
Environment for adapter 1: Shelves monitored: 1 enabled: yes Swap in progress? no Environmental failure? no
Channel: 7b Shelf: 4 SES device path: local access: 7b.81 Module type: ESH; monitoring is active Shelf status: information condition SES Configuration, via loop id 81 in shelf 5: logical identifier=0x50050cc002005132 vendor identification=XYRATEX product identification=DiskShelf14-HA product revision level=9292 Vendor-specific information: Product Serial Number: OPS315882005132 Optional Settings: 0x00 Status reads attempted: 172; failed: 0 Control writes attempted: 18; failed: 0
Data ONTAP® 8.2 Commands: Manual Page Reference for 7-Mode, Volume 1 183
environ
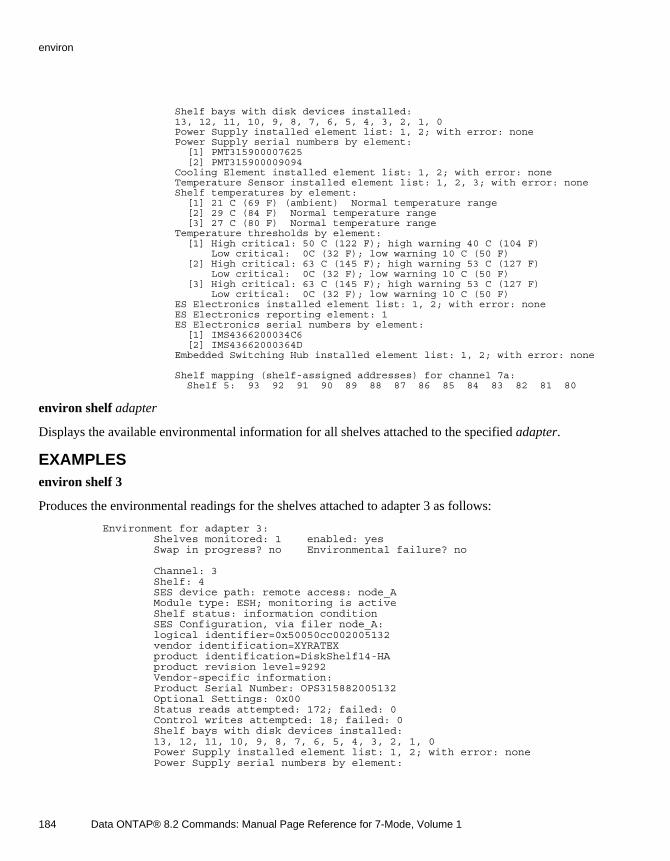
Shelf bays with disk devices installed: 13, 12, 11, 10, 9, 8, 7, 6, 5, 4, 3, 2, 1, 0 Power Supply installed element list: 1, 2; with error: none Power Supply serial numbers by element: [1] PMT315900007625 [2] PMT315900009094 Cooling Element installed element list: 1, 2; with error: none Temperature Sensor installed element list: 1, 2, 3; with error: none Shelf temperatures by element: [1] 21 C (69 F) (ambient) Normal temperature range [2] 29 C (84 F) Normal temperature range [3] 27 C (80 F) Normal temperature range Temperature thresholds by element: [1] High critical: 50 C (122 F); high warning 40 C (104 F) Low critical: 0C (32 F); low warning 10 C (50 F) [2] High critical: 63 C (145 F); high warning 53 C (127 F) Low critical: 0C (32 F); low warning 10 C (50 F) [3] High critical: 63 C (145 F); high warning 53 C (127 F) Low critical: 0C (32 F); low warning 10 C (50 F) ES Electronics installed element list: 1, 2; with error: none ES Electronics reporting element: 1 ES Electronics serial numbers by element: [1] IMS4366200034C6 [2] IMS43662000364D Embedded Switching Hub installed element list: 1, 2; with error: none
Shelf mapping (shelf-assigned addresses) for channel 7a: Shelf 5: 93 92 91 90 89 88 87 86 85 84 83 82 81 80
environ shelf adapter
Displays the available environmental information for all shelves attached to the specified adapter.
EXAMPLESenviron shelf 3
Produces the environmental readings for the shelves attached to adapter 3 as follows:
Environment for adapter 3: Shelves monitored: 1 enabled: yes Swap in progress? no Environmental failure? no
Channel: 3 Shelf: 4 SES device path: remote access: node_A Module type: ESH; monitoring is active Shelf status: information condition SES Configuration, via filer node_A: logical identifier=0x50050cc002005132 vendor identification=XYRATEX product identification=DiskShelf14-HA product revision level=9292 Vendor-specific information: Product Serial Number: OPS315882005132 Optional Settings: 0x00 Status reads attempted: 172; failed: 0 Control writes attempted: 18; failed: 0 Shelf bays with disk devices installed: 13, 12, 11, 10, 9, 8, 7, 6, 5, 4, 3, 2, 1, 0 Power Supply installed element list: 1, 2; with error: none Power Supply serial numbers by element:
184 Data ONTAP® 8.2 Commands: Manual Page Reference for 7-Mode, Volume 1
environ
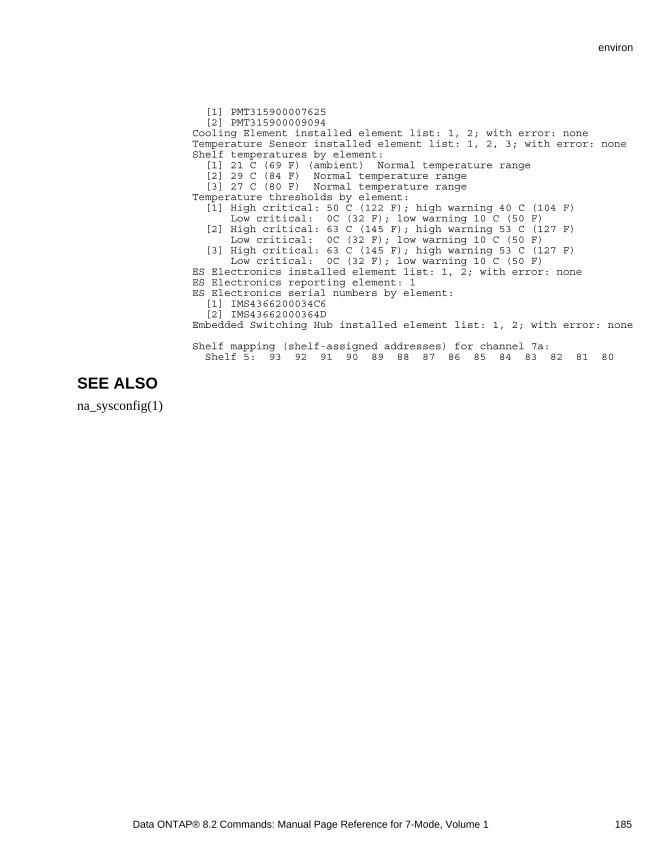
[1] PMT315900007625 [2] PMT315900009094 Cooling Element installed element list: 1, 2; with error: none Temperature Sensor installed element list: 1, 2, 3; with error: none Shelf temperatures by element: [1] 21 C (69 F) (ambient) Normal temperature range [2] 29 C (84 F) Normal temperature range [3] 27 C (80 F) Normal temperature range Temperature thresholds by element: [1] High critical: 50 C (122 F); high warning 40 C (104 F) Low critical: 0C (32 F); low warning 10 C (50 F) [2] High critical: 63 C (145 F); high warning 53 C (127 F) Low critical: 0C (32 F); low warning 10 C (50 F) [3] High critical: 63 C (145 F); high warning 53 C (127 F) Low critical: 0C (32 F); low warning 10 C (50 F) ES Electronics installed element list: 1, 2; with error: none ES Electronics reporting element: 1 ES Electronics serial numbers by element: [1] IMS4366200034C6 [2] IMS43662000364D Embedded Switching Hub installed element list: 1, 2; with error: none
Shelf mapping (shelf-assigned addresses) for channel 7a: Shelf 5: 93 92 91 90 89 88 87 86 85 84 83 82 81 80
SEE ALSOna_sysconfig(1)
Data ONTAP® 8.2 Commands: Manual Page Reference for 7-Mode, Volume 1 185
environ
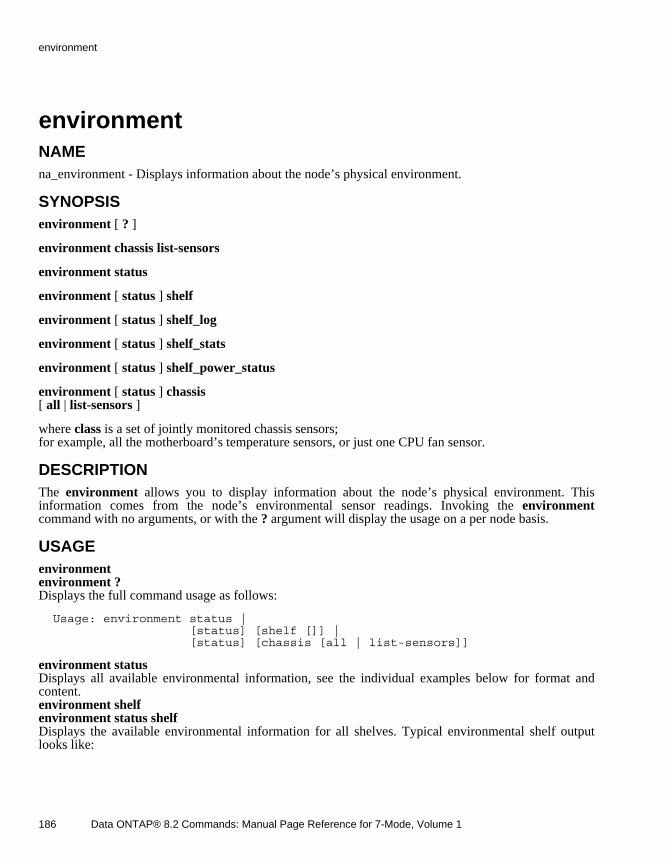
environmentNAMEna_environment - Displays information about the node’s physical environment.
SYNOPSISenvironment [ ? ]
environment chassis list-sensors
environment status
environment [ status ] shelf
environment [ status ] shelf_log
environment [ status ] shelf_stats
environment [ status ] shelf_power_status
environment [ status ] chassis[ all | list-sensors ]
where class is a set of jointly monitored chassis sensors;for example, all the motherboard’s temperature sensors, or just one CPU fan sensor.
DESCRIPTIONThe environment allows you to display information about the node’s physical environment. Thisinformation comes from the node’s environmental sensor readings. Invoking the environmentcommand with no arguments, or with the ? argument will display the usage on a per node basis.
USAGEenvironmentenvironment ?Displays the full command usage as follows:
Usage: environment status | [status] [shelf []] | [status] [chassis [all | list-sensors]]
environment statusDisplays all available environmental information, see the individual examples below for format and content.environment shelfenvironment status shelfDisplays the available environmental information for all shelves. Typical environmental shelf outputlooks like:
186 Data ONTAP® 8.2 Commands: Manual Page Reference for 7-Mode, Volume 1
environment
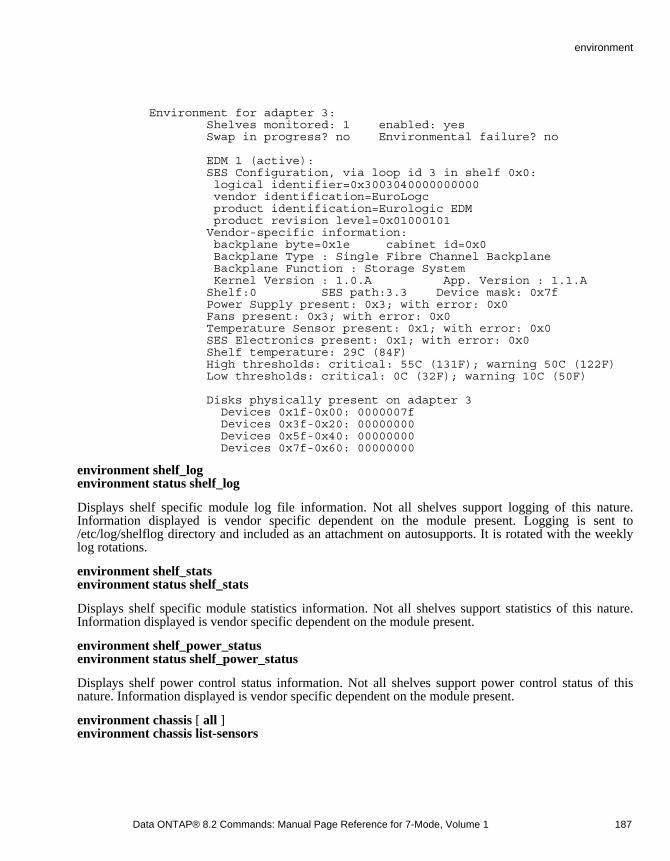
Environment for adapter 3: Shelves monitored: 1 enabled: yes Swap in progress? no Environmental failure? no
EDM 1 (active): SES Configuration, via loop id 3 in shelf 0x0: logical identifier=0x3003040000000000 vendor identification=EuroLogc product identification=Eurologic EDM product revision level=0x01000101 Vendor-specific information: backplane byte=0x1e cabinet id=0x0 Backplane Type : Single Fibre Channel Backplane Backplane Function : Storage System Kernel Version : 1.0.A App. Version : 1.1.A Shelf:0 SES path:3.3 Device mask: 0x7f Power Supply present: 0x3; with error: 0x0 Fans present: 0x3; with error: 0x0 Temperature Sensor present: 0x1; with error: 0x0 SES Electronics present: 0x1; with error: 0x0 Shelf temperature: 29C (84F) High thresholds: critical: 55C (131F); warning 50C (122F) Low thresholds: critical: 0C (32F); warning 10C (50F)
Disks physically present on adapter 3 Devices 0x1f-0x00: 0000007f Devices 0x3f-0x20: 00000000 Devices 0x5f-0x40: 00000000 Devices 0x7f-0x60: 00000000
environment shelf_logenvironment status shelf_log
Displays shelf specific module log file information. Not all shelves support logging of this nature.Information displayed is vendor specific dependent on the module present. Logging is sent to/etc/log/shelflog directory and included as an attachment on autosupports. It is rotated with the weeklylog rotations.
environment shelf_statsenvironment status shelf_stats
Displays shelf specific module statistics information. Not all shelves support statistics of this nature.Information displayed is vendor specific dependent on the module present.
environment shelf_power_statusenvironment status shelf_power_status
Displays shelf power control status information. Not all shelves support power control status of thisnature. Information displayed is vendor specific dependent on the module present.
environment chassis [ all ]environment chassis list-sensors
Data ONTAP® 8.2 Commands: Manual Page Reference for 7-Mode, Volume 1 187
environment
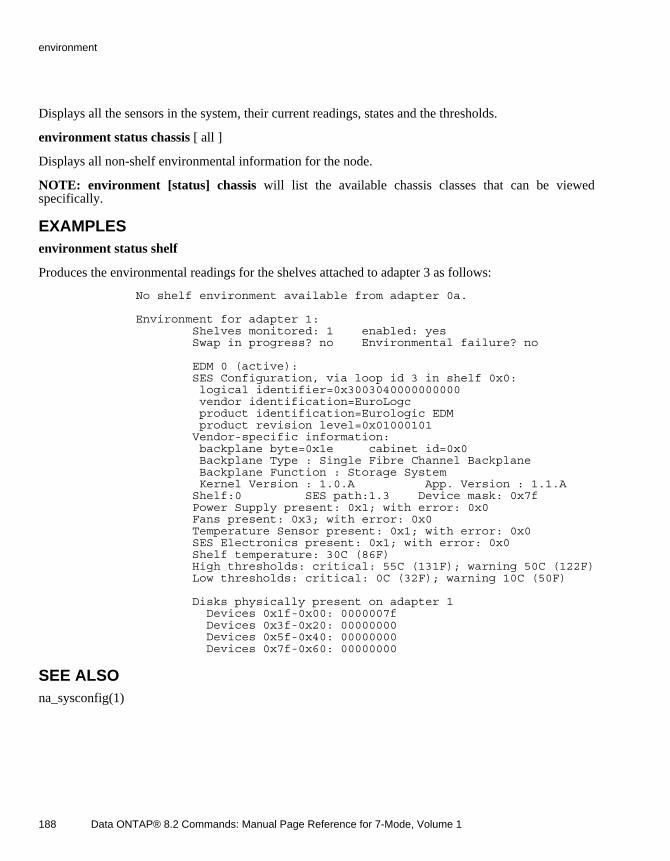
Displays all the sensors in the system, their current readings, states and the thresholds.
environment status chassis [ all ]
Displays all non-shelf environmental information for the node.
NOTE: environment [status] chassis will list the available chassis classes that can be viewedspecifically.
EXAMPLESenvironment status shelf
Produces the environmental readings for the shelves attached to adapter 3 as follows:
No shelf environment available from adapter 0a.
Environment for adapter 1: Shelves monitored: 1 enabled: yes Swap in progress? no Environmental failure? no
EDM 0 (active): SES Configuration, via loop id 3 in shelf 0x0: logical identifier=0x3003040000000000 vendor identification=EuroLogc product identification=Eurologic EDM product revision level=0x01000101 Vendor-specific information: backplane byte=0x1e cabinet id=0x0 Backplane Type : Single Fibre Channel Backplane Backplane Function : Storage System Kernel Version : 1.0.A App. Version : 1.1.A Shelf:0 SES path:1.3 Device mask: 0x7f Power Supply present: 0x1; with error: 0x0 Fans present: 0x3; with error: 0x0 Temperature Sensor present: 0x1; with error: 0x0 SES Electronics present: 0x1; with error: 0x0 Shelf temperature: 30C (86F) High thresholds: critical: 55C (131F); warning 50C (122F) Low thresholds: critical: 0C (32F); warning 10C (50F)
Disks physically present on adapter 1 Devices 0x1f-0x00: 0000007f Devices 0x3f-0x20: 00000000 Devices 0x5f-0x40: 00000000 Devices 0x7f-0x60: 00000000
SEE ALSOna_sysconfig(1)
188 Data ONTAP® 8.2 Commands: Manual Page Reference for 7-Mode, Volume 1
environment
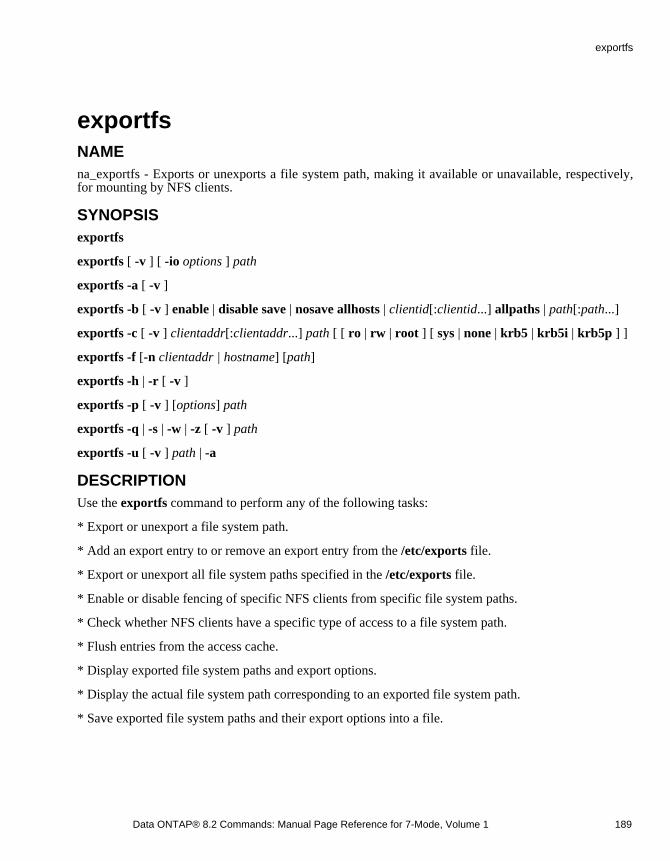
exportfsNAMEna_exportfs - Exports or unexports a file system path, making it available or unavailable, respectively,for mounting by NFS clients.
SYNOPSISexportfs
exportfs [ -v ] [ -io options ] path
exportfs -a [ -v ]
exportfs -b [ -v ] enable | disable save | nosave allhosts | clientid[:clientid...] allpaths | path[:path...]
exportfs -c [ -v ] clientaddr[:clientaddr...] path [ [ ro | rw | root ] [ sys | none | krb5 | krb5i | krb5p ] ]
exportfs -f [-n clientaddr | hostname] [path]
exportfs -h | -r [ -v ]
exportfs -p [ -v ] [options] path
exportfs -q | -s | -w | -z [ -v ] path
exportfs -u [ -v ] path | -a
DESCRIPTIONUse the exportfs command to perform any of the following tasks:
* Export or unexport a file system path.
* Add an export entry to or remove an export entry from the /etc/exports file.
* Export or unexport all file system paths specified in the /etc/exports file.
* Enable or disable fencing of specific NFS clients from specific file system paths.
* Check whether NFS clients have a specific type of access to a file system path.
* Flush entries from the access cache.
* Display exported file system paths and export options.
* Display the actual file system path corresponding to an exported file system path.
* Save exported file system paths and their export options into a file.
Data ONTAP® 8.2 Commands: Manual Page Reference for 7-Mode, Volume 1 189
exportfs
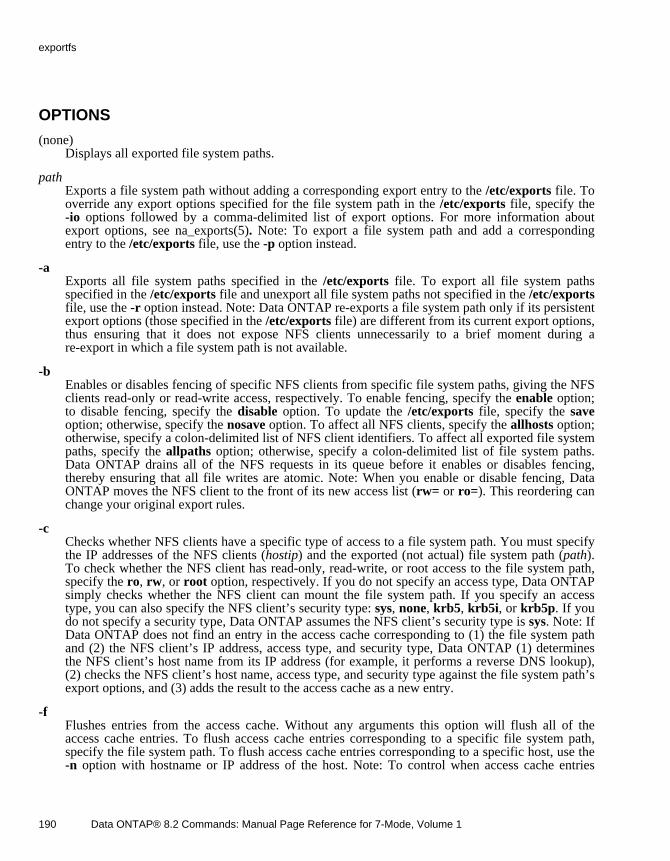
OPTIONS
(none) Displays all exported file system paths.
path Exports a file system path without adding a corresponding export entry to the /etc/exports file. Tooverride any export options specified for the file system path in the /etc/exports file, specify the -io options followed by a comma-delimited list of export options. For more information aboutexport options, see na_exports(5). Note: To export a file system path and add a correspondingentry to the /etc/exports file, use the -p option instead.
-a Exports all file system paths specified in the /etc/exports file. To export all file system pathsspecified in the /etc/exports file and unexport all file system paths not specified in the /etc/exportsfile, use the -r option instead. Note: Data ONTAP re-exports a file system path only if its persistentexport options (those specified in the /etc/exports file) are different from its current export options,thus ensuring that it does not expose NFS clients unnecessarily to a brief moment during are-export in which a file system path is not available.
-b Enables or disables fencing of specific NFS clients from specific file system paths, giving the NFSclients read-only or read-write access, respectively. To enable fencing, specify the enable option;to disable fencing, specify the disable option. To update the /etc/exports file, specify the saveoption; otherwise, specify the nosave option. To affect all NFS clients, specify the allhosts option;otherwise, specify a colon-delimited list of NFS client identifiers. To affect all exported file systempaths, specify the allpaths option; otherwise, specify a colon-delimited list of file system paths.Data ONTAP drains all of the NFS requests in its queue before it enables or disables fencing,thereby ensuring that all file writes are atomic. Note: When you enable or disable fencing, DataONTAP moves the NFS client to the front of its new access list (rw= or ro=). This reordering canchange your original export rules.
-c Checks whether NFS clients have a specific type of access to a file system path. You must specifythe IP addresses of the NFS clients (hostip) and the exported (not actual) file system path (path).To check whether the NFS client has read-only, read-write, or root access to the file system path,specify the ro, rw, or root option, respectively. If you do not specify an access type, Data ONTAPsimply checks whether the NFS client can mount the file system path. If you specify an accesstype, you can also specify the NFS client’s security type: sys, none, krb5, krb5i, or krb5p. If youdo not specify a security type, Data ONTAP assumes the NFS client’s security type is sys. Note: IfData ONTAP does not find an entry in the access cache corresponding to (1) the file system pathand (2) the NFS client’s IP address, access type, and security type, Data ONTAP (1) determinesthe NFS client’s host name from its IP address (for example, it performs a reverse DNS lookup),(2) checks the NFS client’s host name, access type, and security type against the file system path’sexport options, and (3) adds the result to the access cache as a new entry.
-f Flushes entries from the access cache. Without any arguments this option will flush all of theaccess cache entries. To flush access cache entries corresponding to a specific file system path,specify the file system path. To flush access cache entries corresponding to a specific host, use the -n option with hostname or IP address of the host. Note: To control when access cache entries
190 Data ONTAP® 8.2 Commands: Manual Page Reference for 7-Mode, Volume 1
exportfs
expire automatically, set the options nfs.export.harvest.timeout,
nfs.export.neg.timeout, and nfs.export.pos.timeout. For more information about these options, see. na_options(1).
-h Displays help for all exportfs options.
-i Ignores the options specified for a file system path in the /etc/exports file. If you do not specify the -i option with the -o option, Data ONTAP uses the options specified for the file system path in the /etc/exports file instead of the options you specify on the command line.
-o Specifies one or more export options for a file system path as a comma-delimited list. For moreinformation about export options, see na_exports(5). Note: To override the options specified forthe file system path in the /etc/exports file, you must specify the -i and -o options together.
-p Exports a file system path and adds a corresponding export entry to the /etc/exports file. If you donot specify any export options, Data ONTAP automatically exports the file system path with the rw and -sec=sys export options. Use the -p option to add a file system path to the /etc/exports filewithout manually editing the /etc/exports file. Note: Data ONTAP exports the file system pathsspecified in the /etc/exports file every time NFS starts up (for example, when the node reboots).For more information, see na_exports(5).
-q Displays the export options for a file system path. Use the -q option to quickly view the exportoptions for a single file system path without manually searching through the /etc/exports file. Inaddition to displaying the options, it also displays the ruleid for each "rule" in the export. Thisruleid is used to display the in-memory and on-disk access cache for each "rule". Rule is a set ofhost access permissions defined for a security flavor in an export and a ruleid uniquely identifies arule for the duration when a node is up. For example:
exportfs -q /vol/vol0 /vol/vol0 -sec=krb5,(ruleid=2),rw
This means that the filesystem /vol/vol0 is exported via the rule "rw" and this rule has a ruleid of 2.
exportfs -q /vol/vol1 /vol/vol1 -sec=sys,(ruleid=2),rw, sec=krb5,(ruleid=10),ro=172.16.27.0/24,rw=172.16.36.0/24
This means that the filesystem /vol/vol1 is exported via the rule "rw" (ruleid 2) to everyone who iscoming with AUTH_SYS security and is also exported via the rule"ro=172.16.27.0/24,rw=172.16.36.0/24" (ruleid 10) to everyone coming in with Kerberos.
-r Exports all file system paths specified in the /etc/exports file and unexports all file system pathsnot specified in the /etc/exports file. To export all file system paths specified in the /etc/exportsfile without unexporting any file system paths, use the -a option instead. Note: Data ONTAPre-exports a file system path only if its persistent export options (those specified in the /etc/exportsfile) are different from its current export options, thus ensuring that it does not expose NFS clients
Data ONTAP® 8.2 Commands: Manual Page Reference for 7-Mode, Volume 1 191
exportfs
unnecessarily to a brief moment during a re-export in which a file system path is not available.
-s Displays the actual file system path corresponding to an exported file system path. Note: Unless afile system path is exported with the -actual option, its actual file system path is the same as itsexported file system path.
-u Unexports a file system path. To unexport a single file system path, specify the path; otherwise, tounexport all file system paths specified in the /etc/exports file, specify the -a option. Note: The -uoption does not remove export entries from the /etc/exports file. To unexport a file system pathand remove its export entry from the /etc/exports file, use the -z option instead.
-v Specifies that Data ONTAP should be verbose. Use the -v option with any other option. Forexample, specify the -v option with the -a option to specify that Data ONTAP should display allfile system paths that it exports.
-w Saves exported file system paths and their export options into a file.
-z Unexports a file system path and removes its export entry from the /etc/exports file. Use the -zoption to remove a file system path from the /etc/exports file without manually editing the /etc/exports file. Note: By default entries are actually commented out and not removed from the /etc/exports file. To change the behavior to actually remove entries switch off thenfs.export.exportfs_comment_on_delete option. For more information see na_options(1).
OPERANDS
clientaddr An NFS client’s IP address. Every IPv6 address must be enclosed within square brackets (forexample, [7F52:85FC:774A:8AC::34]).
clientid One of the following NFS client identifiers: host name, IP address, netgroup, subnet, or domainname. For more information, see na_exports(5).
options A comma-delimited list of export options. For more information, see na_exports(5).
path A file system path: for example, a path to a volume, directory, or file.
EXTENDED DESCRIPTIONWhen you export a file system path, specify the -p option to add a corresponding entry to the /etc/exports file; otherwise, specify the -i and -o options to override any export options specified for thefile system path in the /etc/exports file with the export options you specify on the command line.
192 Data ONTAP® 8.2 Commands: Manual Page Reference for 7-Mode, Volume 1
exportfs
When you specify the -b option (or the rw=, ro=, or root= export option), you must specify one ormore NFS client identifiers as a colon-delimited list. An NFS client identifier is a host name, IP address,netgroup, subnet, or domain name. For more information about client identifiers, see na_exports(5).
Unlike UNIX systems, Data ONTAP lets you export a file system path even if one of its ancestors hasbeen exported already. For example, you can export /vol/vol0/home even if /vol/vol0 has been exportedalready. However, you must never export an ancestor with fewer access controls than its children.Otherwise, NFS clients can mount the ancestor to circumvent the children’s access controls. Forexample, suppose you export /vol/vol0 to all NFS clients for read-write access (with the rw exportoption) and /vol/vol0/home to all NFS clients for read-only access (with the ro export option). If anNFS client mounts /vol/vol0/home, it has read-only access to /vol/vol0/home. But if an NFS clientmounts /vol/vol0, it has read-write access to vol/vol0 and /vol/vol0/home. Thus, by mounting /vol/vol0,an NFS client can circumvent the security restrictions on /vol/vol0/home.
When an NFS client mounts a subpath of an exported file system path, Data ONTAP applies the exportoptions of the exported file system path with the longest matching prefix. For example, suppose theonly exported file system paths are /vol/vol0 and /vol/vol0/home. If an NFS client mounts /vol/vol0/home/user1, Data ONTAP applies the export options for /vol/vol0/home, not /vol/vol0,because /vol/vol0/home has the longest matching prefix.
Managing the access cacheWhenever an NFS client attempts to access an exported file system path, Data ONTAP checks theaccess cache for an entry corresponding to (1) the file system path and (2) the NFS client’s IP address,access type, and security type. If an entry exists, Data ONTAP grants or denies access according to thevalue of the entry. If an entry does not exist, Data ONTAP grants or denies access according to theresult of a comparison between (1) the file system path’s export options and (2) the NFS client’s hostname, access type, and security type. In this case, Data ONTAP looks up the client’s host name (forexample, Data ONTAP performs a reverse DNS lookup) and adds a new entry to the access cache. Tomanually add access cache entries, use the -c option.
Note: The access cache associates an NFS client’s access rights with its IP address. Therefore, changesto an NFS client’s host name will not change its access rights until the access cache is flushed. DataONTAP automatically flushes an access cache entry when (1) its corresponding file system path isexported or unexported or (2) it expires. To control the expiration of access cache entries, set the nfs.export.harvest.timeout, nfs.export.neg.timeout, and nfs.export.pos.timeout options. For moreinformation about these options, see na_options(1). To manually flush access cache entries, use the -foption.
Running exportfs on a vFiler unitTo run exportfs on a vFiler (TM) unit, use the vfiler run command. All paths you specify must belongto the vFiler unit. In addition, all IP addresses you specify must be in the vFiler unit’s ipspace. For moreinformation, see na_vfiler(1).
Debugging mount and access problemsTo debug mount and access problems, (1) temporarily set the nfs.mountd.trace option to on and (2)monitor related messages that Data ONTAP displays and logs in the /etc/messages file. Some commonaccess problems include:
Data ONTAP® 8.2 Commands: Manual Page Reference for 7-Mode, Volume 1 193
exportfs
* Data ONTAP cannot determine an NFS client’s host name because it does not have a reverse DNSentry for it. Add the NFS client’s host name to the DNS, NIS or the /etc/hosts file. Note: Data ONTAPcannot resolve a IPv6 address to multiple hostnames (including aliases), when doing a reverse hostname lookup.
* The root volume is exported with a file system path consisting of a single forward slash (/), whichmisleads some automounters. Export the file system path using a different file system path name.
Exporting Origin Node for FlexCacheExporting a volume using the /etc/exports file does not affect whether the volume is available to a FlexCache volume; To enable a volume to be a FlexCache origin volume, use the flexcache.accessoption.
EXAMPLESExporting file system pathsEach of the following commands exports /vol/vol0 to all hosts for read-write access:
exportfs -p /vol/vol0 exportfs -io rw /vol/vol0
Each of the following commands exports /vol/vol0 to all hosts for read-only access:
exportfs -p ro /vol/vol0 exportfs -io ro /vol/vol0
Each of the following commands exports /vol/vol0 to all hosts on the 10.45.67.0 subnet with the255.255.255.0 netmask for read-write access:
exportfs -io rw=10.45.67.0/24 /vol/vol0 exportfs -io rw="network 10.45.67.0 netmask 255.255.255.0" /vol/vol0 exportfs -io rw="10.45.67.0 255.255.255.0" /vol/vol0
The following command exports /vol/vol0 to all hosts in the FC21:71BE:B265:5204::49/64 subnet forread-write access and to the NFS client with an IPv6 address of F6C3:430A:B194:5CDA:6A91::83 forroot access:
exportfs -io rw=[FC21:71BE:B265:5204::49]/64,\\ root=[F6C3:420A:B194:5CDA:6A91::83] /vol/vol0
The following command exports /vol/vol0 to the hosts in the trusted netgroup for root access, the hostsin the friendly netgroup for read-write access, and all other hosts for read-only access:
exportfs -io ro,root=@trusted,rw=@friendly /vol/vol0
The following command exports all file system paths specified in the /etc/exports file:
exportfs -a
The following command exports all file system paths specified in the /etc/exports file and unexports allfile system paths not specified in the /etc/exports file:
194 Data ONTAP® 8.2 Commands: Manual Page Reference for 7-Mode, Volume 1
exportfs

exportfs -r
Unexporting file system pathsThe following command unexports /vol/vol0:
exportfs -u /vol/vol0
The following command unexports /vol/vol0 and removes its export entry from the /etc/exports file:
exportfs -z /vol/vol0
The following command unexports all file system paths:
exportfs -ua
Displaying exported file system pathsThe following command displays all exported file system paths and their corresponding export options:
exportfs
The following command displays the export options for /vol/vol0:
exportfs -q /vol/vol0
Enabling and disabling fencingSuppose /vol/vol0 is exported with the following export options:
-rw=pig:horse:cat:dog,ro=duck,anon=0
The following command enables fencing of cat from /vol/vol0:
exportfs -b enable save cat /vol/vol0
Note: cat moves to the front of the ro= list for /vol/vol0:
-rw=pig:horse:dog,ro=cat:duck,anon=0
The following command disables fencing of cat from /vol/vol0:
exportfs -b disable save cat /vol/vol0
Note: cat moves to the front of the rw= list for /vol/vol0:
-rw=cat:pig:horse:dog,ro=duck,anon=0
Checking an NFS client’s access rightsThe following command checks whether an NFS client with an IPv4 address of 192.168.208.51 and asecurity type of sys can mount /vol/vol0:
exportfs -c 192.168.208.51 /vol/vol0
The following command checks whether an NFS client with an IPv4 address of 192.168.208.51 and asecurity type of none has read-only access to /vol/vol0:
Data ONTAP® 8.2 Commands: Manual Page Reference for 7-Mode, Volume 1 195
exportfs
exportfs -c 192.168.208.51 /vol/vol0 ro none
The following command checks whether NFS clients with IP addresses 10.21.121.45 and10.102.168.76, can mount /vol/vol0, with a security type of sys:
exportfs -c 10.21.121.45:10.102.168.76 /vol/vol0
Flushing entries from the access cacheThe following command flushes all entries from the access cache:
exportfs -f
The following command flushes all entries for /vol/vol0 from the access cache:
exportfs -f /vol/vol0
The following command flushes the entry whose IP is 1234:AD19:B23F:23F3::23 from the accesscache:
exportfs -f -n [1234:AD19:B23F:23F3::23]
The following command flushes the entry corresponding to the host client1 for /vol/vol0 from theaccess cache:
exportfs -f -n client1 /vol/vol0
Displaying an actual file system pathThe following example displays the actual file system path corresponding to /vol/vol0:
exportfs -s /vol/vol0
Note: The actual file system path will be the same as the exported file system path unless the file systempath was exported with the -actual option.
Saving file system pathsThe following example saves the file system paths and export options for all currently and recentlyexported file paths into /etc/exports.recent:
exportfs -w /etc/exports.recent
SEE ALSOna_exports(5), na_passwd(5)
196 Data ONTAP® 8.2 Commands: Manual Page Reference for 7-Mode, Volume 1
exportfs
fcadminNAMEna_fcadmin - Commands for managing Fibre Channel adapters
SYNOPSISfcadmin command argument ...
DESCRIPTIONThe fcadmin utility manages the Fibre Channel adapters used by the storage subsystem. Use the utilityto show link and loop-level protocol statistics, list the storage devices connected to the node, andconfigure the personality of adapters. Not all adapters are configurable by this utility.
USAGEfcadmin config[ <adapter_name> ... ]
fcadmin config[ -? ][ -e | -d ][ -t {target|initiator|unconfigured} ] [ <adapter_name> ... ]
fcadmin [link_stats|fcal_stats|device_map] <adapter_name>
DESCRIPTIONThe fcadmin link_stats, fcal_stats, and device_map commands are identical to the fcstat commandoptions. For more information, see na_fcstat(1).
The fcadmin config command configures Fibre channel (FC) adapters. When no arguments are given,the fcadmin config command returns configuration information about all of the configurable FCadapter(s) on the node. If no configurable FC adapters exist, the fcadmin config command is notsupported and an error is returned.
The fcadmin config command displays the following information:
Adapter:An adapter name of the form Xy, where X is a number and y is a letter (for example, 0a or 1b).
Type: The type of adapter: initiator or target. The adapter type is determined by which device drivercontrols the adapter. When the storage initiator driver is attached, the adapter is an initiator. When theFCP target mode driver is attached, the adapter is a target. A node reboot is required to attach a newdriver when the adapter type is changed. The storage initiator driver is attached prior to anyconfiguration changes. The default adapter type is initiator.
Data ONTAP® 8.2 Commands: Manual Page Reference for 7-Mode, Volume 1 197
fcadmin
Status:The status of the adapter, online or offline, reported from the attached driver. Before changing theadapter type, the status must indicate that the adapter is offline.
State: The configuration state of the adapter. Use the configuration state to track changes in the typeand state of the adapter.
The following configuration states exist:
CONFIGURED The adapter is configured and the specified driver is attached. This is the normal operating state.
UNCONFIGURED The adapter is forced offline by the attached driver and cannot be used. This state is only validwhen the initiator driver is attached (the adapter Type is initiator).
PENDING An adapter Type and/or State change is pending. A node reboot is required for the change to takeeffect. While in the PENDING state, the adapter is forced offline by the attached driver and cannotbe used.
There are three possible PENDING substates: (target), (initiator), and (unconfigured). When changingthe adapter type from initiator to target, the adapter moves to the PENDING (target) state. Whenchanging the adapter type from target to initiator, the adapter moves to the PENDING (initiator) state.The PENDING (unconfigured) state means that a change is pending that will affect both the type and state of the adapter. The PENDING (unconfigured) state only occurs when the target driver is attachedto the adapter (the adapter type is target) and a change has been made to move the adapter to theUNCONFIGURED state. When the initiator driver is attached, no reboot is required to change betweenthe CONFIGURED and UNCONFIGURED state.
DISPLAYSExample output:
FAS> fcadmin config
Local Adapter Type State Status --------------------------------------------------- 0a initiator CONFIGURED online 0b initiator UNCONFIGURED offline 0c initiator PENDING (target) offline 0d target PENDING (unconfigured) offline
OPTIONS
-? Provides online help for the fcadmin config command.
-e Enables the adapter by calling the attached driver’s online routine. When the adapter type is initiator, it has the same effect as the storage enable adapter command. When the adapter type is target, this option is obsolete. Enabling the adapter changes the adapter status from offline to
198 Data ONTAP® 8.2 Commands: Manual Page Reference for 7-Mode, Volume 1
fcadmin
online.
-d Disables the adapter by calling the attached driver’s offline routine. When the adapter type is initiator, it has the same effect as the storage disable adapter command. When the adapter type is target, this option is obsolete. Disabling the adapter changes the adapter status from online to offline.
-t type Changes the adapter type and/or state. Valid type arguments are initiator, target, and unconfigured. Before changing the adapter configuration with this option, the adapter must be offline. You can take the adapter offline in a number of ways. If using the -d option does not work,use the utilities for the attached driver. You can also force the adapter offline by removing the FCcable from the adapter port at the back of the node. If a node reboot is required to change theadapter configuration following the use of this option, the adapter moves to the PENDING (type) state to indicate that a reboot is required.
adapter_name The name of one or more adapters, separated by spaces. When no other option is provided, thespecified adapter(s) configuration displays. If no adapter_name argument is provided, theconfigurations of all adapters display.
NOTESAutomatic ReconfigurationUnder some circumstances, the node may boot with the wrong driver attached. When this happens theconfigurable adapters are reprogrammed to their proper type and state and the node is automaticallyrebooted to attach the correct driver. Before rebooting, the fci.config.autoReboot EMS message displayson the console. Events that can cause this problem include maintenance head swaps, use of theconsole set-defaults command, and other operations that affect the node’s boot environment state.
Repair When Data ONTAP is fully initialized and running, configuring an adapter with the fcadmin config utility records the adapter configuration in both the node’s boot environment and on-disk, in thenode’s root volume. Following a console set_defaults operation, a maintenance head swap, or otherevent that destroys the boot environment state, the initiator driver is attached to all configurableadapters during boot. This ensures that all storage loops are discovered during boot. After the node’sroot volume comes online, the boot environment configuration is checked against the on-diskconfiguration information. If a misconfiguration is detected, the boot environment information isrestored and the node automatically reboots to attach the correct drivers and restore the originalconfiguration. This provides consistency between maintenance head swaps and other events whichdestroy the boot environment.
Maintenance Mode OperationYou can use the fcadmin config utility while in Maintenance Mode. After changing the adapterconfiguration in Maintenance Mode, a reboot is required for the change to take effect. When run fromMaintenance Mode, no on-disk configuration information can be stored because the node’s root volumeis unavailable. To account for this, the fcadmin config utility indicates that the boot environmentconfiguration needs to be recorded ondisk during a subsequent reboot. After changing the adapterconfiguration in Maintenance Mode, the boot environment configuration becomes canonical. Otherwise,the on-disk configuration is canonical.
Data ONTAP® 8.2 Commands: Manual Page Reference for 7-Mode, Volume 1 199
fcadmin
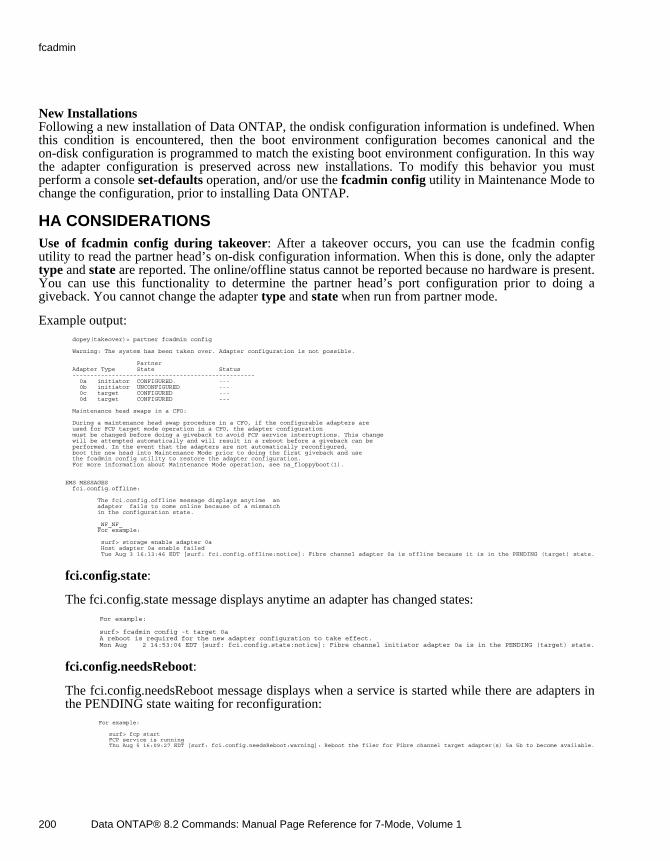
New InstallationsFollowing a new installation of Data ONTAP, the ondisk configuration information is undefined. Whenthis condition is encountered, then the boot environment configuration becomes canonical and theon-disk configuration is programmed to match the existing boot environment configuration. In this waythe adapter configuration is preserved across new installations. To modify this behavior you mustperform a console set-defaults operation, and/or use the fcadmin config utility in Maintenance Mode tochange the configuration, prior to installing Data ONTAP.
HA CONSIDERATIONSUse of fcadmin config during takeover: After a takeover occurs, you can use the fcadmin configutility to read the partner head’s on-disk configuration information. When this is done, only the adapter type and state are reported. The online/offline status cannot be reported because no hardware is present.You can use this functionality to determine the partner head’s port configuration prior to doing agiveback. You cannot change the adapter type and state when run from partner mode.
Example output: dopey(takeover)> partner fcadmin config
Warning: The system has been taken over. Adapter configuration is not possible.
Partner Adapter Type State Status --------------------------------------------------- 0a initiator CONFIGURED. --- 0b initiator UNCONFIGURED --- 0c target CONFIGURED --- 0d target CONFIGURED ---
Maintenance head swaps in a CFO:
During a maintenance head swap procedure in a CFO, if the configurable adapters are used for FCP target mode operation in a CFO, the adapter configuration must be changed before doing a giveback to avoid FCP service interruptions. This change will be attempted automatically and will result in a reboot before a giveback can be performed. In the event that the adapters are not automatically reconfigured, boot the new head into Maintenance Mode prior to doing the first giveback and use the fcadmin config utility to restore the adapter configuration. For more information about Maintenance Mode operation, see na_floppyboot(1).
EMS MESSAGES fci.config.offline:
The fci.config.offline message displays anytime an adapter fails to come online because of a mismatch in the configuration state.
_NF_NF_ For example:
surf> storage enable adapter 0a Host adapter 0a enable failed Tue Aug 3 16:13:46 EDT [surf: fci.config.offline:notice]: Fibre channel adapter 0a is offline because it is in the PENDING (target) state.
fci.config.state:
The fci.config.state message displays anytime an adapter has changed states: For example:
surf> fcadmin config -t target 0a A reboot is required for the new adapter configuration to take effect. Mon Aug 2 14:53:04 EDT [surf: fci.config.state:notice]: Fibre channel initiator adapter 0a is in the PENDING (target) state.
fci.config.needsReboot:
The fci.config.needsReboot message displays when a service is started while there are adapters inthe PENDING state waiting for reconfiguration:
For example:
surf> fcp start FCP service is running Thu Aug 5 16:09:27 EDT [surf: fci.config.needsReboot:warning]: Reboot the filer for Fibre channel target adapter(s) 5a 5b to become available.
200 Data ONTAP® 8.2 Commands: Manual Page Reference for 7-Mode, Volume 1
fcadmin
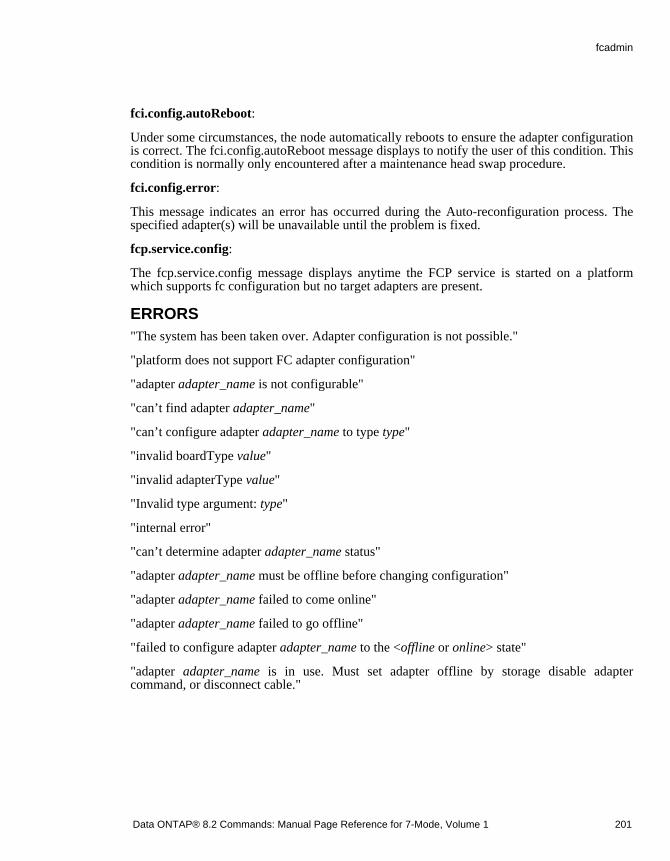
fci.config.autoReboot:
Under some circumstances, the node automatically reboots to ensure the adapter configurationis correct. The fci.config.autoReboot message displays to notify the user of this condition. Thiscondition is normally only encountered after a maintenance head swap procedure.
fci.config.error:
This message indicates an error has occurred during the Auto-reconfiguration process. Thespecified adapter(s) will be unavailable until the problem is fixed.
fcp.service.config:
The fcp.service.config message displays anytime the FCP service is started on a platformwhich supports fc configuration but no target adapters are present.
ERRORS"The system has been taken over. Adapter configuration is not possible."
"platform does not support FC adapter configuration"
"adapter adapter_name is not configurable"
"can’t find adapter adapter_name"
"can’t configure adapter adapter_name to type type"
"invalid boardType value"
"invalid adapterType value"
"Invalid type argument: type"
"internal error"
"can’t determine adapter adapter_name status"
"adapter adapter_name must be offline before changing configuration"
"adapter adapter_name failed to come online"
"adapter adapter_name failed to go offline"
"failed to configure adapter adapter_name to the <offline or online> state"
"adapter adapter_name is in use. Must set adapter offline by storage disable adaptercommand, or disconnect cable."
Data ONTAP® 8.2 Commands: Manual Page Reference for 7-Mode, Volume 1 201
fcadmin

BUGSUnder some circumstances an adapter cannot be taken offline with the fcadmin config -dcommand. When this happens, use the associated driver utility, fcp config or storage disable adapter, in order to change the adapter status or remove the cable from the adapter port atthe back of the node.
SEE ALSOna_san(1), na_fcstat(1)
202 Data ONTAP® 8.2 Commands: Manual Page Reference for 7-Mode, Volume 1
fcadmin
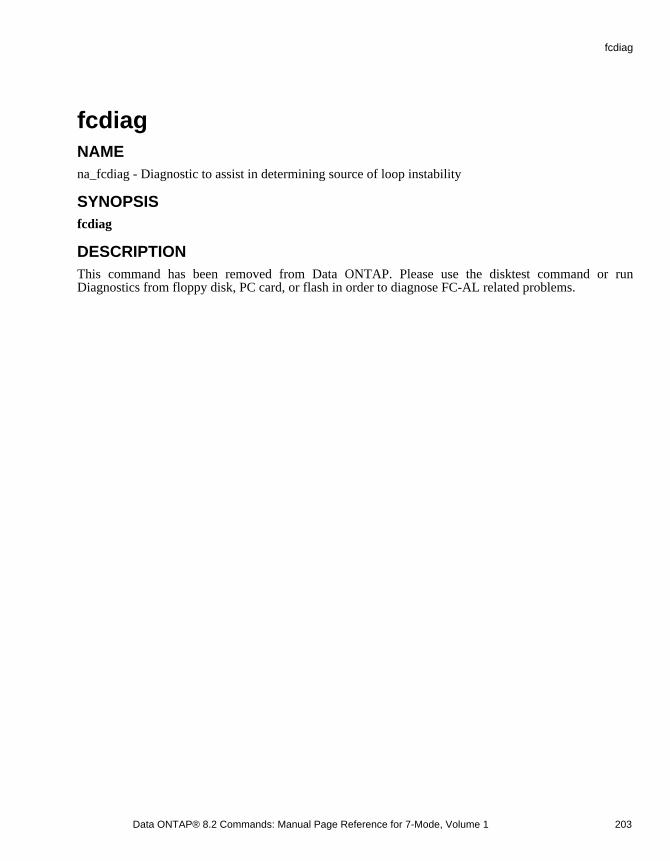
fcdiagNAMEna_fcdiag - Diagnostic to assist in determining source of loop instability
SYNOPSISfcdiag
DESCRIPTIONThis command has been removed from Data ONTAP. Please use the disktest command or runDiagnostics from floppy disk, PC card, or flash in order to diagnose FC-AL related problems.
Data ONTAP® 8.2 Commands: Manual Page Reference for 7-Mode, Volume 1 203
fcdiag

fcnicNAMEna_fcnic - Command to control out-of-order (OOD) frame delivery on Fibre Channel Virtual Interface(FCVI) NIC adapters
SYNOPSISfcnic ood [ on | off | status] <interface>
DESCRIPTIONfcnic ood on
The fcnic ood on subcommand is used to enable the OOD feature on the specified interface.
fcnic ood off
The fcnic ood off subcommand is used to disable the OOD feature on the specified interface.
fcnic ood status
The fcnic ood status subcommand is used to display OOD status for the specified interface.
EXAMPLESExample 1: Enable the OOD feature on FCVI NIC interface ql1a.
FAS> fcnic ood on ql1a
Example 2: Display the OOD status for a specified FCVI NIC on interface ql1a.
FAS> fcnic ood status ql1a NIC 2 Statistics -------------------- OOD Status Enabled Coalescing Enabled
SEE ALSO<none>
204 Data ONTAP® 8.2 Commands: Manual Page Reference for 7-Mode, Volume 1
fcnic
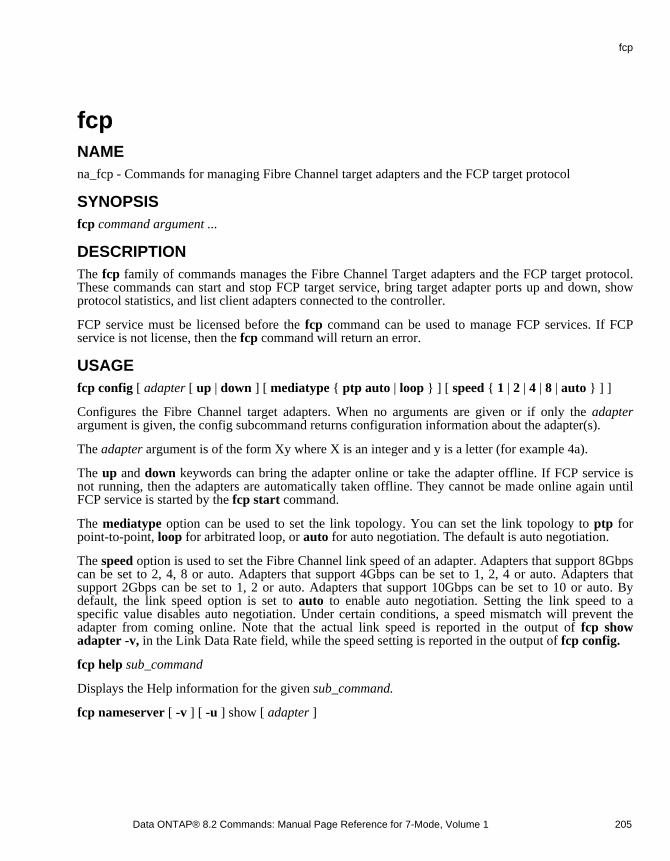
fcpNAMEna_fcp - Commands for managing Fibre Channel target adapters and the FCP target protocol
SYNOPSISfcp command argument ...
DESCRIPTIONThe fcp family of commands manages the Fibre Channel Target adapters and the FCP target protocol.These commands can start and stop FCP target service, bring target adapter ports up and down, showprotocol statistics, and list client adapters connected to the controller.
FCP service must be licensed before the fcp command can be used to manage FCP services. If FCPservice is not license, then the fcp command will return an error.
USAGEfcp config [ adapter [ up | down ] [ mediatype { ptp auto | loop } ] [ speed { 1 | 2 | 4 | 8 | auto } ] ]
Configures the Fibre Channel target adapters. When no arguments are given or if only the adapterargument is given, the config subcommand returns configuration information about the adapter(s).
The adapter argument is of the form Xy where X is an integer and y is a letter (for example 4a).
The up and down keywords can bring the adapter online or take the adapter offline. If FCP service isnot running, then the adapters are automatically taken offline. They cannot be made online again untilFCP service is started by the fcp start command.
The mediatype option can be used to set the link topology. You can set the link topology to ptp forpoint-to-point, loop for arbitrated loop, or auto for auto negotiation. The default is auto negotiation.
The speed option is used to set the Fibre Channel link speed of an adapter. Adapters that support 8Gbpscan be set to 2, 4, 8 or auto. Adapters that support 4Gbps can be set to 1, 2, 4 or auto. Adapters thatsupport 2Gbps can be set to 1, 2 or auto. Adapters that support 10Gbps can be set to 10 or auto. Bydefault, the link speed option is set to auto to enable auto negotiation. Setting the link speed to aspecific value disables auto negotiation. Under certain conditions, a speed mismatch will prevent theadapter from coming online. Note that the actual link speed is reported in the output of fcp show adapter -v, in the Link Data Rate field, while the speed setting is reported in the output of fcp config.
fcp help sub_command
Displays the Help information for the given sub_command.
fcp nameserver [ -v ] [ -u ] show [ adapter ]
Data ONTAP® 8.2 Commands: Manual Page Reference for 7-Mode, Volume 1 205
fcp

Displays entries in the zoned fabric nameserver database. If no adapter is specified, nameserver entriesfor all adapters are shown. The nameserver database contains entries for all devices registered into thefabric. The -v option displays verbose output of the nameserver including the symbolic names of theregistered devices. The -u option can be used to display entries from the unzoned fabric nameserverdatabase. The use of -v and -u is optional.
fcp nodename [ -f ] [ nodename ]
Establishes the nodename which the Fibre Channel target adapters register in the fabric. This nodenameis in the form of a Fibre Channel world wide name, which is in the formXX:XX:XX:XX:XX:XX:XX:XX where X is a hexadecimal digit. The current nodename of thecontroller can be displayed if the nodename argument is not given.
The FCP service must be stopped before the nodename can be changed. When selecting a newnodename, use the following format to fit with NetApp’s registered names: 50:0a:09:80:8X:XX:XX:XXwhere XX:XX:XX is some integral value. If the -f flag is given, the format of the nodename does notneed to comply with the above format.
fcp ping [ -s ] [ -v ] [ -p payload ] adapter address
Sends an ECHO ELS frame from the Fibre Channel target adapter to the specified address location.The address is a Fibre Channel port identifier 0xXXXXXX where X is a hexadecimal value or a FibreChannel world wide port name of the form XX:XX:XX:XX:XX:XX:XX:XX where X is a hexadecimalvalue. If payload is specified, that string will be included in the payload of the ECHO frame. Thepayload string can have a maximum of 255 characters. If the payload string includes white spacecharacters, the entire string should be wrapped in quotes. When the -s flag is specified, fcp ping sendsone ELS ECHO frame per second and prints one line of output for every response it receives andcomputes the round-trip time and frame loss statistics. When the command is terminated with a ^C, thesummary statistics is displayed. If no payload is specified, a default payload will be sent. For a portspeed of 2, 4 or 8 Gbps, the default frame size will be 50 bytes. For a port supporting 10 or 16 Gbps thedefault payload is 248 bytes. The default payload will a carry special pattern to verify the signalintegrity of the Fibre Channel connection. If the -v flag is specified, additional round-trip statistics willbe printed in the summary statistics output. The -v flag is ignored without the -s flag.
fcp portname show [ -v ]
Displays a list of WWPNs used by local Fibre Channel target adapters and names of the correspondingadapters. If the -v flag is given, it also displays valid, but unused, WWPNs for local Fibre Channeltarget adapters. These WWPNs are marked as unused in the output.
fcp portname set [ -f ] adapter wwpn
Assigns a new WWPN to an adapter. The -f flag may be used to override the warning message aboutchanging the WWPN. You must offline and then online the adapter using the fcp config commandbefore and after changing its WWPN. The WWPN must be one of the valid and unused WWPNsdisplayed by the fcp portname show -v command. The original WWPN of this adapter is reset to be unused.
fcp portname [ -f ] swap adapter1 adapter2
206 Data ONTAP® 8.2 Commands: Manual Page Reference for 7-Mode, Volume 1
fcp

Swaps WWPNs of two local Fibre Channel target adapters. The -f flag may be used to override thewarning message about changing the WWPNs. You must offline and then online adapter1 and adapter2using the fcp config command before and after changing their WWPNs.
fcp show adapter [ -v ] [ adapter ]
If no adapter name is given, information about all adapters are shown.
This command displays information such as nodename/portname and link state about the adapter.
If the -v flag is given, this command displays additional information about the adapters.
fcp show cfmode
This command displays the current cfmode setting. This command has been deprecated.
fcp show initiator [ -v ] [ adapter ]
If no adapter name is given, information about all initiators connected to all adapters are shown.
The command displays the portname of initiators that are currently logged in with the Fibre Channeltarget adapters. If the portname is in an initiator group setup through the igroup command, then thegroup name is also displayed. Similarly, all aliases set with the fcp wwpn-alias command for theportname are displayed as well.
If the -v flag is given, the command displays the Fibre Channel host address and thenodename/portname of the initiators as well.
fcp stats [ -z ] [ adapter ]
If no adapter name is given, information about all initiators connected to all adapters are shown. The -zoption zeros all statistics except ‘Initiators Connected’.
The command displays statistics about the Fibre Channel target adapters and the VTIC partner adapter.
These are the Fibre Channel target adapter statistics.
Read Ops: This counts the number SCSI read ops received by the HBA.
Write Ops: This counts the number SCSI write ops received by the HBA.
Other Ops: This counts the number other SCSI ops received by the HBA.
KBytes In: This counts the KBytes of data received by the HBA.
KBytes Out: This counts the KBytes of data sent by the HBA.
Adapter Resets: This counts the number of adapter resets occurred.
Frame Overruns: This counts the frame overruns detected by the adapter during write requests.
Data ONTAP® 8.2 Commands: Manual Page Reference for 7-Mode, Volume 1 207
fcp

Frame Underruns: This counts the frame underruns detected by the adapter during read requests.
Initiators Connected: This counts the total number of initiators connected to this target adapter.
Link Breaks: This records the number of times the link breaks.
LIP Resets: This counts the number of times that a selective Reset LIP (Loop Initialization Primitive)occurred. LIP reset is used to perform a vendor specific reset at the loop port specified by the AL-PAvalue.
SCSI Requests Dropped: This reports the number of SCSI requests being dropped.
Spurious Interrupts: This reports the spurious interrupt counts.
Total Logins/Total Logouts: This counts the times of initiators added/removed. Each time a newinitiator is added, the total logins is incremented by 1. Each time an initiator is removed, the totallogouts is incremented by 1.
CRC Errors: This reports the total CRC errors occurred.
Adapter Qfulls: This reports the number of SCSI queue full responses that were sent.
Protocol Errors: This reports the number of protocol errors that have occurred.
Invalid Transmit Words: This reports the number of invalid transmit words.
LR Sent: This reports the number of link resets sent.
LR Received: This reports the number of link resets received.
Discarded Frames: This reports the number of received frames that were discarded.
NOS Received: This reports the number of NOS (Not Operational Sequence) primitives received.
OLS Received: This reports the number of OLS (Offline Sequence) primitives received.
Queue Depth: This counts the queue depth on the target HBA.
These are stats for the SFP/SFF module on the adapter.
Vendor Name: This reports the name of the vendor.
Vendor OUI: This reports the vendor IEEE Organizationally Unique Identifier.
Vendor PN: This reports the vendor product number.
Vendor Rev: This reports the vendor revision.
Serial No: This reports the serial number.
Date Code: This reports the manufacturing date code.
208 Data ONTAP® 8.2 Commands: Manual Page Reference for 7-Mode, Volume 1
fcp

Media Form: This reports the media form factor.
Connector: This reports the connector type.
Wavelength: This reports the wavelength.
Encoding: This reports the encoding scheme used.
FC Speed Capabilities: This reports the speeds supported.
These are the stats for the VTIC adapter.
Read Ops: This counts the number SCSI read ops received from the partner.
Write Ops: This counts the number SCSI write ops received from the partner.
Other Ops: This counts the number other SCSI ops received from the partner.
KBytes In: This counts the KBytes of data received from the partner.
KBytes Out: This counts the KBytes of data sent by the partner.
out_of_vtic_cmdblks, out_of_vtic_msgs,
out_of_vtic_resp_msgs, out_of_bulk_msgs, out_of_bulk_buffers, out_of_r2t_buffers: These are counters that track variousout of resource errors.
The remaining statistics count the different messages exchanged by the controller’s VTIC adapters in anHA pair.
fcp stats -i interval [ -c count ] [ -a | adapter ]
Displays statistics about fcp adapters over the given interval. The interval is given in seconds. If no adapter is specified, all adapters, with nonzero statistics, are shown.
The -c option will cause the stats to stop after count intervals.
The -a option will cause all HBAs to be listed, including HBAs with zero statistics. This option can notbe used if an adapter is specified.
The statistics are
r/s The number of SCSI read operations per second.
w/s The number of SCSI write operations per second.
o/s The number of other SCSI operations per second.
Data ONTAP® 8.2 Commands: Manual Page Reference for 7-Mode, Volume 1 209
fcp
ki/s Kilobytes per second receive traffic for the HBA.
ko/s Kilobytes per second send traffic for the HBA.
asvc_t Average in milliseconds to process a request through the HBA.
qlen The average number of outstanding requests pending.
hba The name of the HBA.
fcp start
Starts FCP service. When FCP service is started, the adapters are brought online.
fcp status
Displays status information about whether FCP service is running or not.
fcp stop
Stops FCP service and takes the Fibre Channel target adapters offline.
On HA systems, fcp stop will shut down adapters on one controller, but the adapters on the partnercontroller are not affected. In order to prevent all access to the LUNs on one controller, all local andpartner adapters need to be stopped.
The cf disable command does not stop fcp scsi commands from being sent to the partner controller viathe interconnect.
fcp topology [ -v | -z ] show [ adapter ]
Displays fabric topology information. If no adapter is specified, topology information for all adaptersare shown. The topology information lists the switches in the fabric. The option -v lists verbose outputwhich would include all ports in the fabric. Ports that are visible to the Fibre Channel target adapterfrom a fabric zoning perspective are marked with an asterisk. The option -z lists only ports that are inthe same zone as the Fibre Channel target adapter specified.
fcp wwpn-alias set [ -f ] alias wwpn
Set an alias for a wwpn (WorldWide PortName). The alias can be no more than 32 characters long andmay include A-Z, a-z, 0-9, ‘_’,’-’,’.’,’{’,’}’ and no spaces. You may use these aliases in the other fcpand igroup commands that use initiator portnames. Please note that you may set multiple aliases for awwpn, but only one wwpn per alias. To reset the wwpn associated with an alias the -f option must beused.
210 Data ONTAP® 8.2 Commands: Manual Page Reference for 7-Mode, Volume 1
fcp

You may set up to 1024 aliases in the system.
fcp wwpn-alias remove { -a alias ... | -w wwpn }
Removes all alias(es) set for a given wwpn or all alias(es) provided.
fcp wwpn-alias show [ -a alias | -w wwpn ]
Display all aliases and the corresponding wwpn’s if no arguments are supplied. The -a option displaysthe wwpn associated with the alias if set. The -w option displays all aliases associated with the wwpn
fcp zone show [ adapter ]
Displays the active zone set in the fabric. If no adapter is specified, zoning information for all adaptersare shown. The zoning information contains a list of all defined zones and their zone members. Somevalues indicated with a dash are not currently reportable. For example, if the zone contains a physicalport interface, its existence is noted as a Member Interface. However, the port interface value is notretrievable.
HA CONSIDERATIONSThe fcp show cfmode command only applies to HA configured controllers.
SEE ALSOna_san(1), na_uptime(1)
Data ONTAP® 8.2 Commands: Manual Page Reference for 7-Mode, Volume 1 211
fcp
fcstatNAMEna_fcstat - Commands for Fibre Channel stats functions
SYNOPSISfcstat link_stats [ channel_name ]
fcstat fcal_stats [ channel_name ]
fcstat device_map [ channel_name ]
DESCRIPTIONUse the fcstat command to show (a) link statistics maintained for all drives on a Fibre Channel loop, (b)internal statistics kept by the Fibre Channel driver, and (c) a tenancy and relative physical position mapof drives on a Fibre Channel loop.
SUB-COMMANDS: link_statsAll disk drives maintain counts of useful link events. The link_stats option displays the link eventcounts and this information can be useful in isolating problems on the loop. Refer to the eventdescriptions and the example below for more information.
link failure countThe drive will note a link failure event if it cannot synchronize its receiver PLL for a time greater thanR_T_TOV, usually on the order of milliseconds. A link failure is a loss of sync that occurred for a longenough period of time and therefore resulted in the drive initiating a Loop Initialization Primitive (LIP).Refer to loss of sync count below.
underrun countUnderruns are detected by the Host Adapter (HA) during a read request. The disk sends data to the HAthrough the loop and if any frames are corrupted in transit, they are discarded by the HA as it hasreceived less data than expected. The driver reports the underrun condition and retries the read. Thecause of the underrun is downstream in the loop after the disk being read and before the HA.
loss of sync countThe drive will note a loss of sync event if it loses PLL synchronization for a time period less thanR_T_TOV and thereafter manages to resynchronize. This event generally occurs when a component,before the disk, reports loss of sync up to and including the previous active component in the loop.Disks that are on the shelf borders are subject to seeing higher loss of sync counts than disks that are noton a border.
invalid CRC countEvery frame received by a drive contains a checksum that covers all data in the frame. If upon receivingthe frame, the checksum does not match, the invalid CRC counter is incremented and the frame is"dropped". Generally, the disk which reports the CRC error is not at fault, rather a component betweenthe Host Adapter (which originated the write request) and the reporting drive, corrupts the frame.
212 Data ONTAP® 8.2 Commands: Manual Page Reference for 7-Mode, Volume 1
fcstat
frame in count/ frame out countThese counts represent the total number of frames received and transmitted by a device on the loop. Thenumber of frames received by the Host Adapter is equal to the sum of all of the frames transmitted fromall of the disks. Similarly, the number of frames transmitted by the Host Adapter is equal to the sum ofall frames received by all of the disks.
The occurrence of any of the error events may result in loop disruption. A link failure is considered themost serious since it may indicate a transmitter problem that is affecting loop signal integrity upstreamof the drive. These events will typically result in frames being dropped and may result in data underrunsor SCSI command timeouts.
Note that loop disruptions of this type, even though potentially resulting in data underruns and/or SCSIcommand timeouts, will not result in data corruption. The host adapter driver will detect such eventsand will retry the associated commands. The worst-case effect is a negligible drop in performance.
All drive counters are persistent across node reboots and drive resets and can only be cleared bypower-cycling the drives. Host adapter counters, for example underruns, are reset with each reboot.
SUB-COMMANDS: fcal_statsThe Fibre Channel host adapter driver maintains statistics on various error conditions, exceptionconditions, and handler code paths executed. In general, interpretation of the fields requiresunderstanding of the internal workings of the driver. However, some of the counts kept on a per drivebasis, (for example: device_underrun_cnt, device_overrun_cnt, device_timeout_cnt) may be helpful inidentifying potentially problematic drives.
Counts are not persistent across node reboots.
SUB-COMMANDS: device_mapA Fibre Channel loop, as the name implies, is a logically closed loop from a frame transmissionperspective. Consequently, signal integrity problems caused by a component upstream will be seen asproblem symptoms by components downstream.
The relative physical position of drives on a loop is not necessarily directly related to their loop IDs(which are in turn determined by the drive shelf IDs). The device_map sub-command is helpfultherefore in determining relative physical position on the loop.
Two pieces of information are displayed, (a) the physical relative position on the loop as if the loop wasone flat space, and (b) the mapping of devices to shelves, to aid in quick correlation of disk ID withshelf tenancy.
EXAMPLE OF USEDiagnosing a possible problem using fcstat
Suppose a running node is experiencing problems indicative of loop signal integrity problems. Forexample, the syslog shows SCSI commands being aborted (and retried) due to frame parity/CRC errors.
Data ONTAP® 8.2 Commands: Manual Page Reference for 7-Mode, Volume 1 213
fcstat
To isolate the faulty component on this loop, we collect the output of link_stats and device_map.
toaster> fcstat link_stats 4
Loop Link Underrun Loss of Invalid Frame In Frame Out ID Failure count sync CRC count count count count count 4.29 0 0 180 0 787 2277 4.28 0 0 26 0 787 2277 4.27 0 0 3 0 787 2277 4.26 0 0 13 0 788 2274 4.25 0 0 27 0 779 2269 4.24 0 0 2 0 787 2277 4.23 0 0 11 0 786 2274 4.22 0 0 83 0 786 2274 4.21 0 0 3 0 786 2274 4.20 0 0 11 0 786 2274 4.19 0 0 14 0 779 2277 4.18 0 0 26 0 786 2274 4.17 0 0 10 0 787 2274 4.16 0 0 90 0 779 2269 4.45 0 0 12 0 183015 179886 4.44 0 0 16 0 1830107 17990797 4.43 0 0 7 11 1829974 17988806 4.42 0 0 13 33 1968944 18123526 4.41 0 0 14 23 1843636 17989836 4.40 0 0 13 11 1828782 17990036 4.39 0 0 14 138 4740596 18459648 4.38 0 0 11 27 1832428 17133866 4.37 0 0 43 22 1839572 17994200 4.36 0 0 13 130 4740446 18468932 4.35 0 0 11 23 1844301 17994200 4.34 0 0 14 25 1832428 17133866 4.33 0 0 26 29 1839572 17894220 4.32 0 0 110 31 1740446 18268912 4.61 0 0 50 23 1844301 17994200 4.60 0 0 12 21 1830150 18188148 4.59 0 0 16 19 1830107 17990997 4.58 0 0 7 27 1829974 17988904 4.57 0 0 13 25 1968944 18123526 4.50 0 0 14 19 1843636 17889830 4.49 0 0 13 22 1828782 18090042 4.48 0 0 114 130 4740596 18459648 4.ha 0 0 1 0 396255820 51468458
toaster> fcstat device_map 4
214 Data ONTAP® 8.2 Commands: Manual Page Reference for 7-Mode, Volume 1
fcstat
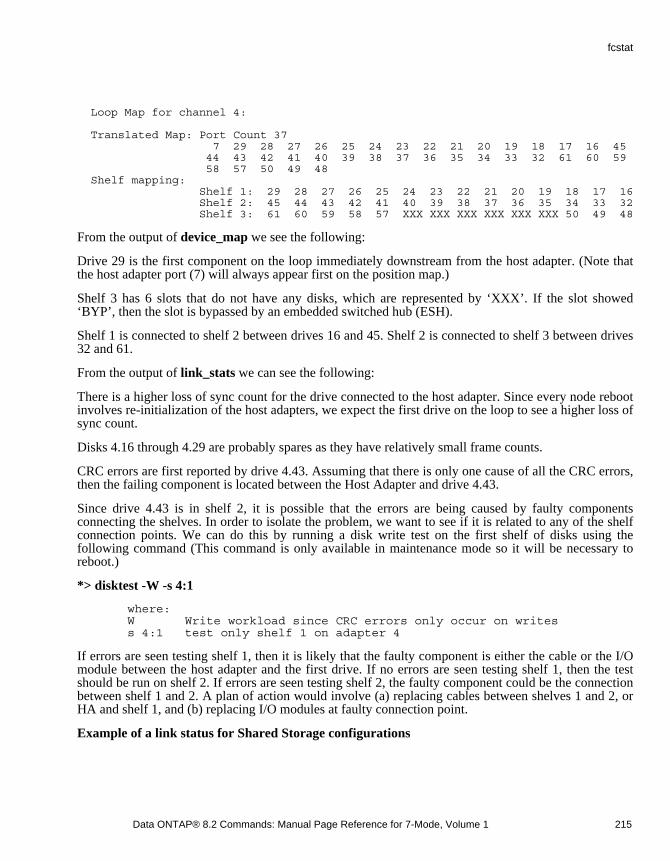
Loop Map for channel 4:
Translated Map: Port Count 37 7 29 28 27 26 25 24 23 22 21 20 19 18 17 16 45 44 43 42 41 40 39 38 37 36 35 34 33 32 61 60 59 58 57 50 49 48 Shelf mapping: Shelf 1: 29 28 27 26 25 24 23 22 21 20 19 18 17 16 Shelf 2: 45 44 43 42 41 40 39 38 37 36 35 34 33 32 Shelf 3: 61 60 59 58 57 XXX XXX XXX XXX XXX XXX 50 49 48
From the output of device_map we see the following:
Drive 29 is the first component on the loop immediately downstream from the host adapter. (Note thatthe host adapter port (7) will always appear first on the position map.)
Shelf 3 has 6 slots that do not have any disks, which are represented by ‘XXX’. If the slot showed‘BYP’, then the slot is bypassed by an embedded switched hub (ESH).
Shelf 1 is connected to shelf 2 between drives 16 and 45. Shelf 2 is connected to shelf 3 between drives32 and 61.
From the output of link_stats we can see the following:
There is a higher loss of sync count for the drive connected to the host adapter. Since every node rebootinvolves re-initialization of the host adapters, we expect the first drive on the loop to see a higher loss ofsync count.
Disks 4.16 through 4.29 are probably spares as they have relatively small frame counts.
CRC errors are first reported by drive 4.43. Assuming that there is only one cause of all the CRC errors,then the failing component is located between the Host Adapter and drive 4.43.
Since drive 4.43 is in shelf 2, it is possible that the errors are being caused by faulty componentsconnecting the shelves. In order to isolate the problem, we want to see if it is related to any of the shelfconnection points. We can do this by running a disk write test on the first shelf of disks using thefollowing command (This command is only available in maintenance mode so it will be necessary toreboot.)
*> disktest -W -s 4:1
where: W Write workload since CRC errors only occur on writes s 4:1 test only shelf 1 on adapter 4
If errors are seen testing shelf 1, then it is likely that the faulty component is either the cable or the I/Omodule between the host adapter and the first drive. If no errors are seen testing shelf 1, then the testshould be run on shelf 2. If errors are seen testing shelf 2, the faulty component could be the connectionbetween shelf 1 and 2. A plan of action would involve (a) replacing cables between shelves 1 and 2, orHA and shelf 1, and (b) replacing I/O modules at faulty connection point.
Example of a link status for Shared Storage configurations
Data ONTAP® 8.2 Commands: Manual Page Reference for 7-Mode, Volume 1 215
fcstat
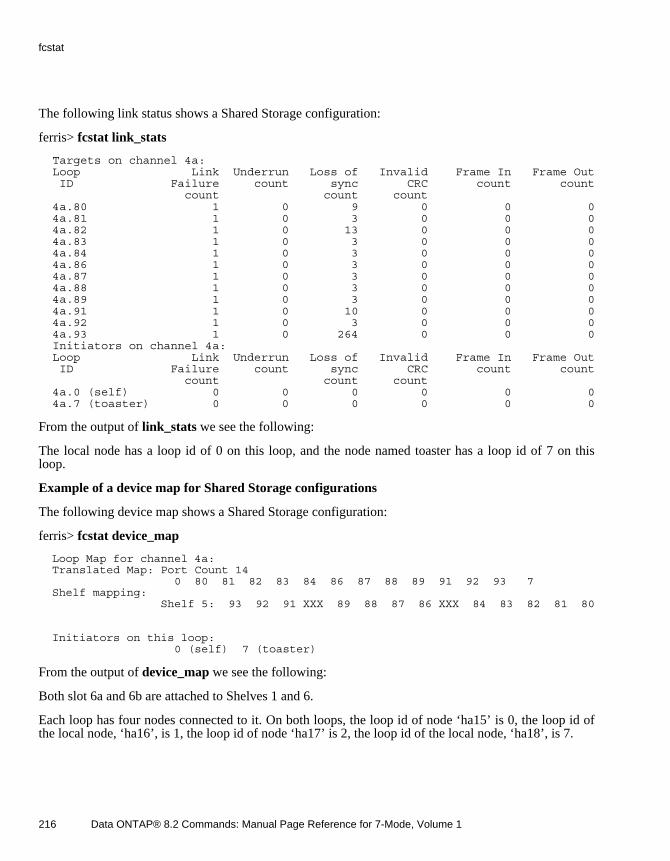
The following link status shows a Shared Storage configuration:
ferris> fcstat link_stats
Targets on channel 4a: Loop Link Underrun Loss of Invalid Frame In Frame Out ID Failure count sync CRC count count count count count 4a.80 1 0 9 0 0 0 4a.81 1 0 3 0 0 0 4a.82 1 0 13 0 0 0 4a.83 1 0 3 0 0 0 4a.84 1 0 3 0 0 0 4a.86 1 0 3 0 0 0 4a.87 1 0 3 0 0 0 4a.88 1 0 3 0 0 0 4a.89 1 0 3 0 0 0 4a.91 1 0 10 0 0 0 4a.92 1 0 3 0 0 0 4a.93 1 0 264 0 0 0 Initiators on channel 4a: Loop Link Underrun Loss of Invalid Frame In Frame Out ID Failure count sync CRC count count count count count 4a.0 (self) 0 0 0 0 0 0 4a.7 (toaster) 0 0 0 0 0 0
From the output of link_stats we see the following:
The local node has a loop id of 0 on this loop, and the node named toaster has a loop id of 7 on thisloop.
Example of a device map for Shared Storage configurations
The following device map shows a Shared Storage configuration:
ferris> fcstat device_map
Loop Map for channel 4a: Translated Map: Port Count 14 0 80 81 82 83 84 86 87 88 89 91 92 93 7 Shelf mapping: Shelf 5: 93 92 91 XXX 89 88 87 86 XXX 84 83 82 81 80
Initiators on this loop: 0 (self) 7 (toaster)
From the output of device_map we see the following:
Both slot 6a and 6b are attached to Shelves 1 and 6.
Each loop has four nodes connected to it. On both loops, the loop id of node ‘ha15’ is 0, the loop id ofthe local node, ‘ha16’, is 1, the loop id of node ‘ha17’ is 2, the loop id of the local node, ‘ha18’, is 7.
216 Data ONTAP® 8.2 Commands: Manual Page Reference for 7-Mode, Volume 1
fcstat

Example of a device map for switch attached drives
The following device map shows a configuration where a set of shelves is connected via a switch:
toaster> fcstat device_map
Loop Map for channel 9: Translated Map: Port Count 43 7 32 33 34 35 36 37 38 39 40 41 42 43 44 45 16 17 18 19 20 21 22 23 24 25 26 27 28 29 64 65 66 67 68 69 70 71 72 73 74 75 76 77 Shelf mapping: Shelf 1: 29 28 27 26 25 24 23 22 21 20 19 18 17 16 Shelf 2: 45 44 43 42 41 40 39 38 37 36 35 34 33 32 Shelf 4: 77 76 75 74 73 72 71 70 69 68 67 66 65 64
Loop Map for channel sw2:0: Translated Map: Port Count 15 126 93 92 89 91 90 88 87 86 85 84 83 80 82 81
Shelf mapping: Shelf 5: 93 92 91 90 89 88 87 86 85 84 83 82 81 80
From the output of device_map we see the following:
The first set of shelves is connected to a host adapter in slot 9.
The disks of shelf 5 are connected via a switch ‘sw2’ at its port 0. The switch port is 126 and appearsfirst in the translated map.
HA CONSIDERATIONSStatistics are maintained symmetrically for primary and partner loops.
Data ONTAP® 8.2 Commands: Manual Page Reference for 7-Mode, Volume 1 217
fcstat
fctestNAMEfctest - Tests Fibre Channel environment.
SYNOPSISfctest [ -B ] [ -t minutes ] [ -v ] [ adapter ]
fctest -T [ -t minutes ] [ -v ] adapter
fctest [ -R ] [ -W ] [ -A ] [ -V ] [ -B ] [ -t minutes ] [ -n sects ] [ -v ] [ -s <shelf-list> ] [ -d <disk-list> ] [ -a <adapter-list> ]
DESCRIPTIONUse the fctest command to test Fibre Channel adapters and disks on an appliance. This commandprovides a report of the integrity of your Fibre Channel environment. It is only available in maintenancemode. By default, it takes about 5 minutes to complete.
The -R option executes a sequential read test with optionally specified large block size (default is 1024kb per I/O).
The -W option executes a sequential write test with optionally specified large block size (default is 1024kb per I/O).
The -A option executes a test that alternates between writes and reads with optionally specified largeblock size (default is 1024 kb per I/O). No data verification is performed.
The -V option executes a sequential write verify test which uses 4 kb per I/O operation. This is identicalto the way fctest would function on previous releases.
The -T option executes a test that alternates between writes and reads with varying I/O sizes. It alsosteps through permutations of shelves on the specified loop. If -t minutes is specified, each iteration ofthe test will run for the specified time. This is a continuous test and will run until stopped via ^C.
The -n option is used to optionally specify the number of sectors to be read for each I/O of the -R,-A, or-W option. The number of sectors used by the -V command is fixed at 8 (4 kb) and cannot be altered.
The -d option allows for running fctest over a specific set of disks in the system by specifying a disk listof the form: <disk-name1> <disk-name2>
The -s option allows for running fctest over all disks contained in a specific shelf by specifying a shelflist of the form: <a>:<m> [<b>:<n> ...] where <m> and <n> are integer shelf ids and <a> and <b> arethe PCI slot numbers of the Fibre Channel Adapter(s) the shelves are connected to. (On board adapter isslot 0a.). Hint: Use fcadmin device_map to get slot locations.
The -a option allows for running fctest over a specific set of Fibre Channel adapters in the system byspecifying an adapter list of the form: <slot1> <slot2> ... <slotN>.
218 Data ONTAP® 8.2 Commands: Manual Page Reference for 7-Mode, Volume 1
fctest
If the -v option is specified, the output is verbose.
If the -B option is specified, disks attached to the Fibre Channel loop via their B ports will also betested.
By default, the test runs for about 5 minutes. However, if the [ -t minutes ] option is used, the test willrun for the specified duration. If [ -t 0 ] is specified, the test will run CONTINUOUSLY until stoppedwith a ^C.
If the adapter or disk-list, adapter-list and shelf-list arguments are missing, all Fibre Channel adaptersand disks in the system are tested. Otherwise, only the specified adapter and disks attached to it aretested.
When finished, fctest prints out a report of the following values for each Fibre Channel adapter tested:
1. Number of times loss of synchronization was detected in that adapter’s Fibre Channel loop.
2. Number of CRC errors found in Fibre Channel packets.
3. The total number of inbound and outbound frames seen by the adapter.
4. A "confidence factor" on a scale from 0 to 1 that indicates the health of your Fibre Channel system ascomputed by the test. A value of 1 indicates that no errors were found. Any value less than 1 indicatesthere are problems in the Fibre Channel loop that are likely to interfere with the normal operation ofyour appliance.
If the confidence factor is reported as less than 1, please run the Config Advisor tool to verify thecabling and contact NetApp technical support.
The actual arithmetic that is used to compute the confidence factor is as follows:
The number of Fibre Channel errors is obtained by adding the number of underrun, CRC,Synchronization and link failure errors with all errors weighted the same.
The allowable number of errors by the Fibre Channel protocol is calculated by adding Fibre Channelframes (inbound + outbound) and then multiplying by 2048 bytes per frame and dividing by the BER of1e-12 converted to bytes at 1e-11.
The confidence factor is calculated as follows:
if total errors = 0, then confidence factor = 1.0
if total errors < allowable errors, then confidence factor = 0.99
if total errors > allowable errors, then confidence factor is decremented by .01 for each error seen whichthe protocol error rate does not allow.
Data ONTAP® 8.2 Commands: Manual Page Reference for 7-Mode, Volume 1 219
fctest

HA CONSIDERATIONSIn an HA configuration, only disks on a node’s primary loop (the A loop) are tested, unless the -Boption is specified. If -B is specified, disks on the B loop are tested as well.
EXAMPLESThe following command runs fctest for 5 minutes doing a sequential alternating write and read test inverbose mode on all Fibre Channel adapters in the system, while testing only those disks which areattached via their A ports:
fctest -v
The following command runs fctest for an hour doing a sequential write test in verbose mode, using1024 kb I/O blocks while testing disks attached to adapter 8 via both A and B ports:
fctest -W -v -B -t 60 -a 8
The following command runs fctest for 5 minutes doing a sequential read test on all disks in shelf 0 onadapter 7:
fctest -R -s 7:0
The following command runs fctest continuously (until stopped) doing a sequential write test of 512 kbI/O’s to all disks on shelf 1 on adapter 7, shelf 2 on adapter 7, disks 7.0 and 7.1 and all disks on adapter8:
fctest -W -n 1024 -t 0 -d 7.0 7.1 -s 7:1 7:2 -a 8
The following command runs fctest continuously (until stopped) doing an alternating sequentialwrite/read test with varying I/O sizes across all shelf permutations in the loop attached to adapter 7 for 4minutes on each iteration:
fctest -T -t 4 7
220 Data ONTAP® 8.2 Commands: Manual Page Reference for 7-Mode, Volume 1
fctest
fcviNAMEna_fcvi - Commands for managing Fibre Channel Virtual Interface adapters and the FCVI protocol
SYNOPSISfcvi command argument ...
DESCRIPTIONThe fcvi family of commands manages the Fibre Channel Virtual Interface adapters and the FCVIprotocol. These commands can be used to ping a remote FC port and to list all the logged in ports.
USAGEfcvi ping adapter address
Sends an ECHO ELS frame from the Fibre Channel Virtual Interface adapter to the specified addresslocation. The address is a Fibre Channel port identifier 0xXXXXXX where X is a hexadecimal value ora Fibre Channel world wide port name of the form XX:XX:XX:XX:XX:XX:XX:XX where X is ahexadecimal value. This command will send at-most three ELS ECHO frames one per second and printsone line of output for every response it receives and computes the round-trip time and frame lossstatistics. The frame size will be 64 bytes. The payload will carry special pattern to verify the signalintegrity of the Fibre Channel connection.
fcvi logins adapter
Lists all the ports to which the Fibre Channel Virtual Interface adapter logs in. It prints Fibre Channelport identifier, Fibre Channel world wide port name and the logged in states of each port.
SEE ALSOna_sysconfig(1),
Data ONTAP® 8.2 Commands: Manual Page Reference for 7-Mode, Volume 1 221
fcvi
fileNAMEna_file - Manages individual files.
SYNOPSISfile
file fingerprint [-a {md5 | sha-256}] [-m] [-d] [-x] <path>
file reservation <path> [ enable | disable ]
DESCRIPTIONThe file command is used for special options and features on files.
USAGEThe following commands are available under file:
fingerprint reservation
file fingerprint [-a {md5 | sha-256}] [-m] [-d] [-x] <path>
fingerprint subcommand generates fingerprint of the file specified in path. Fingerprint is calculatedusing either md5 or sha-256 message digest algorithm.
Fingerprint is calculated over the file data or metadata or over both data and metadata.
Data fingerprint is calculated over file contents. Metadata fingerprint is calculated over the selectedattributes of the file. Attributes used for metadata fingerprint calculations are file type (file-type), filesize (file-size), file crtime (creation-time), file mtime (modified-time), file ctime (changed-time), fileretention time (retention-time, is-wraparound), file uid (ownerid), file gid (group-id). File retention timeis applicable to worm protected files only. Fingerprints are base64 encoded.
[-a] selects digest algorithm used for fingerprint computation. Possible values are sha-256 or md5.Default value is sha-256.
[-m] selects metadata scope for fingerprint computation.
[-d] selects data scope for fingerprint computation.
By default fingerprint is calculated over both data and metadata.
[-x] displays detailed information in XML format about file on which fingerprint is computed, volumeof the file and storage system on which file resides.
path is the file path.
222 Data ONTAP® 8.2 Commands: Manual Page Reference for 7-Mode, Volume 1
file

file reservation <path>
The reservation subcommand can be used to query the space reservation settings for the named file, orto modify those settings. With no further modifiers, the command will report the current setting of thespace reservation flag for a file. This tells whether or not space is reserved to fill holes in the file and tooverwrite existing portions of the file that are also stored in a snapshot. Specifying enable or disablewill turn the reservation setting on or off accordingly for the file.
For symlinks, the link is followed and the command operates on the link target.
EXAMPLESfile fingerprint -a md5 -m -d /vol/vol_worm/myfile
Calculate fingerprint for file /vol/vol_worm/myfile for both data and metadata using md5 hashalgorithm.
SEE ALSOna_vol(1),
Data ONTAP® 8.2 Commands: Manual Page Reference for 7-Mode, Volume 1 223
file
flexcacheNAMEflexcache - commands for administering FlexCache volumes
SYNOPSISflexcache help [subcommand]
flexcache fstat [-i] path
flexcache eject [-i] path [-f]
flexcache stats [ -C [volname]] [ -S [volname] [-c [clientname]]] [-z]
DESCRIPTIONThe flexcache command is used to administer FlexCache volumes. FlexCache volumes are cachedcopies of another volume (called the origin volume) located on a different system. The system thatcontains the FlexCache volumes is called the caching system, and the system that contains the originvolume is called the origin system. The FlexCache volume might contain only part of the contents ofthe origin volume.
Clients access the FlexCache volume the same way they access other volumes exported over NFS,except that only NFSv2 and NFSv3 are supported on FlexCache volumes. FlexCache must be licensedon the caching system, but no license is required on the origin system.
For more information on volumes, see na_vol(1).
USAGEflexcache help [subcommand]
Displays help on the specified flexcache subcommand.
flexcache fstat [-i] path
Display statistics about the object cached at path. path must be given as a canonical pathname. That is,to display information on the file bar, residing on cache volume foo, one would use the path /vol/foo/bar. fstat avoids fetching attribute information for files that aren’t already present in the cache.Note however that all directories given in path will be fetched in order to perform the required lookups.In addition to the traditional UNIX stat information, specific information used by the cachingalgorithms is displayed. In particular, the number of 4K blocks the file is consuming on the cachingvolume, and the last time the file was updated on the cache. fstat can be used on any path on theappliance. The -i option enables you to specify the inode rather than the file name (for example, flexcache fstat -i /vol/foo/inode:24529). The -i option can be useful if the file name is unknown or thepath to the file name cannot be resolved.
224 Data ONTAP® 8.2 Commands: Manual Page Reference for 7-Mode, Volume 1
flexcache

flexcache eject [-i] path [-f]
Eject the given file from the cache. The path must be specified in the same manner as in the flexcache fstat command. The -i option enables you to specify the inode rather than the file name (for example, flexcache eject -i /vol/foo/inode:24529). The -i option can be useful if the file name is unknown or thepath to the file name cannot be resolved. The -f option ejects the file without prompting the user forconfirmation.
flexcache stats [ -C [volname]] [ -S [volname] [-c [clientname]]] [-z]
The -C option on the caching node displays client side bandwidth savings and hit/miss statistics for volname, or for all mapped FlexCache volumes if volname is unspecified. The -S option on the originnode displays server side statistics for volname if one is supplied or for all origin volumes otherwise. If-c is also supplied, statistics for each caching client are also displayed. If clientname is specified theninformation for that client only is displayed. The -c option is only valid with the -S option and theglobal option flexcache.per_client_stats must be set to on. The -z option zeroes all the statistics for allFlexCache volumes.
SEE ALSOna_vol(1)
Data ONTAP® 8.2 Commands: Manual Page Reference for 7-Mode, Volume 1 225
flexcache
floppybootNAMEna_floppyboot - Describes the menu choices at the Boot Menu prompt.
SYNOPSIS1 Normal boot
2 Boot without /etc/rc
3 Change password
4 Clean configuration and initialize all disks OR Initialize owned disks OR Assign ownership andinitialize disks for root volume OR No disks assigned (use ‘disk assign’ from Maintenance Mode)
5 Maintenance Mode
6 Update flash from backup config
7 Install new software first
8 Reboot node
DESCRIPTIONThe term floppy boot refers to a Data ONTAP mode that is entered after booting by an alternatemethod (for example, boot_backup) or after hitting Control-C at the appropriate point during a normalboot.
After initiating the Boot Menu a list of choices is presented that allows the user to modify the bootprocess.
OPTIONSoption 1: Normal boot
This causes a normal full boot sequence to be done, after which the system behaves just as if the systemwhere booted without interruption.
option 2: Boot without /etc/rc
This does a normal boot, but bypasses execution of the /etc/rc file. Following this, the system is runningnormally, but without the configuration normally provided to it in the /etc/rc file. The commands in the/etc/rc file can be typed manually to bring the system to a fully operational state. Generally, thiscommand is used when there is something in the /etc/rc file which is causing the node to misbehave.Often, only an ifconfig command and an nfs on or a cifs restart command are done manually, allowingNFS or CIFS to become operational; then the /etc/rc file is edited to remove the offending lines, andthen the system is rebooted.
226 Data ONTAP® 8.2 Commands: Manual Page Reference for 7-Mode, Volume 1
floppyboot

option 3: Change password
This allows the node password to be changed. It is usually used when the administrator has forgottenthe current password, and so cannot use the online passwd command.
option 4: Clean configuration and initialize all disks
This commands zeroes all the node’s disks and re-enters the setup menu. It is typically used only once,at system installation time. This option asks for confirmation; once confirmed, there is no way toretrieve data previously on the disks. Zeroing the disks may take time (sometimes hours), depending onhow many disks there are, whether they need to be zeroed or not, and their capacity.
On systems with software-based disk ownership, option 4 initializes disks that are assigned to thesystem. If no disks have been assigned on systems other than V-Series systems, the software attempts toassign a minimum set of disks for the aggregate containing the root volume. After disks are assigned,they are zeroed and the user enters the setup menu. For V-Series systems the user must use option 5 toassign at least one disk (LUN) from the storage subsystem, then use option 4 to create the root volume.After disks are assigned, they are zeroed and the setup menu is entered.
option 5: Maintenance Mode
This enters a mode in which a small subset of commands is available, and is usually employed todiagnose hardware (often disk-related) problems. In maintenance mode, WAFL aggregates andtraditional volumes are recognized but are not used, the /etc/rc file is not interpreted, and few systemservices are started. NFS and CIFS cannot be used. Disk reconstructions do not occur. No filesystemupgrade occurs, even if the system is newer than the OS release previously installed.
option 6: Update flash from backup config
Restores system configuration data that has been lost due to a change in the boot device state. Thisoption is usually employed following a CompactFlash boot device replacement. The system bootsnormally to load the WAFL root volume and retrieve the backup configuration data. After the backupconfiguration data is restored onto the boot device the boot process is interrupted and the systemautomatically reboots.
option 7: Install new software first
Allows the download and installation of a new OS release on the boot device before completely bootingthe system.
In order to download the install package a temporary network interface must be configured. If needed,the user is prompted to enter the network device name (for example, e0a) and the system automaticallyreboots. Following this the IP address, netmask, default gateway address and URL of the install packagemust be provided.
option 8: Reboot node
Allows the system to be rebooted from the Boot Menu. This option can be used with option 7 or at anytime the Boot Menu needs to be aborted.
Data ONTAP® 8.2 Commands: Manual Page Reference for 7-Mode, Volume 1 227
floppyboot
HA CONSIDERATIONSIt is generally recommended that High Availability be explicitly disabled by use of the cf disablecommand or that the other system be halted or powered off before entering the various Boot Menuchoices on the system. Failure to do this can sometimes result in takeovers by the other node while inthe Boot Menu; this is usually undesirable.
When using option 6 in a HA configuration the system can stop in the Waiting for Giveback state beforeloading the WAFL root volume and restoring the backup configuration data. When this happens a cf giveback must be done on the partner system. Note that this can be disruptive as the system willautomatically reboot to restore the backup configuration following the giveback.
SEE ALSOna_fcdiag(1), na_ifconfig(1), na_aggr(1)
228 Data ONTAP® 8.2 Commands: Manual Page Reference for 7-Mode, Volume 1
floppyboot
fpolicyNAMEna_fpolicy - configure file policies
SYNOPSISfpolicy
fpolicy help [ <command> ]
fpolicy create <PolicyName> <PolicyType>
fpolicy destroy <PolicyName>
fpolicy disable <PolicyName>
fpolicy enable <PolicyName> [-f]
fpolicy ext[ension] { exc[lude] | inc[lude] } { reset|show } <PolicyName>
fpolicy ext[ension] { exc[lude] | inc[lude] } { add|remove|set } <PolicyName> <ext>[,<ext>]*
fpolicy mon[itor] { add | remove | set } <PolicyName> [-p { cifs | nfs | cifs,nfs }] [-f] <op-spec>[,<op_spec>]*
fpolicy options <PolicyName> required [ on | off ]
fpolicy options <PolicyName> secondary_servers [<IP_address>[,<IP-address>]*]
fpolicy options <PolicyName> cifs_setattr [ on | off ]
fpolicy options <PolicyName> monitor_ads [ on | off ]
fpolicy options <PolicyName> reqcancel_timeout [ <timeout_in-secs> ]
fpolicy options <PolicyName> serverprogress_timeout [ <timeout-in-secs> ]
fpolicy options <PolicyName> cifs_disconnect_check [ on off ]
fpolicy servers show <PolicyName>
fpolicy servers show -I <IP-address>
fpolicy servers stop <PolicyName> <IP-address>
fpolicy show <PolicyName>
fpolicy vol[ume] { inc[lude] | exc[lude] } { reset | show | eval } <PolicyName>
Data ONTAP® 8.2 Commands: Manual Page Reference for 7-Mode, Volume 1 229
fpolicy
fpolicy vol[ume] { inc[lude] | exc[lude] } { add | remove | set } <PolicyName> <vol_spec>[,<vol_spec>]*
DESCRIPTIONThe fpolicy command enables control and configuration of file policies.
USAGEfpolicy
Displays FPolicy settings and provides summary information about policies.
fpolicy help [ <command> ]
Displays information about specific commands available in the FPolicy subsystem of the storagesystem. A list of commands, or syntax for a specific command, can be obtained.
fpolicy create <PolicyName> <PolicyType>
Creates a new policy. Policy names must be unique. The only file policy type supported is "screen" (filescreening).
fpolicy destroy <PolicyName>
Destroys an existing policy.
fpolicy disable <PolicyName>
Disables a policy.
fpolicy enable <PolicyName> [-f]
Enables a policy. The -f force flag forces the policy to be enabled even if there are no servers availableto enforce the policy.
fpolicy ext[ension] { exc[lude] | inc[lude] } { reset|show } <PolicyName>fpolicy ext[ension] { exc[lude] | inc[lude] } { add|remove|set } <PolicyName> <ext>[,<ext>]*
<ext>[,<ext>]* is a comma separated list of extensions. The maximum length allowed for a singleextension is 260 characters. Upto 255 extensions can be specified in a list.The include list determines ifa given file should be screened. The exclude list determines if a given file should not be screened. If anextension is listed on both the exclude and the include list, files with that extension are not screened. Ifan extension is not listed on either the include list or the exclude list, files with that extension are notscreened. The character ? is a wild card. When it is not the last character, it matches any singlecharacter. When it is the last character, or part of a trailing sequence of ? , it matches any number ofcharacters (0, 1 or more).
fpolicy extensions { include | exclude } show <PolicyName>
230 Data ONTAP® 8.2 Commands: Manual Page Reference for 7-Mode, Volume 1
fpolicy
Displays the current file extension list.
fpolicy extensions { include | exclude } reset <PolicyName>
Resets the file extension list to the default list.
fpolicy extensions { include | exclude } set <PolicyName> <ext>[,<ext>]*
Specifies a new extension list which replaces the current list.
fpolicy extensions { include | exclude } add <PolicyName> <ext>[,<ext>]*
Adds new entries to the current file extension list.
fpolicy extensions { include | exclude } remove <PolicyName> <ext>[,<ext>]*
Removes entries from the current file extension list.
fpolicy mon[itor] { add | remove | set } <PolicyName> [-p { cifs | nfs | cifs,nfs }] [-f] <op-spec>[,<op_spec>]*
Typically the list of operations monitored by a file policy is set by an FPolicy server for the policy.However, the list of operations can be configured with the fpolicy monitor command. Note that if anFPolicy server sets the list after this command is entered, the FPolicy server will override the effect ofthis command. Operations may be added or removed from an existing list of operations, or the existinglist may be discarded and set to a new list. Note that some FPolicy servers may not function correctly iftheir set of designated operations is changed. For example, an FPolicy server may wish to match fileopens with file closes and malfunction if it stops receiving notifications of files that are closed. Bydefault all protocols are selected. A subset of protocols can be chosen by providing a comma separatedlist following the -p flag. The -f force flag causes the command to be executed even if there are noservers available to enforce the policy. <op-spec>[,<op_spec>]* is a comma separated list ofoperations for which the policy will receive notifications. Supported values are all, none, close, create, create_dir, delete, delete_dir, getattr, link, lookup, open, read, rename, rename_dir, setattr, symlink, write. Note: Selecting read or write is rarely desirable. Notification for operations which occurfrequently have a detrimental effect on performance.
fpolicy options <PolicyName>
Displays the current values of the file policy options.
fpolicy options <PolicyName> required [ on | off ]
Displays the current setting for the required option. If set to "on", user requests are denied if a filepolicy server is not available to implement the policy. If set to "off", user requests are allowed when it isnot possible to apply the policy to the file because no file policy server is available.
fpolicy options <PolicyName> secondary_servers [ <server_list> ]
Displays the current setting for the secondary_servers option. If a comma separated list of IP addressesis provided, the current list is replaced by the new list. The storage system avoids the use of secondaryservers to enforce file policies unless there are no primary servers available.
Data ONTAP® 8.2 Commands: Manual Page Reference for 7-Mode, Volume 1 231
fpolicy

fpolicy options <PolicyName> cifs_setattr [ on | off ]
Displays the current setting for the cifs_setattr option. If set to "on" then CIFS requests to change filesecurity descriptor will be screened by the policy. File security descriptor changes that will be screenedare file owner change, file primary owner group change, changes in SACL and DACL. If set to "off"cifs security descriptor change requests will not be screened by the policy. By default option is set to"off".
fpolicy options <PolicyName> reqcancel_timeout [ <timeout_in-secs> ]
Set or display the value of reqcancel_timeout for the policy. This is the maximum time allowed to anFPolicy server to screen a request. Upon timeout, the screen request is cancelled from the FPolicyserver. A value of 0 implies that the feature is disabled. The default value is 0.
fpolicy options <PolicyName> serverprogress_timeout [ <timeout-in-secs> ]
Set or display the value of serverprogress_timeout for the policy. This is the maximum time anFPolicy server can remain unresponsive while processing the maximum allowed number of screenrequests. Upon timeout, the unresponsive FPolicy server will be disconnected from the storage system.A value of 0 implies that the feature is disabled. The default value is 0.
fpolicy options <PolicyName> cifs_disconnect_check [ on off ]
Set or display the value of cifs_disconnect_check for the policy. If this option is enabled, CIFSrequests associated with disconnected sessions will not be sent to FPolicy servers for screening. Thedefault setting for this option is "off".
fpolicy options <PolicyName> monitor_ads [ on | off ]
Displays the current setting for the monitor_ads option. If set to "on", the CIFS requests for alternatedata streams (ADS) are monitored by the policy. If set to "off", the policy will not monitor any cifsrequests for alternate data streams. NFS requests for alternate data streams is not supported by FPolicy.
fpolicy servers show <PolicyName>
Displays a list of FPolicy servers which have offered to apply file policies for the storage system. EachFPolicy server that registers for a policy can enable optional parameters.
fpolicy servers show -I <IP-address>
Displays a list of FPolicy servers connected to the storage system from the given IP address.
fpolicy servers show <PolicyName> and fpolicy servers show -I <IP-address> will print all the optionsenabled by the FPolicy server in the "Options enabled:" field. Following are the options that can beenabled by the FPolicy server:
version2FPolicy server is using version 2 of the FPolicy interface. Version 2 enables read redirect and supportfor NFS version 4 protocol (See the SDK for more details).
232 Data ONTAP® 8.2 Commands: Manual Page Reference for 7-Mode, Volume 1
fpolicy
size_and_ownerFile size and owner information is included with the the FPolicy event notification. Size reported to theFPolicy server will be the logical file size. Owner information will be reported in Windows SID format.If the file has windows security descriptor, the owner information will be based on it. If the file has nowindows security descriptor, storage system will try to get an equivalent windows SID from Unix UIDinformation and report it to the FPolicy server. If this translation of windows SID from Unix UID fails,storage system will report the well known CREATOR_OWNER SID to the FPolicy server.
async FPolicy server needs asynchronous screen request notifications. When FPolicy server registersfor asynchronous notifications, storage system will notify FPolicy server about the file events as andwhen they occur but does not wait for the response from FPolicy server. The storage system willcomplete the cifs/nfs request immediately after sending FPolicy screen notification to the FPolicyserver.
snapid FPolicy server needs the snapshot ID of the file being accessed. A snapshot ID is a persistentidentifier that can be used to identify a snapshot of a a file system. The active filesystem has a distinctsnapshot ID.
NTERR-supportWhen Fpolicy server sets this value to true, it will send NT errors that can be received by CIFS clients.The NT error provides details regarding the reason for the service denial. If this parameter is set to‘false’ by the Fpolicy server, then the error returned is always ‘Access Denied’ for any service denial.The default value for this option is ‘false’.
fpolicy show <PolicyName>
Displays status for <PolicyName> which will include operations configured for the policy, extentionsmonitored by the policy, FPolicy servers registered for the policy and the options enabled by eachFPolicy server. It will indicate the total number of requests screened by the FPolicy server, number ofrequests blocked by the FPolicy server and number of requests blocked locally for the given policy.This CLI will also inform that FPolicy servers registered for this policy need inode to pathnametranslation for NFS screen requests and if they need notifications for offline files only.
fpolicy servers stop <PolicyName> <IP-address>
Terminates the connection between the storage system and the FPolicy server registered for the filepolicy <PolicyName> from <IP-address>.
fpolicy vol[ume] { inc[lude] | exc[lude] } { reset | show | eval } <PolicyName>fpolicy vol[ume] { inc[lude] | exc[lude] } { add | remove | set } <PolicyName> <vol_spec>[,<vol_spec>]*
<vol_spec>[,<vol_spec>]* is a comma separated list of storage system volumes. Regular expressionsincluding wildcard characters ? and * are also supported. The include volume list specifies whichvolumes the policy applies to. The exclude volume list specifies which volumes are not monitored bythe policy. When an exclude list is specified any volumes not excluded are controlled by the policy. Ifboth lists are specified for a policy the exclude list takes precedence and the include list is ignored. Ifneither volume list is set, the policy is applied to all volumes.
Data ONTAP® 8.2 Commands: Manual Page Reference for 7-Mode, Volume 1 233
fpolicy
fpolicy vol[ume] { inc[lude] | exc[lude] } add <PolicyName> <vol_spec>[,<vol_spec>]*
Adds new entries to the current volume list.
fpolicy vol[ume] { inc[lude] | exc[lude] } remove <PolicyName> <vol_spec>[,<vol_spec>]*
Removes entries from the current volume list.
fpolicy vol[ume] { inc[lude] | exc[lude] } set <PolicyName> <vol_spec>[,<vol_spec>]*
Specifies a new volume list which replaces the current list.
fpolicy vol[ume] { inc[lude] | exc[lude] } reset <PolicyName>
Resets the volume list to an empty list.
fpolicy vol[ume] { inc[lude] | exc[lude] } show <PolicyName>
Displays the current volume list.
fpolicy vol[ume] { inc[lude] | exc[lude] } eval <PolicyName>
Prints the list of volumes that this policy applies to.
EXAMPLE(S) fpolicy extensions include set p1 C??
This command will cause storage system to screen the files ABC.C, ABC.CPP, ABC.C++,ABC.CPLUS and so on for policy p1.
fpolicy extensions include set p1 C?
This command will cause storage system to screen the files ABC.C, ABC.CP and so, but notABC.CPP for policy p1.
fpolicy extensions include set p1 A?C
This command will cause storage system to screen the files XYZ.ABC, XYZ.ACC and so but notXYZ.APP for policy p1.
fpolicy extensions include set p1 ?
This command will cause storage system to screen the files ABC.A, ABC.C, ABC and so on, butnot ABC.AC p1.
VFILER CONSIDERATIONSWhen run from a vFiler context, (e.g. via the vfiler run command), fpolicy operates on the affectedvFiler.
234 Data ONTAP® 8.2 Commands: Manual Page Reference for 7-Mode, Volume 1
fpolicy

SEE ALSOna_vfiler(1)
Data ONTAP® 8.2 Commands: Manual Page Reference for 7-Mode, Volume 1 235
fpolicy

fsecurityNAMEna_fsecurity - Summary of fsecurity commands
SYNOPSISCommand Summary
This is a list of the subcommands of the fsecurity command.
fsecurity help Displays a list of fsecurity commands or provides additional information about a specifiedfsecurity command.
fsecurity apply Creates and applies a security job based on a supplied definition file.
fsecurity status Displays the general status of security jobs or more detailed status of a particular job.
fsecurity cancel Cancels outstanding security jobs that have not yet completed.
fsecurity show Displays the security settings on files and directories.
fsecurity remove-guardRemoves the storage-level security from a volume or a qtree.
VFILER CONSIDERATIONSWhen run from a vfiler context, (e.g. via the vfiler run command), fsecurity operates on the concernedvfiler.
SEE ALSO
na_fsecurity_cancel(1),
na_fsecurity_remove-guard(1), na_vfiler(1)
236 Data ONTAP® 8.2 Commands: Manual Page Reference for 7-Mode, Volume 1
fsecurity
fsecurity_applyNAMEna_fsecurity_apply - Creates a security job based on a definition file and applies it to the file system.
SYNOPSISfsecurity apply <definition file path> [<options>]
DESCRIPTIONThe fsecurity apply command reads a file generated in a valid fsecurity security definition format, eachline of which includes a full path to an object in the file system and the desired security for that object(and possibly child objects). Each line represents a task, while the entire contents of the file represent asingle job. The tasks within a job are guaranteed to run sequentially. Jobs themselves runasynchronously and will not tie up the node console while they run.
This job is given an ID which can be used with the fsecurity status and fsecurity cancel commands toretrieve the status or cancel the job, respectively. Once the job is complete, the result will be reported tothe console.
NOTE: Security jobs may run simultaneously. It is possible to generate two security jobs that conflictwith each other by defining common paths or subpaths within the tasks and running both jobssimultaneously. This behavior is no different from an external client changing security settings while ajob is running, but this should be taken into account when generating these files and determining whenand how they are applied.
OPTIONS-c = Check job validity without actually applying the contents
-i = Ignore errors and continue job processing
-v = Display each task within the job as it is generated
EXAMPLES toaster> fsecurity apply /security.conf Added security job 1001.
fsecurity: Job 1001 (/security.conf) completed successfully.
toaster> fsecurity apply /security.conf -c Definition validated successfully.
toaster> fsecurity apply /security.conf -v Task 1, NTFS, Normal, Propagate, /vol/vol0/secure ... Added. Added security job 1001.
fsecurity: Job 1001 (/security.conf) completed successfully.
Data ONTAP® 8.2 Commands: Manual Page Reference for 7-Mode, Volume 1 237
fsecurity_apply
fsecurity_cancelNAMEna_fsecurity_cancel - Cancels outstanding fsecurity jobs
SYNOPSISfsecurity cancel { all | <job id> }
DESCRIPTIONThe fsecurity cancel command will stop all of the outstanding security jobs when all is specified. If aspecific job id is specified, only that job will be stopped.
If a job is currently running when it receives the stop request, it will stop at the earliest opportunity andprint a message to the console that helps determine how much of the job had been completed before itwas stopped.
EXAMPLES toaster> fsecurity cancel all Successfully cancelled 2 security job(s).
toaster> fsecurity cancel 1001 fsecurity: Job 1001 (/security.conf) failed: Interrupted by user prior to task 2.
238 Data ONTAP® 8.2 Commands: Manual Page Reference for 7-Mode, Volume 1
fsecurity_cancel
fsecurity_helpNAMEna_fsecurity_help - Displays a description and usage information for fsecurity commands
SYNOPSISfsecurity help [<command>]
DESCRIPTIONThe fsecurity help command displays the list of fsecurity commands. If a command is specified, adescription and usage information for that command will be displayed.
Data ONTAP® 8.2 Commands: Manual Page Reference for 7-Mode, Volume 1 239
fsecurity_help
fsecurity_remove-guardNAMEna_fsecurity_remove-guard - Removes the Storage-Level Access Guard from a volume or qtree
SYNOPSISfsecurity remove-guard <path>
DESCRIPTIONThe fsecurity remove-guard command will clear the StorageLevel Access Guard from the specifiedvolume or qtree. This has no affect on the standard file-level security (such as the NTFS securitydescriptor or mode bits) that is present on the object.
EXAMPLES toaster> fsecurity remove-guard /vol/vol0/secure
240 Data ONTAP® 8.2 Commands: Manual Page Reference for 7-Mode, Volume 1
fsecurity_remove-guard
fsecurity_showNAMEna_fsecurity_show - Displays the security settings on files and directories
SYNOPSISfsecurity show [-v <volume>|-s <share>] <path> [<options>]
fsecurity show -v <volume> -i <inum> [<options>]
DESCRIPTIONThe fsecurity show command displays the full security information related to the target file ordirectory. Paths to volumes and qtrees (which are represented in the file system by directories) may bespecified as well. When specifying the path, wildcards may be used to list security for the contents of adirectory.
The Security style contains the security style of the qtree that the file or directory resides in. The Effective style will vary in Mixed qtree styles depending on which security style is currently active onthe object.
OPTIONS-c = Includes security descriptor control information in the results if an NTFS security descriptor ispresent on the object
-d = Includes directories within the results when using a wildcard to list the security for the contentsof a directory
-l = Disables all name lookup attempts when displaying security information, which may be helpfulwhen those services are unavailable
-x = Expands values such as the DOS attributes and ACE access masks to better describe theircontents
EXAMPLES toaster> fsecurity show /vol/vol0 [/vol/vol0 - Directory (inum 64)] Security style: NTFS Effective style: NTFS
DOS attributes: 0x0030 (---AD---)
Unix security: uid: 0 (root) gid: 0 (daemon)
Data ONTAP® 8.2 Commands: Manual Page Reference for 7-Mode, Volume 1 241
fsecurity_show

mode: 0777 (rwxrwxrwx)
NTFS security descriptor: Owner: BUILTIN\Administrators Group: BUILTIN\Administrators DACL: Allow - Everyone - 0x001f01ff (Full Control) Allow - Everyone - 0x10000000 - OI|CI|IO
242 Data ONTAP® 8.2 Commands: Manual Page Reference for 7-Mode, Volume 1
fsecurity_show
fsecurity_statusNAMEna_fsecurity_status - Displays the status of outstanding fsecurity jobs
SYNOPSISfsecurity status [<job id>]
DESCRIPTIONThe fsecurity status command displays the current status of any outstanding fsecurity jobs as well asthe completion status of the previous 15 jobs. If a job id is specified, more detailed status of thatparticular job will be displayed.
EXAMPLES toaster> fsecurity status [Active jobs] Job Status Current Total Type Subtype Mode Path 1002 Working 2 2 NTFS Normal Propagate /vol/vol0/secure 1003 - - - - - -
[History - Previous 15 jobs] Job Status Tasks Definition 1001 Success 1 /vol/vol0/templates/security-base.conf
toaster> fsecurity status 1002 [Status - Job 1002] Overall Status: Working Definition: /vol/vol0/templates/secure_ntfs.conf Task Status Type Subtype Mode Path 1 Success NTFS Normal Propagate /vol/vol0/ntfs 2 Working NTFS Normal Propagate /vol/vol0/secure
Data ONTAP® 8.2 Commands: Manual Page Reference for 7-Mode, Volume 1 243
fsecurity_status
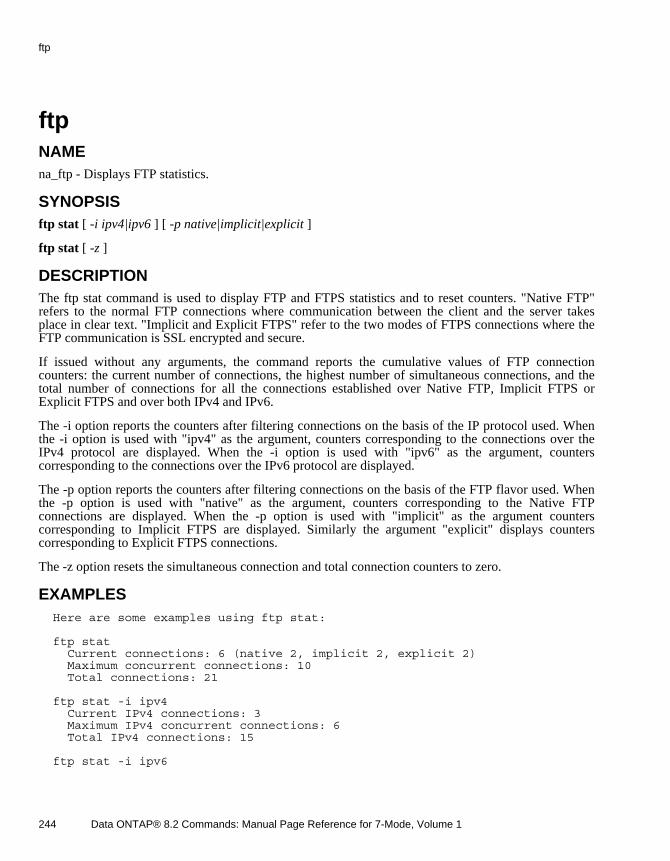
ftpNAMEna_ftp - Displays FTP statistics.
SYNOPSISftp stat [ -i ipv4|ipv6 ] [ -p native|implicit|explicit ]
ftp stat [ -z ]
DESCRIPTIONThe ftp stat command is used to display FTP and FTPS statistics and to reset counters. "Native FTP"refers to the normal FTP connections where communication between the client and the server takesplace in clear text. "Implicit and Explicit FTPS" refer to the two modes of FTPS connections where theFTP communication is SSL encrypted and secure.
If issued without any arguments, the command reports the cumulative values of FTP connectioncounters: the current number of connections, the highest number of simultaneous connections, and thetotal number of connections for all the connections established over Native FTP, Implicit FTPS orExplicit FTPS and over both IPv4 and IPv6.
The -i option reports the counters after filtering connections on the basis of the IP protocol used. Whenthe -i option is used with "ipv4" as the argument, counters corresponding to the connections over theIPv4 protocol are displayed. When the -i option is used with "ipv6" as the argument, counterscorresponding to the connections over the IPv6 protocol are displayed.
The -p option reports the counters after filtering connections on the basis of the FTP flavor used. Whenthe -p option is used with "native" as the argument, counters corresponding to the Native FTPconnections are displayed. When the -p option is used with "implicit" as the argument counterscorresponding to Implicit FTPS are displayed. Similarly the argument "explicit" displays counterscorresponding to Explicit FTPS connections.
The -z option resets the simultaneous connection and total connection counters to zero.
EXAMPLES Here are some examples using ftp stat:
ftp stat Current connections: 6 (native 2, implicit 2, explicit 2) Maximum concurrent connections: 10 Total connections: 21
ftp stat -i ipv4 Current IPv4 connections: 3 Maximum IPv4 concurrent connections: 6 Total IPv4 connections: 15
ftp stat -i ipv6
244 Data ONTAP® 8.2 Commands: Manual Page Reference for 7-Mode, Volume 1
ftp
Current IPv6 connections: 3 Maximum IPv6 concurrent connections: 4 Total IPv6 connections: 6
ftp stat -p native Current native connections: 2 Maximum native concurrent connections: 6 Total native connections: 12
ftp stat -p explicit Current explicit connections: 2 Maximum explicit concurrent connections: 2 Total explicit connections: 4
ftp stat -p implicit Current implicit connections: 2 Maximum implicit concurrent connections:3 Total implicit connections: 5
ftp stat -i ipv4 -p implicit Current implicit IPv4 connections: 1 Maximum implicit IPv4 concurrent connections: 2 Total implicit IPv4 connections: 3
ftp stat -z Current connections: 6 (native 2, implicit 2, explicit 2) Maximum concurrent connections: 10 Total connections: 21 FTP connection counters set to zero
ftp stat Current connections: 6 (native 2, implicit 2, explicit 2) Maximum concurrent connections: 0 Total connections: 0
SEE ALSO na_ftpd(1),
10 Oct 2003 na_ftp(1)
Data ONTAP® 8.2 Commands: Manual Page Reference for 7-Mode, Volume 1 245
ftp
ftpdNAMEna_ftpd - File transfer protocol daemon
SYNOPSISoptions ftpd.enable on
DESCRIPTIONFTPD is the Internet File Transfer Protocol (FTP) server process. The server uses the TCP protocol andlistens at the well-known port (21) for ftp.
RequestsThe FTP server currently supports the following FTP requests; case is not distinguished.
ABOR Aborts previous command.
ACCT Specifies account (ignored).
ALLO Allocates storage (without using space).
APPE Appends to a file.
AUTH Security mechanism
CCC Clears command channel.
CDUP Changes to parent of current working directory.
CWD Changes working directory.
DELE Deletes a file.
EPRT Specifies data connection port (IPv4 or IPv6).
EPSV Prepares for passive mode transfer (IPv4 or IPv6).
246 Data ONTAP® 8.2 Commands: Manual Page Reference for 7-Mode, Volume 1
ftpd

HELP Gives help information.
LIST Gives list files in a directory (ls -lg).
MKD Makes a directory.
MODE Specifies data transfer. mode
NLST Gives name list of files in directory (ls).
NOOP Does nothing.
PASS Specifies password.
PASV Prepares for server-to-server transfer.
PBSZ Protection buffer size
PORT Specifies data connection port.
PROT Data channel protection level.
PWD Prints the current working directory.
QUIT Terminates session.
RETR Retrieves a file.
RMD Removes a directory.
RNFR Specifies rename-from file name.
RNTO Specifies rename-to file name.
Data ONTAP® 8.2 Commands: Manual Page Reference for 7-Mode, Volume 1 247
ftpd
STOR Stores a file.
STOU Stores a file with a unique name.
STRU Specifies data transfer structure.
TYPE Specifies data transfer type.
USER Specifies user name.
XCUP Changes to parent of current working directory.
XCWD Changes working directory.
XMKD Makes a directory.
XPWD Prints the current working directory.
XRMD Removes a directory.
The remaining FTP requests specified in RFC 959 are recognized, but not implemented.
The FTP server aborts an active file transfer only when the ABOR command is preceded by a Telnet"Interrupt Process" (IP) signal and a Telnet "Synch" signal in the command Telnet stream, as describedin RFC 959.
The FTP server interprets file names according to the "globbing" conventions used by sh(1). Thisenables users to use the metacharacters: * ? [ ] { } ~.
The FTP server authenticates users according to two rules:
First, the user name must be in the password database, /etc/passwd, and have a password that is notNULL. A password must always be provided by the client before any file operations can be performed.
Second, if the user name is "anonymous" or "ftp", an entry for the user name ftp must be present inthe password and shadow files. The user is then allowed to log in by specifying any password -- byconvention this is given as the user’s email address (such as [email protected]). Do not specify avalid shell in the password entry of the ftp user, and do not give it a valid password (use NP in theencrypted password field of the shadow file).
248 Data ONTAP® 8.2 Commands: Manual Page Reference for 7-Mode, Volume 1
ftpd
For anonymous ftp users, the FTP server takes special measures to restrict the client’s accessprivileges. The server performs a chroot(2) command to the home directory of the "ftp" user.
DIAGNOSTICSFtpd logs all commands to the /etc/log/ftp.cmd file.
Ftpd logs all transfers to the /etc/log/ftp.xfer file.
FILES/etc/passwd/etc/log/ftp.cmd/etc/log/ftp.xfer
SEE ALSOPostel, Jon, and Joyce Reynolds, File Transfer Protocol (FTP), RFC 959, Network Information Center,SRI International, Menlo Park, Calif., October 1985.
Ford-Hutchison, Securing FTP with TLS, RFC 4217, IBM UK Ltd. October 2005.
Data ONTAP® 8.2 Commands: Manual Page Reference for 7-Mode, Volume 1 249
ftpd
haltNAMEna_halt - Stops the node.
SYNOPSIShalt [ -t <mins> ] [ -f ] [ -s ]halt [ -d <dump_string> ]
DESCRIPTIONhalt shuts the node down. The halt command has two forms. The first form flushes all data to disk, andperforms a clean shutdown. The second form dumps system core without flushing cached data.
NFS clients can maintain use of a file over a halt or reboot, although the node will fail to respondduring that time. CIFS, FCP, and iSCSI clients cannot safely maintain use of a file over a halt or reboot.If the node is running CIFS, FCP or iSCSI, you may use the -t option to specify the time beforeshutdown. If halt is invoked without -t, it displays the number of CIFS users, the
number of open CIFS files, the number of mapped LUNs and the number of connected FCP and iSCSIclients. Then it prompts you for the number of minutes to delay. cifs terminate automaticallynotifies all CIFS clients that a CIFS shut-down is scheduled in mins minutes, and asks them toclose their open files. CIFS files that are still open at the time the node halts will lose writes thathad been cached but not written. FCP and iSCSI will not notify clients, but will allowadministrators to confirm that the mapped LUNs are not in use. LUNs that are in use at the timethe node halts will result in client failures.
halt logs a message in /etc/messages to indicate that the node was halted on purpose.
OPTION-t mins Initiates a clean system shutdown after the indicated number of minutes. Applies only if thenode is running CIFS, FCP or iSCSI.
-f Applies only to nodes in a High Availability (HA) configuration. If you enter the halt -f commandon a node, its partner does not take over.
-s Performs a clean system shutdown. The behavior of this command is different across releases. InData ONTAP releases prior to 8.0.4 and 8.1.2 the end result of this command is to power off thecontroller. The user has to power on the controller using the RLM or SP. In Data ONTAP releases8.0.4, 8.1.2 and beyond, it will no longer power off the controller. Instead, it will halt at theLOADER prompt. For platforms that have FRU attention LEDs on the motherboard, Data ONTAPwill clear these LEDs when subsequently booted. This applies only to Data ONTAP 8.0 and later.
250 Data ONTAP® 8.2 Commands: Manual Page Reference for 7-Mode, Volume 1
halt

-d dump_stringDumps system core and halts the node. This results in a dirty shutdown; cached data will not beflushed to disk. The dump_string should indicate the reason for the core dump. Because it resultsin a dirty shutdown, the -d option generally should not be used for normal maintenance (seeNOTES below).
HA CONSIDERATIONSAfter you enter the halt command on a node in a HA configuration, the other node in the HAconfiguration automatically takes over the halted node. If you do not want takeover to happen, use the halt -f command.
The halt command is not available in partner mode. That is, you cannot enter the partner haltcommand on the live node after it takes over the failed partner. This is because a node that has beentaken over is no longer running and cannot be halted.
NOTESTo shut down the node for maintenance, use the first form of halt, since it does a clean shutdown. Thatis, halt [ -t <mins> ] [ -f ].
When the -d option is used, cached data is not flushed to disk. All data not yet on disk is stored in theNVRAM. The node will automatically replay NVRAM during the next boot, bringing the disks up todate with the most recent operation. However, if NVRAM loses charge, some of the most recentlymodified data may be lost. Because of this, the -d option should be used only to produce coredumpsrequested by technical support. NVRAM retains charge for three days, so all data will be intact ifNVRAM is replayed within three days of the dirty shutdown.
SEE ALSOna_reboot(1), na_messages(5)
Data ONTAP® 8.2 Commands: Manual Page Reference for 7-Mode, Volume 1 251
halt
helpNAMEna_help - Prints summary of commands and help strings.
SYNOPSIShelp [ command ... ]
? [ command ... ]
DESCRIPTIONhelp prints a summary for each command in its argument list. With no arguments, help prints a list ofall available Data ONTAP commands.
Full UNIX-style man pages for all commands and files are available in the /etc/man directory.
If the help facility doesn’t find a matching command, then all the command help strings are searched fora match.
VFILER CONSIDERATIONSWhen run from a vfiler context, (for example via the vfiler run command), help lists and summarizesonly those commands that can be executed in the context of the concerned vfiler.
EXAMPLESIn the following example, the command is found and displayed:
jayna> help version version - display Data ONTAP software version
In the example below, the exact command match is not found and the matching command strings aredisplayed.
jayna> help display date - display or set date and time df - display free disk space hostname - set or display appliance name httpstat - display HTTP statistics nfsstat - display NFS statistics options - display or set options version - display Data ONTAP software version vol - display or change characteristics of volumes ypgroup - Display the NIS group cache entries environment - display environmental information
Here is a vfiler command match.
252 Data ONTAP® 8.2 Commands: Manual Page Reference for 7-Mode, Volume 1
help
jayna> vfiler run vf1 help hostname
===== vf1 hostname - set or display appliance name
Vfilers can also do command string matches.
jayna> vfiler run vf1 help display
===== vf1 df - display free disk space hostname - set or display appliance name nfsstat - display NFS statistics options - display or set options ypgroup - Display the NIS group cache entries
FILES
/etc/man directory of UNIX-style manual pages
Data ONTAP® 8.2 Commands: Manual Page Reference for 7-Mode, Volume 1 253
help
hostnameNAMEna_hostname - Sets or displays node name.
SYNOPSIShostname [ name ]
DESCRIPTIONhostname prints the name of the current host. The hostname can be set by supplying an argument. Thisis usually done in the initialization script, /etc/rc, which is run at boot time. name must exist in the /etc/hosts data base.
VFILER CONSIDERATIONSWhen run from a vfiler context (for example, via the vfiler run command), hostname prints thehostname of the concerned vfiler. Also, the hostname command currently does not allow setting thehostname of a vfiler.
FILES
/etc/hosts host name data base
/etc/rc system initialization command script
SEE ALSOna_rc(5)
254 Data ONTAP® 8.2 Commands: Manual Page Reference for 7-Mode, Volume 1
hostname
httpstatNAMEna_httpstat - display HTTP statistics
SYNOPSIShttpstat [ -adehrst ] [ -c count ] [ -i ipv4|ipv6 ] [ interval ]
httpstat [ -zaderst ] [ -i ipv4|ipv6 ]
DESCRIPTIONhttpstat displays statistical information about HTTP (HyperText Transfer Protocol) for the node. It canalso be used to reinitialize this information.
If no arguments are given, httpstat displays statistical information since last reboot or last zeroed.
When the -c count option is specified new data is displayed every interval until the count expires. Thefirst output line contains the total information from the last reboot or last zero. Subsequent lines containthe difference between the current value and the previous value.
If the interval argument is specified, the first line of displayed data contains cumulative statistics. Eachsubsequent line shows incremental statistics for the interval (in seconds) until the count is reached.
The -i option filters the stats on the basis of the IP protocol used. When -i option is used with ‘ipv4’ asthe argument, only stats for connections established over IPv4 protocol are displayed. When -i option isused with ‘ipv6’ as the argument, only stats for connections established over IPv6 protocol aredisplayed. When -i option is not used, stats for connections established over both IPv4 and IPv6protocols are displayed. The -i option can be used along with -r, -e, -d, -a... options.
The -h option suppresses the printing of the header information and the cumulative statistics.
The -z option can be used to zero a combination of the statistics counters, depending on which of thefollowing options is also included. The "service" statistics cannot be zeroed.
The -d option selects detailed information about the types of successful requests received (Details).
The -e option prints statistics abouts errors (Errors).
The -r option prints statistics abouts requests (Request).
The -s option prints service statistics (Service).
The -t option prints timeout statistics (Timeout).
The -a option selects "all" statistics. When all or more than one type of statistic is selected, it alwaysappears in "Request", "Details", "Errors", "Timeouts", and "Service" order.
Data ONTAP® 8.2 Commands: Manual Page Reference for 7-Mode, Volume 1 255
httpstat
Request (-r)Accept The number of new connections accepted by the node.
Reuse The number of new requests received on existing connections.
ReponseThe number of reponses sent.
InBytesThe number of bytes received for all incoming requests.
OutBytesThe number of bytes sent, including all HTTP headers, but not including data generated by servlets.
Detail (-d)
Get The number of requests for files received.
Head The number of requests for file information received.
Redirect The number of requests redirected to another file.
NotMod The number of times clients (browsers) were told that requested files were not modified.
Post The number of POST requests received.
Put The number of PUT requests received.
Servlet The number of servlet requests received.
Error (-e)Errors The number of HTTP protocol error responses returned.
BadReq The number of unrecognized requests received.
LogDiscardThe number of log entries discarded because the log was full.
UnAuth The number of requests denied because they lacked authorization.
RcvErr The number of requests aborted because of errors on the input socket.
Service (-s)
256 Data ONTAP® 8.2 Commands: Manual Page Reference for 7-Mode, Volume 1
httpstat
Open The number of currently open connections.
Peak The maximum number of connections ever achieved.
Waits The current number of connections accepted, but waiting for a connection structure.
Timeout (-t)PendingThese are connection structures reclaimed after the network connection was started, but before any datawas sent to the node.
Active These are connection structures reclaimed after the network connection was started, and a partialrequest was sent, but before the complete request arrived.
Idle These connections were reclaimed after a complete request, but before the open connection couldreceive another request.
HA CONSIDERATIONSIn takeover mode, the HTTP statistics displayed reflect the sum of operations that take place on the livenode and the operations that the live node performs on behalf of the failed node. The display does notdifferentiate between the operations on the live node’s disks and the operations on the failed node’sdisks.
The HTTP statistics are cumulative; a giveback does not zero out the HTTP statistics. After giving backthe failed partner’s resources, the live node does not subtract the statistics about HTTP operations itperformed on behalf of the failed node in takeover mode.
EXAMPLES Here are some examples using httpstat:
httpstat Requests Accept Reuse Response InBytes OutBytes
Total Stats: 7 0 1 2235 248
IPv4 Stats: 3 0 0 950 68
IPv6 Stats: 4 0 1 1285 180
httpstat -d Details Get Head Redirect NotMod Post Put Servlet Zapid
Total Stats: 24 0 0 34 0 0 1 0
IPv4 Stats: 17 0 0 11 0 0 1 0
Data ONTAP® 8.2 Commands: Manual Page Reference for 7-Mode, Volume 1 257
httpstat

:IPv6 Stats: 7 0 0 23 0 0 0 0
httpstat -i ipv4
Requests Accept Reuse Response InBytes OutBytes 3 0 0 950 68
httpstat -i ipv6
Requests Accept Reuse Response InBytes OutBytes 4 0 1 1285 180
httpstat -e -i ipv4
Errors Errors BadReq LogDiscard UnAuth RcvErr 5 0 0 0 0
SEE ALSO na_netstat(1), na_options(1), na_partner(1), na_sysstat(1).
6 Jun 1998 na_httpstat(1)
258 Data ONTAP® 8.2 Commands: Manual Page Reference for 7-Mode, Volume 1
httpstat
icNAMEna_ic - High Availability (HA) interconnect command
SYNOPSISic primary set { 0 | 1 } [ -r ]ic primary showic primary unset [ -r ]
ic unidirectional_mirroring { on | off | status }
AVAILABILITYThese commands are available only on MetroCluster configurations.
DESCRIPTIONic primary set { 0 | 1 } [ -r ]ic primary showic primary unset [ -r ]
Use this command to set, show, or unset the primary HA interconnect link on MetroClusterconfigurations. If unset, the default link will be used as the primary link.
The -r option issues a link reset if the primary link is changed.
ic unidirectional_mirroring { on | off | status }
Use this command to turn unidirectional mirroring on or off or to check the current status.Unidirectional mirroring increases system performance by configuring one FC-VI link to transmitmirror traffic to the partner and the other FC-VI link to receive mirror traffic from the partner.Unidirectional mirroring is only available on MetroCluster configurations. It is on by default.
NOTESContact NetApp Global Services for help identifying the HA interconnect in use on your controller.
Data ONTAP® 8.2 Commands: Manual Page Reference for 7-Mode, Volume 1 259
ic
if_addr_filter_infoNAMEna_if_addr_filter_info - displays the MAC address filter usage information for the specified networkinterface
SYNOPSISif_addr_filter_info [ interface_name ]
DESCRIPTIONThe if_addr_filter_info command displays the specified network interface address filter usageinformation. It shows the total number of address filter entries - the maximum number of address entriesthe device can support, the number of used address filter entries - the total number of unicast andmulticast address filter entries that is programmed to the network device, and the used address filterentries - the list of unicast and multicast entries that are programmed to the device’s address filter.
EXAMPLESThe following command displays the MAC address filter information for an Ethernet interface named e0a:
if_addr_filter_info e0a
Total number of address filter entries 1328 Number of used address filter entries: 4 The used address filter entries: U 0 c0 dd 14 59 36 M 1 0 c cc cc cc M 33 33 ff 14 59 36 M 33 33 0 0 0 1
SEE ALSOna_ifinfo (1) na_partner (1) na_ifstat (1)
260 Data ONTAP® 8.2 Commands: Manual Page Reference for 7-Mode, Volume 1
if_addr_filter_info
ifconfigNAMEna_ifconfig - Configures network interface parameters.
SYNOPSISifconfig interface [ address_family ][ [ alias | -alias ] [ no_ddns ] address ] [ { netmask mask } | { prefixlen len } ] [ broadcast address ][ mediatype type ][ flowcontrol { none | receive | send | full } ] [ dad_attempts count ] [ mtusize size ] [ up | down ] [ trusted | untrusted ] [ wins | -wins ] [ nfo | -nfo ][ [ partner { address | interface } ] [ -partner ] ]
ifconfig -a
DESCRIPTIONifconfig assigns an address to a network interface and configures network interface parameters. ifconfigmust be used at boot time to define the network address of each network interface present on a machine;it may also be used at a later time to redefine a network interface’s address or other operatingparameters. When used without optional parameters, ifconfig displays the current configuration for anetwork interface.
The interface parameter is the name of the network interface. The name is of the form en for Ethernetinterfaces, possibly followed by a letter; where n is 0 for on-board network interfaces and the expansionslot number for network interfaces plugged into expansion slots. If a card in an expansion slot has morethan one network interface, the network interface name will be followed by a letter, indicating which ofthe network interfaces on that card it is. ifconfig-a is special and it does not take any optionalparameters. It displays the current configuration for all the network interfaces present.
The address is either a host name present in the host name data base /etc/hosts including names of theform ‘hostname‘-<interface name>, or an Internet address expressed in the Internet standard dotnotation for IPv4 addresses and Standard/Compressed/Mixed notation for IPv6 addresses.
OPTIONSaddress_family Specifies the address family which affects interpretation of the remaining parameters.Since an interface can receive transmissions in differing protocols with different naming schemes,specifying the address family is recommended. If the address-family is not explicitly mentioned, itwould be deduced from the IP address provided along with the command if any. If the address family isnot specified and a hostname is specified, it will try to resolve to the IPv4 address of the hostname andif it fails, it will try to resolve to the IPv6 address of the hostname. The address or protocol familiescurrently supported are "inet" and "inet6".
broadcast addressSpecifies the address to use to represent broadcasts to the network. The default broadcast address is theaddress with a host part of all 1’s.
Data ONTAP® 8.2 Commands: Manual Page Reference for 7-Mode, Volume 1 261
ifconfig
May not be applied to a network interface which is part of an interface group.
down Marks a network interface "down". When a network interface is marked "down" the system willnot attempt to transmit messages through that network interface. This action does not automaticallydisable routes using the network interface. See the discussion under HA CONSIDERATIONSbelow for the semantics of this action in an HA environment.
May not be applied to a network interface which is part of an interface group, or is configured as aVLAN interface and one or more VLANs are still up.
mediatype type Specifies the Ethernet media type used.
10/100 and 10/100/1000 Mbps Copper Interfaces: Depending on the physical specifications of theEthernet controller, the acceptable types are "tp" (Half-duplex 10Base-T RJ-45 twisted-pair), "tp-fd"(Full duplex 10Base-T RJ-45 twisted-pair), "100tx" (Half-duplex 100Base-T RJ-45 twisted-pair),"100tx-fd" (Full duplex 100Base-T RJ-45 twisted-pair), and "auto" (Auto RJ-45 twisted-pair).
The default media type is set to "tp" or to "auto" where applicable.
On an auto-negotiable interface, the system will auto-negotiate the speed and duplex of the link and setthe network interface accordingly when it is configured up. If the other end does not supportauto-negotiation and full duplex operation is desired, it must be explicitly set using the mediatypecommand.
All 1000Base-T devices support autonegotiation and the speed cannot be explicitly set to 1000 Mbps.At 1000 Mbps, the interface only operates in full duplex mode.
1000 Mbps Fiber Interfaces: These Gigabit Ethernet Controllers only support the mediatype "auto". Ifthe interface detects that the link partner autonegotiates, then the operational flow control setting isnegotiated. If the interface detects that the link partner does not auto-negotiate, then it uses the flowcontrol setting configured through the flowcontrol option or the default value for the interface. TheGigabit Ethernet Controllers only support full duplex.
10 Gbps Fiber and Twinax Copper Interfaces: These 10G Ethernet Controllers support the mediatype"10g-sr" and "auto". The interface does not do auto-negotiation; it has fixed capabilities and onlysupports 10Gb speed, full duplex. Flowcontrol by default is set to full, but it can be set to none or sendor receive.
1/10 Gbps Twisted-Pair Copper Interfaces: The 10GBase-T Ethernet Controllers support the mediatype"auto". The interface autonegotiates speed and flow control. The speed cannot be explicitly set. Theinterface only operates in full duplex mode.
flowcontrol Specifies the flow control type. The acceptable types are "none" (no flow control), "receive" (onlyreceive flow control frames), "send" (only send flow control frames), and "full" (send and receiveflow control frames). If the flowcontrol option is not specified, the default value isinterface-dependent. If the link partner is configured for autonegotiation, the interface negotiatesflow control by advertising its flow control setting. The actual operational value may be different,depending on the capabilities that each partner advertises. If the link partner is not configured forauto-negotiation, then the interface sends or accepts flow control frames as dictated by the flowcontrol option or the default value.
262 Data ONTAP® 8.2 Commands: Manual Page Reference for 7-Mode, Volume 1
ifconfig
Gigabit Ethernet and 10GBase-T interfaces support flow control as described above, and their default flowcontrol setting is "full".
On 100/1000 and 10/100/1000 Mbps interfaces operating at 10 or 100 Mbps, the system may overridethe configured setting with "receive" or "none" because most 10 and 100 Mbps devices don’t supportflow control. In half-duplex mode, the system always disables flow control. Use the ifstat command tosee the operational setting.
Not supported on interface groups (ifgrp). However the underlying interfaces can be modified with thisoption. See the NMG for details and examples.
dad_attempts count(Inet6 only)Specifices the dadattempts(Duplicate Address Detectionattempts) to use for the multicastinterface. It is used to specify number of consecutive Neighbor Solicitation messages sent whileperforming Duplicate Address Detection on a tentative address per multicast interface.
The default value of dad_attempts is 2 and maximum is 15.
It takes longer for a ifgrp/vlan link to come up because any underlying physical links and the logicalinterface have to both come up.Hence actual NS DAD retransmits for ifgrp/vlan interfaces will beincreased by factor of 2 than what was given in input.
mtusize size Specifies the MTU (maximum transmission unit) to use for the network interface. It is used tospecify the jumbo frame size on Gigabit Ethernet interfaces. Jumbo frames are packets larger thanthe standard Ethernet packet size and must also be supported by the environment’s networkingequipment and clients. The default MTU for jumbo frames is 9000 and the maximum isdriver-dependent.
The MTU size does not include the media header or FCS (checksum). However, other vendors mayinclude the 14-byte Ethernet media header, the 4-byte FCS, or a 4-byte VLAN tag when specifying theirjumbo frame size.
May not be applied to a network interface which is part of an interface group.
netmask mask (Inet only) The mask includes the network part of the local address and the subnet part, which istaken from the host field of the address. The mask can be specified as a single hexadecimal numberwith a leading 0x, with a dot-notation Internet address, or with a pseudo-network name listed in thenetwork table /etc/networks. The mask contains 1’s for the bit positions in the 32-bit address thatare to be used for the network and subnet parts, and 0’s for the host part. The mask should containat least the standard network portion, and the subnet field should be contiguous with the networkportion. A default netmask is chosen according to the class of the IP address.
May not be applied to a network interface which is part of an interface group. Option is only allowed oninterfaces with assigned internet address or if the internet address is provided along with the netmaskoption.
prefixlen len (Inet and Inet6) Specify that len bits are reserved for subdividing networks into sub-networks. Thelen must be integer. When used in IPv6 context, for syntactical reason it must be between 0 and128. It is almost always 64 under the current IPv6 assignment rule. If the parameter is omitted, 64
Data ONTAP® 8.2 Commands: Manual Page Reference for 7-Mode, Volume 1 263
ifconfig
is used. When used in IPv4 context, it must be between 0 and 32.
up Marks a network interface "up". This may be used to enable a network interface after an "ifconfigdown." It happens automatically when setting the first address on a network interface. If thenetwork interface was reset when previously marked down, the hardware will be re-initialized.
May not be applied to a network interface which is part of an interface group.
If IPv6 is enabled, an interface that is brought up will automatically configure a link local address andRA prefix IPv6 addresses in response to router advertisements.
up is ignored if the interface has no addresses configured, and IPv6 is not enabled.
alias Configures an additional network address on this network interface.
May not be applied to a network interface which is part of an interface group.
-alias Removes a network address for this network interface.
May not be applied to a network interface which is part of an interface group.
no_ddns Specifies that DDNS update is not to be sent for this IP address.
May not be applied to a network interface which is part of an interface group.
trusted Specifies that the network to which the network interface is attached is trusted relative tofirewall-style security (default).
May not be applied to a network interface which is part of an interface group.
untrusted Specifies that the network to which the network interface is attached is not trusted relative tofirewall-style security.
May not be applied to a network interface which is part of an interface group.
wins Specifies that the network interface is to be registered with Windows Internet Name Services(default). Such registration is only performed when CIFS is running and at least one WINS serverhas been configured.
May not be applied to a network interface which is part of an interface group.
-wins Specifies that the network interface is not to be registered with Windows Internet Name Services.
264 Data ONTAP® 8.2 Commands: Manual Page Reference for 7-Mode, Volume 1
ifconfig
May not be applied to a network interface which is part of an interface group.
nfo Specifies that negotiated failover is to be enabled for the network interface. This option appliesonly to nodes in an HA pair. See the description of optionsBcf.takeover.on.network_interface_failureR andBcf.takeover.on_network_interface_failure.policyR in na_options(1) for more information.
May not be applied to a network interface which is part of an interface group.
-nfo Specifies that negotiated failover is to be disabled for the network interface. This option appliesonly to nodes in an HA pair.
May not be applied to a network interface which is part of an interface group.
partner address Applies only to nodes in an HA pair. It maps a network interface to address, which isan IPv4 address on the partner and is referred to as the partner IP address. If the network interface beingconfigured is a virtual interface then the partner interface must be denoted by an interface name and notan IP address. In takeover mode, this network interface assumes the identity of the network interface onthe partner, whose IP address is address. For example, toaster1 and toaster2 are nodes in an HA pair.If the IP address of e8 on toaster2 is 198.9.200.38, use the following command on toaster1 if you want e1 of toaster1 to assume the identity of e8 of toaster2 for the duration of a takeover:
ifconfig e1 partner 198.9.200.38
Be sure that both the local network interface and the partner’s network interface are attached to thesame network segment or network switch. Otherwise, after takeover, clients of the failed node mightneed to wait an indeterminate amount of time for routing tables to flush before being able to access thedata on the failed node.
May not be applied to a network interface which is part of an interface group.
Address to address mapping is not supported for IPv6 addresses. If IPv6 addresses are to be taken over,partner interface must be denoted by an interface name and not an IP address.
partner interfaceApplies only to nodes in an HA pair. It maps a network interface to interface, which is an interface onthe partner. If IPv6 addresses configured on the partner interface also needs to be taken care, interface tointerface mapping needs to be employed. If the network interface being configured is a virtual interfacethen interface must refer to a virtual interface on the partner node.
May not be applied to a network interface which is part of an interface group.
-partner Applies only to nodes in an HA pair. It removes the mapping between a network interface and anIP address or interface on the partner.
May not be applied to a network interface which is part of an interface group.
Data ONTAP® 8.2 Commands: Manual Page Reference for 7-Mode, Volume 1 265
ifconfig
HA CONSIDERATIONSOn a node in an HA pair, a network interface performs one of these roles:
A dedicated network interface for the local node whether or not the node is in takeover mode. Anetwork interface performs this role if it has a local IP address but not a partner IP address, which youcan assign by the partner option of the ifconfig command.
A shared network interface for both the local node and the partner. That is, if the partner fails, thenetwork interface assumes the identity of a network interface on the partner but works on behalf of boththe live node and the partner. A network interface performs this role if it has a local IP address and apartner IP address, which you assign by the partner option of the ifconfig command.
A standby network interface for the partner. That is, if the partner fails, the network interface works onbehalf of the partner. When the node is not in takeover mode, the network interface is idle. A networkinterface performs this role if it does not have a local IP address but a partner IP address, which youassign by the partner option of the ifconfig command.
The node maps a partner IP address to a shared or standby interface when the node initiates a takeoveroperation. In takeover mode, all requests destined for the partner IP address are serviced by the sharedor standby interface. Also, in partner mode, if a command takes a network interface name as anargument, enter the network interface name of the failed node. The command is executed on the sharedor standby interface on the live node. Similarly, in partner mode, a command for displaying networkinterface information displays the network interface name of the failed node, even though the commandis serviced by the shared or standby interface on the live node.
To facilitate seamless transition, the partner interfaces broadcast gratuitous ARPS so that all clients mayupdate their arp caches.
In takeover mode, attempting to "ifconfig down" an interface that has taken over an interface of thefailed node only marks the interface down for the live node. To take the interface down completely, the"ifconfig down" command must also be executed in partner mode. These state distinctions are indicatedby the UP and PARTNER_UP flags (shown by ifconfig) associated with each interface.
These ifconfig options are not available in partner mode: partner, -partner, and mtusize.
The autoconf keyword indicates that an IPv6 address is obtained via stateless auto-configuration.
EXAMPLEAn HA pair contains two nodes, toaster1 and toaster2. toaster1 takes over toaster2 after toaster2fails.
The /etc/rc file on toaster1 is as follows:
ifconfig e0 192.9.200.37 ifconfig e1 192.9.200.38 partner 192.9.200.41 ifconfig e2 partner 192.9.200.42
The /etc/rc file on toaster2 is as follows:
266 Data ONTAP® 8.2 Commands: Manual Page Reference for 7-Mode, Volume 1
ifconfig
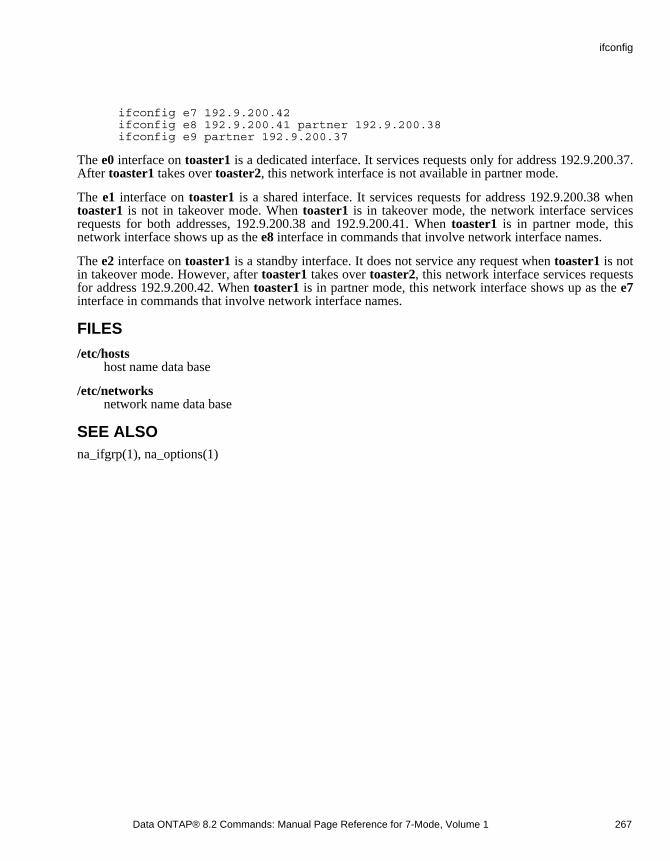
ifconfig e7 192.9.200.42 ifconfig e8 192.9.200.41 partner 192.9.200.38 ifconfig e9 partner 192.9.200.37
The e0 interface on toaster1 is a dedicated interface. It services requests only for address 192.9.200.37.After toaster1 takes over toaster2, this network interface is not available in partner mode.
The e1 interface on toaster1 is a shared interface. It services requests for address 192.9.200.38 when toaster1 is not in takeover mode. When toaster1 is in takeover mode, the network interface servicesrequests for both addresses, 192.9.200.38 and 192.9.200.41. When toaster1 is in partner mode, thisnetwork interface shows up as the e8 interface in commands that involve network interface names.
The e2 interface on toaster1 is a standby interface. It does not service any request when toaster1 is notin takeover mode. However, after toaster1 takes over toaster2, this network interface services requestsfor address 192.9.200.42. When toaster1 is in partner mode, this network interface shows up as the e7interface in commands that involve network interface names.
FILES
/etc/hosts host name data base
/etc/networks network name data base
SEE ALSOna_ifgrp(1), na_options(1)
Data ONTAP® 8.2 Commands: Manual Page Reference for 7-Mode, Volume 1 267
ifconfig
ifgrpNAMEna_ifgrp - Manages interface group (ifgrp) configuration.
SYNOPSISifgrp create [ single | multi | lacp ] ifgrp_name [ -b {rr|mac|ip|port} ] [ interface_list ]
ifgrp destroy ifgrp_name
ifgrp delete ifgrp_name interface_name
ifgrp add ifgrp_name interface_list
ifgrp { favor | nofavor } interface
ifgrp status [ ifgrp_name ]
ifgrp stat ifgrp_name [ interval ]
In the ifgrp commands, ifgrp_name stands for the name of an interface group. The name must be astring that is no longer than 15 characters and meets the following criteria:
- It begins with a letter.
- It does not contain a space.
- It is not in use for another interface group.
Interface group names are case-sensitive.
DESCRIPTIONAn interface group is a mechanism that supports aggregation of network interfaces ("links") into onelogical interface unit ("trunk").
Once created, an interface group is indistinguishable from a physical network interface. You can inspectand modify statistical and configuration information using the ifconfig and netstat commands, amongothers.
You can create an interface group in one of three modes: multi, single or LACP.
Multi-mode interface groups are partly compliant with IEEE 802.3ad. Multi-mode interface groupssupport static configuration but not dynamic aggregate creation. In a multi-mode interface group, alllinks are simultaneously active. This mode is only useful if all the links are connected to a switch thatsupports trunking/aggregation over multiple port connections. The switch must be configured tounderstand that all the port connections share a common media access control (MAC) address and arepart of a single logical interface.
268 Data ONTAP® 8.2 Commands: Manual Page Reference for 7-Mode, Volume 1
ifgrp
Dynamic multi-mode (LACP) interface groups are completely compliant with IEEE 802.3ad. LACPprotocol is used determine which of the underlying links can be aggregated. LACP protocol is also usedto monitor the link status. If the configuration on both ends of the links is correct, then all the interfacesof an interface group are active.
While the switch is responsible for determining how to forward incoming packets to the node, the nodesupports load balancing on the network traffic transmitted over a multi-mode/LACP interface group.The user can choose from any of the following four methods:
- IP based. The outgoing interface is selected on the basis of the node and client’s IP address.
- MAC based. The outgoing interface is selected on the basis of the node and client’s MAC address.
- Round-Robin. All the interfaces are selected on a round-robin basis.
- Port based. The outgoing interface is selected on the basis of the transport layer connection 4-tuple.This includes the node’s IP and port number and the client’s IP and port number. For traffic suchas ICMP, only the souce and destination IP addresses are used.
Since the Round-Robin based load balancing policy may lead to out-of-order of packets, it should beused carefully.
In single-mode interface groups, only one of the links is active at a time. No configuration is necessaryon the switch. If Data ONTAP detects a fault in the active link, a standby link of the interface group, ifavailable, is activated. Note that load balancing is not supported on single-mode interface groups.
Network interfaces belonging to an interface group do not have to be on the same network card. Withthe ifgrp command, you can also create second-level single or multimode interface groups. Forexample, a subnetwork has two switches that are capable of trunking over multiple port connections.The storage system has a two-link multi-mode interface group to one switch and a two-link multi-modeinterface group to the second switch. You can create a second-level single-mode interface group thatcontains both of the multi-mode interface groups. When you configure the second-level interface groupusing the ifconfig command, only one of the two multi-mode interface group is brought up as the activelink. If all the underlying interfaces in the active interface group fail, the second-level interface groupactivates its standby interface group. Please note that multi-level LACP interface groups are notpermitted.
You can destroy an interface group only if you have configured it down using the ifconfig command.
OPTIONS
create Creates a new instance of an interface group. If no mode is specified, the interface group is createdin multi-mode. If a list of interfaces is provided, the interfaces are configured and added to theinterface group. Load balancing is specified with the -b option.
Data ONTAP® 8.2 Commands: Manual Page Reference for 7-Mode, Volume 1 269
ifgrp
- rr refers to Round-robin Load balancing.
- ip refers to IP-based load balancing. The IP based load balancing is used as default for multi-mode interface groups if noneis specified by user.
- mac refers to MAC-based load balancing.
- port refers to port-based load balancing.
destroy Destroys a previously created interface group. The interface must be configured down prior toinvoking this option.
delete Deletes the specified interface from a previously created interface group. The interface group mustbe configured down prior to invoking this option.
add Adds a list of interfaces to an existing interface group trunk. Each interface corresponds to a singlelink in the trunk.
favor Designates the specified interface as active in a single-mode interface group. When a single-modeinterface group is created, an interface is randomly selected to be the active interface. Use the favorcommand to override the random selection.
nofavor If the specified interface is part of a single-mode interface group, this command ensures that thelink corresponding to this interface is not preferred when determining which link to activate.
status Displays the status of the specified interface group. If no interface is specified, displays the statusof all interface groups.
stat Displays the number of packets received and transmitted on each link that makes up the interfacegroup. You can specify the time interval, in seconds, at which the statistics are displayed. Bydefault, the statistics are displayed at a two-second interval.
FAULT DETECTIONThe ifgrp driver constantly checks each interface group and each link for status. Links issue two typesof indications:
up The link is receiving active status from its media access unit.
broken The link is not receiving active status from its media access unit.
270 Data ONTAP® 8.2 Commands: Manual Page Reference for 7-Mode, Volume 1
ifgrp
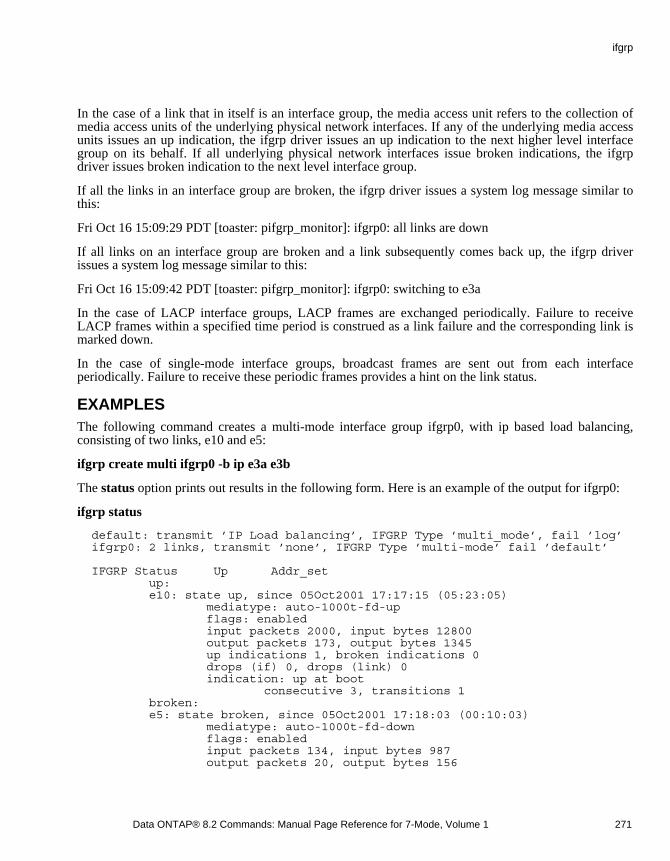
In the case of a link that in itself is an interface group, the media access unit refers to the collection ofmedia access units of the underlying physical network interfaces. If any of the underlying media accessunits issues an up indication, the ifgrp driver issues an up indication to the next higher level interfacegroup on its behalf. If all underlying physical network interfaces issue broken indications, the ifgrpdriver issues broken indication to the next level interface group.
If all the links in an interface group are broken, the ifgrp driver issues a system log message similar tothis:
Fri Oct 16 15:09:29 PDT [toaster: pifgrp_monitor]: ifgrp0: all links are down
If all links on an interface group are broken and a link subsequently comes back up, the ifgrp driverissues a system log message similar to this:
Fri Oct 16 15:09:42 PDT [toaster: pifgrp_monitor]: ifgrp0: switching to e3a
In the case of LACP interface groups, LACP frames are exchanged periodically. Failure to receiveLACP frames within a specified time period is construed as a link failure and the corresponding link ismarked down.
In the case of single-mode interface groups, broadcast frames are sent out from each interfaceperiodically. Failure to receive these periodic frames provides a hint on the link status.
EXAMPLESThe following command creates a multi-mode interface group ifgrp0, with ip based load balancing,consisting of two links, e10 and e5:
ifgrp create multi ifgrp0 -b ip e3a e3b
The status option prints out results in the following form. Here is an example of the output for ifgrp0:
ifgrp status
default: transmit ’IP Load balancing’, IFGRP Type ’multi_mode’, fail ’log’ ifgrp0: 2 links, transmit ’none’, IFGRP Type ’multi-mode’ fail ’default’
IFGRP Status Up Addr_set up: e10: state up, since 05Oct2001 17:17:15 (05:23:05) mediatype: auto-1000t-fd-up flags: enabled input packets 2000, input bytes 12800 output packets 173, output bytes 1345 up indications 1, broken indications 0 drops (if) 0, drops (link) 0 indication: up at boot consecutive 3, transitions 1 broken: e5: state broken, since 05Oct2001 17:18:03 (00:10:03) mediatype: auto-1000t-fd-down flags: enabled input packets 134, input bytes 987 output packets 20, output bytes 156
Data ONTAP® 8.2 Commands: Manual Page Reference for 7-Mode, Volume 1 271
ifgrp
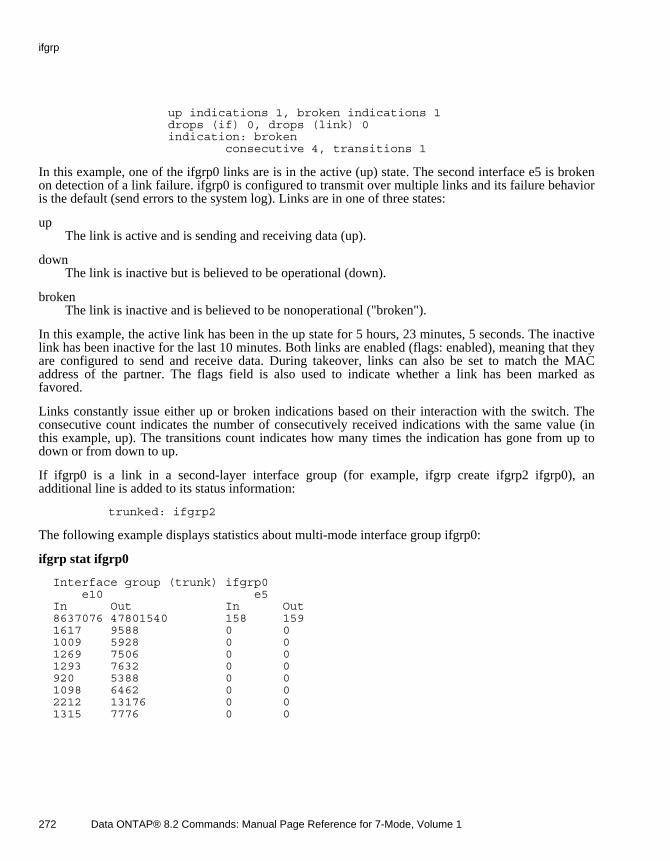
up indications 1, broken indications 1 drops (if) 0, drops (link) 0 indication: broken consecutive 4, transitions 1
In this example, one of the ifgrp0 links are is in the active (up) state. The second interface e5 is brokenon detection of a link failure. ifgrp0 is configured to transmit over multiple links and its failure behavioris the default (send errors to the system log). Links are in one of three states:
up The link is active and is sending and receiving data (up).
down The link is inactive but is believed to be operational (down).
broken The link is inactive and is believed to be nonoperational ("broken").
In this example, the active link has been in the up state for 5 hours, 23 minutes, 5 seconds. The inactivelink has been inactive for the last 10 minutes. Both links are enabled (flags: enabled), meaning that theyare configured to send and receive data. During takeover, links can also be set to match the MACaddress of the partner. The flags field is also used to indicate whether a link has been marked asfavored.
Links constantly issue either up or broken indications based on their interaction with the switch. Theconsecutive count indicates the number of consecutively received indications with the same value (inthis example, up). The transitions count indicates how many times the indication has gone from up todown or from down to up.
If ifgrp0 is a link in a second-layer interface group (for example, ifgrp create ifgrp2 ifgrp0), anadditional line is added to its status information:
trunked: ifgrp2
The following example displays statistics about multi-mode interface group ifgrp0:
ifgrp stat ifgrp0
Interface group (trunk) ifgrp0 e10 e5 In Out In Out 8637076 47801540 158 159 1617 9588 0 0 1009 5928 0 0 1269 7506 0 0 1293 7632 0 0 920 5388 0 0 1098 6462 0 0 2212 13176 0 0 1315 7776 0 0
272 Data ONTAP® 8.2 Commands: Manual Page Reference for 7-Mode, Volume 1
ifgrp
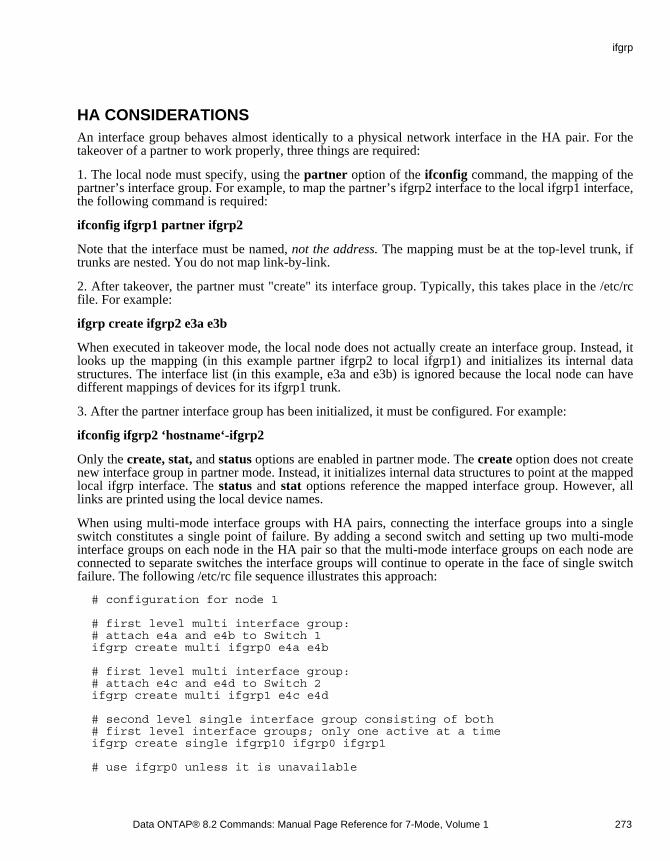
HA CONSIDERATIONSAn interface group behaves almost identically to a physical network interface in the HA pair. For thetakeover of a partner to work properly, three things are required:
1. The local node must specify, using the partner option of the ifconfig command, the mapping of thepartner’s interface group. For example, to map the partner’s ifgrp2 interface to the local ifgrp1 interface,the following command is required:
ifconfig ifgrp1 partner ifgrp2
Note that the interface must be named, not the address. The mapping must be at the top-level trunk, iftrunks are nested. You do not map link-by-link.
2. After takeover, the partner must "create" its interface group. Typically, this takes place in the /etc/rcfile. For example:
ifgrp create ifgrp2 e3a e3b
When executed in takeover mode, the local node does not actually create an interface group. Instead, itlooks up the mapping (in this example partner ifgrp2 to local ifgrp1) and initializes its internal datastructures. The interface list (in this example, e3a and e3b) is ignored because the local node can havedifferent mappings of devices for its ifgrp1 trunk.
3. After the partner interface group has been initialized, it must be configured. For example:
ifconfig ifgrp2 ‘hostname‘-ifgrp2
Only the create, stat, and status options are enabled in partner mode. The create option does not createnew interface group in partner mode. Instead, it initializes internal data structures to point at the mappedlocal ifgrp interface. The status and stat options reference the mapped interface group. However, alllinks are printed using the local device names.
When using multi-mode interface groups with HA pairs, connecting the interface groups into a singleswitch constitutes a single point of failure. By adding a second switch and setting up two multi-modeinterface groups on each node in the HA pair so that the multi-mode interface groups on each node areconnected to separate switches the interface groups will continue to operate in the face of single switchfailure. The following /etc/rc file sequence illustrates this approach:
# configuration for node 1
# first level multi interface group: # attach e4a and e4b to Switch 1 ifgrp create multi ifgrp0 e4a e4b
# first level multi interface group: # attach e4c and e4d to Switch 2 ifgrp create multi ifgrp1 e4c e4d
# second level single interface group consisting of both # first level interface groups; only one active at a time ifgrp create single ifgrp10 ifgrp0 ifgrp1
# use ifgrp0 unless it is unavailable
Data ONTAP® 8.2 Commands: Manual Page Reference for 7-Mode, Volume 1 273
ifgrp

ifgrp favor ifgrp0
# configure the interface group with an interface and partner ifconfig ifgrp10 ‘hostname-ifgrp10‘ partner ifgrp10
The partner node is configured similarly; the favored first level interface in this case is the interfacegroup connected to "Switch 2".
NOTESIEEE 802.3ad requires the speed of all underlying interfaces to be the same and in full-duplex mode.Additionally most switches do not support mixing 10/100 and GbE interfaces in an aggregate/trunk.Check the documentation that comes with your Ethernet switch or router on how to configure theEthernet interfaces to be full-duplex. (Hint: Allow both ends of a link to autonegotiate.)
LIMITATIONSThough interface groups can support up to sixteen links, the number of interfaces in an aggregate islimited by the switch.
SEE ALSOna_sysconfig(1)
274 Data ONTAP® 8.2 Commands: Manual Page Reference for 7-Mode, Volume 1
ifgrp
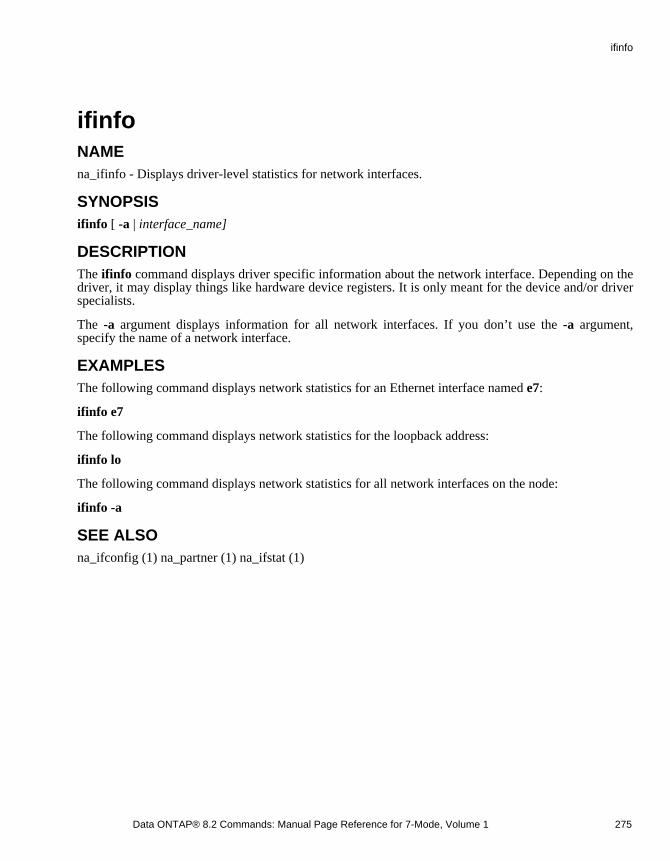
ifinfoNAMEna_ifinfo - Displays driver-level statistics for network interfaces.
SYNOPSISifinfo [ -a | interface_name]
DESCRIPTIONThe ifinfo command displays driver specific information about the network interface. Depending on thedriver, it may display things like hardware device registers. It is only meant for the device and/or driverspecialists.
The -a argument displays information for all network interfaces. If you don’t use the -a argument,specify the name of a network interface.
EXAMPLESThe following command displays network statistics for an Ethernet interface named e7:
ifinfo e7
The following command displays network statistics for the loopback address:
ifinfo lo
The following command displays network statistics for all network interfaces on the node:
ifinfo -a
SEE ALSOna_ifconfig (1) na_partner (1) na_ifstat (1)
Data ONTAP® 8.2 Commands: Manual Page Reference for 7-Mode, Volume 1 275
ifinfo
ifstatNAMEna_ifstat - Displays device-level statistics for network interfaces.
SYNOPSISifstat [ -z ] -a | interface_name
DESCRIPTIONThe ifstat command displays statistics about packets received and sent on a specified network interfaceor on all network interfaces. The statistics are cumulative since the node was booted.
The -z argument clears the statistics. The -a argument displays statistics for all network interfacesincluding the virtual host and the loopback address. If you don’t use the -a argument, specify the nameof a network interface.
HA CONSIDERATIONSIn takeover mode, the ifstat command displays combined statistics about packets processed by the localnetwork interface and packets processed by the local network interface on behalf of the networkinterface on the failed node.
The statistics displayed by the ifstat command are cumulative. That is, a giveback does not cause the ifstat command to zero out the statistics.
EXAMPLESThe following command displays network statistics for an Ethernet interface named e7:
ifstat e7
The following command displays network statistics for the loopback address:
ifstat lo
The following command displays network statistics for all network interfaces on the node:
ifstat -a
SEE ALSOna_partner(1).
276 Data ONTAP® 8.2 Commands: Manual Page Reference for 7-Mode, Volume 1
ifstat
igroupNAMEigroup - Commands for managing initiator groups
SYNOPSISigroup command argument ...
DESCRIPTIONThe igroup family of commands manages the initiator groups. These commands can be used to createnew initiator groups and to show, modify, or destroy existing ones.
USAGEigroup add [ -f ] initiator_group node ...
Adds node(s) to an existing initiator group. You may use the alias for a node set with the fcp wwpnalias command.
The optional -f argument disables checking with the HA partner for LUN mapping conflicts.
igroup bind initiator_group portset
Binds an initiator group to a portset.
The initiator group must not be bound to any portset If the initiator group is bound, use the ‘igroupunbind’ command to first unbind the initiator group before attempting to bind to another portset.
You can only bind an initiator group to a non-empty portset.
igroup create { -f | -i } -t ostype [ -a portset ] initiator_group [ node ... ]
Creates a new initiator group.
If the -f option is given, an FCP initiator group is created.
If the -i option is given, an iSCSI initiator group is created.
The -t option can be used to specify the ostype of the initiators within the group. The type applies to allinitiators within the group and governs the finer details of SCSI protocol interaction with theseinitiators. Valid arguments are solaris, windows, hpux, aix, linux, netware, vmware, openvms, xen andhyper_v.
The -a option can be used to specify a portset to bind to the newly created initiator group. The portsetmust not be empty in order for an initiator group to bind to it.
If the initiator_group includes spaces, it must be enclosed in double quotation marks. The maximumlength of the initiator_group is 96 bytes.
Data ONTAP® 8.2 Commands: Manual Page Reference for 7-Mode, Volume 1 277
igroup
FCP nodes are specified as worldwide port names (WWPN), written as 16 hexadecimal characters withoptional (:) characters. Alternatively, you may also use aliases set for wwpns using the fcp wwpnaliascommand. iSCSI nodes are written in the dotted-domain fashion.
igroup destroy [ -f ] initiator_group ...
Destroys existing initiator group(s). By default a group cannot be destroyed if there are existing LUNmaps defined for that group. This behavior can be overridden with the use of -f option which willdestroy the initiator group and any associated LUN maps.
igroup rename existing_group_name new_group_name
Rename an existing initiator group. The rename operation will not impact access to LUNs that aremapped to the initiator group being modified.
igroup help sub_command
Displays the help information for the given sub_command.
igroup remove [ -f ] initiator_group node ...
Removes node(s) from an initiator group. You may use the alias for the node, set with the fcp wwpnalias command.
The operation is prohibited if there are existing LUN maps defined for that group. The -f option can beused to force node removal.
igroup set [ -f ] initiator_group attribute value
Sets an attribute for an initiator group.
ostype
Sets the operating system type for this initiator group, valid values are solaris windows aix hpux linux netware vmware openvms xen and hyper_v.
throttle_reserve
Reserves a percentage of SCSI target command blocks for this igroup’s exclusive usage. Valid valuesare 0-99. A setting of 0 means the igroup will share the unreserved command block pool.
throttle_borrow
When set to yes the throttle will exceed its command block reservation if unreserved command blocksare available. If the throttle_reserve is 0 this setting has no meaning.
alua
If yes, then the initiators in the igroup can support Asymmetric Logical Unit Access. Valid values are yes and no. For newly created igroups, the default value is true for all host OS type. See the BlockAccess Management Guide for details. ALUA is not supported on iSCSI igroups. ALUA is supportedon FCP igroups when the controller is configured for HA.
278 Data ONTAP® 8.2 Commands: Manual Page Reference for 7-Mode, Volume 1
igroup

The -f option overrides all warnings, and is required with rsh.
report_scsi_name
If yes, then SCSI Name String descriptor will be reported as part of INQUIRY VPD deviceidentification page.
igroup show [ -v ] [ initiator_group ]
Displays the nodes in an initiator group and their aliases, set with the fcp wwpnalias command. If noinitiator_group is specified, the members of all initiator groups are displayed. You can use the -v optionto get a verbose listing.
igroup show -t [ -i interval [ -c count ] [ -a ] ]
If the -t option is used, igroup throttles will be listed. The -i option is used to specify the interval overwhich the statistics will be displayed. The -c option can be used to specify the number of intervals todisplay statistics for. The -a option will cause all throttles to be displayed, instead of only throttles withnon-zero statistics.
igroup unbind initiator_group
Unbinds an initiator group from a portset.
This allows initiators in the initiator group to access target LUNs on all ports.
HA CONSIDERATIONSWhen the system is in takeover mode, the initiator groups for both the systems can be managed usingthe igroup commands.
VFILER CONSIDERATIONSWhen run from a vfiler context (for example via the vfiler run command), igroup operates on theconcerned vfiler. Initiator groups created in a vfiler context can only be manipulated when the igroupcommand is executed in that vfiler context. Only iSCSI initiator groups can be created in a non-defaultvfiler context.
SEE ALSOna_san(1)
Data ONTAP® 8.2 Commands: Manual Page Reference for 7-Mode, Volume 1 279
igroup

ipsecNAMEna_ipsec - ipsec is disabled in this release of Data ONTAP.
280 Data ONTAP® 8.2 Commands: Manual Page Reference for 7-Mode, Volume 1
ipsec
ipspaceNAMEna_ipspace - ipspace operations
SYNOPSISipspace create ipspacename [ interface-list ]
ipspace destroy ipspacename
ipspace assign ipspacename interfacename
ipspace list
ipspace help
DESCRIPTIONThe ipspace command controls the configuration of Multiple IP Address Spaces (ipspaces) on a node.
The ipspace command is available only if your node has the vfiler license.
OPTIONScreate ipspacename [ interface-list ]Creates the named ipspace. The named ipspace must not already be defined on the system. The default-ipspace always exists on a node. Interfaces in the optional interface-list are assigned to the newly created ipspace as with ipspace assign.
delete ipspacenameDeletes the named ipspace. The named ipspace must not contain any vfilers and must not contain anyinterfaces. The default-ipspace cannot be destroyed.
assign ipspacename interface-listAssigns the named interface(s) to the named ipspace. The named interface(s) must not be configuredwith any addresses. Trunked interfaces and base VLAN interfaces cannot have their ipspace reassigned.All interfaces start off by being in the default-ipspace.
list List all defined ipspaces and the interfaces that each contains.
HA CONSIDERATIONSThe names of ipspaces have the same meaning on both systems in an HA pair. Thus both partners in anHA pair should have the same ipspace configuration (at least for those ipspaces that are being used). Fortakeover of a network interface to be successful, an interface and its partner interface must both be inthe same ipspace.
Data ONTAP® 8.2 Commands: Manual Page Reference for 7-Mode, Volume 1 281
ipspace

SEE ALSOna_vfiler(1)
282 Data ONTAP® 8.2 Commands: Manual Page Reference for 7-Mode, Volume 1
ipspace
iscsiNAMEiscsi - Manages iSCSI service.
SYNOPSISiscsi alias [-c | <new_alias>]
iscsi connection show [-v] [ {new | <session_tsih>} <conn_id>]
iscsi initiator show
iscsi interface accesslist add [-f] <initiator_name> {-a | <interface> ...}
iscsi interface accesslist remove [-f] <initiator_name> {-a | <interface> ...}
iscsi interface accesslist show [ { -a | <initiator_name> ...} ]
iscsi interface enable {-a | <interface> ...}
iscsi interface disable [-f] {-a | <interface> ...}
iscsi interface show [-a | <interface> ...]
iscsi isns config <hostname> | <ip_addr>
iscsi isns show
iscsi isns start
iscsi isns stop
iscsi isns update
iscsi nodename [<new_nodename>]
iscsi portal show
iscsi security add -i <initiator> -s CHAP [ -f RADIUS | -p <inpassword> -n <inname> ] [ -o <outpassword> -m <outname> ]
iscsi security add -i <initiator> -s { deny | none }
iscsi security default -s CHAP [ -f RADIUS | -p <inpassword> -n <inname> ] [ -o <outpassword> -m <outname> ]
iscsi security default -s { deny | none }
iscsi security delete -i <initiator>
Data ONTAP® 8.2 Commands: Manual Page Reference for 7-Mode, Volume 1 283
iscsi
iscsi security generate
iscsi security show
iscsi session show [-v | -t | -p | -c] [<session_tsih> ...]
iscsi start
iscsi stats [-z | -a | ipv4 | ipv6]
iscsi status
iscsi stop
iscsi tpgroup add [-f] <tpgroup_name> [<interface> ...]
iscsi tpgroup create [-f] [-t <tpgtag>] <tpgroup_name> [<interface> ...]
iscsi tpgroup destroy [-f] <tpgroup_name>
iscsi tpgroup remove [-f] <tpgroup_name> [<interface> ...]
iscsi tpgroup show
iscsi tpgroup alua show
iscsi tpgroup alua set <tpgroup_name> { optimized | nonoptimized } [preferred]
iscsi ip_tpgroup add [-f] <tpgroup_name> [<IP address> ...]
iscsi ip_tpgroup create [-f] [-t <tpgtag>] <tpgroup_name> [<IP Address> ...]
iscsi ip_tpgroup destroy [-f] <tpgroup_name>
iscsi ip_tpgroup remove [-f] <tpgroup_name> [<IP Address> ...]
iscsi ip_tpgroup show
DESCRIPTIONiSCSI is a transport protocol which allows standard SCSI block access over a TCP/IP network. Whenthe iSCSI service is licensed and enabled, NetApp Inc node can operate as an iSCSI target device.
The iscsi command manages the iSCSI service on a node, and is available only if your node has iSCSIlicensed.
Using the iscsi command, you may set the iSCSI nodename and target alias, and start or stop the iSCSIservice, and display initiators currently connected to a the node. You may also manage iSCSI use ofnode network interfaces, configure security parameters, and dump iSCSI statistics.
284 Data ONTAP® 8.2 Commands: Manual Page Reference for 7-Mode, Volume 1
iscsi
USAGENode Nodename and AliasUnder the iSCSI protocol, each iSCSI target device is assigned a nodename which is unique within theoperational domain of the end user. The protocol also allows an administrator to assign a user-friendlytarget alias string for the device, for ease of identification in user interfaces.
The nodename and alias subcommands are used to manage the node’s nodename and target alias.
iscsi nodename [<new_nodename>]
Sets the iSCSI target nodename of the node to new_nodename, if specified. Otherwise, displays thecurrent iSCSI target nodename of the node.
iscsi alias [-c | <new_alias>]
Sets the iSCSI target alias of the node to new_alias, if specified. Clears the target alias if the -c option isspecified. Otherwise, displays the current iSCSI target alias of the node.
Service StateWhen the iSCSI service is licensed; the node administrator may use the start and stop subcommands tocontrol whether the node accepts new incoming iSCSI requests.
iscsi start
Starts the iSCSI service if it is not already running.
iscsi stop
Stops the iSCSI service if it is running; this causes any active iSCSI sessions to be shutdown.
iscsi status
Displays current status of the iSCSI service.
iSCSI ActivityWhen the iSCSI service is running, the node is actively accepting new iSCSI connections and servicingincoming iSCSI requests from connected initiators. The initiator, stats, session, and connectionsubcommands are used to monitor the node’s iSCSI activity.
iscsi initiator show
Displays list of initiators currently connected to the node. Information displayed for each initiatorincludes the Target Session ID Handle (TSIH) assigned to the session, the target portal group number towhich the initiator is connected, the iSCSI initiator alias (if provided by the initiator), and the initiator’siSCSI nodename and Initiator Session ID (ISID).
iscsi stats [-z | -a | ipv4 | ipv6]
Displays the current iSCSI statistics. Statistics displayed include the different iSCSI PDU typestransmitted and received, SCSI CDB’s processed, and various iSCSI errors which may occur.
Data ONTAP® 8.2 Commands: Manual Page Reference for 7-Mode, Volume 1 285
iscsi
If the -z option is given, all iSCSI statistics are zeroed.
If the -a option is given, the output contains the iSCSI statistics for ipv4, ipv6 and the total.
If the ipv4 option is given, the output contains the iSCSI statistics only for ipv4.
If the ipv6 option is given, the output contains the iSCSI statistics only for ipv6.
iscsi session show [-v | -t | -p | -c] [<session_tsih> ...]
Shows status of specified session, or for all sessions if no sessions are specified.
If the -t option is specified, the output contains underlying TCP connection information.
If the -p option is specified, the output contains iSCSI session parameter information.
If the -c option is specified, the output contains information about the iSCSI commands which are inprogress on the session.
If the -v option is specified, the output is verbose, and contains all information, including that shownwith the -t, -p, and -c options.
Status information displayed includes:
Initiator name, ISID - The iSCSI nodename and iSCSI Initiator Session ID, which combine to identifythe initiator using this session.
TCP connections - The local and remote IP addresses, TCP ports, and node network interface used foreach underlying TCP connection.
Session Parameters - iSCSI session parameters negotiated via the iSCSI login key exchanges. Forspecific definitions of these parameters, please see the iSCSI protocol specification.
iscsi connection show [-v] [ {new | <session_tsih>} <conn_id>]
Shows status of one connection, or for all connections if no connection is specified. A connection maybe one of the connections which compose an active iSCSI session, or it may be a new connection whichhas not yet completed the iSCSI login sequence.
If the -v option is specified, the output is verbose.
Status information displayed includes:
Connection name - session_tsih/connection_id for connections associated with active sessions; new/connection_num for new connections not yet associated with a session.
Connection state - State of this connection (for example: Login_In_Progress, Full_Feature_Phase,Shutdown_In_Progress).
TCP connections - The local and remote IP addresses and TCP ports of the underlying TCPconnections, and the node interface used for the connection (verbose mode only).
286 Data ONTAP® 8.2 Commands: Manual Page Reference for 7-Mode, Volume 1
iscsi

Network Interface ManagementThe node may be accessed as an iSCSI target device over any or all of the node’s network interfaces.The iscsi interface command allows the administrator to control which network interfaces may be usedfor iSCSI connectivity. For example, an administrator may wish to configure a node to support iSCSIaccess only through the node’s Gigabit Ethernet interfaces.
When the iscsi service is enabled, ONTAP will accept iSCSI connections and requests over thosenetwork interfaces enabled for iSCSI use via the iscsi interface command, but not over disabledinterfaces. When the iscsi service is stopped, ONTAP will not accept iSCSI connections or requestsover any interface, regardless of its enable/disable state.
iscsi interface show [-a | <interface> ...]
Shows the enable/disable state of the specified interfaces, or of all interfaces if -a is specified. If noarguments are specified, the state of all interfaces is displayed.
iscsi interface enable { -a | <interface> ... }
Enable the specified interfaces for iSCSI service. If -a is specified, all interfaces are enabled for iSCSIuse.
Once enabled, new iSCSI connections will be accepted, and iSCSI requests serviced, over the newlyenabled interfaces.
iscsi interface disable [-f] { -a | <interface> ... }
Disable the specified interfaces for iSCSI service. If -a is specified, all interfaces are disabled for iSCSIuse.
The process of disabling an interface requires termination of any outstanding iSCSI connections andsessions currently using that interface. The command prompts for confirmation if any active sessionswill be affected, unless the -f flag is specified.
Once disabled, ONTAP rejects subsequent attempts to establish new iSCSI connections over the newlydisabled interfaces.
Network Interface Accesslist ManagementThe iscsi interface command, as described above, controls access to an interface for all initiators. Withthe iscsi interface accesslist subcommand, the administrator can restrict an initiator to certain networkinterfaces. This is useful in environments where a particular initiator cannot access all of the networkinterfaces on a node, for example in configurations that use IEEE 802.1Q Virtual LANs (VLANs).
An accesslist for an initiator is a list of network interfaces that the initiator is allowed to use for iSCSIlogins. Accesslists are recorded as part of the node configuration and are preserved across reboots. Inaddition, separate accesslists are maintained for each vfiler.
The rules for accesslists are:
* If a network interface is disabled for iSCSI use (via iscsi interface disable), then it is not accessible toany initiator regardless of any accesslists in effect.
Data ONTAP® 8.2 Commands: Manual Page Reference for 7-Mode, Volume 1 287
iscsi

* If there is no accesslist for a particular initiator, then that initiator can access any iSCSI-enablednetwork interface.
* If there is an accesslist for a particular initiator, then that initiator can only login to network interfacesin its accesslist. Furthermore, the initiator cannot discover IP addresses to which it does not have access.If an initiator logs into an accessible network interface for a discovery session and sends an iSCSISendTargets command, the node will respond with a list of network portals that includes only IPaddresses from network interfaces that are in its accesslist.
* If an initiator has no accesslist and an iscsi interface accesslist add command is invoked for thatinitiator, an accesslist is created. If an initiator has an accesslist and all of its interfaces are removed viaan iscsi interface accesslist remove operation, then the accesslist itself is deleted.
* Creating or modifying an accesslist may require shutting down existing iSCSI sessions associatedwith network interfaces that no longer appear on the accesslist. For example, creating a new accesslistvia the add operation may cause sessions to be shut down on network interfaces that are not in the newaccesslist. Likewise, removing network interfaces from an existing accesslist via the remove operationmay also cause sessions to be shut down. The add and remove subcommands warn the user if iSCSIsessions could be affected. Note that adding all interfaces (add -a) and removing all interfaces (remove -a) will not affect any iSCSI sessions.
The following subcommands manage accesslists:
iscsi interface accesslist show [ { -a | <initiator_name> ...} ]
Show the accesslist for each of the named initiators (or all initiators if -a is specified).
iscsi interface accesslist add [-f] <initiator_name> {-a | <interface> ...}
Add the named network interfaces (or all interfaces if -a is specified) to the accesslist for the specifiedinitiator. If there is no accesslist, one will be created.
This command prompts for confirmation if any active sessions will be affected, unless the -f flag isspecified.
iscsi interface accesslist remove [-f] <initiator_name> {-a | <interface> ...}
Remove the named network interfaces (or all interfaces if -a is specified) from the accesslist for thespecified initiator. If this command leaves the initiator’s accesslist empty, the accesslist itself isremoved.
This command prompts for confirmation if any active sessions will be affected, unless the -f flag isspecified.
Target Portal Group ManagementAs an iSCSI target device, a node receives iSCSI requests over any or all of its network interfaces. Eachnetwork interface is assigned to an iSCSI target portal group.
The iscsi tpgroup command is used to manage the assignment of a node’s network interfaces to targetportal groups. The administrator may create userdefined target portal groups containing a specific set ofnode network interfaces. Any interface which is not part of a user-defined target portal group isassigned by ONTAP to a system default tpgroup.
288 Data ONTAP® 8.2 Commands: Manual Page Reference for 7-Mode, Volume 1
iscsi
Use the iscsi ip_tpgroup command to manage the assignment of a vFiler’s IP Addresses to target portalgroups. The administrator may create userdefined target portal groups containing a specific set ofvFiler’s IP Addresses. Data ONTAP assigns any IP Address that is not part of a user-defined targetportal group to the system default ip_tpgroup.
Use the iscsi ip_tpgroup command to manage the assignment of a vFiler’s IP Addresses to target portalgroups. The administrator may create userdefined target portal groups containing a specific set ofvFiler’s IP Addresses. Data ONTAP assigns any IP Address that is not part of a user-defined targetportal group to the system default ip_tpgroup.
The administrator should take into account the following factors, imposed by the iSCSI protocol, whenassigning interfaces to target portal groups:
1) All TCP connections within an iSCSI session must use interfaces within the same target portal group.
2) A given initiator may have no more than one iSCSI session in progress to the node through a specifictarget portal group.
The iscsi portal command may be used to display the list of portals (IP address/TCP port number), andtheir portal group assignments, over which the node operates the iSCSI service. The contents of theportal list depends on the enable/disable state and the IP addresses configured on the node’s networkinterfaces, plus the target portal group assignment for each interface.
iscsi tpgroup show
Display the node’s list of target portal groups, both user-defined and system default.
iscsi tpgroup create [-f] [-t <tpgtag>] <tpgroup_name> [<interface> ...]
Create a user-defined target portal group. If one or more network interfaces are provided, add thoseinterfaces to the group.
If a target portal group tag is specified, that tpgtag is assigned to the created group; otherwise, a tpgtagis automatically assigned.
Reassigning network interfaces may result in termination of sessions already in progress on thoseinterfaces. The command prompts for confirmation if any active sessions will be affected, unless the -fflag is specified.
iscsi tpgroup add [-f] <tpgroup_name> [<interface> ...]
Add interfaces to a user-defined target portal group.
Reassigning network interfaces may result in termination of sessions already in progress on thoseinterfaces. The command prompts for confirmation if any active sessions will be affected, unless the -fflag is specified.
iscsi tpgroup remove [-f] <tpgroup_name> [<interface> ...]
Remove interfaces from a user-defined target portal group. The interfaces are assigned by ONTAP backto their system default tpgroups.
Data ONTAP® 8.2 Commands: Manual Page Reference for 7-Mode, Volume 1 289
iscsi
Reassigning network interfaces may result in termination of sessions already in progress on thoseinterfaces. The command prompts for confirmation if any active sessions will be affected, unless the -fflag is specified.
iscsi tpgroup destroy [-f] <tpgroup_name>
Destroy a user-defined target portal group. Any network interfaces which are members of the tpgroupare assigned by ONTAP back to their system default tpgroups.
Reassigning network interfaces may result in termination of sessions already in progress on thoseinterfaces. The command prompts for confirmation if any active sessions will be affected, unless the -fflag is specified.
iscsi ip_tpgroup show
Display the vFiler’s list of IP-based target portal groups, both user-defined and system default.
iscsi ip_tpgroup create [-f] [-t <tpgtag>] <tpgroup_name> [<IP Address> ...]
Create a user-defined IP-based target portal group. If one or more IP Addresses are provided, add thoseIP Addresses to the group.
If a target portal group tag is specified, that tpgtag is assigned to the created group; otherwise, a tpgtagis automatically assigned.
Reassigning IP Addresses may result in termination of sessions already in progress on those IPAddresses. The command prompts for confirmation if any active sessions will be affected, unless the -fflag is specified.
iscsi ip_tpgroup add [-f] <tpgroup_name> [<IP Address> ...]
Add IP Addresses to a user-defined target portal group.
Reassigning IP Addresses may result in termination of sessions already in progress on those IPAddresses. The command prompts for confirmation if any active sessions will be affected, unless the -fflag is specified.
iscsi ip_tpgroup remove [-f] <tpgroup_name> [<IP Address> ...]
Remove IP Addresses from a user-defined target portal group. Data ONTAP assigns the IP Addressesback to their system default ip_tpgroups.
Reassigning IP Addresses may result in termination of sessions already in progress on those IPAddresses. The command prompts for confirmation if any active sessions will be affected, unless the -fflag is specified.
iscsi ip_tpgroup destroy [-f] <tpgroup_name>
Destroy a user-defined IP-based target portal group. Data ONTAP assigns any IP Addresses that aremembers of the ip_tpgroup back to their system default ip_tpgroups.
290 Data ONTAP® 8.2 Commands: Manual Page Reference for 7-Mode, Volume 1
iscsi

Reassigning IP Addresses may result in termination of sessions already in progress on those IPAddresses. The command prompts for confirmation if any active sessions will be affected, unless the -fflag is specified.
iscsi portal show
Display the list of target portals (IP address, TCP port number) over which the node is currently makingavailable the iSCSI service.
Asymmetric Logical Unit Access (ALUA) management Data ONTAP supports SCSI ALUAfunctionality for managing multi-pathed SCSI devices. ALUA provides a standardized mechanism forpath discovery and prioritization. Devices are identified by target port IDs, which are then grouped intotarget port groups. Each group has a state which, when configured, enables the host multipathingsoftware to select the appropriate path priorities when accessing a LUN.
For iSCSI, ALUA settings are controlled at the target portal group level using the iscsi tpgroup alua set command. A target portal group can be configured to be either optimized or non-optimized; a hosttypically uses all the optimized paths before using any non-optimized paths it may find. All target portalgroups are optimized by default.
There is also an optional preferred setting that may be used on a target portal group. Check your host’smultipathing software documentation to see if it supports ALUA and the preferred setting.
ALUA is enabled on Initiator Groups using the igroup set command. All LUNs mapped to an ALUAenabled igroup will support ALUA functionality.
iscsi tpgroup alua show
Display the ALUA settings for all iSCSI target portal groups.
iscsi tpgroup alua set <tpgroup_name> { optimized | nonoptimized } [preferred]
Configure ALUA priorities for a target portal group. If the preferred argument is not given then thetarget portal group will not be configured as preferred.
Security ParametersONTAP supports the configuration of default and perinitiator authentication parameters; theseparameters are used during the iSCSI connection login phase. Initiators may be allowed access onlyafter successfully performing the CHAP authentication procedure; or may be allowed access withoutCHAP authentication; or denied access.
If RADIUS is disabled, all logins are handled by a local lookup. If RADIUS is enabled, and iscsi security is set to -s CHAP -f RADIUS, then the lookups go to RADIUS ONLY. If RADIUS is enabled,and iscsi security is set to -s CHAP, then the lookups go first to local database, then to RADIUSservers.
iscsi security add -i <initiator> -s CHAP [ -f RADIUS | -p <inpassword> -n <inname> ] [ -o <outpassword> -m <outname> ]
Configure the initiator with CHAP as the authentication method. The -p option is used to specify theinbound CHAP password and the -n option to specify the inbound CHAP username. The -o option isused to specify the outbound CHAP password. The -f option ensures that initiator uses only RADIUS asthe authentication method. If this option is not used, the initiator attempts to authenticate via RADIUS
Data ONTAP® 8.2 Commands: Manual Page Reference for 7-Mode, Volume 1 291
iscsi

only if the local CHAP authentication fails. and the -m option is used to specify the outbound CHAPname. The outbound CHAP password and username are optional and need to be configured if mutualauthentication is desired. If the password is not specified on the command line then the administrator isprompted for the password twice.
iscsi security add -i <initiator> -s { deny | none }
Configure the initiator with the authentication method as deny or none. If the authentication method isdeny, then the specified initiator will be denied access. If the authentication method is chosen as nonethen no authentication would be done for the specified initiator.
iscsi security default -s CHAP [ -f RADIUS | -p <inpassword> -n <inname> ] [ -o <outpassword> -m <outname> ]
Configure the default authentication method as CHAP. The default authentication parameters apply toany initiator which is not configured with a specific authentication method via the add command.
The -p option is used to specify the inbound CHAP password and the -n option to specify the inboundCHAP username. The -o option is used to specify the outbound CHAP password. The -f option ensuresthat initiator uses only RADIUS as the authentication method. If this option is not used, the initiatorattempts to authenticate via RADIUS only if the local CHAP authentication fails. and the -m option isused to specify the outbound CHAP name. The outbound CHAP password and username are optionaland need to be configured if mutual authentication is desired. If the password is not specified on thecommand line then the administrator is prompted for the password twice.
iscsi security default -s { deny | none }
Configure the default authentication method as deny or none. The default authentication parametersapply to any initiator which is not configured with a specific authentication method via the addcommand.
iscsi security delete -i <initiator>
Remove the initiator from the authentication list. The default authentication would now be applied forthis initiator.
iscsi security show
Display the default authentication and all the initiator specific authentication information.
iscsi security generate
Generate a 128 bit Random password that can be used as a CHAP secret.
iSNS Server RegistrationONTAP supports registration with an external iSNS server. Large-scale installations may choose to usethe iSNS mechanism for centralized management and automatic device discovery.
The iscsi isns command is used to configure and manage the node’s interaction with an iSNS server.
292 Data ONTAP® 8.2 Commands: Manual Page Reference for 7-Mode, Volume 1
iscsi
iscsi isns config <hostname> | <ip_addr>
Configure the iSNS service with the hostname or IP address of the iSNS server. The ip_addr is anInternet address expressed in the Internet standard dot notation for IPv4 addresses andStandard/Compressed/Mixed notation for IPv6 addresses. Configuration of the iSNS service should takeplace before the iSNS service is started.
The -i ip_addr option will continue to work for backwards compatibility, but has been deprecated.
iscsi isns show
Show the iSNS service configuration. This includes the entity_id_string (EID), the ip_addr of the iSNSserver, and if the service is enabled.
iscsi isns start
Start the iSNS service. This will start the iSNS service and automatically register with the iSNS server.It is best to configure the iSNS service before starting it.
iscsi isns stop
Stop the iSNS service. This will disable the ability to register with the iSNS server and to be discoveredby iSNS clients.
iscsi isns update
Force an update of the registration information with the iSNS server.
HA CONSIDERATIONSEach node in an HA pair operates as an independent iSCSI target device, with its own iSCSI nodenameand alias. During an HA pair takeover, the takeover node assumes the iSCSI identity of the failed node,including its nodename and portals, and services incoming iSCSI requests on behalf of the failed node.
VFILER CONSIDERATIONSWhen run from a vfiler context (for example via the vfiler run command), iscsi subcommands operateon the concerned vfiler with the following exceptions:
iscsi stats subcommand: the statistics displayed apply to the entire physical node and not to individualvfilers
iscsi interface subcommand: node interfaces are physical node attributes
iscsi interface accesslist subcommand: all node interfaces can be added to the accesslist of the vfilerbut the initiator will only be able to access the interfaces bound to the vfiler’s IP addresses
iscsi tpgroup subcommand: target portal group assignments apply to the entire node
iscsi ip_tpgroup subcommand: IP-based target portal group assignments are not available on defaultnode
Data ONTAP® 8.2 Commands: Manual Page Reference for 7-Mode, Volume 1 293
iscsi
EXAMPLESSet the iSCSI target nodename to a new value:
FAS> iscsi nodename iqn.1992-08.com.vendor:sn.mytarget
Start and stop the iSCSI service:
FAS> iscsi start FAS> iscsi stop
Display all initiators currently connected to the node:
FAS> iscsi initiator show Initiators connected: TSIH TPGroup Initiator 26 1001 iqn.1992-08.com.vendor:host1 / 00:00:00:00:00:00
Display current iSCSI statistics:
FAS> iscsi stats
iSCSI PDUs Received SCSI-Cmd: 15236 | Nop-Out: 0 | SCSI TaskMgtCmd: 0 LoginReq: 3 | LogoutReq: 1 | Text Req: 1 DataOut: 0 | SNACK: 0 | Unknown: 0 Total: 15241 iSCSI PDUs Transmitted SCSI-Rsp: 15173 | Nop-In: 0 | SCSI TaskMgtRsp: 0 LoginRsp: 3 | LogoutRsp: 1 | Text Rsp: 1 Data_In: 60743 | R2T: 0 | Reject: 0 Total: 75921 iSCSI CDBs DataIn Blocks: 1942288 | DataOut Blocks: 0 Error Status: 0 | Success Status: 15221 Total CDBs: 15221 iSCSI ERRORS Failed Logins: 1 | Failed TaskMgt: 0 Failed Logouts: 0 | Failed TextCmd: 0 Protocol: 1 Digest: 0 Unexpected session disconnects: 0 PDU discards (outside CmdSN window): 0 PDU discards (invalid header): 0 Total: 2
Disable use of a network interface for the iSCSI service:
FAS> iscsi interface disable e0 FAS> iscsi interface show Interface e0 disabled Interface e5 enabled Interface e11a enabled Interface e11b enabled
294 Data ONTAP® 8.2 Commands: Manual Page Reference for 7-Mode, Volume 1
iscsi
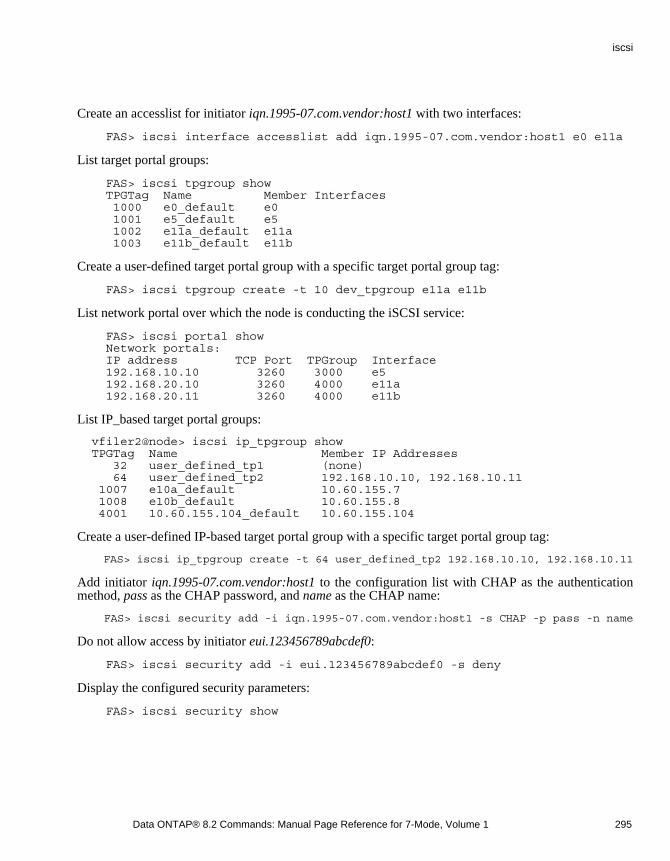
Create an accesslist for initiator iqn.1995-07.com.vendor:host1 with two interfaces:
FAS> iscsi interface accesslist add iqn.1995-07.com.vendor:host1 e0 e11a
List target portal groups:
FAS> iscsi tpgroup show TPGTag Name Member Interfaces 1000 e0_default e0 1001 e5_default e5 1002 e11a_default e11a 1003 e11b_default e11b
Create a user-defined target portal group with a specific target portal group tag:
FAS> iscsi tpgroup create -t 10 dev_tpgroup e11a e11b
List network portal over which the node is conducting the iSCSI service:
FAS> iscsi portal show Network portals: IP address TCP Port TPGroup Interface 192.168.10.10 3260 3000 e5 192.168.20.10 3260 4000 e11a 192.168.20.11 3260 4000 e11b
List IP_based target portal groups:
vfiler2@node> iscsi ip_tpgroup show TPGTag Name Member IP Addresses 32 user_defined_tp1 (none) 64 user_defined_tp2 192.168.10.10, 192.168.10.11 1007 e10a_default 10.60.155.7 1008 e10b_default 10.60.155.8 4001 10.60.155.104_default 10.60.155.104
Create a user-defined IP-based target portal group with a specific target portal group tag:
FAS> iscsi ip_tpgroup create -t 64 user_defined_tp2 192.168.10.10, 192.168.10.11
Add initiator iqn.1995-07.com.vendor:host1 to the configuration list with CHAP as the authenticationmethod, pass as the CHAP password, and name as the CHAP name:
FAS> iscsi security add -i iqn.1995-07.com.vendor:host1 -s CHAP -p pass -n name
Do not allow access by initiator eui.123456789abcdef0:
FAS> iscsi security add -i eui.123456789abcdef0 -s deny
Display the configured security parameters:
FAS> iscsi security show
Data ONTAP® 8.2 Commands: Manual Page Reference for 7-Mode, Volume 1 295
iscsi
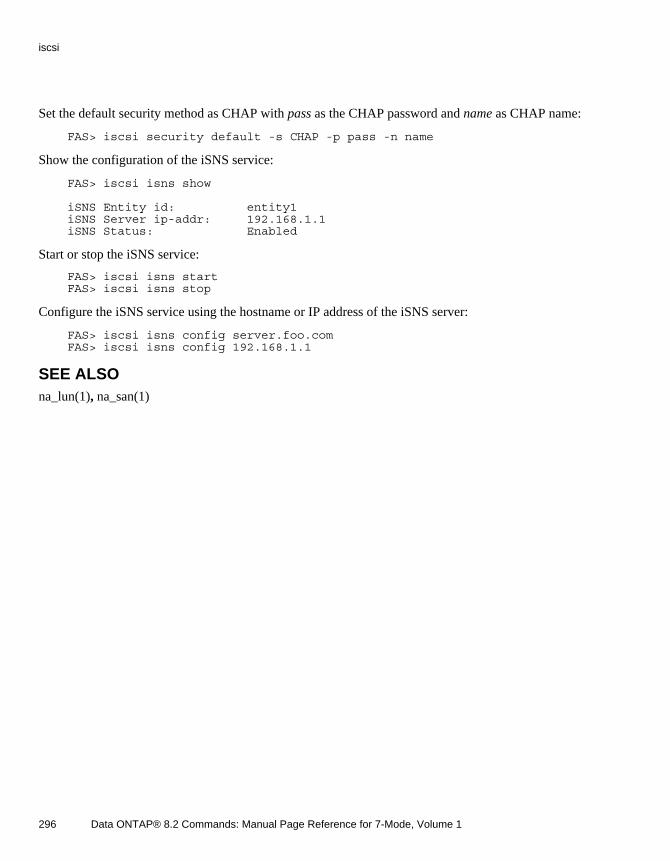
Set the default security method as CHAP with pass as the CHAP password and name as CHAP name:
FAS> iscsi security default -s CHAP -p pass -n name
Show the configuration of the iSNS service:
FAS> iscsi isns show
iSNS Entity id: entity1 iSNS Server ip-addr: 192.168.1.1 iSNS Status: Enabled
Start or stop the iSNS service:
FAS> iscsi isns start FAS> iscsi isns stop
Configure the iSNS service using the hostname or IP address of the iSNS server:
FAS> iscsi isns config server.foo.com FAS> iscsi isns config 192.168.1.1
SEE ALSOna_lun(1), na_san(1)
296 Data ONTAP® 8.2 Commands: Manual Page Reference for 7-Mode, Volume 1
iscsi
iswtNAMEna_iswt - Manages the iSCSI software target (ISWT) driver.
DESCRIPTIONThe iswt command is deprecated. All iSCSI target management functions are now performed using the iscsi command. See na_iscsi(1).
Data ONTAP® 8.2 Commands: Manual Page Reference for 7-Mode, Volume 1 297
iswt
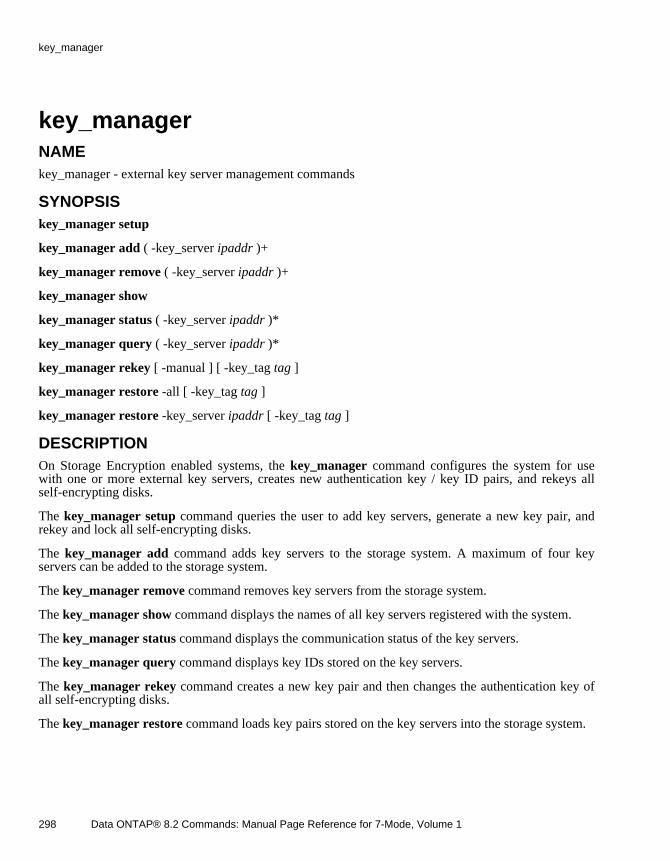
key_managerNAMEkey_manager - external key server management commands
SYNOPSISkey_manager setup
key_manager add ( -key_server ipaddr )+
key_manager remove ( -key_server ipaddr )+
key_manager show
key_manager status ( -key_server ipaddr )*
key_manager query ( -key_server ipaddr )*
key_manager rekey [ -manual ] [ -key_tag tag ]
key_manager restore -all [ -key_tag tag ]
key_manager restore -key_server ipaddr [ -key_tag tag ]
DESCRIPTIONOn Storage Encryption enabled systems, the key_manager command configures the system for usewith one or more external key servers, creates new authentication key / key ID pairs, and rekeys allself-encrypting disks.
The key_manager setup command queries the user to add key servers, generate a new key pair, andrekey and lock all self-encrypting disks.
The key_manager add command adds key servers to the storage system. A maximum of four keyservers can be added to the storage system.
The key_manager remove command removes key servers from the storage system.
The key_manager show command displays the names of all key servers registered with the system.
The key_manager status command displays the communication status of the key servers.
The key_manager query command displays key IDs stored on the key servers.
The key_manager rekey command creates a new key pair and then changes the authentication key ofall self-encrypting disks.
The key_manager restore command loads key pairs stored on the key servers into the storage system.
298 Data ONTAP® 8.2 Commands: Manual Page Reference for 7-Mode, Volume 1
key_manager
USAGEkey_manager setup
On a Storage Encryption enabled system, this command queries the user for key server configurationparameters. It can also create a new authentication key / key ID pair and rekey and lock allself-encrypting disks.
The initial operation of this command is to register the storage system’s KMIP certificate files client.pem and client_private.pem, if necessary. All certificate files must be installed before they canbe registered. See CERTIFICATES.
This command begins by querying the user for a maximum of four key servers. Specify the IP addressof each key server you want to register with the storage system. Previously added key servers (if any)become default answers for this query. At least one key server must be defined.
key_manager setup next queries the user for the TCP/IP port number of the external key server. Allkey servers must use this same port.
key_manager setup next queries the user for the name of the default key tag. The key tag is auser-defined text string associated with a key ID. It can be used later for grouping operations, such aswith key_manager restore.
This command then registers each key server’s CA certificate file ipaddr_CA.pem, if necessary. EachCA certificate file must be installed before it is registered. See CERTIFICATES.
After all key servers are registered, key_manager setup prompts you to create a passphrase for allself-encrypting disks. You can choose to enter a passphrase manually or have it generated for you. Anew key ID is automatically associated with this passphrase.
The passphrase and key ID is now an authentication key / key ID pair, and is stored (along with the keytag) on all registered external key servers.
Note that the system has a creation limit of 128 key pairs. If the new key pair would exceed this limit,the creation request is refused.
The authentication key is secret and is never revealed by the storage system. The key ID is less secret,because it has no meaning without access to the external key server.
The purpose of the key ID is to identify the authentication key without revealing secret information. Thepurpose of the external key server is to maintain this association, for example, across reboots, or for anHA pair.
Finally, key_manager setup prompts for permission to lock all self-encrypting disks, whichautomatically executes commands,
disk encrypt rekey new_key_id * disk encrypt lock *
using the new key ID just created.
Data ONTAP® 8.2 Commands: Manual Page Reference for 7-Mode, Volume 1 299
key_manager
key_manager setup may be executed at any time to reconfigure the key servers and/or rekey the disks.
key_manager add ( -key_server ipaddr )+
On a Storage Encryption enabled system, this command adds key servers to the system.
The initial operation of this command is to register the storage system’s KMIP certificate files client.pem and client_private.pem, if necessary. All certificate files must be installed before they canbe registered. See CERTIFICATES.
Each -key_server option specifies the IP address of an external key server using the KMIP protocol. Atleast one -key_server option is required.
A maximum of four key servers can be registered using this command.
This command registers the key server’s CA certificate file ipaddr_CA.pem. This file must be installedbefore it is registered. See CERTIFICATES.
The operation of adding an external key server to the storage system is also known as "registering" akey server.
key_manager remove ( -key_server ipaddr )+
On a Storage Encryption enabled system, this command removes key servers from the system.
Each -key_server option specifies the IP address of an external key server previously registered with key_manager setup or key_manager add. At least one -key_server option is required.
A maximum of four key servers can be removed using this command.
This command unregisters the key server’s CA certificate file ipaddr_CA.pem.
When removing the last key server, the storage system’s KMIP certificate files client.pem and client_private.pem are also unregistered.
Unregistering a certificate file does not uninstall it. See CERTIFICATES.
key_manager show
On a Storage Encryption enabled system, this command displays all registered key servers.
key_manager status ( -key_server ipaddr )*
On a Storage Encryption enabled system, this command displays the communications status of the keyserver(s).
If no -key_server option is specified, the communication status of all key servers is displayed.
key_manager query ( -key_server ipaddr )*
On a Storage Encryption enabled system, this command displays the key IDs stored on the keyserver(s).
300 Data ONTAP® 8.2 Commands: Manual Page Reference for 7-Mode, Volume 1
key_manager
If no -key_server option is specified, the key IDs from all key servers is displayed.
For each key ID displayed, the key tag associated with the key ID is also displayed. The key tag isassociated with the key ID when the key ID is created.
If the key ID is prefixed with an "*" you should run key_manager restore to load the key ID into thesystem’s internal keytable. See KEYTABLE.
key_manager rekey [ -manual ] [ -key_tag tag ]
On a Storage Encryption enabled system, this command creates a new authentication key / key ID pairand changes the current authentication key of each self-encrypting disk to the new authentication key.The act of changing the authentication key is known as "rekeying" the disk.
Use -manual to enter the passphrase, otherwise the passphrase is generated automatically. A new key IDis automatically associated with this passphrase.
The passphrase and key ID is now an authentication key / key ID pair, and is stored (along with the keytag) on all registered external key servers.
Note that the system has a creation limit of 128 key pairs. If the new key pair would exceed this limit,the creation request is refused.
Use -key_tag to specify a user-defined text string to be associated with this key ID. If not provided, thedefault key tag from key_manager setup is used. Finally, if a default key tag is not defined, a specialvalue known as the parent tag is used instead. The parent tag is the string "systemid-partnerid", in sortorder.
key_manager rekey uses the command,
disk encrypt rekey new_key_id *
to rekey all self-encrypting disks using the new key ID just created.
key_manager restore -all [ -key_tag tag ]
key_manager restore -key_server ipaddr [ -key_tag tag ]
On a Storage Encryption enabled system, this command loads authentication key / key ID pairs fromexternal key servers into the storage system’s internal keytable. See KEYTABLE.
Specify -all to load all key pairs from all registered key servers into the internal keytable. This operationbuilds a new internal keytable, discarding the previous keytable. This option is the only way (other than reboot) to remove key IDs from the internal keytable after they have been deleted from the external keyserver.
Specify -key_server with the IP address of an external key server to load the key pairs from that keyserver. The external key server must have been previously added to the storage system using key_manager setup or key_manager add. This option does not remove key pairs from the keytable.
Data ONTAP® 8.2 Commands: Manual Page Reference for 7-Mode, Volume 1 301
key_manager

Use -key_tag to selectively load key pairs associated with string value tag. If -key_tag is not specified,all key pairs are loaded into the keytable.
CERTIFICATESStorage Encryption enabled systems require certain SSL certificate files be installed. These files havevery specific names and should be created outside of the storage system.
client.pem
client.pem is the Storage System’s KMIP client public SSL certificate file.
client_private.pem
client_private.pem is the Storage System’s KMIP client private SSL certificate file, and contains theprivate key. client_private.pem is created by concatenating the private key file to client.pem, allowingthe private key to be installed as a PEM file.
ipaddr_CA.pem
ipaddr_CA.pem, where ipaddr is the IP address of the external key server, is the external key server’sKMIP public SSL certificate file.
All certificate files must be installed before they can be registered. To install these files, use the keymgr install cert command,
keymgr install cert /path/client.pem
keymgr install cert /path/client_private.pem
keymgr install cert /path/ipaddr_CA.pem
where /path is a pathname accessible to the storage system.
The keymgr install cert command copies each file to the directory /mroot/etc/keymgr/cert, which isonly accessible when the storage system is up and WAFL is running.
But Storage Encryption enabled systems need access to these certificate files before WAFL is available.To register these files means they are copied to /var/kmip/certs, which is an area on the CompactFlashboot device. When kmip_init executes at boot time, it accesses registered files at /var/kmip/certs, since itcannot see installed files at /mroot/etc/keymgr/cert.
When files are unregistered, it means they are removed from /var/kmip/certs using key_manager remove.
When files are uninstalled, it means they are deleted from /mroot/etc/keymgr/cert using keymgr delete cert.
As long as a file is not uninstalled, an unregistered file can be automatically registered again later.
302 Data ONTAP® 8.2 Commands: Manual Page Reference for 7-Mode, Volume 1
key_manager

KEYTABLEThis section provides an overview of the relationship between the keytable and external key servers.
The keytable is an internal data structure inside the storage system main memory. This internal keytableprovides quick access to all authentication key / key ID pairs from all registered external key servers.
The authentication keys are needed by the disk initialization code very early during boot. Therefore,before the system starts, a special process called kmip_init fetches all key pairs from all registered keyservers and loads them into the internal keytable. After kmip_init exits the storage system beginsexecution.
When a self-encrypting disk needs an authentication key, only the internal keytable is consulted, not theexternal key servers. The internal keytable remains in main memory until the storage system is halted orrebooted.
Note that key_manager query only shows key IDs present on the key servers, which may or may notbe present in the keytable. In the key_manager query output, a prepended "*" indicates key IDs notpresent in the internal keytable.
There are three ways to load key pairs into the internal keytable:
1. Use reboot, which uses kmip_init to load the keytable.
2. Use key_manager restore to load key pairs from the external key servers into the keytable.
3. Use key_manager rekey to create a new key pair, which is stored on the external key servers andalso loaded into the keytable.
The keytable does not store duplicate key IDs.
Space for the internal keytable is limited. While a creation limit of 128 key IDs should prevent runawaygrowth of the keytable, the keytable can grow dynamically beyond 128 key IDs, when necessary. Usersare encouraged to establish a key management policy that limits the keytable to 128 key IDs or less.
LIMITATIONSStorage Encryption and SnapLock cannot be used on the same system.
Storage Encryption protects against a single threat model: the security of data for drives that are lost,stolen, or otherwise removed from the storage system. A core file, for example, can reveal the internalkeytable, and is not necessarily a securable asset in this threat model.
A limit exists for consecutive failed authentication attempts for a single disk that, if exceeded, can resultin total data loss on that disk. This limit is currently 1024 and is set by the drive manufacturer. If thislimit is reached, drive lockout occurs and further authentication attempts are ignored. This limit shouldbe considered a feature, since the assumption is the disk is under attack. But pathological scenarios existwhere total drive lockout can occur. For example, if all disks are locked and protected with a non-MSIDkey, and if the storage system is booted while the keys are unavailable, then the storage system maypanic. If AUTOBOOT is enabled, the storage system will reboot. Without authentication keys,AUTOBOOT may cause the storage system to enter a nonstop panic / reboot loop. Each boot attemptincreases the disk counters for the consecutive failed authentication attempts. After enough reboots, themaximum is reached, and total drive lockout (and total data loss) occurs. For these scenarios, the
Data ONTAP® 8.2 Commands: Manual Page Reference for 7-Mode, Volume 1 303
key_manager
storage system maintains a number of features to slow or limit consecutive failed authenticationattempts, but these techniques cannot be considered fool-proof. Great care should be taken whenbooting a Storage Encryption enabled system; needed key servers should be available and in servicebefore the storage system is booted.
SEE ALSOna_snaplock(1)
BUGSkey_manager cannot use DNS names for the key servers.
304 Data ONTAP® 8.2 Commands: Manual Page Reference for 7-Mode, Volume 1
key_manager
keymgrNAMEkeymgr - key and certificate management
SYNOPSISkeymgr generate <type> <file_name> <attributes>
keymgr install <type> <path_name>
keymgr install key <path_name> <PASSWORD>
keymgr list <type>
keymgr view <type> <file_name>
keymgr delete <type> <file_name>
Where <type> is one of,
csr certificate signing request
cert user certificate
root root certificate
key key file
Where <attributes> are,
KeyLen Key length in bits (default 1024)
KeyFile File name of private key
Common Common name (such as hostname)
Country Country name
State State name
Data ONTAP® 8.2 Commands: Manual Page Reference for 7-Mode, Volume 1 305
keymgr
Locality Locality name (such as the City name)
Organization Organization name (such as Company)
Unit Organization unit name
DESCRIPTIONkeymgr manages private keys, certificate signing requests, user certificates, and root certificates forNode.
A private key is a mathematical value of an asymmetric key pair that is not shared with trading partners.A private key works in conjunction with the public key to encrypt and decrypt data.
A certificate signing request (CSR) is an unsigned certificate for submission to a Certification Authority(CA), which signs it with the Private Key of their CA Certificate. Once a CSR is signed, it becomes auser certificate.
A user certificate is a digital ID. It is signed and issued by a certification authority. It contains a uniquename, a serial number, expiration dates, a public key and the digital signature of the certificate-issuingauthority.
keymgr generate command can be used to generate a private key, a certificate signing request, a selfsigned user certificate, or a root certificate.
keymgr install command can be used to install a private key, a user certificate, or a root certificate onthe Node. In most cases, a private key is generated on the same Node by using the keymgr generatecommand. However, private keys can also be generated on a different host, which may generate betterrandom keys than the Node. A user certificate is generally issued as a response to a certificate signingrequest and sent back by a CA (via an out-of-band mechanism such as mail). In order to be able toverify the peer’s user certificates, the system administrator must install root certificates that sign thoseuser certificates.
keymgr list command can be used to list all the private keys, certificate signing requests, usercertificates and root certificates.
keymgr view command can be used to view a certificate signing request, user certificate or a rootcertificate.
keymgr delete command can be used to delete a private key, certificate signing request, user certificateor root certificate. If the key, user certificate, or root certificate is currently used by any application, itcan not be deleted.
306 Data ONTAP® 8.2 Commands: Manual Page Reference for 7-Mode, Volume 1
keymgr
EXAMPLES keymgr generate cert MyCertFile KeyLen = 1024 KeyFile = MyKeyFile Common = MyFiler Country = US State = CA Local = Sunnyvale Org = MyCompany Unit = MyGroup
keymgr list cert
keymgr view cert MyCertFile
keymgr install cert /etc/MyCASignedCert.pem
keymgr install key /etc/MyPrivateKey.pem KEY_PASSWORD
Data ONTAP® 8.2 Commands: Manual Page Reference for 7-Mode, Volume 1 307
keymgr
l2pingNAMEna_l2ping - sends IEEE802.1ag CFM LBx packets to network hosts.
SYNOPSISl2ping [ -d ] [ -h ] -i interface [ -l md_level ] [ -v vlan ] [ -c count ] destination_mac
DESCRIPTIONThe l2ping is a layer 2 ping utility which uses the IEEE802.1ag CFM LBM/LBR protocol. It sends aunicast CFM LBM packet to elicit a CFM LBR response from the destination. If count option isprovided, the CFM LBM packet will be sent every 100ms for count times. l2ping prints the summary ofthe tx/rx statistics after the getting the response or time out occurs. l2ping does not invoke IP and aboveprotocols. This is true even with vlan option. It does not rely on the Ontap vlan interface. Instead, itcomposes the vlan packet and directly passes it to the physical interface. l2ping can be used to checklink level and below health. For example, if the normal ping command to the remote host fails, and the l2ping command succeeds, it indicates that the ethernet driver and physical connection, including theswitch, cable connection are OK. The problem could happen in IP/ICMP and above.
EXAMPLESThe -h option provides the help menu for the command:
l2ping -h
Usage: l2ping [options] mac_addr -d Debug -h Help -i Network interface -l Maintenance domain level -v Vlan ID -c Count
Here is an example for l2ping through the e0c interface to the destination mac 00:1b:21:6b:d9:68:
l2ping -i e0c -c 10 00:1b:21:6b:d9:68
10 packets transmitted, 10 received, 0% loss
The following command displays a l2ping from e0c interface to the destination mac00:07:43:06:24:6f via vlan 100. Note that the -d option is on for debugging, and the l2ping is tried3 times since the count is 3.
l2ping -d -i e0c -c 3 -v 100 00:a0:98:0b:9f:5f
308 Data ONTAP® 8.2 Commands: Manual Page Reference for 7-Mode, Volume 1
l2ping

l2ping destination: 00:07:43:06:24:6f. l2ping through e0c (MAC addr 0x00A09820D0D3) 64 bytes from 0x00074306246F, sequence 0, time 0.138 ms 64 bytes from 0x00074306246F, sequence 1, time 0.108 ms 64 bytes from 0x00074306246F, sequence 2, time 0.110 ms 3 packets transmitted, 3 received, 0% loss round-trip min/avg/max = 0.108/0.118/0.138 ms
SEE ALSOna_ping (1) na_ifstat (1)
Data ONTAP® 8.2 Commands: Manual Page Reference for 7-Mode, Volume 1 309
l2ping
lockNAMElock - Manages locks records.
SYNOPSISlock status -f [file] [-p protocol] [-n]
lock status -h [host [-o owner]] [-f file] [-p proto] [-n]
lock status -o [-f file] [-p proto] [-n] (not valid for NLM and NFSv4)
lock status -o owner [-f file] [-p proto] [-n] (CIFS only)
lock status -p protocol [-n]
lock status -n
lock break -f file [-o owner -h host] [-p proto]
lock break -h host [-o owner] [-f file] [-p protocol]
lock break -o owner [-f file] [-p protocol] (CIFS only)
lock break -p protocol
lock break -net network
Note:
Unless a protocol name is specified above, the syntax is valid for all protocols.
Output of lock status -p protocol and lock status -p protocol -f is identical.
Warning: When the lock break command completes, any CIFS file handle referencing the affected filewill no longer be valid. This may cause unexpected results on the client.
Currently, lock break -f file is allowed, but not recommended because breaking NFSv4 locks mightlead to unexpected results on the client. The breaking of NFSv4 locks can be prevented by mentioningthe protocol along with the file name.
Unlike the case of file name, Host and owner differ in meaning across protocols. Owner is a pertinentfilter for CIFS, NLM, and FLEXCACHE only. If protocol is not specified, then locks across allprotocols, viz., CIFS, FLEXCACHE, NLM (Nfsv2/Nfsv3), NFSv4, FIO, and WAFL are scanned. Inthat case, protocols not recognizing the syntax of host or owner generate syntax errors. In the specificcases of NLM and NFSv4, locks cannot be filtered just by specifying owner. Host must be specifiedalong with owner. Owner, being a pid/uid, is not unique unless host (client) is also specified. The samerestrictions apply when specifying a set of locks to be broken.
310 Data ONTAP® 8.2 Commands: Manual Page Reference for 7-Mode, Volume 1
lock

Currently, all protocols filter locks by file, but only CIFS, NFSv4 and NLM protocols filter locks by hostand owner.
NOTE: In the case of NLM, the value of host could be either a hostname (FQDN, hostname alias, etc.,)or an IP address. The lock command does not resolve the hostname to an IP address. Functionally,filtering locks by a hostname is not equivalent to filtering locks by the corresponding IP address. If thelocks are to be filtered by host, then the value of host should be obtained from the lock status -h output.Such a value of host should not be interpreted in any way. If done so, may lead to improper status orremoval of locks.
DESCRIPTIONlock status prints protocol lock records whereas lock break breaks locks as per the specified options.The options are described as follows:
OPTIONS
-f Prints lock records organized by file.
-f file
Prints or breaks locks of specified file. The syntax of the file-name is a path name prefixed by"/vol/volX" where volX is the name of a volume on the node.
-h
Prints lock records grouped by host-name. CIFS, however, does not group locks by host but insteadprefixes each record by "CIFS host=" string.
-h host
Prints or breaks locks of a specified host. Currently, only CIFS, NFSv4 and NLM can do this. Note:Meaning of host varies across protocols (CIFS: NetBIOS or FQDN or IP, NLM and FLEXCACHE: IPor FQDN, NFSv4: IP).
-o
Prints lock records grouped by owner-name. CIFS, however, does not group locks by owner but insteadprefixes each record by "CIFS owner=" string.
-o owner
Prints or breaks locks of specified owner. Currently, only CIFS does this. NLM and NFSv4 allowspecification of owner, but only in the case in which host is specified as well. Note: Meaning of ownervaries across protocols (CIFS: [domain\]user, FLEXCACHE: IP:fsid of caching node, NLM:Process-ID, NFSv4: UID)
-p protocol
Data ONTAP® 8.2 Commands: Manual Page Reference for 7-Mode, Volume 1 311
lock

Prints or breaks locks of specified protocol, which is a case-insensitive string and can take one of thefollowing values: nlm, nfsv4, cifs, flexcache.
-n Prints the number of share-level and byte-level locks for each protocol. If specified with "-p<protocol>" switch, it prints the same for the specified protocol only.
-net network
Breaks locks of the specified network family, which is a case-insensitive string and can take one of thefollowing value: IPv4 or IPv6. Currently, only valid for NLM.
lock status -f is one way to output lock records across all protocols, grouping locks by file. A header ofform ========<fsid>:<fid> starts the lock dump for each file where fsid and fid uniquely identifythe file. Other ways to output lock records across all protocols are:
lock status -h (group by host) and lock status -o (group by owner).
An example showing locks grouped by file is: FAS> lock status -f ========0e1d66f7:00000040 state=GRANTED mode=FIO_NoDelete state=GRANTED mode=FIO_NoDelete ========0e1d66f7:00000062 state=GRANTED mode=FIO_NoDelete ========0e1d66f7:000000d3 CIFS path=\word.doc(/vol/vol0/share1/word.doc) host=10.34.17.49(FLOYD-XP) owner=root state=GRANTED mode=Oplock-Excl oplock=Excl ========0e1d66f7:000009d8 state=GRANTED mode=FIO_NoDelete ========0e1d66f7:00000aab CIFS path=\another.doc(/vol/vol0/share2/another.doc) host=10.34.17.49(FLOYD-XP) owner=root state=GRANTED mode=RdWr-denyN oplock=None durable_state=DH_GRANTED CIFS path=\another.doc(/vol/vol0/share2/another.doc) host=10.34.17.49(FLOYD-XP) owner=root pid=65279 offset=2147483539 len=1 excl=yes state=GRANTED durable_state=DH_NONE CIFS path=\another.doc(/vol/vol0/share2/another.doc) host=10.34.17.49(FLOYD-XP) owner=root pid=65279 offset=2147483559 len=1 excl=yes state=GRANTED durable_state=DH_NONE CIFS path=\another.doc(/vol/vol0/share2/another.doc) host=10.34.17.49(FLOYD-XP) owner=root pid=65279 offset=2147483599 len=1 excl=yes state=GRANTED durable_state=DH_NONE NLM[zhora.eng.mycompany.com,6892]: 0:0 1 GWAITING (0x61cc5aa0)
The above output shows locks on 5 files with the last one having both CIFS and NLM locks.
As for lock break, there is no way to break locks across all protocols. Locks can be broken for aspecified protocol using -p protocol option though.
CIFS style locks follow the format as shown in the example below: FAS> lock status -p cifs CIFS path=\(/vol/vol0/home/) host=10.34.17.49(FLOYD-XP) owner=administrator state=GRANTED mode=Read-denyN oplock=None fsid=0x6408e411 fileid=0x00000dc8 durable_state=DH_NONE CIFS path=\(/vol/vol0/home/) host=10.34.17.49(FLOYD-XP) owner=administrator state=GRANTED mode=Read-denyN oplock=None fsid=0x6408e411 fileid=0x00000dc8 durable_state=DH_NONE CIFS path=\user1\file1.docx(/vol/vol0/home/user1/file1.docx) host= owner= state=GRANTED mode=Oplock-Excl oplock=Lease-RWH fsid=0x6408e411 fileid=0x00001b40 durable_state=DH_NONE CIFS path=\user1\file1.docx(/vol/vol0/home/user1/file1.docx) host=10.34.17.49(FLOYD-XP) owner=administrator state=GRANTED mode=RdWr-denyW oplock=None fsid=0x6408e411 fileid=0x00001b40 durable_state=... CIFS path=\user1(/vol/vol0/home/user1) host=10.34.17.49(FLOYD-XP) owner=administrator state=GRANTED mode=Read-denyN oplock=None fsid=0x6408e411 fileid=0x00001c7a durable_state=DH_NONE
Unlike other protocols, CIFS does not group lock records by file, host, or owner. Instead, each dumpedlock record is prefixed by "CIFS <field>=" where <field> is "path", "host", or "owner" in response to"-f", "-h", or "-o" option respectively.
Locks are described either as share level locks (denoted by the keyword state appearing in the line) oras byte level locks (which have "offset", "len", and "excl" fields). The first line in the example above isa share level lock and has the following format:
path CIFS path name of the file or directory associated with the lock followed by the absolute("/vol/volX" style) path within parentheses. Undetermined absolute path is denoted by emptyparentheses. Note that Delete-On-Close locks have no associated absolute path informationavailable. Absolute path is also unavailable in case of insufficient memory.
312 Data ONTAP® 8.2 Commands: Manual Page Reference for 7-Mode, Volume 1
lock
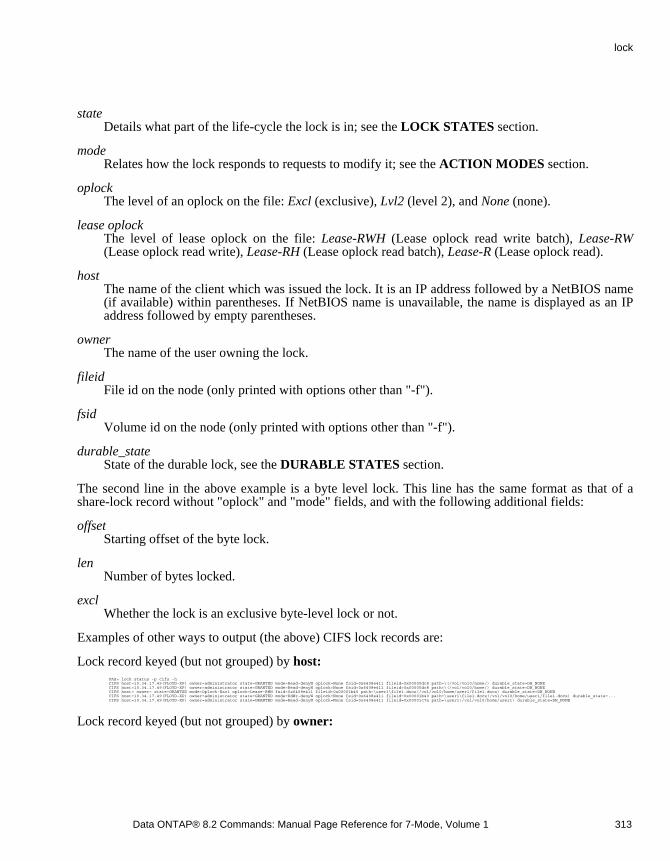
state Details what part of the life-cycle the lock is in; see the LOCK STATES section.
mode Relates how the lock responds to requests to modify it; see the ACTION MODES section.
oplock The level of an oplock on the file: Excl (exclusive), Lvl2 (level 2), and None (none).
lease oplock The level of lease oplock on the file: Lease-RWH (Lease oplock read write batch), Lease-RW(Lease oplock read write), Lease-RH (Lease oplock read batch), Lease-R (Lease oplock read).
host The name of the client which was issued the lock. It is an IP address followed by a NetBIOS name(if available) within parentheses. If NetBIOS name is unavailable, the name is displayed as an IPaddress followed by empty parentheses.
owner The name of the user owning the lock.
fileid File id on the node (only printed with options other than "-f").
fsid Volume id on the node (only printed with options other than "-f").
durable_state State of the durable lock, see the DURABLE STATES section.
The second line in the above example is a byte level lock. This line has the same format as that of ashare-lock record without "oplock" and "mode" fields, and with the following additional fields:
offset Starting offset of the byte lock.
len Number of bytes locked.
excl Whether the lock is an exclusive byte-level lock or not.
Examples of other ways to output (the above) CIFS lock records are:
Lock record keyed (but not grouped) by host: FAS> lock status -p cifs -h CIFS host=10.34.17.49(FLOYD-XP) owner=administrator state=GRANTED mode=Read-denyN oplock=None fsid=0x6408e411 fileid=0x00000dc8 path=\(/vol/vol0/home/) durable_state=DH_NONE CIFS host=10.34.17.49(FLOYD-XP) owner=administrator state=GRANTED mode=Read-denyN oplock=None fsid=0x6408e411 fileid=0x00000dc8 path=\(/vol/vol0/home/) durable_state=DH_NONE CIFS host= owner= state=GRANTED mode=Oplock-Excl oplock=Lease-RWH fsid=0x6408e411 fileid=0x00001b40 path=\user1\file1.docx(/vol/vol0/home/user1/file1.docx) durable_state=DH_NONE CIFS host=10.34.17.49(FLOYD-XP) owner=administrator state=GRANTED mode=RdWr-denyW oplock=None fsid=0x6408e411 fileid=0x00001b40 path=\user1\file1.docx(/vol/vol0/home/user1/file1.docx) durable_state=... CIFS host=10.34.17.49(FLOYD-XP) owner=administrator state=GRANTED mode=Read-denyN oplock=None fsid=0x6408e411 fileid=0x00001c7a path=\user1(/vol/vol0/home/user1) durable_state=DH_NONE
Lock record keyed (but not grouped) by owner:
Data ONTAP® 8.2 Commands: Manual Page Reference for 7-Mode, Volume 1 313
lock
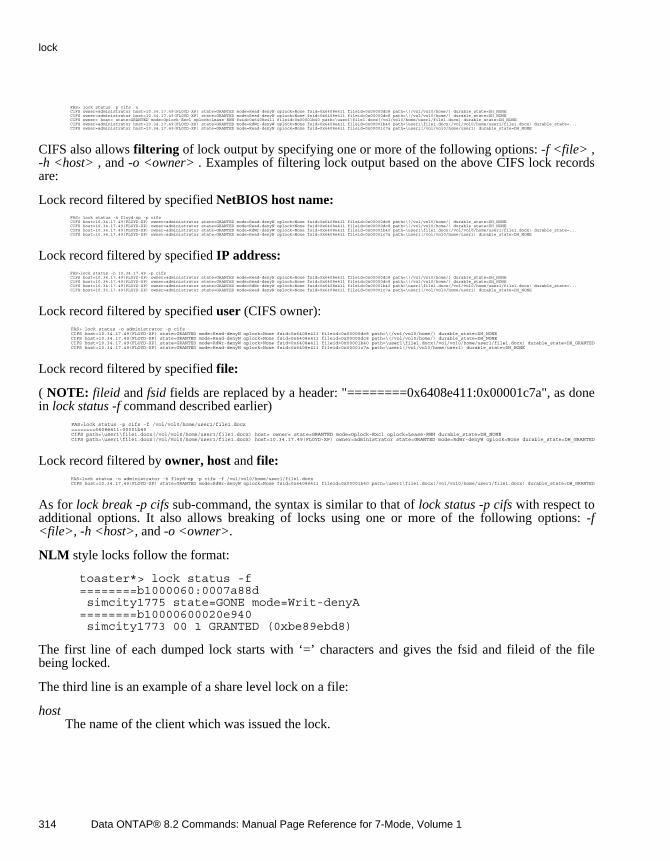
FAS> lock status -p cifs -o CIFS owner=administrator host=10.34.17.49(FLOYD-XP) state=GRANTED mode=Read-denyN oplock=None fsid=0x6408e411 fileid=0x00000dc8 path=\(/vol/vol0/home/) durable_state=DH_NONE CIFS owner=administrator host=10.34.17.49(FLOYD-XP) state=GRANTED mode=Read-denyN oplock=None fsid=0x6408e411 fileid=0x00000dc8 path=\(/vol/vol0/home/) durable_state=DH_NONE CIFS owner= host= state=GRANTED mode=Oplock-Excl oplock=Lease-RWH fsid=0x6408e411 fileid=0x00001b40 path=\user1\file1.docx(/vol/vol0/home/user1/file1.docx) durable_state=DH_NONE CIFS owner=administrator host=10.34.17.49(FLOYD-XP) state=GRANTED mode=RdWr-denyW oplock=None fsid=0x6408e411 fileid=0x00001b40 path=\user1\file1.docx(/vol/vol0/home/user1/file1.docx) durable_state=... CIFS owner=administrator host=10.34.17.49(FLOYD-XP) state=GRANTED mode=Read-denyN oplock=None fsid=0x6408e411 fileid=0x00001c7a path=\user1(/vol/vol0/home/user1) durable_state=DH_NONE
CIFS also allows filtering of lock output by specifying one or more of the following options: -f <file> , -h <host> , and -o <owner> . Examples of filtering lock output based on the above CIFS lock recordsare:
Lock record filtered by specified NetBIOS host name: FAS> lock status -h floyd-xp -p cifs CIFS host=10.34.17.49(FLOYD-XP) owner=administrator state=GRANTED mode=Read-denyN oplock=None fsid=0x6408e411 fileid=0x00000dc8 path=\(/vol/vol0/home/) durable_state=DH_NONE CIFS host=10.34.17.49(FLOYD-XP) owner=administrator state=GRANTED mode=Read-denyN oplock=None fsid=0x6408e411 fileid=0x00000dc8 path=\(/vol/vol0/home/) durable_state=DH_NONE CIFS host=10.34.17.49(FLOYD-XP) owner=administrator state=GRANTED mode=RdWr-denyW oplock=None fsid=0x6408e411 fileid=0x00001b40 path=\user1\file1.docx(/vol/vol0/home/user1/file1.docx) durable_state=... CIFS host=10.34.17.49(FLOYD-XP) owner=administrator state=GRANTED mode=Read-denyN oplock=None fsid=0x6408e411 fileid=0x00001c7a path=\user1(/vol/vol0/home/user1) durable_state=DH_NONE
Lock record filtered by specified IP address: FAS>lock status -h 10.34.17.49 -p cifs CIFS host=10.34.17.49(FLOYD-XP) owner=administrator state=GRANTED mode=Read-denyN oplock=None fsid=0x6408e411 fileid=0x00000dc8 path=\(/vol/vol0/home/) durable_state=DH_NONE CIFS host=10.34.17.49(FLOYD-XP) owner=administrator state=GRANTED mode=Read-denyN oplock=None fsid=0x6408e411 fileid=0x00000dc8 path=\(/vol/vol0/home/) durable_state=DH_NONE CIFS host=10.34.17.49(FLOYD-XP) owner=administrator state=GRANTED mode=RdWr-denyW oplock=None fsid=0x6408e411 fileid=0x00001b40 path=\user1\file1.docx(/vol/vol0/home/user1/file1.docx) durable_state=... CIFS host=10.34.17.49(FLOYD-XP) owner=administrator state=GRANTED mode=Read-denyN oplock=None fsid=0x6408e411 fileid=0x00001c7a path=\user1(/vol/vol0/home/user1) durable_state=DH_NONE
Lock record filtered by specified user (CIFS owner): FAS> lock status -o administrator -p cifs CIFS host=10.34.17.49(FLOYD-XP) state=GRANTED mode=Read-denyN oplock=None fsid=0x6408e411 fileid=0x00000dc8 path=\(/vol/vol0/home/) durable_state=DH_NONE CIFS host=10.34.17.49(FLOYD-XP) state=GRANTED mode=Read-denyN oplock=None fsid=0x6408e411 fileid=0x00000dc8 path=\(/vol/vol0/home/) durable_state=DH_NONE CIFS host=10.34.17.49(FLOYD-XP) state=GRANTED mode=RdWr-denyW oplock=None fsid=0x6408e411 fileid=0x00001b40 path=\user1\file1.docx(/vol/vol0/home/user1/file1.docx) durable_state=DH_GRANTED CIFS host=10.34.17.49(FLOYD-XP) state=GRANTED mode=Read-denyN oplock=None fsid=0x6408e411 fileid=0x00001c7a path=\user1(/vol/vol0/home/user1) durable_state=DH_NONE
Lock record filtered by specified file:
( NOTE: fileid and fsid fields are replaced by a header: "========0x6408e411:0x00001c7a", as donein lock status -f command described earlier)
FAS>lock status -p cifs -f /vol/vol0/home/user1/file1.docx ========6408e411:00001b40 CIFS path=\user1\file1.docx(/vol/vol0/home/user1/file1.docx) host= owner= state=GRANTED mode=Oplock-Excl oplock=Lease-RWH durable_state=DH_NONE CIFS path=\user1\file1.docx(/vol/vol0/home/user1/file1.docx) host=10.34.17.49(FLOYD-XP) owner=administrator state=GRANTED mode=RdWr-denyW oplock=None durable_state=DH_GRANTED
Lock record filtered by owner, host and file: FAS>lock status -o administrator -h floyd-xp -p cifs -f /vol/vol0/home/user1/file1.docx CIFS host=10.34.17.49(FLOYD-XP) state=GRANTED mode=RdWr-denyW oplock=None fsid=0x6408e411 fileid=0x00001b40 path=\user1\file1.docx(/vol/vol0/home/user1/file1.docx) durable_state=DH_GRANTED
As for lock break -p cifs sub-command, the syntax is similar to that of lock status -p cifs with respect toadditional options. It also allows breaking of locks using one or more of the following options: -f <file>, -h <host>, and -o <owner>.
NLM style locks follow the format:
toaster*> lock status -f ========b1000060:0007a88d simcity1775 state=GONE mode=Writ-denyA ========b10000600020e940 simcity1773 00 1 GRANTED (0xbe89ebd8)
The first line of each dumped lock starts with ‘=’ characters and gives the fsid and fileid of the filebeing locked.
The third line is an example of a share level lock on a file:
host The name of the client which was issued the lock.
314 Data ONTAP® 8.2 Commands: Manual Page Reference for 7-Mode, Volume 1
lock

pid Process ID assigned by the client.
state Details what part of the life-cycle the lock is in; see the LOCK STATES section.
mode Relates how the lock responds to requests to modify it; see the ACTION MODES section.
durable_state State of the durable lock, see the DURABLE STATES section.
The fifth line is an example of a byte level lock on a file:
host The name of the client which was issued the lock.
pid Process ID assigned by the client.
byte offset Start of the byte lock.
number of bytes
exclusive Whether the lock is exclusive or not.
state Details what part of the life-cycle the lock is in; see the LOCK STATES section.
lock address NFSv4 style locks follow the format:
FAS> lock status -f ========4292014d:0000007e NFSv4[IP=172.16.28.73,0]: GRANTED mode=RdWr-denyN (0x7e6a9010,ix=2) NFSv4[IP=172.16.28.73,0]: 0:0 1 GRANTED (0x7e6a8f00,ix=3)
The first line of each dumped lock starts with ‘=’ characters and gives the fsid and fileid of the filebeing locked.
The second line is an example of a share level lock on a file:
host The name of the client which was issued the lock.
UID UID of the process on the client.
state Details what part of the life-cycle the lock is in; see the LOCK STATES section.
Data ONTAP® 8.2 Commands: Manual Page Reference for 7-Mode, Volume 1 315
lock
mode Relates how the lock responds to requests to modify it; see the ACTION MODES section.
durable_state State of the durable lock, see the DURABLE STATES section.
lock address
State ID index
The third line is an example of a byte level lock on a file:
host The name of the client which was issued the lock.
UID UID of the process on the client.
byte offset Start of the byte lock.
number of bytes
exclusive Whether the lock is exclusive or not.
state Details what part of the life-cycle the lock is in; see the LOCK STATES section.
lock address
State ID index
-h Prints lock records organized by host.
CIFS style locks are not grouped by host, so they will not show up under this option.
NLM style locks are grouped by host and will show up under this option. They follow the format:
toaster*> lock status -h ========builder 1583 0x00e509e10xb1000060 00 1 GRANTED (0xbe89e8b8) ========simcity 1773 0x0020e9400xb1000060 00 1 GRANTED (0xbe89ebd8) 1775 0x0020e9410xb1000060 state=GONE mode=Writ-denyA
The first line of each dumped lock starts with ‘=’ characters and gives the name of client which hasapplied the lock.
The sixth line in the example above illustrates the format followed by share level locks:
316 Data ONTAP® 8.2 Commands: Manual Page Reference for 7-Mode, Volume 1
lock
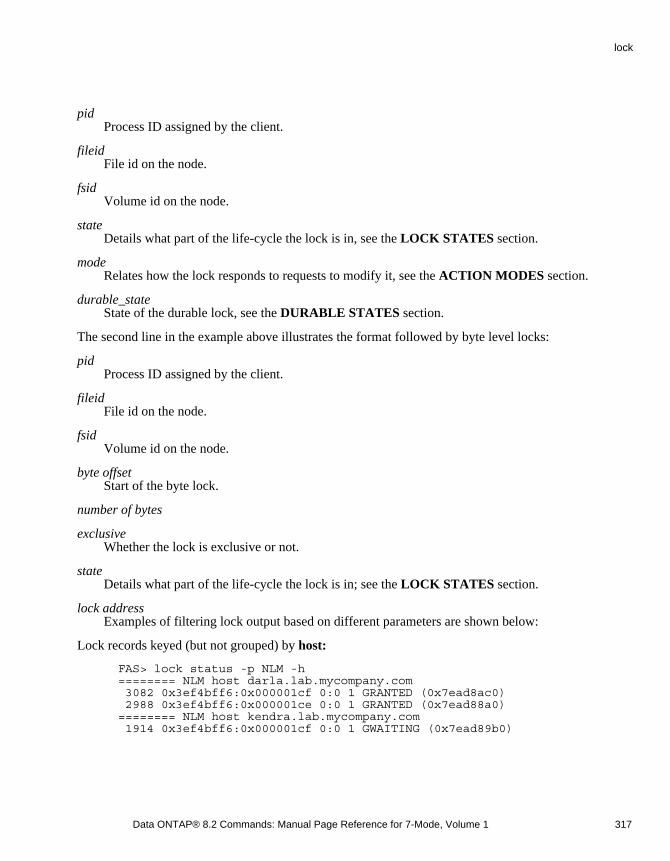
pid Process ID assigned by the client.
fileid File id on the node.
fsid Volume id on the node.
state Details what part of the life-cycle the lock is in, see the LOCK STATES section.
mode Relates how the lock responds to requests to modify it, see the ACTION MODES section.
durable_state State of the durable lock, see the DURABLE STATES section.
The second line in the example above illustrates the format followed by byte level locks:
pid Process ID assigned by the client.
fileid File id on the node.
fsid Volume id on the node.
byte offset Start of the byte lock.
number of bytes
exclusive Whether the lock is exclusive or not.
state Details what part of the life-cycle the lock is in; see the LOCK STATES section.
lock address Examples of filtering lock output based on different parameters are shown below:
Lock records keyed (but not grouped) by host:
FAS> lock status -p NLM -h ======== NLM host darla.lab.mycompany.com 3082 0x3ef4bff6:0x000001cf 0:0 1 GRANTED (0x7ead8ac0) 2988 0x3ef4bff6:0x000001ce 0:0 1 GRANTED (0x7ead88a0) ======== NLM host kendra.lab.mycompany.com 1914 0x3ef4bff6:0x000001cf 0:0 1 GWAITING (0x7ead89b0)
Data ONTAP® 8.2 Commands: Manual Page Reference for 7-Mode, Volume 1 317
lock
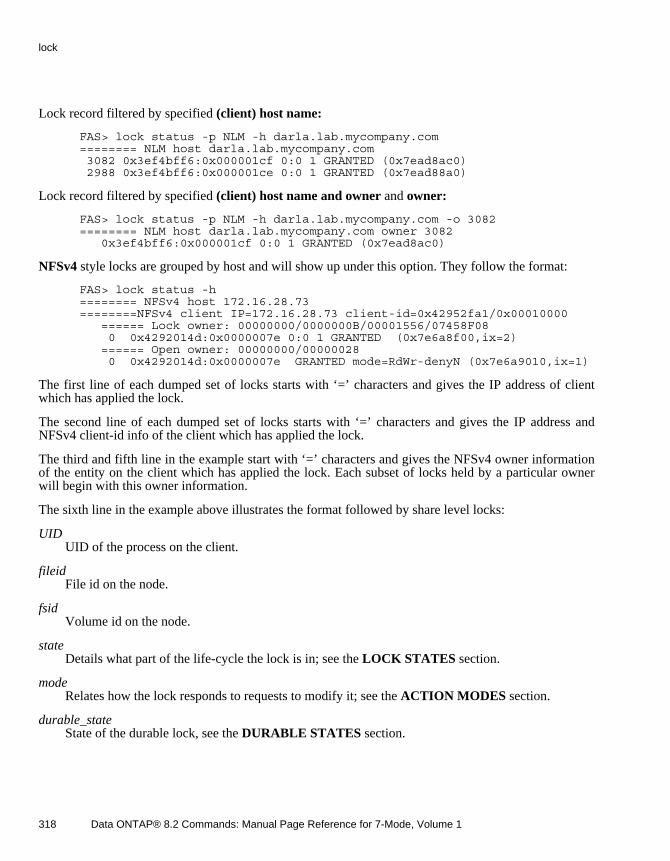
Lock record filtered by specified (client) host name:
FAS> lock status -p NLM -h darla.lab.mycompany.com ======== NLM host darla.lab.mycompany.com 3082 0x3ef4bff6:0x000001cf 0:0 1 GRANTED (0x7ead8ac0) 2988 0x3ef4bff6:0x000001ce 0:0 1 GRANTED (0x7ead88a0)
Lock record filtered by specified (client) host name and owner and owner:
FAS> lock status -p NLM -h darla.lab.mycompany.com -o 3082 ======== NLM host darla.lab.mycompany.com owner 3082 0x3ef4bff6:0x000001cf 0:0 1 GRANTED (0x7ead8ac0)
NFSv4 style locks are grouped by host and will show up under this option. They follow the format:
FAS> lock status -h ======== NFSv4 host 172.16.28.73 ========NFSv4 client IP=172.16.28.73 client-id=0x42952fa1/0x00010000 ====== Lock owner: 00000000/0000000B/00001556/07458F08 0 0x4292014d:0x0000007e 0:0 1 GRANTED (0x7e6a8f00,ix=2) ====== Open owner: 00000000/00000028 0 0x4292014d:0x0000007e GRANTED mode=RdWr-denyN (0x7e6a9010,ix=1)
The first line of each dumped set of locks starts with ‘=’ characters and gives the IP address of clientwhich has applied the lock.
The second line of each dumped set of locks starts with ‘=’ characters and gives the IP address andNFSv4 client-id info of the client which has applied the lock.
The third and fifth line in the example start with ‘=’ characters and gives the NFSv4 owner informationof the entity on the client which has applied the lock. Each subset of locks held by a particular ownerwill begin with this owner information.
The sixth line in the example above illustrates the format followed by share level locks:
UID UID of the process on the client.
fileid File id on the node.
fsid Volume id on the node.
state Details what part of the life-cycle the lock is in; see the LOCK STATES section.
mode Relates how the lock responds to requests to modify it; see the ACTION MODES section.
durable_state State of the durable lock, see the DURABLE STATES section.
318 Data ONTAP® 8.2 Commands: Manual Page Reference for 7-Mode, Volume 1
lock
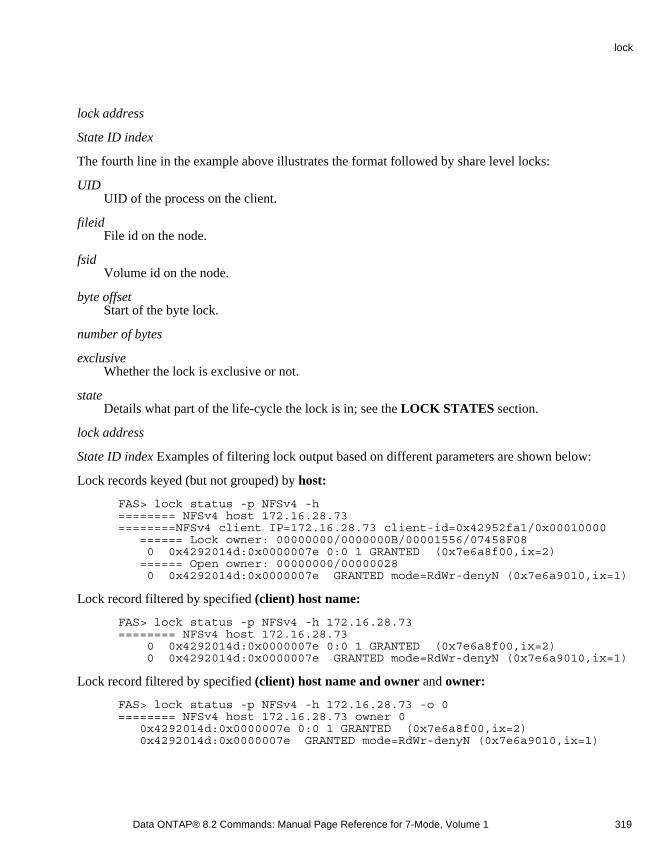
lock address
State ID index
The fourth line in the example above illustrates the format followed by share level locks:
UID UID of the process on the client.
fileid File id on the node.
fsid Volume id on the node.
byte offset Start of the byte lock.
number of bytes
exclusive Whether the lock is exclusive or not.
state Details what part of the life-cycle the lock is in; see the LOCK STATES section.
lock address
State ID index Examples of filtering lock output based on different parameters are shown below:
Lock records keyed (but not grouped) by host:
FAS> lock status -p NFSv4 -h ======== NFSv4 host 172.16.28.73 ========NFSv4 client IP=172.16.28.73 client-id=0x42952fa1/0x00010000 ====== Lock owner: 00000000/0000000B/00001556/07458F08 0 0x4292014d:0x0000007e 0:0 1 GRANTED (0x7e6a8f00,ix=2) ====== Open owner: 00000000/00000028 0 0x4292014d:0x0000007e GRANTED mode=RdWr-denyN (0x7e6a9010,ix=1)
Lock record filtered by specified (client) host name:
FAS> lock status -p NFSv4 -h 172.16.28.73 ======== NFSv4 host 172.16.28.73 0 0x4292014d:0x0000007e 0:0 1 GRANTED (0x7e6a8f00,ix=2) 0 0x4292014d:0x0000007e GRANTED mode=RdWr-denyN (0x7e6a9010,ix=1)
Lock record filtered by specified (client) host name and owner and owner:
FAS> lock status -p NFSv4 -h 172.16.28.73 -o 0 ======== NFSv4 host 172.16.28.73 owner 0 0x4292014d:0x0000007e 0:0 1 GRANTED (0x7e6a8f00,ix=2) 0x4292014d:0x0000007e GRANTED mode=RdWr-denyN (0x7e6a9010,ix=1)
Data ONTAP® 8.2 Commands: Manual Page Reference for 7-Mode, Volume 1 319
lock
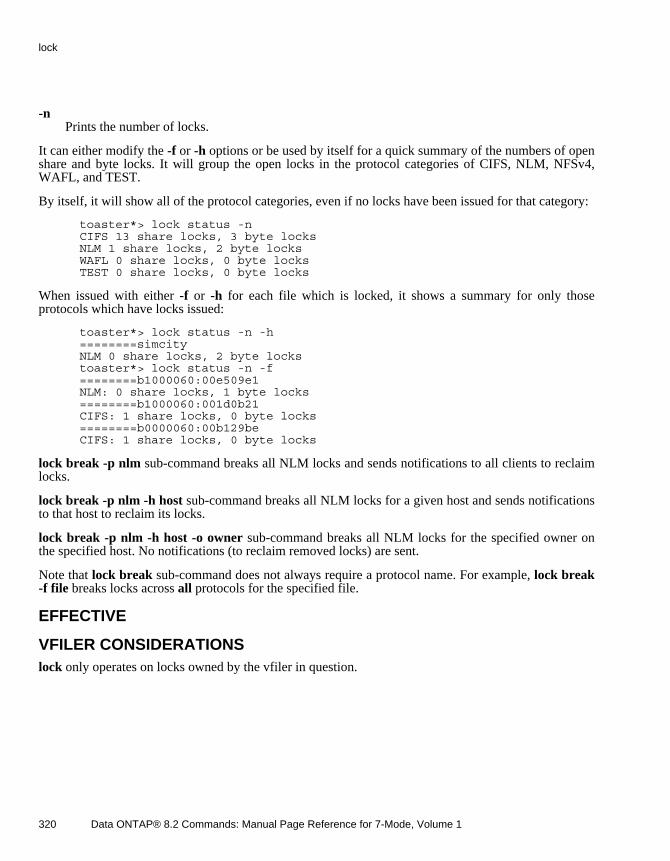
-n Prints the number of locks.
It can either modify the -f or -h options or be used by itself for a quick summary of the numbers of openshare and byte locks. It will group the open locks in the protocol categories of CIFS, NLM, NFSv4,WAFL, and TEST.
By itself, it will show all of the protocol categories, even if no locks have been issued for that category:
toaster*> lock status -n CIFS 13 share locks, 3 byte locks NLM 1 share locks, 2 byte locks WAFL 0 share locks, 0 byte locks TEST 0 share locks, 0 byte locks
When issued with either -f or -h for each file which is locked, it shows a summary for only thoseprotocols which have locks issued:
toaster*> lock status -n -h ========simcity NLM 0 share locks, 2 byte locks toaster*> lock status -n -f ========b1000060:00e509e1 NLM: 0 share locks, 1 byte locks ========b1000060:001d0b21 CIFS: 1 share locks, 0 byte locks ========b0000060:00b129be CIFS: 1 share locks, 0 byte locks
lock break -p nlm sub-command breaks all NLM locks and sends notifications to all clients to reclaimlocks.
lock break -p nlm -h host sub-command breaks all NLM locks for a given host and sends notificationsto that host to reclaim its locks.
lock break -p nlm -h host -o owner sub-command breaks all NLM locks for the specified owner onthe specified host. No notifications (to reclaim removed locks) are sent.
Note that lock break sub-command does not always require a protocol name. For example, lock break -f file breaks locks across all protocols for the specified file.
EFFECTIVE
VFILER CONSIDERATIONSlock only operates on locks owned by the vfiler in question.
320 Data ONTAP® 8.2 Commands: Manual Page Reference for 7-Mode, Volume 1
lock
REFERENCESTR3024 is a Tech Report which describes the differences between Windows and UNIX style locks. Itprovides an overview and context for the concepts presented in this man page.
The report can be found as a white paper, SecureShare: Guaranteed Multiprotocol File Locking athttp://www.netapp.com/tech_library/3024.html.
ACTION MODESThe allowed modes are:
DelOnClose: delete on close semantics
SuperLock: used for virus scanning (issued to CIFS clients only)
Deleg-Read: In this case, the client is granted the read delegation. When the node grants a delegationfor a file to a client, the client is guaranteed certain privileges with respect to the sharing of that file withother clients. The node may provide the client either a read or write delegation for the file. If the clientis granted a read delegation, it is assured that no other client has the ability to write to the file for theduration of the delegation. RFC 3530 has more details on delegations.
Deleg-Wrt: In this case, the client is granted the write delegation. When the node grants a delegationfor a file to a client, the client is guaranteed certain privileges with respect to the sharing of that file withother clients. The node may provide the client either a read or write delegation for the file. If the clientis granted a write delegation, it is assured that no other client has the read or write access to the file forthe duration of the delegation. RFC 3530 has more details on delegations.
Access-Deny:a combination of the following modes on the lock:
access actions which can be performed on the locks
deny actions which can be denied on the locks
The various access modes are:
RdWr can read and write
Read can read, but not write
Write can write, but not read
None can neither read nor write
Data ONTAP® 8.2 Commands: Manual Page Reference for 7-Mode, Volume 1 321
lock

The various deny modes are:
denyA cannot be read or written by others
denyR cannot be read by others
denyW cannot be written by others
denyN can be read and written by others
LOCK STATES
GRANTED Granted and not being revoked.
Locks in this state are on the share-grant or byte-grant lists, depending on type.
REVOKING Revocation started for this lock.
Locks in this state are also on the share-grant or bytegrant lists, depending on type.
GWAITING Waiting for lock to be granted.
Locks in this state are on the share-wait list or one of the wait lists associated with a granted byte lock.Locks enter this state when they can’t be granted because of a conflict and the lock parameters indicatethat the caller is prepared to wait.
EWAITING Waiting for lock to be either granted or denied.
Locks in this state are on the share-wait list or one of the wait lists associated with a granted byte lock.Locks enter this state when they can’t be granted because of a conflict with a soft lock and lockparameters indicate they the caller is not prepared to wait. Generally, in this situation, the protocol isprepared to wait for a limited time to allow the revocation to be resolved so that it can be determinedwhether the lock is to be granted or denied.
REVOKED Undergoing revocation and marked by protocol for deletion.
This is a transient state whereby the protocol indicates the results of lock revocation to the generic lockmanager code. Locks in this state are on the share-grant or bytegrants lists, but are removedimmediately.
ADJUSTED Undergoing revocation and marked by protocol for replacement by a hard lock.
322 Data ONTAP® 8.2 Commands: Manual Page Reference for 7-Mode, Volume 1
lock
This is a transient state whereby the protocol indicates the results of lock revocation to the generic lockmanager code. Locks in this state are on the share-grant or bytegrant lists, but are transitioned back tothe granted state once the changes in the lock have been dealt with.
DENIED The lock has been denied.
This is a temporary state used to mark locks that have, after waiting, been denied. This is so that whenthe lock state is noticed by a WAFL operation, appropriate information about the state of the request,including the denial status, will be available. Locks in this state are not in any of the per-file lists.
TIMEDOUT The wait for the lock has timed out.
This is a temporary state used to mark locks that have, after waiting, had the wait timed out. This is sothat when the lock state is noticed by a WAFL operation, appropriate information about the state of therequest, including the fact that it could not be granted due to a timeout, will be available. Locks in thisstate are not in any of the per-file lists.
SUBSUMED Kept in reserve by protocol.
This is a transient state used for locks which are one of a set of locks that will take the place of a lockbeing revoked. Locks in this state are in an internal list and not in any of the per-file lists. They areconverted to the GRANTED state and put in the share-grant list as part of completing the revocationoperation.
GONE About to be returned.
This is a temporary state for lock objects that are to be freed as soon as any potential references to themare gone. Locks in this state are not on any of the per-file lists.
UNUSED Just allocated.
This is a temporary state for lock objects that have been allocated but have not yet been dealt with (thatis, granted, denied, set up to wait). Locks in this state are not on any of the per-file lists.
DURABLE STATES
DH_NONE Durable handle is none.
Durability on the share-level lock is not required.
DH_GRANTED Durable handle has been granted.
Durability was requested on the file control block and a durable handle was received.
Data ONTAP® 8.2 Commands: Manual Page Reference for 7-Mode, Volume 1 323
lock

RH_GRANTED Resilient handle has been granted.
Resiliency was requested on the file control block and a resilient handle was received.
DH_ACTIVE Durable handle is active.
The file control block preserves durable handle after connection loss and is available for reclaim.
RH_ACTIVE Resilient handle is active.
The file control block preserves resilient handle after connection loss and is available for reclaim.
DH_PURGED Durable handle is purged.
The durable handle is purged because a client touched the file or because of administrator action.
DH_CLOSING Durable handle is being closed.
The durable handle is undergoing close because either it was expired or was purged.
RH_CLOSING Resilient handle is being closed.
The resilient handle is undergoing close because it was expired.
324 Data ONTAP® 8.2 Commands: Manual Page Reference for 7-Mode, Volume 1
lock
loggerNAMEna_logger - Records message in system logs.
SYNOPSISlogger [ -help ]
logger [ string ] ...
loggertext.
DESCRIPTIONThe logger command provides a way to record messages to the system logs. The message may besupplied as a string , on the command line itself or as multiple lines of text entered through the standardinput and terminated with a period (.). The message is logged to various system logs through syslogdwith a priority level of notice (see na_syslogd(8)).
The logger command should be used to record important changes in system configuration so as tofacilitate system diagnosability.
OPTIONS
-help Produces a help message.
OPERANDS
string One of the string arguments whose contents are concatenated together, in the order specified,separated by single space characters.
Without any options or operands logger collects text from the standard input. In this mode the end oftext input is designated by typing a period (.) at the beginning of a line, followed immediately by acarriage return. The maximum number of characters that can be entered in this fashion is 4096.
EXAMPLESLogging a single line :
toaster> logger Modified grounding Wed Jan 26 01:36:20 GMT [logger.usr:notice]: Modified grounding
Logging multiple lines :
Data ONTAP® 8.2 Commands: Manual Page Reference for 7-Mode, Volume 1 325
logger

toaster> logger (Enter ’.’ and carriage return to end message) Painted Bezel yellow Replaced servernet cables . Wed Jan 26 01:38:38 GMT [logger.usr:notice]: Painted Bezel yellow Replaced servernet cables
FILES
/etc/messages File where messages are logged by syslogd.
SEE ALSOna_syslog.conf(5)
326 Data ONTAP® 8.2 Commands: Manual Page Reference for 7-Mode, Volume 1
logger
logoutNAMEna_logout - Allows a user to terminate a telnet session.
SYNOPSISlogout {telnet}
DESCRIPTIONThe logout command sends a signal to the telnet session to terminate. There can be a maximum of onetelnet session per storage system or vFiler and one console session. This command allows the user toterminate the telnet session in the vFiler context. If there is no active telnet session, an error message isdisplayed.
On telnet session, logout telnet disconnects the telnet session.
On the console, logout telnet disconnects the telnet session.
On the rsh, logout telnet disconnects the telnet session.
EXAMPLESTo terminate the telnet session from a telnet session:
FAS> logout telnet
To terminate the telnet session from an interactive SSH session to vFiler:
vfiler@node> logout telnet
To terminate the telnet session from a console session:
nodeconsole> logout telnet
To terminate the telnet session from rsh:
$ rsh -l username:password hostname logout telnet
SEE ALSOna_halt(1)
Data ONTAP® 8.2 Commands: Manual Page Reference for 7-Mode, Volume 1 327
logout
lunNAMElun - Commands for managing LUNs
SYNOPSISlun command argument ...
DESCRIPTIONThe lun command is used to create and manage LUNs, and their mappings using SAN protocols.
USAGEThe following commands are available in the lun suite:
clone help online share comment map resize show config_check maxsize serial snap create move set stats destroy offline setup unmap
LUN cloning allows the user to create a copy of a LUN, which was initially created to be backed by aLUN or a file in a snapshot (that is, using lun clone create). LUN cloning creates a complete copy ofthe LUN and frees the snapshot, which can then be deleted. The following commands can be used tomanage this feature:
lun clone create clone_lunpath [ -o noreserve ] -b parent_lunpath parent_snap
The lun clone create command creates a LUN on the local node that is a clone of a "backing" LUN. Aclone is a LUN that is a writable snapshot of another LUN. Initially, the clone and its parent share thesame storage; more storage space is consumed only as the clone LUN or its parent changes.
The parent_snap is locked in the parent volume, preventing its deletion until the clone is eitherdestroyed or split from the parent using the lun clone split start command.
The lun clone create command fails if the chosen parent_lunpath is currently involved in a lun clone split operation.
lun clone split start [-d] lun_path
This command begins separating clone lun_path from its underlying parent. New storage is allocatedfor the clone LUN that is distinct from the parent.
This process may take some time and proceeds in the background. Use the lun clone split statuscommand to view the command’s progress.
Both clone and parent LUNs remain available during this process of splitting them apart. Uponcompletion, the snapshot on which the clone was based will be unlocked in the parent vol.
328 Data ONTAP® 8.2 Commands: Manual Page Reference for 7-Mode, Volume 1
lun

With the -d option supplied, disables spaceefficient splitting in favor of the legacy style of splittingclones.
lun clone split status [ lun_path ]
This command displays the progress in separating clone LUNs from their underlying parent LUNs.
lun clone split stop lun_path
This command stops the process of separating a clone from its parent LUN. All of the blocks that wereformerly shared between lun_path and its backing LUN that have already been split apart by the lun clone split start will remain split apart.
lun clone show [ lun_path ]
If no lun_path is given, information about all LUNs being cloned is shown. Usage of lun clone showhas been deprecated. Instead, please use lun clone split status.
Displays the cloning status of the LUN in terms of percentage complete.
lun clone start lun_path
Start the cloning of the LUN at the given lun_path. Only LUNs backed by a snapshot can be cloned.
Usage of lun clone start has been deprecated. Instead, please use lun clone split start.
lun clone status lun_path
Display the status of the cloning of the LUN at the given lun_path. This gives details about number ofblocks processed until now.
Usage of lun clone status has been deprecated. Please use lun show -v or lun clone split status todisplay cloning status.
lun clone stop lun_path
Stop the cloning of the LUN at the given lun_path.
Usage of lun clone stop has been deprecated. Instead, please use lun clone split stop.
lun comment lun_path [ comment ]
This command is used to display or change a comment string associated with the LUN. If the commentstring to be supplied has white space, it should be enclosed in double quotes.
lun config_check [ -S | -w ] [ -s | -v ]
config_check performs several checks on the LUN/igroup/fcp configuration of the node. The -v optionenables verbose output which lists the tests being done. The -s option runs the command in a silentmode and disable all output unless problems are discovered. The -w option checks if duplicate WWPNsare present on the HA pair. The -S option runs the ‘SSI’ checks when not running in that cfmode. Thespecific checks are as follows:
Data ONTAP® 8.2 Commands: Manual Page Reference for 7-Mode, Volume 1 329
lun
Compatibility of initiator group ostype and the fcp cfmode setting
FCP HBAs which are not online
FCP cfmodes are set to the same thing on each node in the HA pair
Initiator names which are members of initiator groups with different ostype settings
The SSI checks test for LUN maps that conflict with maps on the partner, and fcp nodenames that aredifferent between the local and partner node.
lun create -s size -t ostype [ -o noreserve ] [ -e space_alloc ] lun_path
This usage of the lun create command should be employed to create a new LUN of given size, withinitially zero contents. The LUN is created at the lun_path given. No file should already exist at thegiven lun_path. The directory specified in the lun_path must be a qtree root directory.
The size is specified in bytes. Optionally, a number followed by a one-character multiplier suffix can beused: c (1), w (2), b (512), k (1024), m (k*k), g (k*m), t (m*m).
The size of the created LUN could be larger than the size specified, in order to get an integral number ofcylinders while reporting the geometry using SAN protocols.
The size of the LUN actually created is reported if it is different from that specified in the command.
The mandatory ostype argument is one of: solaris (the LUN will be used to store a Solaris raw disk in asingle-slice partition), windows (the LUN will be used to store a raw disk device in a singlepartitionWindows disk using the MBR (Master Boot Record) partitioning style), hpux (the LUN will be used tostore HP-UX data), aix (the LUN will be used to store AIX data), vld (the LUN contains aSnapManager VLD), linux (the LUN will be used to store a Linux raw disk without any partition table), netware (the LUN will be used to store NetWare data), vmware (the LUN will be used to storeVMware data), windows_gpt (the LUN will be used to store Windows data using the GPT (GUIDPartition Type) partitioning style), windows_2008 (the LUN will be used to store Windows data forWindows 2008 systems), openvms (the LUN will be used to store Open-VMS data), xen (the LUN willbe used to store Xen data), hyper_v (the LUN will be used to store Hyper-V data), solaris_efi (theLUN will be used to store Solaris_EFI data).
By default, the LUN is space-reserved. To manage space usage manually, -o noreserve can be specified.Using this option will create a LUN without any space being reserved. Provisioning threshold eventscan be enabled by specifying -e space_alloc option. This option has to be used in conjunction with -o noreserve.
lun create -f file_path -t ostype [ -o noreserve ] [ -e space_alloc ] lun_path
Create a LUN from an existing file. A new LUN is created, at the given lun_path (which must be at aqtree root). A hard link is created to the existing file. The file contents are not copied or changed. Thefile can be resized to a larger size, rounding up to a cylinder boundary. If the -o noreserve option isused, make sure that the file does not have any space reservations enabled using the file reservationcommand. Provisioning threshold events can be enabled by specifying -e space_alloc option. Thisoption has to be used in conjunction with -o noreserve.
330 Data ONTAP® 8.2 Commands: Manual Page Reference for 7-Mode, Volume 1
lun

lun create -b snapshot_lun_path [ -o noreserve ] lun_path
A LUN is created in the active file system. The LUN has the same initial contents as the referencedsnapshot copy of an existing LUN. (Note that no copy of the data is made.)
Any subsequent writes to this new LUN would not affect the LUN in the snapshot. All reads to the newLUN would be served by the latest content of the LUN.
Usage of lun create -b has been deprecated. Instead, please use lun clone create.
lun destroy [ -f ] lun_path...
The specified LUN(s) are destroyed. The data container, and the configuration information arediscarded. This operation will fail if the LUN is currently mapped and is online.
The optional -f argument forces the LUN(s) to be destroyed regardless of being mapped or online.
lun help [ subcommand ]
With no arguments, available subcommands are listed with brief help texts. When a subcommand nameis supplied, detailed help for the specific subcommand is displayed.
lun map [ -f ] lun_path initiator_group [ lun_id ]
Maps a LUN to all the initiators in the supplied group. If a LUN ID is not specified, the smallestnumber that can be used for the various initiators in the group is automatically picked. Note that thiscommand can be used multiple times to configure multiple maps for a LUN, or for an initiator group.Once created, you can use lun show -m to list all the LUN mappings.
The optional -f argument disables checking with the HA partner for LUN mapping conflicts.
lun maxsize path
This command returns the maximum possible size of a LUN on a given volume or qtree. The user canpass the path to a volume or qtree in which the LUN is to be created. The command returns themaximum size for different types of LUNs and the possible maximum size with snapshots or withoutsnapshots.
lun move lun_path to_lun_path
Moves the LUN to a new path in the same volume. Both lun_path and to_lun_path should be in thesame volume.
lun offline lun_path...
Disables block-protocol accesses to the LUN(s). Mappings, if any, configured for the LUN are notaltered. Note that unless explicitly taken offline, a LUN is online.
lun online [ -f ] lun_path...
Re-enables block-protocol accesses to the LUN(s). See lun offline for further information.
Data ONTAP® 8.2 Commands: Manual Page Reference for 7-Mode, Volume 1 331
lun
The optional -f argument disables checking with the HA partner for LUN mapping conflicts.
lun resize [ -f ] lun_path [ + | - ] size
Changes the size of the LUN to the input value size. Optional + or - can be used with size to increase ordecrease the LUN size by the given amount. Although it is possible to resize the LUN without takingthe LUN offline first, doing so prevents any potential problems on the host side. Note that client-sideoperations may be needed to ensure that client software recognizes the changed size. The -f option ormanual confirmation is required to reduce the size of a LUN. The LUN may be resized to a larger sizethan specified, rounding up to a cylinder boundary.
lun serial lun_path [ serial_number ]
Displays the persistent serial number associated with the LUN. If a serial number is supplied, it is usedfor the LUN henceforth. The LUN must first be made offline using the lun offline command beforechanging the serial number. The serial number is a 12-character string formed of upper and lower-caseletters, numbers, and the characters /-#$%&*+<=>?@[!]^~.
lun set dev_id lun_path { dev_id | none }
Sets the Device Identifier that is returned in response to a REPORT DEVICE IDENTIFIER SCSIcommand for the specified lun_path. The dev_id value may be 1-9999. To remove the Device ID, setthe Device ID to none.
lun set reservation lun_path [ enable | disable ]
Enables or disables the space reservation on the LUN. If no arguments are supplied after the lun_path,then the space reservation status of the given lun_path is displayed.
lun set report-physical-size lun_path [ enable | disable ]
Enables or disables reporting of physical block size of the LUN. If no arguments are supplied after the lun_path, then the physical block size reporting status of the given lun_path is displayed.
lun set space_alloc lun_path [ enable | disable ]
Enables or disables reporting of provisioning threshold events on the LUN. If no arguments are suppliedafter the lun_path, then the reporting status of the given lun_path is displayed.
lun set svo_offset lun_path [ offset | disable ]
Set the offset used by SnapValidator for Oracle to calculate block numbers in the presence of a hostvolume manager on the LUN. The offset specifies the number of bytes from the beginning of the LUNto the start of Oracle data. Setting the offset to disable will disable SnapValidator checking on thisLUN. This is the default setting.
lun setup
Easy to use interactive mechanism for setting up initiator groups, LUNs, and mapping configuration.
332 Data ONTAP® 8.2 Commands: Manual Page Reference for 7-Mode, Volume 1
lun

Under certain conditions, the default value of the LUN ID might not display. If this occurs, press"Enter", which should display a default LUN ID, or enter the LUN ID manually.
lun share lun_path { all | none | read | write }
Enables file system protocol-based access to a LUN. By default, all accesses are disallowed. Note thatfile permissions and ACL entries still apply.
lun show [ -v | -m | -c ] [ all | mapped | offline | online | unmapped | staging | -g initiator_group | -n node | -l vol_name | lun_path ]
Displays the status (lun_path, size, online/offline state, shared state) of the given LUN or class ofLUNs. With the -v option supplied, additional information (comment string, serial number, LUNmapping, HA Pair Shared Volume Information) is also displayed. With the -m option supplied,information about lun_path to initiator_group mappings is displayed in a table format. With the -coption supplied, information about LUN cloning status is displayed.
A specific LUN can be indicated by supplying its lun_path. When an initiator_group is specified, statusis reported for all LUNs that are mapped to the initiator group. When a node is specified, status isreported for all LUNs that are mapped to initiator groups which contain that node. When staging isspecified, information about the temporary LUNs preserved in the staging area is reported. When vol_name is specified, status is reported for all the LUNs in that volume.
Mapped LUNs are ones with at least one map definition. A LUN is online if it has not been explicitlymade offline using the lun offline command.
lun snap usage [ -s ] vol_name snap_name
Displays information about all LUNs in active file system and snapshots that are backed by the givensnapshot
This command displays all the LUNs in all the existing snapshots which are currently backed by data inthe given snapshot snap_name. If you wish to delete the given snapshot snap_name then you must firstdestroy all those LUNs in the active file system, which are listed in the output. Thereafter, if vol options snapshot_clone_dependency is not set, you need to delete all the snapshots listed in the output startingfrom the one listed at the top. Once this is done, you can delete the snapshot snap_name. The -s optionprovides a summary view of the information.
lun stats [ -o ] [ -z | -a | lun_path ]
Displays or zeroes block-protocol access statistics for LUNs. The time since the stats were last zeroed isdisplayed for each LUN.
The statistics start zeroed at boot time. Thereafter, the -z option zeroes statistics (but does not displaythem).
The -o option will display extra statistics.
The -a option will display all LUNs. Normally only LUNs with non-zero statistics are displayed.
Data ONTAP® 8.2 Commands: Manual Page Reference for 7-Mode, Volume 1 333
lun
With no lun_path specified, statistics for all the LUNs are displayed; otherwise, statistics only for thespecified LUN is displayed.
The default output format is as follows:
/vol/volname/lun (## hours, ## minutes, ## seconds) Read (kbytes) Write (kbytes) Read Ops Write Ops ###### ###### ###### ######
The -o output format is as follows:
/vol/volname/lun (## hours, ## minutes, ## seconds) Read (kbytes) Write (kbytes) Read Ops Write Ops Other Ops QFulls Partner Ops Partner KBytes ###### ###### ###### ###### ###### ###### ##### ######
lun stats -i interval [ -c count ] [ -o ] [ -a | lun_path ]
The -i option will report per LUN performance statistics at the per-second interval given. The -cargument will cause output to stop after the given number of iterations.
The default output format for -i is as follows:
Read Write Read Write Average Queue Lun Ops Ops kB kB Latency Length #### #### ##### ##### ##.## ###.## lun_path
The -i -o output format is as follows:
Read Write Other QFull Read Write Average Queue Partner Lun Ops Ops Ops kB kB Latency Length Ops kB ##### ##### ##### ##### ###### ###### ##.## ###.## #### ##### lun_path
where,
Read OpsThe total number of SCSI read operations.
Write OpsThe total number of SCSI write operations.
Other OpsThe total number of other SCSI operations.
QFullThe number of SCSI Queue Full responses sent per second.
Read kBKilobytes per second read traffic.
Write kBKilobytes per second write traffic.
Average LatencyAverage in milliseconds to process a request for the LUN.
334 Data ONTAP® 8.2 Commands: Manual Page Reference for 7-Mode, Volume 1
lun
Queue LengthThe average number of outstanding requests pending.
Partner OpsThe number of SCSI operations received via the Partner path (included in the Read, Write, and Otherops).
Partner kBKilobtyes per second of SCSI traffic via the Partner path (included in Read kB and Write kb).
LunThe path to the LUN.
lun stats -z [ lun_path ]
zeroes the statistics for the given lun_path or all LUNs if no path is specified.
lun unmap lun_path initiator_group
Reverses the effect of a lun map command.
HA CONSIDERATIONSWhile the system is in takeover mode, LUNs belonging to either host can be managed using the luncommand.
VFILER CONSIDERATIONSWhen run from a vfiler context (for example via the vfiler run command), LUN operates on theconcerned vfiler. LUNs can be created only on storage owned by the vfiler context. The lun commandmay operate only on LUNs created by the vfiler context on which the command is executed. LUN mapsmust refer to initiator groups that have been created within the same vfiler context.
EXAMPLESlun clone create /vol/vol0/myclone -o noreserve -b /vol/vol0/lun0 nightly.0
Creates the LUN clone named myclone in volume /vol/vol0 from the snapshot backed LUN named lun0 also found in /vol/vol0 using the snapshot of /vol/vol0 named nightly.0.
lun resize /vol/vol1/lunY 20g
Resizes the LUN /vol/vol1/lunY to 20G.
lun snap usage vol1 mysnap
Active:LUN: /vol/vol1/lun01cBacked By: /vol/vol1/.snapshot/mysnap/lun01
Data ONTAP® 8.2 Commands: Manual Page Reference for 7-Mode, Volume 1 335
lun

oldsnap:LUN: /vol/vol1/.snapshot/oldsnap/lun02c Backed By: /vol/vol1/.snapshot/mysnap/lun02
This means that one first needs to destroy LUN /vol/vol1/lun01c before snapshot mysnap can bedeleted. If vol option snapshot_clone_dependency is not set then oldsnap will also have to be deletedbefore snapshot mysnap can be deleted.
SEE ALSOna_iscsi(1), na_san(1)
336 Data ONTAP® 8.2 Commands: Manual Page Reference for 7-Mode, Volume 1
lun
manNAMEman - Locates and displays reference manual pages.
SYNOPSISman [ -s section ] name
DESCRIPTIONThe man command prints reference manual pages located in /etc/man on the appliance’s root volume.
If the section is specified, the appliance displays the manual page only if found in the indicated section.If the section is omitted, then the appliance displays the first manual page found in any section.
When executed on the console or via telnet, a prompt for continuation is issued after each 23 lines oftext.
When executed via rsh, the entire manual page is displayed without continuation prompts.
OPTIONS
-s section Used to indicate a specific section from which to display a manual page.
EXIT STATUS
0 Command executed successfully.
1 The manual page was not found.
2 An error in usage occurred.
SEE ALSOna_help(1),
NOTESThe manual pages displayed are located in the ‘cat’ subdirectories of /etc/man on the appliance’s rootvolume. Those subdirectories contain ASCII versions of the manual pages.
Data ONTAP® 8.2 Commands: Manual Page Reference for 7-Mode, Volume 1 337
man
maxfilesNAMEna_maxfiles - Changes the number of files the volume can contain.
SYNOPSISmaxfiles [ -f ] [ vol_name [ max ] ]
DESCRIPTIONThe maxfiles command changes the maximum number of files that a volume can contain, as close aspossible to max. Note that file inodes are stored in blocks, and the system may round the requested maxnumber of files to the nearest multiple of the number of inodes per block.
Increasing the max number of files does not immediately cause additional disk space to be used.Instead, as more files are created on a volume, the system dynamically increases the number of blocksthat are used to store inodes. The number of inodes that can fit within those blocks is called thevolume’s inode capacity. The node will not increase a volume’s inode capacity beyond the max numberof files.
A volume’s inode capacity is never decreased; once additional disk space is assigned to store inodes,that space is never freed. However, the max number of files for a volume can be raised or lowered toany value above the volume’s current inode capacity.
The max number of files cannot be changed for a FlexCache volume.
If Data ONTAP identifies a new value of max as unreasonably large, it queries the user to verify that thenew value is correct. This query can be suppressed by using the -f option.
If no argument is specified, the maxfiles command displays the current value of max for all volumes inthe system. If only the vol_name argument is given, the current value of max for the specified volume isdisplayed. For a FlexCache volume, the origin volume’s value of max is displayed.
The df command (see na_df(1)) can be used to determine how many files currently exist in eachvolume.
SEE ALSOna_df(1)
338 Data ONTAP® 8.2 Commands: Manual Page Reference for 7-Mode, Volume 1
maxfiles

memerrNAMEna_memerr - Prints memory errors.
SYNOPSISmemerr
memerr -v
memerr -h
DESCRIPTIONmemerr prints the history of memory (appliance’s RAM) errors since boot. This can be useful indiagnosing memory problems or determining which DIMM, if any, might need replacement. Somecorrectable ECC errors are to be expected under normal operation, but many more occurring on aparticular DIMM may indicate a problem.
The printout includes correctable, 1 bit ECC memory errors (CECC errors). It shows the number ofthese errors per DIMM. If applicable, it prints a message indicating multiple errors have occurred at thesame physical address in memory. When this happens, we recommend that the user replace the affectedDIMM because it is more likely to generate uncorrectable errors.
If the v option is given, a record of the most recent errors is printed, including the physical slot of theDIMM, the physical address, and the time. If this error history is full, a message indicating this will beprinted. This does not mean the error counts per DIMM are affected.
If correctable ECC errors are not being reported by ONTAP, it will print a message indicating this.ONTAP only turns off reporting of CECC errors when they occur at very high frequency.
OPTIONS
-v Prints individual correctable ECC error records.
-h Prints the usage.
Data ONTAP® 8.2 Commands: Manual Page Reference for 7-Mode, Volume 1 339
memerr

mtNAMEna_mt - Command for magnetic tape positioning and control
SYNOPSISmt { -f | -t } tapedevice command [ count ]
DESCRIPTIONmt is used to position or control the specified magnetic tape drive supporting the commands listedbelow. Commands that support a count field allow multiple operations to be performed (the rewind,status, offline, erase and eom commands do not support a count field). mt will output failure messagesif the specified tape drive cannot be opened or if the operation fails.
The -f option specifies which tape device to use. Use sysconfig -t to list all tape devices on the node. -thas the same effect as -f.
USAGE
eof, weof Writes count end-of-filemarks beginning at the current position on tape.
fsf Forward spaces over count filemarks. Positions the tape on the end-of-tape side of the filemark.
bsf Backward spaces over count filemarks. Positions the tape on the beginning-of-tape side of thefilemark.
fsr Forward spaces count records. Positions the tape on the end-of-tape side of the record(s).
bsr Backward spaces count records. Positions the tape on the beginning-of-tape side of the record(s).
erase Erases the tape beginning at the current tape position. When the erase completes, the tape ispositioned to beginning-of-tape.
rewind Rewinds the tape, positioning the tape to beginning-of-tape.
status Displays status information about the tape unit. If you have a tape device that NetApp Inc has notqualified, you must use the following command syntax to access the tape device before the nodecan register the tape device as a valid clone of a qualified device:
340 Data ONTAP® 8.2 Commands: Manual Page Reference for 7-Mode, Volume 1
mt
mt -f device status
After the node accesses the tape device, you can use the sysconfig -t command to display informationabout the device emulation.
offline Rewinds the tape and unloads tape media.
diag Enables or disables display of diagnostic messages from tape driver. Enabling diagnostic messagescan be helpful when attempting to diagnose a problem with a tape device. Specifying a count of"1" enables display of diagnostic messages, a count of "0" disables diagnostic messages.Diagnostic messages are disabled by default.
eom Positions the tape to end of data (end of media if tape is full).
EXAMPLESThe following example uses mt to display status information for the no-rewind tape device, unit zero,highest format (density):
toaster> mt -f nrst0a status
Tape drive: Exabyte 8505 8mm Status: ready, write enabled Format: EXB-8500C (w/compression) fileno = 0 blockno = 0 resid = 0
To skip over a previously created dump file to append a dump onto a no-rewind tape device, use the fsf(forward space file) command:
toaster> mt -f nrst0a fsf 1
HA CONSIDERATIONSIn takeover mode, the failed node has no access to its tape devices. If you enter the mt command inpartner mode, the command uses the tape devices on the live node.
SEE ALSOna_tape(4).
Data ONTAP® 8.2 Commands: Manual Page Reference for 7-Mode, Volume 1 341
mt

nbtstatNAMEnbtstat - displays information about the NetBIOS over TCP connection
SYNOPSISnbtstat
DESCRIPTIONThe nbtstat command displays information about the NetBIOS over TCP (NBT) connection for theNode. It displays the IP address associated with the interfaces, the broadcast IP mask, the IP addressesof the WINS servers in use, and information about the registered NetBIOS names for the node.
EXAMPLES FAS*> nbtstat interfaces: 10.120.5.39
broadcast interfaces: 10.120.7.255
servers: 10.10.10.55 (active) 10.10.10.56 () NBT scope []; NBT mode [H]; NBT names: FILER <00> ( WINS) ( time left=302 ) FILER <03> ( WINS) ( time left=302 ) FILER <20> ( WINS) ( time left=302 ) NT-DOMAIN <00> ( WINS) ( time left=302 group )
LIMITATIONSNothing will be printed if the CIFS subsystem has never been initialized.
Note that this is not the same as the NT nbtstat command. However, in the future, this command maybecome more aligned with the NT command.
VFILER CONSIDERATIONSWhen run from a vfiler context, (e.g. via the vfiler run command), nbtstat operates on the concernedvfiler.
342 Data ONTAP® 8.2 Commands: Manual Page Reference for 7-Mode, Volume 1
nbtstat

SEE ALSOna_vfiler(1)
Data ONTAP® 8.2 Commands: Manual Page Reference for 7-Mode, Volume 1 343
nbtstat

ndmpcopyNAMEna_ndmpcopy - Transfers directory trees between nodes using NDMP.
SYNOPSISndmpcopy [options] source destination
source and destination are of the form [node_name:]path
options:[-sa username:password][-da username:password][-st { text | md5 }][-dt { text | md5 }][-l { 0 | 1 | 2 }][-d][-f][-mcs { inet | inet6 }][-mcd { inet | inet6 }][-md { inet | inet6 }][-h][-p][-exclude < value >]
DESCRIPTIONNdmpcopy transfers data between nodes/vfilers using the Network Data Management Protocol(NDMP) versions 3 and higher. This process can be thought of as creating a dedicated data pipebetween dump running on the source node and restore running on the destination node.
Ndmpcopy is supported on vfilers, as well as the physical node named vfiler0. Use vfiler context or vfiler run to issue Ndmpcopy commands on a specific vfiler. See na_vfiler(1) for details on how toissue commands on vfilers. The use of Ndmpcopy on vfilers requires a MultiStore license.
The password used must be the NDMP password as described in the ndmpd man page.
The source and destination for the copy are specified in the following format:
[node:]path
where node_name is the hostname or IP address of the node and path is the absolute pathname of thedirectory to be used in the transfer. If you do not specify the node hostname or IP address, ndmpcopyassumes the source and destination nodes to be the same as the node running the ndmpcopy command. ndmpcopy creates the destination directory if it does not already exist. The destination pathnameshould be in the format:
344 Data ONTAP® 8.2 Commands: Manual Page Reference for 7-Mode, Volume 1
ndmpcopy
/vol/<volname>/[path]
where <volname> should be a valid volume on the destination node and [path] is optional.If an invalidpathname is specified then the operation will terminate with an error message.
The node will print the full destination path when ndmpcopy operation successfully completes.
When running ndmpcopy against a vfiler, all the source and destination paths must live in volumesexclusively owned by the vfiler.
ndmpcopy supports IPv6 addresses. IPv6 address can be used to connect to source and destinationnodes (control connections) and also for communication between the source and destination nodes (dataconnection). ndmpcopy by default accepts both IPv6 (inet6) and IPv4 (inet) address modes. In a mixedmode environment, IPv6 address has precedence over an IPv4 address. ndmpcopy determines theaddress mode for the data connection based on the address mode of the control connections as follows:
If either of the IP addresses specified are IPv6 for the control connections, then the data connectionaddress mode will be IPv6.
If both the IP addresses specified are IPv4 for the control connections, then the data connection addressmode will be IPv4.
When a DNS name is specified for the control connection, ndmpcopy will first attempt an IPv6 DNSlookup followed by an IPv4 DNS lookup. The data connection address mode will be determinedaccordingly.
To force the address modes for control and data connections, the user can use options to override thespecified behavior.
If an IPv6 address is specified, it must be enclosed in square brackets.
OPTIONSThe following options may be used in any order:
-sa username:passwordThe source node authentication is used to authenticate the network connections to the source node.If the option is used, username: must always be specified. password should be left blank if there isno password configured for the username on the source node. Note that even if no password isincluded, the : after the username must be present.
-da username:passwordThe destination node authentication is used to authenticate the network connections to thedestination node. If the option is used, username: must always be specified. password should beleft blank if there is no password configured for the username on the source node. Note that even ifno password is included, the : after the username must be present.
-st { text | md5 }The source node authentication type is used to identify the authentication mechanism. The defaultis md5, which encrypts passwords before they are passed over the network. The textauthentication does not provide this benefit and should be used with caution.
Data ONTAP® 8.2 Commands: Manual Page Reference for 7-Mode, Volume 1 345
ndmpcopy

-dt { text | md5 }The destination node authentication type is used to identify the authentication mechanism. Thedefault is md5, which encrypts passwords before they are passed over the network. The textauthentication does not provide this benefit and should be used with caution.
-l { 0 | 1 | 2 }The incremental level to be used for the transfer is restricted to 0, 1 or 2 only. The default levelused is 0. You can do a level 0 transfer at any time, following which you can sequentially do onelevel 1 and one level 2 transfer.
-d The debug mode option allows ndmpcopy to generate diagnostic/debugging information while itruns. The extra diagnostic information is sent only to the ndmpcopy log file.
-f The force flag, is used to enable overwriting of the system files in the /etc directory on the rootvolume. Example 5 below describes this behavior.
-mcs { inet | inet6 }The source control connection mode option forces the specified address mode for the source node.If an IPv6 address is specified, it must be enclosed within square brackets.
-mcd { inet | inet6 }The destination control connection mode option forces the specified address mode for thedestination node. If an IPv6 address is specified, it must be enclosed within square brackets.
-md { inet | inet6 }The data connection mode option forces the specified address mode for communication betweenthe source and destination nodes.
-h The -h option is used to display the usage and help message.
-p The -p option is used to ask for passwords interactively, so that they are not displayed on screen.
-exclude <value>The -exclude option is used to exclude files or directories from the path being backed up through ndmpcopy. <value> can be a comma-separated list of specific files, direcory names or a patternsuch as "*.pst","*.txt".
EXAMPLESIn these examples, network host names are used for the nodes. ("myhost" is used for a local node and"remotehost1" and "remotehost2" are used for remote nodes.) If you specify host names when you usethe ndmpcopy command, the node running the ndmpcopy command should be able to resolve thesenames to their IP addresses. You could use the ping command to make sure that host name resolutionworks.
346 Data ONTAP® 8.2 Commands: Manual Page Reference for 7-Mode, Volume 1
ndmpcopy
Before starting the ndmpcopy operation, the NDMP request daemon ndmpd has to be enabled on boththe source and destination nodes. Issue ‘ndmpd on’ on both nodes to enable the request daemon.
Example 1:
This command migrates data from a source path (source_path) to a different destination path(destination_path) on the same node (myhost).
myhost> ndmpcopy -sa username:password -da username:password myhost:/vol/vol0/source_path myhost:/vol/vol0/destination_path
You can also use this shorter form of the command to achieve the same result.
myhost> ndmpcopy /vol/vol0/source_path /vol/vol0/destination_path
Because you are running the ndmpcopy command on myhost and the source and destination node is thesame as myhost, you can omit specifying the source and destination node names on the ndmpcopycommand line. Also note that when your ndmpcopy command is running on the same node as thesource node and/or destination node, you can omit the -sa and/or -da options.
Example 2:
This command migrates data from a source path (source_path) to a different destination path(destination_path) on remotehost1.
myhost> ndmpcopy -da username:password /vol/vol0/source_path remotehost1:/vol/vol0/destination_path
The destination node must be specified in this case, because it is a remote node. Also the destinationauthorization is needed, but not the source authorization.
Example 3:
This command migrates data from a source path (source_path) on remotehost2 to a destination path(destination_path) on myhost.
myhost> ndmpcopy -sa username:password -st text remotehost2:/vol/vol0/source_path /vol/vol0/destination_path
The source authentication type specified by -st has been set to text. The ndmpcopy command toolrunning on myhost will authenticate with the source node using text authentication.
Example 4:
This command migrates data from a source path (source_path) on remotehost1 to a destination path(destination_path) on remotehost2.
Data ONTAP® 8.2 Commands: Manual Page Reference for 7-Mode, Volume 1 347
ndmpcopy

myhost> ndmpcopy -sa username:password -da username:password -l 1 remotehost1:/vol/vol0/source_path remotehost2:/vol/vol0/destination_path
Note that the -l 1 option is used to do a level 1 transfer.
Example 5:
This command describes the behaviour of ndmpcopy without the -f option. In this case, the /etcdirectory and its contents on the root volume of remotehost1 are protected from being overwritten withthe /etc directory from myhost. This is intended to avoid the unintentional changing of the systemcharacteristics after the root volume migration is completed.
myhost> ndmpcopy -da username:password /vol/rootvol remotehost1:/vol/rootvol
If you intentionally wish to overwrite the /etc directory, during the root volume migration, then use the-f flag as in the following copy.
myhost> ndmpcopy -da username:password -f /vol/rootvol remotehost1:/vol/rootvol
Example 6:
This command describes the usage of ndmpcopy where the address mode for both control and dataconnections is explicitly forced to IPv6.
myhost> ndmpcopy -sa username:password -da username: password -l 0 -mcs inet6 -mcd inet6 -md inet6 remotehost1:/vol/vol0/source_path [xx:xx:xx:xx:xx:xx:xx:xx]:/vol/vol0/dest_path
In the specified example, remotehost1 is the hostname that resolves to an IPv6 address.
Example 7:
This command migrates data from a source path (source_path) on remotehost1 to a destination path(destination_path) on remotehost2.
myhost> ndmpcopy -sa username:password -da username:password -exclude "*.pst","*.txt" remotehost1:/vol/vol0/source_path remotehost2:/vol/vol0/destination_path
In this example, the -exclude "*.pst","*.txt" option is used to exclude all the files of the pattern "*.pst"and "*.txt" from being transferred.
348 Data ONTAP® 8.2 Commands: Manual Page Reference for 7-Mode, Volume 1
ndmpcopy
FILES/etc/log/ndmpcopy.yyyymmdd - The ndmpcopy debug log files
SEE ALSOna_vfiler(1)
NOTESCheck the following things before running the ndmpcopy:
Whether ndmpd is installed and turned on, on the source and destination nodes involved in thecopy.
myhost> ndmpd on
Whether the 2 nodes can ping each other with first their hostnames and if not then their IP addresses. Ifboth do not work, then it usually denotes an incorrect network setup.
myhost> ping remotehost myhost> ping ip address of remotehost
Make sure that the Data ONTAP release on the nodes you are using for the copy support NDMP version3 and/or higher.
myhost> ndmpd version
Data ONTAP® 8.2 Commands: Manual Page Reference for 7-Mode, Volume 1 349
ndmpcopy
ndmpdNAMEna_ndmpd - manages NDMP service
SYNOPSISndmpd [ on | off | status | probe [ session ] | kill [ session ] | killall | password [ username ] | version [ maxversion ] ]
DESCRIPTIONThe ndmpd command controls and displays information about the daemon responsible for providingNetwork Data Management Protocol service.
ndmpd is supported on regular vfilers, as well as the physical node named vfiler0. Use vfiler context or vfiler run to issue ndmpd commands on a specific vfiler. See na_vfiler(1) for details on how to issuecommands on vfilers. The use of ndmp on vfilers requires a MultiStore license.
When used on a vfiler, a few restrictions apply. The vfiler must be rooted on a volume. Ndmp sourceand destination paths must be on volumes exclusively owned by the vfiler. Tape devices are notsupported on vfilers.
Ndmp can be turned on/off on a vfiler independently. Ndmpd commands issued on a vfiler can onlyoperate on volumes or qtrees it has exclusive ownership of.
For backward compatibility, the physical node (vfiler0) can operate on all volumes and qtrees, even ifthey are owned by vfilers. It is highly recommanded that all storage units (volumes and qtrees) arebacked up from either vfiler0 or the hosting vfiler, not both.
OPTIONSOne of the following options must be specified:
on Enables NDMP request-handling by the daemon. Enabling/disabling NDMP persists acrossreboots. NDMP can only be enabled on vfilers which are rooted on volumes.
off Disables NDMP request-handling by the daemon. Processing continues for requests that arealready in progress. New requests are rejected. By default, NDMP service is disabled at systemstartup.
status Displays the current state of NDMP service.
probe [ session ] Displays diagnostic information about the specified session. If session is not specified, informationabout all sessions is displayed.
350 Data ONTAP® 8.2 Commands: Manual Page Reference for 7-Mode, Volume 1
ndmpd
kill session Signals the specified session to stop processing its current requests and move to an inactive state.This allows hung sessions to be cleared without the need for a reboot, since the off command waitsuntil all sessions are inactive before turning off the NDMP service.
killall Signals all active sessions to stop processing their current requests and move to an inactive state.
password [ username ] Displays an NDMP specific password for any existing Data ONTAP non-root user account.Starting with Data ONTAP 6.4, NDMP allows the non-root user login to NDMP server andperform the NDMP backup and NDMPCOPY operations. In the case of a non-default vfiler thecommand must be run in the vfiler context and will display the NDMP specific password for allaccounts on the vfiler including root. At NDMP login, the server authenticates the user name andthe corresponding NDMP specific password to grant access to the user. However, the root loginauthentication process on the default vfiler remains the same. There is no NDMP specific passwordfor root for the default vfiler. Based on the way we create the NDMP specific password that anychange to a Data ONTAP administrative user password will invalidate the associated NDMPspecific password.
version [ maxversion ] Displays the maximum version that NDMP currently supports when invoked without the optional maxversion. Sets the maximum version that NDMP allows when maxversion is specified.Currently only version 4 is supported.
SEE ALSOna_vfiler(1).
Data ONTAP® 8.2 Commands: Manual Page Reference for 7-Mode, Volume 1 351
ndmpd

ndpNAMEna_ndp - Controls/diagnoses IPv6 neighbor discovery protocol.
SYNOPSIS7-mode optionsndp -a [ -ntl ]
ndp -A wait [ -ntl ]
ndp -c [ -nt ]
ndp -d [ -nt ] hostname
ndp -f [ -nt ] filename
ndp -H
ndp -I [ delete| inteface ]
ndp -i interface [ flags... ]
ndp -p
ndp -P
ndp -r
ndp -R
ndp -s [ -nt ] nodename ether_addr [ temp ] [ proxy ]
C-mode run local ndp optionsndp -a [ -ntl ]
ndp -A wait [ -ntl ]
ndp -c [ -nt ]
ndp -d [ -nt ] hostname
ndp -f [ -nt ] filename
ndp -H
ndp -p
ndp -P
352 Data ONTAP® 8.2 Commands: Manual Page Reference for 7-Mode, Volume 1
ndp
ndp -r
ndp -R
ndp -s [ -nt ] nodename ether_addr [ temp ] [ proxy ]
DESCRIPTIONThe ndp command manipulates the address mapping table used by Neighbor Discovery Protocol(NDP).
OPTIONS
-a Dumps the currently existing NDP entries.
-A wait Repeats -a (dump NDP entries) every wait seconds
-c Erases all the NDP entries.
-d Deletes specified NDP entry.
-f Parses the file specified by filename.
-H Harmonizes consistency between the routing table and the default router list; install the top entry ofthe list into the kernel routing table.
-I [ delete | interface ] Shows or specifies the default interface used as the default route when there isno default router. If no argument is given to the option, the current default interface will be shown.If an interface is specified, the interface will be used as the default. If a special keyword delete isspecified, the current default interface will be deleted from the kernel.
-i interface [ flags... ] Views ND information for the specified interface. If additional arguments flagsare given, ndp sets or clears the specified flags for the interface. Possible flags are as follows. Allof the flags can begin with the special character ‘-’ which means the flag should be cleared.
nud Turns on or off NUD (Neighbor Unreachability Detection) on the interface. NUD is usually turnedon by default.
-l Does not truncate numeric IPv6 address.
Data ONTAP® 8.2 Commands: Manual Page Reference for 7-Mode, Volume 1 353
ndp

-n Does not try to resolve numeric address to hostname.
-p Shows prefix list.
-P Flushes all the entries in the prefix list.
-r Shows default router list.
-R Flushes all the entries in the default router list.
-s Registers a NDP entry for a node. The entry will be permanent unless the word temp is given inthe command. If the word proxy is given, this system will act as an proxy NDP server, respondingto requests for hostname even though the host address is not its own.
-t Prints timestamp on each entry, to make it possible to merge output with pktt. Most useful whenused with -A.
SEE ALSOna_arp(1)
354 Data ONTAP® 8.2 Commands: Manual Page Reference for 7-Mode, Volume 1
ndp
netdiagNAMEnetdiag - Performs network diagnostics.
SYNOPSISnetdiag [ -s|v|d ] [ -nbate ] [ -p [ -I interface ] ]
netdiag -?
DESCRIPTIONThe netdiag command analyzes the statistics continuously gathered by the network protocol code and(if required) performs various tests to ensure the sanity of operation of the protocol code. It displays theresults of the analysis (and any tests performed) along with suggested remedial actions (if any problemsare found). The netdiag command analyses almost all of the statistics displayed by the many forms ofthe netstat command for aberrant values.
The first form presented allows the user to specify what subset(s) of the networking subsystem toaddress and what kind of output to produce. The various options that influence this command form aredescribed in detail below.
The second form displays the usage message.
OPTIONS
-s Prints only a summary of the results of the various checks and tests performed.
-v Verbose output. Prints a description of the various checks and subtests as they are performed.
-d Debug output. Prints a very detailed description of the various check and subtests as they areperformed. This option is for use by the expert user, or someone who understands the variouschecks and tests that netdiag performs.
-b Non-interactive usage. The command should not prompt for user input. This is useful when using netdiag from an automated script.
-e Prints error codes. Prints a numeric error code with each message. This is useful when using netdiag in consultation with NetApp personnel.
-p Performs diagnostic checks and tests for the interface layer (that is, the various NIC devicedrivers).
Data ONTAP® 8.2 Commands: Manual Page Reference for 7-Mode, Volume 1 355
netdiag

-I interface Performs diagnostic checks and tests only for the specified interface. The interface names that netdiag understands are the same as displayed by the ifconfig command. This option is meaningfulonly in conjunction with the -p option.
-n Performs diagnostic checks and tests for the network layer (that is, IP).
-t Performs diagnostic checks and tests for the transport layer (that is, TCP and UDP).
-a Performs diagnostic checks and tests to verify the sanity of the overall network subsystem.
SEE ALSOna_partner(1),
356 Data ONTAP® 8.2 Commands: Manual Page Reference for 7-Mode, Volume 1
netdiag
netstatNAMEna_netstat - Shows network status.
SYNOPSISnetstat [ -anx ]
netstat -mnrs
netstat -i | -I interface [ -dn ] [ -f { wide | normal } ]
netstat -w interval [ -i | -I interface ] [ -dn ]
netstat [ -p protocol ]
netstat [ -p ip6 -I interface ]
netstat [ -p icmp6 -I interface ]
netstat [ -T ]
DESCRIPTIONThe netstat command symbolically displays the contents of various network-related data structures.There are a number of output formats, depending on the options for the information presented. The firstform of the command displays a list of active sockets for each protocol.
The second form presents the contents of one of the other network data structures according to theoption selected.
The third form will display cumulative statistics for all interfaces or, with an interface specified usingthe -I option, cumulative statistics for that interface. It will also display the sum of the cumulativestatistics for all configured network interfaces.
The fourth form continuously displays information regarding packet traffic on the interface that wasconfigured first, or with an interface specified using the -I option, packet traffic for that interface. It willalso display the sum of the cumulative traffic information for all configured network interfaces.
The fifth form displays statistics about the protocol specified by protocol.
The sixth form displays statistics about the TCP offload engine.
OPTIONS
-a Show the state of all sockets; normally sockets used by server processes are not shown.
Data ONTAP® 8.2 Commands: Manual Page Reference for 7-Mode, Volume 1 357
netstat
-M This option displays the network context that each socket belongs to--"lg" for nonMP context and apositive integer for MP context. This option has effect only for TCP sockets and when -a option isspecified.
-B This option displays the total number of bytes sent and received over each socket. For bignumbers, a letter such as ‘K’, ‘M’, ‘G’, ‘T’, and ‘P’ is suffixed--’K’ for kilobytes, ‘M’ formegabytes, and so on. This has effect only for TCP connections and when -a option is specified.
-C This option displays the congestion window and the slow start threshold size for each socket. Thishas effect only for TCP connections.
-P This option displays the per TCP connection statistics and corresponds to a few of the statisticswhich are displayed when the -s option is used with netstat. This has effect only for TCPconnections. The following is the description of the statistics shown with this option:
WinProbe Sent: Number of TCP window probe packets sent. OOP Rcvd: Number of Out of OrderPacket received. ReXmitTimeout: Number of TCP retransmit timeouts. Fast ReXmits: Number of TCPfast retransmits. Dupacks (No FastReXmits): Number of duplicate ACKs that did not ultimately triggerfast retransmit. SACK Opt Sent: Number of SACK options sent. SACK Opt Rcvd: Number of SACKoptions received.
B -g This option displays information related to multicast (group address) routing. By default, thisshows the IP multicast virtual-interface and routing tables.
-U This option displays the time since the last upcall was made by the network stack and time sincethe last read was done on the socket. This has effect only for TCP connections.
-x Applicable only to the first form of this command. Shows extended state information for TCPconnections in the ESTABLISHED state. This includes information on whether MAC address andinterface caching ("Fastpath") is in use for this connection (On, Off, or Partial). Partial is not asettable value, it is set automatically under certain conditions. It means that fastpath uses interfacecaching but not mac caching (this will allow most of the benefits of fastpath even in a Windows NT
load-balancing/asymmetric route environment). For more information on Fastpath, see the description of the option ip.fastpath.enable in the na_options (1) man page.
-d With either interface display (option -i or an interval, as described below), show the number ofdropped packets.
358 Data ONTAP® 8.2 Commands: Manual Page Reference for 7-Mode, Volume 1
netstat
-I interface Show information only about this interface. When used in the third form with an interval specifiedas described below, information about the indicated interface is highlighted in a separated column.(The default interface highlighted is the first interface configured into the system.)
-i Show the state of interfaces which have been configured.
-f If the argument is wide then print the output assuming a wide screen. If the argument is normalthen format output so as to fit it within 80 columns. This option has an effect only when used alongwith the -i option. The default on the console/telnet is normal while the default via rsh is wide.
-m Show statistics recorded by the memory management routines for the network’s private pool ofbuffers.
-n Show network addresses as numbers. netstat normally interprets addresses and attempts to displaythem symbolically. This option may be used with any of the display formats that display networkaddresses.
-p protocol Show statistics about protocol, which is one of tcp, udp, ip, icmp, ip6, or icmp6. A null responsetypically means that there are no interesting numbers to report. The program will complain if protocol is unknown or if there is no statistics routine for it.
-s Show per-protocol statistics. If this option is repeated, counters with a value of zero aresuppressed.
-r Show the routing tables. When -s is also present, show routing statistics instead.
-T Show the TCP offload engine statistics.
-w wait Show network interface statistics at intervals of wait seconds.
DISPLAYSThe default display, for TCP sockets, shows the local and remote addresses, send window and sendqueue size (in bytes), receive window and receive queue sizes (in bytes), and the state of the connection.For UDP sockets, it shows the local and remote addresses, and the send and receive queue size (inbytes). Address formats are of the form ‘‘host.port’’ or ‘‘network.port’’ if a socket’s address specifies anetwork but no specific host address. If known, the host and network addresses are displayedsymbolically according to the data bases /etc/hosts and /etc/networks, respectively. If a symbolic namefor an address is not known, or if the -n option is specified, the address is printed numerically,according to the address family. Unspecified, or ‘‘wildcard’’, addresses and ports appear as ‘‘*’’.
Data ONTAP® 8.2 Commands: Manual Page Reference for 7-Mode, Volume 1 359
netstat
The interface display specified by the -i or -I options provides a table of cumulative statistics regardingpackets transferred, errors, and collisions. The network addresses of the interface and the maximumtransmission unit (‘‘mtu’’) are also displayed. If the interface is currently down, then a ‘‘*’’ is appendedto the interface name.
When an interval is specified, a summary of the interface information consisting of packets transferred,errors, and collisions is displayed.
The routing table display indicates the available routes and their status. Each route consists of adestination host or network and a gateway to use in forwarding packets. The flags field shows acollection of information about the route stored as binary choices; the flags are:
2 Protocol-specific routing flag #2 (for ARP entries, means that the entry is "published").
C Use of this route will cause a new route to be generated and used.
D The route was created dynamically by a redirect.
G The route is to a gateway.
H The route is to a host (otherwise, it’s to a net).
L The route includes valid protocol to link address translation.
M The route was modified dynamically by a redirect.
R The route has timed out.
S The route was manually added with a route command (see na_route(1)).
U The route is usable (‘‘up’’).
Direct routes are created for each interface attached to the local host when an IP address for theinterface is configured or the node is rebooted. The gateway field for such entries shows the linknumber of the outgoing interface (direct routes have no next hop), and the interface field shows thename of the interface.
Host routes are created as needed for traffic to hosts that are on directly attached subnets, and theseroutes will time out based on the arp timeout. The gateway field for such entries is the MAC address ofthe host. Note that permanent host routes can also be created using the arp command. For moreinformation about arp see the arp(1) manual page.
360 Data ONTAP® 8.2 Commands: Manual Page Reference for 7-Mode, Volume 1
netstat
The refcnt field gives the current number of active uses of the route. Connection oriented protocolsnormally hold on to a single route for the duration of a connection while connectionless protocols obtaina route whenever they transmit to a destination. The use field provides a count of the number of packetssent using that route. The interface entry indicates the network interface utilized for the route.
When netstat is invoked with the -w option and an interval argument, it displays a running count ofstatistics related to network interfaces. An obsolescent version of this option used a numeric parameterwith no option, and is currently supported for backward compatibility. This display consists of a columnfor the primary interface and a column summarizing information for all interfaces. The default primaryinterface is the first interface configured into the system. The primary interface may be replaced withanother interface with the -I option. The first line of each screen of information contains a summarysince the system was last rebooted. Subsequent lines of output show values accumulated over thepreceding interval.
When netstat is invoked with the -T option, it displays the TCP offload engine statistics for all the TOEcards in the system. The statistics for each TOE device include TCP, IP, mbufs received and mbufstransmitted.
HA CONSIDERATIONSEach node in an HA pair maintains its own socket, routing, and interface tables. If a node is not inpartner mode, the netstat command displays the information in the tables on the live node. If a node isin partner mode, it executes the netstat command on behalf of the failed node, which displays theinformation in the tables on the failed node.
However, in takeover mode, counters displayed by the netstat command represent the combinedstatistics of the live node and the failed node. For example, from the statistics, you cannot determinehow many packets were received on behalf of the live node and how many packets were received onbehalf of the failed node.
In takeover mode, network interface names used by the failed node are mapped to network interfaces onthe live node. When you enter the netstat command in partner mode, the network interface namesdisplayed are the network interface names on the failed node.
If you enter the netstat command in partner mode, you might see a plus sign (+) appended to somenetwork interface names in the output. The plus sign indicates that the network interfaces are used asshared interfaces.
Statistics displayed by the netstat command are cumulative. That is, a giveback operation does not zeroout the statistics. After giving back the virtual node’s resources, the live node does not subtract thestatistics about operations it performed on behalf of the failed node in takeover mode.
VFILER CONSIDERATIONSWhen run from a vfiler context, (for example, via the vfiler run command), netstat operates on theconcerned vfiler. In this mode, only the -r and the -n options are allowed. As currently all vfilers in anipspace share a routing table, netstat -r [-n] in a vfiler context prints the routing table of the vfiler’sipspace.
Data ONTAP® 8.2 Commands: Manual Page Reference for 7-Mode, Volume 1 361
netstat

FILES
/etc/hosts host name data base
/etc/networks network name data base
SEE ALSOna_partner(1), na_arp(1), na_networks(5)
362 Data ONTAP® 8.2 Commands: Manual Page Reference for 7-Mode, Volume 1
netstat
nfsNAMEna_nfs - Manages Network File System service.
SYNOPSISnfs [ help | on | off | setup | stat | status | vstorage nsdb ]
DESCRIPTIONThe nfs command is used to manage the Network File System service. It can be used to turn the NFSservice on or off, do Kerberos setup, manage the NSDB cache or check nfs status. With no arguments, nfs shows the current state of the NFS service. This behavior is now deprecated and may be removed ina future release.
nfs help [subcommand] displays the available subcommands with no further arguments. Otherwise itdisplays a short help message for the subcommand.
nfs off turns off the NFS subsystem.
nfs on turns on the NFS subsystem if it is licensed.
nfs setup enters a setup dialog that is used to set system parameters needed for Kerberos V5 support inNFS.
nfs stat [options] is an alias for nfsstat, please consult the man page for nfsstat for usage.
nfs status displays the current state of the NFS service.
nfs vstorage stats nfs vstorage stats displays statistical information about vstorage.
nfs nsdb: is used to manage the name server database cache (NSDB).
USAGEThe following commands are supported with nfs nsdb
flush
nfs nsdb flush-h| -a| -U username1[,username2, ...]| -u uid1[,uid2, ...]| -G groupname1[,groupname2, ...]| -g gid1[,gid2, ...]
Data ONTAP® 8.2 Commands: Manual Page Reference for 7-Mode, Volume 1 363
nfs
The flush command can be used to flush the specified entries in the NSDB cache.
-h
This option is used to display the help message for this command.
-a
This option is used to flush all of the entries in the NSDB cache.
-U username1[,username2, ...]
This option is used to flush NSDB cache entries as specified by the user names in the argument. Thisoption takes a comma separated list of user names as the argument.
-u uid1[,uid2, ...]
This option is used to flush NSDB cache entries as specified by the user ids in the argument. Thisoption takes a comma separated list of user ids as the argument.
-G groupname1[,groupname2, ...]
This option is used to flush NSDB cache entries as specified by the group names in the argument. Thisoption takes a comma separated list of group names as the argument.
-g gid1[,gid2, ...]
This option is used to flush NSDB cache entries as specified by the group ids in the argument. Thisoption takes a comma separated list of group ids as the argument.
FILESnfs used to be in the initialization command script, /etc/rc, but it is now automatically invoked whenNFS is licensed and when the node is started.
VFILER CONSIDERATIONSWhen run from a vfiler context, (for example via the vfiler run command), nfs operates on theconcerned vfiler. If a /etc/exports file exists for a vfiler, the command nfs on is automatically run whenthe vfiler is started (at boot time or at takeover time).
SEE ALSOna_vfiler(1)
364 Data ONTAP® 8.2 Commands: Manual Page Reference for 7-Mode, Volume 1
nfs
nfsstatNAMEna_nfsstat - Displays NFS statistics.
SYNOPSISnfsstat interval [ count ]
nfsstat -h [ -n [ count ] ] | [ [ ip_address | host_name ] [ interval ] ]
nfsstat -l [ count ]
nfsstat -z
nfsstat -d
nfsstat -C
nfsstat [ -c ] [ -t ]
DESCRIPTIONnfsstat displays statistical information about NFS (Network File System) and RPC (Remote ProcedureCall) for the node. That includes statistics for NFS versions 2, 3 and 4 and general statistics like thenumber of misaligned reads and writes over all the versions of NFS. It can also be used to reinitializethis information. If no arguments are given, nfsstat displays statistical information since last zeroedwith the -z option (or since reboot if statistics have not been zeroed).
If just the interval argument is specified, nfsstat continuously displays the summary information for thefollowing NFS requests: getattr, lookup, readlink, read, write, create, remove, and readdir/readdirplus.The output will show incremental statistics for the interval (in seconds) since the command wasexecuted. If count argument is also specified, then the command exits after displaying the statistics forthe specified number of intervals. The interval specified must be an integer.
Per-client statistics can also be collected and displayed by enabling the nfs.per_client_stats.enableoptions (using the options command - see na_options(1)) and invoking nfsstat with the -h or the -loptions. Per-client statistics can be collected for up to the first 1000 NFS clients that have mounted thefilesystem on the given node. These statistics are displayed in the decreasing order of the total NFS opsperformed by each client.
OPTIONS
-h Displays per-client statistics since last zeroed with the -z option (or since reboot if statistics havenot been zeroed). The statistics are displayed on a per-client basis, with the IP address and hostname (where available) of each client being displayed at the head of each client’s block ofstatistics.
Data ONTAP® 8.2 Commands: Manual Page Reference for 7-Mode, Volume 1 365
nfsstat
If optional count is specified using -n option, then per-client statistics for that many clients aredisplayed.
If an optional IP address or host name is specified with the -h option, only the statistics associated withthis client are displayed.
Statistics for read and write sizes are also displayed as number of read or write requests made by eachclient grouped by size of request. Without this option, the cumulative statistics for all clients aredisplayed.
If the IP address or host name is specified, an optional interval argument can be supplied. This willcause interval statistics to be displayed for the specified client. The behavior is identical as described inthe Description paragraph.
-l Displays a list of the clients whose statistics have been collected on a per-client basis, along withthe total NFS calls for that client since last reboot, or last zeroed with the -z option, or last explicituser request to enable the per-client statistics, the count being displayed both as the actual countand as a percentage of calls from all clients. The list is sorted in the decreasing order of the totalcalls for each client. If count argument is specified, then the command exits after displaying thestatistics for the first count number of clients and if it is not specified the statistics for up to the first256 clients are displayed, ordered by the total NFS ops performed by each client.
-z Zeroes (reinitializes) the current cumulative and per client statistics. (However, statistics since bootare retained.) The per clients statistics also get reinitialized when nfs.per_client_stats.enable optionis turned off.
-c Includes reply cache statistics in the data displayed. The reply cache is used to cache replies tonon-idempotent nfs requests, so that in case of a retransmit, the correct reply can be sent back tothe client. Non-idempotent operations do not return same results if repeated, for example, remove,create. The various fields displayed are:
In Progress Number of requests which were being processed at the time retransmit requests were received forthem.
Delay Hits Number of requests which were dropped because they came in within nfs_rc_delay of sending outthe reply. This field is deprecated. A zero value will always be printed for this field. This is tomaintain backward compatibility with previous ONTAP releases.
Misses Number of requests that were not found in the reply cache. These also include requests coming infor the first time.
Idempotent Number of idempotent requests saved in the reply cache for the purpose of improvingperformance.
366 Data ONTAP® 8.2 Commands: Manual Page Reference for 7-Mode, Volume 1
nfsstat
Non-idempotent Number of non-idempotent requests replied to from the reply cache.
-t Displays the statistics since boot time, rather than since the last time they were zeroed.
-C Displays the number and type of NFS version 2 and 3 requests received by all FlexCache volumes.In addition we display the number of each type that resulted in a cache hit.
-d In addition to reply cache statistics, also includes statistics about incoming messages and allocatedmbufs. The various fields displayed are:
nfs cache size NFS reply cache size. The cache size depends on the Node memory.
hash size NFS reply cache hash size.
num msg Number of incoming requests (over UDP) dropped because there are no free entries in the NFSoperation table.
too many mbufs Number of requests (over UDP) dropped because they require more mbufs than are available.
rpcErr Total number of RPC errors encountered while generating the RPC reply header.
svrErr Total number of RPC errors encountered while processing the request.
msg queued Total number of NFS connections (over TCP) that have been deferred waiting for NFS resources tobecome available. The NFS requests queued on these connections will be processed once theseresources become available. Connections can get queued up when the filesystem is busy doingback to back CPs.
no msg re-queued(xfc)Total number of NFS connections (over TCP) which are in transmit flow control and for which furtherrequest processing has been deferred because there are too many replies queued on the socket waiting tobe acknowledged by the client.
no msg dropped Number of incoming requests (over UDP) dropped because there are no free entries available inthe NFS operation table. It is the same as num msg. Requests can be dropped when the filesystemis busy doing back to back CPs.
no msg unqueued Number of connections unqueued from the deferred list.
Data ONTAP® 8.2 Commands: Manual Page Reference for 7-Mode, Volume 1 367
nfsstat
no msg discarded Number of deferred connections, waiting for NFS resources to become available, dropped becauseof a timeout or shutdown of the socket.
no msg dropped from vol offline Number of requests dropped because the volume was offline.
no deferred msg processedNumber of NFS requests unqueued and processed from NFS over TCP connections that had been put ona queue waiting for NFS resources to become available. This is not the same as number of NFSconnections queued up waiting for resources. Note that one connection can contain more than one NFSrequests waiting to be processed.
sbfull queued Number of requests queued because the send buffer is full.
sbfull unqueued Number of requests unqueued when space available in the send buffer.
sbfull discarded Number of requests waiting on a full send buffer dropped because of a forced shutdown of thesocket.
no mbuf queued Number of requests (over TCP) waiting for mbufs to send a reply.
no mbuf dropped Number of requests (over UDP) dropped because of unavailability of enough mbufs to send areply.
no mbuf unqueued Number of requests (over TCP) processed from the wait queue when enough mbufs becomeavailable.
no mbuf discarded Number of requests (over TCP) waiting for mbufs dropped because nothing can besent over the socket. This can happen if the socket is closing.
(cumulative) active Two values are printed here. The maximum (cumulative) number of entriesavailable in the NFS operation table and the total number of entries processing requests at that time.
req mbufs Number of mbufs allocated for an incoming NFS request over UDP.
tcp input flowcontrol receiveNumber of times the Node went into receive flow control.
tcp input flowcontrol xmitNumber of times the Node went into transmit flow control.
tcp input flowcontrol out receive Number of times the Node came out of receive flow control.
368 Data ONTAP® 8.2 Commands: Manual Page Reference for 7-Mode, Volume 1
nfsstat
tcp input flowcontrol out xmitNumber of times the Node came out of transmit flow control.
sockets zapped nfs Number of nfs sockets disconnected because the send upcall argument in theunderlying tcp socket had been zeroed.
sockets zapped tcp Number of tcp sockets disconnected because both the send and receive upcallarguments in that tcp socket had been zeroed.
no delegation Number of times no delegation was handed out due to some error.
read delegation Number of read delegations handed out to NFS version 4 clients.
write delegation Number of write delegations handed out to NFS version 4 clients.
v4 acls set Total number of acls set on files/dir through an explicit setattr command or when a file or dir iscreated and an acl is supplied in the initial attributes.
nfs msgs counts The tot is the total number of available NFS messages. The unallocated is the number of messageswhich have yet to be allocated from the system. The free is the number of allocated messageswhich are not in use. The used is the number of allocated messages which are currently in use. The "VM cb heard" is how many times virtual memory pressure has asked for messages to bereleased back to the system. The "VM cb done" is how many messages were released back to thesystem.
nfs reply cache countsThe tot is the total number of available reply cache entries. The unallocated is the number of entrieswhich have yet to be allocated from the system. The free is the number of allocated entries which arenot in use. The used is the number of allocated entries which are currently in use. The "VM cb heard"is how many times virtual memory pressure has asked for entries to be released back to the system. The "VM cb done" is how many entries were released back to the system.
v2 mount (requested, granted, denied, resolving) The requested is the number of v2 mount requests.The granted is the number of mount requests granted access. The denied is the number denied access.The resolving is the number of mount requests currently awaiting access resolution.
v2 unmount (requested, granted, denied) The requested is the number of v2 unmount requests. The granted is the number of unmount requests granted. The denied is the number denied.
v2 unmount all (requested, granted, denied) The requested is the number of v2 unmount all requests.The granted is the number of unmount all requests granted. The denied is the number denied.
v3 mount (requested, granted, denied, resolving) The requested is the number of v3 mount requests.The granted is the number of mount requests granted access. The denied is the number denied access.The resolving is the number of mount requests currently awaiting access resolution.
Data ONTAP® 8.2 Commands: Manual Page Reference for 7-Mode, Volume 1 369
nfsstat
v3 unmount (requested, granted, denied) The requested is the number of v3 unmount requests. The granted is the number of unmount requests granted. The denied is the number denied.
v3 unmount all (requested, granted, denied) The requested is the number of v3 unmount all requests.The granted is the number of unmount all requests granted. The denied is the number denied.
mount service requests (curr, total, max, redriven) These are the requests made to the mount service.These include requests for mount, umount, showmount and so on. The curr is the number of currentrequests to the mount service. The total is the total number of requests made to the mount service. The max is the high water mark of the curr counter. The redriven is the total number of mount servicerequests that needed to be redriven after an access cache population.
access cache (hits, partial misses, misses) A request coming into the cache can be looking for anycombination of read, write and root attributes. The hits are the number of requests which were servicedcompletely by an entry already in the access cache. The partial misses are the number of requests thatwere not serviced completely by an entry in the access cache. The misses are the number of requestswhich were not serviced by the access cache because there was no entry in the cache for that client.Note that in general, the ratio hits to the sum of hits and partial misses + misses should be high. Thatis, we want significantly more hits than misses.
access cache lookup requests (curr, total, max) The curr is the number of current requests which arebeing serviced. This number is also representative of the number of entries on the export worker queue.The total is the sum of all requests. The max is the high water mark of the curr counter.
access cache nodes(found, created) The found is the number of entries that were hit as a result of acache lookup. The created is the total number of access cache nodes created since boot.
access cache requests(queued, unqueued) The queued is the number of requests that had to wait (andwere queued) for the access cache to be populated before they could be processed. The unqueued is thenumber of requests that were unqueued and processed after the access cache was populated.
access cache requests unqueued by (flush, restore) These are the number of requests waiting foraccess cache population which were restarted when that access cache was flushed through the exportfs -f command or was restored from disk upon reboot or failover.
access cache read requests (queued, unqueued) The queued counter is for requests which got a cachemiss for read access and had to wait because that information was not in the cache. The unqueuedcounter is for requests which were restarted once the read access information was inserted in the accesscache.
access cache write requests (queued, unqueued) The queued counter is for requests which got acache miss for write access and had to wait because that information was not in the cache. The unqueued counter is for requests which were restarted once the write access information was insertedin the access cache.
access cache root requests (queued, unqueued) The queued counter is for requests which got a cachemiss for root access and had to wait because that information was not in the cache. The unqueuedcounter is for requests which were restarted once the root access information was inserted in the accesscache.
370 Data ONTAP® 8.2 Commands: Manual Page Reference for 7-Mode, Volume 1
nfsstat

access cache expired hits (total, read, write, root)These are the number of hits in the access cache for read, write or root attribute where the accessinformation for that attribute had not been refreshed for sometime. The attribute information expiresbased on the timeout value set in nfs.export.neg.timeout and nfs.export.pos.timeout.
access cache inserts (full, partial, dup, subnet, restore)The full count represents the number of inserts into the access cache where all attributes upon whichone or more requests were waiting, were resolved. As a result of a full insert one or more requestswould be restarted. The partial count represents the number of inserts where some of the attributesupon which one or more requests were waiting, were resolved. No requests are restarted as a result of apartial insert. The dup count represents the number of times an insert was done for an attribute when theaccess cache already contained some information about that attribute. However it is not necessary thatthe same access information was inserted the second time around. For example: If the cache containedinformation about node A.B.C.D as read being allowed and then another insert was done in the cachewhich changed this information to read being denied for A.B.C.D, this would be considered a dupinsert. The subnet count represents the number of times access information was inserted for a subnet.The restore count represents the number of times an insert was done based on information on disk. Thishappens upon reboot or controller failover.
access cache refreshes requested (total, read, write, root)These counts represent for each attribute the number of times stale information was returned by thecache and a refresh was requested for that attribute.
access cache refreshes done (total, read, write, root)These counts represent for each attribute the number of times a refresh was done for that attribute.
access cache errors (query, insert, no mem) The query counter indicates the total number of errors(including no mem) encountered when doing a query in the cache. The insert counter indicates the totalnumber of errors (including no mem) encountered when doing an insert in the cache. The no memcounter indicates the number of times a query or insert could not be done because memory was notavailable.
access cache nodes (flushed, harvested, harvests failed)The flushed count represents the number of nodes removed from the access cache as a result of an exportfs -f command. The harvested count represents the number of nodes removed from the accesscache which have not been accessed for more than nfs.export.harvest.timeout seconds. The harvests failed count represents the number of times a node was found in a state where requests were waiting forresolution on it and that node had not been accessed for more than nfs.export.harvest.timeout seconds.High value of this counter may point to issues with name resolution service.
access cache nodes (allocated, free) The allocated count represents the total number of nodesallocated by all the access caches. The free count represents the number of nodes which are not in useby any access cache.
access cache qctx (allocated, free) The allocated count represents the total number of query contextsallocated to queue requests waiting for resolution. The free count represents the number of contextswhich are not in use.
access cache persistence errors (total) The total count represents the errors encountered while savingor restoring access cache data to/from disk.
Data ONTAP® 8.2 Commands: Manual Page Reference for 7-Mode, Volume 1 371
nfsstat

access cache persistence nodes handled (restored, saved)The restored count represents the number of nodes that were restored from the persistent access cache.The saved count represents the number of nodes saved since the last system boot. This is cumulativeand periodically increases after periodic saving of access cache into persistent storage.
access cache persistence rules deleted (total) The total count represents the number of times wereference a rule which no longer exists while restoring content from persistent access cache. Contentsfor such rules cannot (and need not) be restored.
access cache persistence memchunks (allocated, freed)The allocated count represents the number of memory chunks allocated for use while encoding accesscache data for persistent storage. The freed represents the number of memory chunks freed (afterhaving been allocated) while processing access cache data for persistent storage.
assist queue (queued, split mbufs, drop for EAGAIN) The queued is the number of NFS requestswhich are put on the assist queue. The "split mbufs" is the number of NFS requests in which dataspans multiple mbufs. The "drop for EAGAIN" is the number of NFS requests which were put on theassist queue for servicing an access cache miss and for which name service errors resulted in the requestbeing dropped.
NFS re-drive queue (curr, max, total) The curr is the number of NFS requests currently on theredrive queue, waiting to be processed. The max is the maximum number of NFS requests that werewaiting on the redrive queue at any given time. The total is the total number of NFS requests processedso far.
Direct NFS re-drive (memory, webNFS) Shows the number of NFS requests directly queued from thedriver thread to the redrive queue. The memory is the number of the NFS requests queued up to there-drive queue because of the failure of the non-blocking memory allocation. The webNFS is thenumber of webNFS requests put on the redrive queue.
Errors in the blocking export access check Shows the count of the errors received during blockingexport access check.
RPCSEC_GSS context limitThe limit on the RPCSEC_GSS context table. This limit is defined via the
nfs.rpcsec.ctx.high option. RPCSEC_GSS refers to the authentication protocol used by NFS (see RFC2203) forencapsulating Kerberos V5
authentication information. Therefore an RPCSEC_GSS context corresponds to a Kerberos V5 authenticationsession between the NFS client and server.
current context countThe number of RPCSEC_GSS contexts currently allocated.
maximum context countThe maximum number of RPCSEC_GSS contexts ever allocated since the last boot. Note that this valueis not zeroed when the -z option is used.
372 Data ONTAP® 8.2 Commands: Manual Page Reference for 7-Mode, Volume 1
nfsstat

context reclaim callbacks
context idle/expired scans
vm pressure callbacksEach of these three statistics counts an asynchronous attempt (callback) to reclaim least recently usedcontexts from the RPCSEC_GSS context table.
The "context reclaim callbacks" statistic counts the number of callbacks triggered by the RPCSEC_GSSsubsystem, due to a deferred reclaim (because ONTAP could not suspend).
The "context idle/expired scans" statistic counts the number of periodic scans to look for expired or idlecontexts. A context is considered idle if it has not been used for the number of seconds set in thenfs.rpcsec.ctx.idle option.
The "vm pressure callbacks" statistic counts the number of times the ONTAP VM subsystem asked theRPCSEC_GSS subsystem to release memory back to the system free list of memory.
contexts created Counts the total number of RPCSEC_GSS contexts created.
contexts deleted Counts the total number of RPCSEC_GSS contexts deleted.
contexts deleted due to vm pressure Counts the RPCSEC_GSS contexts deleted due to vm pressurecallbacks.
contexts deleted due to context limit Counts the RPCSEC_GSS contexts deleted due to the currentcontext count already being at the context limit whenever a new context needs to be created. The leastrecently used context will be deleted.
contexts deleted due to idle/expiration Counts the number of RPCSEC_GSS contexts deleted becausethe expired or were idle.
requests exceeding timeoutThe number of NFS requests which exceeded the timer set in
the option nfs.response.trigger.
Files Causing Misaligned I/O’sList of filenames that are causing the most misaligned I/O’s over NFS along with their
corresponding heuristic counters. The higher the counter value, the higher the misaligned I/O requests for thecorresponding file.
Data ONTAP® 8.2 Commands: Manual Page Reference for 7-Mode, Volume 1 373
nfsstat
DISPLAYSThe server RPC display includes the following fields, with separate values for TCP and UDP:
calls The total number of RPC calls received.
badcalls The total number of calls rejected by the RPC layer (the sum of badlen and xdrcall as definedbelow).
nullrecv The number of times an RPC call was not available when it was thought to be received.
badlen The number of RPC calls with a length shorter than a minimum-sized RPC call. Also counts thenumber of RPC requests over the TCP transport with illegal record lengths, such as those that aretoo small, too large, or not a multiple of the base XDR encoding unit (4 bytes).
xdrcall The number of RPC calls whose header could not be XDR decoded.
The server NFS display shows the number of NFS calls received (calls) and rejected (badcalls), and thecounts and percentages for the various calls that were made.
NFSV4 STATSAn NFSV4 compound request can contain more than one operation. Therefore, the nfsstat commanddisplays the total number of rpc requests received by the server (calls) as well as the total operations (ops) received in all the compound requests.
Only a count is displayed for NULL and COMPOUND requests. Percentages are displayed for alloperations received in COMPOUND requests relative to the total number of operations. The total callsdisplayed under the TCP, UDP and Server nfs headings represents the sum of all RPC requestsreceived from NFSV2, NFSV3 and NFSV4 clients and do not take into account any operations in COMPOUND requests.
MISALIGNED I/OA NFS read or write is termed misaligned when its length is a multiple of 4K and it’s starting offset isnot aligned to a 4K boundary. A large number of misaligned reads and writes will have an adverseimpact on the performance of the node. NFS reads and writes are binned into eight bins (BIN-0 toBIN-7). All read and write requests from BIN-1 to BIN-7 are misaligned. A list of filenames that causedthe most misaligned I/O’s is displayed with the -d option.
BUGSnfsstat -l reports unexpected percentages, if the nfs.per_client_stats.enable option is enabled after thesystem has been running for a while (typically this option should be enabled at system startup time viathe /etc/rc file). Resetting the statistics via the nfsstat -z command will clear this condition.
374 Data ONTAP® 8.2 Commands: Manual Page Reference for 7-Mode, Volume 1
nfsstat

HA CONSIDERATIONSIn takeover mode, the nfsstat command displays combined statistics for the live node and the failednode. From the statistics, you cannot determine how many requests were serviced by the live node andhow many requests were serviced on behalf of the failed node.
The -h and -l options display the combined client information for both the live node and the failed node.
The NFS statistics are cumulative. That is, a giveback operation does not zero out the NFS statistics.After giving back the failed node’s resources, the live node does not subtract the statistics about NFSoperations it performed on behalf of the failed node when it was in takeover mode.
VFILER CONSIDERATIONSWhen run from a vfiler context, (for example, via the vfiler run command), nfsstat operates on theconcerned vfiler. Note that if vfilers are licensed when using the -h and -l options it is necessary to runthis command from a vfiler context, since the interpretations of the hosts are dependent on the vfiler.
SEE ALSOna_vfiler(1), na_sysstat(1).
Data ONTAP® 8.2 Commands: Manual Page Reference for 7-Mode, Volume 1 375
nfsstat
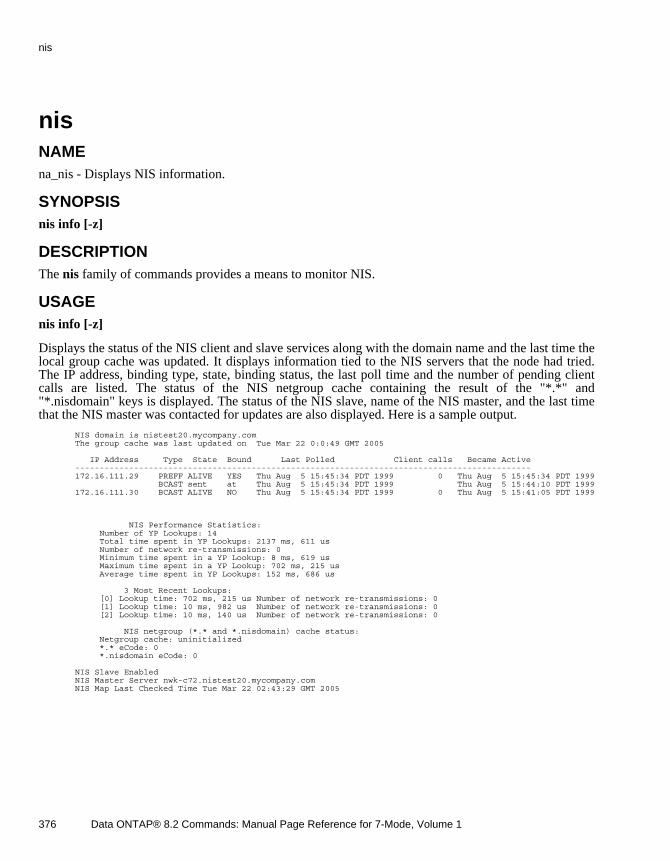
nisNAMEna_nis - Displays NIS information.
SYNOPSISnis info [-z]
DESCRIPTIONThe nis family of commands provides a means to monitor NIS.
USAGEnis info [-z]
Displays the status of the NIS client and slave services along with the domain name and the last time thelocal group cache was updated. It displays information tied to the NIS servers that the node had tried.The IP address, binding type, state, binding status, the last poll time and the number of pending clientcalls are listed. The status of the NIS netgroup cache containing the result of the "*.*" and"*.nisdomain" keys is displayed. The status of the NIS slave, name of the NIS master, and the last timethat the NIS master was contacted for updates are also displayed. Here is a sample output.
NIS domain is nistest20.mycompany.com The group cache was last updated on Tue Mar 22 0:0:49 GMT 2005
IP Address Type State Bound Last Polled Client calls Became Active --------------------------------------------------------------------------------------------- 172.16.111.29 PREFF ALIVE YES Thu Aug 5 15:45:34 PDT 1999 0 Thu Aug 5 15:45:34 PDT 1999 BCAST sent at Thu Aug 5 15:45:34 PDT 1999 Thu Aug 5 15:44:10 PDT 1999 172.16.111.30 BCAST ALIVE NO Thu Aug 5 15:45:34 PDT 1999 0 Thu Aug 5 15:41:05 PDT 1999
NIS Performance Statistics: Number of YP Lookups: 14 Total time spent in YP Lookups: 2137 ms, 611 us Number of network re-transmissions: 0 Minimum time spent in a YP Lookup: 8 ms, 619 us Maximum time spent in a YP Lookup: 702 ms, 215 us Average time spent in YP Lookups: 152 ms, 686 us
3 Most Recent Lookups: [0] Lookup time: 702 ms, 215 us Number of network re-transmissions: 0 [1] Lookup time: 10 ms, 982 us Number of network re-transmissions: 0 [2] Lookup time: 10 ms, 140 us Number of network re-transmissions: 0
NIS netgroup (*.* and *.nisdomain) cache status: Netgroup cache: uninitialized *.* eCode: 0 *.nisdomain eCode: 0
NIS Slave Enabled NIS Master Server nwk-c72.nistest20.mycompany.com NIS Map Last Checked Time Tue Mar 22 02:43:29 GMT 2005
376 Data ONTAP® 8.2 Commands: Manual Page Reference for 7-Mode, Volume 1
nis
OPTIONS-z
This option is used to zero out the NIS Performance Statistics collected since the last rebootor since the last time this option was used. Subsequent use of the nis info command will printNIS Performance Statistics since the last use of -z option.
_FI_FI_
VFILER CONSIDERATIONSWhen run from a vfiler context, (for example via the vfiler run command), nis displays NISinformation about the concerned vfiler.
SEE ALSOna_vfiler(1)
Data ONTAP® 8.2 Commands: Manual Page Reference for 7-Mode, Volume 1 377
nis
optionsNAMEna_options - Displays or sets the node options.
SYNOPSISoptions
options option
options partial-option
options [ option value ] ...
DESCRIPTIONThe options command is used to change configurable node software options. If no options are specified,then options prints the current value of all available options. If an option is specified with no value,then the current value of that option is printed. If only a part of an option is specified with no value, thenthe list of all options that start with the partial-option string is printed. This is similar to the UNIX grepcommand. The default value for most options is off, which means that the option is not set. Changingthe value to on enables the option; for most options, the only valid values are on (which can also beexpressed as yes, true, or 1) in any mixture of upper and lower case, and off (which can also beexpressed as no, false, or 0) in any mixture of upper and lower case. The description of the option willindicate the default if it is not off, and will indicate what values are allowed if it isn’t an on/off option.For options that take string values, use a double quote ("") as the option argument if you wish to set thatoption to be the null string. Normally, arguments are limited to 255 characters in total length.
The legal options are as follows:
acp.domainThis option saves ACP (Alternate Control Path) domain value as integer. Any time this is changed,ACP needs to be disabled and re-enabled using option acp.enabled, for change to take effect. Thedefault value is 43200, that is 192.168.0.0
acp.enabledEnables/disables ACP (Alternate Control Path). The default value is off, value on enable ACP. Thisoption gets set to on if setup is used to enable ACP.
acp.netmaskThis option saves ACP (Alternate Control Path) netmask value as integer. Any time this is changed,ACP needs to be disabled and re-enabled using option acp.enabled, for the change to take effect. Thedefault value is 16580607, that is 255.255.252.0
acp.portThis option saves ACP (Alternate Control Path) Ethernet port value, that is interface name. Any timethis is changed, ACP needs to be disabled and reenabled using option acp.enabled for the change totake effect. Storage Controller with e0P or lockedwrench Ethernet port has default value as e0P. Thisvalue also gets set with the value which is given while enabling or re-configuring ACP.
378 Data ONTAP® 8.2 Commands: Manual Page Reference for 7-Mode, Volume 1
options
auditlog.enableEnables/disables the audit logging of commands executed at the console/telnet shell or by using rsh.The default is on. The data is logged to the file /etc/log/auditlog for a node or /logs/auditlog if thesystem is a NetCache. The maximum size of auditlog file is allowed to grow to the value specified bythe auditlog.max_file_size option. If the auditlog file reaches this size, and on every Saturday at 24:00, /etc/log/auditlog is moved to /etc/log/auditlog.0, /etc/log/auditlog.0 is moved to /etc/log/auditlog.1,and so on (similarly for /logs/auditlog if it is a NetCache). Assuming they do not get full, auditlog filesare saved for a total of six weeks.
auditlog.max_file_sizeThis option controls the maximum size (in bytes) that the auditlog file is allowed to grow to (see above).The default value for this option is 10000000.
auditlog.readonly_api.enableThis option controls auditing of APIs based on their roles. If an API is used to retrieve information butnot for modifying the state of the system then this API is not audited by default. The default value ofthis option is off, which causes read-only APIs not to audit. To overwrite the default value, set thisoption value to true, or on.
autologout.console.enableEnables/disables the autologout of console connections. The default is on, which causes consoleconnections to be disconnected after the console has been idle for the number of minutes specified bythe autologout.console.timeout value. Any change to this option is effective after a command isentered.
autologout.console.timeoutThe number of minutes the console is idle after which console connections are disconnected if autologout.console.enable is on. The default is 60 minutes. Any change to this option is effective aftera command is entered.
autologout.telnet.enableEnables/disables the autologout of telnet/interactive ssh connections. The default is on, which causestelnet/interactive ssh connections to be disconnected after the number of minutes specified by the autologout.telnet.timeout value. Any change to this option requires a logout before it takes effect.
autologout.telnet.timeoutThe number of minutes after which telnet/interactive ssh connections are disconnected if autologout.telnet.enable is on. The default is 60 minutes. Any change to this option requires a logoutbefore it takes effect.
autosupport.contentThe type of content that the autosupport notification should contain. Allowable values are complete and minimal. The default value is complete. The minimal option allows the delivery of a "sanitized" andsmaller version of the autosupport, at the cost of reduced support from NetApp Inc. Please contactNetApp Inc if you feel you need to use the minimal option. The complete option is the traditional (anddefault) form of autosupport. If this option is changed from complete to minimal then all previous andpending autosupport messages will be deleted under the assumption that complete messages should notbe transmitted.
Data ONTAP® 8.2 Commands: Manual Page Reference for 7-Mode, Volume 1 379
options

autosupport.doitTriggers the autosupport daemon to send an autosupport notification immediately. A text word enteredas the option is sent in the notification subject line and should be used to explain the reason for thenotification.
autosupport.enableEnables/disables the autosupport notification features (see na_autosupport(1)). The default is on tocause autosupport notifications to be sent. This option will override the autosupport.support.enableoption.
autosupport.fromDefines the user to be designated as the sender of the notification. The default is [email protected]. Email replies from NetApp Inc will be sent to this address.
autosupport.local_collectionUse this parameter with the value false to disable local storage of AutoSupport files when sending ofAutoSupport messages is disabled. The default setting is true, which causes the node to storeAutoSupport files locally even if AutoSupport is disabled.
autosupport.mailhostDefines the list of up to 5 mailhost names. Enter the host names as a comma-separated list with nospaces in between. The default is an empty list. Both IPv6 and IPv4 addresses are accepted.
autosupport.max_http_sizeUse this parameter to specify the maximum file size (in bytes by default, but can also be specified inKB, MB, TB or PB) for HTTP and HTTPS transfers. Setting the value to 0 disables the delivery sizebudget.
If the size of the AutoSupport message exceeds this value, AutoSupport will deliver as much of themessage as possible. You can use the "autosupport manifest show" command to identify the sections ofthe message that AutoSupport sent. AutoSupport collects and sends the content in order of priority. Thepriority is predefined for each AutoSupport message. To identify the collection order for anAutoSupport trigger, use the "autosupport trigger show" command with the -instance parameter.
autosupport.max_smtp_sizeUse this parameter to specify the maximum file size (in bytes by default, but can also be specified inKB, MB, TB or PB) for SMTP (e-mail) transfers. Setting the value to 0 disables the delivery sizebudget.
If the size of the AutoSupport message exceeds this value, AutoSupport will deliver as much of themessage as possible. You can use the "autosupport manifest show" command to identify the sections ofthe message that AutoSupport sent. AutoSupport collects and sends the content in order of priority. Thepriority is predefined for each AutoSupport message. To identify the collection order for anAutoSupport trigger, use the "autosupport trigger show" command with the -instance parameter.
autosupport.minimal.subject.idDefines the type of string that is used in the identification portion of the subject line when autosupport.content is set to minimal. Allowable values are systemid and hostname. The default is systemid.
380 Data ONTAP® 8.2 Commands: Manual Page Reference for 7-Mode, Volume 1
options
autosupport.nht_data.enableEnables/disables the generation of the Health Trigger (NHT) data autosupport. Default is on
autosupport.notetoDefines the list of recipients for the autosupport short note email. Up to 5 mail addresses are allowed.Enter the addresses as a comma-separated list with no spaces in between. The default is an empty list todisable short note emails.
autosupport.ondemand.polling_intervalDefines the rate in minutes, at which the node polls the AutoSupport OnDemand Server. Valid valuesrange from 5 minutes to 2880 minutes (48 hours). The default is 60 minutes.
autosupport.ondemand.remotediag.stateDefines whether the AutoSupport OnDemand Remote Diagnostics feature is enabled or disabled on thenode. The default is on.
autosupport.ondemand.server_urlDefines the AutoSupport OnDemand Server URL that the node communicates with.
autosupport.ondemand.stateDefines whether the AutoSupport OnDemand feature is enabled or disabled on the node. The default is on.
autosupport.partner.toDefines the list of recipients for the autosupport email notification that will receive all messages that areor will be sent to the standard NetApp Inc autosupport email address. Up to 5 mail addresses areallowed. Enter the addresses as a comma-separated list with no spaces in between. To disable, clear thislist. The default is an empty list.
autosupport.payload_formatUse this parameter to specify the file format of the message payload. Use "7z" to specify 7-Zip archiveformat. Use "tgz" to specify GNU zipped tar file. The default is "7z".
autosupport.performance_data.doitTriggers the autosupport daemon to send a performance data autosupport notification immediately toNetApp Inc, as described by the autosupport.support.transport option. The given value for thisoption is ignored.
autosupport.performance_data.enableEnables/disables hourly sampling of system performance data, and weekly creation of a performancedata autosupport. The default is on.
autosupport.periodic.tx_windowUse this parameter to specify a randomized delay window for periodic AutoSupport messages. Thetransmission window prevents message floods from periodic AutoSupport triggers such as
"callhome.weekly", "callhome.performance.data", "callhome.nht.data", and "callhome.management.log". Valid valuesrange from 0 minutes to 240 minutes (4 hours).The default is 60 minutes (1 hour). Setting the valueto 0 disables the randomized delay.
Data ONTAP® 8.2 Commands: Manual Page Reference for 7-Mode, Volume 1 381
options

autosupport.retry.countNumber of times to try resending the mail before giving up and dropping the mail. Minimum is 5 andmaximum is 4294967295. The default is 15.
autosupport.retry.intervalTime in minutes to delay before trying to send the autosupport again. Minimum is 30 seconds,maximum is 1 day. Values may end with ‘s’, ‘m’ or ‘h’ to indicate seconds, minutes or hoursrespectively If no units are specified, then input is assumed to be in seconds. The default value is 4m.
autosupport.support.enableEnables/disables the autosupport notification to NetApp Inc. The default is on to cause autosupportnotifications to be sent directly to NetApp Inc as described by the autosupport.support.transportoption. This option is superseded (overridden) by the value of autosupport.enable.
autosupport.support.proxyAllows the setting of an HTTP-based proxy if autosupport.support.transport is https or http. Thedefault for this option is the empty string; implying that no proxy is necessary. The format forspecifying the proxy is user:password@proxyhost:port. If the port is not specified, the default portused is 3128. Basic authentication is the default authentication method used for proxies. Both IPv6 andIPv4 addresses are accepted.
autosupport.support.put_urlThis option is used to specify the support URL for HTTP PUT operations. The URL should be enteredwithout an http:// or https:// prefix. If the Web server does not accept the PUT operation, theautosupport.support.url option is used for a POST operation.
autosupport.support.reminderThis option is used to enable or disable a reminder message that is sent when AutoSupport is notconfigured to send messages to technical support. The default is on.
autosupport.support.toThis option is read only; it shows where autosupport notifications to NetApp Inc are sent if autosupport.support.transport is smtp.
autosupport.support.transportAllows setting the type of delivery desired for autosupport notifications that are destined for NetAppInc. Allowed values are https, http (for direct Webbased posting) or smtp (for traditional email). Thedefault value is https. Note that http and https may (depending on local network configuration) requirethat the autosupport.support.proxy option be set correctly. Also smtp requires that autosupport.mailhosts be configured correctly before autosupport delivery can be successful.
autosupport.support.urlThis option is read only, it shows where autosupport notifications to NetApp Inc are sent if autosupport.support.transport is https or http.
autosupport.throttleEnables autosupport throttling (see na_autosupport(1)). When too many autosupports are sent in tooshort a time, additional messages of the same type will be dropped. Valid values for this option are onor off. The default value for this option is on.
382 Data ONTAP® 8.2 Commands: Manual Page Reference for 7-Mode, Volume 1
options
autosupport.toDefines the list of recipients for the autosupport email notification. Up to 5 mail addresses are allowed.Enter the addresses as a comma-separated list with no spaces in between. The default is an empty list.Note that it is no longer necessary to use the standard NetApp Inc autosupport email address in this fieldto direct autosupport messages to NetApp Inc. Please use autosupport.support.enable instead.
autosupport.validate_digital_certificateUse this parameter with the value true to force the node to validate digital certificates that it receives.
backup.log.enableBackup logging captures important events during dump/restore and records them in /etc/log/backup onthe root volume. The option allows users to enable or disable this feature. By default, the option is on.
cdpd.enableWhen this option is set to ON, Cisco Discovery Protocol v1(CDPv1) Daemon is enabled on all physicalnetwork ports so that it starts sending and processing CDPv1 advertisements.
cdpd.intervalThis option is used to set the interval in seconds at which CDPv1 packets are sent on each physicalnetwork port that is up. The storage controller sends CDPv1 advertisements only when cdpd.enable isset to ON.
cdpd.holdtimeThis option is used to set the holdtime advertised by the storage controller in each CDPv1 packet. Theholdtime is the time in seconds that the neighboring CDPv1 compliant device will cache the storagecontroller’s advertisements.
cf.giveback.auto.after.panic.takeoverThis option is used to enable or disable automatic giveback when the partner is ready after it was takenover due to panic. The default value is set to ON.
cf.giveback.auto.cancel.on_network_failureThis option is used to disable automatic giveback when the partner is ready after it was taken over dueto network impairment. The default value is set to ON.
This option is only available for 7-mode.
cf.giveback.auto.cifs.terminate.minutesThis options specifies the number of minutes to delay an automatic giveback before terminating CIFSclients that have open files. During the delay, the system will periodically send notices to the affectedworkstations. If 0 (zero) minutes are specified, then CIFS clients will be terminated immediately.
cf.giveback.auto.delay.secondsThis option specifies a delay before performing automatic giveback. An automatic giveback is invokedwhen one node of a High Availability (HA) configuration is in takeover mode and the "down" node isrepaired and reboots. Using this option makes the outage during takeover and giveback to be two shortoutages instead of one longer outage. The default value is 600 seconds. The allowed range is to 600seconds, inclusive. This option does not impact manual giveback.
Data ONTAP® 8.2 Commands: Manual Page Reference for 7-Mode, Volume 1 383
options
cf.giveback.auto.enableThis options turns on/off automatic giveback. An automatic giveback is invoked when one node of aHigh Availability (HA) configuration is in takeover mode and the "down" node is repaired and reboots.The repaired node will boot into Data ONTAP and the node in takeover mode will detect this andinitiate a giveback.
This feature is only available on flash booted systems.
cf.giveback.auto.override.vetoesThis option, when on, specifies that automatic giveback should immediately terminate long runningoperations (dump/restore, vol verify, and so on) and override all partner veto votes when initiating anautomatic giveback. When this option is off, the automatic giveback will be deferred until the longrunning operations have completed and will take into account partner veto votes.
cf.giveback.check.partnerThis option turns on/off checking for partner readiness before starting giveback. It’s being used on flashbooted systems only.
When this option is on, if operator types in "cf giveback", before starting giveback, the node in takeoverstate checks that partner has actually booted halfway up. If partner is not ready yet, giveback won’tstart.
When this option is off, if operator types in "cf giveback", giveback starts without checking partner’sstatus.
The default value is on, which reduces downtime caused by a giveback.
Two nodes in a High Availability (HA) configuration can have different settings for this option.
cf.hw_assist.enableThis option turns the hardware-assisted takeover functionality on or off.
When enabled, the hardware module notifies the partner of certain hardware failures such aspower-loss, power-cycle, watchdog reset, and so on. This enables the partner to start the takeoverimmediately upon notification, rather than waiting for the configured detection period.
When the hw_assist option is disabled, or if the hardware failure notification doesn’t reach the partner,the partner starts the takeover after waiting for cf.takeover.detection.seconds.
The default value is on. The node must have a Hardware module such as RLM(Remote-LAN-Manager) to enable the hardware-assisted takeover functionality.
cf.hw_assist.partner.addressThe hardware failure notification is sent to this partner IP address. If hostname is given, it is convertedinto an IP address.
cf.hw_assist.partner.portThe hardware failure notification is sent to this partner port.
cf.modeThis is used to set the node either in HA mode or nonHA mode.
384 Data ONTAP® 8.2 Commands: Manual Page Reference for 7-Mode, Volume 1
options
cf.remote_syncmirror.enableThis option when set to on in 7-Mode, enables the MetroCluster functionality. By default, it is off. Thisoption is not valid for Cluster-Mode.
cf.sfoaggr_maxtimeThis optionally specifies the amount of time, in seconds, the source node has to wait for the destinationnode to complete the aggregate migration before declaring the migration as failed. The default set- tingis 120 seconds.
This option is only supported in cluster environments.
cf.takeover.bypass_optimizationWhen set to true, this option bypasses optimized operator-initiated planned takeover. Operatorinitiatedplanned takeover is optimized by serially relocating SFO aggregates to the partner prior to takeover,thereby reducing client outage.
When this option is true, if the operator types "storage failover takeover",
"storage failover takeover -option normal" or "storage failover takeover -option allow-version-mismatch", then the node will bypass the abovementioned takeover optimization.
When this option is false, if the operator types "storage failover takeover",
"storage failover takeover -option normal" or "storage failover takeover -option allow-version-mismatch", then the node will perform theabove mentioned takeover optimization.
The default value is false, which reduces client outage during operator-initiated planned takeovers. Thisoption applies only on HA pairs in a cluster.
Two nodes in a High Availability (HA) configuration can have different settings for this option.
cf.takeover.change_fsidBy default (the default is on), Data ONTAP changes the file system IDs (FSIDs) of all partner volumesand aggregates if a disaster takeover occurs in a MetroCluster configuration. When the value is set tooff, Data ONTAP does not change the FSIDs, enabling users to continue to access their volumes after adisaster takeover.
CAUTION: Although clients of the disaster node would have read access to partner volumes if theoption was set to no, they might experience data loss when attempting to write to the volumes. Disablethe change_fsid option with great care.
cf.takeover.detection.secondsThis option provides a knob to tune the timer used in takeover detection.
The timer is used by the High Availability software in monitoring partner node’s status. If partner nodehas not been responding more than n seconds, where n is the value of this option, local node decides totake over.
Data ONTAP® 8.2 Commands: Manual Page Reference for 7-Mode, Volume 1 385
options

Two nodes do not need to have same value for this option. This provides asymmetric takeover behaviorin terms of aggressiveness.
The default value of this option is 15 seconds. The option can be set to any value between 10 and 180.In case sk.process.timeout.override has been manually set, it is strongly advised that this option is set toa value larger than or equal to sk.process.timeout.override+5.
cf.takeover.on_failureThis option allows automatic takeover to be disabled. By default, this option is set to on and a node willautomatically takeover it’s partner node if the latter fails. If set to off, automatic takeovers are disabledbut operator can still initiate manual takeovers.
This option is available only when cf is licensed and changing the value on one node automaticallychanges the value on the partner node.
cf.takeover.on_disk_shelf_miscompareThis option allows negotiated takeover to be enabled when the HA nodes detect a mismatch in diskshelf count. By default, this option is set to off.
This option is available only when cf is licensed and changing the value on one node automaticallychanges the value on the partner node.
Not valid for configurations supporting software-based disk ownership.
cf.takeover.on_network_interface_failureThis option allows negotiated takeover to be enabled when the HA nodes detect failures in networkinterfaces. Only those network interfaces that have explicitly enabled negotiated failover via the ifconfig command will be monitored. By default, this option is set to off.
This option is available only when cf is licensed and changing the value on one node automaticallychanges the value on the partner node.
Valid for 7-Mode network interfaces and not for Cluster-Mode network interfaces.
cf.takeover.on_network_interface_failure.policy This option determines what policy to apply fortriggering negotiated failover when network interfaces fail. There are two policies that are currentlysupported: all_nics implying failover when all network interfaces participating in negotiated failoverfail and any_nic implying failover when any one of the network interfaces participating in negotiatedfailover fails. By default, this option is set to all_nics.
This option is available only when cf is licensed.
Valid for 7-Mode network interfaces and not for Cluster-Mode network interfaces.
cf.takeover.on_panicThis option turns on/off the takeover on panic feature. It’s available only when cf is licensed. Changingthe value on one node automatically changes the value on the partner node.
Users should use caution when manually changing the option value.
386 Data ONTAP® 8.2 Commands: Manual Page Reference for 7-Mode, Volume 1
options

cf.takeover.on_reboot
This option determines if a takeover will be initiated when the partner node reboots. If a takeover isdone because of the partner node rebooting, then an automatic giveback will be done, regardless of thesetting of the cf.giveback.auto.enable option. By default, this option is set to on. Changing the valueon one node automatically changes the value on the partner node.
cf.takeover.on_short_uptimeThis option determines whether a cf failover will happen if a node fails within sixty seconds of bootingup. By default, this option is set to on.
This option is available only when cf is licensed and changing the value on one node automaticallychanges the value on the partner node.
cf.takeover.use_mcrc_fileThis option indicates takeover to read and execute configuration from different file /etc/mcrc of partner,instead of default /etc/rc file
This option is applicable only to 7-Mode MetroCluster environment.
cifs.ipv6.enableThis option controls CIFS IPv6 support. For this option to take effect, networking stack should supportIPv6 (option ip.v6.enable). When this option is enabled, node starts accepting new cifs sessions overIPv6. When this option is disabled node stops accepting any new cifs sessions over IPv6, existing IPv6sessions will remain active and will not be disconnected.
Default: off
Effective: Immediately
Persistence: Remains in effect across system reboots
Values: on, off
cifs.LMCompatibilityLevelValue of this option controls the different Authentication tokens that the node can accept from theclient. It can take values from 1 to 5. With each value, node accepts security tokens as described below.
1 - Accepts LM, NTLM, NTLMv2 session security, NTLMv2, Kerberos.
2 - Accepts NTLM, NTLMv2 session security, NTLMv2, Kerberos.
3 - Accepts NTLMv2 session security, NTLMv2, Kerberos.
4 - Accepts NTLMv2, Kerberos.
5 - Accepts Kerberos only.
Default: 1
Effective: Immediately
Data ONTAP® 8.2 Commands: Manual Page Reference for 7-Mode, Volume 1 387
options

Persistence: Remains in effect across system reboots
cifs.AD.retry_delayThe time, in seconds, to wait between trying to discover Active Directory DC or AD-LDAP addresses
Default: 15
Min/Max: 0 - 3600 seconds
Effective: Immediately
Persistence: Remains in effect across system reboots
cifs.audit.autosave.file.extensionSpecifies the type of file extension that will be appended to the "saveas" file name when the autosavefeature is enabled. It will append a timestamp or counter value to the saved EVT file. If a value for thisoption is not specified, a timestamp is used as the file extension; however the value "timestamp" is notdisplayed.
Default: "" (null)
Effective: Immediately
Values: timestamp, counter
Persistence: Remains in effect across system reboots
cifs.audit.autosave.file.limitSpecifies how many Microsoft Event Log (EVT) files are to be saved before they are rotated. Once thelimit of files exists on the node, the oldest file is always overwritten. If the value of this option is 0, thenthe node will have no limit to how many file are automatically saved on the node. This option needs tohave the autosave feature enabled.
Default: "" (null)
Effective: Immediately
Min/Max: 0 - 999 files
Persistence: Remains in effect across system reboots
cifs.audit.autosave.onsize.enableWhen this option is on, the CIFS Audit Logging Facility (ALF) daemon will automatically save thecifsaudit.alf file to the corresponding EVT file based on the size of the cifsaudit.alf file. The option cifs.audit.autosave.onsize.threshold is needed to be set to specify the actual threshold to trigger theauto save.
Default: off
Effective: Immediately
388 Data ONTAP® 8.2 Commands: Manual Page Reference for 7-Mode, Volume 1
options
Values: on, off
Persistence: Remains in effect across system reboots
cifs.audit.autosave.onsize.thresholdThis option specifies the size threshold which should trigger an auto save. The option cifs.audit.autosave.onsize.enable should be enabled for this option to be used. Note that if the suffix ispercentage this should be perceived as a percentage of the size of the cifsaudit.alf file which can bespecified by the cifs.audit.logsize option.
Default: 75%
Min/Max: 1 - 100% percent
Min/Max: 512k - 64g in kilobytes (k), megabytes (m) or gigabytes (g)
Effective: If the threshold is specified as a percentage of the size of cifsaudit.alf file, then thresholdvalue takes effect only when the absolute threshold value is more than 512k. If absolute threshold valueis less than 512k, default value of 512k is used.
Persistence: Remains in effect across system reboots
cifs.audit.autosave.ontime.enableWhen this option is on, the CIFS Audit Logging Facility (ALF) daemon will automatically save thecifsaudit.alf file to the corresponding EVT file based on an internal timer. The option cifs.audit.autosave.ontime.interval is needed to be set to specify the timer interval to trigger the autosave.
Default: off
Effective: Immediately
Values: on, off
Persistence: Remains in effect across system reboots
cifs.audit.autosave.ontime.intervalThis option specifies the time interval which should trigger an auto save. The option cifs.audit.autosave.ontime.enable should be enabled for this option to be used.
Default: 1d
Min/Max: 1 - 60m minutes
Min/Max: 1 - 24h hours
Min/Max: 1 - 7d days
Effective: Immediately
Persistence: Remains in effect across system reboots
Data ONTAP® 8.2 Commands: Manual Page Reference for 7-Mode, Volume 1 389
options
cifs.audit.enableWhen this option is on, CIFS audit events may be generated during file access and/or during logon andlogoff. For file access events to be generated, the option cifs.audit.file_access_events.enable must alsobe on. For logon and logoff events to be generated, the option cifs.audit.logon_events.enable must alsobe on.
Default: off
Effective: Immediately
Persistence: Remains in effect across system reboots
cifs.audit.file_access_events.enableWhen both this option and the cifs.audit.enable option are on, file access events will be audited when afile is accessed by an account for an operation and the file has a System Access Control List (SACL)entry that matches the access. If no SACL entry matches the access, then no event will be generated.
Default: on
Effective: Immediately
Persistence: Remains in effect across system reboots
cifs.audit.liveview.enableWhen both this option and the cifs.audit.enable option are on, the audit events can be viewed from aCIFS client by connecting to the node using the Event Viewer application. The events might not showup in Event Viewer as they are generated but they show up after some delay, depending on the auditsettings.
Default: off
Effective: Immediately
Persistence: Remains in effect across system reboots
cifs.audit.liveview.allowed_usersThis option specifies the user or group of users who will be allowed access to audit records using theLiveView feature. The user or group can be either local or domain-based. Irrespective of this optionvalue, local administrators always have permission to access audit records using the LiveView feature.
Effective: Immediately
Persistence: Remains in effect across system reboots
cifs.audit.logon_events.enableWhen both this option and the cifs.audit.enable option are on, logon and logoff events will begenerated. Logon and logoff events reflect CIFS session connects and disconnects, respectively.
Default: on
390 Data ONTAP® 8.2 Commands: Manual Page Reference for 7-Mode, Volume 1
options
Effective: Immediately
Persistence: Remains in effect across system reboots
cifs.audit.account_mgmt_events.enableWhen both this option and the cifs.audit.enable option are on, account management events will begenerated. Account management events reflect the creation, deletion and modification of local users andgroups on the node.
Default: off
Effective: Immediately
Persistence: Remains in effect across system reboots
cifs.audit.logsizeSpecifies the maximum event log file size in bytes.
Default: 1048576
Min/Max: 524288 - 68719476736 bytes
Effective: If the specified log size is smaller than the current log size, changes will be effective afterclearing the log with the ‘cifs audit clear’ command. Otherwise, changes are immediate.
Persistence: Remains in effect across system reboots
cifs.audit.nfs.enableEnables auditing of NFS file access events. When enabled, auditable events are recorded in the log file.Auditable events are specified by the Windows SACLs set either on the file itself, or on the filespecified in the value of cifs.audit.nfs.filter.filename, or on the StorageLevel Access Guard associatedwith the volume or qtree.
cifs.audit.nfs.filter.filenamePoints to the filter file used to identify which NFS file access events get included in the CIFS log bydefault. SACL set on this file, along with the SACLs set on the file being accessed or the Storage-LevelAccess Guard associated with the volume or qtree, is used to determine which NFS file access eventsget logged. SACL set on this file would affect all NFS file access requests irrespective of underlyingqtree security style. There is no default value for this option; therefore it must be set before the option cifs.audit.nfs.enable can be enabled. This option does not have to be set if the option cifs.audit.nfs.enable will not be enabled.
cifs.audit.saveasSpecifies the active event log file. The file must be in an existing directory in a network share.
Default: /etc/log/adtlog.evt
Effective: Immediately
Persistence: Remains in effect across system reboots
Data ONTAP® 8.2 Commands: Manual Page Reference for 7-Mode, Volume 1 391
options

cifs.bypass_traverse_checkingWhen turned on, directories in the path to a file are not required to have the ‘X’ (traverse) permission.This option does not apply to UNIX qtrees.
Default: on
Effective: Immediately
Persistence: Remains in effect across system reboots
cifs.client.dup-detectionWindows servers attempt to detect duplicate sessions in order to terminate any sessions that did notterminate when a client system rebooted. Early versions of Windows servers compare client NetBIOSnames to determine duplication, while newer ones use the client IP addresses.
This option determines how the appliance performs duplicate session detection. With this option set to ip-address (the default), the appliance compares client IP addresses. With this option set to name theappliance compares client NetBIOS names. With this option set to off the appliance does not performduplicate session detection.
Default: ip-address
Effective: Immediately
Persistence: Remains in effect across system reboots
cifs.commentDefines the CIFS server description. CIFS clients see the CIFS server description when browsingservers on the network.
Default: "" (null)
Effective: Immediately
Persistence: Remains in effect across system reboots
cifs.enable_share_browsingWhen this option is turned off, requests from clients to enumerate the list of shares on the CIFS serverwill result in an empty list.
Default: on
Effective: Immediately
Persistence: Remains in effect across system reboots
cifs.gpo.enableWhen this option is turned on, the node will attempt to communicate with the Active Directory serverthat the node is installed into in order to enforce defined group policies that apply to the node.
Default: off
392 Data ONTAP® 8.2 Commands: Manual Page Reference for 7-Mode, Volume 1
options
Effective: Immediately
Persistence: Remains in effect across system reboots
cifs.gpo.trace.enableWhen this option is turned on, messages that are useful for debugging the application of group policieson the node will be printed to the system console.
Default: off
Effective: Immediately
Persistence: Remains in effect across system reboots
cifs.guest_accountEnables a user to get access to the node provided that either the node uses a Domain Controller forauthentication and the user is not in a trusted domain, or the node uses the /etc/passwd file or the NISpassword database for authentication and the user has no entry in the /etc/passwd file or the NISpassword database. If this option is set to the name of an account in the password database, a userlogging into the node will be assigned to the guest account if their name is not listed in the passworddatabase (when using /etc/passwd or NIS) or if the user is not from a trusted domain (when using adomain controller). The configured user name will be used for the UNIX user ID, group ID, and groupset of the specified account. If the option is set to "" (null), guest access is disabled.
Default: "" (null)
Effective: Upon CIFS client reconnection
Persistence: Remains in effect across system reboots
cifs.home_dir_namestyleSpecifies how the name portion of the path to a user’s home directory is determined. If no argument issupplied, the current value of this option is displayed. Valid values for this option are: a null string, ntname, hidden, mapped, or domain. All user home directory paths begin with one of the CIFS homedirectory paths, followed by a slash and the user’s name. If this option is set to ntname then a user’sWindows login name is used and only downward symlinks (in the directory hierarchy) are followed. Ifthis option is set to hidden then a user’s Windows login name is used. However, the user must append adollar sign to their user name when connecting to the node; and the node will append a dollar sign to theuser’s name when enumerating the homedir share name. If the value of this option is mapped then theuser’s UNIX name is used. The UNIX name is obtained by mapping the user’s Windows login nameusing the file /etc/usermap.cfg. If this option is set to domain then the user’s name includes both theuser’s domain and Windows login name separated by a slash. If the option is set to "" (null), this actslike ntname with the exception that symlinks are followed in any direction.
Default: "" (null)
Effective: Immediately
Persistence: Remains in effect across system reboots
Data ONTAP® 8.2 Commands: Manual Page Reference for 7-Mode, Volume 1 393
options
cifs.homedirs_public_for_adminSpecifies whether members of the node’s Builtin\Administrators group can connect to the CIFS homedirectories of other users. If no argument is supplied, the current value of this option is displayed. If thisoption is set to on then an administrator can connect to the CIFS home directory of user username byspecifying the share ~username (tilde username). This can be useful when setting a user profile to mapthe user’s CIFS home directory on the node. Windows 2000 Active Directory does not allow a systemadministrator to set a user’s profile to a non-existent share, and normally a user’s CIFS home directorycan only be accessed by that user and not by the administrator.
Default: on
Effective: Immediately
Persistence: Remains in effect across system reboots
cifs.home_dir.generic_share_access_warnControls the genertion of EMS message when clients attempt to access any of the to generic homedirshares ( "~", "cifs.homedir" or "~cifs.homedir"). Note that even if this option is set to "off", an EMSwill be generated when Data ONTAP detects an actual attempt to perform an unsafe access.
Default: on
Effective: Immediately
Persistence: Remains in effect across system reboots
cifs.home_dir.generic_share_access_levelControls access to generic homedir share named "~", "cifs.homedir" or "~cifs.homedir"
If this options is set to 0, all access using generic home directory share name is denied. Using a value of0 prevents any possibility of a client with multiple connections, for example a Windows TerminalServer or Citrix, from granting incorrect access to other users of the same generic homedir share whomay have files or directories named the same.
When this option is set to 1, access using generic home directory share name is always allowed. Set thisoption to 1, if you are sure there is no possibility of more than one user on the same client accessing thegeneric home directory share at the same time.
Setting this option to 2 allows restricted use of the generic home directory share name. Data ONTAPtries to detect conflicting access patterns and reject them. If the clients are SMB 2.1 aware, they areprotected from compatibility issues by allowing only one user from a client to access using a particulargeneric home directory share name. All further attempts to access the same share name from same clientby different users are rejected. If the clients are not SMB 2.1 aware, Data ONTAP tries to minimize thecompatibility issues by disabling opportunistic locks (aka oplocks) on the files under the generic homedirectory share. Lack of opportunistic locks can result in performance degradation.
The value 3 for this option behaves similar to value 2 for SMB 2.1 aware clients, but rejects access toclients that are not SMB 2.1 aware. This setting avoids all compatibility issues and provides restrictedaccess to the generic home directory share.
394 Data ONTAP® 8.2 Commands: Manual Page Reference for 7-Mode, Volume 1
options
Default: 3
Values: 0, 1, 2, 3
Effective: Immediately
Persistence: Remains in effect across system reboots
cifs.idle_timeoutSpecifies the amount of idle time (in seconds) before the node disconnects a session. If "-1" is specifiedidle sessions are never disconnected. An idle session is a session in which a user does not have any filesopened on the node.
Default: 900
Min/Max: -1 - 4000000 seconds
Effective: Immediately
Persistence: Remains in effect across system reboots
cifs.max_mpxThis option controls how many simultaneous operations the node reports that it can process. An"operation" is each I/O the client believes is pending on the node including outstanding change notifyoperations. Clients such as Windows Terminal Server or IIS may require that this number be increasedto avoid errors and performance delays.
CAUTION - The approved values for this parameter are 50, 126, 253, and 1124. The most accurateway to determine which number to use is to measure the Redirector-Current Commands statistic on theclient with NT perfmon and to increase the number until Current Commands does not hit the negotiatedlimit. For more information see Microsoft Knowledge Base articles Q191370 and Q232890.
CAUTION - This number should only be changed while cifs is terminated.
CAUTION - Only use the approved values to avoid Q232890.
CAUTION - This value affects allocations in the clients. So do not increase the value unless required.
Default: 253
Values: 50, 126, 253, 1124
Effective: Immediately
Persistence: Remains in effect across system reboots
cifs.ms_snapshot_modeSpecifies the mode for snapshot access from a Microsoft Shadow Copy client. Valid values for thisoption are off, pre-xp and xp. off disables snapshot access from all Windows Shadow Copy clients. xpallows access to snapshots from Windows XP and later Shadow Copy clients only. pre-xp, in addition,allows access to snapshots from Windows 2000 Shadow Copy clients. Note that the downlevel pre-xpmode should only be used if Windows 2000 snapshot access is required as it may introduce a very slightperformance hit when there is a heavy load on the node and very long pathnames are in use.
Data ONTAP® 8.2 Commands: Manual Page Reference for 7-Mode, Volume 1 395
options
Default: xp
Values: off, xp, pre-xp
Effective: Immediately
Persistence: Remains in effect across system reboots
cifs.netbios_aliasesProvides a comma-separated list of alternative names for the node. A user can connect to the node usingany of the listed names.
This command is deprecated.
System administrators are encouraged to write CIFS NetBIOS aliases to the file /etc/cifs_nbalias.cfg(one alias per line). Use the "cifs nbalias load" command to cause the node to process the /etc/cifs_nbalias.cfg file. For more information, see the CIFS chapter in the System Administrator’sGuide.
cifs.netbios_over_tcp.enableThis option enables the use of NetBIOS over TCP, which is the standard protocol used for CIFS prior toWindows 2000. In certain Windows 2000 networks it is desirable to disable that protocol. This optioncorresponds to the "Enable NetBIOS over TCP" setting in the Windows 2000 Advanced TCP/IPsettings tab. If it is set to off, all clients must be Windows 2000 (or above), and only Windows 2000 (orabove) domain controllers and virus scanners can be used.
cifs.netbios_over_tcp.enable takes effect when cifs starts. It should not be changed while cifs isrunning.
Default: on
Effective: Upon CIFS client reconnection
Persistence: Remains in effect across system reboots
cifs.nfs_root_ignore_aclWhen on, ACLs will not affect root access from NFS.
Default: off
Effective: Immediately
Persistence: Remains in effect across system reboots
cifs.oplocks.enableWhen cifs.oplocks.enable is on, the storage system allows clients to use oplocks (opportunistic locks)on files. When set to on, this option also enables lease oplocks. Oplocks are a significant performanceenhancement, but have the potential to cause lost cached data on some networks with impairedreliability or latency, particularly wide-area networks. In general, this option should be disabled only toisolate problems.
396 Data ONTAP® 8.2 Commands: Manual Page Reference for 7-Mode, Volume 1
options
Default: on
Effective: Immediately
Persistence: Remains in effect across system reboots
cifs.oplocks.opendeltaThis option defines the length of artificial delay before sending an opportunistic lock break request to aclient that has recently sent the storage system an open request. This is done to work around a bug inMicrosoft Windows clients that can cause the client to ignore an oplock break request if it is received ata certain time.
For example, when opendelta is 8, the storage system will make sure that at least 8 milliseconds haveelapsed after receiving or responding to an open-file request before it sends an oplock break on thatsession.
CAUTION - This option should not be set higher than 35 milliseconds without consulting NetAppGlobal Services.
Default: 0
Min/Max: 0 - 1000 milliseconds
Effective: Immediately
Persistence: Remains in effect across system reboots
cifs.per_client_stats.enableTurning this option on causes the storage system to start gathering statistics on a per-client basis. Thisallows use of the cifs top command, as well as the -u and -h options of cifs stat. Administrators shouldbe aware that there is overhead associated with collecting the per-client stats. This overhead maynoticeably affect storage system performance. If the option is turned off, any existing per-clientstatistics are discarded.
Default: off
Effective: Upon CIFS client reconnection
Persistence: Remains in effect across system reboots
cifs.perfmon.allowed_usersThe value for this option determines the user or the group which has access to performance data viaPerfmon. The option takes as input either a user or a group name. The user or group can be either localor domain-based. By default the option is not set which allows access only to Administrators.Irrespective of the value of this option Administrators will always have access. To allow all users toaccess performance data, this option can be set to "Everyone".
Effective: Immediately
Persistence: Remains in effect across system reboots
Data ONTAP® 8.2 Commands: Manual Page Reference for 7-Mode, Volume 1 397
options
cifs.perm_check_ro_del_okNT delete rules do not allow you to delete a file or directory with the DOS read-only bit set. However, anumber of multi-protocol applications require UNIX delete semantics (w-x perms in parent dir withoutregard to the permissions of the file or directory). This option controls this behavior. By default it is off,which yields NT behavior.
Default: off
Effective: Immediately
Persistence: Remains in effect across system reboots
cifs.perm_check_use_gidThis option affects security checking for Windows clients of files with UNIX security where therequester is not the file owner. In all cases, Windows client requests are checked against the share-levelACL; then if the requester is the owner, the "user" perms are used to determine the access.
If the requester is not the owner and if perm_check_use_gid is on, it means files with UNIX security arechecked using normal UNIX rules. That is, if the requester is a member of the file’s owning group, the"group" perms are used; otherwise the "other" perms are used.
If the requester is not the owner and if perm_check_use_gid is off, files with UNIX security style arechecked in a way which works better when controlling access via share-level ACLs. In that case therequester’s desired access is checked against the file’s "group" permissions, and the "other" permissionsare ignored. In effect, the "group" perms are used as if the Windows client were always a member of thefile’s owning group, and the "other" perms are never used.
If you do not plan to use share-level ACLs to control access to UNIX security style files (for example ina UNIX qtree), you should leave this setting on.
Default: on
Effective: Immediately
Persistence: Remains in effect across system reboots
cifs.preserve_unix_securityThis option preserves UNIX permissions as files are edited and saved by Windows applications thatread the security properties of the file, create a new temporary file, apply those properties to thetemporary file, and then give the temporary file the original file name. When this option is enabled,Windows clients that perform a security query receive a constructed ACL that exactly represents theUNIX permissions. This same ACL can then be assigned to the temporary file to restore the exact sameUNIX permissions that were present in the original file. The constructed ACL is only used to preservethe file’s UNIX permissions, as the file is updated and saved by Windows applications; no NTFS ACLsare set using the constructed ACL. This option only affects NFS files in UNIX or mixed-mode qtrees.
Enabling this option also allows you to manipulate a file’s UNIX permissions using the Security tab ona Windows client, or using any application that can query and set Windows ACLs. When enabled, thisoption causes UNIX qtrees to appear as NTFS volumes. Default: off
398 Data ONTAP® 8.2 Commands: Manual Page Reference for 7-Mode, Volume 1
options
Values: on, off
Effective: Immediately
Persistence: Remains in effect across system reboots
cifs.restrict_anonymousControls the access restrictions of non-authenticated sessions. Permitted values for this option are 0, 1and 2. 0 sets no special access restrictions, 1 disallows enumeration of users and shares, and 2 fullyrestricts access. This option corresponds to the RestrictAnonymous registry entry in Windows. Note thatthese restrictions do not apply to mapped Null users.
Default: 0
Values: 0, 1, 2
Effective: Immediately
Persistence: Remains in effect across system reboots
cifs.restrict_anonymous.enableDeprecated option, use cifs.restrict_anonymous instead.
cifs.save_caseWhen this option is on, CIFS will preserve the case when files are created or renamed. If this option isturned off, all filenames will be forced to lower case. This can help with compatibility between certain16-bit applications and UNIX tools.
Default: on
Effective: Immediately
Persistence: Remains in effect across system reboots
cifs.scopeidNetBIOS scope IDs allow the system administrator to create small workgroups out of a network bypartitioning the NetBIOS name space; only clients with the same NetBIOS scope ID as the storagesystem will be able to use the storage system as a CIFS server. The default scope ID is "" (null), but ifthe storage system is to run in a NetBIOS scope other than the default one, its scope ID must be set tothe scope ID of that scope. The scope ID can be changed only when CIFS is not running.
Default: "" (null)
Effective: Immediately
Persistence: Remains in effect across system reboots
cifs.search_domainsSpecifies a list of domains that trust each other to search for a mapped account. The argument for theoption is a comma-separated list that is searched in order. If this option is set to "" (null), all domainsare searched. You can use this option to control searches if you used an asterisk for a domain name inthe /etc/usermap.cfg file.
Data ONTAP® 8.2 Commands: Manual Page Reference for 7-Mode, Volume 1 399
options
Default: "" (null)
Effective: Upon CIFS client reconnection
Persistence: Remains in effect across system reboots
cifs.show_dotfilesWhen this option is set to off, all file names with a period (.) as the first character will be hidden. Thedefault value is on.
cifs.show_snapshotWhen this option is off, the snapshot directory ~snapshot is no longer shown at the root of a share. Thisis a change in behavior from previous versions. Setting this to on will restore the old behavior. OnWindows NT 4 or Windows 95 clients, the user can access snapshots by entering\\node_name\share\.snapshot (or ~snapshot or ~snapsht) in the Start->Run menu. Snapshots can also beaccessed lower in the share by providing a path to a lower directory. Snapshots can be accessed throughDOS on any system by changing to the ~snapsht directory.
NOTE: When this option is on, it can confuse programs like FastFind that do not know about snapshots.
Default: off
Effective: Immediately
Persistence: Remains in effect across system reboots
cifs.shutdown_msg_levelNormally a message is broadcast to all clients when CIFS is terminating. This option can be set tocontrol this behavior. The value 0 results in never sending such broadcast messages. The value 1 resultsin sending broadcast messages only to sessions which have open files. The value 2 causes the messagesto be sent to all open connections.
Default: 2
Values: 0, 1, 2
Effective: Immediately
Persistence: Remains in effect across system reboots
cifs.sidcache.enableThis options controls whether or not CIFS will cache SID-to-name translation information that it hasreceived from the domain controllers.
Default: on
Effective: Immediately
Persistence: Remains in effect across system reboots
cifs.sidcache.lifetimeThis option controls how long a SID-to-name cache entry is used before it becomes stale. TheSID-to-name mapping functions in the storage system will query the appropriate domain controller toupdate the cached mapping when it is needed, but has become stale.
400 Data ONTAP® 8.2 Commands: Manual Page Reference for 7-Mode, Volume 1
options

Default: 1440
Min/Max: 20 - 10080 minutes
Effective: Immediately
Persistence: Remains in effect across system reboots
cifs.signing.enableSigning is a security feature provided by the CIFS protocol that is designed to detect and prevent‘manin-the-middle’ intrusion into CIFS communications. This is achieved by calculating a securitysignature value for every incoming and outgoing CIFS packet.
This feature introduces a performance penalty on both the client and the storage system when in use,and thus is disabled by default. In a trusted network where the performance impact of this feature mightoutweigh the benefits that it provides, it is recommended that this feature remain disabled.
Before enabling signing, terminate CIFS services. This ensures that existing CIFS connections areterminated. After restarting cifs, all new connections will use signing.
Default: off
Effective: Upon CIFS client reconnection
Persistence: Remains in effect across system reboots
cifs.smb2.enableThis option enables SMB 2.0 and SMB 2.1 support on the storage system. When this option is enabled,the storage system uses SMB 2.0 and SMB 2.1 with a Windows client if the client supports SMB 2.0 orSMB 2.1. When this option is disabled, the storage system will not accept any new SMB 2.0 or SMB2.1 sessions; existing sessions are not terminated.
Default: on
Effective: Immediately
Persistence: Remains in effect across system reboots
cifs.smb2.signing.requiredThis option decides whether the storage system forces the CIFS sessions over SMB 2.0 or SMB 2.1 tobe signed. Signing prevents the packets from being tampered with while being sent from the client tothe server. When this option is off, either there is no signing, or the client can request for the session tobe signed. If set to on, the session is signed.
Default: off
Effective: Immediately
Persistence: Remains in effect across system reboots
cifs.smb2_1.branch_cache.enableThis option enables SMB 2.1 BranchCache support on the storage system. When this option is enabled,the storage system uses BranchCache with a Windows client to reduce Wide Area Network (WAN)utilization, if the BranchCache is configured on client. When this option is disabled, the storage system
Data ONTAP® 8.2 Commands: Manual Page Reference for 7-Mode, Volume 1 401
options
doesn’t support BranchCache.
Default: off
Effective: Immediately
Persistence: Remains in effect across system reboots
cifs.smb2_1.branch_cache.hash_time_outSets the time(in seconds) for which an unused BranchCache hash for a file can be kept in memory of thestorage system.
Default: 300s
Min/Max: 0 - 4000000 seconds
Effective: Immediately
Persistence: Remains in effect across system reboots
cifs.snapshot_file_folding.enableThis option controls whether or not CIFS will attempt to ‘fold’ files on close with previous snapshotversions of themselves in order to minimize disk usage. Disk space is saved by sharing unchanged fileblocks between the active version of the file, and the version of the file in the latest snapshot, if any.The storage system must compare block contents when folding a file, so there is a performance vs.space utilization tradeoff to consider with this option.
Default: off
Effective: Immediately
Persistence: Remains in effect across system reboots
cifs.symlinks.cycleguardThis option eliminates the possibility of traversing directories cyclically during the process of followingsymbolic links. With this option set to on, if the target of the symlink resolves to a directory that isdirectly above the symlink’s parent directory, it is disallowed.
With this option set to off, many standard Windows applications (such as Find in Windows 95 /Windows NT 4.0) will not operate correctly when a symlink points to a parent directory. This is becausethey do not understand symbolic links and will repeatedly loop on them. Users should use caution whenchanging this option.
Default: on
Effective: Immediately
Persistence: Remains in effect across system reboots
cifs.symlinks.enableWhen cifs.symlinks.enable is on, if the object being accessed by a CIFS client is a symbolic link(whether absolute or relative), the storage system follows the link with the proviso that the ultimatetarget turns out to reside within the originating share (thus ensuring that the client has access permissionto the target).
402 Data ONTAP® 8.2 Commands: Manual Page Reference for 7-Mode, Volume 1
options

Default: on
Effective: Immediately
Persistence: Remains in effect across system reboots
cifs.trace_dc_connectionWhen cifs.trace_dc_connection is on, the storage system logs all domain controller address discoveryand connection activities. This can be used to diagnose DC connection problems on the storage system.
Default: off
Effective: Immediately
Persistence: Remains in effect across system reboots
cifs.trace_loginWhen cifs.trace_login is on, the storage system logs all login-related activities. This can be used todiagnose access problems on the storage system.
Default: off
Effective: Immediately
Persistence: Remains in effect across system reboots
cifs.universal_nested_groups.enableWhen cifs.universal_nested_groups.enable is off, the storage system does not include membership innested groups or membership in universal groups from other domains in the forest. This option ispertinent to all NFS clients accessing a file or directory with Windows-style security and does not affectCIFS clients. This option will be deprecated in a future release when the storage system will alwaysinclude the above memberships.
CAUTION - ALL group memberships are fetched from Active Directory only when (a) user andstorage system are in the same domain tree (b) or else user’s domain tree has a two-way transitive trustwith the storage system’s domain tree.
Default: on
Effective: Upon NFS client reconnection
Persistence: Remains in effect across system reboots
cifs.W2K_password_changeThis option only affects storage systems installed in Windows 2000 domains. When on, this optioncauses the storage system to change its domain password once in everyW2K_password_change_interval value duration. The duration is counted in weeks. The passwordchange occurs randomly within the time period specified by option W2K_password_change_within,starting at 01:00 AM on Sunday mornings. For Windows 2000 domains with multiple DCs, a passwordchange may inhibit CIFS connections for a short time while the new password is propagated among theDCs. This option has no effect on storage systems installed in pre-Windows 2000 domains.
Data ONTAP® 8.2 Commands: Manual Page Reference for 7-Mode, Volume 1 403
options
Default: off
Effective: Immediately
Persistence: Remains in effect across system reboots
cifs.W2K_password_change_intervalThis option only affects nodes installed in Windows 2000 domains. Changing this value has no effect ifthe cifs.W2K_password_change is set to "off". It is used to set the time duration (in weeks) after whichthe domain password change is triggered. The actual password change is attempted at approximately01:00 AM on the Sunday morning following the day when the configured time duration expires. Thisoption has no effect on nodes installed in pre-Windows 2000 domains.
Default: 4w
Min/Max: 1w - 8w in weeks
Effective: Immediately
Persistence: Remains in effect across system reboots
cifs.W2K_password_change_withinThis option only affects node installed in Windows 2000 domains. Changing this value has no effect ifthe cifs.W2K_password_change set to "off". It is used to set the time duration (in hours) within whichthe domain password change attempts are made after the expiry of W2K_password_change_interval. Inother words, the password change is attempted at a random time between 01:00 AM andW2K_password_change_within duration on the Sunday morning following the expiry ofW2K_password_change_interval duration. This option has no effect on nodes installed in pre-Windows2000 domains.
Default: 1h
Min/Max: 1h - 6h in hours
Effective: Immediately
Persistence: Remains in effect across system reboots
.TP 4 cifs.widelink.ttl When a CIFS client accesses a"wide symbolic link" (widelink), the storage system returns both a path referral and a time-to-livevalue. The CIFS client can cache the widelink path referral for the time-to-live time period. Thisoption allows the system administrator to set the value which the storage system returns fortime-to-live.
Default: 10m
Min/Max: 0s - 10000m in seconds (s), minutes (m) or hours (h)
Effective: Immediately
404 Data ONTAP® 8.2 Commands: Manual Page Reference for 7-Mode, Volume 1
options
Persistence: Remains in effect across system reboots
cifs.wins_serversThis option can display or set the list of WINS servers used by the CIFS service. To set the list, pass acomma-separated list of IPv4 addresses. To see the current list of WINS servers, leave the parameterblank. To clear the list, pass a "" (null) parameter.
Default: "" (null)
Values: Comma-separated list of IPv4 addresses
Effective: Immediately
Persistence: Remains in effect across system reboots
cksum_offload.gbeIISpecifies whether calculation of TCP and UDP checksums is offloaded to network interface cards.Offloading reduces CPU utilization. The value "on" enables offloading, and "off" disables it. The optionaffects Ethernet Controllers numbered II and higher. TCP checksums are offloaded for TCP packetsover IPv4 as well as IPv6, when this option is enabled. Checksums are not offloaded for outbound UDPpackets over IPv4 in most cases, regardless of the option setting. Checksums are not offloaded for allUDP packets over IPv6 even when this option is enabled.
On systems initially installed with 6.2 or later releases, the default is "on". Prior to 6.2 the default was"off", and a software upgrade does not change the value.
console.encodingSpecifies how non-ASCII character information is presented. The value can be:
nfs - NFS character set. You can use both NFS extended (> 0x7F) and SGML characters for input.
sgml - SGML character format. You can use both NFS extended (greater than 0x7F) and SGMLcharacters for input.
utf8 - UTF-8 character sets. For input, any character greater than 0x7F is the beginning of a UTF-8encoding.
The default is nfs.
coredump.dump.attemptsControls how many attempts should be made to dump a core. Extra attempts are only made if theprevious attempt failed due to a disk write error. Legal values range from 0 - 5. If 0 is chosen, no coreswill be dumped.
The default is 2.
disk.asup_on_mp_lossControls whether or not an AutoSupport message is sent if the redundant path to a shelf is lost. Thedefault value is on.
Data ONTAP® 8.2 Commands: Manual Page Reference for 7-Mode, Volume 1 405
options
disk.auto_assignSpecifies if disks will be auto assigned on systems with software disk ownership. The default is on.When on, the default behavior is to automatically assign disks at the adapter (stack) level of granularity.If all assigned disks on an adapter (stack) have the same ownership assignment, and there are unowneddisks present on that adapter (stack), automatic assignment will assign the unowned disks to match theownership of the already assigned disks on that adapter (stack).
disk.auto_assign_shelfSpecifies whether disks should be auto assigned at the shelf level of granularity or not. This option isignored if disk.auto_assign option is off. Otherwise, when disk.auto_assign and disk.auto_assign_shelf options are on, then if there are unowned disks on a shelf and all assigned diskson that shelf have the same ownership assignment, automatic assignment will assign the unowned disksto match the ownership of the already assigned disks on that shelf. The default value is off.
disk.maint_center.allowed_entriesSets the number of times a disk is allowed to be put into maintenance center testing as a result ofreaching a threshold. If a disk reaches another threshold and has already been through maintenancecenter testing the allowed number of times, the disk is failed. Administrator-initiated testing is notcounted. The administrator can test disks any number of times. The default value is 1.
disk.maint_center.enableEnables/disables maintenance center functionality. The default value is on.
disk.maint_center.max_disksThis option specifies the maximum number of disks that can be running maintenance center tests on asystem at the same time. The default value is 84.
disk.maint_center.rec_allowed_entriesSets the number of times a disk is allowed to be put into maintenance center testing as a result ofrecovery needed types of errors. If a disk encounters another recovery needed type of error and hasalready been through maintenance center testing the allowed number of times for recovery needederrors then the disk is failed. The default value is 5.
disk.maint_center.spares_checkThis option specifies whether to check the number of available spares before putting a disk into themaintenance center as the result of reaching a threshold. If this option is on and there are fewer than twoavailable spares when a disk reaches a threshold, the disk is not put into the maintenance center. If theoption is off or there are at least two available spares, the disk is put into the maintenance center. Thisoption has no effect on administratorinitiated testing of disks. The default value is on.
disk.target_port.cmd_queue_depthSets the maximum number of concurrent commands that can be dispatched to any target port on anexternal RAID array. This is useful on V-Series systems, which support large numbers of LUNs behinda single device ID. If too many commands are issued the overall performance of the external RAIDarray may be degraded. A value of 0 indicates that no limit is enforced on any target port.
dns.domainnameSets the DNS domainname to the specified domainname.
406 Data ONTAP® 8.2 Commands: Manual Page Reference for 7-Mode, Volume 1
options

dns.enableEnables DNS client on the storage system. The DNS domain must be set and the /etc/resolv.conf filemust exist prior to enabling DNS.
dns.cache.enableDetermines whether the DNS cache is used when looking up names. It is on by default. Turning it offwill have the side effect of flushing the dns cache. This option has no effect if DNS is not enabled.
dns.update.enableEnables or disables DDNS (Dynamic DNS). ‘on’, ‘off’, and ‘secure’ are valid options. exchangedsecurely if the security protocol is appropriately configured. DNS must be enabled prior to enablingDDNS.
fcp.enableDetermines whether FCP service starts by default on a storage system.
flexcache.accessRestricts FlexCache access to the storage system. The default value is none. For valid values, seena_protocolaccess(8). Note: this is the only way to allow a volume to be cached by a FlexCachevolume. The /etc/exports file cannot be used for this.
flexcache.deleg.high_waterA valid value for this option is a number between 0 and 100 and greater than the value of flexcache.deleg.low_water. This option sets the maximum percentage of locks that FlexCache willconsume at the origin. Decreasing the number of delegations that are used by FlexCache will result inmore requests to the origin to verify attributes and may have an impact on latency.
flexcache.deleg.low_waterA valid value for this option is a number between 0 and 100 and less than the value of flexcache.deleg.high_water. This option sets the minimum percentage of locks that FlexCache willretain at the origin. When the origin reaches the flexcache.deleg.high_water percentage then it willrecall enough delegations to reach the flexcache.deleg.low_water percentage.
flexcache.enableEnables FlexCache server on the storage system. Valid values for this option are on or off. If thisoption is set to off, no FlexCache volumes can be mapped to any of the volumes on this storage system.Existing FlexCache volumes that are currently mapped to this storage system are no longer serviced. Ifthis option is set to on, FlexCache volumes can be mapped to volumes on this storage system. Thedefault value for this option is off.
flexcache.per_client_statsEnables FlexCache client statistics on an origin storage system. Valid values for this option are on or off. The default value for this option is on. With this set to on, the flexcache stats -S volume -ccommand will show statistics by client on an origin storage system.
flexscale.enableEnables FlexScale on the storage system. Valid values for this option are on or off. If FlexScalehardware is present and licensed then this option will enable the FlexScale functionality in WAFL. If nohardware is present this option will enable FlexScale PCS (Predictive Cache Statistics). The defaultvalue for this option is off.
Data ONTAP® 8.2 Commands: Manual Page Reference for 7-Mode, Volume 1 407
options
flexscale.normal_data_blocksControls whether normal user data blocks should be cached by FlexScale. Valid values for this optionare on or off. If this option is set to off then only metadata blocks are cached, except for those volumesthat have a FlexShare cache setting of keep. See na_priority(1) for details. The default value for thisoption is on.
flexscale.lopri_blocksControls whether low-priority user data blocks should be cached by FlexScale. Valid values for thisoption are on or off. This option is only used when flexscale.normal_data_blocks is set to on. If thisoption is set to on then low-priority user data blocks that are not normally stored by FlexScale will becached. This may be useful for workloads that fit entirely within FlexScale and consist of write followby read, or large sequential reads. The default value for this option is off.
flexscale.pcs_sizeControls the size of the cache emulated by FlexScale PCS. Valid values for this option are integersbetween 16 and 16383. This option is only used when PCS is enabled. The default value of this optionis chosen automatically based on the amount of memory in the controller, and the upper limit is furtherrestricted on controllers with smaller amounts of memory.
flexscale.pcs_high_resControls the sampling resolution of the FlexScale PCS engine. Valid values for this option are on or off. This option is only used when PCS is enabled. Measurement of workloads with very small hotspotsmay be improved by setting this value on. The default value for this option is off, which shouldgenerally be sufficient.
flexscale.readahead_blocksThis option caches readahead data that the system evicts from buffer cache. Readahead data is data thatclients are likely to request.
flexscale.rewarmSpecifies whether a FlexScale cache module (Performance Acceleration Module family or Flash Cachefamily) should attempt to preserve data across reboots. Valid values for this option are on or off. Thisoption only applies to cache hardware with persistent media. It does not apply to Predictive CacheStatistics (PCS). Enabling this option will marginally increase the duration of system boot andshutdown, but it will reduce or eliminate the time required for cache warming. The default value for thisoption is determined by cache hardware type. This option is automatically on if it is supported.
fpolicy.enableWhen turned off, this disables all file policies on the storage system, overriding the settings forindividual file policies. When turned on, the setting of a given file policy determines if that file policy isenabled or disabled.
fpolicy.i2p_ems_intervalTime interval in minutes between two successive fpolicy.fscreen.vol.i2p.off EMS messages.
This EMS occurs when an FPolicy server registers for a file policy with the inode to pathnametranslation, but a volume monitored by the policy has inode to pathname translation disabled.
Valid values for the interval range from 0 (disabled) to 1440. The default interval is 60 minutes.
408 Data ONTAP® 8.2 Commands: Manual Page Reference for 7-Mode, Volume 1
options
fpolicy.multiple_pipesWhen enabled, FPolicy engine can open up to 10 instances of the SMB request named pipesimultaneously to an FPolicy server. When disabled, only one instance of the SMB request pipe isopened to an FPolicy server at a time. The default value is on.
ftpd.enableWhen enabled (on), this option allows FTP connections on port 21. When disabled (off), connectionattempts on port 21 are refused.
Default: off
Effective: Immediately
Persistence: Remains in effect across system reboots
ftpd.explicit.enableWhen enabled (on), this option allows Explicit FTPS (FTP over SSL) connections on port 21. Whendisabled (off), FTP connections on port 21 are not allowed to enter secure mode.
Default: off
Effective: Immediately
Persistence: Remains in effect across system reboots
ftpd.explicit.allow_secure_data_connWhen enabled (on), this option allows Explicit FTPS (FTP over SSL) connections to open dataconnections in secure mode. When disabled (off), Explicit FTPS connections are not allowed to opensecure data connections by sending the PROT P command. However connections which already havePROT level set to P will continue to work as is.
Default: on
Effective: Immediately
Persistence: Remains in effect across system reboots
ftpd.implicit.enableWhen enabled (on), this option allows Implicit FTPS (FTP over SSL) connections on port 990. Whendisabled (off), FTPS connection attempts on port 990 are refused.
Default: off
Effective: Immediately
Persistence: Remains in effect across system reboots
ftpd.ipv6.enableWhen enabled (on), this option allows FTP connections over IPv6. When disabled (off), newconnection attempts over IPv6 are refused; existing IPv6 sessions will remain active and will not bedisconnected.
Data ONTAP® 8.2 Commands: Manual Page Reference for 7-Mode, Volume 1 409
options
For this option to take effect, networking stack should support IPv6 (option ip.v6.enable).
Default: off
Effective: Immediately
Persistence: Remains in effect across system reboots
ftpd.3way.enableEnables/disables third-party file transfers. When enabled (on), this option allows file transfers directlyto and from a remote FTP server. When disabled, the IP address specified in the PORT command mustmatch that of the FTP client. In passive mode, only TCP connections from the client will be allowed.
Default: off
Effective: Immediately
Persistence: Remains in effect across system reboots
ftpd.anonymous.enableEnables/disables anonymous user logins. An anonymous user will only be allowed to access"anonymous" home directory and its subtrees. Anonymous users are not allowed access to externalvolumes. Named account users will not have this limitation unless the ftpd.dir.restriction option isenabled. Default anonymous users are "ftp" and "anonymous". To use anonymous ftp, besides turn onftpd.anonymous.enable, the option ftpd.anonymous.homedir must point to an existing path.
Default: off
Effective: Immediately
Persistence: Remains in effect across system reboots
ftpd.anonymous.home_dirSets the home directory for the anonymous user account.
Default: "" (null)
Effective: Upon FTP client reconnection
Persistence: Remains in effect across system reboots
ftpd.anonymous.nameSpecifies the login name for the anonymous user account. Anonymous user can use the username as setby this option or "ftp". The user ftp is defined in /etc/passwd by default. If there is no mapping of theusername specified by ftpd.anonymous.name to a UID, UID of the user "ftp" is used. The homedirectory entry in /etc/passwd file for ftp is overridden by option ftpd.anonymous.homedir.
Default: anonymous
Effective: Upon FTP client reconnection
410 Data ONTAP® 8.2 Commands: Manual Page Reference for 7-Mode, Volume 1
options
Persistence: Remains in effect across system reboots
ftpd.auth_styleSets the ftpd login authentication style. In mixed mode, usernames with "\" or "@" will authenticate via ntlm and those without will authenticate via unix. Setting ntlm or unix explicitly will force therespective authentication type regardless of the format of the username.
Default: mixed
Values: ntlm, unix, mixed
Effective: Upon FTP client reconnection
Persistence: Remains in effect across system reboots
ftpd.bypass_traverse_checkingWhen turned on, directories in the path to a file are not required to have the ‘X’ (traverse) permission.
Default: off
Effective: Immediately
Persistence: Remains in effect across system reboots
ftpd.dir.restrictionSets user home directory restriction. The off (or none) setting indicates that there is no home directoryrestriction for regular users. When this option is set to on (or homedir), each named account user’saccess is restricted to that user’s own home directory or to the override directory, if one is specified bythe ftpd.dir.override option.
Default: on
Values: on, off, none, homedir
Effective: Upon FTP client reconnection
Persistence: Remains in effect across system reboots
ftpd.dir.overrideSets the override path for the user home directory. A "" (null) value indicates no home directoryoverride; users will be placed in their home directory upon login. When the value of this option is avalid directory path, users will be placed in that directory upon login. This option applies only to nameduser accounts. The behavior of the default user account is not affected by the value of ftpd.dir.override.
Default: "" (null)
Effective: Upon FTP client reconnection
Persistence: Remains in effect across system reboots
ftpd.idle_timeoutSets the time between requests that an FTP session can be idle before it becomes a candidate fordisconnection by the storage system.
Data ONTAP® 8.2 Commands: Manual Page Reference for 7-Mode, Volume 1 411
options
Default: 900s
Min/Max: 300s - 2d in seconds (s), hours (h) or days (d)
Effective: Immediately
Persistence: Remains in effect across system reboots
ftpd.log.enableEnables/disables the logging of FTP commands and data transfer operations.
Default: on
Effective: Immediately
Persistence: Remains in effect across system reboots
ftpd.log.filesizeSpecifies the maximum file size for FTP and HTTP logs in the /etc/log directory. When one of theactive log files, such as ftp.cmd (or ftp.xfer, or httpd.log) reaches this size, it is renamed to ftp.cmd.1 (orftp.xfer.1 for the transfer log, or httpd.log.1 for the http log) and that renamed log history file is closed.If there is already a historical log file, such as ftp.cmd.1, that file is renamed to ftp.cmd.2. Thisrenaming process continues sequentially for all historical log files, until the maximum number ofhistorical log files (specified by ftpd.log.nfiles) is reached. Once the maximum number of historical logfiles is reached, the oldest log file is deleted each time a new active log file is opened. See thedescription of the ftpd.log.nfiles option for more information.
Default: 512k
Min/Max: 1K - 4G in gigabytes (G), megabytes (M), kilobytes (K) or bytes (blank)
Effective: Immediately
Persistence: Remains in effect across system reboots
ftpd.log.nfilesSets the maximum number of log files to be kept for FTP and HTTP. Once an active log file reaches thesize limit determined by the ftpd.log.filesize option, a new active log file is created. The old active logfile is stored as a historical log file by appending the file name with ".1". All existing historical files arerenamed by incrementing the numeric suffix; for example, "ftp.cmd.2" becomes "ftp.cmd.3" and so on.Only the number of files specified by ftpd.log.nfiles are kept. When the maximum number of historicallog files is exceeded, the highest-numbered (oldest) log file is deleted. For example, if nfiles is set to 6,ftp.cmd.5 would be deleted rather than renamed.
Default: 6
Min/Max: 1 - 100 files
Effective: Immediately
412 Data ONTAP® 8.2 Commands: Manual Page Reference for 7-Mode, Volume 1
options
Persistence: Remains in effect across system reboots
ftpd.lockingSets the type of file locking used by the ftpd during file retrieval. Setting this option to none designatesthat files are not to be locked in any way during file retrieval. When the value of this option is delete,files being retrieved cannot be deleted or renamed. When the value of this option is write, file beingretrieved cannot be opened for write or deleted or renamed.
Default: none
Values: none, delete
Effective: Immediately
Persistence: Remains in effect across system reboots
ftpd.max_connectionsSets the maximum number of concurrent ftpd connections allowed. This option is the limit of the totalnumber of FTP control connections allowed to the storage system, or to all vFilers hosted on thephysical storage system. For High Availability configurations, the number of connections permitted isdoubled when in takeover mode. If this setting is changed to a value that is lower than the currentnumber of connected FTP sessions, new connections will be refused until the total number of sessionsfalls below ftpd.max_connections. Existing sessions are unaffected.
Default: 500
Min/Max: 0 - 5000 connections
Effective: Immediately
Persistence: Remains in effect across system reboots
ftpd.tcp_window_sizeSets the TCP window size for FTP operations. The default, 28960 bytes, works for many networkenvironments. Change this value only when required for your network configuration. Changes to thisoption can strongly affect ftpd performance.
Default: 28960
Values: 1600
Effective: Upon FTP client reconnection
Persistence: Remains in effect across system reboots
gfagent.enableEnables/disables the Gateway storage system agent.
gfagent.hdm.hostSets the host address to which Gateway agent will send POST request.
Data ONTAP® 8.2 Commands: Manual Page Reference for 7-Mode, Volume 1 413
options
gfagent.hdm.passwordUser password for Device Manager server.
gfagent.hdm.portPort number of Device Manager’s http server.
gfagent.hdm.userUser name for Device Manager server.
gfagent.hdm.uriURI to which Gateway agent send POST request.
gfagent.interval.minutesTime interval between two successive scans/reports in minutes.
httpd.admin.accessRestricts HTTP access to FilerView, the administration area of the storage system, via a private NetAppInc URL: any URL beginning with /na_admin. If this value is set, trusted.hosts is ignored forFilerView access.
Default: legacy
Values: See na_protocolaccess(8)
Effective: Immediately
Persistence: Remains in effect across system reboots
httpd.admin.enableEnables HTTP access to FilerView, the administration area of the storage system, via a private NetAppInc URL: any URL beginning with /na_admin is mapped to the directory /etc/http. Thus, a man pageon the storage system toaster with the file name /etc/http/man/name can be accessed with the URL http://toaster/na_admin/man/name.
Default: off
Effective: Immediately
Persistence: Remains in effect across system reboots
httpd.admin.max_connectionsSets the maximum number of concurrent httpd administration connections allowed per vfiler. Httpdadministration connections are defined by http://toaster/na_admin.APIconnectionsfallunderthe httpdadministration purview. If this setting is changed to a value that is lower than the current number ofhttpd administration connections, new connections will be refused until the total number of connectionsfalls below httpd.admin.max_connections. Existing connections are unaffected.
Default: 512
Min/Max: 1 - 1023 connections
414 Data ONTAP® 8.2 Commands: Manual Page Reference for 7-Mode, Volume 1
options
Effective: Immediately
Persistence: Remains in effect across system reboots
httpd.admin.ssl.enableEnables HTTPS access to FilerView. To set up ssl, use the secureadmin command. Seena_secureadmin(1) for more details. HTTPS and SSL are enabled by default on a factory installedsystem. Default value is on.
httpd.admin.hostsequiv.enableEnables the use of /etc/hosts.equiv for administrative HTTP authentication. If enabled, theauthentication of administrative HTTP (for APIs) will use the contents of /etc/hosts.equiv in the sameway that it is used for rsh authentication. See na_hosts.equiv(5) and na_rshd(8) for more details.
Default: on
Effective: Immediately
Persistence: Remains in effect across system reboots
httpd.admin.top-page.authenticationIf enabled, the top-level page of FilerView will have authenticated access.
Default: on
Effective: Immediately
Persistence: Remains in effect across system reboots
httpd.autoindex.enableThe normal response to an HTTP GET request that specifies a URL corresponding to a directory is todisplay the contents of an index file contained in that directory. If no index file exists, a directory listingcan be generated automatically and returned instead. This option controls whether to generate adirectory listing.
The storage system always searches for an index file, which is one of "index.html", "default.htm","index.htm", "default.html", searched for in that order. If none is found, and this option is on, adirectory listing is created and returned. If this option is off (the default), the appliance will respondwith a "403" (forbidden) error code.
Default: off
Effective: Immediately
Persistence: Remains in effect across system reboots
httpd.accessRestricts HTTP access to the storage system. Setting this value does not affect FilerView access set by httpd.admin.access.
Data ONTAP® 8.2 Commands: Manual Page Reference for 7-Mode, Volume 1 415
options
Default: legacy
Values: See na_protocolaccess(8)
Effective: Immediately
Persistence: Remains in effect across system reboots
httpd.bypass_traverse_checkingWhen turned on, directories in the path to a file are not required to have the ‘X’ (traverse) permission.
Default: off
Effective: Immediately
Persistence: Remains in effect across system reboots
httpd.enableEnables HTTP access to the storage system.
Default: off
Effective: Immediately
Persistence: Remains in effect across system reboots
httpd.ipv6.enableThis option controls HTTP IPv6 support. For this option to take effect, networking stack should supportIPv6 (option ip.v6.enable). When this option is enabled, storage system starts accepting new httpconnections over IPv6. When this option is disabled storage system stops accepting any new httpconnections over IPv6, existing IPv6 connections will remain active and will not be disconnected.
Default: off
Effective: Immediately
Persistence: Remains in effect across system reboots
Values: on, off
httpd.log.formatSpecifies the log format.
Default: common
Values: common, alt1
Effective: Immediately
Persistence: Remains in effect across system reboots
416 Data ONTAP® 8.2 Commands: Manual Page Reference for 7-Mode, Volume 1
options
httpd.method.trace.enableSpecifies whether the HTTP TRACE method is enabled. There is a potential security vulnerabilityassociated with the TRACE method, documented in http://www.kb.cert.org/vuls/id/867593. The defaultfor this option is off, thus disabling the TRACE method. If you want to support the TRACE method, setthe option to on.
Default: off
Effective: Immediately
Persistence: Remains in effect across system reboots
httpd.rootdirSpecifies the complete pathname of the root directory that contains files and subdirectories for HTTPaccess. The default for this is ‘XXX’ as it is normally set to the appropriate location during http setup.
Default: XXX
Effective: Immediately
Persistence: Remains in effect across system reboots
httpd.timeoutSpecifies the minimum amount of time (in seconds) before an idle HTTP connection will time out.
Default: 300
Min/Max: 30 - 86400 seconds
Effective: Immediately
Persistence: Remains in effect across system reboots
httpd.timewait.enableWhen enabled, the storage system will put HTTP connections that have been closed by the client intothe TIME_WAIT state for one minute, which is twice the maximum segment lifetime (2*MSL).
Default: off
Effective: Immediately
Persistence: Remains in effect across system reboots
ic.carnegie.enableThis option enables platform-specific support for FCVI MetroCluster on FAS32x0 (Carnegie)platforms.
CAUTION: This option is deprecated. Do not modify its value.
interface.blocked.cifsThe option is set to a comma-separated list of interface names for which CIFS is blocked. The default isthe empty list, "", which means that CIFS is not blocked on any interface (unless optioninterface.blocked.mgmt_data_traffic is set to "on"). The interface list cannot include TOE-enabledinterfaces or iSCSI HBAs. See the NMG for details.
Data ONTAP® 8.2 Commands: Manual Page Reference for 7-Mode, Volume 1 417
options
interface.blocked.iscsiThe option is set to a comma-separated list of interface names for which iSCSI is blocked. The defaultis the empty list, "", which means that iSCSI is not blocked on any interface (unless optioninterface.blocked.mgmt_data_traffic is set to "on"). The interface list cannot include TOE-enabledinterfaces or iSCSI HBAs. See the NMG for details.
interface.blocked.ftpdThe option is set to a comma-separated list of interface names for which FTP is blocked. The default isthe empty list, "", which means that FTP is not blocked on any interface. The interface list cannotinclude TOE-enabled interfaces or iSCSI HBAs. See the NMG for details.
interface.blocked.mgmt_data_trafficThis option controls the protocol filter for dedicated mgmt ports, such as e0M on many platforms (notall platforms have a dedicated mgmt port). If the option is set to on (the default for new installs), thenNDMP, NFS, CIFS, iSCSI and the SNAP* family of data protocols will be blocked by the dedicatedmgmt port. "On" is the recommended setting because a dedicated mgmt port is a low-bandwidth portthat does not support jumbo frames, vlans, or ifgrps. If a dedicated mgmt port is used for data traffic, itcan hide misconfigurations that might lead to a serious loss of storage system throughput. A dedicatedmgmt port should only be configured with addresses that are on isolated management-only subnets. Seethe NMG for details.
interface.blocked.ndmpThe option is set to a comma-separated list of interface names for which NDMP is blocked. The defaultis the empty list, "", which means that NDMP is not blocked on any interface (unless optioninterface.blocked.mgmt_data_traffic is set to "on"). The interface list cannot include TOE-enabledinterfaces or iSCSI HBAs. See the NMG for details.
interface.blocked.nfsThe option is set to a comma-separated list of interface names for which NFS is blocked. The default isthe empty list, "", which means that NFS is not blocked on any interface (unless optioninterface.blocked.mgmt_data_traffic is set to "on"). The interface list cannot include TOE-enabledinterfaces or iSCSI HBAs. See the NMG for details.
interface.blocked.snapmirrorThe option is set to a comma-separated list of interface names for which snap* protocols are blocked.The default is the empty list, "", which means that snap* protocols are not blocked on any interface(unless option interface.blocked.mgmt_data_traffic is set to "on"). The interface list cannot includeTOEenabled interfaces or iSCSI HBAs. See the NMG for details.
ip.fastpath.enableIf the option is on, the storage system will attempt to use MAC address and interface caching("Fastpath") so as to try to send back responses to incoming network traffic using the same interface asthe incoming traffic and (in some cases) the destination MAC address equal to the source MAC addressof the incoming data. This allows for automatic loadbalancing between multiple interfaces of a trunkand between multiple storage system interfaces on the same subnet. Valid values for this option are onor off. The default value for this option is on. For TCP connections, the system will also automaticallydetect if this optimization is not feasible in a specific environment or for a specific connection and turnFastpath off automatically for those connections for which using Fastpath is inappropriate. The netstatcommand with the -x option can be used to see if Fastpath is enabled for a specific connection.
418 Data ONTAP® 8.2 Commands: Manual Page Reference for 7-Mode, Volume 1
options

ip.match_any_ifaddrIf the option is on, the storage system will accept any packet that is addressed to it even if that packetcame in on the wrong interface. If you are concerned about security, you should turn this off. Validvalues for this option are on or off. The default value for this option is on.
ip.path_mtu_discovery.enableEnables/disables path MTU discovery; it is currently used only by TCP. Path MTU discovery, describedin RFC 1191, allows a host to discover the ‘‘maximum transmission unit’’, that is, the largest link-levelpacket that can be transmitted over a path from that host to another host. This means that the storagesystem needn’t choose a conservative packet size for a TCP connection to a host not on the same net asthe storage system, but can attempt to discover the largest packet size that can make it to the other hostwithout fragmentation. Valid values for this option are on or off. The default value for this option is on.
ip.ping_throttle.drop_levelSpecifies the maximum number of ICMP echo or echo reply packets (ping packets) that the storagesystem will accept per second. Any further packets within one second are dropped to prevent ping flooddenial of service attacks. The default value is 150.
ip.ping_throttle.alarm_intervalSpecifies how often dropped pings will be syslogged in minutes. This prevents a ping flood denial ofservice attack from flooding the syslog with messages. A value of 0 turns off logging of ping floods.The default value is 0.
ip.tcp.newreno.enableEnables/disables the use of the NewReno modification to TCP’s fast recovery Algorithm (described inRFC 2582). Valid values for this option are on or off. The default value for this option is on.
ip.tcp.sack.enableEnables/disables the use of TCP Selective Acknowledgements (described in RFC 2018). Valid valuesfor this option are on or off. The default value for this option is on.
ip.tcp.abc.enableEnables/disables the use of Appropriate Byte Counting in TCP Congestion Control following RFC3465. Valid values for this option are on or off. The default value for this option is on.
ip.tcp.abc.l_limitThis option is used only when Appropriate Byte Counting is used in TCP Congestion Control. Itspecifies the value of the limit L used to increase congestion window during slow start. Valid values forthis option are 1 and 2. The default value for this option is 2.
ip.tcp.rfc3390.enableEnables/disables the use of RFC 3390 to increase the initial window used by TCP connections. Thedefault value for this option is on.
ip.ipsec.enableEnables/disables the Internet Security Protocol (ipsec) support on the storage system. Valid values forthis option are on or off. The default value for this option is off.
ip.v6.enableEnables/disables the IPv6 support on the storage system. Valid values for this option are on or off. Thedefault value for this option is off. When ip.v6.enable is turned off, existing TCP and UDP connectionswill get closed. The configuration files like /etc/rc, /etc/resolv.conf, /etc/hosts, /etc/dgateways and
Data ONTAP® 8.2 Commands: Manual Page Reference for 7-Mode, Volume 1 419
options
/etc/resolve.conf which include IPv6 addresses are not reset and must be cleaned up manually.Interfaces will be configured down if they have no IPv4 addresses assigned. Enabling IPv6 will notenable the use of IPv6 for some protocols (for example CIFS, NFS). Those protocols have their ownIPv6 enable option that must be set in addition to the global option ip.v6.enable.
ip.v6.ra_enableAccepts/rejects the Router Advertisement messages that can facilitate auto-configuration of addressesand learning of prefixes and routes. Valid values for this option are on or off. The default value for thisoption is off. When ra_enable is turned off, router advertisements will be dropped so no default routeswill be learned, default route failover will be disabled and link mtu updates will be stopped but existingauto-configured IPv6 addresses and default routes will be retained (Duplicate address detection,network discovery, and IPv6 path mtu discovery will all continue to work).
iscsi.auth.radius.enableDetermines whether iSCSI service uses RADIUS for CHAP authentication.
iscsi.enableDetermines whether iSCSI service starts by default on a storage system.
iscsi.isns.revDetermines the draft level of the iSNS specification with which the iSNS service on the storage systemis compatible. There are two possible values: 18 and 22. The default value is 22. A value of 18 allowscompatibility with older iSNS servers that support draft 18 of the iSNS specification. A value of 22provides compatibility with both draft 22 of the iSNS specification and with RFC 4171, the final iSNSspecification. For example, if the iSNS server that the storage system will connect to is compatible withRFC 4171, set the iscsi.isns.rev to 22. This ensures that the iSNS service on the storage system iscompatible with the iSNS server. If this setting is not properly set, the storage system may not be able tosuccessfully register with the iSNS server.
iscsi.tcp_window_sizeCAUTION - This number will affect iSCSI performance, and defines the node’s receive TCP windowsize for all iSCSI connections. The default setting is 131400 bytes. In general, for best performance, thevalue of this option should be set according to your network configuration, taking into account thelatency of the underlying network. However, improved performance may be obtained with certainiSCSI initiators by tuning this value beyond the normal network calculations involving latency andround-trip time. You must stop/start the iSCSI service for a change in this value to take effect.
iscsi.max_connections_per_sessionThe option specifies the number of connections per session allowed by the storage system. You canspecify between 1 and 32 connections, or you can accept the default value: use_system_default. Themaximum number of connections allowed for each session is from 1 to 32. use_system_defaultcurrently equals 4.
Note that this option specifies the maximum number of connections per session supported by thestorage system. The initiator and storage system negotiate the actual number allowed for a session whenthe session is created; this is the smaller of the initiator’s maximum and the storage system’s maximum.The number of connection actually used also depends on how many connections the initiatorestablishes.
420 Data ONTAP® 8.2 Commands: Manual Page Reference for 7-Mode, Volume 1
options
iscsi.max_error_recovery_levelThe option specifies the maximum error recovery level allowed by the storage system. You can specify 0, 1, or 2, or you can accept the default value: use_system_default. The maximum error recovery levelallowed is 0, 1, or 2. use_system_default currently equals 0.
iscsi.ip_based_tpgroupThis option enables the IP-based tpgroup management for iSCSI on the specified vFiler.
Default: off
Effective: Immediately
Persistence: Remains in effect across system reboots
ifgrp.failover.link_degradedThis option is meaningful in configurations of a second-level single-mode ifgrp containing two or moremulti-mode ifgrps where one is favored (see na_ifgrp(1)). The active ifgrp is always the one withhighest aggregate bandwidth. If the underlying ifgrps have equal bandwidth and one is favored, then thefavored ifgrp will be active. When this option is on, and one or more links in the active favoredmulti-mode ifgrp fails or is deleted, or a link in a non-active ifgrp comes up or is added to increase itsaggregate bandwidth, failover to a multi-mode ifgrp that has the highest aggregate bandwidth willoccur. If this option is off, no failover will occur and the favored degraded interface will remain active.The default value for this option is off.
For example,A second-level single-mode ifgrp sif is configured over two multi-mode ifgrps mif1 and mif2, where mif1 is active. When one or more links in mif1 goes down and,
Case 1: No ifgrp is favored.Failover occurs if mif2 has a higher aggregate bandwidth than mif1, irrespective of the value ofifgrp.failover.link_degraded option.
Case 2: mif1(active ifgrp) is favored and
a) ifgrp.failover.link_degraded is on.Failover occurs if mif2 has a higher aggregate bandwidth than mif1. mif2 will become active.If mif1 has a higher aggregate bandwidth than mif2 even after the links go down, mif1 remains active.
b) ifgrp.failover.link_degraded is off.There is no failover in this case and mif1 remains active until all the underlying links of mif1 go downeven though mif2 has a higher aggregate bandwidth than mif1.
Value of this option is overwritten during takeover and behaves according to the value set for the hostthat is up.
kerberos.replay_cache.enableThis option enables the Kerberos replay cache feature. This feature prevents passive replay attacks bystoring user authenticators on the storage system for a short time, and by insuring that the authenticatorsare not reused in subsequent Kerberos tickets by attackers. Storing and comparing the userauthenticators can result in a substantial performance penalty for higher workloads on the storagesystem. The default value for this option is off.
Data ONTAP® 8.2 Commands: Manual Page Reference for 7-Mode, Volume 1 421
options
ldap.enableTurns LDAP lookup off or on. An entry must also be made in the /etc/nsswitch.conf file to use LDAPfor this purpose.
Default: off
Effective: Immediately
Persistence: Remains in effect across system reboots
ldap.fast_timeout.enableThis option is used to control the time-out behavior of LDAP client operations. If enabled, after a failureoccurs the system will wait for ldap.retry_delay seconds before making another attempt to connect toLDAP servers.
Default: on
Effective: Immediately
Persistence: Remains in effect across system reboots
ldap.minimum_bind_levelSpecifies the minimum binding level that is allowed. It can take the following values: anonymousanonymous bind, simple - simple bind sasl - SASL bind.
Default: 0
Effective: Immediately
Persistence: Remains in effect across system reboots
ldap.retry_delayThe time, in seconds, to wait before trying to connect to LDAP servers after a failed attempt. Effectiveonly if ldap.fast_timeout.enable is on. Range: between 0 and 3600, inclusive.
Default: 120
Effective: Immediately
Persistence: Remains in effect across system reboots
ldap.timeoutTimeout used for LDAP searches. This is the period (in seconds), after which an LDAP search requestis timed out on the LDAP server, if incomplete.
Default: 20
Effective: Immediately
Persistence: Remains in effect across system reboots
422 Data ONTAP® 8.2 Commands: Manual Page Reference for 7-Mode, Volume 1
options
ldap.ssl.enableTurns LDAP over SSL support off or on. Only server authentication is supported. The root certificatemust be installed on the storage system to have SSL authentication to succeed. This is the trustedcertificate that is obtained from any of the recognized signing authorities. Multiple trusted certificatesmaybe installed on the storage system. Keymgr is used to install root certificates on the storage system.Please refer to na_keymgr for additional information. Ensure that ldap.port is set to 636.
Default: off
Effective: Immediately
Persistence: Remains in effect across system reboots
ldap.ADdomainThe Active Directory Domain name in DNS format to use for LDAP queries. Typically this will besomething like "group.company.com".
Default: "" (null)
Effective: Immediately
Persistence: Remains in effect across system reboots
ldap.baseThe base distinguished name to use for common ldap lookups, which include user passwd lookup,group lookup and netgroup lookup. The format of the base string is: "(filter1):scope1;(filter2):scope2;".Typically the storage system is something like "cn=company,cn=uk". The scope can be one of thosethree choices: BASE, ONELEVEL or SUBTREE. The default scope is SUBTREE if it is not specified.
Default: "" (null)
Effective: Immediately
Persistence: Remains in effect across system reboots
ldap.base.passwdThe base distinguished name to use for user passwd lookups, this option will override the ldap.baseoption. The format of the base string is: "(filter1):scope1;(filter2):scope2;". Typically the storage systemis something like "cn=company,cn=uk". The scope can be one of those three choices: BASE,ONELEVEL or SUBTREE. The default scope is SUBTREE if it is not specified.
Default: "" (null)
Effective: Immediately
Persistence: Remains in effect across system reboots
ldap.base.groupThe base distinguished name to use for group lookups, this option will override the ldap.base option.The format of the base string is: "(filter1):scope1;(filter2):scope2;". Typically the storage system issomething like "cn=company,cn=uk". The scope can be one of those three choices: BASE, ONELEVELor SUBTREE. The default scope is SUBTREE if it is not specified.
Data ONTAP® 8.2 Commands: Manual Page Reference for 7-Mode, Volume 1 423
options
Default: "" (null)
Effective: Immediately
Persistence: Remains in effect across system reboots
ldap.base.netgroupThe base distinguished name to use for netgroup lookups, this option will override ldap.base option.The format of the base string is: "(filter1):scope1;(filter2):scope2;". Typically the storage system issomething like "cn=company,cn=uk". The scope can be one of those three choices: BASE, ONELEVELor SUBTREE. The default scope is SUBTREE if it is not specified.
Default: "" (null)
Effective: Immediately
Persistence: Remains in effect across system reboots
ldap.nameThe username to use for the administrative queries necessary to look up UIDs and GIDs given ausername. Best practice is to make this a user with read-only access to the database.
Default: "" (null)
Effective: Immediately
Persistence: Remains in effect across system reboots
ldap.nssmap.attribute.gecosThe substitution for RFC 2307 gecos attribute.
Default: gecos
Effective: Immediately
Persistence: Remains in effect across system reboots
ldap.nssmap.attribute.gidNumberThe substitution for RFC 2307 gidNumber attribute.
Default: gidNumber
Effective: Immediately
Persistence: Remains in effect across system reboots
ldap.nssmap.attribute.groupnameThe substitution for RFC 2307 group name attribute.
Default: cn
424 Data ONTAP® 8.2 Commands: Manual Page Reference for 7-Mode, Volume 1
options
Effective: Immediately
Persistence: Remains in effect across system reboots
ldap.nssmap.attribute.homeDirectoryThe substitution for RFC 2307 homeDirectory attribute.
Default: homeDirectory
Effective: Immediately
Persistence: Remains in effect across system reboots
ldap.nssmap.attribute.loginShellThe substitution for RFC 2307 loginShell attribute.
Default: loginShell
Effective: Immediately
Persistence: Remains in effect across system reboots
ldap.nssmap.attribute.memberNisNetgroupThe substitution for RFC 2307 memberNisNetgroup attribute.
Default: memberNisNetgroup
Effective: Immediately
Persistence: Remains in effect across system reboots
ldap.nssmap.attribute.memberUidThe substitution for RFC 2307 memberUid attribute.
Default: memberUid
Effective: Immediately
Persistence: Remains in effect across system reboots
ldap.nssmap.attribute.netgroupnameThe substitution for RFC 2307 netgroup name attribute.
Default: cn
Effective: Immediately
Persistence: Remains in effect across system reboots
ldap.nssmap.attribute.nisNetgroupTripleThe substitution for RFC 2307 nisNetgroupTriple attribute.
Data ONTAP® 8.2 Commands: Manual Page Reference for 7-Mode, Volume 1 425
options
Default: nisNetgroupTriple
Effective: Immediately
Persistence: Remains in effect across system reboots
ldap.nssmap.attribute.uidThe substitution for RFC 2307 uid attribute.
Default: uid
Effective: Immediately
Persistence: Remains in effect across system reboots
ldap.nssmap.attribute.uidNumberThe substitution for RFC 2307 uidNumber attribute.
Default: uidNumber
Effective: Immediately
Persistence: Remains in effect across system reboots
ldap.nssmap.attribute.userPasswordThe substitution for RFC 2307 userPassword attribute.
Default: userPassword
Effective: Immediately
Persistence: Remains in effect across system reboots
ldap.nssmap.objectClass.nisNetgroupThe substitution for RFC 2307 nisNetgroup object class.
Default: nisNetgroup
Effective: Immediately
Persistence: Remains in effect across system reboots
ldap.nssmap.objectClass.posixAccountThe substitution for RFC 2307 posixAccount object class.
Default: posixAccount
Effective: Immediately
Persistence: Remains in effect across system reboots
ldap.nssmap.objectClass.posixGroupThe substitution for RFC 2307 posixGroup object class.
426 Data ONTAP® 8.2 Commands: Manual Page Reference for 7-Mode, Volume 1
options
Default: posixGroup
Effective: Immediately
Persistence: Remains in effect across system reboots
ldap.passwdThe password to use for the administrative user. This will always display as six ‘*’s when listing theoptions.
Default: "" (null)
Effective: Immediately
Persistence: Remains in effect across system reboots
ldap.portThe port to use for LDAP queries. This defaults to 389, LDAP’s well-known port assignment. Whenchanging this value, the storage system will connect to LDAP servers using the new value. Requeststhat are in process will continue to use the old value until they complete.
Default: 389
Min/Max: 1 - 65535 port
Effective: Immediately
Persistence: Remains in effect across system reboots
ldap.serversList of servers to use for LDAP queries. To enter multiple server names use a space separated listenclosed in quotes. When changing this value, the storage system will connect to the specified LDAPservers for new requests. Requests that are in process will continue to use the old values until theycomplete. Note that if the LDAP Server is Windows AD and if it uses SASL bind, then the value forthis option should have the server name instead of the IP Address. The information regarding themapping of the server name with the IP Addresses should be in the /etc/hosts file. For Simple binding,the value for the option can be the IP Address of the server.
Default: "" (null)
Effective: Immediately
Persistence: Remains in effect across system reboots
ldap.servers.preferredList of preferred LDAP servers. To enter multiple server names use a space separated list enclosed inquotes. Use this list to indicate servers that are on faster links if any of the servers listed in ldap.serversis on a WAN link or is for some other reason considered slower or less reliable. When changing thisvalue, the storage system will connect to the specified LDAP servers for new requests. Requests that arein process will continue to use the old values until they complete.
Data ONTAP® 8.2 Commands: Manual Page Reference for 7-Mode, Volume 1 427
options
Default: "" (null)
Effective: Immediately
Persistence: Remains in effect across system reboots
ldap.usermap.attribute.unixaccountSpecify the LDAP account attribute name for the ldap usermapping search.
Default: unixaccount
Effective: Immediately
Persistence: Remains in effect across system reboots
ldap.usermap.attribute.windowsaccountSpecify the windows account attribute name for the ldap usermapping search.
Default: windowsaccount
Effective: Immediately
Persistence: Remains in effect across system reboots
ldap.usermap.baseThe base distinguished name to use for ldap usermapping. The format of the base string is:"(filter1):scope1;(filter2):scope2;". Typically the storage system is something like"cn=company,cn=uk". The scope can be one of those three choices: BASE, ONELEVEL or SUBTREE.The default scope is SUBTREE if it is not specified.
Default: "" (null)
Effective: Immediately
Persistence: Remains in effect across system reboots
ldap.usermap.enableEnable the storage system to search an LDAP database for the user mapping between UNIX users andWindows accounts.
Default: off
Effective: Immediately
Persistence: Remains in effect across system reboots
licensed_feature.disk_sanitization.enableAllows the operation of the Disk Sanitization functionality. Note: once enabled, this option cannot beturned off, this option cannot be accessed remotely and must be configured via the console. The defaultvalue isoff.
428 Data ONTAP® 8.2 Commands: Manual Page Reference for 7-Mode, Volume 1
options
licensed_feature.fcp.enableAllows the operation of FCP functionality. Enabling FCP via this option is not available on allplatforms. Some platforms may require the installation of an fcp license key instead of using thisoption. The default value isoff.
licensed_feature.flexcache_nfs.enableAllows operation of the FlexCache NFS fuctionality. This feature is not available on all plaforms. Thedefault value isoff.
licensed_feature.flex_clone.enableEnables the FlexClone functionality. The default value is off.
licensed_feature.iscsi.enableAllows the operation of iSCSI functionality. Enabling iSCSI via this option is not available on allplatforms. Some platforms may require the installation of an iscsi license key instead of using thisoption. The default value isoff.
licensed_feature.multistore.enableAllows the operation of MultiStore functionality. Enabling MultiStore via this option is not available onall platforms. Some platforms may require the installation of a multistore license key instead of usingthis option. The default value isoff.
licensed_feature.nearstore_option.enableAllows operation as a NearStore. This feature is not available on all plaforms. The default value isoff.
licensed_feature.snaplock.enableEnables the SnapLock Compliance functionality. The default value is off.
licensed_feature.snaplock_enterprise.enable Enables the SnapLock Enterprise functionality. Thedefault value is off.
licensed_feature.vld.enableAllows the operation of the Virtualized Local Disk (VLD) functionalty. This feature is not avaliable onall platforms and requires a reboot to disable the functionality. The default value is off.
locking.grace_lease_secondsSets the grace period for clients to reclaim file locks after a server failure. The grace period is expressedin seconds. For lease-based lock protocols (currently NFSv4), it also sets the locking lease period.Clients that have been inactive for a period equal or longer to the lease period may lose all their lockingstate on a storage system.
lun.partner_unreachable.*These options control the behavior of the SCSI Target when the HA interconnect is down, or when atakeover or giveback is in progress. Do not change these options unless directed by technical support.
These options are usually hidden, but they can become visible if manually changed, or during thenormal upgrade process.
lun.use_partner.cc.enableEnables the SCSI Target Partner Path config checker. Turning the option on causes the config checkerto issue the FCP PARTNER PATH MISCONFIGURED AutoSupport message when there is too muchFCP traffic over the HA interconnect. This option can be turned off in those cases where excessive FCP
Data ONTAP® 8.2 Commands: Manual Page Reference for 7-Mode, Volume 1 429
options
Partner Path traffic is expected/needed, but normally it should be left on so that the storage system willcomplain when there is too much Partner Path I/O, which is probably a sign of something wrong on theSAN.
lun.use_partner.cc.warn_limitThis option allows the administrator to control the threshold window ( in seconds ) for which period theconfig checker would check whether the FCP traffic over the interconnect has exceeded their respectivethreshold values. A FCP PARTNER PATH MISCONFIGURED AutoSupport message would be issuedif there was too much FCP traffic for the threshold window over the interconnect.
These options are usually hidden, but they can become visible if manually changed, or during thenormal upgrade process.
lun.use_partner.cc.opsThis option allows the administrator to control the number of FCP read and write ops threshold, whichthe config checker would use to check whether the FCP traffic ( in ops ) over the interconnect hasexceeded this specified threshold. A FCP PARTNER PATH MISCONFIGURED AutoSupport messagewould be issued if there was too much FCP traffic for the threshold window over the interconnect.
These options are usually hidden, but they can become visible if manually changed, or during thenormal upgrade process.
lun.use_partner.cc.bytesThis option allows the administrator to control the number of FCP read and write bytes threshold, whichthe config checker would use to check whether the FCP traffic (in bytes ) over the interconnect hasexceeded this specified threshold. A FCP PARTNER PATH MISCONFIGURED AutoSupport messagewould be issued if there was too much FCP traffic for the threshold window over the interconnect.
These options are usually hidden, but they can become visible if manually changed, or during thenormal upgrade process.
ndmpd.accessAllows the administrator to restrict access to NDMP operations based on the hostname or the IPaddress. The default value for this option is all. See na_protocolaccess(8) for details.
ndmpd.authtypeAllows the administrator to control which authentication methods the storage system will accept.NDMP supports two authentication types: challenge and plaintext. The default type is challenge.Challenge was MD5 and plaintext was text prior to Data ONTAP 6.4.
ndmpd.connectlog.enabledAllows NDMP to track all the NDMP connection events for security purposes. Turning the option onallows all the NDMP connection events to be recorded in the syslog(/etc/messages) file. The defaultvalue for this option is being changed from on to off. By default, Data ONTAP 6.4 NDMP connectionlogging allows NDMP connection events for security audit purposes. This optional logging supportcauses all NDMP connection events to be recorded in the /etc/messages file. When used in conjunctionwith standard intrusion detection software NDMP connection logging provides a powerful securityaudit mechanism. However NDMP connection logging significantly increased the number of logmessages written to the /etc/messages file. If NDMP connection auditing is not desired, it is advisable todisable NDMP connection logging option to reduce the size of the /etc/messages file. NDMPconnection logging can be disabled by issuing the following command at the storage system console: options ndmpd.connectlog.enabled off. NDMP connection logging can be enabled by issuing the
430 Data ONTAP® 8.2 Commands: Manual Page Reference for 7-Mode, Volume 1
options
following command at the storage system console: options ndmpd.connectlog.enabled on.
ndmpd.data_port_rangeThis option allows administrators to specify a port range on which the NDMP server can listen for dataconnections.
Syntax: options ndmpd.data_port_range { <start_port>-<end_port> | all }. start_port, end_port canhave values between [1024-65535]; start_port must be lesser than or equal to end_port.
If a valid range is specified, NDMP uses a port within that range to listen for data connections. A listenrequest fails if no ports in the specified range are free.
The value ‘all’ implies that any available port can be used to listen for data connections. The defaultvalue for this option is ‘all’.
This option is persistent across reboots.
ndmpd.enableIf on the NDMP daemon accepts requests. Turning the option off disables request handling by theNDMP daemon. The default is off. Enabling and disabling this option is equivalent to executing ndmpd on and ndmpd off respectively.
ndmpd.ignore_ctime.enabledThis option, when on, allows user to exclude files with ctime changed from node incremental dumpssince other processes like virus scanning often alter the ctime of files. When this option is off, backupon the node will include all files with a change or modified time later then the last dump in the previouslevel dump. This option is persistent across reboots.
Most WIN32 APIs are often unaware of the "last changed time", ctime; they often incorrectly set a latertime for files, causing these files to be included in the node’s incremental dumps, and making theincremental dump very large. This is partially defying the purpose of having incremental dumps, sinceone uses incremental dumps to speed up the backup by only dumping files that were "changed" sincethe last backup.
ndmpd.maxversionThis option can be used to set the highest NDMP protocol version supported by the NDMP server. Thedefault value is 4.
ndmpd.offset_map.enableThis option is used to enable or disable generation of the inode offset map during NDMP based dumpbackups. The offset map is required to perform Enhanced Direct Access Restore (DAR) on the backupdata. Enhanced DAR provides support for directory DAR and DAR of files with NT streams.
The default value is on.
This option persists across reboots.
ndmpd.password_lengthAllows administrator to select either 8-byte or 16-byte NDMP specific passwords. The default value is 16. This is the length in all existing versions of ONTAP that support this feature, so it will be backwardscompatible. This option is persistent and the only legal values are 8 and 16. If an illegal value is entered,the following message will be prompted: options ndmpd.password_length: Length must be either 8 or 16. The options ndmpd.password_length controls password length during both generation and
Data ONTAP® 8.2 Commands: Manual Page Reference for 7-Mode, Volume 1 431
options
authentication. Supporting multiple concurrent NDMP specific password lengths is NOT required, andwill not be possible. That is, if this options is set to 8, all NDMP applications managing backups for thatnode MUST use an 8-byte password for authentication.
ndmpd.preferred_interfaceYou can specify the node network interface to be used when establishing an NDMP data connection toanother node. This option is not available on no-default vfilers.
By default, an NDMP data connection uses the same network interface as the NDMP control connectionestablished by the NDMP backup application. However, when a data connection betweenNDMP-enabled devices needs to be established over an alternate network, it is necessary to specify thenode’s interface through which the alternate network will be accessed.
For example, a UNIX or NT resident NDMP backup application and multiple NDMP-enabled nodescan be interconnected via a corporate network. The same NDMP-enabled devices can also beinterconnected via an isolated private network. To minimize load on the corporate network, thendmpd.preferred_interface option can be used to direct all NDMP data connections over the isolatedprivate network.
To specify the preferred network interface to be used for NDMP data connections, issue the followingcommand: options ndmpd.preferred_interface interface. interface identifies the network interface tobe used for all NDMP data connections. Any network interface providing TCP/IP access can bespecified. If no argument is specified, the command returns the name of the interface currentlyconfigured for data connections. If no interface is currently set, it reports disable. You can find theavailable network interfaces by using the ifconfig -a command.
To disable a preferred network interface specification and force the NDMP default interface to be usedfor data connections, issue the following command: options ndmpd.preferred_interface disable. Thedefault value for the ndmp.preferred_interface option is disable.
Note: The ndmpd.preferred_interface option is persistent across node reboots.
ndmpd.tcpnodelay.enableEnables/Disables the TCPNODELAY configuration parameter for the socket between the storagesystem and the DMA. When set to true, the Nagle algorithm is disabled and small packets are sentimmediately rather than held and bundled with other small packets. This optimizes the system forresponse time rather than throughput.
The default value is false.
This option becomes active when the next NDMP session starts. Existing sessions are unaffected.
This option is persistent across reboots.
ndmpd.tcpwinsizeThis option can be used to change the TCP buffer size of the NDMP data connection. The minimum andmaximum values are 8192(8K) and 262,144(256K), respectively. The default value is 32768.
nfs.acache.persistence.enabledThe default for this option is "on" (enabled). This option controls whether the vfiler’s access cache isperiodically saved on disk. A persistently-stored access cache is restored into memory on reboot orfailover, avoiding the need to resolve access requests which have been saved in the cache. To disable
432 Data ONTAP® 8.2 Commands: Manual Page Reference for 7-Mode, Volume 1
options

this feature, the option can be set to "off".
nfs.export.exportfs_comment_on_deleteThis option controls the deletion behavior for exportfs -z. It controls whether entries are removed orcommented from the /etc/exports file. The default value is true and entries are commented out. Toremove entries on deletion set it to false.
nfs.export.allow_provisional_accessThe default for this option is enabled. This option controls whether provisional access is granted in theevent that a name service outage prevents the node from determining if a given client has access to anexported path.
For example, the client in question may have readwrite access to an exported path. In this situationaccess is provided in IP address format. The client however could also be part of a netgroup that isgiven read-only access to the same path. Under normal circumstances the client would not be givenwrite access because of how access rules are applied. In the event that the netgroup could not beresolved or expanded, the client would provisionally be granted write access since an entry for it couldbe found in IP form.
This example illustrates a security issue in that it is possible for clients to be given more access rightsthan originally intended. Therefore, the option is provided to disable provisional access. This has theeffect of delaying access until it is possible for the node to definitively determine access rights for theclient.
nfs.assist.queue.limitThe default for this option is 40. This option controls the percentage of NFS asynchronous messageswhich can be placed onto the NFS assist queue. Once this limit has been reached, further NFS requestswhich need to undergo a name service transaction will instead have permissions granted based on nfs.export.allow_provisional_access. The number of available NFS asynchronous messages can be determined with nfsstat -d.
nfs.export.auto-updateThe default for this option is enabled. This option controls whether automatic updates are performed onthe /etc/exports file. If it is not set, then the commands vol create, vol delete, and vol rename will notautomatically rewrite the file. Instead they will syslog the need to edit the file. When volumes aremoved between vfilers, automatic updates on the /etc/exports file of the source and destination vfilersare dependent on this option.
nfs.export.harvest.timeoutThe default for this option is 1800 seconds (30 minutes). This option sets the idle expiration time forentries in the export access cache. This timer resets every time the export is accessed from the host. Theminimum value is 60 seconds and the maximum is 7 days.
nfs.export.neg.timeoutThe default for this option is 3600 seconds (one hour). This option sets the refresh time for entrieswhich were denied access in the export access cache. The minimum value is 60 seconds and themaximum is 7 days.
nfs.export.pos.timeoutThe default for this option is 36000 seconds (ten hours). This option sets the refresh time for entriesgranted access in the export access cache. The minimum value is 60 seconds and the maximum is 7days.
Data ONTAP® 8.2 Commands: Manual Page Reference for 7-Mode, Volume 1 433
options
nfs.export.resolve.timeoutThe default for this option is 8 seconds. This option had been hidden before and may have had a defaultof either 30 or 15 seconds. This option controls how long a name service lookup is allowed to proceedbefore the NFS export code will determine that the name servers are not responding in a timely fashion.
nfs.kerberos.enableThis option is off by default. It’s not a configurable option. It will be turned on when you do kerberossetup.
nfs.kerberos.file_keytab.enableThe default for this option is off. When enabled, the vfiler is directed to use a file based Kerberos keytable (in /etc/krb5.keytab), with a format equal to that generated by an MIT-based kadmin command.
nfs.kerberos.principalThe default for this string option is a zero length string. If nfs.kerberos.file_keytab.enable is enabled,then the nfs.kerberos.principal option must be set to the host specific part of an NFS server’s Kerberosprincipal name. For example, if nfs.kerberos.principal is set to elrond.mycompany.com, then theresulting principal name of the NFS server will be nfs/elrond.mycompany.com@realm, where realm isthe value of nfs.kerberos.realm. Note that nfs/elrond.mycompany.com@realm must appear as an entryin /etc/krb5.keytab.
nfs.kerberos.realmThe default for this string option is a zero length string. If nfs.kerberos.file_keytab.enable is enabled,then the nfs.kerberos.realm option must be set to the host specific part of an NFS server’s Kerberosprincipal name. For example, if nfs.kerberos.realm is set to MYCOMPANY.COM, then the resultingprincipal name of the NFS server will be nfs/[email protected], where principal is valueof nfs.kerberos.principal. Note that nfs/[email protected] must appear as an entry in/etc/krb5.keytab.
nfs.locking.check_domainThe default for this option is on. If this option is set to off, then the NFS version 2 and 3 lock manager(NLM) and the NFS version 2 and 3 status monitor (NSM) will ignore the domain suffix whencomparing the client host name in an NSM request with that of client host name associated with anoutstanding lock. One might want to set the nfs.locking.check_domain to off if one has NFS version 2or 3 clients that issue NLM requests with fully qualified domain names (FQDNs) and NSM requestswith non-FQDNs. Similarly, if the converse is true, one might want to turn nfs.locking.check_domainoff. Otherwise, clients that send hostnames inconsistently will leave locks held on the node, requiringmanual intervention even after the client reboots (and sends the NSM recovery message).
If nfs.locking.check_domain is off, then one must take care to make sure than the non-FQDNs of eachclient are unique, lest two clients with different domains cause each other to lose locks. For example, ifthe option is off, then two NFS clients, one named wally.eng.mycompany.com and the other named wally.corp.mycompany.com will be considered as the same for purposes of processing the NSMrecovery message when either client reboots. It is strongly recommended that clients be fixed and/orreconfigured to obviate the need for setting nfs.locking.check_domain to off.
Because NFS version 4 uses schemes for locking and lock recovery that are completely different thanNLM and NSM, the nfs.locking.check_domain option and the associated issue, do not apply to NFSversion 4.
434 Data ONTAP® 8.2 Commands: Manual Page Reference for 7-Mode, Volume 1
options

nfs.mount_rootonlyWhen enabled, the mount server will deny the request if the client is not root user using privilegedports. Valid values for this option are on (enabled) or off (disabled). The default value for this option is on for more secure access.
nfs.mountd.traceWhen enabled, all mount requests are logged. This option is intended to help debug denied mountrequests. Valid values for this option are on (enabled) or off (disabled). The default value for this optionis off to avoid generating too many messages. The logging output is stored in /etc/messages.
nfs.max_num_aux_groupsThe default value for this option is 32. This option controls the maximum number of auxiliary UNIXgroups of which a UNIX user can be a member. Valid values: 32 or 256.
nfs.netgroup.strictWhen enabled, all entries in the export access lists which do not have a ‘@’ prepended are considered tonot be netgroups. This setting will bypass a potentially spurious netgroup lookup for each nonnetgroupentry in the access lists. Entries in the export access lists, which do not have a ‘@’ prepended, need tobe unexported and re-exported, for this option to take effect.
nfs.notify.carryoverThis is set to on by default. When set to off, the hosts present in the /etc/sm/notify file are not sent NSMreboot notifications after a node panic/reboot. A zero-byte file /etc/sm/.dontcarryover is created afteratleast one round of notifications or after one hour passes since the notifications began (whichevercomes later). If the /etc/sm/.dontcarryover file exists and the above option is false, then the existing/etc/sm/notify file is truncated. In all other cases, the exisiting /etc/sm/notify file is used for subsequentnotifications.
nfs.per_client_stats.enableEnables/disables the collection and display of perclient NFS statistics, as described in na_nfsstat(1).Valid values for this option are on or off. The default value for this option is off.
nfs.require_valid_mapped_uidIf this option is "on" it forces all NFS requests to be successfully mapped via the /etc/usermap.cfgmechanism. This allows NFS requests to be selectively validated by UID or IP address. This mapping isdescribed in na_usermap.cfg(5). Valid values for this option are on or off. The default value for thisoption is off.
nfs.response.traceIf this option is "on", it forces all NFS requests which have exceeded the time set in nfs.response.trigger to be logged. If this option is "off", only one message will be logged per hour. Thedefault value for this option is off.
nfs.response.triggerAny NFS request which takes longer to complete than the time set by this option will be logged,according to the state of nfs.response.trace. The results of this option can be used to determine if theclient side message "NFS Server not responding" is due to the server or the network. The default valuefor this option is 60 seconds.
Data ONTAP® 8.2 Commands: Manual Page Reference for 7-Mode, Volume 1 435
options

nfs.rpcsec.ctx.highThe default is zero. If set to a value other than zero it sets a high-water mark on the number of statefulRPCSEC_GSS (see RFC2203) authentication contexts (today, only Kerberos V5 produces statefulauthentication state in NFS). If it is zero, then no explicit high-water mark is set.
nfs.rpcsec.ctx.idleDefault is 360 seconds. This is the amount of time, in seconds, an RPCSEC_GSS context (see thedescription for the nfs.rpcsec.ctx.high option) will be permitted to be unused before it is deleted.
nfs.rpcsec.traceWhen enabled, all rpcsec_gss authenticaion requests are logged. This option is intended to help debugdenied rpcsec_gss requests. Valid values for this option are on (enabled) or off (disabled). The defaultvalue for this option is off to avoid generating too many messages. The logging output is stored in/etc/messages.
nfs.tcp.enableWhen enabled, the NFS server supports NFS over TCP. By default, the feature is disabled since someclients which support NFS over TCP do so with performance inferior to UDP. It can be enabled if this isnot an issue in your environment. Valid values for this option are on or off. The default value for thisoption is on.
nfs.udp.enableWhen enabled, the NFS server supports NFS over UDP. Valid values for this option are on or off. Thedefault value for this option is on.
nfs.thin_prov.ejukeThis option is on by default. When enabled, the NFS server sends EJUKEBOX to the client. The clientcan then resend the request after some delay. When the option is disabled, the NFS server sendsEOFFLINE and terminates the connection.
nfs.ipv6.enableWhen enabled, the NFS server supports IPv6 based services. By default, the feature is disabled.Enabling NFS over IPv6 requires a restart of the nfs services with an nfs off and nfs on. Disabling NFSIPv6 support would not affect the IPv4 traffic. The ONTAP IPv6 stack should be turned on with theip.v6.enable option before NFS can run over IPv6. Valid values for this option are on or off. The defaultvalue for this option is off.
nfs.ifc.rcv.highThe option nfs.ifc.rcv.high controls the high watermark after which the NFS level flow control will kickin. This option is also controlled by nfs.tcp.recvwindowsize. Changing the nfs.tcp.recvwindowsizeoption will automatically change the value of nfs.ifc.rcv.high.
nfs.ifc.rcv.lowThe option sets lower limit for NFS flow control window.
nfs.ifc.xmt.highNFS goes into transmit flow control when the send window is full and the number of outstandingrequests increases beyond nfs.ifc.xmt.high. At that time NFS will stop reading from the TCP inputwindow. The default value for this option is set to 16. Its maximum limit is 64. This is a persistentoption.
436 Data ONTAP® 8.2 Commands: Manual Page Reference for 7-Mode, Volume 1
options
nfs.ifc.xmt.lowNFS comes out of flow control when the number of outstanding requests goes below nfs.ifc.xmt.low.The default value for this option is set to 8. Its minimum value is 0. This is a persistent option.
nfs.hide_snapshotThis is off by default and is persistent across reboots. This is effective only when nosnapdir is disabled. Setting this option to on allows snapshots to be hidden in the NFS directory listings. The.snapshot directory itself is visible, but the actual snapshots will be hidden. At the same time, an explicitaccess to snapshots is allowed even though they are not visible in the directory listings.
Also, when this option is set to on, a hidden ".snapshot" directory is available within the ".snapshot"directory. This new entry is not visible in the directory listings of parent ".snapshot" but when accessed,will give the list of named snapshots that were hidden in the parent ".snapshot" directory. Basically, thisprovides a convenient way to see the list of snapshots available in the parent ".snapshot" directory, evenwhen this option is set to on.
NOTE: When this option is on and if you have mounted a path ending with ".snapshot", ‘pwd’ may notwork correctly in such a mounted path and its directory tree on the client. As a result, any applicationsthat depend on obtaining the current working directory using the standard UNIX library calls like getpwd(3C) may not function correctly. The exact result reported when asked for current workingdirectory is dependent on the client’s ‘pwd’ implementation.
nfs.udp.xfersizeThe maximum transfer size (in bytes) that the NFS mount protocol will negotiate with the client forUDP transport. Larger transfer sizes often result in better NFS performance. The default is 32768. Themaximum value for this option is 57344 (56K).
nfs.v2.df_2gb_limCauses the node to return replies to the "file system statistics" NFS version 2 request that shows nomore than (2**31)-1 (or 2,147,483,647) total, free, or available bytes (i.e., 2GB) on the file system.
Some NFS clients require this option because, if they get return values from the "file system statistics"request with more than the specified number of bytes, they’ll incorrectly compute the amount of freespace on the file system, and may think that there’s no free space on a file system that has more than2GB free. Valid values for this option are on or off. The default value for this option is off.
nfs.v2.enableWhen enabled, the NFS server supports NFS version 2. Valid values for this option are on (enabled) or off (disabled). The default value for this option is on.
In certain cases, enabling this option does not automatically enable MOUNT support at version 2 level,causing a subsequent mount operation to fail. If this occurs - or to avoid the issue - stop and restart theNFS server after enabling this option.
nfs.v3.enableWhen enabled, the NFS server supports NFS version 3. Disable this option if there is a problem withsome client when using NFS version 3, and that client can be configured to use NFS version 2. Validvalues for this option are on (enabled) or off (disabled). The default value for this option is on.
Data ONTAP® 8.2 Commands: Manual Page Reference for 7-Mode, Volume 1 437
options
In certain cases, enabling this option does not automatically enable MOUNT version 3 of the NFSserver. Hence, a fresh mount over NFS version 3 may not be successful. A workaround would be toswitch NFS server off followed by switching it on.
nfs.v4.enableWhen enabled, the NFS server supports NFS version 4. NFS version 4 support is only over the TCPprotocol. Valid values for this option are on (enabled) or off (disabled). The default value for this optionis off.
nfs.nfs_rootonlyWhen enabled, the NFS server will reject client requests from the non-reserved ports(>=1024) exceptfor the NULL call. Ports lower than 1024 can only be used by the root user. Valid values for this optionare on (enabled) or off (disabled). The default value for this option is off.
nfs.v4.read_delegationRead delegations allow NFS version 4 clients to do read operations locally without contacting theserver. These include open for read, read locks and file read operations. Both the server and client mustsupport read delegations for this feature to work. When enabled, read delegations are supported for NFSversion 4. This feature is not supported for NFS versions 2 and 3. The default value for this option is off.
nfs.v4.write_delegationWrite delegations allow NFS version 4 clients to do write operations locally without contacting theserver. These include open for write, write locks and writing to files. Both the server and client mustsupport write delegations for this feature to work. When enabled, write delegations are supported forNFS version 4. This feature is not supported over NFS versions 2 and 3. Valid values for this option are on (enabled) or off (disabled). The default value for this option is off.
nfs.v4.id.domainThis option controls the domain portion of the string form of user and group names as defined in theNFS version 4 protocol. The domain name is normally taken from the NIS domain in use, or otherwisefrom the DNS domain. However if this option is set, it will override this default behavior.
nfs.v4.id.allow_numericsThis option allows numeric string identifiers in NFSv4 owner attributes. The default value for thisoption is off. Numeric string identifiers in NFSv4 owner attributes will be treated as NOBODY if thisoption is off.
nfs.v4.acl.enableWhen enabled, ACLs are supported for NFS version 4. The ACL option controls setting and gettingNFSV4 ACLs. It does not control enforcement of these ACLs for access checking. This feature is notsupported over NFS versions 2 and 3. The default value for this option is off.
nfs.vstorage.enableWhen enabled, NFS vStorage feature is supported. The vStorage option provides Copy Offload (serverside copy) feature. The default value for this option is off.
nfs.ntacl_display_permissive_permsThis option controls the permissions that are displayed to NFS version 3 and NFS version 4 clients on afile/directory that has an NT ACL set. When enabled, the permissions displayed are based on themaximum access granted by the NT ACL to any user. When disabled, the permissions displayed arebased on the minimum access granted by NT ACL to any user. The default value for this option is off.
438 Data ONTAP® 8.2 Commands: Manual Page Reference for 7-Mode, Volume 1
options

nfs.webnfs.enableWhen enabled, the NFS server supports WebNFS lookups. Valid values for this option are on (enabled)or off (disabled). The default value for this option is off.
nfs.webnfs.rootdirSpecifies the WebNFS rootdir. Once the rootdir is set, WebNFS clients can issue lookups relative to therootdir using the public filehandle. The default value for this option is ‘XXX’. This option is only usedwhen nfs.webnfs.rootdir.set is on, and nfs.webnfs.rootdir.set can only be on if this option containsthe fully qualified pathname to a valid, existing directory.
nfs.webnfs.rootdir.setThis option needs to be enabled for the rootdir setting to take effect. Disabling this option disables theexisting rootdir setting. Valid values for this option are on (enabled) or off (disabled). The default valuefor this option is off. Note that this option can only be enabled if the nfs.webnfs.rootdir option containsa fully qualified pathname to a valid, existing directory.
nis.domainnameSets the NIS domain to the specified domainname. The default for value for this option is the nullstring.
nis.enableEnables NIS client on the node. The NIS domain must be set prior to enabling NIS. Valid values for thisoption are on or off. The default value for this option is off.
nis.group_update.enableEnables the local caching of the NIS group files. Valid values for this option are on or off. The defaultvalue for this option is off.
nis.group_update_scheduleSpecifies the hours of the day when the local NIS group cache has to be updated. ‘now’ will update thecache immediately. The valid value for this option is a comma separated list of hours, in the range of 1to 24. The default value for this option is 24.
nis.netgroup.domain_search.enableSpecifies whether netgroup entry comparisons will consider the domainnames in the search directivefrom /etc/resolv.conf. The default value for this option is on.
nis.netgroup.legacy_nisdomain_search.enable Specifies whether netgroup entry comparisons willconsider the legacy SUNOS compatible nisdomainname in the search directive. The default value forthis option is on.
nis.serversSpecifies the list of preferred NIS servers. Valid values for this option is ‘*’ or a comma separated listof ip addresses. The default value for this option is ‘*’.
nis.slave.enableEnables NIS slave on the node. Valid values for this option are on or off. The default value for thisoption is off.
Data ONTAP® 8.2 Commands: Manual Page Reference for 7-Mode, Volume 1 439
options
nlm.cleanup.timeoutThis timeout value controls the max duration for which nlm tries to clean-up stale objects. The defaultvalue for this option is 100 milli-seconds.
nlm.traceWhen enabled, all asynchronous nlm requests and server callbacks are logged. This option is intendedto help debug asynchronous nlm requests and all lock requests which were blocked on the serverbecause of a conflict and require the server to send a callback to the client. This option is persistentacross reboots so it should be used carefully. Valid values for this option are on (enabled) or off(disabled). The default value for this option is off to avoid too many messages.
pcnfsd.access_checkIf on, enables synchronization between PCNFSD and NFS locks (shared vs byte locks) on the fileobjects. See burt 249076. Any changes done to this option, needs a node reboot to become effective.
pcnfsd.enableEnables/disables the PCNFSD (PC)NFS authentication request server (see na_pcnfsd(8)). Valid valuesfor this option are on or off. The default value for this option is off.
rquotad.enableEnables/disables the RQUOTA daemon (see na_rquotad(8)). Valid values for this option are on or off.The default value for this option is on.
pcnfsd.umaskSpecifies the default umask for files created by (PC) NFS clients. The value of this option is a threedigitoctal number, and the digits correspond to the read, write, and execute permissions for owner, group,and other, respectively. The default value for this option is 022, which means that files normally createdwith mode 666 effectively will have mode 644. ("644" means that the file owner has read and writepermissions, but the members of the group and others have only read permission.).
nfs.always.deny.truncateThis option controls whether NFSv2 and NFSv3 clients can truncate a file in UNIX qtree when thesame file is also opened from a CIFS client with DENY write permissions. Valid values for this optionare on (enabled) or off (disabled). The default value for this option is on.
If you enable this option, NFSv2 and NFSv3 clients cannot modify a file when the file is opened from aCIFS client with DENY write permissions. This protects the file’s integrity in such a scenario.
If you disable this option, NFSv2 and NFSv3 clients can modify a file when the file is opened from aCIFS client with DENY write permissions. You might want to disable this option in an environmentwhere UNIX semantics need to prevail on a UNIX qtree for stateless clients like NFSv2 and NFSv3.However, in some situations this can lead to the file’s integrity being compromised.
ra.path_switch.thresholdWhen excessive errors are encountered on a device within a short enough time period to raise concernthat there might be a faulty component between the Fibre Channel initiator and backend storage, ascsi.path.excessiveErrors EMS event is logged and the associated path will be avoided by Data ONTAP.
This option controls the sensitivity of intermittent path error detection. Setting this option to a lowervalue will reduce the number of errors required to trigger the avoidance functionality. Setting it to ahigher value requires more errors to trigger this event and decreases the sensitivity of path failuredetection.
440 Data ONTAP® 8.2 Commands: Manual Page Reference for 7-Mode, Volume 1
options
Valid values for this threshold range from 1 to 2000. The default value for this option is 100 and shouldonly be changed when recommended by service personnel.
raid.background_disk_fw_update.enableDetermines the behavior of automatic disk firmware update. Valid values for this option are on or off.The default value for this option is on. If the option is set to on, firmware updates to spares andfilesystem disks within RAID-DP, mirrored RAID-DP and mirrored RAID4 volumes is performed in anondisruptive manner via a background process. Firmware updates for disks within RAID4 volumeswill however be done at boot. If the option is turned off then disk firmware update is run manually.When disk firmware update runs manually it makes disks inaccessible for up to 2 minutes, so networksessions using the node should be closed down before running it. This is particularly true for CIFSsessions, which will normally be terminated while disk firmware update command executes. This wholeprocess is very disruptive to the operation of the node and is highly discouraged.
raid.disk.copy.auto.enableDetermines the action taken when a disk reports a predictive failure. Valid values for this option are onor off. The default value for this option is on.
Sometimes, it is possible to predict that a disk will fail soon based on a pattern of recovered errors thathave happened on the disk. In such cases, the disk will report a predictive failure to Data ONTAP. Ifthis option is set to on, Data ONTAP will initiate Rapid RAID Recovery to copy data from the failingdisk to an available spare. When data is copied, the disk will be failed and placed in the pool of brokendisks. If a spare is not available, the node will continue to use the prefailed disk until the disk fails.
If the option is set to off, the disk will be failed immediately and placed in the pool of broken disks. Aspare will be selected and data from the missing disk will be reconstructed from other disks in the RAIDgroup. The disk will not be failed if the RAID group is already degraded or reconstructing so thatanother disk failure would lead to a failure of the whole RAID group.
raid.disktype.enableThis option is obsolete. Use options
raid.mix.hdd.disktype.capacity and raid.mix.hdd.disktype.performance instead.
raid.mix.hdd.disktype.performanceControls mixing of FCAL and SAS disk types. The default value is off, which prevents mixing.
If you set this option to on, FCAL and SAS disk types are considered interchangeable for all aggregateoperations, including aggregate creation, adding disks to an aggregate, and replacing disks within anexisting aggregate, whether this is done by the administrator or automatically by Data ONTAP.
When this option is set to off, FCAL and SAS disks cannot be combined within the same aggregate. Ifyou have existing aggregates that combine those disk types, those aggregates will continue to functionnormally and accept either disk type.
raid.mix.hdd.disktype.capacityControls mixing of SATA, BSAS, FSAS and ATA disk types. The default value is on, which allowsmixing.
Data ONTAP® 8.2 Commands: Manual Page Reference for 7-Mode, Volume 1 441
options
When this option is set to on, SATA, BSAS, FSAS and ATA disk types are considered interchangeablefor all aggregate operations, including aggregate creation, adding disks to an aggregate, and replacingdisks within an existing aggregate, whether this is done by the administrator or automatically by DataONTAP.
If you set this option to off, SATA, BSAS, FSAS and ATA disks cannot be combined within the sameaggregate. If you have existing aggregates that combine those disk types, those aggregates will continueto function normally and accept any of those disk types.
raid.media_scrub.enableEnables/disables continuous background media scrubs for all aggregates (including those embedded intraditional volumes) in the system. Valid values for this option are on or off. The default value for thisoption is on. When enabled, a low-overhead version of scrub which checks only for media errors runscontinuously on all aggregates in the system. Background media scrub incurs negligible performanceimpact on user workload and uses aggressive disk and CPU throttling to achieve that.
raid.media_scrub.spares.enableEnables/Disables continuous background media scrubs for all spares drives within the system. Validvalues for this option are on or off. The default value for this option is on. When enabled a lowoverhead version of scrub which checks only for media errors runs continuously on all spare drives ofthe system. Background media scrub incurs negligible performance impact on user workload and usesaggressive disk and CPU throttling to achieve that. This option is used in conjunction withraid.media_scrub.enable which enables/disables media_scrub on a system-wide basis. The value for thisoption has no effect if the systemwide option is set to off.
raid.media_scrub.rateSets the rate of media scrub on an aggregate (including those embedded in traditional volumes). Validvalues for this option range from 300 to 3000 where a rate of 300 represents a media scrub ofapproximately 512 MBytes per hour, and 3000 represents a media scrub of approximately 5 GBytes perhour. The default value for this option is 600, which is a rate of approximately 1 GByte per hour.
raid.min_spare_countSpecifies the minimum number of spare drives required to avoid warnings for low spares. If there are atleast raid.min_spare_count spare drives that are appropriate replacements for any filesystem disk, thenthere will be no warnings for low spares. This option can be set from 0 to 4. The default setting is 1.Setting this option to 0 means that there will be no warnings for low spares even if there are no sparesavailable. This option can be set to 0 only on systems with 16 or fewer attached drives and that arerunning with RAID-DP aggregates. A setting of 0 is not allowed on systems with RAID4 aggregates.
raid.mirror_read_plex_prefSpecifies the plex preference when reading from a mirrored traditional volume or aggregate on aMetroCluster-configured system. There are three possible values -- ‘local’ indicates that all reads arehandled by the local plex (plex consisting of disks from Pool0), ‘remote’ indicates that all reads arehandled by the remote plex (plex consisting of disks from Pool1), and ‘alternate’ indicates that thehandling of read requests is shared between the two plexes. This option is ignored if the system is not ina MetroCluster configuration, that is, option cf.remote_syncmirror.enable is not enabled. The optionsetting applies to all traditional volumes and aggregates on the node.
442 Data ONTAP® 8.2 Commands: Manual Page Reference for 7-Mode, Volume 1
options

raid.mirror_skip_config_checksEnables/disables the enforcement of disk pool separation in RAID SyncMirror. Valid values are on or off. The default value is off. When set to off, RAID checks when the first mirrored aggregate is createdthat disks are separated into pools based on the adapter loop they are attached to. When set to on, thesechecks are bypassed. Disk pool separation is important for SyncMirror robustness. Therefore, thisoption should be used with care.
raid.reconstruct_speedThis option is obsolete. See raid.reconstruct.perf_impact for the option that controls the effect ofRAID reconstruction.
raid.reconstruct.perf_impactSets the overall performance impact of RAID reconstruction. When the CPU and disk bandwidth arenot consumed by serving clients, RAID reconstruction consumes as much as it needs. If the serving ofclients is already consuming most or all of the CPU and disk bandwidth, this option allows control overhow much of the CPU and disk bandwidth will be taken away for reconstruction, and hence how muchof a negative performance impact it will be to the serving of clients. As the value of this option isincreased, the speed of reconstruction will also increase. The possible values for this option are low, medium, and high. The default value is medium. There is also a special value of default, which willuse the current default value. When mirror resync and reconstruction are running at the same time, thesystem does not distinguish between their separate resource consumption on shared resources (like CPUor a shared disk). In this case, the resource utilization of these operations taken together is limited to themaximum of their configured individual resource entitlements.
raid.reconstruct.wafliron.enableEnables starting wafliron (see na_vol(1)) when reconstruction encounters a medium error. Valid valuesfor this option are on and off. The default value for this option is on. When a medium error isencountered in an aggregate during reconstruction, access to the volume(s) it contains is temporarilyrestricted and reconstruction proceeds, bypassing media errors. If this option is enabled, wafliron isstarted automatically, thus bringing the aggregate and its volume(s) back online. If this option isdisabled, the volume(s) stay restricted.
raid.resync.perf_impactSets the overall performance impact of RAID mirror resync (whether started automatically by thesystem or implicitly by an operator-issued command). When the CPU and disk bandwidth are notconsumed by serving clients, a resync operation consumes as much as it needs. If the serving of clientsis already consuming most or all of the CPU and disk bandwidth, this option controls how much of theCPU and disk bandwidth will be taken away for resync operations, and hence how much of a negativeperformance impact it will be to the serving of clients. As the value of this option is increased, the speedof resync will also increase. The possible values for this option are low, medium, and high. The defaultvalue is medium. There is also a special value of default, which will use the current default value.When RAID mirror resync and reconstruction are running at the same time, the system does notdistinguish between their separate resource consumption on shared resources (like CPU or a shareddisk). In this case, the resource utilization of these operations taken together is limited to the maximumof their configured individual resource entitlements.
raid.rpm.ata.enableThis option is obsolete. Use option raid.mix.hdd.rpm.capacity instead.
Data ONTAP® 8.2 Commands: Manual Page Reference for 7-Mode, Volume 1 443
options
raid.mix.hdd.rpm.capacityControls separation of capacity-based hard disk drives (ATA, SATA, BSAS, FSAS, MSATA) byuniform rotational speed (RPM). If you set this option to off, Data ONTAP always selects disks with thesame RPM when creating new aggregates or when adding disks to existing aggregates using these disktypes. If you set this option to on, Data ONTAP does not differentiate between these disk types basedon rotational speed. For example, Data ONTAP might use both 5400 RPM and 7200 RPM disks in thesame aggregate. The default value is on.
raid.rpm.fcal.enableThis option is obsolete. Use option raid.mix.hdd.rpm.performance instead.
raid.mix.hdd.rpm.performanceControls separation of performance-based hard disk drives (SAS, FCAL) by uniform rotational speed(RPM). If you set this option to off, Data ONTAP always selects disks with the same RPM whencreating new aggregates or when adding disks to existing aggregates using these disk types. If you setthis option to on, Data ONTAP does not differentiate between these disk types based on rotationalspeed. For example, Data ONTAP might use both 10K RPM and 15K RPM disks in the sameaggregate. The default value is off.
raid.scrub.durationSets the duration of automatically started scrubs, in minutes. If this is not set or set to 0, it defaults to 6hours (360 minutes). If set to ‘-1’, all automatic scrubs will run to completion.
raid.scrub.enableEnables/disables the RAID scrub feature (see na_disk(1)). Valid values for this option are on or off. Thedefault value for this option is on. This option only affects the scrubbing process that gets started fromcron. This option is ignored for userrequested scrubs.
raid.scrub.perf_impactSets the overall performance impact of RAID scrubbing (whether started automatically or manually).When the CPU and disk bandwidth are not consumed by serving clients, scrubbing consumes as muchas it needs. If the serving of clients is already consuming most or all of the CPU and disk bandwidth,this option controls how much of the CPU and disk bandwidth will be taken away for scrubbing, andhence how much of a negative performance impact it will be to the serving of clients. As the value ofthis option is increased, the speed of scrubbing will also increase. The possible values for this option are low, medium, and high. The default value is low. There is also a special value of default, which willuse the current default value. When scrub and mirror verify are running at the same time, the systemdoes not distinguish between their separate resource consumption on shared resources (like CPU or ashared disk). In this case, the resource utilization of these operations taken together is limited to themaximum of their configured individual resource entitlements.
raid.scrub.scheduleSpecifies the weekly schedule (day, time, and duration) for scrubs started automatically by the raid.scrub.enable option. The default schedule is Sunday 1 a.m. for the duration specified by the raid.scrub.duration option. If an empty string ("") is specified as an argument, it will delete theprevious scrub schedule and add the default schedule. One or more schedules can be specified using thisoption. The syntax is duration[h|m]@weekday@start_time,[duration[h|m]@weekday@start_time,...]where duration is the time period for which scrub operation is allowed to run, in hours or minutes (’h’or ‘m’ respectively). If duration is not specified, the raid.scrub.duration option value will be used asduration for the schedule.
444 Data ONTAP® 8.2 Commands: Manual Page Reference for 7-Mode, Volume 1
options
weekday is the day when scrub operation should start. Valid values are sun, mon, tue, wed, thu, fri, sat.
start_time is the time when scrub should start, specified in 24 hour format. Only the hour (0-23) needsto be specified.
For example, options raid.scrub.schedule 240m@tue@2,8h@sat@22 will cause scrub to start on everyTuesday at 2 a.m. for 240 minutes, and on every Saturday at 10 p.m. for 480 minutes.
raid.timeoutSets the time, in hours, that the system will run after a single disk failure in a RAID4 group or a twodisk failure in a RAID-DP group has caused the system to go into degraded mode or double degraded mode respectively, or after NVRAM battery failure has occurred. The default is 24, the minimumacceptable value is 0 and the largest acceptable value is 4,294,967,295. If the raid.timeout option isspecified when the system is in degraded mode or in double degraded mode, the timeout is set to thevalue specified and the timeout is restarted. If the value specified is 0, automatic system shutdown isdisabled.
raid.verify.perf_impactSets the overall performance impact of RAID mirror verify. When the CPU and disk bandwidth are notconsumed by serving clients, a verify operation consumes as much as it needs. If the serving of clientsis already consuming most or all of the CPU and disk bandwidth, this option controls how much of theCPU and disk bandwidth will be taken away for verify, and hence how much of a negative performanceimpact it will be to the serving of clients. As you increase the value of this option, the verify speed willalso increase. The possible values for this option are low, medium, and high. The default value is low.There is also a special value of default, which will use the current default value. When scrub and mirrorverify are running at the same time, the system does not distinguish between their separate resourceconsumption on shared resources (like CPU or a shared disk). In this case, the resource utilization ofthese operations taken together is limited to the maximum of their configured individual resourceentitlements.
replication.logical.reserved_transfersThis option guarantees that the specified number of qtree SnapMirror or SnapVault source/destinationtransfers can always be run. Setting this option will reduce the maximum limits for all other transfertypes. The default value for this option is 0.
replication.throttle.enableEnables global network throttling of SnapMirror and SnapVault transfers. The default value for thisoption is off.
replication.throttle.incoming.max_kbsThis option specifies the maximum total bandwidth used by all the incoming (applied at destination)SnapMirror and SnapVault transfers, specified in kilobytes/sec. The default value for this option is unlimited, which means there is no limit on total bandwidth used. This option is valid only when theoption replication.throttle.enable is on.
replication.throttle.outgoing.max_kbsThis option specifies the maximum total bandwidth used by all the outgoing (applied at source)SnapMirror and SnapVault transfers specified in kilobytes/sec. The default value for this option is unlimited, which means there is no limit on total bandwidth used. This option is valid only when theoption replication.throttle.enable is on.
Data ONTAP® 8.2 Commands: Manual Page Reference for 7-Mode, Volume 1 445
options

replication.volume.reserved_transfersThis option guarantees that the specified number of volume SnapMirror source/destination transfers canalways be run. Setting this option will reduce the maximum limits for all other transfer types. Thedefault value for this option is 0.
replication.volume.use_auto_resyncThis option enables auto resync functionality for Synchronous SnapMirror relations. This option ifenabled on Synchronous SnapMirror, destination will update from the source using the latest commonbase snapshot deleting all destination side snapshots newer than the common base snapshot. The defaultvalue for this option is off.
rlm.setupDisplays whether the RLM has been configured. The RLM is configured through the setup or the rlm setup command.
rlm.autologout.enableEnables or disables the automatic logout of idle RLM SSH connections. The default is on, which causesRLM SSH connections to be disconnected after the number of minutes specified by the rlm.autologout.timeout value. Any change to this option requires a logout from the RLM before ittakes effect.
rlm.autologout.timeoutThe number of minutes after which RLM SSH idle connections are The number of minutes after whichtelnet connections are disconnected if rlm.autologout.enable is on. The default is 60 minutes. Anychange to this option requires a logout from the RLM before it takes effect.
rlm.ssh.accessRestricts SSH access to the RLM. For valid values, see na_rlmaccess(8).
rmc.setupIf LAN settings have been provided for a remote management controller, this will be set to on and thepresence of its dedicated LAN interface and external power supply is periodically verified.
rpc.nlm.tcp.portThis option allows the NLM rpc service over TCP to be registered on a port other than the default. nfs off followed by nfs on is required to re-register the service on the new port. This is a per host optionand is persistent across reboots. The results are undefined if more than one RPC services are registeredon the same port.
rpc.nlm.udp.portThis option allows the NLM rpc service over UDP to be registered on a port other than the default. nfs off followed by nfs on is required to re-register the service on the new port. This is a per host optionand is persistent across reboots. The results are undefined if more than one RPC services are registeredon the same port.
rpc.nsm.tcp.portThis option allows the NSM rpc service over TCP to be registered on a port other than the default. nfs off followed by nfs on is required to re-register the service on the new port. This is a per host optionand is persistent across reboots. The results are undefined if more than one RPC services are registeredon the same port.
446 Data ONTAP® 8.2 Commands: Manual Page Reference for 7-Mode, Volume 1
options
rpc.nsm.udp.portThis option allows the NSM rpc service over UDP to be registered on a port other than the default. nfs off followed by nfs on is required to re-register the service on the new port. This is a per host optionand is persistent across reboots. The results are undefined if more than one RPC services are registeredon the same port.
rpc.mountd.tcp.portThis option allows the MOUNTD rpc service over TCP to be registered on a port other than the default. nfs off followed by nfs on is required to re-register the service on the new port. This is a per host optionand is persistent across reboots. The results are undefined if more than one RPC services are registeredon the same port.
rpc.mountd.udp.portThis option allows the MOUNTD rpc service over UDP to be registered on a port other than the default. nfs off followed by nfs on is required to re-register the service on the new port. This is a per host optionand is persistent across reboots. The results are undefined if more than one RPC services are registeredon the same port.
rpc.pcnfsd.tcp.portThis option allows the PCNFSD rpc service over TCP to be registered on a port other than the default. nfs off followed by nfs on is required to re-register the service on the new port. This is a per host optionand is persistent across reboots. The results are undefined if more than one RPC services are registeredon the same port.
rpc.pcnfsd.udp.portThis option allows the PCNFSD rpc service over UDP to be registered on a port other than the default. nfs off followed by nfs on is required to re-register the service on the new port. This is a per host optionand is persistent across reboots. The results are undefined if more than one RPC services are registeredon the same port.
rpc.rquotad.udp.portThis option allows the RQUOTAD rpc service over UDP to be registered on a port other than thedefault. nfs off followed by nfs on is required to re-register the service on the new port. This is a perhost option and is persistent across reboots. This service is only registered over UDP. The results areundefined if more than one RPC services are registered on the same port.
rsh.accessRestricts rsh access to the node. For valid values, see na_protocolaccess(8).
rsh.enableEnables the RSH server on the node. Valid values for this option are on or off. The starting defaultvalue on a factory install for this option is off.
security.admin.authenticationThis option controls where the node finds authentication information for admins. Authentication can bedone via the local administrative repository or through repositories found in the nsswitch.conf file.Authentication via nsswitch.conf allows ldap and nis centralized administration. The value of thisoption can be ‘internal’, ‘nsswitch’, ‘internal,nsswitch’, or ‘nsswitch,internal’. The repositories aresearched in the order specified. The default value is ‘internal’.
Data ONTAP® 8.2 Commands: Manual Page Reference for 7-Mode, Volume 1 447
options
security.admin.nsswitchgroupThis option specifies which group found in the nsswitch.conf file has administrative access to the node.This option must be set to a valid group to give any nsswitch users login privileges. Seena_useradmin(1) for more information about the admin role. The default value is no group.
security.passwd.firstlogin.enableThis option controls whether all admins (except for root) must change their passwords upon first login.A value of on means that newly created admins, or admins whose passwords were changed by anotheradmin, may only run the passwd command until the password is changed. Default value is off.
security.passwd.lockout.numtriesThis option controls how many attempts an admin can try a login before the account is disabled. Thisaccount may be re-enabled by having a different admin change the disabled admin’s password. If thisvalue is default, then failing to login will never disable an account. The default value for this option is4294967295.
security.passwd.rootaccess.enableThis option controls whether root can have access to the system. A value of off means that root cannotlogin or execute any commands. This option is reset to on if a user changes root’s password, or during aboot without etc/rc. By default, this option is on.
security.passwd.rules.enableThis option controls whether a check for password composition is performed when new passwords arespecified. See na_useradmin(1) for additional information on relevant effected functionality. A value of on means that the check will be made, and the password rejected if it doesn’t pass the check. A value of off means that the check won’t be made. The default value for this option is on. By default, this optiondoes not apply to the users "root" or "Administrator" (the NT Administrator account).
security.passwd.rules.everyoneThis option controls whether a check for password composition is performed for all users, including"root" and "Administrator". A value of off means that the checks do not apply to "root" or"Administrator" (but still may apply to all other users). The starting default value on a factory install ora newly created vfiler for this option is on. security.passwd.rules.enable must have the value on or thisoption is ignored.
security.passwd.rules.historyThis option controls whether an administrator can reuse a previous password. A value of 5 means thatthe appliance will store 5 passwords, none of which an admin can re-use. A value of 0 means that anadmin is not restricted by any previous password. The starting default value on a factory install or anewly created vfiler is 6. security.passwd.rules.enable must have the value on or this option isignored. To prevent administrators from abusing this option by cycling through the password history,see the ‘-m’ option in na_useradmin(1).
security.passwd.rules.maximumThis option controls the maximum number of characters a password can have. Though there is nodefault value for this option, only the first 16 characters are saved. Users with passwords greater than 14characters will not be able to log in via the Windows interfaces, so if you are using Windows, werecommend this value to be 14.) security.passwd.rules.enable must have the value on or this option isignored.
448 Data ONTAP® 8.2 Commands: Manual Page Reference for 7-Mode, Volume 1
options
security.passwd.rules.minimumThis option controls the minimum number of characters a password must have. The default value forthis option is 8. security.passwd.rules.enable must have the value on or this option is ignored.
security.passwd.rules.minimum.alphabeticThis option controls the minimum number of alphabetic characters a password must have. (NOTE: Apassword cannot be just digits and symbols.) These are capital and lowercase letters from a to z. Thedefault value for this option is 2. security.passwd.rules.enable must have the value on or this option isignored.
security.passwd.rules.minimum.uppercaseThis option controls the minimum number of uppercase alphabetic characters ("A" to "Z") that apassword must contain. If set to a non-zero value, a password cannot be comprised only of digits,symbols and lowercase characters. The default value for this option is 0 (zero). security.passwd.rules.enable must have the value on or this option is ignored.
security.passwd.rules.minimum.lowercaseThis option controls the minimum number of lowercase alphabetic characters ("a" to "z") that apassword must contain. If set to a non-zero value, a password cannot be comprised only of digits,symbols and uppercase characters. The default value for this option is 0 (zero). security.passwd.rules.enable must have the value on or this option is ignored.
security.passwd.rules.minimum.digitThis option controls the minimum number of digit characters a password must have. These are numbersfrom 0 to 9. The default value for this option is 1. security.passwd.rules.enable must have the value onor this option is ignored.
security.passwd.rules.minimum.symbolThis option controls the minimum number of symbol characters a password must have. These arewhitespace and punctuation characters. The default value for this option is 0. security.passwd.rules.enable must have the value on or this option is ignored.
sftp.enableWhen enabled (on), this option allows SFTP(SSH File Transfer Protocol) connections on port 22. Whendisabled (off), SFTP connection attempts are refused.
SFTP can be started only if SSH2 is enabled.
Default: off
Effective: Immediately
Persistence: Remains in effect across system reboots
sftp.auth_styleSets the SFTP(SSH File Transfer Protocol) login authentication style. In mixed mode, usernames with"\" or "@" will authenticate via ntlm and those without will authenticate via unix. Setting ntlm or unixexplicitly will force the respective authentication type regardless of the format of the username.
Data ONTAP® 8.2 Commands: Manual Page Reference for 7-Mode, Volume 1 449
options
Default: mixed
Values: ntlm, unix, mixed
Effective: Upon SFTP client reconnection
Persistence: Remains in effect across system reboots
sftp.bypass_traverse_checkingWhen turned on, directories in the path to a file are not required to have the ‘X’ (traverse) permission.
Default: off
Effective: Immediately
Persistence: Remains in effect across system reboots
sftp.dir_restrictionSets user home directory restriction. The off (or none) setting indicates that there is no home directoryrestriction for regular users. When this option is set to on (or homedir), each named account user’saccess is restricted to that user’s own home directory or to the override directory, if one is specified bythe sftp.dir.override option.
Default: on
Values: on, off, none, homedir
Effective: Upon SFTP client reconnection
Persistence: Remains in effect across system reboots
sftp.dir_overrideSets the override path for the user home directory. A "" (null) value indicates no home directoryoverride; users will be placed in their home directory upon login. When the value of this option is avalid directory path, users will be placed in that directory upon login. This option applies only to nameduser accounts. The behavior of the default user account is not affected by the value of sftp.dir.override.
Default: "" (null)
Effective: Upon SFTP client reconnection
Persistence: Remains in effect across system reboots
sftp.idle_timeoutSets the time between requests that a SFTP(SSH File Transfer Protocol) session can be idle before itbecomes a candidate for disconnection by the node.
Default: 900s
Min/Max: 300s - 48h in seconds (s), minutes(m) or hours (h)
450 Data ONTAP® 8.2 Commands: Manual Page Reference for 7-Mode, Volume 1
options
Effective: Immediately
Persistence: Remains in effect across system reboots
sftp.log_enableEnables/disables the logging of SFTP(SSH File Transfer Protocol) packets and data transfer operations.
Default: on
Effective: Immediately
Persistence: Remains in effect across system reboots
sftp.log_filesizeSpecifies the maximum file size for SFTP(SSH File Transfer Protocol) logs in the /etc/log directory.When one of the active log files, such as sftp.cmd reaches this size, it is renamed to sftp.cmd.1, and thatrenamed log history file is closed. If there is already a historical log file, such as sftp.cmd.1, that file isrenamed to sftp.cmd.2. This renaming process continues sequentially for all historical log files, until themaximum number of historical log files (specified by sftp.log.nfiles) is reached. Once the maximumnumber of historical log files is reached, the oldest log file is deleted each time a new active log file isopened. See the description of the sftp.log.nfiles option for more information.
Default: 512k
Min/Max: 1K - 4G in gigabytes (G), megabytes (M), kilobytes (K) or bytes (blank)
Effective: Immediately
Persistence: Remains in effect across system reboots
sftp.log_nfilesSets the maximum number of log files to be kept for SFTP(SSH File Transfer Protocol). Once an activelog file reaches the size limit determined by the sftp.log.filesize option, a new active log file is created.The old active log file is stored as a historical log file by appending the file name with ".1". All existinghistorical files are renamed by incrementing the numeric suffix; for example, "sftp.cmd.2" becomes"sftp.cmd.3" and so on. Only the number of files specified by sftp.log.nfiles are kept. When themaximum number of historical log files is exceeded, the highest-numbered (oldest) log file is deleted.For example, if nfiles is set to 6, sftp.cmd.5 would be deleted rather than renamed.
Default: 6
Min/Max: 1 - 100 files
Effective: Immediately
Persistence: Remains in effect across system reboots
sftp.lockingSets the type of file locking used by the SFTP(SSH File Transfer Protocol) during file retrieval. Settingthis option to none designates that files are not to be locked in any way during file retrieval. When thevalue of this option is delete, files being retrieved cannot be deleted or renamed. When the value of thisoption is write, file being retrieved cannot be opened for write or deleted or renamed.
Data ONTAP® 8.2 Commands: Manual Page Reference for 7-Mode, Volume 1 451
options
Default: none
Values: none, delete
Effective: Immediately
Persistence: Remains in effect across system reboots
sftp.max_connectionsSets the maximum number of concurrent SFTP(SSH File Transfer Protocol) connections allowed. Thisoption is the limit of the total number of SFTP control connections allowed to the node, or to all vFilershosted on the physical node. For HA configurations, the number of connections permitted is doubledwhen in takeover mode. If this setting is changed to a value that is lower than the current number ofconnected SFTP sessions, new connections will be refused until the total number of sessions falls below sftp.max_connections. Existing sessions are unaffected.
Default: 15
Min/Max: 0 - 15 connections
Effective: Immediately
Persistence: Remains in effect across system reboots
sftp.max_connections_thresholdThis option allows an administrator to set a threshold on the number of concurrent SFTP(SSH FileTransfer Protocol) connections. When this threshold is reached an EMS messagesftp.connections.threshold, warning the administrator that the number of concurrent SFTP connectionsis approaching the maximum limit allowed by the option sftp.max_connections, is generated.
This option is set as a percentage of the maximum concurrent SFTP connections allowed by the option sftp.max_connections. If the value is set to zero, then this EMS generation is disabled.
Default: 75%
Min/Max: 0 - 99% percent
Effective: Immediately
Persistence: Remains in effect across system reboots
sftp.override_client_permissionsEnables/disables the override of permissions sent by SFTP(SSH File Transfer Protocol) client. Ifenabled, the UNIX permissions set on a newly created file/directory would be 0755, irrespective of thepermissions sent by the client.
Default: off
Effective: Immediately
Persistence: Remains in effect across system reboots
452 Data ONTAP® 8.2 Commands: Manual Page Reference for 7-Mode, Volume 1
options

shelf.atfcx.auto.reset.enableThis option controls the automatic power-cycle feature of capable AT-FCX shelf enclosures. If enabled,capable shelf enclosures automatically power-cycle to recover from certain failures in a non-disruptivemanner. Valid settings are on, off, and auto. The default value is auto. auto behaves the same as off ina Single Path HA storage configuration. auto behaves the same as on in any other storageconfigurations.
This option will only have effect on DS14mk2-AT shelf enclosures equipped with HE Power ResetCapable power supplies and NDR Capable AT-FCX Shelf Firmware.
shelf.esh4.auto.reset.enableThis option controls the automatic power-cycle feature of capable ESH4 shelf enclosures. If enabled,capable shelf enclosures automatically power-cycle to recover from certain failures in a non-disruptivemanner. Valid settings are on, off, and auto. The default value is auto. auto behaves the same as off ina Single Path HA storage configuration. auto behaves the same as on in any other storageconfigurations.
This option will only have effect on DS14mk2-FC and DS14mk4-FC shelf enclosures equipped withHE Power Reset Capable power supplies and NDR Capable ESH4 Shelf Firmware Revision.
snaplock.autocommit_periodThis option can be used to specify a time delay to be used with the SnapLock auto-commit feature. Thisfeature automatically converts to WORM status any file on any SnapLock volume if the file has notchanged during the delay period. The retention date on the committed file will be determined by thevolume’s default retention period.
To specify a time delay, set this option to a value consisting of an integer count followed by an indicatorof the time period: ‘h’ for hours, ‘d’ for ‘days, ‘m’ for months, or ‘y’ for years. For example, to specifyan auto-commit delay period of 4 hours, set this option to ‘4h’.
To disable the SnapLock auto-commit feature, set this option to none. This is the default value.
The minimum delay that can be specified is two hours. Because auto-commits are performed by ascanner, it could take some time after the delay period ends for the file to be committed to WORM.
snaplock.compliance.write_verifyThis option is used to verify all disk writes to snaplock compliance volumes. It is used when immediateverification of the recording process is required. By default the options is ‘off’.
Using this option will have a negative impact on volume performance.
snaplock.log.default_retentionThis option can be used to specify a default retention policy for a secure log file. The default value is 6months ‘6m’ and cannot be set to less than 6 months. The option may be specified in m|y.
The default retention is used only when operations that are being logged do not specify a retentionperiod. A secure log will be retained for the maximum retention time necessary to verify secureoperations performed on files in the log.
Data ONTAP® 8.2 Commands: Manual Page Reference for 7-Mode, Volume 1 453
options
snaplock.log.maximum_sizeThis option specifies the maximum size for a secure log before the file is closed and a new log file isgenerated for use by the secure logging infrastructure. The default value is ‘10m’ and the possiblevalues for units are ‘k’, ‘m’, ‘g’ and ‘t’. If no unit is specified, given size is assumed to be in bytes.
The minimum size of any log file is 100k and the maximum size is (4t-1).
snapmirror.accessThis option determines which SnapMirror destination nodes may initiate transfers, and over whichnetwork interfaces. When set to "legacy", SnapMirror uses the older snapmirror.allow to determineaccess. The option value is a string containing an expression which provides the access filter. Anexample of the options command for snapmirror.access is options snapmirror.access host=toaster,fridge. The default value is "legacy". See na_snapmirror(1) , na_protocolaccess(8) formore details.
snapmirror.checkip.enableEnables IP address based verification of SnapMirror destination nodes by source nodes. Valid valuesare on or off. The default value is off. See na_snapmirror.allow(5) for more details.
snapmirror.delayed_acks.enableEnables TCP/IP delayed acknowledgements. Disabling this can improve performance of SnapMirrornetwork connections in high latency networks. Valid values are on or off. The default value is on.
This uses the slow start and congestion avoidance algorithms as described in RFC 2581. Do note thatdisabling this option can be disruptive to other clients on the same network as the SnapMirrorconnection.
snapmirror.volume.local_nwk_bypass.enableEnables bypassing network for local Volume SnapMirror transfers. Valid values for this option are onor off. The default value for this option is on. When option is off, local Volume SnapMirror transfersuse the network stack to transfer data.
snapmirror.enableEnable or disable SnapMirror operations. Valid values for this option are on or off. The default valuefor this option is off. When on (SnapMirror must be licensed), SnapMirror data transfers andSnapMirror scheduler are enabled. The command snapmirror on and snapmirror off has the sameeffect as this option. See na_snapmirror(1) for more details.
snapmirror.log.enableDetermines whether SnapMirror activity is logged to the SnapMirror log file. The setting does not affectsyslog output from SnapMirror. Valid values for this option are on or off. The default value for thisoption is on. When on, all the SnapMirror activities will be logged in /etc/log/snapmirror. Seena_snapmirror(5) for more details.
snapvalidator.versionDetermines the version of Oracle that will be validated for by SnapValidator. This setting applies to allvolumes that have the ‘svo_enable’ option set to on. For more information on the this options seena_vol(1). Valid values for this option are 9 or 10. The default value for this option is 9.
454 Data ONTAP® 8.2 Commands: Manual Page Reference for 7-Mode, Volume 1
options
snapvault.accessRestricts/allows client and server access to snapvault from a different node. The default value is "none"For valid values, see na_protocolaccess(8).
snapvault.enableEnable or disable snapvault operation. Valid values for this option are on or off. The default value forthis option is off.
snapvault.lockvault_log_volumeConfigures the LockVault Log Volume. Valid values for this option are online SnapLock volumenames. See na_snapvault(1) for details.
snapvault.nbu.archival_snap_defaultSets the default value for the vol option nbu_archival_snap on new volumes. The nbu_archival_snap voloption will be initialized according to the value of
snapvault.nbu.archival_snap_default. This initialization occurs when the first SnapVault for NetBackup backup to that volume starts,unless the nbu_archival_snap vol option is already configured manually. Valid values for thisoption are on or off. The default value for this option is on.
snapvault.snapshot_for_dr_backupThis option is applicable at Volume SnapMirror destination only, while using SnapVault to backupVolume SnapMirror destination. This option allows SnapVault to choose the primary snapshot for thebackup. Valid values are vsm_base_only, named_snapshot_only and named_snapshot_preferred.
When the option is set to vsm_base_only, SnapVault does the backup of most recent VolumeSnapMirror created snapshot.
When the option is set to named_snapshot_only, SnapVault does the backup of destination requestedsnapshot. If the requested snapshot is not available at the Volume SnapMirror destination, then thebackup will fail.
When the option is set to named_snapshot_preferred, SnapVault tries to backup destination requestedsnapshot. If the destination requested snapshot is not available, then it backs up the most recent VolumeSnapMirror created snapshot.
The default value for this option is vsm_base_only.
snapvault.stale_config_cleanup_enableThis option enables or disables the cleanup of stale SnapVault configurations. The valid values for thisoption are on and off.The default value for this option is on.
snapvault.ossv.compressionThis option enables or disables network compression for Open System SnapVault transfers. The validvalues are on and off. The default value for this option is off. For a specific relationship this option isoverridden by the per-relationship compression option when the per-relationship compression optionhas been set to values other than the default. See na_snapvault(1) for setting the per-relationshipcompression option.
Data ONTAP® 8.2 Commands: Manual Page Reference for 7-Mode, Volume 1 455
options
snapvault.preservesnapThis option allows a user to enable/disable recycling of the SnapVault archival snapshots. The validvalues are on and off. It applies only when the number of SnapVault archival snapshots reaches theretention count. When it is set to off, SnapVault will create room for a new snapshot by deleting theoldest SnapVault archival snapshot. When it is set to on, SnapVault will just preserve all the existingSnapVault archival snapshots and fail the new snapshot creation. So, further snapshots and SnapVaultupdates by that schedule will not be possible until the user deletes any older archived snapshot(s) tobring the count to less than retention count or increase the retention count or turns off this option. Thedefault value for this option is off. For a specific relationship this option is overridden by theperrelationship preserve option when the per-relationship preserve option has been set to values otherthan the default. See na_snapvault(1) for setting the perrelationship preserve option.
snmp.accessRestricts SNMP access to the node. For valid values, see na_protocolaccess(8).
snmp.enableEnables the SNMP server on the node. Valid values for this option are on or off. The default value forthis option is on.
sparse.tcp_windowsizeSets the TCP window size for sparse operations, including FlexCache. The default, 262144 bytes,works for many network environments. Change this value only when required for your networkconfiguration. Changes to this option can strongly affect FlexCache performance. The option can beused on both the FlexCache node and the origin node.
sp.autologout.enableEnables or disables the automatic logout of idle SP SSH connections. The default is on, which causesSP SSH connections to be disconnected after the number of minutes specified by the sp.autologout.timeout value. Any change to this option requires a logout from the SP before it takeseffect.
sp.autologout.timeoutThe number of minutes after which SP SSH idle connections are disconnected if sp.autologout.enableis on. The default is 60 minutes. Any change to this option requires a logout from the SP before it takeseffect.
sp.setupDisplays whether the SP has been configured. The SP is configured through the setup or the sp setupcommand.
sp.ssh.accessRestricts SSH access to the SP. For valid values, see na_spaccess(8).
ssh.accessRestricts ssh access to the node. For valid values, see na_protocolaccess(8).
ssh.enableEnables or disables the SSH 2.0 protocol on the node. Valid values for this option are on or off. Thestarting default value on a factory install for this option is on.
456 Data ONTAP® 8.2 Commands: Manual Page Reference for 7-Mode, Volume 1
options
ssh.idle.timeoutTimeout value for ssh sessions in seconds. For example, options ssh.idle.timeout 300 will set thetimeout value for ssh sessions to 300 seconds. The default value for this option is 600 seconds. A valueof zero, the default setting, is interpreted as 600 seconds.
ssh.passwd_auth.enableEnables or disables the password authentication on the ssh server. Valid values for this option are on or off. The default value for this option is on.
ssh.portChanges the port of the ssh daemon. The default value for this option is 22.
ssh.pubkey_auth.enableEnables or disables the public key authentication on the ssh server. Valid values for this option are on or off. The default value for this option is on.
ssh1.enableEnables or disables the SSH 1.x protocol on the node. Valid values for this option are on or off. Thedefault value for this option is off.
ssh2.enableEnables or disables the SSH 2.0 protocol on the node. Valid values for this option are on or off. Thestarting default value on a factory install for this option is on. This option is equivalent to the ssh.enableoption.
ssl.v2.enableEnables or disables the SSLv2 protocol on https and ldap connections. Valid values for this option areon or off. The default value for this option is on. This setting takes effect immediately and is persistentacross reboots.
ssl.v3.enableEnables or disables the SSLv3 protocol on https and ldap connections. Valid values for this option areon or off. The default value for this option is on. This setting takes effect immediately and is persistentacross reboots.
tape.persistent_reservationsDeprecated option. Use option tape.reservations instead.
tape.reservationsEnables SCSI reservations or persistent reservations for all tape drives, medium changers, bridges, andtape libraries (including those with embedded bridges) attached to the node via Fibre Channel, includingthose attached through switches. Only the initiator which holds the reservation may change the positionor state of the device, protecting it from other initiators. This option determines which type ofreservation is applied when a device open operation requests a reservation. The device is released whenit is closed.
Standard "classic" SCSI reservation isolates well under normal conditions, but reservations can be lostduring interface error recovery procedures, allowing device access by initiators other than the erstwhileowner. Error recovery mechanisms such as loop reset do not affect persistent reservations.
Data ONTAP® 8.2 Commands: Manual Page Reference for 7-Mode, Volume 1 457
options
This option replaces option tape.persistent_reservations, which is no longer used. Valid values are off, scsi, or persistent. The default value is off. This option has no effect on devices attached to parallelSCSI adapters, since the adapter already has exclusive access to the devices.
Tape drives, medium changers, tape libraries, or bridges do not all implement persistent reservationscorrectly. If persistent does not protect a device properly, then use scsi instead, or turn the option off.
telnet.accessRestricts telnet access to the node. For valid values, see na_protocolaccess(8). If this value is set, trusted.hosts is ignored for telnet.
telnet.enableEnables the Telnet server on the node. Valid values for this option are on or off. The default value forthis option is off. If this option is toggled during a telnet session, then it goes into effect on the nexttelnet login.
telnet.distinct.enableEnables making the telnet and console separate user environments. If it is off, then telnet and consoleshare a session. The two sessions view each other’s inputs/outputs and both acquire the privileges of thelast user to login. If this option is toggled during a telnet session, then it goes into effect on the nexttelnet login. Valid values for this option are on or off. The starting default value on a factory install forthis option is on. This option is set to on if a user belonging to "Compliance Administrators" isconfigured and cannot be set to off till the user is configured.
telnet.hostsDeprecated option, use trusted.hosts instead.
tftpd.enableEnables the tftp (Trivial File Transfer Protocol) server on the node. Valid values for this option are onor off. The default value for this option is off. When enabled, the node’s tftp server allows get requests,but does not allow put requests.
tftpd.loggingEnables console logging of accesses for files via tftp. Valid values for this option are on or off. Thedefault value for this option is off.
tftpd.max_connectionsThis option controls the maximum number of simultaneous tftpd connections that will be served. Theminimum value is 4 and the maximum is 32. The default value for this option is 8. If this setting is changed to a value that is lower than the current number of connected TFTP sessions, new connections will be refused until the total number of sessions falls below ftpd.max_connections.Existing sessions are unaffected.
tftpd.rootdirSpecifies the tftpd rootdir. All relative accesses to files via tftp are considered relative to this directory.All absolute accesses via tftp can only access a file if it lies in the filesystem tree rooted at thisdirectory. A valid value for this option is the fully qualified pathname to a valid, existing directory onany volume on the node. The default value of this option is /etc/tftpboot.
458 Data ONTAP® 8.2 Commands: Manual Page Reference for 7-Mode, Volume 1
options
timed.enableIf on and a remote protocol is specified the time daemon (timed) synchronizes to an external source. If off, time is not synchronized to an external source. Valid values for this option are on or off. Thedefault value for this option is on.
HA pair considerations: To keep time synchronized across the nodes in the HA pair, timed should beenabled on both nodes.
timed.logSpecifies whether time changes initiated by timed should be logged to the console.
This option is obsolete and does not have an effect in Data ONTAP 8.0 or later. However, if this optionis modified, the changes would take effect if the system is reverted to a release that does support thisoption.
timed.max_skewSpecifies the maximum amount of skew between the time reported by the time server and the node’stime that we will allow when synchronizing the time. If the difference in the time reported by the serverand the node’s time is greater than this value, the node will not synchronize to the time reported by thetime server. The maximum skew is specified in seconds (suffix s), minutes (suffix m), or hours (suffixh). Defaults to "30m".
This option is obsolete and does not have an effect in Data ONTAP 8.0 or later. However, if this optionis modified, the changes would take effect if the system is reverted to a release that does support thisoption.
HA pair considerations: Specifies the maximum amount of skew between the time reported by thetime master and the time slave’s time.
timed.min_skewSpecifies the minimum amount of skew between the time reported by the time server and the node’stime that is required to trigger the process of time correction into action. If the difference in the timereported by the server and the node’s time is less than this value, the node will not attempt to correct thetime. The minimum skew is specified in seconds (suffix s), minutes (suffix m), or hours (suffix h).Defaults to "0".
This option is obsolete and does not have an effect in Data ONTAP 8.0 or later. However, if this optionis modified, the changes would take effect if the system is reverted to a release that does support thisoption.
Cluster considerations: Specifies the minimum amount of skew between the time reported by the timemaster and the time slave’s time.
timed.protoSpecifies the protocol used to synchronize time. Valid values for this option are rdate, ntp or rtc. rdatespecifies the rdate (RFC 868) protocol. ntp specifies the Network Time Protocol (RFC 1305). rtcspecifies the internal Real-Time Clock chip. The default value for this option is ntp.
Note that sntp can be used as an alias for the ntp setting. Releases before Data ONTAP 8 use theSimple Network Time Protocol (RFC 2030) instead of the Network Time Protocol.
Data ONTAP® 8.2 Commands: Manual Page Reference for 7-Mode, Volume 1 459
options
The option to use the rdate and rtc protocols is no longer supported in Data ONTAP 8.0 or later.However, if this protocol is specified, the changes would take effect if the system is reverted to a releasethat does support the protocols.
timed.schedSpecifies the timed synchronization schedule. There are several pre-defined schedules:
hourlysynchronize every hour (the default)
multihourlysynchronize every 6 hours
dailysynchronize every day at midnight
Custom schedules may also be specified by giving the number of minutes or hours between timesynchronization. Minutes are specified by digits followed by an "m"; hours are specified by digitsfollowed by an "h". For example, options timed.sched 2h will cause time to be synchronized every twohours.
To avoid overburdening the time server, the node randomly selects the exact time of thesynchronization within a window specified by timed.window.
After timed.sched is set, timed.window is capped at ten percent of timed.sched.
This option is obsolete and does not have an effect in Data ONTAP 8.0 or later. However, if this optionis modified, the changes would take effect if the system is reverted to a release that does support thisoption.
HA pair considerations: specifies the time synchronization schedule for the time slave.
timed.serversDefines the list of up to five Network Time Protocol (NTP) time servers to be used. Enter the timeserver names as a comma-separated list with no spaces in between. The default is an empty list. BothIPv6 and IPv4 addresses are accepted.
It is a best practice to use at least three time servers for redundancy and for detection of disagreement oftime servers.
HA pair considerations: The timed.servers option must be configured on both nodes in the HA pair.For best results, the servers specified should be identical.
timed.windowSpecifies a window around the synchronization time set by timed.sched. The actual synchronizationtime is randomly chosen from within this window. timed.window is specified in seconds (suffix s) orminutes (suffix m). The value may be 0, but it may not exceed ten percent of timed.sched. timed.window defaults to "0s".
This option is obsolete and does not have an effect in Data ONTAP 8.0 or later. However, if this optionis modified, the changes would take effect if the system is reverted to a release that does support thisoption.
460 Data ONTAP® 8.2 Commands: Manual Page Reference for 7-Mode, Volume 1
options
HA pair considerations: Specifies a window around the synchronization time set by timed.sched forthe time slave.
tls.enableEnables or disables the TLS (Transport Layer Security) protocol on https, ftps and ldap connections.Valid values for this option are on or off. The default value for this option is off. This setting takeseffect immediately and is persistent across reboots.
trusted.hostsSpecifies up to 5 clients that will be allowed telnet, rsh, and administrative HTTP (that is FilerView)access to the server. The host names should be entered as a comma-separated list with no spaces inbetween. Enter a "*" to allow access to all clients; this is the default. Enter a "-" to disable access to theserver. NOTE: this option used to be called telnet.hosts, and in fact that is still an alias for this option.This value is ignored for telnet if telnet.access is set, and is ignored for administrative HTTP if httpd.admin.access is set. See na_protocolaccess(8) for more details.
vol.copy.throttleSpecifies the default speed of all volume copy operations. The speed can be a number in the range from1 to 10, with 10 being the highest speed and the default. When a vol copy operation is started, itsthrottle is set to this value. See na_vol(1) for more details on the vol copy command.
wafl.default_nt_userSpecifies the NT user account to use when a UNIX user accesses a file with NT security (has an ACL),and that UNIX user would not otherwise be mapped. If this option is set to the null string, such accesseswill be denied. The default value for this option is the null string.
wafl.default_security_styleSpecifies the default security style assigned to a new volume. All qtrees created on the volume get thisas their security style. Legal values for this option are ‘unix’, ‘ntfs’, or ‘mixed’. The default value forthis option is ‘unix’, unless the node is an NTFS-only node, in which case the default is ‘ntfs’.
wafl.default_unix_userSpecifies the UNIX user account to use when an authenticated NT user did not match an entry in theusermap.cfg file. If this option is set to the null string, NT users which are not matched in theusermap.cfg file will not be allowed to log in. The default value for this option is ‘pcuser’.
wafl.group_cpSpecifies the WAFL behavior for coordinating consistency points between groups of volumes in anappliance. If the WAFL Group-CP feature is active then WAFL will coordinate updates across multipletraditional volumes and aggregates during a WAFL consistency point. If WAFL Group-CP is not activethen consistency points are not coordinated across traditional volumes and aggregates during recovery.The allowed values for this option are ‘on’, ‘off’ or ‘default’. If the value is set to ‘default’ then theoption is set based on whether MetroCluster is enabled for the appliance; if MetroCluster is enabledthen the default is on, otherwise the default is off.
wafl.inconsistent.asup_frequency.blks:If the number of unique bad user data blocks encountered by WAFL since last AutoSupport message ofthis type exceeds the value specified by this option, a new AutoSupport message is sent.
Data ONTAP® 8.2 Commands: Manual Page Reference for 7-Mode, Volume 1 461
options
The supported values for the option include integers from 0 to 100. The default value of this option is10.
wafl.inconsistent.asup_frequency.time:If WAFL encounters a bad user data block, a new AutoSupport message is sent, provided that the timesince last AutoSupport message exceeds the value specified by this option.
The supported values for the option include values from 60s to 604800s (seconds in 7 days). The defaultvalue of this option is 24h (86400 seconds).
wafl.inconsistent.ems_suppressThis option suppress EMS messages that are related to bad blocks. The default value of this option isFALSE (which can be entered as 0, off, OFF, no, NO, false, or FALSE). The default means EMSmessages are not suppressed. The value can be overwritten with TRUE (which can be entered as 1, on,ON, yes, YES, true, or TRUE) to suppress EMS messages.
wafl.nt_admin_priv_map_to_rootWhen on (the default), an NT administrator is mapped to UNIX root.
wafl.root_only_chownWhen enabled, only the root user can change the owner of a file. When disabled, non-root users canchange the owner of files that they own. When a non-root user changes the owner of a file they own,both the set-UID and set-GID bits of that file are cleared for security reasons. A non-root user is notallowed to give away a file if it would make the recipient overrun its user quota. wafl.root_only_chownis enabled by default.
wafl.wcc_minutes_validSpecifies the number of minutes a WAFL credential cache entry is valid. The value can range from 1through 20160. The default is 20.
webdav.enableEnables WebDAV access to the node. Valid values for this option are on or off.
Default: on
Effective: Immediately
Persistence: Remains in effect across system reboots
Multiple options can be set at once in an options command. For example:
options nfs.tcp.enable on nfs.v2.df_2gb_lim on raid.timeout 48
sets nfs.tcp.enable to on, sets nfs.v2.df_2gb_lim to on, and sets raid.timeout to 48.
EXAMPLESoptions cifs.trace_login on
Turns on the logging for all CIFS login related activities.
462 Data ONTAP® 8.2 Commands: Manual Page Reference for 7-Mode, Volume 1
options
options cifs
Prints all the options that start with cifs.
HA CONSIDERATIONSIn general, each node in a High Availability (HA) configuration has its own options that areindependent of the options of its partner. After a takeover, the live node uses its own option settings orits partner’s option settings, depending on whether the live node operates in partner mode.
However, a few options must have the same setting for both nodes in a HA configuration for takeover towork properly. If you change the setting for one of these options on one node, the node displays amessage reminding you to make the same change on the other node. In takeover mode, the same optionvalues are used for both nodes.
The following list of options must have the same values on both nodes in a HA configuration:
snmp.enable telnet.enable trusted.hosts wafl.group_cp
It is recommended that the following list of options have the same values on both nodes in a HAconfiguration:
timed.enable timed.log timed.max_skew timed.proto timed.sched timed.servers timed.window
During takeover, certain partner option values are overridden by those of the live node. Whether the livenode is operating in partner mode or not, the live node’s value will be used when an option must beconsulted.
The following list of options is overwritten by the live node’s values during takeover:
auditlog.enable auditlog.max_file_size autologout.telnet.enable autologout.telnet.timeout dns.domainname dns.enable httpd.log.format httpd.timeout httpd.timewait.enable ip.match_any_ifaddr ip.path_mtu_discovery.enable nfs.per_client_stats.enable nfs.v2.df_2gb_lim nfs.v3.enable nis.domainname nis.enable
Data ONTAP® 8.2 Commands: Manual Page Reference for 7-Mode, Volume 1 463
options

nis.group_update.enable nis.group_update_schedule nis.servers nis.slave.enable pcnfsd.enable nfs.always.deny.truncate raid.disk.copy.auto.enable raid.disktype.enable raid.media_scrub.enable raid.reconstruct.perf_impact raid.reconstruct.wafliron.enable raid.resync.perf_impact raid.rpm.ata.enable raid.rpm.fcal.enable raid.timeout raid.verify.perf_impact rmc.setup sparse.tcp_windowsize vol.copy.throttle wafl.root_only_chown wafl.wcc_minutes_valid
After takeover, the options command can be used in partner mode to modify an option setting for thefailed node. However, the change is lost after the giveback operation.
VFILER CONSIDERATIONSEach vfiler has its own set of options. Vfilers, however, recognize only a subset of the optionsrecognized by a node. The list of options recognized by a vfiler is:
cifs.AD.retry_delay cifs.audit.enable cifs.audit.file_access_events.enable cifs.audit.logon_events.enable cifs.audit.logsize cifs.audit.saveas cifs.bypass_traverse_checking cifs.comment cifs.guest_account cifs.home_dir_namestyle cifs.homedirs_public_for_admin cifs.idle_timeout cifs.max_mpx cifs.netbios_aliases cifs.netbios_over_tcp.enable cifs.nfs_root_ignore_acl cifs.oplocks.enable cifs.oplocks.opendelta cifs.perm_check_ro_del_ok cifs.perm_check_use_gid cifs.preserve_unix_security cifs.restrict_anonymous.enable cifs.save_case cifs.scopeid cifs.search_domains
464 Data ONTAP® 8.2 Commands: Manual Page Reference for 7-Mode, Volume 1
options
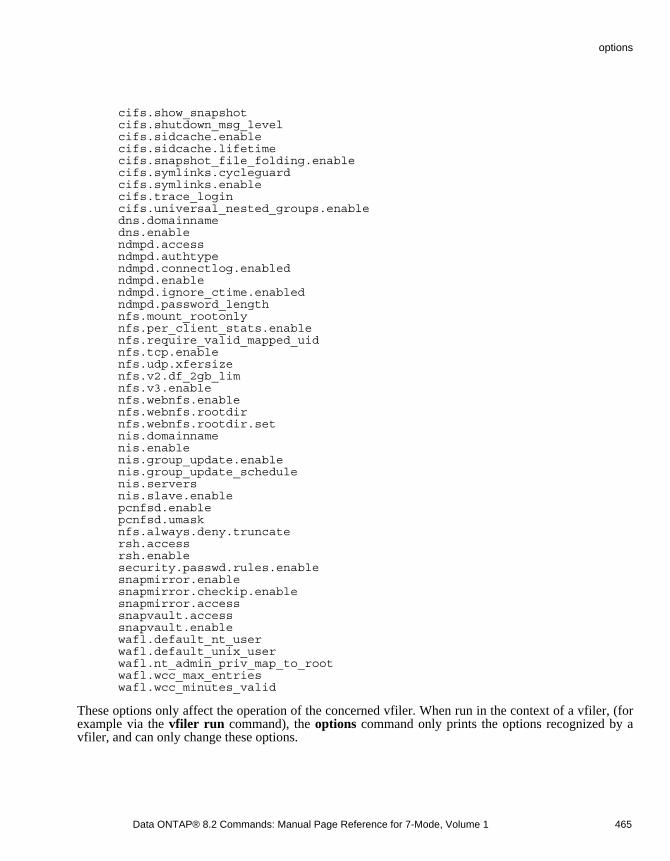
cifs.show_snapshot cifs.shutdown_msg_level cifs.sidcache.enable cifs.sidcache.lifetime cifs.snapshot_file_folding.enable cifs.symlinks.cycleguard cifs.symlinks.enable cifs.trace_login cifs.universal_nested_groups.enable dns.domainname dns.enable ndmpd.access ndmpd.authtype ndmpd.connectlog.enabled ndmpd.enable ndmpd.ignore_ctime.enabled ndmpd.password_length nfs.mount_rootonly nfs.per_client_stats.enable nfs.require_valid_mapped_uid nfs.tcp.enable nfs.udp.xfersize nfs.v2.df_2gb_lim nfs.v3.enable nfs.webnfs.enable nfs.webnfs.rootdir nfs.webnfs.rootdir.set nis.domainname nis.enable nis.group_update.enable nis.group_update_schedule nis.servers nis.slave.enable pcnfsd.enable pcnfsd.umask nfs.always.deny.truncate rsh.access rsh.enable security.passwd.rules.enable snapmirror.enable snapmirror.checkip.enable snapmirror.access snapvault.access snapvault.enable wafl.default_nt_user wafl.default_unix_user wafl.nt_admin_priv_map_to_root wafl.wcc_max_entries wafl.wcc_minutes_valid
These options only affect the operation of the concerned vfiler. When run in the context of a vfiler, (forexample via the vfiler run command), the options command only prints the options recognized by avfiler, and can only change these options.
Data ONTAP® 8.2 Commands: Manual Page Reference for 7-Mode, Volume 1 465
options

SEE ALSOna_snap(1), na_useradmin(1), na_autosupport(1), na_protocolaccess(8).
466 Data ONTAP® 8.2 Commands: Manual Page Reference for 7-Mode, Volume 1
options
oroutedNAMEna_orouted - Old network routing daemon
SYNOPSISorouted on
orouted off
orouted [ -n ] status
DESCRIPTIONrouted (pronounced ‘‘route-D’’) uses a variant of the Xerox NS Routing Information Protocol (RIP) tomanage selection of the default gateway used for IP network routing. The node’s routed is differentfrom the standard UNIX routed as it never sends RIP packets, or builds route tables from RIPinformation, but only snoops for RIP exchanges to determine gateway status; it builds the routing tablebased on ICMP redirects.
When routed is started with the routed on command, it reads the /etc/dgateways file to create a list ofpotential default gateways. The /etc/dgateways file consists of a series of lines, each in the followingformat:
gateway metric
where:
gateway is the name or address of a gateway to be used as a potential default gateway.
metric is a metric indicating the preference weighting of the gateway. 1 is the value to use for highestpreference, 15 for the least. If no value is specified, metric defaults to the value 1.
There can be a maximum of 128 valid entries in the /etc/dgateways file - additional ones are ignored,but cause an error message. Duplicate gateway names or addresses are not allowed - only the first oneencountered in the file is added to the table, and duplicates produce error messages.
After the list of gateways is created, routed selects the one with the lowest metric value to be used asthe preferred default route. If there are multiple gateways available with the same metric value, it usesthe one named first in the /etc/dgateways file.
routed then listens on udp port 520 for routing information packets. When a RIP request or replypacket is received, routed marks the gateway that sent the packet ALIVE. If the gateway has a bettermetric than the current default gateway, or has the same metric but is listed earlier in /etc/dgateways,the current default gateway is changed to the new gateway.
When a gateway is not heard from for 180 seconds, routed marks the gateway as DEAD, and if it wasthe current default gateway, selects a new default gateway if one is available.
Data ONTAP® 8.2 Commands: Manual Page Reference for 7-Mode, Volume 1 467
orouted
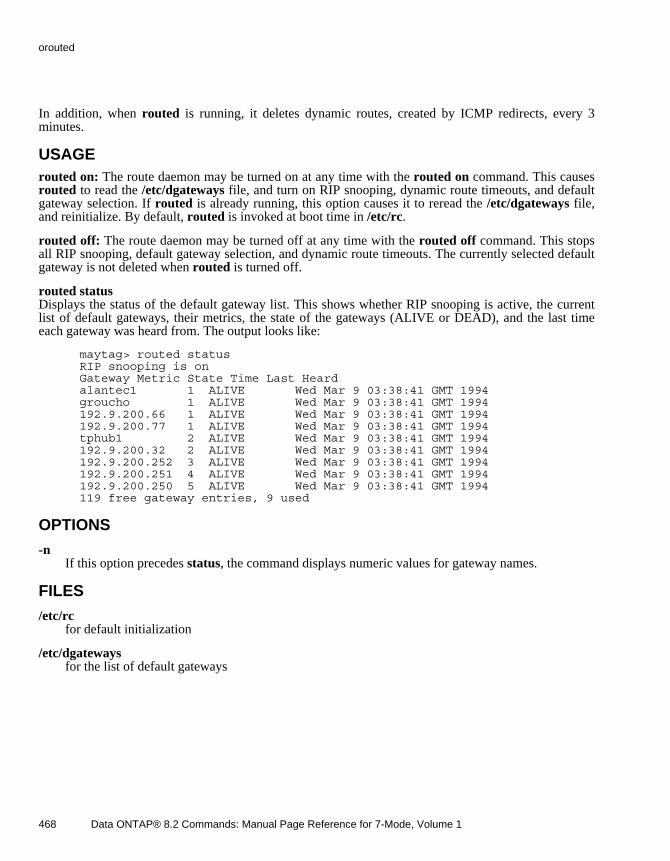
In addition, when routed is running, it deletes dynamic routes, created by ICMP redirects, every 3minutes.
USAGErouted on: The route daemon may be turned on at any time with the routed on command. This causes routed to read the /etc/dgateways file, and turn on RIP snooping, dynamic route timeouts, and defaultgateway selection. If routed is already running, this option causes it to reread the /etc/dgateways file,and reinitialize. By default, routed is invoked at boot time in /etc/rc.
routed off: The route daemon may be turned off at any time with the routed off command. This stopsall RIP snooping, default gateway selection, and dynamic route timeouts. The currently selected defaultgateway is not deleted when routed is turned off.
routed statusDisplays the status of the default gateway list. This shows whether RIP snooping is active, the currentlist of default gateways, their metrics, the state of the gateways (ALIVE or DEAD), and the last timeeach gateway was heard from. The output looks like:
maytag> routed status RIP snooping is on Gateway Metric State Time Last Heard alantec1 1 ALIVE Wed Mar 9 03:38:41 GMT 1994 groucho 1 ALIVE Wed Mar 9 03:38:41 GMT 1994 192.9.200.66 1 ALIVE Wed Mar 9 03:38:41 GMT 1994 192.9.200.77 1 ALIVE Wed Mar 9 03:38:41 GMT 1994 tphub1 2 ALIVE Wed Mar 9 03:38:41 GMT 1994 192.9.200.32 2 ALIVE Wed Mar 9 03:38:41 GMT 1994 192.9.200.252 3 ALIVE Wed Mar 9 03:38:41 GMT 1994 192.9.200.251 4 ALIVE Wed Mar 9 03:38:41 GMT 1994 192.9.200.250 5 ALIVE Wed Mar 9 03:38:41 GMT 1994 119 free gateway entries, 9 used
OPTIONS
-n If this option precedes status, the command displays numeric values for gateway names.
FILES
/etc/rc for default initialization
/etc/dgateways for the list of default gateways
468 Data ONTAP® 8.2 Commands: Manual Page Reference for 7-Mode, Volume 1
orouted
SEE ALSOna_dgateways(5), na_rc(5)
DIAGNOSTICSrouted: unable to allocate free entry - too many valid entries were found in the /etc/dgateways file.Only the first 128 are used.
routed: duplicate gateway entry not allowed - a duplicate gateway name or address was found in the /etc/dgateways file. Only the first one found is used.
routed: unable to open socket - a networking error has prevented routed from initializing properly.
BUGSA default route created with route add, either by hand, or in /etc/rc may be deleted by routed when itstarts running, if it knows a better route.
If the ‘‘best’’ entry selected from /etc/dgateways is DEAD when routed starts up, there may be aperiod of 180 seconds before a gateway that is ALIVE is selected.
Data ONTAP® 8.2 Commands: Manual Page Reference for 7-Mode, Volume 1 469
orouted
partnerNAMEna_partner - Accesses the data on the partner in takeover mode.
SYNOPSISpartner [ command ]
DESCRIPTIONWhen one node in a High Availability (HA) pair fails, the other node takes over. To execute a DataONTAP command on the failed node, use the partner command on the console of the node that tookover. When a node executes a command on behalf of its partner, the node is said to be in ‘‘partnermode.’’
If the node is currently not in partner mode, the partner command without arguments causes the nodeto enter partner mode. After the node enters partner mode, the node executes each subsequent commandon behalf of the partner until you enter the partner command again.
Alternatively, you can type partner followed by a command. The node enters partner mode andexecutes that command on behalf of the partner. After the node finishes executing the command, it exitspartner mode.
In partner mode, you can enter any Data ONTAP command to manage the failed node, except that youcannot perform the following tasks:
Halt or reboot the failed node. Set the date on the failed node. Synchronize the date on the failed node with a time server. Set the time zone on the failed node. Set vfiler limit (only available if multistore is licensed). Initiate a giveback or takeover. Revert the Data ONTAP(tm) software version to an earlier version.
When in partner mode, the node changes the console prompt to display the host name of the failed node,followed by a slash and the host name of the live node.
After a node in an HA pair fails, it stops running the telnet daemon. As a result, you cannot establish a telnet session with the failed node. You can, however, establish a telnet session to the node that hastaken over, and enter the partner command as you would on the console.
EXAMPLESSuppose an HA pair contains two nodes named toaster1 and toaster2. After toaster2 fails, toaster1takes over. Because you can no longer enter commands on the console of toaster2, you must use the partner command on toaster1 to access toaster2. For example, to determine the maximum number offiles on toaster2, enter the following command on toaster1:
470 Data ONTAP® 8.2 Commands: Manual Page Reference for 7-Mode, Volume 1
partner
toaster1(takeover)> partner maxfiles Volume vol0: maximum number of files is currently 241954 (3194 used). Volume vol1: maximum number of files is currently 241954 (3195 used). toaster1(takeover)>
The following example illustrates how the console prompt on toaster1 changes after you enter the partner command on toaster1. The example also shows how to exit partner mode:
toaster1(takeover)> partner toaster2/toaster1> maxfiles Volume vol0: maximum number of files is currently 241954 (3194 used). Volume vol1: maximum number of files is currently 241954 (3195 used). toaster2/toaster1> partner toaster1(takeover)>
The following example shows that the partner command toggles between the consoles of two nodes inan HA pair:
toaster1(takeover)> partner partner toaster1(takeover)>
In this example, the first partner command causes toaster1 to execute the second partner commandon toaster2, which returns you to toaster1’s console. Consequently, the usual console prompt of toaster1 is displayed.
Data ONTAP® 8.2 Commands: Manual Page Reference for 7-Mode, Volume 1 471
partner
passwdNAMEna_passwd - Modifies the system administrative user’s password.
SYNOPSISpasswd
rsh-only usage:
passwd oldpassword newpassword [ username ]
DESCRIPTIONpasswd changes a node’s administrative user’s password. If there are any non-root users on the node,you will be prompted for a user’s login name.
Next, you will be prompted for the user’s current password. If you have the capability security-passwd_change-others (root has this capability), you will automatically bypass this step.
Finally, you will be prompted for the new password. The node imposes no default minimum length orspecial character requirement for root or for Administrator, though this can be changed by setting theoption security.passwd.rules.everyone to on.
As with any password, it is best to choose a password unlikely to be guessed by an intruder. Allnon-root administrative users’ passwords must meet the following settable restrictions:
- it should be at least 8 characters long
- it should contain at least two alphabetic characters
- it should contain at least one digit
By default, the above criteria are enforced by the node when a new password is given. However, thereare a few options which will change the password requirements. security.passwd.rules.enable can beused to prevent the restrictions from being enforced, and there are a series of other options under security.passwd.rules which specify requirements. See na_options(1) for additional information.
If the node is booted from floppy disk, selection "(3) Change password" enables you to reset the rootpassword without entering the old password. This is useful for the forgetful.
The second style of using the passwd command, shown in the SYNOPSIS above, is only allowed whenyou execute the password command using rsh. Since rsh doesn’t allow prompting, all the necessaryvalues must be put on the command-line. If root is the only user on the system, you do not have toprovide an explicit username as a third argument. In this case, root is assumed.
472 Data ONTAP® 8.2 Commands: Manual Page Reference for 7-Mode, Volume 1
passwd

HA CONSIDERATIONSEach node in an HA pair can have a different password. However, in takeover mode, use only thepassword set on the live node to access the consoles of both nodes. You do not need to enter the failednode’s password to execute commands in partner mode.
Because the password for the failed node becomes unnecessary after a takeover, you do not haveincreased security by assigning different passwords to the nodes in an HA pair. NetApp Increcommends that you use the same password for both nodes.
VFILER CONSIDERATIONSWhen run from a vfiler context (for example via the vfiler run command), passwd operates on theconcerned vfiler, and can only be used to change the password of a user of that vfiler.
SEE ALSOna_options(1), na_vfiler(1)
Data ONTAP® 8.2 Commands: Manual Page Reference for 7-Mode, Volume 1 473
passwd

pingNAMEna_ping - Sends ICMP ECHO_REQUEST packets to network hosts.
SYNOPSISping [ -rv ] host [ count ]
ping -s [ -Rrv ] host [ packetsize ]
DESCRIPTIONping uses the ICMP protocol’s mandatory ECHO_REQUEST datagram to elicit an ICMPECHO_RESPONSE from the specified host or gateway. ECHO_REQUEST datagrams have an IP andICMP header, followed by a struct timeval and then an arbitrary number of bytes used to fill out thepacket. If host responds, ping prints "host is alive." Otherwise, ping will resend the ECHO_REQUESTonce a second. If the host does not respond after count retries (default value is 20), ping will print "noanswer from host." If the host is specified as a symbolic name and the system is unable to resolve thisname to an IP address, ping will print "unknown host host."
When the -s flag is specified, ping sends one datagram per second and prints one line of output forevery ECHO_RESPONSE that it receives. ping computes the roundtrip times and packet loss statistics.When the command is terminated with a ^C, the summary statistics is displayed. The default packetsizeis 56, which translates into 64 ICMP bytes when combined with the 8 bytes of ICMP header.
OPTIONS
-R Record route. Includes the RECORD_ROUTE option in the ECHO_REQUEST packet anddisplays the route buffer on returned packets. Note that the IP header is only large enough for ninesuch routes. Many hosts ignore or discard this option. The -R option is ignored without the -soption.
-r Bypass the normal routing tables and send directly to a host on an attached network. If the host isnot on a directly-attached network, an error is returned.
-s Send one datagram every second.
-v Verbose output. ICMP packets other than ECHO_RESPONSE that are received are listed.
474 Data ONTAP® 8.2 Commands: Manual Page Reference for 7-Mode, Volume 1
ping

VFILER CONSIDERATIONSWhen run from a vfiler context, (for example, via the vfiler run command), ping operates on theconcerned vfiler.
SEE ALSOna_vfiler(1)
Data ONTAP® 8.2 Commands: Manual Page Reference for 7-Mode, Volume 1 475
ping
ping6NAMEna_ping6 - Sends ICMPv6 ECHO_REQUEST packets to network hosts.
SYNOPSISping6 [ -HnNqvwW ] [ -b sockbufsize ] [ -c count ] [ -i interface ] [ -I interval ] [ -l preload ] [ -p pattern ] -S sourceaddr [ -d datasize ] [ -h hoplimit ] [ hops... ] ipv6-host
DESCRIPTIONping6 uses the ICMPv6 protocol’s mandatory ICMP6_ECHO_REQUEST datagram to elicit anICMP6_ECHO_REPLY from a host or gateway. ICMP6_ECHO_REQUEST datagrams ("pings") havean IPv6 header, and ICMPv6 header formatted as documented in RFC2463.
OPTIONS
-b sockbufsize
Set socket buffer size.
-c count
Stop after sending (and receiving) count ECHO_RESPONSE packets.
-d datasize
Specifies the number of data bytes to be sent. The default is 56, which translates into 64 ICMP databytes when combined with the 8 bytes of ICMP header data. You may need to specify -b as well toextend socket buffer size.
-H Specifies to try reverse-lookup of IPv6 addresses. The ping6 command does not try reverse-lookupunless the option is specified.
-h hoplimit
Set the IPv6 hoplimit.
-i interface
Source packets with the given interface address. This flag applies if the ping destination is a multicastaddress, or link-local/site-local unicast address.
476 Data ONTAP® 8.2 Commands: Manual Page Reference for 7-Mode, Volume 1
ping6
-I interval
Wait interval seconds between sending each packet. The default is to wait for one second between eachpacket.
-l preload
If preload is specified, ping sends that many packets as fast as possible before falling into its normalmode of behavior.
-n Numeric output only. No attempt will be made to lookup symbolic names for host addresses.
-N Probe node information multicast group (ff02::2:xxxx:xxxx). host must be string hostname of thetarget (must not be a numeric IPv6 address). Node information multicast group will be computedbased on given host and will be used as the final destination. Since node information multicastgroup is a link-local multicast group, destination link needs to be specified by -i option.
-p pattern
You may specify up to 16 "pad" bytes to fill out the packet you send. This is useful for diagnosingdata-dependent problems in a network. For example, "-p ff" will cause the sent packet to be filled withall ones.
-q Quiet output. Nothing is displayed except the summary lines at startup time and when finished.
-S sourceaddr
Specifies the source address of request packets. The source address must be one of the unicast addressesof the sending node. If the outgoing interface is specified by the -i option as well, sourceaddr needs tobe an address assigned to the specified interface.
-v Verbose output. Received ICMP packets other than ECHO_RESPONSE are listed.
-w Generate ICMPv6 Node Information FQDN query, rather than echo-request. Option -d has noeffect if -w is specified.
-W Same as -w , but with old packet format based on 03 draft. This option is present for backwardcompatibility. Option -d has no effect if -w is specified.
hops IPv6 addresses for intermediate nodes, which will be put into type 0 routing header.
Data ONTAP® 8.2 Commands: Manual Page Reference for 7-Mode, Volume 1 477
ping6

ipv6-hostIPv6 address of the final destination node.
When using ping6 for fault isolation, it should first be run on the local host, to verify that the localnetwork interface is up and running. Then, hosts and gateways further and further away should be"pinged". Round-trip times and packet loss statistics are computed. If duplicate packets are received,they are not included in the packet loss calculation, although the round trip time of these packets is usedin calculating the round-trip time statistics. When the specified number of packets have been sent (andreceived) or if the program is terminated with a SIGINT, a brief summary is displayed, showing thenumber of packets sent and received, and the minimum, maximum, mean, and standard deviation of theround-trip times.
This program is intended for use in network testing, measurement and management. Because of the loadit can impose on the network, it is unwise to use ping6 during normal operations or from automatedscripts.
SEE ALSOna_traceroute(1)
NOTESThere have been many discussions on why we separate ping6 and ping. Some people have argued that itwould be more convenient to unify the ping command for both IPv4 and IPv6.
From a developer’s point of view: Since the underlying API is totally different between IPv4 and IPv6,we would end up having two types of code base. There would actually be less benefit to unify the twocommands into a single command from the developer’s standpoint.
From an operator’s point of view: Unlike ordinary network applications like remote login tools, we areusually aware of address family when using network management tools. We do not just want to knowthe reachability of the host, but want to know the reachability of the host via a particular networkprotocol such as IPv6. Thus, even if we had a unified ping command for both IPv4 and IPv6, we wouldusually type a -6 or -4 option (or something like those) to specify the particular address family. Thisessentially means that we have two different commands.
478 Data ONTAP® 8.2 Commands: Manual Page Reference for 7-Mode, Volume 1
ping6
pkttNAMEpktt - Controls on-node packet tracing.
SYNOPSISpktt start {if | all} [-b bsize] [-d dir] [-s size] [-m pklen] [-v] [-i ipaddr] [-i ipaddr] ...
pktt pause {if | all}
pktt dump {if | all} [-d dir]
pktt stop {if | all}
pktt status [{if | all}] [-v]
pktt delete [filename.trc]+
pktt list
DESCRIPTIONThe pktt command controls a simple on-node packet tracing facility. Packets can be captured into atrace buffer then dumped to a file, or the captured data can be logged to a file. The data is stored in"tcpdump" format, and can be directly viewed with tcpdump, ethereal, and perhaps other viewers. Theoutput can also be converted using the editcap(1) program to a variety of other formats, includingSniffer, NetMon, and snoop.
It is helpful to have pktt available because it can capture traffic from switched networks, and from allthe supported node network media types.
In addition, it is often useful to turn on pktt tracing before a node crash occurs, as the packet trace canbe extracted from the core file.
USAGEpktt start {if | all} [-b bsize] [-d dir] [-s size] [-m pklen] [-v] [-i ipaddr] [-i ipaddr] ...
The start subcommand is used to start tracing, (or restart if it has been paused). As mentioned above,the packet trace data is stored in "tcpdump" format in a circular buffer in memory. The options that canbe supplied are as follows:
-b bsize
This sets the buffer size, which may be specified as a number with an optional trailing ‘k’ or ‘m’multiplier. The default is 128K if you have not specified -d, which is fairly small but may be OK forfinding "packet of death" bugs and the like. The default value is 1M when using the -d option. Thevalue may range from 8K to 32M, but only in unusual cases should it be necessary to increase the sizebeyond 1-2M. In cases where the network is very busy and it is not practical to log all the traffic to diskyou may need to use a larger buffer. The total amount of space that can be used by pktt is 64M.
Data ONTAP® 8.2 Commands: Manual Page Reference for 7-Mode, Volume 1 479
pktt
-d dir
This specifies the path to an existing directory in which the trace data file(s) will be written. The fileshave the name "if.trc" where "if" is the interface name (for example, e4, fa3). If this option is missingthe trace data will only be collected in memory, and after the buffer fills, new packets will replaceexisting packets. However, it is always possible to dump the contents of the buffer at any time using the pktt dump command. One thing to be aware of when writing trace data to disk is that if the filesystemcannot keep up with the network traffic, you may not log all packets. This will show up in the"dropped" counts when looking at status. Along with this, you should remember that logging all trafficmay generate a heavy write load on the node which may bog it down. If possible, use the IP filter toreduce the amount of data to log. Also, if you don’t need complete packets you can use -m to reduce theamount written per packet.
Be aware that any existing .trc files will be silently overwritten when the command is issued.
-s size
This allows you to set a maximum size of the trace file. Values can have an optional trailing "k", "m",or "g" multiplier. The default is 1G. This parameter is only useful in conjunction with the -d option.After the maximum size has been reached, packets continue to be logged to the buffer, but not to disk.
-m pklen
This sets the length at which packets will be truncated. The default is 1514 bytes, which is fine forethernet, but may be too short for gigabit ethernet with jumbo frames. It is sometimes useful to limit thedata stored when every byte of the packet is not critical. However, for many debugging tasks it is usefulto have the entire packet. In the case where the packet size can be larger than 1514 you may want tospecify a larger maximum. But be aware that some of the decoders (snoop, for example) refuse to dealwith packets larger than 1514 bytes so you should only specify a larger value if that seems critical tofinding the problem. The ethereal decoder does not have any problems with large packets.
-v
This causes the output of the pktt status -v command to be displayed as tracing starts.
-i ipaddr [-i ipaddr] ...
This allows a kind of primitive filtering capability. Up to sixteen IP address may be specified, whichcauses only traffic to or from any of those IP addresses to be logged. This will, of course, preventlogging of any non-IP (for example, arp/rarp) traffic. With IPv6 option enabled, IPv6 address can alsobe specified as filter IP to capture the packets that are coming from or to the IPv6 address.
start all
This will capture the traffic on all the interfaces.
pktt pause {if | all}
The "pause" subcommand is used to temporarily stop capturing traffic from one or all interfaces. If anyunwritten data is in the trace buffer it will be flushed to disk. Use pktt start without any options torestart a paused interface.
480 Data ONTAP® 8.2 Commands: Manual Page Reference for 7-Mode, Volume 1
pktt
pktt dump {if | all} [-d dir]
The dump subcommand causes the contents of the packet trace buffer to be written to a file. If the -d dir option is used the file will be written to that directory, otherwise it will be written to the rootdirectory of the root volume. The name of the file is always if.trc, and the contents are in "tcpdump"format. If a file by that name already exists it will be silently overwritten.
pktt stop {if | all}
This causes all tracing to stop on the named interface, or all interfaces. If you are logging to disk, anyunwritten data in the trace buffer will be flushed to disk. If you have not dumped the trace data and youwere not tracing to a disk file, the trace data will be lost. This action is not confirmed, so be carefulwhen using this command.
pktt status [{if | all}] [-v]
This can be used to display the buffer and file status of an existing trace. Using "pktt status -v" will giveyou full tracing status for all interfaces.
pktt delete [filename.trc]+
This allows you to delete one or more tracefiles from the root directory. At least one tracefile must bespecified.
pktt list
This allows you to list all tracefiles in the root directory.
EXAMPLESExamples of pktt start:
pktt start e0
This will start capturing network traffic from the "e0" interface. All traffic will be logged to a 128Kcircular buffer. Or, if tracing had been suspended previously it would be restarted.
pktt start fa3 -d / -s 100m -b 2m
This starts capturing traffic on the "fa3" interface, writing to a file called "/fa3.trc" which will beallowed to grow to a maximum size of 100MB, with a 2MB buffer.
pktt start el10 -d /home -m 10k -b 500k -i ehost1 -i ehost2
This starts capturing traffic to and from the hosts "ehost1" and "ehost2", storing the traces into the file"/home/el10.trc". Up to 10K of each of the packets will be stored, in a 500K buffer. Note that this willonly work if the hostnames can be resolved.
pktt start all -b 128k -i 172.20.4.1
All interfaces will start capturing traffic to and from the specified IP address. This is a quick way tolook at traffic if you’re not sure which interface to use but you want to see the packets from one or moreIP addresses.
Data ONTAP® 8.2 Commands: Manual Page Reference for 7-Mode, Volume 1 481
pktt

pktt start ns0 -i 3FFE:81D0:107:2082::1
After enabling IPv6 option, executing the pktt start command with IPv6 address as the filter willcapture all packets that are coming from or to the IPv6 address. The trace file dumped after executing pktt dump command should display only the packets having the IPv6 address as the source ordestination.
NOTESA number of Win32 programs exist to convert from tcpdump format to NetMon. The Win32 version of"editcap" is preferred, but there are also the "capconv" and "captrans" programs.
482 Data ONTAP® 8.2 Commands: Manual Page Reference for 7-Mode, Volume 1
pktt
portsetNAMEportset - Commands for managing portsets
SYNOPSISportset command argument ...
DESCRIPTIONThe portset family of commands manages the portsets. These commands can be used to create newportsets and to show, modify, or destroy existing ones.
Portsets are a collection of ports that can be associated with an igroup. Portsets are used to limit theports that can be used by the initiators in the igroup to access a target lun. To associate/disassociate anigroup to/from a portset, use the igroup bind and igroup unbind commands.
USAGEportset add portset_name port ...
Adds port(s) to an existing portset.
If the port string is specified in the nodename:slotletter format, then only that specific port will be addedto the portset. The example mynode:9a shows this syntax. If the port string is specified by only theslotletter format, then both the local and partner ports will be added to the portset. The example 9ashows this syntax.
portset create { -f | -i } portset_name [ port ... ]
Creates a new portset.
If the -f option is given, an FCP portset is created. If the -i option is given, an iSCSI portset is created.NOTE: currently only FCP portsets are supported.
The maximum length of the portset_name string is 95 characters. All printable ASCII characters arepermitted.
If no ports are supplied, then an empty portset will be created. The maximum length of the port string is63 characters. If the port string is specified in the nodename:slotletter format, then only that specificport will be added when the portset is created. The example mynode:9a shows this syntax. If the portstring is specified by only the slotletter format, then the port will be added from both the local andpartner node when the portset is created. The example 9a shows this syntax.
portset destroy [ -f ] portset_name ...
Destroys existing portset(s). By default a portset cannot be destroyed if it is bound to an igroup. Thisbehavior can be overridden with the use of -f option which will unbind the portset from the igroup andthen destroy the portset.
Data ONTAP® 8.2 Commands: Manual Page Reference for 7-Mode, Volume 1 483
portset

portset help sub_command
Displays the help information for the given sub_command.
portset remove [ -f ] portset_name port ...
Removes port(s) from a portset.
The operation is prohibited if removing the port from the portset leaves the set empty while still boundto an igroup. The -f option can be used to force remove the port.
If the port string is specified in the nodename:slotletter format, then only that specific port will beremoved from the portset. The example mynode:9a shows this syntax. If the port string is specified byonly the slotletter format, then both the local and partner ports of that name will be removed from theportset. The example 9a shows this syntax.
portset show [ portset_name ]
Displays the ports in a portset. If no portset_name is specified, the members of all portsets aredisplayed.
SEE ALSOna_san(1)
484 Data ONTAP® 8.2 Commands: Manual Page Reference for 7-Mode, Volume 1
portset
priorityNAMEna_priority - Commands for managing priority resources
SYNOPSISpriority command argument ...
DESCRIPTIONThe priority family of commands manages resource policies for the appliance. These policies areespecially applicable on a heavily loaded appliance where resources are limited. Others, such as buffercache policy, are also of value in a more general environment.
Administrators may set various priority policies, including the following:
The relative priority of work associated with a volume (see na_vol.1)
For a given volume, the relative priority of system-related operations (for example SnapMirrortransfers) compared to userrelated operations
The buffer cache policy to be used for a volume
A default priority policy is also defined. It is used when a volume does not have a specific policyassigned to it.
USAGEpriority on | off
Globally enables or disables priority management on the appliance. Use the priority show command todisplay whether priority management is currently enabled on the appliance. See also the sub-command priority set enabled_components which allows selected priority components to be active after priority on is used.Note: priority on must be used for priority policies to be active.
priority set volume volname option=value [option=value ...]
The priority set volume command manages the priority policy for the volume volname. The following options may be specified:
serviceSet the service for the volume to value, which may be on or off. When first setting the priority policyfor a volume the service is automatically set to on, unless it is explicitly disabled by setting to off. The off value may also be used subsequently to disable the explicit policy for the volume, while stillpreserving custom values. The policy for the volume may be permanently deleted using priority delete volume.
Data ONTAP® 8.2 Commands: Manual Page Reference for 7-Mode, Volume 1 485
priority

level Set the priority level for operations that are sent to the volume when compared to other volumes.The value might be one of VeryHigh, High, Medium, Low, VeryLow, or a numeric value from 8 (VeryLow) to 92 (VeryHigh). A volume with a higher priority level receives more resources than avolume with a lower priority level. This option sets the values of CPU scheduling, concurrent disk I/Olimit, and nonvolatile log (NVLOG) usage for the volume based on the settings of other volumes in theaggregate. The default value is Medium.
systemSet the relative priority for system-related operations (such as SnapMirror transfers) that are sent to thevolume when compared to user operations that are sent to the volume. The value might be one of VeryHigh, High, Medium, Low, VeryLow, or a numeric value from 4 (VeryLow) to 96 (VeryHigh).The default value is Medium.
cache Set the buffer cache policy to use for the volume. Legal values are keep, meaning try to cachebuffers if possible; reuse, meaning buffers may be immediately reused; and default, meaning that thesystem default policy should be used. This policy also applies to FlexScale cache modules.
priority set default option=value [option=value ...]
The priority set default command manages the default priority policy, which is applied to volumeswithout any specific priority policy. The following options may be specified:
level Set the priority level for operations are sent to the volume when compared to other volumes. The value might be one of VeryHigh, High, Medium, Low, VeryLow, or a numeric value from 8 (VeryLow) to 92 (VeryHigh). A volume with a higher priority level receives more resources than avolume with a lower priority level. The default value is Medium.
systemSet the relative priority for system-related operations (such as SnapMirror transfers) that are sent to thevolume when compared to user operations that are sent to the volume. The value might be one of VeryHigh, High, Medium, Low, VeryLow, or a numeric value from 4 (VeryLow) to 96 (VeryHigh).The default value is Medium.
priority set option=value
Set global priority policy options. The following options may be set:
io_concurrencySets the limit on the average number of concurrent suspended operations per disk for each volume. Theallowed number of suspended operations for a specific volume is determined by the I/O concurrencysetting, the number of disks in the enclosing aggregate for the volume and the type of disk. The value default restores the I/O concurrency to its initial default.
enabled_componentsSets the enabled priority components. Only the specified components are activated. Allowed values are all or cache. The default is all. Note: priority on must be used to activate priority policies in general.
priority showDisplay global priority setting options, including whether or not priority is enabled.
486 Data ONTAP® 8.2 Commands: Manual Page Reference for 7-Mode, Volume 1
priority
priority show default [-v]Display the default priority policy. The default priority policy is used when no specific priority policyhas been specified. If the -v (verbose) option is used then more detailed output will be shown.
priority show volume [-v] [volname]Display the priority policy configuration for volume volname. If no volume name is given then thepriority policy configurations for all volumes are shown.If the -v (verbose) option is used then more detailed output will be shown for options available at thecurrent priority level.
priority delete volume volnameDelete priority policy information for the volume named volname.
HA CONSIDERATIONSWhen an HA system is in failover mode, priority policy is merged from both nodes to form a combinedpolicy.
EXAMPLESpriority set volume prodvol level=high system=low
Set the priority scheduling policy for volume prodvol to high compared to other volumes. Alsoprioritize system operations for the volume low compared to user operations on the same volume. Theseoptions are also enabled by this operation if priority on has been previous issued.
priority delete volume prodvol
Delete any specific priority policy for volume prodvol. In this case the default policy is applied for thevolume.
priority onpriority set enabled_components=cachepriority set volume logvol cache=reuse
Set the cache policy for logvol to not cache data. Only the cache component of priority is enabled.
SEE ALSOna_vol (1), na_snapmirror (1),
Data ONTAP® 8.2 Commands: Manual Page Reference for 7-Mode, Volume 1 487
priority

privNAMEna_priv - Controls per-connection privilege settings.
SYNOPSISpriv
priv set [ -q ] [ priv-level ]
priv help
priv -level priv-level (DEPRECATED FORM)
DESCRIPTIONThe priv command manages the privilege level associated with the current login session.
Possible privilege levels are:
admin (includes normal administrative commands)
and
advanced (includes potentially dangerous commands that should be used under guidance from NetAppGlobal Services).
The advanced privilege level includes everything in the admin level.
Subcommandspriv set [ priv-level ]Sets the per-connection privilege setting to the one specified. If no priv-level is given, admin is used.
priv help Displays usage information and the list of possible privilege levels.
Options
-q Enables "quiet" mode. Normally, when enabling advanced privileges, the priv command prints awarning message; this option suppresses the warning.
EXAMPLESTo access the "advanced" commands, use:
toaster> priv set advanced Warning: These advanced commands are potentially dangerous; use them only when directed to do so by NetApp Inc personnel.
488 Data ONTAP® 8.2 Commands: Manual Page Reference for 7-Mode, Volume 1
priv

You can see that this worked by doing:
toaster*> priv advanced
You can turn this off again with:
toaster*> priv set admin
or simply with:
toaster*> priv set toaster> priv admin
Data ONTAP® 8.2 Commands: Manual Page Reference for 7-Mode, Volume 1 489
priv

qtreeNAMEna_qtree - Creates and manages qtrees.
SYNOPSISqtree create name [ -m mode ]
qtree oplocks name [ enable | disable ]
qtree security name [ unix | ntfs | mixed ]
qtree status [ -i ] [ -v ] [ name ]
qtree stats [ -z ] [ name ]
DESCRIPTIONThe qtree command creates qtrees and specifies attributes for qtrees.
A qtree is similar in concept to a partition. It creates a subset of a volume to which a quota can beapplied to limit its size. As a special case, a qtree can be the entire volume. A qtree is more flexible thana partition because you can change the size of a qtree at any time.
In addition to a quota, a qtree possesses a few other properties.
A qtree enables you to apply attributes such as oplocks and security style to a subset of files anddirectories rather than to an entire volume.
Single files can be moved across a qtree without moving the data blocks. Directories cannot be movedacross a qtree. However, since most clients use recursion to move the children of directories, the actualobserved behavior is that directories are copied and files are then moved.
Qtrees represent the third level at which node storage can be partitioned. Disks are organized into aggregates which provides pools of storage. In each aggregate, one or more flexible volumes can becreated. Traditional volumes may also be created directly without the previous creation of anaggregate. Each volume contains a file system. Finally, the volume can be divided into qtrees.
If there are files and directories in a volume that do not belong to any qtrees you create, the nodeconsiders them to be in qtree 0. Qtree 0 can take on the same types of attributes as any other qtrees.
You can use any qtree command whether or not quotas are enabled on your node.
USAGEThe qtree create command creates a qtree. If name does not begin with a slash (/), the qtree is createdin the root volume. The qtree name cannot be more than 64 characters long. To create a qtree in aparticular volume, specify name in this format: /vol/vol_name/qtree_name.
490 Data ONTAP® 8.2 Commands: Manual Page Reference for 7-Mode, Volume 1
qtree

A qtree can be created only in the root directory of a volume. By default, a qtree has the same securitystyle as the root directory of the volume and oplocks are enabled. The root directory of a volume, bydefault, uses the UNIX security style.
When you create a qtree, you can optionally specify the file permission bits of the qtree using the modeoption. The format of the mode option is similar to UNIX permission bits: 0755 givesread/write/execute permissions to owner and read/execute to group and other users. It consists of 4 octaldigits derived by adding up bits 4, 2, and 1. Omitted digits are assumed to be zeros. The first digitselects the set user ID (4), set group ID (2), and sticky (1) attributes. The second digit selectspermissions for the owner of the file: read (4), write (2), and execute (1); the third selects permissionsfor other users in the same group; the fourth for other users not in the group. If this argument is missing,the permission bits are set using the value of the option "wafl.default_qtree_mode".
A qtree does not have any restrictions on disk space or the number of files. To impose these restrictionson a qtree, edit the /etc/quotas file. Refer to the na_quotas(5) man page for more information about thefile format. To make the changes to the /etc/quotas file go into effect, use the quota command. Refer tothe na_quota(1) man page for more information about the quota command.
To delete a qtree, remove it from a client as you would any directory. There is a limit of 4994 qtrees pervolume.
If you do not specify the name in the "qtree" command, the attributes for all quota trees on the nodeare displayed.
The qtree oplocks command enables or disables oplocks and lease oplocks for files and directories in aqtree or in a volume.If name is the path name to a qtree, the attribute applies to files and directories inthe specified qtree. The path name to a quota tree does not need to end with a slash. If name is the pathname to a volume, the attribute applies to those files and directories in qtree 0. The path name to avolume must end with a slash.
If the cifs.oplocks.enable option is off, oplocks are not sent even if you enable the oplocks on aper-quota-tree basis with the qtree oplocks command. The cifs.oplocks.enable option is enabled bydefault.
If you do not specify enable or disable in the qtree oplocks command, the oplock attribute for name isdisplayed.
The qtree security command changes the security style for files and directories. Security style meansthe method the node uses to determine whether a user has access to a file. If name is the path name to aqtree, the security style applies to the files and directories in the specified qtree. The path name to aqtree does not need to end with a slash. If name is a path name to a volume, the security style applies tothose directories and files in qtree 0. Any new qtree you create inherits the security style from qtree 0 bydefault. The path name to a volume must end with a slash.
The security style can be one of the following values:
unix The user’s UID and GID, and the UNIX-style permission bits of the file or directory determineuser access. The node uses the same method for determining access for both NFS and CIFSrequests. If you change the security style of a qtree or a volume from ntfs to UNIX, the nodedisregards the Windows NT permissions that were established when the qtree or volume used thentfs security style.
Data ONTAP® 8.2 Commands: Manual Page Reference for 7-Mode, Volume 1 491
qtree
ntfs For CIFS requests, Windows NT permissions determine user access. For NFS requests, the nodegenerates and stores a set of UNIX-style permission bits that are at least as restrictive as theWindows NT permissions. The node grants NFS access only if the UNIX-style permission bitsallow the user access. If you change the security style of a qtree or a volume from unix to ntfs, filescreated before the change do not have Windows NT permissions. For these files, the node usesonly the UNIX-style permission bits to determine access.
mixed Some files in the qtree or volume have the unix security style, and some have the ntfs securitystyle. A file’s security style depends on whether the permission was last set from CIFS or NFS. Forexample, if a file currently uses the unix security style and a CIFS user sends a setACL request tothe file, the file’s security style is changed to ntfs. If a file currently uses the ntfs style and an NFSuser sends a set-permission request to the file, the file’s security style is changed to unix.
If you do not specify unix, ntfs, or mixed in the qtree security command, the security style for name isdisplayed.
The qtree status command displays the attributes of all quota trees for volume name on the node. Itdisplays the containing volume, the tree name, the security style, oplock status, and whether the qtree issnapmirrored or not. The "-i" flag will add an "ID" column which displays the "tree id" - an integer usedto identify the qtree in various syslog messages. If vfilers are licensed, the "-v" flag can be used todisplay the owning vfiler for each qtree.
If you do not specify the name in the "qtree status" command, the attributes for all quota trees on thenode are displayed.
The qtree stats command displays a count of the number NFS/CIFS operations caused by user accessesto files in quota trees. The node maintains counters for each quota tree in each of the node’s volumes. The counters are non_persistent.
The "-z" flag can be used to reset the counters.
The values displayed correspond to the operations on qtrees since the volume (in which the qtrees exist)was created or since it was made online on the node via either a "vol online" command or a node reboot,or since the counters were last reset, whichever occurred most recently.
If you do not specify the name in the "qtree stats" command, the statistics for all quota trees on thenode are displayed. Otherwise, statistics for quota trees in volume name are displayed.
Similarly, if you do not specify the name with the "-z" flag, the counters for all quota trees on allvolumes is reset.
EXAMPLESThe following example sets the security style of a qtree named marketing in the root volume to ntfs:
toaster> qtree security marketing ntfs
492 Data ONTAP® 8.2 Commands: Manual Page Reference for 7-Mode, Volume 1
qtree
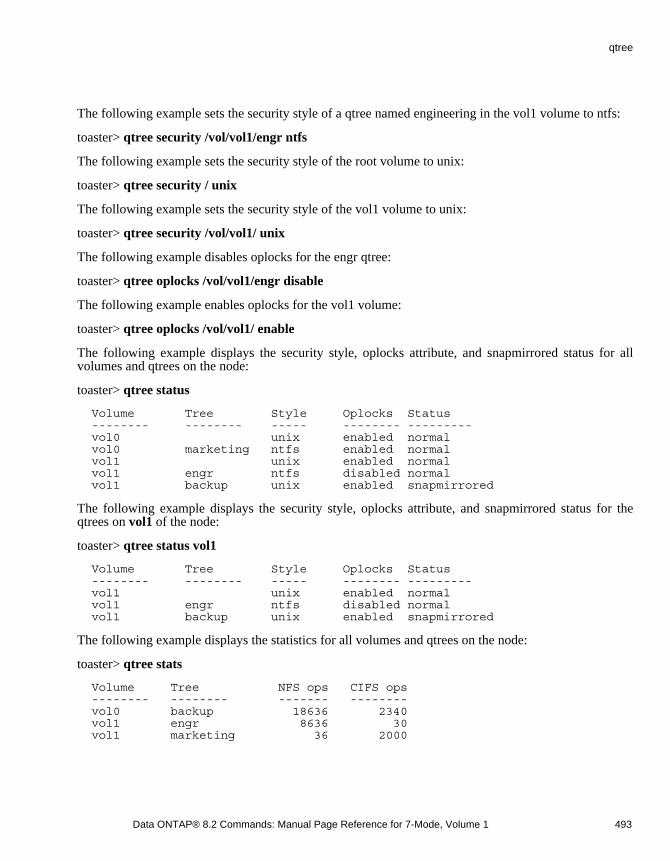
The following example sets the security style of a qtree named engineering in the vol1 volume to ntfs:
toaster> qtree security /vol/vol1/engr ntfs
The following example sets the security style of the root volume to unix:
toaster> qtree security / unix
The following example sets the security style of the vol1 volume to unix:
toaster> qtree security /vol/vol1/ unix
The following example disables oplocks for the engr qtree:
toaster> qtree oplocks /vol/vol1/engr disable
The following example enables oplocks for the vol1 volume:
toaster> qtree oplocks /vol/vol1/ enable
The following example displays the security style, oplocks attribute, and snapmirrored status for allvolumes and qtrees on the node:
toaster> qtree status
Volume Tree Style Oplocks Status -------- -------- ----- -------- --------- vol0 unix enabled normal vol0 marketing ntfs enabled normal vol1 unix enabled normal vol1 engr ntfs disabled normal vol1 backup unix enabled snapmirrored
The following example displays the security style, oplocks attribute, and snapmirrored status for theqtrees on vol1 of the node:
toaster> qtree status vol1
Volume Tree Style Oplocks Status -------- -------- ----- -------- --------- vol1 unix enabled normal vol1 engr ntfs disabled normal vol1 backup unix enabled snapmirrored
The following example displays the statistics for all volumes and qtrees on the node:
toaster> qtree stats
Volume Tree NFS ops CIFS ops -------- -------- ------- -------- vol0 backup 18636 2340 vol1 engr 8636 30 vol1 marketing 36 2000
Data ONTAP® 8.2 Commands: Manual Page Reference for 7-Mode, Volume 1 493
qtree
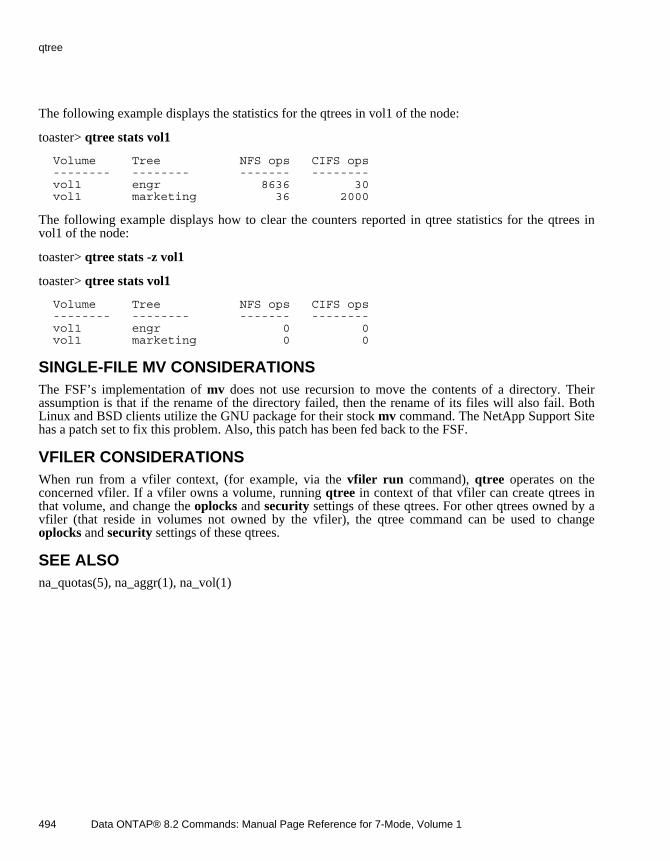
The following example displays the statistics for the qtrees in vol1 of the node:
toaster> qtree stats vol1
Volume Tree NFS ops CIFS ops -------- -------- ------- -------- vol1 engr 8636 30 vol1 marketing 36 2000
The following example displays how to clear the counters reported in qtree statistics for the qtrees invol1 of the node:
toaster> qtree stats -z vol1
toaster> qtree stats vol1
Volume Tree NFS ops CIFS ops -------- -------- ------- -------- vol1 engr 0 0 vol1 marketing 0 0
SINGLE-FILE MV CONSIDERATIONSThe FSF’s implementation of mv does not use recursion to move the contents of a directory. Theirassumption is that if the rename of the directory failed, then the rename of its files will also fail. BothLinux and BSD clients utilize the GNU package for their stock mv command. The NetApp Support Sitehas a patch set to fix this problem. Also, this patch has been fed back to the FSF.
VFILER CONSIDERATIONSWhen run from a vfiler context, (for example, via the vfiler run command), qtree operates on theconcerned vfiler. If a vfiler owns a volume, running qtree in context of that vfiler can create qtrees inthat volume, and change the oplocks and security settings of these qtrees. For other qtrees owned by avfiler (that reside in volumes not owned by the vfiler), the qtree command can be used to change oplocks and security settings of these qtrees.
SEE ALSOna_quotas(5), na_aggr(1), na_vol(1)
494 Data ONTAP® 8.2 Commands: Manual Page Reference for 7-Mode, Volume 1
qtree
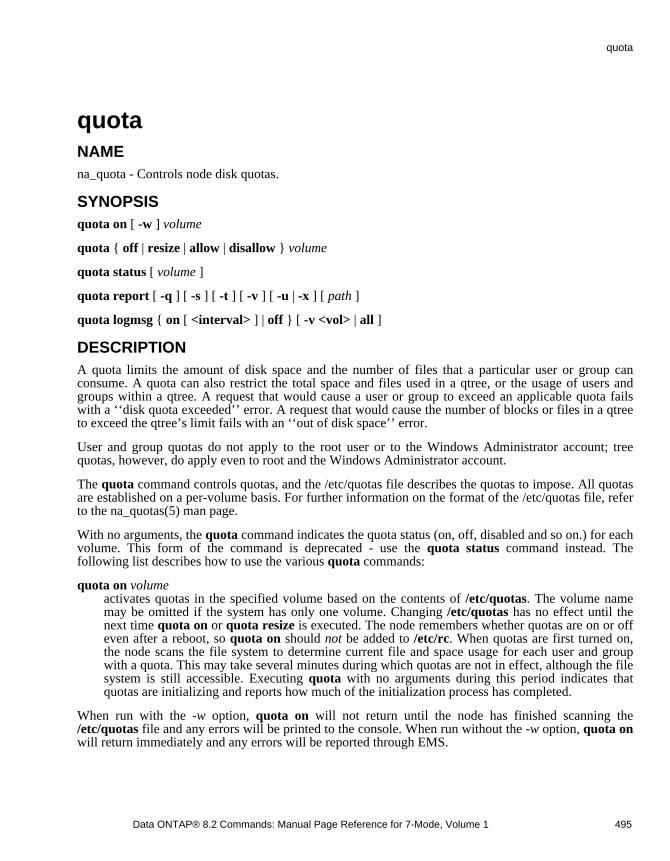
quotaNAMEna_quota - Controls node disk quotas.
SYNOPSISquota on [ -w ] volume
quota { off | resize | allow | disallow } volume
quota status [ volume ]
quota report [ -q ] [ -s ] [ -t ] [ -v ] [ -u | -x ] [ path ]
quota logmsg { on [ <interval> ] | off } [ -v <vol> | all ]
DESCRIPTIONA quota limits the amount of disk space and the number of files that a particular user or group canconsume. A quota can also restrict the total space and files used in a qtree, or the usage of users andgroups within a qtree. A request that would cause a user or group to exceed an applicable quota failswith a ‘‘disk quota exceeded’’ error. A request that would cause the number of blocks or files in a qtreeto exceed the qtree’s limit fails with an ‘‘out of disk space’’ error.
User and group quotas do not apply to the root user or to the Windows Administrator account; treequotas, however, do apply even to root and the Windows Administrator account.
The quota command controls quotas, and the /etc/quotas file describes the quotas to impose. All quotasare established on a per-volume basis. For further information on the format of the /etc/quotas file, referto the na_quotas(5) man page.
With no arguments, the quota command indicates the quota status (on, off, disabled and so on.) for eachvolume. This form of the command is deprecated - use the quota status command instead. Thefollowing list describes how to use the various quota commands:
quota on volume activates quotas in the specified volume based on the contents of /etc/quotas. The volume namemay be omitted if the system has only one volume. Changing /etc/quotas has no effect until thenext time quota on or quota resize is executed. The node remembers whether quotas are on or offeven after a reboot, so quota on should not be added to /etc/rc. When quotas are first turned on,the node scans the file system to determine current file and space usage for each user and groupwith a quota. This may take several minutes during which quotas are not in effect, although the filesystem is still accessible. Executing quota with no arguments during this period indicates thatquotas are initializing and reports how much of the initialization process has completed.
When run with the -w option, quota on will not return until the node has finished scanning the /etc/quotas file and any errors will be printed to the console. When run without the -w option, quota onwill return immediately and any errors will be reported through EMS.
Data ONTAP® 8.2 Commands: Manual Page Reference for 7-Mode, Volume 1 495
quota

quota off volume turns quotas off on the specified volume. The volume name may be omitted if thesystem has only one volume.
quota resize volumeadjusts currently active quotas in the specified volume to reflect changes in the /etc/quotas file. Forinstance, if you edit an entry in /etc/quotas to increase a user’s quota, quota resize will cause thechange to take effect. The volume name may be omitted if the system has only one volume. quota resize can be used only when quotas are already on. Because it does not rescan the file system tocompute usage, quota resize is faster than turning quotas off and then on again. quota resize will applyall updated entries in /etc/quotas; however, it will generally ignore newly added entries. A newly addedentry will only take effect if the corresponding user or group has an active quota as a result of updatinga file subject to default quotas.
quota allow volumeenables quotas on the specified volume. The volume name may be omitted if the system has only onevolume. This command is only supported when MultiStore is licensed. By default quotas are enabled onall volumes. The physical node administrator uses this command to re-enable quotas on a volume afterquotas had been disabled by a quota disallow command.
quota disallow volumedisables quotas on the specified volume. The volume name may be omitted if the system has only onevolume. This command is only supported when MultiStore is licensed. By default quotas are enabled onall volumes. The physical node administrator can disallow quotas on a volume that contains storage thatbelongs to one or more vfilers. This will turn quotas off for all vfilers that have storage on that volume.Quotas may not be turned on again until a quota allow command is issued for the volume.
quota status [ volume ]prints the quota status (on, off, disabled and so on.) for the specified volume. If no volume name isspecified, the quota status for all volumes in the system is printed.
quota report prints the current file and space consumption for each user or group with a quota and for eachqtree. With a path argument, quota report displays information about all quotas that apply to thefile. Space consumption and disk limits are rounded up and reported in multiples of 4 Kbytes.
The formatting options are defined as:
-q If this option is given, the quota target’s ID is displayed in a numeric form. No lookup of the nameassociated with the target ID is done. For UNIX user IDs and group IDs, the ID is displayed as anumber. For Windows IDs, the textual form of the SID is displayed.
-s If this option is given, the soft limit values are printed in the output along with the hard limits.
-t If this option is given, the warning threshold of the quota entry is included in the quota reportoutput. If this option is omitted, the warning threshold is not included. This option is ignored if the -x option is used.
496 Data ONTAP® 8.2 Commands: Manual Page Reference for 7-Mode, Volume 1
quota
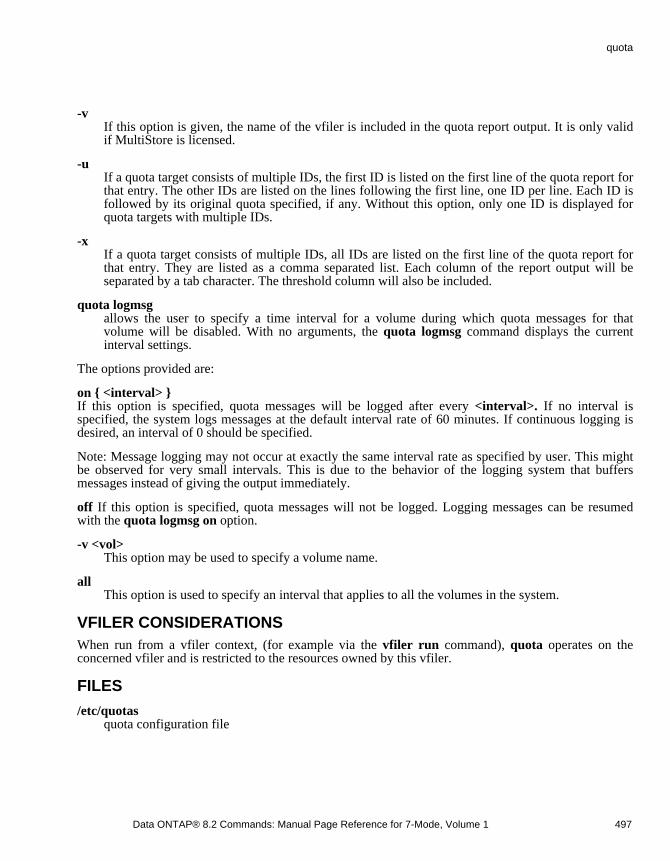
-v If this option is given, the name of the vfiler is included in the quota report output. It is only validif MultiStore is licensed.
-u If a quota target consists of multiple IDs, the first ID is listed on the first line of the quota report forthat entry. The other IDs are listed on the lines following the first line, one ID per line. Each ID isfollowed by its original quota specified, if any. Without this option, only one ID is displayed forquota targets with multiple IDs.
-x If a quota target consists of multiple IDs, all IDs are listed on the first line of the quota report forthat entry. They are listed as a comma separated list. Each column of the report output will beseparated by a tab character. The threshold column will also be included.
quota logmsg allows the user to specify a time interval for a volume during which quota messages for thatvolume will be disabled. With no arguments, the quota logmsg command displays the currentinterval settings.
The options provided are:
on { <interval> }If this option is specified, quota messages will be logged after every <interval>. If no interval isspecified, the system logs messages at the default interval rate of 60 minutes. If continuous logging isdesired, an interval of 0 should be specified.
Note: Message logging may not occur at exactly the same interval rate as specified by user. This mightbe observed for very small intervals. This is due to the behavior of the logging system that buffersmessages instead of giving the output immediately.
off If this option is specified, quota messages will not be logged. Logging messages can be resumedwith the quota logmsg on option.
-v <vol>This option may be used to specify a volume name.
all This option is used to specify an interval that applies to all the volumes in the system.
VFILER CONSIDERATIONSWhen run from a vfiler context, (for example via the vfiler run command), quota operates on theconcerned vfiler and is restricted to the resources owned by this vfiler.
FILES
/etc/quotas quota configuration file
Data ONTAP® 8.2 Commands: Manual Page Reference for 7-Mode, Volume 1 497
quota
SEE ALSOna_vfiler(1)
DIAGNOSTICSIf /etc/quotas is incorrectly formatted, or if a specified file doesn’t exist, then quota on prints a warningand does not turn quotas on.
If /etc/quotas contains user quota targets that are Windows IDs, then CIFS must be active to turn quotason or to perform a quota resize operation.
LIMITATIONSQuotas do not count space consumed by snapshots. Doing so could put users into a state where theycouldn’t create any new files until all snapshots containing their old files expired, which could take aweek or more. That seems like a worse limitation.
Quotas do count space saved by compression. In a volume that has compressed data, quotas count thesum of allocated used space and spaced saved by compression.
It is possible for a quota to exceed its limit if files were created before quotas were turned on or duringquota initialization.
498 Data ONTAP® 8.2 Commands: Manual Page Reference for 7-Mode, Volume 1
quota

radiusNAMEradius - Manages RADIUS client protocol and components.
SYNOPSISradius add [-d] <hostname> | <ip_addr> [-p <port number>]
radius remove <hostname> | <ip_addr> [-p <port number>]
radius show
radius start
radius stats [-z]
radius status
radius stop
DESCRIPTIONRADIUS (Remote Authentication Dial In User Service) is a networking protocol that uses accessservers to provide centralized management of access to large networks.
Using the RADIUS client service in ONTAP, the iSCSI target can access the RADIUS server forcentralized CHAP secrets management and user authentication using an industry standard protocol.
The radius command manages the RADIUS client service on a storage system.
Using the radius command, you can start and stop the RADIUS client service, add or remove RADIUSservers, display the RADIUS configuration, and dump RADIUS statistics.
USAGEradius add [-d] <hostname> | <ip_addr> [-p <port number>]
Adds a RADIUS server to the client service using the hostname or IP address of the RADIUS server.Enter the ip_addr in dotted quad format.
Use the -d option to specify the new configured RADIUS server as the default RADIUS server.
If you do not use the port number argument, the default port number 1812 is used.
radius remove <hostname> | <ip_addr> [-p <port number>]
Removes a RADIUS server from the client service using the hostname or IP address of the RADIUSserver. Enter the ip_addr in dotted quad format.
Data ONTAP® 8.2 Commands: Manual Page Reference for 7-Mode, Volume 1 499
radius
If you do not use the port_number argument, the default port number 1812 is used.
radius start
Starts the RADIUS client service if it is not already running.
radius stop
Stops the RADIUS client service if it is running; this aborts any active RADIUS authenticationrequests.
radius status
Displays the current status of the RADIUS client service.
radius show
Displays information about the RADIUS client service.
radius stats [-z]
Displays or zeroes the RADIUS client statistics.
The -z option zeroes the statistics.
HA CONSIDERATIONSEach storage system in an HA pair operates as an independent RADIUS client service with its ownconfiguration. During a cf takeover, the storage system that takes over assumes the RADIUS clientidentity of the failed storage system, including its configurations.
VFILER CONSIDERATIONSWhen run from a vfiler context (for example via the vfiler run command), radius subcommands operateon the concerned vfiler except for the radius stats subcommand. The statistics displayed apply to theentire physical storage system and not to individual vfilers.
EXAMPLESStarts and stops the RADIUS client service:
FAS> radius start RADIUS client service started
FAS> radius stop RADIUS client service stopped
Displays the information about the RADIUS client service:
500 Data ONTAP® 8.2 Commands: Manual Page Reference for 7-Mode, Volume 1
radius

FAS> radius show RADIUS client service is running
Default RADIUS server : IP_Addr=10.60.155.58 UDPPort=1820
Backup RADIUS server 0: IP_Addr=10.60.155.58 UDPPort=1812
Backup RADIUS server 1: IP_Addr=10.60.155.4 UDPPort=1812
Displays current RADIUS client statistics:
FAS> radius stats RADIUS client statistics RADIUS current queued requests: 12 RADIUS authentication requests: 1343 RADIUS authentication denied: 32 RADIUS access-accept received: 1323 RADIUS access-reject received: 32 RADIUS access-challenges received: 0 RADIUS unknown packets received: 3 RADIUS access-request rexmits: 2 RADIUS access-request noanswer: 0 RADIUS unknown server: 0 RADIUS late reply received: 0 RADIUS short packets received: 0
Adds a RADIUS server to the configuration:
FAS> radius add -d 10.60.155.58 -p 1812
Removes a RADIUS server from the configuration:
FAS> radius remove 10.60.155.58 -p 1812
SEE ALSOna_iscsi(1)
Data ONTAP® 8.2 Commands: Manual Page Reference for 7-Mode, Volume 1 501
radius

rdateNAMEna_rdate - Sets system date from a remote host.
SYNOPSISrdate hostname
DESCRIPTIONrdate sends a request to the time server on hostname and sets the local date and time to the valuereturned by the server. rdate will time out if the server doesn’t respond in 10 seconds.
rdate can be added to /etc/rc to automatically synchronize the system time with the time server on eachreboot.
HA CONSIDERATIONSYou cannot use the rdate command in partner mode to synchronize the time of the partner with a timeserver.
FILES
/etc/rc system initialization command script
SEE ALSOna_rc(5)
502 Data ONTAP® 8.2 Commands: Manual Page Reference for 7-Mode, Volume 1
rdate
rdfileNAMEna_rdfile - Reads a WAFL file.
SYNOPSISrdfile filename
DESCRIPTIONrdfile reads the specified file and writes the contents to standard out. filename must be a fully-qualifiedpathname. Files that contain non-ASCII characters will have indeterminate output.
EXAMPLE toaster> rdfile /etc/hosts #Auto-generated by setup Wed Feb 9 06:11:21 GMT 2000 127.0.0.1 localhost toaster> rdfile /vol/vol0/etc/exports #Auto-generated by setup Mon Apr 2 18:43:04 PDT 2007 /vol/vol0 -sec=sys,rw,anon=0,nosuid /vol/mm_vol1 -sec=sys,rw,nosuid toaster> rdfile /vol/vol1/files/test_me This is a test file. It is for a rdfile test. toaster>
SEE ALSOwrfile(1),
WARNINGSIf a user has the capability to execute the rdfile command, then the user can read any file on the node.
Data ONTAP® 8.2 Commands: Manual Page Reference for 7-Mode, Volume 1 503
rdfile
reallocateNAMEreallocate - Command for managing reallocation of files, LUNs, volumes, and aggregates
SYNOPSISreallocate commands arguments ...
DESCRIPTIONThe reallocate family of commands manages the allocation, or layout optimization, of large files andLUNs on a node. Additionally all files in a volume may be reallocated, and the block layout ofaggregates may be optimized. Using the reallocate command, layout measurement and optimization(reallocation) can be automated.
The automated allocation management process consists of three main steps:
1. Measure the current layout. If the optimization is less than a threshold value, then take no action. Thisstep is optional.
2. Perform reallocation.
3. Measure the layout again. If the optimization is above the threshold value, repeat steps 2. and 3. asnecessary.
When performing aggregate reallocation only step 2 currently applies. This is split into two phases:
2a. Perform block reallocation of the aggregate.
2b. Fix up the flexible volume information within the aggregate.
These steps, together with scheduling and other information comprise a reallocation job.
Reallocation processing operates as a background task. Output goes to the system log. Current statusmay be viewed using the reallocate status subcommand.
A reallocation job can be run at a specific interval, which is the default, or at scheduled times, set usingthe reallocate schedule subcommand.
The reallocation process balances the data blocks reallocated against the performance gained byperforming the reallocation. It only reallocates blocks when a performance improvement is predicted.That is, if a section of a file or LUN is already optimal then no change will be made. In addition, fullone-time reallocation of a large file, LUN or a whole volume, can be forced by using the -f option with reallocate start. A full reallocation will reallocate data unless the performance is predicated to beworse after the movement. Full reallocation is equivalent to using wafl scan reallocate.
504 Data ONTAP® 8.2 Commands: Manual Page Reference for 7-Mode, Volume 1
reallocate
USAGEreallocate on | off
Enable or disable reallocation jobs globally. When jobs are off no new reallocation jobs may be startedor restarted. Any existing jobs that are executing will be requested to stop.
reallocate start [-t threshold] [-i interval] [-n] [-o] [-p] [-u] pathname | /vol/volname
Start reallocation on the LUN or large file specified by pathname. If a volume has many small files thatwould benefit from periodic optimization then a whole volume may also be specified by using /vol/volname.
The reallocation job normally performs a check for the current layout optimization before performingreallocation. If the current optimization is less than the threshold then no reallocation will be performed.If the -n option is specified this check is suppressed. The threshold to use may be specified by the -toption (see below).
The reallocation job will be run periodically at a system-defined interval. The interval between runsmay be changed with the -i (interval) option The interval is specified as a number of minutes, hours ordays, NNN[mhd]. Note, depending on the system configuration and write/read workload it may beappropriate to have the job run at a close interval or at a long interval. If the -o (once) option is usedthen the job will be run once only, and then automatically removed from the system.
The threshold when a LUN, file or volume is considered unoptimized enough that a reallocation shouldbe performed is given as a number from 3 (moderately optimized) to 10 (very unoptimized). For usersof the wafl scan measure_layout command these thresholds are comparable with the ratio output. Thedefault threshold is 4.
The -p option requests that reallocation of user data take place on the physical blocks in the aggregate,but the logical block locations within a flexible volume are preserved. This option may only be usedwith flexible volumes, or files/LUNs within flexible volumes.
Using the -p option may reduce the extra storage requirements in a flexible volume when reallocation isrun on a volume with snapshots. It may also reduce the amount of data that needs to be transmitted bySnapMirror on its next update after reallocation is performed on a SnapMirror source volume.
Using the -p option may cause a performance degradation reading older snapshots if the volume hassignificantly changed after reallocation has been performed. Examples of reading a snapshot includereading files in the .snapshot directory, accessing a LUN backed by a snapshot, or reading a qtreesnapmirror (QSM) destination. When wholevolume reallocation is performed with the -p option andsnapshots exist an extra redirection step is performed to eliminate this degradation.
The -u option specifies that blocks that are shared by deduplication will be unshared. This option canhelp remove fragmentation caused on dense volumes. This may result in increased disk usage,especially for full reallocation.
You cannot use the -u option with the -p option.
reallocate start -f [-p] [-u] pathname | /vol/volname
Data ONTAP® 8.2 Commands: Manual Page Reference for 7-Mode, Volume 1 505
reallocate
The -f (force) option performs a one-time full reallocation of a file, LUN or an entire volume. A forcedreallocation will rewrite blocks in the file, LUN or volume unless the change is predicted to result inworse performance.
If a reallocation job already exists for the pathname it will be stopped, and then restarted as a fullreallocation scan. After the reallocation scan completes the job will revert to its previous schedule. Ifthe job was previously quiesced, it will no longer be quiesced.
When doing full reallocation the active filesystem layout may diverge significantly from the data storedin any snapshots. Because of this, volumelevel full reallocation may not be started on volumes that haveexisting snapshots unless the -p (use physical reallocation) is also used. Please see above for adescription of the -p option.
reallocate start -A [-i interval] [-o] aggr
Perform reallocation on the aggregate aggr. Aggregate level reallocation optimizes the location ofphysical blocks in the aggregate to improve contiguous freespace in the aggregate.
Aggregate snapshots should be deleted prior to running aggregate reallocation. Blocks in an aggregatesnapshot will not be reallocated.
Do not use -A after growing an aggregate if you wish to optimize the layout of existing data; insteaduse ‘reallocate start -f /vol/<volname>’ for each volume in the aggregate.
reallocate stop pathname | aggr
Request that a reallocation job on the LUN or file indicated by pathname, or the indicated aggregate aggr, should be stopped. The stop subcommand will also persistently remove any reallocation jobinformation for pathname, for example scheduled jobs that are not running or jobs that are quiesced.
reallocate status [-v] [pathname | aggr]
Display reallocation status. If pathname is given then only the status for that LUN, file or volume willbe displayed. If aggr is given then only the status for that aggregate will be displayed. If no pathname or aggr is given then the status for all reallocation jobs is displayed.
If -v (verbose) is used then more verbose output is used.
reallocate schedule [-d] [-s schedule] pathname | aggr
Set or delete the schedule to run an existing reallocation job for pathname or aggr. (If the reallocationjob does not already exist, use reallocate start first to create the job.) The -s option sets a new schedule,specified by schedule. The -d option deletes an existing schedule.
The format for schedule is a single string with four fields:
"minute hour dayofmonth dayofweek"
The wild card "*" in a field means all values for the field. Each field may be expressed as a single valueor a comma-separated list.
506 Data ONTAP® 8.2 Commands: Manual Page Reference for 7-Mode, Volume 1
reallocate

minute can be a value from 0 to 59.
hour can be a value from 0 (midnight) to 23 (11 pm).
dayofmonth can be a value from 1 to 31.
dayofweek can be a value from 0 (Sunday) to 6 (Saturday).
When a schedule is deleted the previous execution interval set when reallocate start was issued will berestored.
reallocate quiesce pathname | aggr
Quiesce (temporarily stop) any running reallocation job on LUN or file pathname, preserving persistentstate so that the job may be started again later, using reallocate restart.
reallocate restart [-i] pathname | aggr
Restart a reallocation job on pathname or aggr. If the job was quiesced, it becomes no longer quiesced.If the job was idle (not yet time to be run again) it will immediately be scheduled to run.
Some jobs will checkpoint their position and will restart where they left off. A checkpoint will bepreserved when using reallocate quiesce, but not when using reallocate stop. The -i option will ignorethe checkpoint and will start the job at the beginning. (Currently, this is only useful for the first part ofaggregate reallocation.)
reallocate measure [-l logfile] [-t threshold] [-i interval] [-o] pathname | /vol/volname
Start a measure-only reallocation on the LUN, large file or volume.
A measure-only reallocation job is similar to a normal reallocation job except that only the check phaseis performed. This allows the optimization of the LUN, large file or volume to be tracked over time, ormeasured ad-hoc.
At the end of each check the optimization is logged via EMS. Additionally, for repeating measure-onlyjobs the optimization of the previous check is saved and may be viewed by running reallocate status. Ifa logfile is specified, detailed information about the layout is recorded in the file.
The measure job will be run periodically at a system-defined interval. The interval between runs may bechanged with the -i (interval) option. The interval is specified as a number of minutes, hours, or days; NNN[mhd]. Note: Depending on the system configuration and write/read workload, it may beappropriate to have the job run at a close interval or at a long interval. If the -o (once) option is used, thejob will be run only once, and then automatically removed from the system.
The threshold when a LUN, file or volume is considered unoptimized enough that a reallocation shouldbe performed is given as a number from 3 (moderately optimized) to 10 (very unoptimized). For usersof the wafl scan measure_layout command these thresholds are comparable with the ratio output. Thedefault threshold is 4. When the optimization becomes worse than this level the diagnostic loggedchanges to indicate reallocation may be useful.
Data ONTAP® 8.2 Commands: Manual Page Reference for 7-Mode, Volume 1 507
reallocate
EXAMPLESreallocate start /vol/db1/lun1
Check the LUN /vol/db1/lun1 allocation periodically.
reallocate schedule -s "0 23 * 6" /vol/db/lun1
Schedule a reallocation job at 11 pm every Saturday.
reallocate start -A -o big_aggr
Start a one-time optimization of an aggregate.
reallocate measure -o -l /vol/logs/measure_log_dblun /vol/dbvol/dblun
Measure the optimization of a LUN once, recording detailed information about the measurement in alog.
LIMITATIONSIf a file or LUN being reallocated is present in a snapshot at the time of reallocation then the snapshotwill continue to hold the old, unoptimized, version of the file or LUN until the snapshot is deleted. Thismay result in increased disk usage, storing both the new reallocated, and the old snapshotted, versionsof the file or LUN. This is especially important to keep in mind if performing full reallocation, whenmore data is likely to be reallocated out of the snapshot. The -p argument may be used, if available, toalleviate this condition.
Aggregate reallocation does not change the logical layout of individual files within the flexible volumesof that aggregate. Thus, it may be appropriate to use both aggregate and file/volume reallocation forbest results.
Aggregate reallocation is not supported on aggregates created prior to Data ONTAP 7.2.
NOTESIf this command is applied to a volume then it is interpreted as running on all files or LUNs in thatvolume.
Removing a large file or LUN will not remove any reallocation job created on the file or LUN. Insteadthe reallocation job will suspend until either the file or LUN is recreated, or the reallocation job isdestroyed.
Renaming or destroying an entire volume or aggregate will rename or destroy all reallocation jobsassociated with that volume or aggregate.
A large directory may also be reallocated, in this case specify the full path for the directory.
508 Data ONTAP® 8.2 Commands: Manual Page Reference for 7-Mode, Volume 1
reallocate
rebootNAMEna_reboot - Stops and then restarts the node.
SYNOPSISreboot [ -t minutes ]reboot [ -s ]reboot [ -r ]reboot [ -d dump_string ]reboot [ -f ]
DESCRIPTIONreboot halts the node and then restarts it. reboot is commonly used to allow modified configurationfiles to take effect or to run a newly installed version of Data ONTAP.
NFS clients can maintain use of a file over a halt or reboot, although the node will fail to respondduring that time. CIFS, FCP, and iSCSI clients cannot safely maintain use of a file over a halt or reboot.If the node is running CIFS, FCP or iSCSI, you may use the -t option to specify the time beforeshutdown. If reboot is invoked without -t, it displays the number of CIFS users, the
number of open CIFS files, the number of mapped LUNs and the number of connected FCP and iSCSIclients. Then it prompts you for the number of minutes to delay. cifs terminate automaticallynotifies all CIFS clients that a CIFS shut-down is scheduled in mins minutes, and asks them toclose their open files. CIFS files that are still open at the time the node reboots will lose writes thathad been cached but not written. FCP and iSCSI will not notify clients, but will allowadministrators to confirm that the mapped LUNs are not in use. LUNs that are in use at the timethe node reboots will result in client failures.
reboot logs a message in the /etc/messages file (see messages(5)) file to indicate that the node wasrebooted on purpose.
OPTIONS-t minutesReboots after the indicated number of minutes. Applies only if the node is running CIFS, FCP, oriSCSI.
-s Initiates a clean system shutdown, followed by a power cycle reboot. (When the -s flag is omitted,reboot performs a clean shutdown but does not power cycle the appliance.). The reboot -scommand is equivalent to physically turning the power to the head off and back on after typing"halt".
Data ONTAP® 8.2 Commands: Manual Page Reference for 7-Mode, Volume 1 509
reboot
The reboot -s command does not power cycle the appliance shelves.
-r Bypasses the shutdown process and initiates a power cycle reboot, without first performing a cleansystem shutdown. (When the -r flag is omitted, reboot performs a clean shutdown but does notpower cycle the appliance.). The reboot -r command is equivalent to physically turning the powerto the head off and back on, without first halting the system.
Use this command only when instructed to do so by technical support.
The reboot -r command does not power cycle the appliance shelves.
-d dump_stringDumps system core and reboots the node. This results in a dirty shutdown; cached data will not beflushed to disk. The dump_string should indicate the reason for the core dump. Because it resultsin a dirty shutdown, the -d option generally should not be used for normal maintenance (seeNOTES in na_halt(1)).
-f Applies only to nodes in a High Availability (HA) configuration. If you enter the reboot -fcommand on a node, its partner does not take over.
HA CONSIDERATIONSYou cannot use the reboot command in partner mode to reboot a failed node.
If you reboot the live node that has taken over the failed node, after the reboot, the live node reinitiatesthe takeover process.
SEE ALSOna_savecore(1), na_setup(1)
510 Data ONTAP® 8.2 Commands: Manual Page Reference for 7-Mode, Volume 1
reboot
restoreNAMEna_restore - file system restore
SYNOPSISrestore options [ arguments ... ] [ files ... ]
DESCRIPTIONThe restore command restores files from backup tapes created with the Data ONTAP dump (seena_dump(1)) command. A full backup of a file system may be restored and subsequent incrementalbackups layered on top of it. The actions of restore are controlled by the given options, which are astring of characters containing at most one function letter and possibly one or more function modifiers.
Depending on the function letter, files may have to be specified following the arguments.
FUNCTION KEYSThe restore command’s behavior is controlled by a command key entered in the options field. This keyis mandatory, but may be located anywhere in the options field. The function keys (and their associated restore behavior) is as follows:
r Restores (rebuilds a file system or subtree). The target subtree should be made pristine byremoving it from a client of the server or, if the entire file system or all subtrees of the file systemare to be restored, by booting from floppy disk and selecting the "Install new file system." option,before starting the restoration of the initial level 0 backup. If the level 0 restores successfully, the rkey can be used to restore any necessary incremental backups on top of the level 0.
Note that restore r will restore all files from the dump tape(s).
An example:
restore rf rst0a
Note that restore leaves a file restore_symboltable in the directory that was dumped to passinformation between incremental restore passes. This file should be removed when the last incrementalhas been restored.
R The restore command requests a particular tape of a multi-volume set on which to restart a fullrestore (see the r key above). This is useful if the restore has been interrupted.
t Lists the names of the specified files if they occur on the backup. If no files argument is given, thenthe root directory is listed, which results in the entire content of the backup being listed.
Data ONTAP® 8.2 Commands: Manual Page Reference for 7-Mode, Volume 1 511
restore
T Lists the names of specified files if they are in the backup and happen to be the roots of qtrees.Also lists qtree properties (security style and oplock status) for each qtree root. If no file argumentis given, then the root directory is listed, which results in all qtree roots on the dump file beinglisted.
Note: Older dump files do not contain qtree information, so these will not show qtree data (nor willqtrees be restored using the other flags).
x Extracts the named files. If a named file matches a directory whose contents were backed up, thedirectory is recursively extracted. The owner, modification time, and mode are restored. If no filesargument is specified, the backup root directory is extracted. This results in the entire backup beingrestored.
OPTIONSIf characters in the options string take an arguments, the arguments (which follow the options string) arespecified in the order of the letters which apply to them. For example:
restore rfD rst0a /vol/users/backup
Here, restore has two options that take arguments, ‘f’ and ‘D’. The ‘‘rst0a’’ argument applies to ‘f’, andthe ‘‘/vol/users/backup’’ argument applies to ‘D’.
The following characters can be used in the options string, in addition to the letter that selects thefunction desired.
A Ignore any ACLs on tape. Even if Access Control Lists are present on tape, do not restore them tothe file system. By default, restore recovers as much metadata as is available to it; if the dumpedfile system had ACLs attached to files, restore will attach them to the restored versions of thosefiles.
D targetBy default, files will be restored into the directory from which they were dumped. If the D option isspecified, the next argument to restore is the full absolute pathname of a directory into which the filesshould be restored.
F Force restore to continue, regardless of inode limitations. If restore finds out that there are fewerfree inodes than the number of files it needs to create, it aborts. This might not be necessary; insome cases, the new files that restore creates can overwrite older versions of those files, therebynot taking up any ‘‘new’’ inodes. The F flag forces restore to proceed on the assumption that thiscase is common enough that the file system will not run out of free inodes during the restore. If thisflag is specified, and there are indeed not enough inodes for the restore to complete, it will abort inthe middle of its run.
N Don’t write data to disk. This is used for dump verification only.
512 Data ONTAP® 8.2 Commands: Manual Page Reference for 7-Mode, Volume 1
restore
Q Ignore qtree information. Normally, restore will restore qtree information that is dumped. If thisflag is specified, any qtree information on the dump file will not be restored.
b blksizeThe next argument to restore is used as the block size of the media (in kilobytes). If the b option is notspecified, restore tries to determine the media block size dynamically.
f file The next argument to restore is used as the name of the archive instead of the standard input. Ifthe name of the file is -, restore reads from standard input.
s filenoThe next argument to restore is a number which selects the file on a multi-file dump tape. Filenumbering starts at 1, and is based on the current tape position.
v Normally restore does its work silently. The v (verbose) key causes it to type the name of each fileit treats preceded by its file type.
y Will automatically answer "yes" should restore prompt for user confirmation.
DIAGNOSTICSComplains about bad key characters.
Complains if it gets a read error. If y has been specified, or the user responds y, restore will attempt tocontinue the restore.
If a backup was made using more than one tape volume, restore will notify the user when it is time tomount the next tape volume.
There are numerous consistency checks that can be listed by restore. Most checks are self-explanatoryor can ‘‘never happen’’. Common errors are given below.
filename: not found on tapeThe specified file name was listed in the tape directory, but was not found on the tape. This is caused bytape read errors while looking for the file, and from using a dump tape created on an active file system.
expected next file inumber, got inumber A file that was not listed in the directory showed up. This canoccur when using a dump created on an active file system.
Incremental dump too lowWhen doing incremental restore, a dump that was written before the previous incremental dump, or thathas too low an incremental level has been loaded.
Incremental dump too highWhen doing incremental restore, a dump that does not begin its coverage where the previousincremental dump left off, or that has too high an incremental level has been loaded.
Data ONTAP® 8.2 Commands: Manual Page Reference for 7-Mode, Volume 1 513
restore
Tape read error while restoring filename
Tape read error while skipping over inode inumber
Tape read error while trying to resynchronize A tape (or other media) read error has occurred. If afile name is specified, then its contents are probably partially wrong. If an inode is being skipped or thetape is trying to resynchronize, then no extracted files have been corrupted, though files may not befound on the tape.
resync restore, skipped num blocksAfter a dump read error, restore may have to resynchronize itself. This message lists the number ofblocks that were skipped over.
QTREE RESTORATIONOlder versions of dump did not dump qtree information. If an old dump file is given to restore, it willnot restore any qtrees that were present on that dumped volume.
If there is qtree information present on the dump file, restore will attempt to recover it and (re-)createthe qtree root with the appropriate information. If no directory exists in the target path of the qtree, andit is possible to create a qtree root, restore will do so, and set the attributes (security style, oplockstatus) to those of the dumped qtree. Note that the root of a volume acts as an implicit qtree; so if theroot is restored to a non-existent, first-level pathname, the new directory created there will be the root ofa qtree with the same attributes as those of the dumped volume.
You can use the T function letter to list qtree information on the dump file. You can use the Q option toignore qtree information on the dump.
HA CONSIDERATIONSIn takeover mode, the failed node cannot access its tape devices. The restore command can only restorefrom the tape devices on the live node.
FILES/tmp/rstdir* file containing directories on the tape.
/tmp/rstmode*owner, mode, and time stamps for directories.
restore_symboltableinformation passed between incremental restores.
SEE ALSOna_dump(1)
514 Data ONTAP® 8.2 Commands: Manual Page Reference for 7-Mode, Volume 1
restore
BUGSA level zero dump must be done after a full restore. restore has no control over inode allocation; thus afull restore must be done to get a new set of directories reflecting the new inode numbering, eventhough the contents of the files is unchanged.
restore does not support the -i option for interactive restoring of files. Alternatively, provided your fileaccess is limited to NFS, you could use restore -i from a UNIX client. (That alternative won’t workcorrectly for a file system with CIFS clients, because the UNIX restore utility doesn’t support themulti-protocol directory structures used by the node.) If your tape drive is local to the node, you can usethe rmt facility (see na_rmt(8)) on the node to access the local tape drive from the client doing theinteractive restore.
SEE ALSOna_partner(1)
Data ONTAP® 8.2 Commands: Manual Page Reference for 7-Mode, Volume 1 515
restore
restore_backupNAMEna_restore_backup - Commands for restoring backup through network in an HA pair configuration.
SYNOPSISrestore_backup command argument ...
DESCRIPTIONIn an HA pair configuration, during the procedure of the target node’s boot device replacement,restore_backup sends the restore backup file from the partner node to the target node through thenetwork to restore the configuration file on the target node after the target node is reinstalled.
restore_backup first mounts the target node /mroot over the partner node /partner directory, and thensecurity copies the restore backup file from /partner/etc/varfs.tgz on the partner to/var/home/root/varfs.tgz on the target node. restore_backup will time out if the ssh server doesn’trespond. IP of the target node should be the IP address that used for Netbooting install.
USAGErestore_backup IP or hostname of the target node
HA CONSIDERATIONSThe restore_backup command can only be used in HA configurations where the partner node has takenover the target node.
FILES/var/home/root/.ssh ssh configuration directory
516 Data ONTAP® 8.2 Commands: Manual Page Reference for 7-Mode, Volume 1
restore_backup
revert_toNAMErevert_to - Reverts file system to a previous release.
SYNOPSISrevert_to version
DESCRIPTIONThe revert_to command prepares the file system for reverting to a previous release of Data ONTAP.
The revert_to command is specific to Data ONTAP release families; the Data ONTAP 8.2 version of revert_to can only be used to go back to 8.1 target release, not for any earlier release.
The revert_to command performs these steps:
(1) Revert the /etc/exports file to an older version.
(2) Revert inodes for each volume.
(3) Write an older version of the RAID disk labels for each disk.
(4) Removes the registry entry that enables NDMP after the node reboots. Note: After the reversion, ifyou want NDMP to be enabled each time a node reboots, put the ndmpd on command in the /etc/rcfile.
(5) Halts the node.
PARAMETERS-s: Skips the configuration checks on MLM devices and LUNs during revert.
-d: Bypass check for backlog of asynchronous deletes.
USAGEBefore issuing the revert_to from Data ONTAP 8.2 to Data ONTAP 8.1, the node must meet severalconditions. In general, these involve taking the node out of active use and disabling features. The revert_to command will not proceed until the following conditions are met:
All volumes and aggregates must be online; or, offline volumes and aggregates must be destroyed.
Any unsaved core must be recovered or released by savecore.
WAFL iron must be run on all aggregates that contain bad blocks.
All disks must be online.
All SnapMirror relationships must be broken.
All Flash Pools and advanced_zoned checksum aggregates must be offlined or destroyed.
Data ONTAP® 8.2 Commands: Manual Page Reference for 7-Mode, Volume 1 517
revert_to
All 4096 or 4160 bps disks must be removed.
The following must be disabled:
SnapMirror/SnapVault on all volumes Storage failover
The following operations must not be running: Dump or restore RAID scrubs RAID optimized reconstructions RAID assimilation RAID disk sanitization WAFL iron Inode file upgrade Disk maintenance center testing Disk failure processing
EXAMPLESTo revert a node from Data ONTAP 8.2 to a previous release, enter:
revert_to 8.1
For c-mode system, after mhost revert, enter:
revert_to 8.1c
SEE ALSOna_cifs_terminate(1), na_ndmpd(1), na_snapmirror(1), na_snap(1)
518 Data ONTAP® 8.2 Commands: Manual Page Reference for 7-Mode, Volume 1
revert_to
rlmNAMEna_rlm - Commands for use with a Remote LAN Module (RLM)
SYNOPSISrlm help
rlm reboot
rlm setup
rlm status
rlm test autosupport
rlm test snmp
rlm update
rlm update-status
DESCRIPTIONThe rlm command is used with a Remote LAN Module (RLM), if one is present. Using this command,you may get the status of an RLM and test an RLM. Configuration of an RLM can be performed byusing the setup command.
OPTIONS
help Displays a list of Remote LAN Module (RLM) commands.
reboot Causes the RLM to reboot. If your console connection is through the RLM it will be dropped. The reboot command forces a Remote LAN Module (RLM) to reset itself and perform a self-test.
setup Interactively configures a Remote LAN Module (RLM).
status Displays the current status of a Remote LAN Module (RLM).
test autosupport Performs autosupport test on the Remote LAN Module (RLM). The autosupport test forces aRemote LAN Module (RLM) to send a test autosupport to all email addresses in the option listautosupport.to.
Data ONTAP® 8.2 Commands: Manual Page Reference for 7-Mode, Volume 1 519
rlm
test snmp Performs snmp test on the Remote LAN Module (RLM). The snmp test forces a Remote LANModule (RLM) to send a test snmp trap to all traphosts set in snmp command snmp traphost.
update The RLM firmware is updated. This may be a time consuming operation. Before issuing thiscommand, you need to execute the ‘software install’ command to get the new firmware image. TheRLM will be rebooted at the end of this operation.
update-status Displays the status of an RLM update. The information includes whether an RLM update iscurrently in progress, the completion percentage, and the start and end time for the update.
HA CONSIDERATIONSThis command only acts upon a Remote LAN Module (RLM) that is local to the system.
EXAMPLESrlm status
might produce:
Remote LAN Module Status: Online Part Number: 110-00030 Revision: 32 Serial Number: 296167 Firmware Version: RLM_package_version=1.2.0 Mgmt MAC Address: 00:A0:98:01:98:D0 Using DHCP: no IP Address: 172.22.136.61 Netmask: 255.255.224.0 Gateway: 172.22.128.1
SEE ALSOna_options(1)
NOTESSome of these commands might pause before completing while the Remote LANModule (RLM) is queried. This is normal behavior.
520 Data ONTAP® 8.2 Commands: Manual Page Reference for 7-Mode, Volume 1
rlm
routeNAMEna_route - Manually manipulates the routing table.
SYNOPSISroute [ -fn ] add [ inet ] [ host|net ] destination [ &netmask|/prefixlen ] gateway metric
route [ -fn ] add [ inet ] default gateway metric
route [ -fn ] delete [ inet ] [ host|net ] destination
route [ -fn ] delete [ inet ] default
route [ -fn ] add inet6 [ prefixlen prefixlen ] [ host|net ] destination gateway metric
route [ -fn ] add inet6 default gateway metric
route [ -fn ] delete inet6 [ prefixlen prefixlen ] [ host|net ] destination
route [ -fn ] delete inet6 default
route -s [ inet|inet6 ]
DESCRIPTIONroute allows the system administrator to manually manipulate the network routing table for the specifichost or network specified by destination. The gateway argument is the next-hop gateway to whichpackets should be addressed for the corresponding destination. The metric argument indicates thenumber of "hops" to the destination. The metric argument is required for the add command; it must bezero if the destination is on a directly-attached network, and non-zero if the route is via one or moregateways.
The optional inet keyword specifies the inet (Internet protocol version 4) address family routing tableand causes route to expect addresses in that format for the rest of the command. The inet6 keywordspecifies the inet6 (Internet protocol version 6) address family routing table and causes route to expectaddresses in that format for the rest of the command. inet6 keyword is valid only if IPv6 is enabled onthe node. If neither is specified, inet is assumed.
The add command adds the specified route for the given destination to the routing table. The deletecommand deletes the specified route from the routing table.
Routes to a particular host are distinguished from those to a network by interpreting the Internet addressassociated with destination. The optional keywords net and host force the destination to be interpretedas a network or a host, respectively. Otherwise, if the destination has a "local address part" ofINADDR_ANY (for example, 0), or if the destination is the symbolic name of a network, then the routeis assumed to be to a network; otherwise, it is presumed to be a route to a host. If the route is to adestination via a gateway, the metric parameter should be greater than 0. If metric is set to 0, thegateway given is the address of this host on the common network, indicating the interface to be used fortransmission.
Data ONTAP® 8.2 Commands: Manual Page Reference for 7-Mode, Volume 1 521
route
All symbolic names specified for a destination or gateway are looked up first as a host name in the /etc/hosts database. If this lookup fails, then the name is looked up as a network name in the /etc/networks database. "default" is also a valid destination, which is used if there is no specific host ornetwork route.
For the inet address family the netmask for a route to a network is implicitly derived from the class ofthe network; to override that, the destination for a network route can have /bits or &mask after it,where bits is the number of high-order bits to be set in the netmask, or mask is the netmask (either as anumber - defaults to decimal, precede with 0x for hexadecimal, precede with 0 for octal - or as an IPaddress, for example, 255.255.0.0). Thus the network 128.42.x.x may be specified by 128.42.0.0/16,128.42.0.0&0xffff0000, 128.42.0.0&255.255.0.0, 128.42.0.0&037777600000, or128.42.0.0&4294901760. For the inet6 address family use the prefixlen keyword and argument tospecify the network mask.
OPTIONS
-f Remove all gateway entries in the routing table. This option does not display the domain names ornetwork numbers of the route entries that are deleted. If this is used in conjunction with one of thecommands, route removes the entries before performing the command.
-n Prints host and network numbers rather than symbolic names when reporting actions.
-s Shows the routing tables.
OUTPUTDescription of some columns in the output of routing table
FLAGSDescription of flags in the ouput
U Route entry is usable
G Next hop is a gateway
H Route entry is for host
R Reject all packets that use this route
D Route entry created dynamically by redirect or RIP
522 Data ONTAP® 8.2 Commands: Manual Page Reference for 7-Mode, Volume 1
route
S Manually added static route
1 Protocol specific routing flag 1
2 Protocol specific routing flag 2
L Route entry contains link layer address generated by ARP or NDP(Neighbor Discovery Protocol)
C Generate new cloned routes for target matching this entry
RefNumber of references to this route.
UseCount of lookups for this route.
DIAGNOSTICSThe following messages and error commands may be output by the route command:
add|delete [ host|net ] destination: gateway gateway: Confirmation of an add or delete command. Maybe followed by an error message if the command failed to complete successfully.
network unreachableAn attempt to add a route failed because the gateway listed was not on a directly-connected network.The next-hop gateway must be given.
not in tableA delete operation was attempted for an entry which wasn’t present in the table.
entry already existsAn add operation was attempted for an existing route entry.
routing table overflowAn add operation was attempted, but the system was unable to allocate memory to create the new entry.
destination gateway doneWhen the -f flag is specified, each routing table entry deleted is indicated with a message of this form.
HA CONSIDERATIONSIn takeover mode, each node in an HA pair maintains its own routing table. You can make changes tothe routing table on the live node; or you can make changes to the routing table on the failed node usingthe route command in partner mode. However, the changes you make in partner mode are lost after agiveback.
Data ONTAP® 8.2 Commands: Manual Page Reference for 7-Mode, Volume 1 523
route

VFILER CONSIDERATIONSWhen run from a vfiler context, (for example, via the vfiler run command), route operates on theconcerned vfiler. Currently all vfilers in an ipspace share a routing table; route operates on the routingtable of the concerned vfiler’s ipspace.
SEE ALSOna_vfiler(1)
524 Data ONTAP® 8.2 Commands: Manual Page Reference for 7-Mode, Volume 1
route
routedNAMEna_routed - Network RIP and router discovery routing daemon
SYNOPSISrouted [ -mopAtv ] [ -T tracefile ] [ -P parms ] [ on|off ]
routed [ -n ] status
DESCRIPTIONRouted is a daemon invoked at boot time to manage the network routing tables. It uses RoutingInformation Protocol, RIPv1 (RFC 1058), RIPv2 (RFC 1723), and Internet Router Discovery Protocol(RFC 1256) to maintain the kernel routing table. The RIPv1 protocol is based on the reference BSD 4.3daemon.
It listens on the udp socket for the route service for Routing Information Protocol packets. It alsosolicits multicast Router Discovery ICMP messages.
When started (or when a network interface is later turned on), routed uses an AF_ROUTE addressfamily facility to find those directly connected interfaces configured into the system and marked "up". Itadds necessary routes for the interfaces to the kernel routing table. Soon after being first started, andprovided there is at least one interface on which RIP has not been disabled, routed deletes allpre-existing non-static routes in kernel table. Static routes in the kernel table are preserved.
Normally routed acts as a silent router and never broadcasts its routing table. This is similar to the -qoption on UNIX systems. However, routed will respond to requests from query programs such as rtquery by answering with the complete table. In addition, the -m option, described below, will causeRIP response messages to be generated.
The routing table maintained by the daemon includes space for several gateways for each destination tospeed recovery from a failing router. RIP response packets received are used to update the routing tablesprovided they are from one of the several currently recognized gateways or advertise a better metricthan at least one of the existing gateways.
When an update is applied, routed records the change in its own tables and updates the kernel routingtable if the best route to the destination changes.
In addition to processing incoming packets, routed also periodically checks the routing table entries. Ifan entry has not been updated for 3 minutes, the entry’s metric is set to infinity and marked for deletion.Deletions are delayed until the route has been advertised with an infinite metric to insure theinvalidation is propagated throughout the local internet. This is a form of poison reverse.
Routes in the kernel table that are added or changed as a result of ICMP Redirect messages are deletedafter a while to minimize black-holes. When a TCP connection suffers a timeout, the kernel tells routed,which deletes all redirected routes through the gateway involved, advances the age of all RIP routesthrough the gateway to allow an alternate to be chosen, and advances of the age of any relevant RouterDiscovery Protocol default routes.
Data ONTAP® 8.2 Commands: Manual Page Reference for 7-Mode, Volume 1 525
routed
If no response is received on a remote interface, or if there are more errors than input or output (see na_netstat(1)), then the cable or some other part of the interface is assumed to be disconnected orbroken, and routes are adjusted appropriately.
The Internet Router Discovery Protocol is handled similarly. If routed receives a good Advertisementand it is not multi-homed, it stops listening for broadcast or multicast RIP responses. It tracks severaladvertising routers to speed recovery when the currently chosen router dies. If all discovered routersdisappear, the daemon resumes listening to RIP responses. It continues listen to RIP while using RouterDiscovery if multi-homed to ensure all interfaces are used.
The Router Discovery standard requires that advertisements have a default "lifetime" of 30 minutes.That means should something happen, a client can be without a good route for 30 minutes. It is a goodidea to reduce the default to 45 seconds using -P rdisc_interval=45 on the command line orrdisc_interval=45 in the /etc/gateways file.
While using Router Discovery (which happens by default when the system has a single networkinterface and a Router Discover Advertisement is received), there is a single default route and a variablenumber of redirected host routes in the kernel table. On a host with more than one network interface,this default route will be via only one of the interfaces. Thus, multi-homed hosts might need no_rdiscdescribed below.
See the pm_rdisc facility described below to support "legacy" systems that can handle neither RIPv2nor Router Discovery.
By default, Router Discovery advertisements are not sent over point-to-point links (for example PPP).The netmask associated with point-to-point links (such as SLIP or PPP, with the IFF_POINTOPOINTflag) is used by routed to infer the netmask used by the remote system when RIPv1 is used.
The following options are available:
-m causes the machine to advertise a host or point-to-point route to its primary interface. It is useful onmulti-homed machines such as NFS servers. This option should not be used except when the costof the host routes it generates is justified by the popularity of the server.
-A does not ignore RIPv2 authentication if we do not care about RIPv2 authentication. This option isrequired for conformance with RFC 1723. However, it makes no sense and breaks using RIP as adiscovery protocol to ignore all RIPv2 packets that carry authentication when this machine doesnot care about authentication.
-t increases the debugging level, which causes more information to be logged on the tracefilespecified with -T or standard out. The debugging level can be increased or decreased with the rtquery command from a client.
-o turns off tracing by setting the debugging level back to zero.
526 Data ONTAP® 8.2 Commands: Manual Page Reference for 7-Mode, Volume 1
routed

-T tracefileincreases the debugging level to at least 1 and causes debugging information to be appended to thetrace file. Note that because of security concerns, it is wisest to not run routed routinely withtracing directed to a file.
-v displays and logs the version of daemon.
-P parms is equivalent to adding the parameter line parms to the /etc/gateways file.
on turns on routed.
off turns off routed.
status This option is present for backwards compatibility with the old routed. It prints out an indicationof whether routed is on or off and some information about the default route. The format of the outputmatches that of the old routed. If the -n option is used, the default gateway is printed out numerically.See na_orouted(1) for information about the old routed. The output of this option is likely to change in afuture release.
Routed also supports the notion of "distant" passive or active gateways. When routed is started, it readsthe file /etc/gateways to find such distant gateways which may not be located using only informationfrom a routing socket, to discover if some of the local gateways are passive, and to obtain otherparameters. Gateways specified in this manner should be marked passive if they are not expected toexchange routing information, while gateways marked active should be willing to exchange RIPpackets. Routes through passive gateways are installed in the kernel’s routing tables once upon startupand are not included in transmitted RIP responses.
Distant active gateways are treated like network interfaces. RIP responses are sent to the distant activegateway. If no responses are received, the associated route is deleted from the kernel table and RIPresponses advertised via other interfaces. If the distant gateway resumes sending RIP responses, theassociated route is restored.
Such gateways can be useful on media that do not support broadcasts or multicasts but otherwise actlike classic shared media like Ethernets such as some ATM networks. One can list all RIP routersreachable on the ATM network in /etc/gateways with a series of "host" lines. Note that it is usuallydesirable to use RIPv2 in such situations to avoid generating lists of inferred host routes.
Gateways marked external are also passive, but are not placed in the kernel routing table nor are theyincluded in routing updates. The function of external entries is to indicate that another routing processwill install such a route if necessary, and that other routes to that destination should not be installed by routed. Such entries are only required when both routers may learn of routes to the same destination.
The /etc/gateways file comprises a series of lines, each in one of the following two formats or consistsof parameters described later. Blank lines and lines starting with ‘#’ are comments.
Data ONTAP® 8.2 Commands: Manual Page Reference for 7-Mode, Volume 1 527
routed
net <Nname[/mask]> gateway <Gname> metric <value> < passive No | active No | extern >
host <Hname> gateway <Gname> metric <value> < passive No active No | extern >
<Nname> or <Hname> is the name of the destination network or host. It may be a symbolic networkname or an Internet address specified in "dot" notation. (If it is a name, then it must either be defined in/etc/networks or /etc/hosts, or DNS and/or NIS, must have been started before routed.)
<Mask> is an optional number between 1 and 32 indicating the netmask associated with <Nname>.
<Gname> is the name or address of the gateway to which RIP responses should be forwarded.
<Value> is the hop count to the destination host or network. " host hname " is equivalent to " netnname/32 ".
One of the keywords passive, active or external must be present to indicate whether the gateway shouldbe treated as passive or active (as described above), or whether the gateway is external to the scope ofthe RIP protocol.
As can be seen when debugging is turned on with -t, such lines create psuedo-interfaces. To setparameters for remote or external interfaces, a line starting with if=alias(Hname), if=remote(Hname),and so on should be used.
Lines that start with neither "net" nor "host" must consist of one or more of the following parametersettings, separated by commas or blanks:
if = <ifname>indicates that the other parameters on the line apply to the interface name <ifname>.
subnet = <nname[/mask][,metric]>advertises a route to network <nname> with mask <mask> and the supplied metric (default 1). This isuseful for filling "holes" in CIDR allocations. This parameter must appear by itself on a line. Thenetwork number must specify a full, 32-bit value, as in 192.0.2.0 instead of 192.0.2.
Do not use this feature unless necessary. It is dangerous.
ripv1_mask = <nname/mask1,mask2>specifies that netmask of the network of which nname/mask1 is a subnet should be mask2 . For example ripv1_mask=192.0.2.16/28,27 marks 192.0.2.16/28 as a subnet of 192.0.2.0/27 instead of 192.0.2.0/24.
passwd = <XXX[|KeyID[start|stop]]>specifies a RIPv2 cleartext password that will be included on all RIPv2 responses sent, and checked onall RIPv2 responses received. Any blanks, tab characters, commas, or ‘#’, ‘|’, or NULL characters in thepassword must be escaped with a backslash (\). The common escape sequences \n, \r, \t, \b, and \xxxhave their usual meanings. The KeyID must be unique but is ignored for cleartext passwords. If present, start and stop are timestamps in the form year/month/day@hour:minute. They specify when thepassword is valid. The valid password with the most future is used on output packets, unless allpasswords have expired, in which case the password that expired most recently is used, or unless nopasswords are valid yet, in which case no password is output. Incoming packets can carry any passwordthat is valid, will be valid within 24 hours, or that was valid within 24 hours. To protect the secrets, thepasswd settings are valid only in the /etc/gateways file and only when that file is readable only by UID0.
528 Data ONTAP® 8.2 Commands: Manual Page Reference for 7-Mode, Volume 1
routed
md5_passwd = <XXX|KeyID[start|stop]>specifies a RIPv2 MD5 password. Except that a KeyID is required, this keyword is similar to passwd.
no_ag turns off aggregation of subnets in RIPv1 and RIPv2 responses.
no_super_agturns off aggregation of networks into supernets in RIPv2 responses.
passive marks the interface to not be advertised in updates sent via other interfaces, and turns off all RIPand router discovery through the interface.
no_rip disables all RIP processing on the specified interface. If no interfaces are allowed to process RIPpackets, routed acts purely as a router discovery daemon.
Note that turning off RIP without explicitly turning on router discovery advertisements with rdisc_advcauses routed to act as a client router discovery daemon, not advertising.
no_rip_mcastcauses RIPv2 packets to be broadcast instead of multicast.
no_ripv1_incauses RIPv1 received responses to be ignored.
no_ripv2_incauses RIPv2 received responses to be ignored.
ripv2_out turns off RIPv1 output and causes RIPv2 advertisements to be multicast when possible.
ripv2 is equivalent to no_ripv1_in and no_ripv1_out .
no_rdisc disables the Internet Router Discovery Protocol.
no_solicitdisables the transmission of Router Discovery Solicitations.
send_solicitspecifies that Router Discovery solicitations should be sent, even on point-to-point links, which bydefault only listen to Router Discovery messages.
no_rdisc_advdisables the transmission of Router Discovery Advertisements.
rdisc_adv specifies that Router Discovery Advertisements should be sent, even on point-to-point links,which by default only listen to Router Discovery messages.
bcast_rdiscspecifies that Router Discovery packets should be broadcast instead of multicast.
Data ONTAP® 8.2 Commands: Manual Page Reference for 7-Mode, Volume 1 529
routed
rdisc_pref = <N>sets the preference in Router Discovery Advertisements to the optionally signed integer <N>. Thedefault preference is 0. Default routes with smaller or more negative preferences are preferred byclients.
rdisc_interval = <N>sets the nominal interval with which Router Discovery Advertisements are transmitted to N seconds andtheir lifetime to 3*N.
fake_default = <metric>has an identical effect to -F <net[/mask][=metric]> with the network and mask coming from thespecified interface.
pm_rdisc is similar to fake_default. When RIPv2 routes are multicast, so that RIPv1 listeners cannotreceive them, this feature causes a RIPv1 default route to be broadcast to RIPv1 listeners. Unlessmodified with fake_default, the default route is broadcast with a metric of 14. That serves as a "poorman’s router discovery" protocol.
trust_gateway = <rname[|net1/mask1|net2/mask2|...]> causes RIP packets from that router and otherrouters named in other trust_gateway keywords to be accepted, and packets from other routers to beignored. If networks are specified, then routes to other networks will be ignored from that router.
FILES/etc/gateways for distant gateways
SEE ALSOna_dgateways(5), na_rc(5)
BUGSIt does not always detect unidirectional failures in network interfaces, for example when the output sidefails.
530 Data ONTAP® 8.2 Commands: Manual Page Reference for 7-Mode, Volume 1
routed
rshstatNAMErshstat - Prints information about active rsh sessions.
SYNOPSISrshstat [ -a | -t ]
DESCRIPTIONThe rshstat command prints information about the active rsh sessions.
Without any options, rshstat, prints a summary line that includes the number of rsh invocations sincestarting the node, the number of currently active rsh sessions, the high water mark for the number ofactive rsh sessions since starting the node, and the maximum available sessions. The -a option adds tothe summary line the following individual rsh session information: the session number, the commandthe rsh session is executing, the remote client IP address, and the last string written into the audit log forthe rsh session. The -t option adds the amount of time the command is executing in milliseconds to the -a option. The amount of time is broken up into 3 parts: the total command time, the protocolconnection time, and the get host information time.
EXAMPLES sohail> rshstat Session Invocations: 0 Current Active Sessions: 0 Active High Sessions: 0 Maximum Available Sessions: 24 sohail>
sohail> rshstat -a Session Invocations: 3 Current Active Sessions: 2 Active High Sessions: 2 Maximum Available Sessions: 24
0: sysstat [from 10.72.128.58] ( 50% 0 0 0 178 219 0 0 0 0 >60 ) ---------------------------------------- 1: nfsstat [from 10.72.136.55] ( 0 0 0 0 0 0 0 0) ----------------------------------------
sohail> rshstat -t Session Invocations: 0 Current Active Sessions: 1 Active High Sessions: 1 Maximum Available Sessions: 24
0: sysstat [from 10.72.128.58] ( 0% 0 0 0 4 1 0 0 0 0 >60 ) Command Time: 96413ms Connection Time: 102ms Gethost Time: 2ms ---------------------------------------- sohail>
Data ONTAP® 8.2 Commands: Manual Page Reference for 7-Mode, Volume 1 531
rshstat

SEE ALSOna_rshd(8),
532 Data ONTAP® 8.2 Commands: Manual Page Reference for 7-Mode, Volume 1
rshstat
rtsoldNAMEna_rtsold - Router solicitation daemon
SYNOPSISrtsold [ -dD1 ] interface
rtsold [ -dD1 ] -a
rtsold -k
DESCRIPTIONis the daemon program to send ICMPv6 Router Solicitation messages on the specified interfaces. If anode (re)attaches to a link, rtsold sends some Router Solicitations on the link destined to the link-localscope all-routers multicast address to discover new routers and to get non link-local addresses.
rtsold should be used on IPv6 host non-router node only.
Specifically, rtsold sends at most 3 Router Solicitations on an interface after one of the followingevents:
Just after invocation of rtsold daemon.
The interface is up after a temporary interface failure.
rtsold detects such failures by periodically probing to see if the status of the interface is active or not.Note that some network cards and drivers do not allow the extraction of link state. In such cases, rtsoldcannot detect the change of the interface status.
Once rtsold sends a Router Solicitation, and receives a valid Router Advertisement, it refrains fromsending additional solicitations on that interface, until the next time one of the above events occurs.
When sending a Router Solicitation on an interface, rtsold includes a Source Link-layer address optionif the interface has its link-layer address.
OPTIONS
-a Autodetects all outgoing ipv6 interfaces. rtsold will try to find all non-loopback, non-p2p andIPv6-capable interfaces. If rtsold finds multiple interfaces, it will send out probes on all of them.
-d Enables debugging.
-D Enables more debugging including printing internal timer information.
Data ONTAP® 8.2 Commands: Manual Page Reference for 7-Mode, Volume 1 533
rtsold

-1 Performs only one probe. Transmits Router Solicitation packet until valid Router Advertisementpacket arrives at all the interfaces more than once, and then exit.
-s Dumps output to /rtsold.dump
-k Kills rtsold daemon.
534 Data ONTAP® 8.2 Commands: Manual Page Reference for 7-Mode, Volume 1
rtsold
sanNAMEsan - Glossary for NetApp specific SAN terms
DESCRIPTIONThe san glossary is meant to provide users with short definitions and examples of terminology used byNetApp in its unified storage offering. These terms are supplements to the SNIA dictionary athttp://www.snia.org/education/dictionary/ which provides a more comprehensive list of SAN terms.
GLOSSARYFCP ( Fibre Channel Protocol )
A licensed service on the node that enables you to export LUNs to hosts using the SCSI protocol over aFibre Channel fabric.
HBA ( host bus adapter )
An I/O adapter that connects a host I/O bus to a computer’s memory system. HBA is the preferred termin SCSI contexts. The HBA might be an FCP adapter or an iSCSI adapter. An adapter might havemultiple ports.
host
A system that is accessing data on a node as blocks. The host accesses data using the FCP or iSCSIprotocols.
igroup ( Initiator Group )
A collection of the unique identifiers, either iSCSI node names or WWPNs of initiators (hosts). Initiatorgroups can have multiple initiators, and multiple initiator groups can have the same initiator. To makethe LUNs accessible to hosts, you use the lun map command to map LUNs to an initiator group. Bymapping LUNs to the hosts listed in the initiator group, you allow access to the LUNs to these hosts. Ifyou do not map a LUN, the LUN is not accessible to any hosts. The following example shows an FCPinitiator group with two initiators:
igroup_1 (FCP) (ostype: solaris): 10:00:00:00:c7:2c:36:3e 10:00:00:00:c8:2c:37:g1
Initiator
The system component that originates an I/O command over an I/O bus or network.
iSCSI
A licensed service on the node that enables you to export LUNs to hosts using the SCSI protocol overTCP/IP.
Data ONTAP® 8.2 Commands: Manual Page Reference for 7-Mode, Volume 1 535
san

LUN ( logical unit number )
The SCSI identifier of a logical unit within a target.
LUN clone
A complete copy of a LUN, which was initially created to be backed by a LUN or a file in a snapshot.The clone creates a complete copy of the LUN and frees the snapshot, which can then be deleted. Formore information, see the lun create -b command on the man page for na_lun.
LUN ID
The ID that the node exports for a given LUN. The LUN ID is mapped to an initiator group to enablehost access. For a Windows system LUN 0 must exist so that the host will recognize additional LUNs.The following example shows a LUN with an ID of 6:
LUN path Mapped to LUN ID --------------------------------------------------- /vol/vol10/fcpdb.lun igroup_1 6
LUN path
The path to a LUN on the node. The following example shows a LUN path:
LUN path Mapped to LUN ID --------------------------------------------------- /vol/vol10/fcpdb.lun igroup_1 6
LUN serial
The unique serial number for a LUN as defined by the node. You use the lun serial command to changethis number. The following example shows a LUN serial number:
node_1> lun show -v /vol/vol0/fcpdb /vol/vol0/fcpdb 10m (10485760) (r/w, online) Serial#: Och/RngAi4p4 Share: none Space Reservation: enabled Multiprotocol Type: image
map
To create an association between a LUN and an initiator group. A LUN mapped to an initiator group isexported to the nodes in the initiator group (WWNN or iqn) when the LUN is online. LUN maps areused to secure access relationships between LUNs and the host.
online
Signifies that a LUN is exported to its mapped initiator groups. A LUN can be online only if it isenabled for read/write access.
offline
536 Data ONTAP® 8.2 Commands: Manual Page Reference for 7-Mode, Volume 1
san
Disables the export of the LUN to its mapped initiator groups. The LUN is not available to hosts.
share
Allows the LUN’s data be accessible through multiple file protocols such as NFS and FCP. One canshare a LUN for read or write access, or all permissions.
SPACE_RESERVATIONS
Required for guaranteed space availability for a given LUN with or without snapshots.
target
The system component that receives a SCSI I/O command.
WWN ( World Wide Number )
A unique 48 or 64-bit number assigned by a recognized naming authority (often through blockassignment to a manufacturer) that identifies a connection to the storage network. A WWN is assignedfor the life of a connection (device).
WWNN ( World Wide Node Name )
Every node has a unique World Wide Node Name (WWNN), which Data ONTAP refers to as a FibreChannel Nodename, or simply node name. NetApp assigns a WWNN to a node based on the serialnumber of its NVRAM. The WWNN is stored on disk. The WWNN is a 64-bit address represented inthe following format: nn:nn:nn:nn:nn:nn:nn:nn, where n represents a hexadecimal value.
WWPN ( World Wide Port Name )
Each Fibre Channel device has one or more ports that are used to connect it to the SAN network. Eachport has a unique World Wide Port Name (WWPN), which Data ONTAP refers to as an FC Portname,or simply port name. The WWPN is a 64-bit address represented in the following format:nn:nn:nn:nn:nn:nn:nn:nn, where n represents a hexadecimal value.
SEE ALSOna_lun(1)
Data ONTAP® 8.2 Commands: Manual Page Reference for 7-Mode, Volume 1 537
san
sasadminNAMEna_sasadmin - Commands for managing Serial Attached SCSI (SAS) adapters
SYNOPSISsasadmin command argument ...
OVERVIEWThe sasadmin utility commands manage the SAS adapters and expanders used by the storagesubsystem. These commands show SAS channels, information about attached expanders or diskshelves, expander and adapter phy (transceiver) states and the status of disk drives.
USAGEsasadmin[dev_stats|adapter_state|expander_map|shelf|shelf_short] [<adapter_name>]
sasadmin expander <adapter_name>[.<shelf_id>]
sasadmin expander_phy_state [<adapter_name>[.<shelf_id>]]
SAS DEVICE NAMING CONVENTIONFollowing is the convention used to name devices in a SAS domain.
End devices are named using the concatenated form <adapter_name>.<shelf_id>.<bay_id>, where
adapter_name: An adapter name of the form Xy, where X is a number and y is a letter (for example, 0cor 0d).
shelf_id: A number between 0 through 99. This number corresponds to the thumbwheel setting in thefront of the disk shelf or controller (sometimes referred to as "node" or "appliance"). If no thumbwheelis present, 0 is used. In the cases where the disk shelf ID is either not assigned or unavailable, the serialnumber of the disk shelf is used instead.
bay_id: The physical bay number where the disk drive is located. Bays are numbered from left to right,top to bottom, starting with 0. Therefore, bay 0 is the top left slot of the disk shelf.
Examples device names:
0c.5.19 would be the device in bay number 19 of disk shelf number 5 attached to the adapter 0c.
0d.449292.19 would be the device in bay number 19 of disk shelf with the serial number 449292attached to the adapter 0d.
538 Data ONTAP® 8.2 Commands: Manual Page Reference for 7-Mode, Volume 1
sasadmin
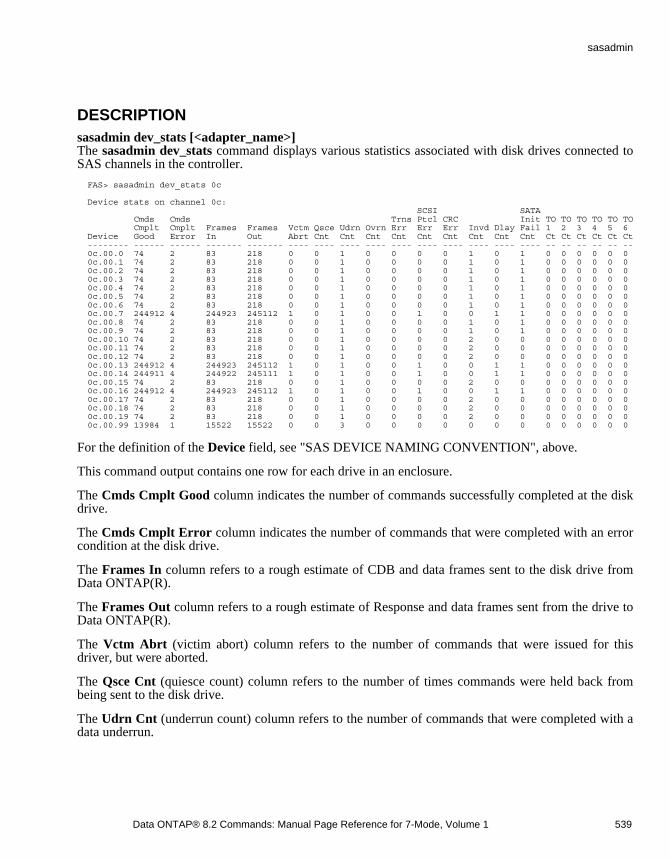
DESCRIPTIONsasadmin dev_stats [<adapter_name>]The sasadmin dev_stats command displays various statistics associated with disk drives connected toSAS channels in the controller.
FAS> sasadmin dev_stats 0c
Device stats on channel 0c: SCSI SATA Cmds Cmds Trns Ptcl CRC Init TO TO TO TO TO TO Cmplt Cmplt Frames Frames Vctm Qsce Udrn Ovrn Err Err Err Invd Dlay Fail 1 2 3 4 5 6 Device Good Error In Out Abrt Cnt Cnt Cnt Cnt Cnt Cnt Cnt Cnt Cnt Ct Ct Ct Ct Ct Ct -------- ------ ------ ------- ------- ---- ---- ---- ---- ---- ---- ---- ---- ---- ---- -- -- -- -- -- -- 0c.00.0 74 2 83 218 0 0 1 0 0 0 0 1 0 1 0 0 0 0 0 0 0c.00.1 74 2 83 218 0 0 1 0 0 0 0 1 0 1 0 0 0 0 0 0 0c.00.2 74 2 83 218 0 0 1 0 0 0 0 1 0 1 0 0 0 0 0 0 0c.00.3 74 2 83 218 0 0 1 0 0 0 0 1 0 1 0 0 0 0 0 0 0c.00.4 74 2 83 218 0 0 1 0 0 0 0 1 0 1 0 0 0 0 0 0 0c.00.5 74 2 83 218 0 0 1 0 0 0 0 1 0 1 0 0 0 0 0 0 0c.00.6 74 2 83 218 0 0 1 0 0 0 0 1 0 1 0 0 0 0 0 0 0c.00.7 244912 4 244923 245112 1 0 1 0 0 1 0 0 1 1 0 0 0 0 0 0 0c.00.8 74 2 83 218 0 0 1 0 0 0 0 1 0 1 0 0 0 0 0 0 0c.00.9 74 2 83 218 0 0 1 0 0 0 0 1 0 1 0 0 0 0 0 0 0c.00.10 74 2 83 218 0 0 1 0 0 0 0 2 0 0 0 0 0 0 0 0 0c.00.11 74 2 83 218 0 0 1 0 0 0 0 2 0 0 0 0 0 0 0 0 0c.00.12 74 2 83 218 0 0 1 0 0 0 0 2 0 0 0 0 0 0 0 0 0c.00.13 244912 4 244923 245112 1 0 1 0 0 1 0 0 1 1 0 0 0 0 0 0 0c.00.14 244911 4 244922 245111 1 0 1 0 0 1 0 0 1 1 0 0 0 0 0 0 0c.00.15 74 2 83 218 0 0 1 0 0 0 0 2 0 0 0 0 0 0 0 0 0c.00.16 244912 4 244923 245112 1 0 1 0 0 1 0 0 1 1 0 0 0 0 0 0 0c.00.17 74 2 83 218 0 0 1 0 0 0 0 2 0 0 0 0 0 0 0 0 0c.00.18 74 2 83 218 0 0 1 0 0 0 0 2 0 0 0 0 0 0 0 0 0c.00.19 74 2 83 218 0 0 1 0 0 0 0 2 0 0 0 0 0 0 0 0 0c.00.99 13984 1 15522 15522 0 0 3 0 0 0 0 0 0 0 0 0 0 0 0 0
For the definition of the Device field, see "SAS DEVICE NAMING CONVENTION", above.
This command output contains one row for each drive in an enclosure.
The Cmds Cmplt Good column indicates the number of commands successfully completed at the diskdrive.
The Cmds Cmplt Error column indicates the number of commands that were completed with an errorcondition at the disk drive.
The Frames In column refers to a rough estimate of CDB and data frames sent to the disk drive fromData ONTAP(R).
The Frames Out column refers to a rough estimate of Response and data frames sent from the drive toData ONTAP(R).
The Vctm Abrt (victim abort) column refers to the number of commands that were issued for thisdriver, but were aborted.
The Qsce Cnt (quiesce count) column refers to the number of times commands were held back frombeing sent to the disk drive.
The Udrn Cnt (underrun count) column refers to the number of commands that were completed with adata underrun.
Data ONTAP® 8.2 Commands: Manual Page Reference for 7-Mode, Volume 1 539
sasadmin

The Ovrn Cnt (overrun count) column refers to the number of commands that were completed with adata overrun.
The Trns Err Cnt (transport error count) column refers to the number of commands that encounteredtransport errors.
The SCSI Ptcl Err Cnt (SCSI protocol error count) column refers to the number of commands thatencountered SCSI protocol errors.
The CRC Err Cnt (CRC error count) column refers to the number of commands that encounteredparity errors.
The Invd Cnt (invalidate count) column refers to the number times the disk drive was not found on adevice scan.
The Dlay Cnt (delay count) column refers to the number times commands were delayed in being sent tothe disk drive.
The SATA Init Fail Cnt (SATA initialization failure count) column refers to the number times the SASadapter firmware issued "SATA initialization command sequence" failed for the disk drive.
The TO 1 Ct (Timeout 1 count) column refers to the number of times a command had to be retried onetime before succeeding.
The TO 2 Ct (Timeout 2 count) column refers to the number of times a command had to be retried twotimes before succeeding.
The TO 3 Ct (Timeout 3 count) column refers to the number of times a command had to be retriedthree times before succeeding.
The TO 4 Ct (Timeout 4 count) column refers to the number of times a command had to be retried fourtimes before succeeding.
The TO 5 Ct (Timeout 5 count) column refers to the number of times a command had to be retried fivetimes before succeeding.
The TO 6 Ct (Timeout 6 count) column refers to the number of times a command had to be retried sixtimes before succeeding.
sasadmin adapter_state [<adapter_name>]The sasadmin adapter_state command displays the state of a logical adapter and its phys. It displaysthe following information.
FAS> sasadmin adapter_state 0c State for adapter channel 0c: UP Invald Disprt Loss Phy Phy DWord Error Sync Reset Change PHY STATE Count Count Count Prob Count -------------------------------------------------------- 0 3.0 Gb/s 0 0 0 0 0 1 3.0 Gb/s 0 0 0 0 0 2 3.0 Gb/s 0 0 0 0 0 3 3.0 Gb/s 0 0 0 0 0
540 Data ONTAP® 8.2 Commands: Manual Page Reference for 7-Mode, Volume 1
sasadmin
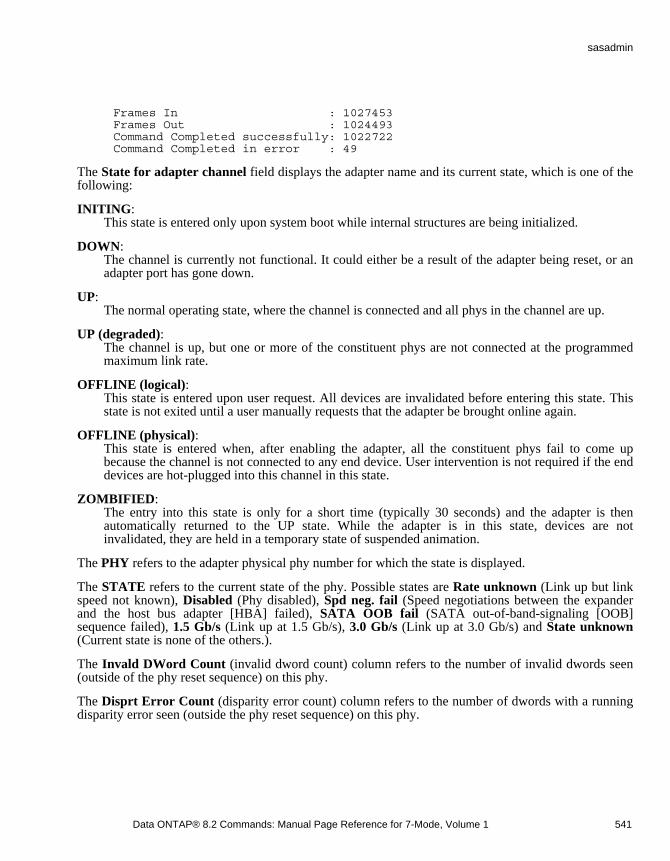
Frames In : 1027453 Frames Out : 1024493 Command Completed successfully: 1022722 Command Completed in error : 49
The State for adapter channel field displays the adapter name and its current state, which is one of thefollowing:
INITING: This state is entered only upon system boot while internal structures are being initialized.
DOWN: The channel is currently not functional. It could either be a result of the adapter being reset, or anadapter port has gone down.
UP: The normal operating state, where the channel is connected and all phys in the channel are up.
UP (degraded): The channel is up, but one or more of the constituent phys are not connected at the programmedmaximum link rate.
OFFLINE (logical): This state is entered upon user request. All devices are invalidated before entering this state. Thisstate is not exited until a user manually requests that the adapter be brought online again.
OFFLINE (physical): This state is entered when, after enabling the adapter, all the constituent phys fail to come upbecause the channel is not connected to any end device. User intervention is not required if the enddevices are hot-plugged into this channel in this state.
ZOMBIFIED: The entry into this state is only for a short time (typically 30 seconds) and the adapter is thenautomatically returned to the UP state. While the adapter is in this state, devices are notinvalidated, they are held in a temporary state of suspended animation.
The PHY refers to the adapter physical phy number for which the state is displayed.
The STATE refers to the current state of the phy. Possible states are Rate unknown (Link up but linkspeed not known), Disabled (Phy disabled), Spd neg. fail (Speed negotiations between the expanderand the host bus adapter [HBA] failed), SATA OOB fail (SATA out-of-band-signaling [OOB]sequence failed), 1.5 Gb/s (Link up at 1.5 Gb/s), 3.0 Gb/s (Link up at 3.0 Gb/s) and State unknown(Current state is none of the others.).
The Invald DWord Count (invalid dword count) column refers to the number of invalid dwords seen(outside of the phy reset sequence) on this phy.
The Disprt Error Count (disparity error count) column refers to the number of dwords with a runningdisparity error seen (outside the phy reset sequence) on this phy.
Data ONTAP® 8.2 Commands: Manual Page Reference for 7-Mode, Volume 1 541
sasadmin
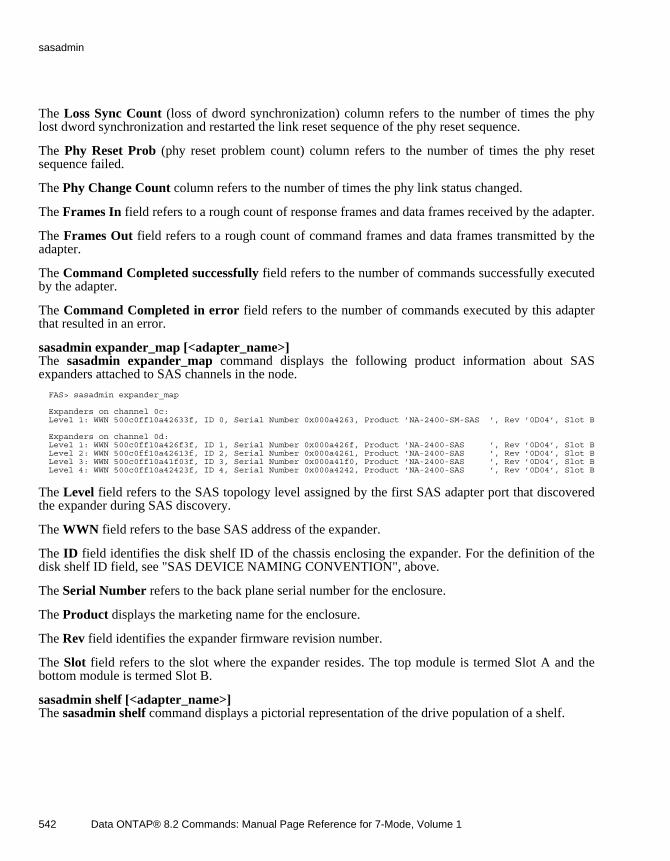
The Loss Sync Count (loss of dword synchronization) column refers to the number of times the phylost dword synchronization and restarted the link reset sequence of the phy reset sequence.
The Phy Reset Prob (phy reset problem count) column refers to the number of times the phy resetsequence failed.
The Phy Change Count column refers to the number of times the phy link status changed.
The Frames In field refers to a rough count of response frames and data frames received by the adapter.
The Frames Out field refers to a rough count of command frames and data frames transmitted by theadapter.
The Command Completed successfully field refers to the number of commands successfully executedby the adapter.
The Command Completed in error field refers to the number of commands executed by this adapterthat resulted in an error.
sasadmin expander_map [<adapter_name>]The sasadmin expander_map command displays the following product information about SASexpanders attached to SAS channels in the node.
FAS> sasadmin expander_map
Expanders on channel 0c: Level 1: WWN 500c0ff10a42633f, ID 0, Serial Number 0x000a4263, Product ’NA-2400-SM-SAS ’, Rev ’0D04’, Slot B
Expanders on channel 0d: Level 1: WWN 500c0ff10a426f3f, ID 1, Serial Number 0x000a426f, Product ’NA-2400-SAS ’, Rev ’0D04’, Slot B Level 2: WWN 500c0ff10a42613f, ID 2, Serial Number 0x000a4261, Product ’NA-2400-SAS ’, Rev ’0D04’, Slot B Level 3: WWN 500c0ff10a41f03f, ID 3, Serial Number 0x000a41f0, Product ’NA-2400-SAS ’, Rev ’0D04’, Slot B Level 4: WWN 500c0ff10a42423f, ID 4, Serial Number 0x000a4242, Product ’NA-2400-SAS ’, Rev ’0D04’, Slot B
The Level field refers to the SAS topology level assigned by the first SAS adapter port that discoveredthe expander during SAS discovery.
The WWN field refers to the base SAS address of the expander.
The ID field identifies the disk shelf ID of the chassis enclosing the expander. For the definition of thedisk shelf ID field, see "SAS DEVICE NAMING CONVENTION", above.
The Serial Number refers to the back plane serial number for the enclosure.
The Product displays the marketing name for the enclosure.
The Rev field identifies the expander firmware revision number.
The Slot field refers to the slot where the expander resides. The top module is termed Slot A and thebottom module is termed Slot B.
sasadmin shelf [<adapter_name>]The sasadmin shelf command displays a pictorial representation of the drive population of a shelf.
542 Data ONTAP® 8.2 Commands: Manual Page Reference for 7-Mode, Volume 1
sasadmin
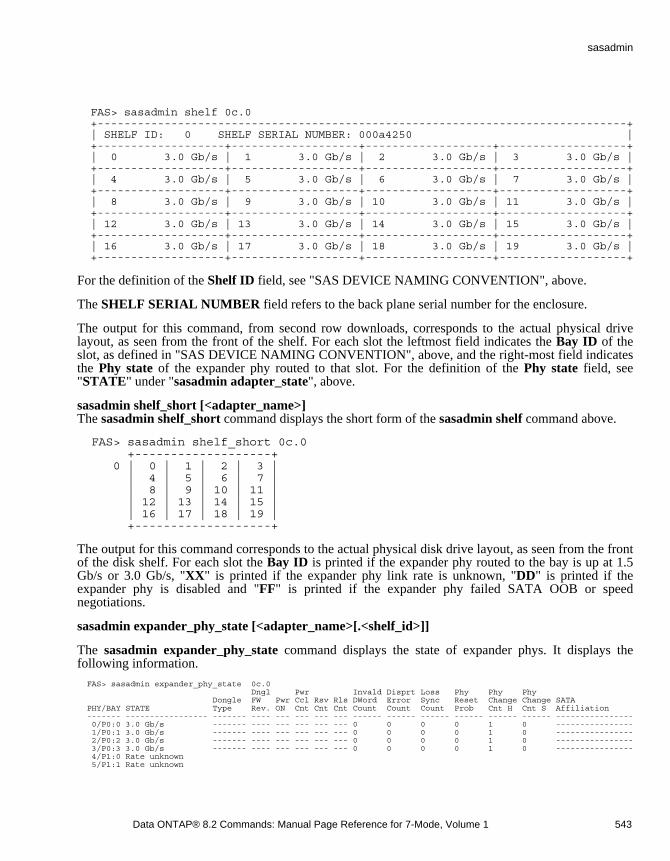
FAS> sasadmin shelf 0c.0 +-------------------------------------------------------------------------------+ | SHELF ID: 0 SHELF SERIAL NUMBER: 000a4250 | +-------------------+-------------------+-------------------+-------------------+ | 0 3.0 Gb/s | 1 3.0 Gb/s | 2 3.0 Gb/s | 3 3.0 Gb/s | +-------------------+-------------------+-------------------+-------------------+ | 4 3.0 Gb/s | 5 3.0 Gb/s | 6 3.0 Gb/s | 7 3.0 Gb/s | +-------------------+-------------------+-------------------+-------------------+ | 8 3.0 Gb/s | 9 3.0 Gb/s | 10 3.0 Gb/s | 11 3.0 Gb/s | +-------------------+-------------------+-------------------+-------------------+ | 12 3.0 Gb/s | 13 3.0 Gb/s | 14 3.0 Gb/s | 15 3.0 Gb/s | +-------------------+-------------------+-------------------+-------------------+ | 16 3.0 Gb/s | 17 3.0 Gb/s | 18 3.0 Gb/s | 19 3.0 Gb/s | +-------------------+-------------------+-------------------+-------------------+
For the definition of the Shelf ID field, see "SAS DEVICE NAMING CONVENTION", above.
The SHELF SERIAL NUMBER field refers to the back plane serial number for the enclosure.
The output for this command, from second row downloads, corresponds to the actual physical drivelayout, as seen from the front of the shelf. For each slot the leftmost field indicates the Bay ID of theslot, as defined in "SAS DEVICE NAMING CONVENTION", above, and the right-most field indicatesthe Phy state of the expander phy routed to that slot. For the definition of the Phy state field, see "STATE" under "sasadmin adapter_state", above.
sasadmin shelf_short [<adapter_name>]The sasadmin shelf_short command displays the short form of the sasadmin shelf command above.
FAS> sasadmin shelf_short 0c.0 +-------------------+ 0 | 0 | 1 | 2 | 3 | | 4 | 5 | 6 | 7 | | 8 | 9 | 10 | 11 | | 12 | 13 | 14 | 15 | | 16 | 17 | 18 | 19 | +-------------------+
The output for this command corresponds to the actual physical disk drive layout, as seen from the frontof the disk shelf. For each slot the Bay ID is printed if the expander phy routed to the bay is up at 1.5Gb/s or 3.0 Gb/s, "XX" is printed if the expander phy link rate is unknown, "DD" is printed if theexpander phy is disabled and "FF" is printed if the expander phy failed SATA OOB or speednegotiations.
sasadmin expander_phy_state [<adapter_name>[.<shelf_id>]]
The sasadmin expander_phy_state command displays the state of expander phys. It displays thefollowing information.
FAS> sasadmin expander_phy_state 0c.0 Dngl Pwr Invald Disprt Loss Phy Phy Phy Dongle FW Pwr Ccl Rsv Rls DWord Error Sync Reset Change Change SATA PHY/BAY STATE Type Rev. ON Cnt Cnt Cnt Count Count Count Prob Cnt H Cnt S Affiliation ------- ----------------- ------- ---- --- --- --- --- ------ ------ ------ ------ ------ ------ ---------------- 0/P0:0 3.0 Gb/s ------- ---- --- --- --- --- 0 0 0 0 1 0 ---------------- 1/P0:1 3.0 Gb/s ------- ---- --- --- --- --- 0 0 0 0 1 0 ---------------- 2/P0:2 3.0 Gb/s ------- ---- --- --- --- --- 0 0 0 0 1 0 ---------------- 3/P0:3 3.0 Gb/s ------- ---- --- --- --- --- 0 0 0 0 1 0 ---------------- 4/P1:0 Rate unknown 5/P1:1 Rate unknown
Data ONTAP® 8.2 Commands: Manual Page Reference for 7-Mode, Volume 1 543
sasadmin

6/P1:2 Rate unknown 7/P1:3 Rate unknown 8/0 3.0 Gb/s SPS3G 3 YES 0 0 0 13 12 1 0 2 0 f081053ef0000000 9/1 3.0 Gb/s SPS3G 3 YES 0 0 0 14 13 1 0 3 0 f081053ef0000000 10/2 3.0 Gb/s SPS3G 3 YES 0 0 0 14 14 1 0 3 0 f081053ef0000000 11/3 3.0 Gb/s SPS3G 3 YES 0 0 0 14 13 1 0 3 0 f081053ef0000000 12/4 3.0 Gb/s SPS3G 3 YES 0 0 0 14 13 1 0 3 0 f081053ef0000000 13/5 3.0 Gb/s SPS3G 3 YES 0 0 0 14 14 1 0 3 0 f081053ef0000000 14/6 3.0 Gb/s SPS3G 3 YES 0 0 0 15 15 1 0 3 0 f081053ef0000000 15/7 3.0 Gb/s SPS3G 3 YES 0 0 0 13 13 1 0 3 0 f081053ef0000000 16/8 3.0 Gb/s SPS3G 3 YES 0 0 0 15 14 1 0 3 0 f081053ef0000000 17/9 3.0 Gb/s SPS3G 3 YES 0 0 0 15 15 1 0 3 0 f081053ef0000000 18/10 3.0 Gb/s SPS3G 3 YES 0 0 0 14 14 1 0 3 0 f081053ef0000000 19/11 3.0 Gb/s SPS3G 3 YES 0 0 0 15 14 1 0 3 0 f081053ef0000000 20/12 3.0 Gb/s SPS3G 3 YES 0 0 0 15 14 1 0 3 0 f081053ef0000000 21/13 3.0 Gb/s SPS3G 3 YES 0 0 0 14 13 1 0 3 0 f081053ef0000000 22/14 3.0 Gb/s SPS3G 3 YES 0 0 0 15 14 1 0 3 0 f081053ef0000000 23/15 3.0 Gb/s SPS3G 3 YES 0 0 0 15 15 1 0 3 0 f081053ef0000000 24/16 3.0 Gb/s SPS3G 3 YES 0 0 0 14 14 1 0 3 0 f081053ef0000000 25/17 3.0 Gb/s SPS3G 3 YES 0 0 0 14 14 1 0 3 0 f081053ef0000000 26/18 3.0 Gb/s SPS3G 3 YES 0 0 0 14 14 1 0 3 0 f081053ef0000000 27/19 3.0 Gb/s SPS3G 3 YES 0 0 0 13 13 1 0 3 0 f081053ef0000000
The PHY/BAY STATE field is of the format logical phy number/[Port Number:Phy Number|Bay ID] <Phy State>.
The logical phy number field displays the logical phy number for which information is beingdisplayed.
The Port Number:Phy Number combination field displays whether this phy is part of a wide port SASlink and the phy number within the wide port.
For the definition of the Bay ID field, see "SAS DEVICE NAMING CONVENTION", above.
For the definition of the Phy State field, see "STATE" under "sasadmin adapter_state", above.
The Dongle Type column represents the type of dongle attached, if the attached end device is a SATAdisk drive.
The Dngl. FW Rev. (dongle firmware revision) column displays the firmware version running in thedongle controller.
The Pwr ON (power on) column indicates how many times disk drive power was successfully turnedon by this particular module.
The Pwr Ccl Cnt (power cycle count) column indicates how many times disk drive power has beensuccessfully turned off and then successfully turned back on by this particular module.
The Rsv Cnt (reserve count) column indicates how many times the Emulate Reserve function wassuccessfully completed for this phy.
The Rls Cnt (release count) column indicates how many times the Emulate Release function wassuccessfully completed for this phy.
For the definitions of Invald DWord Count, Disprt Error Count, Loss Sync Count, Phy Reset Prob,see "sasadmin adapter_state", above.
The Phy Change Cnt H (phy change count hardware) column returns the number times the expandertransmitted BROADCAST(CHANGE) in response to a phy transitioning from disabled to enabled.
544 Data ONTAP® 8.2 Commands: Manual Page Reference for 7-Mode, Volume 1
sasadmin
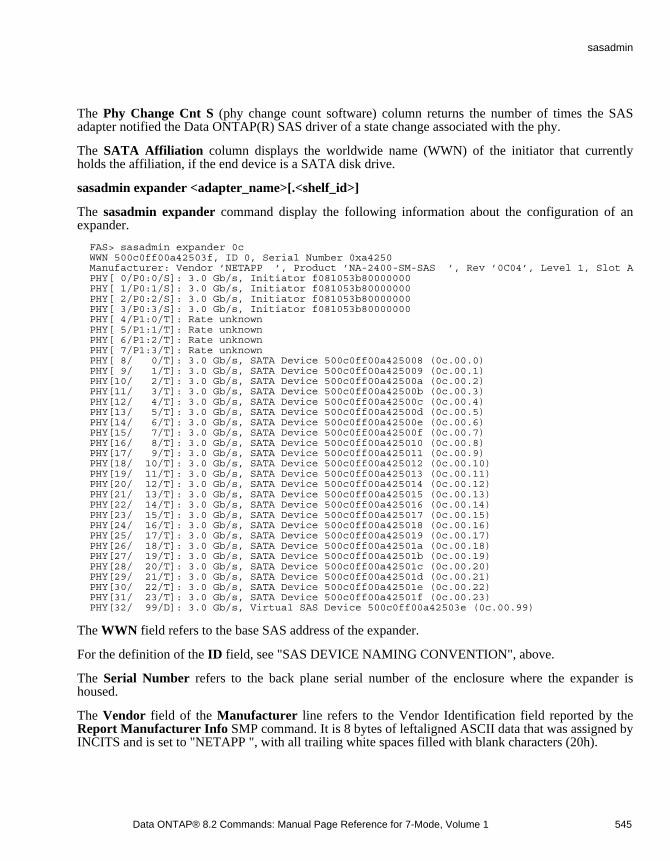
The Phy Change Cnt S (phy change count software) column returns the number of times the SASadapter notified the Data ONTAP(R) SAS driver of a state change associated with the phy.
The SATA Affiliation column displays the worldwide name (WWN) of the initiator that currentlyholds the affiliation, if the end device is a SATA disk drive.
sasadmin expander <adapter_name>[.<shelf_id>]
The sasadmin expander command display the following information about the configuration of anexpander.
FAS> sasadmin expander 0c WWN 500c0ff00a42503f, ID 0, Serial Number 0xa4250 Manufacturer: Vendor ’NETAPP ’, Product ’NA-2400-SM-SAS ’, Rev ’0C04’, Level 1, Slot A PHY[ 0/P0:0/S]: 3.0 Gb/s, Initiator f081053b80000000 PHY[ 1/P0:1/S]: 3.0 Gb/s, Initiator f081053b80000000 PHY[ 2/P0:2/S]: 3.0 Gb/s, Initiator f081053b80000000 PHY[ 3/P0:3/S]: 3.0 Gb/s, Initiator f081053b80000000 PHY[ 4/P1:0/T]: Rate unknown PHY[ 5/P1:1/T]: Rate unknown PHY[ 6/P1:2/T]: Rate unknown PHY[ 7/P1:3/T]: Rate unknown PHY[ 8/ 0/T]: 3.0 Gb/s, SATA Device 500c0ff00a425008 (0c.00.0) PHY[ 9/ 1/T]: 3.0 Gb/s, SATA Device 500c0ff00a425009 (0c.00.1) PHY[10/ 2/T]: 3.0 Gb/s, SATA Device 500c0ff00a42500a (0c.00.2) PHY[11/ 3/T]: 3.0 Gb/s, SATA Device 500c0ff00a42500b (0c.00.3) PHY[12/ 4/T]: 3.0 Gb/s, SATA Device 500c0ff00a42500c (0c.00.4) PHY[13/ 5/T]: 3.0 Gb/s, SATA Device 500c0ff00a42500d (0c.00.5) PHY[14/ 6/T]: 3.0 Gb/s, SATA Device 500c0ff00a42500e (0c.00.6) PHY[15/ 7/T]: 3.0 Gb/s, SATA Device 500c0ff00a42500f (0c.00.7) PHY[16/ 8/T]: 3.0 Gb/s, SATA Device 500c0ff00a425010 (0c.00.8) PHY[17/ 9/T]: 3.0 Gb/s, SATA Device 500c0ff00a425011 (0c.00.9) PHY[18/ 10/T]: 3.0 Gb/s, SATA Device 500c0ff00a425012 (0c.00.10) PHY[19/ 11/T]: 3.0 Gb/s, SATA Device 500c0ff00a425013 (0c.00.11) PHY[20/ 12/T]: 3.0 Gb/s, SATA Device 500c0ff00a425014 (0c.00.12) PHY[21/ 13/T]: 3.0 Gb/s, SATA Device 500c0ff00a425015 (0c.00.13) PHY[22/ 14/T]: 3.0 Gb/s, SATA Device 500c0ff00a425016 (0c.00.14) PHY[23/ 15/T]: 3.0 Gb/s, SATA Device 500c0ff00a425017 (0c.00.15) PHY[24/ 16/T]: 3.0 Gb/s, SATA Device 500c0ff00a425018 (0c.00.16) PHY[25/ 17/T]: 3.0 Gb/s, SATA Device 500c0ff00a425019 (0c.00.17) PHY[26/ 18/T]: 3.0 Gb/s, SATA Device 500c0ff00a42501a (0c.00.18) PHY[27/ 19/T]: 3.0 Gb/s, SATA Device 500c0ff00a42501b (0c.00.19) PHY[28/ 20/T]: 3.0 Gb/s, SATA Device 500c0ff00a42501c (0c.00.20) PHY[29/ 21/T]: 3.0 Gb/s, SATA Device 500c0ff00a42501d (0c.00.21) PHY[30/ 22/T]: 3.0 Gb/s, SATA Device 500c0ff00a42501e (0c.00.22) PHY[31/ 23/T]: 3.0 Gb/s, SATA Device 500c0ff00a42501f (0c.00.23) PHY[32/ 99/D]: 3.0 Gb/s, Virtual SAS Device 500c0ff00a42503e (0c.00.99)
The WWN field refers to the base SAS address of the expander.
For the definition of the ID field, see "SAS DEVICE NAMING CONVENTION", above.
The Serial Number refers to the back plane serial number of the enclosure where the expander ishoused.
The Vendor field of the Manufacturer line refers to the Vendor Identification field reported by the Report Manufacturer Info SMP command. It is 8 bytes of leftaligned ASCII data that was assigned byINCITS and is set to "NETAPP ", with all trailing white spaces filled with blank characters (20h).
Data ONTAP® 8.2 Commands: Manual Page Reference for 7-Mode, Volume 1 545
sasadmin

For the definition of the Product field of the Manufacturer line see the Product field definition under "sasadmin expander_map", above.
The Rev field of the Manufacturer line refers to the running firmware version of the expander.
The Level field of the Manufacturer line refers to the SAS topology level assigned by the first SASadapter port that discovered the expander during SAS discovery.
The Slot field refers to the slot where the expander resides. The top module is termed Slot A and thebottom module is termed Slot B.
The remaining portion of the output of the command displays information regarding each phy of theexpander. The format of each line would be as follows:
PHY[<logical phy number>/[Port Number:Phy Number|Bay ID]/<routing attribute>]:<Phy State>, [[Virtual] <End device type> <WWN> <Device name>]
The logical phy number field displays the logical phy number for which information is beingdisplayed.
The Port Number:Phy Number combination field displays whether this phy is part of a wide port SASlink and the phy number within the wide port.
For the definition of the Bay ID field, see "SAS DEVICE NAMING CONVENTION", above.
The routing attribute field displays the SAS routing attribute for the phy. Possible routing attributetypes are S for subtractive routing, T for table routing and D for direct routing.
For the definition of the Phy State field, see "STATE" under "sasadmin adapter_state", above.
The End device type field displays the type of end device attached to this phy. Possible end devicetypes are "Unknown", "Initiator", "Expander", "SAS Device" and "SATA Device". The optionalattribute Virtual is added if the end device is a SAS virtual device. For example, the SCSI EnclosureServices (SES) device in the expander is a virtual device.
The WWN field refers to the SAS address of the end device attached to this phy.
The Device name field display the Data ONTAP(R) device name, if the end device is either a SAS or aSATA disk drive, which is described in "SAS DEVICE NAMING CONVENTION" above.
DISPLAYSExample output for all commands is included in their descriptions.
OPTIONSAll options for all commands are included in their descriptions.
546 Data ONTAP® 8.2 Commands: Manual Page Reference for 7-Mode, Volume 1
sasadmin
EMS MESSAGESsas.adapter.reset:
The Data ONTAP SAS driver is resetting the specified host adapter. This can occur during normal errorhandling or when requested by the user.
sas.device.quiesce:
This indicates that at least one command to the specified device has not been completed in what wouldbe the normally expected timeframe. In this case, the driver stops sending additional commands to thedevice until all outstanding commands have the opportunity to be completed. This condition isautomatically handled by the Data ONTAP(R) SAS driver.
sas.device.timeout:
All outstanding commands to the specified device have not been completed within the allotted time. Aspart of the standard error handling sequence managed by the Data ONTAP SAS driver, all commands tothe device are aborted and reissued.
sas.device.resetting:
This indicates that device level error recovery has escalated to resetting the device. It is usually seen inassociation with error conditions such as device level timeouts or transmission errors. This event reportsthe recovery action taken by the Data ONTAP(R) SAS driver when evaluating associated device or linkrelated error conditions.
sas.channel.resetting:
This indicates that error recovery has escalated to resetting all devices on the specified channel. It isusually seen in association with error conditions such as device level timeouts or transmission errors.This event is intended to report the recovery action taken by the Data ONTAP SAS driver whenevaluating associated device or link related error conditions.
sas.adapter.bad:
The SAS adapter failed to initialize.
sas.adapter.firmware.fault:
A firmware fault was detected on the SAS adapter and it is being reset to recover.
sas.adapter.not.ready:
The SAS adapter did not become ready after being reset.
sas.adapter.error:
The SAS adapter driver encountered an error with the adapter. The adapter is being reset to recover.
sas.adapter.unexpected.status:
Data ONTAP® 8.2 Commands: Manual Page Reference for 7-Mode, Volume 1 547
sasadmin

The SAS adapter returned an unexpected status and is being reset to recover.
ERRORS"Not a SAS adapter."
"No such adapter adapter_name."
"This operation not allowed on channel chan_name."
"Device device_name is not valid or does not exist."
"Failed."
BUGSNo known bugs exist at this time.
SEE ALSOna_san(1),
548 Data ONTAP® 8.2 Commands: Manual Page Reference for 7-Mode, Volume 1
sasadmin
sasstatNAMEna_sasstat - Commands for managing Serial Attached SCSI (SAS) adapters
SYNOPSISsasstat command argument ...
DESCRIPTIONThe sasstat command manages the SAS adapters and expanders used by the storage subsystem. Thiscommand is an alias for the sasadmin command. Please see na_sasadmin(1) for more details.
Data ONTAP® 8.2 Commands: Manual Page Reference for 7-Mode, Volume 1 549
sasstat
savecoreNAMEna_savecore - Saves a core dump.
SYNOPSISsavecore [ -i | -l | -s ]
savecore [ -f | -k | -w ] [ core id ]
DESCRIPTIONsavecore is meant to be called near the end of the initialization file /etc/rc. Its function is to save thecore dump of the system (assuming one was made) and to write the panic string to /etc/messages. savecore saves the compressed core dump file as core.sysid.YYYY-MM-DD.HH_MM_SS[.n].nz inthe coredump directory (/etc/crash). The timestamp embedded in the core name is the time of the panic,in UTC.
Before savecore writes out a core image, it reads a number from the file /etc/crash/minfree. The minfree file defines the number of free kilobytes that should be left in the root filesystem after savecoreruns. It should contain only a number followed by a newline. If the amount of space left after saving acore would be less than this number, savecore will abort, and not save any more cores. If the minfreefile does not exist, savecore will save cores until it runs out of space in the root filesystem.
savecore is done in parallel with enabling services such as NFS. If a panic occurs prior to thecompletion of the savecore then the node will do a synchronous savecore once it reboots.
When run with no arguments, savecore will save all cores that do not require the -f flag to be saved. If a core id is given, only the specified core will be considered.
A core id is a large integer and only applies to unsaved cores. They can be found by running savecore -l.
OPTION
-f If savecore fails to save an unsaved core too many times, it will stop trying. This flag tells savecoreto ignore the previous attempts, and try again. This attempt will be made synchronously.
-i Displays information about the type of coredump that would be performed, if the system were topanic right now. If unsaved cores are present on the disks, this information will be included in theoutput.
-k Invalidates the special core area that resides on each of the disks. Typically this is used when asavecore command cannot complete due to an error such as a disk read error.
550 Data ONTAP® 8.2 Commands: Manual Page Reference for 7-Mode, Volume 1
savecore

-l Lists all of the saved core files currently in the coredump directory, along with the panic string,panic time, and OS version. This information, along with a core id, is printed for unsaved cores.
-s Displays the progress of the current savecore operation. If no save is in progress, but an unsavedcore is present, a warning will be printed if the unsaved core cannot fit in the root filesystem.
-w Starts savecore in a synchronous mode, which waits for the savecore operation to complete.
FILES
/etc/crash/core.*.nz saved core files
/etc/crash/minfree free KB in FS to maintain after savecore
HA CONSIDERATIONSIf the live node in an HA pair has the savecore command in its /etc/rc file, it can save the cores createdby its partner when its partner crashes. The cores are saved to the partner’s coredump directory.
SEE ALSOna_rc(5).
Data ONTAP® 8.2 Commands: Manual Page Reference for 7-Mode, Volume 1 551
savecore
sectraceNAMEsectrace - Manages permission tracing filters.
SYNOPSISsectrace add [-ip <ipaddr>] [-ntuser <nt username> -unixuser <uid/unix username>] [-path <path>] [-a]
sectrace delete { [<index>] | all }
sectrace show [ <index> | all ]
sectrace print-status <status>
sectrace help <command>
DESCRIPTIONWhen the node determines that a user does not have permission to perform a specific operation, itusually returns a general Access denied error to the client request. There are a wide variety of reasonswhy the user might not have permission to do something which may have nothing to do with thesecurity in place on the file system, often making it difficult to determine the source of the error.
Using the sectrace command, administrators can generate filters that track these requests and report thespecific reason why it was refused. The requests can be filtered by any combination of IP address, userand path prefix. If any filter matches an incoming request, the results will be printed to the console.
Additionally, there may be instances where a user is granted access when it seems like they should notbe. The sectrace command allows you to create filters that track these events as well, and you can printthe full list of decisions that were made which allowed that request to proceed.
When active, these filters may have a minor impact on performance. They are designed to be usedtemporarily in order to help diagnose specific permission problems, and should not be used for anyother purpose.
NOTE: sectrace functionality is currently limited to requests from the CIFS protocol. Support foradditional protocols may be added in future releases
OPTIONS
add Adds a permission tracing filter and starts tracing requests that meet all the criteria specified in thisfilter. It also returns the index of the filter, which can be used to reference the filter in other sectrace subcommands. Currently a maximum of 10 filters can be set per vFiler(tm).
-ip <ipaddr> Specify the IP Address of a client. The filter would match only if the request is received from thisclient.
552 Data ONTAP® 8.2 Commands: Manual Page Reference for 7-Mode, Volume 1
sectrace
-ntuser <nt username>Specify the NT(tm) user name. The filter would match only if the request is received with this user.The <NT username> can be of the form DOMAIN\USER or USER. This option cannot be used if -unixuser is provided.
-unixuser <uid/unix username>Specify the UNIX(R) user name (UID). The filter would match only if the request is received withthis user name credential. This option cannot be used if -ntuser is provided.
-path <path> Specify a path prefix. The filter would match only if the request is received for a file or directorywith this path prefix.
-a Specifies whether to trace ALLOW requests as well, along with DENY requests that are traced bydefault.
delete Deletes one or all permission tracing filters based on the options provided. If a filter index isspecified, the filter bearing this index is deleted. If all is specified, all permission tracing filtersadded in the vFiler(tm) are deleted.
print-status <status>This takes in the <status> code logged corresponding to a request and provides detailed informationabout the reason for DENY or ALLOW of a request. The <status> code is marked with a Status: tag inthe logged message.
show This displays the permission tracing filters added in a vFiler(tm). If the index is specified, the filterbearing this index is displayed. If all is specified or no option is provided, all filters are displayed.
help <command> This provides a brief reference on command usage.
EXAMPLESSetting a simple deny filter for requests from a specific client:
sectrace add -ip 192.168.10.23
Setting a filter for both ALLOW and DENY requests for a UNIX user with login foo accessing homedirectory under /vol/vol0/home4:
sectrace add -unixuser foo -path /vol/vol0/home4 -a
Displaying filter bearing index 5:
sectrace show 5
Data ONTAP® 8.2 Commands: Manual Page Reference for 7-Mode, Volume 1 553
sectrace

WARNINGIf a very generic filter is set which results in a lot of requests being traced and logged:Some events might get dropped and not get logged. The node console might get spammed with logevents.
It is recommended to add criteria to make the filters more specific, for example, limiting the filter matchcriteria to a specific user or IP Address.
554 Data ONTAP® 8.2 Commands: Manual Page Reference for 7-Mode, Volume 1
sectrace
secureadminNAMEna_secureadmin - Command for secure administration of the appliance
SYNOPSISsecureadmin command argument ...
DESCRIPTIONThis command can be used to configure SSL (Secure Sockets Layer) and SSH (Secure Shell), which areused to provide a secure channel for administering a node or a NetCache appliance in a nontrustedenvironment.
SSL provides an encrypted administrative exchange between a node or a NetCache appliance and aclient browser.
SSH provides an encrypted administrative exchange between a node or a NetCache appliance and anSSH 2.0-compliant client.
USAGEsecureadmin setup [ -f ] sshconfigures the SSH server. The administrator specifies the key strength for the RSA host and serverkeys. The keys can range in strength from 384 to 2048 bits. The strength of the host key and the serverkey must differ by at least 128 bits. It does not matter which key is of higher strength.
The -f flag forces setup to run even if the SSH server has already been configured.
secureadmin setup [ -f ] [ -q ] ssl configures the SSL server. The administrator needs to specify thedistinguished name (DN) for the appliance.
The process generates a Certificate Signing Request (CSR) and a temporary self-signed certificate. TheCSR, located in /etc/keymgr/csr/secureadmin_tmp.pem, can optionally be submitted to a CertificateAuthority (CA) for signing. The self-signed certificate allows the SSL server to work withoutsubmitting the CSR to a CA. However, the browser may issue a security warning that the appliance’sidentity cannot be verified. In the US, the administrator can specify the key strengths of 512, 1024,1536, or 2048. Otherwise it is set to 512.
The -f flag forces setup to run even if the SSL server has already been configured.
The-q flag is the non-interactive mode for setting up SSL. The format for this command looks like"secureadmin setup -q ssl domestic<t/f> country state locality org unit fqdn email [keylen] [days untilexpires].
secureadmin addcert ssl [ path to CA-signed cert ] installs a Certificate Authority-signed certificate tothe SSL server. The installed certificate allows the browser to verify the identity of the appliance.
Data ONTAP® 8.2 Commands: Manual Page Reference for 7-Mode, Volume 1 555
secureadmin
The default path of /etc/keymgr/csr/secureadmin.pem is assumed if a path is not specified.
secureadmin enable ssh | ssh1 | ssh2 | ssl | all starts either SSH, SSL, or both servers. The effect ispersistent. Use ‘ssh1’ to enable only SSH1.x protocol. Use ‘ssh’ or ‘ssh2’ for enabling only SSH2.0protocol.
secureadmin disable ssh | ssh1 | ssh2 | ssl | all stops either SSH, SSL, or both servers. The effect ispersistent. Use ‘ssh1’ to disable only SSH1.x protocol. Use ‘ssh’ or ‘ssh2’ for disabling only SSH2.0protocol.
secureadmin statusshows the current status of SSH and SSL servers.
VFILER CONSIDERATIONSThis command is used to configure SSH on the vFiler units to provide a secure channel foradministration. Both interactive SSH,and non-interactive SSH are available for vFiler units. All SSHcommands listed above can be executed through the secure channel on a vFiler unit. Note: SSL is notsupported on vFiler units. SSL commands cannot be executed.
556 Data ONTAP® 8.2 Commands: Manual Page Reference for 7-Mode, Volume 1
secureadmin
setupNAMEna_setup - Updates node configuration.
SYNOPSISsetup
DESCRIPTIONsetup queries the user for the node configuration parameters such as hostname, IP address, andtimezone. It installs new versions of /etc/rc, /etc/hosts, /etc/exports, /etc/resolv.conf, /etc/hosts.equiv,and /etc/dgateways to reflect the new configuration. When setup completes, the configuration fileshave been been updated, but their new contents do not take effect until the node is rebooted (seena_reboot(1)). The old contents of the configuration files are saved in rc.bak, exports.bak, resolv.conf.bak, hosts.bak, hosts.equiv.bak, and dgateways.bak.
One piece of information that setup requests is the name and IP address for adminhost. In /etc/exports, adminhost is granted root access to / so that it can access and modify the configuration files in /etc. Allother NFS clients are granted access only to /home. If no adminhost is specified, then all clients aregranted root access to /. This is not recommended for sites where security is a concern.
If an adminhost is specified, then an additional line is added to the /etc/hosts file to point the defaultmailhost to the adminhost. This is used by the autosupport daemon (see na_autosupport(8)) to sendemail notification.
If a default gateway is provided to setup, it will be used in /etc/rc to specify a default route (seena_route(1)), and will also be used as the first entry in /etc/dgateways.
The hostname that is provided to setup is used to construct default names for all of the configurednetwork interfaces. Ethernet interfaces are given names hostname-0, hostname-1, and so on.
FILES
/etc directory of node configuration and administration files
/etc/rc system initialization command script
/etc/exports directories exported by the server
/etc/hosts host name data base
Data ONTAP® 8.2 Commands: Manual Page Reference for 7-Mode, Volume 1 557
setup
/etc/hosts.equiv list of hosts and users with rsh permission
/etc/resolv.conf list of DNS name servers
/etc/dgateways list of preferred default gateways for routed /etc/nsswitch.conf list of preferred name services
HA CONSIDERATIONSAfter a takeover, you can enter the setup command in partner mode to configure the failed node.However, only the network interfaces on the failed node that were taken over appear in the promptsdisplayed by setup. For example; if the e1 interface on the failed node was not configured and takenover by the live node, the setup command does not prompt you for the IP address of the e1 interface.
VFILER CONSIDERATIONSWhen run from a vfiler context, (for example via the vfiler run command), setup operates on theconcerned vfiler. If the vfiler is not vfiler0, setup only allows the configuration of a subset of parametersthat are meaningful for a vfiler. Specifically, the operator is prompted for the IP address bindings of thevfiler, the name and IP address of the vfiler’s adminhost, the vfiler’s DNS configuration and its NISconfiguration. The command allows the configuration of the password of the root user of the vfiler.Running this command also sets up default versions of the /etc/exports, /etc/hosts and /etc/hosts.equivfiles. A command line version of setup can also be used in the context of a vfiler. This version has theform:
setup [-e <ifname>:<ipaddress>:<netmask>,...] [-d <DNS domaname>:<DNS server IP 1>:...] [-n <NISdomainname>:<NIS server1>:...] [-a <ipaddress> <name>:<ipaddress>] [-p <root password>]
The -e option allows the bindings of the IP addresses of the vfiler to be created. The -d option allows thespecification of a DNS domain name and the IP addresses of one or more DNS servers. The -n optionallows the specification of an NIS domain name and the IP addresses of one or more NIS servers (or theuse of broadcast discovery by using * as the NIS server name). The -a option allows the admin hostsname and IP address to be specified. Finally, the -p option allows the password of the root user of thisvfiler to be set.
SEE ALSOna_vfiler(1), na_hosts(5), na_rc(5), na_autosupport(8)
NOTESSome Ethernet boards determine the media type automatically. It is not necessary to specify the mediatype for them, but it is best to do so anyway in case the board is replaced with one that does notdetermine media type automatically.
As the /etc/rc file is rewritten after running the setup command in vfiler0, all aliases, mtu and vlansconfigured earlier in the /etc/rc file will be lost. If these settings are required, they will have to be addedto the /etc/rc file again before reboot. It is recommended to verify the /etc/rc file for these configurationsafter running the setup command.
558 Data ONTAP® 8.2 Commands: Manual Page Reference for 7-Mode, Volume 1
setup
sftpNAMEna_sftp - display SFTP (SSH File Transfer Protocol) statistics.
SYNOPSISsftp stat [-z]
DESCRIPTIONThe "sftp" command is used to display/reset the SFTP statistics.
The command sftp stat [-z]
reports the values of three SFTP connection counters: the current number of SFTP connections, thehighest number of simultaneous SFTP connections, and the total number of SFTP connections for allthe connections.
The "-z" option resets the simultaneous connection and total connection counters to zero.
EXAMPLESHere are some examples using sftp stat:
sftp statCurrent connections: 2Maximum concurrent connections: 2 Total connections: 9
sftp stat -zCurrent connections: 2Maximum concurrent connections: 2 Total connections: 9
SFTP connection counters set to zero
NOTESThe command sftp stat would work for a vfiler only if it is run from the vfiler context (eg. via thecommand). For example,
vfiler run vfiler0 sftp stat
Data ONTAP® 8.2 Commands: Manual Page Reference for 7-Mode, Volume 1 559
sftp

shelfchkNAMEna_shelfchk - Verifies the communication of environmental information between disk shelves and thenode.
SYNOPSISshelfchk
DESCRIPTIONThe shelfchk command verifies that the disk shelves and the node can exchange environmentalinformation. If the environmental information is being exchanged, you can hotswap disks in the diskshelves.
The shelfchk command is interactive. It requires that you type in your responses after observing theLEDs on the disks. Therefore, enter this command from a console that is near the disk shelves.
The shelfchk command steps through all the disk host adapters that the node discovered when it booted.For each host adapter, the shelfchk command tries to turn on the disk LEDs on the attached diskshelves. The command waits for confirmation that you have observed the LEDs. If you see that all theLEDs are on, respond ‘‘yes’’ when prompted. If one or more LEDs are off, you respond ‘‘no’’ to theprompt. In this case, a problem exists that might prevent hot swapping on the affected shelves. The shelfchk command terminates as soon as you respond ‘‘no’’ to the prompt. It does not continue to testthe other disk shelves. A possible cause of disk shelf problems is that the cables for the shelves are notconnected properly.
Enter the shelfchk command immediately after you install one or more disk shelves. This way, if thereare any cabling problems, you can fix them as soon as possible. Also, this command enables you toquickly correlate the disk shelves with their corresponding host adapter. For example, if you intend tohave all disk shelves connected to a particular host adapter to be installed in one rack, the shelfchkcommand enables you to see at a glance whether any disk shelves were installed inadvertently in adifferent rack.
HA CONSIDERATIONSThe shelfchk command checks the status of all disk shelves attached to the node’s disk adapters. It doesnot distinguish between the disk shelves owned by the local node and the disk shelves owned by thepartner.
After you set up the HA pair for the first time or after you install additional disk shelves to the nodes inan HA pair, enter the shelfchk command on both nodes to verify that the disk shelves are attached tothe appropriate adapters.
In takeover mode, the shelfchk command and the partner shelfchk command generate the same result.
560 Data ONTAP® 8.2 Commands: Manual Page Reference for 7-Mode, Volume 1
shelfchk

EXAMPLEIn the following example, the shelfchk command tests the disk shelves of a node with three hostadapters (8a, 8b, and 7a) and finds no problems:
toaster> shelfchkOnly shelves attached to ha 7a should have all LEDs ON.Are these LEDs all ON now? yOnly shelves attached to ha 8a should have all LEDs ON.Are these LEDs all ON now? yOnly shelves attached to ha 8b should have all LEDs ON.Are these LEDs all ON now? ytoaster> Fri Aug 22 21:35:39 GMT [rc]: Disk Configuration - No Errors Identified
In the following example, the shelfchk command finds an error:
toaster> shelfchkOnly shelves attached to ha 9a should have all LEDs ON.Are these LEDs all ON now? n*** Your system may not be configured properly. Please check cable connections.toaster> Mon Aug 25 11:44:34 GMT [rc]: Disk Configuration - Failure Identified by Operator
SEE ALSOna_partner(1)
Data ONTAP® 8.2 Commands: Manual Page Reference for 7-Mode, Volume 1 561
shelfchk
sisNAMEna_sis - Single Instance Storage (SIS) management.
SYNOPSISsis config [ [ -s schedule ] [ -C <true | false> ] [ -I <true | false> ] [ -Q <true | false> ] [ -z <file_size>] path | path ... ]
sis on path
sis off path
sis start [ -s [ -p ] ] [ -f ] [ -d ] [ -m ] [ -o ] [ -q ] path
sis stop [ -a ] path
sis status [ -l ] [ [ path ] ... ]
sis revert_to [ <8.1> [ -delete ]] [ -cleanup ] [ path ]
DESCRIPTIONThe sis command manages SIS operations: compression and/or deduplication. Data compression can beused on-the-fly, and/or as a scheduled background operation. This can be followed by deduplication,which is a method of reducing disk space usage by eliminating duplicate data blocks on a FlexVolvolume, where only a single instance of each unique data blocks is stored.
The path parameter is the full path of a FlexVol volume, its format is /vol/vol_name.
The sis subcommands are:
config
This command is used to set up, modify, and retrieve the schedule or the options of a SIS enabledvolume. Options can be retrieved and modified even after SIS is no longer enabled on a particularvolume.
The -s option is used to set up or modify the schedule on the specified volume. If no option or path isspecified, then the schedule of all configured SIS enabled volumes is displayed.
schedule is [day_list][@hour_list] or [hour_list][@day_list] or - or auto or manual
The day_list specifies the days of the week that a SIS operation should run. It is a list of the first threeletters of the day ( sun, mon, tue, wed, thu, fri, sat ) separated by a comma. Day ranges such as mon-frican also be used. The default day_list is sun-sat. The names are not case sensitive.
562 Data ONTAP® 8.2 Commands: Manual Page Reference for 7-Mode, Volume 1
sis
The hour_list specifies the hours of each scheduled day that a SIS operation should run. The hour_list isfrom 0 to 23 separated by a comma. Hour ranges such as 8-17 are allowed. Step values can be used inconjunction with ranges (For example, 0-23/2 means every two hours in a day). The default hour_list is 0, i.e. at midnight of each scheduled day.
When SIS is enabled on a volume for the first time, an initial schedule is assigned to the volume. Thisinitial schedule is sun-sat@0, which means run once every day at midnight.
If "-" is specified, no schedule is set on the volume. The auto schedule string triggers a SIS operationdepending on the amount of new data written to the volume. The manual schedule string prevents SISfrom automatically triggering any operations and disables change-logging. This schedule string can onlybe used on SnapVault destination volumes. The use of this schedule is mainly desirable when inlinecompression is enabled on a SnapVault destination volume and background processing is not necessary.
The config option -C is used to enable/disable compression. The default value is false.
The option -I is used to enable/disable inline compression. The default value is false. Inlinecompression can only be enabled if compression is enabled.
The config option -Q is used to enable/disable Incompressible Data Detection(IDD). The default valueis false. IDD can be enabled only if compression is enabled.
The config option -z is used to set the minimum file size (in bytes), required for compression to attemptQuick Check on a file. The default value is 524288000.
on
The on command enables SIS operations on a volume. The specified volume must be an online FlexVolvolume.
On a regular volume, SIS operations will be started periodically according to a per-volume schedule. Ona SnapVault secondary volume, SIS operations will be triggered at the end of SnapVault transfers.
The schedule can be modified by the config subcommand. You can also manually start a SIS operationwith the start subcommand.
off
The off command disables SIS operations on a volume. If a SIS operation is active on the volume, itneeds to be stopped using sis stop before using the sis off command.
start
Use the start command to start SIS operations. The volume must be online and have SIS enabled beforestarting SIS operations. If there is a SIS operation already active on the volume, this command fails.
If the -s option is specified, the SIS operation scans the file system to process all the existing data. Withthe -s option, SIS operation prompts for user confirmation before proceeding. Use the -f option tosuppress the confirmation. When the sis start command is issued, a checkpoint is created at the end ofeach stage or sub-stage, or on an hourly basis in the gathering phase. If at any point the sis startoperation is stopped, the system can restart the SIS operation from the execution state saved in thecheckpoint. The -d option can be used to delete the existing checkpoint and restart a fresh sis startoperation. The checkpoint corresponding to gathering has a validity period of 24 hours. If the user
Data ONTAP® 8.2 Commands: Manual Page Reference for 7-Mode, Volume 1 563
sis
knows that significant changes have not been made on the volume, then such a gatherer checkpointwhose validity has expired can be used with the help of the -sp option. There is no time restriction forcheckpoints of other stages. In this release, whole volume scanning is supported on all FlexVolvolumes. The -m option can be used to build the deduplication metadata by scanning the entire filesystem. You will not achieve any space savings with this option. Once the metadata is built, existingdata can be shared with newly written data on subsequent deduplication runs. The -o option can be usedto scan the entire file system and processes the shared blocks also. You can achieve additional spacesavings using this option. Where as the option -s saves some time by skipping the shared blocks.
Specifying the -q option will queue a new SIS operation.
The start command does not have any effect on inline compression.
stop
Use the stop command to abort any active SIS operations on the volume. SIS will remain enabled andthe operations can be started again by using the start subcommand, SnapVault transfer, or thescheduler.
If the -a option is specified, both active and queued SIS operations are aborted.
status
Use the status command to report the status of SIS volumes. If one or more paths are specified, thecommand only displays the status of the specified volumes. The -l option will display detailed status,along with checkpoint information.
The df -s command displays the space savings generated by deduplication operations.
The df -S command displays the space savings generated by both compression and deduplicationoperations (see na_df(1)).
revert_to
This command downgrades SIS metafiles (fingerprint and changelog files) to Data ONTAP 8.1 release.
The -cleanup option deletes the previously downgraded SIS metafiles. This option does not take anyData ONTAP version number.
The -delete option deletes the existing SIS metafiles during ONTAP revert. When the revert_tocommand is run after setting this option, the existing SIS metafiles are not reverted, but deleted. Afterusing this option, run sis start -s command on the downgraded ONTAP version to generate the SISmetafiles.
The -cleanup and -delete options are mutually exclusive.
With no options specified, the downgrade operation is done on the specified volume. If you do notspecify the volume path, the operation is executed on all SIS enabled volumes.
When the sis revert_to command is run, a downgraded copy of the existing metafiles is created.Though the downgraded copy occupies extra disk space, the benefit of this approach is that if youdecide not to proceed with the downgrade, then you can continue in the current version, which is alsoavailable after sis revert_to.
564 Data ONTAP® 8.2 Commands: Manual Page Reference for 7-Mode, Volume 1
sis

The sis start command on volumes that have downgraded metafiles does not succeed if there arepreviously downgraded metafiles. After executing the sis revert_to if you want to continue in thecurrent version, clean up the reverted metafiles with -cleanup option. This reclaims the space occupiedby the downgraded metafiles.
When general revert_to command is run and if a SIS enabled volume exists, it checks whethermetafiles are downgraded or an option has been set to delete the current metafiles. If the check fails,you are prompted to downgrade the metafiles.
sis revert_to can be done only after SIS metafile upgrade to Data ONTAP 8.2 is completed. The sis start command can be run to upgrade the SIS metafiles.
Only after successful sis revert_to is done to the correct version, you can do a general revert_to. Aftera partial revert, the general revert_to does not succeed.
EXAMPLESsis status
This command displays the status of all SIS enabled volumes. The following example shows the statusoutput in short format:
toaster> sis status Path State Status Progress /vol/dvol_1 Enabled Idle Idle for 04:53:29 /vol/dvol_2 Enabled Pending Idle for 15:23:41 /vol/dvol_3 Disabled Idle Idle for 37:12:34 /vol/dvol_4 Enabled Active 25 GB Scanned /vol/dvol_5 Enabled Active 25 MB Searched /vol/dvol_6 Enabled Active 40 MB (20%) Done /vol/dvol_7 Enabled Active 30 MB Verified /vol/dvol_8 Enabled Active 10% Merged /vol/dvol_9 Enabled Active 23 MB Scanned, 20 MB Compressed
The dvol_1 is Idle. The last SIS operation on the volume was finished 04:53:29 ago.
The dvol_2 is Pending for resource limitation. The SIS operation on the volume will become Activewhen the resource is available.
The dvol_3 is Idle because the SIS operation is disabled on the volume.
The dvol_4 is Active. The SIS operation is doing whole volume scanning. So far, it has scanned 25GBof data.
The dvol_5 is Active. The operation is searching for SIS data, there are 25MB of data already searched.
The dvol_6 is also Active. The operation has saved 40MB of data. This is 20% of the total SIS datafound in the searching stage.
The dvol_7 is Active. It is verifying the metadata of processed data blocks. This process will removeunused metadata.
Data ONTAP® 8.2 Commands: Manual Page Reference for 7-Mode, Volume 1 565
sis
The dvol_8 is Active. Verified metadata is being merged. This process will merge together all verifiedmetadata of processed data blocks to an internal format which supports fast SIS operation.
The dvol_9 is Active. The operation is scanning the volume and so far it has compressed 20MB of data.
The following examples show the sis status output in long format:
toaster> sis status -l /vol/dvol_1
Path: /vol/dvol_1 State: Enabled Compression: Enabled Inline Compression: Enabled Incompressible Data Detection: Disabled Compression Quick Check File Size: 524288000 Status: Idle Progress: Idle for 04:54:34 Type: Regular Schedule: - Minimum Blocks Shared: 1 Blocks Skipped Sharing: 0 Last Operation State: Failure Last Successful Operation Begin: Fri Jul 30 18:03:40 GMT 2010 Last Successful Operation End: Fri Jul 30 18:04:20 GMT 2010 Last Operation Begin: Fri Jul 30 18:08:40 GMT 2010 Last Operation End: Fri Jul 30 18:08:55 GMT 2010 Last Operation Size: 0 KB Last Operation Error: Operation was stopped Changelog Usage: 0% Checkpoint Time: Fri Jul 30 18:08:55 GMT 2010 Checkpoint Op Type: Scan Checkpoint Stage: Sorting Checkpoint Sub-stage: - Checkpoint Progress: 0 KB Searched Logical Data: 502 MB/62 TB (0%) Queued Job: - Stale Fingerprints: 0%
toaster> sis status -l /vol/dvol_9
Path: /vol/dvol_9 State: Enabled Compression: Enabled Inline Compression: Enabled Incompressible Data Detection: Disabled Compression Quick Check File Size: 524288000 Status: Active Progress: 512000 KB Scanned, 447740 KB Compressed Type: Regular Schedule: - Minimum Blocks Shared: 1 Blocks Skipped Sharing: 0 Last Operation State: Success Last Successful Operation Begin: Fri Jul 30 18:13:20 GMT 2010 Last Successful Operation End: Fri Jul 30 18:13:20 GMT 2010 Last Operation Begin: Fri Jul 30 18:13:20 GMT 2010 Last Operation End: Fri Jul 30 18:13:20 GMT 2010 Last Operation Size: 0 KB Last Operation Error: - Changelog Usage: 0% Checkpoint Time: No Checkpoint Checkpoint Op Type: - Checkpoint Stage: - Checkpoint Sub-stage: -
566 Data ONTAP® 8.2 Commands: Manual Page Reference for 7-Mode, Volume 1
sis
Checkpoint Progress: - Logical Data: 502 MB/62 TB (0%) Queued Job: - Stale Fingerprints: 0%
Path: The absolute path of the volume.
State: The current state of SIS on the volume (Enabled or Disabled).
Compression: The current state of compression on the volume (Enabled or Disabled).
Inline Compression: The current state of inline compression on the volume (Enabled or Disabled).
Incompressible Data Detection: The current state of incompressible data detection on the volume(Enabled or Disabled).
Compression Quick Check File Size: The minimum file size (in bytes) required to attempt Quick checkon the file. The default value is 500MB and can be changed using sis config command.
Status: The status of the SIS operation on the volume.
Progress: The progress of the SIS operation on the volume.
Type: The type of SIS volume.
Schedule: The schedule of SIS operation for the volume.
Minimum Blocks Shared: The minimum number of adjacent blocks in a file that can be shared.
Blocks Skipped Sharing: The number of blocks skipped in the deduplication process.
Last Operation Status: The status of the last operation.
Last Successful Operation Begin: The time and date at which the last successful operation began.
Last Successful Operation End: The time and date at which the last successful operation ended.
Last Operation Begin: The time and date at which the last operation began.
Last Operation End: The time and date at which the last operation ended.
Last Operation Size: The size of the last operation.
Last Operation Error: The error encountered by the last operation.
Changelog Usage: The percentage of the changelog that was used.
Checkpoint Time: The time and date at which the checkpoint was created.
Checkpoint Op Type: The operation during which the checkpoint was created.
Checkpoint Stage: The stage of operation at which the checkpoint was created.
Data ONTAP® 8.2 Commands: Manual Page Reference for 7-Mode, Volume 1 567
sis
Checkpoint Sub-stage: The sub-stage of the checkpoint stage.
Checkpoint Progress: The progress of the checkpoint.
Logical Data: The total logical data in the volume, and how much is reached compared to thededuplication logical data limit, displayed as Logical Data Size / Logical Data limit (Logical Datapercent).
Queued Job: The job that is queued.
Stale Fingerprints: The percentage of stales in fingerprint database. If this is > 20%, subsequent ‘sisstart’ operation triggers the verify operation, which may take a long time to complete.
sis config
This command displays the schedule and compression configuration for all SIS enabled volumes. Thefollowing example shows the config output:
toaster> sis config Inline Incompressible Compression Quick Path Schedule Compression Compression Data Detection Check File Size -------------------- ------------ ----------- ----------- -------------- ----------------- /vol/dvol_1 - Enabled Enabled Disabled 524288000 /vol/dvol_2 23@sun-fri Enabled Disabled Enabled 524288000 /vol/dvol_3 auto Disabled Disabled Disabled 524288000
SIS on the volume dvol_1 is not scheduled.
SIS on the volume dvol_2 is scheduled to run every day from Sunday to Friday at 11 PM.
SIS on the volume dvol_3 is set to auto schedule.
sis revert_to
This command downgrades SIS metafiles.
sis revert_to 8.1
Downgrades the SIS metafiles on all SIS enabled volumes.
sis revert_to -cleanup
Deletes all of the downgraded metafiles created, if they exist.
sis revert_to 8.1 -delete
Ensures that all the current versions of SIS metafiles are deleted when the Data ONTAP revert_tocommand is run. In such a case, the SIS metafiles are not downgraded.
sis revert_to 8.1 /vol/vol1
Downgrades the SIS metafiles on volume vol1.
568 Data ONTAP® 8.2 Commands: Manual Page Reference for 7-Mode, Volume 1
sis

SEE ALSOna_df(1)
Data ONTAP® 8.2 Commands: Manual Page Reference for 7-Mode, Volume 1 569
sis
smtapeNAMEna_smtape - image-based backup and restore
SYNOPSISsmtape backup [ options ] path tape_device
smtape restore [ options ] path tape_device
smtape restore -g path
smtape restore -h tape_device
smtape abort job_id
smtape continue job_id [ tape_device ]
smtape status [ -l ] [ [ -p path ] | [ job_id ] ]
smtape help [ subcommand ]
DESCRIPTIONThe smtape command is used to manage backup and restore operations. It allows user to backup avolume to tape, restore to a volume from tape, abort or continue an operation, show the status of anoperation, and get help on smtape command.
USAGEThe smtape subcommands are:
backup [ -g volume_geometry ] [ -b block_size ] [ -s snapshot_name ] path tape_device
Performs a level 0 backup of a specified volume path to a tape_device. Use sysconfig -t for a list oflocal tape devices. If no snapshot name is specified, a snapshot is created as the base snapshot. If asnapshot name is specified, the specified snapshot is used as the base snapshot. A new unique job ID inthe range of [1...99999] is assigned for this operation and is returned in the output of this command.This ID can be subsequently used to perform other operations such as status check, abort, etc.
smtape backup performs a SnapMirror to Tape equivalent backup. The base snapshot is retained at thecompletion of the backup. This is to facilitate re-establishing SnapMirror relationship upon restore.
The -b option sets the tape record size to be set by the tape device. The tape record size should bemultiples of 4 kilobytes, ranging from 4 kilobytes to 256 kilobytes. The default tape record size is set to240 kilobytes.
570 Data ONTAP® 8.2 Commands: Manual Page Reference for 7-Mode, Volume 1
smtape
The -s option specifies a base snapshot.
The -g option specifies the geometry of the backup image. This will optimize the tape for a particulardestination traditional volume. This option only applies to traditional volumes. The volume_geometryargument is a string which describes the geometry of the intended destination traditional volume. It canbe acquired by using the smtape restore -g command on that traditional volume. Using this option canincrease smtape restore performance dramatically.
restore [ -b block_size ] path tape_device
Performs a level 0 restore of a backup image in the specified tape_device to a destination volume path.A new unique job ID in the range of [1...99999] is assigned for this operation and is returned in theoutput of this command.
smtape restore works in the same way as SnapMirror to Tape restore. It provides users the ability toinitialize a volume SnapMirror (VSM) destination volume using backup images from tapes. After therestore, a VSM relationship can be established between the source volume and the destination volumethrough SnapMirror command. The volume needs to be placed in restricted mode prior to restore. Anyexisting data on the volume will get overwritten upon restore. The volume will stay restricted duringrestore and made read-only after the restore in snapmirrored state.
The -b option specifies the tape record size to be used.
restore -g pathDisplays the volume geometry string for the specified path. This string, when given to the smtape backup -g command, will dramatically improve smtape restore performance to this traditional volumepath.
restore -h tape_deviceDisplays the image header of the tape in the specified tape_device. If the command fails to displayimage header of the tape, check the position of tape using mt command.
abort job_idAborts the backup or restore operation associated with a given job ID.
continue job_id [ tape_device ]Continues the backup or restore operation using the specified tape_device. This command is used whenan operation has reached the end of current tape and is in the wait state to write output or accept inputfrom a new tape. If tape_device is not specified, the original tape device will be used.
status [ -l ] [ [ -p path ] | [ job_id ] ] Shows status of the backup and restore jobs. If a job_id isspecified, the command will only display the status of that job. The status field will be either Active,Aborting, or Waiting.
The -l option will display detailed status.
The -p option will only display status for the corresponding path.
help [ subcommand ]Prints a summary for the subcommand. With no arguments, help prints a list of all availablesubcommands.
Data ONTAP® 8.2 Commands: Manual Page Reference for 7-Mode, Volume 1 571
smtape
EXAMPLESHere are a few examples of using the smtape command:
The following example shows backing up a volume to tape:
adams> smtape backup /vol/vol1 rst3a Job 9 started.
The following example shows restoring a backup image from tape to volume:
adams> smtape restore /vol/vol2 rst4a Job 10 started.
The following example presents the smtape status with jobs running:
adams> smtape status Job ID Seq No Type Status Path Device Progress 9 0 Backup Active /vol/vol1 rst3a 1.403 GB 10 0 Restore Active /vol/vol2/ rst4a 258.492 MB
HA CONSIDERATIONSIf one node in an HA pair goes down, any active smtape jobs running on that node are aborted.Nevertheless, any active smtape jobs running on the other node are not impacted and will run tocompletion. While the system is in takeover mode, one can perform smtape backup or restore of thevolumes associated with the failed partner using tape devices on the active node. If cf giveback isissued while smtape jobs with partner volumes are running, giveback is canceled and those jobs willcontinue to run. If cf giveback -f is issued instead, then the active smtape jobs using partner volumesare aborted and giveback will proceed. Any active smtape jobs using local volumes of the active nodeare not affected by giveback.
VFILER CONSIDERATIONSTape devices are not supported on vfilers. Therefore smtape command runs on the physical node only.
FILES/etc/log/backupThis file logs smtape activity. See na_backuplog(5) for details.
SEE ALSOna_restore(1), na_tape(4)
572 Data ONTAP® 8.2 Commands: Manual Page Reference for 7-Mode, Volume 1
smtape
snapNAMEna_snap - Manage Snapshot copies.
SYNOPSISsnap autodelete vol_name [ on | off | show | reset | help ]snap autodelete vol_name option value
snap create [ -A | -V ] vol_name name
snap delete [ -A | -V ] vol_name name snap delete [ -A | -V ] -a [ -f ] [ -q ] vol_name
snap delta [ -A | -V ] [ vol_name [ snap ] [ snap ] ]
snap list [ -A | -V ] [ -n ] [ -l ] [ -fs-block-format ] [ -b ][ [ -q ] [ vol_name ] | -o [ qtree_path ] ]
snap reclaimable vol_name snap ...
snap rename [ -A | -V ] vol_name old-snapshot-name new-snapshot-name
snap reserve [ -A | -V ] [ vol_name [ percent ] ]
snap restore [ -A | -V ] [ -f ] [ -t vol | file ] [ -s snapshot_name ][ -r restore_as_path ] vol_name | restore_from_path
snap sched [ -A | -V ] [ vol_name [ weeks [ days [ hours[@list] ] ] ] ]
DESCRIPTIONThe snap family of commands provides a means to create and manage Snapshot copies in each volumeor aggregate.
A snapshot is a read-only copy of the entire file system, as of the time the snapshot was created. Thenode creates snapshots very quickly without consuming any disk space. The existing data remains inplace; future writes to those blocks are redirected to new locations. Only as blocks in the active filesystem are modified and written to new locations on disk does the snapshot begin to consume extraspace.
Volume snapshots are exported to all CIFS or NFS clients. They can be accessed from each directory inthe file system. From any directory, a user can access the set of snapshots from a hidden sub-directorythat appears to a CIFS client as ~snapshot and to an NFS client as .snapshot. These hiddensub-directories are special in that they can be accessed from every directory, but they only show up indirectory listings at an NFS mount point or at the root of CIFS share.
Each volume on the node can have up to 255 snapshots at one time. Each aggregate on the node canhave up to 10 snapshots at one time. Because of the technique used to update disk blocks, deleting asnapshot will generally not free as much space as its size would seem to indicate. Blocks in the snapshotmay be shared with other snapshots, or with the active file system, and thus may be unavailable for
Data ONTAP® 8.2 Commands: Manual Page Reference for 7-Mode, Volume 1 573
snap
reuse even after the snapshot is deleted.
If executed on a vfiler, the snap commands can only operate on volumes of which the vfiler hasexclusive ownership. Manipulating snapshots in shared volumes can only be performed on the physicalnode. Operations on aggregate snapshots are unavailable on vfilers and must be performed on thephysical node. For the rest of this section, if the snap commands are executed on a vfiler, all volumenames passed on the command line must belong to the vfiler exclusively.
The snap commands have a special set of restrictions that only apply when they are executed on an Cluster-Mode deployment of Data ONTAP 8.0 and beyond via a special provision of the ClusterCLI. These restrictions are necessary in this specific product environment so as to mesh cleanly with theadditional cluster-wide databases. If these restrictions are encountered in this narrow use case, the snapcommands will provide detailed information about them.
The snap commands are persistent across reboots. Do not include snap commands in the /etc/rc. If youinclude a snap command in the /etc/rc file, the same snap command you enter through the commandline interface does not persist across a reboot and is overridden by the one in the /etc/rc file.
Automatic snapshotsAutomatic snapshots can be scheduled to occur weekly, daily, or hourly. Weekly snapshots are named weekly.N, where N is "0" for the most recent snapshot, "1" for the next most recent, and so on. Dailysnapshots are named daily.N and hourly snapshots hourly.N. Whenever a new snapshot of a particulartype is created and the number of existing snapshots of that type exceeds the limit specified by the sched option described below, then the oldest snapshot is deleted and the existing ones are renamed. If,for example, you specified that a maximum of 8 hourly snapshots were to be saved using the schedcommand, then on the hour, hourly.7 would be deleted, hourly.0 would be renamed to hourly.1, and soon. If deletion of the oldest snapshot fails because it is busy, the oldest snapshot is renamed to scheduled_snap_busy.N, where N is a unique number identifying the snapshot. Once the snapshot is nolonger busy, it will be deleted. Do not use snapshot names of this form for other purposes, as they maybe deleted automatically.
USAGEAll of the snap commands take the options -A and -V. The first specifies that the operation should beperformed on an aggregate; and the following name is taken to be the name of an aggregate. The secondspecifies a volume-level operation. This is the default. The -A option is not available on vfilers.
snap autodelete volname [ on | off | reset | show | help ]
snap autodelete volname option value ... Snap autodelete allows a flexible volume to automaticallydelete the snapshots in the volume. This is useful when a volume is about to run out of available spaceand deleting snapshots can recover space for current writes to the volume. This feature works togetherwith vol autosize to automatically reclaim space when the volume is about to get full. The volumeoption try_first controls the order in which these two reclaim policies are used.
By default autodelete is disabled. The on subcommand can be used to enable autodelete. The resetsub-command resets the settings of the snap autodelete to defaults. The show sub-command can be usedto view the current settings.
574 Data ONTAP® 8.2 Commands: Manual Page Reference for 7-Mode, Volume 1
snap
The snapshots in a volume are deleted in accordance to a policy defined by the option settings. Thecurrently supported options:
commitment { try | disrupt | destroy }
This option determines whether a particular snapshot is allowed to be deleted by autodelete. Setting thisoption to try permits snapshots which are not locked by data protection utilities (for example, dump,mirroring, NDMPcopy) and data backing functionalities (for example, volume and LUN clones) to bedeleted. Snapvault snapshots are not locked and thus are not protected from autodelete by the tryoption. Setting this option to disrupt permits snapshots which are not locked by data backingfunctionalities to be deleted in addition to those which the try option allows to be deleted. Setting thisoption to destroy in conjunction with the destroy_list option allows autodelete of snapshots that arelocked by data backing functionalities (for example, LUN clone). Since the values for the commitmentoption are hierarchical, setting it to destroy will allow destruction of the snapshots which the try and disrupt options allow to be deleted.
destroy_list { none | lun_clone | file_clone vol_clone | cifs_share }
This option, when used with the commitment destroy option, determines which types of lockedsnapshots can be autodeleted. Setting the option to none prevents all snapshots from being autodeleted.Setting the option to lun_clone allows snapshots locked by LUN clones to be autodeleted. Setting theoption to file_clone allows snapshots locked by file clones to be autodeleted. Setting the option to vol_clone allows snapshots locked by volume clones to be autodeleted. Setting the option to cifs_shareallows snapshots locked by CIFS shares to be autodeleted. These options have no effect unless the commitment option is also set to destroy. Multiple comma-separated options can be combined (except none). The following is an example of the destroy_list being set on a node when the commitmentoption is not set to destroy:
host01> snap autodelete test_vol destroy_list lun_clone WARNING: Make sure commitment option is set to destroy, to make use of this feature
snap autodelete: snap autodelete configuration options set
host01> snap autodelete test_vol commitment destroy snap autodelete: snap autodelete configuration options set
trigger { volume | snap_reserve | space_reserve }
This option determines the condition which starts the automatic deletion of snapshots. Setting theoption to volume triggers snapshot delete when the volume reaches "threshold" capacity and thevolume’s snap reserve has been exceeded. Setting the option to snap_reserve triggers snapshotdelete when the snap reserve of the volume reaches "threshold" capacity. Setting the option to space_reserve triggers snapshot delete when the space reserved in the volume reaches "threshold"capacity and the volume’s snap reserve has been exceeded. "Threshold" capacity is determined bythe size of the volume as given below:
If the volume size is less than 20 GB, the autodelete threshold is 85%.
If the volume size is equal to or greater than 20 GB and less than 100 GB, the autodelete thresholdis 90%.
Data ONTAP® 8.2 Commands: Manual Page Reference for 7-Mode, Volume 1 575
snap
If the volume size is equal to or greater than 100 GB and less than 500 GB, the autodeletethreshold is 92%.
If the volume size is equal to or greater than 500 GB and less than 1 TB, the autodelete threshold is95%.
If the volume size is equal to or greater than 1 TB, the autodelete threshold is 98%.
target_free_space value
This option determines the condition when snapshot autodeletion should stop (once started). The value is a percentage. Depending on the trigger, snapshots are deleted till the free space reachesthe target_free_space percentage.
delete_order { newest_first | oldest_first }
This option determines if the oldest or newest snapshots will be deleted first.
defer_delete { scheduled | user_created | prefix none }
This deletion of a particular kind of snapshot can be deferred to the end. Setting this option valueto scheduled will delete the snapshots created by the snapshot scheduler last. Setting this optionvalue to user_created will delete the snapshots not created by the scheduler last. Setting it to prefix will delete the snapshots matching the prefix string (see option prefix) to be deleted last.Setting the option to none will set all snapshot eligible for deletion right away.
prefix string
The option value sets the prefix for the prefix setting for option defer_delete. The prefix string canbe 15 characters long.
snap create vol_name snapshot-nameCreates a snapshot of volume vol_name with the specified name.
snap delete vol_name nameDeletes the existing snapshot belonging to volume vol_name that has the specified name.
snap delete -a [ -f ] [ -q ] vol_name Deletes all existing snapshots belonging to volume vol_name.Before beginning deletion, the user is requested to confirm the operation. The -f option suppressesthis confirmation step. A message is printed out to indicate each snapshot deleted, unless the -qoption is specified, in which case deletion will occur silently. This command can be interrupted byentering CTRL-C. Note that certain node utilities, such as RAID sync mirror, need to lock snapshotsperiodically to temporarily prevent snapshot deletion. In such a case, all snapshots may not be deletedby snap delete -a. The snap delete command prints the list of owners of all busy snapshots (snapshotswhich have other applications/systems locking them).
snap delta [ vol_name [ snapshot-name ] [ snapshot-name ]]Displays the rate of change of data between snapshots. When used without any arguments, itdisplays the rate of change of data between snapshots for all volumes in the system, or all aggregates inthe case of snap delta -A. If a volume is specified, the rate of change of data is displayed for thatparticular volume. The query can be made more specific by specifying the beginning and endingsnapshots to display the rate of change between them for a specific volume. If no ending snapshot islisted, the rate of change of data between the beginning snapshot and the Active File System is
576 Data ONTAP® 8.2 Commands: Manual Page Reference for 7-Mode, Volume 1
snap
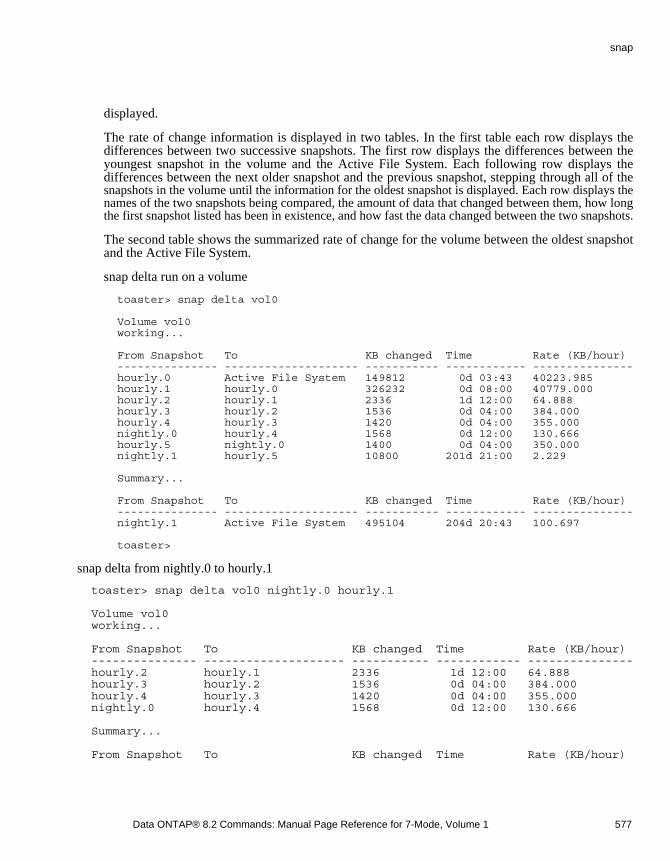
displayed.
The rate of change information is displayed in two tables. In the first table each row displays thedifferences between two successive snapshots. The first row displays the differences between theyoungest snapshot in the volume and the Active File System. Each following row displays thedifferences between the next older snapshot and the previous snapshot, stepping through all of thesnapshots in the volume until the information for the oldest snapshot is displayed. Each row displays thenames of the two snapshots being compared, the amount of data that changed between them, how longthe first snapshot listed has been in existence, and how fast the data changed between the two snapshots.
The second table shows the summarized rate of change for the volume between the oldest snapshotand the Active File System.
snap delta run on a volume
toaster> snap delta vol0
Volume vol0 working...
From Snapshot To KB changed Time Rate (KB/hour) --------------- -------------------- ----------- ------------ --------------- hourly.0 Active File System 149812 0d 03:43 40223.985 hourly.1 hourly.0 326232 0d 08:00 40779.000 hourly.2 hourly.1 2336 1d 12:00 64.888 hourly.3 hourly.2 1536 0d 04:00 384.000 hourly.4 hourly.3 1420 0d 04:00 355.000 nightly.0 hourly.4 1568 0d 12:00 130.666 hourly.5 nightly.0 1400 0d 04:00 350.000 nightly.1 hourly.5 10800 201d 21:00 2.229
Summary...
From Snapshot To KB changed Time Rate (KB/hour) --------------- -------------------- ----------- ------------ --------------- nightly.1 Active File System 495104 204d 20:43 100.697
toaster>
snap delta from nightly.0 to hourly.1
toaster> snap delta vol0 nightly.0 hourly.1
Volume vol0 working...
From Snapshot To KB changed Time Rate (KB/hour) --------------- -------------------- ----------- ------------ --------------- hourly.2 hourly.1 2336 1d 12:00 64.888 hourly.3 hourly.2 1536 0d 04:00 384.000 hourly.4 hourly.3 1420 0d 04:00 355.000 nightly.0 hourly.4 1568 0d 12:00 130.666
Summary...
From Snapshot To KB changed Time Rate (KB/hour)
Data ONTAP® 8.2 Commands: Manual Page Reference for 7-Mode, Volume 1 577
snap
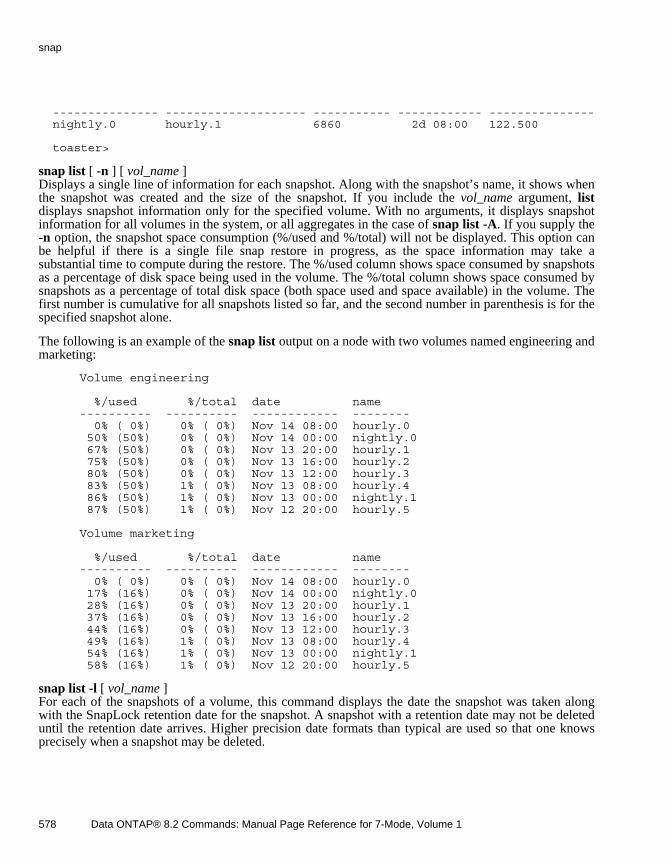
--------------- -------------------- ----------- ------------ --------------- nightly.0 hourly.1 6860 2d 08:00 122.500
toaster>
snap list [ -n ] [ vol_name ]Displays a single line of information for each snapshot. Along with the snapshot’s name, it shows whenthe snapshot was created and the size of the snapshot. If you include the vol_name argument, listdisplays snapshot information only for the specified volume. With no arguments, it displays snapshotinformation for all volumes in the system, or all aggregates in the case of snap list -A. If you supply the -n option, the snapshot space consumption (%/used and %/total) will not be displayed. This option canbe helpful if there is a single file snap restore in progress, as the space information may take asubstantial time to compute during the restore. The %/used column shows space consumed by snapshotsas a percentage of disk space being used in the volume. The %/total column shows space consumed bysnapshots as a percentage of total disk space (both space used and space available) in the volume. Thefirst number is cumulative for all snapshots listed so far, and the second number in parenthesis is for thespecified snapshot alone.
The following is an example of the snap list output on a node with two volumes named engineering andmarketing:
Volume engineering
%/used %/total date name ---------- ---------- ------------ -------- 0% ( 0%) 0% ( 0%) Nov 14 08:00 hourly.0 50% (50%) 0% ( 0%) Nov 14 00:00 nightly.0 67% (50%) 0% ( 0%) Nov 13 20:00 hourly.1 75% (50%) 0% ( 0%) Nov 13 16:00 hourly.2 80% (50%) 0% ( 0%) Nov 13 12:00 hourly.3 83% (50%) 1% ( 0%) Nov 13 08:00 hourly.4 86% (50%) 1% ( 0%) Nov 13 00:00 nightly.1 87% (50%) 1% ( 0%) Nov 12 20:00 hourly.5
Volume marketing
%/used %/total date name ---------- ---------- ------------ -------- 0% ( 0%) 0% ( 0%) Nov 14 08:00 hourly.0 17% (16%) 0% ( 0%) Nov 14 00:00 nightly.0 28% (16%) 0% ( 0%) Nov 13 20:00 hourly.1 37% (16%) 0% ( 0%) Nov 13 16:00 hourly.2 44% (16%) 0% ( 0%) Nov 13 12:00 hourly.3 49% (16%) 1% ( 0%) Nov 13 08:00 hourly.4 54% (16%) 1% ( 0%) Nov 13 00:00 nightly.1 58% (16%) 1% ( 0%) Nov 12 20:00 hourly.5
snap list -l [ vol_name ]For each of the snapshots of a volume, this command displays the date the snapshot was taken alongwith the SnapLock retention date for the snapshot. A snapshot with a retention date may not be deleteduntil the retention date arrives. Higher precision date formats than typical are used so that one knowsprecisely when a snapshot may be deleted.
578 Data ONTAP® 8.2 Commands: Manual Page Reference for 7-Mode, Volume 1
snap
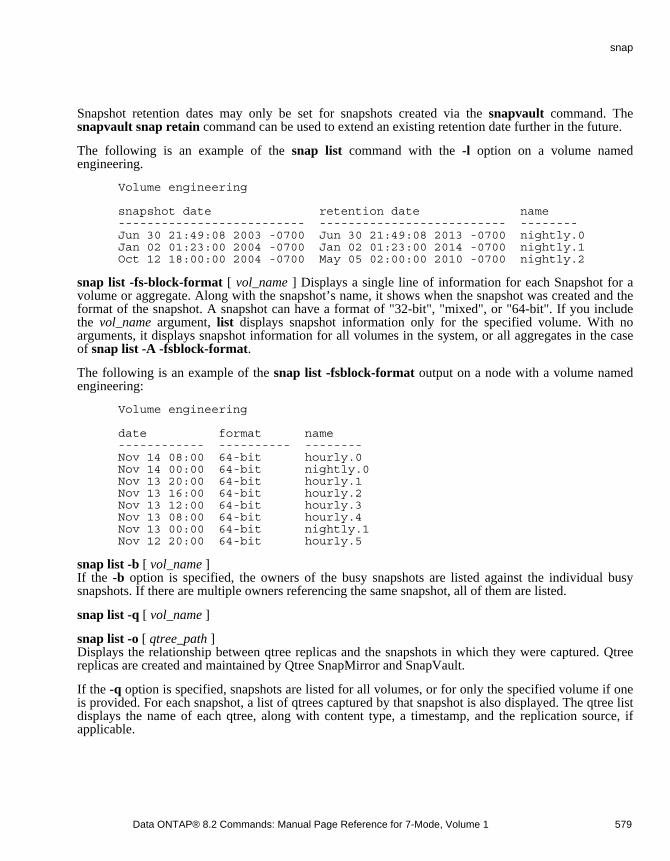
Snapshot retention dates may only be set for snapshots created via the snapvault command. The snapvault snap retain command can be used to extend an existing retention date further in the future.
The following is an example of the snap list command with the -l option on a volume namedengineering.
Volume engineering
snapshot date retention date name -------------------------- -------------------------- -------- Jun 30 21:49:08 2003 -0700 Jun 30 21:49:08 2013 -0700 nightly.0 Jan 02 01:23:00 2004 -0700 Jan 02 01:23:00 2014 -0700 nightly.1 Oct 12 18:00:00 2004 -0700 May 05 02:00:00 2010 -0700 nightly.2
snap list -fs-block-format [ vol_name ] Displays a single line of information for each Snapshot for avolume or aggregate. Along with the snapshot’s name, it shows when the snapshot was created and theformat of the snapshot. A snapshot can have a format of "32-bit", "mixed", or "64-bit". If you includethe vol_name argument, list displays snapshot information only for the specified volume. With noarguments, it displays snapshot information for all volumes in the system, or all aggregates in the caseof snap list -A -fsblock-format.
The following is an example of the snap list -fsblock-format output on a node with a volume namedengineering:
Volume engineering
date format name ------------ ---------- -------- Nov 14 08:00 64-bit hourly.0 Nov 14 00:00 64-bit nightly.0 Nov 13 20:00 64-bit hourly.1 Nov 13 16:00 64-bit hourly.2 Nov 13 12:00 64-bit hourly.3 Nov 13 08:00 64-bit hourly.4 Nov 13 00:00 64-bit nightly.1 Nov 12 20:00 64-bit hourly.5
snap list -b [ vol_name ]If the -b option is specified, the owners of the busy snapshots are listed against the individual busysnapshots. If there are multiple owners referencing the same snapshot, all of them are listed.
snap list -q [ vol_name ]
snap list -o [ qtree_path ]Displays the relationship between qtree replicas and the snapshots in which they were captured. Qtreereplicas are created and maintained by Qtree SnapMirror and SnapVault.
If the -q option is specified, snapshots are listed for all volumes, or for only the specified volume if oneis provided. For each snapshot, a list of qtrees captured by that snapshot is also displayed. The qtree listdisplays the name of each qtree, along with content type, a timestamp, and the replication source, ifapplicable.
Data ONTAP® 8.2 Commands: Manual Page Reference for 7-Mode, Volume 1 579
snap

The content type is one of Original, Replica, or Transitioning. The Original label indicates that thesnapshot contains an original copy of the qtree, and not a replicated one. At the time the snapshot wascreated, the qtree was writable. The Replica label indicates that the snapshot contains a consistentreplica of some original source qtree, which is also listed on that line. The timestamp for a replica qtreeis given as the date of the replication, not of the snapshot. The Transitioning label indicates that at thetime the snapshot was taken, the replica qtree was in a transitional state, and therefore does notrepresent an exact copy of any original source qtree.
The following is an example of the snap list command with the -q option, on a node named toaster witha volume named vault. The volume contains SnapVault qtree replicas from a volume named usr3 on asystem named oven.
toaster> snap list -q vault Volume vault working...
qtree contents date source -------- ------------- ------------ -------- sv_hourly.0 (Nov 18 18:56) dr4b Replica Nov 18 18:55 oven:/vol/usr3/dr4b gf2e Replica Nov 18 18:55 oven:/vol/usr3/gf2e mjs Replica Nov 18 18:55 oven:/vol/usr3/mjs xydata Original Nov 18 18:56 - toaster(0007462703)_vault-base.0 (Nov 18 18:56) dr4b Replica Nov 18 18:55 oven:/vol/usr3/dr4b gf2e Replica Nov 18 18:55 oven:/vol/usr3/gf2e mjs Replica Nov 18 18:55 oven:/vol/usr3/mjs xydata Original Nov 18 18:56 - hourly.0 (Nov 18 18:55) dr4b Transitioning - - gf2e Transitioning - - mjs Transitioning - - xydata Original Nov 18 18:55 - hourly.1 (Nov 18 18:52) dr4b Replica Nov 18 18:50 oven:/vol/usr3/dr4b gf2e Replica Nov 18 18:51 oven:/vol/usr3/gf2e mjs Replica - Unknown sv_nightly.0 (Nov 18 18:51) dr4b Replica Nov 18 18:50 oven:/vol/usr3/dr4b sv_hourly.1 (Nov 18 18:49)
If the -o option is specified, then all qtrees are displayed, or only the specified qtree if one is provided.For each qtree displayed, a list of snapshots in which the qtree is not Transitioning is also given, alongwith the timestamp and replication source, if applicable.
The following is an example of the snap list command with the -o option, on a node named toaster witha volume named vault. The volume contains SnapVault qtree replicas from a volume named usr3 on asystem named oven.
580 Data ONTAP® 8.2 Commands: Manual Page Reference for 7-Mode, Volume 1
snap
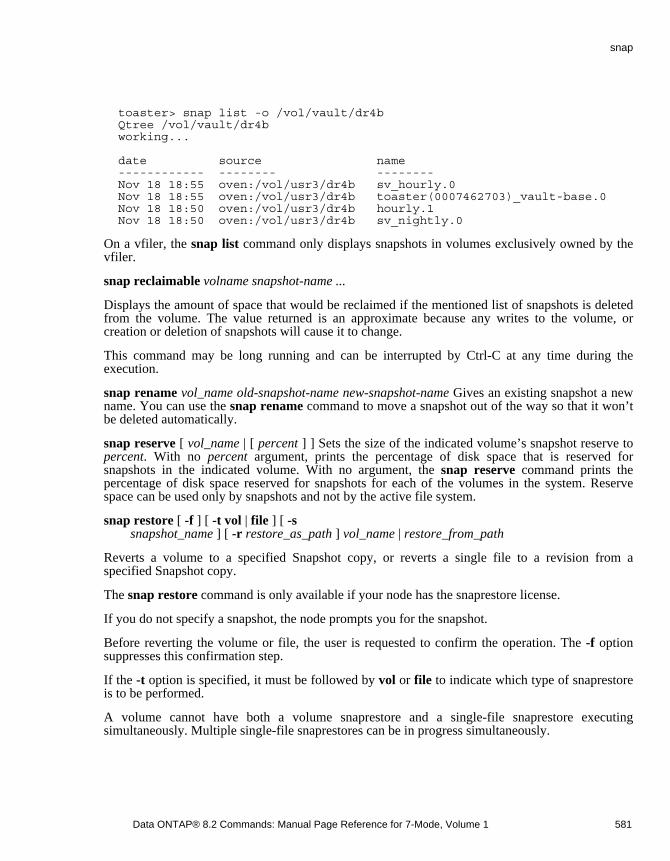
toaster> snap list -o /vol/vault/dr4b Qtree /vol/vault/dr4b working...
date source name ------------ -------- -------- Nov 18 18:55 oven:/vol/usr3/dr4b sv_hourly.0 Nov 18 18:55 oven:/vol/usr3/dr4b toaster(0007462703)_vault-base.0 Nov 18 18:50 oven:/vol/usr3/dr4b hourly.1 Nov 18 18:50 oven:/vol/usr3/dr4b sv_nightly.0
On a vfiler, the snap list command only displays snapshots in volumes exclusively owned by thevfiler.
snap reclaimable volname snapshot-name ...
Displays the amount of space that would be reclaimed if the mentioned list of snapshots is deletedfrom the volume. The value returned is an approximate because any writes to the volume, orcreation or deletion of snapshots will cause it to change.
This command may be long running and can be interrupted by Ctrl-C at any time during theexecution.
snap rename vol_name old-snapshot-name new-snapshot-name Gives an existing snapshot a newname. You can use the snap rename command to move a snapshot out of the way so that it won’tbe deleted automatically.
snap reserve [ vol_name | [ percent ] ] Sets the size of the indicated volume’s snapshot reserve to percent. With no percent argument, prints the percentage of disk space that is reserved forsnapshots in the indicated volume. With no argument, the snap reserve command prints thepercentage of disk space reserved for snapshots for each of the volumes in the system. Reservespace can be used only by snapshots and not by the active file system.
snap restore [ -f ] [ -t vol | file ] [ -s snapshot_name ] [ -r restore_as_path ] vol_name | restore_from_path
Reverts a volume to a specified Snapshot copy, or reverts a single file to a revision from aspecified Snapshot copy.
The snap restore command is only available if your node has the snaprestore license.
If you do not specify a snapshot, the node prompts you for the snapshot.
Before reverting the volume or file, the user is requested to confirm the operation. The -f optionsuppresses this confirmation step.
If the -t option is specified, it must be followed by vol or file to indicate which type of snaprestoreis to be performed.
A volume cannot have both a volume snaprestore and a single-file snaprestore executingsimultaneously. Multiple single-file snaprestores can be in progress simultaneously.
Data ONTAP® 8.2 Commands: Manual Page Reference for 7-Mode, Volume 1 581
snap
For volume snaprestore:
The volume must be online and must not be a mirror.
If reverting the root volume, the node will be rebooted. Non-root volumes do not require a reboot.
When reverting a non-root volume, all ongoing access to the volume must be terminated, just as isdone when a volume is brought offline. See the description under the vol offline command for adiscussion of circumstances that would prevent access to the volume from being terminated and thusprevent the volume from being reverted.
After the reversion, the volume is in the same state as it was when the snapshot was taken. The sizeof the flexible volume will be set to either the current volume size or the snapshot size - whichever isgreater.
For single-file snaprestore:
The volume used for restoring the file must be online and must not be a mirror.
If restore_as_path is specified, the path must be a full path to a filename, and must be in the samevolume as the volume used for the restore.
Files other than normal files and LUNs are not restored. This includes directories (and theircontents), and files with NT streams.
If there is not enough space in the volume, the single file snap restore will not start.
If the file already exists (in the active filesystem), it will be overwritten with the version in thesnapshot.
It could take up to several minutes for before the snap command returns. During this time clientexclusive oplocks are revoked and hard exclusive locks like the DOS compatibility lock are invalidated.
Once the snap command returns, the file restore will proceed in the background. During this time,any operation which tries to change the file will be suspended until the restore is done. Also, othersinglefile snap restores can be executed.
Also it is possible for the single file snap restore to be aborted if we run out of disk space duringthe operation. When this happens, the timestamp of the file being restored will be updated. Thus it willnot be the same as the timestamp of the file in the snapshot.
An in-progress restore can be aborted by removing the file. For NFS users, the last link to the filemust be removed.
The snapshot used for the restore cannot be deleted. New snapshots cannot be created while asingle-file snaprestore is in progress. Scheduled snapshots on the volume will be suspended for theduration of the restore.
Tree, user, and group quota limits are not enforced for the owner, group and tree in which the fileis being restored. Thus if the user, group, or tree quotas are exceeded, /etc/quotas will need to be alteredafter the single file snap restore operation has completed. Then quota resize will need to be run.
582 Data ONTAP® 8.2 Commands: Manual Page Reference for 7-Mode, Volume 1
snap
When the restore completes, the file’s attributes (size, permissions, ownership, and so on) shouldbe identical with those in the Snapshot copy.
If the system is halted or crashes while a single file snaprestore is in progress then the operationwill be restarted on reboot.
snap sched [ vol_name [ weeks [ days [ hours [ @list ] ] ] ] ]Sets the schedule for automatic snapshot creation. The argument vol_name identifies the volumethe schedule should be applied to. The second argument indicates how many weekly snapshots shouldbe kept on-line, the third how many daily, and the fourth how many hourly. If an argument is left off, orset to zero, then no snapshot of the corresponding type is created. Daily snapshots are created at 24:00of each day except Sunday, and weekly snapshots are created at 24:00 on Sunday. Only one snapshot iscreated at a time. If a weekly snapshot is being created, for instance, no daily or hourly snapshot will becreated even if one would otherwise be scheduled. For example, the command:
snap sched vol0 2 6
indicates that two weekly snapshots and six daily snapshots of volume vol0 should be kept on line.No hourly snapshots will be created. For snapshots created on the hour, an optional list of times can beincluded, indicating the hours on which snapshots should occur. For example, the command:
snap sched vol0 2 6 8@8,12,16,20
indicates that in addition to the weekly and daily snapshots, eight hourly snapshots should be kepton line, and that they should be created at 8 am, 12 pm (noon), 4 pm, and 8 pm. Hours must be specifiedin 24-hour notation.
With no argument, snap sched prints the current snapshot schedule for all volumes in the system.With just the vol_name argument, it prints the schedule for the specified volume.
SEE ALSOna_df(1)
BUGSThe time required by the snap list command depends on the size of the file system. It can takeseveral minutes on very large file systems. Use snap list -n instead.
Data ONTAP® 8.2 Commands: Manual Page Reference for 7-Mode, Volume 1 583
snap
snaplockNAMEna_snaplock - compliance related operations.
SYNOPSISsnaplock command argument ...
DESCRIPTIONThe snaplock command manages compliance related functionality on the system. A volume createdusing the vol command (see na_vol(1)) is a snaplock volume when either the enterprise or complianceoption is chosen. Enterprise and compliance SnapLock volumes allow different levels of securityassurance.
Snaplock compliance volumes may additionally be used as compliant log volumes for operationsperformed on any SnapLock volume or system.
SnapLock enterprise volumes may allow audited file deletions before the expiration of file retentiondates. This privileged delete capability may be enabled on a per volume basis when secure logging isproperly configured.
USAGEThe following commands are available under snaplock:
privdel log options clock
snaplock privdel [ -f ] path
Allows the deletion of retained files on SnapLock enterprise volumes before the expiration date of thefile specified by path. The -f flag allows the command to proceed without interactive confirmation fromthe user.
For this command to succeed the user must be accessing the node over a secure connection and must bea member of the Compliance Administrators group (see na_useradmin(1))
This command is not available on SnapLock compliance volumes.
snaplock logvolume [ -f ] [ vol ]archive vol [ basename ]status vol [ basename ]
The volume command sets the SnapLock log volume to vol if the volume vol is online and is aSnapLock Compliance volume. The active SnapLock log files on the previous log volume (if there wasone) will be archived. New SnapLock log will be initialized on the new volume vol. If the volume vol isnot specified then the command displays the current SnapLock log volume.
584 Data ONTAP® 8.2 Commands: Manual Page Reference for 7-Mode, Volume 1
snaplock

SnapLock log file archival normally happens whenever the size of a log reaches the maximum sizespecified by the snaplock.log.maximum_size option (see na_options(1)). The archive command forcesactive SnapLock log file to be archived and replaces them with new log files. If the basename parameteris given, the active SnapLock log file with that base name will be archived and replaced. Otherwise, allactive SnapLock log files on log files on volume vol will be archived and replaced.
The status command reports the status of the active SnapLock log files on volume vol.
snaplock options [ -f ] vol privdel [ on | off disallowed ]
The options privdel command sets or reports the state of the privileged delete option on a SnapLockenterprise volume. The -f flag is required to be able to set the state to disallowed to prevent operatorerror. The -f flag is ignored if it is used to set the option to any other state.
The valid states are:
Not initialized: No state has yet been specified for this volume and no privileged deletions will beallowed on the volume.
on: The feature is turned on and deletions are allowed.
off: The feature is turned off and no privileged delete operations will be allowed. The feature may beturned on in future.
disallowed: The feature has been disabled for this volume and can never be turned on for this volume.
snaplock clockinitializesync [ <volume> ]status[ <volume> ]
The initialize command initializes the system compliance clock from the system clock. Compliance clock can be initialized only once by the user. Once initialized, user cannot make any changes to the system compliance clock.
The sync command forces a sync of the volume compliance clock to the system compliance clock. Ifthe volume is specified, then volume compliance clock of only that volume is synced to the systemcompliance clock.
The status command prints the value of the system compliance clock and volume compliance clock ofall the SnapLock volumes present in the system. If the volume is specified, then command printsvolume compliance clock of only that system.
VFILER CONSIDERATIONSsnaplock command is not available via vfiler contexts. snaplock command works only on the volumescompletely owned by the default vfiler vfiler0. A user can designate a SnapLock compliance volume asthe SnapLock log volume if it is completely owned by the default vfiler. A user is not allowed to moveany storage resource on an active SnapLock log volume from the default vfiler. In addition, a user canturn on SnapLock privilege delete option if SnapLock enterprise volume is completely owned by thedefault vfiler. A user is not allowed to move any storage resource from SnapLock enterprise volumethat has privilege delete option turned on.
Data ONTAP® 8.2 Commands: Manual Page Reference for 7-Mode, Volume 1 585
snaplock
EXAMPLESsnaplock privdel -f /vol/slevol/myfile
Deletes the file myfile on the enterprise volume slevol. The user must have sufficient privileges andmust have initiated the command over a secure connection to the node for the command to succeed.
snaplock log volume
Prints out the value of system compliance log volume name if it has been initialized. An uninitialzedSnapLock log volume will be reported as not set.
snaplock log volume logvol
Sets the SnapLock log volume to logvol.
snaplock log volume -f logvol
Sets the SnapLock log volume to logvol and ignores any errors encountered during SnapLock logvolume change.
snaplock log status logvol
Prints log status for all the active SnapLock log files on volume logvol.
snaplock log status logvol priv_delete
Prints the status for the active SnapLock log file priv_delete on volume logvol.
snaplock options -f slevol privdel on
Turn on the privileged delete feature on enterprise volume slevol without asking for confirmation.
SEE ALSOna_vol (1), na_options (1), na_useradmin (1).
586 Data ONTAP® 8.2 Commands: Manual Page Reference for 7-Mode, Volume 1
snaplock
snapmirrorNAMEna_snapmirror - volume, and qtree mirroring
SYNOPSISsnapmirror { on | off }
snapmirror status [ options ] [ volume | qtree ... ]
snapmirror initialize [ options ] destination
snapmirror update [ options ] destination
snapmirror quiesce destination
snapmirror resume destination
snapmirror break [ options ] destination
snapmirror resync [ options ] destination
snapmirror destinations [ option ] [ source ]
snapmirror release source destination
snapmirror throttle <n> destination
snapmirror abort [ options ] destination ...
snapmirror migrate [ options ] source destination
DESCRIPTIONThe snapmirror command is used to control SnapMirror, a method of mirroring volumes and qtrees. Itallows the user to enable and disable scheduled and manual data transfers, request information abouttransfers, start the initializing data transfer, start an update of a mirror, temporarily pause updates to amirror, break mirror relationships, resynchronize broken mirrors, list destination information, releasechild mirrors, and abort ongoing transfers.
SnapMirror can be used to replicate volumes or qtrees. The processes and behaviors involved areslightly (and sometimes subtly) different between the various kinds of data mirroring.
The SnapMirror process is destination-driven. The snapmirror initialize command starts the firsttransfer which primes the destination with all the data on the source. Prior to the initial transfer, thedestination must be ready to be overwritten with the data from the source; destination volumes must berestricted (see na_vol(1)), and destination qtrees must not yet exist.
Data ONTAP® 8.2 Commands: Manual Page Reference for 7-Mode, Volume 1 587
snapmirror
For asynchronous mirrors, the destination periodically requests an update from the source, accepts atransfer of data, and writes those data to disk. These update transfers only include changes made on thesource since the last transfer. The SnapMirror scheduler initiates these transfers automatically accordingto schedules in the snapmirror.conf file.
Synchronous mirrors will initially behave asynchronously, but will transition to synchronous mode atfirst opportunity. These mirrors may return to asynchronous mode on error (for example, a networkpartition between the mirroring nodes) or at the request of the user.
The snapmirror update command can be used to initiate individual transfers apart from the scheduledones in snapmirror.conf.
After the initial transfer, the destination is available to clients, but in a read-only state. The status of adestination will show that it is snapmirrored (see na_qtree(1) for more details on displaying thedestination state).
To use the destination for writing as well as reading, which is useful when a disaster makes the sourceunavailable or when you wish to use the destination as a test volume/qtree, you can end the SnapMirrorrelationship with the snapmirror break command. This command changes the destination’s statusfrom snapmirrored to broken-off, thus making it writable. The snapmirror resync command canchange a former destination’s status back to snapmirrored and will resynchronize its contents with thesource. (When applied to a former source, snapmirror resync can turn it into a mirror of the formerdestination. In this way, the roles of source and destination can be reversed.)
A node keeps track of all destinations, either direct mirrors or mirrors of mirrors, for each of its sources.This list can be displayed via the snapmirror destinations command. The snapmirror releasecommand can be used to tell a node that a certain direct mirror will no longer request updates.
The snapmirror migrate command is used on an existing source and destination pair to make thedestination volume a writable "mimic" of the source. The destination assumes the NFS filehandles ofthe source, helping the node administrator to avoid NFS re-mounting on the client side.
The snapmirror.conf file on the destination node’s root volume controls the configuration andscheduling of SnapMirror on the destination. See na_snapmirror.conf(5) for more details onconfiguration and scheduling of SnapMirror.
Access to a source is controlled with the snapmirror.access option on the source node. Seena_options(1) and na_protocolaccess (8) for information on setting the option.
(If the snapmirror.access option is set to "legacy", access is controlled by the snapmirror.allow fileon the source node’s root volume. See na_snapmirror.allow(5) for more details.)
SnapMirror is a licensed service, and a license must be obtained before the snapmirror command canbe used. SnapMirror must be licensed on both source and destination nodes. See na_license(1) for moredetails.
SnapMirror is supported on regular vfilers, as well as the physical node named vfiler0. Use vfiler context or vfiler run to issue snapmirror commands on a specific vfiler. See na_vfiler(1) for details onhow to issue commands on vfilers. The use of SnapMirror on vfilers requires a MultiStore license.
588 Data ONTAP® 8.2 Commands: Manual Page Reference for 7-Mode, Volume 1
snapmirror
When used on a vfiler, a few restrictions apply. The vfiler must be rooted on a volume and SnapMirrorsources and destinations cannot be qtrees in shared volumes. Synchronous SnapMirror is not supportedon vfilers. For a qtree SnapMirror, the vfiler must own the containing volume of the Qtree.
Each vfiler has its own /etc/snapmirror.conf file in its root volume. SnapMirror can be turned on or offon a vfiler independently. SnapMirror commands issued on a vfiler can only operate on volumes orqtrees it has exclusive ownership of.
For backward compatibility, the physical node (vfiler0) can operate on all volumes and all qtrees, evenif they are owned by vfilers. It is highly recommanded, however, that all storage units (volumes andqtrees) be mirrored from either vfiler0 or the hosting vfiler, not both. When vfiler storage units aremirrored via vfiler0, leave snapmirror off on the vfiler.
USAGEThe snapmirror command has many subcommands. Nearly every command takes a destinationargument. This argument takes three different forms. The form used for a particular invocation dependson whether you’re specifying a volume or a qtree.
Volumes are specified by their name:
vol1
Qtrees are specified by their fully-qualified path:
/vol/vol1/qtree
There is a special path that can be used to SnapMirror all the data in a volume which does not reside ina qtree. This path can only be used as a SnapMirror source, never a SnapMirror destination. The path isspecified as:
/vol/vol1/-
All commands which don’t say otherwise can take any of these forms as an argument.
The snapmirror subcommands are:
on
Enables SnapMirror data transfers and turns on the SnapMirror scheduler. This command must beissued before initiating any SnapMirror data transfers with the initialize, update, or resyncsubcommands. This command also turns on the SnapMirror scheduler, which initiates update transferswhen the time matches one of the schedules in the snapmirror.conf file. This command must be issuedon the source side for the node to respond to update requests from destinations.
off
Aborts all active SnapMirror data transfers and disables the commands which initiate new transfers (initialize, update, and resync), and turns the SnapMirror scheduler off.
Data ONTAP® 8.2 Commands: Manual Page Reference for 7-Mode, Volume 1 589
snapmirror

The on/off state of SnapMirror persists through reboots, and is reflected by the snapmirror.enableoption. This option can be set off and on, and doing so has the exact same effect as the snapmirror onor snapmirror off commands.
status [ -l | -t | -q ] [ volume | qtree ... ]
Reports status of all the SnapMirror relationships with a source and/or destination on this node. Thiscommand also reports whether SnapMirror is on or off. If any volume or qtree arguments are given tothe command, only the SnapMirror relationships with a matching source or destination will be reported.If the argument is invalid, there won’t be any status in the output.
Without any options, the short form of each relationship’s status is displayed. This shows the state ofthe local side of the relationship, whether a transfer is in progress (and if so, the progress of thattransfer), and the mirror lag, i.e. the amount of time by which the mirror lags behind the source. This isa simple difference of the current time and the source-side timestamp of the last successful transfer. Thelag time will always be at least as much as the duration of the last successful transfer, unless the clockson the source and destination are not synchronized (in which case it could even be negative).
If the -l option is given, the output displays more detailed information for each SnapMirror relationship.If a * is displayed along with relationship status in the short form output of snapmirror status command,then extra special information about that relationship is available, which is visible only with -l option.
If the -t option is given, the output displays the relationships that are active. A relationship is consideredas active if the source or destination is involved in:
1. data transfer to or from the network. 2. Performing local on-disk processing or cleanup.
If the -q option is given, the output displays the volumes and qtrees that are quiesced or quiescing. Seethe quiesce command, below, for what this means.
See the Examples section for more information on snapmirror status.
On a vfiler, the status command shows entries related to the vfiler only. On the physical node, activetransfer entries from all vfilers are displayed. Inactive transfers are only displayed on the relevant vfiler.The preferred way to get a comprehensive and more readable list of SnapMirror transfers is to run vfiler run * snapmirror status. It iterators through all vfilers and lists its transfers.
initialize [ -S source ] [ -k kilobytes ] [ -s src_snap ] [ -c create_dest_snap ] [ -w ] destination
Starts an initial transfer over the network. An initial transfer is required before update transfers can takeplace. The initialize command must be issued on the destination node. If the destination is a volume, itmust be restricted (see na_vol(1) for information on how to examine and restrict volumes). If thedestination is a qtree, it must not already exist (see na_qtree(1) for information on how to list qtrees). Ifa qtree already exists, it must be renamed or removed (using an NFS or CIFS client), or snapmirror initialize to that qtree will not work.
If the snapmirror status command reports that an aborted initial transfer has a restart checkpoint, theinitialize commmand will restart the transfer where it left off.
The -S option specifies a source node and volume or qtree path, in a format similar to that of destinationarguments. The source must match the entry for the destination in the snapmirror.conf file. If it doesn’tmatch, the operation prints an error message and aborts. If the -S option is not set, the source used is theone specified by the entry for that destination in the snapmirror.conf file. If there is no such entry, the
590 Data ONTAP® 8.2 Commands: Manual Page Reference for 7-Mode, Volume 1
snapmirror
operation prints an error message and aborts.
The -k option sets the maximum speed at which data is transferred over the network in kilobytes persecond. It is used to throttle disk, CPU, and network usage. This option merely sets a maximum valuefor the transfer speed; it does not guarantee that the transfer will go that fast. If this option is not set, thenode transmits data according to the kbs setting for this relationship in the snapmirror.conf file (seena_snapmirror.conf(5)). However, if this option is not set and there is no kbs setting for this relationshipin the snapmirror.conf file, the node transmits data as fast as it can.
The -c option only works for an initialize to a qtree. With this option, SnapMirror creates a snapshotnamed create_dest_snap on the destination after the initialize has successfully completed (so that itdoes not compete with any ongoing updates). SnapMirror does not lock or delete this snapshot. create_dest_snap cannot be hourly.x, nightly.x, or weekly.x, because these names are reserved forscheduled snapshots.
The -s option only works for an initialize to a qtree. It designates a snapshot named src_snap fromwhich SnapMirror transfers the qtree, instead of creating a source snapshot and transferring the qtreefrom the new snapshot. This option is used to transfer a specific snapshot’s contents; for example, it cantransfer a snapshot that was taken while a database was in a stable, consistent state. SnapMirror does notlock or delete the src_snap. src_snap cannot be hourly.x, nightly.x, weekly.x, snapshot_for_backup.x orsnapshot_for_volcopy.x.
The -w option causes the command not to return once the initial transfer starts. Instead, it will wait untilthe transfer completes (or fails), at which time it will print the completion status and then return.
update [ -S source ] [ -k kilobytes ] [ -s src_snap ] [ -c create_dest_snap ] [ -w ] destination
For asynchronous mirrors, an update is immediately started from the source to the destination to updatethe mirror with the contents of the source.
For synchronous mirrors, a snapshot is created on the source volume which becomes visible to clients ofthe destination volume.
The update command must be issued on the destination node.
The -S option sets the source of the transfer, and works the same for update as it does for initialize.
The -k option sets the throttle, in kilobytes per second, of the transfer, and works the same for updateas it does for initialize.
The -c option only works for an update to a qtree. With this option SnapMirror creates a snapshotnamed create_dest_snap on the destination after the update completes (so that it does not compete withany ongoing updates). SnapMirror does not lock or delete this snapshot. create_dest_snap cannot behourly.x, nightly.x, or weekly.x, because these names are reserved for scheduled snapshots.
The -s option only works for an update to a qtree. It designates a snapshot named src_snap from whichSnapMirror transfers the qtree, instead of creating a source snapshot and transferring the qtree from thenew snapshot. This option is used to transfer a specific snapshot’s contents; for example, it can transfera snapshot that was taken while a database was in a stable, consistent state. SnapMirror does not lock ordelete the src_snap. src_snap cannot be hourly.x, nightly.x, weekly.x, snapshot_for_backup.x orsnapshot_for_volcopy.x.
Data ONTAP® 8.2 Commands: Manual Page Reference for 7-Mode, Volume 1 591
snapmirror
The -w option causes the command not to return once the incremental transfer starts. Instead, it willwait until the transfer completes (or fails), at which time it will print the completion status and thenreturn.
quiesce destination
Allows in-progress transfers to destination to complete after which new transfers are not allowed tostart. Synchronous mirrors will be taken out of synchronous mode. Any further requests to update thisvolume or qtree will fail until the snapmirror resume command is applied to it.
This command has special meaning to qtree destinations. A qtree destination which is being modifiedby SnapMirror during a transfer will have changes present in it. These changes will not be exported toNFS or CIFS clients. However, if a snapshot is taken during this time, the snapshot will contain thetransitioning contents of the qtree. quiesce will bring that qtree out of a transitioning state, by eitherfinishing or undoing any changes a transfer has made. snapmirror status can report whether a qtree isquiesced or not. The quiesce process can take some time to complete while SnapMirror makes changesto the qtree’s contents. Any snapshot taken while a qtree is quiesced will contain an image of that qtreewhich matches the contents exported to NFS and CIFS clients.
resume destination
Resumes transfers to destination. The snapmirror resume command can be used either to abort a snapmirror quiesce in progress or undo a previously completed snapmirror quiesce. The commandrestores the state of the destination from quiescing or quiesced to whatever it was prior to the quiesceoperation.
break [ -f ] destination
Breaks a SnapMirror relationship by turning a snapmirrored destination into a normal read/writevolume or qtree. This command must be issued on the destination node.
The -f option forces a snapmirror break between snaplocked volume relationship without promptingfor conformation.
This command does not modify the snapmirror.conf file. Any scheduled transfers to a broken mirrorwill fail.
For volumes, this command has the same effect as the vol options snapmirrored off command, andwill remove the snapmirrored option from a volume. The fs_size_fixed volume option will remain on;it must be manually removed from the volume to reclaim any disk space that SnapMirror may havetruncated for replication. (See the Options section and na_vol(1) for more information on these twovolume options.)
A destination qtree must be quiesced before it can be broken.
resync [ -n ] [ -f ] [ -S source ] [ -k kilobytes ] [ -s src_snap ] [ -c create_dest_snap ] [ -w ] destination
Resynchronizes a broken-off destination to its former source, putting the destination in the snapmirrored state and making it ready for update transfers. The resync command must be issued onthe destination node.
592 Data ONTAP® 8.2 Commands: Manual Page Reference for 7-Mode, Volume 1
snapmirror
The resync command can cause data loss on the destination. Because it is effectively making destination a replica of the source, any edits made to the destination after the break will be undone.
For formerly mirrored volumes, the resync command effectively performs a SnapRestore (seena_vol(1)) on the destination to the newest snapshot which is common to both the source and thedestination. In most cases, this is the last snapshot transferred from the source to the destination, but itcan be any snapshot which is on both the source and destination due to SnapMirror replication. If newdata has been written to the destination since the newest common snapshot was created, that data will belost during the resync operation.
For formerly mirrored qtrees, SnapMirror restores data to the file system from the latestSnapMirrorcreated snapshot on the destination volume. Unlike the volume case, it requires this lastsnapshot in order to perform a resync.
The resync command initiates an update transfer after the SnapRestore or qtree data restorationcompletes.
The -n option reports what execution of the resync command would do, but does not execute thecommand.
The -f option forces the operation to proceed without prompting for confirmation.
The -S option sets the source of the transfer, and works the same for resync as it does for initialize.
The -k option sets the throttle, in kilobytes per second, of the transfer, and works the same for resync asit does for initialize.
The -c option only works for a resync to a qtree. With this option SnapMirror creates a snapshot named create_dest_snap on the destination after the resync transfer completes (so that it does not compete withany ongoing updates). SnapMirror does not lock or delete this snapshot. create_dest_snap cannot behourly.x, nightly.x, or weekly.x, because these names are reserved for scheduled snapshots.
The -s option only works for a resync to a qtree. It designates a snapshot named src_snap from whichSnapMirror transfers the qtree, instead of creating a source snapshot and transferring the qtree from thenew snapshot. This option is used to transfer a specific snapshot’s contents; for example, it can transfera snapshot that was taken while a database was in a stable, consistent state. SnapMirror does not lock ordelete the src_snap. src_snap cannot be hourly.x, nightly.x, weekly.x, snapshot_for_backup.x orsnapshot_for_volcopy.x.
The -w option causes the command not to return once the resync transfer starts. Instead, it will waituntil the transfer completes (or fails), at which time it will print the completion status and then return.This option has no effect if the -n option is also specified.
destinations [ -s ] [ source ]
Lists all of the currently known destinations for sources on this node. For volumes, this command alsolists any cascaded destinations; these are any volumes which are replicas of direct destinations. Thiscommand will list all such descendants it knows about.
The -s option includes in the listing names of snapshots retained on the source volume for eachdestination.
Data ONTAP® 8.2 Commands: Manual Page Reference for 7-Mode, Volume 1 593
snapmirror
If a specific source is specified, only destinations for that volume will be listed. The source may eitherbe a volume name or a qtree path.
release source { node_name:volume | node:qtree }
Tell SnapMirror that a certain direct mirror is no longer going to request updates.
If a certain destination is no longer going to request updates, you must tell SnapMirror so that it will nolonger retain a snapshot for that destination. This command will remove snapshots that are no longerneeded for replication to that destination, and can be used to clean up SnapMirror-created snapshotsafter snapmirror break is issued on the destination side.
The source argument is the source volume or qtree that the destination is to be released from. Thedestination argument should be either the destination node and destination volume name or thedestination node and destination qtree path. You can use a line from the output of the snapmirror destinations command as the set of arguments to this command.
throttle <n> destination
Modifies the throttle value for the snapmirror transfer to the destination with the specified value inkilobytes per second. This sets the maximum speed at which the data is trasfered over the network forthe current transfer. A value of zero can be used to disable throttling.
The new value will be used only for the current transfer. The next scheduled transfer will use the kbsvalue specified in the snapmirror.conf file. If the value for the kbs option in the snapmirror.conf ischanged while transfer is going on, then the new value will take effect within two minutes.
abort [ -h ] destination ...
Aborts currently executing transfers to all specified destinations. It may take a few minutes for atransfer to clean up and abort. This does not stop new updates from starting. If you are interested instopping further updates use the snapmirror quiesce command.
Any transfer with a restart checkpoint (you can view this via the snapmirror status command) may berestartable; to clear out the restart checkpoint and force any subsequent transfer to start with a freshsnapshot on the source, you can use abort -h on the destination. The -h option specifies that this is ahard abort; the restart checkpoint will be cleared out in addition to the transfer being stopped.
The abort command can be invoked from either the source or the destination node. However, the -hoption is only effective on the destination node. The option will be ignored if specified on the sourcenode.
migrate [ -n ] [ -f ] [ -k kilobytes ] [source_node:]source_volume[destination_node:]destination_volume
snapmirror migrate is run on the node which holds the source volume. It must be run on two volumeswhich are already the source and destination of a SnapMirror pair.
snapmirror migrate will transfer data and NFS filehandles from the source_volume to the destination_node’s destination_volume (if no node is specified, then migrate assumes the volume islocal). If source_node is specified, then the migrate destination will use that network interface toconnect up to the source node for the transfer of information.
594 Data ONTAP® 8.2 Commands: Manual Page Reference for 7-Mode, Volume 1
snapmirror
The first thing migrate will do is check the source and destination sides for readiness. Then, it will stopNFS and CIFS service to the source. This will prevent changes to the source volume’s data, which willmake it appear to clients as though nothing has changed during the migration. It will run a regularSnapMirror transfer between the two volumes. At the end of the transfer, it will migrate the NFSfilehandles, bring the source offline, and make the destination volume writable.
The -n flag will make a test run; that is, it will run all the pre-transfer checks, but stop short oftransferring data. The -f flag will not prompt the user for confirmation. The -k flag will throttle thespeed at which the transfer runs (at kilobytes kilobytes per second), in a manner similar to that used inthe snapmirror update command.
HA CONSIDERATIONSIf one node in an HA pair goes down, any active transfers are aborted. The SnapMirror scheduler andservices will continue for volumes on the downed node. The configurations of the SnapMirrorrelationships are taken from the downed node’s snapmirror.access option or snapmirror.allow and snapmirror.conf files.
EXAMPLESHere are a few examples of use of the snapmirror command:
The following example turns the scheduler on and off:
toaster> snapmirror on toaster> snapmirror status Snapmirror is on. toaster> snapmirror off toaster> snapmirror status Snapmirror is off. toaster>
The following example presents the snapmirror status with transfers running. Two are idledestinations (both from fridge); one of these has a restart checkpoint, and could be restarted if the setupof the two volumes has not changed since the checkpoint was made. The transfer from vol1 to arc2 hasjust started, and is in the initial stages of transferring. The transfer from toaster to icebox is partiallycompleted; here, we can see the number of megabytes transferred.
toaster> snapmirror status Snapmirror is on. Source Destination State Lag Status fridge:home toaster:arc1 Snapmirrored 22:09:58 Idle toaster:vol1 toaster:arc2 Snapmirrored 01:02:53 Transferring toaster:vol2 icebox:saved Uninitialized - Transferring (128MB done) fridge:users toaster:arc3 Snapmirrored 10:14:36 Idle with restart checkpoint (12MB done) toaster>
The following example presents detailed status for one of the above snapmirror relationships specifiedas argument to the command. It displays extra information about base snapshot, transfer type, errormessage, and last transfer, etc.
toaster> snapmirror status -l arc1 Snapmirror is on.
Source: fridge:home Destination: toaster:arc1
Data ONTAP® 8.2 Commands: Manual Page Reference for 7-Mode, Volume 1 595
snapmirror
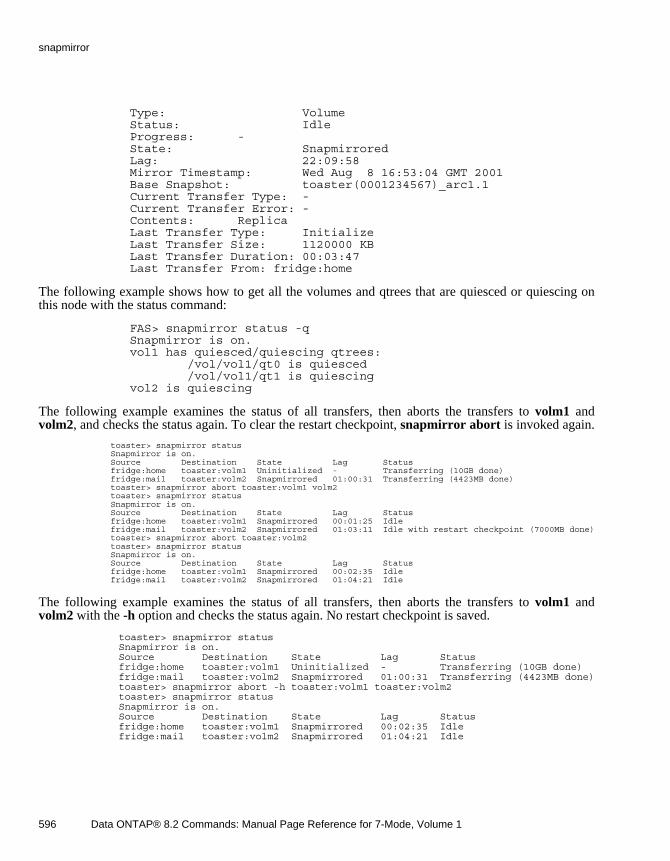
Type: Volume Status: Idle Progress: - State: Snapmirrored Lag: 22:09:58 Mirror Timestamp: Wed Aug 8 16:53:04 GMT 2001 Base Snapshot: toaster(0001234567)_arc1.1 Current Transfer Type: - Current Transfer Error: - Contents: Replica Last Transfer Type: Initialize Last Transfer Size: 1120000 KB Last Transfer Duration: 00:03:47 Last Transfer From: fridge:home
The following example shows how to get all the volumes and qtrees that are quiesced or quiescing onthis node with the status command:
FAS> snapmirror status -q Snapmirror is on. vol1 has quiesced/quiescing qtrees: /vol/vol1/qt0 is quiesced /vol/vol1/qt1 is quiescing vol2 is quiescing
The following example examines the status of all transfers, then aborts the transfers to volm1 and volm2, and checks the status again. To clear the restart checkpoint, snapmirror abort is invoked again.
toaster> snapmirror status Snapmirror is on. Source Destination State Lag Status fridge:home toaster:volm1 Uninitialized - Transferring (10GB done) fridge:mail toaster:volm2 Snapmirrored 01:00:31 Transferring (4423MB done) toaster> snapmirror abort toaster:volm1 volm2 toaster> snapmirror status Snapmirror is on. Source Destination State Lag Status fridge:home toaster:volm1 Snapmirrored 00:01:25 Idle fridge:mail toaster:volm2 Snapmirrored 01:03:11 Idle with restart checkpoint (7000MB done) toaster> snapmirror abort toaster:volm2 toaster> snapmirror status Snapmirror is on. Source Destination State Lag Status fridge:home toaster:volm1 Snapmirrored 00:02:35 Idle fridge:mail toaster:volm2 Snapmirrored 01:04:21 Idle
The following example examines the status of all transfers, then aborts the transfers to volm1 and volm2 with the -h option and checks the status again. No restart checkpoint is saved.
toaster> snapmirror status Snapmirror is on. Source Destination State Lag Status fridge:home toaster:volm1 Uninitialized - Transferring (10GB done) fridge:mail toaster:volm2 Snapmirrored 01:00:31 Transferring (4423MB done) toaster> snapmirror abort -h toaster:volm1 toaster:volm2 toaster> snapmirror status Snapmirror is on. Source Destination State Lag Status fridge:home toaster:volm1 Snapmirrored 00:02:35 Idle fridge:mail toaster:volm2 Snapmirrored 01:04:21 Idle
596 Data ONTAP® 8.2 Commands: Manual Page Reference for 7-Mode, Volume 1
snapmirror
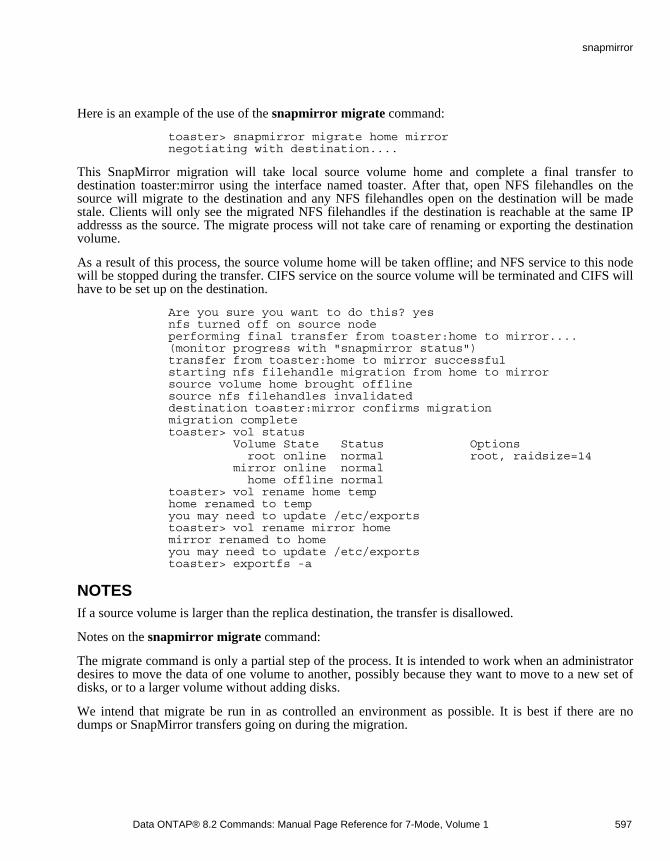
Here is an example of the use of the snapmirror migrate command:
toaster> snapmirror migrate home mirror negotiating with destination....
This SnapMirror migration will take local source volume home and complete a final transfer todestination toaster:mirror using the interface named toaster. After that, open NFS filehandles on thesource will migrate to the destination and any NFS filehandles open on the destination will be madestale. Clients will only see the migrated NFS filehandles if the destination is reachable at the same IPaddresss as the source. The migrate process will not take care of renaming or exporting the destinationvolume.
As a result of this process, the source volume home will be taken offline; and NFS service to this nodewill be stopped during the transfer. CIFS service on the source volume will be terminated and CIFS willhave to be set up on the destination.
Are you sure you want to do this? yes nfs turned off on source node performing final transfer from toaster:home to mirror.... (monitor progress with "snapmirror status") transfer from toaster:home to mirror successful starting nfs filehandle migration from home to mirror source volume home brought offline source nfs filehandles invalidated destination toaster:mirror confirms migration migration complete toaster> vol status Volume State Status Options root online normal root, raidsize=14 mirror online normal home offline normal toaster> vol rename home temp home renamed to temp you may need to update /etc/exports toaster> vol rename mirror home mirror renamed to home you may need to update /etc/exports toaster> exportfs -a
NOTESIf a source volume is larger than the replica destination, the transfer is disallowed.
Notes on the snapmirror migrate command:
The migrate command is only a partial step of the process. It is intended to work when an administratordesires to move the data of one volume to another, possibly because they want to move to a new set ofdisks, or to a larger volume without adding disks.
We intend that migrate be run in as controlled an environment as possible. It is best if there are nodumps or SnapMirror transfers going on during the migration.
Data ONTAP® 8.2 Commands: Manual Page Reference for 7-Mode, Volume 1 597
snapmirror

The clients may see stale filehandles or unresponsive NFS service while migrate is running. This isexpected behavior. Once the destination volume is made writable, the clients will see the data as ifnothing has happened.
migrate will not change exports or IP addresses; the new destination volume must be reachable in thesame way as the source volume once was.
CIFS service will need to be restarted on the migrate destination.
OPTIONSHere are SnapMirror-related options (see na_options(1), na_snapmirror(5), and na_snapmirror.allow(5)for details on these options):
snapmirror.accessControls SnapMirror access to a node.
snapmirror.checkip.enableControls SnapMirror IP address checking using snapmirror.allow.
snapmirror.delayed_acks.enableControls a SnapMirror networking option.
replication.volume.transfer_limitsControls increased stream counts. This option is provided to revert stream counts to legacy limits.
replication.volume.reserved_transfersGuarantees that specified number of volume SnapMirror source/destination transfers always start. Thisoption will reduce the maximum limit on all other transfers types and will be equivalent to maximumnumber of transfers possible.
snapmirror.enableTurns SnapMirror on and off. SnapMirror can only be enabled on vfilers which are rooted on volumes.
snapmirror.log.enableTurns SnapMirror logging on and off.
replication.volume.use_auto_resyncTurns auto resync functionality on and off for Synchronous SnapMirror relations. This option if enabledon Synchronous SnapMirror, destination will update from the source using the latest common basesnapshot deleting all destination side snapshots newer than the common base snapshot.
Here are SnapMirror-related volume pseudo-options (see na_vol(1) for more details):
snapmirroredDesignates that the volume is read-only.
fs_size_fixedEffectively truncates the filesystem on the destination volume to the size of the source.
598 Data ONTAP® 8.2 Commands: Manual Page Reference for 7-Mode, Volume 1
snapmirror
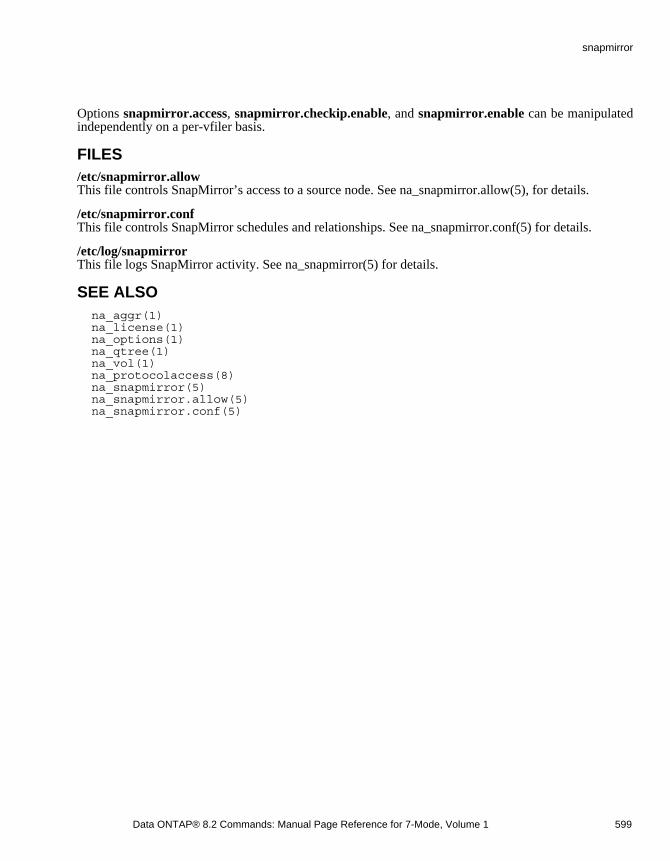
Options snapmirror.access, snapmirror.checkip.enable, and snapmirror.enable can be manipulatedindependently on a per-vfiler basis.
FILES/etc/snapmirror.allowThis file controls SnapMirror’s access to a source node. See na_snapmirror.allow(5), for details.
/etc/snapmirror.confThis file controls SnapMirror schedules and relationships. See na_snapmirror.conf(5) for details.
/etc/log/snapmirrorThis file logs SnapMirror activity. See na_snapmirror(5) for details.
SEE ALSO na_aggr(1) na_license(1) na_options(1) na_qtree(1) na_vol(1) na_protocolaccess(8) na_snapmirror(5) na_snapmirror.allow(5) na_snapmirror.conf(5)
Data ONTAP® 8.2 Commands: Manual Page Reference for 7-Mode, Volume 1 599
snapmirror

snapvaultNAMEna_snapvault - disk-based data protection
SYNOPSIS ON THE SECONDARYsnapvault start [ options ] secondary_qtree
snapvault modify [ options ] secondary_qtree
snapvault update [ options ] secondary_qtree
snapvault stop [-f] secondary_qtree
snapvault prerevert [-f]
snapvault snap sched [-f] [-x] [-o options ] [volume [snapname [schedule]]]
snapvault snap unsched [-f] [-d] [volume [snapname]]
snapvault snap create [ -o options ] volume snapname
snapvault snap retain [-f] volume snapname count{d|m|y}
snapvault snap preserve volume snapname [ tagname ]
snapvault snap unpreserve volume snapname { [ tagname ] [ -all ] }
snapvault snap preservations volume [ snapname ]
snapvault abort { [-f] [-h] [dst_node:]dst_path | -s volume snapname }
snapvault status { [ options ] [ path ] | -s [volume [snapname]] | -c [qtree] | -b [volume] }
snapvault release secondary_qtree primary_node:restored_qtree
snapvault destinations [options] [[secondary_node:]secondary_qtree]
SYNOPSIS ON THE PRIMARYsnapvault snap sched [ -o options ] [volume [snapname [schedule]]]
snapvault snap unsched [-f] [-d] [volume [snapname]]
snapvault snap create [ -o options ] volume snapname
snapvault abort [-f] [-h] [dst_node:]dst_path
snapvault status { [ options ] [ path ] | -s [volume [snapname]] }
600 Data ONTAP® 8.2 Commands: Manual Page Reference for 7-Mode, Volume 1
snapvault
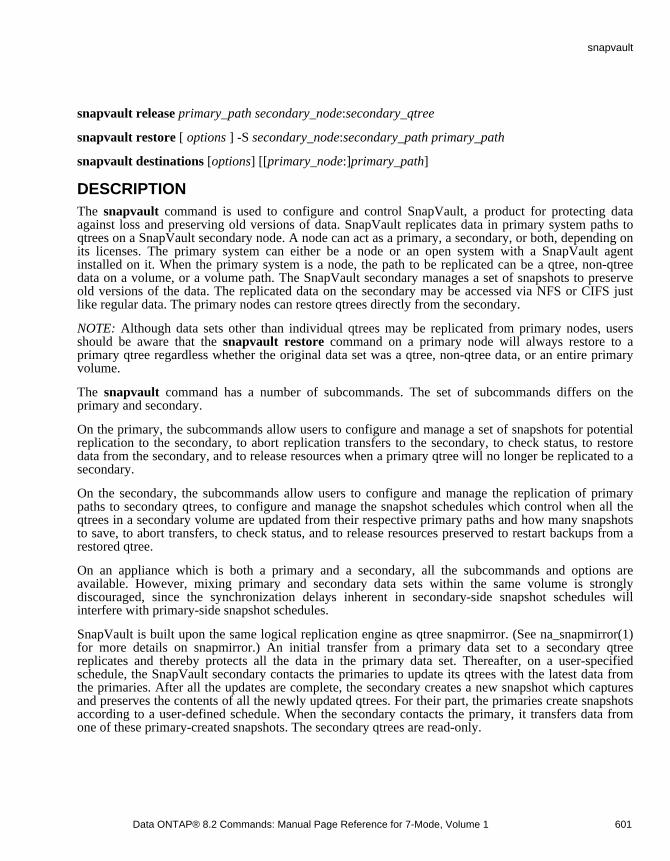
snapvault release primary_path secondary_node:secondary_qtree
snapvault restore [ options ] -S secondary_node:secondary_path primary_path
snapvault destinations [options] [[primary_node:]primary_path]
DESCRIPTIONThe snapvault command is used to configure and control SnapVault, a product for protecting dataagainst loss and preserving old versions of data. SnapVault replicates data in primary system paths toqtrees on a SnapVault secondary node. A node can act as a primary, a secondary, or both, depending onits licenses. The primary system can either be a node or an open system with a SnapVault agentinstalled on it. When the primary system is a node, the path to be replicated can be a qtree, non-qtreedata on a volume, or a volume path. The SnapVault secondary manages a set of snapshots to preserveold versions of the data. The replicated data on the secondary may be accessed via NFS or CIFS justlike regular data. The primary nodes can restore qtrees directly from the secondary.
NOTE: Although data sets other than individual qtrees may be replicated from primary nodes, usersshould be aware that the snapvault restore command on a primary node will always restore to aprimary qtree regardless whether the original data set was a qtree, non-qtree data, or an entire primaryvolume.
The snapvault command has a number of subcommands. The set of subcommands differs on theprimary and secondary.
On the primary, the subcommands allow users to configure and manage a set of snapshots for potentialreplication to the secondary, to abort replication transfers to the secondary, to check status, to restoredata from the secondary, and to release resources when a primary qtree will no longer be replicated to asecondary.
On the secondary, the subcommands allow users to configure and manage the replication of primarypaths to secondary qtrees, to configure and manage the snapshot schedules which control when all theqtrees in a secondary volume are updated from their respective primary paths and how many snapshotsto save, to abort transfers, to check status, and to release resources preserved to restart backups from arestored qtree.
On an appliance which is both a primary and a secondary, all the subcommands and options areavailable. However, mixing primary and secondary data sets within the same volume is stronglydiscouraged, since the synchronization delays inherent in secondary-side snapshot schedules willinterfere with primary-side snapshot schedules.
SnapVault is built upon the same logical replication engine as qtree snapmirror. (See na_snapmirror(1)for more details on snapmirror.) An initial transfer from a primary data set to a secondary qtreereplicates and thereby protects all the data in the primary data set. Thereafter, on a user-specifiedschedule, the SnapVault secondary contacts the primaries to update its qtrees with the latest data fromthe primaries. After all the updates are complete, the secondary creates a new snapshot which capturesand preserves the contents of all the newly updated qtrees. For their part, the primaries create snapshotsaccording to a user-defined schedule. When the secondary contacts the primary, it transfers data fromone of these primary-created snapshots. The secondary qtrees are read-only.
Data ONTAP® 8.2 Commands: Manual Page Reference for 7-Mode, Volume 1 601
snapvault
There are three steps to configure SnapVault. The first is basic configuration: licensing, enabling,setting access permissions, and (only for nodes which will have SnapLock secondary volumes)configuring the LockVault log volume. The SnapVault secondary and primary are separately licensedand require separate sv_ontap_sec and sv_ontap_pri licenses (see na_license(1) for details). However,both may be licensed together. To enable SnapVault on the primaries and secondaries, use the optionscommand to set the snapvault.enable option to on (see na_options(1) for details). To give theSnapVault secondary permission to transfer data from the primaries, set the snapvault.access option oneach of the primaries. (see na_protocolaccess(8) for details). To give primaries permission to restoredata from the secondary, set the snapvault.access option on the secondary. To configure the LockVaultlog volume (only for nodes which will have SnapLock secondary volumes), set the snapvault.lockvault_log_volume option on the secondary.
The second step is to configure the primary paths to be replicated to secondary qtrees. This is done onthe secondary. The snapvault start command both configures a primary_path-secondary_qtree pair andlaunches the initial complete transfer of data from the primary to the secondary. The snapvault statuscommand reports current status for the qtrees. The snapvault status -c command reports the qtreeconfigurations. The snapvault modify command changes the configuration set with the snapvault startcommand.
The third configuration step is to establish the SnapVault snapshot schedules on the primaries and thesecondary with the snapvault snap sched command. A snapshot schedule in a volume creates andmanages a series of snapshots with the same root name but a different extension such as sv.0, sv.1, sv.2,etc. (For snapshots on SnapLock secondary volumes, the extensions are representations of the date andtime the snapshot was created rather than .0, .1, etc.). The primaries and secondary must have snapshotschedules with matching snapshot root names. On the secondary, the -x option to the snapvault snap sched command should be set to indicate that the secondary should transfer data from the primariesbefore creating the secondary snapshot. If -x is set, when the scheduled time arrives for the secondary tocreate its new sv.0 (or sv.yyyymmdd_hhmmss_zzz for SnapLock volumes) snapshot, the secondaryupdates each qtree in the volume from the sv.0 snapshot on the respective primary. Thus, the primariesand secondaries need snapshot schedules with the same base snapshot names. However, snapshotcreation time and the number of snapshots preserved on the primary and secondary may be different.
In normal operation, qtree updates and snapshot creation proceed automatically according to thesnapshot schedule. However, SnapVault also supports manual operation. The snapvault updatecommand on the secondary initiates an update transfer from the primary to the secondary for anindividual qtree. The snapvault snap create command begins snapshot creation just as if the scheduledtime had arrived. On the secondary, if the -x option for the snapshot schedule is set, the secondary willcontact the primaries to begin update transfers for all the qtrees in the volume, just as it would if thescheduled time had arrived.
If an entire primary qtree needs to be restored from an older version available on the secondary, the usercan use the snapvault restore command on the primary. If an existing primary qtree needs to bereverted back to an older version available on the secondary, the user can use the snapvault restore -rcommand on the primary. The primary qtree will be read-only until the restore transfer completes, atwhich time it becomes writable. After a restore, the user may choose to resume backups from therestored qtree to the secondary qtree from which it was restored. In this case, the user should issue the snapvault start -r command on the secondary. If not, the user should tell the secondary that thesnapshot used for the restore is not needed to resume backups by issuing the snapvault releasecommand on the secondary. If the user does not issue one of these two commands, a snapshot will besaved on the secondary indefinitely.
602 Data ONTAP® 8.2 Commands: Manual Page Reference for 7-Mode, Volume 1
snapvault
SnapVault is supported on regular vfilers, as well as the physical node named vfiler0. Use vfiler context or vfiler run to issue SnapVault commands on a specific vfiler. See na_vfiler(1) for details onhow to issue commands on vfilers. The use of SnapVault on vfilers requires a MultiStore license.
When used on a vfiler, a few restrictions apply. The vfiler must be rooted on a volume. In order to runany SnapVault operations on qtrees, the vfiler must have exclusive ownership of the volume containingthe qtrees.
SnapVault can be turned on or off on a vfiler independently. SnapVault commands issued on a vfilercan only operate on qtrees it has ownership of. Furthermore, the vfiler must have exclusive ownershipof the hosting volume.
For backward compatibility, the physical node (vfiler0) can operate on all qtrees, even if they are ownedby vfilers. It is highly recommended, however, that all qtrees be backed up from either vfiler0 or thehosting vfiler, not both. When vfiler storage units are backed up via vfiler0, leave snapmirror off on thevfiler.
USAGEThe snapvault subcommands are:
start [ -r ] [ -k n ] [ -t n ] [ -w ] [-p {inet | inet6 unspec}] [ -o options ] [ -S [primary_node:]primary_path ] secondary_qtree
options is opt_name=opt_value[[,opt_name=opt_value]...]
Available on the secondary only. Configures the secondary to replicate primary_path on primary_nodeto secondary_qtree on the secondary. The secondary qtree is specified by a path such as/vol/vol3/my_qtree. The primary_path can be a qtree, represented in a similar way; it can refer to the setof non-qtree data on a volume, represented by a path such as /vol/vol3/-; or it can refer to the contents ofthe entire volume, including all qtrees, by a path such as /vol/vol3. After configuring the qtree, thesecondary begins a full baseline transfer from the primary to initialize the qtree unless the qtree hasalready been initialized. The command may also be used to restart baseline transfers which wereaborted.
The -k option sets the maximum speed at which data is transferred in kilobytes per second. It is used tothrottle disk, CPU, and network usage. If this option is not set, the node transmits data as fast as it can.The setting applies to the initial transfer as well as subsequent update transfers from the primary.
The -t option sets the number of times that updates for the qtree should be tried before giving up. Thedefault is 2. When the secondary starts creating a snapshot, it first updates the qtrees in the volume(assuming the -x option was set on the snapshot schedule). If the update fails for a reason such as atemporary network outage, the secondary will try the update again one minute later. This option sayshow many times the secondary should try before giving up and creating a new snapshot with data fromall the other qtrees. If set to 0, the secondary will not update the qtree at all. This is one way totemporarily disable updates to a qtree.
The -w option causes the command not to return once the baseline transfer starts. Instead, it will waituntil the transfer completes (or fails), at which time it will print the completion status and then return.
Data ONTAP® 8.2 Commands: Manual Page Reference for 7-Mode, Volume 1 603
snapvault

The -p option is used for selecting the IP connection mode when the SnapVault secondary contacts theprimary for transfers. The value for this argument can be inet, inet6 or unspec.
When the value is inet6, the connection between the primary and secondary will be established usingIPv6 addresses only. If there is no IPv6 address configured for the primary, then the connection willfail. When the value is inet, the connection between primary and secondary will be established usingIPv4 addresses only. If there is no IPv4 address configured on the primary, then the connection will fail.When this argument is not specified, then the connection will be tried using both IPv6 and IPv4addresses. inet6 mode will have higher precedence than inet mode. If a connection request using inet6mode fails, SnapVault will retry the connection using inet mode.
This option is not meaningful when an IP address is specified instead of a hostname. If the IP addressformat and connection mode doesn’t match, the operation prints an error message and aborts.
The -S option specifies the primary node and path. It must be given the first time to configure the qtree.It is optional when restarting an initial transfer for a previously configured qtree.
The -r option tells the secondary to restart updates from a different primary path. Most often, thiscommand will be used after a snapvault restore to tell the secondary to restart updates from a qtree thatwas previously restored from the secondary to a primary. It may also be used after a primary data set ismigrated to a new primary volume.
The -o option sets user configurable options for this relationship. These option settings apply to theinitial transfer as well as subsequent update transfers for this relationship. We currently support thefollowing options:
back_up_open_files
The supported values for this option are on and off. The default value for this option is on.
When this option is turned off, the open systems SnapVault agent will not back up any files that areopen on the primary at the time of the back up transfer. Files on the primary that changed after the agenthad begun transferring the file contents will also be excluded from that back up transfer.
When turned on, the OSSV agent includes the open files in the back up transfer.
Note that this option setting only affects primary systems using OSSV 2.0 or higher.
ignore_atime
The supported values for this option are on and off. The default value for this option is off.
When this option is turned on, SnapVault will ignore files which have only their access times changedfor incremental transfers.
When turned off, SnapVault will transfer metadata for all modified files.
compression
Available on secondary only. The supported values for this option are on and off. The default value forthis option is off.
604 Data ONTAP® 8.2 Commands: Manual Page Reference for 7-Mode, Volume 1
snapvault
When this option is turned on, SnapVault secondary will interpret the network data received fromsource as compressed stream. When this option is turned off SnapVault assumes that the data streamfrom network is not compressed. This option is valid only for data transfer between OSSV and node.
modify [ -k n ] [ -t n ] [-p {inet | inet6 | unspec}] [ -o options ] [ -S primary_node:primary_path ] secondary_qtree
options is opt_name=opt_value[[,opt_name=opt_value]...]
Available on the secondary only. The command changes the configuration for a qtree that waspreviously established with the snapvault start command. The meaning of the options is the same asfor the snapvault start command. If an option is set, it changes the configuration for that option. If anoption is not set, the configuration of that option is unchanged.
The -p option is used for selecting the IP connection mode when the SnapVault secondary contacts theprimary for transfers. The value for this argument can be inet, inet6 or unspec.
When the value is inet6, the connection between the primary and secondary will be established usingIPv6 addresses only. If there is no IPv6 address configured for the primary, then the connection willfail. When the value is inet, the connection between primary and secondary will be established usingIPv4 addresses only. If there is no IPv4 address configured on the primary, then the connection will fail.When this argument is not specified, then the connection will be tried using both IPv6 and IPv4addresses. inet6 mode will have higher precedence than inet mode. If a connection request using inet6mode fails, SnapVault will retry the connection using inet mode.
This option is not meaningful when an IP address is specified instead of a hostname. If the IP addressformat and connection mode doesn’t match, the operation prints an error message and aborts
update [ -k n ] [ -s snapname ] [ -w ] secondary_qtree
Available on the secondary only. Immediately starts an update of the specified qtree on the secondary.The qtree must have previously been configured with the snapvault start command.
The -k option sets the maximum transfer rate in kilobytes per second just as it does in the snapvault start command. However, in this case, the setting only applies to this one transfer. It does notpermanently change the configuration for the qtree.
The -s option says which snapshot on the primary should be used for the update. If the option is not set,the primary creates a new snapshot and transfers its contents to the secondary.
The -w option causes the command not to return once the incremental transfer starts. Instead, it willwait until the transfer completes (or fails), at which time it will print the completion status and thenreturn. When the command returns successfully, the status of the transfer can be Idle or Quiescing.
stop [ -f ] secondary_qtree
Available on the secondary only. Unconfigures the qtree so there will be no more updates of the qtreeand then deletes the qtree from the active file system. The deletion of the qtree can take a long time forlarge qtrees and the command blocks until the deletion is complete. The qtree is not deleted fromsnapshots that already exist on the secondary. However, after the deletion, the qtree will not appear inany future snapshots. To keep the qtree indefinitely, but stop updates to the qtree, use the snapvault modify -t 0 command to set the tries for the qtree to 0.
Data ONTAP® 8.2 Commands: Manual Page Reference for 7-Mode, Volume 1 605
snapvault
The -f option forces the stop command to proceed without first asking for confirmation from the user.
prerevert
Available on the secondary only. The prerevert command prepares OSSV secondary qtrees for revertingto a previous ontap release. It also breaks all the OSSV secondary qtree relationships and changes theirstate to broken-off. All these broken off relationships cannot be used for further back-up unless restartedusing snapvault start -r.
The -f option forces the prerevert command to proceed without issuing any warning.
snap sched [ -f ] [ -x ] [ -o options ] [ volname [ snapname [ schedule ]]]
options is opt_name=opt_value[[,opt_name=opt_value]...]
schedule is cnt[@day_list][@hour_list] or cnt[@hour_list][@day_list]
Available on the primary and secondary. Sets, changes, or lists snapshot schedules. The -f and -xoptions are only available on the secondary. If no schedule argument is given, the command listscurrently configured snapshot schedules.
If volname, snapname, and schedule are all specified, the command sets or changes a snapshot schedule.The snapshots will be created in volume volname. The root name of the snapshots will be snapname.For example, if snapname is sv, the snapshots will be given names sv.0, sv.1, sv.2, etc., fornonSnapLock volumes and primary SnapLock volumes. The snapshots will be given names
sv.yyyymmdd_hhmmss_zzz, where yyyymmdd_hhmmss_zzz is the date/time/timezone when the snapshot is created, forsecondary SnapLock volumes.
The -f option forces the snapvault snap sched command on a SnapLock volume to proceed withoutfirst asking for confirmation from the user. It is ignored for non-SnapLock volumes and for primaries.
When setting or changing a snapshot schedule, the -x option tells SnapVault to transfer new data fromall primary paths before creating the snapshot. In most cases, this option should be set when configuringsnapshots schedules on the secondary because this is how SnapVault does scheduled backups. In specialcases, for example, to create weekly snapshots on the secondary when no weekly snapshots arescheduled on the primaries, the user may choose not to set the -x option on the secondary. The -x optionis not allowed when not setting a schedule.
The -o option sets user configurable options for this snapshot schedule. We currently support thefollowing options:
retention_period=count{d|m|y}|default
This option is used to specify a retention period for the snapshots that are being scheduled by the snapvault snap sched command for SnapLock secondary volumes. The retention period is specified asa count followed by a suffix. The valid suffixes are d for days, m for months and y for years. Forexample, a value of 6m represents a retention period of 6 months. The maximum valid retention periodis 30 years, or the maximum retention period set for the volume, whichever is shorter. The minimumvalid retention period is 0 days, or the minimum retention period set for the volume, whichever islonger. If the option value is default or the retention_period option is not specified, then the snapshots
606 Data ONTAP® 8.2 Commands: Manual Page Reference for 7-Mode, Volume 1
snapvault
will be created with retention periods equal to the default retention period of the secondary SnapLockvolume, or 30 years, whichever is shorter. This option is ignored if the volume is not a SnapLockvolume.
preserve=on|off|default
This option is used to prevent SnapVault from deleting older snapshots created by this snapvaultsnapshot schedule on snapvault secondary volumes. When this option is set to on, SnapVault stopsdeleting older snapshots to create new backup snapshots when running out of allocated snapshots forthis schedule. When this option is not specified or set to default, behavior of preserving snapshots isguided by the global snapvault.preservesnap option. This option is valid only for snapvault snapshotschedules on snapvault secondary volumes and ignored for snapvault snapshot schedules on snapvaultprimary volumes. If this option is set to on, after snapvault creating cnt number of schedule snapshots,it fails creating further schedule snapshots and issues a warning message on every attempt of snapshotcreation for this schedule.
warn=wcount
This option is used to specify a warning level for the remaining number of snapshots for this schedule.This option is honored only for the snapvault snapshot schdeules on secondary volumes. Valid valuesare from 0 to cnt - 1. The default value is 0. If the value is 0 snapvault does not issue any warningmessage. Otherwise, SnapVault issues a warning message along with a SNMP trap if the number ofremaining schedule snapshots for this schedule are below wcount.
tries=count
This option sets the number of times SnapVault should try creating each scheduled snapshot beforegiving up. If the snapshot creation fails due to transient errors such as the volume being out of space,SnapVault will keep trying to create the snapshot every minute until the request is fulfilled. The allowedrange is from 0 to 120. The default value is unlimited. If set to 0, attempts to create the snapshot targetwill be disabled. If the tries option is not specified, then the option value will remain unchanged and thealready configured value is used.
If only volname and snapname are specified, the command displays the schedule for snapshots withname snapname in volume volname. If only volname is specified, the command displays the schedulesfor all snapshots in volume volname. If no arguments are given, the command displays the schedules forall configured snapshots in all volumes.
In the schedule, cnt tells SnapVault how many of the snapshots to keep for primaries and fornon-SnapLock secondary volumes. The snapshots will be numbered newest to oldest from 0 to cnt-1.When creating a new snapshot, SnapVault will delete the oldest snapshots, increment by one thenumber on the remaining snapshots and then create a new number 0 snapshot. If a snapshot is missingfrom the sequence (e.g. sv.0, sv.1, and sv.3 exist but sv.2 does not), only snapshots that need to berenumbered to make room for the new sv.0 snapshot will be renumbered. In the example, sv.0 and sv.1would be renamed to sv.1 and sv.2, but sv.3 would remain unchanged.
The cnt in the schedule is interpreted differently for SnapVault secondary SnapLock volumes. ForSnapLock secondary volumes, snapshots are created with a name that includes an encoded date andtime of when the snapshot is created. These snapshots are never renamed and they are neverautomatically deleted. These snapshots may be deleted using snap delete after the retention period ofthe snapshot has expired. If cnt is 0, no snapshots will be taken. If cnt is any non-zero value, snapshotswill be taken and no snapshots will be automatically deleted.
Data ONTAP® 8.2 Commands: Manual Page Reference for 7-Mode, Volume 1 607
snapvault
If specified, the day_list specifies which days of the week the snapshot should be created. The day_listis a comma-separated list of the first three letters of the day: mon, tue, wed, thu, fri, sat, sun. The namesare not case sensitive. Day ranges such as mon-fri can also be given. The default day_list is mon-sun,i.e. every day.
If specified, the hour_list specifies which hours of the day the snapshot should be created, on eachscheduled day. The hour_list is a comma-separated list of the hours during the day, where hours areintegers from 0 to 23. Hour ranges such as 8-17 are allowed. Also, step values are allowed in conjuctionwith ranges. For example, 0-23/2 means "every two hours". The default hour_list is 0, i.e. midnight onthe morning of each scheduled day.
snap unsched [ -f ] [ -d ] [ volname [ snapname ]]
Available on the primary and secondary. Unsets the schedule for a snapshot or a set of snapshots. Ifboth volname and snapname are specified, the command unsets that single snapshot schedule. If only volname is specified, the command unsets all snapshot schedules in the volume. If neither volname nor snapname are specified, the command unsets all snapshot schedules on the system.
The -f option forces the snapshots to be unscheduled without first asking for confirmation from the user.
The -d option deletes ACS softlock set by schedule.
Snapshots which are currently active as reported by the snapvault status -s command cannot be unset.Either wait for the qtree updates and snapshot creation to complete or abort the snapshot creation with snapvault abort -s first and then unschedule the snapshot.
snap create [ -w ] [ -o options ] volname snapname
options is opt_name=opt_value[[,opt_name=opt_value]...]
Available on the primary and secondary. Initiates creation of the previously configured snapshot snapname in volume volname just as if its scheduled time for creation had arrived. Old snapshots aredeleted, existing ones are renamed, and a new one is created. On the secondary, if the -x option wasgiven to the snapvault snap sched command when the snapshot schedule was configured, then updatetransfers from the primaries for all the qtrees in the volume will start just as they would when thescheduled time arrives. If another SnapVault snapshot is actively being created in the same volume,activity on this snapshot will be queued until work on the other snapshot completes.
The -w option has no effect if only the primary is licensed. If the secondary is licensed, the -w optioncauses the command not to return once the snapshot creation starts. Instead, it will wait until thesnapshot creation completes (or fails), at which time it will print the completion status and then return.
The -o option sets user configurable options for this snapshot schedule. We currently support thefollowing option:
tries=count
This option works similarly to the tries option in the snap sched command.
608 Data ONTAP® 8.2 Commands: Manual Page Reference for 7-Mode, Volume 1
snapvault
snap retain [ -f ] volname snapname count{d|m|y}
Available on the secondary only. Extends the retention period on the existing snapshot snapname in aSnapLock volume volname to the retention period specified. The specified retention period begins at thetime the command is entered. The retention period is specified as a count followed by a suffix. Thevalid suffixes are d for days, m for months and y for years. For example, a value of 6m represents aretention period of 6 months. The maximum valid retention period is 30 years, or the maximumretention period set for the volume, whichever is shorter.
The retention period may only be extended by this command. This command does not permit theretention period of the snapshot to be reduced. In addition, if the snapshot does not have a retentionperiod, this command will not establish a retention period on the snapshot. Initial retention periods areestablished on snapshots which are created according to a SnapVault snapshot schedule or as the resultof the snapvault snap create command on SnapLock volumes. Retention periods may not be set on anyother snapshots, nor on snapshots which are not on SnapLock volumes.
The -f option forces the retention period to be extended without first asking for confirmation from theuser.
snapvault snap preserve volume snapname [ tagname ]
Add preservation on the specified snapshot, which needs to be retained at the primary in a cascadedsystem. tagname uniquely identifies this preserve operation. When not specified, preservation will beadded with default tagname.
This command does not need SnapVault license.
snapvault snap unpreserve volume snapname { [ softlock-name ] | [ -all ] }
Remove preservation on the specified snapshot. When tagname specified, preservation with thistagname will be removed. When not specified, preservation with default tagname will be removed.When option -all is specified, all preservations on given snapshot will be removed.
This command does not need SnapVault license.
snapvault snap preservations volume [ snapname ]
List preservations. When no snapname specified, lists all those snapshots which are preserved. When snapname specified, lists all preservations on the snapshot.
This command does not need SnapVault license.
abort [-f] [ -h ] [dst_node:]dst_path
abort -s volname snapname
Available on the primary and secondary. Cancels transfers to all dst_paths specified or, with the -soption, cancels the creation of a snapshot. The destination dst_path is on the secondary for normalupdates, but is on the primary for restores. When cancelling a snapshot creation, the command alsocancels all update transfers initiated as part of creating the snapshot.
Data ONTAP® 8.2 Commands: Manual Page Reference for 7-Mode, Volume 1 609
snapvault
Any transfer with a restart checkpoint (you can view this via the snapvault status command) may berestartable; to clear out the restart checkpoint and force any subsequent transfer to start from thebeginning and possibly a different snapshot on the primary, you can use abort -h on the dst_path. The -h option specifies that this is a hard abort; the restart checkpoint will be cleared out in addition to thetransfer being stopped.
The abort command can be invoked from either the primary or the secondary node. However, the -hoption is only effective on the destination node. The option will be ignored if specified on the sourcenode.
The -f option forces the abort command to proceed without first asking for confirmation from the user.
status [ -l | -t ] [ path ]
Available on the primary and secondary. Reports status of all the SnapVault relationships for which thenode is either a primary or a secondary. This command also reports whether SnapVault is on or off. Ifany path arguments are given to the command, only the relationships with a matching source ordestination will be reported. If the argument is invalid, there won’t be any status in the output.
Without any options, the command behaves just like the snapmirror status command, displaying theshort form of each relationship’s status. This shows the state of the local side of the relationship,whether a transfer is in progress (and if so, the progress of that transfer), and the mirror lag, i.e. theamount of time by which the mirror lags behind the source. This is a simple difference of the currenttime and the source-side timestamp of the last successful transfer. The lag time will always be at least asmuch as the duration of the last successful transfer, unless the clocks on the source and destination arenot synchronized (in which case it could even be negative).
If the -l option is given, the output displays more detailed information for each relationship.
If the -t option is given, the output displays the relationships that are active. A relationship is consideredas active if the source or destination is involved in:
1. data transfer to or from the network. 2. reading or writing to a tape device. 3. Performing localon-disk processing or cleanup. (eg. snapvault stop command )
On a vfiler, the status command shows entries related to the vfiler only. On the physical node, activetransfer entries from all vfilers are displayed. Inactive transfers are only displayed on the relevant vfiler.The preferred way to get a comprehensive and more readable list of SnapVault transfers is to run vfiler run * snapvault status. It iterators through all vfilers and lists its transfers.
status -s [ volname [ snapname ]]
Available on the primary and the secondary. Reports status of all the configured snapshot targets. Alsoshows the currently configured schedule for each snapshot target displayed. The snapshot targetsdisplayed may be restricted to a single volume by specifying that volume, or to a single snapshot targetby specifying the volume and snapshot name.
status -c [ qtree ]
Available only on the secondary. Reports the currently configured SnapVault relationships. For eachrelationship, displays the destination, source, throttle, tries count and the user configurable optionssettings. The configurations reported may be restricted to only those which involve a specific qtree byspecifying the path to that qtree. Optionally, the node on which the qtree resides may also be specified.
610 Data ONTAP® 8.2 Commands: Manual Page Reference for 7-Mode, Volume 1
snapvault
status -b [ volume ]
Available only on the secondary. Reports the space savings information on all SnapVault forNetBackup volumes. The space savings information displayed may be restricted to a single volume byspecifying that volume.
release src_path dst_node:dst_qtree
On the primary, tells SnapVault that primary path src_path will no longer be replicated to qtree dst_qtree on SnapVault secondary dst_node.
On the secondary, tells SnapVault that qtree src_qtree, which had previously been restored to qtree dst_qtree on primary dst_node, will not be used as a replica for the restored qtree. After a restore, theuser can restart replication from the restored qtree with the snapvault start -r command. The releasecommand on the secondary tells SnapVault that replication will not be restarted and the snapshot beingsaved for the restart may be released for normally scheduled deletion.
restore [-f] [ -k n ] [-r] [-w] [-p {inet | inet6 unspec}] [ -s snapname ] -S secondary_node:secondary_path primary_path
Available on the primary only. The secondary_path and the primary_path must be qtree paths. Thespecified qtree paths are restored from the secondary_path on the secondary_node, to the primary_pathon the primary node. When the restore completes, the qtree on the primary becomes writable. Theprimary path may be an existing qtree or a non-existent one. If the primary qtree specified does notexist, the restore will create it before the transfer. If the primary qtree exists, then its contents will beoverwritten by the transfer.
By default, snapvault restore performs a baseline transfer from the secondary qtree. If the -r option isused, an incremental restore will be attempted. The incremental restore can be used to revert back thechanges made to a primary qtree since any backed up version on the secondary. Since it transfers onlythe required changes from secondary to primary, it is more efficient than a baseline restore.
By default, the command restores data from the most recent snapshot on the secondary. The -s optionspecifies that the restore should instead be from snapshot snapname on the secondary. The -k optionsets the maximum transfer rate in kilobytes per second. The -f option forces the operation to proceedwithout prompting for confirmation. The -w option causes the command not to return once the restoretransfer starts. The -p option sets the IP connection mode. Restores are restartable; reissue the restorecommand to restart an aborted restore.
After the restore, the user should either restart backups on the secondary from the restored volume orqtree on primary or release snapshot resources held on the secondary to enable restarting backups. Torestart backups after restoring to a nonexistent primary qtree, the snapvault start -r command must beissued. After restoring to an existing primary qtree either a snapvault start -r or a snapvault updatemay be used to restart backups. However, it should be noted that a snapvault update will be muchmore inefficient. If it is not required to restart the backup, release the snapshot resources on thesecondary. To release snapshot resources on the secondary, issue the snapvault release command asdescribed above.
destinations [ -s ] [[node:]path]
Data ONTAP® 8.2 Commands: Manual Page Reference for 7-Mode, Volume 1 611
snapvault
Available on the primary and secondary. On the primary, this lists all the known destinations forSnapVault primary paths. On the secondary, this lists all the known destinations for SnapVaultsecondary qtrees, if the secondary volume has been replicated using snapmirror.
If the secondary volume has been replicated using snapmirror, this command, on both the primary andsecondary, reports the existence of the SnapVault secondary qtrees within the snapmirrored volumes onanother node and/or tape.
The -s option includes in the listing names of snapshots retained on this node for the reporteddestinations.
If a specific path is provided, only destinations for that path will be listed. If the command is being runon the primary, path must be a primary path. If the command is being run on the secondary, path mustbe a secondary qtree. The node, if specified, must be the hostname of the node this command is beingexecuted on.
OPTIONSsnapvault.enableThis option turns SnapVault on and off. Valid settings are on and off. The option must be set to on onthe primaries and the secondary for SnapVault to transfer data from the primary to the secondary andcreate new snapshots. See na_options(1) for more information on setting options.
SnapVault can only be enabled on vfilers which are rooted on volumes.
snapvault.accessThis option controls which SnapVault secondaries may transfer data from a primary and whichprimaries may restore data from a SnapVault secondary. The option string lists the hosts from whichSnapVault transfer requests are allowed or disallowed, or the network interfaces on the source nodeover which these transfers are allowed or disallowed. Set the option on the primary to grant permissionto the secondary. Set the option on the secondary to grant permission to the primaries.
An example of the snapvault.access command is:
options snapvault.access "host=node1,node2 AND if=e10,e11"
This command allows SnapVault transfer requests from node1 and node2, but only over the networkinterfaces e10 and e11. See na_protocolaccess(8) for more details.
snapvault.lockvault_log_volumeThis option controls which volume should be used as the LockVault log volume. This volume containslogs of SnapVault activity when the secondary is a SnapLock volume. The LockVault log volume mustbe an online SnapLock volume. It must not also be used as a SnapMirror destination or SnapVaultsecondary. The compliance clock must be initialized before the LockVault log volume can beconfigured. See na_date(1) for a description of how to set the compliance clock. The LockVault logvolume must be configured before any SnapVault relationships that include a SnapLock secondaryvolume may be established.
An example of the snapvault.lockvault_log_volume command is:
612 Data ONTAP® 8.2 Commands: Manual Page Reference for 7-Mode, Volume 1
snapvault
options snapvault.lockvault_log_volume wormlog
This command configures an existing, online SnapLock volume, wormlog, as the LockVault logvolume.
See the Data Protection Online Backup and Recovery Guide for a description of the LockVault logvolume and its purpose.
Options snapvault.access and snapvault.enable can be manipulated independently on a per-vfilerbasis.
FILES/etc/log/snapmirrorThis file logs SnapVault and SnapMirror activity. See na_snapmirror(5) for details.
See the Data Protection Online Backup and Recovery Guide for a description of the log files in theLockVault log volume.
SEE ALSO na_license(1) na_options(1) na_date(1) na_snapvault(1) na_protocolaccess(8)
Data ONTAP® 8.2 Commands: Manual Page Reference for 7-Mode, Volume 1 613
snapvault
snmpNAMEna_snmp - Sets and queries SNMP agent variables.
SYNOPSISsnmp
snmp authtrap [ 0 | 1 ]
snmp community [ add ro community ]
snmp community [ delete { all | ro community } ]
snmp contact [ contact ]
snmp init [ 0 | 1 ]
snmp location [ location ]
snmp traphost [ { add | delete } { hostname | ipaddress } ]
snmp traps [ walk prefix ]
snmp traps load filename
snmp traps [ { enable | disable | reset | delete } trapname ]
snmp traps trapname.parm value
Note that trapname may not contain embedded periods (’.’).
DESCRIPTIONThe snmp command is used to set and query configuration variables for the SNMP agent daemon (seena_snmpd(8)). If no options are specified, snmp lists the current values of all variables.
You use traps to inspect the value of MIB variables periodically and send an SNMP trap to themachines on the traphost list whenever that value meets the conditions you specify. The traphost listspecifies network management stations that receive trap information.
The priority level of a build-in trap can be found by inspecting the ones digit of the trap number sent tothe traphost, or from the trap definition in the Data ONTAP MIB.
-- 1 emergency -- 2 alert -- 3 critical -- 4 error -- 5 warning -- 6 notification -- 7 information -- 8 debug
614 Data ONTAP® 8.2 Commands: Manual Page Reference for 7-Mode, Volume 1
snmp

OPTIONSIn all the following options, specifying the option name alone prints the current value of that optionvariable. If the option name is followed by one or more variables, then the appropriate action to set ordelete that variable is taken.
authtrap [ 0 | 1 ]Enables or disables SNMP agent authentication failure traps. To enable authentication traps, specify 1.To disable authentication traps, specify 0. Traps are sent to all hosts specified with the traphost option.
community [ add | delete ro | rw community ]
Adds or deletes communities with the specified access control type. Specify ro for a read-onlycommunity and rw for a read-write community. For example, to add the read-only community private,use the following command:
snmp community add ro private
Currently the SNMP SetRequest PDU is not supported, so all read-write communities default toread-only. The default community for the node SNMP agent is public and its access mode is ro. Amaximum of eight communities are supported.
contact [ contact ]
Sets the contact name returned by the SNMP agent as the System.sysContact.0 MIB-II variable.
init [ 0 | 1 ]
With an option of 1, this initializes the snmp daemon with values previously set by the snmp command.It also sends a coldStart trap to any hosts previously specified by the traphost option.
On a query, init returns the value 0 if the SNMP daemon has not yet been initialized. Otherwise, itreturns the value 1.
location [ location ]
Sets the location name returned by the SNMP agent as the System.sysLocation.0 MIB-II variable.
traphost [ add | delete hostname | ipaddress ]
Adds or deletes SNMP managers who receive the node’s trap PDUs. Specify the word add or delete asappropriate, followed by the host name or IP address. If a host name is specified, it must exist in the /etc/hosts file. For example, to add the host alpha, use the following command:
snmp traphost add alpha
No traps are sent unless at least one trap host is specified. Up to a maximum of eight trap hosts aresupported.
On a query the traphost option returns a list of registered trap hosts followed by their IP addresses. If ahost name cannot be found in /etc/hosts for a previously registered IP address, its name defaults to astring representation of its IP address.
Data ONTAP® 8.2 Commands: Manual Page Reference for 7-Mode, Volume 1 615
snmp
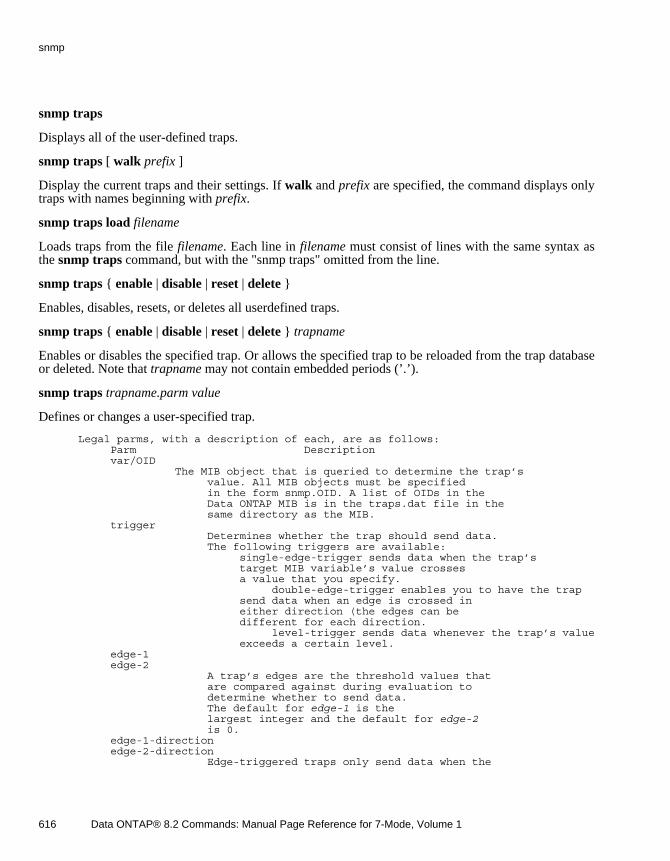
snmp traps
Displays all of the user-defined traps.
snmp traps [ walk prefix ]
Display the current traps and their settings. If walk and prefix are specified, the command displays onlytraps with names beginning with prefix.
snmp traps load filename
Loads traps from the file filename. Each line in filename must consist of lines with the same syntax asthe snmp traps command, but with the "snmp traps" omitted from the line.
snmp traps { enable | disable | reset | delete }
Enables, disables, resets, or deletes all userdefined traps.
snmp traps { enable | disable | reset | delete } trapname
Enables or disables the specified trap. Or allows the specified trap to be reloaded from the trap databaseor deleted. Note that trapname may not contain embedded periods (’.’).
snmp traps trapname.parm value
Defines or changes a user-specified trap.
Legal parms, with a description of each, are as follows: Parm Description var/OID The MIB object that is queried to determine the trap’s value. All MIB objects must be specified in the form snmp.OID. A list of OIDs in the Data ONTAP MIB is in the traps.dat file in the same directory as the MIB. trigger Determines whether the trap should send data. The following triggers are available: single-edge-trigger sends data when the trap’s target MIB variable’s value crosses a value that you specify. double-edge-trigger enables you to have the trap send data when an edge is crossed in either direction (the edges can be different for each direction. level-trigger sends data whenever the trap’s value exceeds a certain level. edge-1 edge-2 A trap’s edges are the threshold values that are compared against during evaluation to determine whether to send data. The default for edge-1 is the largest integer and the default for edge-2 is 0. edge-1-direction edge-2-direction Edge-triggered traps only send data when the
616 Data ONTAP® 8.2 Commands: Manual Page Reference for 7-Mode, Volume 1
snmp
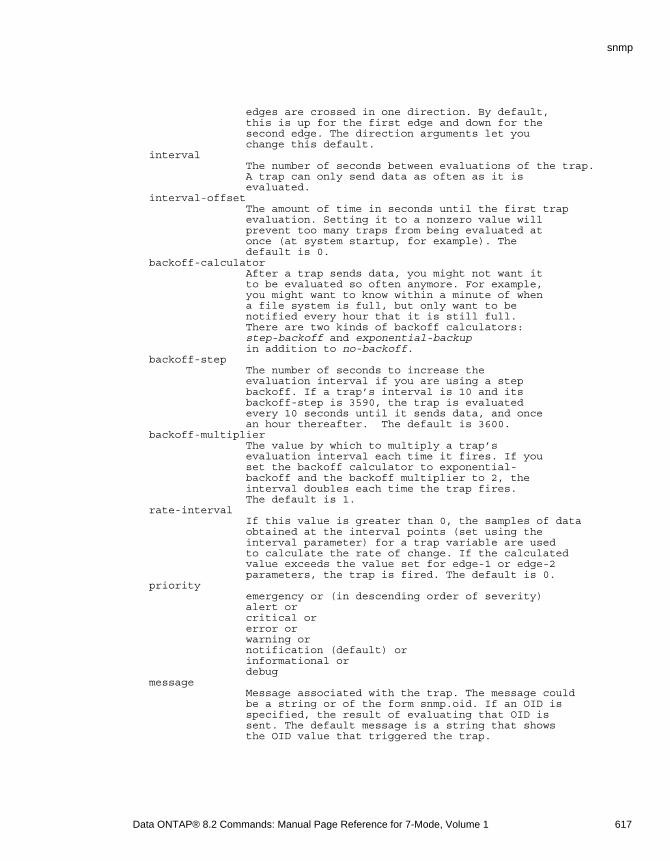
edges are crossed in one direction. By default, this is up for the first edge and down for the second edge. The direction arguments let you change this default. interval The number of seconds between evaluations of the trap. A trap can only send data as often as it is evaluated. interval-offset The amount of time in seconds until the first trap evaluation. Setting it to a nonzero value will prevent too many traps from being evaluated at once (at system startup, for example). The default is 0. backoff-calculator After a trap sends data, you might not want it to be evaluated so often anymore. For example, you might want to know within a minute of when a file system is full, but only want to be notified every hour that it is still full. There are two kinds of backoff calculators: step-backoff and exponential-backup in addition to no-backoff. backoff-step The number of seconds to increase the evaluation interval if you are using a step backoff. If a trap’s interval is 10 and its backoff-step is 3590, the trap is evaluated every 10 seconds until it sends data, and once an hour thereafter. The default is 3600. backoff-multiplier The value by which to multiply a trap’s evaluation interval each time it fires. If you set the backoff calculator to exponential- backoff and the backoff multiplier to 2, the interval doubles each time the trap fires. The default is 1. rate-interval If this value is greater than 0, the samples of data obtained at the interval points (set using the interval parameter) for a trap variable are used to calculate the rate of change. If the calculated value exceeds the value set for edge-1 or edge-2 parameters, the trap is fired. The default is 0. priority emergency or (in descending order of severity) alert or critical or error or warning or notification (default) or informational or debug message Message associated with the trap. The message could be a string or of the form snmp.oid. If an OID is specified, the result of evaluating that OID is sent. The default message is a string that shows the OID value that triggered the trap.
Data ONTAP® 8.2 Commands: Manual Page Reference for 7-Mode, Volume 1 617
snmp

You can trap on any numeric MIB variable.
All user-defined traps are sent with a variable binding to the user-defined trap in the Data ONTAP MIB,which has the OID of 1.3.6.1.4.1.789.0.2. The trap itself contains the source entity (the node). The trapdata contains a string of the following form:
name == valuename is the name specified by the user. value is the value of its MIB object at the time the trap fires.
You use standard SNMP tools to receive and examine these traps.
You can enter trap parameters in any order. They are never evaluated until you specify a variable and anevaluation interval.
EXAMPLESTo define the cpuBusyPct trap and set it to point at the MIB object that returns the cumulative CPUbusy time percentage of the node, use the following command:
snmp traps cpuBusyPct.OID snmp.1.3.6.1.4.1.789.1.2.1.3.0
To set the evaluation interval of cpuBusyPct to one minute, use the following command:
snmp traps cpuBusyPct.interval 60
To prompt cpuBusyPct to fire whenever its value exceeds a value (which has not yet been specified),use the following command:
snmp traps cpuBusyPct.trigger level-trigger
You can set a firing threshold to a percentage of a returned value. The following command sets the cpuBusyPct trap’s firing threshold at 90%. This means that whenever cpuBusyPct is evaluated and aGET to the MIB entry it points to returns a number in the range 90..100, the trap fires.
snmp traps cpuBusyPct.edge-1 90
To cause cpuBusyPct to become active, use the following command:
snmp traps enable cpuBusyPct
To use a backoff and not hear about the busy percentage every 60 seconds, use the following command:
snmp traps cpuBusyPct.backoff-calculator stepbackoff
To cause the trap to be evaluated only every 30 minutes after the first firing (60 + 1740 == 1800seconds, or thirty minutes), use the following command:
snmp traps cpuBusyPct.backoff-step 1740
To Define badfans and set its MIB object, use the following command:
618 Data ONTAP® 8.2 Commands: Manual Page Reference for 7-Mode, Volume 1
snmp

snmp traps badfans.OID snmp.1.3.6.1.4.1.789.1.2.4.2.0
A double-edge-triggered trap fires once when the first edge is crossed and again when the second edgeis crossed. To define badfans as a double-edge-triggered trap, use the following command:
snmp traps badfans.trigger double-edge-trigger
To cause badfans to fire when the number of bad fans in the node goes from zero to nonzero (it stillfires if the number of fans suddenly goes from zero to two), use the following command:
snmp traps badfans.edge-1 1
You can cause badfans to fire again whenever the number of bad fans in the node becomes zero again.By default the crossing direction for the first edge is up, and for the second is down; this is what youwant, so there is no need to specify the edge direction, and you use the following command:
snmp traps badfans.edge-2 0
To cause badfans to be evaluated every 30 seconds, use the following command:
snmp traps badfans.interval 30
FILES
/etc/hosts Hosts name database
HA CONSIDERATIONSThe nodes in an HA pair can have different settings for the snmp options.
EXIT STATUS
0 The command completed successfully.
1 The command failed due to unusual circumstances.
2 There was a syntax error in the command.
3 There was an invalid argument provided.
255 No result was available.
Data ONTAP® 8.2 Commands: Manual Page Reference for 7-Mode, Volume 1 619
snmp

SEE ALSOna_snmpd(8).
620 Data ONTAP® 8.2 Commands: Manual Page Reference for 7-Mode, Volume 1
snmp
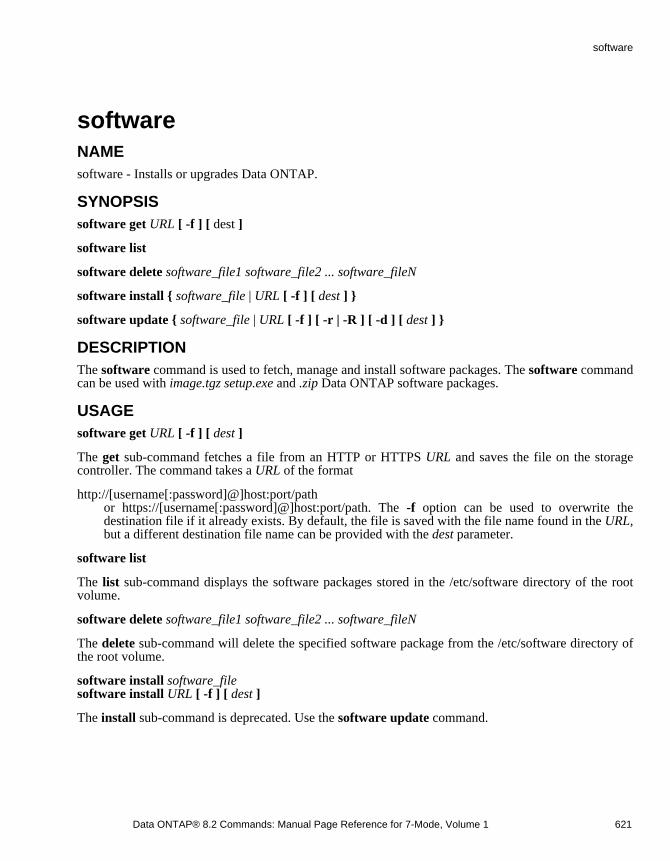
softwareNAMEsoftware - Installs or upgrades Data ONTAP.
SYNOPSISsoftware get URL [ -f ] [ dest ]
software list
software delete software_file1 software_file2 ... software_fileN
software install { software_file | URL [ -f ] [ dest ] }
software update { software_file | URL [ -f ] [ -r | -R ] [ -d ] [ dest ] }
DESCRIPTIONThe software command is used to fetch, manage and install software packages. The software commandcan be used with image.tgz setup.exe and .zip Data ONTAP software packages.
USAGEsoftware get URL [ -f ] [ dest ]
The get sub-command fetches a file from an HTTP or HTTPS URL and saves the file on the storagecontroller. The command takes a URL of the format
http://[username[:password]@]host:port/path or https://[username[:password]@]host:port/path. The -f option can be used to overwrite thedestination file if it already exists. By default, the file is saved with the file name found in the URL,but a different destination file name can be provided with the dest parameter.
software list
The list sub-command displays the software packages stored in the /etc/software directory of the rootvolume.
software delete software_file1 software_file2 ... software_fileN
The delete sub-command will delete the specified software package from the /etc/software directory ofthe root volume.
software install software_filesoftware install URL [ -f ] [ dest ]
The install sub-command is deprecated. Use the software update command.
Data ONTAP® 8.2 Commands: Manual Page Reference for 7-Mode, Volume 1 621
software
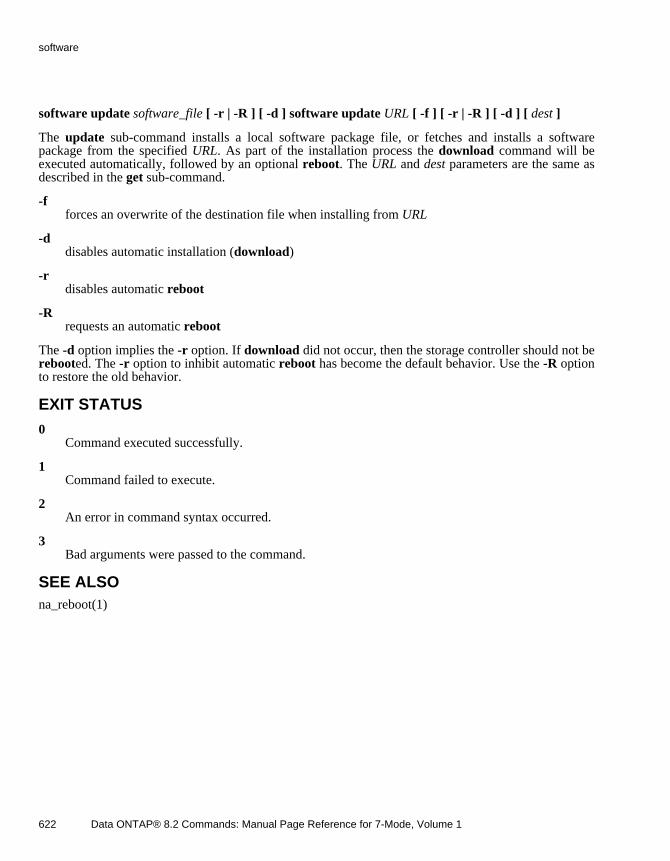
software update software_file [ -r | -R ] [ -d ] software update URL [ -f ] [ -r | -R ] [ -d ] [ dest ]
The update sub-command installs a local software package file, or fetches and installs a softwarepackage from the specified URL. As part of the installation process the download command will beexecuted automatically, followed by an optional reboot. The URL and dest parameters are the same asdescribed in the get sub-command.
-f forces an overwrite of the destination file when installing from URL
-d disables automatic installation (download)
-r disables automatic reboot
-R requests an automatic reboot
The -d option implies the -r option. If download did not occur, then the storage controller should not be rebooted. The -r option to inhibit automatic reboot has become the default behavior. Use the -R optionto restore the old behavior.
EXIT STATUS
0 Command executed successfully.
1 Command failed to execute.
2 An error in command syntax occurred.
3 Bad arguments were passed to the command.
SEE ALSOna_reboot(1)
622 Data ONTAP® 8.2 Commands: Manual Page Reference for 7-Mode, Volume 1
software
sourceNAMEsource - Reads and executes a file of CLI commands.
SYNOPSISsource [ -v ] filename
DESCRIPTIONThe source command reads and executes a file of CLI commands, line by line. Errors do not causetermination; upon error the next line in the file is read and executed. The filename argument mustcontain the fully qualified pathname to the file because there is no concept of a current workingdirectory in ONTAP.
Options
-v Enables verbose mode.
WARNINGSSince execution does not halt on error, do not use the source command to develop scripts in which anyline of the script depends on successful execution of the previous line.
Data ONTAP® 8.2 Commands: Manual Page Reference for 7-Mode, Volume 1 623
source
spNAMEna_sp - Commands for use with a Service Processor (SP)
SYNOPSISsp help
sp reboot
sp setup
sp status
sp test autosupport
sp test snmp
sp update
sp update-status
DESCRIPTIONThe sp commands have been deprecated in favor of the system node service-processor commands.Please refer to the man page for the system node service-processor commands for details.
The sp command is used with a Service Processor (SP), if one is present. Using this command, you mayget the status of a SP and test a SP. Configuration of a SP can be performed by using the setupcommand.
OPTIONS
help Display a list of Service Processor (SP) commands.
reboot Causes the SP to reboot. If your console connection is through the SP it will be dropped. The reboot command forces a Service Processor (SP) to reset itself and perform a self-test.
setup Interactively configure networking for the Service Processor (SP).
status Display the current status of a Service Processor (SP).
test autosupport Performs autosupport test on the Service Processor (SP). The autosupport test forcesthe Service Processor (SP) to send a test autosupport to all email addresses in the option listautosupport.to.
624 Data ONTAP® 8.2 Commands: Manual Page Reference for 7-Mode, Volume 1
sp
test snmp Performs snmp test on the Service Processor (SP). The snmp test forces the Service Processor (SP)to send a test snmp trap to all traphosts shown by the command snmp traphost.
update The SP firmware is updated. This may be a time consuming operation. Before issuing thiscommand, you need to execute the ‘software install’ command to get the new firmware image. TheSP will be rebooted at the end of this operation.
update-status Displays the status of an SP update. The information includes whether an SP update is currently inprogress, the completion percentage, and the start and end time for the update.
HA CONSIDERATIONSThis command only acts upon a Service Processor (SP) that is local to the system.
EXAMPLESsp status
might produce:
Service Processor Status: Online Firmware Version: 1.0 Mgmt MAC Address: 00:A0:98:13:9C:22 Ethernet Link: up Using DHCP: yes IPv4 configuration: IP Address: 172.22.131.145 Netmask: 255.255.224.0 Gateway: 172.22.128.1
SEE ALSOna_options(1), na_system_node_service-processor(1)
NOTESSome of these commands might pause before completing while the Service Processor (SP) is queried.This is normal behavior.
Data ONTAP® 8.2 Commands: Manual Page Reference for 7-Mode, Volume 1 625
sp

statsNAMEstats - Command for collecting and viewing statistical information
SYNOPSISstats commands arguments ...
DESCRIPTIONThe stats family of commands reports various statistics collected by the system.
The stats command may be run in one of three ways:
a. Singleton, in which current counter values are displayed as a snapshot. (stats show)
b. Repeating, in which counter values are displayed multiple times at a fixed interval. (stats show -i)
c. Period, in which counters are gathered over a single period of time and then displayed (stats start/stats stop). Intermediate results may also be shown, by using stats show.
USAGEstats list objects [-p preset]
Displays the names of objects active in the system for which data is available. If -p is specified theobjects used by the preset preset will be listed.
stats list instances [-p preset] | [ object_name ]
Displays the list of active instance names for a given object, or if -p is specified the instances used bythe preset preset. If neither -p nor object_name is specified then all instances for all objects are listed.
stats list counters [-p preset] | [ object_name ]
Displays the list of all counters associated with an object, or if -p is specified the counters used by thepreset preset. If neither -p nor object_name is specified then all counters for all objects are listed.
stats list presets
Displays the list of defined presets in the system.
stats explain counters [ object_name [ counter_name ] ]
Displays an explanation for specific counter(s) in the specified object, or all counters in all objects if no object_name or counter_name are given.
stats show [ -n num ] [ -i interval ] [ -o path ] [ -d delimiter ] [ -p preset ] -O option=value{,option=value} ] [ -r | -c ] [ -e ] [ -I identifier | object_def [ object_def ...] ]
626 Data ONTAP® 8.2 Commands: Manual Page Reference for 7-Mode, Volume 1
stats

Shows all or selected statistics in various formats. If neither -i nor -I options are used a single 1-secondsnapshot of statistics will be used. If -i (interval) is used then statistics will be output repeatedly at thespecified interval. If -I (identifier) is used, where the identifier is a valid name used with stats start,then the statistics since the stats start will be displayed.
-p presetUse the preset configuration preset for default format and object selection. See the section on Preset Configurations below for more information.
-r|-c If the -r option is used then the output will be in rows (with one data element per row). If -c is usedthen the output will in columns, with one data element per column. -r and -c are mutuallyexclusive. If -i is used then the default is -c, otherwise the default is -r.
-i intervalSpecifies that output should be produced periodically, with an interval of interval seconds betweeneach set of output. interval is a positive, non-zero value.
-n numTerminate the output after num number of iterations when -i is used. The num is a positive,non-zero integer. If no num value is specified, the output will run forever till a user issues a break.
-o pathnameSend output to pathname on the appliance instead of the default output for the command.
-d delimiterChange the column delimiter from the default TAB character to the specified delimiter.
-e Allow extended regular expressions (regex) for instance and counter names. When -e is used, theinstance and counter names are independently interpreted as regular expressions. The character ‘*’is still a wild-card representing all instances and/or counter names. The regular expression is notanchored, if necessary use ^ to indicate the start of an instance or counter name, and $ to indicatethe end of an instance or counter name.
-O option=value[,...]Set stats options. The value for each option may be "on" or "off". See na_stats_preset for a list ofoptions that may be set, including print_header, whether or not to print column headers, and print_units, whether or not to print counter units.
-I identifierIf multiple stats requests are being run, using stats start, then each may be identified by a uniquename. This may also be used with stats show to display incremental results (from the initial stats start statistics snapshot until the stats show). The identifier is a printable text string from one to 32characters in length.
stats start [-p preset] [-I identifier] [object_def [ object_def ...]]
Indicates that statistics collection should begin at the current point in time. This subcommand must beused before the stats stop subcommand. The choice of objects/instance/counters to be monitored isspecified with the start subcommand, not with the stop subcommand. If identifier is already in use thenthat identifier will be reused (the old statistics associated with the identifier is discarded). See the
Data ONTAP® 8.2 Commands: Manual Page Reference for 7-Mode, Volume 1 627
stats
description for stats show for information on the -p and -I options.
stats stop [-p preset] [-I identifier] [-r] [-c] [-o pathname] [-d delimiter] [-O option=value[,...]] [-a]
Causes statistics collection to end at this point in time; and output is displayed on the appliance consoleor redirected to the file specified.
If multiple stats start commands are concurrently running, with different identifiers, then -I identifiershould be used to indicate which command should be stopped. If no identifier is given then the mostrecent stats start command will be used.
If the -a (all) option is used then all background requests will be stopped and the output discarded.
See the description for stats show for a description of other options.
Objects, Instances and CountersThe statistics data can be displayed in various levels of granularity: all statistics data available (usingthe * key as a wildcard to represent all objects), statistics data for a single object in the system, statisticsdata for a single instance of an object, statistics data for a single counter in an instance of an object andfinally data for a single counter across all the instances of an object (using * as a wildcard to representvarious instances). Statistics are grouped into several object classes, which may be regarded as a logicalgrouping of counters. Each object has one or more instances, each with a distinct name.
An object definition (object_def) is one of the following:
A single "*" means all counters in all instances of all objects.
object_name A given object_name includes all counters in all instances of a specific object.
object_name:instance_name A given instance_name of a given object_name includes all counters in thespecific instance of the object.
object_name:instance_name:counter_name: A given counter_name in a given instance_name of agiven object_name. Use the instance_name "*" to mean counters in all instances of the given object.
Note that instance names may contain spaces, in which case the object definition string should bequoted. If an instance name contains the separator character ":" then it must be dereferenced by using ittwice, for example an instance name "my:name" should be given as "my::name".
If an instance and/or counter is specified more than once, for example on the command line and in apreset, then only the first occurrence will be displayed in output.
Preset ConfigurationsThe stats command supports preset configurations that contain commonly used combinations ofstatistics and formats. The preset to be used is specified with the -p command line argument, forexample:
stats show -p my_preset_file
628 Data ONTAP® 8.2 Commands: Manual Page Reference for 7-Mode, Volume 1
stats
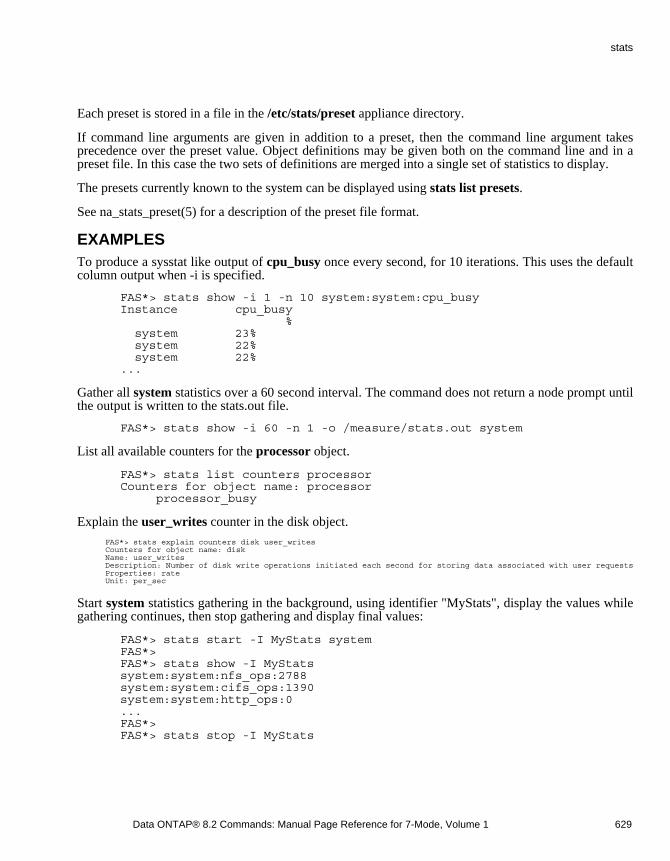
Each preset is stored in a file in the /etc/stats/preset appliance directory.
If command line arguments are given in addition to a preset, then the command line argument takesprecedence over the preset value. Object definitions may be given both on the command line and in apreset file. In this case the two sets of definitions are merged into a single set of statistics to display.
The presets currently known to the system can be displayed using stats list presets.
See na_stats_preset(5) for a description of the preset file format.
EXAMPLESTo produce a sysstat like output of cpu_busy once every second, for 10 iterations. This uses the defaultcolumn output when -i is specified.
FAS*> stats show -i 1 -n 10 system:system:cpu_busy Instance cpu_busy % system 23% system 22% system 22% ...
Gather all system statistics over a 60 second interval. The command does not return a node prompt untilthe output is written to the stats.out file.
FAS*> stats show -i 60 -n 1 -o /measure/stats.out system
List all available counters for the processor object.
FAS*> stats list counters processor Counters for object name: processor processor_busy
Explain the user_writes counter in the disk object. FAS*> stats explain counters disk user_writes Counters for object name: disk Name: user_writes Description: Number of disk write operations initiated each second for storing data associated with user requests Properties: rate Unit: per_sec
Start system statistics gathering in the background, using identifier "MyStats", display the values whilegathering continues, then stop gathering and display final values:
FAS*> stats start -I MyStats system FAS*> FAS*> stats show -I MyStats system:system:nfs_ops:2788 system:system:cifs_ops:1390 system:system:http_ops:0 ... FAS*> FAS*> stats stop -I MyStats
Data ONTAP® 8.2 Commands: Manual Page Reference for 7-Mode, Volume 1 629
stats
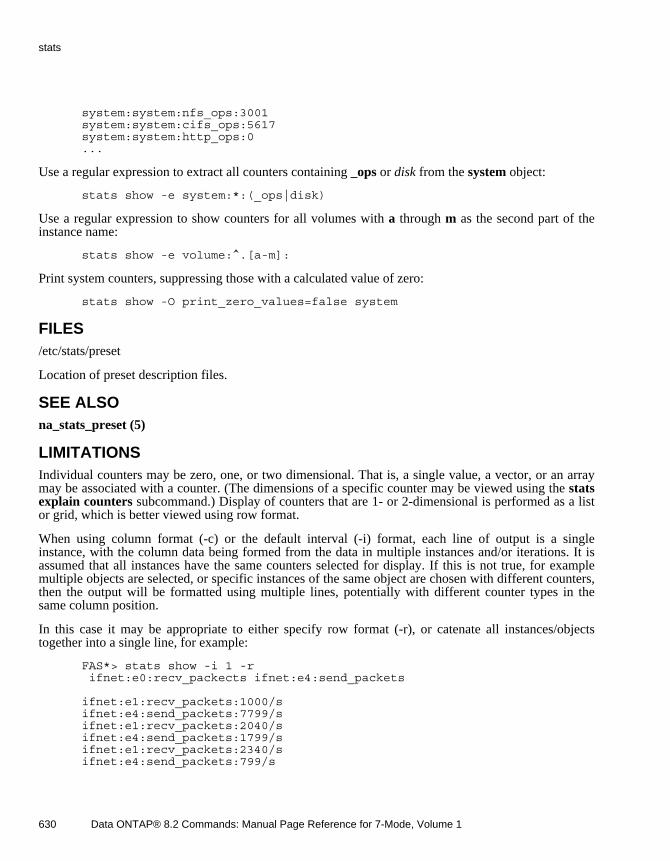
system:system:nfs_ops:3001 system:system:cifs_ops:5617 system:system:http_ops:0 ...
Use a regular expression to extract all counters containing _ops or disk from the system object:
stats show -e system:*:(_ops|disk)
Use a regular expression to show counters for all volumes with a through m as the second part of theinstance name:
stats show -e volume:^.[a-m]:
Print system counters, suppressing those with a calculated value of zero:
stats show -O print_zero_values=false system
FILES/etc/stats/preset
Location of preset description files.
SEE ALSOna_stats_preset (5)
LIMITATIONSIndividual counters may be zero, one, or two dimensional. That is, a single value, a vector, or an arraymay be associated with a counter. (The dimensions of a specific counter may be viewed using the stats explain counters subcommand.) Display of counters that are 1- or 2-dimensional is performed as a listor grid, which is better viewed using row format.
When using column format (-c) or the default interval (-i) format, each line of output is a singleinstance, with the column data being formed from the data in multiple instances and/or iterations. It isassumed that all instances have the same counters selected for display. If this is not true, for examplemultiple objects are selected, or specific instances of the same object are chosen with different counters,then the output will be formatted using multiple lines, potentially with different counter types in thesame column position.
In this case it may be appropriate to either specify row format (-r), or catenate all instances/objectstogether into a single line, for example:
FAS*> stats show -i 1 -r ifnet:e0:recv_packects ifnet:e4:send_packets
ifnet:e1:recv_packets:1000/s ifnet:e4:send_packets:7799/s ifnet:e1:recv_packets:2040/s ifnet:e4:send_packets:1799/s ifnet:e1:recv_packets:2340/s ifnet:e4:send_packets:799/s
630 Data ONTAP® 8.2 Commands: Manual Page Reference for 7-Mode, Volume 1
stats
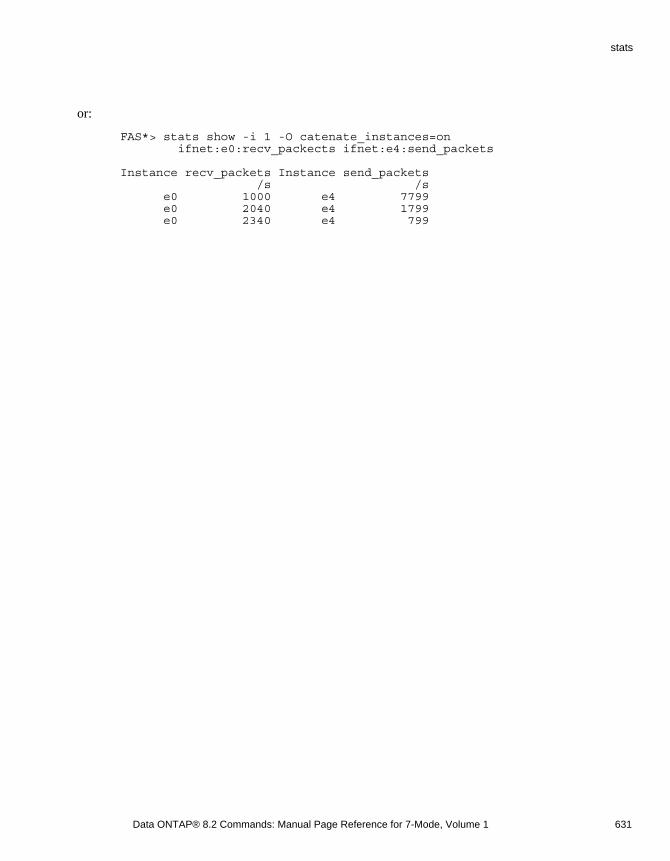
or:
FAS*> stats show -i 1 -O catenate_instances=on ifnet:e0:recv_packects ifnet:e4:send_packets
Instance recv_packets Instance send_packets /s /s e0 1000 e4 7799 e0 2040 e4 1799 e0 2340 e4 799
Data ONTAP® 8.2 Commands: Manual Page Reference for 7-Mode, Volume 1 631
stats
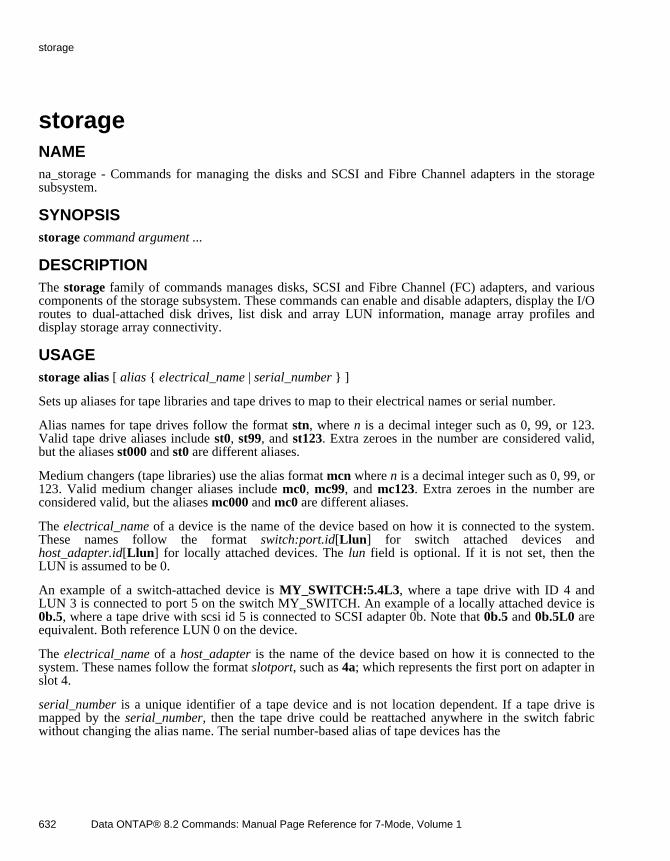
storageNAMEna_storage - Commands for managing the disks and SCSI and Fibre Channel adapters in the storagesubsystem.
SYNOPSISstorage command argument ...
DESCRIPTIONThe storage family of commands manages disks, SCSI and Fibre Channel (FC) adapters, and variouscomponents of the storage subsystem. These commands can enable and disable adapters, display the I/Oroutes to dual-attached disk drives, list disk and array LUN information, manage array profiles anddisplay storage array connectivity.
USAGEstorage alias [ alias { electrical_name | serial_number } ]
Sets up aliases for tape libraries and tape drives to map to their electrical names or serial number.
Alias names for tape drives follow the format stn, where n is a decimal integer such as 0, 99, or 123.Valid tape drive aliases include st0, st99, and st123. Extra zeroes in the number are considered valid,but the aliases st000 and st0 are different aliases.
Medium changers (tape libraries) use the alias format mcn where n is a decimal integer such as 0, 99, or123. Valid medium changer aliases include mc0, mc99, and mc123. Extra zeroes in the number areconsidered valid, but the aliases mc000 and mc0 are different aliases.
The electrical_name of a device is the name of the device based on how it is connected to the system.These names follow the format switch:port.id[Llun] for switch attached devices and host_adapter.id[Llun] for locally attached devices. The lun field is optional. If it is not set, then theLUN is assumed to be 0.
An example of a switch-attached device is MY_SWITCH:5.4L3, where a tape drive with ID 4 andLUN 3 is connected to port 5 on the switch MY_SWITCH. An example of a locally attached device is 0b.5, where a tape drive with scsi id 5 is connected to SCSI adapter 0b. Note that 0b.5 and 0b.5L0 areequivalent. Both reference LUN 0 on the device.
The electrical_name of a host_adapter is the name of the device based on how it is connected to thesystem. These names follow the format slotport, such as 4a; which represents the first port on adapter inslot 4.
serial_number is a unique identifier of a tape device and is not location dependent. If a tape drive ismapped by the serial_number, then the tape drive could be reattached anywhere in the switch fabricwithout changing the alias name. The serial number-based alias of tape devices has the
632 Data ONTAP® 8.2 Commands: Manual Page Reference for 7-Mode, Volume 1
storage

following format SN[xxxxxxxxxxxxxxxxxxxxxxxx][Llun], where x is an alphanumeric character and lun isthe logical unit number of the tape device. If the LUN is 0, the L[lun] part of the string is notdisplayed. Example of a valid serial number as a mapped alias include the following: SN[00013B0122]L12 and SN[HU104514FJ].
Note that SN[HU104514FJ] and SN[HU104514FJ]L0 are equivalent because both address LUN 0.
If no options are given to the storage alias command, a list of the current alias mappings is shown.
Aliases allow multiple storage systems that are sharing tape drives to use the same names for eachdevice. The alias names can be assigned either a location dependent name (electrical_name) so that astorage system always use a tape drive attached to port 5 on switch MY_SWITCH, or the names can beassigned to a physical device (serial number) so that a storage system always use the same tape driveregardless of where it is moved on the network.
If the storage system detects the addition of a tape device and no alias mapping has been set up foreither the electrical name or the serial number, an alias mapped to the device serial number is added tothe storage system.
Tip: Sharing this configuration information between storage systems, especially with long devicenames and many alias settings, can be done by entering the commands into a source file and running the source command on the storage system.
storage array modify array-name [ -m model ] [ -n new array name ] [ -v vendor ] [ -p prefix ] [ -o array options ]
This command modifies attributes of array profile records. The controller maintains a record for eachstorage array that presents array LUNs to it. The record gives the storage array a name, and is used toassociate each of its target ports with a single entity. You can change some of the systemassignedvalues.
-m model
The -m option enables you to change the model name assigned to the array profile. A default modelname is returned by an inquiry command sent to the storage array.
-n new_name
The -n option allows the administrator to change the default name given to the array profile. The arrayprofile name is used to identify the storage array on most displays. The default name is a concatenationof the vendor and model inquiry data and an increasing numerical value.
-v vendor
The -v option allows the administrator to change the vendor name given to the array profile. The defaultvendor name is returned by an inquiry command to the storage array.
-p prefix
Data ONTAP® 8.2 Commands: Manual Page Reference for 7-Mode, Volume 1 633
storage

The -p option allows the administrator to change the prefix assigned to an array profile. A prefix is aunique 5 character string assigned to the array profile. The prefix is not currently used.
-o options
The -o option allows the administrator to set storage array specific options on a per storage array basis.
storage array purge-database
This command removes all records from the controller’s array profile database. For storage arrays thatare still attached to the controller, Data ONTAP automatically repopulates the database with recordsusing default values.
storage array remove array-name
This command removes array profile records from the controller’s internal database. The administratormay wish to remove array profiles that are no longer connected to the controller. If a storage array isstill connected to the controller, it reappears with the default values after its’ removal.
storage array remove-port array-name -p WWPN
This command removes ports associated with an array profile. The administrator may wish to removeports from the array profile record if the ports are no longer connected to the controller. This can happendue to hardware replacement, rezoning or other activities. The -p WWPN arguments must be supplied tospecify the World Wide Port Name (WWPN) of the port to be removed.
storage array show [ array-name ]
This command lists all array profile records known to the controller. A record is known to the controllerif the controller has ever seen the storage array export array LUNs to the controller, regardless ofwhether or not the array LUNs were assigned.
The record can exist even if the storage array is not currently visible to the controller.
A record is eliminated only if you remove the record by using the storage array purge-databasecommand, or the storage array remove command. When you specify an array profile name, only theinformation for the array profile you specifiy is shown.
storage array show-ports [ array-name ]
This command lists all target ports known to the controller for a given storage array (if an array name isspecified) or for all storage arrays if no storage array name is specified. Target ports will remain as partof an array profile forever, unless they are removed as a result of removing the port, the profile orpurging the database.
storage array show-luns [ -a ] array-name
[ -a ] The -a option will only display array LUNs that are assigned.
[ -p WWPN ]
634 Data ONTAP® 8.2 Commands: Manual Page Reference for 7-Mode, Volume 1
storage
This command lists all array LUNs exported from a named storage array that you identify.Alternatively, you can specify a World Wide Port Name (WWPN), in which case only the array LUNSthat are exported by that target port on the named storage array you identified are listed.
storage array show-config [ -a ]
[ -a ] The -a option displays only the array LUNs that are assigned.
This command provides information about the connectivity to SAN-attached storage arrays that areconnected to the V-Series system’s FC initiator ports. The summary shows the LUN groups that theVSeries system can see. For each LUN group, the following information is shown: target ports, thearray LUNs exported over each target port, and the V-Series system’s FC initiator ports that can see theLUN group. A properly configured array LUN group shows two target ports per LUN group.
storage disable adapter <adapter>
Disables an adapter with name <adapter> and takes it offline. For FC adapters this prevents the systemfrom using the adapter for I/O. FC adapters must be redundant to be be disabled. An adapter isconsidered redundant if all devices connected to it can be reached through another adapter. Thesubcommand show can display whether the adapter is redundant and whether it is enabled or disabled.
After an FC adapter connected to dual-attached disk drive has been disabled, the other adapterconnected to the same disks is no longer considered redundant and cannot be disabled.
This command also allows the disabling of parallel SCSI host bus adapters connected to tape drivesand/or medium changers. The command cannot disable parallel SCSI HBAs connected to disk drives.
Disabling a parallel SCSI HBA connected to tape drives and/or medium changers allows them to beadded and removed from the bus without turning off the storage system. The parallel SCSI bus is notdesigned for hot-plugging devices so the instructions given here must be followed explicitly or thestorage system might panic or the hardware might be damaged. When the HBA is enabled, itreinitializes the hardware on the SCSI bus; if there any faulty cables or devices are put on the SCSI bus,the storage system might panic. This is no different from what happens when the storage system bootsafter being turned on.
Below are the steps that must be followed to change the tape drives and/or medium changers that areconnected to a parallel SCSI bus.
1. Run the command storage disable adapter adapter, replacing adapter with the name of the parallelSCSI HBA that needs tape drives or medium changers added to or removed from it.
This command first ensures that no tape drives or medium changers connected to the HBA are beingused, and then takes the HBA offline. If the HBA has dual-channels, then both channels are takenoffline. After the HBA is offline, it is in a safe state and changes can be made to the SCSI bus.
2. Turn off all devices connected by the SCSI bus to the HBA.
3. Add to or remove from the SCSI bus any tape drives or medium changers, and then change thecabling appropriately.
Data ONTAP® 8.2 Commands: Manual Page Reference for 7-Mode, Volume 1 635
storage
4. Verify the new bus connections by checking that all devices have different SCSI ID’s and havecompatible bus types, so that low voltage differential (LVD) and high voltage differential (HVD)devices are not connected to the same bus. Also verify the bus is properly terminated.
5. Turn on all devices now connected by the SCSI bus to the HBA.
6. Run the command storage enable adapter adapter using the same adapter name used in step 1.
This command reinitializes the HBA and scans the bus for any devices. After this command iscomplete, the tape drives and medium changers now connected to the system can be seen with the storage show tape or storage show mc commands.
storage download shelf [ -R ] [ adapter | shelf ]
Downloads new firmware to disk shelves attached to adapter name adapter If the name is of the form adapter.shelfN where N is an integer, then it is considered to be the name of the shelf with ID Nattached to the adapter. In this case only the specified shelf is updated.
If neither the adapter nor the shelf name is specified, then all shelves attached to all adapters will beupdated. For example, the following command updates all shelves attached to adapter 5:
storage download shelf 5
The following command updates shelf 3 attached to adapter 8:
storage download shelf 8.shelf3
The -R option allows the firmware to be reverted to the version shipped with the current Data ONTAPrelease.
storage download acp [ -R ] [ <adapter_name>.<shelf_id>.<module_number> ]
Downloads new firmware to ACP processors with inband specified by triplet <adapter_name>.<shelf_id>.<module_number>
If no inband id is specified, then all ACP processors connected to ACP administrator will be updated.For example, the following command updates all ACP processors connected to the system:
storage download acp
The following command updates ACP processor on slot B in shelf 4 connected to adapter 7a:
storage download acp 7a.4.B
The -R option allows the firmware to be reverted to the version shipped with the current Data ONTAPrelease.
storage enable adapter <adapter>
Enables an adapter with name <adapter> after the adapter has been disabled by the disablesubcommand. I/O can be issued on the adapter.
636 Data ONTAP® 8.2 Commands: Manual Page Reference for 7-Mode, Volume 1
storage

storage help sub_command
Displays the Help information for the given sub_command.
storage load balance
Requests that I/O load over the storage system FC initiator ports be balanced based on recent averages.
storage load summary
Displays a summary of I/O load (in blocks) for each storage system FC initiator port. The I/O volume isshown between each storage system FC initiator port and each storage array target port. This commandis valid only for storage systems that attach to FC storage arrays. This command is only available onV-Series systems.
storage load show
Displays the total I/O volume, to all array LUNs, over each storage system FC initiator port. If youspecify an FC initiator port in the command, the output is shown only for the port you specify. Thiscommand is only available on V-Series systems.
storage shelf identify <shelf-name> [ on | off ]
Turns the identify mode of a shelf to on or off. The identify mode will flash all LEDs on the front andback of the shelf when set to on and when set to off restore shelf LEDs to previous state. The OPS LEDpanel on the front of the shelf will also alternate between the shelf ID and "H0" letters. This aids inidentifying the shelf among other hardware.
storage show
Displays information about storage components of the system.
The storage show command displays information about all disks, hubs, and adapters. Additionalarguments to storage show can control the output; see the following commands:
storage show acp [ -a ]
Displays status and statistics for the Alternate Control Path (ACP) administrator. The header displayswhether the ACP is enabled or not. If ACP is enabled, the output displays all ACP administratorinformation including Ethernet interface, IP address, current status, domain, netmask and ACPconnectivity status.
It also displays shelf module id, reset count statistics, IP address, firmware version, module type andcurrent status of all the connected ACP processors.
ACP connectivity status can be,
No Connectivity: no ACP processors connected.
Partial Connectivity: more ACP processors reported through inband than alternate path.
Data ONTAP® 8.2 Commands: Manual Page Reference for 7-Mode, Volume 1 637
storage

Full Connectivity: same number of ACP processors seen through inband and alternate path.
Additional Connectivity: more ACP processors reported through alternate path than inband.
-a
The -a option displays information about all the ACP processors connected through the alternate path.ACP processors which are reported only through inband will have ‘NA’ for the reset count, IP address,firmware version, module type and status.
storage show adapter [ -a ] [ adapter ]
If no adapter name is given, information about all adapters is shown. The -a option shows the sameinformation (the -a option is provided for consistency, matching the storage show disk -a command). Ifan adapter name is given, only information about that specified adapter is shown.
storage show disk [ -a | -p | -T | -x ] [ name ]
If no options are given, the current disks in the system are displayed. If a name is given theninformation about that disk or host adapter is displayed. The name can be either an electrical_name or a world_wide_name. The following options are supported:
-a
The -a option displays all information about disks in a report form that makes it easy to include newinformation, and that is easily interpreted by scripts. This is the information and format that appears inthe STORAGE section of an AutoSupport report.
-p
The -p option displays the primary and secondary paths to a disk device. Disk devices can be connectedthrough the A-port or the B-port. If the storage system can access both ports, one port is used as theprimary path and the other port is used as a secondary (backup) path.
Optionally displays the disks that have primary path on a given host adapter by specifying a hostadapter name. Specifying all for host adapter name will display the disk primary path list for all hostadapters, sorted by the host adapter name.
Only the endpoints of a route are used to determine primary and secondary paths. If two adapters areconnected to a switch but the switch is only connected to one port on the drive, there is only one path tothe device.
-T
The -T option displays the disk type (e.g., FCAL, LUN, ATA) and can be used in conjunction with the-x option.
-x
The -x option displays the disk specific information including serial number, vendor name and model.
638 Data ONTAP® 8.2 Commands: Manual Page Reference for 7-Mode, Volume 1
storage
storage show expander [ -a ] [ expander ]
Displays shelf expander statistics for SAS shelf modules. If no expander name is given, informationabout all expanders are shown. The -a option shows the same information (the -a option is provided forconsistency, matching the storage show disk -a command). If an expander name is given, onlyinformation about that specified expander is shown.
storage show fabric
This command shows all fabrics, including any fabric health monitor status.
storage show fault [ -a ] [ -v ] [ shelf ]
Displays shelf fault information for shelves that currently have a fault. If no shelf is specified,information for all shelves that have any fault is shown. The -a option shows information formatted forAutoSupport and limits the information to a maximum of 10 shelves. The -v option shows faultinformation for a shelf even if no fault exists currently in that shelf.
storage show hub [ -a ] [ hub ]
Displays shelf hub statistics for shelves with ESH, ESH2, or ESH4 modules. If no hub name is given,information about all hubs is shown. The -a option shows the same information (the -a option isprovided for consistency, matching the storage show disk -a command). If a hub name is given, onlyinformation about that specified hub is shown.
storage show initiators [ -a ]
Displays the host name and system id of other controllers in a Shared Storage configuration. The localhost is denoted by the word self after its system ID.
storage show mc [ mc ]
If no mc name is given, information about all media changer devices is shown. If the mc argument isgiven, then only information about that device is shown unless the device does not exist in the system.The mc name can either be an alias name of the form mcn, an electrical_name, or a serial_number.
storage show port [ port ]
If the port name argument is absent, the command displays information about all ports on all switches.If the port name argument is given, only information about the named port is displayed. Theinformation includes the WWPN, the switch name and loop and link status.
storage show shelf [ -a ] [ -e ] [ shelf ]
Displays shelf module statistics for shelves with SAS or ESH, ESH2, or ESH4 modules. If no shelf module name is given, information about all shelves is shown. The -a option shows the sameinformation (the -a option is provided for consistency, matching the storage show disk -a command). The -e option shows the status of expanders and modules. If a shelf module name is given, onlyinformation about that specified shelf module is shown.
Data ONTAP® 8.2 Commands: Manual Page Reference for 7-Mode, Volume 1 639
storage
storage show switch [ switch ]
If no switch name is given, information about all switches is displayed. If the switch argument is given,then only information about that switch is shown. The information includes the symbolic name, theWWN, the current status and switch statistics.
storage show tape [ tape ]
If no tape name is given, information about all tape devices is shown. If the tape argument is given,then only information about that device is shown unless the device does not exist in the system. The tape name can either be an alias name of the form stn, an electrical_name or a serial_number.
storage show tape supported [ -v ]
If no options are given, the list of supported tape drives is displayed. The following option is supported:
-v
The -v option displays all the information about the supported tape drives including their supporteddensity and compression settings.
storage stats tape [ tape ]
Displays statistics of the tape drive named tape. The output shows the total number of bytes read/writtento/from the tape drive and a breakdown of the time spent in the different tape commands. The tapecommands include writes, reads, erases, writing the end of file marker, and tape movement operations.The output displays how many times each command was executed, the average time to execute thecommand, the maximum time to execute the command, and the minimum time to execute thecommand. For writes and reads, the output also shows a breakdown of the times spent and thethroughput for different block sizes in 4-KB increments up to 508 KB.
If no tape drive is named in the command, statistics for all tape drives are be shown.
storage stats tape zero [ tape ]
Resets to zero all the statistics for the tape drive named tape to zero.
If no tape drive is named in the command, statistics for all tape drives would be zeroed.
storage unalias { alias | -a | -m | -t }
Removes alias settings from the storage system. If the alias argument is entered, then that particularalias mapping is removed.
-a
The -a option removes all aliases stored in the system.
-m
The -m option removes all medium changer aliases stored in the system. Medium changer aliasesfollow the format mcn.
640 Data ONTAP® 8.2 Commands: Manual Page Reference for 7-Mode, Volume 1
storage

-t
The -t option removes all tape drive aliases stored in the system. Tape drive aliases follow the format stn.
HA CONSIDERATIONSThe information displayed can present disks that belong to the partner controller. The storage commandshows all the disks it sees, regardless of who owns the disks.
The storage enable and storage disable commands are disabled if a controller is in takeover mode andthe command is issued on behalf of the virtual partner. The storage show command shows devicesconnected to the live partner.
SEE ALSOna_sysconfig(1)
Data ONTAP® 8.2 Commands: Manual Page Reference for 7-Mode, Volume 1 641
storage
sysconfigNAMEna_sysconfig - Displays node configuration information.
SYNOPSISsysconfig [ -A | -a | -v | -c | -d | -h | -m | -p | -r -t | -V | -av ]
sysconfig [ -a | -v | -h | -av ] [ slot ]
DESCRIPTIONsysconfig displays the configuration information about the node. Without any arguments, the outputincludes the Data ONTAP(tm) version number and a separate line for each I/O device on the node. Ifthe slot argument is specified, sysconfig displays detail information for the specified physical slot; slot0 is the system board, and slot n is the nth expansion slot on the node.
OPTIONS
-A Displays all the sysconfig reports, one after the other. These include the report of configurationerrors, disk drives, media changers, RAID details, tape devices, and aggregate details.
-a Displays very detailed information about each I/O device. This is more verbose than the outputproduced by the -v option. Disk sizes are scaled in GB. A GB is equal to 1000 MB (1024 * 1024 *1000) or 1,048,576,000 bytes.
-h Displays very detailed information about each I/O device. This is the same output as the -a optionexcept that the disk size values are scaled in size-related units, KB , GB , TB , whichever is mostappropriate. The values will range from 1 to 999 to the left of the decimal point, and from 0 to 9 tothe right of the decimal point. Unit values are based on powers of two; for example, one gigabyteis equal to (1024 * 1024 * 1024) or 1,073,741,824 bytes.
-c Checks that expansion cards are in the appropriate slots.
-d Displays vital product information for each disk.
-m Displays tape library information. To use this option, the autoload setting of the tape library mustbe off when the node boots.
-p Supported only on virtual platforms. Displays information about the physical host machine and itsmapping to the virtual machine.
642 Data ONTAP® 8.2 Commands: Manual Page Reference for 7-Mode, Volume 1
sysconfig
-r Displays RAID configuration information. The command output prints information about allaggregates, volumes, file system disks, spare disks, maintenance disks, and failed disks. See the vol and aggr commands for more information about RAID configuration.
-t Displays device and configuration information for each tape drive.
If you have a tape device that NetApp Inc has not qualified, the sysconfig -t command output for thatdevice is different from that for qualified devices. If the node has never accessed this device, the outputindicates that this device is a nonqualified tape drive, even though there is an entry for this device in the /etc/clone_tape file. Otherwise, the output provides information about the qualified tape drive that isbeing emulated by this device.
You can enter the following command to access a tape device:
mt -f device status
-v Displays detailed information about each I/O device. For SCSI or Fibre Channel host adapters, theadditional information includes a separate line describing each attached disk.
-V Displays aggregate configuration information.
HA CONSIDERATIONSDuring normal operation, the sysconfig command displays similar information on a node in an HA pairas the sysconfig command on a standalone node. The output on a node in an HA pair, however, includesdisks on both fibre channel loop A and loop B. The information about disks on loop B is for hardwareonly. That is, the sysconfig command only displays information about the adapters supporting the diskson loop B. It does not show the capacity of each disk on loop B or whether a disk on loop B is a filesystem disk, spare disk, or parity disk.
In takeover mode, the sysconfig command provides the same types of information as in normal mode,except that it also displays a reminder that the node is in takeover mode.
In partner mode, the sysconfig command does not display information about any hardware that isattached only to the partner. For example, if you enter the partner sysconfig -r command, you canobtain the software information about the disks on the partner. That is, for each disk on the partner, thecommand output indicates the capacity and whether the disk is a file system, spare, or parity disk. Thecommand output does not include information about the disk adapters on the partner. The informationabout the disk adapters in the command output is for those on the local node.
SEE ALSOna_mt(1), na_vol(1)
Data ONTAP® 8.2 Commands: Manual Page Reference for 7-Mode, Volume 1 643
sysconfig
sysstatNAMEna_sysstat - Reports node performance statistics.
SYNOPSISsysstat [ interval ]
sysstat [ -c count ] [ -s ] [ -u | -x | -m | -f | -i | -b ] [ -d ] [ interval ]
DESCRIPTIONsysstat reports aggregated node performance statistics such as the current CPU utilization, the amountof network I/O, the amount of disk I/O, and the amount of tape I/O. When invoked with no arguments sysstat prints a new line of statistics every 15 seconds. Use control-C or set the interval count (-c count) to stop sysstat.
OPTIONS
-c count Terminates the output after count number of iterations. The count is a positive, nonzero integer,values larger than LONG_MAX will be truncated to LONG_MAX.
-s Displays a summary of the output columns upon termination, descriptive columns such as ‘CP ty’will not have summaries printed. Note that, with the exception of ‘Cache hit’, the ‘Avg’ summaryfor percentage values is an average of percentages, not a true mean of the underlying data. The‘Avg’ is only intended as a gross indicator of performance. For more detailed information use toolssuch as na_nfsstat, na_netstat, or statit.
-f For the default format display FCP statistics.
-i For the default format display iSCSI statistics.
-b Displays the SAN extended statistics instead of the default display.
-u Displays the extended utilization statistics instead of the default display.
-x Displays the extended output format instead of the default display. This includes all availableoutput fields. Be aware that this produces output that is longer than 80 columns and is generallyintended for "offline" types of analysis and not for "realtime" viewing.
644 Data ONTAP® 8.2 Commands: Manual Page Reference for 7-Mode, Volume 1
sysstat
-m Displays multi-processor CPU utilization statistics. In addition to the percentage of the time thatone or more CPUs were busy (ANY), the average (AVG) is displayed, as well as, the individualutilization of each processor.
-d Separating HDD and SSD statistics of Disks. Without this option, both SSD and HDD values areincluded in the values under the "Disk" columes. This option is only effective to the the followingoutput formats: default, -u, and -x.
interval A positive, non-zero integer that represents the reporting interval in seconds. If not provided, thedefault is 15 seconds.
DISPLAYSThe default output format is as follows:
CPU NFS CIFS HTTP Net kB/s Disk kB/s Tape kB/s Cache in out read write read write age ###% ###### ###### ###### ###### ###### ###### ###### ###### ###### >##
The default output format with -d is as follows:
CPU NFS CIFS HTTP Net kB/s HDD kB/s SSD kB/s Tape kB/s Cache in out read write read write read write age ###% ###### ###### ###### ###### ###### ###### ###### ###### ############ ###### >##
The FCP default output format is as follows:
CPU NFS CIFS FCP Net kB/s Disk kB/s FCP kB/s Cache in out read write in out age ###% ###### ###### ###### ###### ###### ###### ###### ###### ###### >##
The iSCSI default output format is as follows:
CPU NFS CIFS iSCSI Net kB/s Disk kB/s iSCSI kB/s Cache in out read write in out age ###% ###### ###### ###### ###### ###### ###### ###### ###### ###### >##
The SAN extended statistics output format is as follows: CPU FCP iSCSI Partner Total FCP kB/s iSCSI kB/s Partner kB/s Disk kB/s CP CP Disk in out in out in out read write time ty util ###% ###### ###### ####### ###### ###### ###### ###### ###### ###### ###### ###### ###### ###% A ###%
The utilization output format is as follows:
CPU Total Net kB/s Disk kB/s Tape kB/s Cache Cache CP CP Disk ops/s in out read write read write age hit time ty util ###% ####### ###### ###### ###### ###### ###### ###### >## ###% ###% A ###%
The utilization output format with -d is as follows:
CPU Total Net kB/s HDD kB/s SSD kB/s Tape kB/s Cache Cache CP CP HDD SSD ops/s in out read write read write read write age hit time ty util util ###% ####### ###### ###### ###### ###### ###### ###### ###### ###### >## ###% ###% A ###% ###%
Data ONTAP® 8.2 Commands: Manual Page Reference for 7-Mode, Volume 1 645
sysstat

The extended display output format is as follows: CPU NFS CIFS HTTP Total Net kB/s Disk kB/s Tape kB/s Cache Cache CP CP Disk OTHER FCP iSCSI FCP kB/s iSCSI kB/s in out read write read write age hit time ty util in out in out ###% ###### ###### ###### ####### ###### ###### ###### ###### ###### ###### >## ###% ###% A ###% ###### ###### ###### ###### ###### ###### ######
The extended display output format with -d is as follows: CPU NFS CIFS HTTP Total Net kB/s HDD kB/s SSD kB/s Tape kB/s Cache Cache CP CP HDD SSD OTHER FCP iSCSI FCP kB/s iSCSI kB/s in out read write read write read write age hit time ty util util in out in out ###% ###### ###### ###### ####### ###### ###### ###### ###### ###### ###### ###### ###### >## ###% ###% A ###% ###% ###### ###### ###### ###### ###### ###### ######
The summary output format is as follows (for -u):
-- Summary Statistics (#### samples ## secs/sample) CPU Total Net kB/s Disk kB/s Tape kB/s Cache Cache CP CP Disk ops/s in out read write read write age hit time ty util
Min ###% ####### ###### ###### ###### ###### ###### ###### >## ###% ###% A ###%
Avg ###% ####### ###### ###### ###### ###### ###### ###### >## ###% ###% A ###%
Max ###% ####### ###### ###### ###### ###### ###### ###### >## ###% ###% A ###%
The summary output format with -d is as follows (for -u) -- Summary Statistics (#### samples ## secs/sample) CPU Total Net kB/s HDD kB/s SSD kB/s Tape kB/s Cache Cache CP CP HDD SSD ops/s in out read write read write read write age hit time ty util util
Min ###% ####### ###### ###### ###### ###### ###### ###### ###### ###### >## ###% ###% A ###% ###%
Avg ###% ####### ###### ###### ###### ###### ###### ###### ###### ###### >## ###% ###% A ###% ###%
Max ###% ####### ###### ###### ###### ###### ###### ###### ###### ###### >## ###% ###% A ###% ###%
The output column descriptions are:
CPU The greater of either the utilization of the busiest domain or the average utilization of allCPUs during the previous interval seconds.
NFS The number of NFS operations per second during that time.
CIFS The number of CIFS operations per second during that time.
HTTP The number of HTTP operations per second during that time.
FCP The number of FCP operations per second during that time.
646 Data ONTAP® 8.2 Commands: Manual Page Reference for 7-Mode, Volume 1
sysstat
iSCSI The number of iSCSI operations per second during that time.
Partner The number of SCSI Partner operations per second during that time.
Net kB/s The number of kilobytes per second of network traffic into and out of the server.
Disk kB/s The kilobytes per second of disk (both HDD and SSD) traffic being read and written.
HDD kB/s The kilobytes per second of HDD traffic being read and written.
SSD kB/s The kilobytes per second of SSD traffic being read and written.
Tape kB/s The number of kilobytes per second of tape traffic being read and written.
FCP kB/s The number of kilobytes per second of fcp traffic into and out of the server.
iSCSI kB/s The number of kilobytes per second of iSCSI traffic into and out of the server.
Partner kB/s The number of kilobytes per second of SCSI Partner traffic into and out of the server.
Cache age The age of the data most recently evicted from the buffer pool. This data is usually, butnot necessarily, the least recently used. Thus, it is possible for the statistic reported bysysstat to sometimes change erratically as buffers containing data of varying age arereclaimed.
Total ops/s The total number of operations per second (NFS + CIFS + HTTP).
Cache hit The WAFL cache hit rate percentage. This value is the percent of instances in whichWAFL attempted to load a disk-block that the data was found already cached in memory.A dash in this column indicates that WAFL did not attempt to load any blocks during themeasurement interval.
CP time The Consistency Point (CP) utilization, the % of time spent in a CP.
CP ty Consistency Point (CP) type, the cause of the CP that was started in the interval. MultipleCPs list no cause, just the number of CPs during the measurement interval. The CP typesare as follows:
Data ONTAP® 8.2 Commands: Manual Page Reference for 7-Mode, Volume 1 647
sysstat
- No CP started during sampling interval
number Number of CPs started during sampling interval, if greater than one
B Back to back CPs (CP generated CP)
b Deferred back to back CPs (CP generated CP)
F CP caused by full NVLog
H A type H CP is a CP from high watermark in modified buffers. If a CP is not in progress,and the number of buffers holding data that has been modified but not yet written to diskexceeds a threshold, then a CP from high watermark is triggered.
L A type L CP is a CP from low watermark in available buffers. If a CP is not in progress,and the number of buffers available goes below a threshold, then a CP form lowwatermark is triggered.
S CP caused by snapshot operation
T CP caused by timer
U CP caused by flush
Z CP caused by internal sync
V CP caused by low virtual buffers
M CP caused by low mbufs
D CP caused by low datavecs
N CP caused by the NV Log reaching a maximum number of entries.
: Continuation of CP from previous interval
648 Data ONTAP® 8.2 Commands: Manual Page Reference for 7-Mode, Volume 1
sysstat

# Continuation of CP from previous interval, and the NVLog for the next CP is now full,so that the next CP will be of type B.
The type character is followed by a second character which indicates the phase of the CP atthe end of the sampling interval. If the CP completed during the sampling interval, this secondcharacter will be blank. The phases are as follows:
0 Initializing
n Processing normal files
s Processing special files
q Processing quota files
f Flushing modified data to disk
v Flushing modified superblock to disk
Disk util The disk utilization (percentage) of the busiest disk of all types since a true aggregatevalue would probably not show the user that there is some type disk based bottleneck.Do not confuse this with disk space used; this is an access based value.
HDD util Like the "Disk util" above but for HDD disks only.
SSD util Like the "Disk util" above but for SSD disks only.
OTHER The number of all "other" operations, including admin, WebDav, FTP, PFS, local,SpinNP, BSD VFS, SnapMirror, and Antivirus. Excludes nfs, nlm, mount, cifs, iscsi, fcp,and http.
EXAMPLESsysstatDisplays the default output every 15 seconds, requires control-C to terminate.
sysstat 1Displays the default output every second, requires control-C to terminate.
sysstat -s 1Displays the default output every second, upon control-C termination print out the summarystatistics.
Data ONTAP® 8.2 Commands: Manual Page Reference for 7-Mode, Volume 1 649
sysstat

sysstat -c 10Displays the default output every 15 seconds, stopping after the 10th iteration.
sysstat -c 10 -s -u 2
sysstat -u -c 10 -s 2Displays the utilization output format, every 2 seconds, stopping after the 10th iteration, uponcompletion print out the summary statistics.
sysstat -x -s 5Displays the extended (full) output, every 5 seconds, upon control-C termination print out thesummary statistics.
HA CONSIDERATIONSIn takeover mode, the sysstat command displays the combined statistics from both the failednode and the live node.
The statistics displayed by the sysstat command are cumulative; a giveback operation doesnot zero out the statistics. That is, after giving back its partner’s resources, the live node does notsubtract the statistics about operations it performed on behalf of the failed node in takeover mode.
SEE ALSOna_partner(1).
650 Data ONTAP® 8.2 Commands: Manual Page Reference for 7-Mode, Volume 1
sysstat

system_healthNAMEna_system_health - Summary of system health management and diagnosis commands
SYNOPSISCommand Summary
This is a list of the subcommands for the system health command.
system health alertDisplays and modifies system health alerts.
system health autosupportDisplays autosupport trigger history.
system health configDisplay system health configuration.
system health policyDisplays and modifies system health policy.
system health statusDisplay system health monitoring status.
system health subsystemDisplay the health of subsystems.
SEE ALSOna_system_health_alert(1),na_system_health_autosupport(1),
na_system_health_policy(1), na_system_health_subsystem(1),
Data ONTAP® 8.2 Commands: Manual Page Reference for 7-Mode, Volume 1 651
system_health

system_health_alertNAMEna_system_health_alert - Displays and modifies system health alert and alert definition.
DESCRIPTIONsystem health alert definition show - Display system health alert definition.
system health alert delete - Delete system health alert.
system health alert modify - Modify system health alert.
system health alert show - View system health alert.
USAGEsystem health alert definition show [ -fields ] [ -instance ] [ -monitor ] [ -alert-id ] [ -perceivedseverity ] [ -probable-cause ] [ -probable-causedescription ] [ -subsystem ] [ -possible-effect ] [ -corrective-actions ] [ -additional-information ] [ -tags ]
This command displays information about the various alerts defined in the system health monitor policyfile. Using -instance will display detailed information on each alert defined.
{ [-fields <fieldname>, ...]
Displays the fields specified.
| [-instance] }
Displays additional information on each alert definition.
[-monitor <hm_type>] - Monitor
Displays information about all the alert definitions with the specified monitor name.
[-alert-id <text>] - Class of Alert
Displays information about all the alert definitions with the specified alert identifier.
[-perceived-severity <hm_perceived_sev>] - Severity of Alert
Displays information about all the alert definitions with the specified perceived severity.
[-probable-cause <hm_probable_cause>] - Probable Cause
Displays alert definitions for the specified probable cause of the alert.
[-probable-cause-description <text>] - Probable Cause Description
652 Data ONTAP® 8.2 Commands: Manual Page Reference for 7-Mode, Volume 1
system_health_alert

Displays alert definitions for the specified probable cause description.
[-subsystem <hm_subsystem>] - Subsystem Name
Displays alert definitions for the specified subsystem.
[-possible-effect <text>] - Possible Effect
Displays alert definitions for the specified possible effect.
[-corrective-actions <text>] - Corrective Actions
Displays alert definitions for the specified corrective action.
[-additional-information <text>] - Additional Relevant Data
Displays definitions for the specified additional information.
[-tags <hm_alert_type>, ...] - Additional Alert Tags
Query the alerts based on keywords.
system health alert delete [ -monitor ] [ -alert-id ] [ -alerting-resource ]
This command deletes all the alerts with the specified input options.
[-monitor <hm_type>] - Monitor
Deletes alerts generated on the monitor specified.
[-alert-id <text>] - Alert ID
Deletes alerts generated on the alert ID specified.
[-alerting-resource <text>] - Alerting Resource
Deletes alerts generated on the alerting resource specified.
system health alert modify [ -monitor ] [ -alert-id ] [ -alerting-resource ] [ -acknowledge ] [ -suppress ] [ -acknowledger ] [ -suppressor ]
This command suppresses alerts generated and sets the acknowledgement state for an alert.
[-monitor <hm_type>] - Monitor
Specifies the monitor name that you want to change the state.
[-alert-id <text>] - Alert ID
Specifies the alert ID that you want to change the state.
[-alerting-resource <text>] - Alerting Resource
Data ONTAP® 8.2 Commands: Manual Page Reference for 7-Mode, Volume 1 653
system_health_alert
Specifies the alerting resource name that you want to change the state.
[-acknowledge {true|false}] - Acknowledge
Sets the acknowledgement state to true or false.
[-suppress {true|false}] - Suppress
Sets the suppress state to true or false.
[-acknowledger <text>] - Acknowledger
Sets the acknowledger as the filter for setting state.
[-suppressor <text>] - Suppressor
Sets the suppressor as the filter for setting state.
system health alert show [ -fields ] [ -instance ] [ -monitor ] [ -alert-id ] [ -alerting-resource ] [ -subsystem ] [ -indication-time ] [ -perceived-severity ] [ -probable-cause ] [ -probable-cause-description ] [ -possible-effect ] [ -corrective-actions ] [ -acknowledge ] [ -suppress ] [ -policy ] [ -acknowledger ] [ -suppressor ] [ -tags ] [ -additional-info ] [ -alertingresource-name ]
This command displays all the alerts generated on the system. Using -instance will display detailedinformation on each alert that was generated.
{ [-fields <fieldname>, ...]
Displays the fields you specify.
| [-instance] }
Displays additional information on each alert generated.
[-monitor <hm_type>] - Monitor
Displays information about all of the alerts with the specified monitor name.
[-alert-id <text>] - Alert ID
Displays information about all the alerts with the specified alert ID.
[-alerting-resource <text>] - Alerting Resource
Displays information about all the alerts with the specified alerting resource name.
[-subsystem <hm_subsystem>] - Subsystem
Displays information about all the alerts generated on the monitoring subsystem.
[-indication-time <Date>] - Indication Time
654 Data ONTAP® 8.2 Commands: Manual Page Reference for 7-Mode, Volume 1
system_health_alert
Displays information about all the alerts with the specified indicated time.
[-perceived-severity <hm_perceived_sev>] Perceived Severity
Displays information about all the alerts with the perceived severity level.
[-probable-cause <hm_probable_cause>] - Probable Cause
Displays information about all the alerts that contain the specified probable cause.
[-probable-cause-description <text>] - Description
Displays information about all of the alerts containing the specified probable cause description.
[-corrective-actions <text>] - Corrective Actions
Displays information about all the alerts with the specified recommended corrective action.
[-possible-effect <text>] - Possible Effect
Displays information about all the alerts with the specified possible effect.
[-acknowledge {true|false}] - Acknowledge
Displays information about all the alerts with the specified acknowledgement status.
[-suppress {true|false}] - Suppress
Displays information about all of the alerts with the specified suppressor field status of true or false.
[-policy <text>] - Policy
Displays information about all the alerts with the specified policy name.
[-acknowledger <text>] - Acknowledger
Displays information about all the alerts with the specified acknowledger field.
[-suppressor <text>] - Suppressor
Displays information about all the alerts with the specified suppressor field.
[-additional-info <text>, ...] - Additional Information
Displays information about all the alerts with the specified additional information.
[-alerting-resource-name <text>] - Alerting Resource Name
Displays information about all the alerts with the specified alerting resource name.
[-tags <hm_alert_type>, ...] - Additional Alert Tags
Data ONTAP® 8.2 Commands: Manual Page Reference for 7-Mode, Volume 1 655
system_health_alert

Query the alert based on keywords.
EXAMPLES This example displays information about all the alert definitions that are present in the alert definition file:
node> system health alert definition show
Node Monitor Subsystem Alert ID ------------- ---------------------- ----------------- ----------------------- csiptc-2240-23 node-connect SAS-connect ControllerToShelfIomA_ Alert Severity: Major Probable Cause: Cable_tamper Probable Cause Description: Disk shelf $(nschm_shelf_info.id) is connected to controller $(LOCALHOST) through IOM A only. Possible Effect: Access to disk shelf $(nschm_shelf_info.id) will be lost with a single hardware failure of IOM A, HBA $(nschm_shelf_info.ioma-adapter), or any intervening IOM or SAS cable. Corrective Actions: 1. Halt controller $(LOCALHOST) and all controllers attached to disk shelf $(nschm_shelf_info.id). 2. Connect disk shelf $(nschm_shelf_info.id) IOM A and IOM B to controller $(LOCALHOST) following the rules in the Universal SAS and ACP Cabling Guide. 3. Reboot the halted controllers. 4. Contact support personnel if the alert persists. Additional Info: - Tags: quality_of_service
This example displays information about all the alert definitions in detail that are present in the alert definition file:
node> system health alert definition show -instance
Node: csiptc-2240-23 Monitor: node-connect Class of Alert: ControllerToShelfIomA_Alert Severity of Alert: Major Probable Cause: Cable_tamper Probable Cause Description: Disk shelf $(nschm_shelf_info.id) is connected to controller $(LOCALHOST) through IOM A only. Possible Effect: Access to disk shelf $(nschm_shelf_info.id) will be lost with a single hardware failure of IOM A, HBA $(nschm_shelf_info.ioma-adapter), or any intervening IOM or SAS cabl... Corrective Actions: 1. Halt controller $(LOCALHOST) and all controllers attached to disk shelf $(nschm_shelf_info.id). 2. Connect disk shelf $(nschm_shelf_info.id) IOM A and IOM B to controller $(LOCALHOST) following the rules in the Universal SAS and ACP Cabling Guide. 3. Reboot the halted controllers. 4. Contact support personnel if the alert persists. Subsystem Name: SAS-connect Additional Relevant Data: - Additional Alert Tags: quality_of_service
This example shows how to delete an alert with the specified alert-id:
node> system health alert delete -alert-id ControllerToShelfIomA_Alert -alerting-resource *
This example modifies the alert field states:
node> system health alert modify -alert-id ControllerToShelfIomA_Alert -suppress true
This example displays information about all the alerts generated:
node> system health alert show
Node: csiptc-2240-23 Resource: ha_node_pair_info Severity: Major Probable Cause: The administrator has disabled storage failover on the node "csiptc-2240-23". Possible Effect: There will be storage downtime if the node "csiptc-2240-23" fails. Corrective Actions: Enable the storage failover feature on the node "csiptc-2240-23" using the command "storage failover modify -enabled true".
This example displays additional information about a specific alert generated:
node> system health alert show -monitor node-connect -instance
Node: csiptc-2240-23 Monitor: node-connect Alert ID: StorageFailoverDisabled_Alert Alerting Resource: ha_node_pair_info Subsystem: HA-health Indication Time: Fri Sep 28 14:58:39 2012 Perceived Severity: Major Probable Cause: Loss_of_redundancy Description: The administrator has disabled storage failover on the node "csiptc-2240-23". Corrective Actions: Enable the storage failover feature on the node "csiptc-2240-23" using the command "storage failover modify -enabled true". Possible Effect: There will be storage downtime if the node "csiptc-2240-23" fails. Acknowledge: false Suppress: false Policy: StorageFailoverDisabled_Policy Acknowledger: - Suppressor: - Additional Information: node_id: 1785241917 node_name: csiptc-2240-23 partner_node_name: partner_id: 0 takeover_status: to_admin_disabled Alerting Resource Name: ha_node_pair_info Additional Alert Tags: -
SEE ALSO
656 Data ONTAP® 8.2 Commands: Manual Page Reference for 7-Mode, Volume 1
system_health_alert
system_health_autosupportNAMEna_system_health_autosupport - View system health alert history
SYNOPSISsystem health autosupport trigger history show [ -fields ] [ -instance ] [ -monitor ] [ -alert-id ] [ -alertingresource ] [ -subsystem ] [ -indication-time ] [ -perceived-severity ] [ -autosupport-triggered ] [ -probable-cause ] [ -corrective-actions ] [ -asup-enable ]
DESCRIPTIONThis command displays the alerts that triggered an AutoSupport message (true) or the alerts that did nottrigger an AutoSupport message (false). The following fields are displayed in the output:
o Monitor name o Subsystem o Alert identifier o Alerting resource o Severity o If an AutoSupport has been sent due to this alert
OPTIONS{ [-fields <fieldname>, ...]
Displays the fields you specify.
| [-instance] }
Displays additional information about all of the alerts that were generated.
[-monitor <hm_type>] - Monitor
Displays AutoSupport trigger history with the specified monitor name.
[-alert-id <text>] - Alert ID
Displays the AutoSupport message triggered by the specified alert ID.
[-alerting-resource <text>] - Alerting Resource
Displays the AutoSupport message triggered by the specified alerting resource.
[-subsystem <hm_subsystem>] - Subsystem
Displays the AutoSupport message triggered by the specified subsystem.
Data ONTAP® 8.2 Commands: Manual Page Reference for 7-Mode, Volume 1 657
system_health_autosupport
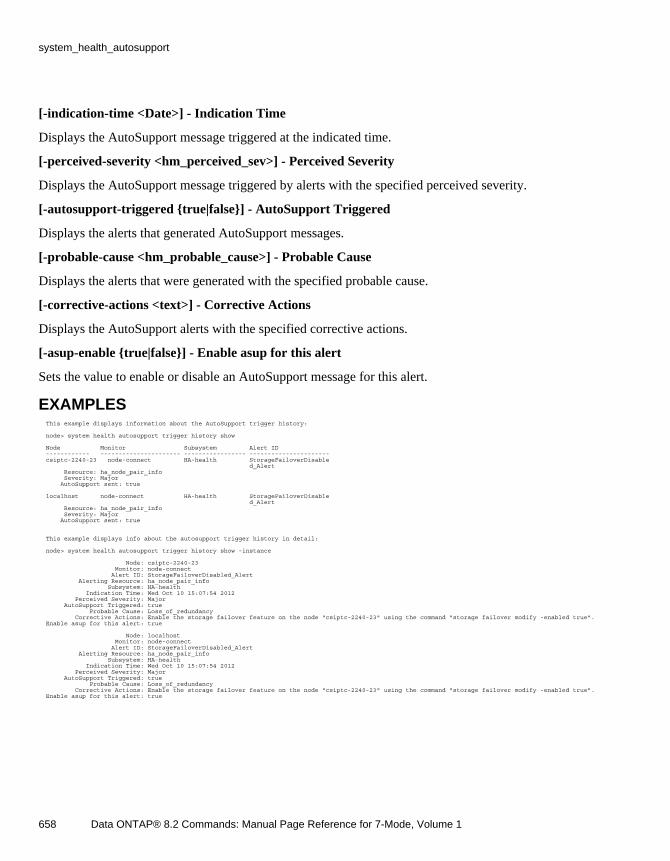
[-indication-time <Date>] - Indication Time
Displays the AutoSupport message triggered at the indicated time.
[-perceived-severity <hm_perceived_sev>] - Perceived Severity
Displays the AutoSupport message triggered by alerts with the specified perceived severity.
[-autosupport-triggered {true|false}] - AutoSupport Triggered
Displays the alerts that generated AutoSupport messages.
[-probable-cause <hm_probable_cause>] - Probable Cause
Displays the alerts that were generated with the specified probable cause.
[-corrective-actions <text>] - Corrective Actions
Displays the AutoSupport alerts with the specified corrective actions.
[-asup-enable {true|false}] - Enable asup for this alert
Sets the value to enable or disable an AutoSupport message for this alert.
EXAMPLES This example displays information about the AutoSupport trigger history:
node> system health autosupport trigger history show
Node Monitor Subsystem Alert ID ------------ ---------------------- ----------------- ---------------------- csiptc-2240-23 node-connect HA-health StorageFailoverDisable d_Alert Resource: ha_node_pair_info Severity: Major AutoSupport sent: true
localhost node-connect HA-health StorageFailoverDisable d_Alert Resource: ha_node_pair_info Severity: Major AutoSupport sent: true
This example displays info about the autosupport trigger history in detail:
node> system health autosupport trigger history show -instance
Node: csiptc-2240-23 Monitor: node-connect Alert ID: StorageFailoverDisabled_Alert Alerting Resource: ha_node_pair_info Subsystem: HA-health Indication Time: Wed Oct 10 15:07:54 2012 Perceived Severity: Major AutoSupport Triggered: true Probable Cause: Loss_of_redundancy Corrective Actions: Enable the storage failover feature on the node "csiptc-2240-23" using the command "storage failover modify -enabled true". Enable asup for this alert: true
Node: localhost Monitor: node-connect Alert ID: StorageFailoverDisabled_Alert Alerting Resource: ha_node_pair_info Subsystem: HA-health Indication Time: Wed Oct 10 15:07:54 2012 Perceived Severity: Major AutoSupport Triggered: true Probable Cause: Loss_of_redundancy Corrective Actions: Enable the storage failover feature on the node "csiptc-2240-23" using the command "storage failover modify -enabled true". Enable asup for this alert: true
658 Data ONTAP® 8.2 Commands: Manual Page Reference for 7-Mode, Volume 1
system_health_autosupport

SEE ALSO
Data ONTAP® 8.2 Commands: Manual Page Reference for 7-Mode, Volume 1 659
system_health_autosupport

system_health_configNAMEna_system_health_config - Display system health configuration.
SYNOPSISsystem health config show [ -fields ] [ -instance ] [ -node ] [ -monitor ] [ -subsystem ] [ -health ] [ -monversion ] [ -context ] [ -pol-version ] [ -aggregator ] [ -resources ] [ -init-state ] [ -sub-pol-versions ]
DESCRIPTIONThe system health config show command displays the configuration and status of each health monitor.The command shows a health status for each health monitor. The health status is an aggregation of thesubsystem health for each subsystem that the health monitor monitors. For example, if a health monitormonitors two subsystems and the health status of one subsystem is "ok" and the other is "degraded", thehealth status for the health monitor is "degraded".
OPTIONS{ [-fields <fieldname>, ...]
Displays the fields specified.
| [-instance] }
Displays additional information on the health monitor configuration.
[-node {<nodename>|local}] - Node
Lists the health monitors present on the specified node.
[-monitor <hm_type>] - Monitor
Displays the health monitors with the specified monitor name.
[-subsystem <hm_subsystem>, ...] - Subsystem
Displays the health monitors with the specified subsystems.
[-health {ok|ok-withsuppressed|degraded|unreachable|unknown}] - Health
Displays the health monitors with the specified health status.
[-mon-version <text>] - Monitor Version
Displays the health monitors with the specified monitor version.
660 Data ONTAP® 8.2 Commands: Manual Page Reference for 7-Mode, Volume 1
system_health_config
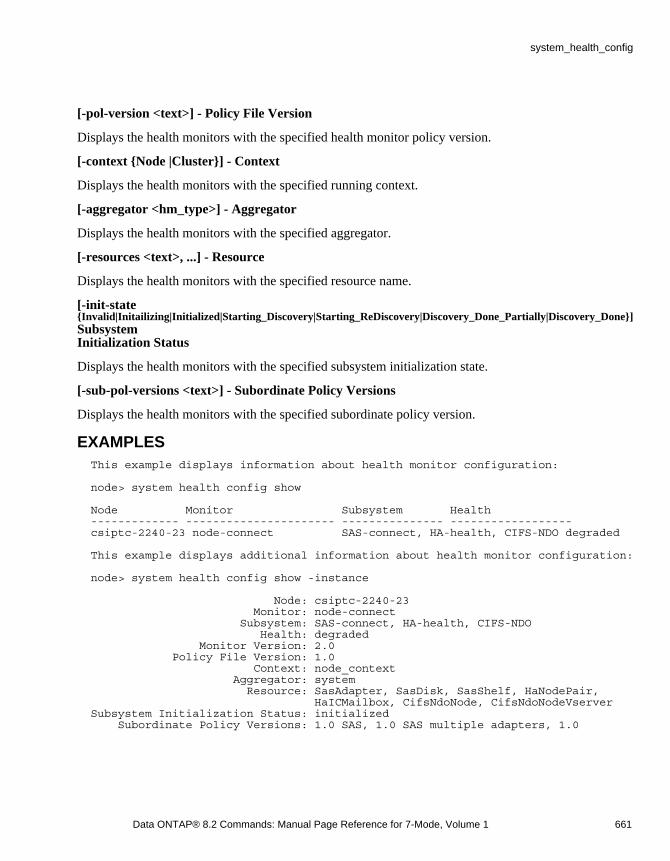
[-pol-version <text>] - Policy File Version
Displays the health monitors with the specified health monitor policy version.
[-context {Node |Cluster}] - Context
Displays the health monitors with the specified running context.
[-aggregator <hm_type>] - Aggregator
Displays the health monitors with the specified aggregator.
[-resources <text>, ...] - Resource
Displays the health monitors with the specified resource name.
[-init-state{Invalid|Initailizing|Initialized|Starting_Discovery|Starting_ReDiscovery|Discovery_Done_Partially|Discovery_Done}] SubsystemInitialization Status
Displays the health monitors with the specified subsystem initialization state.
[-sub-pol-versions <text>] - Subordinate Policy Versions
Displays the health monitors with the specified subordinate policy version.
EXAMPLES This example displays information about health monitor configuration:
node> system health config show
Node Monitor Subsystem Health ------------- ---------------------- --------------- ------------------ csiptc-2240-23 node-connect SAS-connect, HA-health, CIFS-NDO degraded
This example displays additional information about health monitor configuration:
node> system health config show -instance
Node: csiptc-2240-23 Monitor: node-connect Subsystem: SAS-connect, HA-health, CIFS-NDO Health: degraded Monitor Version: 2.0 Policy File Version: 1.0 Context: node_context Aggregator: system Resource: SasAdapter, SasDisk, SasShelf, HaNodePair, HaICMailbox, CifsNdoNode, CifsNdoNodeVserver Subsystem Initialization Status: initialized Subordinate Policy Versions: 1.0 SAS, 1.0 SAS multiple adapters, 1.0
Data ONTAP® 8.2 Commands: Manual Page Reference for 7-Mode, Volume 1 661
system_health_config

SEE ALSO
662 Data ONTAP® 8.2 Commands: Manual Page Reference for 7-Mode, Volume 1
system_health_config
system_health_policyNAMEna_system_health_policy - Displays and modifies system health policy definition.
DESCRIPTIONsystem health policy definition modify - Modify system health policy definition
system health policy definition show - Display system health policy definitions
USAGEsystem health policy definition modify [ -monitor ] [ -policy-id ] [ -enable ] [ -asup-enable ]
This command specifies whether the alerts generated by this health policy trigger AutoSupportmessages.
[-monitor <hm_type>] - Monitor
Specifies the monitor name for which you want to be enable or disable the policy.
[-policy-id <text>] - Policy
Specifies the policy identifier that you want to enable or disable.
[-enable {true|false}] - Policy Status
Sets the value to enable or disable the policy.
[-asup-enable {true|false}] - Enable AutoSupport for this alert
Sets the value to enable or disable an AutoSupport message for this alert.
system health policy definition show [ -fields ] [ -instance ] [ -monitor ] [ -policy-id ] [ -rule-expression ] [ -where ] [ -enable ] [ -alert-id ] [ -alert-count ] [ -prev-alert-creation-time ] [ -responsible-resource-info ] [ -asup-enable ]
This command displays the health policies that trigger an AutoSupport message for an alert (true) or thehealth policies that do not trigger an AutoSupport message for an alert (false).
[-fields <fieldname>, ...]
Displays the fields you specify.
[-instance]
Displays additional information on each policy definition.
Data ONTAP® 8.2 Commands: Manual Page Reference for 7-Mode, Volume 1 663
system_health_policy
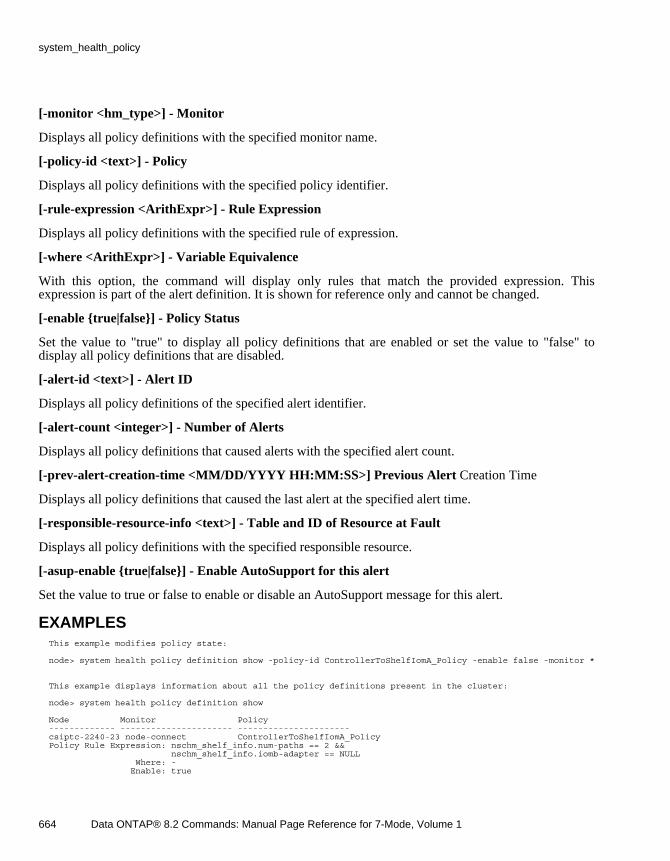
[-monitor <hm_type>] - Monitor
Displays all policy definitions with the specified monitor name.
[-policy-id <text>] - Policy
Displays all policy definitions with the specified policy identifier.
[-rule-expression <ArithExpr>] - Rule Expression
Displays all policy definitions with the specified rule of expression.
[-where <ArithExpr>] - Variable Equivalence
With this option, the command will display only rules that match the provided expression. Thisexpression is part of the alert definition. It is shown for reference only and cannot be changed.
[-enable {true|false}] - Policy Status
Set the value to "true" to display all policy definitions that are enabled or set the value to "false" todisplay all policy definitions that are disabled.
[-alert-id <text>] - Alert ID
Displays all policy definitions of the specified alert identifier.
[-alert-count <integer>] - Number of Alerts
Displays all policy definitions that caused alerts with the specified alert count.
[-prev-alert-creation-time <MM/DD/YYYY HH:MM:SS>] Previous Alert Creation Time
Displays all policy definitions that caused the last alert at the specified alert time.
[-responsible-resource-info <text>] - Table and ID of Resource at Fault
Displays all policy definitions with the specified responsible resource.
[-asup-enable {true|false}] - Enable AutoSupport for this alert
Set the value to true or false to enable or disable an AutoSupport message for this alert.
EXAMPLES This example modifies policy state:
node> system health policy definition show -policy-id ControllerToShelfIomA_Policy -enable false -monitor *
This example displays information about all the policy definitions present in the cluster:
node> system health policy definition show
Node Monitor Policy ------------- ---------------------- ---------------------- csiptc-2240-23 node-connect ControllerToShelfIomA_Policy Policy Rule Expression: nschm_shelf_info.num-paths == 2 && nschm_shelf_info.iomb-adapter == NULL Where: - Enable: true
664 Data ONTAP® 8.2 Commands: Manual Page Reference for 7-Mode, Volume 1
system_health_policy

Alert ID: ControllerToShelfIomA_Alert Number of Alerts: - Previous Alert Time: - Responsible Resource: nschm_shelf_info.name ASUP Enabled: true
This example displays detailed information about all the policy definitions present in the cluster:
node> system health policy definition show -instance
Node: csiptc-2240-23 Monitor: node-connect Policy: ControllerToShelfIomA_Policy Rule Expression: nschm_shelf_info.num-paths == 2 && nschm_shelf_info.iomb-adapter == NULL Variable Equivalence: - Policy Status: true Alert ID: ControllerToShelfIomA_Alert Number of Alerts: - Previous Alert Creation Time: - Table and ID of Resource at Fault: nschm_shelf_info.name Enable ASUP for this alert: true
SEE ALSO
Data ONTAP® 8.2 Commands: Manual Page Reference for 7-Mode, Volume 1 665
system_health_policy
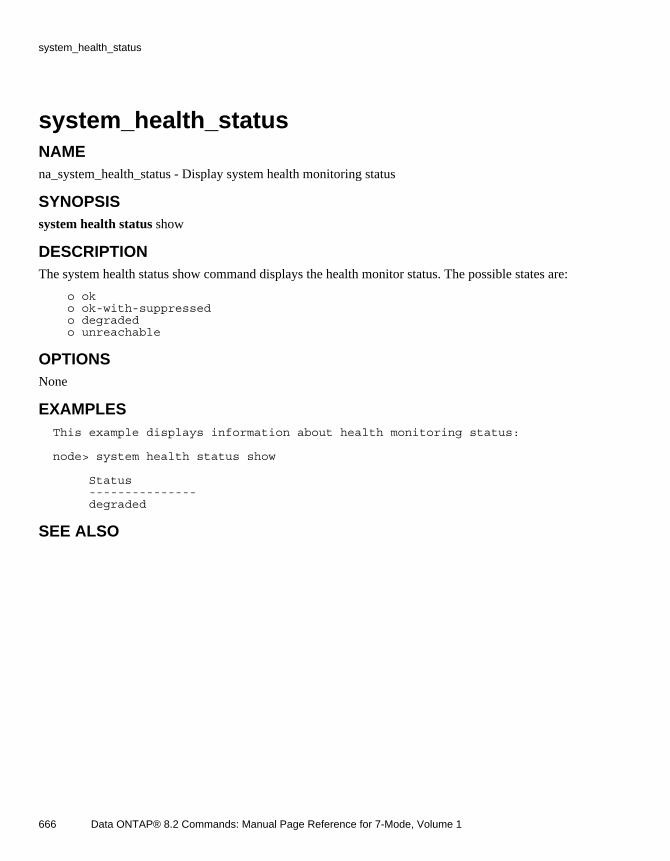
system_health_statusNAMEna_system_health_status - Display system health monitoring status
SYNOPSISsystem health status show
DESCRIPTIONThe system health status show command displays the health monitor status. The possible states are:
o ok o ok-with-suppressed o degraded o unreachable
OPTIONSNone
EXAMPLES This example displays information about health monitoring status:
node> system health status show
Status --------------- degraded
SEE ALSO
666 Data ONTAP® 8.2 Commands: Manual Page Reference for 7-Mode, Volume 1
system_health_status
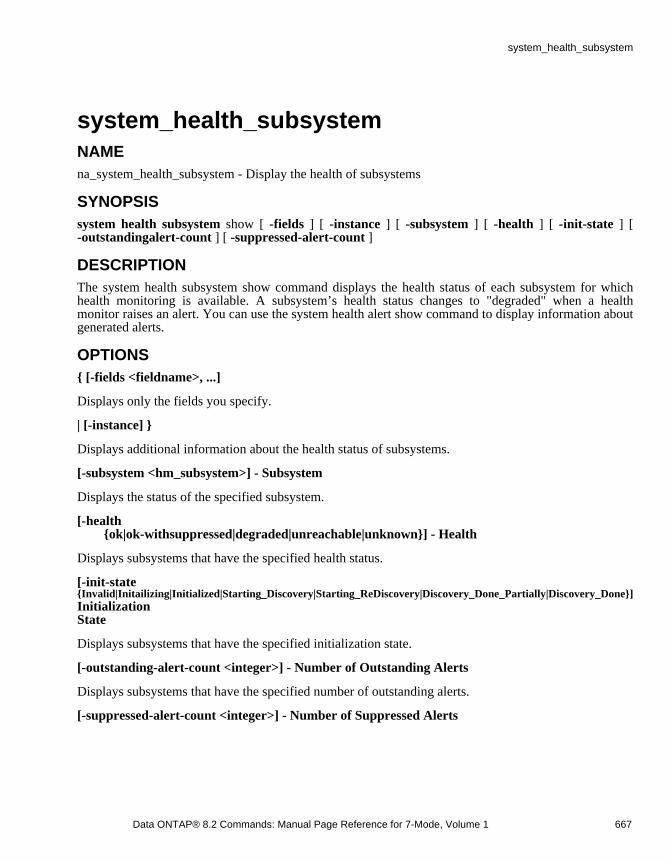
system_health_subsystemNAMEna_system_health_subsystem - Display the health of subsystems
SYNOPSISsystem health subsystem show [ -fields ] [ -instance ] [ -subsystem ] [ -health ] [ -init-state ] [ -outstandingalert-count ] [ -suppressed-alert-count ]
DESCRIPTIONThe system health subsystem show command displays the health status of each subsystem for whichhealth monitoring is available. A subsystem’s health status changes to "degraded" when a healthmonitor raises an alert. You can use the system health alert show command to display information aboutgenerated alerts.
OPTIONS{ [-fields <fieldname>, ...]
Displays only the fields you specify.
| [-instance] }
Displays additional information about the health status of subsystems.
[-subsystem <hm_subsystem>] - Subsystem
Displays the status of the specified subsystem.
[-health {ok|ok-withsuppressed|degraded|unreachable|unknown}] - Health
Displays subsystems that have the specified health status.
[-init-state{Invalid|Initailizing|Initialized|Starting_Discovery|Starting_ReDiscovery|Discovery_Done_Partially|Discovery_Done}] InitializationState
Displays subsystems that have the specified initialization state.
[-outstanding-alert-count <integer>] - Number of Outstanding Alerts
Displays subsystems that have the specified number of outstanding alerts.
[-suppressed-alert-count <integer>] - Number of Suppressed Alerts
Data ONTAP® 8.2 Commands: Manual Page Reference for 7-Mode, Volume 1 667
system_health_subsystem

Displays subsystems that have the specified number of suppressed alerts.
EXAMPLES This example displays the health status of each subsystem:
node> system health subsystem show
Subsystem Health ----------------- ------------------ SAS-connect ok HA-health degraded CIFS-NDO ok
This example displays additional information about the health status of each subsystem:
node> system health subsystem show -instance
Subsystem: SAS-connect Health: ok Initialization State: initialized Number of Outstanding Alerts: 0 Number of Suppressed Alerts: 0
Subsystem: HA-health Health: degraded Initialization State: initialized Number of Outstanding Alerts: 2 Number of Suppressed Alerts: 0
Subsystem: CIFS-NDO Health: ok Initialization State: initialized Number of Outstanding Alerts: 0 Number of Suppressed Alerts: 0
SEE ALSO
668 Data ONTAP® 8.2 Commands: Manual Page Reference for 7-Mode, Volume 1
system_health_subsystem
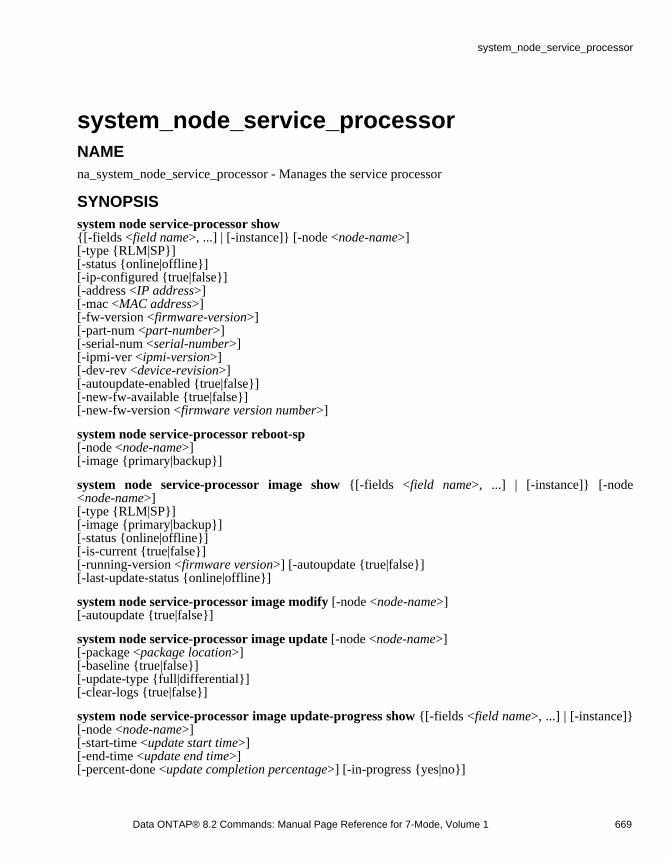
system_node_service_processorNAMEna_system_node_service_processor - Manages the service processor
SYNOPSISsystem node service-processor show{[-fields <field name>, ...] | [-instance]} [-node <node-name>][-type {RLM|SP}][-status {online|offline}][-ip-configured {true|false}][-address <IP address>][-mac <MAC address>][-fw-version <firmware-version>][-part-num <part-number>][-serial-num <serial-number>][-ipmi-ver <ipmi-version>][-dev-rev <device-revision>][-autoupdate-enabled {true|false}][-new-fw-available {true|false}][-new-fw-version <firmware version number>]
system node service-processor reboot-sp[-node <node-name>][-image {primary|backup}]
system node service-processor image show {[-fields <field name>, ...] | [-instance]} [-node <node-name>][-type {RLM|SP}][-image {primary|backup}][-status {online|offline}][-is-current {true|false}][-running-version <firmware version>] [-autoupdate {true|false}][-last-update-status {online|offline}]
system node service-processor image modify [-node <node-name>][-autoupdate {true|false}]
system node service-processor image update [-node <node-name>][-package <package location>][-baseline {true|false}][-update-type {full|differential}][-clear-logs {true|false}]
system node service-processor image update-progress show {[-fields <field name>, ...] | [-instance]}[-node <node-name>][-start-time <update start time>][-end-time <update end time>][-percent-done <update completion percentage>] [-in-progress {yes|no}]
Data ONTAP® 8.2 Commands: Manual Page Reference for 7-Mode, Volume 1 669
system_node_service_processor
system node service-processor network show {[-fields <field name>, ...] | [-instance]} [-node <node-name>][-address-type {IPv4|IPv6}][-enable {true|false}][-type {RLM|SP}][-status {online|offline}][-link-status {up|down|disabled|unknown}] [-dhcp {v4|none}][-ip-address <IP address>][-mac <MAC address>][-netmask <netmask>][-prefix-length <mask prefix length>] [-router-ip <IP address>][-link-local-ip <IP address>][-gateway <IP address>]
system node service-processor network modify [-node <node-name>][-address-type {IPv4|IPv6}][-enable {true|false}][-dhcp {v4|none}][-ip-address <IP address>][-netmask <netmask>]
DESCRIPTIONThe system node service-processor commands configure, modify and display information about theService Processor in a node.
The show command displays information about the Service Processor.The reboot-sp command reboots the Service Processor. The image show command displaysinformation about the currently installed firmware images on the Service Processor.The image modify command enables or disables automatic firmware update on the Service Processor.The image update command installs a new firmware version on the Service Processor.The image update-progress show command displays the progress information of the firmware updateson the Service Processor.
The network show command displays the network configuration of the Service Processor. The network modify command modifies the network configuration of the Service Processor.
USAGEsystem node service processor show
This command displays information about the Service Processor. The output can be limited to specifictypes of information or filter the result by specific field values. This command currently does notsupport the Remote LAN Module (RLM) completely. If the command is run on nodes that use RLM,the command output displays the device type as "RLM" and all the other fields as "-". This commandsupports the following options:
[-fields <field name>, ...] allows the user to limit the output by providing a list of field names. Theoutput will only contain those fields. Cannot be used along with -instance option.
670 Data ONTAP® 8.2 Commands: Manual Page Reference for 7-Mode, Volume 1
system_node_service_processor
[-instance] displays detailed information about all fields. Cannot be used along with -fields option.
[-node <node-name>] accepts either "local" or the hostname of the current node as a value.
[-type {RLM|SP}] displays information only if the Service Processor is of the specified type. If the typeprovided is "RLM", the command output displays the device type as "RLM" and all the other fields as"-".
[-status {online|offline}] displays information only if the Service Processor whose status matches thespecified value.
[-ip-configured {true|false}] displays information only if the Service Processor network is configured("true") or network is not configured ("false").
[-address <IP address>] displays information only if the Service Processor uses the specified IPaddress or addresses.
[-mac <MAC address>] displays information only if the Service Processor uses the specified MACaddress.
[-fw-version <firmware-version>] displays information only if the Service Processor is running thespecified firmware version.
[-part-num <part-number>] displays information only if the Service Processor has the specified partnumber.
[-serial-num <serial-number>] displays information only if the Service Processor has the specifiedserial number.
[-ipmi-ver <ipmi-version>] displays information only if the Service Processor has the specifiedIntelligent Platform Management Interface version.
[-dev-rev <device-revision>] displays information only if the Service Processor has the specifiedrevision number.
[-autoupdate-enabled {true|false}] displays information only if the Service Processor has the specifiedstatus for automatic firmware update.
[-new-fw-available {true|false}] displays information only if the Service Processor has the specifiedstatus for new firmware availability.
[-new-fw-version <firmware version number>] displays information only if the new firmware versionof the Service Processor matches the specified value.
system node service-processor reboot-sp
This command reboots the Service Processor of the current node. This command does not support theRemote LAN Module (RLM). This command supports the following commands :
[-node <node-name>] accepts either "local" or the hostname of the current node as a value.
Data ONTAP® 8.2 Commands: Manual Page Reference for 7-Mode, Volume 1 671
system_node_service_processor
[-image {primary|backup}] specifies the image type to be used for booting after the Service Processorreboots.
system node service-processor image show
This command displays information about the currently installed firmware images on the ServiceProcessor of the current node. The output can be limited to specific types of information or filter theresult by specific field values.This command currently does not support the Remote LAN Module(RLM) completely. If the command is run on nodes that use RLM, the command output displays thedevice type as "RLM" and all the other fields as "-". This command supports the following options:
[-fields <field name>, ...] allows the user to limit the output by providing a list of field names. Theoutput will only contain those fields. Cannot be used along with -instance option.
[-instance] displays detailed information about all fields. Cannot be used along with -fields option.
[-node <node-name>] takes either "local" or the hostname of the current node as values.
[-type {RLM|SP}] displays information only if the Service Processor is of the specified type. If the typeprovided is "RLM", the command output displays the device type as "RLM" and all the other fields as"-".
[-status {online|offline}] displays information only if the Service Processor whose status matches thespecified value.
[-is-current {true|false}] displays information only if the Service Processor current image matches thespecified status.
[-running-version <firmware version>] displays information only if the Service Processor is runningthe specified firmware version.
[-autoupdate {true|false}] displays information only if the automatic firmware status of the ServiceProcessor matches the specified status.
[-last-update-status {online|offline}] displays information only if the last status update of the ServiceProcessor is of the specified value.
system node service-processor image modify
This command enables or disables automatic firmware updates on the Service Processor. This commandcurrently does not support the Remote LAN Module (RLM). This command supports the followingoptions:
[-node <node-name>] accepts either "local" or the hostname of the current node as a value.
[-autoupdate {true|false}] displays information only if the automatic firmware status of the ServiceProcessor matches the specified status.
system node service-processor image update
672 Data ONTAP® 8.2 Commands: Manual Page Reference for 7-Mode, Volume 1
system_node_service_processor
This command installs a new firmware version on the Service Processor of the current node. Thiscommand also allows the user to specify which firmware to install and how. The command system node serviceprocessor image update-status show can be used to track the progress of the update. Thiscommand does not currently support Remote LAN Module (RLM). This command supports thefollowing options:
[-node <node-name>] accepts either "local" or the hostname of the current node as a value.
[-package <package name>] specifies the package to be installed. The package file can be found in theSP Update Repository field of the system node service-processor image show command. If thisparameter is not specified, the Service Processor is updated to the most recent version of the firmwarethat is available in the update repository. This option must be used if -baseline option is either omittedor is specified as false.
[-baseline {true|false}] option when true, installs the Service Processor firmware version that isbundled with the currently running release of Data ONTAP. This is a safety mechanism which allowsthe user to revert the SP firmware to the version that was qualified and bundled with the currentlyrunning version of Data ONTAP on the current node. If this option is not used, then it reverts to thedefault value of false.
[-update-type {full|differential}] specifies the type of firmware update on the Service Processor. fullresults in the entire firmware image being updated and differential results in only the changed portionsof the firmware image being updated on the Service Processor.
[-clear-logs {true|false}] option resets the log setting to factory default and clears contents of all logsmaintained by the Service Processor, including event logs, IPMI logs and forensics logs (true).
system node service-processor image update-progress show
This command displays the progress information of firmware updates on the Service Processor. The"InProgress" field displays no if no update is in progress. This command does not currently supportRemote LAN Module (RLM) completely. If this command is run on a node that uses RLM, the outputwill always display no for the "In-Progress" field. This command supports the following options:
[-fields <field name>, ...] allows the user to limit the output by providing a list of field names. Theoutput will only contain those fields. Cannot be used along with -instance option.
[-instance] displays detailed information about all fields. Cannot be used along with -fields option.
[-node <node-name>] accepts either "local" or the hostname of the current node as a value.
[-start-time <update start time>] displays the status of the Service Processor firmware update if theupdate start time matches the specified value.
[-end-time <update end time>] displays the status of the Service Processor firmware update if theupdate end time matches the specified value.
[-percent-done <update completion percentage>] displays the status of the Service Processor firmwareupdate if the update completion percentage matches the specified value.
Data ONTAP® 8.2 Commands: Manual Page Reference for 7-Mode, Volume 1 673
system_node_service_processor
[-in-progress {yes|no}] displays the status of the Service Processor firmware update if the update statusmatches the specified value.
system node service-processor network show
This command displays the network configuration of the Service Processor of the current node. Theoutput can be limited to specific types of information or filter the result by specific field values. Thiscommand currently does not support the Remote LAN Module (RLM) completely. If the command isrun on nodes that use RLM, the command output displays the device type as "RLM" and all the otherfields as "-". This command supports the following options:
[-fields <field name>, ...] allows the user to limit the output by providing a list of field names. Theoutput will only contain those fields. Cannot be used along with -instance option.
[-instance] displays detailed information about all fields. Cannot be used along with -fields option.
[-node <node-name>] accepts either "local" or the hostname of the current node as a value.
[-address-type {IPv4|IPv6}] displays network configuration information only if the Service Processorhas the specified IP address type.
[-enable {true|false}] displays network configuration information only if the network interface status ofthe Service Processor for the given address type matches the specified value.
[-type {RLM|SP}] displays information only if the Service Processor is of the specified type. If the typeprovided is "RLM", the command output displays the device type as "RLM" and all the other fields as"-".
[-status {online|offline}] displays network configuration information only if the status of the ServiceProcessor matches the specified value.
[-link-status {up|down|disabled|unknown}] displays network configuration information only if theService Processor network interface link status matches the specified value.
[-dhcp {v4|none}] displays network configuration information only if the Service Processor DHCPstatus matches the specified value.
[-ip-address <IP address>] displays network configuration information only if the Service Processor IPaddress matches the specified value.
[-mac <MAC address>] displays network configuration information only if the Service ProcessorMAC address matches the specified value.
[-netmask <netmask>] displays network configuration information only if the Service Processornetmask matches the specified value.
[-prefix-length <mask prefix length>] displays network configuration information only if the prefixlength of the Service Processor network mask matches the specified value.
[-router-ip <IP address>] displays network configuration information only if the routerassigned IPaddress of the Service Processor matches the specified value.
674 Data ONTAP® 8.2 Commands: Manual Page Reference for 7-Mode, Volume 1
system_node_service_processor
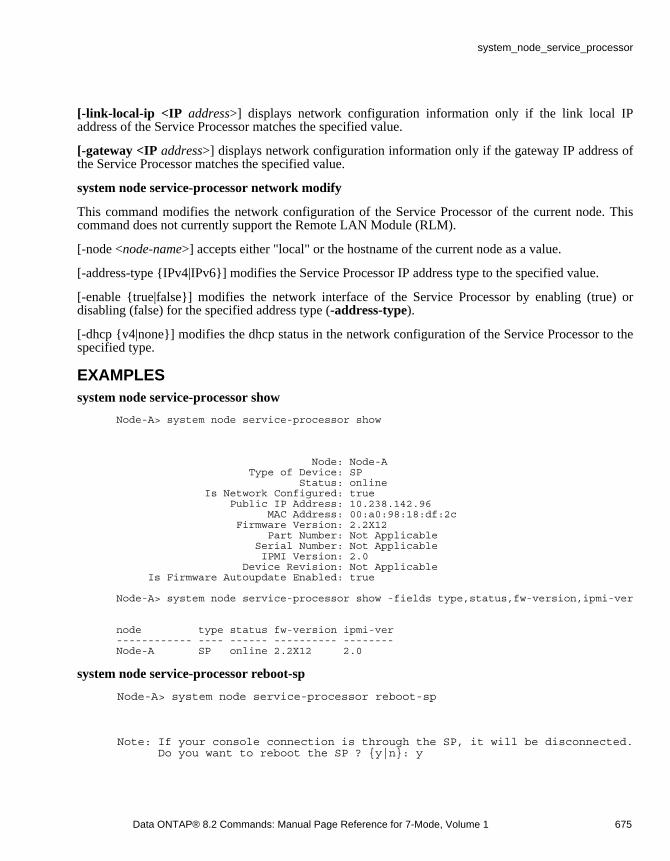
[-link-local-ip <IP address>] displays network configuration information only if the link local IPaddress of the Service Processor matches the specified value.
[-gateway <IP address>] displays network configuration information only if the gateway IP address ofthe Service Processor matches the specified value.
system node service-processor network modify
This command modifies the network configuration of the Service Processor of the current node. Thiscommand does not currently support the Remote LAN Module (RLM).
[-node <node-name>] accepts either "local" or the hostname of the current node as a value.
[-address-type {IPv4|IPv6}] modifies the Service Processor IP address type to the specified value.
[-enable {true|false}] modifies the network interface of the Service Processor by enabling (true) ordisabling (false) for the specified address type (-address-type).
[-dhcp {v4|none}] modifies the dhcp status in the network configuration of the Service Processor to thespecified type.
EXAMPLESsystem node service-processor show
Node-A> system node service-processor show
Node: Node-A Type of Device: SP Status: online Is Network Configured: true Public IP Address: 10.238.142.96 MAC Address: 00:a0:98:18:df:2c Firmware Version: 2.2X12 Part Number: Not Applicable Serial Number: Not Applicable IPMI Version: 2.0 Device Revision: Not Applicable Is Firmware Autoupdate Enabled: true
Node-A> system node service-processor show -fields type,status,fw-version,ipmi-ver
node type status fw-version ipmi-ver ------------ ---- ------ ---------- -------- Node-A SP online 2.2X12 2.0
system node service-processor reboot-sp
Node-A> system node service-processor reboot-sp
Note: If your console connection is through the SP, it will be disconnected. Do you want to reboot the SP ? {y|n}: y
Data ONTAP® 8.2 Commands: Manual Page Reference for 7-Mode, Volume 1 675
system_node_service_processor
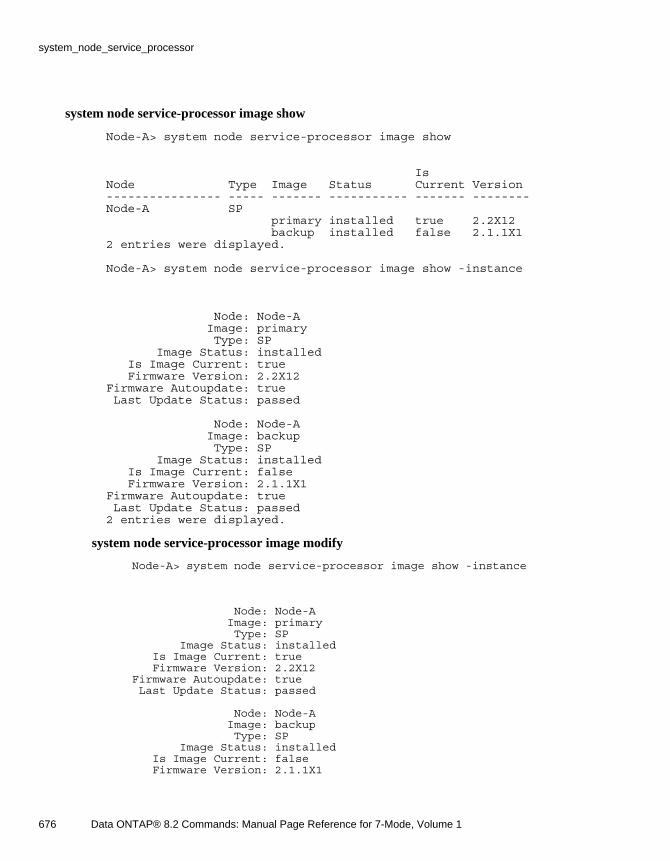
system node service-processor image show
Node-A> system node service-processor image show
Is Node Type Image Status Current Version ---------------- ----- ------- ----------- ------- -------- Node-A SP primary installed true 2.2X12 backup installed false 2.1.1X1 2 entries were displayed.
Node-A> system node service-processor image show -instance
Node: Node-A Image: primary Type: SP Image Status: installed Is Image Current: true Firmware Version: 2.2X12 Firmware Autoupdate: true Last Update Status: passed
Node: Node-A Image: backup Type: SP Image Status: installed Is Image Current: false Firmware Version: 2.1.1X1 Firmware Autoupdate: true Last Update Status: passed 2 entries were displayed.
system node service-processor image modify
Node-A> system node service-processor image show -instance
Node: Node-A Image: primary Type: SP Image Status: installed Is Image Current: true Firmware Version: 2.2X12 Firmware Autoupdate: true Last Update Status: passed
Node: Node-A Image: backup Type: SP Image Status: installed Is Image Current: false Firmware Version: 2.1.1X1
676 Data ONTAP® 8.2 Commands: Manual Page Reference for 7-Mode, Volume 1
system_node_service_processor
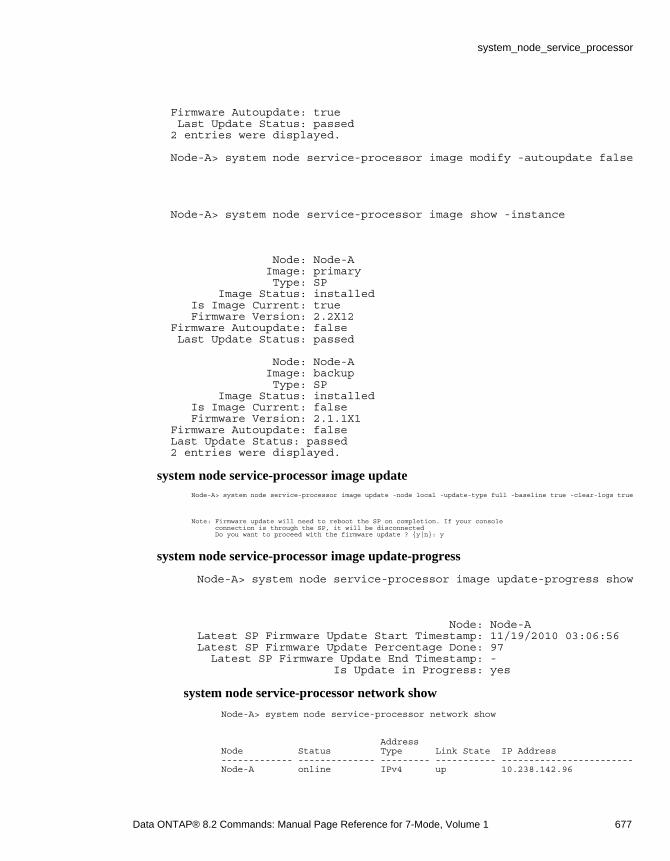
Firmware Autoupdate: true Last Update Status: passed 2 entries were displayed.
Node-A> system node service-processor image modify -autoupdate false
Node-A> system node service-processor image show -instance
Node: Node-A Image: primary Type: SP Image Status: installed Is Image Current: true Firmware Version: 2.2X12 Firmware Autoupdate: false Last Update Status: passed
Node: Node-A Image: backup Type: SP Image Status: installed Is Image Current: false Firmware Version: 2.1.1X1 Firmware Autoupdate: false Last Update Status: passed 2 entries were displayed.
system node service-processor image update Node-A> system node service-processor image update -node local -update-type full -baseline true -clear-logs true
Note: Firmware update will need to reboot the SP on completion. If your console connection is through the SP, it will be disconnected Do you want to proceed with the firmware update ? {y|n}: y
system node service-processor image update-progress
Node-A> system node service-processor image update-progress show
Node: Node-A Latest SP Firmware Update Start Timestamp: 11/19/2010 03:06:56 Latest SP Firmware Update Percentage Done: 97 Latest SP Firmware Update End Timestamp: - Is Update in Progress: yes
system node service-processor network show
Node-A> system node service-processor network show
Address Node Status Type Link State IP Address ------------- -------------- --------- ----------- ------------------------ Node-A online IPv4 up 10.238.142.96
Data ONTAP® 8.2 Commands: Manual Page Reference for 7-Mode, Volume 1 677
system_node_service_processor
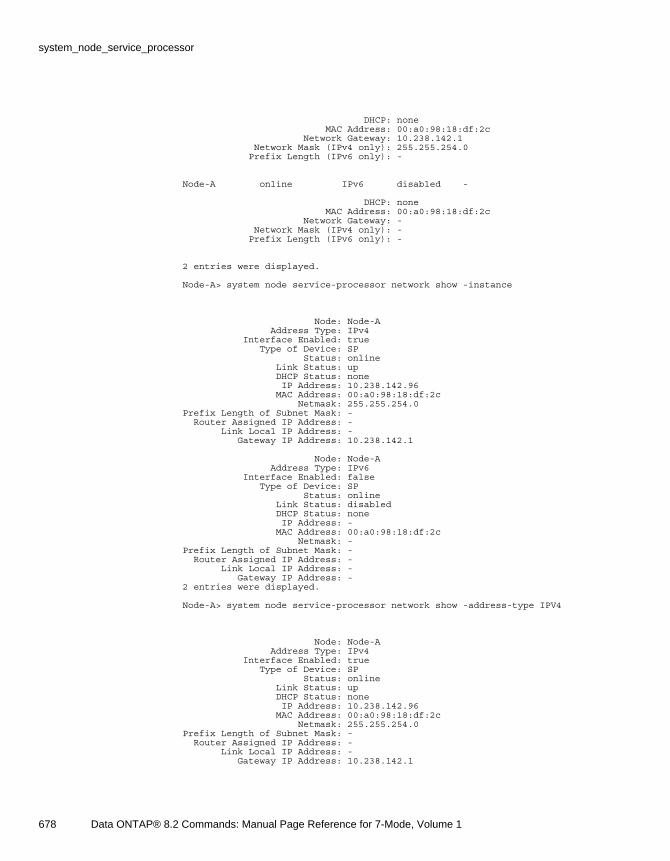
DHCP: none MAC Address: 00:a0:98:18:df:2c Network Gateway: 10.238.142.1 Network Mask (IPv4 only): 255.255.254.0 Prefix Length (IPv6 only): -
Node-A online IPv6 disabled -
DHCP: none MAC Address: 00:a0:98:18:df:2c Network Gateway: - Network Mask (IPv4 only): - Prefix Length (IPv6 only): -
2 entries were displayed.
Node-A> system node service-processor network show -instance
Node: Node-A Address Type: IPv4 Interface Enabled: true Type of Device: SP Status: online Link Status: up DHCP Status: none IP Address: 10.238.142.96 MAC Address: 00:a0:98:18:df:2c Netmask: 255.255.254.0 Prefix Length of Subnet Mask: - Router Assigned IP Address: - Link Local IP Address: - Gateway IP Address: 10.238.142.1
Node: Node-A Address Type: IPv6 Interface Enabled: false Type of Device: SP Status: online Link Status: disabled DHCP Status: none IP Address: - MAC Address: 00:a0:98:18:df:2c Netmask: - Prefix Length of Subnet Mask: - Router Assigned IP Address: - Link Local IP Address: - Gateway IP Address: - 2 entries were displayed.
Node-A> system node service-processor network show -address-type IPV4
Node: Node-A Address Type: IPv4 Interface Enabled: true Type of Device: SP Status: online Link Status: up DHCP Status: none IP Address: 10.238.142.96 MAC Address: 00:a0:98:18:df:2c Netmask: 255.255.254.0 Prefix Length of Subnet Mask: - Router Assigned IP Address: - Link Local IP Address: - Gateway IP Address: 10.238.142.1
678 Data ONTAP® 8.2 Commands: Manual Page Reference for 7-Mode, Volume 1
system_node_service_processor

system node service-processor network modify Node-A> system node service-processor network show -address-type IPV4
Node: Node-A Address Type: IPv4 Interface Enabled: true Type of Device: SP Status: online Link Status: up DHCP Status: none IP Address: 10.238.142.96 MAC Address: 00:a0:98:18:df:2c Netmask: 255.255.254.0 Prefix Length of Subnet Mask: - Router Assigned IP Address: - Link Local IP Address: - Gateway IP Address: 10.238.142.1
Node-A> system node service-processor network modify -node local -address-type IPv4 -ip-address 192.168.1.202 -netmask 255.255.255.0 -gateway 192.168.1.1
Node-A> system node service-processor network show -address-type IPV4
Node: Node-A Address Type: IPv4 Interface Enabled: true Type of Device: SP Status: online Link Status: up DHCP Status: none IP Address: 192.168.1.202 MAC Address: 00:a0:98:18:df:2c Netmask: 255.255.255.0 Prefix Length of Subnet Mask: - Router Assigned IP Address: - Link Local IP Address: - Gateway IP Address: 192.168.1.1
SEE ALSOna_sp(1)
Data ONTAP® 8.2 Commands: Manual Page Reference for 7-Mode, Volume 1 679
system_node_service_processor

timezoneNAMEna_timezone - Sets and obtains the local timezone.
SYNOPSIStimezone [ name | -v ]
DESCRIPTIONtimezone sets the system timezone and saves the setting for use on subsequent boots. The argument name specifies the timezone to use. See the Software Setup Guide for a complete list of time zonenames. If no argument is supplied, the current time zone name is printed. If -v is specified, the versionof the zoneinfo files is printed in the format YYYYv, where YYYY is the year and v is the version, forexample 2007a. This version can be compared to the version at ftp://elsie.nci.nih.gov/pub for currency.
Each timezone is described by a file that is kept in the /etc/zoneinfo directory on the node. The nameargument is actually the name of the file under /etc/zoneinfo that describes the timezone to use. Forinstance, the name "America/Los_Angeles" refers to the timezone file /etc/zoneinfo/America/Los_Angeles. These files are in standard ‘‘Arthur Olson’’ timezone file format,as used on many flavors of UNIX (SunOS 4.x and later, 4.4BSD, System V Release 4 and later, andothers).
GMT+13 is to allow DST for timezone GMT+12.
FILES
/etc/zoneinfo directory of time zone information files
HA CONSIDERATIONIn partner mode, you can use the timezone command without arguments to display the current timezone. However, you cannot use the timezone command to change the time zone.
SEE ALSOna_zoneinfo(5).
680 Data ONTAP® 8.2 Commands: Manual Page Reference for 7-Mode, Volume 1
timezone
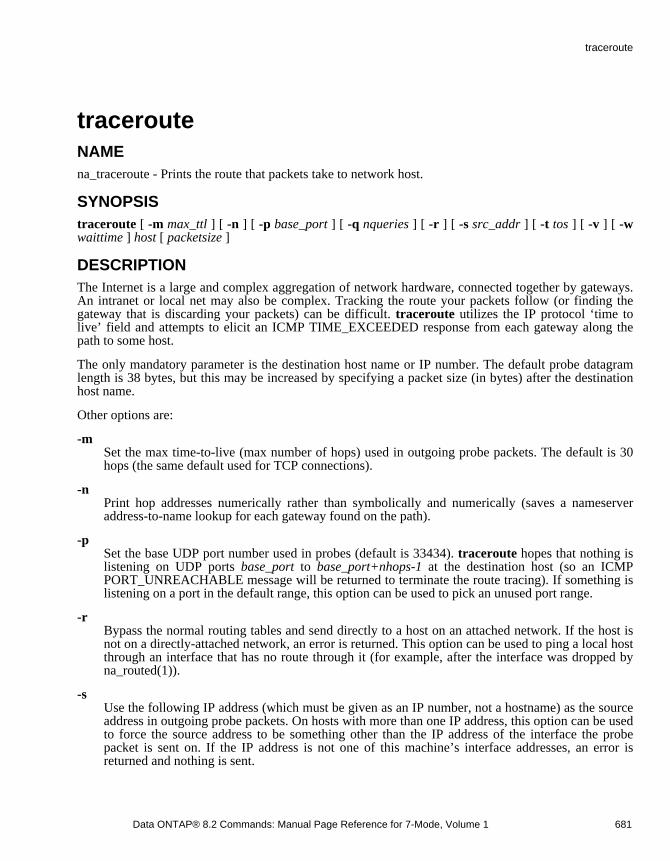
tracerouteNAMEna_traceroute - Prints the route that packets take to network host.
SYNOPSIStraceroute [ -m max_ttl ] [ -n ] [ -p base_port ] [ -q nqueries ] [ -r ] [ -s src_addr ] [ -t tos ] [ -v ] [ -w waittime ] host [ packetsize ]
DESCRIPTIONThe Internet is a large and complex aggregation of network hardware, connected together by gateways.An intranet or local net may also be complex. Tracking the route your packets follow (or finding thegateway that is discarding your packets) can be difficult. traceroute utilizes the IP protocol ‘time tolive’ field and attempts to elicit an ICMP TIME_EXCEEDED response from each gateway along thepath to some host.
The only mandatory parameter is the destination host name or IP number. The default probe datagramlength is 38 bytes, but this may be increased by specifying a packet size (in bytes) after the destinationhost name.
Other options are:
-m Set the max time-to-live (max number of hops) used in outgoing probe packets. The default is 30hops (the same default used for TCP connections).
-n Print hop addresses numerically rather than symbolically and numerically (saves a nameserveraddress-to-name lookup for each gateway found on the path).
-p Set the base UDP port number used in probes (default is 33434). traceroute hopes that nothing islistening on UDP ports base_port to base_port+nhops-1 at the destination host (so an ICMPPORT_UNREACHABLE message will be returned to terminate the route tracing). If something islistening on a port in the default range, this option can be used to pick an unused port range.
-r Bypass the normal routing tables and send directly to a host on an attached network. If the host isnot on a directly-attached network, an error is returned. This option can be used to ping a local hostthrough an interface that has no route through it (for example, after the interface was dropped byna_routed(1)).
-s Use the following IP address (which must be given as an IP number, not a hostname) as the sourceaddress in outgoing probe packets. On hosts with more than one IP address, this option can be usedto force the source address to be something other than the IP address of the interface the probepacket is sent on. If the IP address is not one of this machine’s interface addresses, an error isreturned and nothing is sent.
Data ONTAP® 8.2 Commands: Manual Page Reference for 7-Mode, Volume 1 681
traceroute
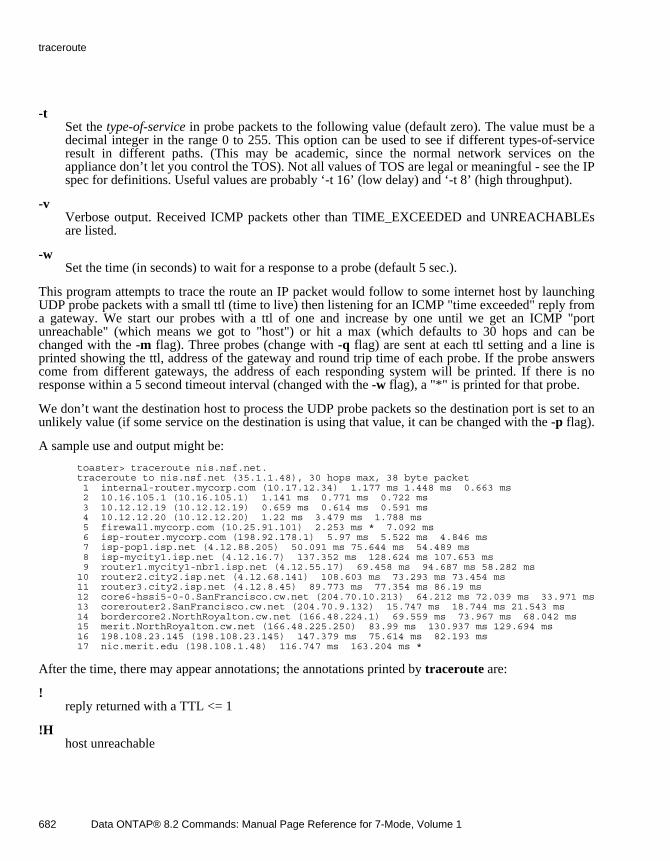
-t Set the type-of-service in probe packets to the following value (default zero). The value must be adecimal integer in the range 0 to 255. This option can be used to see if different types-of-serviceresult in different paths. (This may be academic, since the normal network services on theappliance don’t let you control the TOS). Not all values of TOS are legal or meaningful - see the IPspec for definitions. Useful values are probably ‘-t 16’ (low delay) and ‘-t 8’ (high throughput).
-v Verbose output. Received ICMP packets other than TIME_EXCEEDED and UNREACHABLEsare listed.
-w Set the time (in seconds) to wait for a response to a probe (default 5 sec.).
This program attempts to trace the route an IP packet would follow to some internet host by launchingUDP probe packets with a small ttl (time to live) then listening for an ICMP "time exceeded" reply froma gateway. We start our probes with a ttl of one and increase by one until we get an ICMP "portunreachable" (which means we got to "host") or hit a max (which defaults to 30 hops and can bechanged with the -m flag). Three probes (change with -q flag) are sent at each ttl setting and a line isprinted showing the ttl, address of the gateway and round trip time of each probe. If the probe answerscome from different gateways, the address of each responding system will be printed. If there is noresponse within a 5 second timeout interval (changed with the -w flag), a "*" is printed for that probe.
We don’t want the destination host to process the UDP probe packets so the destination port is set to anunlikely value (if some service on the destination is using that value, it can be changed with the -p flag).
A sample use and output might be:
toaster> traceroute nis.nsf.net. traceroute to nis.nsf.net (35.1.1.48), 30 hops max, 38 byte packet 1 internal-router.mycorp.com (10.17.12.34) 1.177 ms 1.448 ms 0.663 ms 2 10.16.105.1 (10.16.105.1) 1.141 ms 0.771 ms 0.722 ms 3 10.12.12.19 (10.12.12.19) 0.659 ms 0.614 ms 0.591 ms 4 10.12.12.20 (10.12.12.20) 1.22 ms 3.479 ms 1.788 ms 5 firewall.mycorp.com (10.25.91.101) 2.253 ms * 7.092 ms 6 isp-router.mycorp.com (198.92.178.1) 5.97 ms 5.522 ms 4.846 ms 7 isp-pop1.isp.net (4.12.88.205) 50.091 ms 75.644 ms 54.489 ms 8 isp-mycity1.isp.net (4.12.16.7) 137.352 ms 128.624 ms 107.653 ms 9 router1.mycity1-nbr1.isp.net (4.12.55.17) 69.458 ms 94.687 ms 58.282 ms 10 router2.city2.isp.net (4.12.68.141) 108.603 ms 73.293 ms 73.454 ms 11 router3.city2.isp.net (4.12.8.45) 89.773 ms 77.354 ms 86.19 ms 12 core6-hssi5-0-0.SanFrancisco.cw.net (204.70.10.213) 64.212 ms 72.039 ms 33.971 ms 13 corerouter2.SanFrancisco.cw.net (204.70.9.132) 15.747 ms 18.744 ms 21.543 ms 14 bordercore2.NorthRoyalton.cw.net (166.48.224.1) 69.559 ms 73.967 ms 68.042 ms 15 merit.NorthRoyalton.cw.net (166.48.225.250) 83.99 ms 130.937 ms 129.694 ms 16 198.108.23.145 (198.108.23.145) 147.379 ms 75.614 ms 82.193 ms 17 nic.merit.edu (198.108.1.48) 116.747 ms 163.204 ms *
After the time, there may appear annotations; the annotations printed by traceroute are:
! reply returned with a TTL <= 1
!H host unreachable
682 Data ONTAP® 8.2 Commands: Manual Page Reference for 7-Mode, Volume 1
traceroute
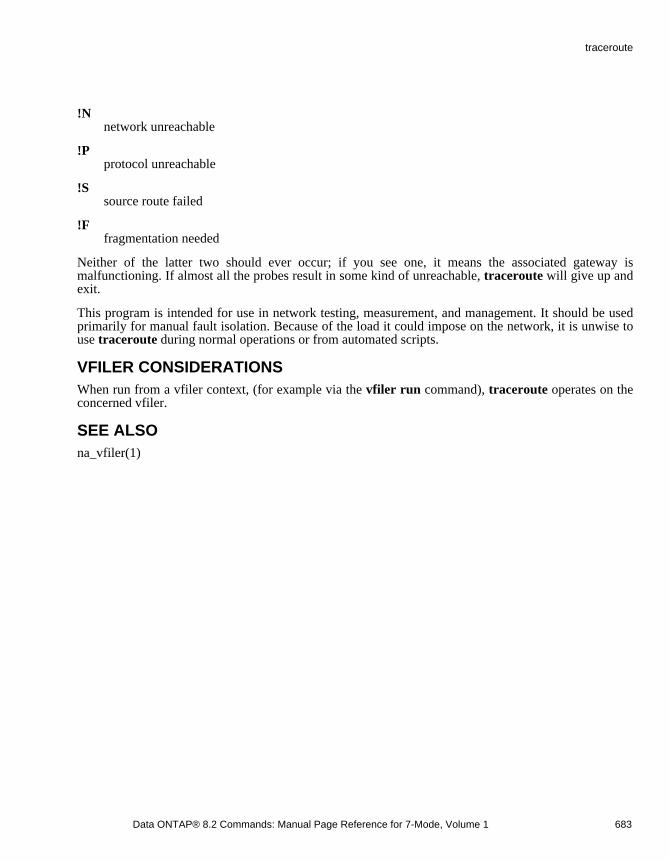
!N network unreachable
!P protocol unreachable
!S source route failed
!F fragmentation needed
Neither of the latter two should ever occur; if you see one, it means the associated gateway ismalfunctioning. If almost all the probes result in some kind of unreachable, traceroute will give up andexit.
This program is intended for use in network testing, measurement, and management. It should be usedprimarily for manual fault isolation. Because of the load it could impose on the network, it is unwise touse traceroute during normal operations or from automated scripts.
VFILER CONSIDERATIONSWhen run from a vfiler context, (for example via the vfiler run command), traceroute operates on theconcerned vfiler.
SEE ALSOna_vfiler(1)
Data ONTAP® 8.2 Commands: Manual Page Reference for 7-Mode, Volume 1 683
traceroute
traceroute6NAMEna_traceroute6 - print the route IPv6 packets take to a network node
SYNOPSIStraceroute [ -dlnrv ] [ -f first_hop ] [ -m max_hops ] [ -p port ] [ -q nqueries ] [ -s src_addr ] [ -g gateway ] [ -w wait ] host [ data_size ]
DESCRIPTIONThe traceroute6 utility uses the IPv6 protocol hop limit field to elicit an ICMPv6 TIME_EXCEEDEDresponse from each gateway along the path to some host.
The only mandatory parameter is the destination host name or IPv6 address. The default probe datagramcarries 12 bytes of payload, in addition to the IPv6 header. The size of the payload can be specified bygiving a length (in bytes) after the destination host name.
Other options are:
-d Debug mode.
-f first_hop
Specify how many hops to skip in trace.
-g gateway
Specify intermediate gateway ( traceroute6 uses routing header).
-l Print both host hostnames and numeric addresses. Normally traceroute6 prints only hostnames if -n is not specified, and only numeric addresses if -n is specified.
-m hoplimit
Specify maximum hoplimit, up to 255. The default is 30 hops.
-n Do not resolve numeric address to hostname.
-p port
684 Data ONTAP® 8.2 Commands: Manual Page Reference for 7-Mode, Volume 1
traceroute6

Set UDP port number to port.
-q nqueries
Set the number of probe per hop count to nqueries.
-r Bypass the normal routing tables and send directly to a host on an attached network. If the host isnot on a directly-attached network, an error is returned.
-s src_addr
src_addr specifies the source IPv6 address to be used.
-v Be verbose.
-w wait
Specify the delay time between probes.
This program prints the route to the given destination and the round-trip time to each gateway, in thesame manner as traceroute.
Here is a list of possible annotations after the roundtrip time for each gateway:
!N Destination Unreachable - No Route to Host.
!P Destination Unreachable - Administratively Prohibited.
!S Destination Unreachable - Not a Neighbour.
!A Destination Unreachable - Address Unreachable.
! This is printed if the hop limit is <= 1 on a port unreachable message. This means that the packetgot to the destination, but that the reply had a hop limit that was just large enough to allow it to getback to the source of the traceroute6. This was more interesting in the IPv4 case, where some IPstack bugs could be identified by this behavior.
This program is intended for use in network testing, measurement and management. It should be usedprimarily for manual fault isolation. Because of the load it could impose on the network, it is unwise touse traceroute6 during normal operations or from automated scripts.
Data ONTAP® 8.2 Commands: Manual Page Reference for 7-Mode, Volume 1 685
traceroute6

VFILER CONSIDERATIONSWhen run from a vfiler context, (e.g. via the vfiler run command), traceroute6 operates on theconcerned vfiler.
SEE ALSOna_netstat(1), na_vfiler(1)
686 Data ONTAP® 8.2 Commands: Manual Page Reference for 7-Mode, Volume 1
traceroute6
ucadminNAMEna_ucadmin - Commands for managing Fibre Channel and converged networking adapters
SYNOPSISucadmin command argument ...
DESCRIPTIONThe ucadmin command manages Fibre Channel and converged networking adapters used by thestorage subsystem. Use the command to show the capabilities of adapters or to configure the personalitymode and FC-4 type of adapters.
USAGEucadmin show [ -c ] [ adapter ]
Displays the current and pending configuration of the adapters in the system. When no arguments aregiven, the command will return configuration information for all manageable adapters.
The -c option displays the capabilities of the adapters in the system.
The adapter argument is of the form Xy where X is an integer and y is a letter (for example 4a).
ucadmin help sub_command
Displays the help information for the given sub_command.
ucadmin modify [ -m mode ] [ -t type ] [ -f ] adapter
Changes the adapter configuration. The mode value refers to the personality mode of the adapter andcan be fc or cna. The type value refers to the FC-4 type of the adapter and can be initiator or target. The -f option suppresses confirmation prompts. Any changes to the adapter mode or type will require areboot for the changes to take effect. The adapter must also be offline before any changes can be made.When the adapter type is initiator, use the storage disable adapter command to bring the adapteroffline. When the adapter type is target, use the fcp config command to bring the adapter offline.
NOTESAutomatic ReconfigurationUnder some circumstances, the node may boot with the wrong mode and FC-4 type. When this happens,the configurable adapters are reprogrammed to their proper mode and type and the node isautomatically rebooted. Before rebooting, the ucm.mode.autoReboot or fci.config.autoReboot EMSmessage displays on the console. Events that can cause this problem include maintenance head swaps ,use of the console set-defaults command, and other operations that affect the node’s boot environmentstate.
Data ONTAP® 8.2 Commands: Manual Page Reference for 7-Mode, Volume 1 687
ucadmin
Repair When Data ONTAP is fully initialized and running, configuring an adapter with the ucadmincommand records the adapter configuration is stored in two places. Mode information is storedprimarily on the adapter’s onboard flash with a backup on-disk in the node’s root volume. FC-4 typeinformation is stored in the node’s boot environment with a backup on-disk in the node’s root volume.Following a console set-defaults operation, a maintenance head swap or other event that destroys theboot environment state, you might need to use the ucadmin command in Maintenance Mode to restorethe storage adapter (initiator type) as some adapters will default into target mode. After the node’s rootvolume comes online, the boot environment configuration is checked against the on-disk configurationinformation. If a misconfiguration is detected, the boot environment information is restored and thenode automatically reboots to attach the correct drivers and restore the original configuration. Thisprovides consistency between maintenance head swaps and other events which destroy the bootenvironment.
Maintenance Mode OperationYou can use the ucadmin command while in Maintenance Mode. After changing the adapterconfiguration in Maintenance Mode, a reboot is required for the change to take effect. When runningfrom Maintenance Mode, no on-disk configuration information can be stored because the node’s rootvolume is unavailable. To account for this, the ucadmin command indicates that the boot environmentconfiguration needs to be recorded ondisk during a subsequent reboot. After changing the adapterconfiguration in Maintenance Mode, the boot environment configuration becomes canonical. Otherwise,the on-disk configuration is canonical.
New InstallationsFollowing a new installation of Data ONTAP, the ondisk configuration information is undefined. Whenthis condition is encountered, the boot environment configuration becomes canonical and the on-diskconfiguration is programmed to match the existing boot environment configuration. In this way, theadapter configuration is preserved across new installations. To modify this behavior you must perform aconsole set-defaults operation, and/or use the ucadmin command in Maintenance Mode to change theconfiguration, prior to installing Data ONTAP.
HA CONSIDERATIONSUse of ucadmin during takeover:After a takeover occurs, you cannot use the ucadmin command to display or change the adapter modeand type for the partner. If you need to make a change on the partner node that was taken over, thepartner node should be booted into Maintenance Mode.
Maintenance head swaps in a CFO:
During a maintenance head swap procedure in a CFO, if the adapter mode and type do not match whatwas originally set, Data ONTAP will attempt to automatically restore them before allowing thegiveback to occur. In the event that the adapters are not automatically reconfigured, boot the new headinto Maintenance Mode prior to doing the first giveback. Use the ucadmin command to restore theadapter configuration manually. This will avoid any service disruptions. For more information aboutMaintenance Mode operation, see na_floppyboot(1).
688 Data ONTAP® 8.2 Commands: Manual Page Reference for 7-Mode, Volume 1
ucadmin

SEE ALSOna_sysconfig(1), na_floppyboot(1),
Data ONTAP® 8.2 Commands: Manual Page Reference for 7-Mode, Volume 1 689
ucadmin

uptimeNAMEna_uptime - Shows how long the system has been up.
SYNOPSISuptime
DESCRIPTIONuptime prints the current time, the length of time the system has been up, and the total number of NFS,CIFS, and HTTP operations the system has performed since it was last booted.
The node runs uptime automatically once an hour and automatically logs its output to /etc/messages.
EXAMPLE toaster> uptime 2:58pm up 7 days, 19:16 795217260 NFS ops, 1017333 CIFS ops, 1639 HTTP ops, 0 FCP ops, 0 iSCSI ops
HA CONSIDERATIONSIn partner mode, the uptime command displays how long the failed node has been down and the hostname of the live node.
SEE ALSOna_partner(1), na_messages(5)
690 Data ONTAP® 8.2 Commands: Manual Page Reference for 7-Mode, Volume 1
uptime
useradminNAMEna_useradmin - Administers node access controls.
SYNOPSISuseradmin user command argument...
useradmin domainuser command argument...
useradmin group command argument...
useradmin role command argument...
useradmin whoami
DESCRIPTIONThe useradmin command is used to control node access privileges. For each category of access grantee-- user, group, and role -- privileges can be added or listed. The following definitions apply:
user
An authenticated person who can be placed into one or more groups.
domainuser
A non-local user who belongs to a Windows domain and is authenticated by the domain. This type ofuser can only be put into groups if CIFS has been set up. These users can use their administrativecapabilities via the ONTAP API RPC interface, as well as the telnet, RSH, SSH, and ONTAP API httpinterfaces.
group
A collection of users and domainusers that can be granted one or more roles
role
A collection of capabilities
capability
The privilege granted to execute commands or take other specified actions
USAGEuseradmin user add login_name [-c comments] -p password <only for rsh command> -n full name -g group1[,group2,...,groupN] -m password min-age -M password max-age
Data ONTAP® 8.2 Commands: Manual Page Reference for 7-Mode, Volume 1 691
useradmin

useradmin user modify login_name -n full name [-c comments] [-g group1,group2,...,groupN] -m password min-age -M password max-age
user add and user modify are used to add and modify administrative users. The user name can be up to 32 characters long. The user name can contain any alphanumeric character, a space, or a punctuationcharacter that is not one of:
" * + , / : ; < = > ? [ \ ]
There are other symbols allowed in user, group, and role names, which have issues with the commandline. Putting double-quotes around the name should deal with this problem. Some of these symbolsinclude # @ & <space>.
The -p requirement during rsh sessions for add specifies the password for the user. This password mustconform to the rules found in the options "security.passwd.rules".
The -g requirement for add specifies which groups contain this user. A user inherits all the privileges ofthe groups he is in. This option completely replaces this user’s current groups with the new ones.
The -c option specifies a comment about the user. Comments about the user should be no longer than128 characters and should not contain the character ‘:’ (colon).
The -n option specifies the full name of the user. The full name should be no longer than 256 characters,and should not contain the character ‘:’ (colon).
The -m option specifies the minimum allowable age of the user’s password (in days) before the user canchange it again. This works in conjunction with the option security.passwd.rules.history to make surethat users have unique, non-repeating passwords.
The -M option specifies the maximum allowable age of the user’s password (in days). When the user’spassword expires, the user’s status is set to "Password Expired" and the user can only run the "passwd"command.
When you add a user, you will be prompted to create the user’s password and then verify it. A passwordis case-sensitive and defaults with the following restrictions:
- it must be at least 8 characters long
- it must contain at least two alphabetic characters
- it must contain at least one digit
If the setting of the security.passwd.rules.enable option is off, then the restrictions will not beenforced. See na_options(1) for additional information about this option.
useradmin user delete login_name
user delete can be used to delete any local user except for "root".
692 Data ONTAP® 8.2 Commands: Manual Page Reference for 7-Mode, Volume 1
useradmin
useradmin user list [login_name ] [-g group_name ]
user list displays all non-root users if no user name is provided. Specifying a user name displays fullinformation about that user. The -x option displays extended information about users. -g groupnameoption displays all of the users in a particular group.
The user entries will each be printed in list format as follows:
Name: fred Info: This is a comment for fred. Rid: 131343 Groups: audit
A single user extended format will be printed as follows:
Name: fred Info: This is a comment for fred Groups: Administrators Full Name: Rid: 131343 Allowed Capabilities: login-*,api-*,cli-*,security-* Password min/max age in days: 1/30 Status: Enabled
The Info field is the comment (or the NT user description), if any, entered for the user.
The Full Name field contains the user’s full name. This is generally more descriptive of the user thanthe user’s name.
The Rid is a unique integer associated with each user. This value is generated automatically by ONTAPwhen the user record is created.
The Groups field displays all of the groups this user is associated with.
The Allowed Capabilities field indicates this user’s privileges. "fred" can login through anyadministrative protocol. This will be discussed further with the role add command.
The Password min/max age in days: field displays the password aging parameters. Min is theminimum number of days that a password must be used and max is the maximum number of days that apassword can be used. In this case, "fred" can only change his password at most once a day, and mustchange his password at least once every 30 days.
The Status field displays the current status of the administrator. This can be: Enabled, Disabled, orPassword Expired.
useradmin domainuser add Network login_name -g group1[,group2,...,groupN]
domainuser add is used to add non-local administrative users. The Windows Domain Controllerauthenticates these users instead of the node. The Network login_name can be a name, a domain\name,or a textual_sid_S-x-y-z. For more information about a Network login_name, please look at the manpage for na_cifs_lookup(1).
Data ONTAP® 8.2 Commands: Manual Page Reference for 7-Mode, Volume 1 693
useradmin

useradmin domainuser delete Network login_name -g group1[,group2,...,groupN]
useradmin domainuser delete is used to remove a Network login_name from a specific group. Thiscannot delete the user from the system. Call the useradmin user delete command to delete a local userfrom the ONTAP node. If a local user is removed from all groups using the domainuser deletecommand, the local user is automatically placed into the "Administrators" group.
useradmin domainuser list -g group_name
domainuser list is used to list all of the SIDs in a group. To find what username a SID represents, usethe cifs lookup command.
useradmin domainuser loadfile_name
domainuser load is used to load a new file over the lclgroups.cfg file. This replaces all the currentgroup membership with the membership given in the new file. This functionality is only available if thecurrent user has the security-load-lclgroups capability.
useradmin group add group_name [-c comments] [-r role1[,role2,...,roleN]]
useradmin group modify group_name [-c comments] [-r role1[,role2,...,roleN]]
group add and group modify are used to add and modify administrative groups. The group name hasall the restrictions of a user name except a group name can have up to 256 characters.
The -r requirement specifies which roles this group contains. These roles specify a set of capabilitiesthat the group inherits. This option completely replaces this group’s current roles with the new ones.
The -c option specifies a comment about the group. Comments for groups have all the restrictions ofuser comments.
The -f option for modify is only necessary when trying to modify your own group. This option forcesthe change without a warning.
useradmin group delete group_name
group delete is used to delete administrative groups.
useradmin group list [group_name [-u ]]
group list is used to list administrative groups. Giving a group name lists more detailed output aboutthe group. The -u option lists all of the users in the group.
The user entries will each be printed in list format as follows:
Name: audit Info: Default group for auditing the system. Roles: audit
A single group extended format will be printed as follows:
694 Data ONTAP® 8.2 Commands: Manual Page Reference for 7-Mode, Volume 1
useradmin
Name: Administrators Info: Default group for all admins created prior to this release. Roles: admin Allowed Capabilities: login-*,cli-*,api-*,security-*
The fields are very similar to the user fields. A few things of note in this example is the fact that"Administrators" is the default group, and the use of * in the capabilities allow multiple capabilities tobe defined in one statement.
useradmin role add role_name [ -c comments ] -a capability1[,capability2,...,capabilityN ]
useradmin role modify role_name [-c comments] [-a capability1,capability2,...,capabilityN]
role add and role modify are used to add and modify administrative roles. The role name has all therestrictions of a user name.
The -a option specifies which capabilities are allowed in this role. This option completely replaces thisrole’s current capabilities with the new ones.
The -c option specifies a comment about the role. Comments for roles have all the restrictions of usercomments.
useradmin role delete role_name
role delete is used to delete an administrative role.
useradmin role list [role_name ]
role list is used to list administrative roles. Giving a role name just lists a single role.
The role entries will each be printed in list format as follows:
Name: none Info: Allowed Capabilities:
This means that this role does not have any capabilities.
Capabilities:
There are five categories of capabilities: login-*, cli-*, api-*, security-* and compliance-*. A sixthcapability, filerview-readonly, is unused and ignored.
The ‘*’ character is used similar to a wildcard, with a couple of restrictions: It must be used at the endof the capability. It must be used alone or in conjunction with one of the categories. If used with cli-, itmust be used with the full name of the CLI command.
The login-* category includes logging in via login_telnet, login-console, login-rsh, login-ssh, login_snmp, login-ndmp, login-sp, and login-http-admin.
The cli-* category includes all of the commands that can be run after a user is logged in with telnet,console, rsh, or ssh. The format for this is cli-<command>*, which means allow all the commands andsubcommands. (cli-<command> just means the command and NO subcommands.) The capability for aspecific command, like exportfs, would have the following syntax: cli-exportfs* This allows command
Data ONTAP® 8.2 Commands: Manual Page Reference for 7-Mode, Volume 1 695
useradmin
line accesses to the exportfs command and all of its subcommands. cli-export* may look valid but isNOT allowed.
The api-* type includes all of the ONTAP API calls. These commands are only available vialogin-httpadmin, so in general, any api-* command must also include this login. The format for this is api-<ontap-api-command> which means allow a specific command/subcommand. Here, it is possibleto list only subcommands, like api-system-get-info or a command and its subcommands, like api-systemget-*, or even api-system-*.
The security-* type currently only has a few elements:
security-passwd-change-others which is used specifically to control if a user can change anotheruser’s password without knowing their previous password. By default, only root and members of theAdministrators group have this capability.
security-priv-advanced which is necessary to run advanced commands that are not used for normaladministration. Please talk to a NetApp Inc representative before using advanced commands. Bydefault, only root and members of the Administrators group have this capability.
security-api-vfiler Normally a client will send ONTAP APIs directly to a vfiler if it wishes the API tobe executed on the vfiler. The security-apivfiler capability is necessary to send ONTAP APIs to thephysical node which is to be forwarded to a vfiler for execution. By default, only root and members ofthe Administrators group have this capability.
security-load-lclgroups which is necessary to run the useradmin domainuser load command. Thiscommand changes all group membership. By default, only root and members of the Administratorsgroup have this capability.
security-complete-user-control which is used to allow an admin to add, modify, and delete users,groups and roles with more capabilities than himself. These users typically only have access to thecli-useradmin* and associated commands, though they can give themselves greater permissions. Bydefault, only root and members of the Administrators group have this capability.
The compliance-* category provides compliance capabilities to users in the "ComplianceAdministrators" group when issuing snaplock commands. This category may not be added to othergroups in the system, nor can it be removed from the list of capabilities given to ComplianceAdministrators. Currently, the only privilege associated in this category is complianceprivileged-delete. A user can be added to the "Compliance Administrators" group only ifthe system has "telnet.distinct.enable" option set to "on".
The filerview-readonly is unused and ignored.
useradmin whoami displays the username of the user running this command.
ExamplesCreating a user who only administers SNMP
useradmin role add rsh_help -a login-rsh,cli-help* useradmin role add snmp_commands -a login-*,cli-snmp*,api-snmp-* useradmin group add snmp_admins -r rsh_help,snmp_commands useradmin user add wilma -g snmp_admins
696 Data ONTAP® 8.2 Commands: Manual Page Reference for 7-Mode, Volume 1
useradmin
This creates two roles, one which can rsh into the node and run the help command, and another which isallowed to log in through any login method and run any SNMP command. The "snmp_admins" group isallowed to log into the node and run the help command through telnet, rsh, SNMPv3, and so on, andmake get and get next requests. The user "wilma" inherits these capabilities from the group.
Creating a user who only makes SNMP requests
useradmin role add snmp_requests -a login-snmp useradmin group add snmp_managers -r snmp_requests useradmin user add storeMgr -g snmp_managers
This creates a role and group whose only capability is making SNMP requests. The storeMgr clientinherits this capability.
Creating/Modifying a user to not have console access
This is a common issue that arises for appliances running in Windows domains. A user without consoleaccess cannot execute any node CLI commands. These local users should be placed in local groups (oreven no groups at all) that do not have any roles which contain these capabilities. To see if a user hasaccess, list the user and check the Allowed Capabilities. If a user is in a group with the capabilities:"cli-*" and "login-*", then that user has console access. The following command places a user into agroup with no capabilities, which will revoke all privileges.
useradmin user modify myuser -g "Guests" useradmin user list myuser
Creating a user who has Service Processor login privileges
The login-sp capability can be used to configure users who have login privileges to the ServiceProcessor (for example RLM). If a user is in a group with the login-sp capability, then that user hasService Processor access. Console redirection from the Service Processor is controlled via consoleaccess as described in this document. The following command places sp-user into a group with login-spcapabilities.
useradmin role add sp-role -a login-sp useradmin group add sp-group -r sp-role useradmin user add sp-user -g sp-group
Creating a user who only makes NDMP requests
The "Backup Operators" group includes the "backup" role, which contains login-ndmp. Adding a userinto that group will permit NDMP requests.
useradmin user add ndmpuser -g "Backup Operators"
VFILER CONSIDERATIONSWhen run from a vfiler context, (for example via the vfiler run command), useradmin operates on theconcerned vfiler.
Data ONTAP® 8.2 Commands: Manual Page Reference for 7-Mode, Volume 1 697
useradmin

SEE ALSOna_snmp(1), na_vfiler(1).
NOTESFor information on node access via rsh, please see na_rshd(8).
698 Data ONTAP® 8.2 Commands: Manual Page Reference for 7-Mode, Volume 1
useradmin
versionNAMEna_version - Displays Data ONTAP version.
SYNOPSISversion [ -b | -v ]
DESCRIPTIONversion displays the version of Data ONTAP running on the server, and the date when the version wascreated.
version [ -b ] displays the version information for Data ONTAP, diagnostics, and firmware files storedon the primary boot device.
version [ -v ] displays verbose output including compilation flags.
EXAMPLE toaster> version NetApp Release 7.1: Thu Jun 9 08:11:34 PDT 2005
toaster> version -b
/cfcard/x86_64/freebsd/image1/kernel: OS 8.0.0 /cfcard/backup/x86_64/kernel/primary.krn: OS 7.3.2 /cfcard/x86_64/diag/diag.krn: 5.3.7 /cfcard/x86_64/firmware/excelsio/firmware.img: Firmware 1.7 /cfcard/x86_64/firmware/DrWho/firmware.img: Firmware 2.3 /cfcard/x86_64/firmware/SB_XV/firmware.img: Firmware 4.2 /cfcard/boot/loader: Loader 1.6.1 /cfcard/common/firmware/zdi/zdi_fw.zpk: X1936A FPGA Configuration PROM 1.0 (Build 0x200706131558)
SEE ALSOna_sysconfig(1)
Data ONTAP® 8.2 Commands: Manual Page Reference for 7-Mode, Volume 1 699
version

vfilerNAMEna_vfiler - Commands for vfiler operations
SYNOPSISvfiler create vfilername [-n] [-s ipspace ] -i ipaddr [-i ipaddr ]... path [ path ...]
vfiler create vfilername -r path [-b old_vfiler_name ]
vfiler destroy [-f] vfilername
vfiler rename old_vfilername new_vfilername
vfiler add vfilername [-f] [-i ipaddr [-i ipaddr]...] [ path [ path ...]]
vfiler remove vfilername [-f] [-i ipaddr [-i ipaddr]...] [ path [path ...]]
vfiler limit [ max_vfilers ]
vfiler move vfiler_from vfiler_to [-f] [-i ipaddr [-i ipaddr]...] [path [path ...]]
vfiler start vfilertemplate
vfiler stop vfilertemplate
vfiler status [-r|-a] [ vfilertemplate]
vfiler run [-q] vfilertemplate command [args]
vfiler allow vfilertemplate [proto=cifs] [proto=nfs] [proto=rsh] [proto=iscsi] [proto=ftp] [proto=http][proto=ssh]
vfiler disallow vfilertemplate [proto=cifs] [proto=nfs] [proto=rsh] [proto=iscsi] [proto=ftp] [proto=http][proto=ssh]
vfiler context vfilername
vfiler dr configure [-l user:password ] [-e ifname:IP address:netmask,... ] [-d dns_server_ip:... ] [-n nis_server_ip:... ] [-s ] [-a alt-src,alt-dst ] [-u ] [-c secure ] remote_vfiler@remote_node
vfiler dr status remote_vfiler@remote_node
vfiler dr delete [-f] [-c secure ] remote_vfiler@remote_node
vfiler dr activate remote_vfiler@remote_node
vfiler dr resync [-l remote_login:remote_passwd ] [-a alt_src,alt-dst ] [-s ] [-c secure ] remote_vfiler@remote_node
700 Data ONTAP® 8.2 Commands: Manual Page Reference for 7-Mode, Volume 1
vfiler
vfiler migrate [-m nocopy [-f]] [-l user:password ] [-c secure ] [-e ifname:IP address:netmask,... ] remote_vfiler@remote_node
vfiler migrate start [-l user:password ] [-c secure ] [-e ifname:IP address:netmask,... ] remote_vfiler@remote_node
vfiler migrate status remote_vfiler@remote_node
vfiler migrate cancel [-c secure ] remote_vfiler@remote_node
vfiler migrate complete [-l remote_login:remote_passwd ] [-c secure ] remote_vfiler@remote_node
vfiler help
DESCRIPTIONThe vfiler command controls the configuration of Virtual Filers (vfilers) on a node.
The vfiler command is available only if your node has the vfiler license.
SUBCOMMANDS
create Creates the named vfiler. The named vfiler must not already be defined on the system. The defaultvfiler, vfiler0, always exists on a node.
There are two ways to create a vfiler. The first uses the -i option to specify configuration information onthe command line. Use this form when creating a vfiler for the first time. The second form uses the -roption to re-create a vfiler from configuration information stored in the specified data set. Use this formwhen creating a vfiler from a data store that has been Snapmirrored between nodes.
When initially creating a vfiler with the vfiler create vfilername [-s ipspace ] -i form of the command,at least one path must be supplied on the command line. The paths can be either volumes or qtrees.Additional paths can be specified later by using the vfiler add command. Any attempt to use storageclaimed by another vfiler causes the command to fail. The first storage unit mentioned when creating avfiler is special in that it will be used for the /etc store space for vfilervisible configuration information.This first storage unit is permanently associated with the vfiler. It can only be disassociated when thevfiler is destroyed.
At least one IP address must be supplied on the command line. Additional IP addresses can be specifiedlater by using the vfiler add command. Unless the -s option is used, the new vfiler is associated with thedefault IP space. An attempt to use an IP address that is already in use by another vfiler in the same IPspace causes the command to fail.
Any IP address specified as part of this command must also be unconfigured. To unconfigure aninterface address, you can either configure the interface down, or (if this address is an IP alias) removethe address using ifconfig -alias.
When a vfiler is created using -i, a set of default options is created. After a new vfiler is created, it willbe in a running state; but no protocol servers will be running. You can run the setup command in thecontext of this vfiler using "vfiler run" to setup the vfiler. If the -n option is not used, the vfiler createcommand will automatically run the setup command after creating the vfiler.
Data ONTAP® 8.2 Commands: Manual Page Reference for 7-Mode, Volume 1 701
vfiler
When re-creating a Snapmirrored vfiler or otherwise copied datastore, using the vfiler create vfilername -r path form of the command, the specified vfilername parameter must match the name ofthe original vfiler exactly, and the path must match the first path that was specified in the vfiler createcommand that originally created the vfiler. Optionally, if the vfilername is intended to be different, thenthe -b option must be used and the parameter must match the name of the original vfiler exactly.
After a vfiler is re-created it will be in the running state, and its protocol servers will be running.
At the end of vfiler create the IP addresses of the new vfiler are unconfigured. The setup command canbe run (manually, or automatically if the -n option is not used in the first form of vfiler create) on thisvfiler to configure these addresses. If setup is not run, configure the addresses using ifconfig and makethis IP address configuration persistent by putting these ifconfig lines in /etc/rc.
destroy The destroy subcommand releases all resources and removes the configuration informationassociated with the named vfiler. The vfiler to be destroyed must be in a stopped state. Note that nouser data is destroyed by this operation, just the association of the storage and IPs with the namedvfiler. Any network interfaces configured with an IP address of the vfiler being destroyed must beconfigured down before this operation can be performed. The default vfiler, vfiler0, cannot bedestroyed. Unless the -f option is specified, the action must be confirmed. The storage resourcesare returned to the hosting node.
rename The rename subcommand renames an existing vfiler with the new name.
add The add subcommand adds the specified IP addresses and/or paths to an existing vfiler. Thearguments have the same rules as those specified during the initial create. The -f option skips theconfirmation and warnings.
remove The remove subcommand removes the named IP addresses and/or paths from an existing vfiler.The arguments must belong to the named vfiler. Note that no user data is modified by thiscommand. The only effect is to disassociate the paths and/or IPs from the named vfiler. Note thatthe path that holds the /etc directory can only be removed by vfiler destroy. The storage resourcesare returned to the hosting node. The -f option skips the confirmation and warnings.
limit The limit subcommand sets the upper limit on the number of vfilers that can be created withoutrebooting. For HA systems, the user is responsible for setting the limit to the same value on boththe local and the partner node. When no argument is supplied, this subcommand returns the currentupper limit. The range of acceptable values for max_vfilers is platform dependent. Use vfiler help limit to determine the range for your platform. When the vfiler limit is decreased, the change iseffective immediately. When the vfiler limit is raised beyond what it was when the node was lastbooted, the new limit will not take effect until the next reboot.
move The move subcommand removes the named IP addresses and/or paths from vfiler_from and addsthem to vfiler_to. The arguments must belong to vfiler_from. At least one IP address or storagepath must be specified as an argument for the subcommand. No user data is modified by thiscommand. The only effect is to disassociate the paths and/or IPs from the source vfiler and addthem to the destination vfiler. This means that security information such as UIDs and SIDs may not
702 Data ONTAP® 8.2 Commands: Manual Page Reference for 7-Mode, Volume 1
vfiler
be valid or meaningful in the destination vfiler, so the administrator may have to re-perm the filesafter moving. Note that the path that holds the vfiler’s /etc directory cannot be moved to another vfiler.Also, at least one IP must be left on the source vfiler. The -f option skips the confirmation andwarnings.
start The start subcommand causes one or more previously stopped vfilers to enter the running state.This means packets will be accepted for the vfiler(s) that match the specified vfilertemplate. Avfilertemplate can be a "*" (matching all vfilers), a vfiler name, a comma seperated list of vfilernames or an IPspace (specified as i:<ipspacename>). The hosting node is not affected by thiscommand.
stop The stop subcommand causes the matching vfilers to stop receiving network traffic. From the pointof view of a client the vfiler will be down. The hosting node is not affected by this command.
status The status subcommand displays the running/stopped status of the matching vfiler(s). The -r flagdisplays all IPs and storage assigned to the matching vfilers. The -a flag combines the output of vfiler status -r with a report on what protocols and commands are allowed and disallowed on thematching vfilers. If vfilertemplate is omitted, all vfilers are displayed.
run The run subcommand runs the command on the vfiler(s) specified in the vfilertemplate. If morethan one vfiler matches, the command will be run separately for each vfiler. Any vfiler-specificconsole command can be supplied. If a command is not vfiler-specific, an error will be issued andthe command will not be executed. A wildcard specification will run the command on all vfilers,including the hosting node. The -q option prevents printing a separator before the command runsfor each vfiler. The run command affects vfilers in running states only.
allow The allow subcommand allows the use of the specified protocols on the vfiler(s) specified in thevfilertemplate. If more than one vfiler matches, the specified protocols will be allowed on eachvfiler. The CIFS and NFS protocols can only be allowed if they have been licensed on the hostingnode. A wildcard specification will allow the specified protocols on all vfilers, including thehosting node.
disallow The disallow subcommand disallows the use of the specified protocols on the vfiler(s) specified inthe vfilertemplate. If more than one vfiler matches, the specified protocols will be disallowed oneach vfiler. A wildcard specification will disallow the specified protocols on all vfilers, includingthe hosting node.
context The context switches the vfiler context of the CLI to the specified vfiler. Any subsequentcommand typed on the CLI is executed in the context of the specified vfiler, and is subject to theconstraints of that vfiler. The command vfiler context vfiler0 returns the context of the CLI to thedefault vfiler context.
Data ONTAP® 8.2 Commands: Manual Page Reference for 7-Mode, Volume 1 703
vfiler
dr The dr subcommand configures the specified remote vfiler from the specified remote node fordisaster recovery on the local node. This operation has three logical stages. First, issue the configure command, which initiates the mirroring of the remote vfiler’s storage to the local nodeusing SnapMirror. Then you can use the status command to monitor the status of this mirror. Inthe event of a disaster, you can issue the activate command to activate the remote vfiler on thelocal machine. At any point when the remote vfiler is mirrored, you can use the delete command toremove this DR configuration. The configure subcommand requires the user to provide anadministrative login id and password for the remote pfiler; this information can be provided as anargument to the -l option, or in response to an interactive question. The user also needs to provideinformation for binding the IP addresses of the vfiler to specific local interfaces. This can bespecified as an argument to a -e options or in response to interactive questions. SynchronousSnapmirror can be used for data transfer by specifying the -s option. The user may specify analternate set of DNS and NIS servers to be used at the DR site, either using the -d or -n options, orin response to interactive questions. The -a option, specified in conjunction with -s option, can beused to specify the alternate hostnames or IP addresses for redundancy purposes. The -f option for dr delete forces deletion in spite of errors. The -u option can be used to skip snapmirror initialize.The -c secure option is to use secure command channel while communicating with remote node.The resync subcommand is used to resync a source with an activated destination or resync adestination with a source. One can specify the -l , -s , -a options which have the same semantics asthat of the configure command.
migrate The migrate subcommand moves the specified remote vfiler from the specified remote node to thelocal node. This operation has three logical steps, and should be performed in three stages. First,issue the start command which initiates the movement of the remote vfiler’s storage to the localnode using SnapMirror. Then you can use the status command to monitor the status of this datamovement. When this status for each path changes from Being initialized to SnapMirrored, youcan issue the complete command to finish the migration. When the complete command completes,the remote vfiler will have been moved to the local machine. If the command argument is omitted,the migrate command goes through the three steps in sequence and blocks until the migration iscomplete. This command requires the user to provide an administrative login id and password forthe remote pfiler; this information can be provided as an argument to the -l option, or in responseto an interactive question. The user also needs to provide information for binding the IP addressesof the vfiler to specific local interfaces. This can be specified with the -e option or in response tointeractive questions.
The -m nocopy option indicates that the vfiler should be migrated using software disk ownershiptechnology in order to avoid copying the vfiler data. Both local and remote machines must use softwaredisk ownership and be licensed for SnapMover. The storage units belonging to the vfiler must becomplete volumes. This option only applies when the command argument is omitted. The -c secureoption is to use secure command channel while communicating with remote node.
The vfiler will not be migrated if:
* the source node file system version is not the same as the local file system version
* NFS, CIFS, or iSCSI are allowed on the source vfiler but not licensed locally
704 Data ONTAP® 8.2 Commands: Manual Page Reference for 7-Mode, Volume 1
vfiler
* CFO is licensed on the source node but not licensed locally
The -f option allows vfiler migration even if the above conditions are not met. However, it will notallow the migration of a vfiler if the source node’s file system version is greater than the local node’sfile system version.
help The help subcommand provides help for the vfiler subcommands.
HA CONSIDERATIONSController failover starts up instances of a failing partner’s vfilers on the partner that is taking-over. Forthis to be successful, all IP addresses in use by vfilers must failover correctly; that is, the partnerinterface information for each interface in use by a vfiler must be configured correctly. Thus, all ifconfig lines in /etc/rc of either partner that specify the main address of an interface must correctly andconsistently specify the partner interface. Lines in /etc/rc that specify IP aliases should not specify apartner interface or address. It is also required that all ipspaces defined on the failing partner that are inuse must also be configured on the partner taking-over even though these ipspaces may not have anyvfilers defined on the taking-over partner.
Note also, for controller failover purposes, a vfiler (other than vfiler0) does not have a partner vfiler.The number of vfilers configured on each host of an HA pair (and their specific configuration) may becompletely asymmetric. For instance, one partner may have 3 vfilers configured and the other partnermay have 7 vfilers configured. Two non-default vfilers on different hosts of an HA pair may even havethe same name.
For vfiler0 the usual HA configuration restrictions still apply. For example, certain configurationparameters (options) of vfiler0 must match the corresponding parameters of the partner’s vfiler0.
SEE ALSOna_ifconfig(1)
Data ONTAP® 8.2 Commands: Manual Page Reference for 7-Mode, Volume 1 705
vfiler
vifNAMEna_vif - DEPRECATED, please use the na_ifgrp(1) command instead.
SYNOPSISvif create [ single | multi | lacp ] vif_name [ -b {rr|mac|ip|port} ] [ interface_list ]
vif destroy vif_name
vif delete vif_name interface_name
vif add vif_name interface_list
vif { favor | nofavor } interface
vif status [ vif_name ]
vif stat vif_name [ interval ]
In the vif commands, vif_name stands for the name of a virtual interface. The name must be a string thatis no longer than 15 characters and meets the following criteria:
- It begins with a letter.
- It does not contain a space.
- It is not in use for another virtual interface.
Virtual interface names are case-sensitive.
DESCRIPTIONThe vif command has been DEPRECATED in favor of the na_ifgrp(1) command.
A virtual network interface is a mechanism that supports aggregation of network interfaces ("links")into one logical interface unit ("trunk").
Once created, a vif is indistinguishable from a physical network interface. You can inspect and modifystatistical and configuration information using the ifconfig and netstat commands, among others.
You can create a vif in one of three modes: multi, single, or LACP.
Multi-mode vifs are partly compliant with IEEE 802.3ad. Multi-mode vifs support static configurationbut not dynamic aggregate creation. In multi-mode vif, all links are simultaneously active. This mode isonly useful if all the links are connected to a switch that supports trunking/aggregation over multipleport connections. The switch must be configured to understand that all the port connections share acommon media access control (MAC) address and are part of a single logical interface.
706 Data ONTAP® 8.2 Commands: Manual Page Reference for 7-Mode, Volume 1
vif
LACP vifs are completely compliant with IEEE 802.3ad. LACP protocol is used determine which of theunderlying links can be aggregated. LACP protocol is also used to monitor the link status. If theconfiguration on both ends of the links is correct then all the interfaces of a vif are active.
While the switch is responsible for determining how to forward incoming packets to the node, the nodesupports load balancing on the network traffic transmitted over a multi-mode/LACP vif. The user canchoose from any of the following four methods:
- IP based: The outgoing interface is selected on the basis of the node and client’s IP address.
- MAC based: The outgoing interface is selected on the basis of the node and client’s MAC address.
- Round-Robin: All the interfaces are selected on a round-robin basis.
- Port based: The outgoing interface is selected on the basis of the transport layer connection 4-tuple.This includes the node’s IP and port number and the client’s IP and port number. For traffic suchas ICMP only the source and destination IP addresses are used.
Since the Round-Robin based load balancing policy may lead to out-of-order of packets, it should beused carefully.
In single-mode, only one of the links is active at a time. No configuration is necessary on the switch. IfData ONTAP detects a fault in the active link, a standby link of the vif, if available, is activated. Notethat load balancing is not supported on single-mode vifs.
Network interfaces belonging to a vif do not have to be on the same network card. With the vifcommand, you can also create second-level single or multi-mode vifs. For example, a subnetwork hastwo switches that are capable of trunking over multiple port connections. The node has a two-linkmulti-mode vif to one switch and a two-link multi-mode vif to the second switch. You can create asecond-level single-mode vif that contains both of the multi-mode vifs. When you configure thesecond-level vif using the .B ifconfig command, only one of the two multimode vif is brought up as theactive link. If all the underlying interfaces in the active vif fail, the secondlevel vif activates its standbyvif. Please note that multi-level LACP vifs are not permitted.
You can destroy a virtual interface only if you have configured it down using the ifconfig command.
OPTIONS
create Creates a new instance of a virtual interface. If no mode is specified, the virtual interface is createdin multi- mode. If a list of interfaces is provided, the interfaces are configured and added to thevirtual interface trunk. Load balancing is specified with the -b option.
- rr refers to Round-robin Load balancing.
Data ONTAP® 8.2 Commands: Manual Page Reference for 7-Mode, Volume 1 707
vif
- ip refers to IP-based load balancing. The IP based load balancing is used as default for multi-modevifs if none is specified by user.
- mac refers to MAC-based load balancing.
- port refers to port-based load balancing.
destroy Destroys a previously created virtual interface. The interface must be configured down prior toinvoking this option.
delete Deletes the specified interface from a previously created virtual interface. The virtual interfacemust be configured down prior to invoking this option.
add Adds a list of interfaces to an existing virtual interface trunk. Each interface corresponds to a singlelink in the trunk.
favor designates the specified interface as active in a single-mode vif. When a single-mode vif is created,an interface is randomly selected to be the active interface. Use the favor command to override therandom selection.
nofavor If the specified interface is part of a single-mode vif, this command ensures that the linkcorresponding to this interface is not preferred when determining which link to activate.
status Displays the status of the specified virtual interface. If no interface is specified, displays the statusof all virtual interfaces.
stat Displays the number of packets received and transmitted on each link that makes up the virtualinterface. You can specify the time interval, in seconds, at which the statistics are displayed. Bydefault, the statistics are displayed at a two-second interval.
FAULT DETECTIONThe vif driver constantly checks each virtual interface and each link for status. Links issue two types ofindications:
up The link is receiving active status from its media access unit.
broken The link is not receiving active status from its media access unit.
In the case of a link that is itself a vif interface, the media access unit refers to the collection of mediaaccess units of the underlying physical network interfaces. If any of the underlying media access unitsissues an up indication, the vif issues an up indication to the next higher level vif on its behalf. If allunderlying physical network interfaces issue broken indications, the vif issues broken indication to thenext level vif.
708 Data ONTAP® 8.2 Commands: Manual Page Reference for 7-Mode, Volume 1
vif
If all the links in a vif are broken, the vif issues a system log message similar to this:
Fri Oct 16 15:09:29 PDT [toaster: pvif_monitor]: vif0: all links are down
If all links on a vif are broken and a link subsequently comes back up, the vif issues a system logmessage similar to this:
Fri Oct 16 15:09:42 PDT [toaster: pvif_monitor]: vif0: switching to e3a
In the case of LACP vifs, LACP frames are exchanged periodically. Failure to receive LACP frameswithin a specified time period is construed as a link failure and the corresponding link is marked down.
In the case of single-mode vifs, broadcast frames are sent out of each interface periodically. Failure toreceive these periodic frames provides a hint on the link status.
EXAMPLESThe following command creates a multi-mode vif vif0, with ip based load balancing, consisting of twolinks, e10 and e5:
vif create multi vif0 -b ip e3a e3b
The status option prints out results in the following form. Here is an example of the output for vif0:
vif status
default: transmit ’IP Load balancing’, VIF Type ’multi_mode’, fail ’log’ vif0: 2 links, transmit ’none’, VIF Type ’multi-mode’ fail ’default’
VIF Status Up Addr_set up: e10: state up, since 05Oct2001 17:17:15 (05:23:05) mediatype: auto-1000t-fd-up flags: enabled input packets 2000, input bytes 12800 output packets 173, output bytes 1345 up indications 1, broken indications 0 drops (if) 0, drops (link) 0 indication: up at boot consecutive 3, transitions 1 broken: e5: state broken, since 05Oct2001 17:18:03 (00:10:03) mediatype: auto-1000t-fd-down flags: enabled input packets 134, input bytes 987 output packets 20, output bytes 156 up indications 1, broken indications 1 drops (if) 0, drops (link) 0 indication: broken consecutive 4, transitions 1
In this example, one of the vif0 links are is in the active (up) state. The second interface e5 is broken ondetection of a link failure. vif0 is configured to transmit over multiple links and its failure behavior isthe default (send errors to the system log). Links are in one of three states:
Data ONTAP® 8.2 Commands: Manual Page Reference for 7-Mode, Volume 1 709
vif
up The link is active and is sending and receiving data (up).
down The link is inactive but is believed to be operational (down).
broken The link is inactive and is believed to be nonoperational ("broken").
In this example, the active link has been in the up state for 5 hours, 23 minutes, 5 seconds. The inactivelink has been inactive for the last 10 minutes. Both links are enabled (flags: enabled), meaning that theyare configured to send and receive data. During takeover, links can also be set to match the MACaddress of the partner. The flags field is also used to indicate whether a link has been marked asfavored.
Links constantly issue either up or broken indications based on their interaction with the switch. Theconsecutive count indicates the number of consecutively received indications with the same value (inthis example, up). The transitions count indicates how many times the indication has gone from up todown or from down to up.
If vif0 is a link in a second-layer vif (for example, vif create vif2 vif0), an additional line is added to itsstatus information:
trunked: vif2
The following example displays statistics about multi-mode vif vif0:
vif stat vif0
Virtual interface (trunk) vif0 e10 e5 In Out In Out 8637076 47801540 158 159 1617 9588 0 0 1009 5928 0 0 1269 7506 0 0 1293 7632 0 0 920 5388 0 0 1098 6462 0 0 2212 13176 0 0 1315 7776 0 0
HA CONSIDERATIONSA virtual interface behaves almost identically to a physical network interface in the HA pair. For thetakeover of a partner to work properly, three things are required:
1. The local node must specify, using the partner option of the ifconfig command, the mapping of thepartner’s virtual interface. For example, to map the partner’s vif2 interface to the local vif1 interface,the following command is required:
710 Data ONTAP® 8.2 Commands: Manual Page Reference for 7-Mode, Volume 1
vif
ifconfig vif1 partner vif2
Note that the interface must be named, not the address. The mapping must be at the top-level trunk, iftrunks are nested. You do not map link-by-link.
2. After takeover, the partner must "create" its virtual interface. Typically, this takes place in the /etc/rcfile. For example:
vif create vif2 e3a e3b
When executed in takeover mode, the local node does not actually create a vif2 virtual interface.Instead, it looks up the mapping (in this example partner vif2 to local vif1) and initializes its internaldata structures. The interface list (in this example, e3a and e3b) is ignored because the local node canhave different mappings of devices for its vif1 trunk.
3. After the partner virtual interface has been initialized, it must be configured. For example:
ifconfig vif2 ‘hostname‘-vif2
Only the create, stat, and status options are enabled in partner mode. The create option does not createnew vif in partner mode. Instead, it initializes internal data structures to point at the mapped local vifinterface. The status and stat options reference the mapped vif. However, all links are printed using thelocal device names.
When using multi-mode vifs with HA pairs, connecting the vifs into a single switch constitutes a singlepoint of failure. By adding a second switch and setting up two multi-mode vifs on each node in the HApair so that the multi-mode vifs on each node are connected to separate switches, the vifs will continueto operate in the face of single switch failure. The following /etc/rc file sequence illustrates this approach:
# configuration for node 1
# first level multi vif: # attach e4a and e4b to Switch 1 vif create multi vif0 e4a e4b
# first level multi vif: # attach e4c and e4d to Switch 2 vif create multi vif1 e4c e4d
# second level single vif consisting of both # first level vifs; only one active at a time vif create single vif10 vif0 vif1
# use vif0 unless it is unavailable vif favor vif0
# configure the vif with an interface and partner ifconfig vif10 ‘hostname-vif10‘ partner vif10
The partner node is configured similarly; the favored first level interface in this case is the vif connectedto "Switch 2".
Data ONTAP® 8.2 Commands: Manual Page Reference for 7-Mode, Volume 1 711
vif

NOTESIEEE 802.3ad requires the speed of all underlying interfaces to be the same and in full-duplex mode.Additionally, most switches do not support mixing 10/100 and GbE interfaces in an aggregate or atrunk. Check the documentation that comes with your Ethernet switch or router on how to configure theEthernet interfaces to be full-duplex. (Hint: Allow both ends of a link to autonegotiate.)
LIMITATIONSThough vifs interfaces can support up to sixteen links, the number of interfaces in an aggregate islimited by the switch.
SEE ALSOna_netstat(1), na_sysconfig(1)
712 Data ONTAP® 8.2 Commands: Manual Page Reference for 7-Mode, Volume 1
vif
vlanNAMEna_vlan - Manages VLAN interface configuration.
SYNOPSISvlan create [ -g {on|off} ] if_name vlanid ...
vlan add if_name vlanid ...
vlan delete [ -q ] if_name [ vlanid ... ]
vlan modify [ -g {on|off} ] if_name
vlan stat if_name [ vlanid ]
In the vlan commands, if_name stands for the name of an Ethernet interface. The vlanid is a numericalvalue between 1 and 4094.
DESCRIPTIONVLAN interfaces allow a single network interface card to participate in multiple broadcast domainssupported by a VLAN enabled switch. Individual frames are tagged with a vlanid to distinguish whichVLAN the data belongs to.
Once created, a VLAN interface is indistinguishable from a physical network interface. You can inspectand modify statistical and configuration information using the ifconfig and netstat commands, amongothers. An Ethernet interface can be configured to support multiple VLANs with different MTU sizes.One reason to do this would be to enable storage systems and workstations on a high speed gigabitbackbone to communicate with each other using large packets on a separate VLAN. Lower speedclients belonging to a VLAN of conventionally-sized Ethernet packets could be connected to the samebackbone via 10/100 Mbps switches at the edge of the network. A storage system with a single gigabitinterface that supports VLANs would then be able to communicate with devices in either VLAN.
The switch port connected to the storage system must be configured to support the VLANs in which thestorage system participates, unless GVRP (GARP VLAN Registration Protocol) has been enabled. IfGVRP is configured on the storage system and switch, a VLAN interface is able to dynamically registerits vlanids with the switch. This does away with the need to explicitly configure specific VLANs on theswitch port.
OPTIONS
create Creates one or more VLAN interfaces for each vlanid that is specified. The Ethernet interface if_name is converted to a VLAN only interface. The -g option can be used to enable GVRP on theinterface. GVRP is turned off by default.
Data ONTAP® 8.2 Commands: Manual Page Reference for 7-Mode, Volume 1 713
vlan
add Adds one or more VLAN interfaces to an Ethernet interface if_name that has already been used to create a VLAN interface.
delete Will delete all interfaces associated with an Ethernet adapter when only the if_name is specified. Ifone or more vlanids are also specified, each VLAN interface corresponding to a vlanid will bedeleted. The delete operation will fail if any interface that is to be deleted is configured "up". The -q option can be used to force the deletion of vlan interfaces, regardless of "up" or "down" status.
modify Will enable or disable GVRP on an already created VLAN interface. The underlying interface isspecified as if_name.
stat Displays the number of packets received and transmitted on each link that makes up the VLANinterface.
EXAMPLESThe following command creates two VLAN interfaces e3-10 and e3-20:
vlan create e3 10 20
The following example would display statistics for all VLANs associated with interface e3:
vlan stat e3
To display statistics for just VLAN interface e3-20, use the following command:
vlan stat e3 20
HA CONSIDERATIONSA VLAN interface behaves almost identically to a physical network interface in the HA pair. For aVLAN interface to successfully takeover a partner IP address, the partner’s adapter must be a memberof the same VLAN as the interface on the takeover system.
Example: An HA pair contains two storage systems, toaster1 and toaster2. toaster1 takes over toaster2 after toaster2 fails.
The /etc/rc file on toaster1 is as follows:
vlan create e0 10 vlan create e1 20 30 ifconfig e0-10 192.9.200.37 ifconfig e1-20 192.9.200.38 partner 192.9.200.41 ifconfig e1-30 partner 192.9.200.42
The /etc/rc file on toaster2 is as follows:
714 Data ONTAP® 8.2 Commands: Manual Page Reference for 7-Mode, Volume 1
vlan
vlan create e7 30 vlan create e8 10 20 ifconfig e7-30 192.9.200.42 ifconfig e8-20 192.9.200.41 partner 192.9.200.38 ifconfig e8-10 partner 192.9.200.37
The e0-10 VLAN interface on toaster1 is a dedicated interface. It services requests only for address192.9.200.37. After toaster1 takes over toaster2, this network interface is not available in partnermode.
The e1-20 VLAN interface on toaster1 is a shared interface. It services requests for address192.9.200.38 when toaster1 is not in takeover mode. When toaster1 is in takeover mode, the networkinterface services requests for both addresses, 192.9.200.38 and 192.9.200.41. When toaster1 is inpartner mode, this network interface shows up as the e8-20 interface in commands that involve networkinterface names.
The e1-30 interface on toaster1 is a standby VLAN. It does not service any request when toaster1 isnot in takeover mode. However, after toaster1 takes over toaster2, this network interface servicesrequests for address 192.9.200.42. When toaster1 is in partner mode, this network interface shows upas the e7-30 interface in commands that involve network interface names.
LIMITATIONSIn partner or takeover mode, the create, add and delete operations are disabled.
SEE ALSOna_sysconfig(1)
Data ONTAP® 8.2 Commands: Manual Page Reference for 7-Mode, Volume 1 715
vlan
vmservicesNAMEna_vmservices - services for Data ONTAP running in a virtual machine
SYNOPSISvmservices vsphere credential show
vmservices vsphere credential check
vmservices vsphere credential modify [-server server] [-username user] [-password passwd]
DESCRIPTIONThe vmservices vsphere credential show command displays the current vSphere authentication info(except the password). This consists of the vSphere server and username. vSphere authentication info isrequired for ‘‘sysconfig -p’’ to be able to gather information about the physical host machine.
The vmservices vsphere credential check command attempts to verify the current vSphereauthentication info with the vSphere host, indicating either success or a reason for failure.
Finally, the vmservices vsphere credential modify command is used to set the vSphere credentials:server, username, and password. The server identifies the vSphere server (either a vCenter server or anESX host) controlling this virtual machine. It can be either an IP address or (if name resolution enabled)a hostname. The username identifies a vSphere user (only ‘‘read-only’’ permissions required), and password is their password. If username is specified without password we will prompt for passwordwithout echoing. The password prompt is unavailable when using rsh.
SEE ALSOna_sysconfig(1)
716 Data ONTAP® 8.2 Commands: Manual Page Reference for 7-Mode, Volume 1
vmservices
volNAMEna_vol - Commands for managing volumes, displaying volume status, moving volumes, and copyingvolumes.
SYNOPSISvol command argument ...
DESCRIPTIONThe vol family of commands manages volumes. A volume is a logical unit of storage, containing a filesystem image and associated administrative options such as snapshot schedules. The disk space that avolume occupies (as well as the characteristics of the RAID protection it receives) is provided by an aggregate (see na_aggr(1)).
Prior to Data ONTAP 7.0, volumes and aggregates were fused into a single administrative unit, whereeach aggregate (RAID-level collection of disks) contained exactly one volume (logical, user-visible filesystem). The vol family of commands managed both the lower-level disk storage aspects and thehigher-level file system aspects of these tightly-bound volume/aggregate pairs. Such traditionalvolumes still exist for backwards compatibility.
Administrators can now decouple the management of logical file systems (volumes) from theirunderlying physical storage (aggregates). In particular, this new class of flexible volumes provides muchgreater freedom.
Aggregates can be created, destroyed, and managed independently (via the aggr command family).When an aggregate is created, it is a completely clean slate, free of any independent logical file systems(flexible volumes).
Refer to the Storage Management Guide for the maximum number of volumes that a storage system cansupport.
The administrator can take Snapshot copies, create SnapMirror relationships and perform Snaprestoreoperations on Flexvol volumes independently from all other FlexVol volumes contained in the sameaggregate.
Administrators can also move 7-mode flexible volumes within controllers to either re-balanceworkloads and/or adjust capacity utilization. As part of the move, any and all associated volumeattributes such as replica relationships, Snapshot relationships, MetroCluster relationships, thinprovisioning settings and clones will move nondisruptively. The move of FlexVol volumes can happenwhile servicing block IO to SCSI clients without application outage. vol move in 7-mode applies only tovolumes containing LUNs (excluding exported volumes for NFS & CIFS).
The vol move of 7-mode flexible volumes consists of three phases, namely, Setup Phase, Data CopyPhase, and the Cutover Phase.
Data ONTAP® 8.2 Commands: Manual Page Reference for 7-Mode, Volume 1 717
vol
To move FlexVol volumes to another aggregate, user should have the necessary permissions and theaggregate that the volume is being moved to must have the available space. The destination volumecould be in an aggregate that is laid out on a different drive type and(or) laid on drives of a differentsize and(or) has a different RAID property from the source volume.
Aggregates that contain one or more flexible volumes cannot be restricted or taken offline. In order torestrict or offline an aggregate, it is necessary to first destroy all of its contained flexible volumes. Thisguarantees that flexible volumes cannot disappear in unexpected and unclean ways, without having theirsystem state properly and completely cleaned up. This also makes sure that any and all protocols thatare being used to access the data in the flexible volumes can perform clean shutdowns. Aggregates thatare embedded in traditional volumes can never contain flexible volumes, so they do not operate underthis limitation.
Because FlexVol volumes (also called flexible volumes) are independent entities from their containingaggregates, their size may be both increased and decreased. FlexVol volumes may be as small as 20MB. The maximum size for a FlexVol volume depends on the volume format (32-bit or 64-bit) and thestorage system model. 32-bit FlexVol volumes are never larger than 16 TB. Refer to the SystemConfiguration Guide for the maximum sizes of 64-bit aggregates, which determines the maximum sizeof the volume they contain.
Clone volumes can be quickly and efficiently created. A clone volume is in effect a writable snapshotof a flexible volume. Initially, the clone and its parent share the same storage. More storage space isconsumed only as one volume or the other changes. Clones may be split from their parents, promotingthem to fully-independent flexible volumes that no longer share any blocks. A clone is always created inthe same aggregate as its parent. Clones of clones may be created.
FlexCache volumes can be quickly created using the vol command. FlexCache volumes are housed onthe local node, referred to as caching node, and are cached copies of separate volumes, which are on adifferent node, referred to as the origin node. Clients access the FlexCache volume as they wouldaccess any other volume exported over NFS. FlexCache must be licensed on the caching node but is notrequired for the origin node. On the origin node, option flexcache.enable must be set to "on" andoption flexcache.access must be appropriately set. The current version of FlexCache only supportsclient access via NFSv2 and NFSv3.
The vol command family is compatible in usage with earlier releases and can manage both traditionaland flexible volumes. Some new vol commands in this release apply only to flexible volumes. The newaggr command family provides control over RAIDlevel storage. The underlying aggregate of flexiblevolumes can only be managed through this command.
The vol command family has a special set of restrictions that only apply when it is executed on an Cluster-Mode deployment of Data ONTAP 8.0 and beyond via a special provision of the ClusterCLI. These restrictions are necessary in this specific product environment so as to mesh cleanly with theadditional cluster-wide databases. If these restrictions are encountered in this narrow use case, the volcommand family will provide detailed information about them.
The vol commands can create new volumes, destroy existing ones, change volume status, increase thesize of a volume (or decrease the size if it is a flexible volume), apply options to a volume, copy onevolume to another, display status, move volumes within controllers (flexible volumes only) and createand manage clones of flexible volumes.
718 Data ONTAP® 8.2 Commands: Manual Page Reference for 7-Mode, Volume 1
vol

Each volume has a name, which can contain letters, numbers, and the underscore character (_); the firstcharacter must be a letter or underscore.
A volume may be online, restricted, iron_restricted, or offline. When a volume is restricted, certainoperations are allowed (such as vol copy and parity reconstruction), but data access is not allowed.When a volume is iron_restricted, wafliron is running in optional commit mode on the volume and dataaccess is not allowed.
Volumes can be in combinations of the following states:
copyingThe volume is currently the target of active vol copy or snapmirror operations.
degradedThe volume’s containing aggregate contains at least one degraded RAID group that is not beingreconstructed.
flexThe volume is a flexible volume contained by an aggregate and may be grown or shrunk in 4Kincrements.
foreignThe disks that the volume’s containing aggregate contains were moved to the current node from anothernode.
growingDisks are in the process of being added to the volume’s containing aggregate.
initializingThe volume or its containing aggregate is in the process of being initialized.
invalidThe volume does not contain a valid file system. This typically happens only after an aborted vol copyoperation.
ironingA WAFL consistency check is being performed on the volume’s containing aggregate.
mirror degradedThe volume’s containing aggregate is a mirrored aggregate, and one of its plexes is offline orresynchronizing.
mirroredThe volume’s containing aggregate is mirrored and all of its RAID groups are functional.
needs checkA WAFL consistency check needs to be performed on the volume’s containing aggregate.
out-of-dateThe volume’s containing aggregate is mirrored and needs to be resynchronized.
Data ONTAP® 8.2 Commands: Manual Page Reference for 7-Mode, Volume 1 719
vol
partialAt least one disk was found for the volume’s containing aggregate, but two or more disks are missing.
raid0The volume’s containing aggregate consists of RAID-0 (no parity) RAID groups (V-Series andNetCache only).
raid4The volume’s containing aggregate consists of RAID-4 RAID groups.
raid_dpThe volume’s containing aggregate consists of RAID-DP (Double Parity) RAID groups.
reconstructAt least one RAID group in the volume’s containing aggregate is being reconstructed.
resyncingOne of the plexes of the volume’s containing mirrored aggregate is being resynchronized.
snapmirroredThe volume is a snapmirrored replica of another volume.
sv-restoringRestore-on-Demand is currently in progress on this volume. The volume is accessible, even though allof the blocks in the volume may not have been restored yet. Use the snapvault status command to viewthe restore progress.
trad The volume is what is referred to as a traditional volume. It is fused to an aggregate, and no othervolumes may be contained by this volume’s containing aggregate. This type is exactly equivalent to thevolumes that existed before Data ONTAP 7.0.
unrecoverableThe volume is a flexible volume that has been marked unrecoverable. Please contact Customer Supportif a volume appears in this state.
verifyingA RAID mirror verification operation is currently being run on the volume’s containing aggregate.
wafl inconsistentThe volume or its containing aggregate has been marked corrupted. Please contact Customer Support ifa volume appears in this state.
flexcacheThe volume is a FlexCache volume.
connectingThe volume is a FlexCache volume, and the network connection between this volume and the originvolume is not yet established.
720 Data ONTAP® 8.2 Commands: Manual Page Reference for 7-Mode, Volume 1
vol
USAGEThe following commands are available in the vol suite:
add destroy offline scrub autosize lang online size clone media_scrub options split container mirror rename status copy move restrict verify create
vol add volname[ -f ][ -n ][ -g raidgroup ]{ ndisks[@size]
| -d disk1 [ disk2 ... ] [ -d diskn [ diskn+1 ... ] ] }
Adds the specified set of disks to the aggregate portion of the traditional volume named volname, andgrows the user-visible file system portion of the traditional volume by that same amount of storage. Seethe na_aggr (1) man page for a description of the various arguments.
The vol add command fails if the chosen volname is a flexible volume. Flexible volumes require thatany operations on their containing aggregates be handled via the new aggr command suite. In thisspecific case, aggr add should be used.
vol autosize volname[ -m size [k|m|g|t] ][ -i size [k|m|g|t] ][ -minimum-size size [k|m|g|t] ][ -grow-threshold-percent <used space %> ] [ -shrink-threshold-percent <used space %> ] [ grow(on) | grow_shrink |off | reset ]
Volume autosize allows a flexible volume to automatically grow or shrink in size within an aggregate.Autogrow is useful when a volume is about to run out of available space, but there is space available inthe containing aggregate for the volume to grow. Autoshrink is useful in combination with autogrow. Itcan return unused blocks to the aggregate when the amount of data in a volume drops below a userconfigurable shrink threshold. Autoshrink can be enabled via the grow_shrink subcommand.Autoshrink without autogrow is not supported. The autogrow feature works together with snap autodelete to automatically reclaim space when a volume is about to get full. The volume option try_first controls the order in which these two reclaim policies are used.
By default autosize is disabled. The minimum autosize is set to the volume size, the maximum autosizeis set to 120% of the volume size, and the autosize increment is set to the lesser value of either 1GB or5% of the volume size at the time of command. The grow (or on) subcommand can be used to enableautogrow on a volume. The grow_shrink subcommand enables both autogrow and autoshrink. The reset subcommand resets the settings of volume autosize to defaults. The off subcommand can be usedto disable autosize.
Data ONTAP® 8.2 Commands: Manual Page Reference for 7-Mode, Volume 1 721
vol
The -m switch allows the user to specify the maximum size to which a flexible volume will be allowedto grow. When increasing the size of a volume, Data ONTAP uses the increment size specified with the -i switch as a guide; the actual size increase may be larger or smaller. You can specify the incrementamount either as a fixed size (in bytes) or as a percentage. The percentage is converted to a fixed sizethat is based on the current volume size. If the value of the -m parameter is invalidated by a manualvolume resize or is invalid when autosize is enabled, the maximum size is reset to 120% of the volumesize, and the autosize increment is reset to the lesser value of either 1GB or 5% of the volume size.
The -minimum-size switch allows you to specify the minimum size below which a flexible volume isnot allowed to shrink. The default value is the size of the volume at the time grow_shrink is enabled. Ifthe value of the -minimum-size parameter is invalidated by a manual volume resize or is invalid whenautosize is enabled, the minimum size is reset to the volume size. The -shrink-threshold-percentswitch allows you to specify the threshold percentage of used space below which the autoshrink actionis triggered. Similarly, if the used space in a volume exceeds the value specified with the -grow-threshold-percent switch, the autogrow action is triggered.
vol clone create clone_vol[ -s none | file | volume ]-b parent_vol [ parent_snap ]
The vol clone create command creates a flexible volume named clone_vol on the local node that is aclone of a backing flexible volume named parent_vol. A clone is a volume that is a writable snapshotof another volume. Initially, the clone and its parent share the same storage; more storage space isconsumed only as one volume or the other changes.
If a specific parent_snap within parent_vol is provided, it is chosen as the backing snapshot. Otherwise,the node will create a new snapshot named clone_parent_<UUID> (using a freshlygenerated UUID) in parent_vol for that purpose.
The parent_snap is locked in the parent volume, preventing its deletion until the clone is eitherdestroyed or split from the parent using the vol clone split start command.
Backing flexible volume parent_vol may be a clone itself, so "clones of clones" are possible. A clone isalways created in the same aggregate as its parent_vol.
The vol clone create command fails if the chosen parent_vol is currently involved in a vol clone splitoperation.
The vol clone create command fails if the chosen parent_vol is a traditional volume. Cloning is a newcapability that applies exclusively to flexible volumes.
By default, the clone volume is given the same storage guarantee as the parent volume; the default maybe overridden with the -s switch. Clone create with -s option and guarantee set to volume or none, the fractional_reserve will take the same value as that of the parent value. Clone create with -s option and guarantee set to file the fractional_reserve is set to 100. See the vol create command for moreinformation on the storage guarantee.
A clone volume may not be currently used as a target for vol copy or volume snapmirror. A clonevolume can be used as the target for qtree snapmirror.
722 Data ONTAP® 8.2 Commands: Manual Page Reference for 7-Mode, Volume 1
vol

vol clone split start volname
This command begins separating clone volume volname from its underlying parent. New storage isallocated for the clone volume that is distinct from the parent.
This process may take some time and proceeds in the background. Use the vol clone split statuscommand to view the command’s progress.
Both clone and parent volumes remain available during this process of splitting them apart. Uponcompletion, the snapshot on which the clone was based will be unlocked in the parent volume. Anysnapshots in the clone are removed at the end of processing. Use the vol clone split stop command tostop this process.
The vol clone split start command also fails if the chosen volname is a traditional volume. Cloning is anew capability that applies exclusively to flexible volumes.
vol clone split status [volname]
This command displays the progress in separating clone volumes from their underlying parent volumes.If volname is specified, then the splitting status is provided for that volume. If no volume name appearson the command line, then status for all clone splitting operations that are currently active is provided.
The vol clone split status command fails if the chosen volname is a traditional volume. Cloning is anew capability that applies exclusively to flexible volumes.
vol clone split estimate [volname]
This command displays an estimate of the free disk space required in the aggregate to split the indicatedclone volume from its underlying parent volume. The value reported may differ from the space actuallyrequired to perform the split, especially if the clone volume is changing when the split is beingperformed.
vol clone split stop volname
This command stops the process of separating a clone from its parent volume. All of the blocks thatwere formerly shared between volname and its backing volume that have already been split apart by the vol clone split start will remain split apart.
The vol clone split stop command fails if the chosen volname is a traditional volume. Cloning is a newcapability that applies exclusively to flexible volumes.
vol container volname
This command displays the name of the aggregate that contains flexible volume volname.
The vol container command fails if asked to operate on a traditional volume, as its tightly-boundaggregate portion cannot be addressed independently.
vol copy abort operation_number | all
Data ONTAP® 8.2 Commands: Manual Page Reference for 7-Mode, Volume 1 723
vol

This command terminates volume copy operations. The operation_number parameter in the vol copy abort command specifies which operation to terminate. If all is specified, all volume copy operationsare terminated.
vol copy start [ -p {inet | inet6 } ] [ -S | -s snapshot ] source destination
Copies all data, including snapshots, from one volume to another. If the -S flag is used, the commandcopies all snapshots in the source volume to the destination volume. To specify a particular snapshot tocopy, use the -s flag followed by the name of the snapshot. If neither the -S nor -s flag is used in thecommand, the node automatically creates a distinctively-named snapshot at the time the vol copy startcommand is executed and copies only that snapshot to the destination volume.
The -p option is used for selecting the IP connection mode. The value for this argument can be inet or inet6. When the value is inet6, the connection will be established using IPv6 addresses only. If there isno IPv6 address configured for the destination, then the connection will fail. When the value is inet, theconnection will be established using IPv4 addresses only. If there is no IPv4 address configured on thedestination, then the connection will fail. When this argument is not specified, then the connection willbe tried using both IPv6 and IPv4 addresses. inet6 mode will have higher precedence than inet mode. Ifa connection request using inet6 mode fails, the connection will be retried using inet mode.
This option is not meaningful when an IP address is specified instead of a hostname. If the IP addressformat and connection mode doesn’t match, the operation prints an error message and aborts.
The source and destination volumes must either both be traditional volumes or both be flexiblevolumes. The vol copy command will abort if an attempt is made to copy between different volumetypes.
The source and destination volumes can be on the same node or on different nodes. If the source ordestination volume is on a node other than the one on which the vol copy start command was entered,specify the volume name in the node_name:volume_name format.
Note that the source and destination volumes must be of the same type, either both flexible or bothtraditional.
The nodes involved in a volume copy must meet the following requirements for the vol copy startcommand to be completed successfully:
The source volume must be online and the destination volume must be offline.
If data is copied between two nodes, each node must be defined as a trusted host of the other node. Thatis, the node’s name must be in the /etc/hosts.equiv file of the other node. If one node is not in the/etc/hosts.equiv file of the other node then "Permission denied" error message is displayed to the user.
If data is copied on the same node, localhost must be included in the node’s /etc/hosts.equiv file. Also,the loopback address must be in the node’s /etc/hosts file. Otherwise, the node cannot send packets toitself through the loopback address when trying to copy data.
The usable disk space of the destination volume must be greater than or equal to the usable disk spaceof the source volume. Use the df pathname command to see the amount of usable disk space of aparticular volume.
724 Data ONTAP® 8.2 Commands: Manual Page Reference for 7-Mode, Volume 1
vol
Each vol copy start command generates two volume copy operations: one for reading data from thesource volume and one for writing data to the destination volume. Each node supports up to foursimultaneous volume copy operations.
vol copy status [ operation_number]
Displays the progress of one or all active volume copy operations, if any. The operations are numberedfrom 0 through 3. If no operation_number is specified, then status for all active vol copy operations isprovided.
vol copy throttle [ operation_number ] value
This command controls the performance of the volume copy operation. The value ranges from 10 (fullspeed) to 1 (one-tenth of full speed). The default value is maintained in the node’s vol.copy.throttleoption and is set 10 (full speed) at the factory. The performance value can be applied to an operationspecified by the operation_number parameter. If an operation number is not specified, the commandapplies to all active volume copy operations.
Use this command to limit the speed of volume copy operations if they are suspected to be causingperformance problems on a node. In particular, the throttle is designed to help limit the volume copy’sCPU usage. It cannot be used to fine-tune network bandwidth consumption patterns.
The vol copy throttle command only enables the speed of a volume copy operation that is in progressto be set. To set the default volume copy speed to be used by future volume copy operations, use the options command to set the vol.copy.throttle option.
vol create flex_volname[ -l language_code ][ -s none | file | volume ]aggrname size
vol create trad_volname[ -l language_code ][-f] [-n] [-m][-L [compliance | enterprise]][-t raidtype ] [-r raidsize ]{ ndisks[@size]
| -d disk1 [ disk2 ... ] [ -d diskn [ diskn+1 ... ] ] }
vol create flexcache_volname[ -l language_code ]aggrname size[ size [k|m|g|t] ][ -S remotehost:remotevolume ]
Creates a flexible, traditional, or FlexCache volume.
Data ONTAP® 8.2 Commands: Manual Page Reference for 7-Mode, Volume 1 725
vol
If the first format is used, a flexible volume named flex_volname is created in the storage provided byaggregate aggrname. The size argument specifies the size of the flexible volume being created. It is anumber, optionally followed by k, m, g, or t, denoting kilobytes, megabytes, gigabytes, or terabytesrespectively. If none of the above letters is used, the unit defaults to bytes (and is rounded up to thenearest 4 KB). FlexVol volumes (also called flexible volumes) may be as small as 20 MB. Themaximum size for a FlexVol volume depends on the volume format (32-bit or 64-bit), which isinherited from containing aggregate, and the storage system model. 32-bit FlexVol volumes are neverlarger than 16 TB. Refer to the System Configuration Guide for the maximum sizes of 64-bitaggregates, which determines the maximum size of the volume they contain.
The optional -s switch controls whether the volume is guaranteed some amount of disk space. Thedefault value is volume, which means that the entire size of the volume will be preallocated. The filevalue means that space will be preallocated for all the space-reserved files and LUNs within the volume.Storage is not preallocated for files and LUNs that are not spacereserved. Writes to these can fail if theunderlying aggregate has no space available to store the written data. This value can be set if fractional_reserve is 100. Note that a guarantee of file will no longer be supported in a future releaseof Data ONTAP. The none value means that no space will be preallocated, even if the volume containsspace-reserved files or LUNs; if the aggregate becomes full, space will not be available even forspace-reserved files and LUNs within the volume. Note that the file setting allow for overbooking thecontaining aggregate aggrname. As such, it will be possible to run out of space in the new flexiblevolume even though it has not yet consumed its stated size. Use this setting carefully, and take care toregularly monitor space utilization in overbooking situations.
To create a clone of a flexible volume, use the vol clone create command.
If the underlying aggregate aggrname upon which the flexible volume is being created is a SnapLockaggregate, the flexible volume will be a SnapLock volume and automatically inherit the SnapLock type,either Compliance or Enterprise, from the aggregate.
If the second format is used, a traditional volume named trad_volname is created using the specified setof disks. See the na_aggr (1) man page for a description of the various arguments to this traditionalform of volume creation.
If the third format is used, a FlexCache volume named flexcache_volname is created in the aggreagate aggrname. The FlexCache volume is created for the volume remotevolume located on the node remotehost. This option is only valid if FlexCache functionality is licensed. If the size is not specifiedthen the FlexCache volume will be created with autogrow enabled. The original size of the volume willbe the smallest possible size of a flexible volume, but the size will automatically grow as more spaces isneeded in the FlexCache volume to improve performance by avoiding evictions. Although the size isleft as an optional parameter, the recommended way of using FlexCache volumes is with autogrowenabled.
If the -l language_code argument is used, the node creates the volume with the language specified bythe language code. The default is the language used by the node’s root volume.
Language codes are:
C (POSIX) ar (Arabic) cs (Czech) da (Danish) de (German)
726 Data ONTAP® 8.2 Commands: Manual Page Reference for 7-Mode, Volume 1
vol
en (English) en_US (English (US)) es (Spanish) fi (Finnish) fr (French) he (Hebrew) hr (Croatian) hu (Hungarian) it (Italian) ja (Japanese euc-j) ja_JP.PCK (Japanese PCK (sjis)) ko (Korean) no (Norwegian) nl (Dutch) pl (Polish) pt (Portuguese) ro (Romanian) ru (Russian) sk (Slovak) sl (Slovenian) sv (Swedish) tr (Turkish) zh (Simplified Chinese) zh.GBK (Simplified Chinese (GBK)) zh_TW (Traditional Chinese euc-tw) zh_TW.BIG5 (Traditional Chinese Big 5)
To use UTF-8 as the NFS character set, append ‘’.UTF-8’’ to the above language codes.
vol create will create a default entry in the /etc/exports file unless the option nfs.export.auto-update isdisabled.
To create a SnapLock volume, specify -L flag with vol create command. This flag is only supported ifeither SnapLock Compliance or SnapLock Enterprise is licensed. The type of the SnapLock volumecreated, either Compliance or Enterprise, is determined by the type of installed SnapLock license. Ifboth SnapLock Compliance and SnapLock Enterprise are licensed, use -L compliance or -L enterprise to specify the desired volume type.
vol destroy { volname | plexname } [ -f ]
Destroys the (traditional or flexible) volume named volname, or the plex named plexname within atraditional mirrored volume.
Before destroying the volume or plex, the user is prompted to confirm the operation. The -f flag can beused to destroy a volume or plex without prompting.
It is acceptable to destroy flexible volume volname even if it is the last one in its containing aggregate.In that case, the aggregate simply becomes devoid of user-visible file systems, but fully retains all itsdisks, RAID groups, and plexes.
If a plex within a traditional mirrored volume is destroyed in this way, the traditional volume is left withjust one plex, and thus becomes unmirrored.
Data ONTAP® 8.2 Commands: Manual Page Reference for 7-Mode, Volume 1 727
vol
All of the disks in the plex or traditional volume destroyed by this operation become spare disks.
Only offline volumes and plexes can be destroyed.
vol destroy will delete all entries belonging to the volume in the /etc/exports file unless the option nfs.export.auto-update is disabled.
vol lang [ volname [ language_code ] ]
Displays or changes the character mapping on volname.
If no arguments are given, vol lang displays the list of supported languages and their language codes.
If only volname is given, it displays the language of the specified volume.
If both volname and language-code are given, it sets the language of the specified volume to the givenlanguage. This will require a reboot to fully take effect.
vol media_scrub status [ volname | plexname | groupname -s disk-name ][-v]
This command prints the status of the media scrub on the named traditional volume, plex, RAID group,or spare drive. If no name is given, then status is given on all RAID groups and spare drives currentlyrunning a media scrub. The status includes a percent-complete and the suspended status (if any).
The -v flag displays the date and time at which the last full media scrub completed, the date and time atwhich the current instances of media scrub started, and the current status of the named traditionalvolume, plex RAID group, or spare drive. This is provided for all RAID groups if no name is given.
The vol media_scrub status command fails if the chosen volname is a flexible volume. Flexiblevolumes require that any operations having directly to do with their containing aggregates be handledvia the new aggr command suite. In this specific case, the administrator should use the aggr media_scrub status command.
vol mirror volname[ -n ][ -v victim_volname ][ -f ][ -d disk1 [ disk2 ... ] ]
Mirrors the currently-unmirrored traditional volume volname, either with the specified set of disks orwith the contents of another unmirrored traditional volume victim_volname, which will be destroyed inthe process.
The vol mirror command fails if either the chosen volname or victim_volname are flexible volumes.Flexible volumes require that any operations having directly to do with their containing aggregates behandled via the new aggr command suite.
For more information about the arguments used for this command, see the information for the aggr mirror command on the na_aggr(1) man page.
728 Data ONTAP® 8.2 Commands: Manual Page Reference for 7-Mode, Volume 1
vol
vol move start ndmsrcvol dstaggr [ -k ] [ -m | -r num_cutover_attempts ] [ -w cutover_window] [ -o] [ -d ]
Starts the vol move of volume named ndmsrcvol to the destination aggregate named dstaggr. Theexecution sequence starts with a series of checks on the controller, source volume, source anddestination aggregates. If all the checks are successful, the move starts with Setup phase in which aplaceholder volume in the destination aggregate is created, and baseline transfer from source todestination volume initiated. This is followed by Data Copy phase wherein the destination volumerequests successive snapmirror updates from source volume to synchronize itself completely with thesource volume. Finally the move completes with the cutover phase.
By default, vol move will initiate cutover automatically, unless invoked with an optional -m thatdisables automatic cutover. With the -m option, vol move continues to trigger snapmirror updates fromsource volume and the user can initiate cutover at any time with the vol move cutover command.
The duration of the cutover window can be specified by the -w option. The minimum, default andmaximum values for cutover window are respectively 30, 60 and 300. The number of cutover attemptsis provided by an optional -r. The minimum, default and maximum values for cutover attempts are 1, 3and 25. If user has not specified -m option and cutover cannot be completed in the specified number ofattempts, vol move will pause. The user may either abort or resume vol move with/without -m option.After successful move, the source volume, by default, will be destroyed unless the move was startedwith -k option.
Before executing cutover, vol move performs a series of checks, similar to the checks during theinitialization phase, to verify that the conditions are favorable to cutover. If any of the checks fail, volmove pauses with an EMS message that indicates the exact reason for pause. The user may wait for theunfavorable event to complete and resume vol move thereafter.
The -o option is provided to ignore the redundancy characteristics of aggregates in MetroClusterenvironment when a vol move is initiated from the mirrored source aggregate to an unmirroreddestination aggregate. In other words, without -o option, vol move will not start when the redundancycharacteristics of the two aggregates are different and if started with -o option, will pause beforeentering cutover if the redundancy characteristics of the two aggregates are different.
The -d option is used to perform dry run. When issued with this option, vol move sub system only runsa series of checks without starting vol move. Appropriate error messages are displayed in case anychecks fail.
vol move pause ndmsrcvol
Pauses the move of the volume named ndmsrcvol if it is in the Setup or Data Copy phase. The pauseaborts the present active transfer, if any, and pauses vol move. The command returns an error if volmove is in the cutover phase.
vol move resume ndmsrcvol [ -k ] [ -m | -r num_cutover_attempts ] [ -w cutover_window ] [ -o ]
Resume the move of volume named ndmsrcvol that has been paused. On resuming, vol move runs thesame set of checks that were run at initialization phase. The user can add to or change the optionspreviously specified in vol move start. Options -k and -o, if specified in vol move start command,cannot be undone. The user may switch from automatic to manual cutover by resuming vol move with -m option. Similarly, specifying -r will enable vol move to switch from manual to automatic cutover.
Data ONTAP® 8.2 Commands: Manual Page Reference for 7-Mode, Volume 1 729
vol
vol move abort ndmsrcvol
Aborts the move of volume named ndmsrcvol. The current data transfer is aborted and placeholderdestination volume destroyed. An EMS message is logged. Vol move cannot be aborted during cutoverphase.
vol move status [ ndmsrcvol ] [-v ]
View the status of the vol move operation of the volume named ndmsrcvol.
This command returns the following data:
vol move source volume name. Destination aggregate name. Length of Cutover window. Number of Cutover attempts State of the move;
The state could be one of the following:
Setup Move Cutover Abort
If the move had been paused, the state would be one of the following:
Setup (paused) Move (paused)
The -v option returns additional data like:
Amount of data (KB) and time taken for last completed transfer. Amount of data (KB) currently being transferred.
vol move cutover ndmsrcvol [ -w cutover_window ]
Initiates manual cutover of volume named ndmsrcvol. The command returns error if move wasconfigured in automatic cutover. The move will pause if cutover could not be completed. The user maychoose to resume the move in manual cutover or automatic cutover or abort vol move using vol move abort command.
Manual cutover can be initiated if the move was started or resumed with -m option. Manual cutover isforbidden when move is paused or in process of getting aborted. The duration of the cutover windowcan be specified by the -w option, the minimum and default value for which is 60 seconds.
vol offline { volname | plexname }[ -t cifsdelaytime ]
Takes the volume named volname (or the plex named plexname within a traditional volume) offline.The command takes effect before returning. If the volume is already in restricted or iron_restricted state,then it is already unavailable for data access, and much of the following description does not apply.
730 Data ONTAP® 8.2 Commands: Manual Page Reference for 7-Mode, Volume 1
vol
The current root volume may not be taken offline. Neither may a volume marked to become root (byusing vol options volname root) be taken offline.
If a volume contains CIFS shares, users should be warned before taking the volume offline. Use the -toption to do this. The cifsdelaytime argument specifies the number of minutes to delay before taking thevolume offline, during which time CIFS users are warned of the pending loss of service. A time of 0means that the volume should be taken offline immediately and without warning. CIFS users can losedata if they are not given a chance to terminate applications gracefully.
If a plexname is specified, the plex must be part of a mirrored traditional volume, and both plexes mustbe online. Prior to taking a plex offline, the system will flush all internally-buffered data associated withthe plex and create a snapshot that is written out to both plexes. The snapshot allows for efficientresynchronization when the plex is subsequently brought back online.
A number of operations being performed on the volume in question can prevent vol offline fromsucceeding for various lengths of time. If such operations are found, there will be a one-second wait forsuch operations to finish. If they do not, the command is aborted.
A check is also made for files on the volume opened by internal ONTAP processes. The command isaborted if any are found.
The vol offline command fails if plexname resides not in a traditional mirrored volume, but in anindependent aggregate. Flexible volumes require that any operations having directly to do with theircontaining aggregates be handled via the new aggr command suite. In this specific case, theadministrator should consult the na_aggr(1) man page for a more detailed description of the aggr offline command.
vol online { volname [ -f ] | plexname }
This command brings the volume named volname (or the plex named plexname within a traditionalvolume) online. It takes effect immediately. If there are CIFS shares associated with the volume, theyare enabled.
If a volname is specified, it must be currently offline, restricted, or in a foreign aggregate. If volnamebelongs to a foreign aggregate, the aggregate will be made native before being brought online. A foreign aggregate is an aggregate that consists of disks moved from another node and that has neverbeen brought online on the current node. Aggregates that are not foreign are considered native.
If the volume is inconsistent but has not lost data, the user will be cautioned and prompted beforebringing it online. The -f flag can be used to override this behavior. It is advisable to run WAFL_check(or do a snapmirror initialize in case of a replica volume) prior to bringing an inconsistent volumeonline. Bringing an inconsistent volume online increases the risk of further file system corruption. If thevolume is inconsistent and has experienced possible loss of data, it cannot be brought online unlessWAFL_check (or snapmirror initialize) has been run on the volume.
If the volume is a flexible volume and the containing aggregate cannot honour the space guaranteesrequired by this volume, the volume online operation will fail. The -f flag can be used to override thisbehavior. It is not advisable to use volumes with their space guarantees disabled. Lack of free space canlead to failure of writes which in turn can appear as data loss to some applications.
Data ONTAP® 8.2 Commands: Manual Page Reference for 7-Mode, Volume 1 731
vol
If a plexname is specified, the plex must be part of an online, mirrored traditional volume. The systemwill initiate resynchronization of the plex as part of online processing.
The vol online command fails if plexname resides not in a traditional volume, but in an independentaggregate. Flexible volumes require that any operations having directly to do with their containingaggregates be handled via the new aggr command suite. In this specific case, the administrator shouldconsult the na_aggr(1) man page for a more detailed description of the aggr online command.
vol options volname [ optname optval ]
This command displays the options that have been set for volume volname, or sets the option named optname of the volume named volname to the value optval.
The command remains effective after the node is rebooted, so there is no need to add vol optionscommands to the /etc/rc file. Some options have values that are numbers. Other options have values thatmay be on (which can also be expressed as yes, true, or 1) or off (which can also be expressed as no, false, or 0). A mixture of uppercase and lowercase characters can be used when typing the value of anoption. The vol status command displays the options that are set per volume. The root option is specialin that it does not have a value. To set the root option, use this syntax:
vol options volname root
There are four categories of options handled by this command. The first category is the set of optionsthat are defined for all volumes, both flexible and traditional, since they have to do with the volume’suser-visible file system aspects. The second category is the set of aggregate-level (that is, disk andRAID) options that only apply to traditional volumes and not to flexible volumes. The third category isthe set of options that are applicable only to flexible volumes and not to traditional volumes. The fourthcategory is the set of options that are applicable only to FlexCache volumes.
This section documents all four categories of options. It begins by describing, in alphabetical order,options common to all volumes (both flexible and traditional) and their possible values:
convert_ucode on | off
Setting this option to on forces conversion of all directories to UNICODE format when accessed fromboth NFS and CIFS. By default, it is set to off, in which case access from CIFS causes conversion ofpre-4.0 and 4.0 format directories. Access from NFS causes conversion of 4.0 format directories. Thedefault setting is off.
create_ucode on | off
Setting this option to on forces UNICODE format directories to be created by default, both from NFSand CIFS. By default, it is set to off, in which case all directories are created in pre-4.0 format, and thefirst CIFS access will convert it to UNICODE format. The default setting is off.
extent on | space_optimized | off
Setting this option to on or space_optimized enables extents in the volume. This causes applicationwrites to be written in the volume as a write of a larger group of related data blocks called an extent.Using extents may help workloads that perform many small random writes followed by large sequentialreads. However, using extents may increase the amount of disk operations performed on the controller,so this option should only be used where this trade-off is desired. If the option is set to space_optimized then the reallocation update will not duplicate blocks from Snapshot copies into the
732 Data ONTAP® 8.2 Commands: Manual Page Reference for 7-Mode, Volume 1
vol
active file system, and will result in conservative space utilization. Using space_optimized may beuseful when the volume has Snapshot copies or is a SnapMirror source, when it can reduce the storageused in the Flexible Volume and the amount of data that SnapMirror needs to move on the next update.The space_optimized value can only be used for Flexible volumes and can result in degraded readperformance of Snapshot copies. The default value is off; extents are not used.
fractional_reserve <pct>
This option changes the amount of space reserved for overwrites of reserved objects (LUNs, files) in avolume. The option is set to 100 by default with guarantee set to file or volume. A setting of 100 meansthat 100% of the required reserved space will actually be reserved, so the objects are fully protected foroverwrites. The option is set to 0 by default with guarantee set to none. The value can be either 0 or100 when guarantee is set to volume or none. If guarantee is set to file, 100 is the only allowed value.Using a value of 0 indicates that no space is reserved for overwrites. This returns the extra space to theavailable space for the volume, decreasing the total amount of space used. However, this does leave theprotected objects in the volume vulnerable to out of space errors. If the percentage is set to 0%, theadministrator must monitor the space usage on the volume and take corrective action.
fs_size_fixed on | off
This option causes the file system to remain the same size and not grow or shrink when a SnapMirroredvolume relationship is broken, or when a vol add is performed on it. This option is automatically set tobe on when a volume becomes a SnapMirrored volume. It will remain on after the snapmirror breakcommand is issued for the volume. This allows a volume to be SnapMirrored back to the source withoutneeding to add disks to the source volume. If the volume is a traditional volume and the size is largerthan the file system size, turning off this option will force the file system to grow to the size of thevolume. If the volume is a flexible volume and the volume size is larger than the file system size,turning off this option will force the volume size to become equal to the file system size. The defaultsetting is off.
guarantee file | volume | none
This option controls whether the volume is guaranteed some amount of disk space. The default value is volume, which means that the entire size of the volume will be preallocated. The file value means thatspace will be preallocated for all the space-reserved files and LUNs within the volume. Storage is notpreallocated for files and LUNs that are not space-reserved. Writes to these can fail if the underlyingaggregate has no space available to store the written data. This value can be set if fractional_reserve is100. Note that a guarantee of file will no longer be supported in a future release of Data ONTAP. The none value means that no space will be preallocated, even if the volume contains space-reserved files orLUNs; if the aggregate becomes full, space will not be available even for space-reserved files and LUNswithin the volume. Note that the file setting allows for overbooking the containing aggregate aggrname. As such, it will be possible to run out of space in the new flexible volume even though it hasnot yet consumed its stated size. Use this setting carefully, and take care to regularly monitor spaceutilization in overbooking situations. For flexible root volumes, to ensure that system files, log files, andcores can be saved, the guarantee must be volume. This is to ensure support of the appliance bycustomer support, if a problem occurs.
Disk space is preallocated when the volume is brought online and, if not used, returned to the aggregatewhen the volume is brought offline. It is possible to bring a volume online even when the aggregate hasinsufficient free space to preallocate to the volume. In this case, no space will be preallocated, just as ifthe none option had been selected. The vol options command will display the guarantee type, and the
Data ONTAP® 8.2 Commands: Manual Page Reference for 7-Mode, Volume 1 733
vol
vol status command will display information about disabled guarantees.
maxdirsize number
Sets the maximum size (in KB) to which a directory can grow. The default maximum directory size ismodel-dependent, and optimized for the size of system memory. You can increase it for a specificvolume by using this option, but doing so could impact system performance. Do not increase themaxdirsize without consulting with customer support. When a user tries to create a file in a directorythat is at the limit, the system returns an ENOSPC error and fails the create.
minra on | off
If this option is on, the node performs minimal file read-ahead on the volume. By default, this option is off, causing the node to perform speculative file read-ahead when needed. Using speculative read-aheadwill improve performance with most workloads, so enabling this option should be used with caution.
no_atime_update on | off
If this option is on, it prevents the update of the access time on an inode when a file is read. This optionis useful for volumes with extremely high read traffic, since it prevents writes to the inode file for thevolume from contending with reads from other files. It should be used carefully. That is, use this optionwhen it is known in advance that the correct access time for inodes will not be needed for files on thatvolume. The default setting is off.
no_i2p on | off
If this option is on, it disables inode to parent pathname translations on the volume. The default settingis off.
nosnap on | off
If this option is on, it disables automatic snapshots on the volume. The default setting is off.
nosnapdir on | off
If this option is on, it disables the visible .snapshot directory that is normally present at client mountpoints, and turns off access to all other .snapshot directories in the volume. The default setting is off.
nvfail on | off
If this option is on, the node performs additional status checking at boot time to verify that the NVRAMis in a valid state. This option is useful when storing database files. If the node finds any problems,database instances hang or shut down, and the node sends error messages to the console to alertadministrators to check the state of the database. The default setting is off.
read_realloc on | space_optimized | off
Setting this option to on or space_optimized enables read reallocation in the volume. This results in theoptimization of file layout by writing some blocks to a new location on disk. The layout is updated onlyafter the blocks have been read because of a user read operation, and only when updating their layoutwill provide better read performance in the future. Using read reallocation may help workloads thatperform a mixture of random writes and large sequential reads. If the option is set to space_optimizedthen the reallocation update will not duplicate blocks from Snapshot copies into the active file system,
734 Data ONTAP® 8.2 Commands: Manual Page Reference for 7-Mode, Volume 1
vol
and will result in conservative space utilization. Using space_optimized may be useful when thevolume has Snapshot copies or is a SnapMirror source, when it can reduce the storage used in theFlexible Volume and the amount of data that snapmirror needs to move on the next update. The space_optimized value can only be used for Flexible Volumes and can result in degraded readperformance of Snapshot copies. The default value is off; read reallocation is not used.
root [ -f ]
The volume named volname will become the root volume for the node on the next reboot. This optioncan be used on one volume only at any given time. The existing root volume will become a non-rootvolume after the reboot.
Until the system is rebooted, the original volume will continue to show root as one of its options, andthe new root volume will show diskroot as an option. In general, the volume that has the diskrootoption is the one that will be the root volume following the next reboot.
The only way to remove the root status of a volume is to set the root option on another volume.
The act of setting the root status on a flexible volume will also move the HA mailbox disk informationto disks on that volumes. A flexible volume must meet the minimum size requirement for the appliancemodel, and also must have a space guarantee of volume, before it can be designated to become the rootvolume on the next reboot. This is to ensure support of the appliance by customer support, because theroot volume contains system files, log files, and in the event of reboot panics, core files.
Since setting a volume to be a root volume is an important operation, the user is prompted if they wantto continue or not. If system files are not detected on the target volume, then the set root operation willfail. You can override this with the -f flag, but upon reboot, the appliance will need to be reconfiguredvia setup.
Note that it is not possible to set the root status on a SnapLock volume.
schedsnapname create_time | ordinal
If this option is ordinal, the node formats scheduled snapshot names using the type of the snapshot andits ordinal (such as hourly.0) If the option is create_time, the node formats scheduled snapshot namesbase on the type of the snapshot and the time at which it was created, such as hourly.2005-04-21_1100.The default setting is ordinal.
snaplock_compliance
This read only option indicates that the volume is a SnapLock Compliance volume. Volumes can onlybe designated SnapLock Compliance volumes at creation time.
snaplock_default_period min | max | infinite <count>d|m|y
This option is only visible for SnapLock volumes and specifies the default retention period that will beapplied to files committed to WORM state without an associated retention period.
If this option value is min, then snaplock_minimum_period is used as the default retention period. Ifthis option value is max, then snaplock_maximum_period is used as the default retention period. If thisoption value is infinite, then a retention period that never expires will be used as the default retentionperiod.
Data ONTAP® 8.2 Commands: Manual Page Reference for 7-Mode, Volume 1 735
vol
The retention period can also be explicitly specified as a number followed by a suffix. The validsuffixes are s for seconds, h hours, d for days, m for months and y for years. For example, a value of 6m represents a retention period of 6 months. The maximum valid retention period is 70 years.
snaplock_enterprise
This read only option indicates that the volume is a SnapLock Enterprise volume. Volumes can only bedesignated SnapLock Enterprise volumes at creation time.
snaplock_maximum_period infinite | <count>d|m|y
This option is only visible for SnapLock volumes and specifies the maximum allowed retention periodfor files committed to WORM state on the volume. Any files committed with a retention period longerthan this maximum will be assigned this maximum value.
If this option value is infinite then files that have retention periods that never expire may be committedto the volume.
Otherwise, the retention period is specified as a number followed by a suffix. The valid suffixes are sfor seconds, h hours, d for days, m for months and y for years. For example, a value of 6m represents aretention period of 6 months. The maximum allowed retention period is 70 years. This option is notapplicable while extending retention period of an already committed WORM file.
snaplock_minimum_period infinite | <count>d|m|y
This option is only visible for SnapLock volumes and specifies the minimum allowed retention periodfor files committed to WORM state on the volume. Any files committed with a retention period shorterthan this minimum will be assigned this minimum value.
If this option value is infinite, then every file committed to the volume will have a retention period thatnever expires.
Otherwise, the retention period is specified as a number followed by a suffix. The valid suffixes are are s for seconds, h hours, d for days, m for months and y for years. For example, a value of 6m representsa retention period of 6 months. The maximum allowed retention period is 70 years. This option is notapplicable while extending retention period of an already committed WORM file.
snaplock_autocommit_period none | <count> h|d|m|y
This options is visible for SnapLock volumes only. This option defines the criteria for committing filesto WORM on a SnapLock volume by the autocommit scanner. The h, d, m, y denote hours, days,months and years respectively. The default value of this option is none that corresponds to autocommitbeing disabled in the SnapLock volume. The minimum autocommit period on a SnapLock volume is 2h. Any valid value other than none, specified in hours (h), days (d), months (m) or years (y) wouldtrigger the autocommit scanner on the Snaplock volume.
snapmirrored off
If SnapMirror is enabled, the node automatically sets this option to on. Set this option to off ifSnapMirror is no longer to be used to update the mirror. After setting this option to off, the mirrorbecomes a regular writable volume. This option can only be set to off; only the node can change thevalue of this option from off to on.
736 Data ONTAP® 8.2 Commands: Manual Page Reference for 7-Mode, Volume 1
vol
snapshot_clone_dependency on | off
Setting this option to on will unlock all initial and intermediate backing snapshots for all inactive LUNclones. For active LUN clones, only the backing snapshot will be locked. If the option is off the backingsnapshot will remain locked until all intermediate backing snapshots are deleted.
try_first volume_grow | snap_delete
A flexible volume can be configured to automatically reclaim space in case the volume is about to runout of space, by either increasing the size of the volume or deleting snapshots in the volume. If thisoption is set to volume_grow ONTAP will try to first increase the size of volume before deletingsnapshots to reclaim space. If the option is set to fBsnap_delete ONTAP will first automatically deletesnapshots and in case of failure to reclaim space will try to grow the volume.
svo_allow_rman on | off
If this option is on, the node performs SnapValidator for Oracle data integrity checks that arecompatible with volumes that contain Oracle RMAN backup data. If the node finds any problems, thewrite will be rejected if the svo_reject_errors option is set to on. The default setting is off.
svo_checksum on | off
If this option is on, the node performs additional SnapValidator for Oracle data integrity checksumcalculations of all writes on the volume. If the node finds any problems, the write will be rejected if the svo_reject_errors option is set to on. The default setting is off.
svo_enable on | off
If this option is on, the node performs additional SnapValidator for Oracle data integrity checking of alloperations on the volume. If the node finds any problems, the operation will be rejected if the svo_reject_errors option is set to on. The default setting is off.
svo_reject_errors on | off
If this option is on, the node will return an error to the host and log the error if any of the SnapValidatorfor Oracle checks fail. If the option is off, the error will be logged only. The default setting is off.
The second category of options managed by the vol options command comprises the set of things thatare closely related to aggregate-level (that is, disk and RAID) qualities, and are thus only accessible viathe vol options command when dealing with traditional volumes. Note that these aggregate-leveloptions are also accessible via the aggr family of commands. The list of these aggregate-level options isprovided below in alphabetical order:
ignore_inconsistent on | off
If this option is set to on, then aggregate-level inconsistencies that would normally be consideredserious enough to keep the associated volume offline are ignored during booting. The default setting is off.
raidsize number
Data ONTAP® 8.2 Commands: Manual Page Reference for 7-Mode, Volume 1 737
vol
The -r raidsize argument specifies the maximum number of disks in each RAID group in the traditionalvolume. The maximum and default values of raidsize are platform-dependent, based on performanceand reliability considerations.
raidtype raid4 | raid_dp | raid0
The -t raidtype argument specifies the type of RAID group(s) to be used to create the traditionalvolume. The possible RAID group types are raid4 for RAID-4, raid_dp for RAID-DP (Double Parity),and raid0 for simple striping without parity protection. Setting the raidtype on V-Series systems is notpermitted; the default of raid0 is always used.
resyncsnaptime number
This option is used to set the mirror resynchronization snapshot frequency (in minutes). The defaultvalue is 60 minutes.
For new volumes, options convert_ucode, create_ucode, and maxdirsize get their values from the rootvolume. If the root volume doesn’t exist, they get the default values.
The following are the options that only apply to flexible volumes:
nbu_archival_snap on | off [-f]
Setting this option to on for a volume enables archival snapshot copies for SnapVault for NetBackup. Ifthis option is set to off, no archival snapshot copy is taken after a backup. Drag-and-drop restores areonly available for those backups that are captured in archival snapshot copies. Enabling or re-enablingarchival snapshot copies will only be permitted on a volume if no SnapVault for NetBackup backupsexist on that volume. If the nbu_archival_snap vol option is not configured at the time the firstSnapVault for NetBackup backup starts for that volume, the vol option is then set according to the valueof the snapvault.nbu.archival_snap_default option. The -f option disables the prompt that asks forconfirmation.
There are a set of options managed by the vol options command that are tied to FlexCache volumes.The list of these options is as follows:
acregmax <timeout> [m|h|d|w]
Attribute Cache regular file timeout. The amount of time (in seconds) in which the cache considersregular files on the given volume to be valid before consulting the origin. The timeout value is anumber, optionally followed by m, h, d or w, denoting minutes, hours, days or weeks respectively. Ifnone of the above letters is used, the unit defaults to seconds. The default value is 15 seconds. A valueof zero means the cache will perform an attribute verify for every client request.
acdirmax <timeout> [m|h|d|w]
Similar to acregmax, but for directories.
acsymmax <timeout> [m|h|d|w]
Similar to acregmax, but for symbolic links.
738 Data ONTAP® 8.2 Commands: Manual Page Reference for 7-Mode, Volume 1
vol
actimeo <timeout> [m|h|d|w]
Attribute Cache default timeout. This value is used for any attribute cache timeout option that has notbeen explicitly assigned a value. For example, if the administrator has explicitly set acregmax to 15 and actimeo to 60 but has not set values for the other 2 options, regular files will be considered valid for 15seconds while symbolic links and directories will be considered valid for 60.
acdisconnected <timeout> [m|h|d|w]
Attribute cache timeout value used when the disconnected mode feature is enabled on this volume. Ifthis option is set to 0 (the default value), access will be allowed indefinitely.
disconnected_mode off | hard | soft
This option is used to configure the behavior of the cache volume when it is disconnected from theorigin and the normal TTL (for example, acregmax) on the object has expired. When disabled (off), allaccess attempts will hang. When set to hard or soft, read-only access attempts will be allowed up to thevalue of the acdisconnected option. After the acdisconnected timeout is exceeded, attempts will eitherhang (hard) or have an error returned (soft). All attempts to modify the file system contents or accessdata that is not currently in the cache volume will hang.
flexcache_autogrow on | off
Setting this option to on enables autogrow on the FlexCache volume. This causes the FlexCachevolume to automatically grow, if there is room in the aggregate, in order to avoid evictions. Setting thisoption to off will cause the FlexCache volume to no longer automatically grow. The size will not bereverted back to its original size. This option is only valid on FlexCache volumes. Autogrow will beenabled by default on new FlexCache volumes that are created without a size parameter.
flexcache_min_reserve size
Alter the space reserved in the aggregate for the given FlexCache volume, such that the volume isguaranteed to be able to cache up to size data. The size parameter is given as in the vol createcommand.
vol rename volname newname
Renames the volume named volname to the name newname. vol rename will rewrite all entriesbelonging to the volume in the /etc/exports file unless the option nfs.export.auto-update is disabled.
vol restrict volname[ -t cifsdelaytime ]
Put the volume volname in restricted state, starting from either online or offline state. If the volume isonline, then it will be made unavailable for data access as described above under vol offline.
If a volume contains CIFS shares, users should be warned before taking the volume offline. Use the -toption for this. The cifsdelaytime argument specifies the number of minutes to delay before taking thevolume offline, during which time CIFS users are warned of the pending loss of service. A time of 0means take the volume offline immediately with no warnings given. CIFS users can lose data if they arenot given a chance to terminate applications gracefully.
Data ONTAP® 8.2 Commands: Manual Page Reference for 7-Mode, Volume 1 739
vol
vol scrub resume [ volname | plexname | groupname ]
Resume parity scrubbing on the named traditional volume, plex, or RAID group. If no name is given,then all suspended parity scrubs are resumed.
The vol scrub resume command fails if the chosen volname is a flexible volume. Flexible volumesrequire that any operations having directly to do with their containing aggregates be handled via thenew aggr command suite. In this specific case, the administrator should use the aggr scrub resumecommand.
vol scrub start [ volname | plexname | groupname ]
Start parity scrubbing on the named traditional volume, plex, or RAID group. If volname is a flexiblevolume, vol scrub start aborts.
Parity scrubbing compares the data disks to the parity disk in a RAID group, correcting the parity disk’scontents as necessary.
If no name is given, then start parity scrubs on all online RAID groups on the node. If a traditionalvolume is given, scrubbing is started on all RAID groups contained in the traditional volume. Similarly,if a plex name is given, scrubbing is started on all RAID groups in the plex.
The vol scrub start command fails if the chosen volname is a flexible volume. Flexible volumes requirethat any operations having directly to do with their containing aggregates be handled via the new aggrcommand suite. In this specific case, the administrator should use the aggr scrub start command.
vol scrub status [ volname | plexname | groupname ] [ -v ]
Print the status of parity scrubbing on the named traditional volume, plex or RAID group. If no name isprovided, the status is given on all RAID groups currently undergoing parity scrubbing. The statusincludes a percent-complete as well as the scrub’s suspended status (if any).
The -v flag displays the date and time at which the last full scrub completed, along with the currentstatus on the named traditional volume, plex, or RAID group. If no name is provided, full status isprovided for all RAID groups on the node.
The vol scrub status command fails if the chosen volname is a flexible volume. Flexible volumesrequire that any operations having directly to do with their containing aggregates be handled via thenew aggr command suite. In this specific case, the administrator should use the aggr scrub statuscommand.
vol scrub stop [ volname | plexname | groupname ]
Stop parity scrubbing for the named traditional volume, plex or RAID group. If no name is given, thenparity scrubbing is stopped on any RAID group on which one is active.
The vol scrub stop command fails if the chosen volname is a flexible volume. Flexible volumes requirethat any operations having directly to do with their containing aggregates be handled via the new aggrcommand suite. In this specific case, the administrator should use the aggr scrub stop command.
740 Data ONTAP® 8.2 Commands: Manual Page Reference for 7-Mode, Volume 1
vol
vol scrub suspend [ volname | plexname | groupname ]
Suspend parity scrubbing on the named traditional volume, plex, or RAID group. If no name is given,all active parity scrubs are suspended.
The vol scrub suspend command fails if the chosen volname is a flexible volume. Flexible volumesrequire that any operations having directly to do with their containing aggregates be handled via thenew aggr command suite. In this specific case, the administrator should use the aggr scrub suspendcommand.
vol size volname [[+|-]size]
This command sets or displays the given flexible volume’s size as specified; using space from thevolume’s containing aggregate. It can make the flexible volume either larger or smaller. The sizeargument has the same form and obeys the same rules as when it is used in the vol create command tocreate a flexible volume. Be careful if the sum of the sizes of all flexible volumes in an aggregateexceeds the size of the aggregate.
If [+|-]size is used, then the flexible volume’s size is changed (grown or shrunk) by that amount.Otherwise, the volume size is set to size (rounded up to the nearest 4 KB).
When displaying the flexible volume’s size, the units used have the same form as when creating thevolume or setting the volume size. The specific unit chosen for a given size is based on matching thevolume size to an exact number of a specific unit. k is used if no larger units match.
The file system size of a readonly replica flexible volume, such as a snapmirror destination, isdetermined from the replica source. In such cases, the value set in vol size is interpreted as an upperlimit on the size. A flexible volume with the fs_size_fixed option set may have its size displayed, butnot changed.
A flexible root volume cannot be shrunk below a minimum size determined by the appliance model.This to ensure that there is sufficient space in the root volume to store system files, log files, and corefiles for use by NetApp technical support if a problem with the system occurs.
The amount of space available for the active filesystem in a volume is limited by the snapshotreservation set for that volume. The snapshot reservation should be taken into account when sizing avolume. See na_snap (1) for details on how to set a volume’s snapshot reservation.
vol split volname/plexname new_volname
This command removes plexname from a mirrored traditional volume and creates a new, unmirroredtraditional volume named new_volname that contains the plex. The original mirrored traditional volumebecomes unmirrored. The plex to be split from the original traditional volume must be functional (notpartial), but it could be inactive, resyncing, or out-of-date. The vol split can therefore be used to gainaccess to a plex that is not up to date with respect to its partner plex if its partner plex is currently failed.
If the plex is offline at the time of the split, the resulting traditional volume will be offline. Otherwise,the resulting traditional volume will be in the same online/offline/restricted state as the originaltraditional volume. A split mirror can be joined back together via the -v option to vol mirror.
Data ONTAP® 8.2 Commands: Manual Page Reference for 7-Mode, Volume 1 741
vol
The aggr split command is the preferred way to split off plexes. It is the only way to split off plexesfrom mirrored aggregates that contain flexible volumes.
vol status [ volname ][ -r | -v[C] | -d | -l | -c | -C[v] |-b | -s | -f -m | -w | -S[k|m|g|t] | -F[k|m|g|t] ]
Displays the status of one or all volumes on the node. If volname is used, the status of the specifiedvolume is printed. Otherwise, the status of all volumes in the node is printed. By default, it prints aone-line synopsis of the volume, which includes the volume name, its type (either traditional or flexible), whether it is online or offline, other states (for example, partial, degraded, wafl inconsistentand so on) and pervolume options. It also reports volume attributes related to the node’sclustered/scale-out capabilities and configuration, if any. For example, Data ONTAP 8.0 Cluster-Modesystems identify which of the selected volumes are ClusterMode (owned by Vservers). Per-volumeoptions are displayed only if the options have been turned on using the vol options command. If thewafl inconsistent state is displayed, please contact Customer Support.
When run in a vfiler context only the -v, -l, -b, and -? flags can be passed to vol status.
The -v flag shows the on/off state of all pervolume options and displays information about each plexand RAID group within the traditional volume or the aggregate containing the flexible volume. aggr status -v is the preferred manner of obtaining the per-aggregate options and the RAID informationassociated with flexible volumes.
The -C flag displays additional information related to the new clustered/scale-out capabilities, if any. Itcan be used alone or in direct combination with the -v flag described above (that is, -vC or -Cv) tocontrol the amount of additional cluster-related information displayed. Included are the volume’s Owner UUID, Master Data Set ID, Data Set ID and Mirror Type.
The -r flag displays a list of the RAID information for the traditional volume or the aggregatecontaining the flexible volume. If no volname is specified, it prints RAID information about alltraditional volumes and aggregates, information about file system disks, spare disks, and failed disks.For more information about failed disks, see the -f option description below.
The -d flag displays information about the disks in the traditional volume or the aggregate containingthe flexible volume. The types of disk information are the same as those from the sysconfig -dcommand. aggr status -d is the preferred manner of obtaining this low-level information for aggregatesthat contain flexible volumes.
The -l flag displays, for each volume on a node, the name of the volume, the language code, andlanguage being used by the volume.
The -c flag displays the upgrade status of the Block Checksums data integrity protection feature for thetraditional volume or the aggregate containing the flexible volume. aggr status -c is the preferredmanner of obtaining this information for a flexible volume’s containing aggregate.
The -b is used to get the size of source and destination traditional volumes for use with SnapMirror. Theoutput contains the size of the traditional volume and the size of the file system in the volume.SnapMirror and aggr copy use these numbers to determine if the source and destination volume sizesare compatible. The file system size of the source must be equal or smaller than the volume size of thedestination. These numbers can be different if using SnapMirror between volumes of dissimilargeometry.
742 Data ONTAP® 8.2 Commands: Manual Page Reference for 7-Mode, Volume 1
vol
The -s flag displays a list of the spare disks on the system. aggr status -s is the preferred manner ofobtaining this information.
The -m flag displays a list of the disks in the system that are sanitizing, in recovery mode, or inmaintenance testing.
The -f flag displays a list of the failed disks on the system. The command output includes the diskfailure reason which can be any of following:
unknown Failure reason unknown. failed Data ONTAP failed disk, due to a fatal disk error. admin failed User issued a ’disk fail’ command for this disk. labeled broken Disk was failed under Data ONTAP 6.1.X or an earlier version. init failed Disk initialization sequence failed. admin removed User issued a ’disk remove’ command for this disk. not responding Disk not responding to requests. pulled Disk was physically pulled or no data path exists on which to access the disk. bypassed Disk was bypassed by ESH.
aggr status -f is the preferred manner of obtaining this information.
The -w flag displays expiry date of the volume which is maximum retention time of WORM files andWORM snapshots on that volume. A value of "infinite" indicates that the volume has infinite expirydate. A value of "Unknown...volume offline" indicates that expiry date is not displayed since thevolume is offline. A value of "Unknown...scan in progress" indicates that expiry date is not displayedsince WORM scan on the volume is in progress. A value of "none" indicates that the volume has noexpiry date. The volume has no expiry date when it does not hold any WORM files or WORMsnapshots. A value of "-" is displayed for regular volumes.
The -S flag displays information about space usage within the volume for online volumes. Dependingon volume state, a variety of relevant, non-zero rows will be displayed. Rows that are notselfexplanatory are detailed below. All sizes are reported in units automatically scaled for bestreadability unless a specific measurement unit is requested by specifying one of the following flags: -k,-m, -g, or -t.User Data: This is the amount of data written to the volume via CIFS, NFS or SAN protocols plus themetadata (e.g. indirect blocks, directory blocks, etc.) directly associated with user files, plus the spacereserved in the volume for these files (hole and overwrite reserves). This is the same informationdisplayed by running the Unix du command on the mount point.Inodes: This is the amount of space required to store inodes in the file system and is proportional to themaximum number of files ever created in the volume. The inode file is not compacted or truncated, so ifa large number of files are created and then deleted, the inode file does not shrink.Snapshot Spill: This is the amount of Snapshot spill in the volume. If Snapshot used space exceeds theSnapshot reserve, the volume’s snapshots are considered to spill out of the reserve. This space cannot beused by the active file system. Total Used: This is the total amount of space used in the volume,including the space used by the Snapshot reserve.
Data ONTAP® 8.2 Commands: Manual Page Reference for 7-Mode, Volume 1 743
vol
The -F flag displays information about the space used in associated aggregates by FlexVol volumes andfeatures enabled in those volumes. Depending on volume and aggregate state, a variety of relevant,non-zero rows will be displayed. Percentages are based on aggregate size. Output rows that are notself-explanatory are detailed below. All sizes are reported in units automatically scaled for bestreadability unless a specific measurement unit is requested by specifying one of the following flags: -k,-m, -g, or -t.Volume Data Footprint: This is the total amount of data written to the volume. It includes data in thevolume’s active file system as well as volume Snapshot copies. This row only includes data and notreserved space, so when volumes have reserved files, the volume’s total usage as displayed in the outputof the vol status -S command can exceed the value in this row. Flexible Volume Metadata: This is thespace used or reserved in the aggregate for metadata associated with this volume.Delayed Frees: When Data ONTAP frees space in a volume, this space is not always immediatelyshown as free in the aggregate. This is because the operations that free the space in the aggregate arebatched for increased performance. Blocks that are declared free in the FlexVol volume but which arenot yet free in the aggregate are considered "delayed free blocks" until they are processed. ForSnapMirror destinations, this row will have a value of 0 and will not be displayed. SnapMirror Destination: During a SnapMirror transfer, this row will include incoming SnapMirror data andSnapMirror-triggered delayed free blocks from previous SnapMirror transfers. Volume Guarantee: Thisis the amount of space reserved by this volume in the aggregate for future writes. The amount of spacereserved depends on the guarantee type (the provisioning mode) of the volume. For a "volumeguaranteed" volume, this is the size of the volume minus the amount in the Volume Data Footprint row. For a "file guaranteed" volume, this is the sum of all of the space reserved for hole fills and overwrites in all of the space reserved files in the volume.
vol verify resume [ volname ]
Resume RAID mirror verification on the given traditional volume. If no volume name is given, thenresume all suspended RAID mirror verification operations.
The vol verify resume command fails if the chosen volname is a flexible volume. Flexible volumesrequire that any operations having directly to do with their containing aggregates be handled by the new aggr command suite. In fact, the administrator should always use the aggr verify resume command.
vol verify start [ volname ] [ -f plexnumber ]
Start RAID mirror verification on the named online, mirrored traditional volume. If no name is given,then RAID mirror verification is started on all traditional volumes and aggregates on the node.
RAID mirror verification compares the data in both plexes of a mirrored traditional volume oraggregate. In the default case, all blocks that differ are logged, but no changes are made. If the -f flag isgiven, the plex specified is fixed to match the other plex when mismatches are found. A volume namemust be specified with the -f plexnumber option.
The vol verify start command fails if the chosen volname is a flexible volume. Flexible volumesrequire that any operations having directly to do with their containing aggregates be handled by the new aggr command suite. In fact, the administrator should always use the aggr verify start command.
vol verify status [ volname ]
744 Data ONTAP® 8.2 Commands: Manual Page Reference for 7-Mode, Volume 1
vol

Print the status of RAID mirror verification on the given traditional volume. If no volume name isgiven, then provide status for all active RAID mirror verification operations. The status includes apercent-complete and the verification’s suspended status (if any).
The vol verify status command fails if the chosen volname is a flexible volume. Flexible volumesrequire that any operations having directly to do with their containing aggregates be handled by the new aggr command suite. In fact, the administrator should always use the aggr verify status command.
vol verify stop [ volname ]
Stop RAID mirror verification on the named traditional volume. If no volume name is given, stop allactive RAID mirror verification operations on traditional volumes and aggregates.
The vol verify stop command fails if the chosen volname is a flexible volume. Flexible volumes requirethat any operations having directly to do with their containing aggregates be handled by the new aggrcommand suite. In fact, the administrator should always use the aggr verify stop command.
vol verify suspend [ volname ]
Suspend RAID mirror verification on the named traditional volume. If no volume name is given, thensuspend all active RAID mirror verification operations on traditional volumes and aggregates.
The vol verify suspend command fails if the chosen volname is a flexible volume. Flexible volumesrequire that any operations having directly to do with their containing aggregates be handled by the new aggr command suite. In fact, the administrator should always use the aggr verify suspend command.
HA CONSIDERATIONSVolumes on different nodes in an HA pair can have the same name. For example, both nodes in an HApair can have a volume named vol0.
However, having unique volume names in an HA pair makes it easier to move volumes between thenodes in the HA pair.
VFILER CONSIDERATIONSA subset of the vol subcommands are available via vfiler contexts. They are used for vfiler SnapMirroroperations. These subcommands are: online, offline, and restrict. These volume operations are onlyallowed if the vfiler owns the specified volumes. See na_vfiler(1) and na_snapmirror(1) for details onvfiler and snapmirror operations.
EXAMPLESvol create vol1 aggr0 50g
Creates a flexible volume named vol1 using storage from aggregate aggr0. This new flexible volume’ssize will be set to 50 gigabytes.
vol create vol1 -r 10 20
Data ONTAP® 8.2 Commands: Manual Page Reference for 7-Mode, Volume 1 745
vol

Creates a traditional volume named vol1 with 20 disks. The RAID groups in this traditional volume cancontain up to 10 disks, so this traditional volume has two RAID groups. The node adds the current sparedisks to the new traditional volume, starting with the smallest disk.
vol create vol1 20@9
Creates a traditional volume named vol1 with 20 9-GB disks. Because no RAID group size is specified,the default size (8 disks) is used. The newly created traditional volume contains two RAID groups with8 disks and a third RAID group with four disks.
vol create vol1 -d 8a.1 8a.2 8a.3
Creates a traditional volume named vol1 with the specified disks.
vol create vol1 aggr1 20m -S kett:vol2
Creates a flexible volume named vol1 on aggr1 of size 20 megabytes, which caches source volume vol2residing on the origin node kett.
vol create vol1 10vol options vol1 raidsize 5
The first command creates a traditional volume named vol1 with 10 disks that belong to one RAIDgroup. The second command specifies that if any disks are subsequently added to this traditionalvolume, they will not cause any current RAID group to have more than five disks. Each existing RAIDgroup will continue to have 10 disks, and no more disks will be added to those RAID groups. Whennew RAID groups are created, they will have a maximum size of five disks.
vol size vol1 250g
Changes the size of flexible volume vol1 to 250 gigabytes.
vol size vol1 +20g
Adds 20 gigabytes to the size of flexible volume vol1.
vol clone create vol2 -b vol1 snap2
The node will create a writable clone volume vol2 that is backed by the storage of flexible volume vol1,snapshot snap2.
vol clone create will create a default entry in the /etc/exports file unless the option nfs.export.auto-update is disabled.
vol clone split start vol2
The node will start an operation on clone volume vol2 to separate the it from its parent volume. Thebacking snapshot for vol2 will be unlocked once the separation is complete.
vol options vol1 root
746 Data ONTAP® 8.2 Commands: Manual Page Reference for 7-Mode, Volume 1
vol
The volume named vol1 becomes the root volume after the next node reboot.
vol options vol1 nosnapdir on
In the volume named vol1, the snapshot directory is made invisible at the client mount point or at theroot of a share. Also, for UNIX clients, the .snapshot directories that are normally accessible in all thedirectories become inaccessible.
vol status vol1 -r
Displays the RAID information about the volume named vol1:
Volume vol1 (online, raid4) (zoned checksums) Plex /vol1/plex0 (online, normal, active) RAID group /vol1/plex0/rg0 (normal)
RAID Disk Device HA SHELF BAY CHAN Used (MB/blks) Phys (MB/blks) --------- ------ --------------- ---- -------------- -------------- parity 3a.0 3a 0 0 FC:A 34500/70656000 35239/72170880 data 3a.1 3a 0 1 FC:A 34500/70656000 35239/72170880
vol copy start -s nightly.1 vol0 toaster1:vol0
Copies the nightly snapshot named nightly.1 on volume vol0 on the local node to the volume vol0 on aremote node named toaster1.
vol copy status
Displays the status of all active volume copy operations.
vol copy abort 1
Terminates volume copy operation 1.
vol copy throttle 1 5
Changes volume copy operation 1 to half (50%) of its full speed.
SEE ALSOna_aggr (1), na_license (1), na_partner (1), na_snapmirror (1), na_sysconfig (1)
Data ONTAP® 8.2 Commands: Manual Page Reference for 7-Mode, Volume 1 747
vol
vscanNAMEna_vscan - Control virus scanning for files on the node.
SYNOPSISvscan
vscan extensions { include | exclude } [ reset | set ext_list | add ext-list | remove ext-list ]
vscan [ on [-f] | off ]
vscan options timeout [ reset | set <value> ]
vscan options abort_timeout [ reset | set <value> ]
vscan options mandatory_scan [ on | off ]
vscan options use_host_scanners [ on | off ]
vscan options client_msgbox [ on | off ]
vscan reset
vscan scanners [stop scanner-IP-address secondary_scanners [ scanner-IP-address [, scanner-IP_address ]]]
DESCRIPTIONThe vscan command allows for control and configuration of virus scanning for files on the node.
USAGEvscanDisplays vscan settings and provides summary information about scan requests. This informationincludes
- Whether virus scan is enabled or disabled
- A list of virus scanners that are currently connected to the node. The list contains the IP addressand the name of the virus scanner, if the scanner is a primary or secondary, the length of time thescanner has been connected to the node, the number of requests serviced by the scanner and howmany failures were reported by the scanner. Note, this information is reset when a scannerdisconnects and then reconnects again.
748 Data ONTAP® 8.2 Commands: Manual Page Reference for 7-Mode, Volume 1
vscan
- A list of file extensions that will cause the node to request a scan.
- A list of file extensions that are specifically exempt from scanning.
- The total number of files that have been scanned since vscan was last enabled
- The number of scan failures that have been reported. Failures include scans which have detectedviruses, scan requests which timed out and client requests which would normally trigger a scan butfor which no scanners were available
The counts for a scanner are set to zero when it connects (or reconnects) to the node. The vscan totalsand counts for each scanner are zeroed when vscan is enabled. This occurs, for example, when the nodeboots, when cifs is restarted, or when the command ‘vscan on’ is entered on the node console. Becauseof this, the overall node totals will not necessarily match the totals obtained by adding the values for thescanners.
vscan extensions { include | exclude } [ reset | set ext_list | add ext-list | remove ext-list ]ext-list is a comma separated list of at most six letters file extensions. The include list determines if agiven file should be scanned for viruses. The exclude list determines if a given file should not bescanned for viruses. If an extension is listed on both the exclude and the include list, then files with thatextension are not scanned for viruses. If an extension is not listed on either the include list or theexclude list, then files with that extension are not scanned for viruses. The character ? is a wild card.When it is not the last character, it matches any single character. When it is the last character, or part ofa trailing sequence of ? , it matches any number of characters (0, 1 or more). The exception is if it is inthe first or second position, when it matches any or no character only. For example, putting C?? into theextension list would cause the node to scan the files ABC.C, ABC.CPP, ABC.C++, ABC.CPLUS andso on.For example, putting C? into the extension list would cause the node to scan the files ABC.C, ABC.CPand so on; but not ABC.CPPFor example, putting A?C into the extension list would cause the node to scan the files ABC.ABC, ABC.ACC and so on; but not ABC.ACFor example, putting ? into the extension list would cause the node to scan the files ABC.A, ABC.C, ABC and so on; but not ABC.AC
Usage ofvscan extensions command ext-listhas been deprecated. Instead, please use vscan extensions include command ext-list
vscan extensions { include | exclude } Displays the current file extension list.
vscan extensions { include | exclude } reset Restores the file extension list to a default list provided byNetApp Inc.
vscan extensions { include | exclude } set ext-list Specifies a new extension list which replaces thecurrent list.
Data ONTAP® 8.2 Commands: Manual Page Reference for 7-Mode, Volume 1 749
vscan
vscan extensions { include | exclude } add ext-list Adds new entries to the current file extension list.
vscan extensions { include | exclude } remove ext-list Removes entries from the current file extensionlist.
vscan [ on [-f] | off ]Enables/disables on-access virus scanning for files on the node. The f flag forces virus scanning to beenabled even if there are no vscan servers available to scan files for the node.
vscan optionsDisplays the current values of the virus scan options.
vscan options timeout [ reset | set <value> ] Displays the current virus scan timeout value in seconds.This value determines how long the node will wait for the vscan server to perform a virus scan request.After this time period elapses, the node allows the scan to continue but contacts the vscan server toensure that it is still functioning and is still scanning the file. This allows the node to detect and recoverfrom a vscan server failure which occurs while a scan is in progress. The timeout value may be reset toa NetApp-provided default value. It is also possible to set the timeout.
vscan options abort_timeout [ reset | set <value> ] Displays the current virus scan abort_timeoutvalue in seconds. This value determines how long the node will wait for the vscan server to perform avirus scan request. Even if the file is still being scanned, the node will abort the scan. The node maydeny access to the file if this time period elapses, depending on the setting for the vscan optionmandatory_scan. The timeout value may be reset to a NetApp-provided default value. It is also possibleto set the timeout. Note that setting the timeout to 0 disables this option. If the abort_timeout setting is0, the node will wait forever for a scan to complete as long as the vscan server reports that it is makingprogress.
vscan options mandatory_scan [ on | off ] Displays the current setting for the mandatory_scan option.If set to "on", then access to files will be denied if a virus scan cannot be performed, for examplebecause no scanners are available. If this option is set to "off" then access to files is allowed if it is notpossible to scan the file.
vscan options use_host_scanners [ on | off ] Displays the current setting for the use_host_scannersoption. If set to "on", then vfilers will be allowed to use vscan servers which are registered with thehosting node. If this option is set to "off" then a vfiler can only use vscan servers which have registeredto the vfiler’s IP address.
vscan options client_msgbox [ on | off ] Displays the current setting for the client_msgbox option. Ifset to "on", the node will attempt to send a pop-up MsgBox to the opener of an infected file.
vscan resetDiscards cached information of files that have been successfully scanned.
vscan scanners [stop scanner-IP-address secondary_scanners [ scanner-IP-address [, scanner-IP_address ]]]Displays a list of vscan servers which have offered to scan files for the node, or terminates theconnection to a specified vscan server, or specifies which vscan server(s) should be classified assecondary scanners. Secondary scanners are not used by the node to perform scans unless there are noprimary scanners available. To remove all secondary scanners from the list, use a pair of double quotes("") as the argument.
750 Data ONTAP® 8.2 Commands: Manual Page Reference for 7-Mode, Volume 1
vscan
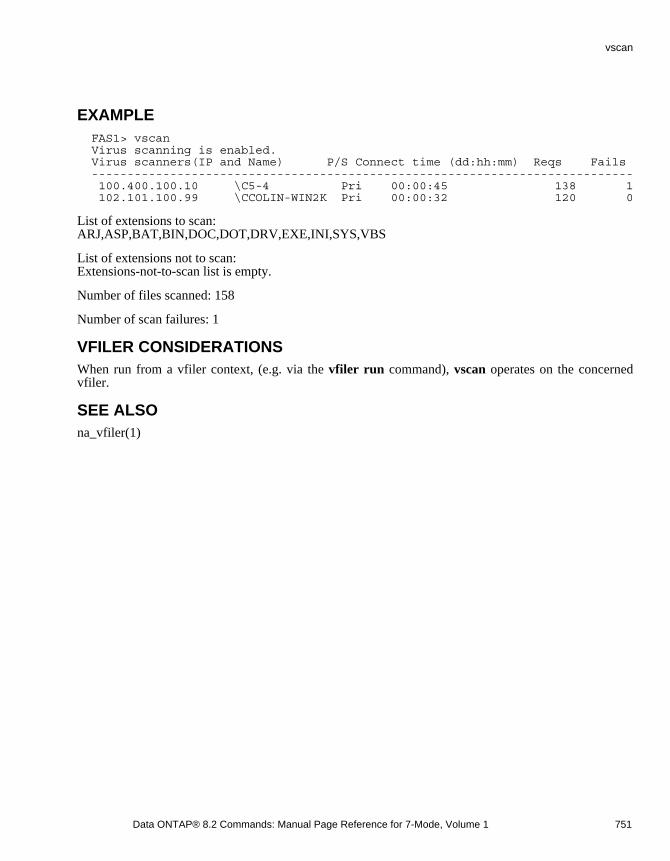
EXAMPLE FAS1> vscan Virus scanning is enabled. Virus scanners(IP and Name) P/S Connect time (dd:hh:mm) Reqs Fails ---------------------------------------------------------------------------- 100.400.100.10 \C5-4 Pri 00:00:45 138 1 102.101.100.99 \CCOLIN-WIN2K Pri 00:00:32 120 0
List of extensions to scan:ARJ,ASP,BAT,BIN,DOC,DOT,DRV,EXE,INI,SYS,VBS
List of extensions not to scan:Extensions-not-to-scan list is empty.
Number of files scanned: 158
Number of scan failures: 1
VFILER CONSIDERATIONSWhen run from a vfiler context, (e.g. via the vfiler run command), vscan operates on the concernedvfiler.
SEE ALSOna_vfiler(1)
Data ONTAP® 8.2 Commands: Manual Page Reference for 7-Mode, Volume 1 751
vscan
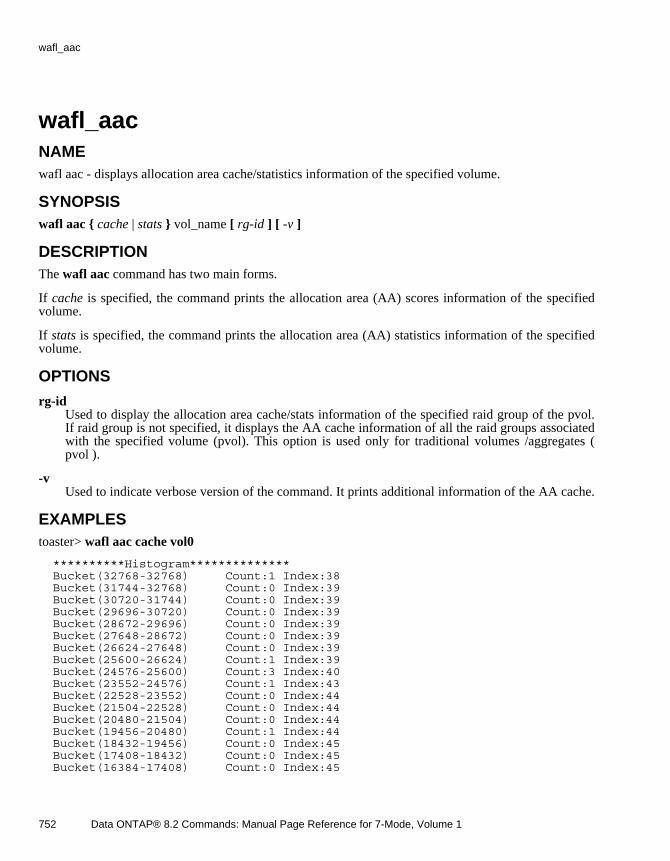
wafl_aacNAMEwafl aac - displays allocation area cache/statistics information of the specified volume.
SYNOPSISwafl aac { cache | stats } vol_name [ rg-id ] [ -v ]
DESCRIPTIONThe wafl aac command has two main forms.
If cache is specified, the command prints the allocation area (AA) scores information of the specifiedvolume.
If stats is specified, the command prints the allocation area (AA) statistics information of the specifiedvolume.
OPTIONS
rg-id Used to display the allocation area cache/stats information of the specified raid group of the pvol.If raid group is not specified, it displays the AA cache information of all the raid groups associatedwith the specified volume (pvol). This option is used only for traditional volumes /aggregates (pvol ).
-v Used to indicate verbose version of the command. It prints additional information of the AA cache.
EXAMPLEStoaster> wafl aac cache vol0
**********Histogram************** Bucket(32768-32768) Count:1 Index:38 Bucket(31744-32768) Count:0 Index:39 Bucket(30720-31744) Count:0 Index:39 Bucket(29696-30720) Count:0 Index:39 Bucket(28672-29696) Count:0 Index:39 Bucket(27648-28672) Count:0 Index:39 Bucket(26624-27648) Count:0 Index:39 Bucket(25600-26624) Count:1 Index:39 Bucket(24576-25600) Count:3 Index:40 Bucket(23552-24576) Count:1 Index:43 Bucket(22528-23552) Count:0 Index:44 Bucket(21504-22528) Count:0 Index:44 Bucket(20480-21504) Count:0 Index:44 Bucket(19456-20480) Count:1 Index:44 Bucket(18432-19456) Count:0 Index:45 Bucket(17408-18432) Count:0 Index:45 Bucket(16384-17408) Count:0 Index:45
752 Data ONTAP® 8.2 Commands: Manual Page Reference for 7-Mode, Volume 1
wafl_aac
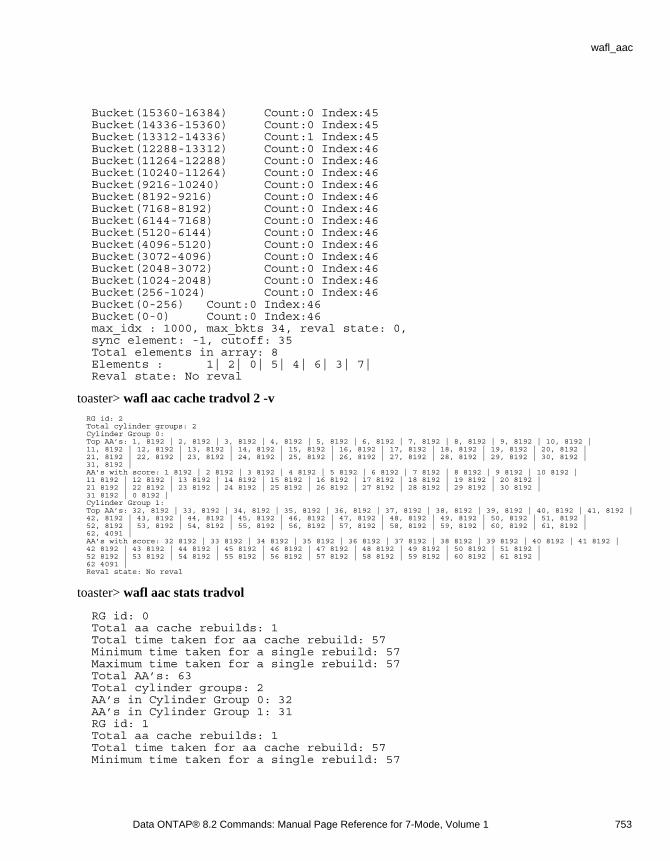
Bucket(15360-16384) Count:0 Index:45 Bucket(14336-15360) Count:0 Index:45 Bucket(13312-14336) Count:1 Index:45 Bucket(12288-13312) Count:0 Index:46 Bucket(11264-12288) Count:0 Index:46 Bucket(10240-11264) Count:0 Index:46 Bucket(9216-10240) Count:0 Index:46 Bucket(8192-9216) Count:0 Index:46 Bucket(7168-8192) Count:0 Index:46 Bucket(6144-7168) Count:0 Index:46 Bucket(5120-6144) Count:0 Index:46 Bucket(4096-5120) Count:0 Index:46 Bucket(3072-4096) Count:0 Index:46 Bucket(2048-3072) Count:0 Index:46 Bucket(1024-2048) Count:0 Index:46 Bucket(256-1024) Count:0 Index:46 Bucket(0-256) Count:0 Index:46 Bucket(0-0) Count:0 Index:46 max_idx : 1000, max_bkts 34, reval state: 0, sync element: -1, cutoff: 35 Total elements in array: 8 Elements : 1| 2| 0| 5| 4| 6| 3| 7| Reval state: No reval
toaster> wafl aac cache tradvol 2 -v RG id: 2 Total cylinder groups: 2 Cylinder Group 0: Top AA’s: 1, 8192 | 2, 8192 | 3, 8192 | 4, 8192 | 5, 8192 | 6, 8192 | 7, 8192 | 8, 8192 | 9, 8192 | 10, 8192 | 11, 8192 | 12, 8192 | 13, 8192 | 14, 8192 | 15, 8192 | 16, 8192 | 17, 8192 | 18, 8192 | 19, 8192 | 20, 8192 | 21, 8192 | 22, 8192 | 23, 8192 | 24, 8192 | 25, 8192 | 26, 8192 | 27, 8192 | 28, 8192 | 29, 8192 | 30, 8192 | 31, 8192 | AA’s with score: 1 8192 | 2 8192 | 3 8192 | 4 8192 | 5 8192 | 6 8192 | 7 8192 | 8 8192 | 9 8192 | 10 8192 | 11 8192 | 12 8192 | 13 8192 | 14 8192 | 15 8192 | 16 8192 | 17 8192 | 18 8192 | 19 8192 | 20 8192 | 21 8192 | 22 8192 | 23 8192 | 24 8192 | 25 8192 | 26 8192 | 27 8192 | 28 8192 | 29 8192 | 30 8192 | 31 8192 | 0 8192 | Cylinder Group 1: Top AA’s: 32, 8192 | 33, 8192 | 34, 8192 | 35, 8192 | 36, 8192 | 37, 8192 | 38, 8192 | 39, 8192 | 40, 8192 | 41, 8192 | 42, 8192 | 43, 8192 | 44, 8192 | 45, 8192 | 46, 8192 | 47, 8192 | 48, 8192 | 49, 8192 | 50, 8192 | 51, 8192 | 52, 8192 | 53, 8192 | 54, 8192 | 55, 8192 | 56, 8192 | 57, 8192 | 58, 8192 | 59, 8192 | 60, 8192 | 61, 8192 | 62, 4091 | AA’s with score: 32 8192 | 33 8192 | 34 8192 | 35 8192 | 36 8192 | 37 8192 | 38 8192 | 39 8192 | 40 8192 | 41 8192 | 42 8192 | 43 8192 | 44 8192 | 45 8192 | 46 8192 | 47 8192 | 48 8192 | 49 8192 | 50 8192 | 51 8192 | 52 8192 | 53 8192 | 54 8192 | 55 8192 | 56 8192 | 57 8192 | 58 8192 | 59 8192 | 60 8192 | 61 8192 | 62 4091 | Reval state: No reval
toaster> wafl aac stats tradvol
RG id: 0 Total aa cache rebuilds: 1 Total time taken for aa cache rebuild: 57 Minimum time taken for a single rebuild: 57 Maximum time taken for a single rebuild: 57 Total AA’s: 63 Total cylinder groups: 2 AA’s in Cylinder Group 0: 32 AA’s in Cylinder Group 1: 31 RG id: 1 Total aa cache rebuilds: 1 Total time taken for aa cache rebuild: 57 Minimum time taken for a single rebuild: 57
Data ONTAP® 8.2 Commands: Manual Page Reference for 7-Mode, Volume 1 753
wafl_aac
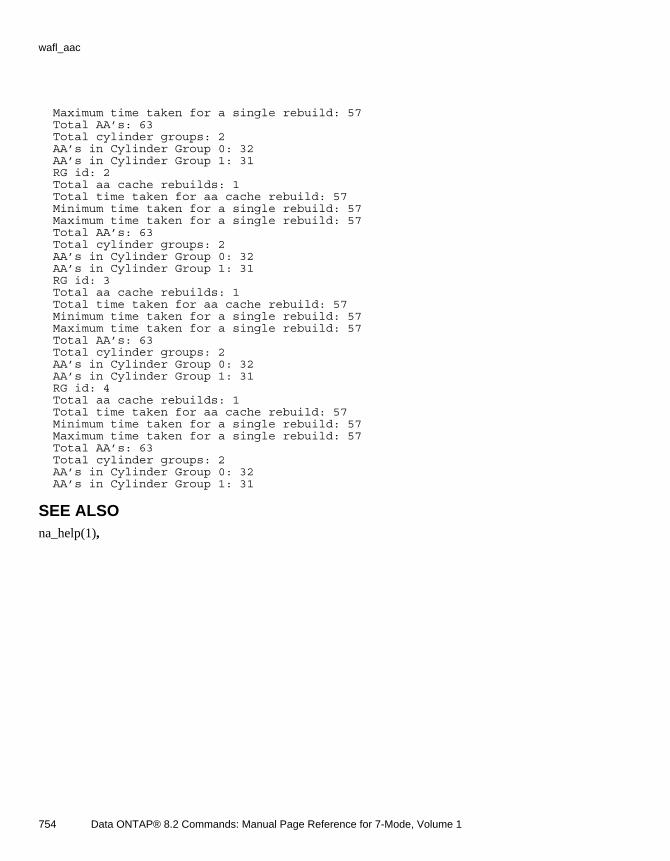
Maximum time taken for a single rebuild: 57 Total AA’s: 63 Total cylinder groups: 2 AA’s in Cylinder Group 0: 32 AA’s in Cylinder Group 1: 31 RG id: 2 Total aa cache rebuilds: 1 Total time taken for aa cache rebuild: 57 Minimum time taken for a single rebuild: 57 Maximum time taken for a single rebuild: 57 Total AA’s: 63 Total cylinder groups: 2 AA’s in Cylinder Group 0: 32 AA’s in Cylinder Group 1: 31 RG id: 3 Total aa cache rebuilds: 1 Total time taken for aa cache rebuild: 57 Minimum time taken for a single rebuild: 57 Maximum time taken for a single rebuild: 57 Total AA’s: 63 Total cylinder groups: 2 AA’s in Cylinder Group 0: 32 AA’s in Cylinder Group 1: 31 RG id: 4 Total aa cache rebuilds: 1 Total time taken for aa cache rebuild: 57 Minimum time taken for a single rebuild: 57 Maximum time taken for a single rebuild: 57 Total AA’s: 63 Total cylinder groups: 2 AA’s in Cylinder Group 0: 32 AA’s in Cylinder Group 1: 31
SEE ALSOna_help(1),
754 Data ONTAP® 8.2 Commands: Manual Page Reference for 7-Mode, Volume 1
wafl_aac
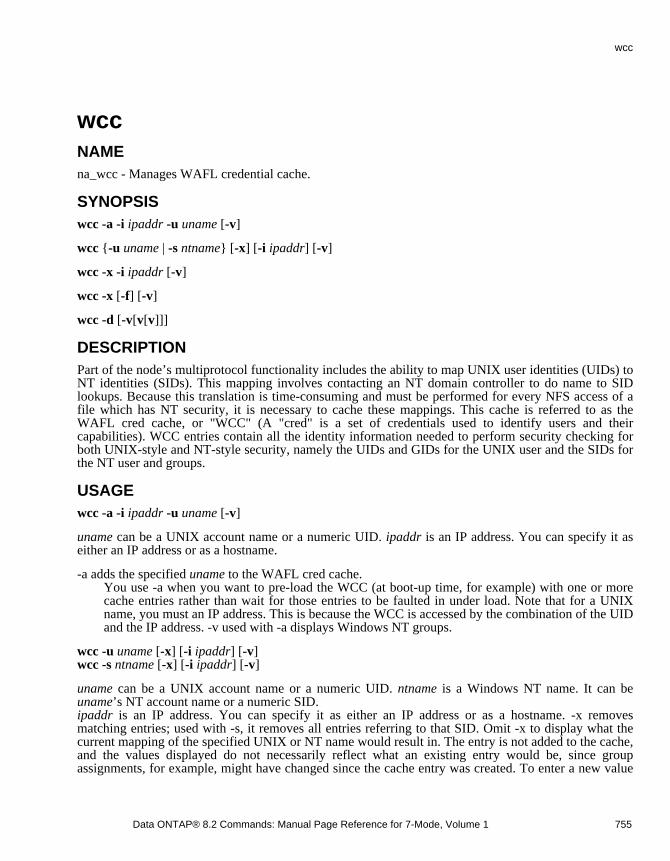
wccNAMEna_wcc - Manages WAFL credential cache.
SYNOPSISwcc -a -i ipaddr -u uname [-v]
wcc {-u uname | -s ntname} [-x] [-i ipaddr] [-v]
wcc -x -i ipaddr [-v]
wcc -x [-f] [-v]
wcc -d [-v[v[v]]]
DESCRIPTIONPart of the node’s multiprotocol functionality includes the ability to map UNIX user identities (UIDs) toNT identities (SIDs). This mapping involves contacting an NT domain controller to do name to SIDlookups. Because this translation is time-consuming and must be performed for every NFS access of afile which has NT security, it is necessary to cache these mappings. This cache is referred to as theWAFL cred cache, or "WCC" (A "cred" is a set of credentials used to identify users and theircapabilities). WCC entries contain all the identity information needed to perform security checking forboth UNIX-style and NT-style security, namely the UIDs and GIDs for the UNIX user and the SIDs forthe NT user and groups.
USAGEwcc -a -i ipaddr -u uname [-v]
uname can be a UNIX account name or a numeric UID. ipaddr is an IP address. You can specify it aseither an IP address or as a hostname.
-a adds the specified uname to the WAFL cred cache.You use -a when you want to pre-load the WCC (at boot-up time, for example) with one or morecache entries rather than wait for those entries to be faulted in under load. Note that for a UNIXname, you must an IP address. This is because the WCC is accessed by the combination of the UIDand the IP address. -v used with -a displays Windows NT groups.
wcc -u uname [-x] [-i ipaddr] [-v]wcc -s ntname [-x] [-i ipaddr] [-v]
uname can be a UNIX account name or a numeric UID. ntname is a Windows NT name. It can be uname’s NT account name or a numeric SID.ipaddr is an IP address. You can specify it as either an IP address or as a hostname. -x removesmatching entries; used with -s, it removes all entries referring to that SID. Omit -x to display what thecurrent mapping of the specified UNIX or NT name would result in. The entry is not added to the cache,and the values displayed do not necessarily reflect what an existing entry would be, since groupassignments, for example, might have changed since the cache entry was created. To enter a new value
Data ONTAP® 8.2 Commands: Manual Page Reference for 7-Mode, Volume 1 755
wcc
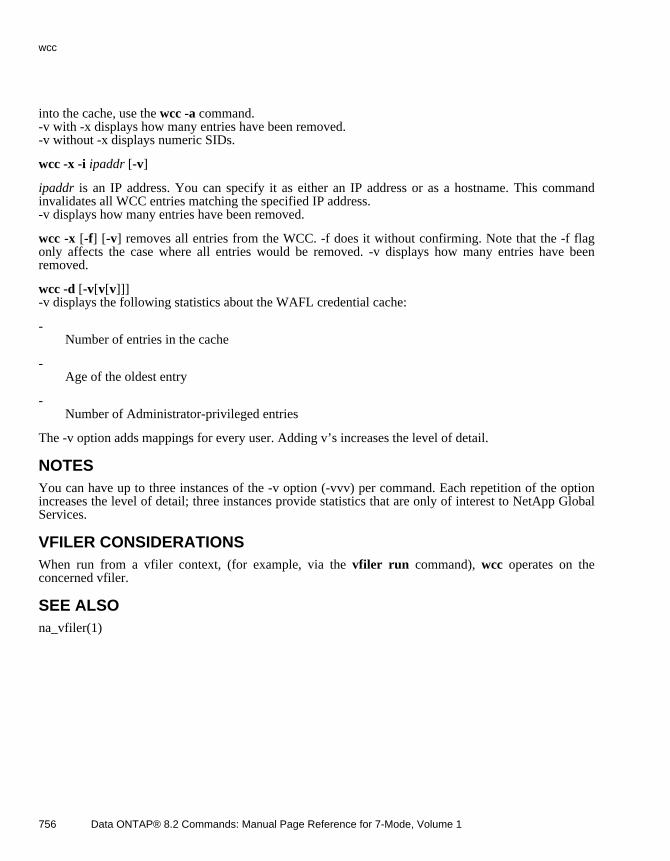
into the cache, use the wcc -a command.-v with -x displays how many entries have been removed.-v without -x displays numeric SIDs.
wcc -x -i ipaddr [-v]
ipaddr is an IP address. You can specify it as either an IP address or as a hostname. This commandinvalidates all WCC entries matching the specified IP address.-v displays how many entries have been removed.
wcc -x [-f] [-v] removes all entries from the WCC. -f does it without confirming. Note that the -f flagonly affects the case where all entries would be removed. -v displays how many entries have beenremoved.
wcc -d [-v[v[v]]]-v displays the following statistics about the WAFL credential cache:
- Number of entries in the cache
- Age of the oldest entry
- Number of Administrator-privileged entries
The -v option adds mappings for every user. Adding v’s increases the level of detail.
NOTESYou can have up to three instances of the -v option (-vvv) per command. Each repetition of the optionincreases the level of detail; three instances provide statistics that are only of interest to NetApp GlobalServices.
VFILER CONSIDERATIONSWhen run from a vfiler context, (for example, via the vfiler run command), wcc operates on theconcerned vfiler.
SEE ALSOna_vfiler(1)
756 Data ONTAP® 8.2 Commands: Manual Page Reference for 7-Mode, Volume 1
wcc
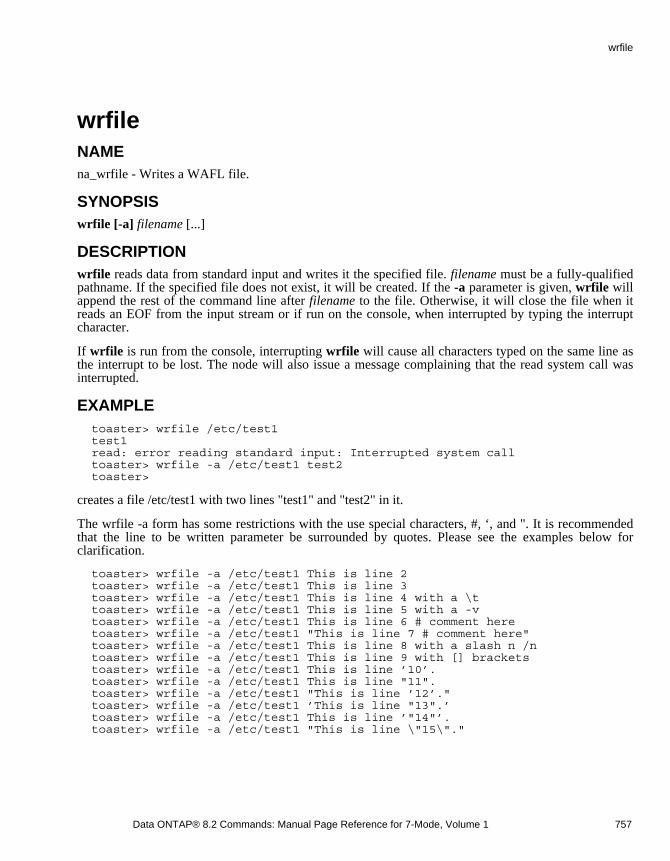
wrfileNAMEna_wrfile - Writes a WAFL file.
SYNOPSISwrfile [-a] filename [...]
DESCRIPTIONwrfile reads data from standard input and writes it the specified file. filename must be a fully-qualifiedpathname. If the specified file does not exist, it will be created. If the -a parameter is given, wrfile willappend the rest of the command line after filename to the file. Otherwise, it will close the file when itreads an EOF from the input stream or if run on the console, when interrupted by typing the interruptcharacter.
If wrfile is run from the console, interrupting wrfile will cause all characters typed on the same line asthe interrupt to be lost. The node will also issue a message complaining that the read system call wasinterrupted.
EXAMPLE toaster> wrfile /etc/test1 test1 read: error reading standard input: Interrupted system call toaster> wrfile -a /etc/test1 test2 toaster>
creates a file /etc/test1 with two lines "test1" and "test2" in it.
The wrfile -a form has some restrictions with the use special characters, #, ‘, and ". It is recommendedthat the line to be written parameter be surrounded by quotes. Please see the examples below forclarification.
toaster> wrfile -a /etc/test1 This is line 2 toaster> wrfile -a /etc/test1 This is line 3 toaster> wrfile -a /etc/test1 This is line 4 with a \t toaster> wrfile -a /etc/test1 This is line 5 with a -v toaster> wrfile -a /etc/test1 This is line 6 # comment here toaster> wrfile -a /etc/test1 "This is line 7 # comment here" toaster> wrfile -a /etc/test1 This is line 8 with a slash n /n toaster> wrfile -a /etc/test1 This is line 9 with [] brackets toaster> wrfile -a /etc/test1 This is line ’10’. toaster> wrfile -a /etc/test1 This is line "11". toaster> wrfile -a /etc/test1 "This is line ’12’." toaster> wrfile -a /etc/test1 ’This is line "13".’ toaster> wrfile -a /etc/test1 This is line ’"14"’. toaster> wrfile -a /etc/test1 "This is line \"15\"."
Data ONTAP® 8.2 Commands: Manual Page Reference for 7-Mode, Volume 1 757
wrfile
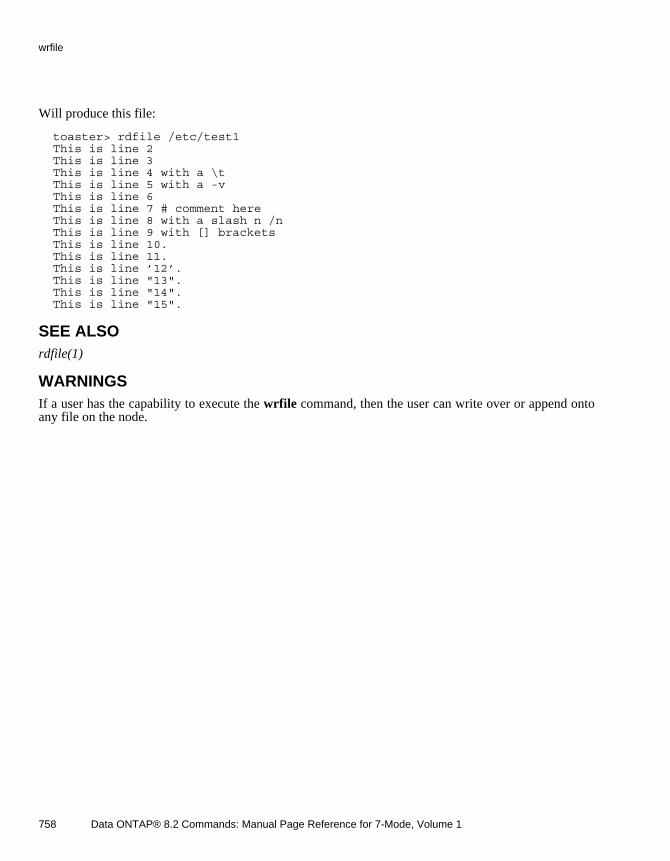
Will produce this file:
toaster> rdfile /etc/test1 This is line 2 This is line 3 This is line 4 with a \t This is line 5 with a -v This is line 6 This is line 7 # comment here This is line 8 with a slash n /n This is line 9 with [] brackets This is line 10. This is line 11. This is line ’12’. This is line "13". This is line "14". This is line "15".
SEE ALSOrdfile(1)
WARNINGSIf a user has the capability to execute the wrfile command, then the user can write over or append ontoany file on the node.
758 Data ONTAP® 8.2 Commands: Manual Page Reference for 7-Mode, Volume 1
wrfile
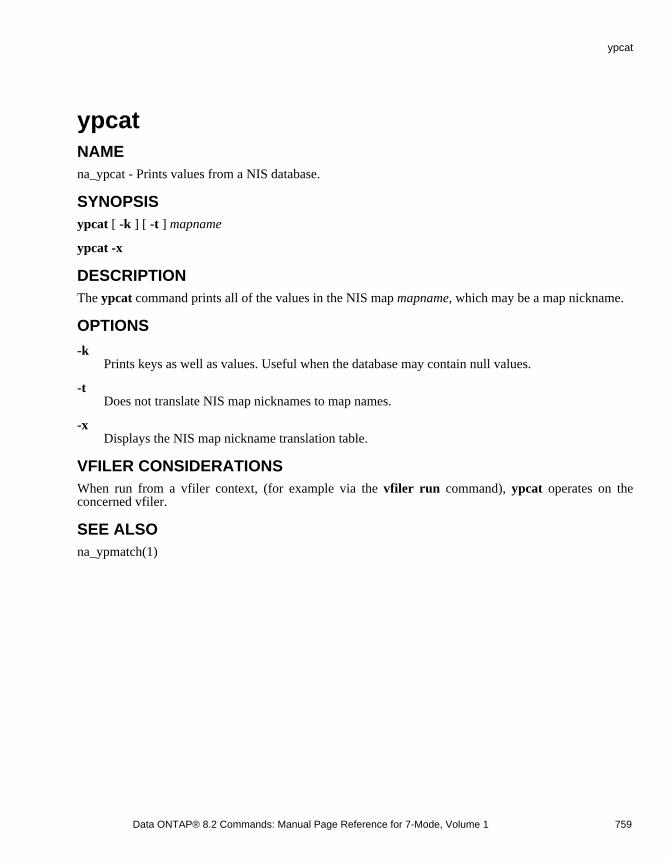
ypcatNAMEna_ypcat - Prints values from a NIS database.
SYNOPSISypcat [ -k ] [ -t ] mapname
ypcat -x
DESCRIPTIONThe ypcat command prints all of the values in the NIS map mapname, which may be a map nickname.
OPTIONS
-k Prints keys as well as values. Useful when the database may contain null values.
-t Does not translate NIS map nicknames to map names.
-x Displays the NIS map nickname translation table.
VFILER CONSIDERATIONSWhen run from a vfiler context, (for example via the vfiler run command), ypcat operates on theconcerned vfiler.
SEE ALSOna_ypmatch(1)
Data ONTAP® 8.2 Commands: Manual Page Reference for 7-Mode, Volume 1 759
ypcat
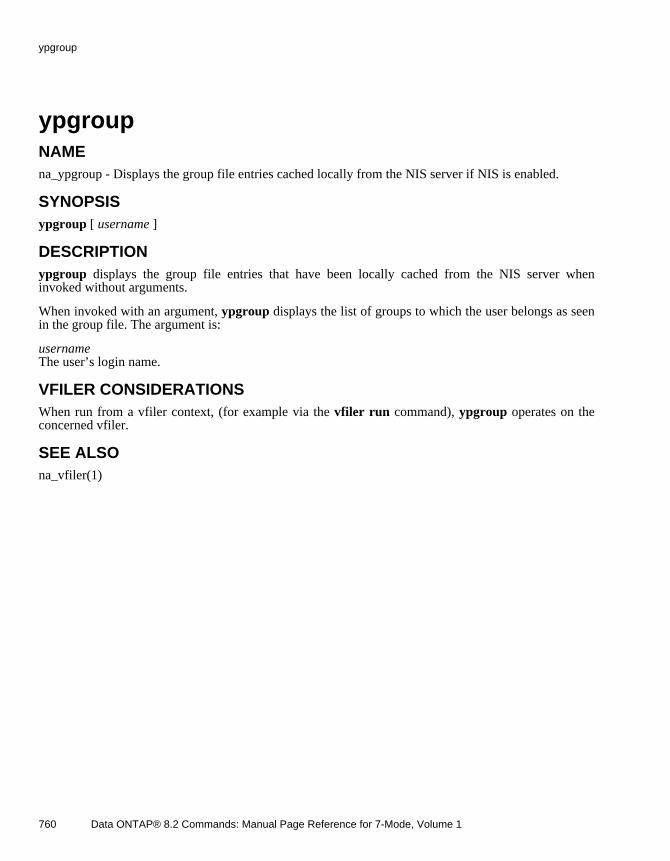
ypgroupNAMEna_ypgroup - Displays the group file entries cached locally from the NIS server if NIS is enabled.
SYNOPSISypgroup [ username ]
DESCRIPTIONypgroup displays the group file entries that have been locally cached from the NIS server wheninvoked without arguments.
When invoked with an argument, ypgroup displays the list of groups to which the user belongs as seenin the group file. The argument is:
usernameThe user’s login name.
VFILER CONSIDERATIONSWhen run from a vfiler context, (for example via the vfiler run command), ypgroup operates on theconcerned vfiler.
SEE ALSOna_vfiler(1)
760 Data ONTAP® 8.2 Commands: Manual Page Reference for 7-Mode, Volume 1
ypgroup
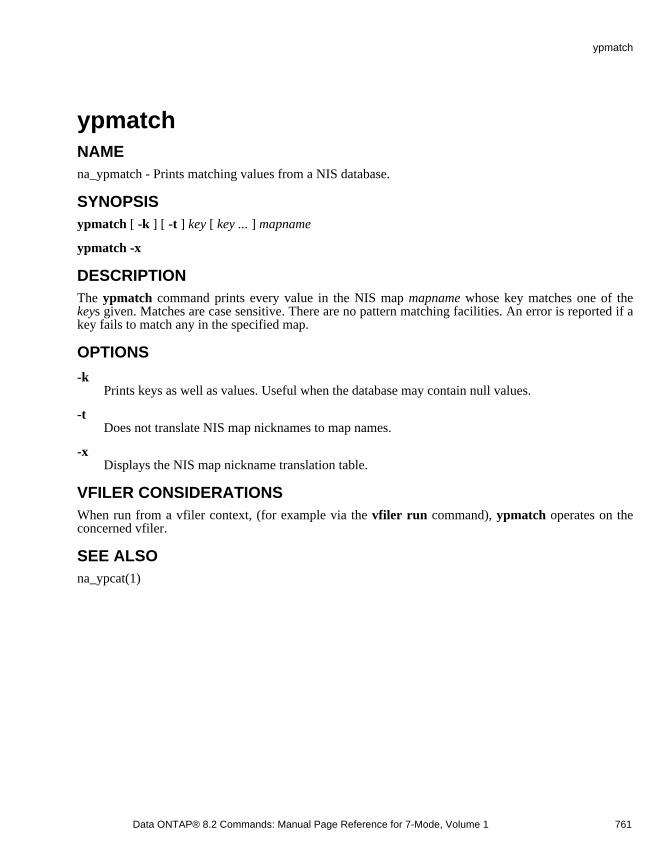
ypmatchNAMEna_ypmatch - Prints matching values from a NIS database.
SYNOPSISypmatch [ -k ] [ -t ] key [ key ... ] mapname
ypmatch -x
DESCRIPTIONThe ypmatch command prints every value in the NIS map mapname whose key matches one of the keys given. Matches are case sensitive. There are no pattern matching facilities. An error is reported if akey fails to match any in the specified map.
OPTIONS
-k Prints keys as well as values. Useful when the database may contain null values.
-t Does not translate NIS map nicknames to map names.
-x Displays the NIS map nickname translation table.
VFILER CONSIDERATIONSWhen run from a vfiler context, (for example via the vfiler run command), ypmatch operates on theconcerned vfiler.
SEE ALSOna_ypcat(1)
Data ONTAP® 8.2 Commands: Manual Page Reference for 7-Mode, Volume 1 761
ypmatch
ypwhichNAMEna_ypwhich - Displays the NIS server if NIS is enabled.
SYNOPSISypwhich
DESCRIPTIONypwhich prints the name of the current NIS server if NIS is enabled. If there is no entry for the serveritself in the host’s database, then it prints the IP address of the server.
The NIS server is dynamically chosen by the node.
VFILER CONSIDERATIONSWhen run from a vfiler context, (for example via the vfiler run command), ypwhich operates on theconcerned vfiler.
SEE ALSOna_vfiler(1)
762 Data ONTAP® 8.2 Commands: Manual Page Reference for 7-Mode, Volume 1
ypwhich