Embed Size (px)
DESCRIPTION
Daily Theme User Guide
Citation preview
Daily Theme Guide By OnlineTipsToday.com 1
Legal Notice
While all attempts have been made to verify the information provided in this publication, the Author assumes no responsibility for errors, omissions, or contrary interpretation of the subject matter herein.
The Reader of this publication assumes responsibility for the use of these materials and information. The Author do not warrant the performance or effectiveness of any sites stated in this book. All links are for informational and educational purposes only and are not warranted for content, accuracy or any other implied or explicit purpose. Adherence to all applicable laws and regulations, federal, state, and local, governing professional licensing, business practices, advertising, and all other aspects of doing business in the United States or any other jurisdiction is the sole responsibility of the Reader.
The Author assume no responsibility or liability whatsoever on the behalf of any Reader of these materials. Any perceived slights of specific people or organizations are unintentional.
The Author is not related to Theme Junkie in anyway and Theme Junkie expresses no opinion as to the correctness of any of the statements made in this Guide.
Daily Theme Guide By OnlineTipsToday.com 2
TABLE OF CONTENTS
Getting Started 4
Setting up the Header 5
Change Font Size 10
Image Sizes for Featured & Content Areas 15
Single Post Preference 17
Widgets 18
Subscriber Sign up Box 20
Email RSS Sign up Box 24
Conclusion 25
Daily Theme Guide By OnlineTipsToday.com 3
Getting Started
After purchasing the Daily theme, it is important that you know how to quickly set up your theme. The reality is every new theme have different challenges (due to the way the theme is designed) even to experience bloggers. As for new bloggers, setting up a theme can be a nightmare. To them, the first question is…where to start!
Even though Theme Junkie provide great support to its customers, you have to take a lot of time to go through the existing treads (or start new ones) and play around with the theme on order to set it up. All these can sometimes take a lot of time!
This is where this Daily Theme Guide comes in to help you to a quick start. This guide will show you to set up the Daily Theme as what you see in the Daily Theme Demo.
I wrote this Guide for my reference and for sharing this with fellow Daily theme users who may find this useful
I only cover basic customization e.g. how to put in a header image, putting in an email RSS subscription box, subscriber optin box and some minor changes to the text/image size and color(text & borders) etc.
Have fun!
Daily Theme Guide By OnlineTipsToday.com 4
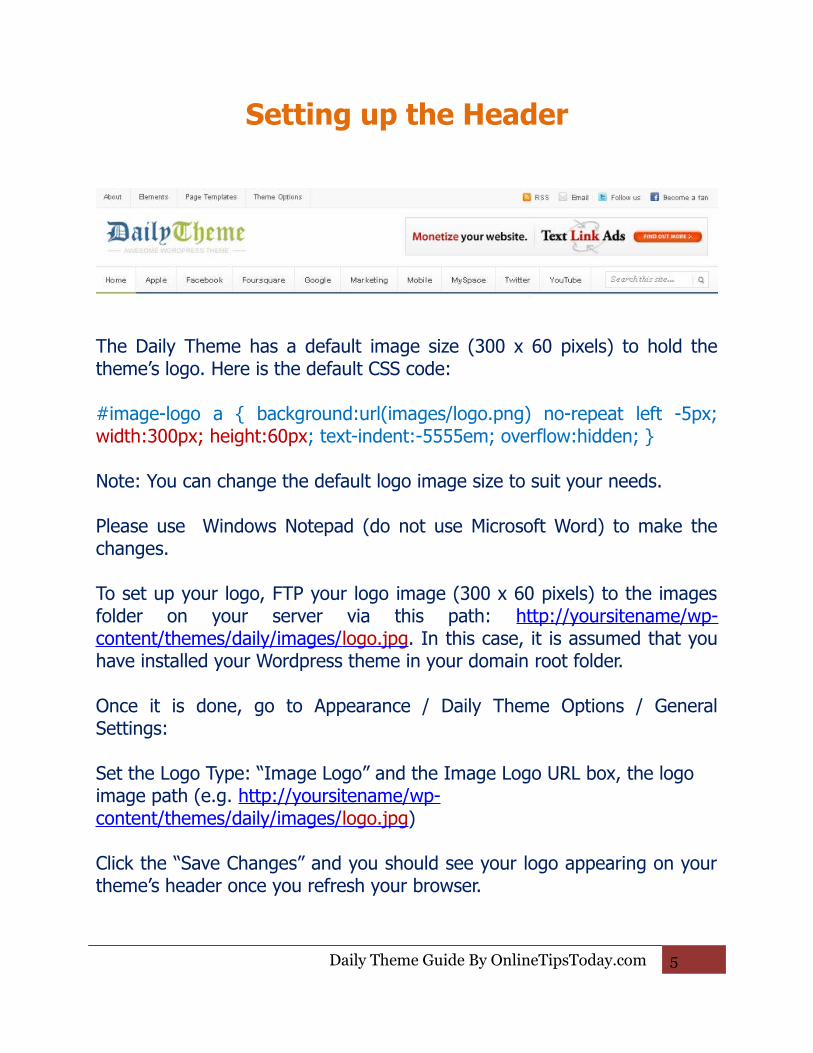
Setting up the Header
The Daily Theme has a default image size (300 x 60 pixels) to hold the theme’s logo. Here is the default CSS code:
#image-logo a { background:url(images/logo.png) no-repeat left -5px; width:300px; height:60px; text-indent:-5555em; overflow:hidden; }
Note: You can change the default logo image size to suit your needs.
Please use Windows Notepad (do not use Microsoft Word) to make the changes.
To set up your logo, FTP your logo image (300 x 60 pixels) to the images folder on your server via this path: http://yoursitename/wp-content/themes/daily/images/ logo.jpg . In this case, it is assumed that you have installed your Wordpress theme in your domain root folder.
Once it is done, go to Appearance / Daily Theme Options / General Settings:
Set the Logo Type: “Image Logo” and the Image Logo URL box, the logo image path (e.g. http://yoursitename/wp-content/themes/daily/images/ logo.jpg )
Click the “Save Changes” and you should see your logo appearing on your theme’s header once you refresh your browser.
Daily Theme Guide By OnlineTipsToday.com 5
If you need to adjust the vertical alignment of your logo (in relation to your advertisement banner (right side of logo)), change the CSS code:
.logo { margin:15px 0px 0px 15px; font-family:georgia,serif; font-size:36px; font-weight:bold; line-height:30px; letter-spacing:0px; }
To change the overall header height or background color, change the CSS code:
#header { background:#FFF; height:90px; padding:0 15px 0 0; text-align:left; }
Setting Up Your Header Ad Advertisement (Banner)
Go to Appearance / Daily Theme Options / Advertisement and insert your banner affiliate codes (from the vendor’s site). To adjust the banner’s vertical alignment (to your logo image or the social links above), change this CSS code:
.header-ad { float:right; width:468px; height:60px; overflow:hidden; margin:15px 0 0; }
Daily Theme Guide By OnlineTipsToday.com 6
Activate Your Social Links
Go to Appearance / Daily Theme Options / Social Links and insert your RSS (Feedburner), Twitter and Facebook IDs. Important: The IDs must be in non-numeric format or else it will not work. For example, for RSS feed, your ID would be the last portion of your Feed Address (in red) e.g. Feed Address:http://feeds.feedburner.com/yoursite name/xxxx.
Note: You must get a Feedburner account to set up your feed address for your blog. For the Email RSS, remember to “activate” your RSS in Feedburner (Email Subscription).
Similarly, your Twitter ID would be e.g.: Twitter.com/youraccountname etc.Note: Make sure you select “Yes” in the “Enable your social links in top bar” box.
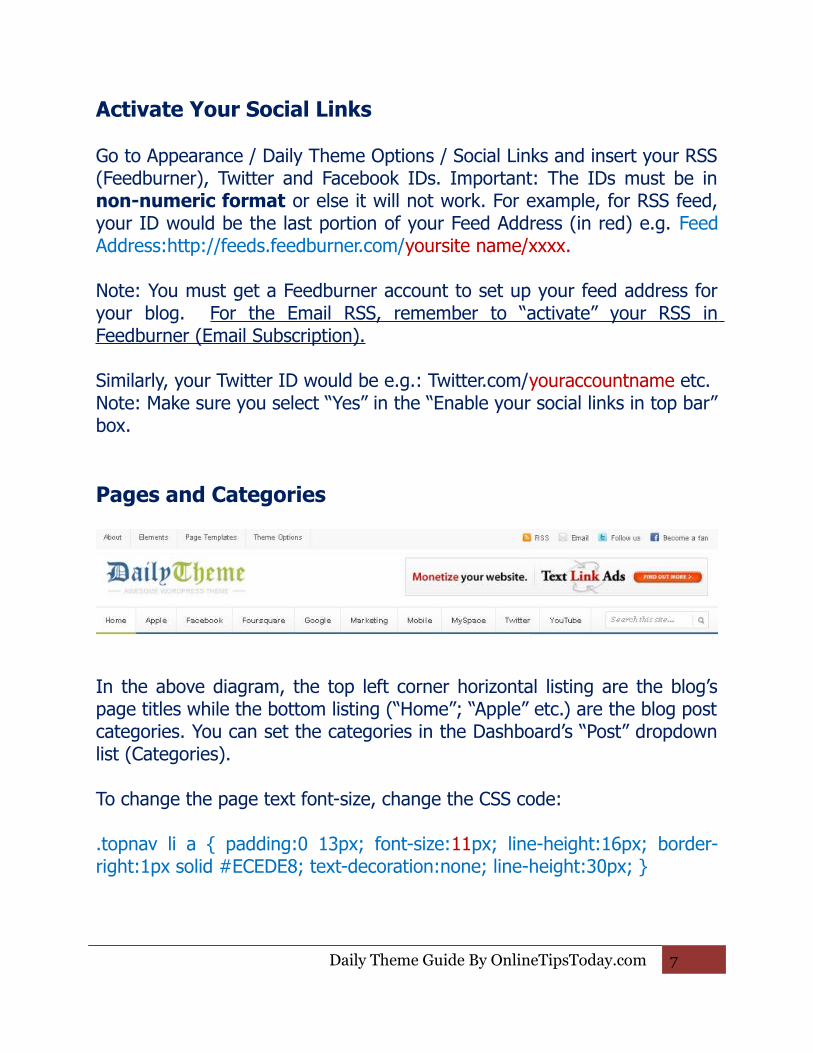
Pages and Categories
In the above diagram, the top left corner horizontal listing are the blog’s page titles while the bottom listing (“Home”; “Apple” etc.) are the blog post categories. You can set the categories in the Dashboard’s “Post” dropdown list (Categories).
To change the page text font-size, change the CSS code:
.topnav li a { padding:0 13px; font-size:11px; line-height:16px; border-right:1px solid #ECEDE8; text-decoration:none; line-height:30px; }
Daily Theme Guide By OnlineTipsToday.com 7
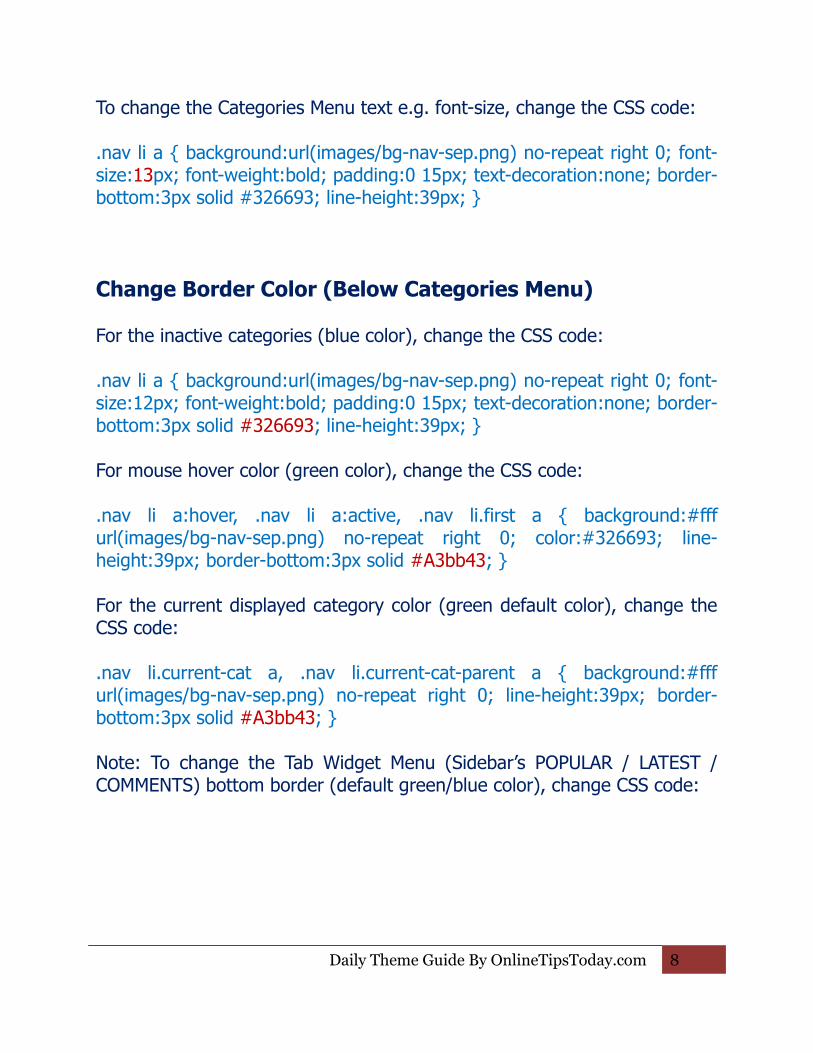
To change the Categories Menu text e.g. font-size, change the CSS code:
.nav li a { background:url(images/bg-nav-sep.png) no-repeat right 0; font-size:13px; font-weight:bold; padding:0 15px; text-decoration:none; border-bottom:3px solid #326693; line-height:39px; }
Change Border Color (Below Categories Menu)
For the inactive categories (blue color), change the CSS code:
.nav li a { background:url(images/bg-nav-sep.png) no-repeat right 0; font-size:12px; font-weight:bold; padding:0 15px; text-decoration:none; border-bottom:3px solid #326693; line-height:39px; }
For mouse hover color (green color), change the CSS code:
.nav li a:hover, .nav li a:active, .nav li.first a { background:#fff url(images/bg-nav-sep.png) no-repeat right 0; color:#326693; line-height:39px; border-bottom:3px solid #A3bb43; }
For the current displayed category color (green default color), change the CSS code:
.nav li.current-cat a, .nav li.current-cat-parent a { background:#fff url(images/bg-nav-sep.png) no-repeat right 0; line-height:39px; border-bottom:3px solid #A3bb43; }
Note: To change the Tab Widget Menu (Sidebar’s POPULAR / LATEST / COMMENTS) bottom border (default green/blue color), change CSS code:
Daily Theme Guide By OnlineTipsToday.com 8

Non-active tab:
.tab-widget-menu { background:#fbfbfb; font-size:12px; font-weight:bold; width:290px; height:30px; border-bottom:3px solid #326693; }.tab-widget-menu li { float:left; display:block; background:#fbfbfb url(images/bg-tab-sep.png) no-repeat right 0; padding:0 10px; width:66px; height:30px; line-height:30px; cursor:pointer; text-transform:uppercase; color:#444; text-align:center; border-bottom:3px solid #326693; }
Active tab:
.tab-widget-menu li.selected { background:#fff url(images/bg-tab-sep.png) no-repeat right 0; position:relative; height:30px; bottom:0px; border-bottom:3px solid #ff6600; }
Add Contents Below The Categories Menu
You can add Google Adsense banners, or any contents in the place just below the Categories menu (see red arrow below).
Daily Theme Guide By OnlineTipsToday.com 9

Add codes to the header.php file:
</div> <!--end #cat-nav-->Add your codes here<?php if(is_home()) { ?>
Change Font Size
Daily Theme Guide By OnlineTipsToday.com 10
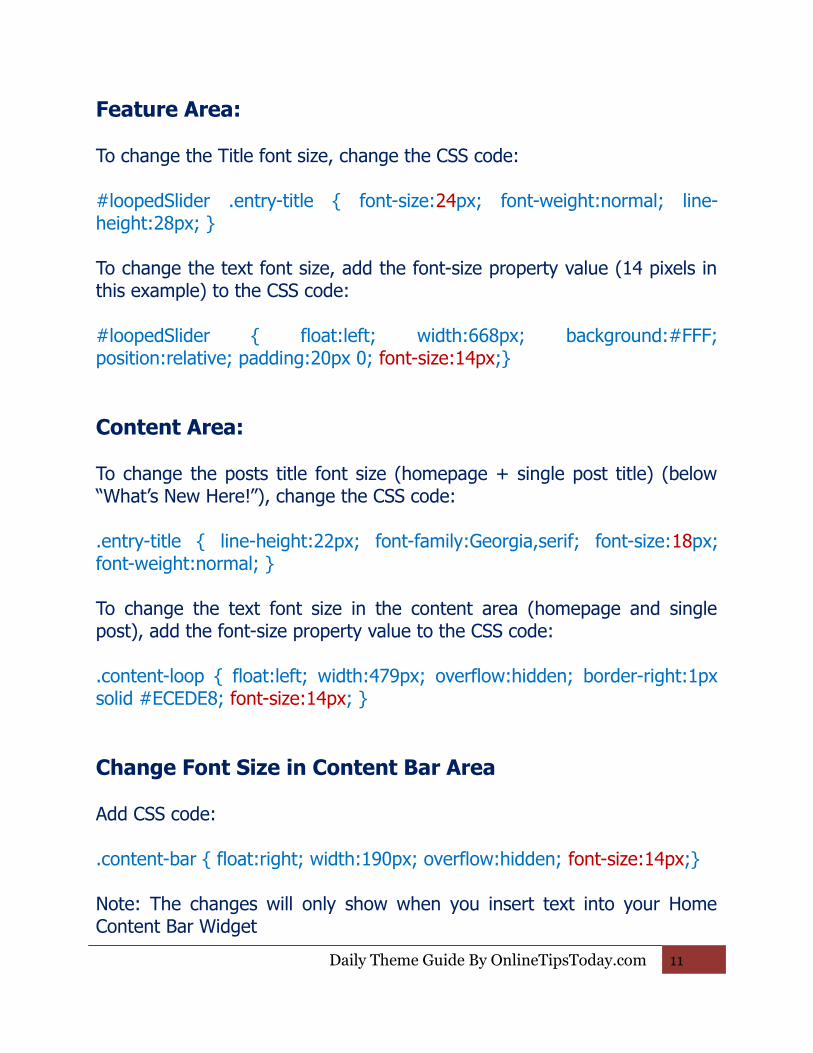
Feature Area:
To change the Title font size, change the CSS code:
#loopedSlider .entry-title { font-size:24px; font-weight:normal; line-height:28px; }
To change the text font size, add the font-size property value (14 pixels in this example) to the CSS code:
#loopedSlider { float:left; width:668px; background:#FFF; position:relative; padding:20px 0; font-size:14px;}
Content Area:
To change the posts title font size (homepage + single post title) (below “What’s New Here!”), change the CSS code:
.entry-title { line-height:22px; font-family:Georgia,serif; font-size:18px; font-weight:normal; }
To change the text font size in the content area (homepage and single post), add the font-size property value to the CSS code:
.content-loop { float:left; width:479px; overflow:hidden; border-right:1px solid #ECEDE8; font-size:14px; }
Change Font Size in Content Bar Area
Add CSS code:
.content-bar { float:right; width:190px; overflow:hidden; font-size:14px;}
Note: The changes will only show when you insert text into your Home Content Bar Widget
Daily Theme Guide By OnlineTipsToday.com 11
Change Sidebar Texts Font Size
Add CSS code:
#sidebar { float:right; width:289px; padding:0; border-top:1px solid #ECEDE8; font-size:14px;}
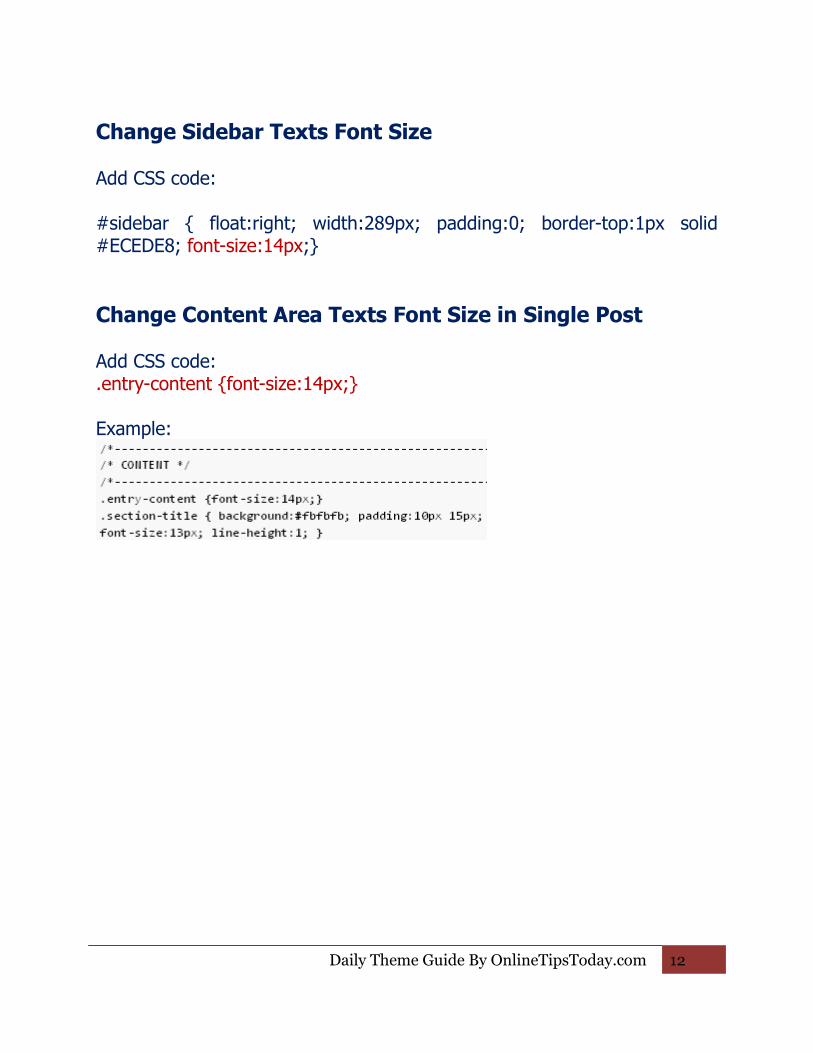
Change Content Area Texts Font Size in Single Post
Add CSS code:.entry-content {font-size:14px;}
Example:
Daily Theme Guide By OnlineTipsToday.com 12
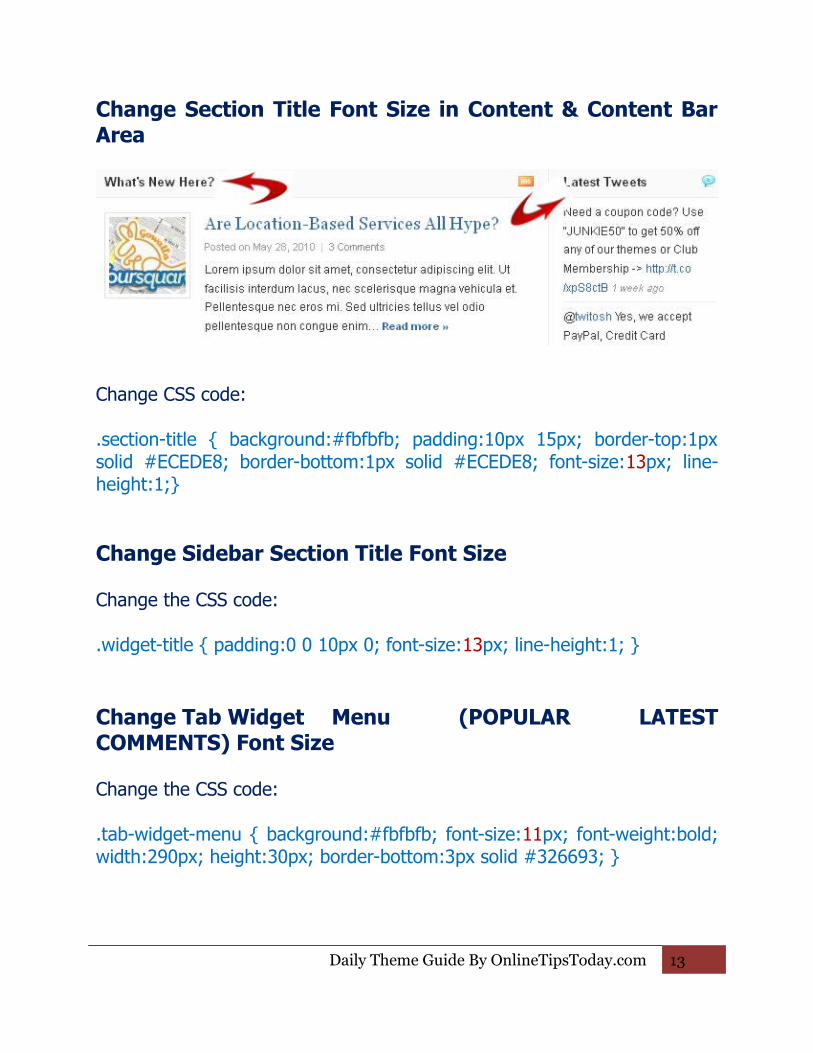
Change Section Title Font Size in Content & Content Bar Area
Change CSS code:
.section-title { background:#fbfbfb; padding:10px 15px; border-top:1px solid #ECEDE8; border-bottom:1px solid #ECEDE8; font-size:13px; line-height:1;}
Change Sidebar Section Title Font Size
Change the CSS code:
.widget-title { padding:0 0 10px 0; font-size:13px; line-height:1; }
Change Tab Widget Menu (POPULAR LATEST COMMENTS) Font Size
Change the CSS code:
.tab-widget-menu { background:#fbfbfb; font-size:11px; font-weight:bold; width:290px; height:30px; border-bottom:3px solid #326693; }
Daily Theme Guide By OnlineTipsToday.com 13
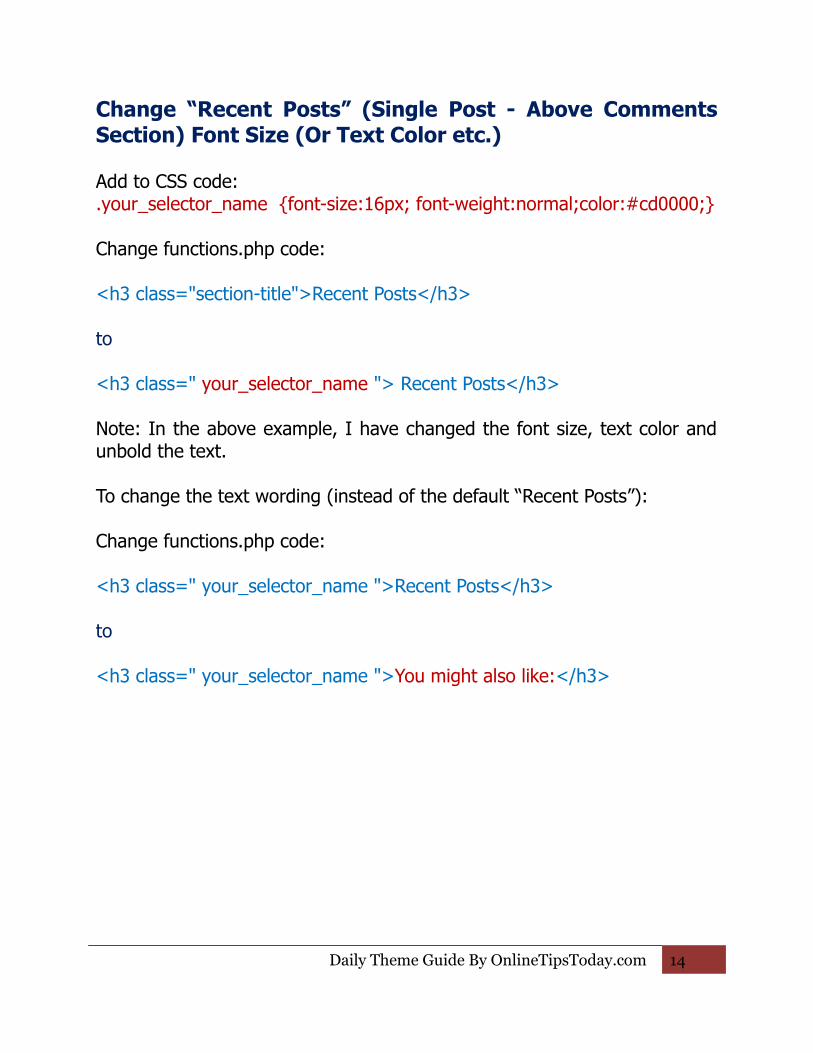
Change “Recent Posts” (Single Post - Above Comments Section) Font Size (Or Text Color etc.)
Add to CSS code:.your_selector_name {font-size:16px; font-weight:normal;color:#cd0000;}
Change functions.php code:
<h3 class="section-title">Recent Posts</h3>
to
<h3 class=" your_selector_name "> Recent Posts</h3>
Note: In the above example, I have changed the font size, text color and unbold the text.
To change the text wording (instead of the default “Recent Posts”):
Change functions.php code:
<h3 class=" your_selector_name ">Recent Posts</h3>
to
<h3 class=" your_selector_name ">You might also like:</h3>
Daily Theme Guide By OnlineTipsToday.com 14

Image Sizes for Featured & Content Areas
Thumbnail images (Featured area) on homepage
To set the thumbnail image size, insert the appropriate thumbnail sizes in the Appearance / Daily Theme Options / Featured Content Slider Settings:
Note: Remember to indicate the number of Featured Posts that you want to display and enable your thumbnail image (select “Yes”).
Daily Theme Guide By OnlineTipsToday.com 15
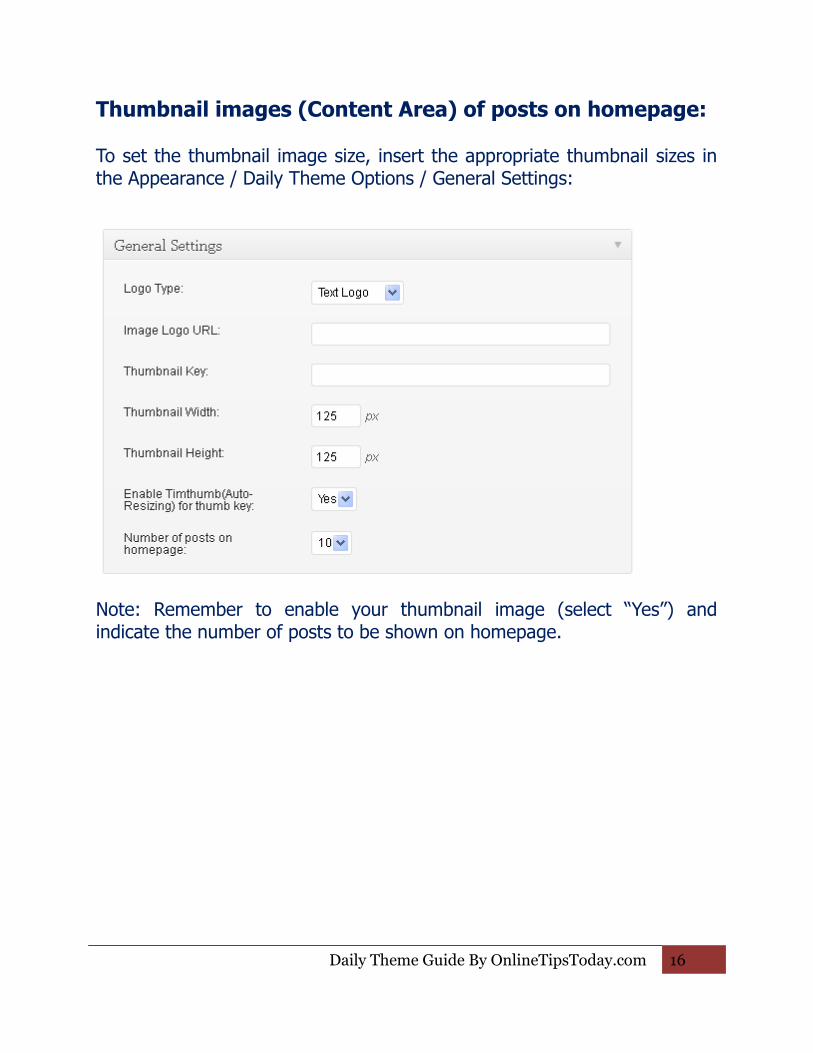
Thumbnail images (Content Area) of posts on homepage:
To set the thumbnail image size, insert the appropriate thumbnail sizes in the Appearance / Daily Theme Options / General Settings:
Note: Remember to enable your thumbnail image (select “Yes”) and indicate the number of posts to be shown on homepage.
Daily Theme Guide By OnlineTipsToday.com 16
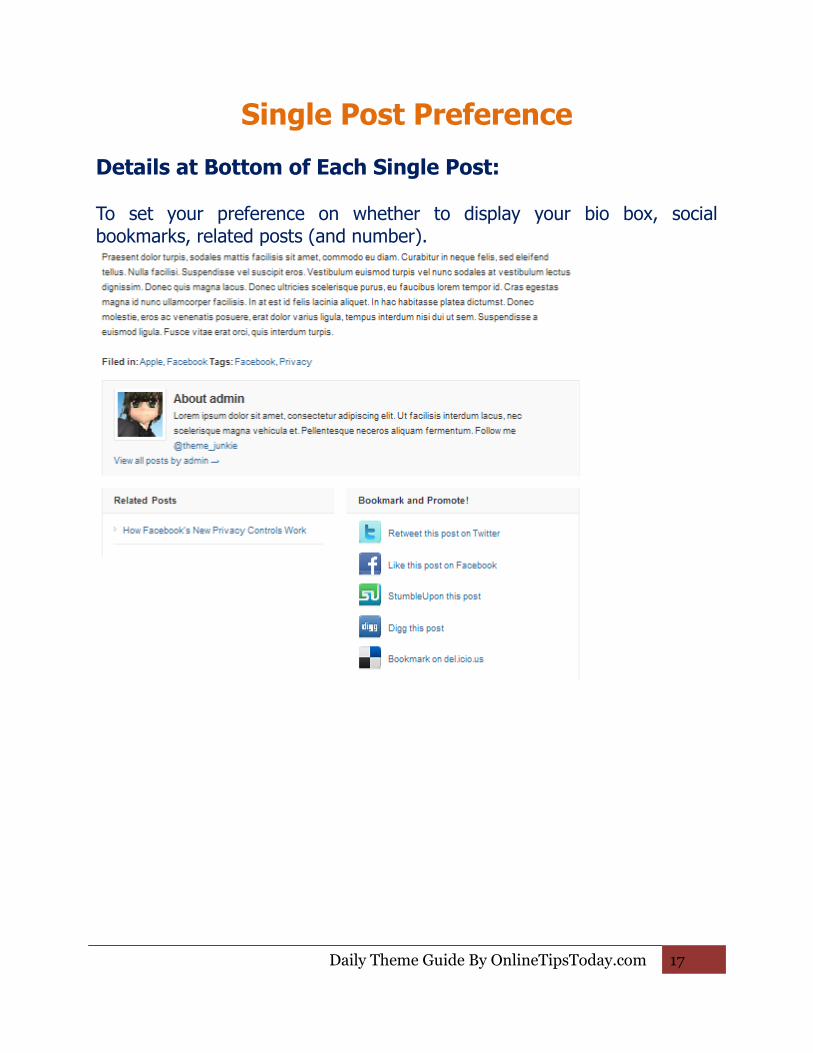
Single Post Preference
Details at Bottom of Each Single Post:
To set your preference on whether to display your bio box, social bookmarks, related posts (and number).
Daily Theme Guide By OnlineTipsToday.com 17

To set your preference, go to Appearance / Daily Theme Options / Single Posts:
Widgets
You can access the Widgets Area (see below) via Appearance / Widgets:
Daily Theme Guide By OnlineTipsToday.com 18
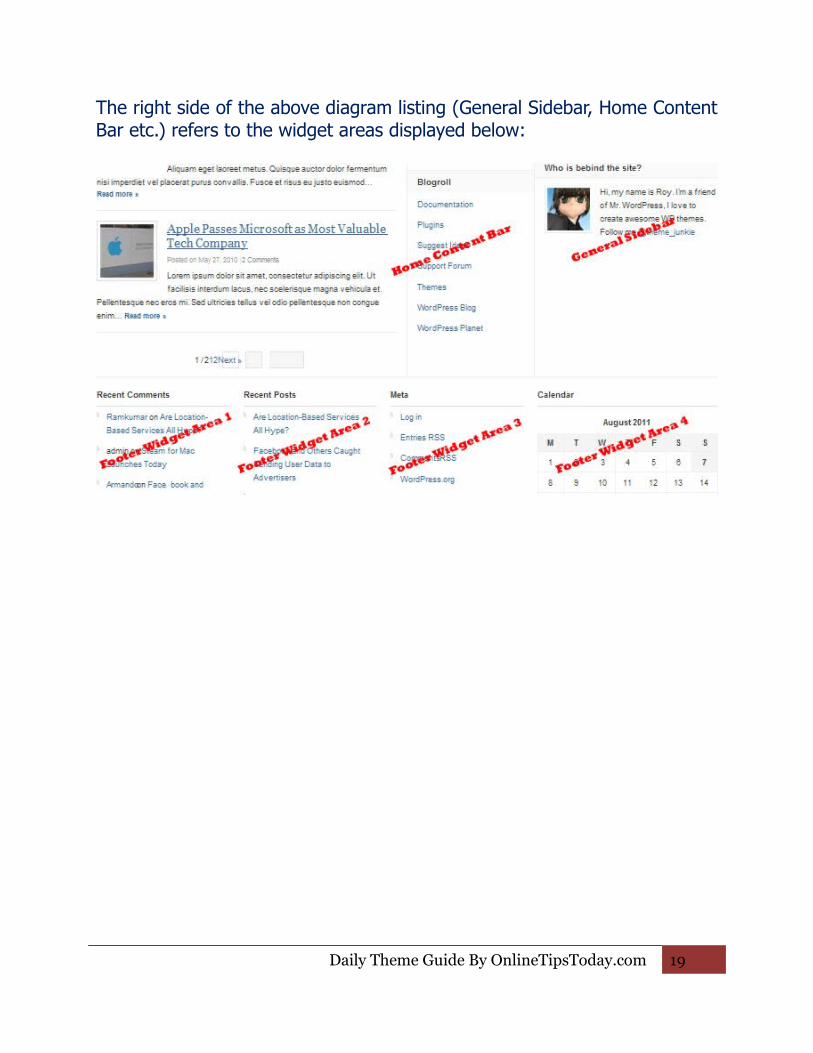
The right side of the above diagram listing (General Sidebar, Home Content Bar etc.) refers to the widget areas displayed below:
Daily Theme Guide By OnlineTipsToday.com 19

To add a widget to the Sidebar, click the “General Sidebar” down arrow. An empty box will appear. Click and drag your preferred widget (from the “Available Widgets” on the left side of the screen) to the empty box and insert your contents (HTML codes/text). The widget title is optional.
To add another widget to the sidebar, you have to “close” the existing widget and repeat the above process.
Subscriber Sign up Box
Below are the steps and codes required to insert a Subscriber Sign Up box into the Home Content Bar or Sidebar.
Home Content Bar:
Step 1: Drag a “Text Widget” to the Home Content Bar box
Step 2: Insert the “Title” (optional) and the following codes:
<div style="border:0px solid #cccccc; width:130px; background-color: #ffffff;margin-top:0px; padding:0 10px 0 10px;background-color:#ffffff; font-family: verdana;">
Daily Theme Guide By OnlineTipsToday.com 20
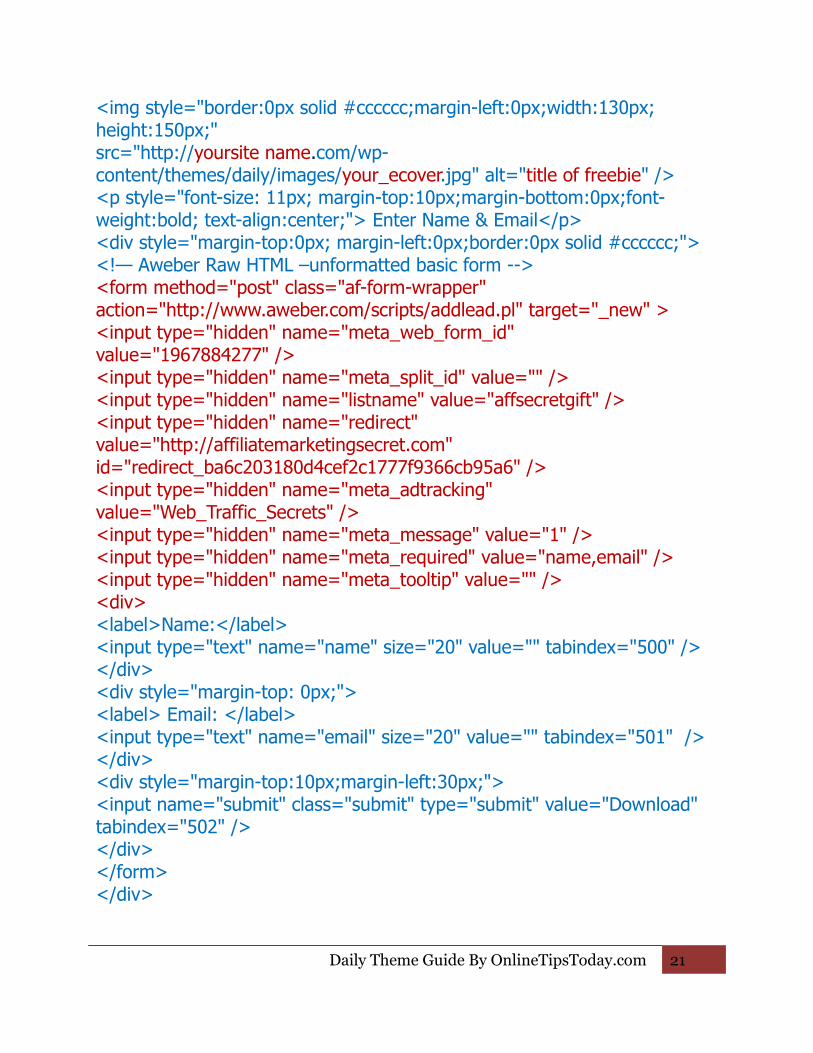
<img style="border:0px solid #cccccc;margin-left:0px;width:130px; height:150px;"src="http://yoursite name.com/wp-content/themes/daily/images/your_ecover.jpg" alt="title of freebie" /><p style="font-size: 11px; margin-top:10px;margin-bottom:0px;font-weight:bold; text-align:center;"> Enter Name & Email</p><div style="margin-top:0px; margin-left:0px;border:0px solid #cccccc;"><!— Aweber Raw HTML –unformatted basic form --><form method="post" class="af-form-wrapper" action="http://www.aweber.com/scripts/addlead.pl" target="_new" ><input type="hidden" name="meta_web_form_id" value="1967884277" /><input type="hidden" name="meta_split_id" value="" /><input type="hidden" name="listname" value="affsecretgift" /><input type="hidden" name="redirect" value="http://affiliatemarketingsecret.com" id="redirect_ba6c203180d4cef2c1777f9366cb95a6" /><input type="hidden" name="meta_adtracking" value="Web_Traffic_Secrets" /><input type="hidden" name="meta_message" value="1" /><input type="hidden" name="meta_required" value="name,email" /><input type="hidden" name="meta_tooltip" value="" /><div><label>Name:</label><input type="text" name="name" size="20" value="" tabindex="500" /></div><div style="margin-top: 0px;"><label> Email: </label><input type="text" name="email" size="20" value="" tabindex="501" /></div><div style="margin-top:10px;margin-left:30px;"><input name="submit" class="submit" type="submit" value="Download" tabindex="502" /></div></form></div>
Daily Theme Guide By OnlineTipsToday.com 21
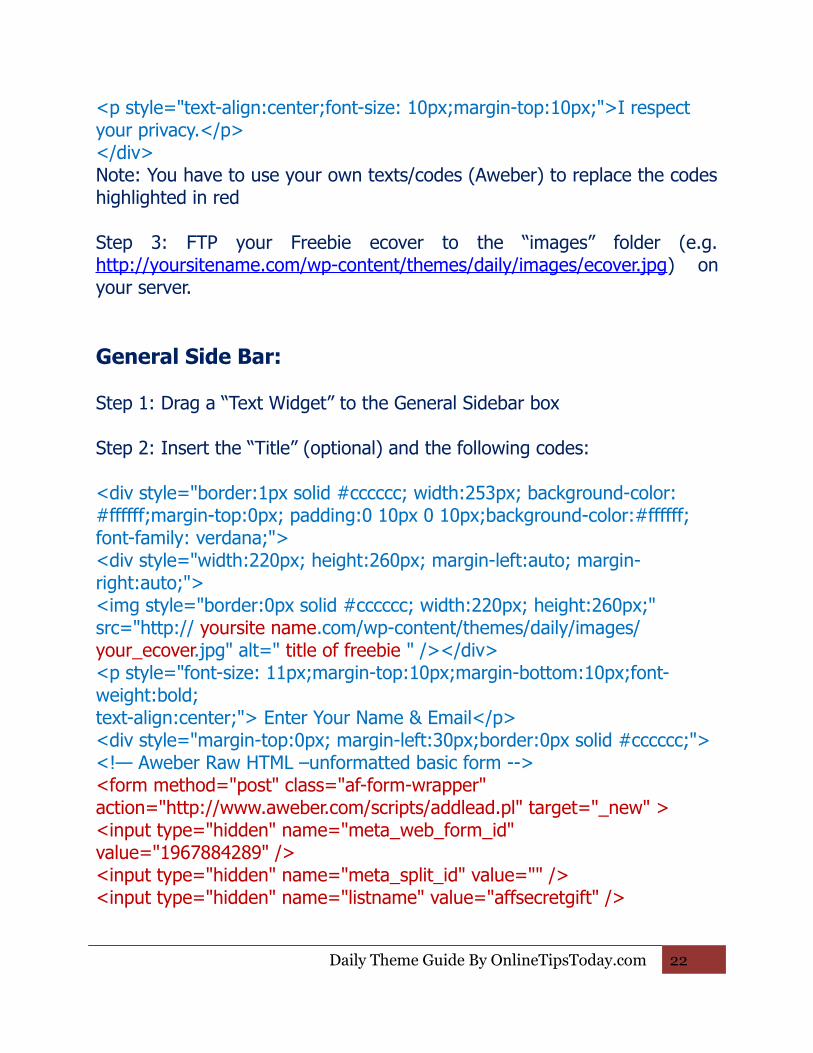
<p style="text-align:center;font-size: 10px;margin-top:10px;">I respect your privacy.</p></div>Note: You have to use your own texts/codes (Aweber) to replace the codes highlighted in red
Step 3: FTP your Freebie ecover to the “images” folder (e.g. http://yoursitename.com/wp-content/themes/daily/images/ecover.jpg) on your server.
General Side Bar:
Step 1: Drag a “Text Widget” to the General Sidebar box
Step 2: Insert the “Title” (optional) and the following codes:
<div style="border:1px solid #cccccc; width:253px; background-color: #ffffff;margin-top:0px; padding:0 10px 0 10px;background-color:#ffffff; font-family: verdana;"><div style="width:220px; height:260px; margin-left:auto; margin-right:auto;"><img style="border:0px solid #cccccc; width:220px; height:260px;"src="http:// yoursite name.com/wp-content/themes/daily/images/ your_ecover.jpg" alt=" title of freebie " /></div><p style="font-size: 11px;margin-top:10px;margin-bottom:10px;font-weight:bold;text-align:center;"> Enter Your Name & Email</p><div style="margin-top:0px; margin-left:30px;border:0px solid #cccccc;"><!— Aweber Raw HTML –unformatted basic form --><form method="post" class="af-form-wrapper" action="http://www.aweber.com/scripts/addlead.pl" target="_new" ><input type="hidden" name="meta_web_form_id" value="1967884289" /><input type="hidden" name="meta_split_id" value="" /><input type="hidden" name="listname" value="affsecretgift" />
Daily Theme Guide By OnlineTipsToday.com 22
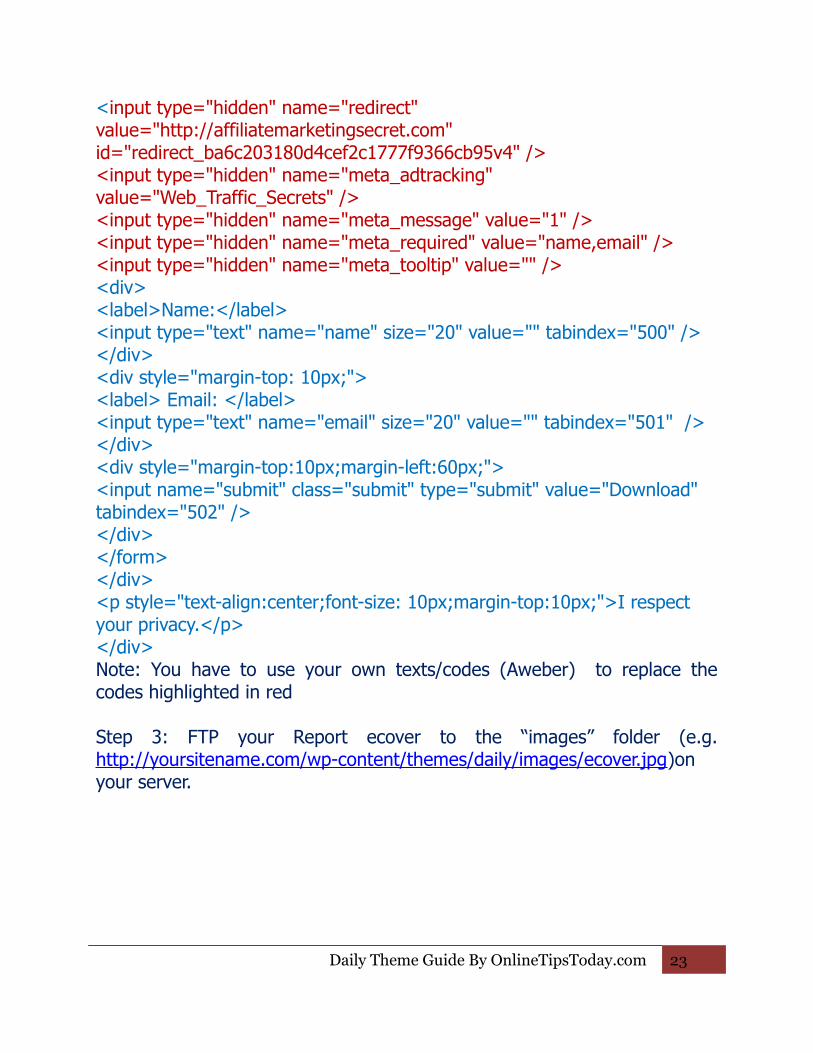
<input type="hidden" name="redirect" value="http://affiliatemarketingsecret.com" id="redirect_ba6c203180d4cef2c1777f9366cb95v4" /><input type="hidden" name="meta_adtracking" value="Web_Traffic_Secrets" /><input type="hidden" name="meta_message" value="1" /><input type="hidden" name="meta_required" value="name,email" /><input type="hidden" name="meta_tooltip" value="" /><div><label>Name:</label><input type="text" name="name" size="20" value="" tabindex="500" /></div><div style="margin-top: 10px;"><label> Email: </label><input type="text" name="email" size="20" value="" tabindex="501" /></div><div style="margin-top:10px;margin-left:60px;"><input name="submit" class="submit" type="submit" value="Download" tabindex="502" /></div></form></div><p style="text-align:center;font-size: 10px;margin-top:10px;">I respect your privacy.</p></div>Note: You have to use your own texts/codes (Aweber) to replace the codes highlighted in red
Step 3: FTP your Report ecover to the “images” folder (e.g. http://yoursitename.com/wp-content/themes/daily/images/ecover.jpg)on your server.
Daily Theme Guide By OnlineTipsToday.com 23
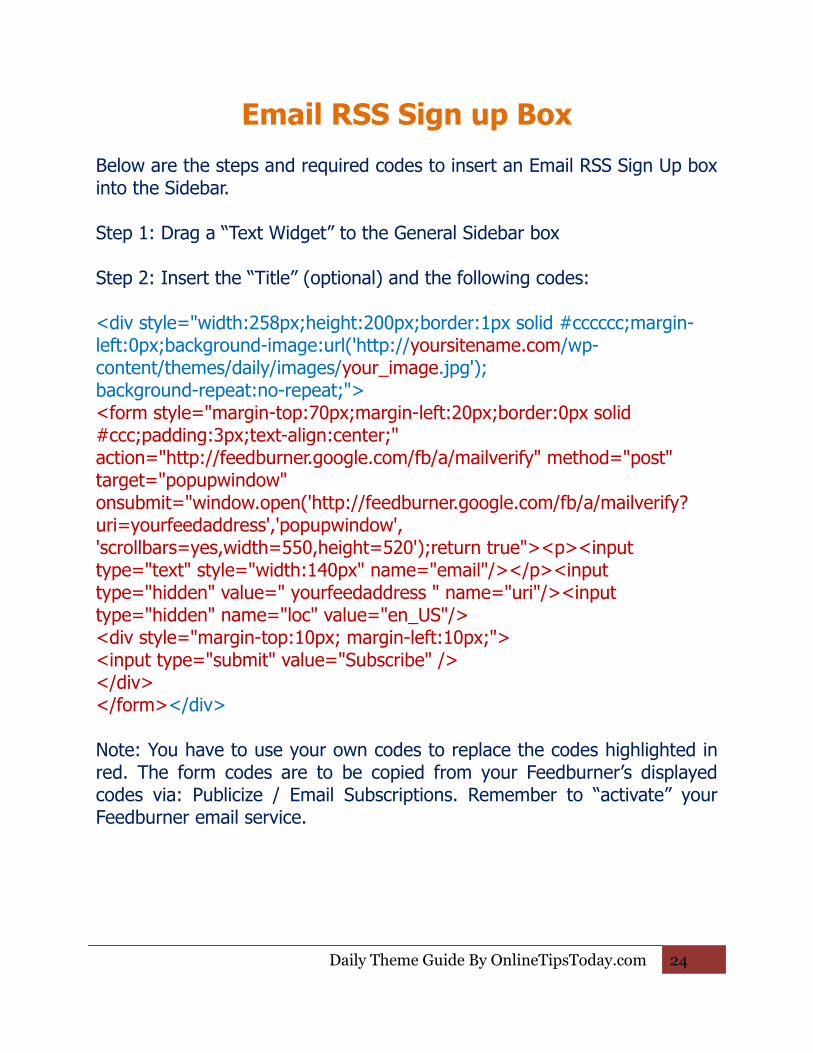
Email RSS Sign up Box
Below are the steps and required codes to insert an Email RSS Sign Up box into the Sidebar.
Step 1: Drag a “Text Widget” to the General Sidebar box
Step 2: Insert the “Title” (optional) and the following codes:
<div style="width:258px;height:200px;border:1px solid #cccccc;margin-left:0px;background-image:url('http://yoursitename.com/wp-content/themes/daily/images/your_image.jpg');background-repeat:no-repeat;"><form style="margin-top:70px;margin-left:20px;border:0px solid #ccc;padding:3px;text-align:center;" action="http://feedburner.google.com/fb/a/mailverify" method="post" target="popupwindow" onsubmit="window.open('http://feedburner.google.com/fb/a/mailverify?uri=yourfeedaddress','popupwindow', 'scrollbars=yes,width=550,height=520');return true"><p><input type="text" style="width:140px" name="email"/></p><input type="hidden" value=" yourfeedaddress " name="uri"/><input type="hidden" name="loc" value="en_US"/><div style="margin-top:10px; margin-left:10px;"><input type="submit" value="Subscribe" /></div></form></div>
Note: You have to use your own codes to replace the codes highlighted in red. The form codes are to be copied from your Feedburner’s displayed codes via: Publicize / Email Subscriptions. Remember to “activate” your Feedburner email service.
Daily Theme Guide By OnlineTipsToday.com 24
Conclusion
That’s it. I hope you find the above Guide really useful to assist you to quickly set up your Daily Theme.
For more detailed changes to your theme, please go to the Junkie Support forum.
To your success,Solomon Cheah
Recommended:
Download the 3 Most Powerful List Building Strategies: http://onlinetipstoday.com
Daily Theme Guide By OnlineTipsToday.com 25