Embed Size (px)
Citation preview
Creating and embedding a Google Form 1 / 13
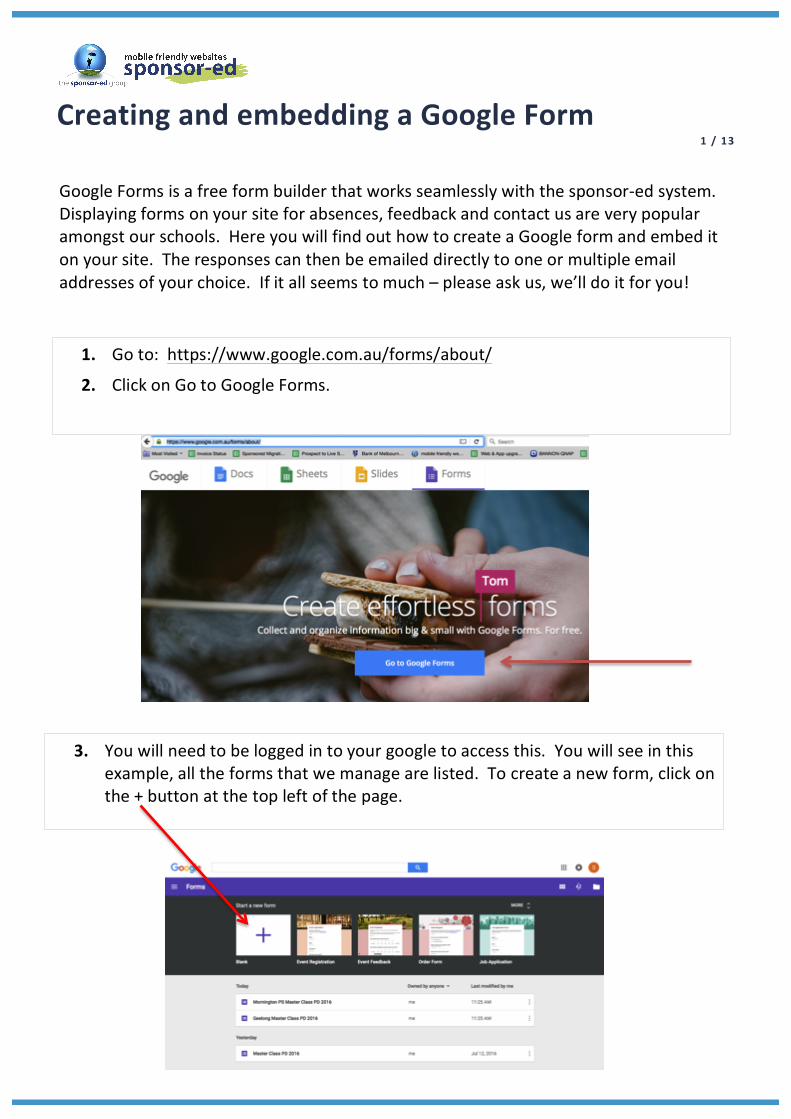
1. Go to: https://www.google.com.au/forms/about/
2. Click on Go to Google Forms.
Google Forms is a free form builder that works seamlessly with the sponsor-‐ed system. Displaying forms on your site for absences, feedback and contact us are very popular amongst our schools. Here you will find out how to create a Google form and embed it on your site. The responses can then be emailed directly to one or multiple email addresses of your choice. If it all seems to much – please ask us, we’ll do it for you!
3. You will need to be logged in to your google to access this. You will see in this example, all the forms that we manage are listed. To create a new form, click on the + button at the top left of the page.
Creating and embedding a Google Form 2 / 13
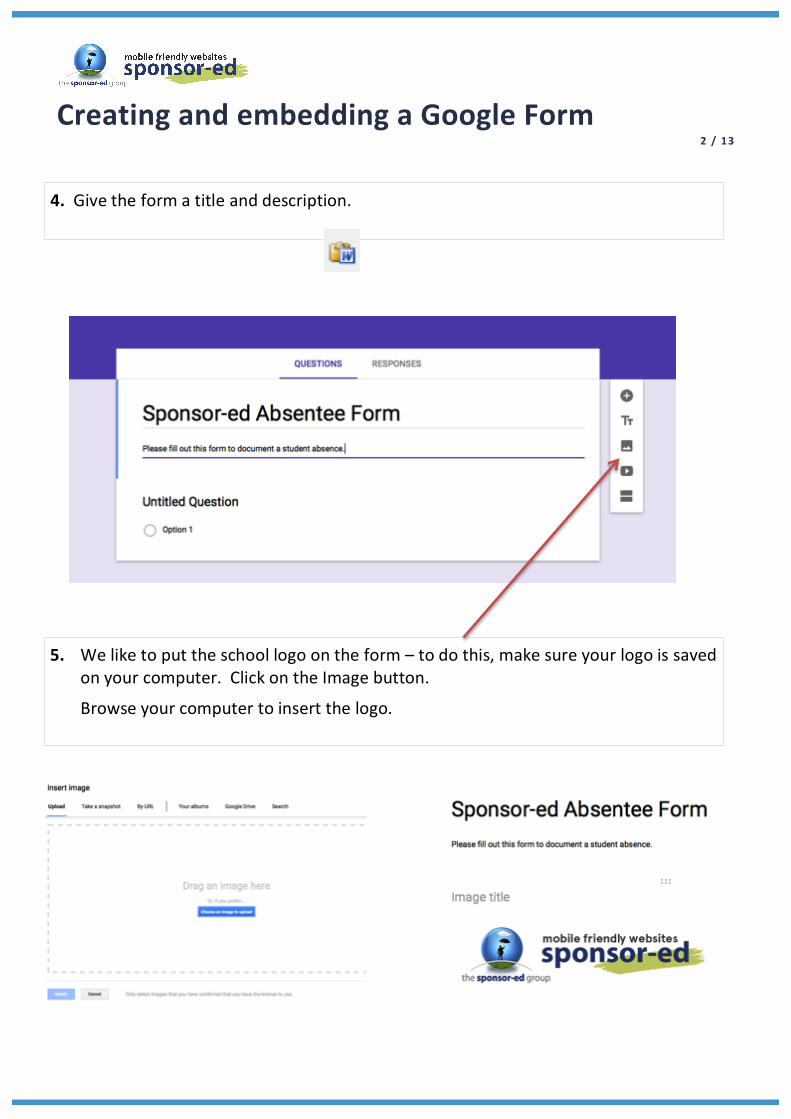
5. We like to put the school logo on the form – to do this, make sure your logo is saved on your computer. Click on the Image button.
Browse your computer to insert the logo.
4. Give the form a title and description.
Creating and embedding a Google Form 3 / 13
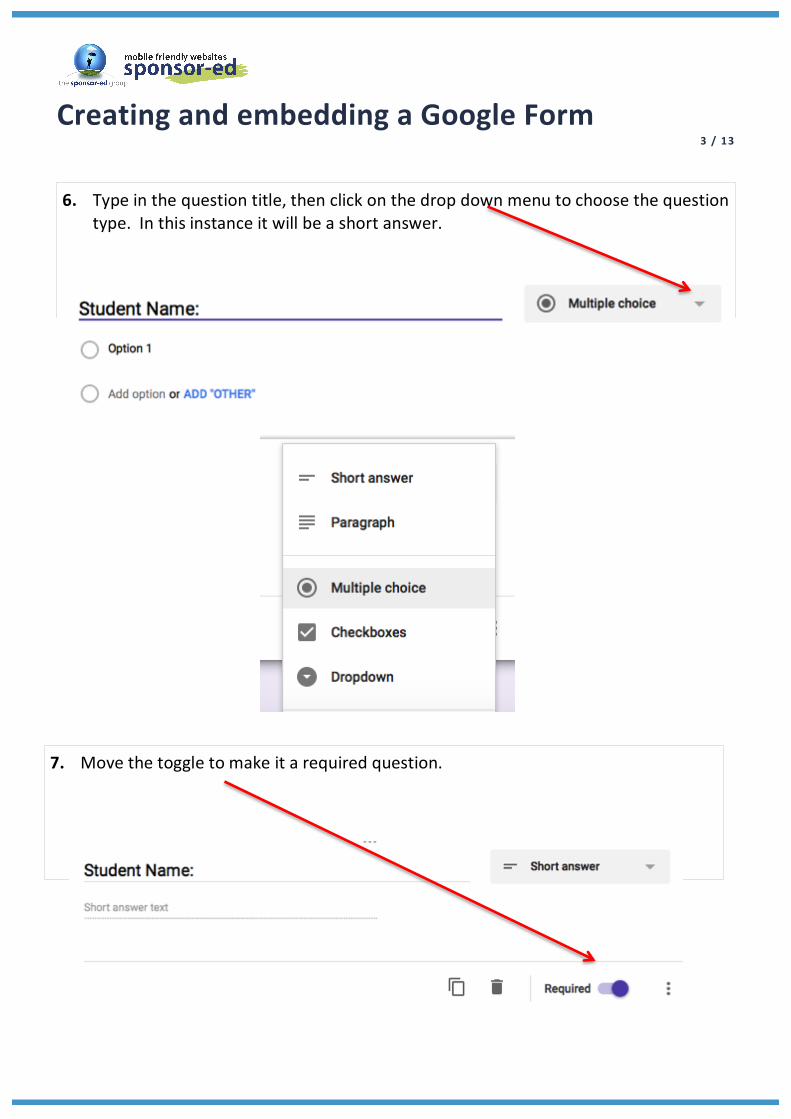
6. Type in the question title, then click on the drop down menu to choose the question type. In this instance it will be a short answer.
7. Move the toggle to make it a required question.
Creating and embedding a Google Form 4 / 13
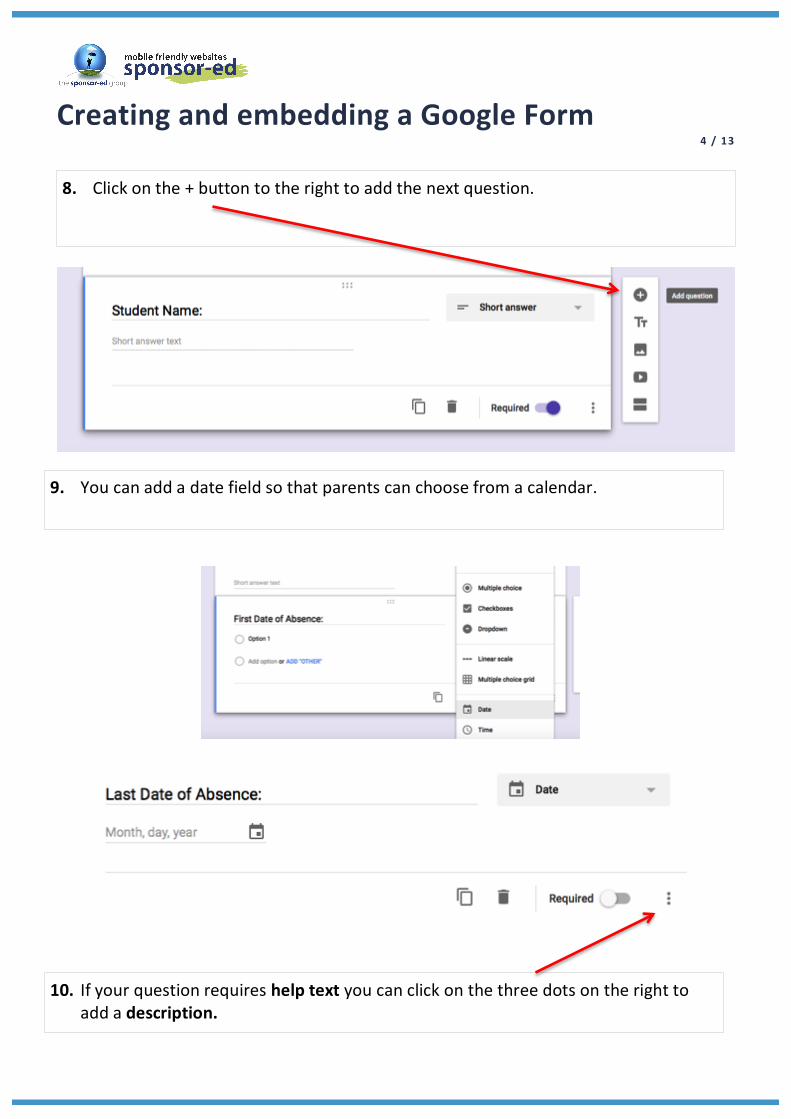
8. Click on the + button to the right to add the next question.
9. You can add a date field so that parents can choose from a calendar.
10. If your question requires help text you can click on the three dots on the right to add a description.
Creating and embedding a Google Form 5 / 13
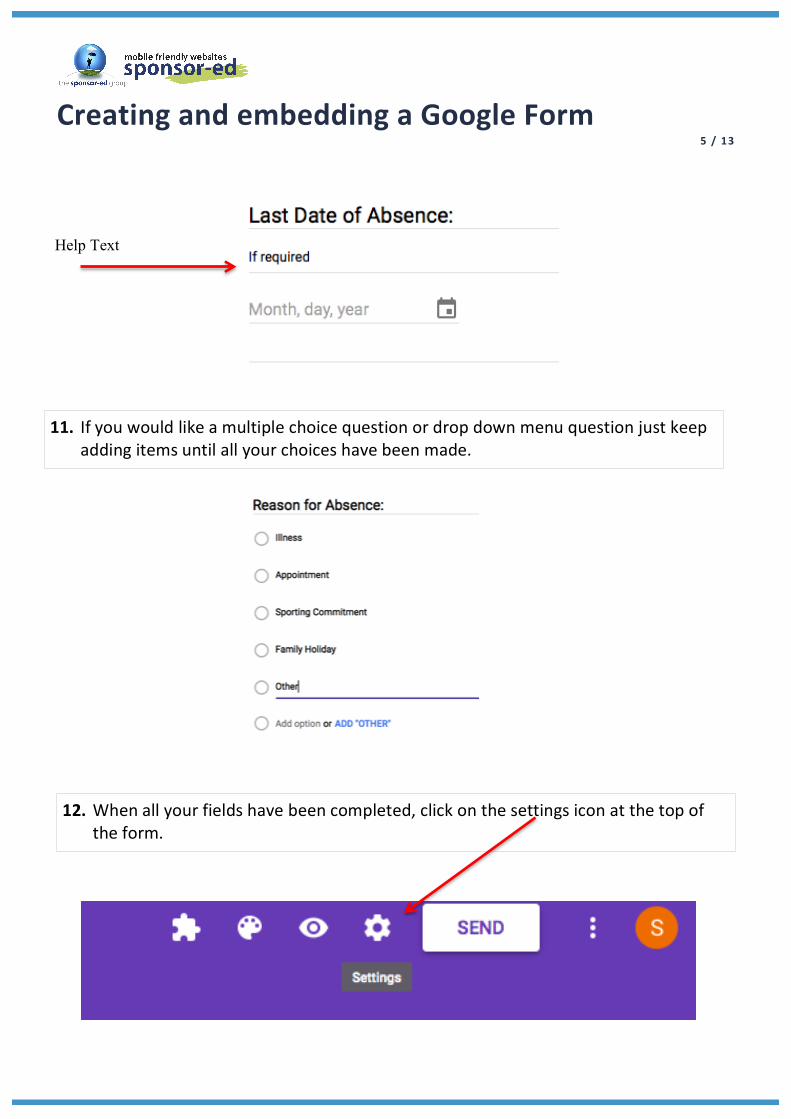
11. If you would like a multiple choice question or drop down menu question just keep adding items until all your choices have been made.
Help Text
12. When all your fields have been completed, click on the settings icon at the top of the form.

Creating and embedding a Google Form 6 / 13
13. Under GENERAL – ensure that all boxes are unchecked.
Under PRESENTATION – you can change the text that appears when the form has been submitted. Hit SAVE.
14. Click on the colour palette at the top of the screen to change the theme colours.
Creating and embedding a Google Form 7 / 13
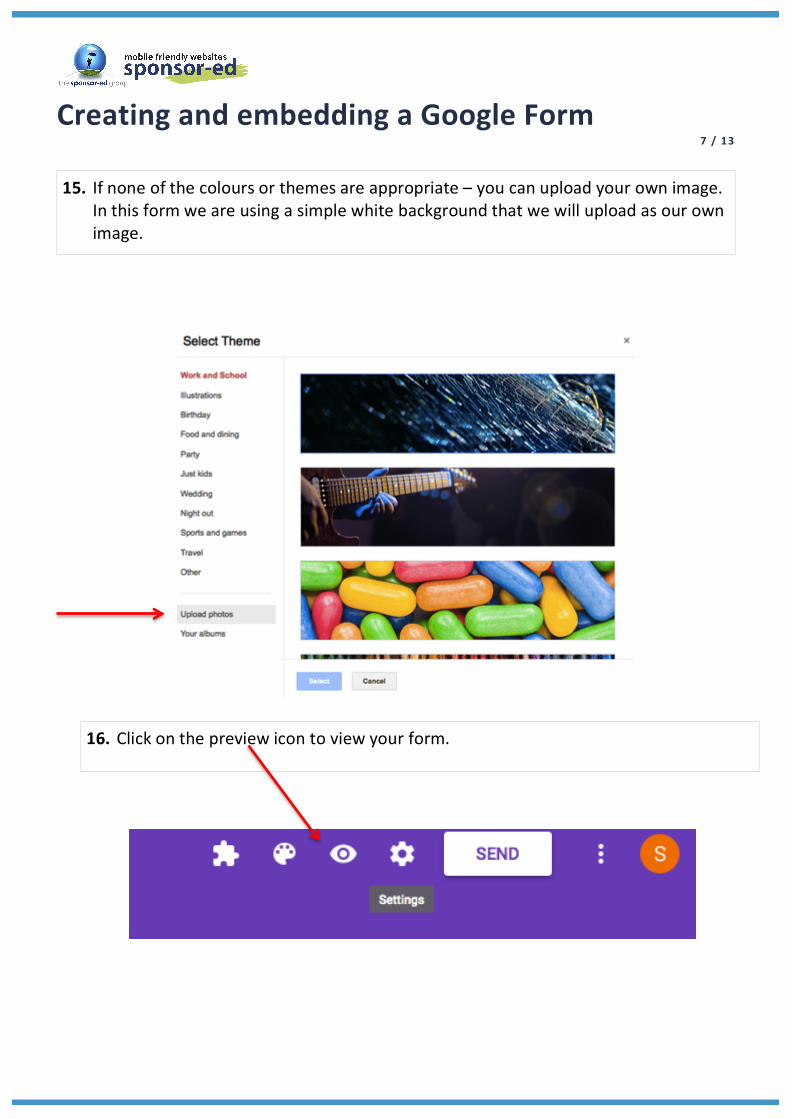
15. If none of the colours or themes are appropriate – you can upload your own image. In this form we are using a simple white background that we will upload as our own image.
16. Click on the preview icon to view your form.
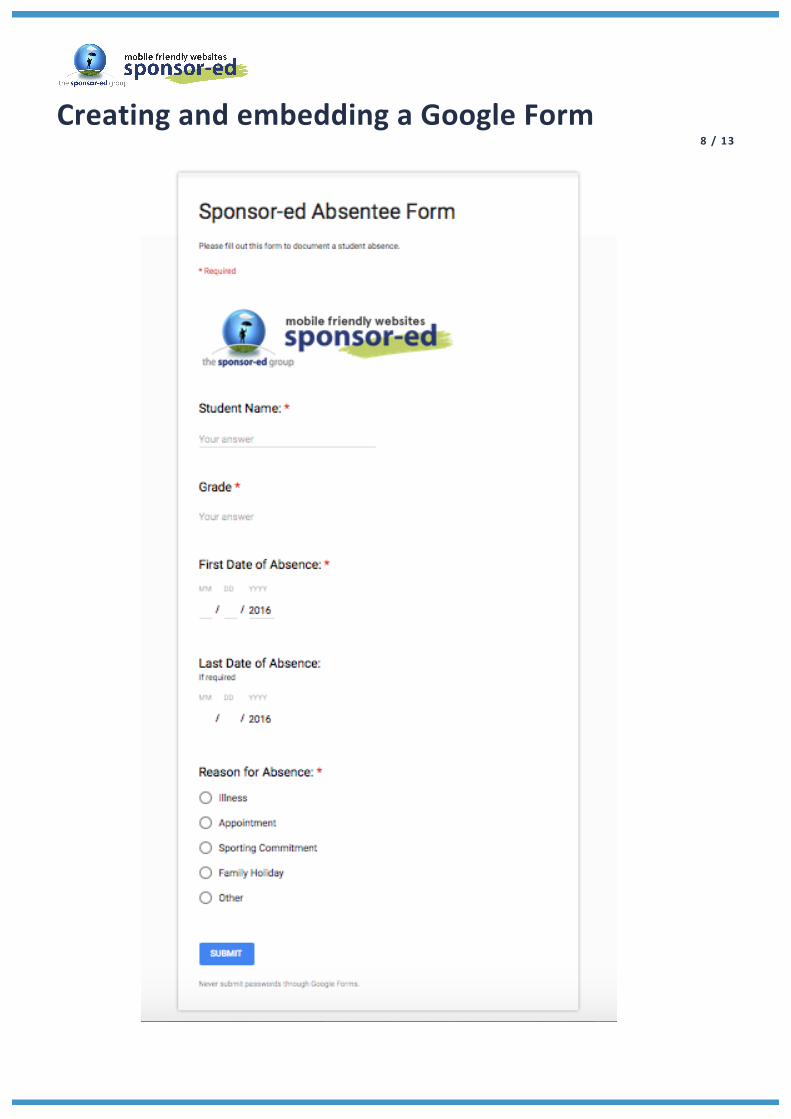
Creating and embedding a Google Form 8 / 13

Creating and embedding a Google Form 9 / 13
17. To get an email every time your form is filled out – you must get an ADD ON for your form. Click on the 3 dots at the top of the form, then select ADD ONS.
18. Search for Email Notifications for Forms and add it to google forms.
Creating and embedding a Google Form 10 / 13
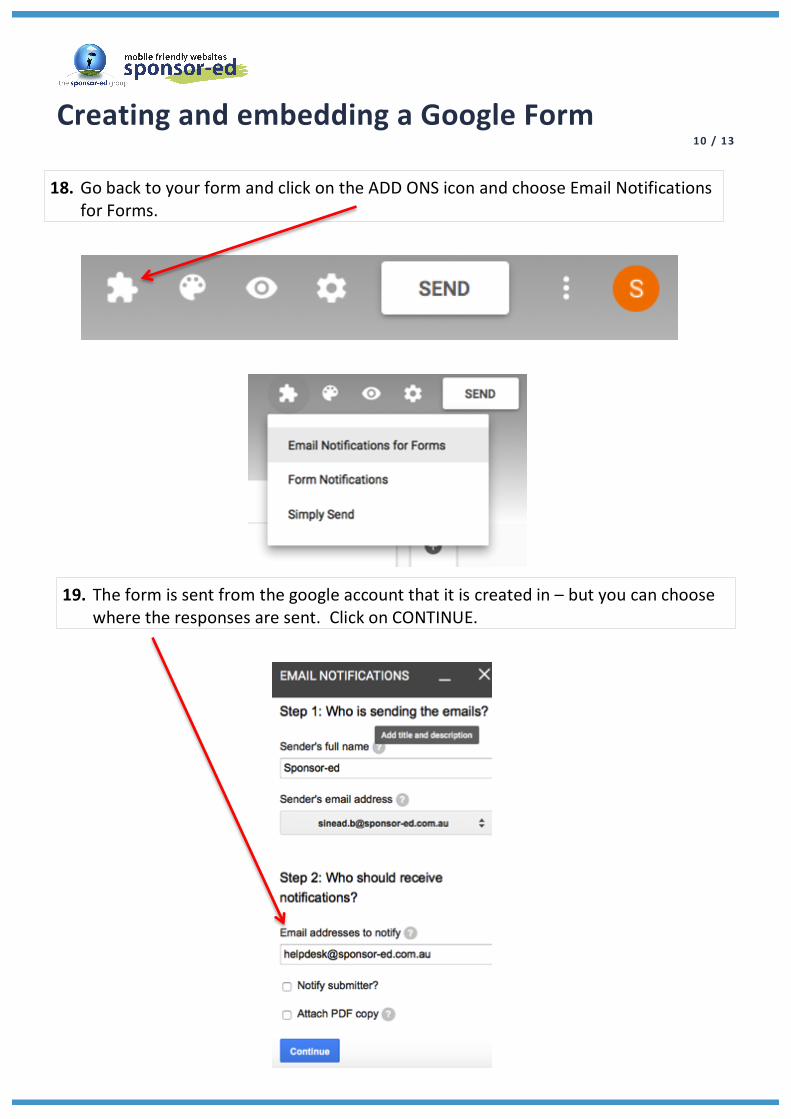
18. Go back to your form and click on the ADD ONS icon and choose Email Notifications for Forms.
19. The form is sent from the google account that it is created in – but you can choose where the responses are sent. Click on CONTINUE.
Creating and embedding a Google Form 11 / 13
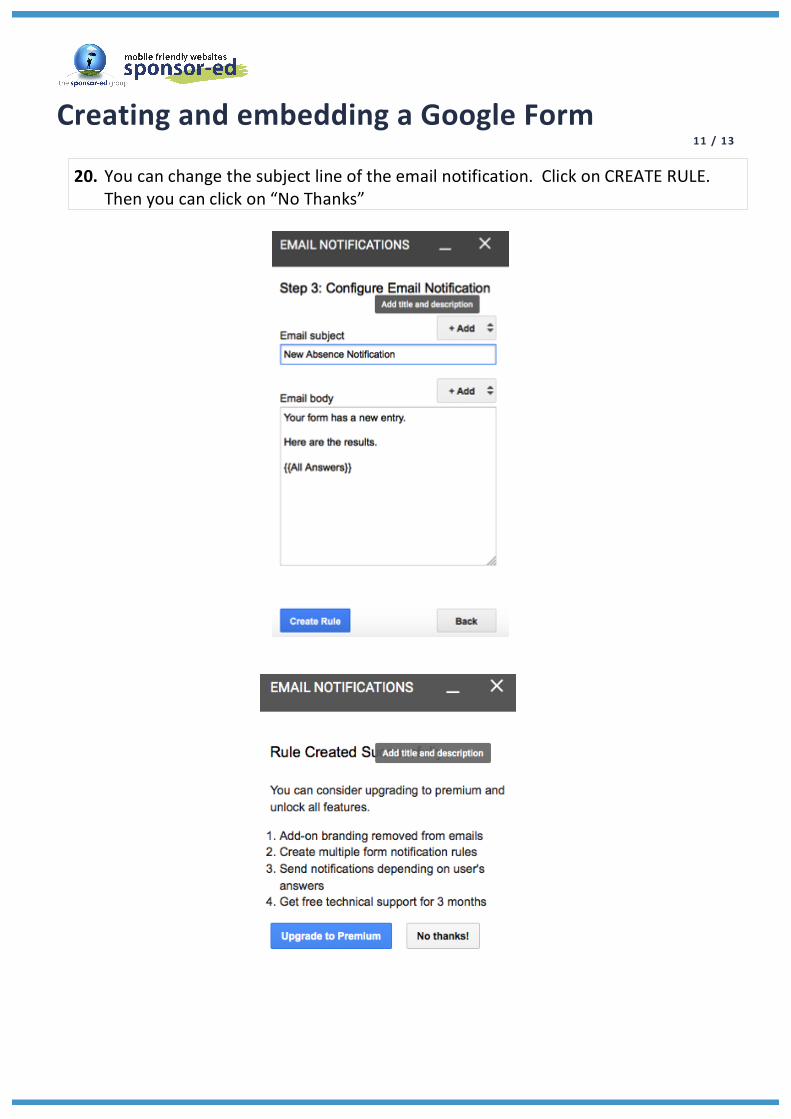
20. You can change the subject line of the email notification. Click on CREATE RULE. Then you can click on “No Thanks”
Creating and embedding a Google Form 12 / 13
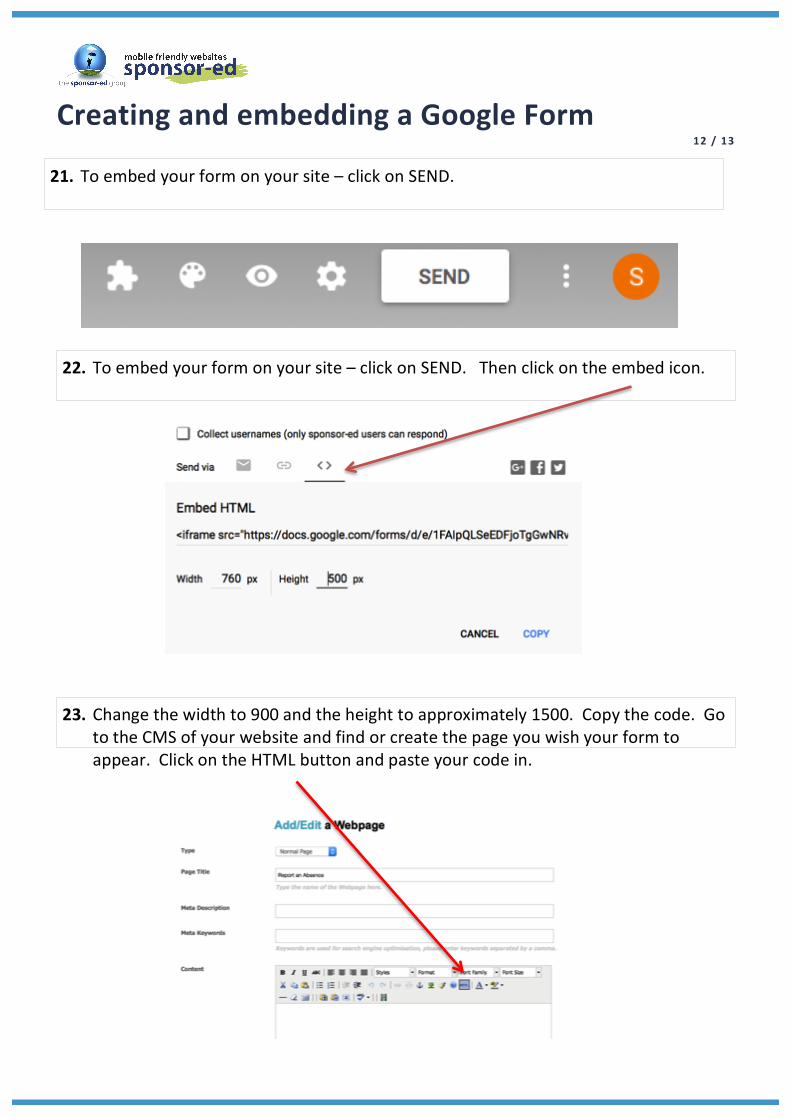
21. To embed your form on your site – click on SEND.
22. To embed your form on your site – click on SEND. Then click on the embed icon.
23. Change the width to 900 and the height to approximately 1500. Copy the code. Go to the CMS of your website and find or create the page you wish your form to appear. Click on the HTML button and paste your code in.
Creating and embedding a Google Form 13 / 13
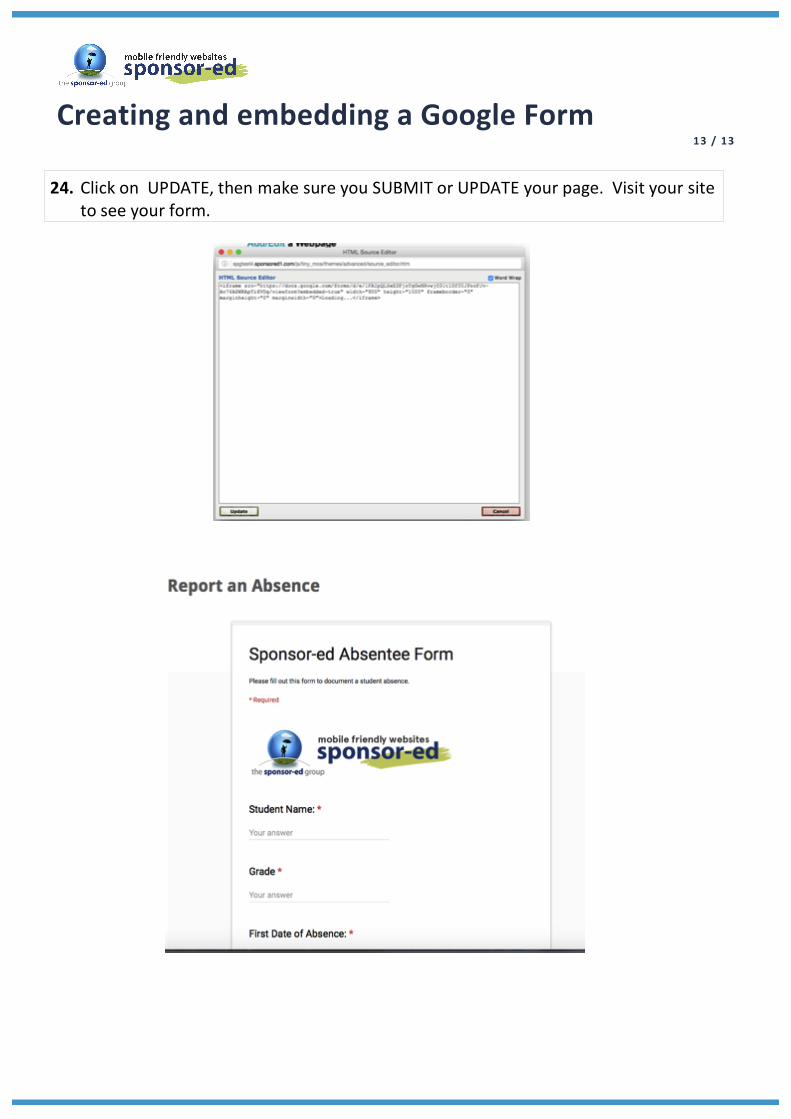
24. Click on UPDATE, then make sure you SUBMIT or UPDATE your page. Visit your site
to see your form.