Embed Size (px)
Citation preview

CP/M-86® Operating System
User's Guide

[(ill DIGITAL
RESEARCHTM
CP/M-86® Operating System
User's Guide

COPYRIGHT
Copyright © 1981 by Digital Research. All rights reserved. No part of this publication may be reproduced, transmitted, transcribed, stored in a retrieval system, or translated into any· language or computer language, in any form or by any means, electronic, mechanical, magnetic, optical, chemical, manual or otherwise, without the prior written permission of Digital Research, Post Office Box 579, Pacific Grove, California, 93950.
DISCLAIMER
Digital Research makes no representations or warranties with respect to the contents hereof and specifically disclaims any implied warranties of merchantability or fitness for any particular purpose. Further, Digital Research reserves the right to revise this publication and to make changes from time to time in. the content hereof without obligation of Digital Research to notify any person of such revision or changes.
TRADEMARKS
CP 1M and CP IM-86 are registered trademarks of Digital Research. ASM-86 and DDT-86 are trademarks of Digital Research. Intel is a registered trademark of Intel Corporation. Z80 is a registered trademark of Zilog, Inc.
The CP/M-86 Operating System User's Guide was prepared using the Digital Research TEX Text Formatter and printed in the United States of America by Commercial Press/ Monterey.
Second Printing: July 1982

Foreword
CP/M-86 is an operating system designed by Digital Research for the 8086 and 8088 sixteen bit microprocessor. CP/M-86 is distributed with its accompanying utility programs on two eight-inch single sided, single density floppy disks.
CP/M-86 file structure is compatible with the file structure of Digital Research's CP/M® operating system for computers based on the 8080 or Z80® microprocessor chips. This means that if the disk formats are the same, as in standard single density format, CP/M-86 can read the same data files as CP/M. The system calls are as close to CP/M as possible to provide a familiar assembly language programming environment. This allows application programs to be easily converted to execute under CP/M-86.
The minimum hardware requirement for CP/M-86 consists of a computer system based on an 8086 or 8088 microprocessor, 32K (kilobytes) of random access memory, a keyboard and a screen device, and generally, two eight-inch floppy disk drives with diskettes. The CP/M-86 operating system itself, excluding the utility programs supplied with it, uses approximately 12 kilobytes of memory. To run DDT-86@, you must have 48K of memory, and to run ASM-86@ and many of the application programs that run under CP/M-86, you must have 64K of memory.
If you expand your system beyond these minimums, you will appreciate that CP/M-86 supports many other features you can add to your computer. For example, CP/M-86 can support up to one megabyte of Random Access Memory (RAM), the maximum allowed by your 8086 or 8088 microprocessor. CP/M-86 can support up to sixteen logical disk drives of up to eight megabytes of storage each, allowing up to 128 megabytes of on-line storage.
This manual introduces you to CP/M-86 and tells you how to use it. The manual assumes your CP/M-86 system is up and running. (The interface between the hardware and the software must be configured in the Basic Input Output System (BIOS) according to the instructions in the CP/M-86 System Guide.) The manual also assumes you are familiar with the parts of your computer, how to set it up and turn it on, and how to handle, insert and store disks. However, it does not assume you have had a great deal of experience with computers.
Section 1 tells how to start CP/M-86, enter a command and make a back-up disk. Section 2 discusses disks and files. Section 3 develops the CP/M-86 command concepts
iii

you need to understand the command summary in Section 4. The command summary describes all of the user programs supplied with CP/M-86.
Section 5 tells you how to use ED, the CP/M-86 file editor. With ED you can create and edit program, text and data files.
Appendix A supplies an ASCII to Hexadecimal conversion table. Appendix B lists the filetypes associated with CP/M-86. Appendix C lists the CP/M-86 Control Characters. Appendix D lists the messages CP/M-86 displays when it encounters special conditions. If the condition requires correction, Appendix D can also tell you what actions you should take before you proceed. Appendix E provides a simple glossary of commonly used computer terms for the convenience of the user.
The more complex programs are described in the CPIM-86 Programmer's and System Guides. ASM-86 is the CP/M-86 assembler for your computer. You won't need ASM-86 until you decide to write assembly language programs and become more familiar with your computer's 8086 or 8088 microprocessor instruction set. When you do, you'll find that ASM-86 simplifies writing 8086 or 8088 microprocessor programs. DDT-86 is the CP/M-86 debugging program. You can use DDT-86 to find errors in programs written in high-level languages as well as in ASM-86.
IV

Table of Contents
1 Introduction
1.1 How to Get CP IM-86 Started ................................. 1 1.2 The Command Line .......................................... 2 1. 3 CP 1M Line Editing Control Characters ......................... 4 1.4 Why You Should Back Up Your Files.................. ......... 5 1.5 How to Make a Copy of Your CP IM-86 Disk .................. 6
2 Files, Disks, Drives and Devices
2.1 What is a File? ............................................... 9 2.2 How Are Files Created? ....................................... 9 2.3 Naming Files-What's in a Name? ............................. 10 2.4 Accessing Files-Do You Have the Correct Drive? ................ 11 2.5 Accessing More Than One File ................................. 12 2.6 How Can I Organize and Protect My Files? ..................... 13 2. 7 How Are Files Stored on a Disk? ............................... 15 2. 8 Changing Disks .............................................. 15 2. 9 Changing the Default Drive .................................... 16 2.10 More CP IM-86 Drive Features ................................. 16 2.11 Other CP/M-86 Devices ...................................... 17
3 CP IM-86 Command Concepts
3.1 Two Types of Commands ..................................... 19 3.2 Built-in Commands ........................................... 19 3.3 Transient Utility Commands ................................... 20 3.4 How CP IM-86 Searches for Commands ........................ 21 3.5 Control Character Commands ...................... . . . . . . . . . . . 23
4 Command Summary
4.1 Let's Get Past the Formalities .................................. 25 4.2 How Commands Are Described ................................ 26 4.3 The ASM-86 (Assembler) Command ........................... 30 4.4 The COPYDISK (Copy Disk) Command ........................ 32 4.5 The DDT-86 (Dynamic Debugging Tool) Command ............. 34 4.6 The DIR (Directory) Built-in ............ 0...................... 36 4.7 The ED (Character File Editor) Command ...................... 39 4.8 The ERA (Erase) Built-in ...................................... 45
v

Table of Contents (continued)
4.9 The GENCMD (Generate CMD File) Command................. 46 4.10 The HELP (Help) Command .................................. 48 4.11 PIP (Peripheral Interchange Program-Copy File) Command ...... 50
4. 11. 1 Single File Copy ...................................... 50 4.11.2 Multiple File Copy ................................... 53 4.11.3 Combining Files ...................................... 54 4.11.4 Copy Files to and from Auxiliary Devices ............... 55 4.11.5 Multiple Command Mode ............................. 57 4.11.6 Using Options With PIP .............................. 58
4.12 The REN (Rename) Built-in . . . . . . . . . . . . . ... . . . . . . . . . . . . . . . . . . . 62 4.13 The STAT (Status) Command . . .. . . ... . ... . . .... .. .... . .. . . . . 63
4.13.1 Set a Drive to Read-Only Status ....................... 64 4.13.2 Free Space on Disk ................................... 65 4.13.3 Files-Display Space Used and Access Mode ............. 66 4.13.4 Set File Access Modes (Attributes) ...................... 69 4.13.5 Display Disk Status ................................... 70 4.13.6 Di~play User Numbers With Active Files ................ 71 4.13.7 Display STAT Commands and Device Names ............ 72 4.13.8 Display and Set Physical to Logical Device Assignments ... 72
4.14 The SUBMIT (Batch Processing) Command ..................... 73 4.15 The TOD (Display and Set Time of Day) Command ............. 76 4.16 The TYPE (Display File) Built-in ............................... 78 4.17 The USER (Display and Set User Number) Built-in ............... 79
5 ED, The CP IM-86 Editor
5.1 Introduction to ED ........................................... 81 5.2 Starting ED .................................................. 81 5.3 ED Operation ................. ". ...... . . ..... .... . .. . .. .. . . . .. 82
5.3.1 Appending Text into the Buffer ......................... 84 5.3.2 ED Exit .............................................. 85
5.4 Basic Editing Commands ...................................... 86 5.4.1 Moving the Character Pointer ........................... 88 5.4.2 Displaying Memory Buffer Contents ..................... 90 5.4.3 Deleting Characters .................................... 91 5.4.4 Inserting Characters into the Memory Buffer .............. 92 5.4.5 Replacing Characters ................................... 94
vi

Table of Contents (continued)
5.5 Combining ED Commands .................................... 95 5.5.1 Moving the Character Pointer ........................... 96 5.5.2 Displaying Text ....................................... 96 5.5.3 Editing............................................... 97
5.6 Advanced ED Commands ...................................... 98 5.6.1 Moving the CP and Displaying Text ..................... 98 5.6.2 Finding and Replacing Character Strings ................. 99 5.6.3 Moving Text Blocks ................................... 103 5.6.4 Saving or Abandoning Changes: ED Exit ................. 105
5.7 ED Error Messages ........................................... 107
Appendixes
A ASCII and Hexadecimal Conversions ................................ 111
B CP/M-86 File Types ............................................... 117
C CP/M-86 Control Characters ...................................... 119
D CP/M-86 Error Messages .......................................... 121
E User's Glossary 133
List of Tables
1-1 Control Character Commands .................................... 4
2-1 CP/M-86 Filetypes ............................................ .. 11 2-2 CP IM-86 Logical Devices... . ... .. . . .. .. . . . . . . . .... . . . . . . . . . . . . . . 17
3-1 Built-In Commands ............................................. 19 3-2 CP IM-86 Utilities .............................................. 20 3-3 Control Character Commands .................................... 23
vii

Table of Contents (continued)
4-1 DDT-86 Commands ............................................ 34 4-2 ED Command Summary ........................ .................. 39 4-3 PIP Options .................................................... 58
5-1 Text Transfer Commands ........................................ 84 5-2 Basic Editing Commands ......................................... 87 5-3 CP IM-86 Line Editing Controls .................................. 93 5-4 ED Error Symbols ............................................... 107 5-5 ED Disk File Error Messages ..................................... 109
A-1 ASCII Symbols ................................................. 111 A-2 ASCII Conversion Table ......................................... 112
B-1 Filetypes. . . . . . . . . . . . . . . . . . . . . . . . . . . . . . . . . . . . . . . . . . . . . . . . . . . . . .. 117
C-1 CP/M-86 Control Characters .................................... 119
0-1 CP/M-86 Command Messages ................................... 121
List of Figures
5-1 Overall ED Operation ............................................ 83
viii

Section 1 Introduction to CP/M-86
This section discusses the fundamentals of your computer and CP/M-86. It describes CP/M-86 start-up procedures and initial messages. Then it shows you how to enter a CP/M-86 command and make a back-up copy of your CP/M-86 distribution disk.
. CP/M-86 manages information stored magnetically on disks by grouping this infor-/ mation into files of programs or data. CP/M-86 can copy files from a disk to your
computer's memory, or to a peripheral device such as a printer. CP/M-86 performs these and other tasks by executing various programs according to commands you enter at your keyboard.
Once in memory, a program runs through a set of steps that instruct your computer to perform a certain task. You can use CP/M-86 to create your own CP/M-86 programs, or you can choose from the wide variety of CP/M-86 application programs that entertain, educate, and solve commercial and scientific problems.
1.1 How to Get CP/M-86 Started
Starting or loading CP/M-86 means reading a copy of CP/M-86 from your CP/M-86 distribution system disk into your computer's memory.
After you have turned on the power, insert your CP/M-86 system disk into drive A, generally a built-in drive on the right side of the computer unit. Close the drive door. Press the RESET or RESTART button. This automatically loads CP/M-86 into memory.
If power is on and you want to restart CP/M-86, first make sure your CP/M-86 system disk is in drive A and then press the RESET or RESTART button. This is called System Reset, or booting the system.
At System Reset, CP/M-86 is loaded into memory. The first thing CP/M-86 does after it is loaded into memory is display the following message on your screen:
CP/M-8S Version V.V CoPYri~ht (c) 1881 Di~ital Research Inc.
1

1.1 How to Get CP/M-86 Started CP/M-86 User's Guide
The version number, represented above by V.V, tells you the major and minor revision level of the CP/M-86 version that you own. This display is followed by the two character message:
A)
The A> symbol is the CP/M-86 system prompt. The system prompt tells you that CP/M-86 is ready to read a command from your keyboard. It also tells you that drive A is your default drive. This means that until you tell CP/M-86 to do otherwise, it looks for program and data files on the disk in drive A.
1.2 The Command Line
CP/M-86 performs certain tasks according to specific commands that you type at your keyboard. A CP/M-86 command line is composed of a command keyword, an optional command tail, and a carriage return keystroke. The carriage return key might be marked RETURN or CR on your particular terminal. The command keyword identifies a command (program) to be executed by the microprocessor. The command tail can contain extra information for the command such as a filename, option or parameter. To end the command line, you must press the RETURN key.
As you type characters at the keyboard, they appear on your screen and the cursor (position indicator) moves to the right. If you make a typing mistake, press the Backspace key if your terminal has one, or the CTRL-H characters if it does not, to move the cursor to the left and correct the error.
You can type the keyword and command tail in any combination of upper-case and lower-case letters. CP/M-86 treats all letters in the command line as upper-case.
Generally, you type a command line directly after the system prompt. However, CP/M-86 does allow spaces between the prompt and the command keyword.
A command keyword identifies one of two different types of commands: Built-in commands and Transient Utility commands. Built-in commands reside in memory as a part of CP/M-86 and can be executed immediately. Transient Utility commands are stored on disk as program files. They must be loaded into memory to perform their task. You can recognize Transient Utility program files in a disk's directory because their filenames end with CMD.
2

CP/M-86 User's Guide 1.2 The Command Line
For Transient Utilities, CP/M-86 checks only the command keyword. If you include a command tail, CP/M-86 passes it to the utility without checking it because many utilities require unique command tails.
Let's use one Built-in command to demonstrate how CP/M-86 reads command lines. The DIR command tells CP/M-86 to display the names of disk files on your screen. Type the DIR keyword after the system prompt, omit the command tail, and press RETURN.
A)DIR
CP/M-86 responds to this command by writing the names of all the files that are stored on the disk in drive A. For example, if you have your CP/M-86 system disk in drive A, these filenames, among others, appear on your screen:
COPYDISK CMD PIP CMD STAT CMD
CP/M-86 recognizes only correctly spelled command keywords. If you make a typing error and press RETURN before correcting your mistake, CP/M-86 echoes the command line with a question mark at the end. For example, if you accidently mistype the DIR command, CP/M-86 responds:
A)DJR DJR?
to tell you that it can not find the command keyword.
DIR accepts a filename as a command tail. You can use DIR with a filename to see if a specific file is on the disk. For example, to check that the Transient Utility program COPYDISK.CMD is on your system disk, type:
A)DIR CDPYDISK,CMD
CP/M-86 performs this task by writing either the name of the file you specified or the message NO FILE.
3

1.2 The Command Line CP/M-86 User's Guide
Be sure to type at least one space after DIR to separate the command keyword from the command tail. If you don't, CP/M-86 responds as shown below.
A>DIRCDPYDISK,CMD DIRCOPYDISK.CMD?
1.3 CP/M-86 Line Editing Control Characters
You can correct typing mistakes with the Backspace key. However, CP/M-86 supports the following control character commands to help you edit more efficiently. You can use these control characters to edit command lines or input lines to most programs. To type a control character, hold down the CONTROL key (sometimes labeled CTRL) and press the required letter key. Release both keys.
Command
CTRL-E
CTRL-H
CTRL-I
CTRL-J
CTRL-M
CTRL-R
4
Table 1-1. Control Character Commands
Meaning
moves the cursor to the beginning of the following line without erasing your previous input.
moves the cursor left one character position and deletes the character - the same as the Backspace key.
moves the cursor to the next tab stop, where tab stops are automatically placed at each eighth column - same as the TAB key.
moves the cursor to the left of the current line and sends the command line to CP/M-86 - same effect as a RETURN keystroke.
moves the cursor to the left of the current line and sends the command line to CP/M-86 - same as a RETURN keystroke.
types a # at the current cursor location, moves the cursor to the next line and retypes any partial command you have typed so far.

CP/M-86 User's Guide 1.3 Line Editing Control Characters
Command
CTRL-U
CTRL-X
Table 1-1. (continued)
Meaning
discards all the characters in the command line that you've typed so far, types a # at the current cursor position and moves the cursor to the next command line.
discards all the characters in the command line that you've typed so far and moves the cursor back to the beginning of the current line.
You probably noticed that some control characters have the same meaning. For example, the CTRL-J and CTRL-M keystrokes have the same effect as pressing the RETURN key: all three send the command line to CP/M-86 for processing. Also, CTRL-H has the same effect as pressing the backspace key.
1.4 Why You Should Back Up Your Files
Humans have faults, and so do computers. Human or computer errors sometimes destroy valuable programs or data files. By mistyping a command, for example, you could accidently erase a program that you just created. A similar disaster could result from an electronic component failure.
Data processing professionals avoid losing programs and data by making copies of valuable files. Always make a working copy of any new program you purchase and save the original. If the program is accidentally erased from the working copy, you can easily restore it from the original.
Professionals also make frequent copies of new programs or data files during the time they are being developed. The frequency of making copies varies with each programmer, but as a general rule, make a copy at the point where it takes ten to twenty times longer to reenter the information than it takes to make the copy.
You can make back-ups in two ways. You can back up files one at a time, or you can can make a complete copy of the entire disk. The choice is usually made based on the number of files on the disk that need to be backed up. It might take less than a minute to make a copy of one file, but it only takes two or three minutes to copy an entire disk.
5

1.4 Why You Should Back Up Your Files CP/M-86 User's Guide
So far, we haven't discussed any commands that change information recorded on your CP/M-86 system disk. Before we do, let's make a few working copies of the original disk.
1.5 How to Make a Copy of Your CP/M-86 Disk
To back up your CP/M-86 disk, you will use one or more eight-inch floppy disks for the back-ups, the COPYDISK Transient Utility program, and of course your CP/M-86 disk.
The back-up disks can be factory-fresh or used. Some eight-inch disks come with a notch cut out of the lower right hand side. This notch prevents data from being written to the disk. It is called a write-protect notch. To copy data to these disks, you have to write-enable them by placing a small foil tab over the write-protect notch. These tabs are supplied with the disks.
You might want to format new or reformat used disks with the disk formatting program that should accompany your particular computer. If the disks are used, 'make sure they do not contain any information you might need again! COPYDISK copies everything from a source disk to a destination disk - including blank space - and writes over any information that might already be stored on the destination disk.
To make a copy of your CP/M-86 disk, use the COPYDISK utility. First make sure that your system disk is in drive A and a formatted disk is inserted in drive B. Then enter the following command to the system prompt, terminated by a carriage return keystroke.
A>COPYDISK
6

CP/M-86 User's Guide 1.5 How to Copy Your CP/M-86 Disk
CP/M-86 loads COPYDISK into memory and runs it. COPYDISK displays the following messages on your screen:
CP/M-8S Full DisK COpy Utility Version 2.0
Enter Source DisK Drive (A-P) ?A
Destination DisK Drive (A-P) ?8
Copyin~ DisK A: to DisK B: Is this what yOU want to do (YIN) ?Y
COpy started Readin~ TracK 0 ••• COpy cOMPleted.
COpy another disK (YIN) ?N COpy pro~raM exitin~
A)
Now you have an exact copy of the original CP/M-86 disk in drive B. Remove the original from drive A and store it in a safe place. If your original remains safe and unchanged, you can easily restore your CP/M-86 program files if something happens to your working copy.
Remove the copy from drive B and insert it in drive A. Use it as your CP/M-86 system disk to make more back-ups, to try the examples shown in the rest of this manual and to start CP/M-86 the next time you power up your computer.
End of Section 1
7


Section 2 Files, Disl{s, Drives and Devices
CP/M-86's most important task is to access and maintain files on your disks. It can create, read, write, copy and erase program and data files. This section tells you what a file is, how to create, name and access a file, and how files are stored on your disks. It also tells how to indicate to CP/M-86 that you've changed disks or that. you want to change your default drive.
2.1 What is a File
A CP/M-86 file is a collection of related information stored on a disk. Every file must have a unique name because that name is used to access that file. A directory is also stored on each disk. The directory contains a list of the filenames stored on that disk and the locations of each file on the disk.
In general, there are two kinds of files: program files and data files. A program file is an executable file, a series of instructions the computer can follow step by step. A data file is usually a collection of information; a list of names and addresses, the inventory of a store, the accounting records of a business, the text of a document, or similar related information. For example, your computer cannot execute names and addresses, but it can execute a program that prints names and addresses on mailing labels.
A data file can also contain the source code for a program. Generally, a program source file must be processed by an assembler or compiler before it becomes an executable program file. In most cases, an executing program processes a data file. However, there are times when an executing program processes an executable program file. For example, the executable copy program PIP can copy one or more command program files.
2.2 How Are Files Created
There are many ways to create a file. You can create a file by copying an existing file to a new location, perhaps renaming it in the process. Under CP/M-86, you can use the Transient Utility PIP to copy and rename files. The second way to create a file
9

2.3 Naming Files CP/M-86 User's Guide
is to use a text editor. The CP/M-86 text editor ED can create a file and assign it the name you specify. Finally, some programs such as ASM-86 create output files as they process input files.
2.3 Naming Files - What's in a Name?
CP/M-86 identifies every file by its unique file specification. A file specification (filespec) can have three parts:
d: filename typ
drive specifier filename filetype
one character 1-8 characters 0-3 characters
optional
optional
We recommend that you create file specifications from letters and numbers. Because the CP/M-86 command processor recognizes the following special characters as delimiters (separators), they must not be included within a filename or filetype.
<>.,;:=?*[]
A file specification can be simply a one to eight character filename, such as:
MYFILE
When you make up a filename, try to let the name tell you something about what the file contains. For example, if you have a list of customer names for your business, you could name the file
CUSTOMER
so that the name is eight or fewer characters and also gives you some idea of what's in the file.
As you begin to use your computer with CP/M-86, you'll find that fi.1es fall naturally into families. To keep file families separated, CP/M-86 allows you to add an optional one to three character family name, called a filetype, to the filename. When you add a filetype to the filename, separate the filetype from the filename with a period. Try to use three letters that tell something about the file's family. For example, you could add the following filetype to the file that contains a list of customer names:
CUSTOMER.NAM
When CP/M-86 displays file specifications in response to a DIR command, it fills in short filenames and filetypes with blanks so that you can compare filetypes quickly.
10

CP/M-86 User's Guide 2.3 Naming Files
The executable program files that CP/M-86 loads into memory from a disk have different filenames, but are in the family of 8086 or 8088 programs that run with CP/M-86. The filetype CMD identifies this family of executable programs.
CP/M-86 has already established several file families. Here's a table of some of their filetypes with a short description of each family.
Table 2-1. CP/M-86 Filetypes
Filetype Meaning
CMD 8086 or 8088 Machine Language Program
BAS CBASIC Source Program
$$$ Temporary File
A86 ASM-86 Source File
H86 Assembled ASM-86 Program in hexadecimal format
SUB List of commands to be executed by SUBMIT
2.4 Accessing Files - Do You Have the Correct Drive?
When you type a file specification in a command tail, the Built-in or Transient Utility looks for the file on the disk in the drive named by the system prompt. For example, if you type the command
A>dir copydisk,cmd
CP/M-86 looks in the directory of the disk in drive A for COPYDISK.CMD. But if you have another drive, B for example, you need a way to tell CP/M-86 to access the disk in drive B instead. For this reason, CP/M-86 lets you to preceed a filename with a drive specifier which is the drive letter followed by a colon. For example, in response to the command
A>dir b:myfile,lib
CP/M-86 looks for the file MYFILE.LIB in the directory of the disk in drive B.
11

2.4 Accessing Files CP/M-86 User's Guide
You can also precede an executable program filename with a drive specifier, even if you are using the program filename as a command keyword. For example, if you type the following command
A)b:pip
CP/M-86 looks in the directory of the disk in the B drive for the file PIP.CMD. If CP/M-86 finds PIP on drive B, it loads PIP into memory and executes it.
Unlike the filename and filetype that are stored in the disk directory, the drive specifier for a file changes as you move the disk from one drive to another. Therefore a file has a different file specification when you change its disk from one drive to another.
2.5 Accessing More Than One File
Certain CP/M-86 Built-in and Transient Utilities can select and process several files when special wildcard characters are included in the filename or filetype. A file specification containing wildcards can refer to more than one file because it gives CP/M-86 a pattern to match: CP/M-86 searches the disk directory and selects any file whose filename or filetype matches the pattern.
The two wildcard characters are ?, which matches any single letter in the same position, and *, which matches any character at that position, and any other characters remaining in the filename or filetype. The rules for using wildcards are listed below.
• A ? matches any character in a name, including a space character.
• A * must be the last, or only, character in the filename or filetype. CP/M-86 internally replaces a * with ? characters to the end of the filename or filetype.
• When the filename to match is shorter than eight characters, CP/M-86 treats the name as if it ends with spaces.
• When the filetype to match is shorter than three characters, CP/M-86 treats the filetype as if it ends with spaces.
Suppose, for example, you have a disk with the following six files:
A.CMD, AA.CMD, AAA.CMD, B.CMD, A.A86, and B.A86
12

CP/M-86 User's Guide 2.5 Accessing Multiple Files
Several cases are listed below where a name with wildcards matches all, or a portion of, these files:
* * is treated as ???????????
??????????? matches all six names
*.CMD is treated as ????????CMD
???? ??? ? . CMD matches the first four names
?CMD matches A.CMD and B.CMD
?* is treated as ????
???? matches A.CMD, B.CMD, A.A86, and B.A86
A?CMD matches A.CMD and AA.CMD
A*.CMD is treated as A???????CMD
A???????CMD matches A.CMD, AA.CMD, and AAA.CMD
Remember that CP/M-86 uses wildcard patterns only while searching a disk directory, and therefore wildcards are valid only in filenames and filetypes. You cannot use a wildcard in a drive specifier.
2.6 How Can I Organize and Protect My Files?
Under CP/M-86 you can organize your files into groups, protect your files from accidental change, and specify how your files are displayed in response to a DIR command. CP/M-86 supports these features by assigning user numbers and attributes to files and recording them in the disk's directory.
You can use user numbers to separate your files into 16 file groups. All files are identified by a user number which ranges from 0 to 15. CP/M-86 assigns a user number to a file when the file is created. Unless you use the command program PIP to copy the file to another user number, the file is assigned the current user number. You can use the Built-in command USER to display and change the current user number.
13

2.6 File Organization and Protection CP/M-86 User's Guide
Most commands can access only those files that have the current user number. For example, if the current user number is 7, a DIR command displays only the files that were created under user number 7. The exception to this is the PIP command. With the [Gn] option, PIP can copy a file with one user number and give the copy another user number.
File attributes control how a file can be accessed. There are two kinds of file accessing attributes. The DIRISYS attribute can be set to either DIR (Directory) or SYS (System). When you create a file, it is automatically marked with the DIR attribute. The DIR command only displays files that are in the current user area, whether that is user number 0, 1, 2, 3 or 15.
You can use the STAT Transient Utility command to assign the SYS or DIR attribute to a file. The DIR command does not display files that are marked with the SYS attribute. You must use the DIRS command to display SYS files. Remember that DIRS only displays the system files that are in the current user number. The STAT command also displays files marked with the SYS attribute. Again, STAT displays files from the current user number only.
It is very useful to assign the SYS attribute to files that are in user number o. They should be command files, files with a filetype of CMD. If you give a command file in user number 0 the SYS attribute, you can read and execute that file from any user number on the same drive. This feature gives you a convenient way to make your commonly used programs available under any user number, without having to maintain a copy of each command program in every user number.
The RW/RO file accessing attribute can be set to either RW (Read-Write) or RO (Read-Only). A file with the RW attribute can be read or written to at any time unless the disk is write-protected, or the drive containing the disk is set to Read-Only. If a file is marked RO, any attempt to write data to that file produces a Read-Only error message. Therefore you can use the RO attribute to protect important files.
You can use the STAT Transient Utility program to assign the Read-Write or Read-Only attribute to a file or group of files. STAT can also assign the Read-Only attribute to a drive. CTRL-C resets all logged-in drives to Read-Write.
14

CP/M-86 User's Guide 2.7 How Are Files Stored on a Disk
2.7 How Are Files Stored on a Disk?
CP/M-86 records the filename, filetype, user number and attributes of each file in a special area of the disk called the directory. In the directory, CP/M-86 also records which disk sectors belong to which file. The directory is large enough to store this data for up to sixty-four files.
CP/M-86 allocates directory and storage space for a file as records are added to the file. When you erase a file, CP/M-86 reclaims storage in two ways: it makes the file's directory space available to catalog a different file, and frees the file's storage space for later use. It's this dynamic allocation feature that makes CP/M-86 powerful. You don't have to tell CP/M-86 how big your file' will become because CP/M-86 automatically allocates more storage for a file as it is needed, and releases the storage for reallocation when the file is erased.
2.8 Changing Disks
CP/M-86 cannot, of course, do anything to a file unless the disk that holds the file is inserted into a drive and the drive is in ready status. When a disk is in a drive, it is on-line and CP/M-86 can access its directory.
At some time, you'll have to take a disk out of a drive and insert another that contains different files. You can replace an on-line disk whenever you see the system prompt at your console. However, if you are going to write on the disk, you must tell CP/M-86 that you have changed a disk by typing CTRL-C directly after the system prompt. In response, CP/M-86 resets the drive for the new disk.
If you forget to type CTRL-C after you change a disk, CP/M-86 automatically protects the new disk. You can run a text editor or copy program and try to write to the new disk, but when you do, CP/M-86 notices that the original disk is no longer in the drive and writes the message:
Bdos err on d: RO
where d: is the drive specifier of the new disk. If you get this message, you must type one CTRL-C to return to the system prompt and another CTRL-C to log in the new disk.
15

2.9 Changing the Default Drive CP/M-86 User's Guide
2.9 Changing the Default Drive
At any given time during operation of CP/M-86, there is one drive called the default drive. Unless you put a drive specifier in your command line, CP/M-86 and the utilities look in the directory of the disk in the default drive for all program and data files. You can tell the default drive from the CP/M-86 system prompt. For example, the message:
A>
tells you that the A drive is the default drive. When you give commands to CP/M-86, you should remember which disk is the default drive. Then you will know which files an application program can access if you do not add a drive specifier.
Drive A is usually the default drive when you start CP/M-86. If you have more than one drive, you might want to change the default drive. Do this by typing the drive specifier of the desired default drive next to the system prompt and pressing the RETURN key.
A>B:
This command, for example, changes the default drive to B. Unless you change the default drive again, all system prompt messages appear as:
B>
The system prompt now indicates that CP/M-86 and its utilities will check in the directory of the disk in drive B for any file that does not have a drive specifier included in the file specification.
2.10 More CP/M-86 Drive Features
Under CP/M-86, drives can be marked RO just as files can be given the RO attribute. The default state of a drive is RW, but CP/M-86 marks a drive RO whenever you change the disk in the drive. You can give a drive the RO attribute by using the STAT Transient Utility described in Section 4. To return the drive to RW you must type a CTRL-C to the system prompt.
16

CP/M-86 User's Guide 2.11 Other CP/M-86 Devices
2.11 Other CP/M-86 Devices
CP/M-86 manages all the peripheral devices attached to your computer. These can include storage devices such as disk drives, input devices such as keyboards, or modems, and output devices such as printers, modems, and screens.
To keep track of input and output devices, CP/M-86 uses logical devices. The table below shows CP/M-86 logical device names and indicates whether the device is input or output.
Table 2-2. CP/M-86 Logical Devices
Device Name Device Type
CON: Console input and output
AXI: Auxiliary input
AXO: Auxiliary output
LST: List output
CP/M-86 associates physical devices with the logical device names. For example, the default console input device is the keyboard and the default console output device is the screen. If you want CP/M-86 to manage an optional peripheral, you must use the STAT command to assign an alternate peripheral to the logical device name. For example, a STAT command can change the console input device from the keyboard to a teletype. STAT can assign a printer to the LST: logical output device name.
A logical input device can be assigned only one physical device. A logical output device can be assigned only one physical device. See the description vi the STAT command in Section 4 for more detail.
End of Section 2
17


Section 3 CP/M-86 Command Concepts
As we discussed in Section 1, a CP/M-86 command line consists of a command keyword, an optional command tail, and a carriage return keystroke. This section describes the two different kinds of programs the command keyword can identify, and tells how CP/M-86 searches for command files on a disk. It also introduces the control characters that direct CP/M-86 to perform various tasks.
3.1 Two Types of Commands
A command keyword identifies a program that resides either in memory as part of CP/M-86, or on a disk as a program file. If a command keyword identifies a program in memory, it is called a Built-in command. If a command keyword identifies a program file on a disk, it is called a Transient Utility or simply a utility.
Six Built-in commands and sixteen Transient Utilities are included with CP/M-86. You can add utilities to your system by purchasing various CP/M-86-compatible application programs. If you are an experienced programmer, you can also write your own utilities that operate with CP/M-86.
3.2 Built-In Commands
Built-in commands are part of CP/M-86 and are always available for your use regardless of which disks you have in which drives. Built-in commands reside in memory as a part of CP/M-86 and therefore execute more quickly than the utilities. Section 4 gives you the operating details for the Built-in commands listed in the table below.
Command
DIR
DIRS
Table 3-1. Built-In Commands
Meaning
displays a list of filenames with the DIR attribute from a disk directory.
displays a filename list of files marked with the SYS attribute.
19

3.2 Built-In Commands CP/M-86 User's Guide
Command
ERA
REN
TYPE
USER
Table 3-1. (continued)
Meaning
erases a filename from a disk directory and releases the storage occupied by the file.
lets you rename a file.
writes the content of a character file at your screen.
lets you change from one user number to another.
3.3 Transient Utility Commands
A program that executes a Transient Utility command comes into memory only when you request it. Section 5 gives you operating details for the standard CP/M-86 Utilities listed in the table below.
Command
ASM86
COPYDISK
DDT86
ED
GENCMD
HELP
PIP
20
Table 3-2. CP/M-86 Utilities
Meaning
translates 8086 assembly language programs into machine code form.
creates a copy of a disk that can contain CP/M-86, program files, and data files.
helps you check out your programs and interactively correct bugs and programming errors.
lets you create and alter character files for access by various programs.
uses the output of ASM-86 to produce an executable command file.
displays information on how to use each CP/M-86 command.
combines and copies files.

CP/M-86 User's Guide
Command
STAT
SUBMIT
TOD
3.3 Transient Utility Commands
Table 3-2. (continued)
Meaning
lets you examine and alter file and disk status, and assign physical 110 devices to CP/M-86 logical devices.
sends a file of commands to CP/M-86 for execution.
sets and displays the system date and time.
3.4 How CP/M-86 Searches for Commands
If a command keyword does not identify a Built-in command, CP/M-86 looks on the default or specified drive for a program file. It looks for a filename equal to the keyword and a filetype of CMD. For example, suppose you type the command line:
A )ED M}'PRDG, BAS
CP/M-86 goes through these steps to execute the command:
1. CP/M-86 first finds that the keyword ED does not identify one of the Builtin commands.
2. CP/M-86 searches for the utility program file ED.CMD in the directory of the default drive. If it does not find the file under the current user number, it looks under user number 0 for ED.CMD with the SYS attribute.
3. When CP/M-86 locates ED.CMD, it copies the program to memory and passes control to ED.
4. ED remains operational until you enter a command to exit ED.
5. CP/M-86 types the system prompt and waits for you to type another command line.
21

3.4 How CP/M-86 Searches for Commands CP/M-86 User's Guide
If CP/M-86 cannot find either a Built-in or a Transient Utility, it reports a keyword error by repeating the command line you typed on your screen, followed by a question mark. This tells you that one of four errors has occurred:
• The keyword is not a Built-in command.
• No corresponding .CMD file appears under the current user number or with the SYS attribute under user O.
• No corresponding .CMD file appears under the current user number or with the SYS attribute under user 0 on the specified drive when you have included a drive specifier.
For example, suppose your default disk contains only standard CP/M-86 utilities and you type the command line:
A)EDIT MYPROG.BAS
Here are the steps that CP/M-86 goes through to report the error:
22
1. CP/M-86 first examines the keyword EDIT and finds that it is not one of the Built-in commands.
2. CP/M-86 then searches the directory of the default disk, first under the current user number for EDIT.CMD and then under user 0 for EDIT.CMD with the SYS attribute.
3. When the file cannot be found, CP/M-86 writes the message:
EDIT?
at the screen to tell you that the command cannot be executed.
4. CP/M-86 displays the system prompt and waits for you to type another command line.

CP/M-86 User's Guide 3.5 Control Character Commands
3.5 Control Character Commands
You can direct CP/M-86 to perform certain functions just by striking a special key. Using the Control Character commands, you can tell CP/M-86 to start and stop screen scrolling, suspend current operations, or echo the screen display at the printer. The table below summarizes Control Character Commands.
Command
CTRL-C
CTRL-P
CTRL-S
Table 3-3. Control Character Commands
Meaning
ends the currently operating program, Of, if typed after the system prompt, initializes the system and default drives and sets all drives to R W status.
echoes all console activity at the printer; a second CTRL-P ends printer echo. This only works if your system is connected to a printer.
toggles screen scrolling. If a display at your screen rolls by too quickly for you to read it, press CTRL-S. Press any key or CTRL-S again to continue the display.
End of Section 3
23


Section 4 Command Summary
This section describes how we show the parts of a file specification in a command line. It also describes the notation used to indicate optional parts of a command line and other syntax notation. The remainder of the section provides a handy reference for all standard CP/M-86 commands.
Built-in and Transient Utility commands are intermixed in alphabetical order. Each command is listed, followed by a short explanation of its operation with examples. More complicated commands are described later in detail. For example, ED is described in Section 5 while ASM-86, DDT-86 and GENCMD are described in the CPIM-86 System Guide.
4.1 Let's Get Past the Formalities
You can see that there are several parts in a file specification that we must distinguish. To avoid confusion, we give each part a formal name that is used when we discuss command lines. The three parts of a file specification are:
• drive specifier - the optional disk drive, A, B, C, or D that contains the file or group of files to which you are referring. If a drive specifier is included in your command line, it must be followed by a colon.
• filename - the one-to-eight character first name of a file or group of files.
• filetype - the optional one-to-three character family name of a file or group of files. If the filetype is present, it must be separated from the filename by a period.
We use the following form to write the general form of a file specification:
d:filename.typ
In the above form, d: represents the optional drive specifier, filename represents the one to eight character filename, and .typ represents the optional one to three character
25

4.1 Let's Get Past the Formalities CP/M-86 User's Guide
filetype. Valid combinations of the elements of a CP/M-86 file specification are shown in the following list.
• filename • d:filename • filename. typ • d:filename.typ
If you do not include a drive specifier, CP/M-86 automatically supplies the default drive. If you omit the period and the filetype, CP/M-86 automatically includes a filetype of three blanks.
We call this general form a file specification. A file specification names a particular file or group of files in the directory of the on-line disk given by the drive specifier. For example,
B:MYFILE.AB8
is a file specification that indicates drive B:, filename MYFILE, and filetype A86. We abbreviate file specification as simply
filespec
in the command syntax statements.
Some CP/M-86 commands accept wildcards in the filename and filetype parts of the command tail. For example,
is a file specification with drive-specifier B:, filename MY*, and filetype A?? This file specification might match several files in the directory.
You now understand command keywords, command tails, control characters, default drives, on-line drives, and wildcards. You also see how we use the formal names' filespec, drive specifier, filename, and filetype. These concepts give you the background necessary to compose complete command lines.
26

CP/M-86 User's Guide 4.2 How Commands Are Described
4.2 How Commands Are Described
This section lists the Built-in and Transient Utility commands in alphabetical order. Each command description is given in a specific form.
• The description begins with the command keyword in upper-case. When appropriate, an English phrase that is more descriptive of the command's purpose follows the keyword, in parentheses.
• The Syntax section gives you one or more general forms to follow when you compose the command line.
• The Type section tells you if the keyword is a Built-in or Transient Utility command. Built-in commands are always available for your use, while Transient Utility commands must be present on an on-line disk as a CMD program file.
• The Purpose section defines the general use of the command keyword.
• The Remarks section points out exceptions and special cases.
• The Examples section lists a number of valid command lines that use the command keyword. To clarify examples of interactions between the user and the operating system, the characters entered by the user are shown in boldface. CP/M-86's responses are shown in normal type.
The notation in the syntax lines describes the general command form using these rules:
• Words in capital letters must be typed by you and spelled as shown, but you can use any combination of upper- or lower-case letters.
• A lower-case word in italics has a general meaning that is defined further in the text for that command. When you see the word option, for example, you can choose from a given list of options.
• You can substitute a number for n.
• The symbolic notation d:, filename, .typ and filespec have the general meanings described in the previous section.
• You must include one or more space characters where a space is shown, unless otherwise specified. For example, the PIP options do not need to be separated by spaces.
27
4.2 How Commands Are Described CP/M-86 User's Guide
• Items enclosed within curly braces { } are optional. You can enter a command without the optional items. The optional items add effects to your command line.
• An ellipsis ( ... ) tells you that the previous item can be repeated any number of times.
• When you can enter one or more alternative items in the Syntax line, a vertical bar I separates the alternatives. Think of this vertical bar as the or bar.
• An up-arrow t or CTRL represents the Control Key on your keyboard.
• All other punctuation must be included in the command line.
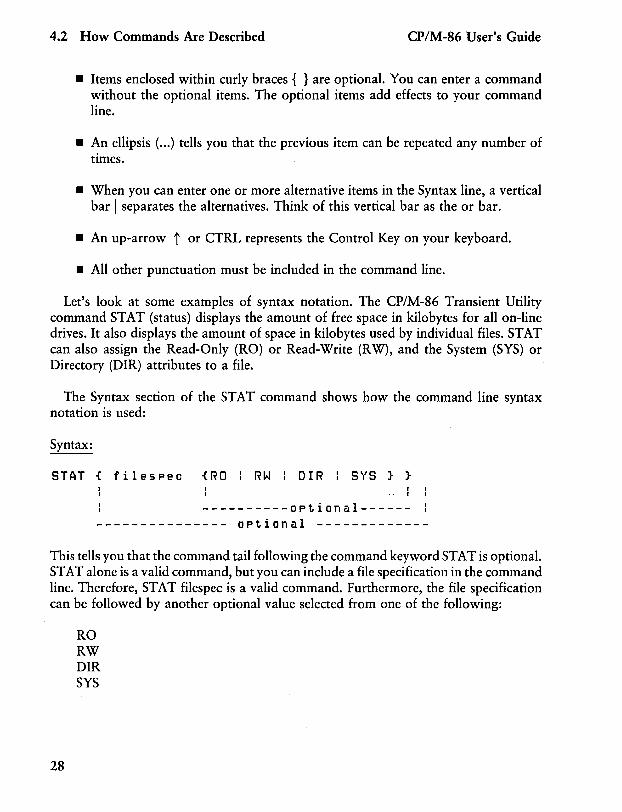
Let's look at some examples of syntax notation. The CP/M-86 Transient Utility command STAT (status) displays the amount of free space in kilobytes for all on-line drives. It also displays the amount of space in kilobytes used by individual files. STAT can also assign the Read-Only (RO) or Read-Write (RW), and the System (SYS) or Directory (DIR) attributes to a file.
The Syntax section of the STAT command shows how the command line syntax notation is used:
Syntax:
STAT {filespec {RO: RW : OIR : SYS } } I
.. I
----------optional--------------------- optional -------------
This tells you that the command tail following the command keyword STAT is optional. STAT alone is a valid command, but you can include a file specification in the command line. Therefore, STAT filespec is a valid command. Furthermore, the file specification can be followed by another optional value selected from one of the following:
28
RO RW DIR SYS

CP/M-86 User's Guide 4.2 How Commands Are Described
Therefore,
STAT filespec RO
is a valid command.
Recall that in Section 3 you learned about wildcards in filenames and filetypes. The STAT command accepts wildcards in the file specification.
Using this syntax, we can construct several valid command lines:
STAT STAT X.A88 STAT X.A88 RO STAT X.A88 SYS STAT *.A88 STAT *.* RW STAT X.* DIR
The CP/M-86 command PIP (Peripheral Interchange Program) is the file copy program. PIP can copy information from your screen to the disk or printer. PIP can combine two or more files into one longer file. PIP can also rename files after copying them. Let's look at one of the formats of the PIP command line for another example of how to use command line notation.
Syntax:
PIP dest-filespec = source-filespec {,filespec ... }
For this example, dest-filespec is further defined as a destination file specification or peripheral device (printer, for example) that receives data. Similarly, source-filespec is a file specification or peripheral device (keyboard, for example) that transmits data. PIP accepts wildcards in the filename and filetype. (See the PIP command summary for details regarding other capabilities of PIP.) There are, of course, many valid command lines that come from this syntax. Some of them are shown below.
PIP NEWFILE.DAT = OLDFILE.DAT PIP B: = A:THISFILE.DAT PIP B:X.BAS = Y.BAS, Z.BAS PIP X.BAS = A.BAS, B.BAS, C.BAS PIP B: = A:*.BAK PIP B: = A:*.*
29

4.3 The ASM-86 Command CP/M-86 User's Guide
4.3 The ASM-86 (Assembler) Command
Syntax:
ASM86 filespec { $parameter-list }
Transient Utility
Purpose:
The ASM-86 Utility converts 8088 and 8086 assembly language source statements into machine code form.
The operation of the ASM-86 assembler is described in detail in the CPIM-86 Programmer's Guide.
Remarks:
The filespec names the character file that contains an 8086 assembly language program to translate. If you omit the filetype, a filetype of A86 is assumed. The assembler uses the drive specifier portion of the filespec as the destination drive for output' files unless you include a parameter in the command tail to override this default.
The three output files produced by the assembler are given the filetypes listed below.
LST contains the annotated source listing.
H86 contains the 8086 machine code in hex format.
SYM contains all programmer-defined symbols with their program relative addresses.
The assembler assigns the same filename as the source filename to the LST, H86 and SYM files.
You control the assembly process by including optional parameters in the parameterlist. Each parameter is a single parameter letter followed by a single letter device name. The parameters can be separated by blanks, but each parameter letter must be followed immediately by the device name.
30

CP/M-86 User's Guide 4.3 The ASM-86 Command
The parameter letters are A, H, P, S, and F. The device names are the letters A through P, corresponding to the drive letters. The letters X, Y, and Z have special meaning when used as device names:
X is the Screen.
Y is the Printer.
Z is Zero Output.
Use the A parameter letter to override the default drive specifier to obtain the source file. The valid parameters are AA through AP.
Use the H parameter letter to override the default drive specifier to receive the H86 file. Valid parameters are HA through HP, and HX, HY, and HZ.
Use the P parameter letter to override the default drive specifier to receive the LST file. Valid parameters are PA through PP, PX, PY, and PZ.
Use the S parameter letter to override the default drive specifier to receive the SYM file. Valid parameters are SA through SP, SX, SY, and SZ.
Use the F parameter letter to select the format of the hex output file. Valid parameters are FI and FD. The FI parameter selects Intel® format hex file output. The FD parameter selects Digital Research format hex file output. FD is assumed if neither FI nor FD appear as a parameter. Use FI when the program is going to be combined with a program generated by an Intel compiler or assembler.
When conflicting parameters appear on the command line, the rightmost parameter prevails.
Examples:
A)ASH86 X
The ASM86.CMD file must be on drive A. The source file X.A86 is read from drive A, and X.LST, X.H86, and X.SYM are written to drive A.
B)ASH86 X,ASH $PX
31

4.3 The ASM-86 Command CP/M-86 User's Guide
The ASM86.CMD file must be on drive B. The source file X.ASM is read from drive B. The listing is written to the screen, and the X.H86 and X.SYM files are placed on drive B.
A)ASM85 B:MYPRDG $PY He
The source file MYPROG.A86 is read from drive B, the listing is sent to the printer, the file MYPROG.H86 is written to drive C, and file MYPROG.SYM is placed on drive B.
A)B:ASM85 X $SZ
The ASM86.CMD file must be on drive B. The X.A86 file is read from drive A. The X.LST and X.H86 files are written to drive A. No X.SYM file is generated.
4.4 The COPYDISK (Copy Disk) Command
Syntax:
COPYDISK
Transient Utility
Purpose:
The COPYDISK Utility copies all the information on one disk to another disk, including the CP/M-86 system tracks if they are present on the source disk.
Before copying to a brand-new disk, you might first have to prepare it with the disk formatting program that should accompany your computer. If you copy to a used disk, COPYDISK writes all the information from the source disk over the information on the destination disk, including blank space.
Remarks:
To display instructions on how to use COPYDISK, enter the keyword HELP with the command tail COPYDISK.
32

CP/M-86 User's Guide 4.4 The COPYDISK Command
To successfully copy from one disk to another, you must make sure that your destination disk is not write-protected. Check that there is a foil tab covering any existing write-protect notch on the edge of your disk before inserting the disk into the destination drive.
COPYDISK is an exact track-for-track, sector-for-sector copy utility, and is the fastest way to copy an entire disk. However, if many files have been created and erased on the source disk, the records belonging to a particular file might be randomly placed on the disk. In this case, it might be more efficient (although slower) to use PIP to copy the files and thus to put all the records in sequential order on the new disk.
Examples:
A>CDPYDISK
Invoke COPYDISK and it prompts you for the source and destination disk. In our next example, COPYDISK copies from your master disk (disk A:) to the new disk (disk B:). When invoked, COPYDISK displays the information in the first line of our example:
CP/M-8S Full Disk COpy Utility Version 2.0
Enter Source Disk Drive (A-D) ? A
Destination Disk Drive (A-D) ? B
Copyin~ disk A: to disk B: Is this what you want to do (YIN) ? Y COpy started Readin~ track nn Writin~ track nn Verifyin~ track nn COpy cOMPleted.
(After read f new text appears) (After write f next Messa~e is)
COpy another disk (YIN) ? N COpy pro~raM exitin~
A>
33

4.5 The DDT-86 Command CP/M-86 User's Guide
4.5 The DDT-86 (Dynamic Debugging Tool) Command
Syntax:
DDT86 { filespec}
Transient Utility
Purpose:
The DDT-86 Utility allows you to monitor and test programs developed for the 8086 and the 8088 processors.
The DDT-86 single letter commands, their parameters and options are described in Table 4-1. The actual command letter is printed in boldface. The parameters are in lower-case and follow the command letter. Optional items are in curly brackets. Replace the arguments with the appropriate values as described in the following list Table 4-1.
Table 4-1. DDT -86 Commands
Command Meaning
As (Assemble) Enter Assembly Language Statements
Bs,f,sl (Block Cmp) Compare Blocks of Memory
D{WHs{,f}} (Display) Display Memory in Hex and ASCII
Efilespec (Execution) Load Program for Execution
Fs,f,bc (Fill) Fill Memory Block - Byte
FWs,f,wc (Fill) Fill Memory Block - Word
G{sH,bl{,b2}} (Go) Begin Execution
Hwcl,wc2 (Hex) Hexadecimal Sum and Difference
34

CP/M-86 User's Guide 4.5 The DDT -86 Command
Command
Icommand tail
L{s{,f}}
Ms,f,d
Rfilespec
S{W}s
T{n}
TS{n}
U{n}
US{n}
V
Wfilespec{,s,f}
X{r}
Parameter
bc b1 b2 d f n r s sl W we
Table 4-1 (continued)
Meaning
(Input) Set Up Input Command Line
(List) List Memory in Mnemonic Form
(Move) Move Memory Block
(Read) Read Disk File to Memory
(Set) Set Memory Values
(Trace) Trace Program· Execution
(Trace) Trace and Show All Registers
(Untrace) Monitor Execution without Trace
(Untrace) Monitor and Show All Registers
(Verify) Show Memory Layout after Disk Read
(Write) Write Content of Block to Disk
(Examine) Examine and Modify CPU Registers
Replace with
byte constant breakpoint one breakpoint two destination for data final address number of instructions to execute register or flag name starting address second starting address word 16-bit word constant
35

4.5 The DDT-86 Command CP/M-86 User's Guide
The overall operation of DDT -86, along with each single letter command, is described in detail in the CPIM-86 Operating System Programmer's Guide.
Remarks:
If the file specification is not included, DDT-86 is loaded into User Memory without a test program. You must not use the DDT-86 commands G, T, or U until you have first loaded a test program. The test program is usually loaded using E command.
If the file specification is included, both DDT-86 and the test program file specified by filespec are loaded into User Memory. Use G, T, or U to begin execution of the test program under supervision of DDT-86.
If the filetype is omitted from the file specification, a filetype of CMD is assumed.
DDT-86 cannot directly load test programs in Hexadecimal (H86) format. You must first convert to command file form (CMD) using the GENCMD Utility.
Examples:
A>DDT88
The DDT-86 Utility is loaded from drive A to User Memory. DDT-86 displays the - prompt when it is ready to accept commands.
A>B:DDT88 TEST.CMD
The DDT-86 Utility is loaded from drive B to User Memory. The program file TEST.CMD is then loaded to User Memory from drive A. DDT-86 displays the address where the file was loaded and the - prompt.
4.6 The DIR (Directory) Built-in
Syntax:
36
DIR {d:} DIR {filespec}
DIRS {d:} DIRS {filespec}

CP/M-86 User's Guide 4.6 The DIR Command
Built-in
Purpose:
The DIR and DIRS Built-in commands display the names of files cataloged in the directory of an on-line disk. The DIR Built-in lists the names of files in the current user number that have the Directory (DIR) attribute. DIR accepts wildcards in the file specification.
The DIRS command displays the names of files in the current user number that have the System (SYS) attribute. Therefore, even though you can access System (SYS) files that are stored in user 0 from any other user number on the same drive, DIRS only displays those user 0 files if the current user number is O. DIRS accepts wildcards in the file specification.
Remarks:
If the drive and file specifications are omitted, the DIR command displays the names of all files with the DIR attribute on the disk in the default drive and current user number. Similarly, DIRS displays the SYS files.
If the drive specifier is included, but the filename and filetype are omitted, the DIR command displays the names of all DIR files in the current user on the disk in the specified drive. DIRS displays the SYS Jiles.
If the file specification contains wildcard characters, all filenames that satisfy the match are displayed on the screen.
If no filenames match the file specification, or if no files are cataloged in the directory of the disk in the named drive, the DIR command displays the message:
NO FILE
If system (SYS) files reside on the specified drive, DIR displays the message:
SYSTEM FILE(S) EXIST
If non-system (DIR) files reside on the specifed drive, DIRS displays the message:
NON-SYSTEM FILES(S) EXIST
37

4.6 The DIR Command CP/M-S6 User's Guide
You cannot use a wildcard character in a drive specifier.
Examples:
A)DIR
All DIR files cataloged in the current user number in the directory of the disk mounted in drive A are displayed on the screen.
A)DIR B:
All DIR files in the current user number on the disk in drive B are displayed on the screen.
A)OIR B:X,A85
If the file X.AS6 is present on the disk in drive B, the DIR command displays the name X.AS 6 on the screen.
A)OIR *,BAS
All DIR files with filetype BAS in the current user number on the disk in drive A are displayed on the screen.
B)OIR A:X*,C?D
All DIR files in the current user number on the disk in drive A whose filename begins with the letter X, and whose three character filetype contains the first character C and last character D are displayed on the screen.
A)OIRS
Displays all files in the current user number on drive A that have the system (SYS) attribute.
A)DIRS *,CHD
Displays all files in the current user number on drive A with a filetype of CMD that have the system (SYS) attribute.
38

CP/M-86 User's Guide 4.7 The ED Command
4.7 The ED (Character File Editor) Command
Syntax:
ED input-filespec {d: I output-filespec}
Transient Utility
Purpose:
The ED Utility lets you create and edit a disk file.
The ED Utility is a line-oriented and context editor. This means that you create and change character files line-by-line, or by referencing individual characters within a line.
The ED Utility lets you create or alter the file named in the file specification.
The ED Utility uses a portion of your User Memory as the active text Buffer where you add, delete, or alter the characters in the file. You use the A command to read all or a portion of the file into the Buffer. You use the W or E command to write all or a portion of the characters from the Buffer back to the file.
An imaginary character pointer, called CP, is at the beginning of the Buffer, between two characters in the Buffer, or at the end of the Buffer.
You interact with the ED Utility in either command or insert mode. ED displays the * prompt on the screen when ED is in command mode. When the * appears, you can enter the single letter command that reads text from the Buffer, moves the CP, or changes the ED mode of operation.
Table 4-2. ED Command Summary
Command Action
nA append n lines from original file to memory buffer
OA append file until buffer is one half full
39

4.7 The ED Command CP/M-86 User's Guide
Table 4-2. (continued)
Command Action
#A append file until buffer is full (or end of file)
B, -B move CP to the beginning (B) or bottom (-B) of buffer
nC, -nC move CP n characters forward (C) or back (-C) through buffer
nD, -nD delete n characters before (-D) or from (D) the CP
E save new file and return to CP/M-86
Fstring{ t Z} find character string
H save the new file, then reedit, using the new file as the original file '
I enter insert mode; use t Z to exit insert mode
Istring{ t Z} insert string at CP
J search _ str"Zins _ str"Zdel_ to _ str{ t Z} juxtapose strings
nK, -nK delete (kill) n lines from the CP
nL, -nL, OL move CP n lines
40

CP/M-86 User's Guide 4.7 The ED Command
Table 4-2. (continued)
Command Action
nMcommands execute commands n times
n,-n move CP n lines and display that line
n: move to line n
:ncommand execute command through line n
Nstring{ i Z} extended find string
o return to original file
nP,-nP move CP 23 lines forward and display 23 lines at console
Q abandon new -£ile, return to CP/M-86
R read X$$$$$$$.LIB file into buffer
Rfilespec{ i Z} read filespec into buffer
Sdelete string"Zinsert string{ i Z} substitute string
nT, -nT, OT type n lines
U, -U upper-case translation
41

4.7 The ED Command CP/M-86 User's Guide
Command
v, -V, OV
nW
oX
oXfilespec{ i Z}
ox
OXfilespec{ i Z}
nZ
Table 4-2. (continued)
Action
line numbering on/off, display free buffer space
write n lines to new file
write or append n lines to X$$$$$$$.LIB
write n lines to filespec or append if previous x command applied to the same file
delete file X$$$$$$$.LIB
delete filespec
wait n seconds
Section 5 gives a detailed description of the overall operation of the ED Utility and the use of each command.
Remarks:
Include the second file specification only if the file named by the first file specification is already present and you do not want the original file replaced. The file named by the second file specification receives the altered text from the first file, which remains unchanged.
If the second file specification contains only the drive specifier the second filename and filetype become the same as the first filename and filetype.
42

CP/M-86 User's Guide 4.7 The ED Command
If the file given by the first file specification is not present, the ED Utility creates the file and writes the message:
NEW FILE
If the second filespec is omitted, the original file is preserved by renaming its filetype to BAK before it is replaced. If you issue an ED command line that contains a filespec with filetype BAK, ED creates and saves your new edited version of the BAK file, but ED deletes your source file, leaving no back-up. If you want to save the original BAK file, use the REN command first to change the filetype from BAK, so that ED can rename it to BAK.
If you include the optional second filespec and give it the same name as the first filespec, ED again creates and saves your new edited version of the output filespec, but has to delete the original input filespec because it has the same name as the output file. You cannot, of course, have two files with the same name in the same user number on the same drive.
If the file given by the first filespec is already present, you must issue the A command to read portions of the file to the Buffer. If the size of the file does not exceed the 'size of the Buffer, the command:
reads the entire file to the Buffer.
The i (Insert) command places the ED Utility in insert mode. In this mode, any characters you type are stored in sequence in the Buffer starting at the current CPo
Any single letter commands typed in insert mode are not interpreted as commands, but are simply stored in the Buffer. You return from insert mode to command mode by typing CTRL-Z.
The single letter commands are normally typed in lower-case. The commands that must be followed by a character sequence end with CTRL-Z if they are to be followed by another command letter.
Any single letter command typed in upper-case tells ED to internally translate to upper-case all characters up to the CTRL-Z that ends the command.
43
4.7 The ED Command CP/M-86 User's Guide
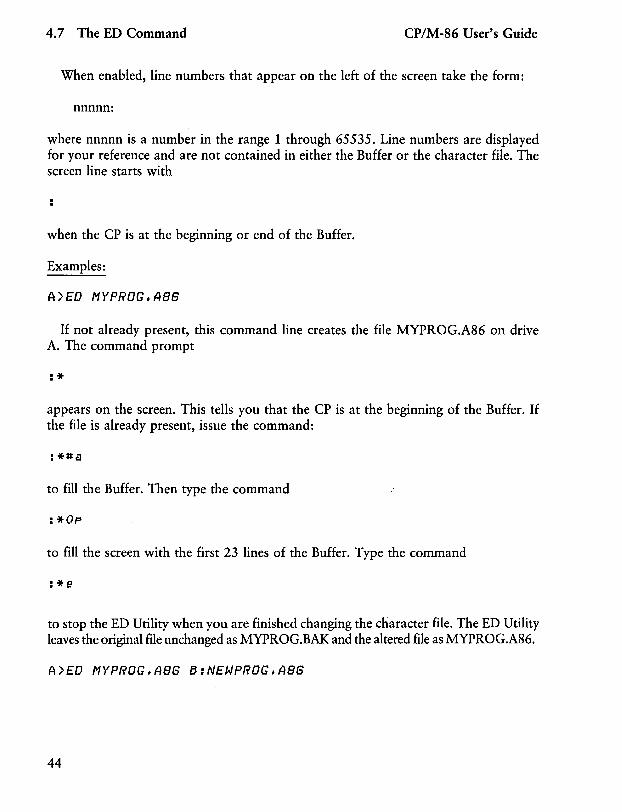
When enabled, line numbers that appear on the left of the screen take the form:
nnnnn:
where nnnnn is a number in the range 1 through 65535. Line numbers are displayed for your reference and are not contained in either the Buffer or the character file. The screen line starts with
when the CP is at the beginning or end of the Buffer.
Examples:
A )ED M}'PRDG, ABS
If not already present, this command line creates the file MYPROG.A86 on drive A. The command prompt
:*
appears on the screen. This tells you that the CP is at the beginning of the Buffer. If the file is already present, issue the command:
to fill the Buffer. Then type the command
to fill the screen with the first 23 lines of the Buffer. Type the command
to stop the ED Utility when you are finished changing the character file. The ED Utility leaves the original file unchanged as MYPROG.BAK and the altered file as MYPROG.A86.
A)ED MYPRDG,ABS B:NEWPRDG,ABS
44

CP/M-86 User's Guide 4.7 The ED Command
The original file is MYPROG.A86 on the default drive A. The original file remains unchanged when the ED Utility finishes, with the altered file stored as NEWPROG.A86 on drive B.
A)B:£D MYPROG.A86 B:
The ED.CMD file must be on drive B. The original file is MYPROG.A86 located on Drive A. It remains unchanged, with the altered program stored on drive B as MYPROG.A86.
4.8 The ERA (Erase) Built-in
Syntax:
ERA filespec
Built-in
Purpose:
The ERA Built-in removes one or more files from the directory of a disk. Wildcard characters are accepted in the command tail. Directory and data space are automatically reclaimed for later use by another file.
Remarks:
Use the ERA command with care since all files that satisfy the file specification are removed from the disk directory.
Command lines that take the form:
ERA {d:}*.*
require your acknowledgment since they reclaim all file space. You'll see the message:
All (YIN)?
Respond with y if you want to remove all files, and n if you want to avoid erasing any files.
45

4.8 The ERA Command CP/M-86 User's Guide
You will see the message:
NO FILE
on the screen if no files match the file specification.
Examples:
A)ERA X,AB8
This command removes the file X.A86 from the disk in drive A.
A)ERA *,PRN
All files with the filetype PRN are removed from the disk in drive A.
B)ERA A:f1Y*,*
Each file on drive A with a filename that begins with MY is removed from the disk.
A)ERA B:*,*
All files on drive B are removed from the disk. To complete the operation, you must respond with a y when the ERA command displays the message:
All (YIN)?
4.9 The GENCMD (Generate CMD File) Command
Syntax:
46
GENCMD filespec {8080 CODE[An,Bn,Mn,Xn] DATA[An,Bn,Mn,Xn] STACK[An,Bn,Mn,Xn] EXTRA[An,Bn,Mn,Xn] Xl[ ... ]
Transient Utility

CP/M-86 User's Guide 4.9 The GENCMD Command
Purpose:
The GENCMD Utility uses the hex output of ASM-86 and other language processors to produce a CMD file. An optional parameter list follows the file specification.
You need to know how to use GENCMD when you write assembly language programs that become Transient Utility commands.
The operation of GENCMD is described in detail in the CPIM-86 System Guide.
The parameter-list consists of up to nine keywords with a corresponding list of values. The keywords are:
8080 CODE DATA STACK EXTRA Xl X2 X3 X4
The keyword 8080 identifies the CMD file as an 8080 Memory Model where code and data groups overlap. The remaining keywords define segment groups that have specific memory requirements. The values that define the memory requirements are separated by commas and enclosed in square brackets ([ ]) following each keyword. The bracketed keywords and related values must be separated from other keywords by at least one blank.
The values included in brackets are defined below, where n represents a hexadecimal constant of from one to four digits. The value n represents a paragraph value where each paragraph is 16 bytes long. The paragraph value corresponds to the byte value n * 16, or hhhhO in hexadecimal.
An Load Group at Absolute Location n Bn Begin Group at address n iIi the Hexadecimal File Mn The Group Requires a Minimum of n * 16 Bytes Xn The Group Can Address up to n * 16 Bytes
Remarks:
Use the 8080 keyword for programs converted from 8-bit microprocessors to CP/M-86. The programs load into an area with overlapping code and data segments. The code segment in the program must begin at location 100H.
Use An for any group that must be loaded at an absolute location in memory. Don't use an A value in the command tail unless you know that the requested absolute area will be available when the program runs.
47
4.9 The GENCMD Command CP/M-86 User's Guide
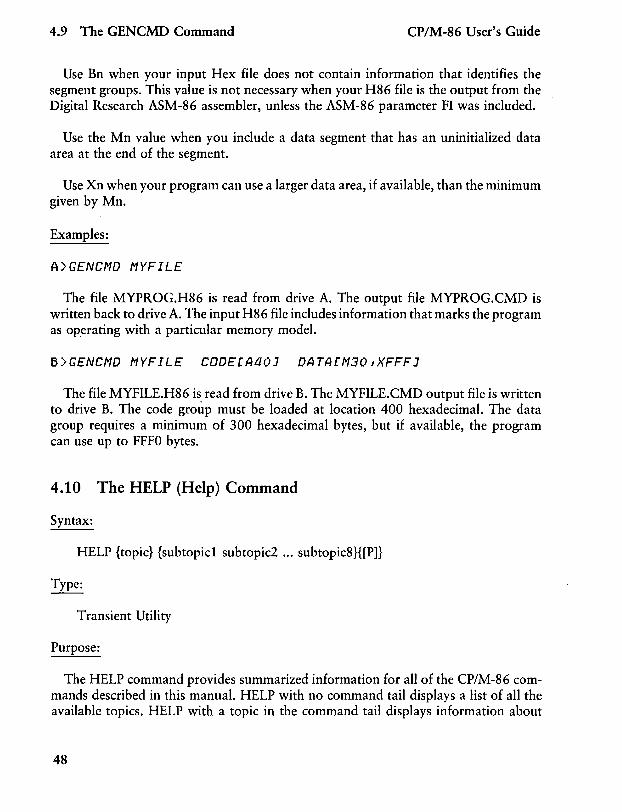
Use Bn when your input Hex file does not contain information that identifies the segment groups. This value is not necessary when your H86 file is the output from the Digital Research ASM-86 assembler, unless the ASM-86 parameter FI was included.
Use the Mn value when you include a data segment that has an uninitialized data area at the end of the segment.
Use Xn when your program can use a larger data area, if available, than the minimum given by Mn.
Examples:
A)GENCHD H}'FILE
The file MYPROG.H86 is read from drive A. The output file MYPROG.CMD is written back to drive A. The input H86 file includes information that marks the program as operating with a particular memory model.
B)GENCHD HYFILE CDDECA40J DATACH30,XFFFJ
The file MYFILE.H86 is read from drive B. The MYFILE.CMD output file is written to drive B. The code group must be loaded at location 400 hexadecimal. The data group requires a minimum of 300 hexadecimal bytes, but if available, the program can use up to FFFO bytes.
4.10 The HELP (Help) Command
Syntax:
HELP {topic} {subtopic1 subtopic2 ... subtopic8}{[P]}
Transient Utility
Purpose:
The HELP command provides summarized information for all of the CP/M-86 commands described in this manual. HELP with no command tail displays a list of all the available topics. HELP with a topic in the command tail displays information about
48

CP/M-86 User's Guide 4.10 The HELP Command
that topic, followed by any available subtopics. HELP with a topic and a subtopic displays information about the specific subtopic.
Remarks:
After HELP displays the information for your specified topic, it displays the special prompt HELP> on your screen. You can continue to specify topics for additional information, or simply press the RETURN key to return to the CP/M-86 system prompt.
You can abbreviate the names of topics and subtopics. Usually one or two letters is enough to specifically identify the topics.
HELP with the [P] option prevents the screen display from stopping every 23 lines.
Examples:
A)H£LP
The command above displays a list of topics for which help is available.
A)H£LP STAT
This command displays general information about the STAT command. It also displays any available subtopics.
A)H£LP STAT OPTIONS
The command above includes the subtopic options. In response, HELP displays information about options associated with the STAT command.
A)H£LP £0
The command above displays general information about the ED Utility.
A)H£LP £0 COMMANDS
This form of HELP displays information about commands internal to ED.
49

4.11 The PIP Command CP/M-86 User's Guide
4.11 PIP (Peripheral Interchange Program - Copy File) Command
Syntax:
PIP dest-file{(GnHldev = src-file{(optionsHldev{(optionsH
Transient Utility
Purpose:
The PIP Utility copies one or more files from one disk and or user number to another. PIP can rename a file after copying it. PIP can combine two or more files into one file. PIP can also copy a character file from disk to the printer or other auxiliary logical output device. PIP can create a file on disk from input from the console or other logical input device. PIP can transfer data from a logical input device to a logical output device. Hence the name Peripheral Interchange Program.
4.11.1 Single File Copy
Syntax:
PIP d:{(GnH = source-filespec{(optionsH
PIP dest-filespec{(GnH = d:{(optionsH
PIP dest-filespec{(GnH = source-filespec{(optionsH
Purpose:
The first form shows the simplest way to copy a file. PIP looks for the file named by source-filespec on the default or optionally specified drive. PIP copies the file to the drive specified by d: and gives it the same name as source-filespec. If you want, you can use the [Gn] option to place your destination file (dest-filespec) in the user number specified by n. The only option recognized for the destination file is [Gn]. Several options can be combined together for the source file specification (source-filespec). See the section· on PIP options.
50

CP/M-86 User's Guide 4.11 The PIP Command
The second form is a variation of the first. PIP looks for the file named by destfilespec on the drive specified by d:, copies it to the default or optionally specified drive, and gives it the same name as dest-filespec.
The third form shows how to rename the file after you copy it. You can copy it to the same drive and user number, or to a different drive and/or user number. Rules for options are the same. PIP looks for the file specified by source-filespec, copies it to the location specified in dest-filespec, and gives it the name indicated by dest-filespec.
Remember that PIP always goes to and gets from the current user number unless you specify otherwise with the [Gn] option.
Remarks:
Before you start PIP, be sure that you have enough free space in kilobytes on your destination disk to hold the entire file or files that you are copying. Even if you are replacing an old copy on the destination disk with a new copy, PIP still needs enough room for the new copy before it deletes the old copy. (See the STAT Utility.)
Data is first copied to a temporary file to ensure that the entire data file can be constructed within the space available on the disk. PIP gives the temporary file the filename specified for the destination, with the filetype $$$. If the copy operation is successful, PIP changes the temporary filetype $$$ to the filetype specified in the destination.
If the copy operation succeeds and a file with the same name as the destination file already exists, the old file with the same name is erased before renaming the temporary file.
File attributes (SYS, DIR, RW, RO) are transferred with the files.
If the existing destination file is set to Read-Only (RO), PIP asks you if you want to delete it. Answer Y or N. Use the W option to write over Read-Only files.
You can include PIP options following each source name (see PIP Options, below). There is one valid option ([Gn] - go to user number n) for the destination file specification. Options are enclosed in square brackets. Several options can be included for the source files. They can be packed together or separated by spaces. Options can verify that a file was copied correctly, allow PIP to read a file with the system (SYS) attribute, cause PIP to write over Read-Only files, cause PIP to put a file into or copy it from a specified user number, transfer from lower- to upper-case, and much more.
51

4.11 The PIP Command CP/M-86 User's Guide
Examples:
A)PIP B:=A:oldfile,dat
A)PIP B:oldfile,dat = A:
Both forms of this command cause PIP to read the file oldfile.dat from drive A and put an exact copy of it onto drive B. This is called the short form of PIP, because the source or destination names only a drive and does not include a filename. When using this form you cannot copy a file from one drive and user number to the same drive and user number. You must put the destination file on a different drive or in a different user number. See the section on PIP Options, and the section on the USER Command. The second short form produces exactly the same result as the first one. PIP simply looks for the file oldfile.dat on drive A, the drive specified as the source.
A)PIP B:newfile,dat=A:oldfile,dat
This command copies the file oldfile.dat from drive A to drive B and renames it to newfile.dat. The file remains as oldfile.dat on drive A. This is the long form of the PIP command, because it names a file on both sides of the command line.
A)PIP newfile,dat = oldfile,dat
Using this long form of PIP, you can copy a file from one drive and user number (usually user 0 because CP/M-86 automatically starts out in user 0 - the default user number) to the same drive and user number. This effectively gives you two copies of the same file on one drive and user number, each with a different name.
A>PIP B:PRDGRAH,BAK = A:PRDGRAH,DATCG11
The command above copies the file PROGRAM.DAT from user 1 on drive A to the currently selected user number on drive B and renames the filetype on drive B to BAK.
6)PIP prodram2,dat = A:prOdraml,datC£ V *G31
In this command, PIP copies the file named program1.dat on drive A and echoes [£] the transfer to the console, verifies [V] that the two copies are exactly the same, and gets [G3] the file program1.dat from user 3 on drive A. Since there is no drive specified for the destination, PIP automatically copies the file to the default user number and drive, in this case drive B.
52

CP/M-86 User's Guide 4.11 The PIP Command
4.11.2 Multiple File Copy
Syntax:
PIP d:{[Gnn = {d:}wildcard-filespec{[optionsn
Purpose:
When you use a wildcard in the source specification, PIP copies qualifying files oneby-one to the destination drive, retaining the original name of each file. PIP displays the message COPYING followed by each filename as the copy operation proceeds. PIP issues an error message and aborts the copy operation if the destination drive and user number are the same as those specified in the source.
Examples:
A>PIP B:=A:*,CMD
This command causes PIP to copy all the files on drive A with the filetype CMD to drive B.
A>PIP B:=A:*,*
This command causes PIP to copy all the files on drive A to drive B. You can use this command to make a back-up copy of your distribution disk. Note, however, that this command does not copy the CP/M-86 system from the system tracks. COPYDISK copies the system for you.
A)PIP B:=A:PROG????,*
The command above causes PIP to copy all files beginning with PROG and having any filetype at all from drive A to drive B.
A)PIP B:CG11=A:*,ABB
This command causes PIP to copy all the files with a filetype of A86 on drive A in the default user number (user ZERO unless you have changed the user number with the USER command) to drive B in user number 1. (Remember that the DIR, TYPE, ERA and other commands only access files in the same user number from which they were invoked. See the USER Utility.)
53

4.11 The PIP Command CP/M-86 User's Guide
4.11.3 Combining Files
Syntax:
PIP dest-file{[Gn]} = src-file{[ opt]},file{[opt]H,file{[opt]} ... }
Purpose:
This form of the PIP command lets you specify two or more files in the source. PIP copies the files specified in the source from left to right and combines them into one file with the name indicated by the destination file specification. This procedure is called file concatenation. You can use the [Gn] option after the destination file to place it in the user number specified by n. You can specify one or more options for each source file.
Remarks:
Most of the options force PIP to copy files character by character. In these cases PIP looks for a CTRL-Z character to determine where the end of the file is. All of the PIP options force a character transfer except the following:
Gn, K, 0, R, V, and W.
Copying data to or from logical devices also forces a character transfer.
During character transfers, you can terminate a file concatenation operation by striking any key on your keyboard.
When concatenating files, PIP only searches the last record of a file for the CTRL-Z end-of-file character. However, if PIP is doing a character transfer, it stops when it encounters a CTRL-Z character.
Use the [0] option if you are concatenating machine code files. The [0] option causes PIP to ignore embedded CTRL-Z (end-of-file) characters, normally used to indicate the end-of-file character in files.
Examples:
A)PIP NEWFILE=FILE1,FILE2,FILE3
54

CP/M-86 User's Guide 4.11 The PIP Command
The three files named FILE1, FILE2, and FILE3 are joined from left to right and copied to NEWFILE.$$$. NEWFILE.$$$ is renamed to NEWFILE upon successful completion of the copy operation. All source and destination files are on the disk in the default drive A.
A)PIP B:X,ABB = Y,ABB, B:Z,ABB
The file Y.A86 on drive A is joined with Z.A86 from drive B and placed in the temporary file X.$$$ on drive B. The file X.$$$ is renamed to X.A86 on drive B when PIP runs to successful completion.
4.11.4 Copy Files to and from Auxiliary Devices
Syntax:
PIP dest-filespec {[Gn]} = AXO: CON: PRN: LST:
Purpose:
source-filespec {[ options}] AXI: {[options}] CON: {[options}] NUL: EOF:
This form is a special case of the PIP command line that lets you copy a file from a disk to a device, from a device to a disk or from one device to another. The files must contain printable characters. Each peripheral device can be assigned to a logical name that identifies a source device that can transmit data or a destination device that can receive data. A colon (:) follows each logical device name so it cannot be confused with a filename. Strike any key to abort a copy operation that uses a logical device in the source or destination.
The logical device names are:
CON: Console: the physical device assigned to CON: When used as a source, usually the keyboard; When used as a destination, usually the screen.
AXI: Auxiliary Input or Output Device.
AXO: Auxiliary Output Device.
55

4.11 The PIP Command CP/M-86 User's Guide
LST: The destination device assigned to LST: Usually the printer.
There are three device names that have special meaning:
NUL: A source device that produces 40 hexadecimal zeroes.
EOF: A source device that produces a single CTRL-Z, (The CP/M-86 End-of-File Mark).
PRN: The printer device with tab expansion to every eighth column, line numbers, and page ejects every 60th line.
Examples:
B)PIP PRN:=CON:IMYDATAfDAT
Characters are first read from the console input device, generally the keyboard, and sent directly to your printer device. You type a CTRL-Z character to tell PIP that keyboard input is complete. At that time, PIP continues by reading character data from the file MYDATA.DAT on drive B. Since PRN: is the destination device, tabs are expanded, line numbers are added, and page ejects occur every 60 lines.
A)PIP B:FUNFILEf.5UE = CON:
If CRT: is assigned to CON: whatever you type at the console is written to the file FUNFILE.SUE on drive B. End the keyboard input by typing a CTRL-Z.
A)PIP L5T:=CON:
If CRT: is assigned to CON: whatever you type at the keyboard is written to the list device, generally the printer. Terminate input with a CTRL-Z.
A)PIP L5T:=B:DRAFT.TXTCT81
The file DRAFT.TXT on drive B is written to the printer device. Any tab characters are expanded to the nearest column that is a multiple of 8.
56

CP/M-86 User's Guide 4.11 The PIP Command
A)PIP PRN:=B:DRAFT,TXT
The command above causes PIP to write the file DRAFT.TXT to the list device. It automatically expands the tabs, adds line numbers, and ejects pages after sixty lines.
4.11.5 Multiple Command Mode
Syntax:
PIP
Purpose:
This form of the PIP command starts the PIP Utility and lets you type multiple command lines while PIP remains in User Memory.
Remarks:
PIP writes an asterisk (*) on your screen when ready to accept input command lines.
You can type any valid command line described under previous PIP formats following the asterisk prompt.
Terminate PIP by pushing only the RETURN key following the asterisk prompt. The empty command line tells PIP to discontinue operation and return to the CP/M-86 system prompt.
Examples:
A)PIP *NEWFILE=FILE1IFILE2,FILE3 *APRDG,CHD=BPRDG,CHD *A:=B:X,A86 *B:=*,*
* This command loads the PIP program. The PIP command input prompt (*) tells you
that PIP is ready to accept commands. The effects of this sequence of commands are the same as shown in the previous examples, where the command line is included in the command tail. PIP is not loaded into memory for each command.
57

4.11 The PIP Command CP/M-86 User's Guide
4.11.6 Using Options With PIP
Purpose:
Options enable you to process your source file in special ways. You can expand tab characters, translate from upper- to lower-case, extract portions of your text, verify that the copy is correct, and much more.
The PIP options are listed below, using n to represent a number and s to represent a sequence of characters terminated by a CTRL-Z. An option must immediately follow the file or device it affects. the option must be enclosed in square brackets []. For those options that require a numeric value, no blanks can occur between the letter and the value.
You can include the [Gn] option after a destination file specification. You can include a list of options after a source file or source device. An option list is a sequence of single letters and numeric values that are optionally separated by blanks and enclosed in square brackets [ ].
Option
Dn
E
F
S8
Table 4-3. PIP Options
Function
Delete any characters past column n. This parameter follows a source file that contains lines too long to be handled by the destination device, for example, an SO-character printer or narrow console. The number n should be the maximum column width of the destination device.
Echo transfer at console. When this parameter follows a source name, PIP displays the source data at the console as the copy is taking place. The source must contain character data.
Filter form-feeds. When this parameter follows a source name, PIP removes all form-feeds embedded in the source data. To change form-feeds set for one page length in the source file to another page length in the destination file, use the F command to delete the old form-feeds and a P command to simultaneously add new form-feeds to the destination file.

CP/M-86 User's Guide 4.11 The PIP Command
Option
Gn
H
I
L
N
a
Pn
Table 4-3. (continued)
Function
Get source from or Go to user number n. When this parameter follows a source name, PIP searches the directory of user number n for the source file. When it follows the destination name, PIP places the destination file in the user number specified by n. The number must be in the range 0 to 15.
Hex data transfer. PIP checks all data for proper Intel hexadecimal file format. The console displays error messages when errors occur.
Ignore :00 records in the transfer of Intel hexadecimal format file. The I option automatically sets the H option.
Translate upper-case alphabetics in the source file to lower-case in the destination file. This parameter follows the source device or filename.
Add line numbers to the destination file. When this parameter follows the source filename, PIP adds a line number to each line copied, starting with 1 and incrementing by one. A colon follows the line number. If N2 is specified, PIP adds leading zeroes to the line number and inserts a tab after the number. If the T parameter is also set, PIP expands the tab.
Object file transfer for machine code (non-character and therefore non-printable) files. PIP ignores any CTRL-Z ends-of-file during concatenation and transfer. Use this option if you are combining object code files.
Set page length. n specifies the number of lines per page. When this parameter modifies a source file, PIP includes a page eject at the beginning of the destination file and at every n lines. If n = 1 or is not specified, PIP inserts page ejects every 60 lines. When you also specify the F option, PIP ignores form-feeds in the source data and inserts new form-feeds in the destination data at the page length specified by n.
59

4.11 The PIP Command CP/M-86 User's Guide
Table 4-3. (continued)
Options Function
Qs
R
Ss
Tn
u
v
W
60
Quit copying from the source device after the string s. When used with the S parameter, this parameter can extract a portion of a source file. The string argument must be terminated by CTRL-Z.
Read system (SYS) files. Normally, PIP ignores files marked with the system attribute in the disk directory. But when this parameter follows a source filename, PIP copies system files, including their attributes, to the destination.
Start copying from the source device at the string s. The string argument must be terminated by CTRL-Z. When used with the Q parameter, this parameter can extract a portion of a source file. Both start and quit strings are included in the destination file.
Expand tabs. When this parameter follows a source filename, PIP expands tab (CTRL-I) characters in the destination file. PIP replaces each CTRL-I with enough spaces to position the next character in a column divisible by n.
Translate lower-case alphabetic characters in the source file to upper-case in the destination file. This parameter follows the source device or filename.
Verify that data has been copied correctly. PIP compares the destination to the source data to ensure that the data has been written correctly. The destination must be a disk file.
Write over files with RO (Read-Only) attribute. Normally, if a PIP command tail includes an existing RO file as a destination, PIP sends a query to the console to make sure you want to write over the existing file. When this parameter follows a source name, PIP overwrites the RO file without a console exchange. If the command tail contains multiple source files, this parameter need follow only the last file in the list.

CP/M-86 User's Guide 4.11 The PIP Command
Table 4-3. (continued)
Options Function
Z Zero the parity bit. When this parameter follows a source name, PIP sets the parity bit of each data byte in the destination file to zero. The source must contain character data.
Examples:
A)PIP N£UPRoG,A86=CoD£,A86fLJ, DATA,A86fUJ
This command constructs the file NEWPROG.AS6 on drive A by joining the two files CODE.AS6 and DATA.AS6 from drive A. During the copy operation, CODE.AS6 is translated to lower-case, while DATA.AS6 is translated to upper-case.
A)PIP CoN:=UID£FIL£,A86fD80J
This command writes the character file WIDEFILE.AS6 from drive A to the console device, but deletes all characters following the SOth column position.
A)PIP B:=L£TT£R,TXTf£J
The file LETTER.TXT from drive A is copied to LETTER.TXT on drive B. The LETTER.TXT file is also written to the screen as the copy operation proceeds.
A)PIP LST:=B:LoNGPAG£,TXTfFP65J
This command writes the file LONGPAGE.TXT from drive B to the printer device. As the file is written, form-feed characters are removed and re-inserted at the beginning and every 65th line thereafter.
B)PIP LST:=PRoGRAH,A86fNT8UJ
This command writes the file PROGRAM.AS6 from drive B to the printer device. The N parameter tells PIP to number each line. The TS parameter expands tabs to every eighth column. The U parameter translates lower-case letters to upper-case as the file is printed.
A)PIP PORTION, TXT=L£TT£R, TXTfSDear Sir~Z Q5inc~relY~ZJ
61

4.11 The PIP Command CP/M-86 User's Guide
This command abstracts a portion of the LETTER.TXT file from drive A by searching for the character sequence Dear Sir before starting the copy operation. When found, the characters are copied to PORTION.TXT on drive A until the sequence Sincerely is found in the source file.
B)PIP B:=A:*.CMDCVWRJ
This command copies all files with filetype CMD from drive A to drive B. The V parameter tells PIP to read the destination files to ensure that data was correctly transferred. The W parameter lets PIP overwrite any destination files that are marked as RO (Read-Only). The R parameter tells PIP to read files from drive A that are marked with the SYS (System) attribute.
4.12 The REN (Rename) Built-in
Syntax:
REN {d:}newname{.typ} = oldname{.typ}
Built-in
Purpose:
The REN Built-in lets you change the name of a file that is cataloged in the directory of a disk.
The filename oldname identifies an existing file on the disk. The filename newname is not in the directory of the disk. The REN command changes the file named by oldname to the name given as newname.
Remarks:
REN does not make a copy of the file. REN changes only the name of the file.
If you omit the drive specifier, REN assumes the file to rename is on the default drive.
62

CP/M-86 User's Guide 4.12 The REN Command
You can include a drive specifier as a part of the newname. If both file specifications name a drive, it must be the same drive.
If the file given by oldname does not exist, REN displays the following message on the screen:
NO FILE
If the file given by newname is already present in the directory, REN displays the following message on the screen:
FILE EXISTS
Examples:
A)REN NEUA5M.A86=OLOFILE.A86
The file OLDFILE.A86 changes to NEW ASM.A86 on drive A.
B)REN A:X.PA5 = Y.PLI
The file Y.PLI changes to X.PAS on drive A.
A)REN B:NEULI5T=B:OLOLI5T
The file OLDLIST changes to NEWLIST on drive B. Since the second drive specifier, B: is implied by the first one, it is unnecessary in this example. The command line above has the same effect as the following:
A)REN B:NEULI5T=OLDLI5T
4.13 The STAT (Status) Command
Syntax:
STAT STAT d:=RO STAT filespec {RO\RW\SYS\DIR\SIZE} STAT {d:}DSK: \ USR: STAT VAL: \ DEV:
63
4.12 The REN Command CP/M-86 User's Guide
Transient Utility
Purpose:
The various forms of the STAT Utility command give you information about the disk drives, files and devices associated with your computer . STAT lets you change the attributes of files and drives. You can also assign physical devices to the STAT logical device names.
Note that the options following filespec can be enclosed in square brackets [], or be preceded by a dollar $ sign or by no delimiter as shown in the syntax section above.
Remarks:
The notation R W tells you the drive is in a Read-Write state so that data can be both read from and written to the disk.
The notation RO tells you the drive is in a Read-Only state so that data can only be read from, but not writ~en to, the disk.
Drives are in a Read-Write state by default, and become Read-Only when you set the drive to RO or when you change a disk and forget to type a CTRL-C.
4.13.1 Seta Drive to Read-Only Status
Syntax:
STAT d:= RO
Purpose:
You can use this form of the STAT command to set the drive to Read-Only status. Use CTRL-C to reset a drive to Read-Write.
64
CP/M-86 User's Guide 4.13 The STAT Command
Example:
A)STAT B: = RO
The command line shown above sets drive 13 to Read-Only status.
4.13.2 Free Space on Disk
Syntax:
STAT {d:}
Purpose:
STAT with no command tail reports the amount of free storage space that is available on all on-line disks. This form of the SlAT command reports free space fot OIily those disks that have been accessed since CP/M-86 was last started or reloaded. You can find the amount of free space on a particular disk by including the drive specifier in the command tail.
Remarks:
If the drive specifier names a drive that is not on-line, CP/M-86 places the drive in an on-line status.' .
This form of the STAT command displays information ori your screen in the following form:
d: RW, Free Space: nnK
where d is the drive specifier, and n is the number of kilobytes of storage remaining on the disk in the drive specified by d.
Examples:
A)STAT
65

4.13 The STAT Command CP/M-86 User's Guide
Suppose you have two disk drives containing active disks. Suppose also that drive A has 16K (16,384) bytes of free space, while drive B has 32K (32,728) bytes of free space. Assume that drive A is marked RW, and drive B is marked RO. The STAT command displays the following messages on your screen:
A: RW, Free Space: 18K B: RO, Free Space: 32K
A)5TAT B:
Suppose drive B is set to Read-Only and has 98 Kilobytes of storage that is free for program and data storage. The following message is displayed on your screen:
B: RO, Free Space: 8SK
4.13.3 Files - Display Space Used and Access Mode
Syntax:
STAT filespec {SIZE}
Purpose:
This form of the STAT command displays the amount of space in kilobytes used by the specified file. It also displays the Access Mode of the file. STAT accepts wildcards in the filename and filetype part of the command tail. When you include a wildcard in your file specification, the STAT command displays a list of qualifying files from the default or specified drive, with their file characteristics, in alphabetical order.
Note that the S option following the filespec can be enclosed in square brackets [], or be preceded by a dollar $ sign, or by no delimiter as shown in the syntax line above.
66
CP/M-86 supports four file Access Modes:
RO The file has the Read-Only attribute that allows data to come from. the file, but the file cannot be altered.
RW The file has the Read-Write attribute that allows data to move either to or from the file.

CP/M-86 User's Guide 4.13 The STAT Command
SYS The file has the system attribute. System files do not appear in DIR (directory) displays. Use DIRS to show System (SYS) files. Use the STAT command to display all files including those with the System attribute. The STAT command shows System files in parentheses.
DIR The file has the directory attribute and appears in DIR (directory) displays.
A file has either the RO or RW attribute, and either the SYS or DIR attribute. By default, and unless changed by the STAT command, a file has the RW and DIR attributes.
This format for the STAT command produces a list of file characteristics under five headings:
IJ The first column displays the number of records used by the file, where each record is 128 bytes in length. This value is listed on your screen under the column marked Recs.
r:J The second column displays the number of kilobytes used by the file, where each kilobyte contains 1,024 bytes. This value is listed under Bytes.
IJ The third column displays the number of directory entries used by the file. This value appears under the FCBs column. FCB (File Control Block) is another name for a directory entry.
r:J The Access Modes are displayed under the Attributes column.
r:J The file specification, consisting of the drive specifier, filename, and filetype of the file appears under Name on your screen.
Remarks:
If the drive specifier is included, and the corresponding drive is not active, CP/M-86 places the drive in an active status.
Use SIZE to tell STAT to compute the virtual file size of each file. The virtual and real file size are identical for sequential files, but can differ for files written in random mode. When you use SIZE, the additional column, marked Size, is displayed on the screen. The value in this column represents the number of filled and unfilled records allotted to the file.
67

4.13 The STAT Command CP/M-86 User's Guide
When you enter the command STAT *. * , STAT performs a directory verification to ensure that two files do not share the same disk space allocation. This means that the indicated file shares a portion of the disk with another file in the directory. If STAT finds a duplicate space allocation it displays the following message:
Bad Directory on d: Space Allocation Conflict: User nn d:filenaMe.typ
STAT prints the user number and the name of the file containing doubly allocated space. More than one file can be listed. The recommended solution is to erase the listed files, and then type a CTRL-C.
STAT does a complete directory verification whenever a wildcard character appears in the command tail.
Examples:
A)STAT MY*, *
This command tells STAT to display the characteristics of all files that begin with the letters MY, with any filetype at all. Assume that the following three files satisfy the file specification. The screen could display the following:
D ri ve B: User 0 Recs Bytes FCBs Attributes NaMe
is 2K 1 Dir RW B:MYPROG • A8S ' 8 lK 1 Dir RO B:MYTEST .DAT
32 18K 2 SyS RO B:MYTRAN .CMD
Total: 21K 4
B: RWf Free Space: 80K
A)STAT MY*,* 5IZE
This command causes the same action as the previous command, but includes the Size column in the display. Assume that MYFILE.DAT was written using random
68
CP/M-86 User's Guide 4.13 The STAT Command
access from record number 8 through 15, leaving the first 8 records empty. The virtual file size is 16 records, although the file only consumes eight records. The screen appears as follows:
Dr i ve B: User 0 Size Recs Bytes FCBs Attributes NaMe
18 18 2K 1 Dir RW B:MYPROG .A8S 18 8 11~ 1 Dir RO B:MYTEST .DAT 32 32 18K 2 SyS RO B:MYTRAN .CMD
Total: 21K 4
B: RW, Free Space: 80K
4.13.4 Set File Access Modes (Attributes)
Syntax:
STAT filespec RO IRW ISYS IDIR
Purpose:
This form of the STAT command lets you set the Access Mode for one or more files. Note that the option following filespec can be enclosed in square brackets [], be preceded by a dollar $ sign or by no delimiter as shown above.
The four Access Modes, described above, are:
RO RW SYS DIR
Remarks:
If the drive named in the file specification corresponds to an inactive drive, CP/M-86 first places the drive in an on-line state.
A file can have either the RO or R W Access Mode, but not both. Similarly, a file can have either the SYS or DIR Access Mode, but not both.
69

4.13 The STAT Command CP/M-86 User's Guide
Examples:
A)STAT LETTER, TXT RD
This command sets the Access Mode for the file LEITER. TXT on the default drive to RO. The following message appears on your screen if the file is present:
LETTER. TXT set to RO
The command:
sets the Access Mode for all files on drive A, with filetype COM, to SYS. Given that the three command files PIP, ED, and ASM-86 are present on drive A, the following message appears on your screen:
PIP.COM set to SYS ED. COM set to SYS ASM86 set to SYS
4.13.5 Display Disk Status
Syntax:
STAT {d:}DSK:
Purpose:
This form of the STAT command displays internal information about your disk system for all on-line disks.
If a drive is specified, it is placed in an on-line status.
The information provided by this command is useful for more advanced programming, and is not necessary for your everyday use of CP/M-86.
Examples:
A)STAT DSK:
70

CP/M-86 User's Guide 4.13 The STAT Command
This STAT command displays information about drive A in the following form. STAT supplies numbers for n.
A: Drive Characteristics nnnn: 128 Byte Record Capacity nnnn: Kilobyte Drive Capacity nnnn: 32 Byte Directory Entries nnnn: Checked Directory Entries nnnn: 128 Byte RecordslDirectory Entry nnnn: 128 Byte RecordslBlock nnnn: 128 Byte Recordsffrack nnnn: Reserved Tracks
A)STAT B:DSK:
This command produces the information shown in the previous example for drive B.
4.13.6 Display User Numbers With Active Files
Syntax:
STAT {d:}USR:
Purpose:
This form of the STAT command lets you determine the User Numbers that have files on the disk in the specified drive.
User Numbers are assigned to files that are created under CP/M-86. Use this form of the STAT command to determine the active User Numbers on a disk.
Examples:
A)STAT USR:
This command displays the User Numbers containing active files on the disk in drive A.
71
4.13 The STAT Command CP/M-86 User's Guide
4.13.7 Display STAT Commands and Device Names
Syntax:
STAT VAL: .
Purpos~: .
STAT VAL: displays the general form of the STAT commands. It also displays the possible physic~l device names that you can assign ~o each of the four CP/M-86 logical device names.
Examples:
The STAT VAL: display is sh?wn below:
,A)STAT VAL: STAT ·2. 1
Read Only DisK: d:=RO Set Attribu~e: d:filenaMe.ty~ [ro] [rw] [sys] [dir] DisK Status DSK: d:DSK: User Status USR: d:USR: Iobyte Assi!1n: CON: = TTY: CRT: BAT: UCi: AXI: = TTY: PTR: URi: UR2: AXO: = TTY: PTP: UPi: UP2: LST: = TTY: CRT: ·LPT: ULi: A)
4.13.8 Display and Set Physical ~o Logical Device Assignments
Syntax:
STAT DEV: STAT . logical device: = physi~al device: .
Purpose:
STAT DEV: displays the current assignments for the four CP/M-86 logical device
72

CP/M-86 User's Guide 4.13 The STAT Command
names, CON:, RDR:, PUN: and LST:. Use the second form of the above STAT command to change these current assignments. The command STAT VAL: displays the possible physical device names that you, can assign to each logical device name. Refer to the part of the STAT VAL: display entitled lobyte Assign shown above.
When you assign a physical device to a logical device, STAT assigns a value from 0 to 3 to the logical device name in what is called the 10byte.
You can assign any of the listed physical device names to their appropriate logical device names. However, the assignment does not work unless you are using the proper Input-Output Port on your computer, with the proper cable to connect the computer to the device, and the proper 10 (Input-Output) driver routine for the particular physical device.
The physical device drivers have to be implemented in the BIOS (Basic Disk Operating System). The 10byte must be read and interpreted. The appropriate drivers must be jumped to for the logical output routine. Refer to the CPIM-86 System Guide for further information on handling external physical devices.
Examples:
A>STAT CON: = CRT:
The command above assigns the physical device name CRT: to the logical input device name CON:, which generally refers to the console.
A>STAT LST: = LPT:
The command above assigns the physical device name LPT: to the logical output device name LST:, which generally refers to the list device of the printer.
4.14 The SUBMIT (Batch Processing) Command
Syntax:
SUBMIT filespec { parameters ... }
Transient Utility
73

4.14 The SUBMIT Command CP/M-86 User's Guide
Purpose:
The SUBMIT Utility lets you group a set of commands together for automatic processing by CP/M-86.
Normally, you enter commands one line at a time. If you must enter the same sequence of commands several times, you'll find it easier to batch the commands together using the SUBMIT Utility. To do this create a file and list your commands in this file. The file is identified by the filename, and must have a filetype of SUB. When you issue the SUBMIT command, SUBMIT reads the file named by filespec and prepares it for interpretation by CP/M-86.
The file of type SUB can contain any valid CP/M-86 commands. If you want, you can include SUBMIT parameters within the SUB file that are filled in by values that you include in the command tail.
SUBMIT parameters take the form of a dollar sign ($), followed by a number in the range 1 through 9:
$1 $2 $3 $4 $5 $6 $7 $8 $9
You can put these parameters anywhere in the command lines in your file of type SUB.
The SUBMIT Utility reads the command line following SUBMIT filespec and substitutes the items you type in the command tail for the parameters that you included in the file of type SUB. When the substitutions are complete, SUBMIT sends the file to CP/M-86 line by line as if you were typing each command.
Remarks:
Each item in the command tail is a sequence of alphabetic, numeric, and/or special characters. The items are separated by one or more blanks.
74

CP/M-86 User's Guide 4.14 The SUBMIT Command
The first word in the command tail takes the place of $1, the second word replaces $2, and so-forth, through the last parameter.
If you type fewer items in the command tail than parameters in the SUB file, remaining parameters are removed from the command line.
If you type more items in the command tail than parameters in the SUB file, the words remaining in the command tail are ignored.
SUBMIT creates a file named $$$.SUB that contains the command lines resulting from the substitutions.
Batch command processing stops after reading the last line of the SUB file. CTRLBreak stops the SUBMIT process. You can also stop batch processing before reaching the end of the SUB file by pressing any key after CP/M-86 issues the command input prompt, A>.
The file $$$.SUB is automatically removed when CP/M-86 has processed all command lines.
SUB files cannot contain nested SUBMIT commands. However, the last command in a SUB file can be a SUBMIT command that chains to another SUB file.
To include an actual dollar sign ($) in your file of type SUB, type two dollar signs ($$). The SUBMIT Utility replaces them with a single dollar sign when it substitutes a command tail item for a $ parameter in the SUB file.
Examples:
A>SUBMIT SUBFILE
Assume the file SUBFILE.SUB is on the disk in drive A, and that it contains the lines shown below.
OIR *.COM A8MB6 X $$86 PIP L8T:= X.PRN[TBOBO]
75

4.14 The SUBMIT Command CP/M-86 User's Guide
The SUBMIT command shown above sends the sequence of commands contained in SUBFILE.SUB to CP/M-86 for processing. CP/M-86 first performs the DIR command and then assembles X.A86. When ASM-86 finishes, the PIP command line is executed.
A>SUBMIT B:ASMCDM X 8 080 SZ <--these COMMand tail iteMs are assi~ned
$1 ~2 $3 $4 <--to these SUB file $n paraMeters.
Assume that ASMCOM.SUB is pre~ent on drive B and that it contains the commands:
ERA $l.BAK ASM8S $1 $$$4 PIP LST:= $1.PRN[T$2 $3 $5]
The SUBMIT Utility reads this file and substitutes the items in the command tail for the parameters in the SUB file as follows:
ERA X.BAK ASM8S X $SZ PIP LST:= X.PRN[T8 080]
These commands are executed from top to bottom by CP/M-86.
4.15 The TOD (Display and Set Time of Day) Command
Syntax:
TOD {time-specification I P}
Transient Utility
Purpose:
The TOD Utility lets you examine and set the time of day.
When you start CP/M-86, the date and time are set to the creation date of the BDOS. Use TOD to change this initial value, at your option, to the current date and actual time.
76

CP/M-86 User's Guide 4.15 The TOD Command
A date is represented as a month value in the range 1 to 12, a day value in the range 1 to 31, depending upon the month, and a two digit year value relative to 1900.
Time is represented as a twenty-four hour clock, with hour values from 00 to 11 for the morning, and 12 to 23 for the afternoon.
Use the command:
TOO
to obtain the current date and time in the format:
weekday month/day/year hour:minute:second
For example, the screen might appear as:
12/08/81 08:15:37
in response to the TOD command.
Use the command form:
TOD time-specification
to set the date and time, where the time-specification takes the form:
month/day/year hour:minute:second
A command line in this form is:
TOO 02/08/81 10:30:00
To let you accurately set the time, the TOD Utility writes the message:
Press any key to set tiMe
When the time that you give in the command tail occurs, press any key. TOD begins timing from that instant, and responds with a display in the form:
02/08/81 10:30:00
77

4.15 The TOD Command CP/M-86 User's Guide
Use the command form:
TOD P
to continuously print the date and time on the screen. You can stop the continuous display by pressing any key.
Remarks:
TOD checks to ensure that the time-specification represents a valid date and time.
You need not set the time-of-day for proper operation of CP/M-86.
Examples:
A)TDD
This command writes the current date and time on the screen.
A)TDD 12/31/81 23:58:58
This command sets the current date and time to the last second of 1981.
4.16 The TYPE (Display File) Built-in
Syntax:
TYPE {d:}filename{.typ}
Built-in
Purpose:
The TYPE built-in displays the contents of a character file on your screen.
Remarks:
Tab characters occurring in the file named by the file specification are expanded to every eighth column position of your screen.
78

CP/M-86 User's Guide 4.16 The TYPE Command
Press any key on your keyboard to discontinue the TYPE command.
Make sure the file specification identifies a file containing character data.
If the file named by the file specification is not present on an on-line disk, TYPE displays the following message on your screen:
NO FILE
To list the file at the printer as well as on the screen, type a CTRL-P before entering the TYPE command line. To stop echoing keyboard input at the printer, type a second CTRL-P.
Examples:
A>TYPE MYPRDG.AB6
This command displays the contents of the file MYPROG.A86 on your screen.
A>TYPE B:THI5FILE
This command displays the contents of the file THIS FILE from drive B on your screen.
4.17 The USER (Display and Set User Number) Built-in
Syntax:
USER { number}
Built-in
Purpose:
The USER Built-in command displays and changes the current user number. The disk directory can be divided into distinct groups according to a User Number.
79

4.17 The USER Command CP/M-86 User's Guide
Remarks:
When CP/M-86 starts, 0 is the current Us~r Number. Any files you create under this User Number are not generally accessible under any other User Number except through the PIP command or the System (SYS) attribute as assigned with the STAT command. (See the G parameter of the PIP Utility.)
Use the command
USER
to display the current User Number.
Use the command
USER number
where number is a number in the range 0 through 15, to change the current User Number.
Use the command
STAT USR:
to get a list of User Numbers that have files associated with them.
Examples:
A > USER o
This command displays the current User Number.
A>UsER 3
This command changes the current User Number to 3.
End of Section 4
80

Section 5 ED, The CP/M-86 Editor
5.1 Introduction to ED
To do almost anything with a computer you need some way to enter data, some way to give the computer the information you want it to process. The programs most commonly used for this task are called editors. They transfer your keystrokes at the keyboard to a disk file. CP/M-86's editor is named ED. Using ED, you can easily create and alter CP/M-86 text files.
The correct command syntax for invoking the CP/M-86 editor is given in the first section, "Starting ED." After starting ED, you issue commands that transfer text from a disk file to memory for editing. "ED Operation" details this operation and describes the basic text transfer commands that allow you to easily enter and exit the editor.
"Basic Editing Commands" details the commands that edit a file. "Combining ED Commands" describes how to combine the basic commands to edit more efficiently. Although you can edit any file with the basic ED commands, ED provides several more commands that perform more complicated editing functions, as described in "Advanced ED Commands."
During an editing session, ED may return two types of error messages. "ED Error Messages" lists these messages and provides examples that indicate how to recover from common editing error conditions.
5.2 Starting ED
Syntax:
ED filespec filespec
To start ED, enter its name after the CP/M-86 prompt. The command ED must be followed by a file specification, one that contains no wildcard characters, such as:
A)ED MYFILE.TEX
The file specification, MYFILE.TEX in the above example, specifies a file to be edited or created. The file specification can be preceded by a drive specifier but a drive specifier
81

5.2 Starting· ED CP/M-86 User's Guide
is unnecessary if the file to be edited is on your default drive. Optionally, the file specification can be followed by a drive specifier, as shown in the following example.
A)ED MYFILE,TEX B:
In response to this command, ED opens the file to be edited; MYFILE. TEX, on drive A, but sends all the edited material to a· file on drive B.
Optionally, you can send the edited material to a file with a different filename, as shown in the following example.
A)ED MYFILE,TEX YOURFILE,TEX
The file with the different filename cannot already exist or ED prints the following message and terminates.
Output File Existst Erase It
The ED prompt,"', appears at the screen when ED is ready to accept a command, as shown below.
A)ED MYFILE,TEX : *
If no previous version of the file exists on the current disk, ED automatically creates a new file and displays the following message:
NEW FILE : *
Note: before starting an editing session, use the STAT command to check the amount of free space on your disk. Make sure that the unused portion of your disk is at least as large as the file you are· editing .; larger if you plan to add characters to the file. When ED finds a disk or directory full, ED has only limited recovery mechanisms. These are explained in "ED Error Messages."
5.3 ED Operation
With ED, you change portions of a file that pass through a memory buffer. When you start ED with one of the commands shown above, this memory buffer is empty.
82

CP/M-86 User's Guide 5.3 . ED Operation
At your command, ED reads segments of the 'source file, for example MYFILE.TEX, into the ~emory buffer for you to edit. If the file is new, you must insert text into the file before you can edit. During the edit, ED writes the edited text onto a temporary work file, MYFILE.$$$.
When you end the edit, ED 'writes the memory buffer contents to the temporary file, followed by any remaining text in the source file. ED then changes the name of the source file from MYFILE. TEX to MYFILE.BAK, so you can reclaim this original material from the back-up file if necessary. ED then renames the temporary file, MYFILE.$$$, to MYFILE.TEX, the new edited file. The following figure illustrates the relationship between the source file, the temporary work file and the new file.
Note: when you invoke ED with two filespecs, an input file and an output file, ED does not rename the input file to type .BAK; therefore, the input file can 'be Read-Only or on a write protected disk if the output file is written to another disk.
After Edit
(E)
Append (A) ,----; ______ ----"--,
Memory Buffer
Insert
D Type
(T)
After Edit
Figure 5-1. Overall ED Operation
(E)
83

5.3 ED Operation CP/M-86 User's Guide
In the figure above, the memory buffer is logically between the source file and the temporary work file. ED supports several commands that transfer lines of text between the source file, the memory buffer and the temporary, and eventually final, file. The following table lists the three basic text transfer commands that allow you to easily enter the editor, write text to the temporary file, and exit the editor.
Command
nA
nW
E
Table 5-1. Text Transfer Commands
Result
Append the next n unprocessed source lines from the source file to the end of the memory buffer.
Write the first n lines of the memory buffer to the temporary file free space.
End the edit. Copy all buffered text to the temporary file, and copy all unprocessed source lines to the temporary file. Rename files.
5.3.1 Appending Text into the Buffer
When you start ED and the memory buffer is empty, you can use the A (append) command to add text to the memory buffer.
Note: ED can number lines of text to help you keep track of data in the memory buffer. The colon that appears when you start ED indicates that line numbering is turned on. Type -V after the ED prompt to turn the line number display off. Line numbers appear on the screen but never become a part of the output file.
The A (Append) Command
The A command appends (copies) lines from an existing source file into the memory buffer. The form of the A command is:
nA
where n is the number of unprocessed source lines to append into the memory buffer. If a pound sign, #, is given in place of n, then the integer 65535 is assumed. Because the memory buffer can contain most reasonably sized source files, it is often possible
84

CP/M-86 User's Guide 5.3 ED Operation
to issue the command # A at the beginning of the edit to read the entire source file into memory.
If n is 0, ED appends the unprocessed source lines into the memory buffer until the buffer is approximately half full. If you do not specify n, ED appends one ·line from the source file into the memory buffer.
5.3.2 ED Exit
You can use the W (Write) command and the E (Exit) command to save your editing changes. The W command writes lines from the memory buffer to the new file without ending the ED session. An E command saves the contents of the buffer and any unprocessed material from the source file and exits ED.
The W (Write) Command
The W command writes lines from the buffer to the new file. The form of the W command is:
nW
where n is the number of lines to be written from the beginning of the buffer to the end of the new file. If n is greater than 0, ED writes n lines from the beginning of the buffer to the end of the new file. If n is 0, ED writes lines until the buffer is half empty. The OW command is a convenient way of making room in the memory buffer for more lines from the source file. You can determine the number of lines to write out by executing a OV command to check the amount of free space in the buffer, as shown below:
1: *OV 25000/30000 1: *
The above display indicates that the total size of the memory buffer is 30,000 bytes and there are 25,000 free bytes in the memory buffer.
Note: after a W command is executed, you must enter the H command to reedit the saved lines during the current editing session.
85

5.3 . ED Operation CP/M-86 User's Guide
The E (Exit) Command
An E command performs a normal exit from ED. The form of the E command is:
E
followed by a carriage return.
When you enter an E command, ED first writes all data lines from the buffer and the original source file to the new file. If a .BAK file exists, ED deletes it, then renames the original file with the .BAK filetype. Finally, ED renames the new file from filename.$$$ to the original filetype and returns control to the CCP.
The operation of the E command makes it unwise to edit a back-up file. When you edit a BAK file and exit with an E command, ED erases your original file because it has a .BAK filetype. To avoid this, always rename a back-up file to some other filetype before editing it with ED.
Note: any command that terminates an ED session.must be the only command on the line.
5.4 Basic Editing Commands
The text transfer commands discussed above allow you to easily enter and exit the editor. This section discusses the basic commands that edit a file.
ED treats a file as a long chain of characters grouped together in lines. ED displays and edits characters and lines in relation to an imaginary device called the character pointer (CP). During an edit session, you must mentally picture the CP's location in the memory buffer and issue commands to move the CP and edit the file.
The following commands move the character pointer or display text in the vicinity of the CPo These ED commands consist of a numeric argument and a single command letter ,and ,must be followed by a carriage return. The numeric argument, n, determines the number of times ED executes a command; however, there are four special cases to consider in regard to the numeric argument:
• If the numeric argument is omitted, ED assumes an argument of 1.
86
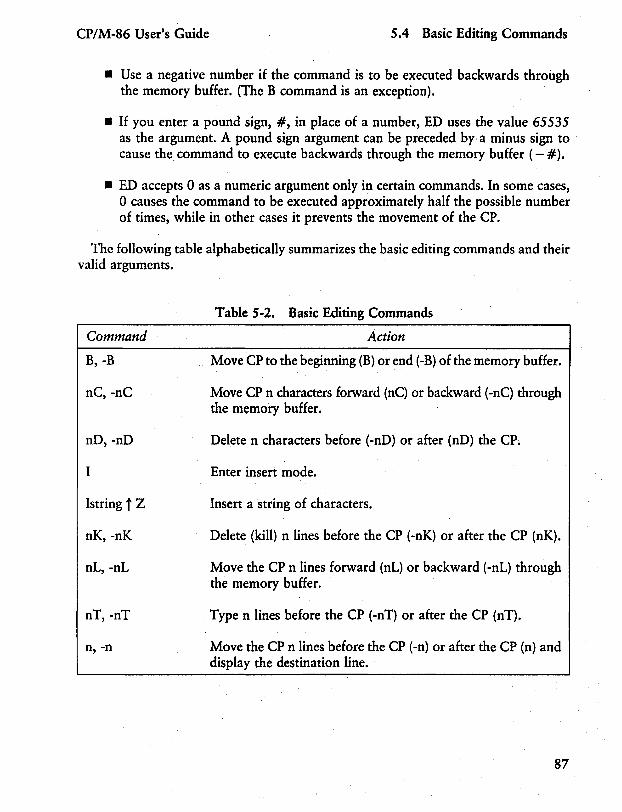
CP/M-86 User's Guide 5.4 Basic Editing Commands
• Use a negative number if the command is to be executed backwards through the memory buffer. (The B command is an exception).
• If you enter a pound sign, #, in place of a number, ED uses the value 65535 as the argument. A pound sign argument can be preceded by a minus sign to cause the command to execute backwards through the memory buffer ( - #).
• ED accepts 0 as a numeric argument only in certain commands. In some cases, o causes the command to be executed approximately half the possible number of times, while in other cases it prevents the movement of the CPo
The following table alphabetically summarizes the basic editing commands and their valid arguments.
Command
B, -B
nC, -nC
nD, -nD
I
Istring i Z
nK, -nK
nL, -nL
nT, -nT
n, -n
Table 5-2. Basic Editing Commands
Action
Move CP to the beginning (B) or end (-B) of the memory buffer.
Move CP n characters forward (nC) or backward (-nC) through the memory buffer.
Delete n characters before (-nD) or after (nD) the CPo
Enter insert mode.
Insert a string of characters.
Delete (kill) n lines before the CP (-nK) or after the CP (nK).
Move the CP n lines forward (nL) or backward (-nL) through the memory buffer.
Type n lines before the CP (-nT) or after the CP (nT).
Move the CP n lines before the CP (-n) or after the CP (n) and display the destination line.
87

5.4 Basic Editing Commands CP/M-86 User's Guide
The following sections discuss ED's basic editing commands in more detail. The examples in these sections illustrate how the commands affect the position. of the character pointer in the memory buffer. Later examples in "Combining ED Commands" illustrate how the commands appear at the screen. For these sections, however, the symbol" in command examples represents the character pointer, which you must imagine in the m.emory buffer.
5.4.1 Moving the Character Pointer
This section describes commands that move the character pointer in useful increments but do not display the destination line. Although ED is used primarily to create and edit program source files, the following sections present a simple text as an example to make ED easier to learn and understand.
The B (BeginningIBottom) Command
The B command moves the CP to the beginning or bottom of the memory buffer. The forms of the B command are:
B, -B
-B moves the CP to the end or bottom of the memory buffer; B moves the CP to the beginning of the buffer.
The C (Character) Command
The C command moves the CP forward or backward the specified number of characters. The forms of the C command are:
nC, -nC
where n is the number of characters the CP is to be moved. A positive number moves the CP towards the end of the line and the bottom of the buffer. A negative number moves the CP towards the beginning of the line and the top of the buffer . You can enter an n large enough to move the CP to a different line. However, each line is
88

CP/M-86 User's Guide 5.4 Basic Editing Commands
separated from the next by two invisible characters: a carriage-return and a line-feed represented by <cr><1£>. You must compensate for their presence. For example, the command 30C moves the CP to the next line:
Emily Dickinson said,<cr><1£> "I fin"d ecstasy in living -<cr><1£>
The L (Line) Command
The L command moves the CP the specified number of lines. After an L command, the CP always points to the beginning of a line. The forms of the L command are:
nL, -nL
where n is the number of lines the CP is to be moved. A positive number moves the CP towards the end of the buffer. A negative number moves the CP back toward the beginning of the buffer. The command 2L moves the CP two lines forward through the memory buffer and positions the character pointer at the beginning of the line.
Emily Dickinson said,<cr><1£> "I find ecstasy in living -<cr><1£>
"the mere sense of living<cr><1£>
The command -L moves the CP to the beginning of the previous line, even if the CP originally points to a character in the middle of the line. Use the special character 0 to move the CP to the beginning of the current line.
The n (Number) Command
The n command moves the CP and displays the destination line. The forms of the n command are:
n, -n
where n is the number of lines the CP is to be moved. In response to this command, ED moves the CP forward or backward the number of lines specified, then prints only the destination line.
Emily Dickinson said,<cr><1£> ""I find ecstasy in living -<<;r><1£>
89

5.4 Basic Editing Commands CP/M-86 User's Guide
A further abbreviation of this command is to enter no number at all. In response to a carriage return without a preceding command, ED assumes an n command of 1 and moves the CP down to the next line and prints it.
Emily Dickinson said,<cr><lf> . ""I find ecstasy in living -<cr><lf>
Also, a minus sign, -, without a number moves the CP back one line.
5.4.2 Displaying Memory Buffer Contents
ED does not display the contents of the memory buffer until you specify which part of the text you want to see. The T command displays text without moving the CPo
The T (Type) Command
The T command types a specified number of lines from the CP at the screen. The forms of the T command are:
nT, -nT
where n specifies the number of lines to be displayed. If a negative number is entered, ED displays n lines before the CP. A positive number displays n lines after the CP. If no number is specified, ED types from the character pointer to the end of the line. The CP remains in its original position no matter how many lines are typed. For example, if the character pointer is at the beginning of the memory buffer, and you instruct ED to type four lines (4T), four lines are displayed at the screen, but the CP stays at the beginning of line 1.
"Emily Dickinson said,<cr><lf> "I find ecstasy in living -<cr><lf> the mere sense of living is joy enough."
If the CP is between two characters in the middle of the line, T command with no number specified types only the characters between the CP and the end of the line, but the character pointer stays in the same position, as shown in the memory buffer example below.
"I find ec"stasy in living -
90

CP/M-86 User's Guide 5.4 Basic Editing Commands
Whenever ED is displaying text with the T command, you can enter a CTRL-S to stop the display, then a CTRL-Q when you're ready to continue scrolling. Enter a CTRLC to abort long type-outs.
5.4.3 Deleting Characters
The D (Delete) Command
The D command deletes a specified number of characters and has the forms:
nD, -nD
where n is the number of characters to be deleted. If no number is specified, ED deletes the character to the right of the CPo A positive number deletes multiple characters to the right of the CP, towards the bottom of the file. A negative number deletes characters to the left of the CP, towards the top of the file. If the character pointer is positioned in the memory buffer as shown below:
Emily Dickinson said, <cr><lf> "I find ecstasy in living -<cr><lf> the mere sense of living<cr><lf> is joy Aenough."<cr><lf>
the command 6D deletes the six characters after the CP, and the resulting memory buffer looks like this:
Emily Dickinson said, <cr><lf> "I find ecstasy in living -<cr><lf> the mere sense of living<cr><lf> is joy A."<cr><lf>
You can also use a D command to delete the <cr><lf> between two lines to join them together. Remember that the <cr> and <If> are two characters.
The K (Kill) Command
The K command kills or deletes whole lines from the memory buffer and takes the forms:
nK, -nK
91

5.4 Basic Editing Commands CP/M-86 User's Guide
where n is the number of lines to be deleted. A positive number kills lines after the CPo A negative number kills lines before the CPo When no number is specified, ED kills the current line. If the character pointer is at the beginning of the second line (as shown below),
Emily Dickinson said, <cr> <If> ""I find ecstasy in living -<cr><If> the mere sense of living<cr><lf> is joy enough."<cr><If>
then the command -I(-deletes the previous line and the memory buffer changes:
""I find ecstasy in living -<cr><If> the mere sense of living<cr><If> is joy enough."<cr><If>
If the CP is in the middle of a line, a K command kills only the characters from the CP to the end of the line and concatenates the characters before the CP with the next line. A -K command deletes all the characters between the beginning of the previous line and the CPo A OK command deletes the characters on the line up to the CPo
You can use the special # character to delete all the text from the CP to the beginning or end of the buffer. Be careful when using # K because you cannot reclaim lines after they are removed from the memory buffer.
5.4.4 Inserting Characters into the Memory Buffer
The I (Insert) Command
To insert characters into the memory buffer from the screen, use the I command. The I command takes the forms:
Istring"Z
When you type the first command, ED enters insert mode. In this mode, all keystrokes are added directly to the memory buffer. ED enters characters in lines and does not start a new line until you press the enter key.
92

CP/M-86 User's Guide 5.4 Basic Editing Commands
A) ED B:QUDTE,TEX
NEW FILE *i
1: EmilY DicKinson saidl 2: "1 find ecstasY in livind -3: the mere sense of livind 4: is JOY enoudh," 5: "'z : *
Note: to exit from insert mode, you must press CTRL-Z or Esc. When the ED prompt, * , appears on the screen, ED is not in insert mode.
In command mode, you can use CP/M-86 line editing control characters to edit your input. The table below lists these control characters.
Command
CTRL-C
CTRL-E
CTRL-H
CTRL-U
CTRL-X
Rubout
Table 5-3. CP/M-86 Line Editing Controls
Result
Abort the editor and return to the CP/M-86 system.
Return carriage for long lines without transmitting command line to the buffer.
Delete the last character typed on the current line.
Delete the entire line currently being typed.
Delete the entire line currently being typed. Same as CTRLU.
Remove the last character and echo deleted character at the screen.
Note: in insert mode, the same line editing controls exist except for CTRL-C and CTRL-E.
93

5.4 Basic Editing Commands CP/M-86 User's Guide
When entering a combination of numbers and letters, you might find it inconvenient to press a caps-lock key if your terminal translates caps-locked numbers to special characters. ED provides two ways to translate your alphabetic input to upper-case without affecting numbers. The first is to enter the insert command letter in uppercase: I. All alphabetics entered during the course of the capitalized command, either in insert mode or as a string, are translated to upper-case. (If you enter the insert command letter in lower-case, all alphabetics are inserted as typed). The second method is to enter a U command before inserting text. Upper-case translation remains in effect until you enter a -U command.
The Istring"Z (Insert String) Command
The second form of the I command does not enter insert mode. It inserts the character string into the memory buffer and returns immediately to the ED prompt. You can use CP/M-86's line editing control characters to edit the command string.
To insert a string, first use one of the commands that position the CPo You must move the CP to the place where you want to insert a string. For example, if you want to insert a string at the beginning of the first line, use a B command to move the CP to the beginning of the buffer. With the CP positioned correctly, enter an insert string, as shown below:
iln 1870, "'z
This inserts the phrase "In 1870", at the beginning of the first line, and returns immediately to the ED prompt. In the memory buffer, the CP appears after the inserted string, as shown below:
In 1870, "Emily Dickinson said,<cr><lf>
5.4.5 Replacing Characters
The S (Substitute) Command
The S command searches the memory buffer for the specified string, but when it finds it, automatically substitutes a new string for the search string. The S command takes the form:
nSsearch string"Znew string
94

CP/M-86 User's Guide 5.4 Basic Editing Commands
where n is the number of substitutions to make. If no number is specified, ED searches for the next occurrence of the search string in the memory buffer. For example, the command:
EMily DicKinsonhZThe poet
searches for the first occurrence of Emily Dickinson and substitutes The poet. In the memory buffer, the CP appears after the substituted phrase, as shown below:
The poet'" said,<cr><lf>
If upper-case translation is enabled by a capital S command letter, ED looks for a capitalized search string and inserts a capitalized insert string. Note that if you combine this command with other commands, you must terminate the new string with a CTRL-Z.
5.5 Combining ED Commands
It saves keystrokes and editing time to combine the editing and display commands. You can type any number of ED commands on the same line. ED executes the command string only after you press the carriage-return key. Use CP/M-86's line editing controls to manipulate ED command strings.
When you combine several commands on a line, ED executes them in the same order they are entered, from left to right on the command line. There are four restrictions to combining ED commands:
m The combined command line must not exceed CP/M-86's 128 character maximum.
a If the combined command line contains a character string, the line must not exceed 100 characters.
• Commands to terminate an editing session must not appear in a combined command line .
• Commands, such as the I, S, J, X and R commands, that require character strings or filespecs must be either the last command on a line or must be terminated with a CTRL-Z or Esc character, even if no character string or filespec is given.
95

5.5 Combining ED Commands CP/M-86 User's Guide
While the examples in the previous section show the memory buffer and the position of the character pointer, the examples in this section show how the screen looks during an editing session. Remember that the character pointer is imaginary, but you must picture its location because ED's commands display and edit text in relation to the character pointer.
5.5.1 Moving the Character Pointer
To move the CP to the end of a line without calcq.lating the number of characters, combine an L command with a C command, L-2C. This command string accounts for the <cr><lf> sequence at the end of the line.
Change the C command in this command string to move the CP more characters to the left. You can use this command string if you must make a change at the end of the line and you don't want to calculate the number of characters before the change, as in the following example.
1: *T 1: Emily Dickinson saidt 1: *L-7CT
sa i d t
1: *
5.5.2 Displaying Text
A T command types from the CP to the end of the line. To see the entire line, you can combine an L command and a T command. Type Olt to move the CP from the middle to the beginning of the line and then display the entire line. In the example below, the CP is in the middle of the line. OL moves the CP to the beginning of the line. T types from the CP to the end of the line, allowing you to see the entire line.
3: *T sense of livin!f
3: *OL T 3: the mere sense of livin!f 3: *
The command orr displays the entire line without moving the CPo
96

CP/M-86 User's Guide 5.5 Combining ED Commands
To verify that an ED command moves the CP correctly, combine the command with the T command to display the line. The following example combines a C command and a T command.
2: *BCT ecstasY in livin~ -
2: *
4: *B#T 1: EMily DicKinson said, 2: 3:
III find ecstasY in livin~ -the Mere sense of livin~
4: is JOY enou~h.1I
1: *
5.5.3 Editing
To edit text and verify corrections quickly, combine the edit commands with other ED commands that move the CP and display text. Command strings like the one below move the CP, delete specified characters, and verify changes quickly.
1: * 15C5DOL T 1: EMily DicKinson, 1: *
Combine the edit command K with other ED commands to delete entire lines and verify the correction quickly, as shown below.
1: *2L2KB#T 1 : EMily DicKinson saidt 2: III find ecstasY in livin~ -1: *
The abbreviated form of the I (insert) command makes simple textual changes. To make and verify these changes, combine the I command string with the C command
97

5.5 Combining ED Commands CP/M-86 User's Guide
and the OLT command string as shown below. Remember that the insert string must be terminated by a CTRL-Z.
1: *20Ci to a friend~ZOLT 1: EMily DicKinson said to a friend, 1: *
5.6 Advanced ED Commands
The basic editing commands discussed above allow you to use ED for all your editing. The following ED commands, however, enhance ED's usefulness.
5.6.1 Moving the CP and Displaying Text
The P (Page) Command
Although you can display any amount of text at the screen with a T command, it is sometimes more convenient to page through the buffer, viewing whole screens of data and moving the CP to the top of each new screen at the same time. To do this, use ED's P command. The P command takes the following forms:
nP, -nP
where n is the number of pages to be displayed. If you do not specify n, ED types the 23 lines following the CP and then moves the CP forward 23 lines. This leaves the CP pointing to the first character on the screen.
To display the current page without moving the CP, enter OP. The special character o prevents the movement of the CPo If you specify a negative number for n, P pages backwards towards the top of the file.
The n: (Line Number) Command
When line numbers are being displayed, ED accepts a line number as a command to specify a destination for the CPo The form for the line number command is:
n:
98

CP/M-86 User's Guide 5.6 Advanced ED Commands
where n is the number of the destination line. This command places the CP at the beginning of the specified line. For example, the command 4: moves the CP to the beginning of the fourth line.
Remember that ED dynamically renumbers text lines in the buffer each time a line is added or deleted. Therefore, the number of the destination line you have in mind can change during editing.
The :n (Through Line Number) Command
The inverse of the line number command specifies that a command should be executed through a certain line number. You can only use this command with three ED commands: the T (type) command, the L (line) command, and the K (kill) command. The :n command takes the following form:
:ncommand
where n is the line number through which the command is to be executed. The :n part of the command does not move the CP, but the command that follows it might.
You can combine n: with :n to specify a range of lines through which a command should be executed. For example, the command 2::4T types the second, third, and fourth lines, as shown below.
1: *2::4T 2: III find ecstasy in livin!1 -3: the Mere sense of livin!1 4: is JOY enoU!1h. 1I
2: *
5.6.2 Finding and Replacing Character Strings
ED supports a find command, F, that searches through the memory buffer and places the CP after the word or phrase you want. The N command allows ED to search through the entire source file instead of just the buffer. The J command searches for and then juxtaposes character strings.
99

5.6 Advanced ED Commands CP/M-86 User's Guide
The F (Find) Command
The F command performs the simplest find function. Its form is:
nFstring
where n is the occurrence of the string to be found. Any number you enter must be positive because ED can only search from the CP to the bottom of the buffer. If you enter no number, ED finds the next occurrence of the string in the file. In the following example, the second occurrence of the word living is found.
1: *2flivin!1 3: *
The character pointer moves to the beginning of the third line where the second occurrence of the word living is located. To display the line, combine the find command with a type command. Note that if you follow an F command with another ED command on the same line, you must terminate the string with a CTRL-Z, as shown below.
1: *2flivin!1~ZOlt
3: *the mere sense of livin!1
It makes a difference whether you enter the F command in upper- or lower-case. If you enter F, ED internally translates the argument string to upper-case. If you specify f, ED looks for an exact match. For example, FCp/m-86 searches for CP/M-86 but fCp/m-86 searches for Cp/m-86, and cannot find CP/M-86 or cp/m-86.
If ED does not find a match for the string in the memory buffer, it issues the message:
BREAK # AT
where the symbol # indicates that the search failed during the execution of an F command.
The N Command
The N command extends the search function beyond the memory buffer to include
100

CP/M-86 User's Guide 5.6 Advanced ED Commands
the source file. If the search is successful, it leaves the CP pointing to the first character after the search string. The form of the N command is:
nNstring
where n is the occurrence of the string to be found. If no number is entered, ED .looks for the next occurrence of the string in the file. The case of the N command has the same effect on an N command as it does on an F command. Note that if you follow an N command with another ED command, you must terminate the string with a CTRL-Z.
When an N command is executed, ED searches the memory buffer for the specified string, but if ED doesn't find the string, it doesn't issue an error message. Instead, ED automatically writes the searched data from the buffer into the new file. Then ED performs a OA command to fill the buffer with unsearched data from the source file. ED continues to search the buffer, write out data and append new data until it either finds the string or reaches the end of the source file. If ED reaches the end of the source file, ED issues the following message:
BREAK "#" AT
Because ED writes the searched data to the new file before looking for more data in the source file, ED usually writes the contents of the buffer to the new file before finding the end of the source file and issuing the error message.
Note: you must use the H command to continue an edit session after the source file is exhausted and the memory buffer is emptied.
The J Uuxtapose) Command
The J command inserts a string after the search string, then deletes any characters between the end of the inserted string to the beginning of the third delete-to string. This juxtaposes the string between the search and delete-to strings with the insert string. The form of the J command is:
nJsearch string"Zinsert string"Zdelete-to string
where n is the occurrence of the search string. If no number is specified, ED searches for the next occurrence of the search string in the memory buffer. In the following
101

5.6 Advanced ED Commands CP/M-86 User's Guide
example, ED searches for the word Dickinson and inserts the phrase told a friend after it and then deletes everything up to the comma.
1: *#T 1: Emily DicKinson said, 2: III find ecstasY in livin!l -3: the mere sense of livin!l 4: is JOY enoU!lh. 1I
1: *JDickinson~Z told a friend~ZI
1: *Olt 1: Emily DicKinson told a friend, 1: *
If you combine this command with other commands, you must terminate the deleteto string with a CTRL-Z or Esc. (This is shown in the following example). If an uppercase J command letter is specified, ED looks for upper-case search and delete-to strings and inserts an upper-case insert string.
The J command is especially useful when revising comments in assembly language source code, as shown below.
238: SORT LXI H, SW ;ADDRESS TOGGLE SWITCH 238: *J;~ZADDRESS SWITCH TDGGLE~Z~L~ZOLT
238: SORT LXI H, SW ;ADDRESS SWITCH TOGGLE 238: *
In this example, ED searches for the first semicolon and inserts ADDRESS SWITCH TOGGLE after the mark and then deletes to the <cr> <If> sequence, represented by CTRL-L. (In any search string, you can use CTRL-L to represent a <cr><If> when your desired phrase extends across a line break. You can also use a CTRL-I in a search string to represent a tab).
Note: if long strings make your command longer than your screen line length, enter a CTRL-E to cause a physical carriage return at the screen. A CTRL-E returns the cursor to the left edge of the screen, but does not send the command line to ED. Remember that no ED command line containing strings can exceed 100 characters. When you finish your command, press the carriage-return key to send the command to ED.
102

CP/M-86 User's Guide 5.6 Advanced ED Commands
The M (Macro) Command
An ED macro command, M, can increase the usefulness of a string of commands. The M command allows you to group ED commands together for repeated execution. The form of the M command is:
nMcommand string
where n is the number of times the command string is to be executed. A negative number is not a valid argument for an M command. If no number is specifed, the special character # is assumed, and ED executes the command string until it reaches the end of data in the buffer or the end of the source file, depending on the commands specified in the string. In the following example, ED executes the four commands repetitively until it reaches the end of the memory buffer:
3: *
1: *mflivind~Z-BdiLivind~ZOlt
2: III find ecstasy in Livin~ -3: the Mere sense of Livin~
BREAK 11#11 AT '"Z
The terminator for an M command is a carriage return; therefore, an M command must be the last command on the line. Also, all character strings that appear in a macro must be terminated by CTRL-Z or Esc. If a character string ends the combinedcommand string, it must be terminated by CTRL-Z, then followed by a <cr> to end the M command.
The execution of a macro command always ends in a BREAK "#" message, even when you have limited the number of times the macro is to be performed, and ED does not reach the end of the buffer or source file. Usually the command letter displayed in the message is one of the commands from the string and not M.
To abort a macro command, strike a CTRL-C at the keyboard.
5.6.3 Moving Text Blocks
To move a group of lines from one area of your data to another, use an X command to write the text block into a temporary .LIB file, then a K command to remove these
103

5.6 Advanced ED Commands CP/M-86 User's Guide
lines from their original location, and finally an R command to read the block into its new location.
The X (Xfer) Command
The X command takes the forms:
nX nX filespec"Z
where n is the number of lines from the CP towards the bottom of the buffer that are to be transferred to a temporary file; therefore, n must always be a positive number. If no filename is specified, X$$$$$$$ is assumed. If no filetype is specified, .LIB is assumed. If the X command is not the last command on the line, the command must be terminated by a CTRL-Z or Esc. In the following example, just one line is transferred to the temporary file:
1: *X 1: * t 1: *EMily DicKinson said, 1: *k t 1: *III find ecstasY in livins -1: *
If no library file is specified, ED looks for a file named X$$$$$$$.LIB. If the file does not exist, ED creates it. If a previous X command already created the library file, ED appends the specified lines to the end of the existing file.
Use the special character 0 as the n argument in an X command to delete any file from within ED.
The R (Read) Command
The X command transfers the next n lines from the current line to a library file. The R command can retrieve the transferred lines. The R command takes the forms:
104
R Rfilespec
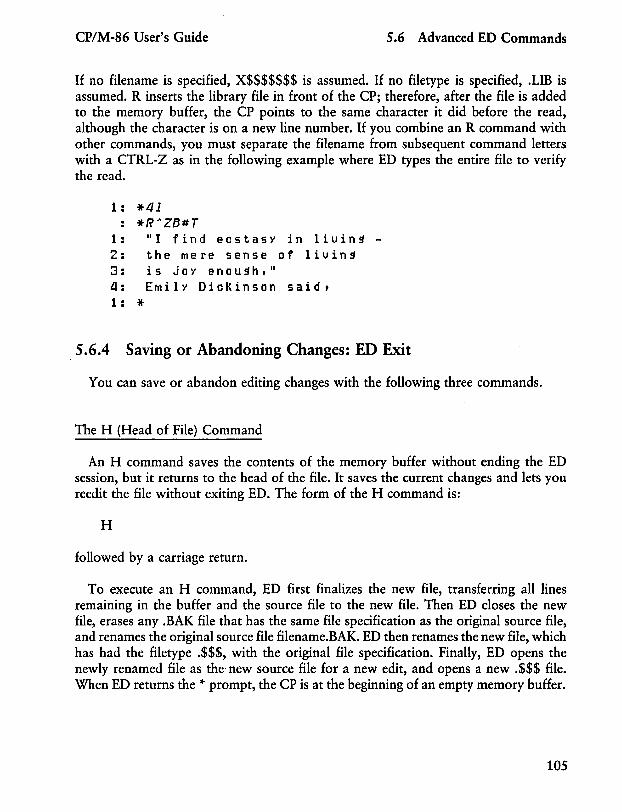
CP/M-86 User's Guide 5.6 Advanced ED Commands
If no filename is specified, X$$$$$$$ is assumed. If no filetype is specified, .LIB is assumed. R inserts the library file in front of the CP; therefore, after the file is added to the memory buffer, the CP points to the same character it did before the read, although the character is on a new line number. If you combine an R command with other commands, you must separate the filename from subsequent command letters with a CTRL-Z as in the following example where ED types the entire file to verify the read.
1: *41 *R"ZB#T
1: III find ecstasY in livin~ -2: the mere sense of livin~
3: is JOY enou~h.1I
4: Emily Dickinson said. 1: *
5.6.4 Saving or Abandoning Changes: ED Exit
You can save or abandon editing changes with the following three commands.
The H (Head of File) Command
An H command saves the contents of the memory buffer without ending the ED session, but it returns to the head of the file. It saves the current changes and lets you reedit the file without exiting ED. The form of the H command is:
H
followed by a carriage return.
To execute an H command, ED first finalizes the new file, transferring all lines remaining in the buffer and the source file to the new file. Then ED closes the new file, erases any .BAK file that has the same file specification as the original source file, and renames the original source file filename.BAK. ED then renames the new file, which has had the filetype .$$$, with the original file specification. Finally, ED opens the newly renamed file as the' new source file for a new edit, and opens a new .$$$ file. When ED returns the * prompt, the CP is at the beginning of an empty memory buffer.
105

5.6 Advanced ED Commands CP/M-86 User's Guide
If you want to send the edited material to a file other than the original file, use the following command:
A> ED filespec differentfilespec
If you then restart the edit with the H command, ED renames differentfilename.$$$ to differentfilename.BAK and creates a new file of differentfilespec when you finish editing.
The 0 (Original) Command
An 0 command abandons changes made since the beginning of the edit and allows you to return to the original source file and begin reediting without ending the ED session. The form of the 0 command is:
o
followed by a carriage return. When you enter an 0 command, ED confirms that you want to abandon your changes by asking:
a (YIN)?
You must respond with either a Y or an N; if you press any other key, ED repeats the question. When you enter Y, ED erases the temporary file and the contents of the memory buffer. When the * prompt returns, the character pointer is pointing to the beginning of an empty memory buffer, just as it is when you start ED.
The Q (Quit) Command
A Q command abandons changes made since the beginning of the ED session and exits ED. The form of the Q command is:
Q
followed by a carriage return.
106

CP/M-86 User's Guide 5.6 Advanced ED Commands
When you enter a Q command, ED verifies that you want to abandon the changes by asking:
Q (YIN)?
You must respond with either a Y or an N; if you press any other key, ED repeats the question. When you enter Y, ED erases the temporary file, closes the source file, and returns control to CP/M-86.
Note: you can enter a CTRL-C to immediately return control to CP/M-86. This does not give ED a chance to close the source or new files, but it prevents ED from deleting any temporary files.
5.7 ED Error Messages
ED returns one of two types of error messages: an ED error message if ED cannot execute an edit command, or a CP/M-86 error message if ED cannot read or write to the specified file.
The form of an ED error message is:
BREAK "x" AT c
where x is one of the symbols defined in the following table and c is the command letter where the error occurred.
Symbol
#
?c
o
Table 5-4. ED Error Symbols
Meaning
Search failure. ED cannot find the string specified in an F, S, or N command.
Unrecognized command letter c. ED does not recognize the indicated command letter, or an E, H, Q, or 0 command is not alone on its command line.
No .LIB file. ED did not find the .LIB file specified in an R command.
107

5.7 ED Error Messages CP/M-86 User's Guide
Table 5-4. (continued)
Symbol Meaning
> Buffer full. ED .cannot put any more characters in the memory buffer, or string specified in an F, N, or S command is too long.
E
F
Command aborted. A keystroke at the keyboard aborted command execution.
File error. Followed by either DISK FULL or DIRECTORY FULL.
The following examples show how to recover from common editing error conditions. For example:
BREAK 11)11 AT A
means that ED filled the memory buffer before completing the execution of an A command. When this occurs, the character pointer is at the end of the buffer and no editing is possible. Use the OW command to write out half the buffer or use an 0 or H command and reedit the file.
means that ED reached the end of the memory buffer without matching the string in an F command. At this point, the character pointer is at the end of the buffer. Move the CP with a B or n: line number command to resume editing.
BREAK IIFII AT F DISK FULL
Use the OX command to erase an unnecessary file on the disk or a B#Xd:buffer.sav command to write the contents of the memory buffer onto another disk.
BREAK IIFII AT n DIRECTORY FULL
Use the same commands described in the previous message to recover from this file error.
108

CP/M-86 User's Guide 5.7 ED Error Messages
The following table defines the disk file error messages ED returns when it cannot read or write a file.
Table 5-5. ED Disk File Error Messages
Message Meaning
BDOS ERR ON d: RO
Disk d: has Read-Only attribute. This occurs if a different disk has been inserted in the drive since the last cold or warm boot.
"'''' FILE IS READ ONLY"''''
The file specified in the command to invoke ED has the RO attribute. ED can read the file so that you can examine it, but ED cannot change a Read-Only file.
End of Section 5
109


Appendix A ASCII and Hexadecimal
Conversion
ASCII stands for American Standard Code for Information Interchange. The code contains 96 printing and 32 non-printing characters used to store data on a disk. Table A-l defines ASCII symbols, then Table A-2lists the ASCII and hexadecimal conversions. The table includes binary, decimal, hexadecimal, and ASCII conversions.
Table A-l. ASCII Symbols
Symbol Meaning Symbol Meaning
ACK acknowledge FS file separator BEL bell GS group separator BS backspace HT horizontal tabulation CAN cancel LF line-feed CR carriage return NAK negative acknowledge DC device control NUL null DEL delete RS record separator DLE data link escape SI shift in EM end of medium SO shift out ENQ enquiry SOH start of heading EaT end of transmission SP space ESC escape STX start of text ETB end of transmission SUB substitute ETX end of text SYN synchronous idle FF form-feed US unit separator
VT vertical tabulation
111

Appendix A ASCII Conversions CP/M-86 User's Guide
Table A-2. ASCII Conversion Table
Binary Decimal Hexadecimal ASCII
0000000 0 0 NUL 0000001 1 1 SOH (CTRL-A) 0000010 2 2 STX (CTRL-B) 0000011 3 3 ETX (CTRL-C) 0000100 4 4 EaT (CTRL-D) 0000101 5 5 ENQ (CTRL-E) 0000110 6 6 ACK (CTRL-F) 0000111 7 7 BEL (CTRL-G) 0001000 8 8 BS (CTRL-H) 0001001 9 9 HT (CTRL-I) 0001010 10 A LF (CTRL-J) 0001011 11 B VT (CTRL-K) 0001100 12 C FF (CTRL-L) 0001101 13 D CR (CTRL-M) 0001110 14 E SO (CTRL-N) 0001111 15 F SI (CTRL-O) 0010000 16 10 DLE (CTRL-P) 0010001 17 11 DCl (CTRL-Q) 0010010 18 12 DC2 (CTRL-R) 0010011 19 13 DC3 (CTRL-S) 0010100 20 14 DC4 (CTRL-T) 0010101 21 15 NAK (CTRL-U) 0010110 22 16 SYN (CTRL-V) 0010111 23 17 ETB (CTRL-W) 0011000 24 18 CAN (CTRL-X) 0011001 25 19 EM (CTRL-Y) 0011010 26 lA SUB (CTRL-Z) 0011011 27 IB ESC (CTRL-[) 0011100 28 lC FS (CTRL-\) 0011101 29 ID GS (CTRL-]) 0011110 30 lE RS (CTRL-") 0011111 31 IF US (CTRL-) 0100000 32 20 (SPACE) 0100001 33 21 ! 0100010 34 22 II
0100011 35 23 # 0100100 36 24 $ 0100101 37 25 %
112

CP/M-86 User's Guide Appendix A ASCII Conversions
Table A-2. (continued)
Binary Decimal Hexadecimal ASCII
0100110 38 26 & 0100111 39 27 ,
0101000 40 28 ( 0101001 41 29 ) 0101010 42 2A * 0101011 43 2B + 0101100 44 2C , 0101101 45 2D -0101110 46 2E , 0101111 47 2F / 0110000 48 30 0 0110001 49 31 1 0110010 50 32 2 0110011 51 33 3 0110100 52 34 4 0110101 53 35 5 0110110 54 36 6 0110111 55 37 7 0111000 56 38 8 0111001 57 39 9 0111010 58 3A : 0111011 59 3B ; 0111100 60 3C < 0111101 61 3D = 0111110 62 3E > 0111111 63 3F ? 1000000 64 40 @ 1000001 65 41 A 1000010 66 42 B 1000011 67 43 C 1000100 68 44 D 1000101 69 45 E 1000110 70 46 F 1000111 71 47 G 1001000 72 48 H 1001001 73 49 I 1001010 74 4A J 1001011 75 4B K
113

Appendix A ASCII Conversions CP/M-86 User's Guide
Table A-2. (continued)
Binary Decimal Hexadecimal ASCII
1001100 76 4C L 1001101 77 4D M 1001110 78 4E N 1001111 79 4F 0 1010000 80 50 P 1010001 81 51 Q 1010010 82 52 R 1010011 83 53 S 1010100 84 54 T 1010101 85 55 U 1010110 86 56 V 1010111 87 57 W 1011000 88 58 X 1011001 89 59 Y 1011010 90 SA Z 1011011 91 5B [ 1011100 92 5C \ 1011101 93 5D ] 1011110 94 5E ,.
1011111 95 SF < 1100000 96 60 , 1100001 97 61 a 1100010 98 62 b 1100011 99 63 c 1100100 100 64 d 1100101 101 65 e 1100110 102 66 f 1100111 103 67 g 1101000 104 68 h 1101001 105 69 i 1101010 106 6A j 1101011 107 6B k 1101100 108 6C 1 1101101 109 6D m 1101110 110 6E n 1101111 111 6F 0
1110000 112 70 p 1110001 113 71 q
114

CP/M-86 User's Guide Appendix A ASCII Conversions
Table A-2. (continued)
Binary Decimal Hexadecimal ASCII
1110010 114 72 r 1110011 115 73 s 1110100 116 74 t 1110101 117 75 u 1110110 118 76 v 1110111 119 77 w 1111000 120 78 x 1111001 121 79 y 1111010 122 7A z 1111011 123 7B { 1111100 124 7C I 1111101 125 7D } 1111110 126 7E -1111111 127 7F DEL
End of Appendix A
115


Appendix B CP/M-86 File Types
CP/M-S6 identifies every file by a unique file specification, which consists of a drive specifier, a filename, and a filetype. The filetype is an optional three character ending separated from the filename by a period. The filetype generally indicates a special kind of file. The following table lists common filetypes and their meanings.
Filetype
AS6
BAK
BAS
CMD
COM
HS6
INT
LST
PRN
SUB
Table B-1. Filetypes
Indication
Assembly language source file; the CP/M-S6 assembler, ASM-S6, assembles or translates a file of type .AS6 into machine language.
Back-up file created by a text editor; an editor renames the source file with this filetype to indicate that the original file has been processed. The original file stays on the disk as the back-up file, so you can refer to it.
CBASIC-S6 program source file.
Command file that contains instructions in machine executable code.
SOSO executable file.
Program file in hexadecimal format.
CBASIC-S6 program intermediate language file.
Printable file that can be displayed on a console or printer.
Printable file that can be displayed on a console or printer.
Filetype required for SUBMIT input file containing one or more CP/M-S6 commands. The SUBMIT program executes the commands in the file of type SUB providing a batch mode for CP/M-S6.
117

Appendix B CP/M-86 File Types CP/M-86 User's Guide
Table B-l. (continued)
Filetype Indication
SYM Symbol table file.
$$$ Temporary file created by PIP.
End of Appendix B
118

Appendix C CP/M-86 Control Characters
Keystroke
BACKSPACE
CTRL-C
DEL
CTRL-E
CTRL-H
CTRL-J
CTRL-M
CTRL-P
CTRL-R
RETURN
RUB
Table C-l. CP/M-86 Control Characters
Action
moves cursor back one space, erases previous character.
prompts to abort a program currently running at a given console.
same as RUB.
forces a physical carriage return, but does not send command to CP/M-86.
same as BACKSPACE.
line-feed, terminates input at the console.
same as carriage return.
echoes all console activity at the printer; a second CTRL-P ends printer echo. This only works if your system is connected to a printer.
retypes current command line; useful after using RUB or DEL key.
carriage return.
deletes character to the left of cursor; echoes character deleted - cursor moves right.
119

Appendix C CP/M-86 Control Characters CP/M-86 User's Guide
Keystroke
CTRL-S
CTRL-U
CTRL-X
CTRL-Z
120
Table C-1. (continued)
Action
stops console listing temporarily; CTRL-S resumes the listing.
cancels line, displays #, cursor moves down one line and awaits a new command.
deletes all characters in command line.
string or field separator.
End of Appendix C

Message
Appendix D CP/M-86 Error Messages
Table D-1. CP/M-86 Command Messages
Meaning
Ambiguous operand
DDT-86. An attempt was made to assemble a command with an ambiguous operand. Precede the operand with the prefix BYTE or WORD.
Bad Directory on d: Space Allocation Conflict: User n d:filename.typ
STAT has detected a space allocation conflict in which one data block is assigned to more than one file. One or more filenames might be listed. Each of the files listed contains a data block already allocated to another file on the disk. You can correct the problem by erasing the files listed. After erasing the conflict-ing file or files, press t C to regenerate the allocation vector. If you do not, the error might repeat itself.
BDOS err on d:
CP/M-86 replaces d: with the drive specifier of the drive where the error occurred. This message appears when CP/M-86 finds no disk in the the drive, when the disk is improperly formatted, when the drive latch is open, or when power to the drive is off. Check for one of these situations and retry.
BDOS err on d: bad sector
This could indicate a hardware problem or a worn or improperly formatted disk. Press CTRL-C to terminate the program and return to CP/M-86, or press the enter key to ignore the error.
121

Appendix D Messages CP/M-86 User's Guide
Table D-1 (continued)
Message Meaning
BDOS err on d: select
CP/M-86 has received a request specifying a non-existent drive, or disk in drive is improperly formatted. CP/M-86 terminates the current program as soon as you press any key.
BDOS err on d: RO
Drive has been assigned Read-Only status with a STAT com-mand, or the disk in the drive has been changed without being initialized with a CTRL-C. CP/M-86 terminates the current pro-gram as soon as you press any key.
Cannot close
ASM-86. An output file cannot be closed. This is a fatal error that terminates ASM-86 execution. The user should take appro-priate action after checking to see if the correct disk is in the drive and that the disk is not write protected.
DDT-86. The disk file written by a W command cannot be closed. This is a fatal error that terminates DDT-86 execution. The user should take appropriate action after checking to see if the correct disk is in the drive and that the disk is not write protected.
Command name?
If CP/M-86 cannot find the command you specified, it returns the command name you entered followed by a question mark. Check that you have typed the command name correctly, or that the command you requested exists as a .CMD file on the default or specified disk.
DESTINATION IS RIO, DELETE (YIN)?
PIP. The destination file specified in a PIP command already exists and it is Read-Only. If you type Y, the destination file is deleted before the file copy is done.
122

CP/M-86 User's Guide Appendix D Messages
Message
Directory full
Disk full
Disk read error
Disk write error
Table D-1 (continued)
Meaning
ASM-86. There is not enough directory space for the output files. You should either erase some unnecessary files or get another disk with more directory space and execute ASM-86 again.
ASM-86. There is not enough disk space for the output files (LST, H86 and SYM). You should either erase some unnecessary files or get another disk with more space and execute ASM-86 again.
ASM-86. A source or include file could not be read properly. This is usually the result of an unexpected end of file. Correct the problem in your source file.
DDT-86. The disk file specified in an R command could not be read properly. This is usually the result of an unexpected end of file. Correct the problem in your file.
DDT-86. A disk write operation could not be successfully performed during a W command, probably due to a full disk. You should either erase some unnecessary files or get another disk with more space and execute ASM -86 again.
Double defined variable
ASM-86. An identifier used as the name of a variable is used elsewhere in the program as the name of a variable or label. Example:
x X
DB • • •
DB
5
123H
123

Appendix D Messages CP/M-86 User's Guide
Table D-1 (continued)
Message Meaning
Double defined label
ASM-86. An identifier used as a label is used elsewhere in the program as a label or variable name. Example:
LAB3: MOV BXtS • • •
LAB3: -CALL MOVE
Double defined symbol - treated as undefined
ASM-86. The identifier used as the name of an EQU directive is used as a name elsewhere in the program.
ERROR: BAD PARAMETER
PIP. An illegal parameter has been entered in a PIP command. Retype the entry correctly.
ERROR: CLOSE FILE - {filespec}
PIP. An output file cannot be closed. The user should take appropriate action after checking to see if the correct disk is in the drive and that the disk is not write protected.
ERROR: DISK READ - {filespec}
PIP. The input disk file specified in a PIP command could not be read properly. This is usually the result of an unexpected end of file. Correct the problem in your file.
ERROR: DISK WRITE - {filespec}
PIP. A disk write operation could not be successfully performed during a PIP command, probably due to a full disk. You should either erase some unnecessary files or get another disk with more space and execute PIP again.
ERROR: FILE NOT FOUND - {filespec}
PIP. An input file that you have specified does not exist.
124

CP/M-86 User's Guide Appendix D Messages
Table D-1 (continued)
Message Meaning
ERROR: HEX RECORD CHECKSUM - {filespec}
PIP. A hex record checksum was encountered during the transfer of a hex file. The hex file with the checksum error should be corrected, probably by recreating the hex file.
Error in codemacro building
ASM-86. Either a codemacro contains invalid statements, or a codemacro directive was encountered outside a codemacro.
ERROR: INV ALID DESTINATION
PIP. The destination specified in your PIP command is illegal. You have probably specified an input device as a destination.
ERROR: INVALID FORMAT
PIP. The format of your PIP command is illegal. See the descrip-tion of the PIP command.
ERROR: INVALID HEX DIGIT - {filespec}
PIP. An invalid hex digit has been encountered while reading a hex file. The hex file with the invalid hex digit should be cor-rected, probably by recreating the hex file.
ERROR: INVALID SEPARATOR
PIP. You have placed an invalid character for a separator between two input filenames.
ERROR: INVALID SOURCE
PIP. The source specified in your PIP command is illegal. You have probably specified an output device as a source.
ERROR: INV ALID USER NUMBER
PIP. You have specified a User Number greater than 15. User Numbers are in the range 0 to 15.
125

Appendix D Messages CP/M-86 User's Guide
Table D-1 (continued)
Message Meaning
ERROR: NO DIRECTORY SPACE - {filespec}
PIP. There is not enough directory space for the output file. You should either erase some unnecessary files or get another disk with more directory space and execute PIP again.
ERROR: QUIT NOT FOUND
PIP. The string argument to a Q parameter was not found in your input file.
ERROR: START NOT FOUND
PIP. The string argument to an S parameter could not be found in the source file.
ERROR: UNEXPECTED END OF HEX FILE - {filespec}
PIP. An end of file was encountered prior to a termination hex record. The hex file without a termination record should be corrected, probably by recreating the hex file.
ERROR: USER ABORTED
PIP. The user has aborted a PIP operation by pressing a key.
ERROR: VERIFY - {filespec}
PIP. When copying with the V option, PIP found a difference when rereading the data just written and comparing it to the data in its memory buffer. Usually this indicates a failure of either the destination disk or drive.
File exists
You have asked CP/M-86 to create a new file using a file spec-ification that is already assigned to another file. Either delete the existing file or use another file specification.
126

CP/M-86 User's Guide Appendix D Messages
Table D-1 (continued)
Message Meaning
File name syntax error
File not found
ASM-86. The filename in an INCLUDE directive is improperly formed. Example:
INCLUDE FILE.A86X
CP/M-86 could not find the specified file. Check that you have entered the correct drive specification or that you have the correct disk in the drive.
Garbage at end of line - ignored
ASM-86. Additional items were encountered on a line when ASM-86 was expecting an end of line. Examples:
NOLIST LI MOV AX,a RET
Illegal expression element
Illegal first item
ASM-86. An expression is improperly formed. Examples:
x DB OW
12X (a * )
ASM-86. The first item on a source line is not a valid identifier, directive or mnemonic. Example: 123aH
Illegal "IF" operand - "IF" ignored
ASM-86. Either the expression in an IF statement is not numeric, or it contains a forward reference.
127

Appendix D Messages CP/M-86 User's Guide
Table D-1 (continued)
Message Meaning
Illegal pseudo instruction
ASM-86. Either a required identifier in front of a pseudo instruction is missing, or an identifier appears before a pseudo instruction that doesn't allow an identifier.
Illegal pseudo operand
ASM-86. The operand in a directive is invalid. Examples:
x EQU TITLE
OAGH UNQUOTED STRING
Instruction not in code segment
ASM-86. An instruction appears in a segment other than a CSEG.
Is this what you want to do (YIN)?
COPYDISK. If the displayed COPYDISK function is what you want performed, type Y.
Insufficient memory
Invalid Assignment
Label out of range
128
DDT-86. There is not enough memory to load the file specified in an R or E command.
STAT. An invalid device was specified in a STAT device assignment. Use the STAT val: display to list the valid assignments for each of the four logical STAT devices: CON:, RDR:, PUN: and LST:.
ASM-86. The label referred to in a call, jump or loop instruction is out of range. The label can be defined in a segment other than the segment containing the instruction. In the case of short instructions (JMPS, conditional jumps and loops), the label is more than 128 bytes from the location of the following instruction.

CP/M-86 User's Guide Appendix D Messages
Table D-1 (continued)
Message Meaning
Memory request denied
Missing instruction
DDT-86. A request for memory during an R command could not be fulfilled. Up to eight blocks of memory can be allocated at a given time.
ASM-86. A prefix on a source line is not followed by an instruction. Example:
REPNZ
Missing pseudo instruction
ASM-86. The first item on a source line is a valid identifier and the second item is not a valid directive that can be preceded by an identifier. Example:
THIS IS A MISTAKE
Missing segment information in operand
ASM-86. The operand in a CALLF or JMPF instruction (or an expression in a DD directive) does not contain segment information. The required segment information can be supplied by including a numeric field in the segment directive as shown:
X: CSEG lOOOH
• • • JMPF X DO X
Missing type information in operand(s)
ASM-86. Neither instruction operand contains sufficient type information. Example:
MOV [BXJ,lO
129

Appendix D Messages CP/M-86 User's Guide
Table D-1 (continued)
Message Meaning
Nested "IF" illegal - "IF" ignored
ASM-86~ The maximum nesting level for IF statements has been exceeded.
Nested INCLUDE not allowed
No file
ASM-86. An INCLUDE directive was encountered within a file already being included.
CP/M-86 could not find the specified file, or no files exist.
ASM-86. The indicated source or include file could not be found on the indicated drive.
DDT-86. The file specified in an R or E command could not be found on the disk.
No matching "IF" for "ENDIF"
No space
ASM-86. An ENDIF statement was encountered without a matching IF statement.
DDT-86. There is no space in the directory for the file being written by a W command.
Operand(s) mismatch instruction
130
ASM-86. Either an Instruction has the wrong number of operands, or the types of the operands do not match. Examples:
x MOV DB MOV
ex ,1 ,2 o AX,X

CP/M-86 User's Guide Appendix D Messages
Message
Parameter error
Table D-1 (continued)
Meaning
ASM-86. A parameter in the command tail of the ASM-86 command was specified incorrectly. Example:
ASM88 TEST $S;
Symbol illegally forward referenced - neglected
ASM-86. The indicated symbol was illegally forward referenced in an ORG, RS, EQU or IF statement.
Symbol table overflow
ASM-86. There is not enough memory for the symbol table. Either reduce the length and/or number of symbols, or reassemble on a system with more memory available.
Undefined element of expression
ASM-86. An identifier used as an operand is not defined or has been illegally forward referenced. Examples:
A B
Undefined instruction
JMP EQU EQU
X B 5
MOV ALtB
ASM-86. The item following a label on a source line is not a valid instruction. Example:
DONE: BAD INSTR
Use: [size] [ro] [rw] [sys] or [dir]
STAT. This message results from an invalid set file attributes command. These are the only options valid in a STAT filespec [ option] command.
131

Appendix D Messages CP/M-86 User's Guide
Table D-1 (continued)
Message Meaning
Use: STATd:=RO
STAT. An invalid STAT drive command was given. The only valid drive assignment in STAT is STAT d: =RO.
Too Many Files
STAT. A STAT wildcard command matched more files in the directory than STAT can sort. STAT can sort a maximum of 512 files.
Verify error at s:o
DDT-86. The value placed in memory by a Fill, Set, Move, or Assemble command could not be read back correctly, indicating bad user memory or attempting to write to ROM or non-existent memory at the indicated location.
End of Appendix D
132

Appendix E User's Glossary
ambiguous filename: Filename that contains either of the CP/M-86 wildcard characters, ? or *, in the primary filename or the filetype or both. When you replace characters in a filename with these wildcard characters, you create an ambiguous filename and can easily reference more than one CP/M-86 file in a single command line. See Section 2 of this manual.
applications program: Program that needs an operating system to provide an environment in which to execute. Typical applications programs are business accounting packages, word processing (editing) programs and mailing list programs.
argument: Symbol, usually a letter, indicating a place into which you can substitute a number, letter or name to give an appropriate meaning to the formula in question.
ASCII: The American Standard Code for Information Interchange is a standard code for representation of numbers, letters, and symbols. An ASCII text file is a file that can be intelligibly displayed on the video screen or printed on paper. See Appendix A.
attribute: File characteristic that can be set to on or off.
back-up: Copy of a disk or file made for safe keeping, or the creation of the disk or file.
bit: Switch in memory that can be set to on (1) or off (0). Bits are grouped into bytes.
block: Area of disk reserved for a specific use.
bootstrap: Process of loading an operating system into memory. Bootstrap procedures vary from system to system. The boot for an operating system must be customized for the memory size and hardware environment that the operating system manages. Typically, the boot is loaded automatically and executed at power up or when the computer is reset. Sometimes called a cold start.
buffer: Area of memory that temporarily stores data during the transfer of information.
built-in commands: Commands that permanently reside in memory. They respond quickly because they are not accessed from a disk.
byte: Unit of memory or disk storage containing eight bits.
133

Appendix E User's Glossary CP/M-86 User's Guide
command: Elements of a CP/M-86 command line. In general, a CP/M-86 command has three parts: the command keyword, the command tail, and a carriage return.
command file: Series of coded machine executable instructions stored on disk as a program file, invoked in CP/M-86 by typing the command keyword next to the system prompt on the console. The CP/M- 86 command files generally have a filetype of CMD. Files are either command files or data files. Same as a command program.
command keyword: Name that identifies an CP/M-86 command, usually the primary filename of a file of type CMD, or a built in command. The command keyword precedes the command tail and the carriage return in the command line.
command syntax: Statement that defines the correct way to enter a command. The correct structure generally includes the command keyword, the command tail, and a carriage return. A syntax line usually contains symbols that you should replace with actual values when you enter the command.
, command tail: Part of a command that follows the command keyword in the command line. The command tail can include a drive specification, a filename and/or filetype, and options or parameters. Some commands do not require a command tail.
concatenate: Term that describes one of PIP's operations that copies two or more separate files into one new file in the specified sequence.
console: Primary input/output device. The console consists of a listing device such as a screen and a keyboard through which the user communicates with the operating system or applications program.
control character: Non-printing character combination that sends a simple command to CP/M-86. Some control characters perform line editing functions. To enter a control character, hold down the CONTROL key on your terminal and strike the character key specified. See Appendix C.
cursor: One-ch~racter symbol that can appear anywhere on the console screen. The cursor indicates the position where the next keystroke at the console will have an effect.
data file: Non-executable collection of similar information that generally requires a command file to manipulate it.
default: Currently selected disk drive and user number. Any command that does not specify a disk drive or a user number references the default disk drive and user number.
134

CP/M-86 User's Guide Appendix E User's Glossary
When CP/M-86 is first invoked, the default disk drive is drive A, and the default user number is 0, until changed with the USER command.
delimiter: Special characters that separate different items in a command line. For example, in CP/M-86, a colon separates the drive specification from the filename. A period separates the filename from the filetype. Brackets separate any options from their command or file specification. Commas separate one item in an option list from another. All of the above special characters are delimiters.
directory: Portion of a disk that contains entries for each file on the disk. In response to the DIR command, CP/M-86 displays the filenames stored in the directory.
DIR attribute: File attribute. A file with the DIR attribute can be displayed by a DIR command. The file can be accessed from the default user number and drive only.
disk, diskette: Magnetic media used to store information. Programs and data are recorded on the disk in the same way that music is recorded on a cassette tape. The term diskette refers to smaller capacity removable floppy diskettes. Disk can refer to a diskette, a removable cartridge disk or a fixed hard disk.
disk drive: Peripheral device that reads and writes on hard or floppy disks. CP/M-86 assigns a letter to each drive under its control. For example, CP/M-86 may refer to the drives in a four-drive system as A, B, C, and D.
editor: Utility program that creates and modifies text files. An editor can be used for creation of documents or creation of code for computer programs. The CP/M-86 editor is invoked by typing the command ED next to the system prompt on the console. (See ED in Section 5 of this manual).
executable: Ready to be run by the computer. Executable code is a series of instructions that can be carried out by the computer. For example, the computer cannot execute names and addresses, but it can execute a program that prints all those names and addresses on mailing labels.
execute a program: Start a program executing. When a program is running, the computer is executing a sequence of instructions.
FeB: File Control Block.
file: Collection of characters, instructions or data stored on a disk. The user can create files on a disk.
135

Appendix E User's Glossary CP/M-86 User's Guide
File Control Block: Structure used for accessing files on disk. Contains the drive, filename, filetype and other information describing a file to be accessed or created on the disk.
filename: Name assigned to a file. A filename can include a primary filename of 1-8 characters and a filetype of 0-3 characters. A period separates the primary filename from the filetype.
file specification: Unique file identifier. A complete CP/M-86 file specification includes a disk drive specification followed by a colon (d:), a primary filename of 1 to 8 characters, a period and a filetype of 0 to 3 characters. For example, b:example.tex is a complete CP/M-86 file specification.
filetype: Extension to a filename. A filetype can be from 0 to 3 characters and must be separated from the primary filename by a period. A filetype can tell something about the file. Certain programs require that files to be processed have certain filetypes (s.ee Appendix B).
floppy disk: Flexible magnetic disk used to store information. Floppy disks come in 5 114 and 8 inch diameters.
hard disk: Rigid, platter-like, magnetic disk sealed in a container. A hard disk stores more information than a floppy disk.
hardware: Physical components of a computer.
hex file: ASCII-printable representation of a command (m'achine language) file.
hexadecimal notation: Notation for the base 16 number system using the symbols 0, 1, 2, 3, 4, 5, 6, 7, 8, 9, A, B, C, D, E, and F to represent the sixteen digits. Machine code is often converted to hexadecimal notation because it can be easily represented by ASCII characters and therefore printed on the console screen or on paper (see Appendix A).
input: Data going into the computer, usually from an operator typing at the terminal or by a program reading from the disk.
interface: Object that allows two independent systems to communicate with each other, as an interface between hardware and software in a microcomputer.
I/O: Abbreviation for input/output.
136

CP/M-86 User's Guide Appendix E User's Glossary
keyword: See command keyword.
kilobyte: 1024 bytes denoted as lK. 32 kilobytes equal 32K. 1024 kilobytes equal one megabyte, or over one million bytes.
list device: Device such as a printer onto which data can be listed or printed.
logged in: Made known to the operating system, in reference to drives. A drive is logged in when it is selected by the user or an executing process, and remains selected or logged in until you change disks in a floppy disk drive or enter CTRL-C at the command level.
logical: Representation of something that mayor may not be the same in its actual physical form. For example, a hard disk can occupy one physical drive, and yet you can divide the available storage on it to appear to the user as if it were in several different drives. These apparent drives are the logical drives.
megabyte: Over one million bytes; 1024 kilobytes (see byte, kilobyte).
microprocessor: Silicon chip that is the Central Processing Unit (CPU) of the microcomputer.
operating system: Collection of programs that supervises the running of other programs and the management of computer resources. An operating system provides an orderly input/output environment between the computer and its peripheral devices. It enables user written programs to execute safely.
option: One of many parameters that can be part of a command tail. Use options to specifiy additional conditions for a command's execution.
output: Data that the processor sends to the console or disk.
parameter: Value in the command tail that provides additional information for the command. Technically, a parameter is a required element of a command.
peripheral devices: Devices external to the CPU. For example, terminals, printers and disk drives are common peripheral devices that are not part of the processor, but are used in conjunction with it.
physical: Actual hardware of a computer. The physical environment varies from computer to computer.
137

Appendix E User's Glossary CP/M-86 User's Guide
primary filename: First 8 characters of a filename. The primary filename is a unique name that helps the user identify the file contents. A primary filename contains 1 to 8 characters and can include any letter or number and some special characters. The primary filename follows the optional drive specification and precedes the optional filetype.
program: Series of specially coded instructions that performs specific tasks when executed by a computer.
prompt: Any characters displayed on the video screen to help the user decide what the next appropriate action is. A system prompt is a special prompt displayed by the operating system. The system prompt indicates to the user that the operating system is ready to accept input. The CP/M-86 system prompt is an alphabetic character followed by an angle bracket. The alphabetic character indicates the default drive. Some applications programs have their own special system prompts.
Read-Only: Attribute that can be assigned to a disk file or a disk drive. When assigned to a file, the Read-Only attribute allows you to read from that file but not write any changes to it. When assigned to a drive, the Read-Only attribute allows you to read any file on the disk, but prevents you from adding a new file, erasing or changing a file, renaming a file, or writing on the disk. The STAT command can set a file or a drive to Read-Only. Every file and drive is either Read-Only or Read-Write. The default setting for drives and files is Read-Write, but an error in resetting the disk or changing media automatically sets the drive to Read-Only until the error is corrected. Files and disk drives may be set to either Read-Only or Read-Write.
Read-Write: Attribute that can be assigned to a disk file or a disk drive. The ReadWrite attribute allows you to read from and write to a specific Read-Write file or to any file on a disk that is in a drive set to Read-Write. A file or drive can be set to either Read-Only or Read-Write.
record: Collection of data. A file consists of one or more records stored on disk. A CP/M-86 re'cord is 128 bytes long.
RO: Abbreviation for Read-Only.
RW: Abbreviation for Read-Write.
sector: Portion of a disk track. There are a specified number of sectors on each track.
138

CP/M-86 User's Guide Appendix E User's Glossary
software: Specially coded programs that transmit machine readable instructions to the computer, as opposed to hardware, which is the actual physical components of a computer.
source file: ASCII text file that is an input file for a processing program, such as an editor, text formatter, or assembler.
syntax: Format for entering a given command.
system attribute: A file attribute. You can give a file the system attribute by using the SYS option in the STAT command. A file with the SYS attribute is not displayed in response to a DIR command; you must use DIRS (see Section 4). If you give a file with user number 0 the SYS attribute, you can read and execute that file from any user number on the same drive. Use this feature to make your commonly used programs available under any user number.
system prompt: Symbol displayed by the operating system indicating that the system is ready to receive input. See prompt.
terminal: See console.
track: Concentric rings dividing a disk. There are 77 tracks on a typical eight inch floppy disk.
turn-key application: Application designed for the non computer-oriented user. For example, a typical turn-key application is designed so that the operator needs only to turn on the computer, insert the proper program disk and select the desired procedure from a selection of functions (menu) displayed on the screen.
upward-compatible: Term meaning that a program created for the previously released operating system (or compiler, etc.) runs under the newly released version of the same operating system.
user number: Number assigned to files in the disk directory so that different users need only deal with their own files and have their own directories even though they are all working from the same disk. In CP/M-86, files can be divided into 16 user groups.
utility: Tool. Program that enables the user to perform certain operations, such as copying files, erasing files, and editing files. Utilities are created for the convenience of programmers and users.
139

Appendix E User's Glossary CP/M-86 User's Guide
wildcard characters: Special characters that match certain specified items. In CP/M-86 there are two wilQcard characters, ? and *. The? can be substituted for any single character in a filename, and the *. can be substituted for the primary filename or the filetype or both. By placing wildcard characters in filenames, the user creates an ambiguous filename and can quickly reference one or more files.
End of Appendix E
140

Index
A
A (append) command, 84 abort a copy operation, 55 access modes, 66-67, 69-70 active status, 67 active user numbers, 71 ASM-86 (assembler) command, 30 assign physical device to logical
device, 73 attributes, 13, 67 AXI:, 17,55 AXO:, 17,55
B
B (beginning/bottom) command, 88 back-up disks, 6 basic editing commands, 86 batch command processing, 75 built-in commands, 2, 19 bytes, 67
c C (character) command, 88, 96 character pointer, 86 character transfer, 54 CMD, 11 combined-command line, 96 combining files, 54 command description, 26-27 command files, 14 command keyword, 2, 19, 26 command line, 2, 19
command mode, 93 command tail, 2 CON:, 17,55 concatenation, 54-55 continuous date and time display, 78 control character commands, 4-5, 23 copy, 6 copy files to and from auxiliary
devices, 55 COPYDISK (copy disk) command, 6-
7, 32-33, 53 CP, 86 CTRL-E, 102 CTRL-Z, 54, 56, 93, 102 current user number, 13, 79 cursor, 2
D
D (delete) command, 91 data files, 9 date and time format, 77 DDT-86 commands, 34 DDT-86 parameters, 34-35 default drive, 16 default user number, 53 delimiters, 10 dest-filespec, 29 DEV:,72 device names, 56 DIR (directory) command, 3, 14, 37,
67,69 DIR/SYS attribute, 14 directory, 9, 15 directory attribute, 67 directory entries, 67
141

directory space, 15 directory verification, 68 DIRS command, 14, 37 disk free space, 65 disk space allocation, 68 displaying disk status, 70 Dn (delete characters) option, 58 drive, 15 drive specifier, 11-12, 25
E
E (echo) option, 52, 58 E (exit) command, 86 ED command, 9, 39 ED command summary, 39-42 ED error symbols, 107-108 ED messages, 82, 100, 103, 107 ED prompt, 82, 93 ED syntax, 81 editing, 97 editors, 81 end-of-file character, 54 EOF:,56 ERA command, 45 error message, BDOS, 15
F
F (filter form-feeds) option, 58 F (find) command, 100 FCB, 67 file, 1, 9 file attributes, 14, 51 file concatenation, 54 file families, 10, 11 file groups, 13 file specification, 10, 25, 26, 67
142
filename, 10, 25 filespec, 10 filetype, 10-11, 25
G
GENCMD command, 46 Gn option, 50-51, 54, 58, 59
H
H (head of file) command, 85, 101, 105
H (hex data transfer) option, 59 HELP (help) command, 48
I
I (ignore) option, 59 I (insert) command, 92 initial date and time, 77 input devices, 17 input-output port, 73 insert mode, 92 Istring A Z (insert string) command,
94
J
J (juxtapose) command, 101
K
K (kill) command, 91 keyword error, 22 kilobytes, 67

L
L (line) command, 89, 96 L (translate case) option, 59 line editing controls, 93 line numbers, 84 loading CP IM-86, 1 logical devices, 17, 55, 72 long form of PIP, 52 LST:, 17,56
M
M (macro) command, 103 memory buffer, 82-83 multiple command mode, 57 multiple file copy, 53
N
N (add line numbers) option, 59 n (number) command, 89 N command, 100 n: (line number) command, 98 NUL:, 56 numeric arguent, 86
o o (object file transfer) option, 54, 59 o (original) command, 106 on-line disk, 15 on-line status, 65, 70 output devices, 17
p
P (page) command, 98 peripheral devices, 17 physical device drivers, 73 physical device names, 72 PIP, 9, 13, 29, 50 PIP messages, 53 PIP options, 51, 58 Pn (set page length) option, 59 pound sign argument, 84 PRN:,56 program, 1 program file, 9
Q
Q (quit) command, 106 Qs (quit copying) option, 60
R
R (read system files) option, 60 R (read) command, 104 read-only, 64 read-only attribute, 66 read-only files, 51 read-write, 64 read-write attribute, 66 ready status, 15 real file size, 67 records, 67 recovering from editing error
conditions, 108 recs, 67
143

reformat, 6 REN command, 62 REN messages, 63 repeated execution of ED commands,
104 reset, 15 RO, 14, 16, 64, 66, 69 RW, 14, 16, 64, 66, 69 RW IRO file attribute, 14
s S (substitute) command, 94 set a drive to read-only status, 64 set file access modes, 69 set time of day, 76 short form of PIP, 52 single file copy, 50 SIZE, 67 source file, 83 square brackets, 51, 58 Ss (start copying) option, 60 STAT command, 14, 17,63 STAT messages, 68 SUB file, 74 SUBMIT command, 74 SUBMIT parameters, 74 syntax notation, 28 SYS, 67, 70 SYS attribute, 14 SYS files, 14 system attribute, 67 system prompt, 2, 16 system reset, 1
144
T
T (type) command, 90, 96-97 tab characters, 78 temporary file, 51, 83 text editor, 9 text transfer commands, 84 time, 77 Tn (expand tabs) option, 60 TOO command, 76 TOO messages, 77 transient utilities, 3, 19, 20 TYPE command, 79 TYPE messages, 78
u U (translate case) option, 60 U (upper-case translation) command,
94 USER, 13 USER command, 53, 79 user memory, 36 user numbers, 13, 71, 80 utility, 19
v v (verify) option, 52, 60 VAL:, 72 version number, 2 virtual file size, 67

w W (write over) option, 51, 60 W (write) command, 85 wildcard characters, 12, 29, 66 write-protect, 15 write-protect notch, 6
x X (xfer) command, 104 X$$$$$$$.LIB file, 104
z Z (zero the parity bit) option, 61
$
$$$ file, 51
:n command, 99
145

Reader Comment Card We welcome your comments and suggestions. They help us provide you with better product documentation.
Date _____ Second Edition: July 1982
1. What sections of this manual are especially helpful?
2. What suggestions do you have for improving this manual? What information is missing or incomplete? Where are examples needed?
3. Did you find errors in this manual? (Specify section and page number.)
CP / M-86® Operating System User's Guide
COMMENTS AND SUGGESTIONS BECOME THE PROPERlY OF DIGITAL RESEARCH.

From:--____________________ _
Attn: Publications Production
BUSINESS REPLY MAIL FIRST CLASS / PERMIT NO. 182 / PACIFIC GROVE, CA
POSTAGE WILL BE PAID BY ADDRESSEE
[!ill DIGITAL RESEARCH~ P.o. Box 579 Pacific Grove, California 93950
NO POSTAGE NECESSARY IF MAILED IN THE UNITED STATES