Embed Size (px)
DESCRIPTION
Country Tenant Handbook
Citation preview

S I N C E 1 8 0 5
Tenant HandbookHelpful tips, advice for emergencies
and useful contacts.

2

table of contents
Helpful Tips ............................................................................................ 4
Looking after your home ............................................. 5
Condensation ............................................................... 6
Leaking, burst or frozen pipes .................................... 7
Washing Machine .. ...................................................... 8
Clearing blockages..................................................... 12
Overflows.....................................................................13
Saniflo..................... ....................................................14
Septic Tank..................................................................16
Bleeding a Radiator. ...................................................18
Kitchen Extractor Filters............................................19
Fuse Box.......................................................................20
Central Heating........................................................... 22
Oil Tanks...................................................................... 24
Oil Watchman.............................................................. 26
Replacing Halogen light bulbsx................................. 28
Pest Control ............ ...................................................30
Troubleshooting...... ...................................................31
Emergencies ........................................................................................ 32
Branch Contact details....... ................................................................. 36

4
water
gas heat
fire electricity
oil

HELPFU
L TIPSEM
ERG
ENCIES
CON
TACTS
5
HELPFUL TIPSPlease note that demonstrations of most of these tips are available through internet search engines.
looking after your homeYou are responsible for keeping your home in good condition. To help you do this it is best to carry out small tasks and checks to prevent future problems:
• Wipe down on a regular basis all windows affected by condensation, and if any mould has formed, clean it off using a wash of diluted bleach, or an appropriate product from a supermarket or DIY shop. See ‘Condensation’.
• Lime scale can be removed from baths, sinks, shower heads, and taps with a de-scaler available from all DIY shops and supermarkets.
• Blockages in kitchen sink waste pipes can be prevented by flushing through a drain clearing product. (also available from supermarkets & DIY shops)
• Outside gullies should be kept clear of leaves and other debris so that water drains away easily. This is a tenant’s responsibility and if blocked gullies cause leaks or damage to the property, you will be liable for costs.
• It is your responsibility to replace light bulbs during your tenancy. See ‘Changing Halogen Light Bulbs’
• Make sure you know where the main water stopcock is, and how to turn it off. It is usually where the main water pipe enters the property or by the kitchen sink.
• Be sure you know how to turn off electricity and gas supply in an emergency. See ‘turning of electricity’ or ask a contractor when they next visit you.
• Carry out regular Maintenance Washes, with Soda Crystals, to keep your washing machine clean and in good running order. See ‘Maintenance Washes’.
• If you have a kitchen waste disposal unit make sure you run water down it regularly, to keep it from seizing up.’
• Defrost your freezer compartment regularly. Excessive ice build up will prevent your freezer from working properly and may break the door/flap.

6
condensationCondensation occurs when there is an excessive build up of moisture in the air. There is always moisture in the air, but people create additional moisture in their homes by:
• Cooking, or boiling water
• Taking baths or showers
• Drying clothes indoors
Warm air holds more moisture than cold air, so when warm air cools, it releases the moisture. This will happen when it touches a cool surface, such as outside walls, mirrors, windows, wall tiles or even clothes. This is why condensation is usually worse in cold weather.
If condensation cannot dry out, it will cause mould to form on walls, in cupboards and on window sills, and mildew to form on clothes and upholstery.
There are four things you can do to stop condensation forming:
• Produce less moisture. Cover pans and turn down the heat when boiling; switch off boiling kettles; and dry clothes outside, or in a well ventilated room
• Ventilate to let moisture out. Open a bathroom or kitchen window to let steam escape (or use an extractor fan), and open windows for a while each day to change the air in your property.
• Keep your home warm. Keep a low background heat: this need not result in significantly increased heating costs.
• Wipe down anywhere moisture settles.

HELPFU
L TIPS
7
leaking, burst or frozen pipesPlease contact property management and take the following precaustions:
When pipes leak:
When pipes burst:
If electric fittings get wet:
Place a dish or bowl underneath the leak. Pull back any carpets and lay down newspapers or towels to absorb any dampness.
• Turn off the water at the main stopcock, and switch off any water heaters.
• Open all taps to drain water from the system.
• Can it be isolated? Some appliances may have their own isolation valve (either a gate valve, or a service valve). You can use these to stop their water supply.
Do not touch. Turn off electricity at the consumer unit. See ‘Turning off electricity’
Gate valve
Stopcock, stop valve
Service valve

8
washing machineTo keep your washing machine in good running order, you should carry out a ‘maintenance wash’ once a month, to dissolve any mould or soap scum build up in the machine (see ‘Maintenance Washes’).
You should ensure that the door to the machine is wiped down after washes, and left open when not in use, to allow the machine to dry out between uses. This will help prevent the formation of black mould, which tends to form when low-temperature (non-bleach) liquid detergents are used, when moisture is left around the seal and glass, and when there is reduced oxygen with the door shut. (Please also see ‘Removing Mould’).
The tray should be removed from the detergent drawer, according to the manufacturer’s instructions, and cleaned on a regular basis to prevent build up of fabric softener and detergent. Warm water should also be poured into the drawer to dissolve any build up of powder.
Be sure not to overload the machine as this prevents the clothes from properly circulating in the wash. If the machine starts to move more than usual it is likely to be because large bulky items, such as towels, become heavy when wet, which then causes the machine to become unbalanced.
Many common problems, such as the machine not draining properly, or not completing cycles, are caused by foreign objects blocking the pump. This can be easily rectified. (See ‘Checking the pump filter, pg 10’).
HELPFU
L TIPS
9
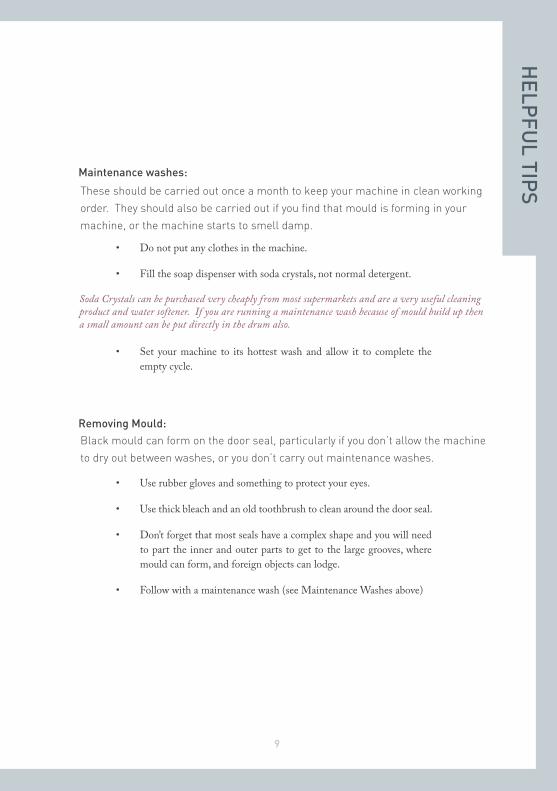
These should be carried out once a month to keep your machine in clean working order. They should also be carried out if you find that mould is forming in your machine, or the machine starts to smell damp.
Black mould can form on the door seal, particularly if you don’t allow the machine to dry out between washes, or you don’t carry out maintenance washes.
Maintenance washes:
Removing Mould:
• Do not put any clothes in the machine.
• Fill the soap dispenser with soda crystals, not normal detergent.
•
•
• Set your machine to its hottest wash and allow it to complete the empty cycle.
• Use rubber gloves and something to protect your eyes.
• Use thick bleach and an old toothbrush to clean around the door seal.
• Don’t forget that most seals have a complex shape and you will need to part the inner and outer parts to get to the large grooves, where mould can form, and foreign objects can lodge.
• Follow with a maintenance wash (see Maintenance Washes above)
Soda Crystals can be purchased very cheaply from most supermarkets and are a very useful cleaning product and water softener. If you are running a maintenance wash because of mould build up then a small amount can be put directly in the drum also.

10
washing machine: continuedChecking the pump filterMany problems, such as the machine not draining properly, or stopping part way through a cycle, are caused by foreign objects finding their way into the pump area. This sometimes happens with small socks or colour catchers, but you should ensure that collar stiffeners and other small loose objects are removed from clothes before washing.
Please note that if an object of this sort damages the machine, you would be responsible for the cost of fixing/replacing the machine.
If your machine is not full of water, follow the directions below:
• Check that you have an access panel to the pump filter. This is usually at the bottom front of the machine.
• Open the panel; be careful as they are often flimsy.
• Make sure you have a towel to hand in case there is water in the filter.
• If your machine is not full of water, unscrew the filter anticlockwise and you should be able to remove the filter.
• If there is a foreign object in the filter, remove it and replace the filter, taking care to close it completely to prevent leaks.

HELPFU
L TIPS
11
Please note that some machines, particularly older ones, don’t have accessible pump filters, or have filters that are accessed in a different way. You should always refer to the appliance handbook and when carrying out maintenance, and if you can’t find an access panel, or you are unable to carry out the instructions, call your property manager, who will arrange for an engineer to attend.
If your machine is full of water, follow the directions below:
• Locate & open the access panel, as above.
• Some machines have a drain tube next to the pump filter, which can be pulled out, and used to slowly drain the water from the machine, into a sink or bucket.
• If your machine does not have a drain tube, place a bowl in front of the machine, under the pump filter.
• Make sure you have plenty of towels on the floor as the water can drain very quickly.
• Slowly open the filter and drain the water into the bowl.
• When the bowl is full, tighten the filter, empty the bowl and start again, until no more water drains from the machine.
• You are then free to remove the filter and check for foreign objects.
12
clearing blockagesMost blockages are caused by a build up of foreign objects; such as food, grease or hair. You should make every effort to avoid these going down the sink, and hair traps can be bought from most home stores very cheaply. You should also use a drain clearing product every so often to clear the drains. These are available from DIY shops or supermarkets.
If a blockage is caused by your misuse in this way, you are likely to be held liable for the full cost of clearing the blockage. Therefore, you should try to clear any blockages yourself before calling your property manager.
If more than one fitting is blocked:
The problem may be in the soil stack or main drain. This will need to be cleared by one of our contractors. Call your property manager during office hours.
HELPFU
L TIPS
13
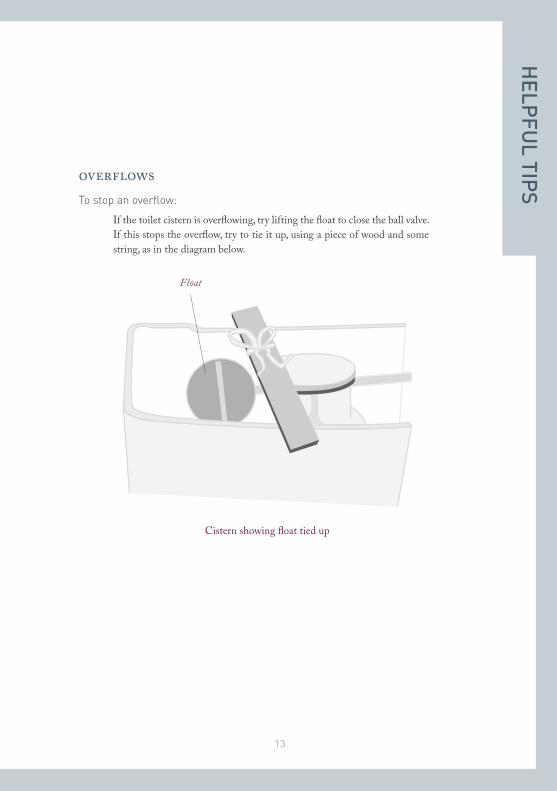
overflowsTo stop an overflow:
If the toilet cistern is overflowing, try lifting the float to close the ball valve. If this stops the overflow, try to tie it up, using a piece of wood and some string, as in the diagram below.
Cistern showing float tied up
Float

14
saniflo toiletsSome toilets are fitted with a Saniflo Macerator Pump, which breaks up material and pumps water into the drains of the property. They are used when a toilet’s position is too far from the drain pipe-work for it to be plumbed in normally.
If you have a Saniflo toilet you should be able to see a box, where the pump is located, and you will hear the pump working when you flush the toilet. This sound is completely normal, though if you notice it increasing in volume or the sound changes, you should contact your property manager, as there may be a fault with the pump.
Everyday Use
The important thing to note with Saniflo toilets is that you cannot put anything other than small amounts of toilet paper down them. Any items other than toilet paper can break the macerator. It is expensive to replace Saniflo pumps and if they break down due to misuse, you will be charged for repair or replacement.
Saniflo Device
HELPFU
L TIPS
15
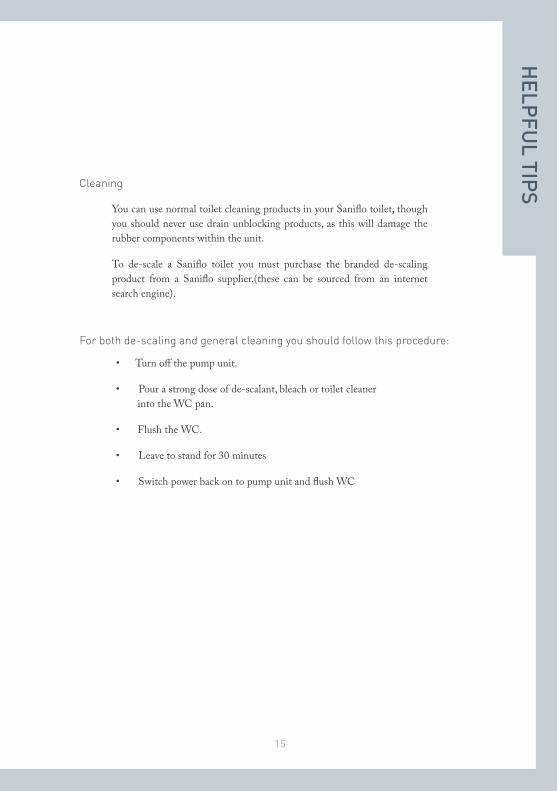
Cleaning
You can use normal toilet cleaning products in your Saniflo toilet, though you should never use drain unblocking products, as this will damage the rubber components within the unit.
To de-scale a Saniflo toilet you must purchase the branded de-scaling product from a Saniflo supplier.(these can be sourced from an internet search engine).
•Turnoffthepumpunit.
•Pourastrongdoseofde-scalant,bleachortoiletcleaner into the WC pan.
• FlushtheWC.
•Leavetostandfor30minutes
•SwitchpowerbackontopumpunitandflushWC
For both de-scaling and general cleaning you should follow this procedure:

16
septic tankThis leaflet has been designed to give you more information on how septic tanks work, and how to maintain them.
Everyday Use
Wastewater flows from your house into the septic tank where settling occurs. The heavier solids (e.g. organic waste) sink to the bottom of the tank and are gradually digested by bacteria in the absence of air to form a sludge layer. Liquid above the sludge layer drains away from the tank into a soakaway or stream. Over time the sludge layer becomes thicker and eventually has to be removed by being pumped out.
Sludge
Crust
Tank Lid
Outlet PipeInlet Pipe
HELPFU
L TIPS
17
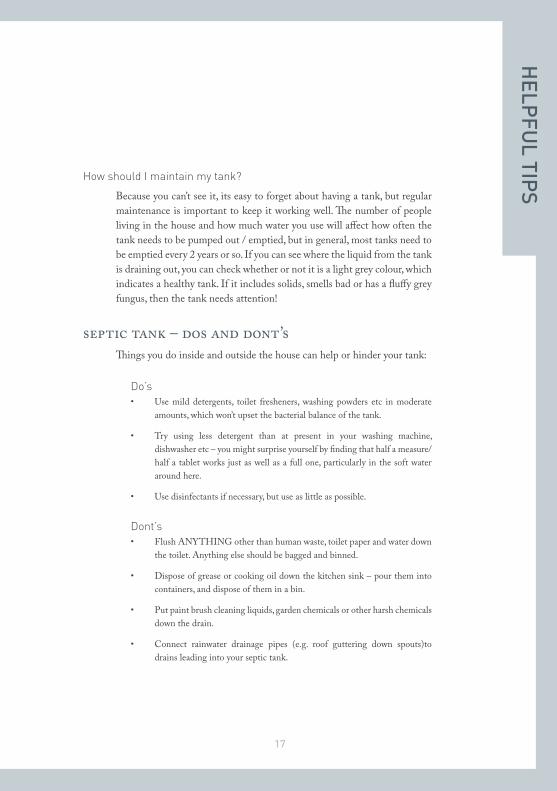
How should I maintain my tank?
septic tank – dos and dont’s
Do’s
Dont’s
Because you can’t see it, its easy to forget about having a tank, but regular maintenance is important to keep it working well. The number of people living in the house and how much water you use will affect how often the tank needs to be pumped out / emptied, but in general, most tanks need to be emptied every 2 years or so. If you can see where the liquid from the tank is draining out, you can check whether or not it is a light grey colour, which indicates a healthy tank. If it includes solids, smells bad or has a fluffy grey fungus, then the tank needs attention!
Things you do inside and outside the house can help or hinder your tank:
• Use mild detergents, toilet fresheners, washing powders etc in moderate amounts, which won’t upset the bacterial balance of the tank.
• Try using less detergent than at present in your washing machine, dishwasher etc – you might surprise yourself by finding that half a measure/ half a tablet works just as well as a full one, particularly in the soft water around here.
• Use disinfectants if necessary, but use as little as possible.
• Flush ANYTHING other than human waste, toilet paper and water down the toilet. Anything else should be bagged and binned.
• Dispose of grease or cooking oil down the kitchen sink – pour them into containers, and dispose of them in a bin.
• Put paint brush cleaning liquids, garden chemicals or other harsh chemicals down the drain.
• Connect rainwater drainage pipes (e.g. roof guttering down spouts)to drains leading into your septic tank.
18
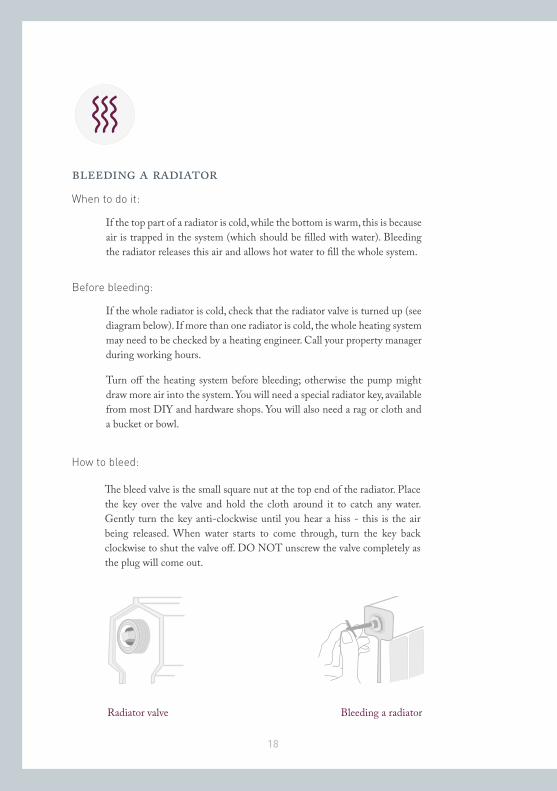
bleeding a radiatorWhen to do it:
Before bleeding:
How to bleed:
If the top part of a radiator is cold, while the bottom is warm, this is because air is trapped in the system (which should be filled with water). Bleeding the radiator releases this air and allows hot water to fill the whole system.
If the whole radiator is cold, check that the radiator valve is turned up (see diagram below). If more than one radiator is cold, the whole heating system may need to be checked by a heating engineer. Call your property manager during working hours.
The bleed valve is the small square nut at the top end of the radiator. Place the key over the valve and hold the cloth around it to catch any water. Gently turn the key anti-clockwise until you hear a hiss - this is the air being released. When water starts to come through, turn the key back clockwise to shut the valve off. DO NOT unscrew the valve completely as the plug will come out.
Turn off the heating system before bleeding; otherwise the pump might draw more air into the system. You will need a special radiator key, available from most DIY and hardware shops. You will also need a rag or cloth and a bucket or bowl.
Bleeding a radiatorRadiator valve

HELPFU
L TIPS
19
kitchen extractor filters:
replacing your filter:
The filters on kitchen extractor hoods should be replaced regularly to ensure that they continue to work. You will see the discolouration when the filter needs to be replaced, but as a guide, this should be done about once in 12 months. If you don’t change the filter grease will build up around the cooker.
Remove the cover. These usually have catches which can be pushed down or small screws which can easily be removed.
You can buy a replacement filter from most appliance shops or online. You will need to make a note of the make and model number of the appliance to ensure you buy the correct filter.

20
turning off electricityIf you need to turn off all electricity (e.g. because of water penetration), use the main ON/OFF switch on the electricity consumer unit (Fuse box).
checking your fuse box:Check your consumer unit (fuse box). It will either have fuses or trip switches (see diagrams). Modern electric circuits are fitted with a circuit breaker fuse system. If a fault develops, a switch is tripped and the circuit is broken, stopping power to the circuit. Older units will have fuses as in the diagram below.
Trip switch
Fuse
Modern fuse box with trip switches
Trip switch: replaces fuses in modern fuse boxes
Electricity Consumer Unit (fuse box)
Main On/Off SwitchFuses or circutbreakers

HELPFU
L TIPS
21
When a switch is tripped:
Plugs: Overloaded circuits are common causes of a trip or blown fuse. Therefore do not overload plug sockets by using multiple plug adaptors.
Open the cover on the consumer unit to expose the trip switches. Check which switches have tripped to the OFF position and put them back to the ON position. For more detail, refer to any user manuel supplied.
22
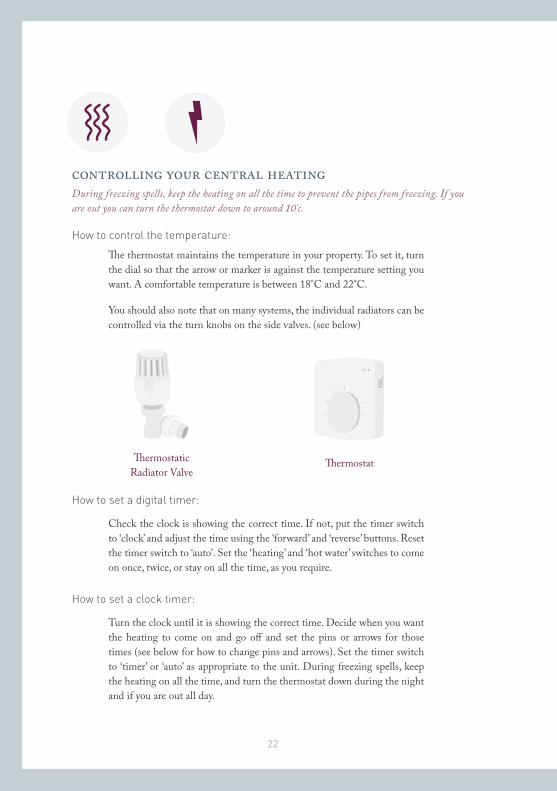
controlling your central heating
How to control the temperature:
How to set a digital timer:
How to set a clock timer:
The thermostat maintains the temperature in your property. To set it, turn the dial so that the arrow or marker is against the temperature setting you want. A comfortable temperature is between 18°C and 22°C.
You should also note that on many systems, the individual radiators can be controlled via the turn knobs on the side valves. (see below)
Check the clock is showing the correct time. If not, put the timer switch to ‘clock’ and adjust the time using the ‘forward’ and ‘reverse’ buttons. Reset the timer switch to ‘auto’. Set the ‘heating’ and ‘hot water’ switches to come on once, twice, or stay on all the time, as you require.
Turn the clock until it is showing the correct time. Decide when you want the heating to come on and go off and set the pins or arrows for those times (see below for how to change pins and arrows). Set the timer switch to ‘timer’ or ‘auto’ as appropriate to the unit. During freezing spells, keep the heating on all the time, and turn the thermostat down during the night and if you are out all day.
During freezing spells, keep the heating on all the time to prevent the pipes from freezing. If you are out you can turn the thermostat down to around 10˙c.
Thermostatic Radiator Valve
Thermostat

HELPFU
L TIPS
23
Changing arrows on time clock:
Slide the ‘on’ arrows (usually red) around the clock to the times when you want the heating to come on. Slide the ‘off ’ arrows (usually blue) around to the times when you want the heating to go off.
Turn the clock until it is showing the correct time. Decide when you want the heating to come on and go off and set the pins or arrows for those times (see below for how to change pins and arrows). Set the timer switch to ‘timer’ or ‘auto’ as appropriate to the unit.
Timer
24
oil tanks
Points to consider as tenant
• Find out where the tank is located, and how to read the oil gauge, and where to top up the oil. You will also need to know where the isolation valve is located if you have to shut off the supply.
• On some tanks there may be a site gauge (a clear plastic pipe on the outside of the tank) where you can see the oil level. Please note that these need to be operated by opening up a small valve at the bottom of the pipe which sets the correct level in the gauge, before it can be read. You will need to order more oil at around 25% of the tank. Do not leave the valve open when taking a reading.
• Other tanks have an electronic monitoring device (known as a watchman), which operates an electronic gauge located usually near the boiler or in the kitchen. These gauges give a digital reading. At the lower reading levels 1 or 2 you will need to order more oil.
• Please check the tank on a regular basis for leaks and spills around the tank. Notify the landlord or agent immediately if you do notice any spills or discharge from the tank.
• Please do not let the tank run dry. The system will then need to be bled to avoid air locks and this will cost you money.
These can be made of steel or plastic and may be single skinned or double skinned. Newer tanks may be bunded to prevent oil spillage.

HELPFU
L TIPS
25
Oil Tank
Gauge
F
341214
L
26
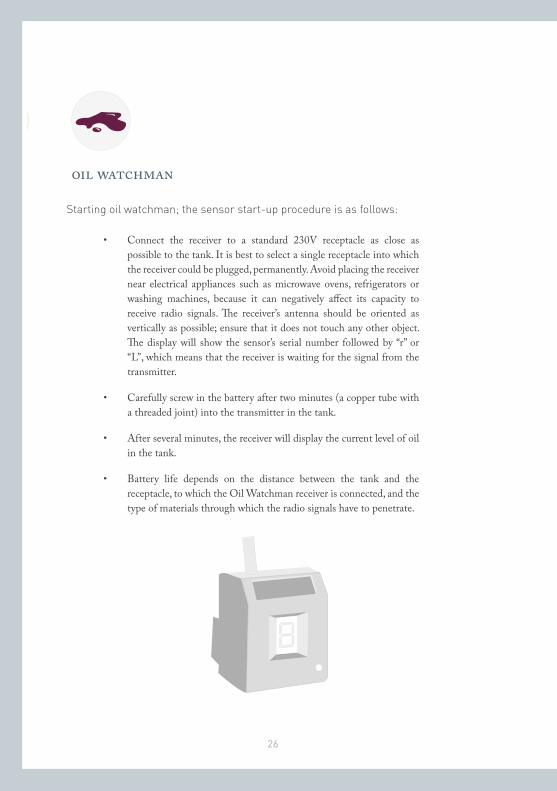
oil watchman
Starting oil watchman; the sensor start-up procedure is as follows:
• Connect the receiver to a standard 230V receptacle as close aspossible to the tank. It is best to select a single receptacle into which the receiver could be plugged, permanently. Avoid placing the receiver near electrical appliances such as microwave ovens, refrigerators or washing machines, because it can negatively affect its capacity to receive radio signals. The receiver’s antenna should be oriented as vertically as possible; ensure that it does not touch any other object. The display will show the sensor’s serial number followed by “r” or “L”, which means that the receiver is waiting for the signal from the transmitter.
• Carefully screw in the battery after two minutes (a copper tube with a threaded joint) into the transmitter in the tank.
• After several minutes, the receiver will display the current level of oil in the tank.
• Battery life depends on the distance between the tank and the receptacle, to which the Oil Watchman receiver is connected, and the type of materials through which the radio signals have to penetrate.

HELPFU
L TIPS
27
WATCHMAN’S DISPLAY DESCRIPTION
“L” The receiver is waiting for the signal from the transmitter in the tank.
FLASHING RED LED
Along with “0” and “1” displayed
Low oil level.
FLASHING RED LED
Plus, every 5s the letter
If the LED flashes along with the “e”, the receiver has not received a signal from the transmitter on the tank since the last time it was switched on. If there was a power cut or another electrical appliance was used nearby (radio, hairdryer, blender), this could cause such a read-out. The receiver will display oil level after the next update of data from the transmitter. If such behaviour of the receiver persists, follow the steps below to reset the system:
1. Unplug the receiver from the receptacle.
2. Unscrew the battery from the transmitter in the tank.
3. Plug the receiver to a 230V receptacle.
4. Wait 2 minutes. Carefully screw the battery into the transmitter.
If the status remains unchanged, call service.
BAT LOW This information is displayed instead of the level read-out. It shows that there has been a drop in the voltage of the battery in the transmitter. The battery’s voltage will drop in low temperatures. The voltage will rise along with the temperature and the information will disappear.
OIL WATCHMAN will continue to operate normally in low voltage conditions for several weeks without the need to change the battery.
The displayed oil level is flashing
The battery is flat – replace it.
“F” The tank is full.
If the letter “F” is displayed and the tank is actually not full, it means that there is liquid in the upper section of the probe. Dismantle the transmitter, remove and thoroughly clean the probe.
Capital “C” This symbol suggests lack of connection between the transmitter and the probe. Check the connection between the transmitter and the probe – if it is correct, you will need to replace the probe.
28
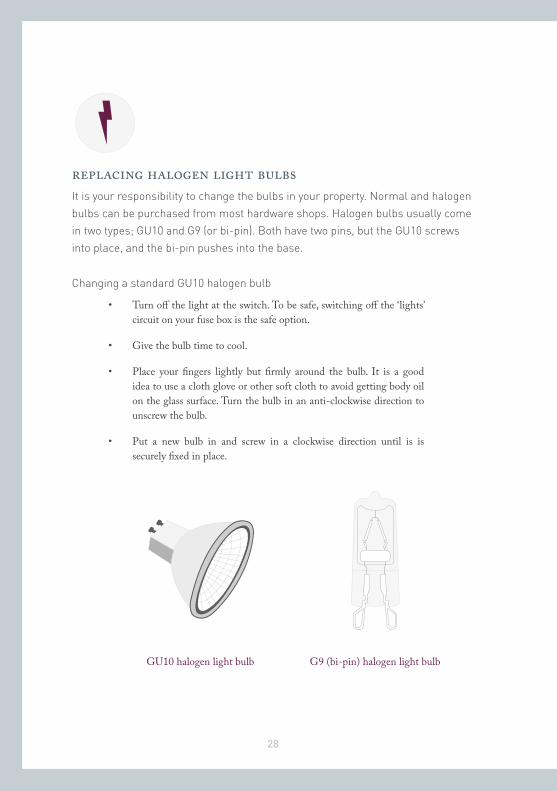
replacing halogen light bulbsIt is your responsibility to change the bulbs in your property. Normal and halogen bulbs can be purchased from most hardware shops. Halogen bulbs usually come in two types; GU10 and G9 (or bi-pin). Both have two pins, but the GU10 screws into place, and the bi-pin pushes into the base.
Changing a standard GU10 halogen bulb
• Turn off the light at the switch. To be safe, switching off the ‘lights’ circuit on your fuse box is the safe option.
• Give the bulb time to cool.
• Place your fingers lightly but firmly around the bulb. It is a good idea to use a cloth glove or other soft cloth to avoid getting body oil on the glass surface. Turn the bulb in an anti-clockwise direction to unscrew the bulb.
• Put a new bulb in and screw in a clockwise direction until is is securely fixed in place.
G9 (bi-pin) halogen light bulbGU10halogenlightbulb
HELPFU
L TIPS
29
Changing a G9 (bi-pin) halogen bulb:
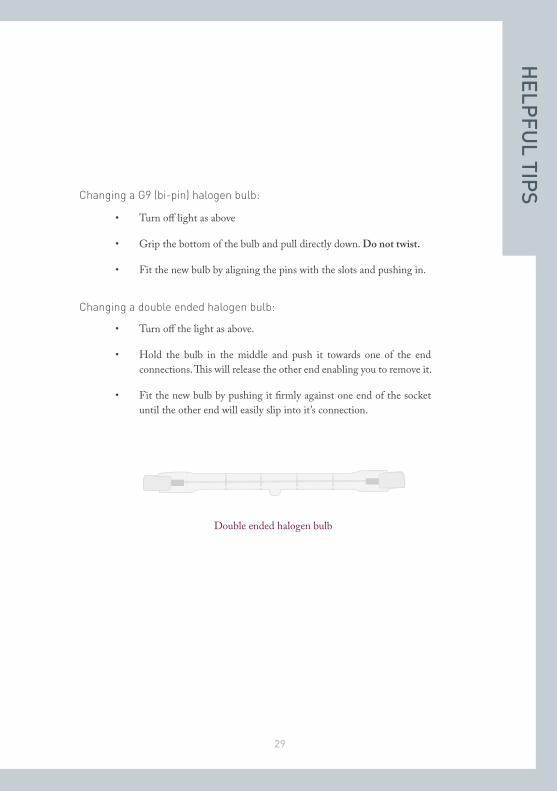
Changing a double ended halogen bulb:
• Turn off light as above
• Grip the bottom of the bulb and pull directly down. Do not twist.
• Fit the new bulb by aligning the pins with the slots and pushing in.
• Turn off the light as above.
• Hold the bulb in the middle and push it towards one of the end connections. This will release the other end enabling you to remove it.
• Fit the new bulb by pushing it firmly against one end of the socket until the other end will easily slip into it’s connection.
Double ended halogen bulb

30
• Food is stored in sealed containers and put away in cupboards/on shelves.
• Food crumbs are cleaned away immediately.
• Waste is kept in closed bins and removed from the property regularly for local authority waste collection services to remove.
pest controlIt is your responsibility to carry out pest control. Traps and bait can be bought from some supermarkets, or DIY stores.
Alternatively, we can provide you with a name of a professional pest control company who you may wish to instruct.
If necessary, in some cases, the landlord will carry out “proofing” of the property, i.e. blocking as many obvious holes, which may be considered a point of entry for rodents, as possible.
Mice are one of the most common types of pest in London and it can be very difficult to exclude them from properties, particularly conversion flats and terraced houses, as there are so many points of entry. It is generally said that a mouse can enter through a hole about the diameter of a biro pen (about 6mm).
To lessen the likelihood of mice in your property you should ensure that:
mice

HELPFU
L TIPS
31
troubleshootingMy electric oven has stopped working:
My fridge isn’t draining and my food is getting wet:
My washing machine is not draining, or has stopped mid cycle.
My sink is draining slowly/not draining at all.
My Dishwasher isn’t washing my crockery properly.
My radiators aren’t hot all the way up.
My central heating isn’t working properly.
• You may have accidentally re-set the timer. Check and re-set your clock.
• If there is no power at all, check your fuse box to be sure that the circuit hasn’t been broken. (See ‘Checking your fuse box’).
• Your drainage valve is probably blocked. Take a straw, or cotton bud, and try to clear out the drainage hole located at the back inside the fridge.
• Your pump filter is probably blocked. Drain the machine and check the filter for foreign objects. (See ‘Washing Machines’ for how-to guide).
• This is likely to be caused by a build up of food and limescale. Buy a sink/drain unblocking liquid to remove the blockage. (See ‘Clearing Blockages’)
• You may need to replace your rinse aid or dishwasher salt. Both can be bought from supermarkets and are easily topped up. Check your appliance manual for further info.
• There is too much air in the system. You need to bleed your radiators. (See ‘Bleeding a radiator’).
• Have you checked that the thermostat isn’t set too low and that the timer is set correctly on the boiler? (See ‘Controlling central heating’)

32
EMERGENCIESThe following are suggestions of what to do in case of an emergency situation.
fire
smell of gas
In case of fire, dial 999.
Get everyone out and do not go back for any reason
Close all doors and windows
Warn your neighbours if any of them might be in danger
If you live in a block of flats set off the communal fire alarm.
Open the doors and windows to get rid of the gas
Check to see if the gas has been left on unlit, or the pilot light has gone out. If so, turn the appliance off, and do not try to relight it until all smell of gas has been cleared from the property
If the leak cannot be stopped by turning off an appliance, or you are uncertain whether it has been stopped, turn the main gas supply off at the meter: see helpful tips and phone the gas emergency service immediately: National Grid 0800 111 999
Do not turn any electrical switches on or off
Do not use door bell
Do not smoke
Do not use matches or naked flames

EMER
GEN
CIES
33
bursting or leaking pipe
loss of electricity
Turn the water off at the mains. See the helpful tips.
If electrics are affected, turn off the electricity at the consumer unit. See helpful tips.
Call your property manager. If our office is closed, use the emergency number.
If neighbours are also affected, call your electricity company (check your electricity bill for the number).
Check your fuse box to see if a switch has tripped or a fuse blown. See helpful tips.
If none of the above apply and the problem persists, call your property Manager. If our office is closed, use the emergency number.
34
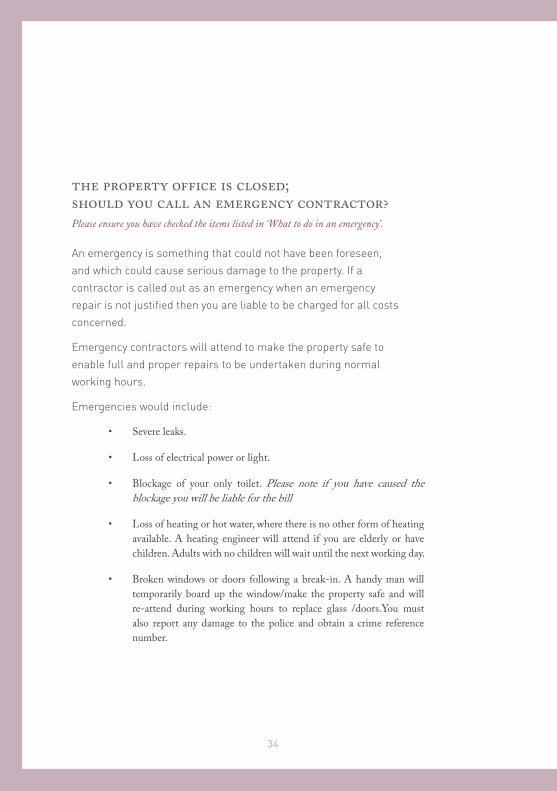
should you call an emergency contractor?the property office is closed;
An emergency is something that could not have been foreseen, and which could cause serious damage to the property. If a contractor is called out as an emergency when an emergency repair is not justified then you are liable to be charged for all costs concerned.
Emergency contractors will attend to make the property safe to enable full and proper repairs to be undertaken during normal working hours.
Emergencies would include:
• Severe leaks.
• Loss of electrical power or light.
• Blockage of your only toilet. Please note if you have caused the blockage you will be liable for the bill
• Loss of heating or hot water, where there is no other form of heating available. A heating engineer will attend if you are elderly or have children. Adults with no children will wait until the next working day.
• Broken windows or doors following a break-in. A handy man will temporarily board up the window/make the property safe and will re-attend during working hours to replace glass /doors.You must also report any damage to the police and obtain a crime reference number.
Please ensure you have checked the items listed in ‘What to do in an emergency’.

EMER
GEN
CIES
35
notes

36
property management contact during office hours
Chippenham
King’s Head House, 35 Market Place
Chippenham, Wiltshire SN15 3HT
Marlborough
106 Hgh Street, Marlborough
Wiltshire SN8 1LT
Salisbury
37 Castle Street, Salisbury
Wiltshire SP1 1TT
Tel: 01249 444 555
Fax:01249 444 556
Tel: 01672 511 333
Fax:01672 514 099
Tel: 01722 342 398
Fax:01722 413 229
Should you have any maintenance issues relating to the property in the duration of the tenancy, our Property Management Department manage the property on your behalf.
Please call your local office with any maintenance queries.
Opening Hours - Monday to Friday9.00 am to 5.30pm
Opening Hours - Monday to Friday9.00 am to 5.30pm
Opening Hours - Monday to Friday9.00 am to 5.30pm
CON
TACTS
37
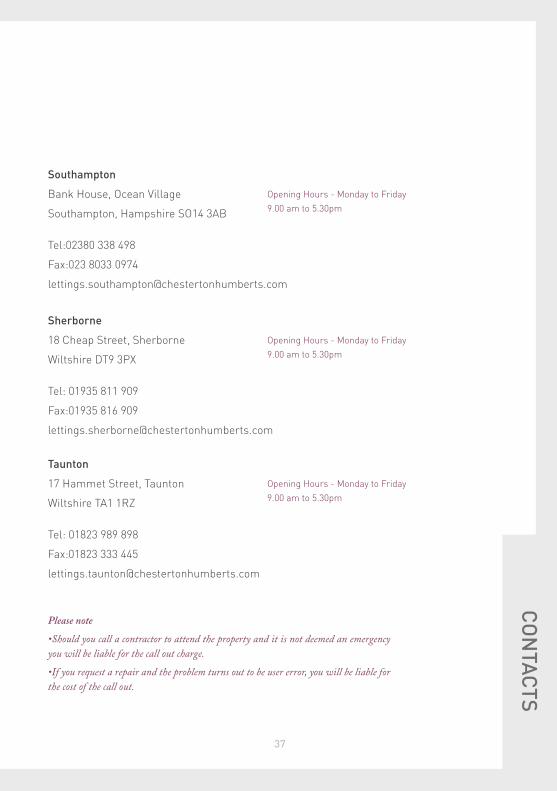
Southampton
Bank House, Ocean Village
Southampton, Hampshire SO14 3AB
Sherborne
18 Cheap Street, Sherborne
Wiltshire DT9 3PX
Taunton
17 Hammet Street, Taunton
Wiltshire TA1 1RZ
Tel:02380 338 498
Fax:023 8033 0974
Tel: 01935 811 909
Fax:01935 816 909
Tel: 01823 989 898
Fax:01823 333 445
Opening Hours - Monday to Friday9.00 am to 5.30pm
Opening Hours - Monday to Friday9.00 am to 5.30pm
Opening Hours - Monday to Friday9.00 am to 5.30pm
Please note
•Should you call a contractor to attend the property and it is not deemed an emergency you will be liable for the call out charge.
•If you request a repair and the problem turns out to be user error, you will be liable for the cost of the call out.

38
S I N C E 1 8 0 5