Embed Size (px)
Citation preview


Copyright & Disclaimer
Copyright Notice:
This e-book is offered for free to the general public. You may distribute it in its original format (PDF), provided that the contents are not changed in any way and you do not claim to be the author. In addition, the information contained in this report may not be used elsewhere without written permission from its authors. Any persons or entities found in violation of infringing the copyright of this report will be prosecuted to the full extent of the law. This e-book is for informational purposes only and its authors do not earn any profit from its distribution. NERF is a registered trademark of Kenner Toys, which is an affiliate of Hasbro, Inc. The authors of this e-book are not affiliated with the aforementioned parties and do not intend to infringe upon any copyright, trademark, or patent.
Disclaimer:
Individual results may vary. Modding blasters is a hobby of ours, and in no way do we claim to be experts on the subject. We’ve written this e-book for other enthusiasts who want to accomplish what we have with our blasters. However, due to legal reasons, we're unable to guarantee any results and the content in this e-book should not be considered professional advice.
The use of this information and recommended products should be based on your own due diligence. You agree not to hold the authors and/or distributors of this e-book liable for any success or failure of your endeavors that are directly or indirectly related to the
purchase and use of our information, recommended products and services.
Table of Contents
Introduction ...........................................................................................................................1
Opening the Blaster .................................................................................................2
Removing the Locks ...............................................................................................8
Increasing Spring Power ............................................................................ 12
Padding the Plunger and Modifying the
O-ring Seal .......................................................................................................................... 17
Air Restrictor and Dead Space Removal ........................ 24

1 | P a g e
Introduction
What is a Mod?
A modification or “mod” is anything you do to your blaster that changes its looks, form,
or functionality. Doing a custom paint job, adding your own accessories and parts, and
working on the internals to increase power are all considered mods.
Why Mod?
There are a plethora of reasons to mod a blaster:
A modded blaster is a great addition to a costume.
A blaster that you mod becomes your own work of art.
A modded blaster can shoot further and with more intensity compared to FOF
(fresh out of factory) blasters. It can give you the upper hand in your next battle.
Cosmetic modding, when done right, yields stunning results. A humble foam
blaster can become anything from a dystopian “steampunk” gun to a clean cut
weapon right out of science fiction. They can even mimic weapons out of video
games and movies.
Regardless of the reason, modding is an incredibly fun hobby that creates custom
works of art out of average foam blasters.
Dangers of Modding
If performed incorrectly, modifications can reduce performance or render the blaster
inoperable. When performing even basic mods, there is always a risk of losing parts,
cracking plastic, or not being able to re-assemble the blaster. Some of the more
common blasters' internal pictures can be found online, and it is worthwhile to use these
as references.
When performing cosmetic mods, care must be taken in order to not lock up any moving
parts. Without a few layers of a hard clear coat, paint can gum up areas where plastic
slides on plastic. For more complex mods like barrel replacement and fabrication of
sealed breech, you must take into consideration the volume of the plunger tube in
relation to the barrel length, and spring power must also be increased. So make sure
you know what you are getting yourself into before you start a mod.

2 | P a g e
Chapter 1: Opening the Blaster
It is important to be familiar with your blaster’s internal structure in order to carry out any
performance-related mods. Be sure to remember what size screws go where and make
sure no small springs shoot out when the blaster is opened. The blaster should be
unloaded with the mainspring relaxed. Try to avoid opening the blaster when it is in the
cocked position.
Note: This guide uses a Zombiestrike Longshot as an example. The internals are the
same as the original Longshot, but there is no bipod present.
Supplies Needed:
• Small Phillips head screwdriver
• Small flat head screwdriver
• 2 large flat head screwdrivers or 2 small pry bars
If you have not assembled your priming handle, you can take it apart and trim the clip
that holds the priming bar with a hobby knife. By cutting bevels into the clip you can
make it possible to take the handle off without weakening it.

3 | P a g e
Step 1:
If you have not installed the priming handle, you can ignore this step.
To remove the priming handle you will need to pry it off. The handle is not designed to
be removed once installed, so it will take quite a bit of force to remove it.
Start by placing the blaster on a flat surface with the screws facing you.

4 | P a g e
Place the heads of the large flat head screwdrivers under the priming handle as shown.
Pry the priming handle upward by evenly applying downward force to the screwdrivers.
Be careful not to damage your shell in the process. You can put tape underneath the
screwdrivers to protect the shell from scratches.

5 | P a g e
Step 2:
Remove all exposed screws with the small Philips head screwdriver. Remove the
screws in the stock first to expose the screws hidden underneath the stock. Be careful
not to lose them!
Take note of each screw’s placement because sizes differ. The Longshot is an older
blaster and its screws vary between very large and very small.
6 | P a g e
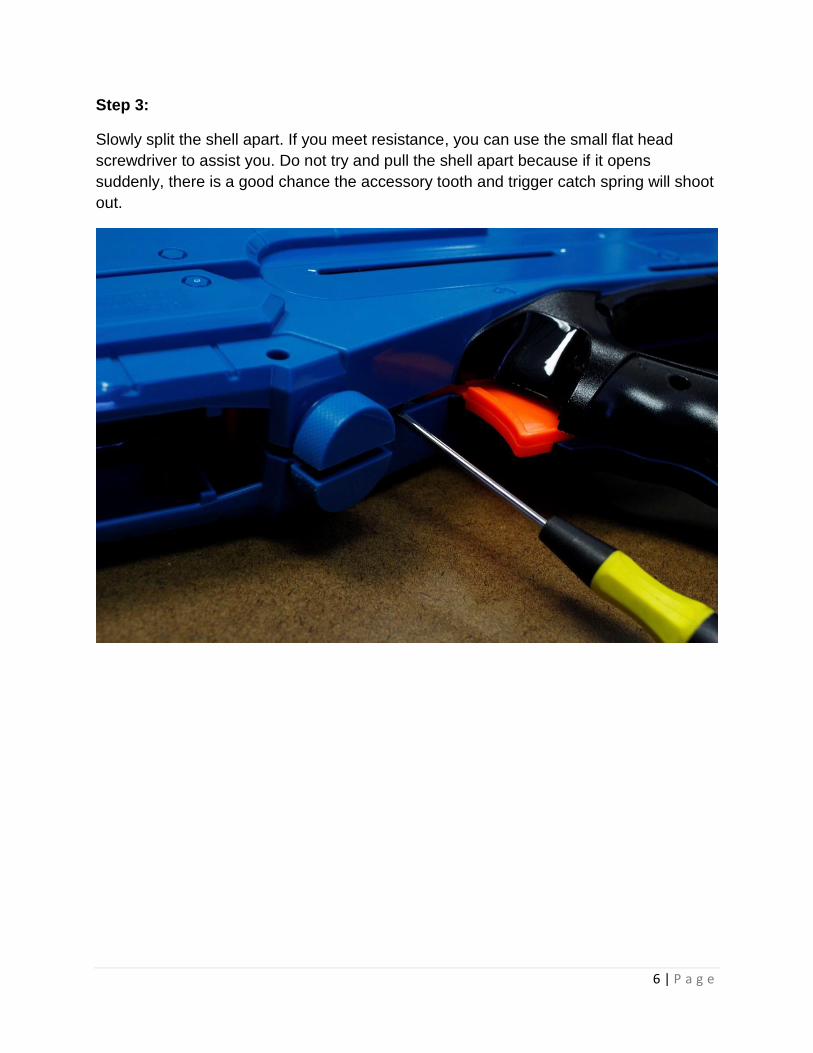
Step 3:
Slowly split the shell apart. If you meet resistance, you can use the small flat head
screwdriver to assist you. Do not try and pull the shell apart because if it opens
suddenly, there is a good chance the accessory tooth and trigger catch spring will shoot
out.

7 | P a g e
Familiarize yourself with the placement of the internals.

8 | P a g e
Chapter 2: Removing the Locks
Locks allow you to half-cock your blaster, and are there to ensure that the blaster is fully
primed before it can be fired. Many modders prefer to remove these locks in order to
control blaster function precisely to their liking. Because most blasters are rated safe for
children as young as 6 years old, the locks are designed with them in mind. If you are
mature enough to be attempting to mod your blaster, odds are you do not need the
locks. However, if you prefer, they can be left in the blaster.
Supplies Needed:
• Small punch or nail
• Small Phillips head screwdriver
• Pliers
9 | P a g e
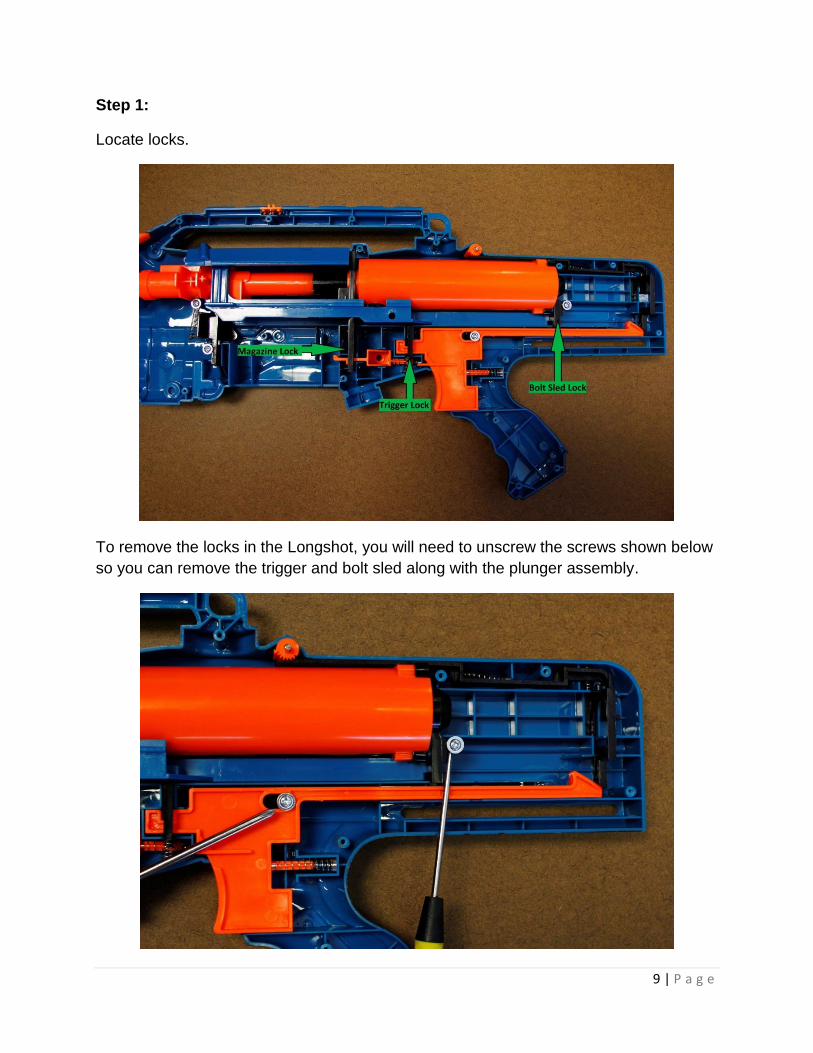
Step 1:
Locate locks.
To remove the locks in the Longshot, you will need to unscrew the screws shown below
so you can remove the trigger and bolt sled along with the plunger assembly.

10 | P a g e
Step 2:
Remove the bolt sled and trigger lock.
11 | P a g e
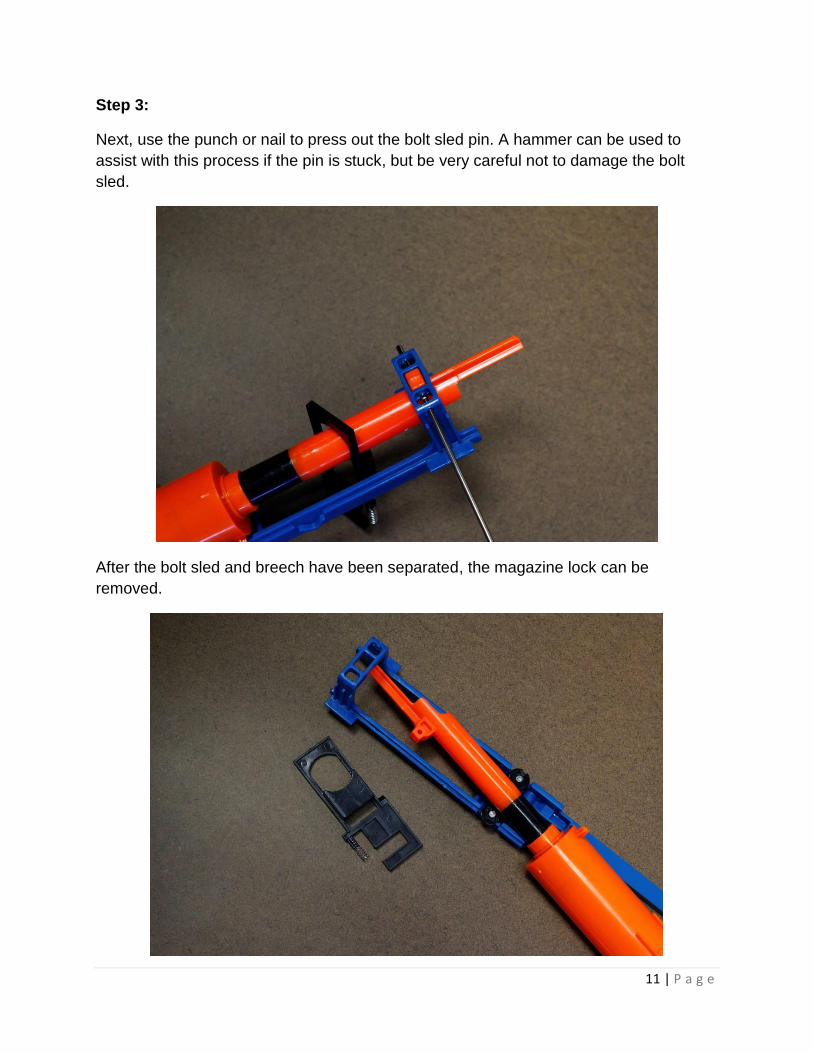
Step 3:
Next, use the punch or nail to press out the bolt sled pin. A hammer can be used to
assist with this process if the pin is stuck, but be very careful not to damage the bolt
sled.
After the bolt sled and breech have been separated, the magazine lock can be
removed.

12 | P a g e
Chapter 3: Increasing Spring Power
Doubling up on springs is an easy way to increase spring power without purchasing a dedicated mainspring. Any spring narrow enough to fit inside the stock Longshot spring while still being able to slide over the plunger rod will work. If the spring you chose to use is too long, you can cut it down to size with some wire cutters or simply compress it while you screw down the plunger head. In this tutorial, a stock Recon spring will be added to the plunger rod.
Supplies Needed:
• Full sized #2 Phillips head screwdriver
• Small Phillips head screwdriver
• Stock Recon spring or another spring that will nest inside of the Longshot spring
• Wire cutters (optional)

13 | P a g e
Step 1:
Unscrew the two small screws located at the rear of the plunger body and remove the
plunger assembly.

14 | P a g e
Step 2:
Use the full sized #2 Phillips head screwdriver to unscrew the plunger head and remove
it. Be sure to get a firm grip on the plunger so you do not strip the screw head.
15 | P a g e
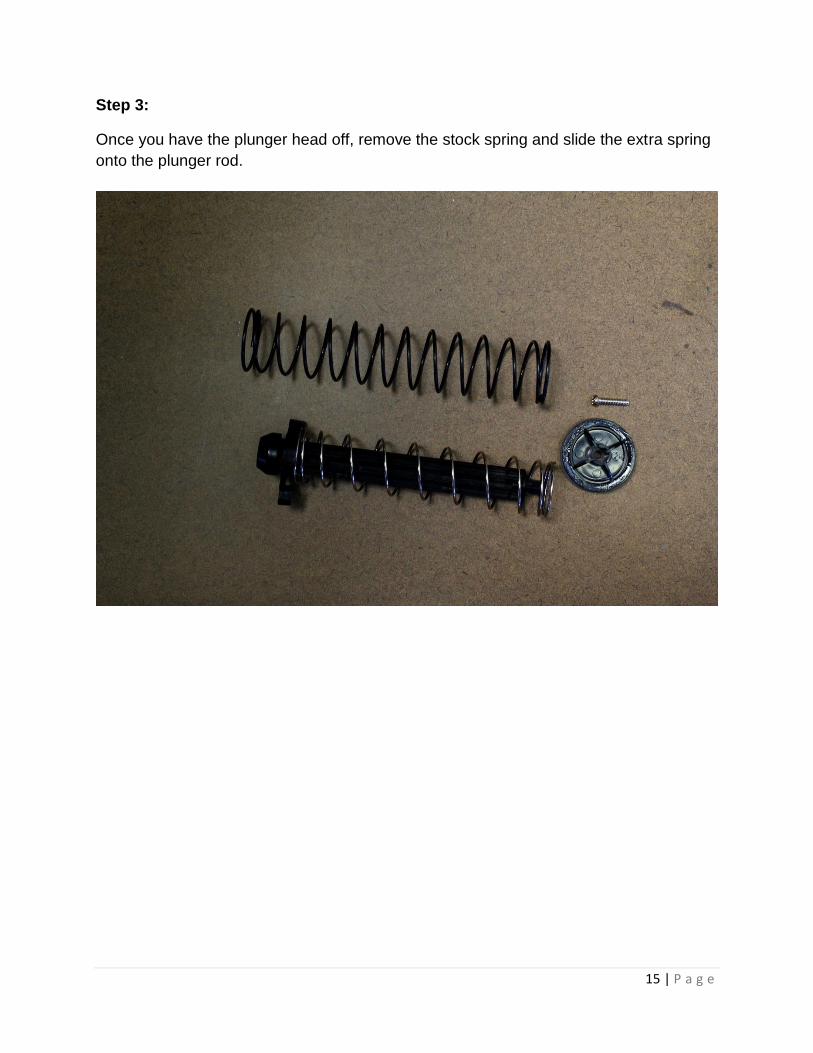
Step 3:
Once you have the plunger head off, remove the stock spring and slide the extra spring
onto the plunger rod.

16 | P a g e
Step 4:
Install the Longshot spring over the extra spring and screw the plunger head back into place. Be sure to line up the plunger head notches with the corresponding notches on the plunger rod.

17 | P a g e
Chapter 4: Padding the Plunger and Modifying
the O-ring Seal
The Longshot’s plunger design allows the plunger head to come into contact with the
plunger body when fired, so adding some foam or rubber padding to the plunger head
will help reduce wear and tear on the front of the plunger body.
The inside of the plunger body is tapered slightly, so the o-ring fits loosely at the back
and slightly better at the front. Adding a few wraps of Teflon tape to the o-ring’s groove
will help give you a tighter and more uniform seal against the inside of the plunger body.
Supplies Needed:
• 5mm craft foam or padding material of your choice
• Small Phillips head screwdriver
• Teflon tape
• O-ring safe grease
• Scissors
• Glue (hot glue is recommended)
• Sandpaper
18 | P a g e
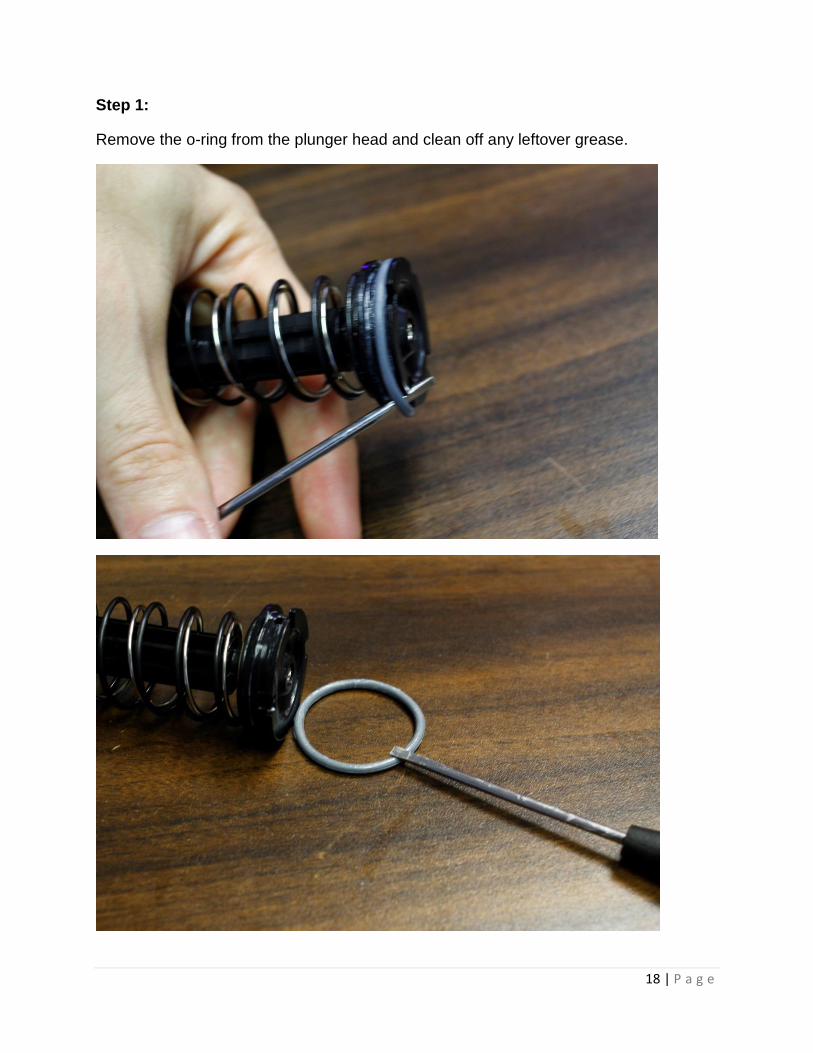
Step 1:
Remove the o-ring from the plunger head and clean off any leftover grease.

19 | P a g e
Step 2:
Wind 3 to 5 layers of Teflon tape into the o-ring’s groove.
Step 3:
Test fit the plunger with the o-ring installed. You want a snug fit, but it is very important
that the fit is not too tight or it will reduce performance. If your o-ring has too tight of a fit,
you can remove some of the tape.

20 | P a g e
Step 4:
Trim off any excess tape.
21 | P a g e
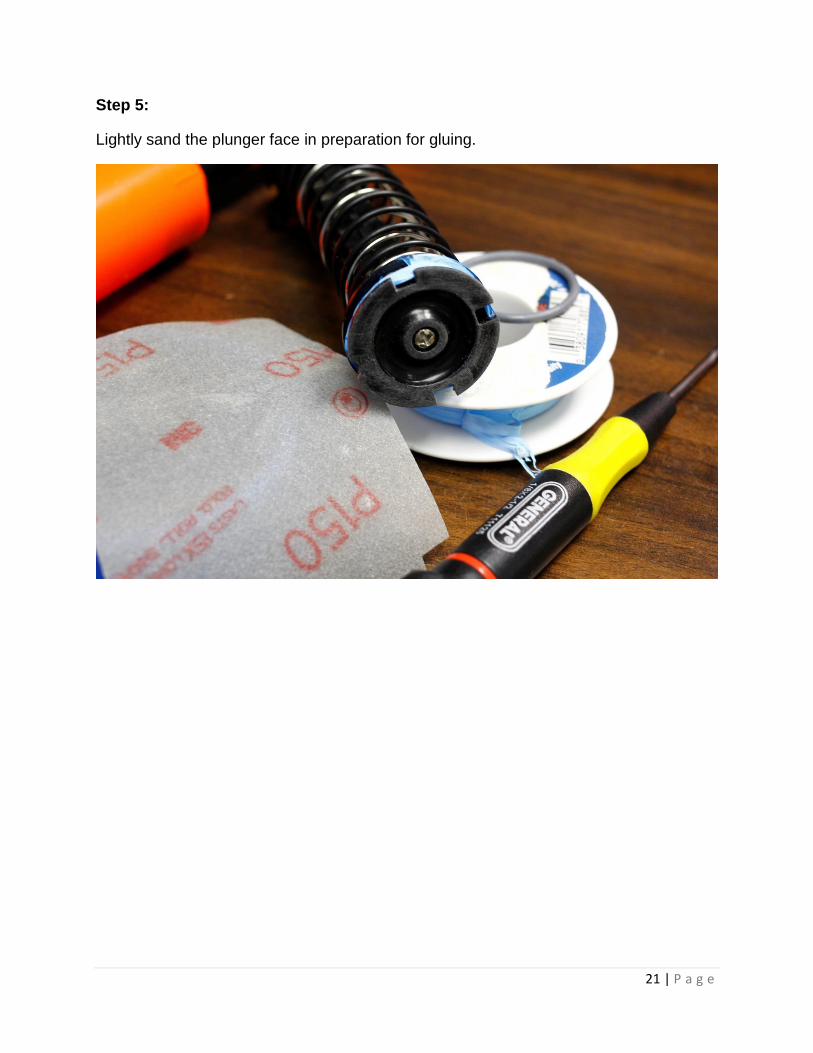
Step 5:
Lightly sand the plunger face in preparation for gluing.

22 | P a g e
Step 6:
Cut a circular pad out of the craft foam or padding material of your choice. Make the pad
slightly smaller than the diameter of the plunger head.

23 | P a g e
Step 7:
Glue the plunger padding into place. While the glue is drying, you can go ahead and
lubricate the o-ring with the rubber safe grease.

24 | P a g e
Chapter 5: Air Restrictor and Dead Space
Removal
The air restrictor (AR) slows down the flow of air from the plunger to the dart. This
device serves to reduce the blaster's power and prevent the plunger from slamming into
the plunger tubing at full speed, thus drastically reducing the noise generated during
firing.
Supplies Needed:
Wire cutters or hobby knife
Tape
Craft foam or other material to fill the dead space
Something to block the airway while filling the dead space (in this example I will
be using a piece of brass tubing)
Step 1:
Remove the breech and plunger assembly from the bolt sled.

25 | P a g e
Step 2:
Push the breech into the plunger tube as far as you can and cut the three plastic
supports that hold the air restrictor in place.
The air restrictor components will fall out of the breech once the supports have been
cut.

26 | P a g e
Step 3:
Clean the area that you will be filling and measure the depth of the dead space. The
measurement doesn’t need to be exact, but you do not want any of your filler material to
extend into the plunger.
27 | P a g e
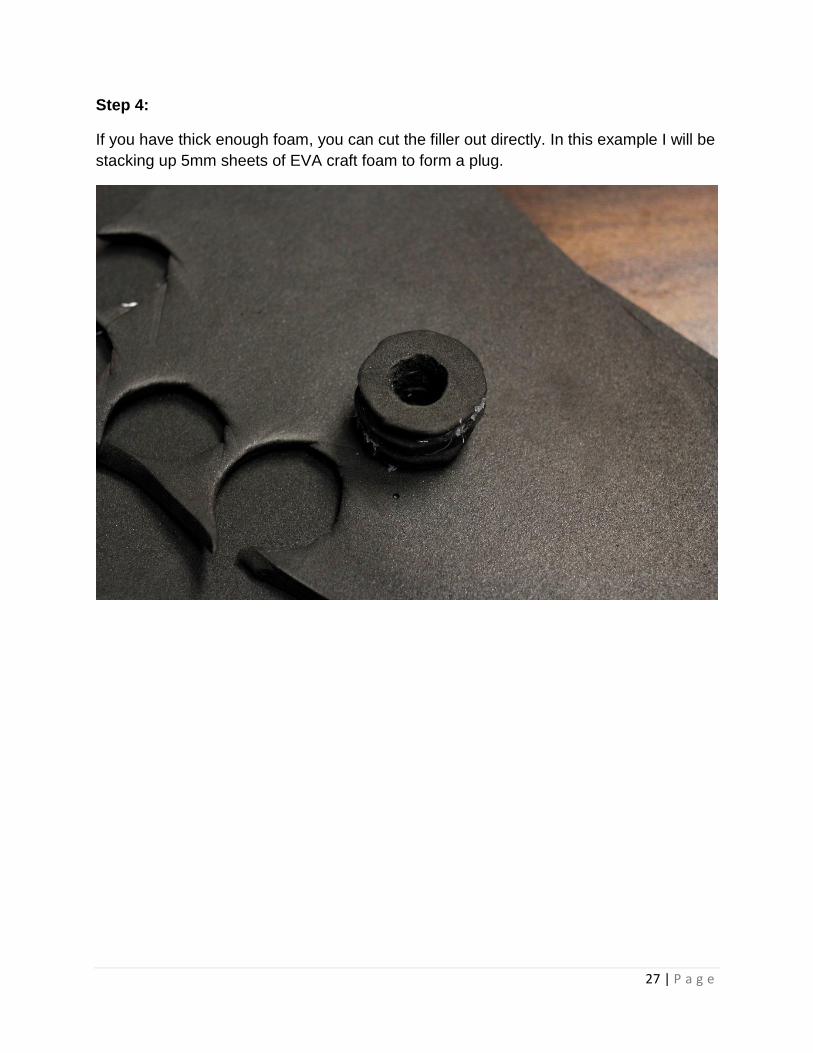
Step 4:
If you have thick enough foam, you can cut the filler out directly. In this example I will be
stacking up 5mm sheets of EVA craft foam to form a plug.

28 | P a g e
Step 5:
Glue your plug into place.

29 | P a g e
Step 6:
Wrap a piece of tape around the hole on the side of the breech, then pin your breech
back to the bolt sled and reassemble the blaster. Any tape will do, as long as it is strong
enough to stay in place. Alternatively, you can use a drop of glue to seal the hole.
Step 7:
Reassemble the blaster and test fire!