Embed Size (px)
Citation preview
CONQUEST OF THE NEW WORLD™
INTRODUCTION 1
TUTORIAL SCENARIO 2
CUSTOM MAKING YOUR OWN GAME 19
COLONIES AND TRADE 24
UNITS 33
COMBAT 40
MULTIPLAYER GAMES 47
WINNING THE GAME 53
NEW FEATURES 55
HOW TO PLAY MY E-MAIL 60
CREDITS 66
CUSTOMER SERVICE 69
TABLE OF CONTENTS
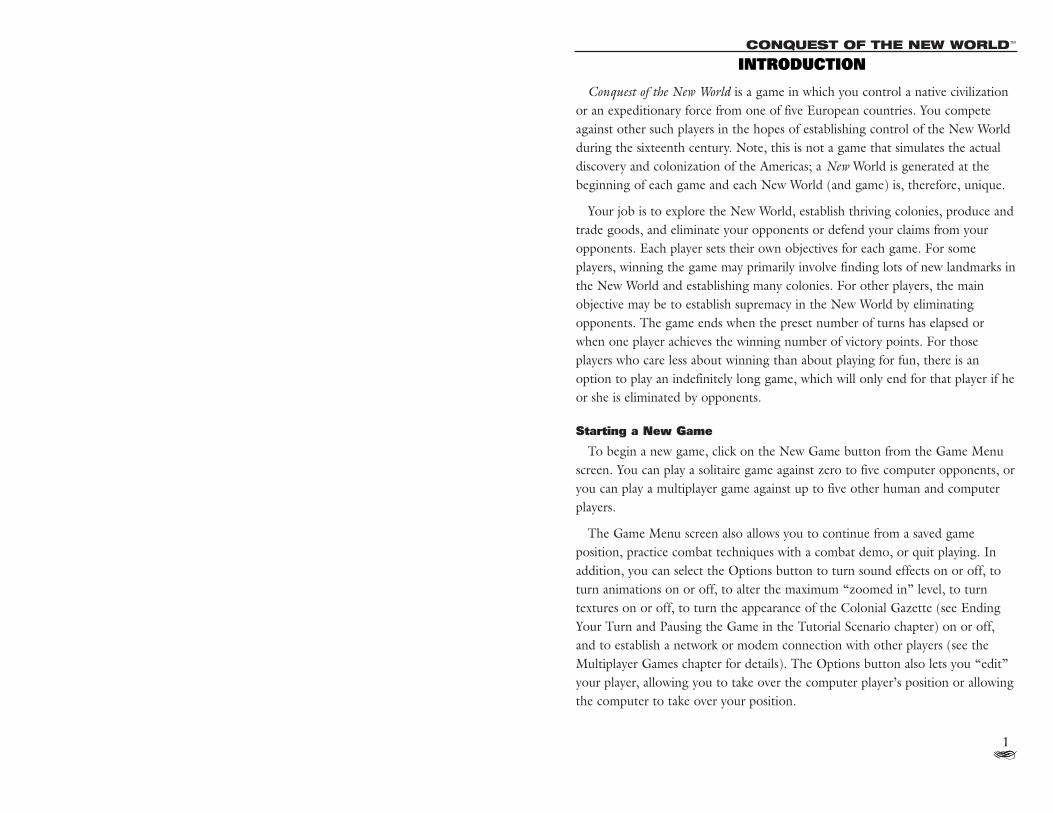
INTRODUCTION
Conquest of the New World is a game in which you control a native civilization
or an expeditionary force from one of five European countries. You compete
against other such players in the hopes of establishing control of the New World
during the sixteenth century. Note, this is not a game that simulates the actual
discovery and colonization of the Americas; a New World is generated at the
beginning of each game and each New World (and game) is, therefore, unique.
Your job is to explore the New World, establish thriving colonies, produce and
trade goods, and eliminate your opponents or defend your claims from your
opponents. Each player sets their own objectives for each game. For some
players, winning the game may primarily involve finding lots of new landmarks in
the New World and establishing many colonies. For other players, the main
objective may be to establish supremacy in the New World by eliminating
opponents. The game ends when the preset number of turns has elapsed or
when one player achieves the winning number of victory points. For those
players who care less about winning than about playing for fun, there is an
option to play an indefinitely long game, which will only end for that player if he
or she is eliminated by opponents.
Starting a New Game
To begin a new game, click on the New Game button from the Game Menu
screen. You can play a solitaire game against zero to five computer opponents, or
you can play a multiplayer game against up to five other human and computer
players.
The Game Menu screen also allows you to continue from a saved game
position, practice combat techniques with a combat demo, or quit playing. In
addition, you can select the Options button to turn sound effects on or off, to
turn animations on or off, to alter the maximum “zoomed in” level, to turn
textures on or off, to turn the appearance of the Colonial Gazette (see Ending
Your Turn and Pausing the Game in the Tutorial Scenario chapter) on or off,
and to establish a network or modem connection with other players (see the
Multiplayer Games chapter for details). The Options button also lets you “edit”
your player, allowing you to take over the computer player’s position or allowing
the computer to take over your position.
a1
CONQUEST OF THE NEW WORLD™
a1
Closing and Manipulating Windows
Whenever a window has been opened, you can close it by clicking on the
Close box in the top left corner of the window or by hitting the ESC key. There
are a few windows that have no Close box. For most of these, you must choose
one of the indicated options in order to close the window. For others (such as
when the Colonial Gazette appears at the beginning of each turn), close the
window by clicking on it.
To move windows to a different location on the Game screen, click on a part
of the window that has no button or scroll box. Then drag the window to a new
location on the Game screen.
The Mission Button
By clicking on the Mission button at the top of the game screen you can
obtain a refresher on your current objectives.
The Main Menu window and the Basic Game Turn
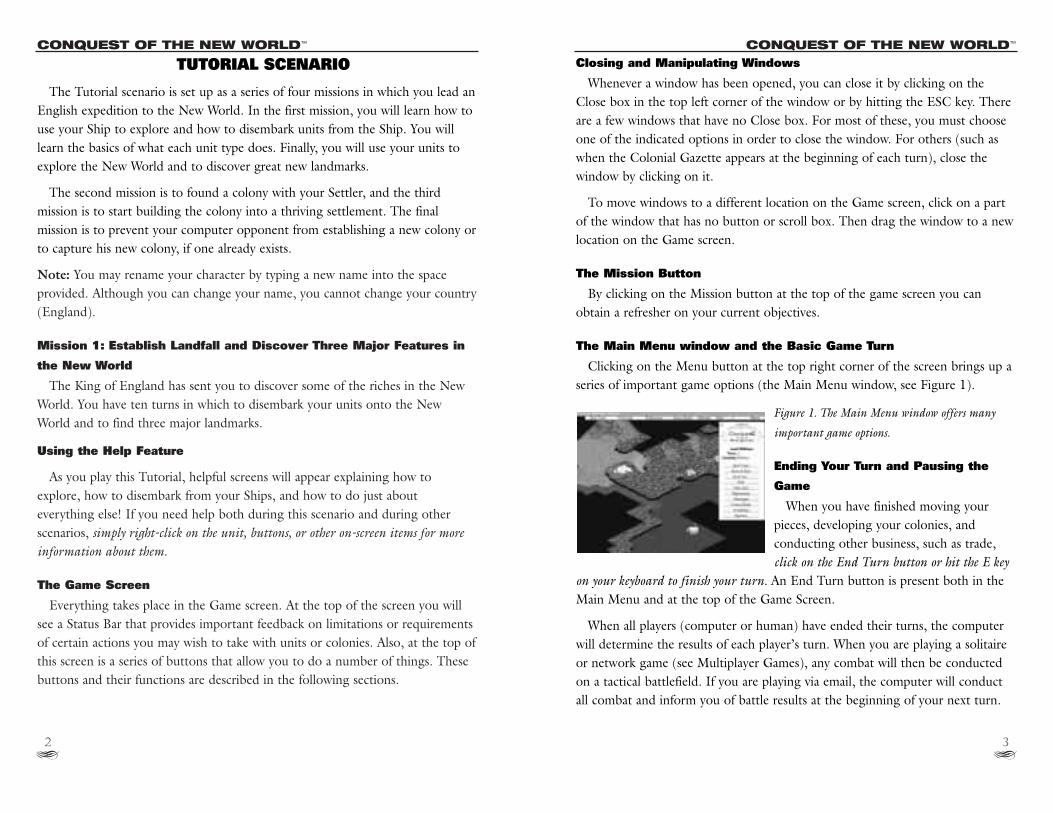
Clicking on the Menu button at the top right corner of the screen brings up a
series of important game options (the Main Menu window, see Figure 1).
Figure 1. The Main Menu window offers many
important game options.
Ending Your Turn and Pausing the
Game
When you have finished moving your
pieces, developing your colonies, and
conducting other business, such as trade,
click on the End Turn button or hit the E keyon your keyboard to finish your turn. An End Turn button is present both in the
Main Menu and at the top of the Game Screen.
When all players (computer or human) have ended their turns, the computer
will determine the results of each player’s turn. When you are playing a solitaire
or network game (see Multiplayer Games), any combat will then be conducted
on a tactical battlefield. If you are playing via email, the computer will conduct
all combat and inform you of battle results at the beginning of your next turn.
TUTORIAL SCENARIO
The Tutorial scenario is set up as a series of four missions in which you lead an
English expedition to the New World. In the first mission, you will learn how to
use your Ship to explore and how to disembark units from the Ship. You will
learn the basics of what each unit type does. Finally, you will use your units to
explore the New World and to discover great new landmarks.
The second mission is to found a colony with your Settler, and the third
mission is to start building the colony into a thriving settlement. The final
mission is to prevent your computer opponent from establishing a new colony or
to capture his new colony, if one already exists.
Note: You may rename your character by typing a new name into the space
provided. Although you can change your name, you cannot change your country
(England).
Mission 1: Establish Landfall and Discover Three Major Features in
the New World
The King of England has sent you to discover some of the riches in the New
World. You have ten turns in which to disembark your units onto the New
World and to find three major landmarks.
Using the Help Feature
As you play this Tutorial, helpful screens will appear explaining how to
explore, how to disembark from your Ships, and how to do just about
everything else! If you need help both during this scenario and during other
scenarios, simply right-click on the unit, buttons, or other on-screen items for moreinformation about them.
The Game Screen
Everything takes place in the Game screen. At the top of the screen you will
see a Status Bar that provides important feedback on limitations or requirements
of certain actions you may wish to take with units or colonies. Also, at the top of
this screen is a series of buttons that allow you to do a number of things. These
buttons and their functions are described in the following sections.
a3
a2
CONQUEST OF THE NEW WORLD™ CONQUEST OF THE NEW WORLD™
Unit List and Manipulating Units
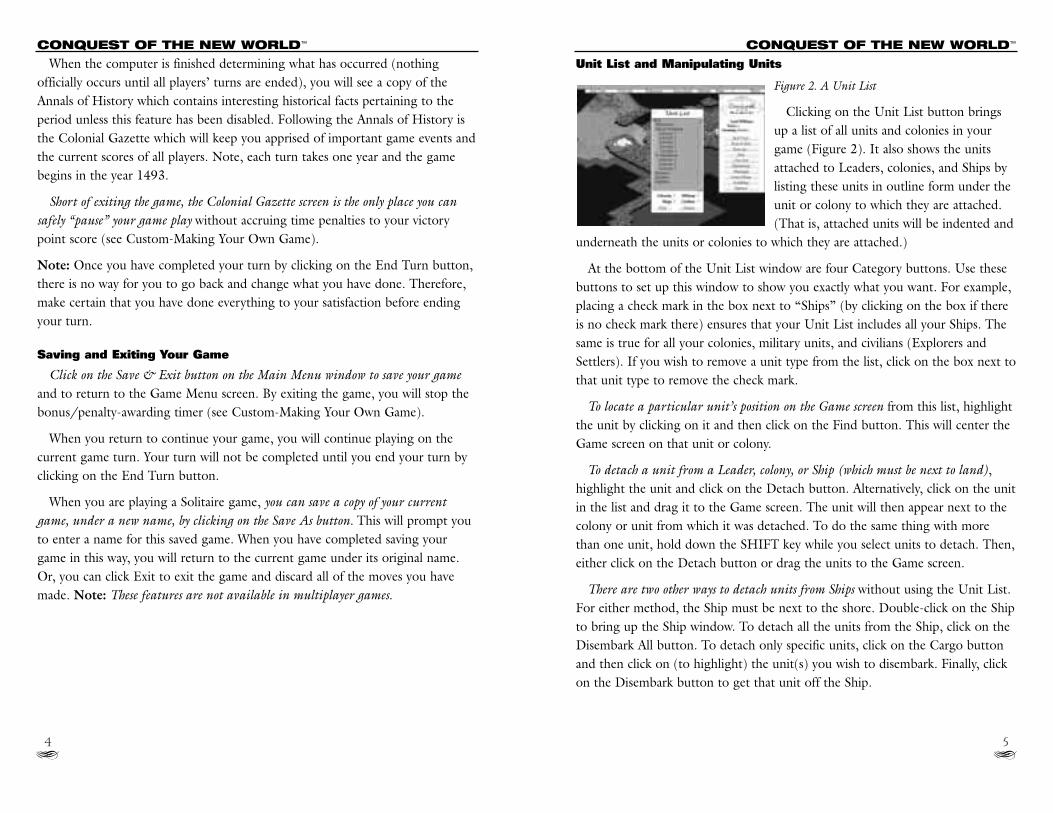
Figure 2. A Unit List
Clicking on the Unit List button brings
up a list of all units and colonies in your
game (Figure 2). It also shows the units
attached to Leaders, colonies, and Ships by
listing these units in outline form under the
unit or colony to which they are attached.
(That is, attached units will be indented and
underneath the units or colonies to which they are attached.)
At the bottom of the Unit List window are four Category buttons. Use these
buttons to set up this window to show you exactly what you want. For example,
placing a check mark in the box next to “Ships” (by clicking on the box if there
is no check mark there) ensures that your Unit List includes all your Ships. The
same is true for all your colonies, military units, and civilians (Explorers and
Settlers). If you wish to remove a unit type from the list, click on the box next to
that unit type to remove the check mark.
To locate a particular unit’s position on the Game screen from this list, highlight
the unit by clicking on it and then click on the Find button. This will center the
Game screen on that unit or colony.
To detach a unit from a Leader, colony, or Ship (which must be next to land),
highlight the unit and click on the Detach button. Alternatively, click on the unit
in the list and drag it to the Game screen. The unit will then appear next to the
colony or unit from which it was detached. To do the same thing with more
than one unit, hold down the SHIFT key while you select units to detach. Then,
either click on the Detach button or drag the units to the Game screen.
There are two other ways to detach units from Ships without using the Unit List.
For either method, the Ship must be next to the shore. Double-click on the Ship
to bring up the Ship window. To detach all the units from the Ship, click on the
Disembark All button. To detach only specific units, click on the Cargo button
and then click on (to highlight) the unit(s) you wish to disembark. Finally, click
on the Disembark button to get that unit off the Ship.
When the computer is finished determining what has occurred (nothing
officially occurs until all players’ turns are ended), you will see a copy of the
Annals of History which contains interesting historical facts pertaining to the
period unless this feature has been disabled. Following the Annals of History is
the Colonial Gazette which will keep you apprised of important game events and
the current scores of all players. Note, each turn takes one year and the game
begins in the year 1493.
Short of exiting the game, the Colonial Gazette screen is the only place you cansafely “pause” your game play without accruing time penalties to your victory
point score (see Custom-Making Your Own Game).
Note: Once you have completed your turn by clicking on the End Turn button,
there is no way for you to go back and change what you have done. Therefore,
make certain that you have done everything to your satisfaction before ending
your turn.
Saving and Exiting Your Game
Click on the Save & Exit button on the Main Menu window to save your gameand to return to the Game Menu screen. By exiting the game, you will stop the
bonus/penalty-awarding timer (see Custom-Making Your Own Game).
When you return to continue your game, you will continue playing on the
current game turn. Your turn will not be completed until you end your turn by
clicking on the End Turn button.
When you are playing a Solitaire game, you can save a copy of your currentgame, under a new name, by clicking on the Save As button. This will prompt you
to enter a name for this saved game. When you have completed saving your
game in this way, you will return to the current game under its original name.
Or, you can click Exit to exit the game and discard all of the moves you have
made. Note: These features are not available in multiplayer games.
a5
a4
CONQUEST OF THE NEW WORLD™ CONQUEST OF THE NEW WORLD™
orient yourself and can give you a “big picture” sense of the world. Colonies and
native settlements appear as clumps of red dots on this Auto Map.
The white box in the center of the Auto Map shows the area that is currently
visible on the Game screen. This area will grow and shrink (as does the Game
screen) when you Zoom In or Zoom Out (see Zooming In and Zooming Out).
You may use the Auto Map feature to jump to other areas of the New World.
Click on any point in the Auto Map window to center the Game screen on that
location. You may also scroll around both the Game screen and the Auto Map
by clicking and dragging your mouse on the Auto Map.
Options
This button takes you to the Options window where you can adjust the
sound, animations and the maximum level for zooming in. You may also select
to skip the Colonial Gazette, set up Network play, and “Edit” your player by
turning its control over to the computer or by assuming control over a computer
player. Note: For users with 8 megabytes of RAM: turning off final zoom can
improve your machine’s performance significantly.
Status Bar and Timer
The Status Bar runs along the top of the Game screen
Often, as you try to move units and found and develop colonies, this bar will
provide you with important information. For example, it may tell you that you
can’t build a certain structure because you are short of vital building supplies.
Pay close attention to this Status Bar as you play the game.
If you are playing with the Play Time Bonus (see the Custom Game Setup
Screen), you will see a changing number on the right side of the Status Bar. This
number starts out black at the beginning of each of your turns and decreases in
value as time passes. If you complete your turn while this number is still black
(positive), you will earn the indicated number of victory points as a bonus for
quickly finishing the turn. If the number is red (negative) by the time your turn
is complete, that many victory points will be deducted from your score.
Zooming In and Zooming Out
The + and - buttons on the top of the Game screen allow you to zoom your
view of the world in and out so that you can see things at a detail level you
You may use the Unit List to attach units to Leaders, colonies, or Ships. Select
such units by clicking on their name in the list and then drag them to their
target (in the list). This only works if the unit and its target are in the same
location in the New World. You may also attach units to Leaders, colonies, or
Ships that are by the shore using the Game screen. Click on the units and drag
them to the Leader, Colony Center (see the Founding A Colony section in the
Colonies and Trade chapter), or Ship. If they can walk far enough on this turn
to get to their target, they will attach to the target. Otherwise, you may need to
wait until a later turn to attach them.
Diplomacy
The Diplomacy button takes you to the Diplomacy window from which you
can send emissaries to other players, pay your taxes, and alter your relationships
with other players and your Mother Country. Your taxes are set to “automated”
so they will be paid automatically from your colonies’ Gold and commodities.
See the Diplomacy chapter for more details on the use of diplomacy in Conquestof the New World.
Messages
Clicking on the Messages button will list the significant events (Figure 9), if
any, that transpired at the end of the preceding game turn.
Close this window by clicking on its center.
Note: a Messages Window will automatically appear at the beginning of a game
turn when significant events have transpired on the preceding turn.
Game Scores
Clicking on the Game Scores button brings up information on how many
victory points you have accrued to date. By clicking on the Current Standings
button you will get information on how your opponents are doing as well. While
it does not matter for this scenario, in other games the victor is determined by
who reaches the preset winning score first or who, by the time the preset
number of game turns have transpired, has the highest number of victory points.
Auto Map
Clicking on the Auto Map button brings up a small “zoomed out” picture of
the world in the bottom left of your Game screen. This picture can help you
a7
a6
CONQUEST OF THE NEW WORLD™ CONQUEST OF THE NEW WORLD™
For more efficient exploration, hold down the CTRL key while units move. If
you click on the Game screen with the CTRL key depressed, the moving unit
will start moving towards that spot. This is a very fast and efficient way to
explore unknown territory (especially when you are trying to follow a new
landmark such as a river or mountain range).
If you wish, you may press the Explore button on the Explorer’s window
(Figure 15). The unit will automatically explore local areas for you. Note: The
SHIFT key will speed up this movement as well. If you have chosen the Explore
feature, the button will read “Halt” instead. Click on the Halt button to stop
exploring in this way.
All units have a Movement Allotment that is represented by a red bar (Moves
Remaining) on the unit’s window. As the unit expends movement points, the red
bar will decrease in length and eventually disappear when the unit has moved all
it may during the current game turn.
Click on the Persistent box in a unit’s window to place a check mark there.
When this Persistent box is checked, units that can Explore will do so
automatically at the beginning of every turn. For all units, clicking on this box
will allow the unit to move to a desired destination over the course of several
turns. If you change your mind and wish to control a unit’s movement, click on
this box again to remove the check mark
You may explore the coastline with your Ship in the same way. Either click onthe Ship and drag it to where you wish it to go or click on the Explore button.
Other units (Leaders, Infantry, Cavalry, Artillery, and Settlers) may only bemoved by clicking and dragging. They all move considerably less distance per turn
than Explorers do, but their primary functions are different as well.
To cycle to the next unattached unit with a remaining movement allotment, clickon the Next button at the top of the Game screen. When all units have expended all
their movement points, this button will be grayed out. Note: Units attached to
Leaders or Ships automatically travel with those units. Units attached to colonies
stay within the colony until you detach them (see the Attaching, Detaching, and
Reorganizing section in the Units chapter).
As your units explore the New World, they will uncover terrain of all types.
Among the things they will discover are rivers, mountains, mountain ranges, and
prefer. Be careful not to zoom out too much when you’re trying to move
around, however, as some items will disappear from view!
To zoom in to the closest view or to zoom out to the farthest view, hold
down the SHIFT key while clicking on the + or - buttons.
You may also use the + and - keys on your keyboard to zoom in and out of
your Game screen.
The Next Button
When you wish to move your units, you may cycle to your next unattached
unit (see Units chapter) by clicking on the Next button at the top of the Game
screen. When all your unattached units have used up their movement allotments,
this button will be grayed out.
You may cycle through selected unit types by using the F1 through F4 buttons
on your keyboard:
F1 key: Next Colony F2 key: Next Leader
F3 key: Next ship F4 key: Next Explorer
Note: The Next button will not take you to each of your colonies. To cycle
through your colonies in order to manage them, use the F1 key.
Explorers, Exploration, Basic Movement, and Discovering Major
Landmarks
Your first mission is to establish landfall and start exploring the New World.
To disembark units from your Ship, click on the Ship. Then either click on
Disembark All to move everyone off the Ship at once, or click on the Cargo
button, highlight the unit you wish to leave the Ship, and click on the
Disembark button.
Your Explorers can move farther and more easily over all terrain types than any
other unit. Select an Explorer by clicking on it and direct it where to go bydragging it to another spot on the map. It will do its best to get there in the most
efficient way possible. Note: Units cannot cross lakes or walk on ocean squares.
You may make any unit travel more quickly by holding down the SHIFT key whilethe unit moves. You may also change your destination by clicking on the unit
(even while moving) and dragging it elsewhere.
a9
a8
CONQUEST OF THE NEW WORLD™ CONQUEST OF THE NEW WORLD™
Founding a Good Colony
Colonies must find land suitable for farming as well as for the production of
Wood, Metals, Gold and more for the construction of buildings and the
recruitment of soldiers and other units. A balanced colony site will include
grasslands near rivers (for the most productive farmland), access to the ocean
(for building a Dock and establishing trade with the Mother Country), forests or
jungles (for Mills and Wood), and mountains (for Gold and Metal mining).
Proximity to a river will further enhance the productivity of Mines and Mills. In
addition, much of the land surrounding the colony’s center should be flat since
nothing can be built on hills or mountains.
It may be difficult to find the most ideal location. To determine whether or
not a colony will do well somewhere, place the mouse cursor in a central
location of some apparently suitable land. Press the Z key and see that varioussquares are highlighted. For your first colony, make sure that one of the squares is anocean square or a river square with access to the ocean (or you won’t be able to
build a Dock and conduct vital trade with your Mother Country). Try to build aDock on an ocean square so that you can build Ships; Docks built on lakes and
rivers act as trading posts and do not build Ships. Furthermore, Docks on lakes
or rivers without access to the ocean cannot be used to conduct trade with your
Mother Country. Make sure that some of your land is forested so that you can buildgood Mills. Finally, try to build by a river with neighboring grasslands. These
grasslands will become your Farms. In the best of all possible worlds you will
also have a small mountainous area adjacent to your colony’s territory. The lands
near (or flat areas on) mountains are the richest sources of Gold and Metals.
If the highlighted areas seem suitable, name your colony (or accept the default
name) and click on the OK button. If you change your mind about this colony,
and if you have not clicked on the End Turn button yet, you can double-click on
the Colony Center and select Undo Found to get your Settler back.
Getting Your New Colony Started
When you have founded a colony, double-click on the Colony Center. This will
bring up your Colony window. From this screen you can do a number of things.
First, you can see how much you have of the various commodities, including Gold,
Metals, Wood, Goods, and Crops. You can also see how much of any of these you
are expecting to receive (via trade or internal production) by the next turn.
great regions. When you discover one of these, you will be asked to name it.
Name your discovery in the window that appears. If you are the first to discover
this landmark, it will be named according to your dictates at the beginning of
the next game turn. You may also find a Special Discovery, like a Diamond
Deposit or a Gold Vein. These give you special bonuses, as you’ll see later.
You will gain victory points for discovering major landmarks. Furthermore, if
you have discovered the longest river, highest mountain, etc., at the end of the
game you will receive bonus victory points for this discovery. If, however,
someone else has found such landmarks at the end of the game, they will earn
those bonuses! To see what bonuses you have earned, click on the Menu button
and select Game Scores.
When you have discovered three major landmarks, your first mission in the
Tutorial scenario is complete. Note, you must discover three landmarks by the
end of the tenth turn or the King will have you beheaded! Even before that,
however, he will become extremely impatient with you. Make an extra effort to
look for mountains and rivers. By moving along any mountain ranges or rivers
you come upon, you will quickly make important discoveries.
Mission 2: Found a Colony
When you have completed your first mission, you will get a second edict from
England. This is to take the new Ship that you’ve been sent and bring it to land.
Place a Settler on a suitable location in the New World (with lots of flat land and
other goodies) and found a colony. You must complete this mission before 20
turns total have elapsed.
Settler Units
Settler units look like little pilgrim women. They are the slowest moving pieces
in the game and have no combat ability, but they carry with them all that is
necessary to establish a new colony. Since Settlers move so slowly, it is a good
idea to leave them on the faster- moving Ship until they are near a good colony
site. Then disembark them, move to a new site, and found a colony by clicking onthe Found button. Note: The Found button will be grayed out if you cannot
establish a colony at the site you have chosen. Move your Settler around until
the button is no longer grayed out.
a11
a10
CONQUEST OF THE NEW WORLD™ CONQUEST OF THE NEW WORLD™
ocean access cannot be used for trade with your Mother Country.
Eventually you will want to build a Fort. Make sure you have a 2x2 square
upon which you can build a future Fort.
Note: The buildings listed above are those you should aim to include one or
more of in your colony at an early stage in its development; this list is not meant
to convey a rigid plan for building up your colony. Minimally, you will needFarms, Mills, and Housing at the very beginning. Before too long, you should
also build Metal Mines to obtain the necessary metals for upgrading the Colony
Center and other buildings in your settlement. Beyond that, how many and what
type of buildings you choose to construct will depend largely on your own
strategy for playing the game.
The Colony Center and all buildings start out as Level 1 structures. These are
the least productive buildings. When you have enough resources to upgrade yourColony Center, the Upgrade button on the Colony window will brighten. If you
check this box, on the next game turn your colony will have increased in size (by
approximately one square around the perimeter) and you will be able to upgrade
any buildings currently in the colony.
Upgrade buildings by double-clicking on the building and clicking in theUpgrade box that appears. You can only upgrade structures if you have the
necessary materials on hand and if the Colony Center is at a higher level than the
building’s current level. By passing your cursor over the Upgrade box, the Status
Bar will tell you what is required to upgrade a building and by how much you
are short in relevant resources.
If you must rebuild a section of your colony, you can double-click on a buildingand then click on the Demolish button to remove the building from the colony. This
allows you to restructure your colony to best suit your needs as time goes by.
Note: The building won’t be demolished until the beginning of your next turn,
so you can’t build anything new at that site until then. On the following turn
(when your building is demolished), you will get back a small portion of the
materials that were used in its construction.
If you haven’t ended the turn yet and you change your mind about building a
structure, upgrading a building, or demolishing one, simply double-click on the
building and “undo” your instructions.
To build up your colony, click on the Build Building button. This brings up a list
of buildings you can construct. If you do not have the supplies to build a
particular structure, that building’s button will be grayed out. By passing your
cursor over any button (even the grayed-out ones), you can see the materials
required to build that building in the Status Bar.
To choose a building, click on its button. Your cursor will turn into the building
type you have selected. All available land (and water for Docks) for building will
be highlighted around your Colony Center. By passing the building cursor over
the highlighted colony areas, you can obtain information on the building’s
productivity if placed in a particular location. The Status Bar will also tell you if
you can’t build that structure where you’re trying to place it and why you can’t
do this. To place a building on a site, simply click with your building cursor on asuitable location.
First, find some suitable farming land (look for the highest productivity
modifier you can). Place one or two Farms on the land.
Then click on the Mill button and find the land that yields the highestproductivity modifier for producing Wood. Build several Mills.
Click on the Gold Mine button and try to find a site where the productivitymodifier is greater than -100%. Otherwise the Status Bar will inform you that
building at that site will be useless because the productivity modifier is so low
that the mine will yield no Gold. Build a Gold Mine if you can find a suitable
location.
Click on the Metal Mine button and try to find a site where the productivity willbe greater than 0%. If you can’t find such a site, choose any location you like.
Metal Mines normally yield at least one Metal per turn for a Level 1 building
regardless of where they are built! Build several Metal Mines.
Build some Housing and a Church (encourages immigration) on the least usefulland you have.
Finally, build a Dock on an ocean square, if possible (so you can build Ships).Otherwise, settle for building a Dock on a river with access to the ocean (so you
can still trade with your Mother Country). In the worst case, you can build a
Dock on an inland river or lake square. Docks built on such squares serve solely
as trading posts, a necessary building for any new colony, but Docks without
a13
a12
CONQUEST OF THE NEW WORLD™ CONQUEST OF THE NEW WORLD™

New: Clicking on this button brings up a window with option from which you
can choose to buy from or sell to your Mother Country, to trade with natives, to
give or demand tribute from other players, to barter with other players, or to
transfer supplies between your colonies. Select “buy from” or “sell to” the
Mother Country (if you are playing as a European). (This option is named
“Europe” if you declare independence from your country.) Trade with your
country involves buying or selling commodities. This is the primary way
European players can buy the Goods needed to build a Commerce building
(which will produce Goods) and to make later upgrades. Selling resources to the
Mother Country is also a way to acquire the Gold you will need for upgrades,
recruiting Leaders, and making Settlers. Select “Trade with Natives” to trade
with native Indians (if there are any close by) for everything except Goods.
Select “Transfer to Colony” to send resources to other colonies. Finally, if you
have established contact with another player, you can choose to demand or give
tribute to that player or attempt to barter with that player or establish a Trade
Alliance (if relations are good enough).
Trades with the Mother Country or Europe require a Dock built on an ocean
or on a river with access to the ocean and take several turns to complete. Trades
within the New World require one or more turns to complete, depending on the
distance between colonies and known trade routes. Overland trade requires
significantly more time than ocean-borne trade. Note, you may make several
trades with your Mother Country every turn, but you may only make one trade
per turn with natives. Trades with Natives occur immediately.
Edit: Click on a trade in the scrolling list of trades to alter that particular trade.
Note: Trades with natives cannot be altered since they take place immediately.
Remove: Click on a trade in the scrolling list of trades. Then click on the
Remove button to retract that trade.
Crates: This button brings up the Crate list, if you’ve closed it.
Done: Click here to close the Trade list.
Besides the above options, you may also commission a Leader from your Colony
window if you have sufficient resources. See the Units chapter and Colonies and
Trade chapter for more information on recruiting Leaders and their
characteristics.
Finally, if you decide you’ve picked a rotten site for a colony and you have not yetended your turn (after which it will be too late), simply click on the Undo Foundbutton in your Colony window. This will return your Settler, and you can choose
a new colony site.
Finding Out More About the Colony and Trade
There are several more buttons in the Colony window that provide additional
useful information and options.
The Population Detail button brings up the Population Detail window. This
window shows the colony’s base (current) population, the number of units in
the colony, its total population, and maximum population (based on current
Housing). It also shows how much labor (Labor Demand) the current industries
in the colony require and how much Free Labor there is. Free Labor is positive if
not everyone in the colony is employed. It is negative when there is a labor
shortage. This window shows how the various population parameters are
expected to change by the next turn (in parentheses). It also indicates the
number of Crops needed to feed the current population and how any Churches
are contributing to the immigration rate. Note: You must have enough Crops
(from internal production, current supplies, or trade) to feed your colonists or
they will start emigrating.
The Commodity Detail button brings up the Commodity Detail window. This
window provides vital information on how many resources your colony is
producing and consuming per turn. Production is given as how many units of a
particular commodity your colony is producing out of how many it can produce
(based on its buildings). If the current production is less than the colony’s
capabilities, that indicates that the colony needs more labor (people) or raw
materials to maximize its production. This window also shows how many Crops
or other commodities your colony is consuming per turn. Finally, it shows how
many resources you are obtaining through trade as well as the total net
production (or consumption) of each commodity.
The Trade button allows your colony to conduct trade with the Mother Country,
other players, native players, and other colonies and to create Trade Alliances.
You can only establish trade with other players once you have encountered them
in the game (by discovering one of their colonies). The Trade button brings up
the Trade list and the Crate list. The Trade screen has a scrolling list of current
trades as well as the following options:
a15
a14
CONQUEST OF THE NEW WORLD™ CONQUEST OF THE NEW WORLD™

to get to the French since most units take forever to negotiate the intervening
hilly and mountainous terrain.
Disembark your units near the French, and click and drag them towards the
Colony Center or towards the French Settler (Figure 3). Select the Capture or
Raid button if you are attacking their colony or the Attack button if you are
attempting to destroy their Settler. When your turn ends, you will be engaged in
tactical combat with the enemy.
Figure 3. Attacking a colony.
Basic Combat
Each side’s units begin in their “reserves.”
The row of squares next to the reserves is
called the home row. When it is your turn,
click on the unit you wish to move and
move it to one of the highlighted squares.
When you are close enough to fire on the
enemy, click on the units you wish to conduct the attack and then click on the
target square occupied by enemy units. Your goal is to force your opponents to
retreat, to eliminate them, or to enter the square containing their flag.
Infantry units can only move forwards, backwards, or sideways by one square
per turn. Or, they may initiate an attack. Cavalry units can move two squares per
turn (not diagonally) or move up to one square and attack. Artillery units may
move one square per turn (although they must stay in the row closest to your
side) or they may fire on the enemy. Infantry units and Cavalry units can only
attack opponents in squares in front, behind, or next to them. Artillery units can
fire on any square in the column they occupy.
The more different types of units attacking at one time, the better their
chances of success. This is a combined arms bonus to your attack. To launch a
combined arms attack, click on each unit you wish to involve in the attack.
When you are done selecting all such units, click on the target enemy square.
Cavalry will launch better attacks if they have moved before they attack (a
charging bonus). However, they will not receive this bonus if they panicked and
retreated during the preceding turn.
Finally, if you do not wish to engage in the necessary hands-on work required
for building up a colony, you can click on the Auto Colony button. If you do
this, the computer will make all the necessary decisions on what to build,
demolish, and trade based on what it assesses your greatest needs to be. See the
Building list for details on what the Auto Colony feature has done for you
during the turn.
Mission 3: Upgrade Your Colony Center To Level 2
To upgrade your first Colony Center you must have 20 Wood and 5 Metals.
You can obtain these by building productive Mills and Metal Mines and
sufficient Housing to acquire the labor to run these industries. You may also
trade whatever resources you can produce to the Mother Country or natives for
Gold and then purchase the remaining resources required. In order to trade with
the Mother Country your settlement must have a Dock built on an ocean square
or on a river with access to the ocean!
See the above sections and the Colonies and Trade chapter for more
information on upgrading and developing your colony.
You must complete this third mission by the end of the 30th game turn.
Mission 4: Eliminate The French From the New World!
In the Tutorial scenario you are playing against a French player. For your last
mission, some natives have promised to locate the new French settlement for
you. You must build a Fort and recruit military units for combat. Then you must
prevent the French from establishing a new colony or eliminate their colony if
one is already established. You must complete this mission by the end of turn 40.
To build a Fort, when you have sufficient supplies, click on the Build Building
button in your Colony window. Select a Fort and place it in your colony. On
subsequent turns, double-click on the Fort and click next to Infantry, Cavalry, or
Artillery to build one of these units by the following turn. When you have built
enough units, use the Leaders you already have or commission new ones
(through the Colony window) and attach your military units to these Leaders
(see Attaching, Detaching, and Reorganizing section of the Units chapter).
Finally, embark Leaders and units on your Ships (either your old Ships or new
ones built by double-clicking on your Dock and selecting Construct Ship) and
set sail for the French colony or Settler. Sailing will probably be your fastest way
a17
a16
CONQUEST OF THE NEW WORLD™ CONQUEST OF THE NEW WORLD™
Mission Accomplished
If you successfully complete the Tutorial scenario, you will have learned how
to use the basic elements in the game. You are now ready to strike out on your
own.
CUSTOM MAKING YOUR OWN GAMEFrom the Game Menu screen you can elect to start a new solitaire game. In
the Scenario screen, choose Custom to create your own new game.
Choosing Custom will bring up the Custom Game Setup screen (Figure 4)
where you will be able to set various parameters for your new game and the
game’s world.
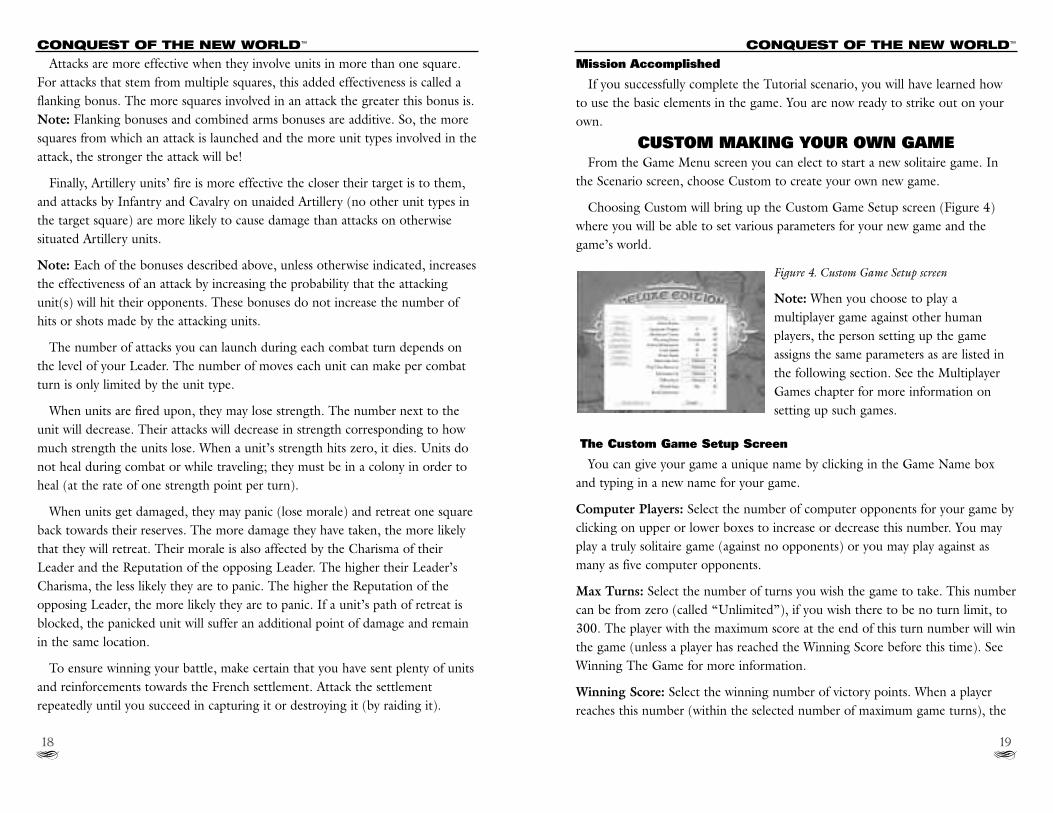
Figure 4. Custom Game Setup screen
Note: When you choose to play a
multiplayer game against other human
players, the person setting up the game
assigns the same parameters as are listed in
the following section. See the Multiplayer
Games chapter for more information on
setting up such games.
The Custom Game Setup Screen
You can give your game a unique name by clicking in the Game Name box
and typing in a new name for your game.
Computer Players: Select the number of computer opponents for your game by
clicking on upper or lower boxes to increase or decrease this number. You may
play a truly solitaire game (against no opponents) or you may play against as
many as five computer opponents.
Max Turns: Select the number of turns you wish the game to take. This number
can be from zero (called “Unlimited”), if you wish there to be no turn limit, to
300. The player with the maximum score at the end of this turn number will win
the game (unless a player has reached the Winning Score before this time). See
Winning The Game for more information.
Winning Score: Select the winning number of victory points. When a player
reaches this number (within the selected number of maximum game turns), the
Attacks are more effective when they involve units in more than one square.
For attacks that stem from multiple squares, this added effectiveness is called a
flanking bonus. The more squares involved in an attack the greater this bonus is.
Note: Flanking bonuses and combined arms bonuses are additive. So, the more
squares from which an attack is launched and the more unit types involved in the
attack, the stronger the attack will be!
Finally, Artillery units’ fire is more effective the closer their target is to them,
and attacks by Infantry and Cavalry on unaided Artillery (no other unit types in
the target square) are more likely to cause damage than attacks on otherwise
situated Artillery units.
Note: Each of the bonuses described above, unless otherwise indicated, increases
the effectiveness of an attack by increasing the probability that the attacking
unit(s) will hit their opponents. These bonuses do not increase the number of
hits or shots made by the attacking units.
The number of attacks you can launch during each combat turn depends on
the level of your Leader. The number of moves each unit can make per combat
turn is only limited by the unit type.
When units are fired upon, they may lose strength. The number next to the
unit will decrease. Their attacks will decrease in strength corresponding to how
much strength the units lose. When a unit’s strength hits zero, it dies. Units do
not heal during combat or while traveling; they must be in a colony in order to
heal (at the rate of one strength point per turn).
When units get damaged, they may panic (lose morale) and retreat one square
back towards their reserves. The more damage they have taken, the more likely
that they will retreat. Their morale is also affected by the Charisma of their
Leader and the Reputation of the opposing Leader. The higher their Leader’s
Charisma, the less likely they are to panic. The higher the Reputation of the
opposing Leader, the more likely they are to panic. If a unit’s path of retreat is
blocked, the panicked unit will suffer an additional point of damage and remain
in the same location.
To ensure winning your battle, make certain that you have sent plenty of units
and reinforcements towards the French settlement. Attack the settlement
repeatedly until you succeed in capturing it or destroying it (by raiding it).
a19
a18
CONQUEST OF THE NEW WORLD™ CONQUEST OF THE NEW WORLD™
availability of resources (terrain-based productivity modifiers) in computer
players’ colonies. In addition, native Indians are more likely to be hostile
towards you at higher difficulty levels. Friendly natives will trade with your
colonies and will not attack wandering units. Hostile natives will attack units that
are too close to their settlements.
When you have selected the features for your game and its world, click on the
Player Setup button to select features and specific victory conditions for your
character.
World Size: If you’d like to play in a crowded world, you can limit the number
of grids in the world. Normally, it’s 256 by 256 square, but you can cut it back
all the way to 80 by 80 if you want.
Early Diplomacy: Here’s an exciting twist. You can allow all players to do
Diplomacy even before they’re Independent. But be careful – you could make
your Mother Country angry!
Setting Up Your Player Characteristics
The Player Setup screen (Figure 5) allows you to name your player and assign
various victory conditions or special abilities.
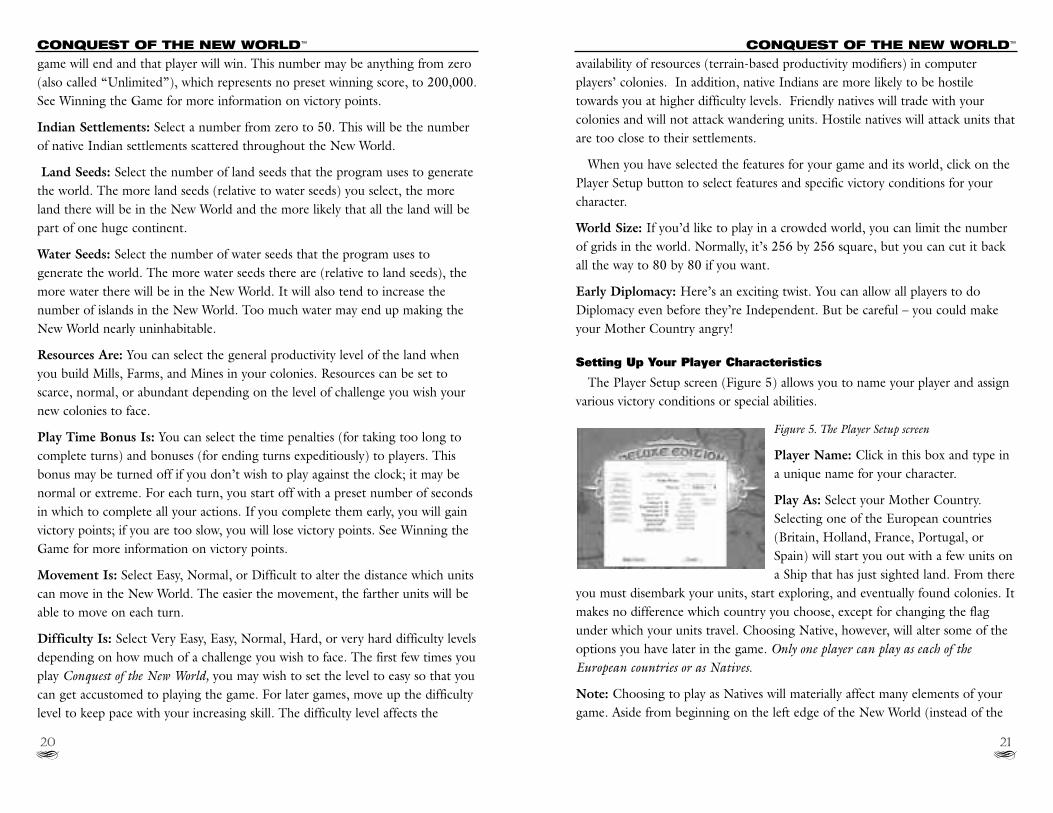
Figure 5. The Player Setup screen
Player Name: Click in this box and type in
a unique name for your character.
Play As: Select your Mother Country.
Selecting one of the European countries
(Britain, Holland, France, Portugal, or
Spain) will start you out with a few units on
a Ship that has just sighted land. From there
you must disembark your units, start exploring, and eventually found colonies. It
makes no difference which country you choose, except for changing the flag
under which your units travel. Choosing Native, however, will alter some of the
options you have later in the game. Only one player can play as each of theEuropean countries or as Natives.
Note: Choosing to play as Natives will materially affect many elements of your
game. Aside from beginning on the left edge of the New World (instead of the
game will end and that player will win. This number may be anything from zero
(also called “Unlimited”), which represents no preset winning score, to 200,000.
See Winning the Game for more information on victory points.
Indian Settlements: Select a number from zero to 50. This will be the number
of native Indian settlements scattered throughout the New World.
Land Seeds: Select the number of land seeds that the program uses to generate
the world. The more land seeds (relative to water seeds) you select, the more
land there will be in the New World and the more likely that all the land will be
part of one huge continent.
Water Seeds: Select the number of water seeds that the program uses to
generate the world. The more water seeds there are (relative to land seeds), the
more water there will be in the New World. It will also tend to increase the
number of islands in the New World. Too much water may end up making the
New World nearly uninhabitable.
Resources Are: You can select the general productivity level of the land when
you build Mills, Farms, and Mines in your colonies. Resources can be set to
scarce, normal, or abundant depending on the level of challenge you wish your
new colonies to face.
Play Time Bonus Is: You can select the time penalties (for taking too long to
complete turns) and bonuses (for ending turns expeditiously) to players. This
bonus may be turned off if you don’t wish to play against the clock; it may be
normal or extreme. For each turn, you start off with a preset number of seconds
in which to complete all your actions. If you complete them early, you will gain
victory points; if you are too slow, you will lose victory points. See Winning the
Game for more information on victory points.
Movement Is: Select Easy, Normal, or Difficult to alter the distance which units
can move in the New World. The easier the movement, the farther units will be
able to move on each turn.
Difficulty Is: Select Very Easy, Easy, Normal, Hard, or very hard difficulty levels
depending on how much of a challenge you wish to face. The first few times you
play Conquest of the New World, you may wish to set the level to easy so that you
can get accustomed to playing the game. For later games, move up the difficulty
level to keep pace with your increasing skill. The difficulty level affects the
a21
a20
CONQUEST OF THE NEW WORLD™ CONQUEST OF THE NEW WORLD™
Exploration: Adding victory point bonuses to this category increases the victory
points you get for being the first to explore new areas of the world (those that
were previously in the dark) and for being the first to discover important
landmarks. Note, you get no victory points for exploring oceans.
Combat: Adding victory point bonuses here will increase the victory points you
get for successfully battling hostile natives and other players. Points are awarded
for any damage done to enemy units in combat.
Diplomacy: Adding victory point bonuses to this category will increase the
victory points you get for conducting diplomacy (such as making or breaking
alliances).
X Percentage Points Left: This tells you how many of the 40 victory point
bonuses you have left to allocate to colony, exploration, combat, diplomacy, or
special abilities.
Clear All: Selecting this will remove all of the already allocated victory point
bonuses so you can start over again.
Special Abilities: You may purchase special abilities that can affect your game-
play and your victory points. Each ability costs ten victory point bonuses from
the 40 you have when you begin setting up your player characteristics.
Miser: This special ability gives you extra victory points for Gold you accumulate
in your colonies. The bonus you get for this Gold is a measured bonus;
ultimately, the victory points you get for having this ability will depend on how
much Gold you have at the end of the game.
Colonist: This ability awards victory points for attracting colonists to the New
World. The more colonists in your settlements, the more victory points earned.
This is a measured bonus, so the victory points you earn at the end of the game
due to this ability depend on how many colonists you have at that time.
Discoverer: This ability increases the points (in the form of a cumulative bonus)
you earn from naming and claiming discovered landmarks.
Pacifist: This ability awards points for colony development and upgrades,
penalizes you for initiating attacks, and decreases the cost of researching
defensive military tactics. Victory points earned as a result of choosing this ability
are awarded cumulatively.
right, as is true for European players), your colonies and diplomatic options will
differ substantially from those of European players. The costs of building and
upgrading structures vary somewhat from those for European players. Native
players can build larger cities and suffer no taxation, although they cannot trade
with Europe. Native players pay less for Settlers, Infantry, and Cavalry, and their
Explorers move farther per turn than those of European players. They cannot
build Artillery. Finally, Native players can trade with native Indian tribes that are
farther from their colonies, while European players’ trades with local tribes
require much closer juxtaposition of such tribes to colonies.
Victory Point Bonuses: In this section you specify your victory conditions. You
get 40 points to allocate as bonuses to founding and building up colonies (the
Colony button), exploring and discovering landmarks (the Exploration button),
winning battles (the Combat button), and playing a strong diplomatic game (the
Diplomacy button). You may also use these points to “buy” special abilities
(described below). Each point represents one percentage point. For example, if
you place a “5” next to exploration, the victory points you get for exploring and
discovering landmarks will be given a 5% bonus. So if you earn 100 points for
discovering something, you will actually get 105 points for doing this. Use the
upper and lower buttons next to each category to increase and decrease the
bonus you will be awarded in each area.
The victory points you earn as you play may be in the form of cumulative
bonuses or “measured” bonuses. Cumulative bonuses are added to your victorypoint score at the end of every game turn and cannot be taken away from your score.Measured bonuses depend on the current state of your colonies, resources, anddiscoveries, and, therefore, their contribution to your score can vary from turn toturn. When the game ends, the state of the game at that time determines the finalcontribution of any measured bonuses.
Colony: Adding victory point bonuses to this category will increase the victory
points from your colonies. When your colonies eventually reach a high level of
surplus production, you may use the Convert Surplus button in the Commodity
Detail window to convert excess production into victory points. The more
victory point bonuses you allocate towards this category, the more you may
benefit from your colonies’ surplus production during the game.
a23
a22
CONQUEST OF THE NEW WORLD™ CONQUEST OF THE NEW WORLD™
If, upon further inspection, you decide that the site where you founded your
colony is unsuitable, double-click on the Colony Center and then click on the
Undo Found button. Your Settler will then reappear to be moved to a better
location. You can only do this during the turn in which you found the colony.
After you end this turn, the Undo Found option will no longer be available, and
you can no longer change the site of the colony.
Later in the game, to found a new colony you must build a new Settler unit. You
can recruit a Settler from a Housing structure by double-clicking on some
Housing in a colony and then clicking on the Recruit Settlers button (if you
have an adequate number of resources to build a Settler), placing a check mark
next to it. On your next game turn a new Settler will appear. If you decide not
to build a Settler after all, you can click on the Recruit Settlers button again to
remove the check mark.
Building Up a New Colony
Buildings can only be placed on flat land (or water squares if Docks) near the
Colony Center. Available squares for placing a new building will be highlighted
when you click on the button to select a new building to construct. New
buildings must be placed entirely within the highlighted area.
To build a new building, double-click on the Colony Center. Then, click on
the Build Building button, followed by clicking on the button for the building
you wish to construct. This will turn your cursor into the building you chose.
You can then click on the location within the colony where you want to place
this building. The cursor will blink if you may not place the building at your
chosen location.
Note: If you do not have the materials necessary for raising a particular building,
that building’s button will be grayed out. The Status Bar will let you know what
you are lacking in the way of resources to build such structures.
Finally, pay close attention to the Status Bar as you try to build. This will provide
important feedback on the productivity of various structures if placed at a given
location. In particular, whenever you wish to place a new Farm, Mill, Mine or
Commerce building in your colony, pay attention to the Status Bar as you move
the building cursor over the highlighted areas in your colony. Always try to place
your buildings in areas with high productivity modifiers. The productivity
Cartography: This selection increases the movement allotment of all your land-
based units (i.e., they’ll be able to move farther every turn). Cartography has no
effect on your victory points.
Navigator: This special ability increases the movement allotment of your Ships,
but has no effect on your victory points.
Conqueror: This special ability allows your Forts to support more military units
than the standard for each Fort you build, allowing you to support one extra
unit per Fort level. This ability has no effect on your victory points. See the
Table of Buildings in the Colonies and Trade chapter for more information on
how many units Forts can support.
Craftsman: This ability increases the amount you earn for selling commodities
to your Mother Country, other players, and local natives. This skill has no effect
on your victory points.
Admiral: Selecting this special ability improves the skill of your Ships during
ship-to-ship combat, but has no effect on your victory points.
Missionary: This special ability improves your relations with native Indians over
time; it has no effect on your victory points.
When you have completed selecting your player characteristics, click on the
Begin Game button to start playing! If you change your mind, click on the
Cancel button.
COLONIES AND TRADE
Founding a Colony
In most scenarios, your first settler appears on turn 6. Move your Settler to the
exact location where you want your Colony Center to be built, then click the
Found Colony button to place it there. You can only build a Colony Center andother buildings on flat land, so be sure that you are founding your colony in such
a place. (The Found button will be grayed out if you cannot found a Colony
Center where your Settler is standing).
After selecting Found, a highlighted area will appear around the Settler; this
highlighted area is where you will be able to raise buildings. If the highlighted
areas seem suitable, name your colony (or accept the default name) and click on
the OK button.
a25
a24
CONQUEST OF THE NEW WORLD™ CONQUEST OF THE NEW WORLD™
construction will be placed back in your stockpiles. Once a turn has elapsed,
however, you can only remove a building by demolishing it.
In addition to demolition and upgrades, you can learn about the colony’s
buildings by double-clicking on them.
The Colony Center’s Options
Upgrade: If you have the necessary materials you can upgrade your Colony
Center to a higher level (maximum level is four; two for Native players). By
upgrading your Colony Center, you will be able to upgrade other buildings in
your colony. These buildings can only be at levels less than or equal to the level
of your Colony Center. The higher the level of a building, the more efficient or
productive it will be and the higher the level of units it can recruit if it has such a
function. Higher level units are faster or more capable than those at lower levels.
When you upgrade your Colony Center, you will also increase the size of your
colony by approximately one square around the perimeter. This will provide you
with new land for raising new buildings.
Monitor Commodities: The Colony window shows how many of each
commodity are in your colony’s reserves and how many of each you are
expecting to get by the next game turn, taking into account consumption,
production, and trade.
Build Building: Clicking on this button brings up a list of buildings that you
can construct in your colony. Buildings for which you do not have sufficient
materials will have their buttons grayed out. To build something, click on its
button and place the building (now your cursor) on a suitable area in your
colony. The cursor will blink when you have positioned the building over an
unsuitable area; it will be steady if you can place the building there. As you try
to place buildings, pay attention to the Status Bar (top left) for important
feedback. Once you have placed a building, the chosen site will be marked for
construction. The new Level 1 building will become functional on the following
game turn.
Population Detail: Clicking on this button brings up a window from which you
can determine important information pertaining to the colony’s population. This
information includes the colony’s current population, its maximum population
(based on available Housing), the demand for labor (from all of the industries in
modifiers you observe depend on the building you are trying to construct and
the immediate and local terrain. You will see different modifiers when you try to
place different buildings on the same square or when you try to place the same
type of building in different squares.
Importantly, your colonies will get productivity bonuses for specializing in yourmost common buildings. For example, the more Mills or Farms you build, the
more productive all your Mills or Farms will be. This increased productivity due
to specialization will be reflected in the production modifier of your most
common building type (accessed through the window you bring up by double-
clicking on a building in your colony).
Inspecting, Upgrading, and Demolishing Buildings and Recruiting
New Units
Double-clicking on any building in your colony brings up that building’s
window from which you can do several things.
Demolish: Except for the Colony Center, you can demolish all buildings by
double-clicking on them and then clicking on the box next to “Demolish.”
Until you have ended your game turn, you can change your mind about the
scheduled demolition by clicking on this box again. Demolishing buildings will
not only clear space, but will also return some of the raw materials used to build
that structure.
Upgrade: If you have the requisite materials, you can upgrade any structure in
your colony by double-clicking on it and then clicking on the Upgrade box.
Before your turn ends, you can click on this box again to change your mind.
Note: You cannot upgrade any building to a level higher than that of the Colony
Center. This structure must always be upgraded first. The maximum level to
which you can upgrade any structure is Level 4. The Upgrade box will be grayed
out if it is already at the same level as the Colony Center or if you have
insufficient resources. Place your cursor over the Upgrade box and look at the
Status Bar to determine what you still need in the way of resources to upgrade
this structure.
Halt Construction: If you have just placed a building in your colony, you may
double-click on it and then click on the Halt Construction button to stop
building it. The building will be removed, and the resources allocated to its
a27
a26
CONQUEST OF THE NEW WORLD™ CONQUEST OF THE NEW WORLD™

and will demolish, build, upgrade, trade, and recruit accordingly. You can undo
anything the computer does manually. Pay attention to the Building List after
you choose Auto Colony to see what the computer is doing with your colony.
Click twice on Auto Colony to make it “persistent.” It will then operate
automatically every turn without the need for you to click the button each time.
Building List: The building list provides a convenient summary of all buildings
in the colony, sorted by type and level. There will be an “X” to the right of any
building that is being demolished on this turn, and a small triangle to the right
of a building that is being upgraded.
Commission Leader: Clicking on this option will, if you have sufficient
resources, recruit a new military Leader for you. Higher-level Leaders can initiate
more attacks per turn during combat and can lead more military units. Each
colony can support a limited number of Leaders.
the colony), the Free Labor (negative if more people are needed to man
industries; positive if there aren’t enough jobs to go around), how many Crops
are consumed by the colony’s current population, and how much any Churches
are contributing to the immigration rate. Note: Industries will not be optimally
productive if they are short of labor. Also, if there is insufficient Housing or
food, people will leave the colony or starve to death. Finally, numbers in
parentheses indicate expected changes in colony population for the next turn.
Colony Contents: Clicking on this button brings up a list of units in the colony.
This list functions like the Unit List.
Commodity Detail: Clicking on this button brings up information (the
Producing column) on how many Wood, Metals, Gold, Goods, and Crops your
colony is currently producing per turn out of how many it could produce if all
industries were fully manned. Note: If you do not have enough people or
resources, your production will fall short of its maximum. The Using column in
this window shows how much of each of your resources are being consumed per
turn (either in production or to feed colonists). Net Trade indicates how much
you are exporting (negative numbers) or importing (positive numbers) over the
current turn. The Total column shows the net change to your reserves for this
turn for each of the listed commodities. Finally, clicking on the Convert Surplus
button allows you to convert a colony’s surplus production into victory points.
This option is useful for making the most of older, well-established colonies.
Trade: Clicking on this button will take you to the Trade window from which
you can choose to conduct trade with your Mother Country, other players,
natives, or other colonies of yours. You may also pay or demand tribute from
other players as well as check up on any shipments you have en route to or from
any of your colonies. See the Trade chapter for more details. Note, you may only
trade overseas if you have a Dock in the colony.
Undo Found: Clicking on this button during the same turn in which you’ve
founded a colony will undo the settlement, return your Settler to you, and leaves
you free to found a new colony at a different site with that Settler. This option is
only present on the turn during which you found a colony.
Auto Colony: Clicking on this button will turn over the building, recruiting,
and trading efforts of this colony to the computer for this turn only. The
computer will determine what it views as your colony’s most important needs
a29
a28
CONQUEST OF THE NEW WORLD™ CONQUEST OF THE NEW WORLD™
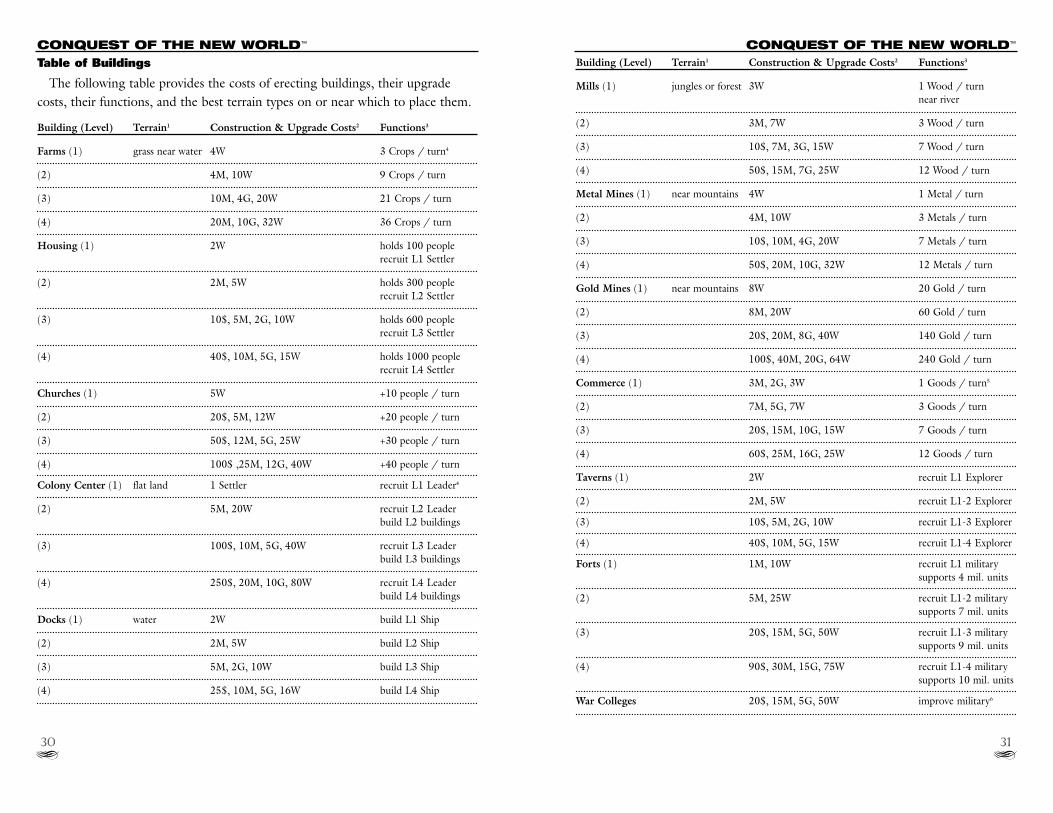
Building (Level) Terrain1 Construction & Upgrade Costs2 Functions3
Mills (1) jungles or forest 3W 1 Wood / turn
near river
(2) 3M, 7W 3 Wood / turn
(3) 10$, 7M, 3G, 15W 7 Wood / turn
(4) 50$, 15M, 7G, 25W 12 Wood / turn
Metal Mines (1) near mountains 4W 1 Metal / turn
(2) 4M, 10W 3 Metals / turn
(3) 10$, 10M, 4G, 20W 7 Metals / turn
(4) 50$, 20M, 10G, 32W 12 Metals / turn
Gold Mines (1) near mountains 8W 20 Gold / turn
(2) 8M, 20W 60 Gold / turn
(3) 20$, 20M, 8G, 40W 140 Gold / turn
(4) 100$, 40M, 20G, 64W 240 Gold / turn
Commerce (1) 3M, 2G, 3W 1 Goods / turn5
(2) 7M, 5G, 7W 3 Goods / turn
(3) 20$, 15M, 10G, 15W 7 Goods / turn
(4) 60$, 25M, 16G, 25W 12 Goods / turn
Taverns (1) 2W recruit L1 Explorer
(2) 2M, 5W recruit L1-2 Explorer
(3) 10$, 5M, 2G, 10W recruit L1-3 Explorer
(4) 40$, 10M, 5G, 15W recruit L1-4 Explorer
Forts (1) 1M, 10W recruit L1 military
supports 4 mil. units
(2) 5M, 25W recruit L1-2 military
supports 7 mil. units
(3) 20$, 15M, 5G, 50W recruit L1-3 military
supports 9 mil. units
(4) 90$, 30M, 15G, 75W recruit L1-4 military
supports 10 mil. units
War Colleges 20$, 15M, 5G, 50W improve military6
Table of Buildings
The following table provides the costs of erecting buildings, their upgrade
costs, their functions, and the best terrain types on or near which to place them.
Building (Level) Terrain1 Construction & Upgrade Costs2 Functions3
Farms (1) grass near water 4W 3 Crops / turn4
(2) 4M, 10W 9 Crops / turn
(3) 10M, 4G, 20W 21 Crops / turn
(4) 20M, 10G, 32W 36 Crops / turn
Housing (1) 2W holds 100 people
recruit L1 Settler
(2) 2M, 5W holds 300 people
recruit L2 Settler
(3) 10$, 5M, 2G, 10W holds 600 people
recruit L3 Settler
(4) 40$, 10M, 5G, 15W holds 1000 people
recruit L4 Settler
Churches (1) 5W +10 people / turn
(2) 20$, 5M, 12W +20 people / turn
(3) 50$, 12M, 5G, 25W +30 people / turn
(4) 100$ ,25M, 12G, 40W +40 people / turn
Colony Center (1) flat land 1 Settler recruit L1 Leader4
(2) 5M, 20W recruit L2 Leader
build L2 buildings
(3) 100$, 10M, 5G, 40W recruit L3 Leader
build L3 buildings
(4) 250$, 20M, 10G, 80W recruit L4 Leader
build L4 buildings
Docks (1) water 2W build L1 Ship
(2) 2M, 5W build L2 Ship
(3) 5M, 2G, 10W build L3 Ship
(4) 25$, 10M, 5G, 16W build L4 Ship
a31
a30
CONQUEST OF THE NEW WORLD™ CONQUEST OF THE NEW WORLD™
UNITS
Taking a Closer Look At Units
You can examine your units by double-clicking on them. This brings up a
small Unit window replete with options for movement or other actions
depending on the unit type.
Movement
Units can be moved by clicking on them (to select them) and then dragging themwhere you wish them to go. They will travel as best they can and will only stop
upon running out of their movement allotment for the turn or because they
reach a terrain type that they cannot cross. Note, Ships may only travel on ocean
squares (not up rivers or on lakes), and land units cannot travel on oceans or
lakes, although they may cross rivers.
You can quickly go through all moveable units by clicking on the Next button atthe top of the Game screen. This will take you to the next unit with a remaining
movement allotment. When the unit is done moving, click on Next again to go
to the next unit. When all unattached units are done moving, the Next button is
grayed out.
You may cycle selectively through certain unit types or your colonies by using
the F1 through F4 keys on your keyboard:
F1: Next Colony F2: Next Leader
F3: Next Ship F4: Next Explorer
For unit types with Explore buttons, clicking on this button (or pressing the X
key on your keyboard) will cause the selected unit to explore on its own. You
can stop its progress at any time by clicking on the Halt button that appears to
replace the Explore button or by clicking on the unit in the Game screen.
Note: Military units and Settlers have no Explore buttons. This is because these
units move very slowly compared to Explorers and also because these units have
other primary functions. Military units are meant to be used in offensive and
defensive ways and come into their own on the battlefield. Settlers carry all that
is required to found a new colony and serve their purpose best when transported
to a future colony site, allowing them to get on with their raison d’être.
1 - Terrain types are listed if they enhance the productivity of a building type or
are necessary to raise the indicated building type. If no terrain type is listed,
terrain has no effect on the structure.
2 - Abbreviations used in these columns:
W = Wood M = Metal
$ = Gold G = Goods
3 - Terrain-based productivity modifiers can increase or decrease the level of
production of Farms, Mills, or Mines from the normal value shown. Labor
shortages will decrease the actual production of Farms, Mills, and Mines, while
specialization in any of these areas will boost their productivity. The abbreviation
L stands for level. Special Discoveries can increase the modifiers for certain
buildings.
4 - Farms also house 40 people per level. Colony Centers provide as much living
space as equivalent level Housing structures.
5 - Each Commerce building consumes 1 Metal, 1 Wood, and 1 Crop per level
in order to produce the amount of Goods indicated in the table.
6 - To improve in each military area requires increasingly larger quantities of
Gold. Players with the Pacifist ability get a 50% discount to their Defensive
Tactics research costs.
a33
a32
CONQUEST OF THE NEW WORLD™ CONQUEST OF THE NEW WORLD™
cannot board Ships that are not next to the shore, and units cannot attach
themselves to Leaders or Ships that are already at maximum capacity. Leaders
can only contain military units and Settlers.
On all unit lists (reached by double-clicking on Leaders and selecting Units
Attached, double-clicking on Ships and selecting Cargo, by selecting the Unit
List button from the Main Menu window, or by selecting the Colony Contents
button) attached units appear indented and underneath the unit to which they
are attached.
Units that are attached do not move on their own. If they are in a colony, on a
Ship, or with a Leader, they will not appear when you click on the Next button
to find the next unit with an available movement allotment. If they are attached
to a Leader or Ship, they move with that unit. (They will disembark a Ship if
they are attached to a Leader who disembarks.) Until you detach them from
where they are, they will not move independently.
Units can be detached from Leaders, Colonies, or Ships in several
ways:
Leaders: Detach units by double-clicking on the Leader and then clicking on
the Units Attached button. Select the unit you wish to detach and click on the
Detach button. Holding down the SHIFT key while selecting units to detach
and then clicking on the Detach button or dragging the units to the Game
screen will detach all selected units. To detach all the units traveling with the
Leader, double-click on the Leader and then click on the Detach All button.
You may also detach units from Leaders by using the Unit List screen. Click
on the Menu button at the top of the screen and select Unit List. Find the units
you wish to detach from the Leader. You can selectively search for military units
or other units by clicking on the box next to the unit types you are interested in
seeing (placing a check mark in that box). Or, deselect the units you are not
interested in by clicking on the box to remove the check mark.
Click on the unit(s) you wish to detach from the Leader (holding down the
SHIFT key if you wish to detach more than one) and then either click on the
Detach button or drag the selected units onto the map.
Ships: Detaching units from Ships is called “disembarking” and works in the
same way as detaching units from Leaders except that Ships must be next to the
Holding down the SHIFT key as a unit moves will speed up its movement; it
will also speed up the movements of all other units on the map.
You can change a unit’s destination by clicking on that unit and dragging it to
a new target location. You can also change a unit’s destination while it is moving
by clicking on the map (at a new target location) while holding down the CTRL
key.
All units have a Moves Remaining box (Figure 51). This box is filled in with
red at the beginning of a turn. As you move a unit, the red bar will get shorter
and will finally disappear when the unit’s movement allotment for this turn is
expended.
Units will always try to find the best way to get to their destination. Over
explored terrain, units will try to avoid movement-slowing obstacles. When
heading toward unexplored terrain, units will generally use a straight path
approach.
For units with Explore buttons, clicking on the Persistent box in the unit’s
window to place a check mark there will cause the unit to explore automatically
at the beginning of each game turn. For all units, clicking on the Persistent box
will allow such units to move towards a chosen destination (that is too far to
reach in one turn) over the course of several game turns. If you change your
mind and decide to control the unit personally, simply double-click on the unit
and click on the Persistent box again to remove the check mark.
Finding a Unit on the Game Screen
To find a particular unit, click on the Menu button and then click on the Unit
List button. Select the unit you wish to find and then click on the Find button
to center the Game screen on that unit.
Attaching, Detaching, and Reorganizing
Units may be unattached or attached to Leaders, colonies, or Ships. Units that
are attached to something do not move independently; they must first be
unattached.
To attach units to a Leader, colony, or Ship, move them to it. That is, click on
the unit and drag it to the Leader, Colony Center, or Ship. If the unit can get to
this destination on this turn, it will get there and attach itself to its target.
Otherwise, you will have to try to attach the unit on a future turn. Note: Units
a35
a34
CONQUEST OF THE NEW WORLD™ CONQUEST OF THE NEW WORLD™
Recruited military units (Infantry, Artillery, and Cavalry) will always be at a
level less than or equal to that of the Fort where they are recruited. When you
choose to recruit a new military unit, then, you may specify the level of the
recruit (although the maximum level you can select will be the level of the
building where you are recruiting the unit).
Buildings can support only a limited number of units. You may not recruit
more of any type of unit than you can support based on the number and levels
of the buildings where such units are produced. For example, you cannot recruit
more Explorers than all your Taverns (taking into account their levels) indicate
they can support.
Note: Make sure that you build a few military units as soon as you can. You will
need them to defend your colonies and to eliminate your enemies.
shore for you to successfully disembark units. Double-click on the Ship to bring
up the Ship window. Select Disembark All if you wish all the units to detach
from the Ship.
Select Cargo to get a list of all units on the Ship. Then, select the unit(s) you
wish to detach or disembark (holding down the SHIFT key during this selection
if you wish to detach more than one unit) and then either drag the units to the
map or click on the Disembark button.
You may also disembark units from Ships from the Unit List in the same way
as you would detach units from Leaders. The only caveat is that the Ship must
be next to the shore.
Colonies: You can detach units from colonies by using the Colony Contents
button in the Colony Center window and detaching them as you would detach
units from Leaders.
Reorganizing units is only possible when all the units you are trying to
reorganize are in the same location. For example, you can reorganize units on
Ships, under Leaders, or in colonies which are close to one another.
To reorganize units, select the unit you wish to attach to another unit or
detach from its current unit. (You can select multiple units by holding the
SHIFT key down while clicking on the units you wish to move.) Click on this
unit and drag it to the unit or colony on the list to which you wish to reattach it.
You can do this from any of the unit lists that you can access, either by double-
clicking on Ships or Leaders and then selecting Units Attached or Cargo buttons
or by going to the Unit List from the Main Menu.
Recruiting New Units
Various buildings within your colony can be used to recruit new units. When
you choose this function (assuming you have enough materials on hand to
recruit the desired unit) the new unit will not appear until the following game
turn. Explorers will appear next to the Tavern that recruited them; Settlers
appear next to the Housing that produced them; Leaders appear next to the
Colony Center where they were commissioned; and Ships appear next to the
Dock that built them. Military units, however, remain housed in the Fort where
they were recruited until you detach them from this structure (see previous
section).
a37
a36
CONQUEST OF THE NEW WORLD™ CONQUEST OF THE NEW WORLD™
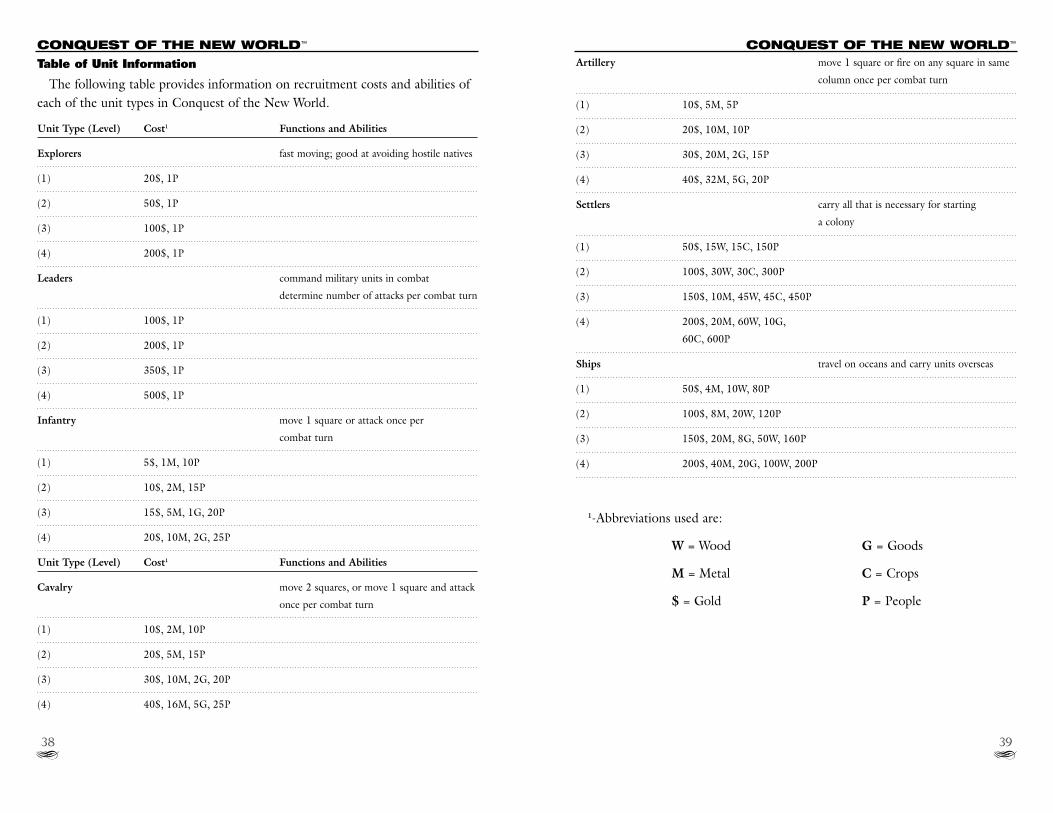
Artillery move 1 square or fire on any square in same
column once per combat turn
(1) 10$, 5M, 5P
(2) 20$, 10M, 10P
(3) 30$, 20M, 2G, 15P
(4) 40$, 32M, 5G, 20P
Settlers carry all that is necessary for starting
a colony
(1) 50$, 15W, 15C, 150P
(2) 100$, 30W, 30C, 300P
(3) 150$, 10M, 45W, 45C, 450P
(4) 200$, 20M, 60W, 10G,
60C, 600P
Ships travel on oceans and carry units overseas
(1) 50$, 4M, 10W, 80P
(2) 100$, 8M, 20W, 120P
(3) 150$, 20M, 8G, 50W, 160P
(4) 200$, 40M, 20G, 100W, 200P
1-Abbreviations used are:
W = Wood G = Goods
M = Metal C = Crops
$ = Gold P = People
Table of Unit Information
The following table provides information on recruitment costs and abilities of
each of the unit types in Conquest of the New World.
Unit Type (Level) Cost1 Functions and Abilities
Explorers fast moving; good at avoiding hostile natives
(1) 20$, 1P
(2) 50$, 1P
(3) 100$, 1P
(4) 200$, 1P
Leaders command military units in combat
determine number of attacks per combat turn
(1) 100$, 1P
(2) 200$, 1P
(3) 350$, 1P
(4) 500$, 1P
Infantry move 1 square or attack once per
combat turn
(1) 5$, 1M, 10P
(2) 10$, 2M, 15P
(3) 15$, 5M, 1G, 20P
(4) 20$, 10M, 2G, 25P
Unit Type (Level) Cost1 Functions and Abilities
Cavalry move 2 squares, or move 1 square and attack
once per combat turn
(1) 10$, 2M, 10P
(2) 20$, 5M, 15P
(3) 30$, 10M, 2G, 20P
(4) 40$, 16M, 5G, 25P
a39
a38
CONQUEST OF THE NEW WORLD™ CONQUEST OF THE NEW WORLD™
Squabbles With Hostile Natives
During exploration, your units will occasionally come too close to hostile
native settlements. (You can deliberately provoke an encounter by moving your
units close to hostile native colonies or by specifically targeting a native tribe.)
When this occurs, a window will appear giving you the option to attack or avoid
an unfriendly encounter.
Note: Explorers, Settlers, and lone Leaders cannot fight! If they get too close
to hostile natives and cannot avoid the resulting attack, they will simply be
eliminated. Click on the Avoid button to escape attack. If you keep trying to
move near such hostile natives, eventually the Avoid button will be grayed out
and you will be forced to attack, even if that means the attacking unit will be
automatically eliminated.
If the unit is a Leader with attached units, you may choose to attack hostile
natives instead of running away. In this event, click on the Attack button. Note,
if a unit outside of your field of vision encounters hostile natives, center the
Game screen on your unit by clicking on the Find button that appears in the
pop-up window.
To cancel an attack: Before you end the turn, double-click on the attacking
unit and click on the Cancel Attack button.
When you engage in combat with hostile natives, the native’s tribe strength
will determine the number and quality of units they bring to the battlefield. Also
the larger and stronger the tribe, the more likely they are to intercept your units
at a distance far from their home.
Defending Colonies
When you attack a colony or when your colonies are attacked, it’s helpful to
know how such a settlement can defend itself. First, to get an idea of how well
defended a colony is, double-click on a Fort in that colony. (You must have a
Fort to get this information.)
The number of militia units (which are always Level 2 Infantry or Artillery) for
a defending colony depends on the level of the colony. If militia units fall in
battle, the population of your colony will decrease.
For each Fort within a colony, additional Artillery units will appear to defend
the colony in case of attack. Also, any military units within the colony will assist
COMBAT
There are two basic types of combat in Conquest of the New World. Military
units can attack other units, natives, or colonies. Also, Ships can engage in
combat with one another. The following sections describe how combat is
initiated, conducted, and resolved.
Attacking Units or Settlements
Only military units (Infantry, Cavalry, Artillery, and Leaders) may initiate
attacks on land. Click on the unit and drag it to the unit, tribe, or colony you
wish to attack. If you are close enough to reach your target on this turn, you will
be given the option of destroying, raiding, or capturing your target, depending
on the target. Click on the corresponding buttons to attempt these actions.
If you are attacking a unit, your only option is to destroy the target. If you are
attacking a colony (Figure 59), you may attempt to capture or raid your target.
Colonies that are captured will sustain some damage. Note: Native players may
not capture European players’ colonies and European players may not capture
Native players’ colonies. If you attempt to capture a colony, you will only
capture it if you win the battle.
Raiding a colony does not require a victory on the battlefield to be considered
a success. Instead, a raider’s objective is to prolong the battle; the longer the
battle, the more damage is done during a raid. During every battle round after
the fourth, one building level will be destroyed. In addition, one half the value
of that building, (or its most recent upgrade cost) if it is a first-level structure,
will be acquired by the attacker as spoils of battle. Each combat round, starting
on the third round of battle, the attacker also receives 10% of the resources in
the colony’s stockpiles. Note, the 10% applies to the resources remaining in the
stockpiles after the last combat round. On each subsequent combat round, the
amount of new resources gained by the attacker will be less than on the previous
round. If the raid continues until the defender’s forces are eliminated or retreat,
the colony is destroyed. Retreated defending forces will appear near the former
colony’s site at the beginning of the next game turn. Forts are harder to destroy
than other buildings.
a41
a40
CONQUEST OF THE NEW WORLD™ CONQUEST OF THE NEW WORLD™
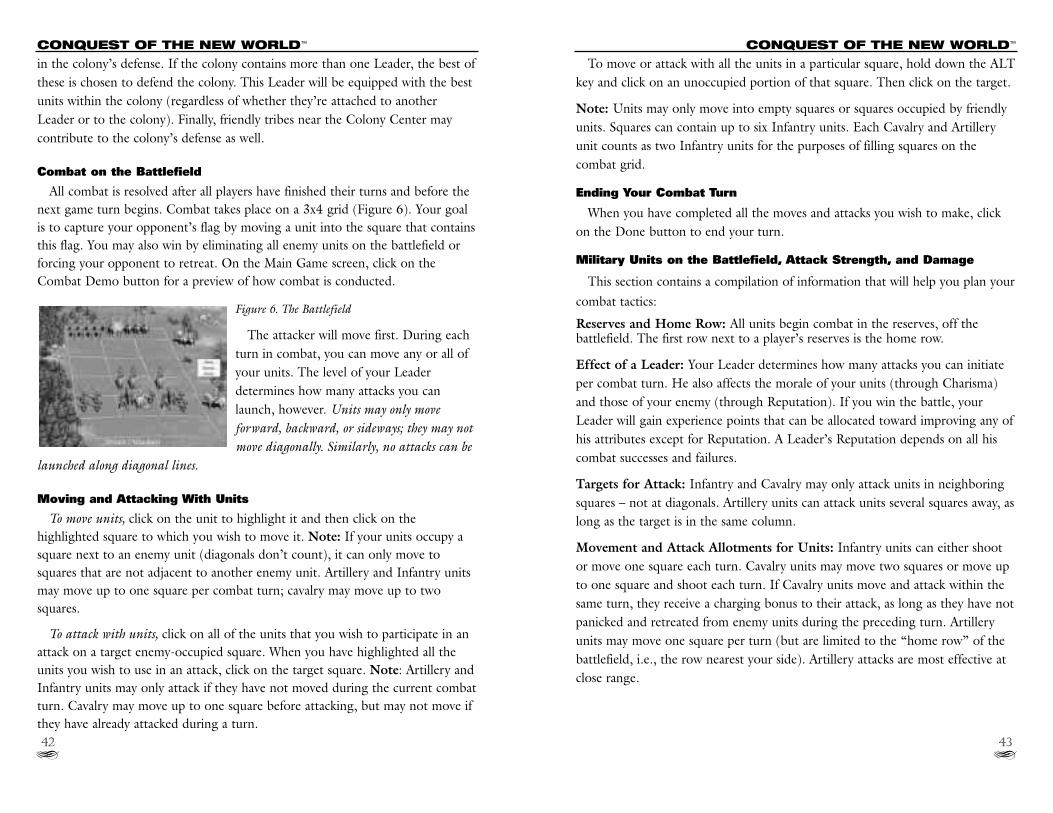
To move or attack with all the units in a particular square, hold down the ALT
key and click on an unoccupied portion of that square. Then click on the target.
Note: Units may only move into empty squares or squares occupied by friendly
units. Squares can contain up to six Infantry units. Each Cavalry and Artillery
unit counts as two Infantry units for the purposes of filling squares on the
combat grid.
Ending Your Combat Turn
When you have completed all the moves and attacks you wish to make, click
on the Done button to end your turn.
Military Units on the Battlefield, Attack Strength, and Damage
This section contains a compilation of information that will help you plan your
combat tactics:
Reserves and Home Row: All units begin combat in the reserves, off thebattlefield. The first row next to a player’s reserves is the home row.
Effect of a Leader: Your Leader determines how many attacks you can initiate
per combat turn. He also affects the morale of your units (through Charisma)
and those of your enemy (through Reputation). If you win the battle, your
Leader will gain experience points that can be allocated toward improving any of
his attributes except for Reputation. A Leader’s Reputation depends on all his
combat successes and failures.
Targets for Attack: Infantry and Cavalry may only attack units in neighboring
squares – not at diagonals. Artillery units can attack units several squares away, as
long as the target is in the same column.
Movement and Attack Allotments for Units: Infantry units can either shoot
or move one square each turn. Cavalry units may move two squares or move up
to one square and shoot each turn. If Cavalry units move and attack within the
same turn, they receive a charging bonus to their attack, as long as they have not
panicked and retreated from enemy units during the preceding turn. Artillery
units may move one square per turn (but are limited to the “home row” of the
battlefield, i.e., the row nearest your side). Artillery attacks are most effective at
close range.
in the colony’s defense. If the colony contains more than one Leader, the best of
these is chosen to defend the colony. This Leader will be equipped with the best
units within the colony (regardless of whether they’re attached to another
Leader or to the colony). Finally, friendly tribes near the Colony Center may
contribute to the colony’s defense as well.
Combat on the Battlefield
All combat is resolved after all players have finished their turns and before the
next game turn begins. Combat takes place on a 3x4 grid (Figure 6). Your goal
is to capture your opponent’s flag by moving a unit into the square that contains
this flag. You may also win by eliminating all enemy units on the battlefield or
forcing your opponent to retreat. On the Main Game screen, click on the
Combat Demo button for a preview of how combat is conducted.
Figure 6. The Battlefield
The attacker will move first. During each
turn in combat, you can move any or all of
your units. The level of your Leader
determines how many attacks you can
launch, however. Units may only moveforward, backward, or sideways; they may notmove diagonally. Similarly, no attacks can be
launched along diagonal lines.
Moving and Attacking With Units
To move units, click on the unit to highlight it and then click on the
highlighted square to which you wish to move it. Note: If your units occupy a
square next to an enemy unit (diagonals don’t count), it can only move to
squares that are not adjacent to another enemy unit. Artillery and Infantry units
may move up to one square per combat turn; cavalry may move up to two
squares.
To attack with units, click on all of the units that you wish to participate in an
attack on a target enemy-occupied square. When you have highlighted all the
units you wish to use in an attack, click on the target square. Note: Artillery and
Infantry units may only attack if they have not moved during the current combat
turn. Cavalry may move up to one square before attacking, but may not move if
they have already attacked during a turn.
a43
a42
CONQUEST OF THE NEW WORLD™ CONQUEST OF THE NEW WORLD™
correctly positioned Artillery units. When you have highlighted all the units you
wish to participate in the attack, click on the target square.
Flanking and combined arms bonuses are cumulative. So, always use as many
units in as many squares as possible to initiate attacks. Both flanking and
combined arms bonuses are more effective in that they result in more potential
damage to enemy units.
Who Gets Hit: If an attack is launched against a target square that contains
more than one type of unit, the units most likely to absorb damage depend both
on the attacking and defending units. Basically, units are most likely to attack like
units. So, Infantry are most likely to attack other Infantry units; Cavalry are
most likely to attack Cavalry; and Artillery will generally fire preferentially on
other Artillery. For example, if you have a square full of Cavalry units and this
square is probably going to be attacked by a squad of Infantry on the next turn,
it is a good idea to move some Infantry units into the square with the Cavalry
units to absorb the brunt of the attack.
Fleeing
Click on the Retreat button if you wish to flee from the battle. Your enemy
will be allowed one parting shot before your troops can leave. Remember that if
an army flees from a colony that it is defending, the colony will be lost to the
attacker, or, in the case of raids, the colony will be destroyed.
OOPS!
Click on the Undo button to take back your move. You may not take back
attacks, however! You may continue to click on the Undo button to remove
successively earlier moves you made during a turn. You may not take back any
moves made prior to your latest attack nor can you go back to a previous battle
turn.
Combat Practice with the Combat Demo
You may wish to hone your combat skills or simply engage in battles for fun
by clicking on the Combat Demo button in the Game Menu screen. When you
select this, a Combat Parameters window will open. Click in the box next to
Name and name this battle. Then click on the box next to location and choose a
location (forest, river, or grass) for the battle. The location has no effect on the
Attack Strength and Taking Damage: All units on the battlefield have a level
(or combat strength) that ranges from one to five. This number determines how
much damage the unit can take. It also determines the strength of that unit. As
this number falls (from taking damage), the unit’s strength and hit points
decrease. When the number reaches zero, the unit is dead.
Healing: Units do not heal on the battlefield or while traveling. They must be
in a colony (attached to a Colony Center) to heal. Healing takes place at the rate
of one strength point per game turn.
Morale, Panicking, and Retreating: When units are damaged there is a chance
that they will lose morale, panic, and retreat one square towards their reserves.
The more damage a unit has taken, the greater the chance that it will retreat. If
the unit’s Leader has a high Charisma, this will increase its morale and decrease
the probability of retreating. If the enemy’s Leader has a high Reputation,
however, this will increase the probability of a damaged unit’s retreating. If a
unit cannot retreat because its path is blocked, it will suffer an additional point
of damage while remaining in its current location.
White, Red, and Yellow Numbers: On the battlefield, units with white
numbers are recruited military units; those with red numbers are militia units or
Artillery units (from Forts) that arise to defend a colony. Damage to red militia
units will decrease a colony’s population. Damage to red Artillery units,
however, will have no effect on a colony’s population. Friendly natives that assist
in defense bear yellow numbers.
Attacking Artillery Units: If an Artillery unit is the only unit type in a square
attacked by Infantry and/or Cavalry units, it may suffer extra damage! Artillery
units are less effective when firing on Artillery units than they are when firing on
Infantry or Cavalry. This is a counter-battery penalty.
Combined Arms and Flanking Bonuses: If you initiate combined arms attacks
(by attacking a target square with more than one unit type), your attacks will be
more effective. Furthermore, if you initiate attacks from more than one square,
you will gain a flanking bonus. The more squares involved in an attack, the more
of a bonus you will gain.
To initiate combined arms attacks you must have more than one unit type
capable of attacking a target square. Click on each unit you wish to be part of
the attack – this includes neighboring Infantry and Cavalry units, as well as
a45
a44
CONQUEST OF THE NEW WORLD™ CONQUEST OF THE NEW WORLD™
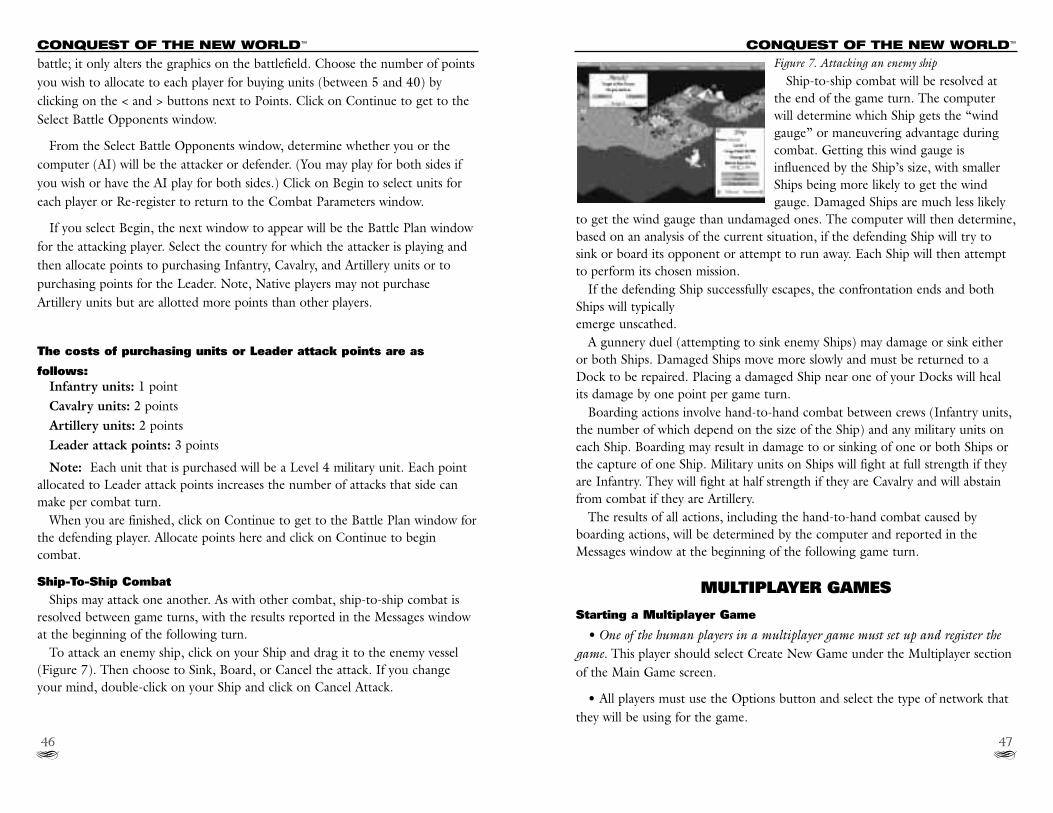
Figure 7. Attacking an enemy shipShip-to-ship combat will be resolved at
the end of the game turn. The computer
will determine which Ship gets the “wind
gauge” or maneuvering advantage during
combat. Getting this wind gauge is
influenced by the Ship’s size, with smaller
Ships being more likely to get the wind
gauge. Damaged Ships are much less likely
to get the wind gauge than undamaged ones. The computer will then determine,
based on an analysis of the current situation, if the defending Ship will try to
sink or board its opponent or attempt to run away. Each Ship will then attempt
to perform its chosen mission.
If the defending Ship successfully escapes, the confrontation ends and both
Ships will typically
emerge unscathed.
A gunnery duel (attempting to sink enemy Ships) may damage or sink either
or both Ships. Damaged Ships move more slowly and must be returned to a
Dock to be repaired. Placing a damaged Ship near one of your Docks will heal
its damage by one point per game turn.
Boarding actions involve hand-to-hand combat between crews (Infantry units,
the number of which depend on the size of the Ship) and any military units on
each Ship. Boarding may result in damage to or sinking of one or both Ships or
the capture of one Ship. Military units on Ships will fight at full strength if they
are Infantry. They will fight at half strength if they are Cavalry and will abstain
from combat if they are Artillery.
The results of all actions, including the hand-to-hand combat caused by
boarding actions, will be determined by the computer and reported in the
Messages window at the beginning of the following game turn.
MULTIPLAYER GAMES
Starting a Multiplayer Game
• One of the human players in a multiplayer game must set up and register thegame. This player should select Create New Game under the Multiplayer section
of the Main Game screen.
• All players must use the Options button and select the type of network that
they will be using for the game.
battle; it only alters the graphics on the battlefield. Choose the number of points
you wish to allocate to each player for buying units (between 5 and 40) by
clicking on the < and > buttons next to Points. Click on Continue to get to the
Select Battle Opponents window.
From the Select Battle Opponents window, determine whether you or the
computer (AI) will be the attacker or defender. (You may play for both sides if
you wish or have the AI play for both sides.) Click on Begin to select units for
each player or Re-register to return to the Combat Parameters window.
If you select Begin, the next window to appear will be the Battle Plan window
for the attacking player. Select the country for which the attacker is playing and
then allocate points to purchasing Infantry, Cavalry, and Artillery units or to
purchasing points for the Leader. Note, Native players may not purchase
Artillery units but are allotted more points than other players.
The costs of purchasing units or Leader attack points are as
follows:Infantry units: 1 point
Cavalry units: 2 points
Artillery units: 2 points
Leader attack points: 3 points
Note: Each unit that is purchased will be a Level 4 military unit. Each point
allocated to Leader attack points increases the number of attacks that side can
make per combat turn.
When you are finished, click on Continue to get to the Battle Plan window for
the defending player. Allocate points here and click on Continue to begin
combat.
Ship-To-Ship CombatShips may attack one another. As with other combat, ship-to-ship combat is
resolved between game turns, with the results reported in the Messages window
at the beginning of the following turn.
To attack an enemy ship, click on your Ship and drag it to the enemy vessel
(Figure 7). Then choose to Sink, Board, or Cancel the attack. If you change
your mind, double-click on your Ship and click on Cancel Attack.
a47
a46
CONQUEST OF THE NEW WORLD™ CONQUEST OF THE NEW WORLD™
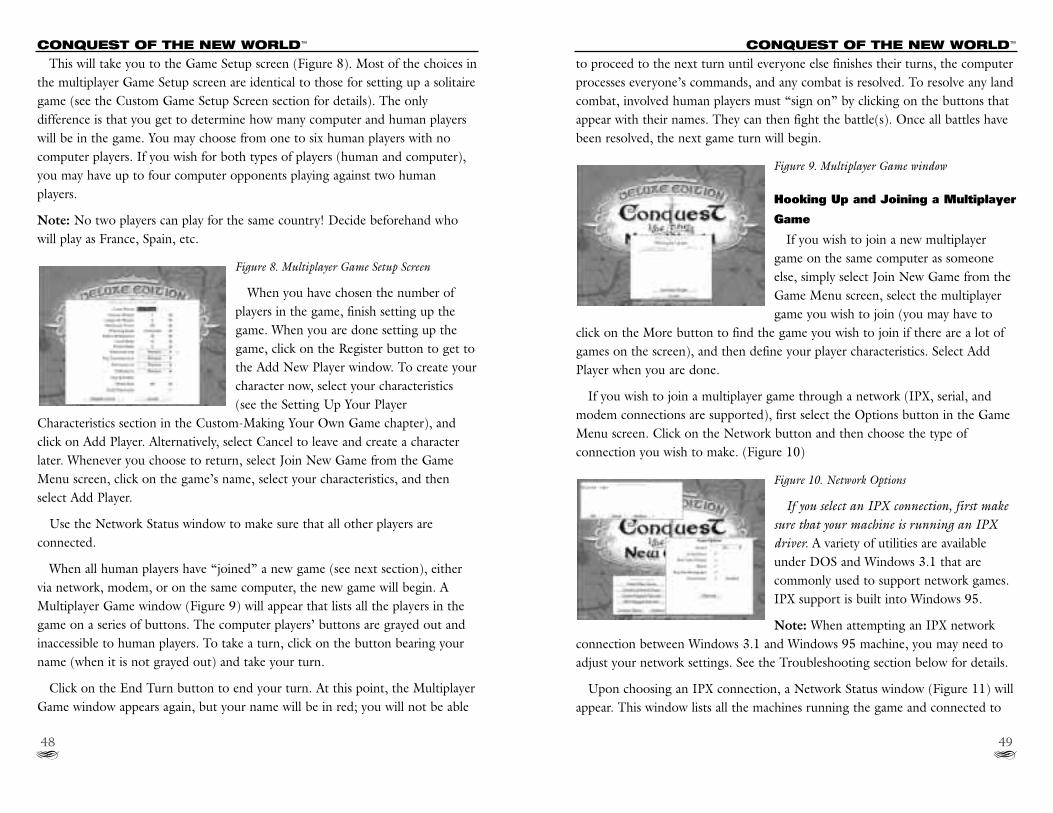
to proceed to the next turn until everyone else finishes their turns, the computer
processes everyone’s commands, and any combat is resolved. To resolve any land
combat, involved human players must “sign on” by clicking on the buttons that
appear with their names. They can then fight the battle(s). Once all battles have
been resolved, the next game turn will begin.
Figure 9. Multiplayer Game window
Hooking Up and Joining a Multiplayer
Game
If you wish to join a new multiplayer
game on the same computer as someone
else, simply select Join New Game from the
Game Menu screen, select the multiplayer
game you wish to join (you may have to
click on the More button to find the game you wish to join if there are a lot of
games on the screen), and then define your player characteristics. Select Add
Player when you are done.
If you wish to join a multiplayer game through a network (IPX, serial, and
modem connections are supported), first select the Options button in the Game
Menu screen. Click on the Network button and then choose the type of
connection you wish to make. (Figure 10)
Figure 10. Network Options
If you select an IPX connection, first makesure that your machine is running an IPXdriver. A variety of utilities are available
under DOS and Windows 3.1 that are
commonly used to support network games.
IPX support is built into Windows 95.
Note: When attempting an IPX network
connection between Windows 3.1 and Windows 95 machine, you may need to
adjust your network settings. See the Troubleshooting section below for details.
Upon choosing an IPX connection, a Network Status window (Figure 11) will
appear. This window lists all the machines running the game and connected to
This will take you to the Game Setup screen (Figure 8). Most of the choices in
the multiplayer Game Setup screen are identical to those for setting up a solitaire
game (see the Custom Game Setup Screen section for details). The only
difference is that you get to determine how many computer and human players
will be in the game. You may choose from one to six human players with no
computer players. If you wish for both types of players (human and computer),
you may have up to four computer opponents playing against two human
players.
Note: No two players can play for the same country! Decide beforehand who
will play as France, Spain, etc.
Figure 8. Multiplayer Game Setup Screen
When you have chosen the number of
players in the game, finish setting up the
game. When you are done setting up the
game, click on the Register button to get to
the Add New Player window. To create your
character now, select your characteristics
(see the Setting Up Your Player
Characteristics section in the Custom-Making Your Own Game chapter), and
click on Add Player. Alternatively, select Cancel to leave and create a character
later. Whenever you choose to return, select Join New Game from the Game
Menu screen, click on the game’s name, select your characteristics, and then
select Add Player.
Use the Network Status window to make sure that all other players are
connected.
When all human players have “joined” a new game (see next section), either
via network, modem, or on the same computer, the new game will begin. A
Multiplayer Game window (Figure 9) will appear that lists all the players in the
game on a series of buttons. The computer players’ buttons are grayed out and
inaccessible to human players. To take a turn, click on the button bearing your
name (when it is not grayed out) and take your turn.
Click on the End Turn button to end your turn. At this point, the Multiplayer
Game window appears again, but your name will be in red; you will not be able
a49
a48
CONQUEST OF THE NEW WORLD™ CONQUEST OF THE NEW WORLD™
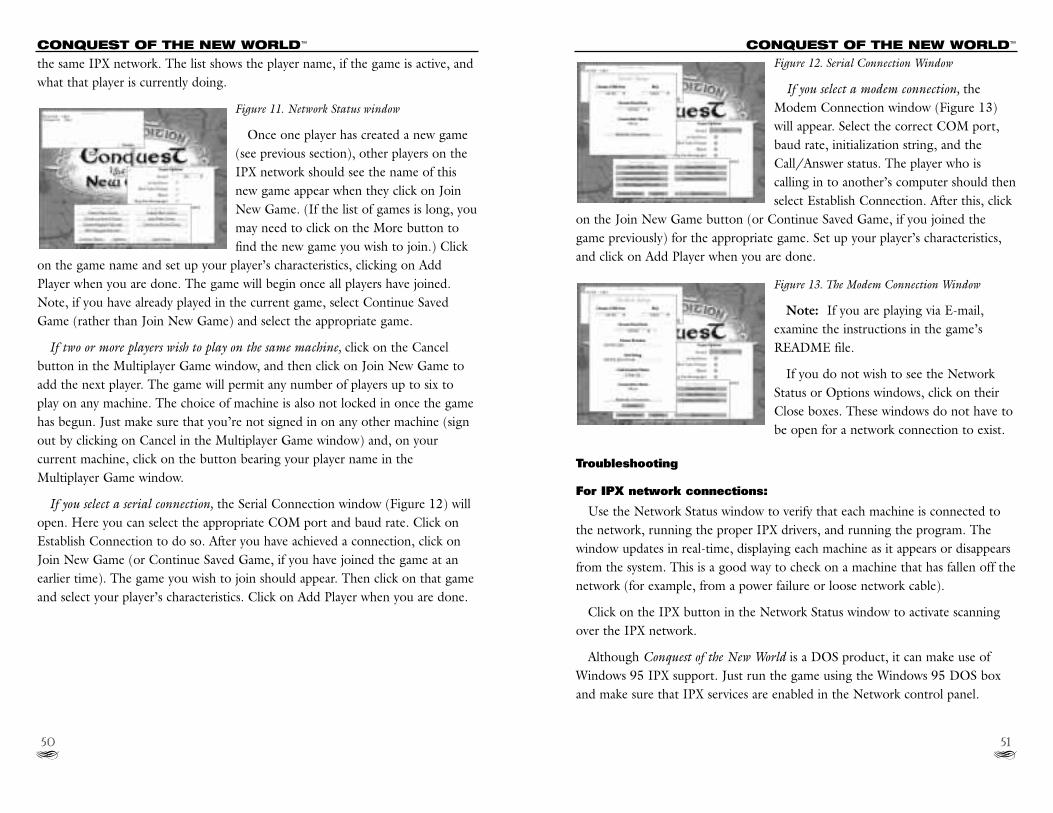
Figure 12. Serial Connection Window
If you select a modem connection, the
Modem Connection window (Figure 13)
will appear. Select the correct COM port,
baud rate, initialization string, and the
Call/Answer status. The player who is
calling in to another’s computer should then
select Establish Connection. After this, click
on the Join New Game button (or Continue Saved Game, if you joined the
game previously) for the appropriate game. Set up your player’s characteristics,
and click on Add Player when you are done.
Figure 13. The Modem Connection Window
Note: If you are playing via E-mail,
examine the instructions in the game’s
README file.
If you do not wish to see the Network
Status or Options windows, click on their
Close boxes. These windows do not have to
be open for a network connection to exist.
Troubleshooting
For IPX network connections:
Use the Network Status window to verify that each machine is connected to
the network, running the proper IPX drivers, and running the program. The
window updates in real-time, displaying each machine as it appears or disappears
from the system. This is a good way to check on a machine that has fallen off the
network (for example, from a power failure or loose network cable).
Click on the IPX button in the Network Status window to activate scanning
over the IPX network.
Although Conquest of the New World is a DOS product, it can make use of
Windows 95 IPX support. Just run the game using the Windows 95 DOS box
and make sure that IPX services are enabled in the Network control panel.
the same IPX network. The list shows the player name, if the game is active, and
what that player is currently doing.
Figure 11. Network Status window
Once one player has created a new game
(see previous section), other players on the
IPX network should see the name of this
new game appear when they click on Join
New Game. (If the list of games is long, you
may need to click on the More button to
find the new game you wish to join.) Click
on the game name and set up your player’s characteristics, clicking on Add
Player when you are done. The game will begin once all players have joined.
Note, if you have already played in the current game, select Continue Saved
Game (rather than Join New Game) and select the appropriate game.
If two or more players wish to play on the same machine, click on the Cancel
button in the Multiplayer Game window, and then click on Join New Game to
add the next player. The game will permit any number of players up to six to
play on any machine. The choice of machine is also not locked in once the game
has begun. Just make sure that you’re not signed in on any other machine (sign
out by clicking on Cancel in the Multiplayer Game window) and, on your
current machine, click on the button bearing your player name in the
Multiplayer Game window.
If you select a serial connection, the Serial Connection window (Figure 12) will
open. Here you can select the appropriate COM port and baud rate. Click on
Establish Connection to do so. After you have achieved a connection, click on
Join New Game (or Continue Saved Game, if you have joined the game at an
earlier time). The game you wish to join should appear. Then click on that game
and select your player’s characteristics. Click on Add Player when you are done.
a51
a50
CONQUEST OF THE NEW WORLD™ CONQUEST OF THE NEW WORLD™
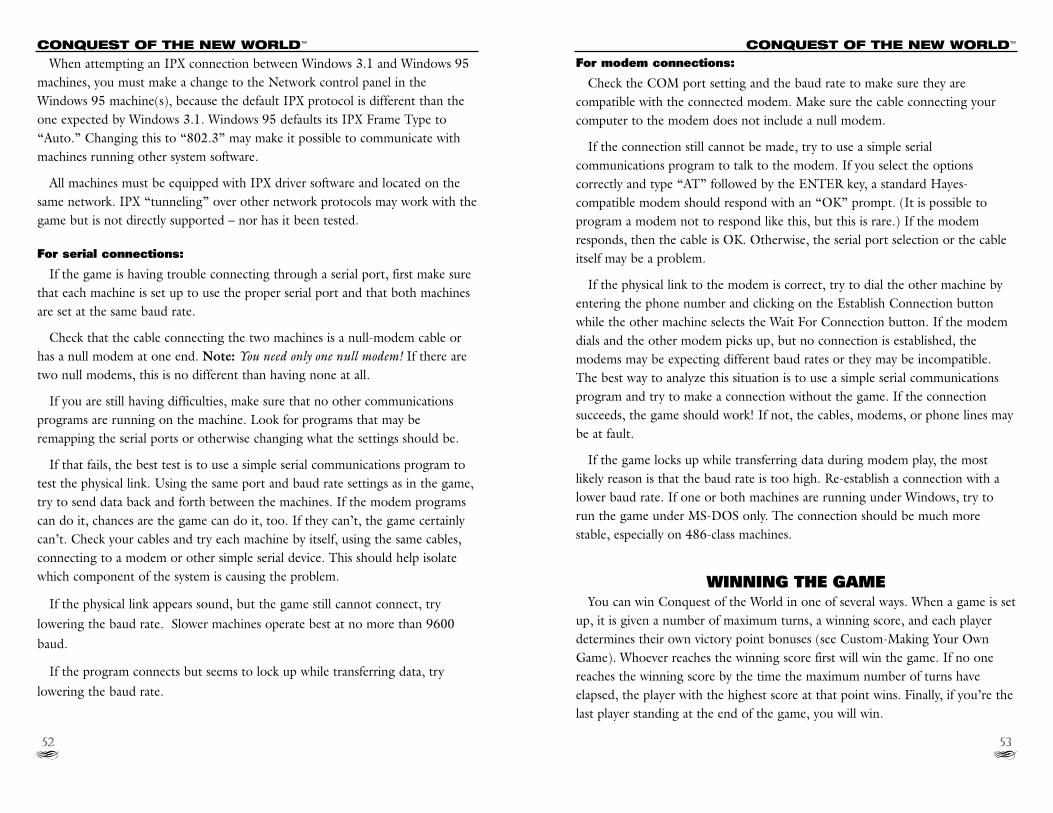
For modem connections:
Check the COM port setting and the baud rate to make sure they are
compatible with the connected modem. Make sure the cable connecting your
computer to the modem does not include a null modem.
If the connection still cannot be made, try to use a simple serial
communications program to talk to the modem. If you select the options
correctly and type “AT” followed by the ENTER key, a standard Hayes-
compatible modem should respond with an “OK” prompt. (It is possible to
program a modem not to respond like this, but this is rare.) If the modem
responds, then the cable is OK. Otherwise, the serial port selection or the cable
itself may be a problem.
If the physical link to the modem is correct, try to dial the other machine by
entering the phone number and clicking on the Establish Connection button
while the other machine selects the Wait For Connection button. If the modem
dials and the other modem picks up, but no connection is established, the
modems may be expecting different baud rates or they may be incompatible.
The best way to analyze this situation is to use a simple serial communications
program and try to make a connection without the game. If the connection
succeeds, the game should work! If not, the cables, modems, or phone lines may
be at fault.
If the game locks up while transferring data during modem play, the most
likely reason is that the baud rate is too high. Re-establish a connection with a
lower baud rate. If one or both machines are running under Windows, try to
run the game under MS-DOS only. The connection should be much more
stable, especially on 486-class machines.
WINNING THE GAMEYou can win Conquest of the World in one of several ways. When a game is set
up, it is given a number of maximum turns, a winning score, and each player
determines their own victory point bonuses (see Custom-Making Your Own
Game). Whoever reaches the winning score first will win the game. If no one
reaches the winning score by the time the maximum number of turns have
elapsed, the player with the highest score at that point wins. Finally, if you’re the
last player standing at the end of the game, you will win.
When attempting an IPX connection between Windows 3.1 and Windows 95
machines, you must make a change to the Network control panel in the
Windows 95 machine(s), because the default IPX protocol is different than the
one expected by Windows 3.1. Windows 95 defaults its IPX Frame Type to
“Auto.” Changing this to “802.3” may make it possible to communicate with
machines running other system software.
All machines must be equipped with IPX driver software and located on the
same network. IPX “tunneling” over other network protocols may work with the
game but is not directly supported – nor has it been tested.
For serial connections:
If the game is having trouble connecting through a serial port, first make sure
that each machine is set up to use the proper serial port and that both machines
are set at the same baud rate.
Check that the cable connecting the two machines is a null-modem cable or
has a null modem at one end. Note: You need only one null modem! If there are
two null modems, this is no different than having none at all.
If you are still having difficulties, make sure that no other communications
programs are running on the machine. Look for programs that may be
remapping the serial ports or otherwise changing what the settings should be.
If that fails, the best test is to use a simple serial communications program to
test the physical link. Using the same port and baud rate settings as in the game,
try to send data back and forth between the machines. If the modem programs
can do it, chances are the game can do it, too. If they can’t, the game certainly
can’t. Check your cables and try each machine by itself, using the same cables,
connecting to a modem or other simple serial device. This should help isolate
which component of the system is causing the problem.
If the physical link appears sound, but the game still cannot connect, try
lowering the baud rate. Slower machines operate best at no more than 9600
baud.
If the program connects but seems to lock up while transferring data, try
lowering the baud rate.
a53
a52
CONQUEST OF THE NEW WORLD™ CONQUEST OF THE NEW WORLD™
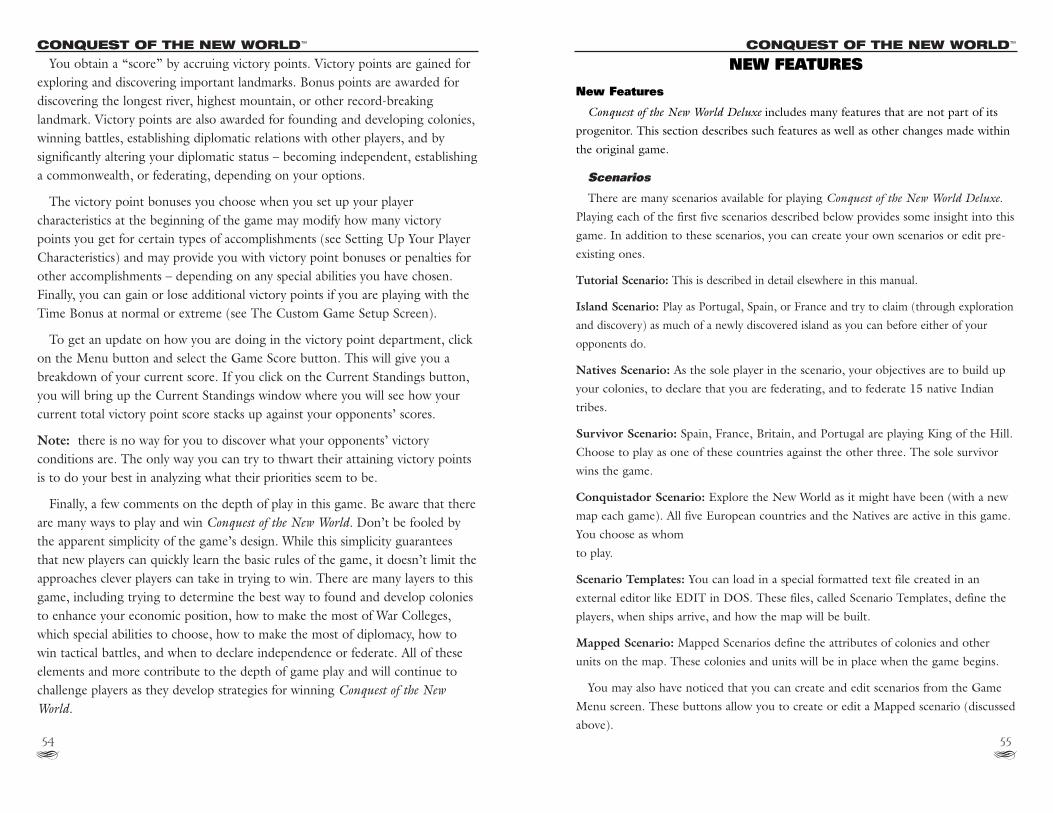
NEW FEATURES
New Features
Conquest of the New World Deluxe includes many features that are not part of its
progenitor. This section describes such features as well as other changes made within
the original game.
Scenarios
There are many scenarios available for playing Conquest of the New World Deluxe.
Playing each of the first five scenarios described below provides some insight into this
game. In addition to these scenarios, you can create your own scenarios or edit pre-
existing ones.
Tutorial Scenario: This is described in detail elsewhere in this manual.
Island Scenario: Play as Portugal, Spain, or France and try to claim (through exploration
and discovery) as much of a newly discovered island as you can before either of your
opponents do.
Natives Scenario: As the sole player in the scenario, your objectives are to build up
your colonies, to declare that you are federating, and to federate 15 native Indian
tribes.
Survivor Scenario: Spain, France, Britain, and Portugal are playing King of the Hill.
Choose to play as one of these countries against the other three. The sole survivor
wins the game.
Conquistador Scenario: Explore the New World as it might have been (with a new
map each game). All five European countries and the Natives are active in this game.
You choose as whom
to play.
Scenario Templates: You can load in a special formatted text file created in an
external editor like EDIT in DOS. These files, called Scenario Templates, define the
players, when ships arrive, and how the map will be built.
Mapped Scenario: Mapped Scenarios define the attributes of colonies and other
units on the map. These colonies and units will be in place when the game begins.
You may also have noticed that you can create and edit scenarios from the Game
Menu screen. These buttons allow you to create or edit a Mapped scenario (discussed
above).
You obtain a “score” by accruing victory points. Victory points are gained for
exploring and discovering important landmarks. Bonus points are awarded for
discovering the longest river, highest mountain, or other record-breaking
landmark. Victory points are also awarded for founding and developing colonies,
winning battles, establishing diplomatic relations with other players, and by
significantly altering your diplomatic status – becoming independent, establishing
a commonwealth, or federating, depending on your options.
The victory point bonuses you choose when you set up your player
characteristics at the beginning of the game may modify how many victory
points you get for certain types of accomplishments (see Setting Up Your Player
Characteristics) and may provide you with victory point bonuses or penalties for
other accomplishments – depending on any special abilities you have chosen.
Finally, you can gain or lose additional victory points if you are playing with the
Time Bonus at normal or extreme (see The Custom Game Setup Screen).
To get an update on how you are doing in the victory point department, click
on the Menu button and select the Game Score button. This will give you a
breakdown of your current score. If you click on the Current Standings button,
you will bring up the Current Standings window where you will see how your
current total victory point score stacks up against your opponents’ scores.
Note: there is no way for you to discover what your opponents’ victory
conditions are. The only way you can try to thwart their attaining victory points
is to do your best in analyzing what their priorities seem to be.
Finally, a few comments on the depth of play in this game. Be aware that there
are many ways to play and win Conquest of the New World. Don’t be fooled by
the apparent simplicity of the game’s design. While this simplicity guarantees
that new players can quickly learn the basic rules of the game, it doesn’t limit the
approaches clever players can take in trying to win. There are many layers to this
game, including trying to determine the best way to found and develop colonies
to enhance your economic position, how to make the most of War Colleges,
which special abilities to choose, how to make the most of diplomacy, how to
win tactical battles, and when to declare independence or federate. All of these
elements and more contribute to the depth of game play and will continue to
challenge players as they develop strategies for winning Conquest of the NewWorld.
a55
a54
CONQUEST OF THE NEW WORLD™ CONQUEST OF THE NEW WORLD™
bonuses to their defensive and offensive skills equivalent to 1 plus your War College’s
ratings in Cavalry offense and defense.
High Natives: In addition to the basic differences between playing as native Indians
and playing as Europeans detailed elsewhere in this manual, High Natives receive
some specific bonuses. All land units move as if they were one level higher than they
are (i.e., they can move farther per level than European units can). Native players’
Gold Mines will always be able to produce some Gold. Unlike those of European
players’, whose Gold Mines may be useless because productivity modifiers can go as
low as -100%, Native players’ Gold Mines always have productivity modifiers greater
than or equal to -90%. Native players’ Gold Mines also produce more Gold per level
than those of European players. Finally, Cavalry units receive bonuses to their
defensive and offensive skills equivalent to 1 plus your War College ratings in these
areas.
Holland: Playing as Holland has some truly unique benefits. Your Gold stockpiles
(in all colonies) accrue interest—at a rate of 5% per game turn! Furthermore, all
trades that Holland players conduct with their Mother Country take one fewer turns
to complete; although a trade always takes at least one turn. Holland receives no
military benefits.
Portugal: Portuguese units move as if you were playing at a game setting that is one
easier than it actually is. For example, if you have set the game to Normal movement,
Portuguese units will move as if you had set it to Easy movement. This allows them
to move an additional 50% per turn! The Portuguese get no military benefits.
Spain: If you play as Spain, your Explorers will act as if they are one level higher than
they actually are—i.e., they can move farther per turn. Your Infantry units also
receive a bonus to their defensive and offensive skill equivalent to adding 1 to your
War College ratings in these areas.
The Age of Exploration
Exploration and discovery in Conquest of the New World Deluxe have been made
even more interesting. Now, besides finding rivers, mountains, regions, etc., your
Explorers and other units can make special discoveries. The New World is replete
with metal deposits, gem deposits, and other special discoveries just waiting to be
made!
Notes on Editing a Mapped Scenario: During the editing process (while you are placing
colonies and units on the game map), you will be able to see the entire game world. A
name will appear on the game map for each player to indicate where their first Ships will
appear. This will enable you to place colonies and units appropriately.
In editing a Mapped scenario, you can move around the screen as normal. You can
also move using the arrow keys. To change which player you are editing, select
Change Players and choose the player whose units and colonies you wish to alter.
Choose Create Objects to build a Colony Center (of any level), to build units (you
can select any level) and to place buildings (of any level) in a colony. To bring up a
box that lets you alter the resources and population within a colony, double-click on
the Colony Center.
You can Unfound colonies and Disband units as well. Take care, when you do this,
however, as you cannot undo such choices later.
When you are done editing a Mapped Scenario, choose Save and Exit.
World Size
When you choose to create a Custom scenario (see Custom-Making Your Own
Game), you can now alter the size of the land masses in the New World. Choose a
number from 80 to 256. Smaller numbers will result in less overall land, and the land
masses will tend to be pushed into the right most quadrant of the game world.
All Countries are not Created Equal
In the original game, it did not matter which European country you started as,
since all such countries had equivalent capabilities and attributes. The only material
decision was whether to play as High Native or as a European. Now, however, each
country comes with its own bonuses. Whoever plays as a particular country (human
or computer player) receives these bonuses:
Britain: Playing as this country gives you the bonuses equivalent to those you (your Ships)
would get if you had chosen the Admiral special ability. You can still choose the Admiral
ability when playing as Britain. You will then get a double bonus. Your Artillery units
receive improved defensive and offensive skills equivalent to 1 plus the ratings of Artillery
offense and defense accrued through your War College.
France: Playing as France improves your starting relations with the native Indians in the
New World (by 30 points on a 201-point scale). In addition, Cavalry units receive
a57
a56
CONQUEST OF THE NEW WORLD™ CONQUEST OF THE NEW WORLD™
Pyramid: Improves all Leaders belonging to the controlling player. Bonuses are +4
Leadership, +2 Combat, and +1 Movement. Bonuses for Native players are doubled
and the Native player’s Leaders also gain +2 Charisma.
Lost Dutchman Mine: Increases the Gold production from all Gold Mines owned
by the controlling player by 25%.
Ancient Ruin: May give you one of several special bonuses.
The Building List Button
When you double-click on one of your Colony Centers, you will find a new
button, the Building List button. Clicking on the Building List will give you a list of
all the buildings in this colony, their levels, and their productivities. Furthermore, if
you highlight one of the buildings by clicking on it, that building will by highlighted
so you can locate that building easily in your colony. This is extremely helpful for
optimally upgrading and rebuilding your colony.
Trade Alliances
A new option in the Trade Menu is to select Trade Alliance. By selecting this
option, you are proposing a long-term trade alliance with another player’s colony. In
order for the alliance to go into effect, the other player must agree to it.
Furthermore, either player may cancel the trade alliance at any time.
The option to form a trade alliance will only be there if your diplomatic status with
the other player is better than that of Understanding.
Once agreed to, a Trade Alliance begins with the exchange of 1 unit of the
commodities being traded. The amount being traded increases by 10% per game turn
(rounding up) until the maximum level is reached. The maximum amount that can
be traded is determined by the size and trading capacity of each of the colonies
involved in the alliance.
Exiting Without Saving
If you click the Menu button in the Game screen, you will find a new option: Exit.
Clicking
this button lets you quit the game without saving the moves you have made during
the current game turn.
If you build a colony near a special discovery, some of your industries may reap a
productivity bonus from this favorable juxtaposition. Which industries benefit
depends on the nature of the discovery. The amount of the bonus depends on the
nature of the discovery and the distance of the building from the discovery.
The player who finds a special discovery is considered the player who controls that
discovery. That means, that player’s colonies, if they are close enough, will gain the
benefits of the discovery. However, an opposing player can wrest control away from
the founding player by placing a unit adjacent to the discovery. As long as the unit is
there, the new player controls the discovery and gains benefits from it.
Note, each special discovery, if it enhances an industry’s productivity, has a magnitude and
radius over which it confers this benefit. The amount of the benefit decreases with distance
from the discovery, until it dwindles to no effect after it reaches the radius of its influence.
To view the radius of effect of a special discovery, just click on the discovery. To
get a list of this radius and the productivity bonus the discovery confers, double-click
on the discovery. If you have a building that is benefiting from a discovery, the
amount that its productivity is increased because of its proximity to a special
discovery is indicated in brackets to the right of the building’s bonus. (You can view
a building’s productivity by double-clicking on the building.)
Below is a list of some of the special discoveries you may find in the New
World:
Metal Deposits or Mines: Gold and Silver Deposits increase the production from Gold
Mines. Tin and Iron Deposits increase production from Metal Mines. Copper Deposits
increase both Gold and Metal Mine’s productivity.
Forests: All special forests—Redwood, Oak, Cherry, Teak, and Maple—increase the
production of Mills.
Agriculture: Fields of Rice, Wheat, Corn, Potatoes, and Alfalfa increase the
production of Crops by Farms.
Medicinal Herbs: These finds increase nearby Churches’ bonuses to immigration.
There are also rare special discoveries that are unique and not necessarily present in
any particular game. Among these rare discoveries you can expect to find:
Fountain of Youth: Increases the growth rate of the population of all colonies of the
controlling player.
a59
a58
CONQUEST OF THE NEW WORLD™ CONQUEST OF THE NEW WORLD™
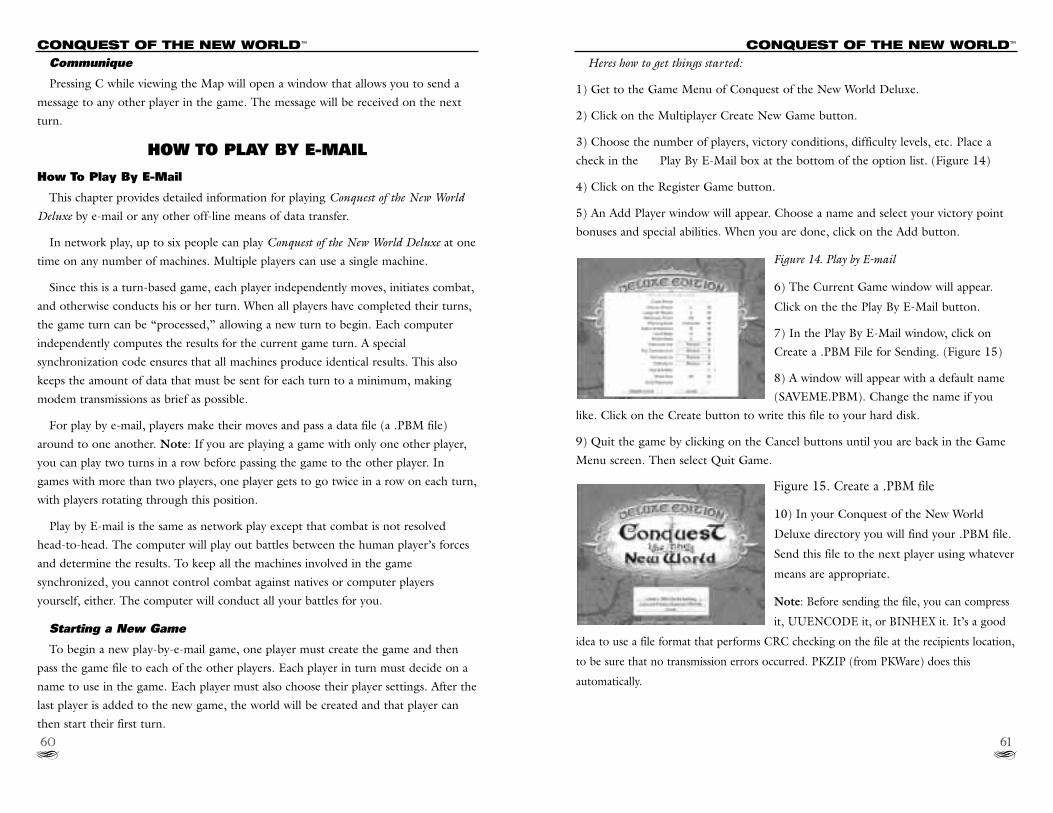
Heres how to get things started:
1) Get to the Game Menu of Conquest of the New World Deluxe.
2) Click on the Multiplayer Create New Game button.
3) Choose the number of players, victory conditions, difficulty levels, etc. Place a
check in the Play By E-Mail box at the bottom of the option list. (Figure 14)
4) Click on the Register Game button.
5) An Add Player window will appear. Choose a name and select your victory point
bonuses and special abilities. When you are done, click on the Add button.
Figure 14. Play by E-mail
6) The Current Game window will appear.
Click on the the Play By E-Mail button.
7) In the Play By E-Mail window, click on
Create a .PBM File for Sending. (Figure 15)
8) A window will appear with a default name
(SAVEME.PBM). Change the name if you
like. Click on the Create button to write this file to your hard disk.
9) Quit the game by clicking on the Cancel buttons until you are back in the Game
Menu screen. Then select Quit Game.
Figure 15. Create a .PBM file
10) In your Conquest of the New World
Deluxe directory you will find your .PBM file.
Send this file to the next player using whatever
means are appropriate.
Note: Before sending the file, you can compress
it, UUENCODE it, or BINHEX it. It’s a good
idea to use a file format that performs CRC checking on the file at the recipients location,
to be sure that no transmission errors occurred. PKZIP (from PKWare) does this
automatically.
Communique
Pressing C while viewing the Map will open a window that allows you to send a
message to any other player in the game. The message will be received on the next
turn.
HOW TO PLAY BY E-MAIL
How To Play By E-Mail
This chapter provides detailed information for playing Conquest of the New World
Deluxe by e-mail or any other off-line means of data transfer.
In network play, up to six people can play Conquest of the New World Deluxe at one
time on any number of machines. Multiple players can use a single machine.
Since this is a turn-based game, each player independently moves, initiates combat,
and otherwise conducts his or her turn. When all players have completed their turns,
the game turn can be “processed,” allowing a new turn to begin. Each computer
independently computes the results for the current game turn. A special
synchronization code ensures that all machines produce identical results. This also
keeps the amount of data that must be sent for each turn to a minimum, making
modem transmissions as brief as possible.
For play by e-mail, players make their moves and pass a data file (a .PBM file)
around to one another. Note: If you are playing a game with only one other player,
you can play two turns in a row before passing the game to the other player. In
games with more than two players, one player gets to go twice in a row on each turn,
with players rotating through this position.
Play by E-mail is the same as network play except that combat is not resolved
head-to-head. The computer will play out battles between the human player’s forces
and determine the results. To keep all the machines involved in the game
synchronized, you cannot control combat against natives or computer players
yourself, either. The computer will conduct all your battles for you.
Starting a New Game
To begin a new play-by-e-mail game, one player must create the game and then
pass the game file to each of the other players. Each player in turn must decide on a
name to use in the game. Each player must also choose their player settings. After the
last player is added to the new game, the world will be created and that player can
then start their first turn.
a61
a60
CONQUEST OF THE NEW WORLD™ CONQUEST OF THE NEW WORLD™
If you are not the last player, performing Step 8 will land you in the Current Game
window with a list of buttons for each player and a Play By E-Mail button at the
bottom.
In either case, click on the Play By E-Mail button.
10) Click on Create a .PBM File for Sending. Then click Create .PBM File.
11) Quit the game by clicking on the Cancel buttons until you are back in the Game
Menu screen. Click Quit Game.
12) Find your SAVEME.PBM file in your Conquest of the New World Deluxe
directory. Send this file to the next player.
Continuing the Game
Once all players have joined the new game, click on the Continue Existing
Multiplayer Game option from the Game Menu screen. In all cases the process is the
same as in the preceding section, except that you don’t have to join or add yourself
to the game. Instead, you process the game, take your turn (or two turns, if you are
the last player taking the current game turn), and send the file on to the next player.
In detail:
1) Get the .PBM file from the previous player. Decompress or decode the file and
place it in the Conquest of the New World Deluxe directory.
2) Start the game and select Continue Existing Multiplayer Game from the Game
Menu screen.
3) Click on the button with your game name on it. Click on Play By E-Mail.
4) This brings up the Play By E-Mail window with the top button grayed out. Click
on the second button, the Load and Process a Received .PBM File button.
5) This opens a new window. At the top of this window is the name of a .PBM file.
Three buttons underneath read Process, Find Another, and Cancel. When you have
the correct .PBM file shown at the top of the window, click on Process.
Note: If there is a message that says no .PBM files were found, make sure that you
put the .PBM file into your current Conquest of the New World Deluxe directory.
Then verify that the time and date of the file are correct. It’s possible, for example,
that an old game file is interfering.
On To Player Two: Joining a New Game
The player who receives the new .PBM file from the previous player (who just
created the game) will do the following:
1) Get the .PBM file and decompress or decode it if appropriate. Place the file in the
Conquest of the New World Deluxe directory.
2) Start the game and select the Multiplayer Join New Game button from the Game
Menu screen.
3) This brings up an empty list. Click on the the Play By E-Mail button at the
bottom of the
new window.
4) This brings up the Play By E-Mail window with the top button grayed out. Click
on the second button, the Load and Process a Received .PBM File button.
5) This opens a new window. At the top of this window is the name of a .PBM file.
Three buttons underneath read Process, Find Another, and Cancel. When you have
the correct .PBM file shown at the top of the window, click on Process.
Note: If there is a message that says no .PBM files were found, make sure that you put
the .PBM file into your current Conquest of the New World Deluxe directory. Then
verify that the time and date of the file are correct. It’s possible, for example, that an old
game file is interfering.
6) You will now be back in the Game Menu screen. Click on the Multiplayer Join
New
Game button.
7) This will take you to the Multiplayer Join New Game window where you should
see a game with a few listed players. Click on the button with the game’s name on it.
8) This brings up the Add Player window. Choose your name, victory point bonuses,
and special abilities. Click on the Add button when you are done.
9) If you are the last player, the world will be created and you can begin the first
turn. Click on End Turn when you are done. You will end up in the Current Game
window with a list of buttons for each player and a Play By E-Mail button at the
bottom.
a63
a62
CONQUEST OF THE NEW WORLD™ CONQUEST OF THE NEW WORLD™
properly on each machine that will be used during actual gameplay.
2) If you accidentally click on a button belonging to a different player, don’t click
End Turn or Save and Exit. Instead, use the emergency exit key sequence: Hold
down the Shift key and hit
the Esc key. This will take you out to DOS or Windows and will not save any
information to the hard disk.
3) If you cannot get all players back into synchronization using e-mail, send the
entire set of game files to each player. To do this: Find the name of the current game
file by looking in your Conquest of the New World Deluxe directory for all files with
the .TE2 or .GE2 extensions. Look at the time and date of each file. The most recent
files are what you want. Alternatively, go to the Continue Existing Multiplayer Game
window and click on the Delete button. Click the name of the game. A Confirmation
window appears that shows the file name. Now click on Cancel so you don’t delete
the game.
Each game consists of a pair of files with the same name and the extensions .TE2
and .GE2. Encode or compress both files from the same machine (which still has a
correct copy of the game). Send the files to all the other players.
Each player should decode the received data and place the new .TE2 and .GE2
game files into their Conquest of the New World Deluxe directories, overwriting old
files.
Power User Tips
You can also play Conquest of the New World Deluxe using a “Start” configuration.
Everyone must send their files to a selected player, who will process the turn and
send out new SAVEME.PBM files to everyone each turn. Each player must name
their saved .PBM file differently when sending it (use agreed-upon names) to prevent
inadvertently overwriting game files.
6) You will now be back in the Current Game window. Click on the button with
your name and play your turn. Click End Turn when you are done.
7) If this is a two-player game or if you are the last person to play on this turn, you
can play another turn. When you are done with your turn(s), you will be returned to
the Current Game window. Click on the Play By E-Mail button.
8) Select Create a .PBM File for Sending. Then click on Create .PBM File.
9) Quit the game by clicking on Cancel buttons until you are back at the Game
Menu screen. Click on Quit Game.
10) Find the SAVEME.PBM file in your Conquest of the New World Deluxe
directory and send it to the next player.
A Typical Turn
Playing Conquest of the New World Deluxe by e-mail is easy. Below is a summary
of the steps you must take to play one game turn:
1) Receive a .PBM file from the previous player and place it in your Conquest of the
New World Deluxe directory.
2) Get into the Game Menu of Conquest of the New World Deluxe, click on
Continue Existing Multiplayer Game, and select Play by E-Mail. Click on the Load
and Process a Received .PBM File button. Select the correct .PBM file and click on
Process.
3) When you are done, select your game, and then select your player. Play your turn
as normal. Click on End Turn when you are done.
4) Return to the Current Game window (this is automatic) and select Play By E-
Mail. Click on the Create button and save the game file to your disk. Quit the game.
5) Send the file to the next player.
Troubleshooting
Because e-mail play offers so many options, there’s always a chance that a game
will be set up incorrectly. Here’s what to watch out for:
1) Each player should click on the Add Player button on the machine where they will
be playing their games. If two or more players are playing on the same machine, they
should both add themselves before passing the file to the next player. Do not try to
add all players on a single machine as this may prevent the game from setting itself up
a65
a64
CONQUEST OF THE NEW WORLD™ CONQUEST OF THE NEW WORLD™
Additional Programming Robert Barris, Michael Gerard, Brian MacDonald
Design Vince DeNardo, William C. Fisher, Byon Garrabrant
Greg Marsters
Additional Design Alan “the” Emrich, Michael Gerard, Tom Hughes
George Shackelford, Craig Warmsley
Art Direction Todd Camasta
3D Art Jim Hornback, Brandon MacDougall
Audio Director Charles Deenen
Sound Effects Larry Peacock, Gregory R. Allen, Charles Deenen
Sound Effects Mastering Craig Duman
Music Richard Band
Music Mastering Keven Reeves and Jason Arnold
at Capitol/Tower Mastering
Introduction Voice Bill E. Martin
Audio Programming Byon Garrabrant
Headlines and Factoids Alan Emrich, Scott Wessler, Chris Avellone
Scott Bennie, Steve Perrin
Historical Research Alan Emrich, Vince DeNardo
Country Names and Titles Steve Perrin, Scott Bennie, David “Zeb” Cook
Product Marketing Manager Jim Veevaert
Additional Playtesting Chris Venuti, Mike Hearne, Pat, A. J.
Manual Writer Petra Schlunk
Manual Design Jennifer Hillis
Cover Illustration Robert August
Additional Editing Cindy Fisher, Amy Mitchell., Petra Schlunk
Installer Programmers Darren L. Monahan, Parallax Software
a67
CREDITSConquest of the New World Deluxe Edition Credits
*Producer Vince DeNardo
*Line Producer William C. Fisher
*Lead Programmer Greg “Bigger Office” Marsters
*More Brains & Scenario Stuff George Shackelford
*Additional Programming Shiun Hwang
*Design Vince DeNardo, William C. Fisher, Tom Hughes
Greg Marsters
*Appreciated Assistance Donovan Mandap, Michael Gerard,
Robert “The Cleaner” Barris, Byon Garrabrant
*Art Direction Todd Camasta
*3D Art Jim Hornback
*Additional Playtesting Dennis Volper, Craig Warmsley
*Director of Quality Assurance Chad Allison
*Assistant Director of QA Colin Totman
*Lead Tester Steve Victory
*Testers Amy Mitchell, Charles Crail, Greg Baumeister,
James Chung, Evan Chantland, Erick Lujan,
Bill Field, Marvic Ambata
*Original Release
Conquest of the New World Original Credits
Producer Vince DeNardo
Line Producer William C. “You Want It When?” Fisher
Lead Programmer Byon “Weird Al” Garrabrant
Feature Boy & Beast of Burden Greg “Midnight Oil” Marsters
Plastic Brains George “Oh Shut Up” Shackelford
a66
CREDITS
I N T E R P L A Y L I M I T E D 9 0 - D A Y W A R R A N T Y
Interplay warrants to the original purchaser of this Interplay Productions™ product that the
compact disc or floppy disk(s) on which the software programs are recorded will be free from
defects in material and workmanship for 90 days from the date of purchase. If the compact disc
or floppy disk(s) is found defective within 90 days of original purchase, Interplay agrees to
replace, free of charge, any product discovered to be defective within such period upon receipt
at its factory service center of the product, postage paid, with proof of the date of purchase.
This warranty is limited to the compact disc or floppy disk(s) containing the software program
originally provided by Interplay and is not applicable to normal wear and tear. This shall be void
if the defect has arisen through abuse, mistreatment, or neglect. Any implied warranties
applicable to this product, including warranties of merchantability and fitness for a particular
purpose are disclaimed. Interplay disclaims all responsibility for incidental or consequential
damages.
Some states do not allow limitations as to how long an implied warranty lasts and/or
exclusions or limitations of incidental or consequential damages so the above limitations and/or
exclusions or liability may not apply to you. This warranty gives you specific rights, and you may
also have other rights which vary from state to state.
Limited WarrantyIf the compact disc or floppy disk(s) should fail after the original 90-day warranty period has
expired, you may return the software program to Interplay at the address noted below with a
check or money order for $5.00 (U.S. currency), which includes postage and handling, and
Interplay will mail a replacement to you. To receive a replacement, you need to enclose the
original defective compact disc or floppy disk(s) in protective packaging accompanied by: (1) a
$5.00 check or money order, (2) a brief statement describing the defect, and (3) your return
address. If you have a problem with your software, you may wish to call us first at (949) 553-
6678. If your compact disc is defective and a replacement is necessary, U.P.S. or registered mail
is recommended for returns. Please send the defective disc(s) only (not the box) with a
description of the problem and $5.00 to:
Warranty Replacements
Interplay Productions
16815 Von Karman Avenue
Irvine, CA 92606
Copying ProhibitedThis software product and the manual are copyrighted and all rights are reserved by Interplay
Productions and are protected by the copyright laws that pertain to computer software. You
may not copy the software except that you may make one copy of the software solely for backup
or archival purposes. You may not loan, sell, rent, lease, give, sub license, or otherwise transfer
the software (or any copy). You may not modify, adapt, translate, create derivative works,
decompile, disassemble, or otherwise reverse engineer or derive source code from, all or any
portion of the software or anything incorporated therein or permit or encourage any third party
to do so.
NOTICE: Interplay reserves the right to make modifications or improvements to the
product described in this manual at any time and without notice.
a69
CUSTOMER SERVICEDirector Of Quality Assurance Jeremy S. Barnes
Assistant Director of QA Darren L. Monahan
Lead Testers Tony Martin, Michael Motoda, Craig Warmsley
Testers Amy Mitchell, Erick Lujan, Matt Golembiewski
Frank Pimentel, Cory Nelson, Bill Field
Shanna SanPaolo, Alex Beltran, Rob Loudon
Marvic Ambata, Steve Baldoni, Dave Hendee
Doug Avery, Tony Piccoli, Anthony Taylor
Petra Schlunk
Technical Coordinator John Werner
Compatibility Technicians Dan Forsyth, Marc Duran, Derek Gibbs, Aaron Olaiz
Phuong Nguyen, Jack Parker
IS Technicians Aaron Meyers, Bill Delk
Thanks To Tim Jordan, Otmar Schlunk, Jim Veevaert
Special Thanks To Brian Fargo for giving us the time and
space to do the job correctly.
In Memory Of Vince DeNardo Sr., Lyman Marsters, Orange Julius
and Ajax Here’s hoping they’re having a great time
playing Conquest over Heaven’s net
(wherever they may be logged in!)
©1996 Interplay Productions. All rights reserved. Conquest of the New World and Interplay are
trademarks of Interplay Productions. All rights reserved.
a68
CREDITS
Welcome to the Interplay Web! As a company dedicated to providing innovative,
high-quality interactive entertainment software, we are always striving to stay as
close as possible to the leading edge of technology. This Web site is the latest
example of our ongoing effort to provide a wealth of information and opportunities
to you.
As a company of fanatic gamers, we love the idea of gamers all over the world
tapping into cyberspace to see, touch and feel our latest games. No hype, no
marketing campaign; just great games. To make it work, our goal is to keep this site
fresh and new, to make it a place where you can tell US what you like about our
games... and what you don’t like about them. So use the feedback options on these
pages and sound off.
Enjoy your visit in our Web site, explore all the different areas we have to offer, and
come back soon. Check us out in the weeks and months ahead; we will be
introducing new and exciting areas for you to experience.
Once again, welcome.
Brian Fargo
C.E.O.
Interplay’s World Wide Web site is an Internet service designed to give you the latest
information about Interplay and our products.
This site features our demos, upgrades, product information and ordering
information.
HOW TO GET THEREFrom your Internet account, point your favorite
browser to:
www.interplay.com
a71
CUSTOMER SERVICE
T E C H N I C A L S U P P O R TIf you have any questions about this, or any other Interplay product, you can reach our Customer
Service/Technical Support Group at: Interplay, 16815 Von Karman Avenue, Irvine, CA 92606 Attn:
Customer Service. Customer Service is available 24 hours a day through our Automated Customer
Service system, with a Customer Service representative available during normal business hours at (949)
553-6678.
Please have your system information available, or better yet, try to be at your computer. The
more detailed information you can provide our support personnel, the better service we can
provide you.
InternetYou can reach Interplay by sending Internet E-mail to “[email protected]”. Many
Interplay demos and patches are available at Internet FTP sites. To visit our World Wide Web
site, point your browser to: “http://www.interplay.com” or you may ftp to ftp.interplay.com.
The Interplay BBSWe have a 24-hour, 7-day a week multiline BBS available for customer questions, support and
fixes. The number is 949-252-2822. Modem settings are 300-28.8k Baud, V.32bis, V.42bis,
8-N-1. You also may contact our BBS over the Internet. Telnet to bbs.interplay.com. This is a
free service. (Excluding toll charges.)
America OnlineYou may E-mail Interplay Customer Support at IPTECH.
a70
CUSTOMER SERVICE