Embed Size (px)
Citation preview
Installation and Administration Guide
Compute Manager 11.1
Installation and Administration Guide2
Copyright © 1992 - 2012 Altair Engineering Inc.
Table of Contents
4Introduction to Compute Manager1
................................................................................................................................... 6Copyrights, Trademarks, and Third Party Licenses
................................................................................................................................... 7System Requirements
................................................................................................................................... 9Supported Platforms
11Window Installations2
................................................................................................................................... 12Installing CM via GUI
................................................................................................................................... 29Uninstalling CM via GUI
................................................................................................................................... 34Starting CM
................................................................................................................................... 35Stopping CM
................................................................................................................................... 36Restarting CM
37Linux Installations3
................................................................................................................................... 38Installing CM via GUI
................................................................................................................................... 55Installing CM via Console
................................................................................................................................... 75Uninstalling CM via GUI
................................................................................................................................... 80Uninstalling CM via Console
................................................................................................................................... 83Determining Installation Location of CM
................................................................................................................................... 84Determining if CM is Installed & Running
................................................................................................................................... 85Starting CM
................................................................................................................................... 86Stopping CM
................................................................................................................................... 87Restarting CM
88Advanced Configuration4
................................................................................................................................... 89Adding a Generic Action
................................................................................................................................... 92Configuring Access to CM
................................................................................................................................... 96Configuring Profile Sharing
................................................................................................................................... 97Configuring Application Help and Application Icons
................................................................................................................................... 99Configuring File Extension Icons
................................................................................................................................... 101Installing Google Chrome Frame
................................................................................................................................... 102Configuring Google Chrome Frame
................................................................................................................................... 104Enabling a Secure Connection between CM and PAS
................................................................................................................................... 105Configuring MIME types for File Viewing/Editting
................................................................................................................................... 106Setting Maximum Page Size for Files
................................................................................................................................... 108Configuring the Job Refresh Rate
3Contents
3
Copyright © 1992 - 2012 Altair Engineering Inc.
................................................................................................................................... 109Configuring the Application Refresh Rate
................................................................................................................................... 110Changing the PBS Application Services Staging Directory
................................................................................................................................... 111Refreshing Application Definitions
................................................................................................................................... 112Configuring JVM Performance
................................................................................................................................... 113Fine Tuning CM
114Location of CM Files5
115Logging into CM6
Installation and Administration Guide4
Copyright © 1992 - 2012 Altair Engineering Inc.
1 Introduction to Compute Manager
Altair HyperWorks Enterprise Compute Manager (CM) is a job submission and monitoring portal whichenables users to run, monitor and manage workloads on distributed resources remotely. ComputeManager uses the High Performance Computing workload management capability of Altair’s PBSApplication Services and PBS Professional for efficient resource utilization, access to the cloud for jobsubmission and subsequent accounting.
Compute Manager provides a web-based user interface for submitting, monitoring and managingworkloads connected to PBS Professional complexes. End user productivity improves since there areno complicated commands to learn. With minimal configuration Compute Manager automates the jobsubmission process, allowing users to spend more time creating better models and simulations.
There are no complicated commands to learn or complex scripts to create and maintain. PBSApplication Services allows you to tailor Compute Manager to fit your applications and userpreferences, making job submission simple and error free.
Compute Manager is an ideal solution for customers who:
want a simple but powerful graphical interface for submitting and monitoring jobs to PBSProfessional queues.
need to browse and modify remote files.
want to minimize the effort needed to write, modify and test complex application scripts.
want to automate job submission tasks to maximize end-user productivity while optimizingresource availability.
require a consistent job submission and monitoring interface.
need to have automated staging of input and output files.
Components available through the installation of Compute Manager:
Compute Manager application and services
Results Visualization plug-in (use of the plug-in requires Results Visualization Service to beinstalled.)
Access Management Service
Results Visualization Service
Results Visualization provides necessary features and functionalities to access, process and visualizeCAE results information through an easy and intuitive graphical user interface, embedded directly intothe web browser. This allows users to access these features anytime and from anywhere without theneed for installing any post processing applications on their desktop. In the current release, thesefeatures are accessible through the HyperWorks Enterprise Compute Manager web interface.
Access Management Service
Access Management Service provides a toolkit for managing users and groups, as well as accesscontrol policies. For more information about Access Management Service, you may download theAccess Management Service Administrator's Toolkit Command Reference Guide from the HyperWorksor PBSWorks documentation user area.
Introduction to Compute Manager 5
Copyright © 1992 - 2012 Altair Engineering Inc.
Compute Manager and Results Visualization Service must be installed separately. The ResultsVisualization Service must be installed to use the plug-in with Compute Manager. For more informationabout Compute Manager see the Compute Manager Installation and Administration Guide. For moreinformation about Results Visualization Service see the Results Visualization Service Installation andAdministration Guide. Both documents can be downloaded from the HyperWorks or PBSWorksdocumentation user area.
Installation and Administration Guide6
Copyright © 1992 - 2012 Altair Engineering Inc.
1.1 Copyrights, Trademarks, and Third Party Licenses
Compute Manager Installation and Administration Guide 11.1, Updated: 8/31/2012.
Copyright© 2003-2012 Altair Engineering, Inc. All Rights Reserved
HWE Compute Manager, HyperWorks Enterprise, PBS™, PBS Works™, PBS GridWorks®, PBSProfessional®, PBS Analytics™, PBS Desktop™, PBS Portal™, PBS Animate™, PBS BioChem™,PBS MCAE™, e-BioChem™, e-Compute™ and e-Render™ are trademarks of Altair Engineering, Inc.and are protected under U.S. and international laws and treaties.
All other marks are the property of their respective owners.
Copyright notice does not imply publication. Contains trade secrets of Altair Engineering, Inc.
Decompilation or disassembly of this software is strictly prohibited.
Introduction to Compute Manager 7
Copyright © 1992 - 2012 Altair Engineering Inc.
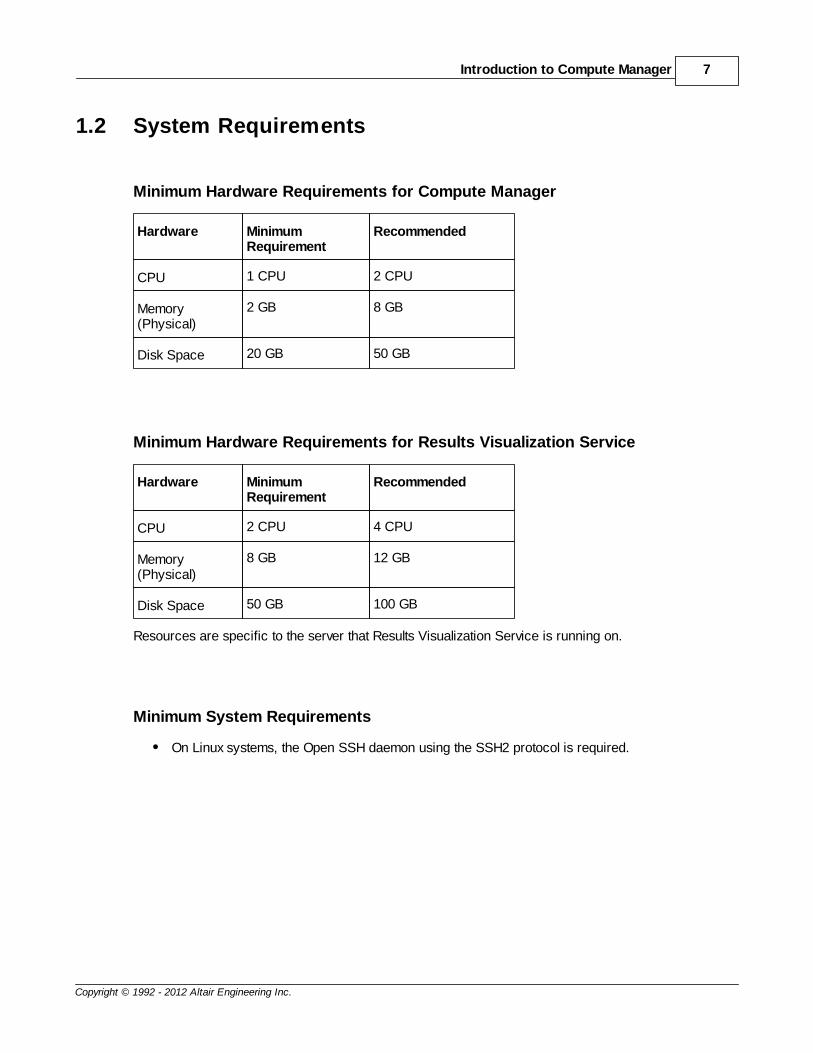
1.2 System Requirements
Minimum Hardware Requirements for Compute Manager
Hardware MinimumRequirement
Recommended
CPU 1 CPU 2 CPU
Memory(Physical)
2 GB 8 GB
Disk Space 20 GB 50 GB
Minimum Hardware Requirements for Results Visualization Service
Hardware MinimumRequirement
Recommended
CPU 2 CPU 4 CPU
Memory(Physical)
8 GB 12 GB
Disk Space 50 GB 100 GB
Resources are specific to the server that Results Visualization Service is running on.
Minimum System Requirements
On Linux systems, the Open SSH daemon using the SSH2 protocol is required.
Installation and Administration Guide8
Copyright © 1992 - 2012 Altair Engineering Inc.
Assumptions, Constraints, and Dependencies
In order to register a user session of Compute Manager to an Enterprise PBS Professional complex,the complex head node must be running PBS Professional 10.4 or later, and PBS Application Services11.0.1 or later. Please contact your site administrator for further information.
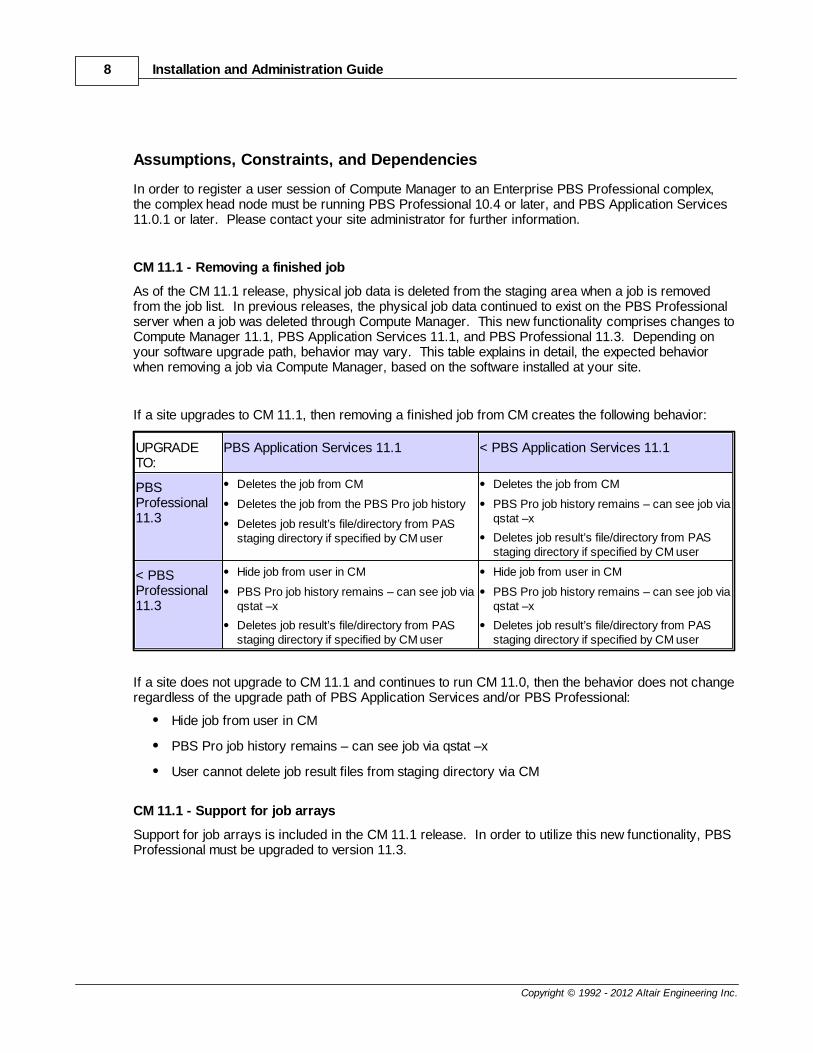
CM 11.1 - Removing a finished job
As of the CM 11.1 release, physical job data is deleted from the staging area when a job is removedfrom the job list. In previous releases, the physical job data continued to exist on the PBS Professionalserver when a job was deleted through Compute Manager. This new functionality comprises changes toCompute Manager 11.1, PBS Application Services 11.1, and PBS Professional 11.3. Depending onyour software upgrade path, behavior may vary. This table explains in detail, the expected behaviorwhen removing a job via Compute Manager, based on the software installed at your site.
If a site upgrades to CM 11.1, then removing a finished job from CM creates the following behavior:
UPGRADETO:
PBS Application Services 11.1 < PBS Application Services 11.1
PBSProfessional11.3
Deletes the job from CM
Deletes the job from the PBS Pro job history
Deletes job result’s file/directory from PASstaging directory if specified by CM user
Deletes the job from CM
PBS Pro job history remains – can see job viaqstat –x
Deletes job result’s file/directory from PASstaging directory if specified by CM user
< PBSProfessional11.3
Hide job from user in CM
PBS Pro job history remains – can see job viaqstat –x
Deletes job result’s file/directory from PASstaging directory if specified by CM user
Hide job from user in CM
PBS Pro job history remains – can see job viaqstat –x
Deletes job result’s file/directory from PASstaging directory if specified by CM user
If a site does not upgrade to CM 11.1 and continues to run CM 11.0, then the behavior does not changeregardless of the upgrade path of PBS Application Services and/or PBS Professional:
Hide job from user in CM
PBS Pro job history remains – can see job via qstat –x
User cannot delete job result files from staging directory via CM
CM 11.1 - Support for job arrays
Support for job arrays is included in the CM 11.1 release. In order to utilize this new functionality, PBSProfessional must be upgraded to version 11.3.
Introduction to Compute Manager 9
Copyright © 1992 - 2012 Altair Engineering Inc.
1.3 Supported Platforms
Compute Manager is supported on the following platforms:
Windows 64bit
Windows Server 2008
Windows Server 2008 R2
Linux 64bit
Suse Linux Enterprise Server 10 & 11
Red Hat Enterprise Linux 5 & 6
Cent OS 5.5
Supported Browsers
Windows
Firefox v4.x - v13 (preferred)
Google Chrome 12 - 20 (preferred)
Internet Explorer v8 - v9 (limited)
Linux
Firefox v4.x - v14 (preferred)
Google Chrome 15 - 21 (preferred)
OSX
Safari 5 - 6 (currently not heavily tested)
Google Chrome Frame plug-in
Compute Manager
Internet Explorer versions 8 and 9 do not natively support the multi-file upload mechanisms for local filesnor the file upload progress meter in Compute Manager. It has been observed that many timesinstalling the Chromium projects Google Chrome Frame plug-in on Windows XP, Vista and Windows 7has provided indirect support for this. However, this configuration has not formally been tested, so it isnot fully supported by Altair. Please use the Chromium projects at your own discretion.
Results Visualization Service
It is observed that installing Google Chrome Frame on IE 8 and 9 significantly improves theperformance of Results Visualization, especially plotting use cases. However, the plug-in appears tohave some random issues with the Hyperview Player plug-in, which sometimes leads to unexpectedbehavior during animation data viewing. In these instances, the generated animation file (h3d) can be
Installation and Administration Guide10
Copyright © 1992 - 2012 Altair Engineering Inc.
downloaded and viewed locally using the standalone version of HyperView player. This configuration(Google Chrome Frame + IE 8/9) has not been formally tested, so it is not fully supported by Altair. Ifissues arise, it may be recommended to uninstall the plug-in.
To install and configure Google Chrome Frame see Installing Google Chrome Frame and ConfiguringGoogle Chrome Frame.
Window Installations 11
Copyright © 1992 - 2012 Altair Engineering Inc.
2 Window Installations
Installing CM is quick and easy. A GUI-based installer walks you through the process, requestinginstallation and configuration information along the way. Once the installation is complete, CM is readyfor use.
Installing CM
See Also
Uninstalling CM
Installation and Administration Guide12
Copyright © 1992 - 2012 Altair Engineering Inc.
2.1 Installing CM via GUI
Installation of this product requires:
System administrator privileges (root privileges)
The existence of the following users before beginning the installation
The HWE Database Owner - must be a non-administrative user that exists on the serverwhere the HWE Suite will be installed, and will be used to administer the HWE database.
The Portal Administrator - must be an existing user on the authenticating server and will beused to administer the HWE portal.
To install CM, follow the steps below:
1. Download the installer appropriate for your platform from the user area.
2. Invoke the installer by double clicking on the exe file.
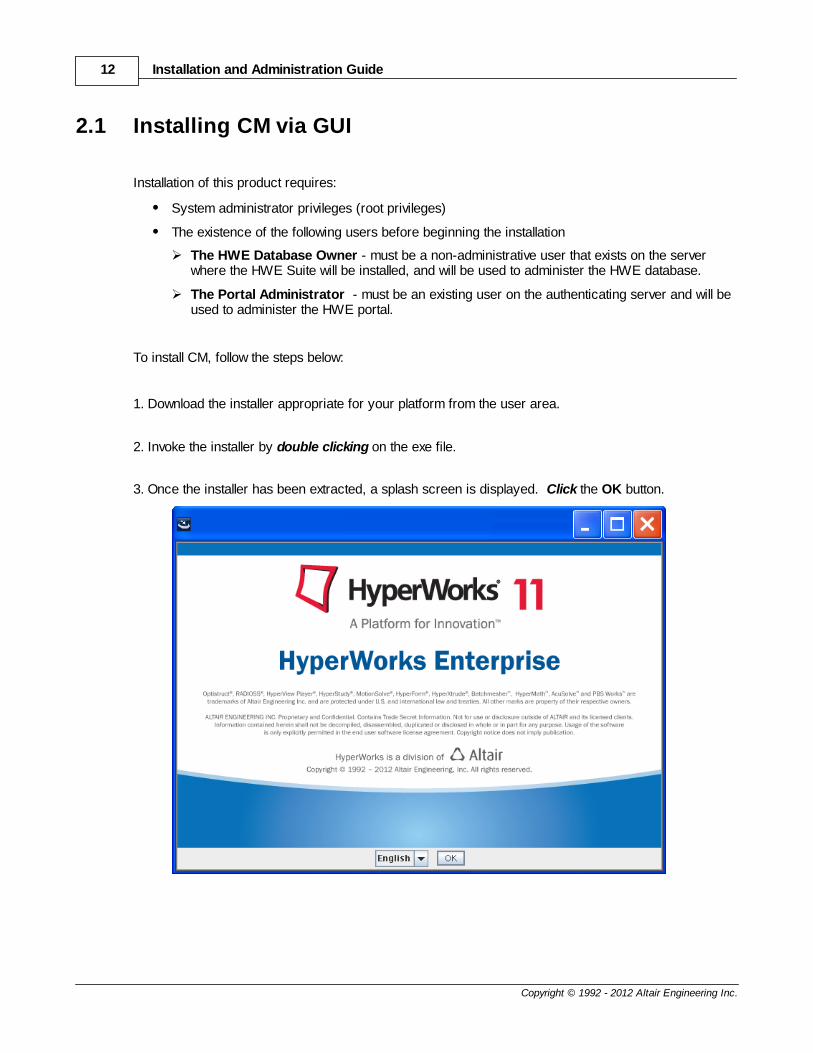
3. Once the installer has been extracted, a splash screen is displayed. Click the OK button.
Window Installations 13
Copyright © 1992 - 2012 Altair Engineering Inc.
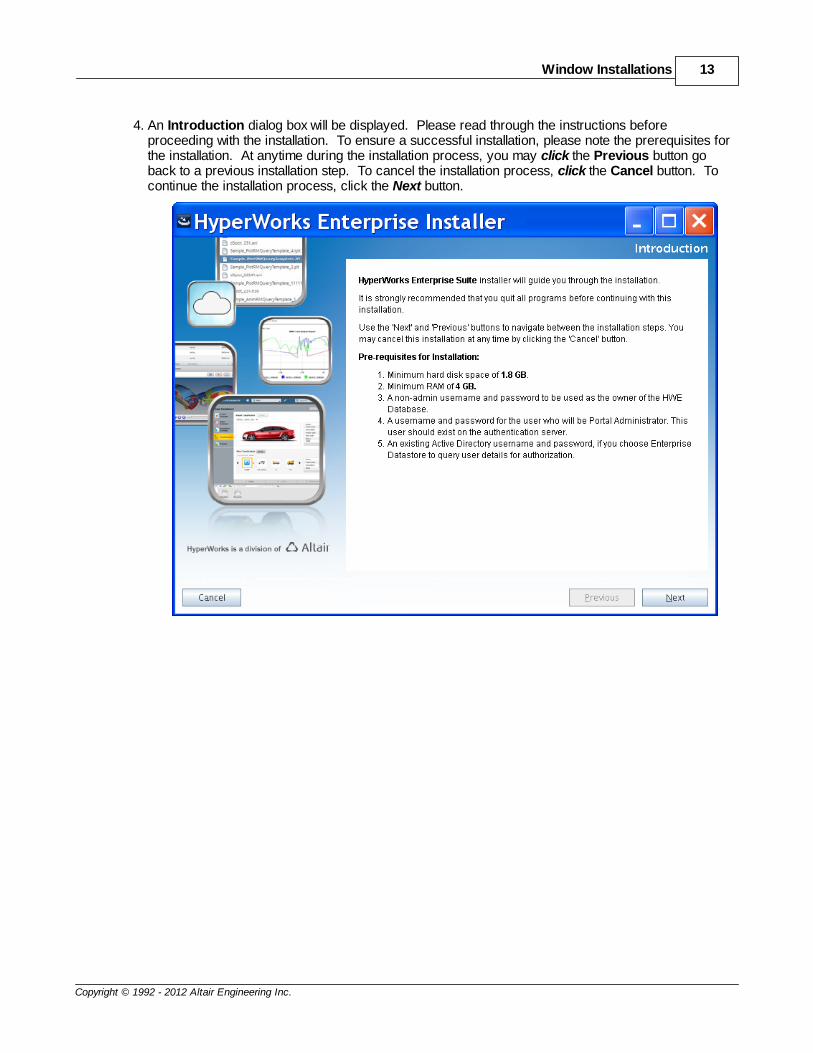
4. An Introduction dialog box will be displayed. Please read through the instructions beforeproceeding with the installation. To ensure a successful installation, please note the prerequisites forthe installation. At anytime during the installation process, you may click the Previous button goback to a previous installation step. To cancel the installation process, click the Cancel button. Tocontinue the installation process, click the Next button.

Installation and Administration Guide14
Copyright © 1992 - 2012 Altair Engineering Inc.
5. A License Agreement dialog will be displayed. Please read through the License Agreement beforeproceeding with the installation. To accept the License Agreement terms and conditions andcontinue with the installation process, click on the button next to I accept the terms of the LicenseAgreement and click the Next button.

Window Installations 15
Copyright © 1992 - 2012 Altair Engineering Inc.
6. A Choose Install Options dialog will be displayed. You can choose to install either:
Compute Manager which installs:
Compute Manager application and services
Results Visualization plug-in (use of the plug-in requires Results Visualization Service(RVS) to be installed. The installation of RVS can be done at a later time)
Access Management Service
Results Visualization Service which installs:
Results Visualization Service
Select the component to install by clicking on the radio button next to the component description,then click the Next button.
Installation and Administration Guide16
Copyright © 1992 - 2012 Altair Engineering Inc.
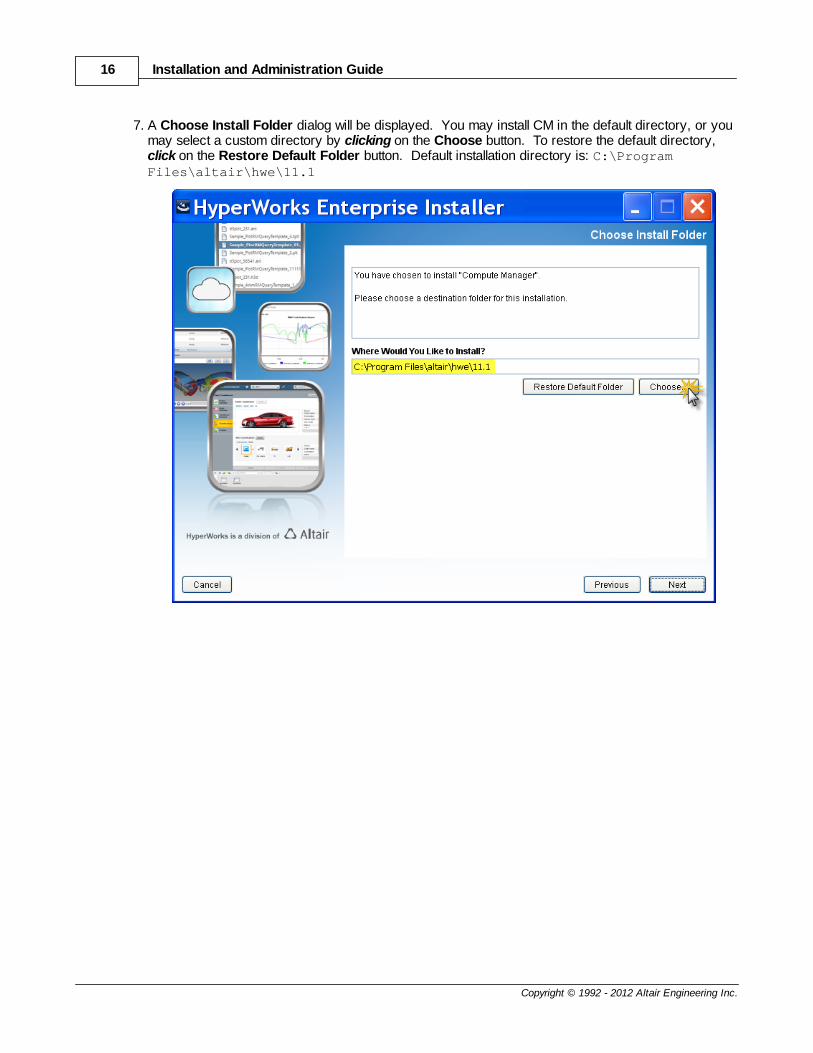
7. A Choose Install Folder dialog will be displayed. You may install CM in the default directory, or youmay select a custom directory by clicking on the Choose button. To restore the default directory,click on the Restore Default Folder button. Default installation directory is: C:\ProgramFiles\altair\hwe\11.1
Window Installations 17
Copyright © 1992 - 2012 Altair Engineering Inc.
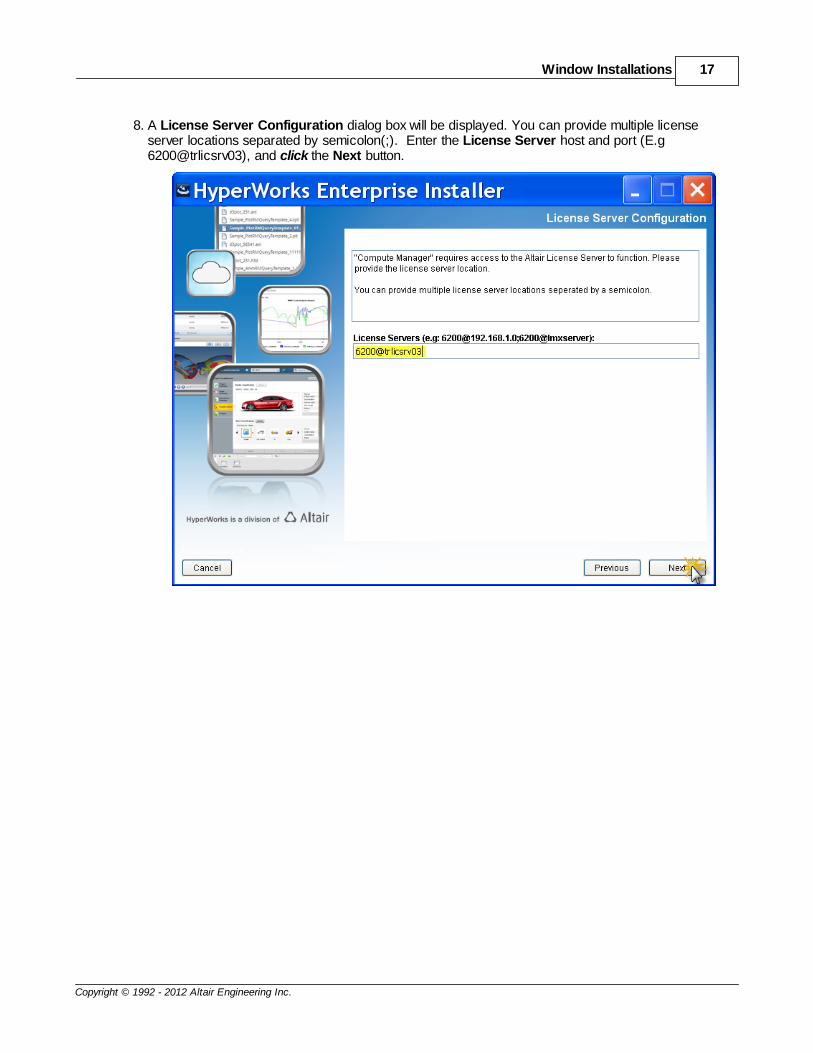
8. A License Server Configuration dialog box will be displayed. You can provide multiple licenseserver locations separated by semicolon(;). Enter the License Server host and port (E.g6200@trlicsrv03), and click the Next button.

Installation and Administration Guide18
Copyright © 1992 - 2012 Altair Engineering Inc.
9. A Database Configuration dialog box will be displayed. Enter a user id and password that will beused to administer the HWE database. This user must be an existing user on the local server andshould not have administrative privileges.
Window Installations 19
Copyright © 1992 - 2012 Altair Engineering Inc.
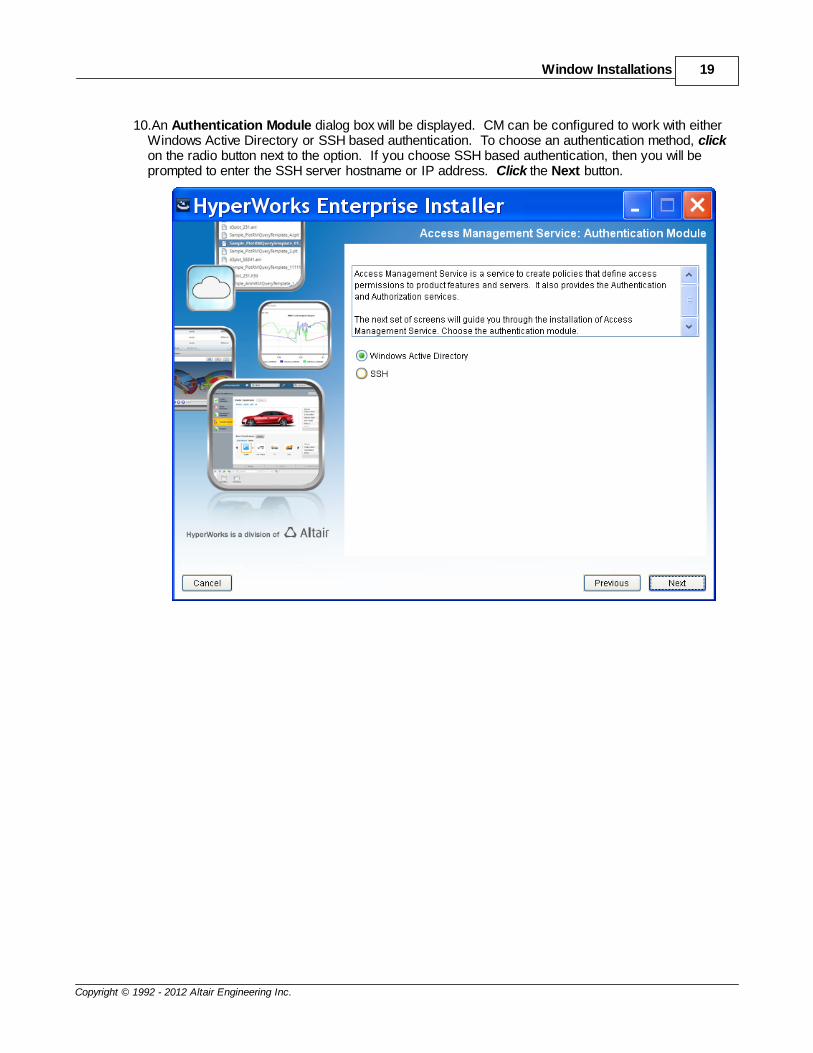
10.An Authentication Module dialog box will be displayed. CM can be configured to work with eitherWindows Active Directory or SSH based authentication. To choose an authentication method, clickon the radio button next to the option. If you choose SSH based authentication, then you will beprompted to enter the SSH server hostname or IP address. Click the Next button.
Installation and Administration Guide20
Copyright © 1992 - 2012 Altair Engineering Inc.
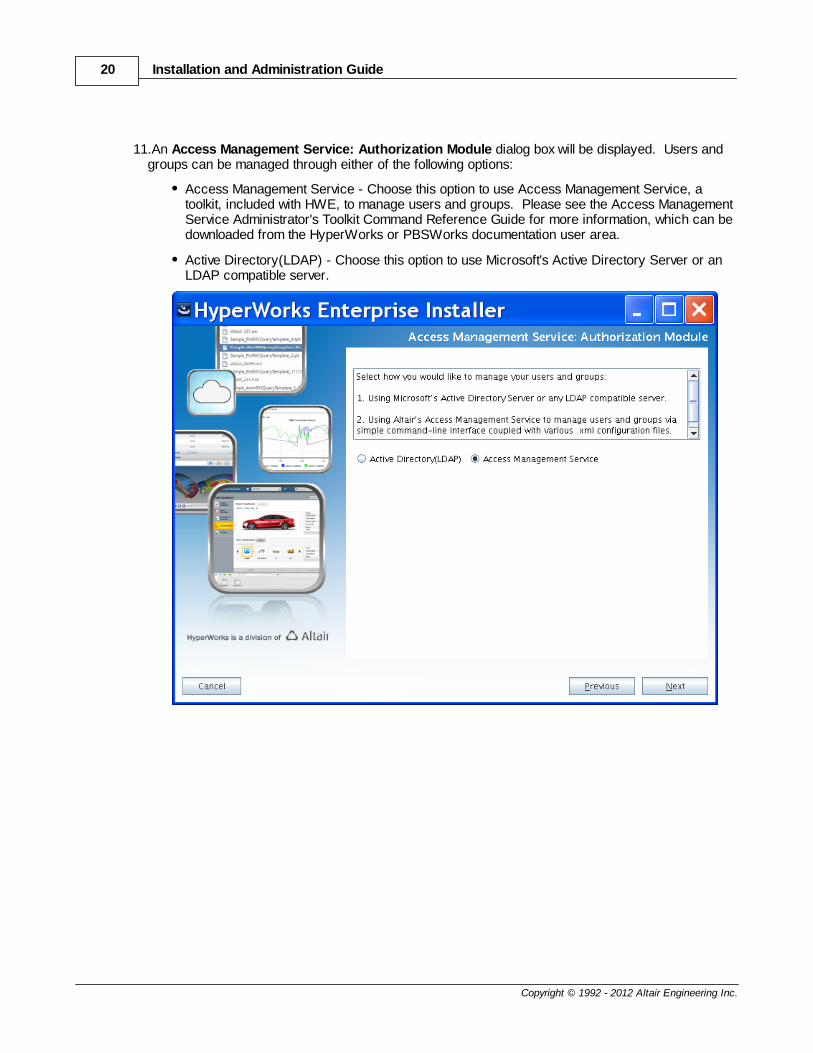
11.An Access Management Service: Authorization Module dialog box will be displayed. Users andgroups can be managed through either of the following options:
Access Management Service - Choose this option to use Access Management Service, atoolkit, included with HWE, to manage users and groups. Please see the Access ManagementService Administrator's Toolkit Command Reference Guide for more information, which can bedownloaded from the HyperWorks or PBSWorks documentation user area.
Active Directory(LDAP) - Choose this option to use Microsoft's Active Directory Server or anLDAP compatible server.

Window Installations 21
Copyright © 1992 - 2012 Altair Engineering Inc.
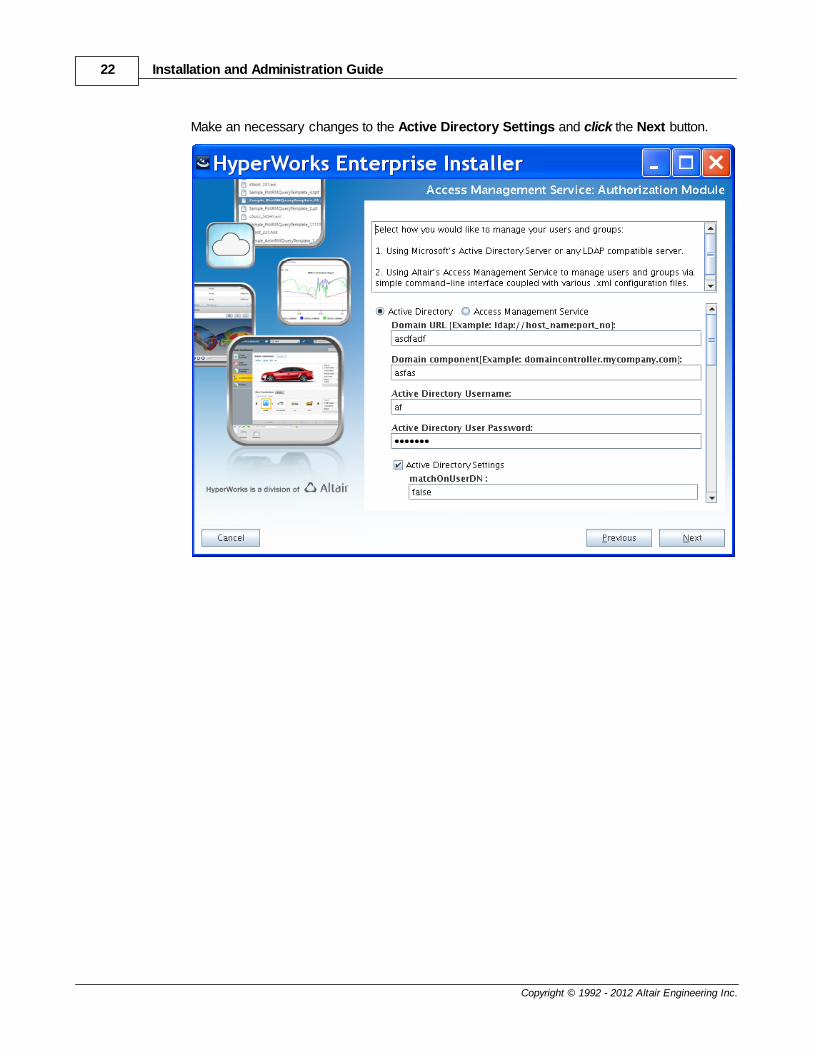
If you choose the Active Directory(LDAP) option, then you will be prompted to enter the ActiveDirectory or LDAP information. Click on the Active Directory Settings checkbox to edit thedefault Active Directory/LDAP Settings.
Installation and Administration Guide22
Copyright © 1992 - 2012 Altair Engineering Inc.
Make an necessary changes to the Active Directory Settings and click the Next button.
Window Installations 23
Copyright © 1992 - 2012 Altair Engineering Inc.
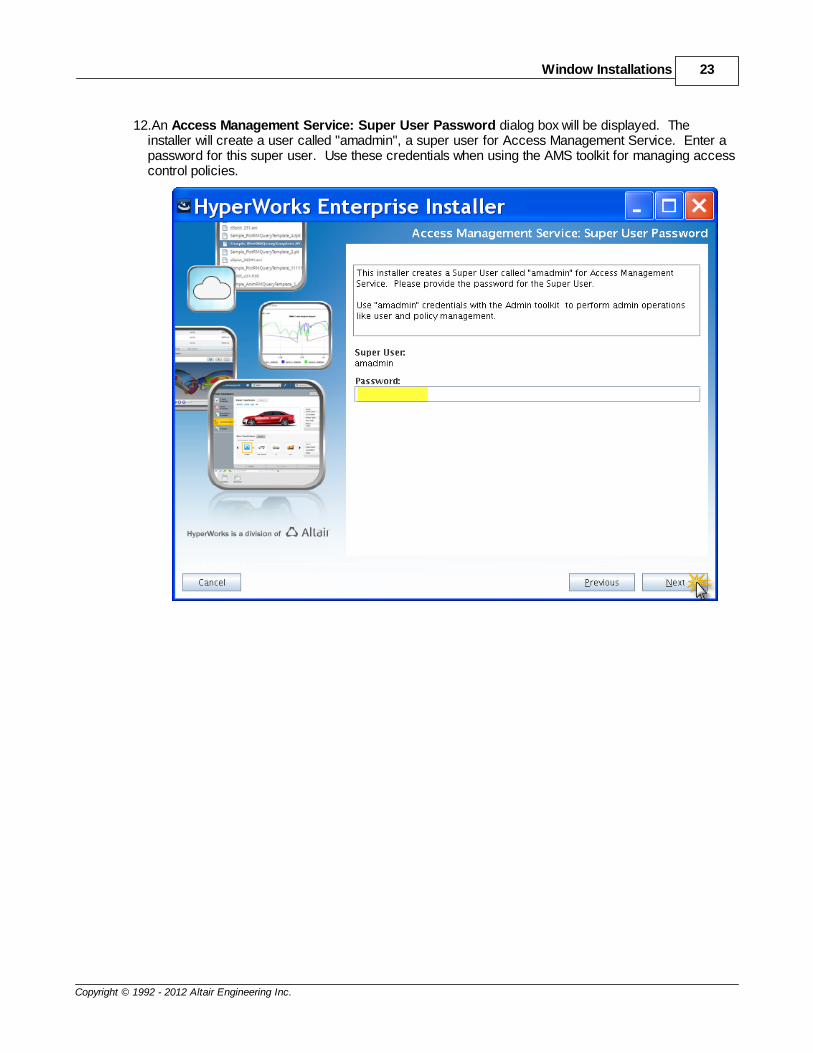
12.An Access Management Service: Super User Password dialog box will be displayed. Theinstaller will create a user called "amadmin", a super user for Access Management Service. Enter apassword for this super user. Use these credentials when using the AMS toolkit for managing accesscontrol policies.

Installation and Administration Guide24
Copyright © 1992 - 2012 Altair Engineering Inc.
13.A HWE Applications: Portal Administrator Setup dialog box will be displayed. Enter a user idand password that will be used to administer the HWE portal. This user must be an existing user onthe authentication server.
Window Installations 25
Copyright © 1992 - 2012 Altair Engineering Inc.
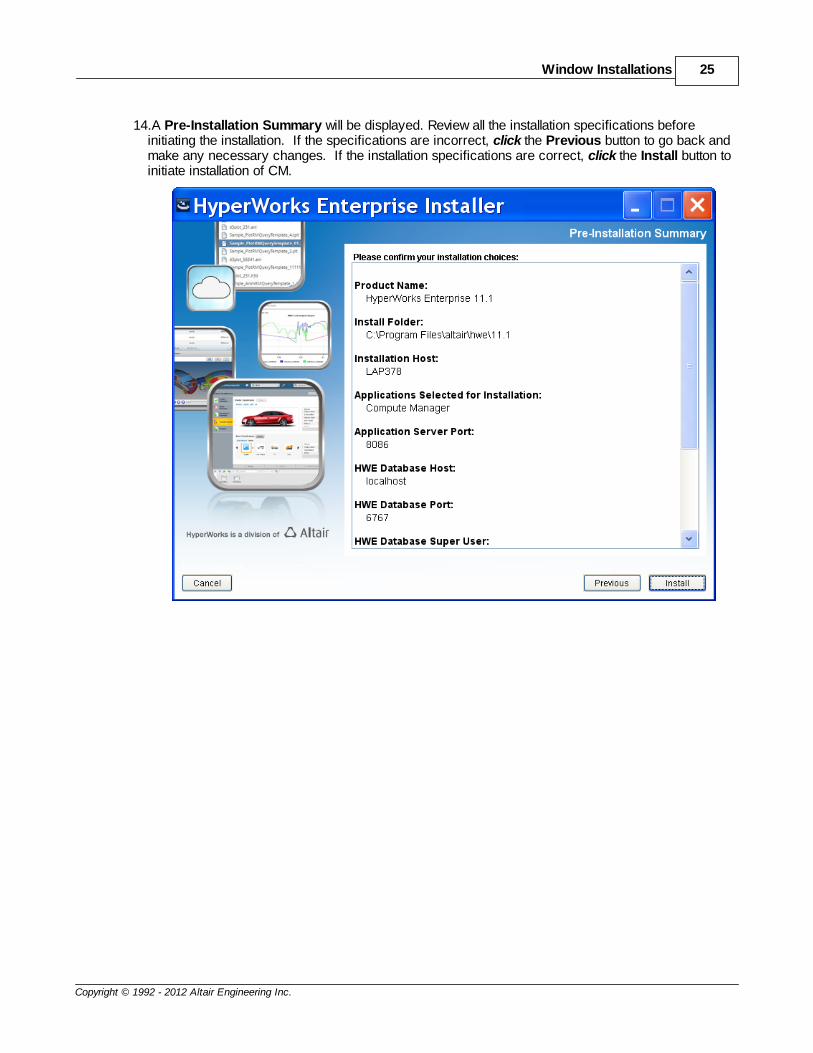
14.A Pre-Installation Summary will be displayed. Review all the installation specifications beforeinitiating the installation. If the specifications are incorrect, click the Previous button to go back andmake any necessary changes. If the installation specifications are correct, click the Install button toinitiate installation of CM.
Installation and Administration Guide26
Copyright © 1992 - 2012 Altair Engineering Inc.
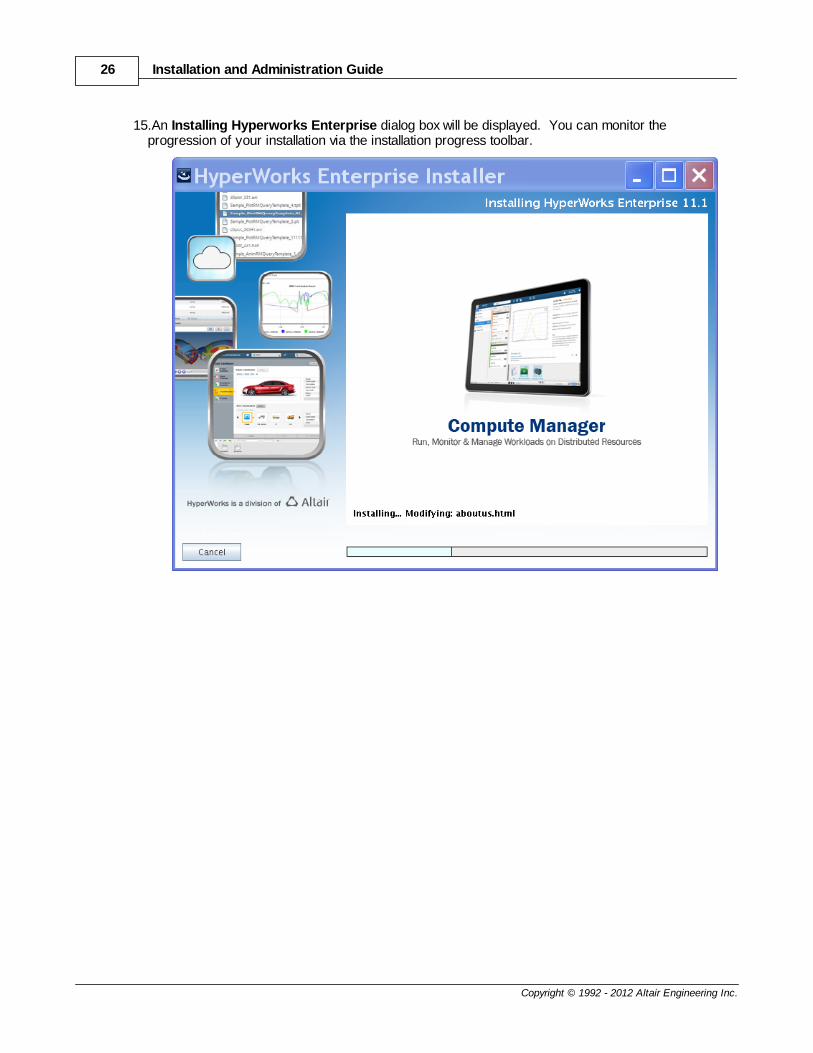
15.An Installing Hyperworks Enterprise dialog box will be displayed. You can monitor theprogression of your installation via the installation progress toolbar.

Window Installations 27
Copyright © 1992 - 2012 Altair Engineering Inc.
Once the components of CM are installed, you will be asked to wait while the system is beingconfigured.

Installation and Administration Guide28
Copyright © 1992 - 2012 Altair Engineering Inc.
16.An Install Complete dialog will be displayed indicating your installation is complete. Click the Donebutton to complete the installation.
CM is now installed and configured. Use a web browser to login to CM through the URL http://<hostname>:<port>/hwe.
Window Installations 29
Copyright © 1992 - 2012 Altair Engineering Inc.
2.2 Uninstalling CM via GUI
To uninstall CM, follow the steps below:
1. As the Windows Administrator navigate to Add or Remove Programs (Start > Control Panel > Add or Remove Programs).
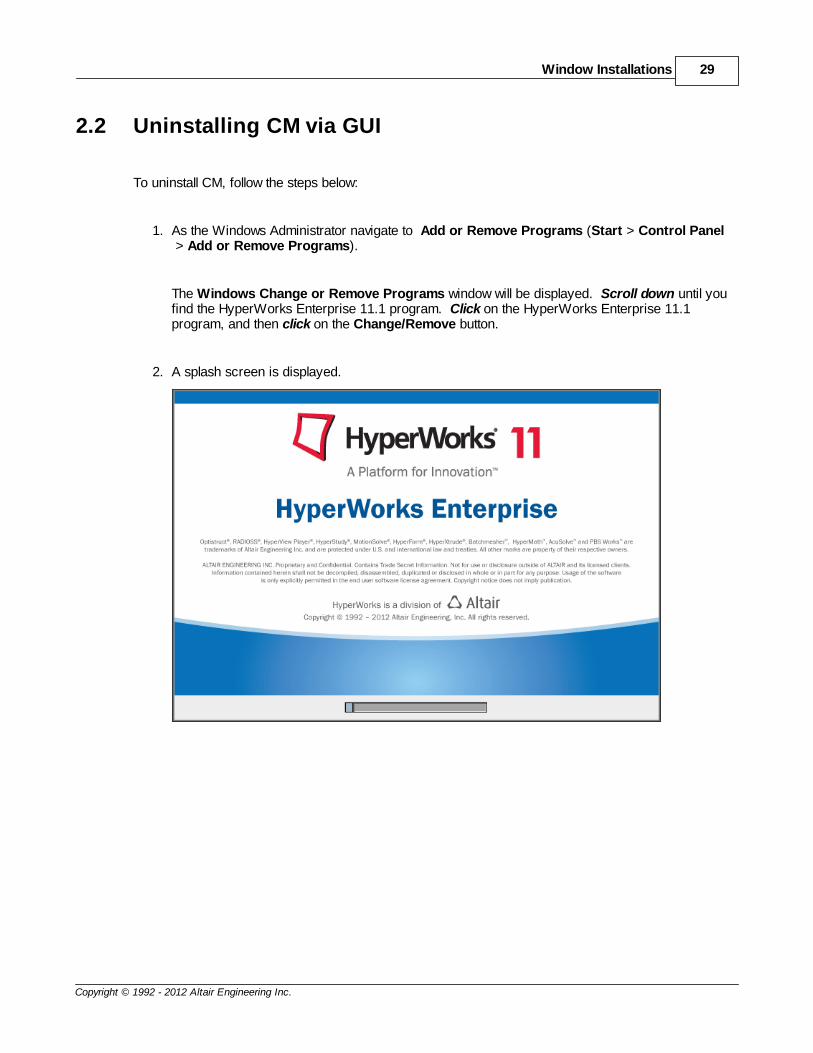
The Windows Change or Remove Programs window will be displayed. Scroll down until youfind the HyperWorks Enterprise 11.1 program. Click on the HyperWorks Enterprise 11.1program, and then click on the Change/Remove button.
2. A splash screen is displayed.

Installation and Administration Guide30
Copyright © 1992 - 2012 Altair Engineering Inc.
3. A Maintenaince Mode dialog will be displayed. Click the button next to the Uninstall Productoption, and then click the Next button.

Window Installations 31
Copyright © 1992 - 2012 Altair Engineering Inc.
4. A Uninstall Hyperworks Enterprise Suite dialog will be displayed. Please read the instructionsbefore proceeding with the uninstall. Click the Uninstall button to initiate the uninstall process.To cancel the uninstall process, click the Cancel button.
Installation and Administration Guide32
Copyright © 1992 - 2012 Altair Engineering Inc.
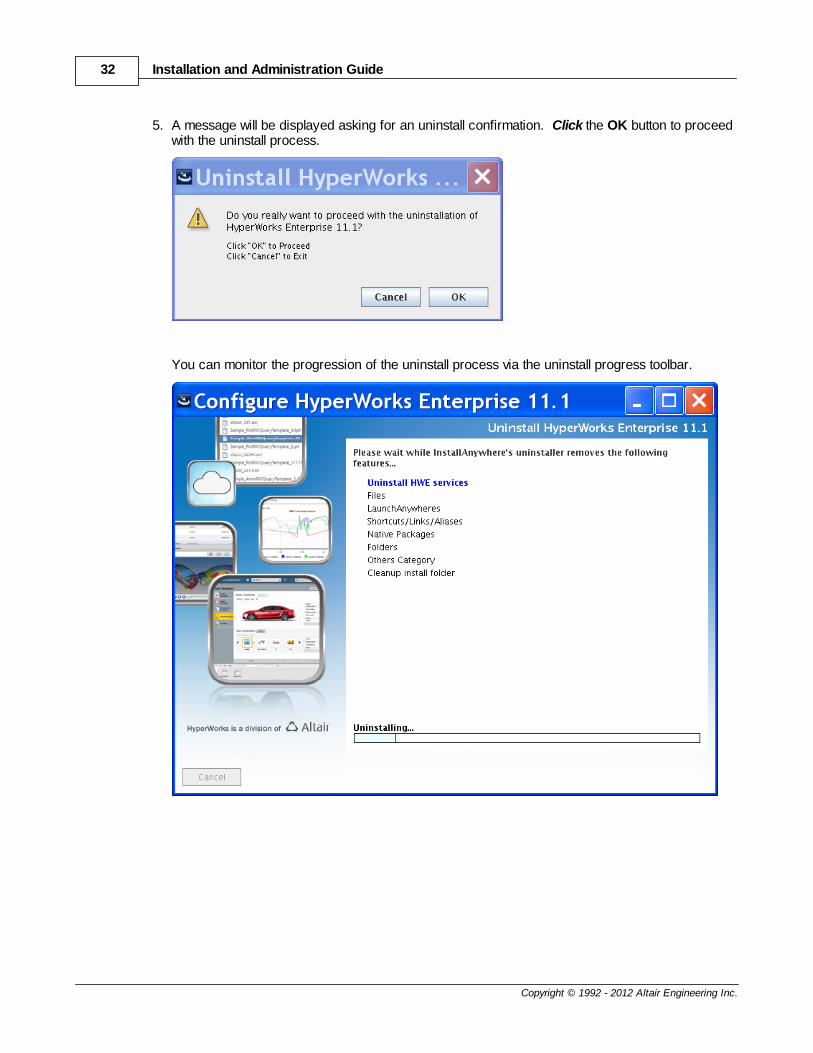
5. A message will be displayed asking for an uninstall confirmation. Click the OK button to proceedwith the uninstall process.
You can monitor the progression of the uninstall process via the uninstall progress toolbar.

Window Installations 33
Copyright © 1992 - 2012 Altair Engineering Inc.
6. Once the uninstall is complete, an Uninstall Complete dialog box is displayed. Any items thatcould not be removed will be listed.
Note: A back-up of your configuration files and database will remain in your installation
directory. 7. To complete the uninstall, click the Done button.
Installation and Administration Guide34
Copyright © 1992 - 2012 Altair Engineering Inc.
2.3 Starting CM
To start CM:
1. Open Control Panel->Administrative Tools->Services
2. Right click on "HWE Portal Service" and click the "Start" option.
Window Installations 35
Copyright © 1992 - 2012 Altair Engineering Inc.
2.4 Stopping CM
To stop CM:
1. Open Control Panel->Administrative Tools->Services
2. Right click on "HWE Portal Service" and click the "Stop" option.
Installation and Administration Guide36
Copyright © 1992 - 2012 Altair Engineering Inc.
2.5 Restarting CM
To restart CM:
1. Open Control Panel->Administrative Tools->Services
2. Right click on "HWE Portal Service" and click the "Restart" option.
Linux Installations 37
Copyright © 1992 - 2012 Altair Engineering Inc.
3 Linux Installations
Installing CM is quick and easy. On Linux platforms there are two ways to install CM, a GUI-basedinstaller or a console installer. The GUI-based installer walks you through the process, requestinginstallation and configuration information along the way. You may also install CM at the console. Oncethe installation is complete, CM is ready for use.
Installing CM using a GUI-based installer
Installing CM via the Console
See Also
Uninstalling CM
Installation and Administration Guide38
Copyright © 1992 - 2012 Altair Engineering Inc.
3.1 Installing CM via GUI
Installation of this product requires:
System administrator privileges (root privileges)
The existence of the following users before beginning the installation
The HWE Database Owner - must be a non-administrative user that exists on the serverwhere the HWE Suite will be installed, and will be used to administer the HWE database.
The Portal Administrator - must be an existing user on the authenticating server and will beused to administer the HWE portal.
To install CM, follow the steps below:
1. Download the installer appropriate for your platform from the user area.
2. Invoke the installer by executing the following command:
./HWE_11.1_Linux_x86_64.bin -i swing
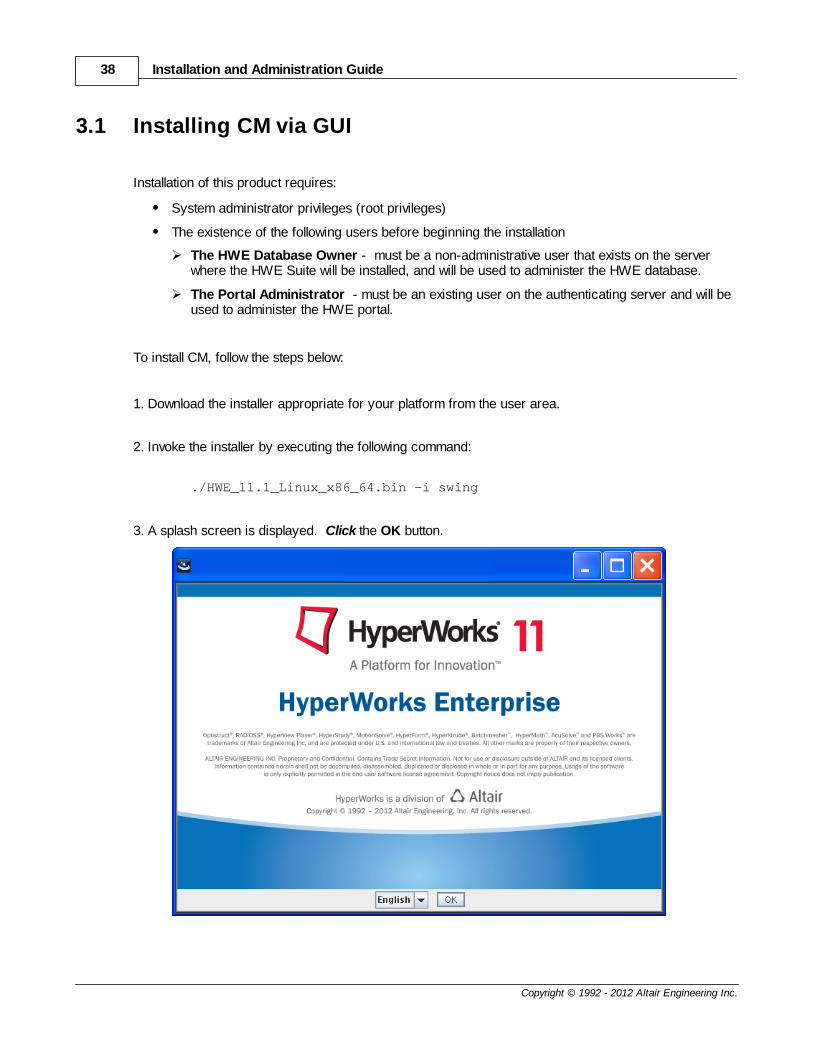
3. A splash screen is displayed. Click the OK button.
Linux Installations 39
Copyright © 1992 - 2012 Altair Engineering Inc.
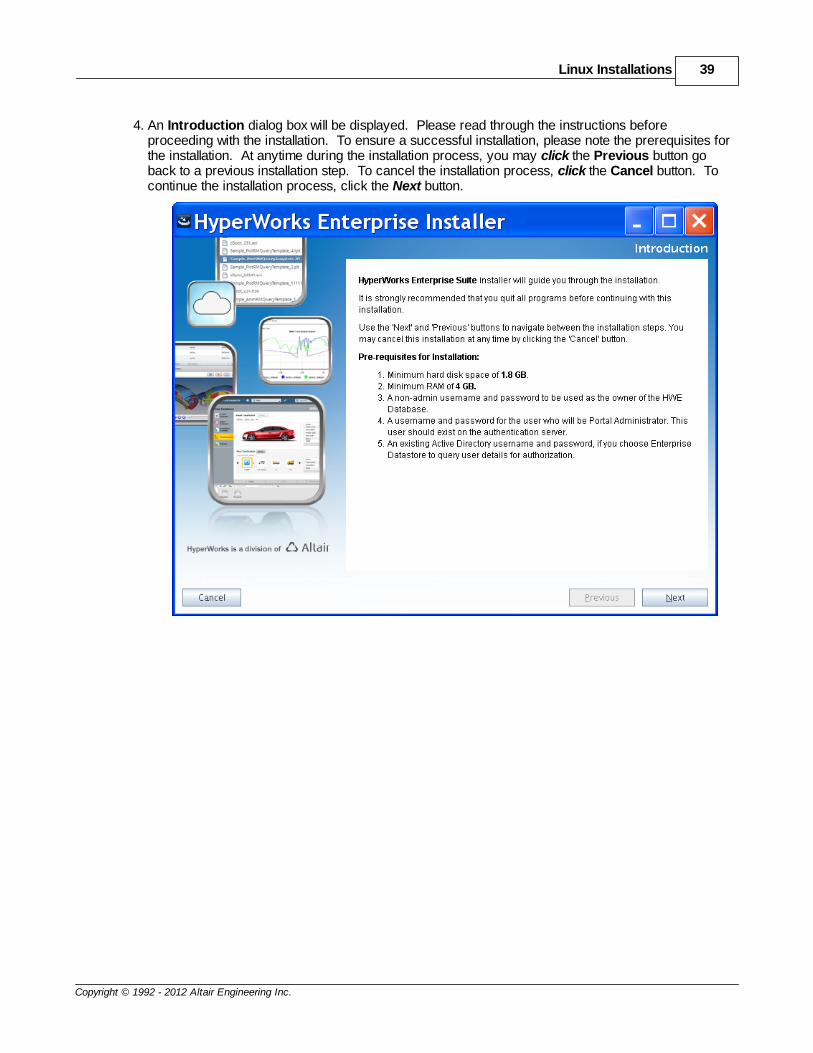
4. An Introduction dialog box will be displayed. Please read through the instructions beforeproceeding with the installation. To ensure a successful installation, please note the prerequisites forthe installation. At anytime during the installation process, you may click the Previous button goback to a previous installation step. To cancel the installation process, click the Cancel button. Tocontinue the installation process, click the Next button.
Installation and Administration Guide40
Copyright © 1992 - 2012 Altair Engineering Inc.
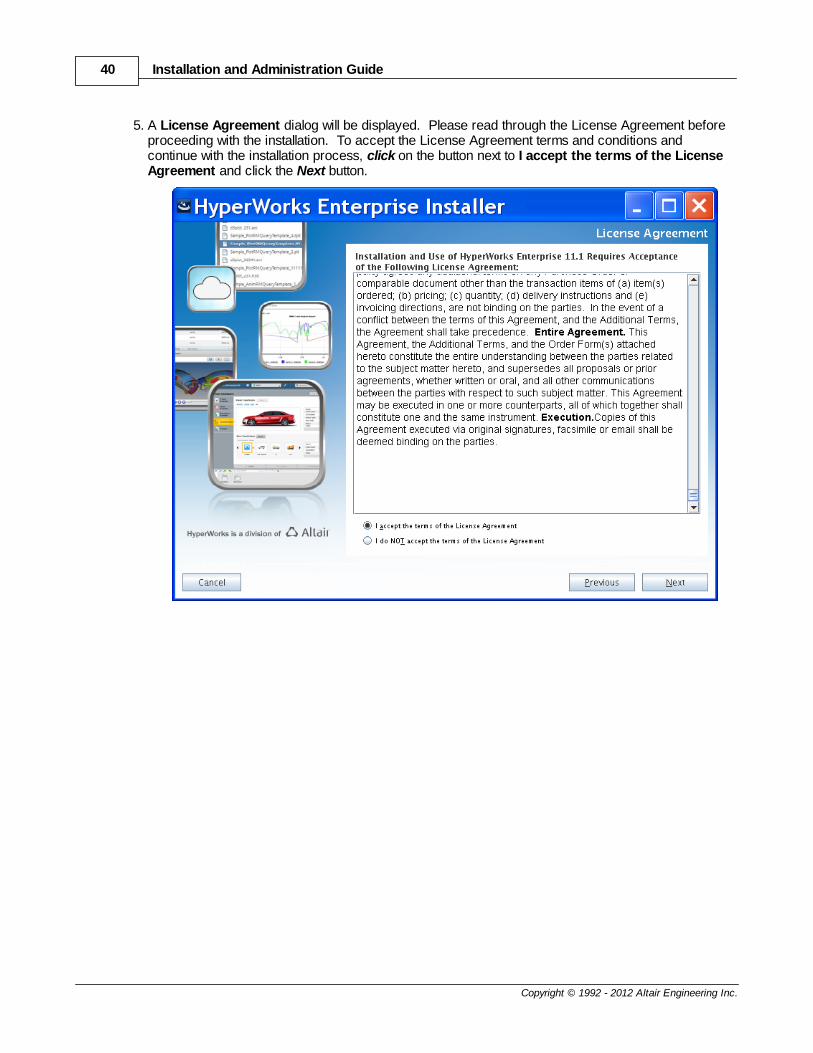
5. A License Agreement dialog will be displayed. Please read through the License Agreement beforeproceeding with the installation. To accept the License Agreement terms and conditions andcontinue with the installation process, click on the button next to I accept the terms of the LicenseAgreement and click the Next button.

Linux Installations 41
Copyright © 1992 - 2012 Altair Engineering Inc.
6. A Choose Install Options dialog will be displayed. You can choose to install either:
Compute Manager which installs:
Compute Manager application and services
Results Visualization plug-in (use of the plug-in requires Results Visualization Service(RVS) to be installed. The installation of RVS can be done at a later time)
Access Management Service
Results Visualization Service which installs:
Results Visualization Service
Select the component to install by clicking on the radio button next to the component description,then click the Next button.
Installation and Administration Guide42
Copyright © 1992 - 2012 Altair Engineering Inc.
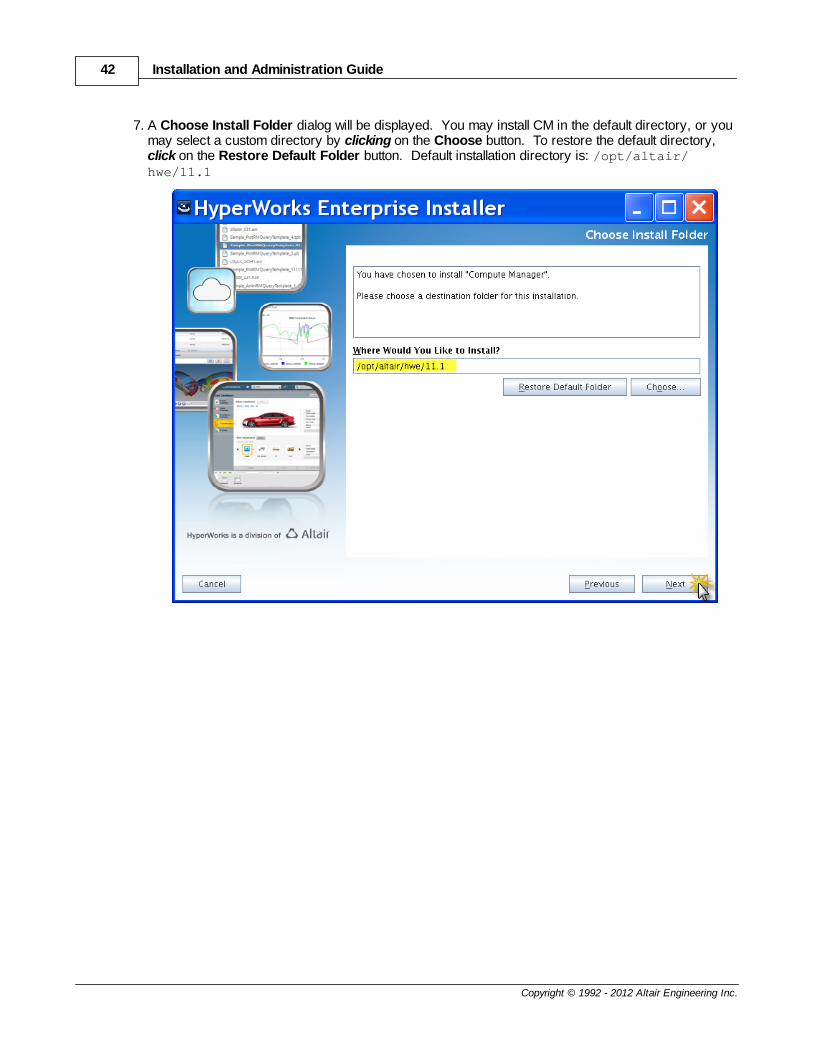
7. A Choose Install Folder dialog will be displayed. You may install CM in the default directory, or youmay select a custom directory by clicking on the Choose button. To restore the default directory,click on the Restore Default Folder button. Default installation directory is: /opt/altair/hwe/11.1
Linux Installations 43
Copyright © 1992 - 2012 Altair Engineering Inc.
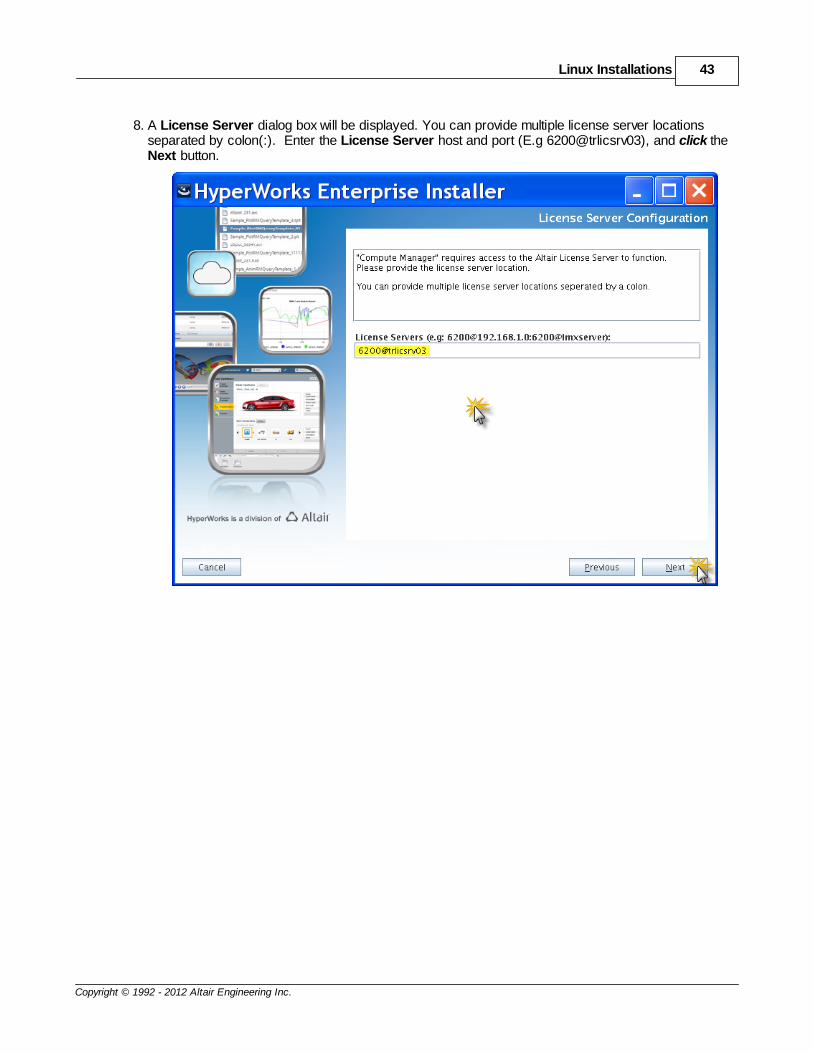
8. A License Server dialog box will be displayed. You can provide multiple license server locationsseparated by colon(:). Enter the License Server host and port (E.g 6200@trlicsrv03), and click theNext button.

Installation and Administration Guide44
Copyright © 1992 - 2012 Altair Engineering Inc.
9. A Database Configuration dialog box will be displayed. Enter a user id and password that will beused to administer the HWE database. This user must be an existing user on the local server andshould not have administrative privileges.
Linux Installations 45
Copyright © 1992 - 2012 Altair Engineering Inc.
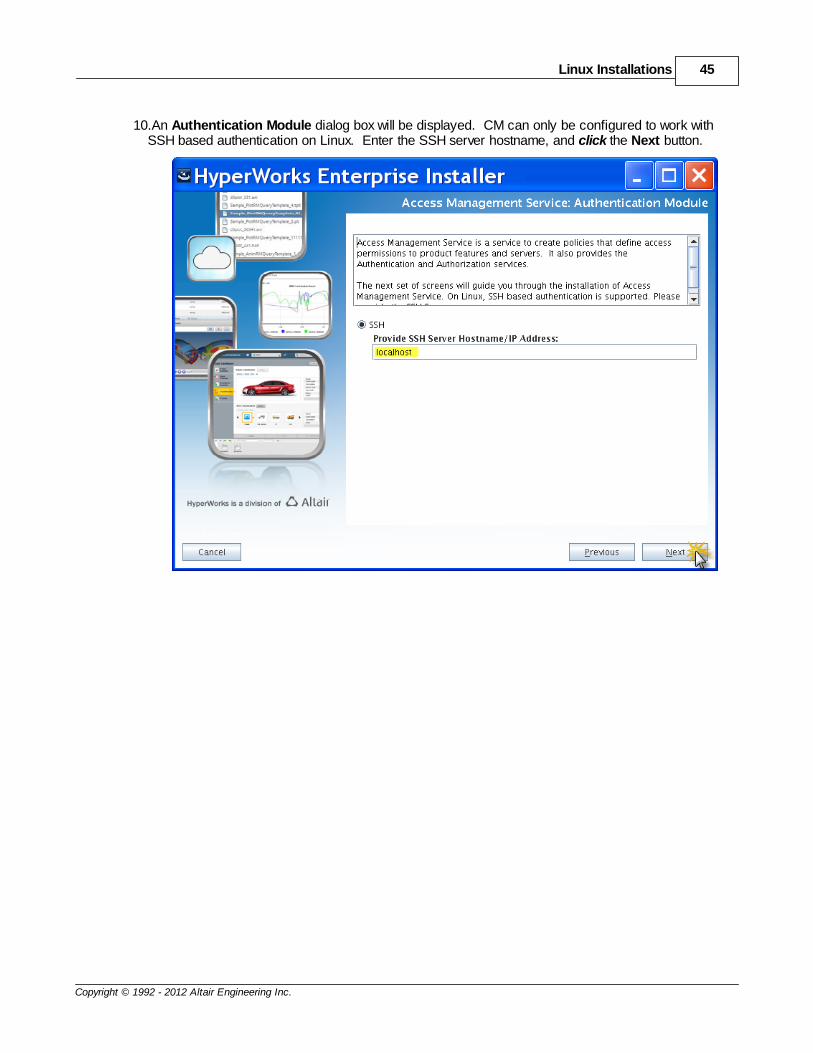
10.An Authentication Module dialog box will be displayed. CM can only be configured to work withSSH based authentication on Linux. Enter the SSH server hostname, and click the Next button.
Installation and Administration Guide46
Copyright © 1992 - 2012 Altair Engineering Inc.
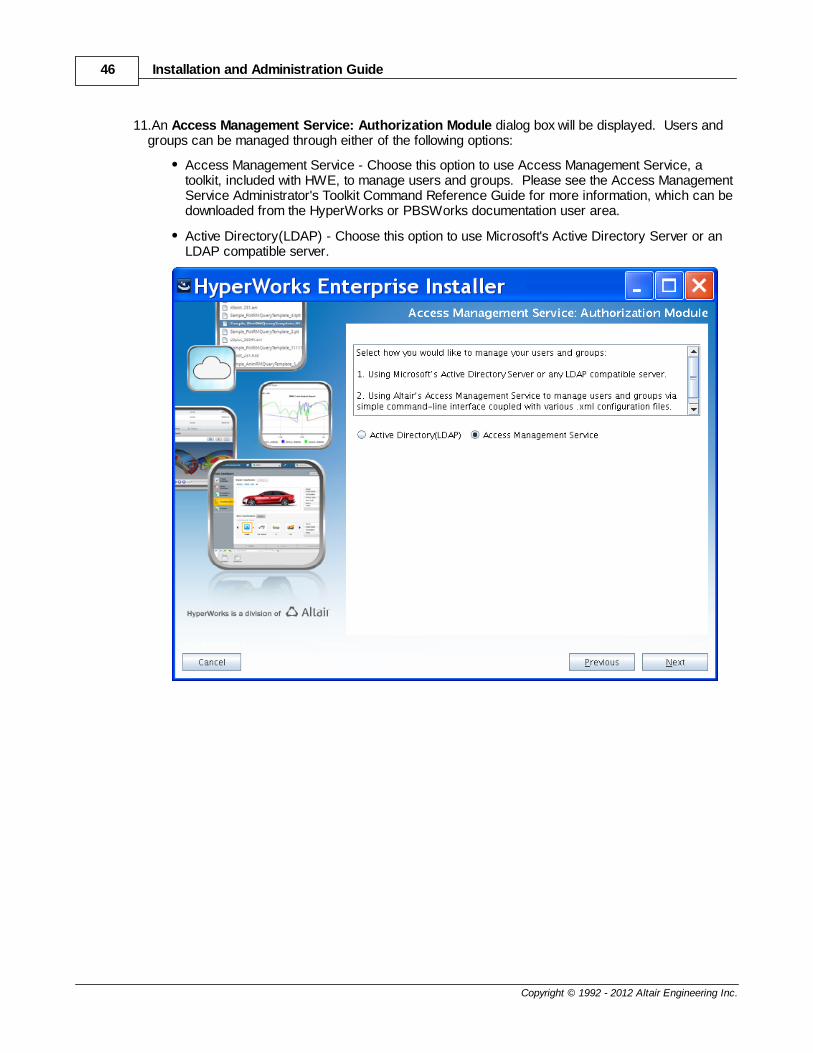
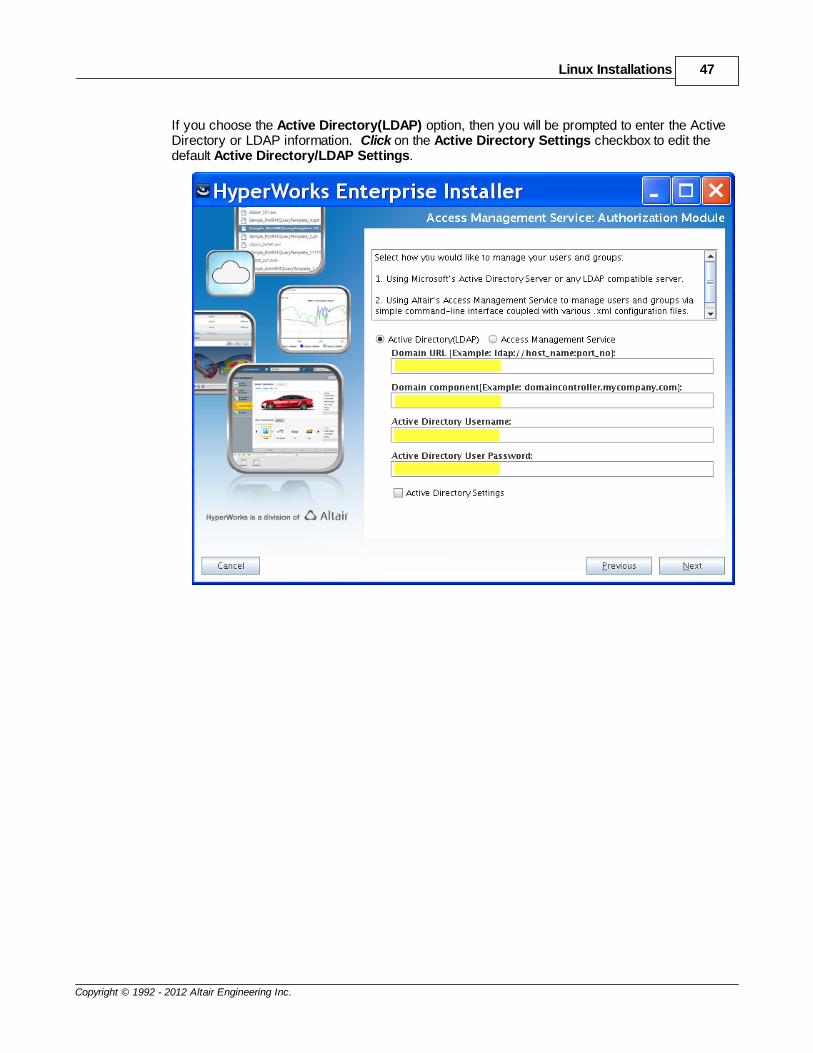
11.An Access Management Service: Authorization Module dialog box will be displayed. Users andgroups can be managed through either of the following options:
Access Management Service - Choose this option to use Access Management Service, atoolkit, included with HWE, to manage users and groups. Please see the Access ManagementService Administrator's Toolkit Command Reference Guide for more information, which can bedownloaded from the HyperWorks or PBSWorks documentation user area.
Active Directory(LDAP) - Choose this option to use Microsoft's Active Directory Server or anLDAP compatible server.
Linux Installations 47
Copyright © 1992 - 2012 Altair Engineering Inc.
If you choose the Active Directory(LDAP) option, then you will be prompted to enter the ActiveDirectory or LDAP information. Click on the Active Directory Settings checkbox to edit thedefault Active Directory/LDAP Settings.

Installation and Administration Guide48
Copyright © 1992 - 2012 Altair Engineering Inc.
Make an necessary changes to the Active Directory Settings and click the Next button.
Linux Installations 49
Copyright © 1992 - 2012 Altair Engineering Inc.
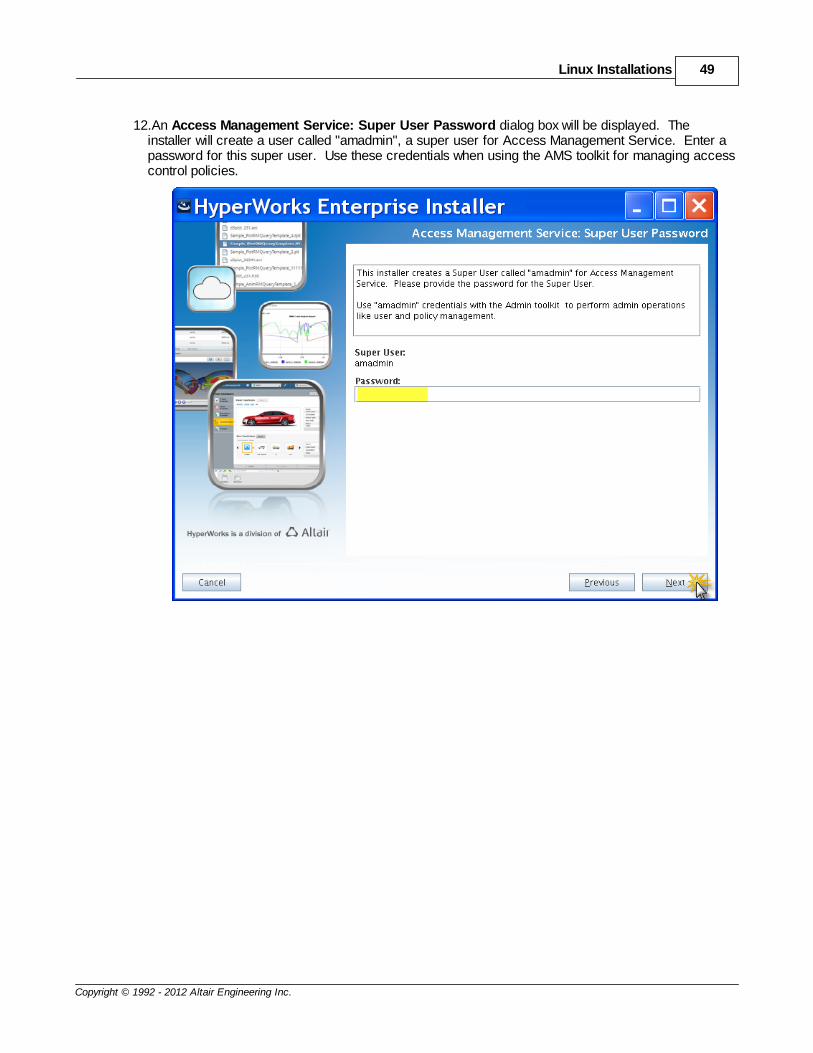
12.An Access Management Service: Super User Password dialog box will be displayed. Theinstaller will create a user called "amadmin", a super user for Access Management Service. Enter apassword for this super user. Use these credentials when using the AMS toolkit for managing accesscontrol policies.
Installation and Administration Guide50
Copyright © 1992 - 2012 Altair Engineering Inc.
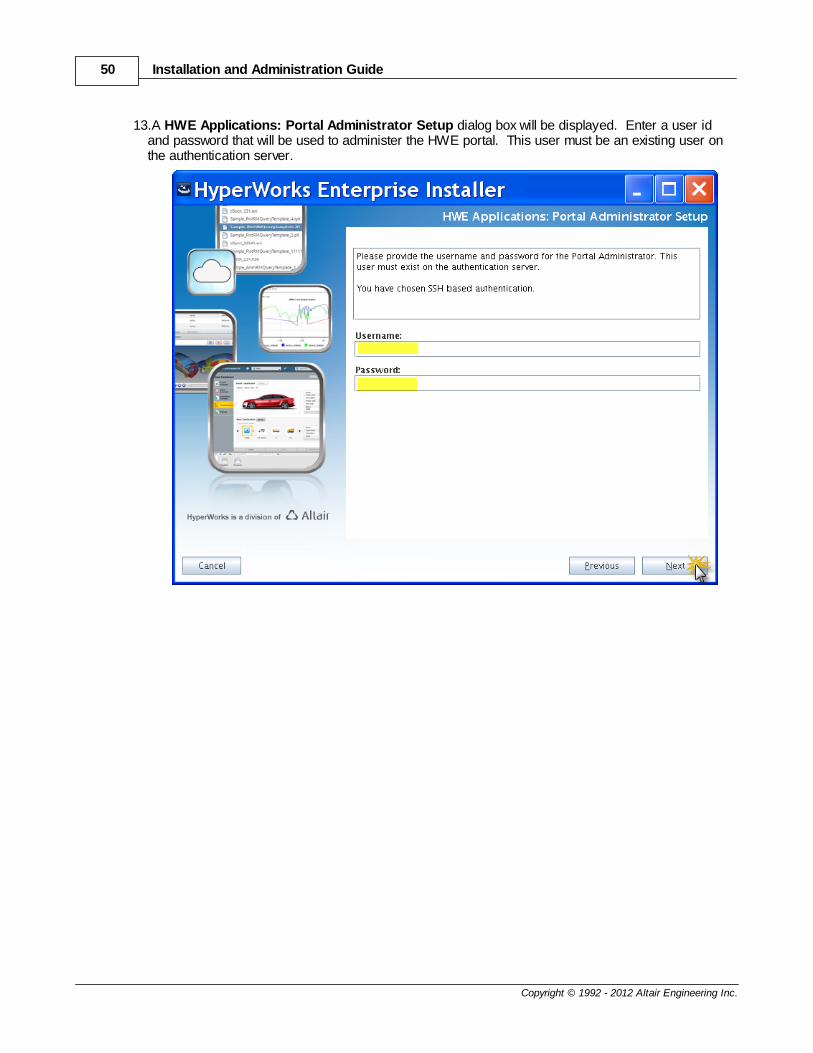
13.A HWE Applications: Portal Administrator Setup dialog box will be displayed. Enter a user idand password that will be used to administer the HWE portal. This user must be an existing user onthe authentication server.

Linux Installations 51
Copyright © 1992 - 2012 Altair Engineering Inc.
14.A Pre-Installation Summary will be displayed. Review all the installation specifications beforeinitiating the installation. If the specifications are incorrect, click the Previous button to go back andmake any necessary changes. If the installation specifications are correct, click the Install button toinitiate installation of CM.

Installation and Administration Guide52
Copyright © 1992 - 2012 Altair Engineering Inc.
15.An Installing Hyperworks Enterprise dialog box will be displayed. You can monitor theprogression of your installation via the installation progress toolbar.
Linux Installations 53
Copyright © 1992 - 2012 Altair Engineering Inc.
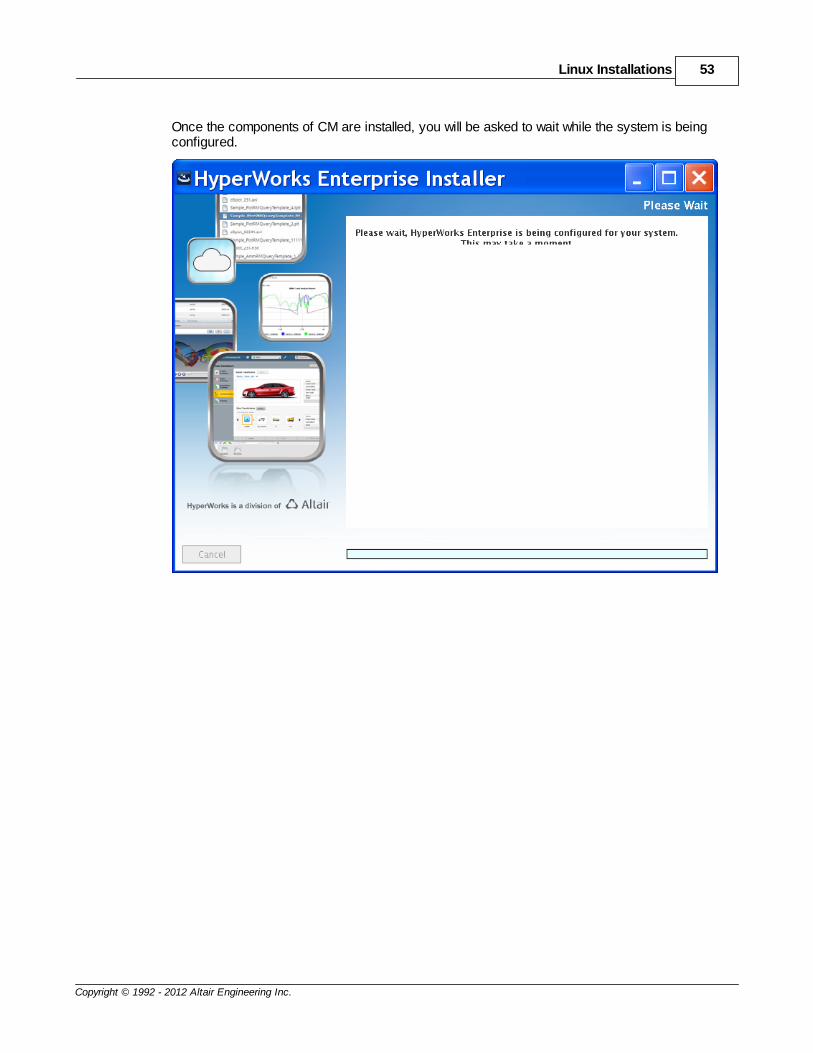
Once the components of CM are installed, you will be asked to wait while the system is beingconfigured.
Installation and Administration Guide54
Copyright © 1992 - 2012 Altair Engineering Inc.
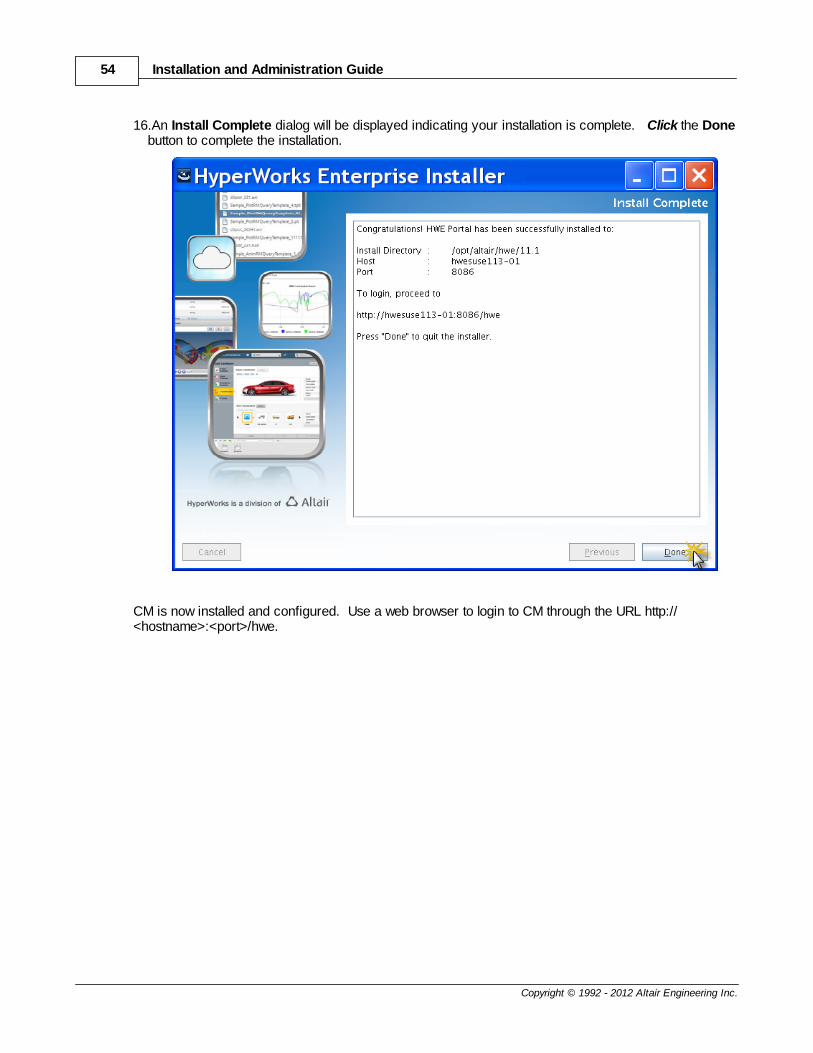
16.An Install Complete dialog will be displayed indicating your installation is complete. Click the Donebutton to complete the installation.
CM is now installed and configured. Use a web browser to login to CM through the URL http://<hostname>:<port>/hwe.
Linux Installations 55
Copyright © 1992 - 2012 Altair Engineering Inc.
3.2 Installing CM via Console
Installation of this product requires:
System administrator privileges (root privileges)
The existence of the following users before beginning the installation
The HWE Database Owner - must be a non-administrative user that exists on the serverwhere the HWE Suite will be installed, and will be used to administer the HWE database.
The Portal Administrator - must be an existing user on the authenticating server and will beused to administer the HWE portal.
To install CM, follow the steps below:
1. Download the installer appropriate for your platform from the user area.
2. Invoke the installer by executing the following command:
./HWE_11.1_Linux_x86_64.bin -i console
Installation and Administration Guide56
Copyright © 1992 - 2012 Altair Engineering Inc.
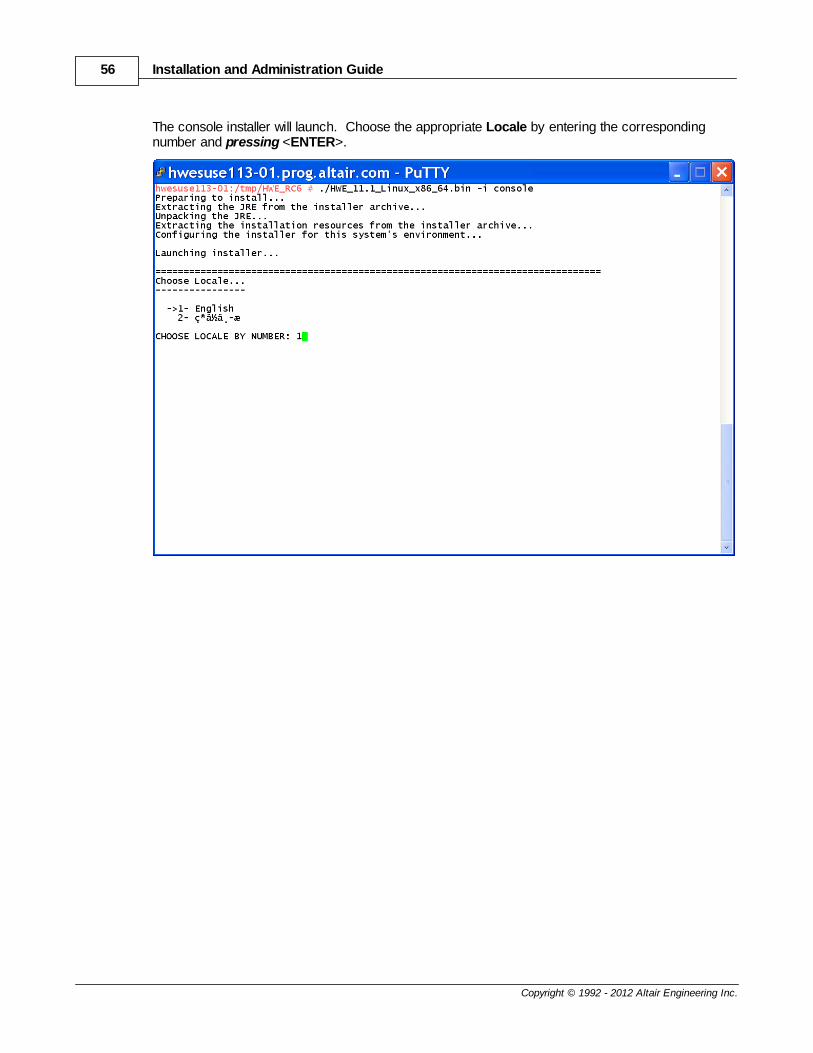
The console installer will launch. Choose the appropriate Locale by entering the correspondingnumber and pressing <ENTER>.

Linux Installations 57
Copyright © 1992 - 2012 Altair Engineering Inc.
3. Please read the installation instructions. Press <ENTER> when you are ready to initiate theinstallation. You may cancel the installation process at anytime by entering "quit" and pressing <ENTER>. At anytime during the installation process, you may enter "back" and press <ENTER> togo back to a previous installation step.
Installation and Administration Guide58
Copyright © 1992 - 2012 Altair Engineering Inc.
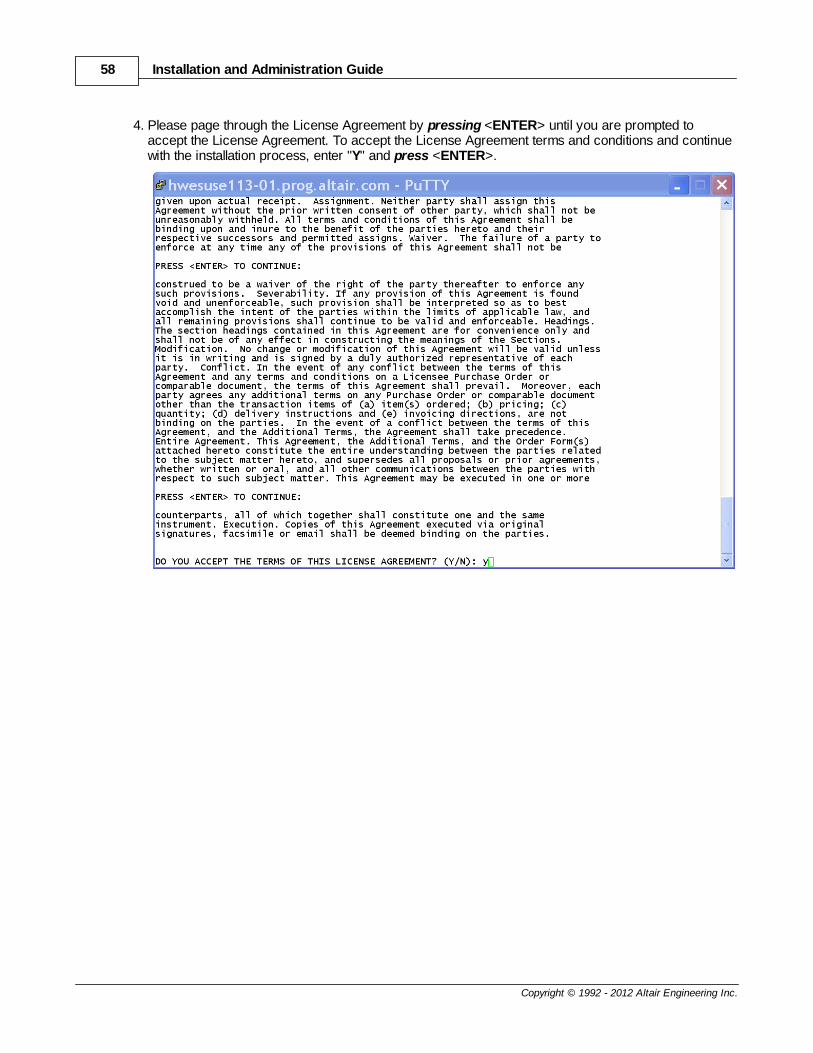
4. Please page through the License Agreement by pressing <ENTER> until you are prompted toaccept the License Agreement. To accept the License Agreement terms and conditions and continuewith the installation process, enter "Y" and press <ENTER>.
Linux Installations 59
Copyright © 1992 - 2012 Altair Engineering Inc.
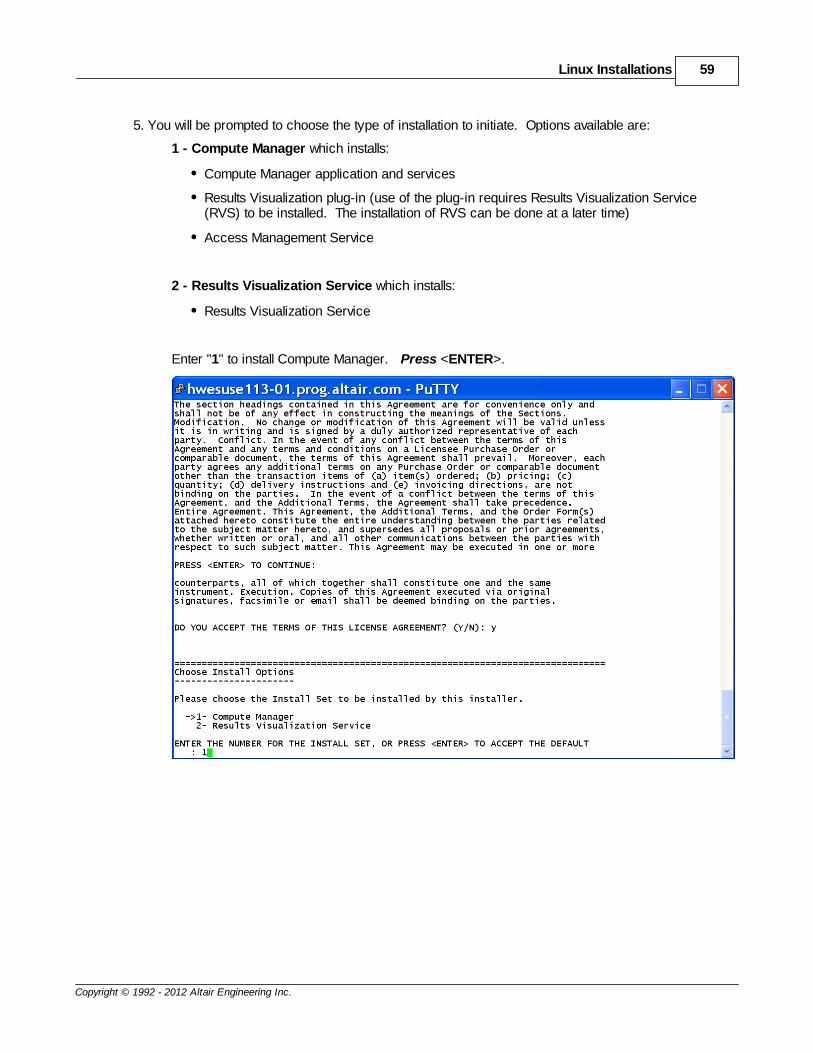
5. You will be prompted to choose the type of installation to initiate. Options available are:
1 - Compute Manager which installs:
Compute Manager application and services
Results Visualization plug-in (use of the plug-in requires Results Visualization Service(RVS) to be installed. The installation of RVS can be done at a later time)
Access Management Service
2 - Results Visualization Service which installs:
Results Visualization Service
Enter "1" to install Compute Manager. Press <ENTER>.
Installation and Administration Guide60
Copyright © 1992 - 2012 Altair Engineering Inc.
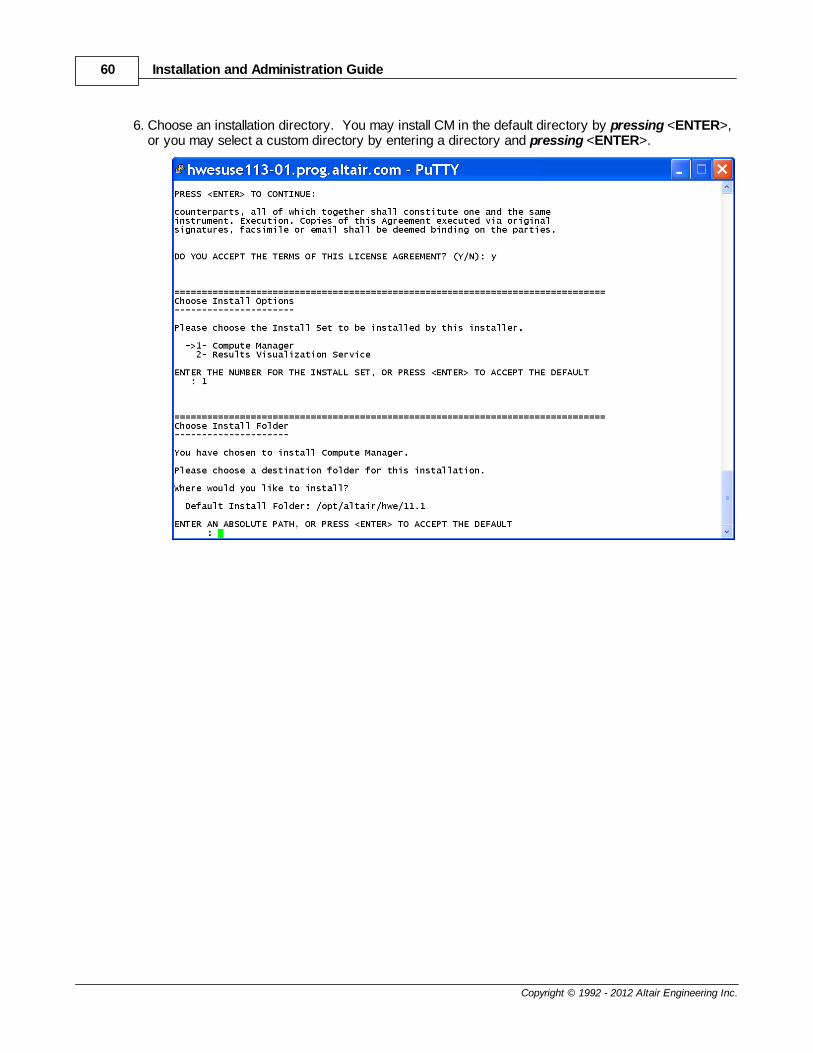
6. Choose an installation directory. You may install CM in the default directory by pressing <ENTER>,or you may select a custom directory by entering a directory and pressing <ENTER>.
Linux Installations 61
Copyright © 1992 - 2012 Altair Engineering Inc.
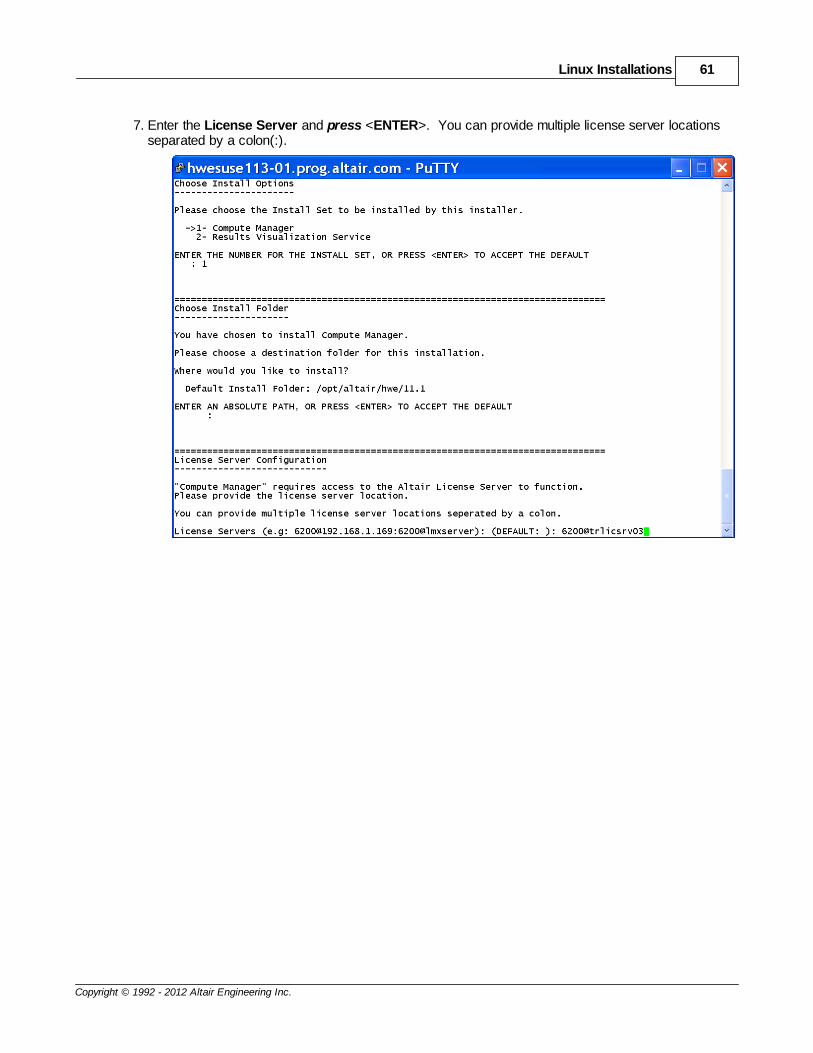
7. Enter the License Server and press <ENTER>. You can provide multiple license server locationsseparated by a colon(:).
Installation and Administration Guide62
Copyright © 1992 - 2012 Altair Engineering Inc.
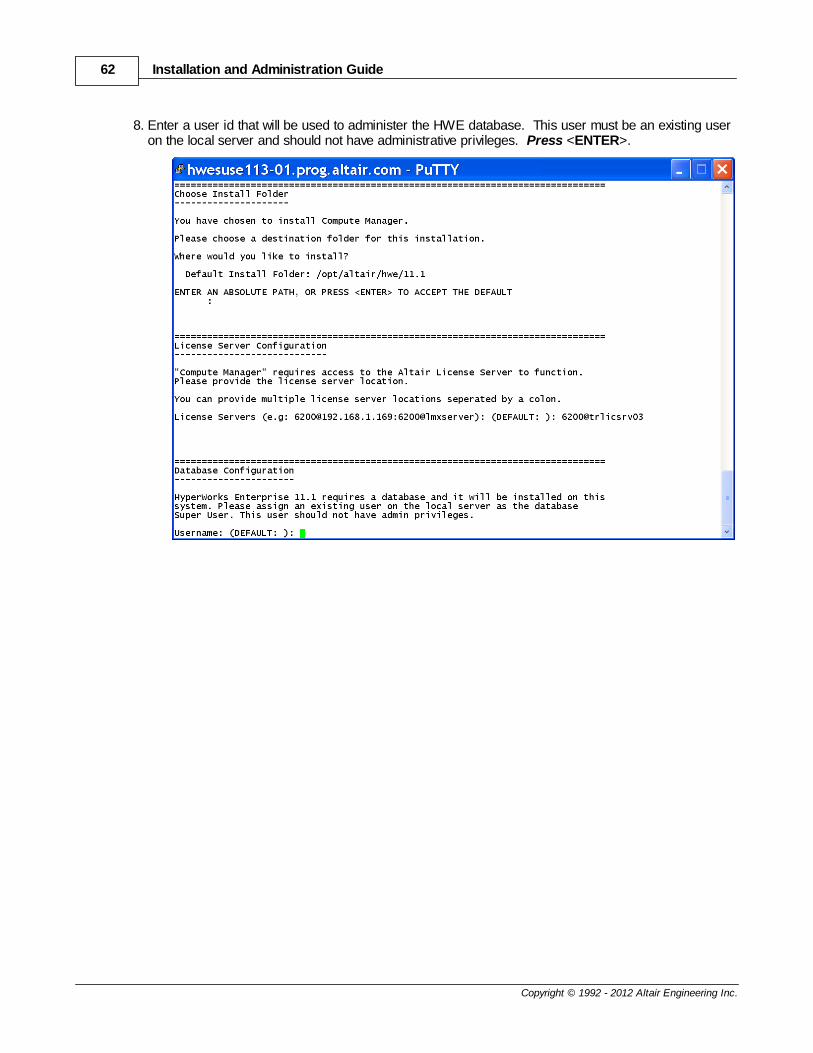
8. Enter a user id that will be used to administer the HWE database. This user must be an existing useron the local server and should not have administrative privileges. Press <ENTER>.
Linux Installations 63
Copyright © 1992 - 2012 Altair Engineering Inc.
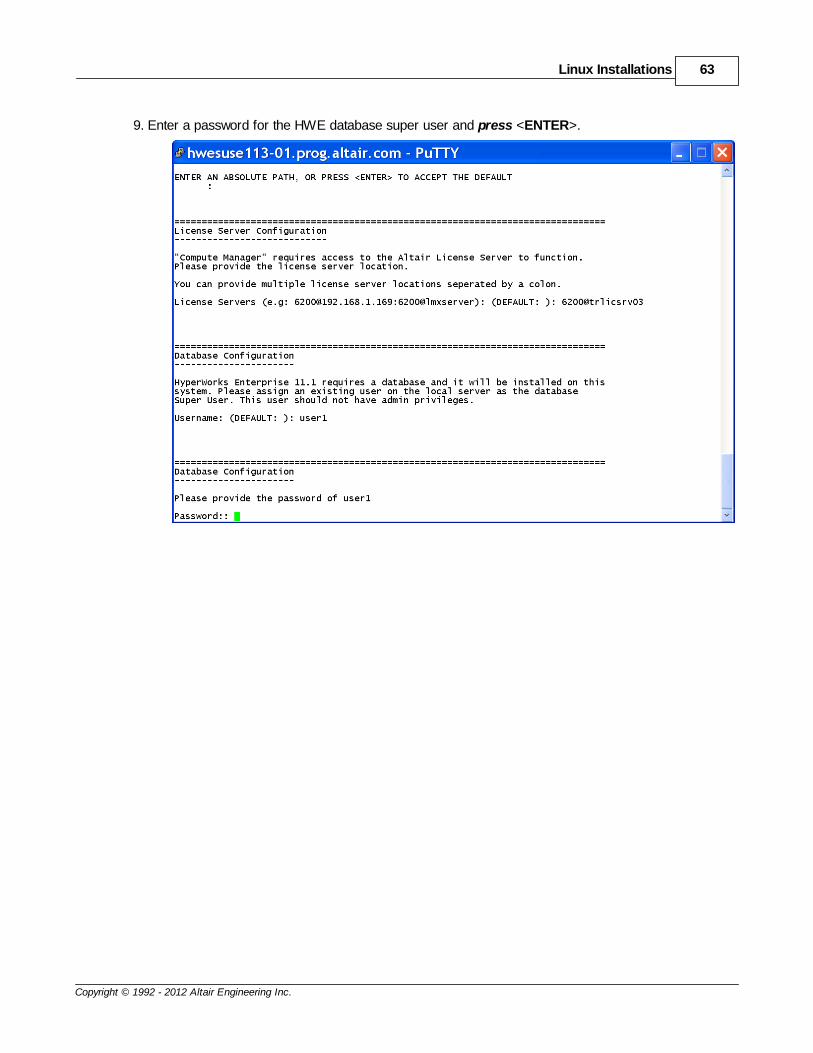
9. Enter a password for the HWE database super user and press <ENTER>.
Installation and Administration Guide64
Copyright © 1992 - 2012 Altair Engineering Inc.
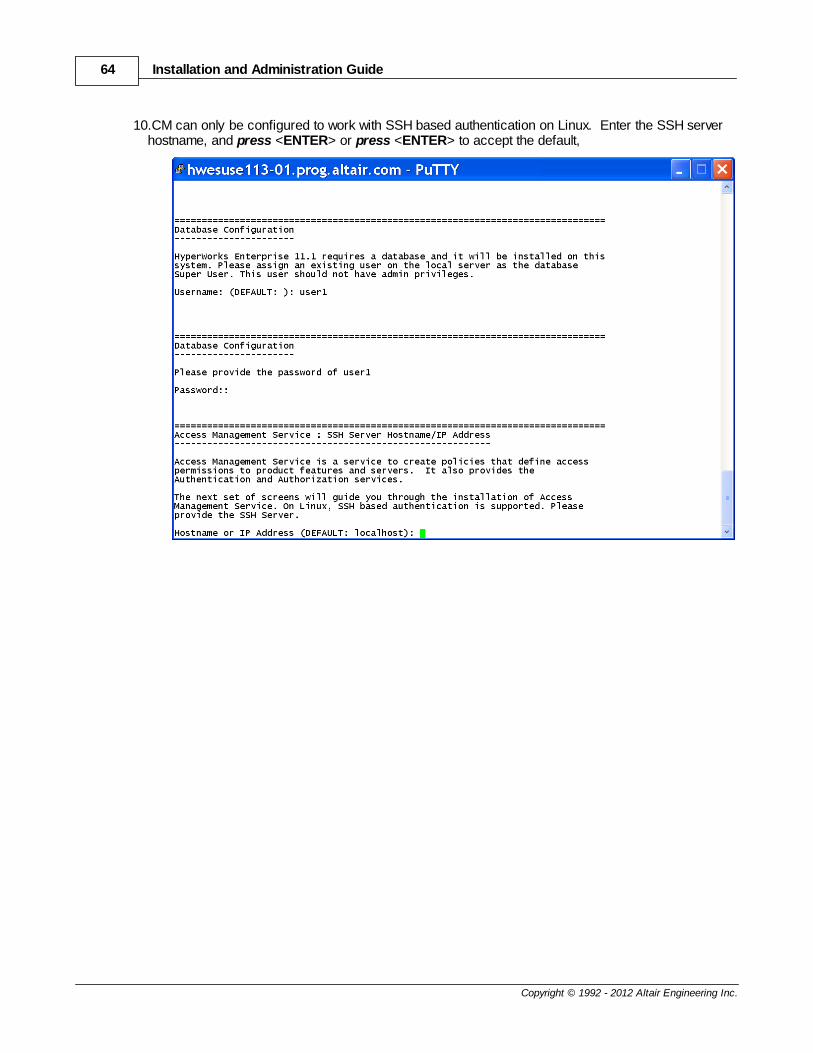
10.CM can only be configured to work with SSH based authentication on Linux. Enter the SSH serverhostname, and press <ENTER> or press <ENTER> to accept the default,

Linux Installations 65
Copyright © 1992 - 2012 Altair Engineering Inc.
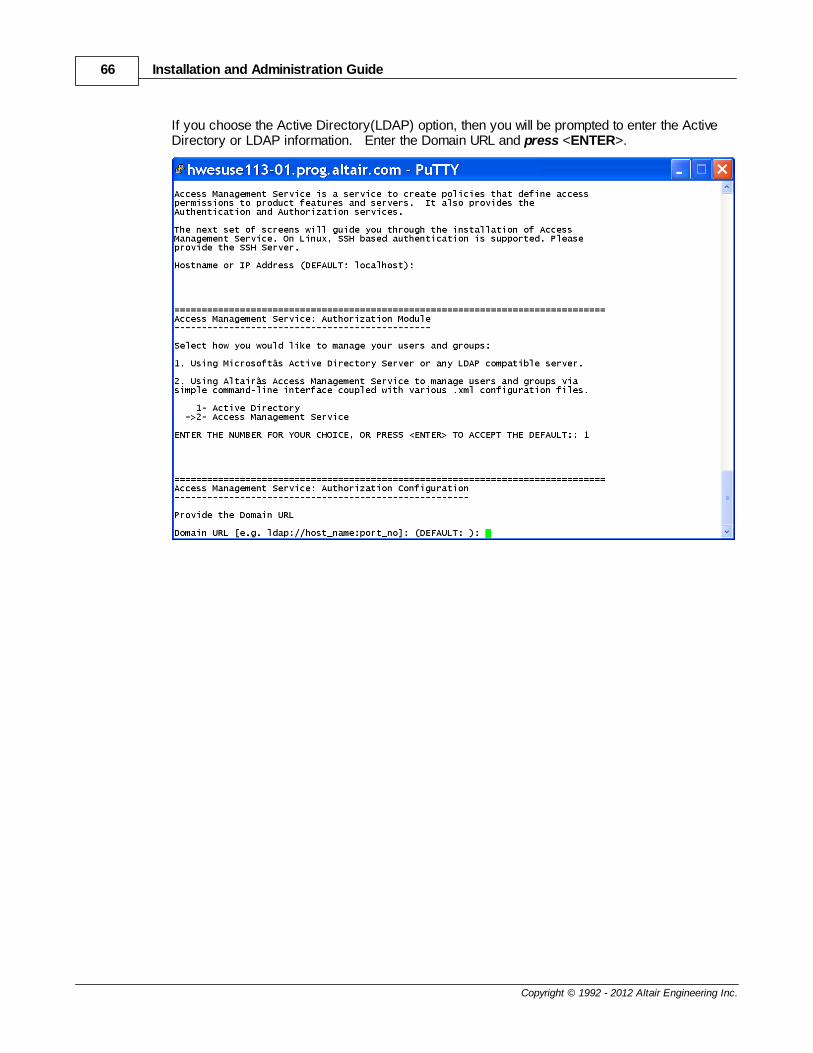
11.Select how to manage your users and groups. Users and groups can be managed through either ofthe following options:
Access Management Service - Choose this option to use Access Management Service, atoolkit, included with HWE, to manage users and groups. Please see the Access ManagementService Administrator's Toolkit Command Reference Guide for more information, which can bedownloaded from the HyperWorks or PBSWorks documentation user area.
Active Directory(LDAP) - Choose this option to use Microsoft's Active Directory Server or anLDAP compatible server.
Installation and Administration Guide66
Copyright © 1992 - 2012 Altair Engineering Inc.
If you choose the Active Directory(LDAP) option, then you will be prompted to enter the ActiveDirectory or LDAP information. Enter the Domain URL and press <ENTER>.
Linux Installations 67
Copyright © 1992 - 2012 Altair Engineering Inc.
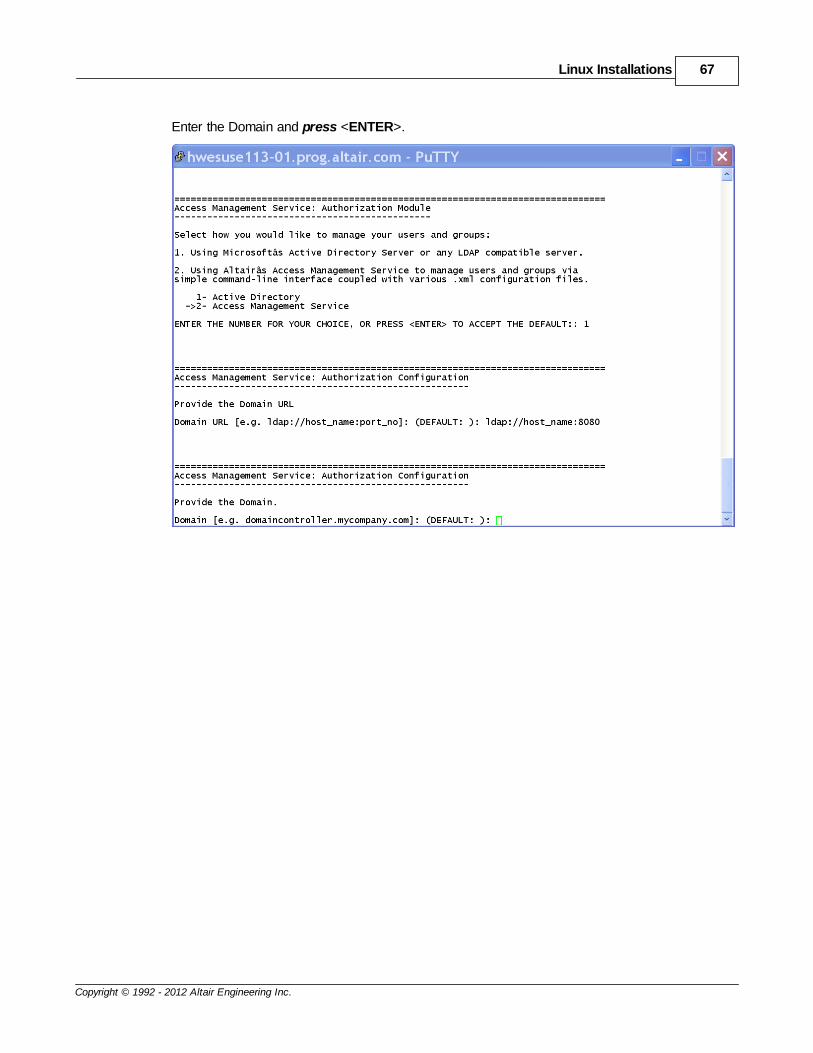
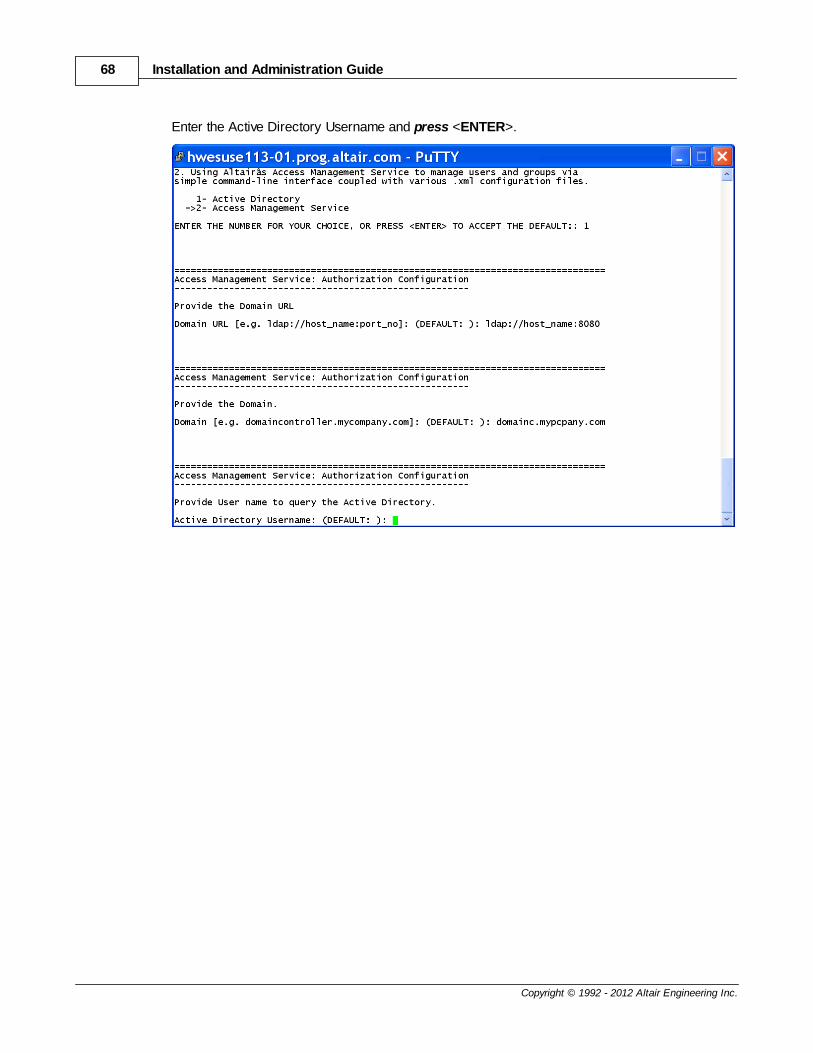
Enter the Domain and press <ENTER>.
Installation and Administration Guide68
Copyright © 1992 - 2012 Altair Engineering Inc.
Enter the Active Directory Username and press <ENTER>.
Linux Installations 69
Copyright © 1992 - 2012 Altair Engineering Inc.
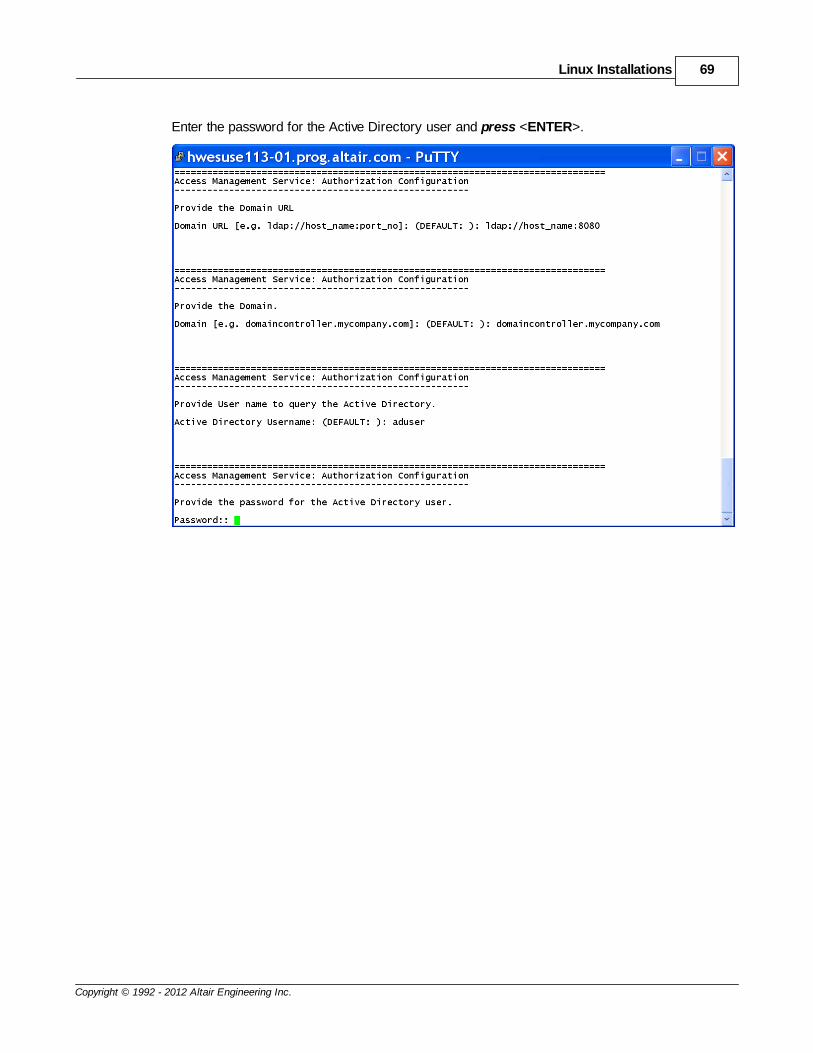
Enter the password for the Active Directory user and press <ENTER>.
Installation and Administration Guide70
Copyright © 1992 - 2012 Altair Engineering Inc.
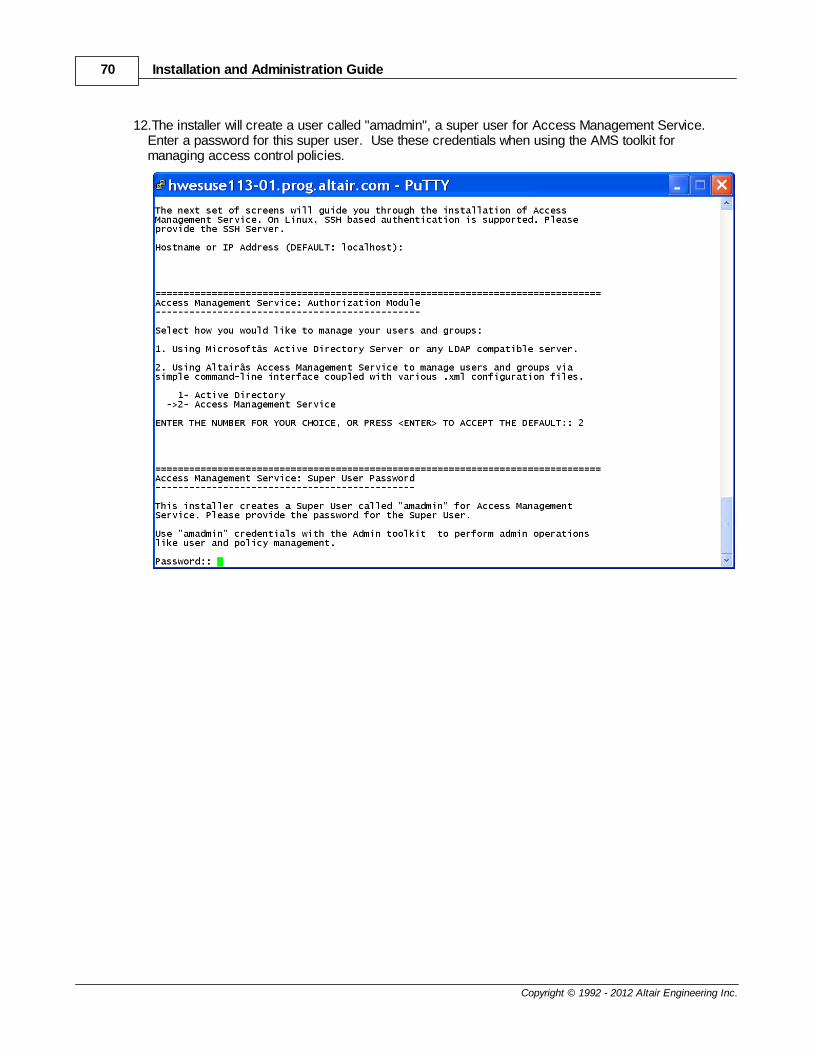
12.The installer will create a user called "amadmin", a super user for Access Management Service. Enter a password for this super user. Use these credentials when using the AMS toolkit formanaging access control policies.
Linux Installations 71
Copyright © 1992 - 2012 Altair Engineering Inc.
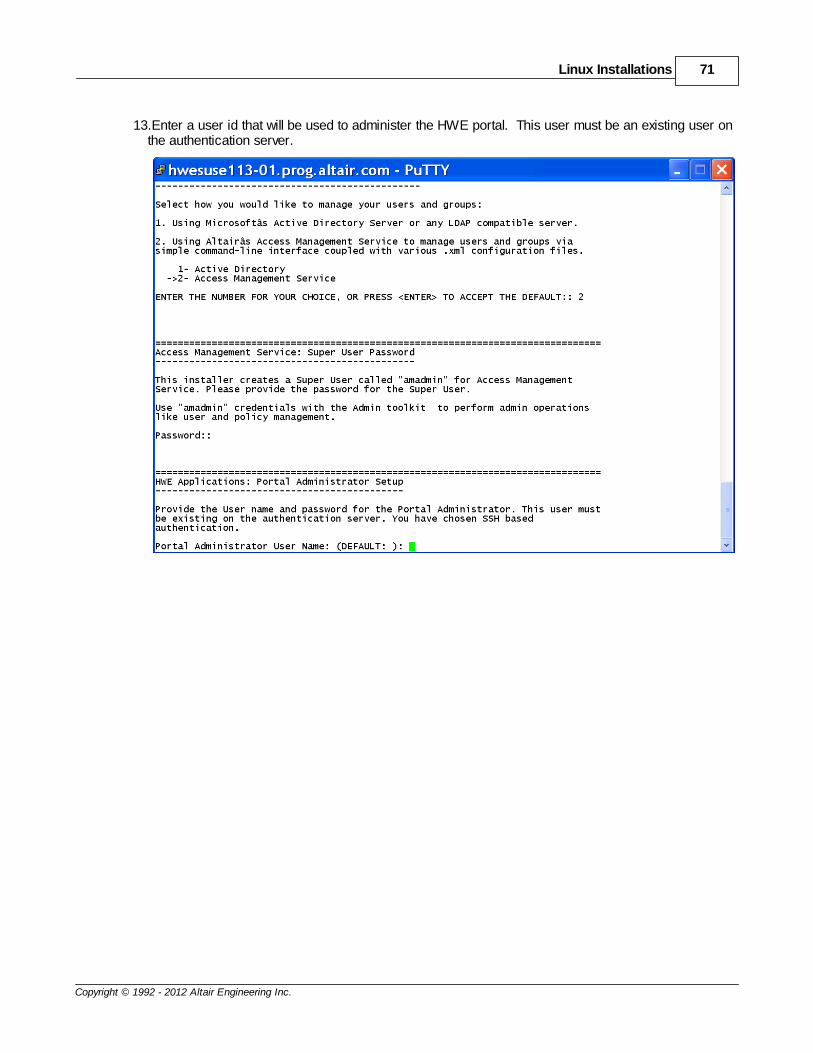
13.Enter a user id that will be used to administer the HWE portal. This user must be an existing user onthe authentication server.
Installation and Administration Guide72
Copyright © 1992 - 2012 Altair Engineering Inc.
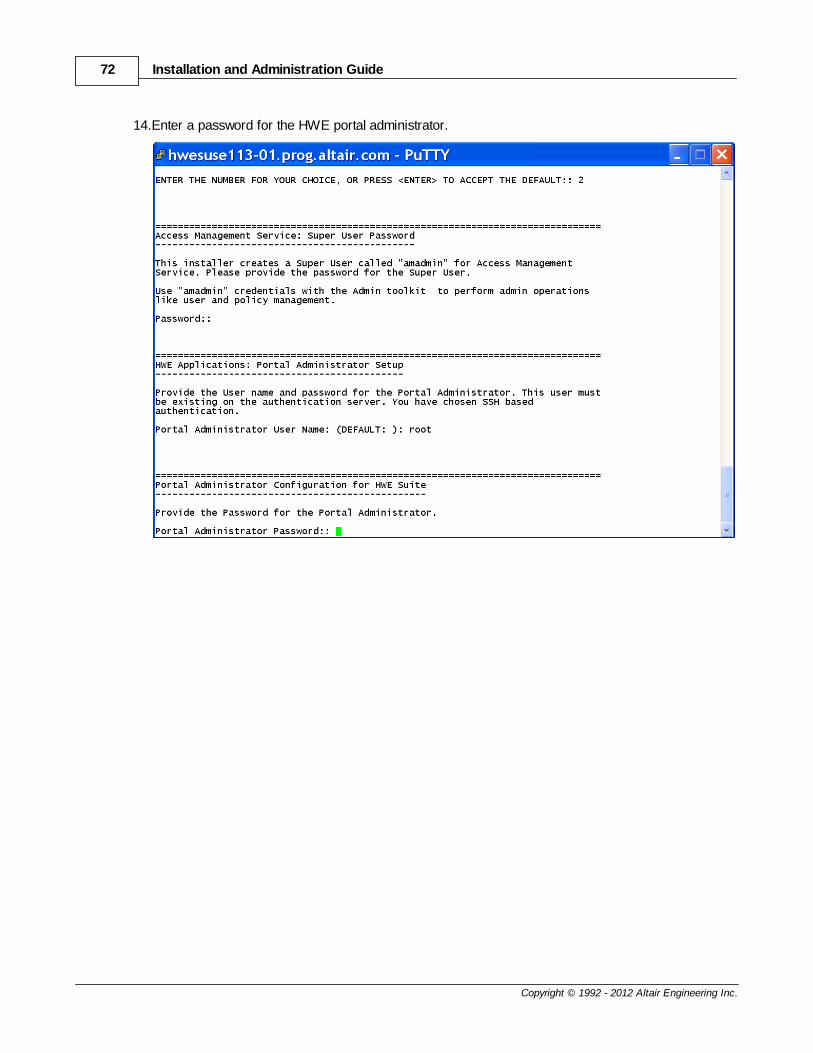
14.Enter a password for the HWE portal administrator.
Linux Installations 73
Copyright © 1992 - 2012 Altair Engineering Inc.
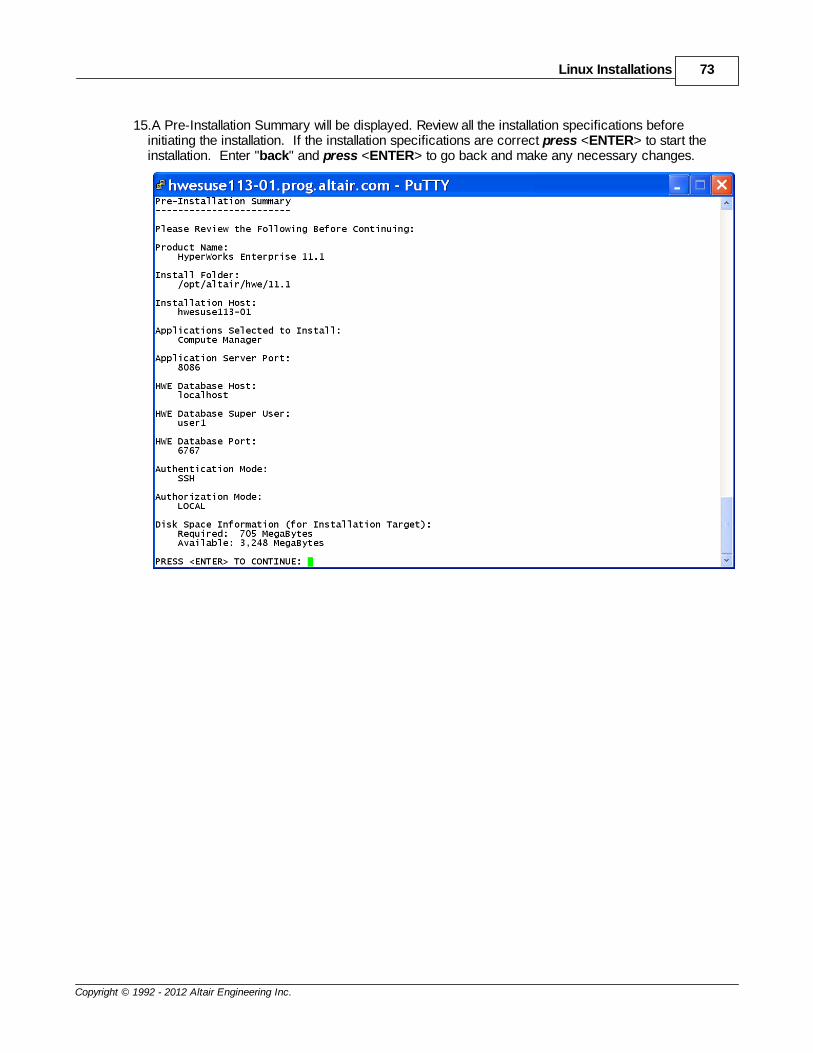
15.A Pre-Installation Summary will be displayed. Review all the installation specifications beforeinitiating the installation. If the installation specifications are correct press <ENTER> to start theinstallation. Enter "back" and press <ENTER> to go back and make any necessary changes.
Installation and Administration Guide74
Copyright © 1992 - 2012 Altair Engineering Inc.
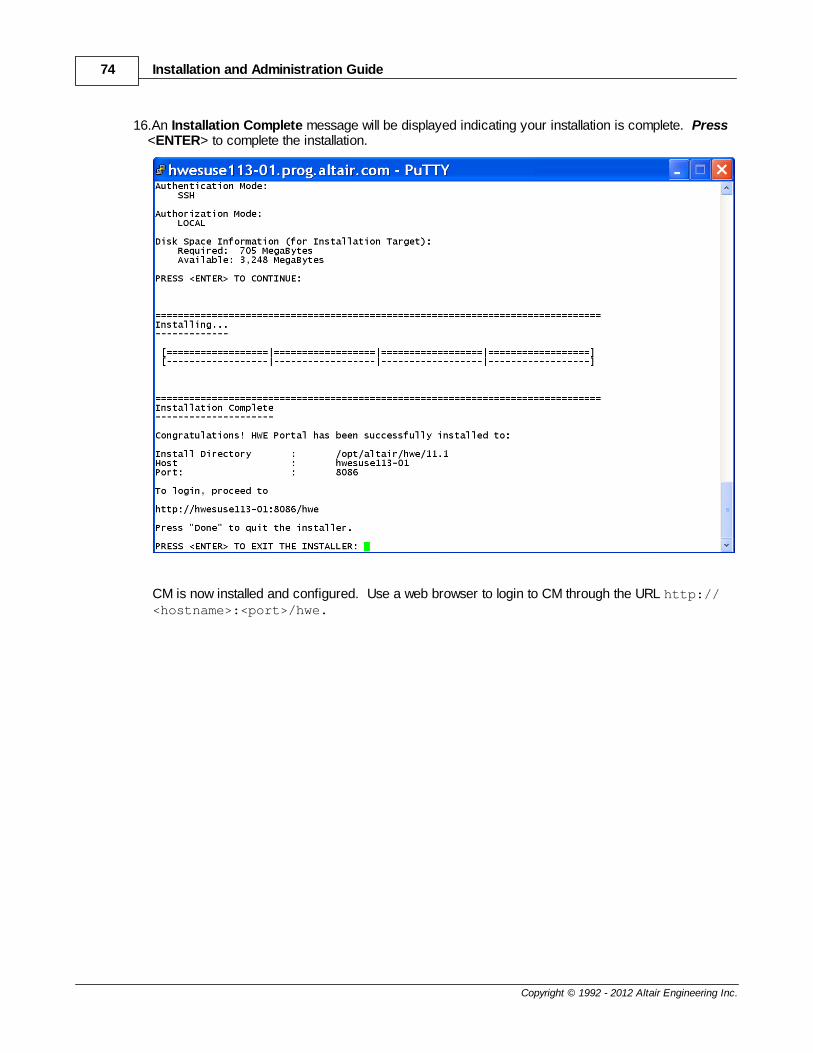
16.An Installation Complete message will be displayed indicating your installation is complete. Press<ENTER> to complete the installation.
CM is now installed and configured. Use a web browser to login to CM through the URL http://<hostname>:<port>/hwe.
Linux Installations 75
Copyright © 1992 - 2012 Altair Engineering Inc.
3.3 Uninstalling CM via GUI
To uninstall CM, follow the steps below:
1. Navigate to the CM installation directory, by entering the following at the Linux command lineprompt:
cd /opt/altair/hwe/11.1/_HyperWorks\ Enterprise\ 11.1_installation
2. Execute the uninstall script by entering the following command at the Linux command line prompt:
./Change\ HyperWorks\ Enterprise\ 11.1\ Installation -i swing (command must contain spaces with escape characters)
A splash screen is displayed.

Installation and Administration Guide76
Copyright © 1992 - 2012 Altair Engineering Inc.
3. A Maintenaince Mode dialog will be displayed. Click the button next to the Uninstall Productoption, and then click the Next button.
Linux Installations 77
Copyright © 1992 - 2012 Altair Engineering Inc.
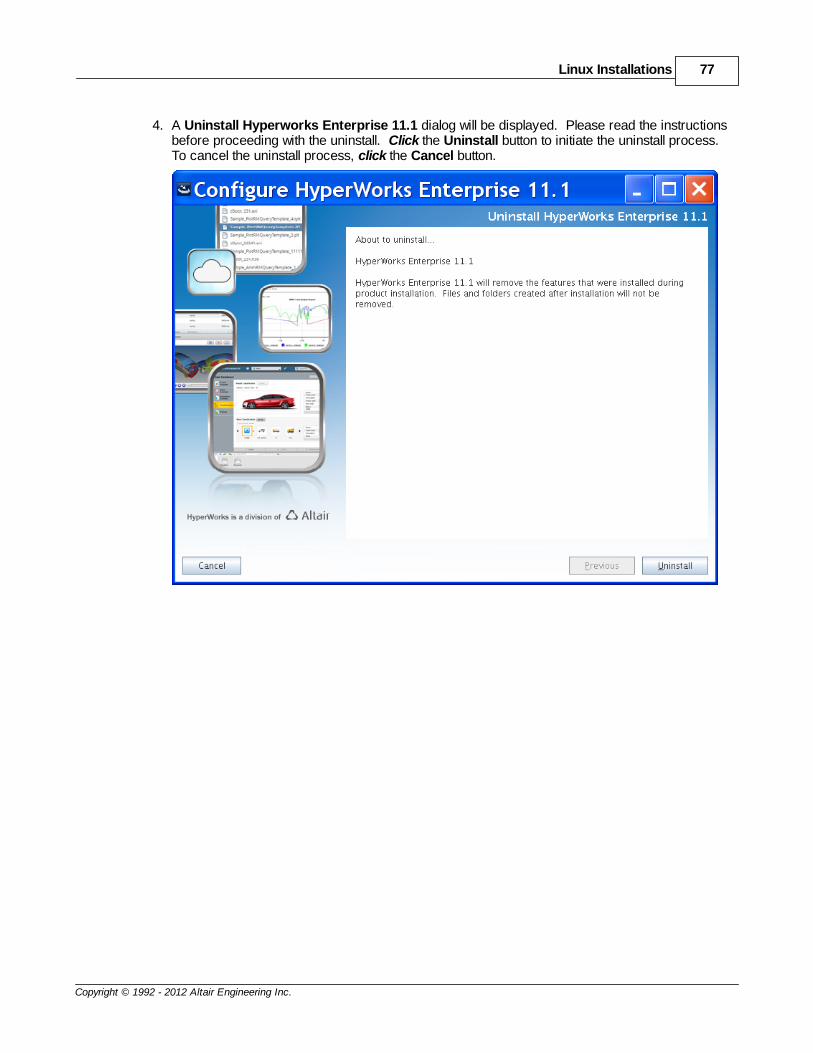
4. A Uninstall Hyperworks Enterprise 11.1 dialog will be displayed. Please read the instructionsbefore proceeding with the uninstall. Click the Uninstall button to initiate the uninstall process.To cancel the uninstall process, click the Cancel button.

Installation and Administration Guide78
Copyright © 1992 - 2012 Altair Engineering Inc.
5. A message will be displayed asking for an uninstall confirmation. Click the OK button to proceedwith the uninstall process. Click the Cancel button to cancel the uninstall process.
You can monitor the progression of the uninstall process via the uninstall progress toolbar.

Linux Installations 79
Copyright © 1992 - 2012 Altair Engineering Inc.
6. Once the uninstall is complete, an Uninstall Complete dialog box is displayed. Any items thatcould not be removed will be listed.
Note: A back-up of your configuration files and database will remain in your installation
directory. 7. To complete the uninstall, click the Done button.
Installation and Administration Guide80
Copyright © 1992 - 2012 Altair Engineering Inc.
3.4 Uninstalling CM via Console
To uninstall CM, follow the steps below:
1. Navigate to the CM installation directory, by entering the following at the Linux command lineprompt:
cd /opt/altair/hwe/11.1/_Compute\ Manager_installation
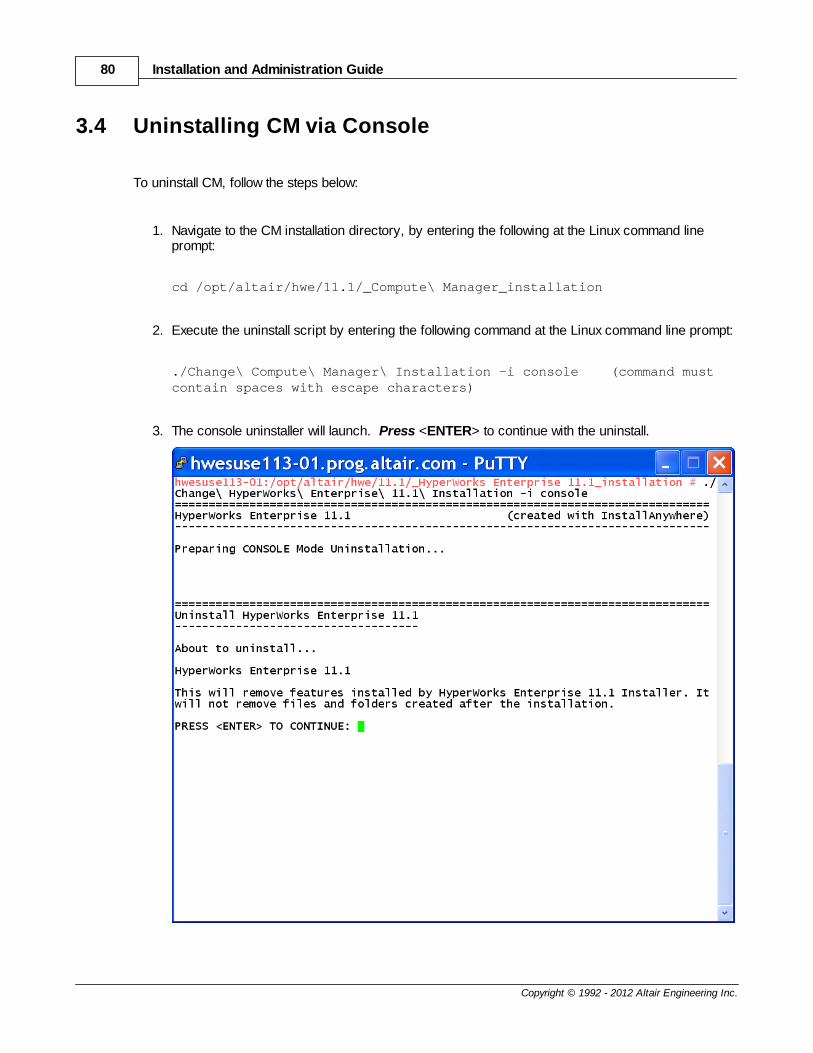
2. Execute the uninstall script by entering the following command at the Linux command line prompt:
./Change\ Compute\ Manager\ Installation -i console (command mustcontain spaces with escape characters)
3. The console uninstaller will launch. Press <ENTER> to continue with the uninstall.
Linux Installations 81
Copyright © 1992 - 2012 Altair Engineering Inc.
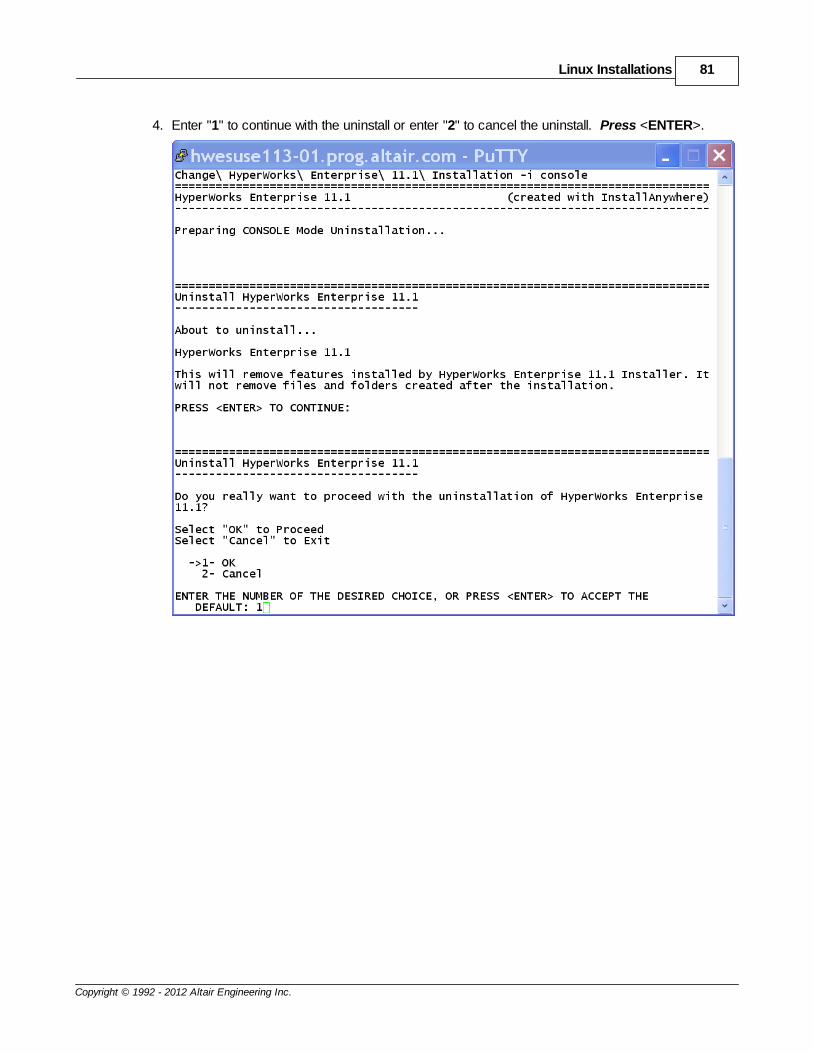
4. Enter "1" to continue with the uninstall or enter "2" to cancel the uninstall. Press <ENTER>.

Installation and Administration Guide82
Copyright © 1992 - 2012 Altair Engineering Inc.
5. Once the uninstall is complete, a message is displayed. Any items that could not be removed willbe listed. Please take a moment to manually remove them
Note: A back-up of your configuration files and database will remain in your installation
directory.
Linux Installations 83
Copyright © 1992 - 2012 Altair Engineering Inc.
3.5 Determining Installation Location of CM
To determine the installation location of CM:
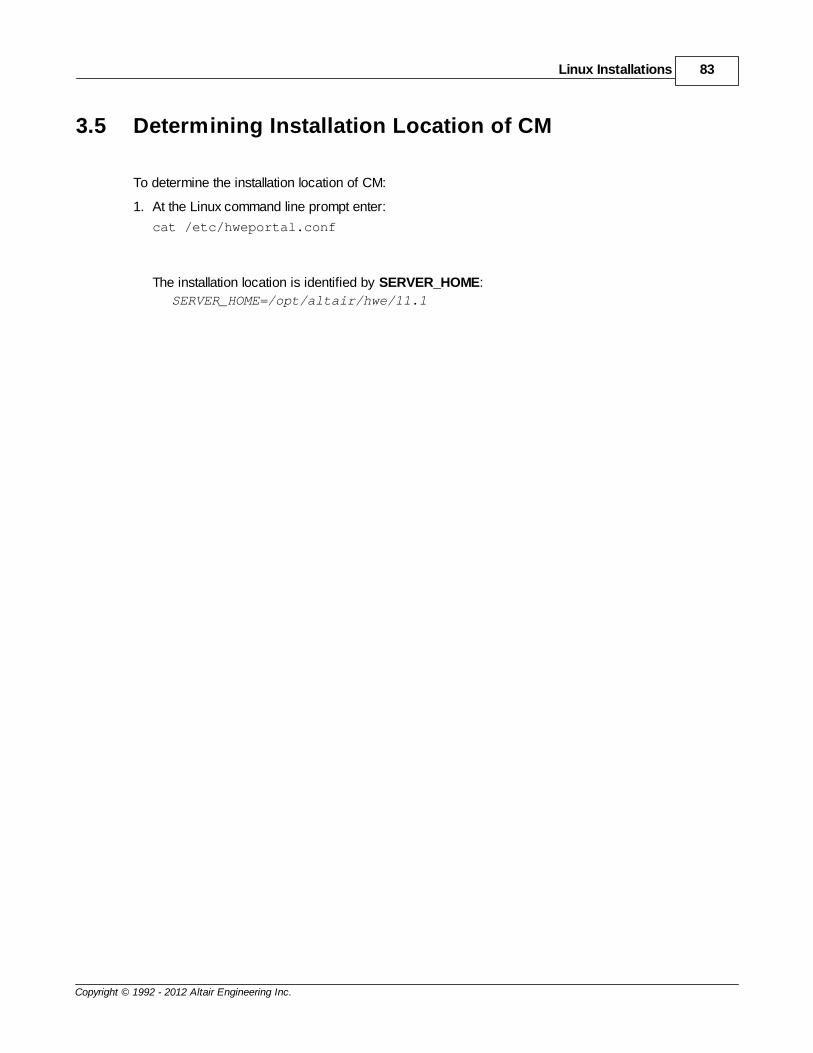
1. At the Linux command line prompt enter:
cat /etc/hweportal.conf
The installation location is identified by SERVER_HOME:
SERVER_HOME=/opt/altair/hwe/11.1
Installation and Administration Guide84
Copyright © 1992 - 2012 Altair Engineering Inc.
3.6 Determining if CM is Installed & Running
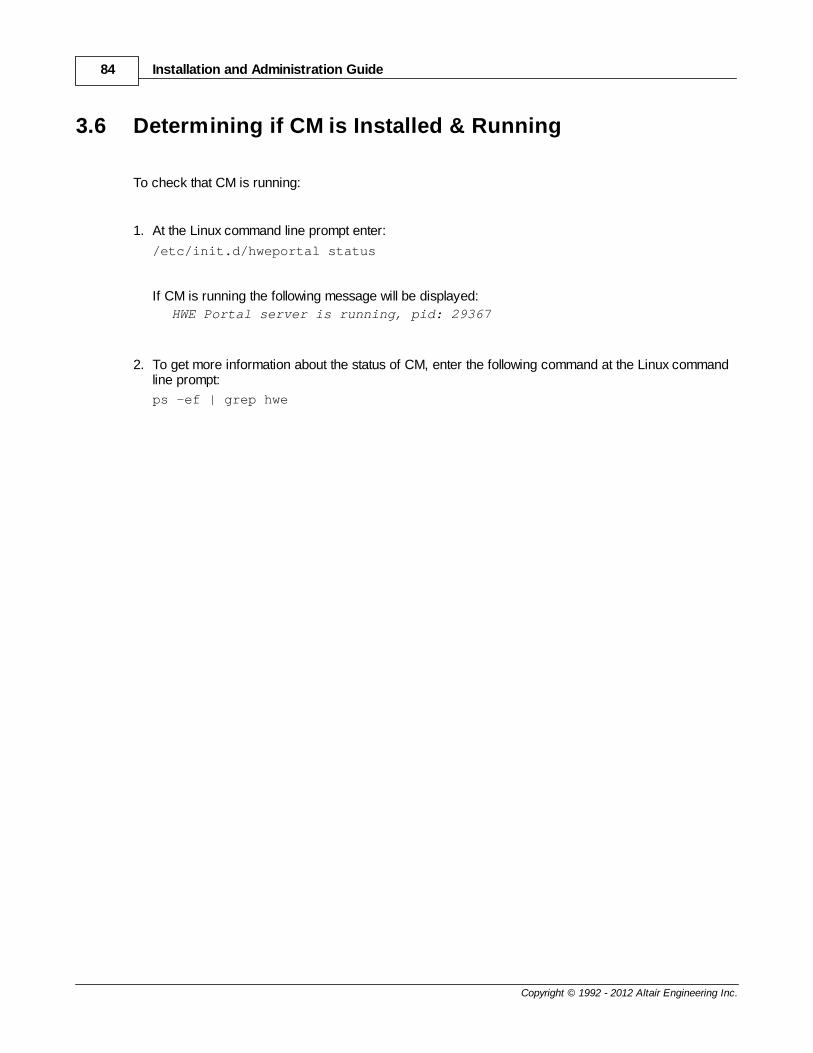
To check that CM is running:
1. At the Linux command line prompt enter:
/etc/init.d/hweportal status
If CM is running the following message will be displayed:
HWE Portal server is running, pid: 29367
2. To get more information about the status of CM, enter the following command at the Linux commandline prompt:
ps -ef | grep hwe
Linux Installations 85
Copyright © 1992 - 2012 Altair Engineering Inc.
3.7 Starting CM
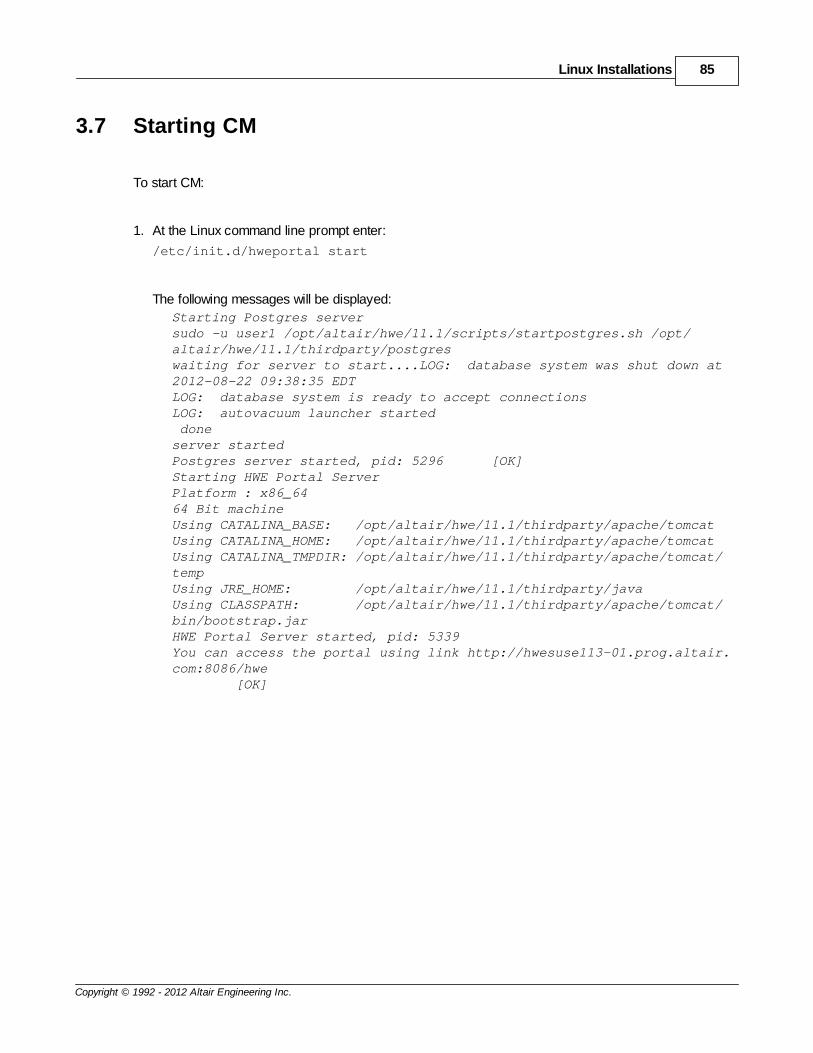
To start CM:
1. At the Linux command line prompt enter:
/etc/init.d/hweportal start
The following messages will be displayed:
Starting Postgres serversudo -u user1 /opt/altair/hwe/11.1/scripts/startpostgres.sh /opt/altair/hwe/11.1/thirdparty/postgreswaiting for server to start....LOG: database system was shut down at2012-08-22 09:38:35 EDTLOG: database system is ready to accept connectionsLOG: autovacuum launcher started doneserver startedPostgres server started, pid: 5296 [OK]Starting HWE Portal ServerPlatform : x86_6464 Bit machineUsing CATALINA_BASE: /opt/altair/hwe/11.1/thirdparty/apache/tomcatUsing CATALINA_HOME: /opt/altair/hwe/11.1/thirdparty/apache/tomcatUsing CATALINA_TMPDIR: /opt/altair/hwe/11.1/thirdparty/apache/tomcat/tempUsing JRE_HOME: /opt/altair/hwe/11.1/thirdparty/javaUsing CLASSPATH: /opt/altair/hwe/11.1/thirdparty/apache/tomcat/bin/bootstrap.jarHWE Portal Server started, pid: 5339You can access the portal using link http://hwesuse113-01.prog.altair.com:8086/hwe [OK]
Installation and Administration Guide86
Copyright © 1992 - 2012 Altair Engineering Inc.
3.8 Stopping CM
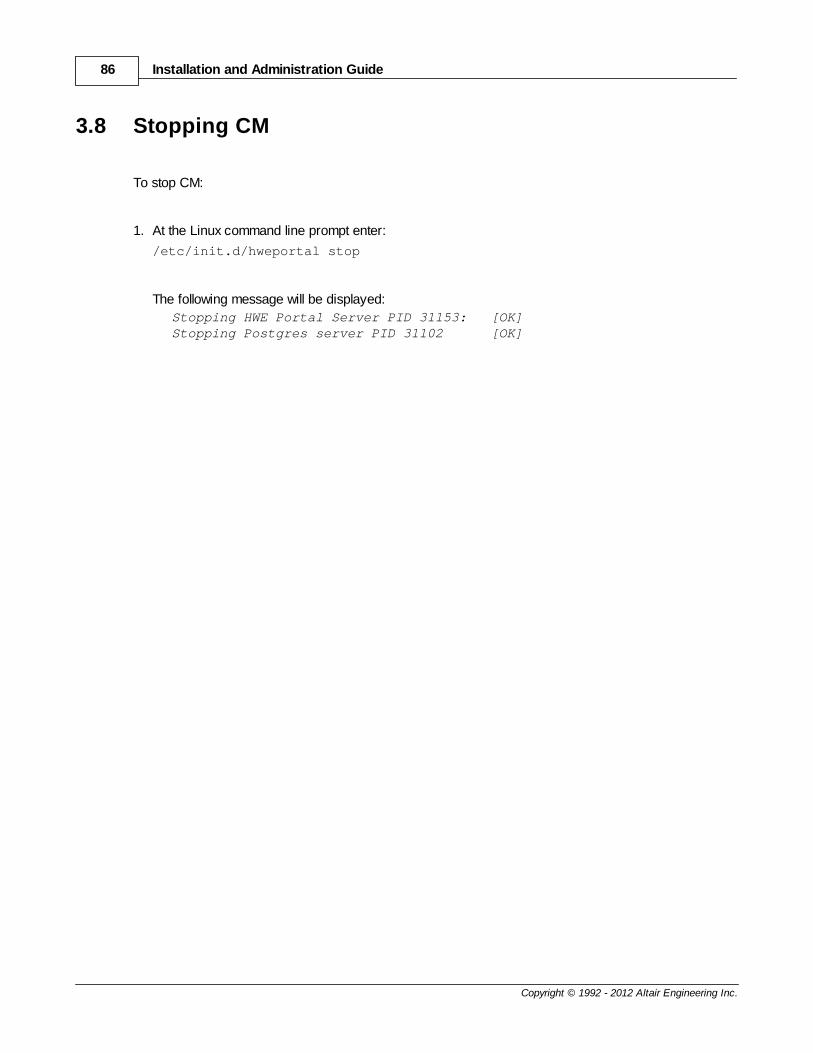
To stop CM:
1. At the Linux command line prompt enter:
/etc/init.d/hweportal stop
The following message will be displayed:
Stopping HWE Portal Server PID 31153: [OK]Stopping Postgres server PID 31102 [OK]
Linux Installations 87
Copyright © 1992 - 2012 Altair Engineering Inc.
3.9 Restarting CM
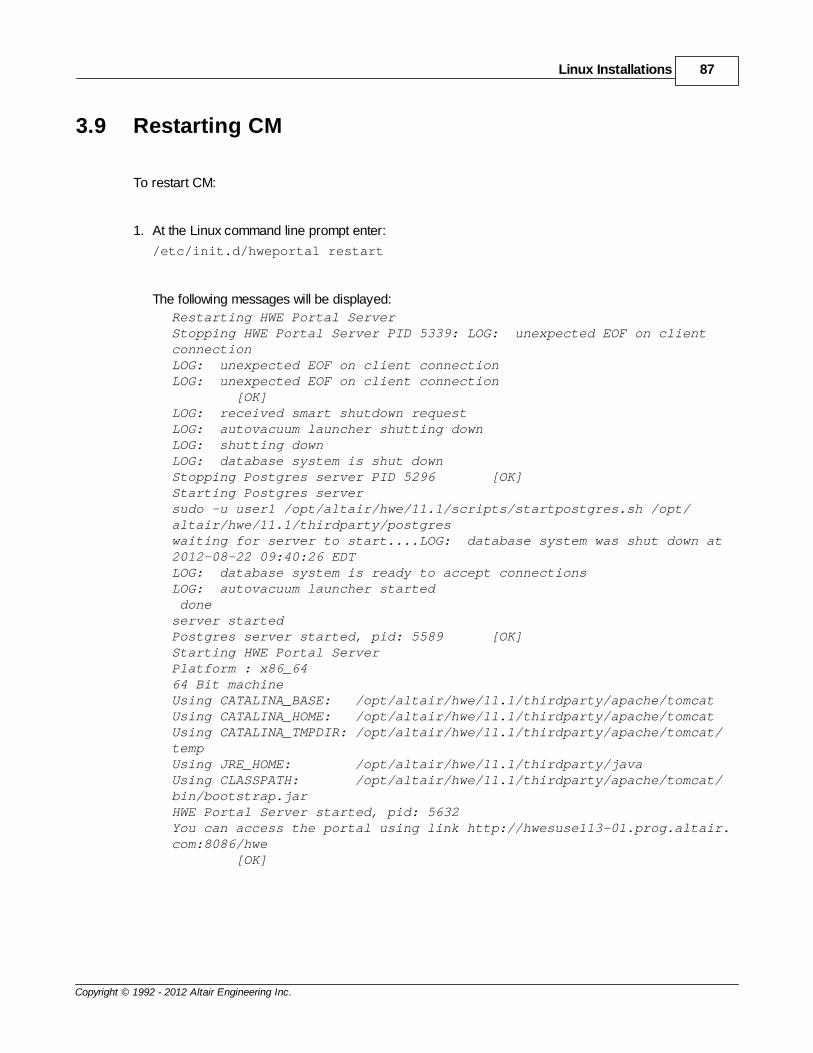
To restart CM:
1. At the Linux command line prompt enter:
/etc/init.d/hweportal restart
The following messages will be displayed:
Restarting HWE Portal ServerStopping HWE Portal Server PID 5339: LOG: unexpected EOF on clientconnectionLOG: unexpected EOF on client connectionLOG: unexpected EOF on client connection [OK]LOG: received smart shutdown requestLOG: autovacuum launcher shutting downLOG: shutting downLOG: database system is shut downStopping Postgres server PID 5296 [OK]Starting Postgres serversudo -u user1 /opt/altair/hwe/11.1/scripts/startpostgres.sh /opt/altair/hwe/11.1/thirdparty/postgreswaiting for server to start....LOG: database system was shut down at2012-08-22 09:40:26 EDTLOG: database system is ready to accept connectionsLOG: autovacuum launcher started doneserver startedPostgres server started, pid: 5589 [OK]Starting HWE Portal ServerPlatform : x86_6464 Bit machineUsing CATALINA_BASE: /opt/altair/hwe/11.1/thirdparty/apache/tomcatUsing CATALINA_HOME: /opt/altair/hwe/11.1/thirdparty/apache/tomcatUsing CATALINA_TMPDIR: /opt/altair/hwe/11.1/thirdparty/apache/tomcat/tempUsing JRE_HOME: /opt/altair/hwe/11.1/thirdparty/javaUsing CLASSPATH: /opt/altair/hwe/11.1/thirdparty/apache/tomcat/bin/bootstrap.jarHWE Portal Server started, pid: 5632You can access the portal using link http://hwesuse113-01.prog.altair.com:8086/hwe [OK]

Installation and Administration Guide88
Copyright © 1992 - 2012 Altair Engineering Inc.
4 Advanced Configuration

Advanced Configuration 89
Copyright © 1992 - 2012 Altair Engineering Inc.
4.1 Adding a Generic Action
A generic action is similar to an application definition's application action. The main difference is thatan application action is associated with particular application, while generic actions are simple pythonscripts that run on the server irrespective of the job or application. The definition of a generic action isdone through an XML file, similar to an application action. A separate XML file must be maintained foreach individual PBS Application Services server registered in CM. For a typical installation of CM,these XML files are stored at:
on Windows: C:\Program Files\altair\hwe\11.1\services\cm\config\genericActions
on Unix/Linux: /opt/altair/hwe/11.1/services/cm/config/genericActions
The naming convention of the generic action XML files are servername.xml where servername is thename of the server as it was added by the HWE portal administrator.
Here is an example of a generic action added for the server "hwe1", stored in an generic action XMLfile called hwe1.xml. This generic action will allow a CM user to enter a command to execute, alongwith some command options. For an example of how this works using CM see the Compute ManagerUser Guide - Monitoring Jobs - Managing Jobs - More Actions - Executing a Job Action.
hwesuse113-01:/opt/altair/hwe/11.1/services/cm/config/genericActions # vi hwe1.xml<?xml version="1.0" encoding="UTF-8"?><GenericActionsList xmlns="http://schemas.altair.com/gen-actions" xmlns:xsi="http://www.w3.org/2001/XMLSchema-instance" xmlns:schemaLocation="gen-actions.xsd"> <GenericAction> <Name>EXECUTE_COMMAND</Name> <DisplayName>Execute Command</DisplayName> <Description>Enter a command to execute</Description> <ScriptLocation>/home/pbsadmin/GenericActions/ExecCmd.py</ScriptLocation> <ArgumentChoice> <ArgumentString> <Name>COMMAND</Name> <Description>Enter a command to execute</Description> <DisplayName>Command to execute</DisplayName> <InputRequired>true</InputRequired> </ArgumentString> </ArgumentChoice> <ArgumentChoice> <ArgumentString> <Name>ARGUMENTS</Name> <Description>Enter any command arguments</Description> <DisplayName>Command arguments</DisplayName> <InputRequired>true</InputRequired> </ArgumentString> </ArgumentChoice> <ShowOutput>true</ShowOutput> </GenericAction></GenericActionsList>
Installation and Administration Guide90
Copyright © 1992 - 2012 Altair Engineering Inc.
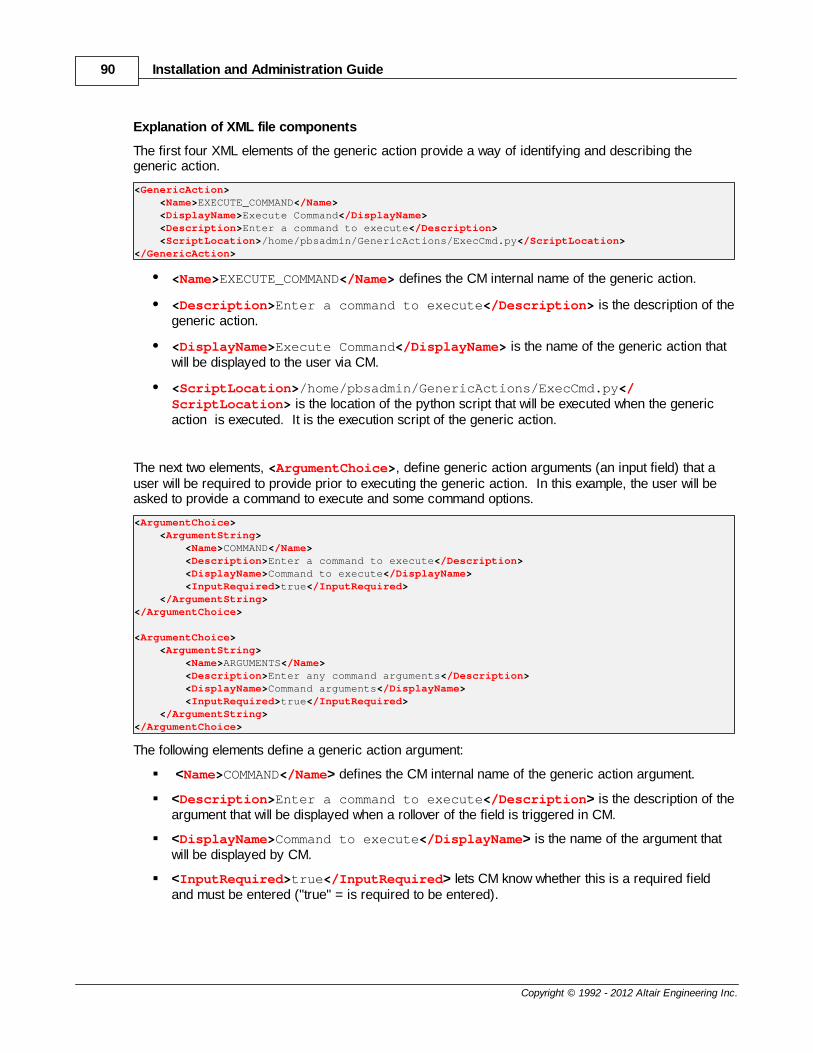
Explanation of XML file components
The first four XML elements of the generic action provide a way of identifying and describing thegeneric action.
<GenericAction> <Name>EXECUTE_COMMAND</Name> <DisplayName>Execute Command</DisplayName> <Description>Enter a command to execute</Description> <ScriptLocation>/home/pbsadmin/GenericActions/ExecCmd.py</ScriptLocation></GenericAction>
<Name>EXECUTE_COMMAND</Name> defines the CM internal name of the generic action.
<Description>Enter a command to execute</Description> is the description of thegeneric action.
<DisplayName>Execute Command</DisplayName> is the name of the generic action thatwill be displayed to the user via CM.
<ScriptLocation>/home/pbsadmin/GenericActions/ExecCmd.py</ScriptLocation> is the location of the python script that will be executed when the genericaction is executed. It is the execution script of the generic action.
The next two elements, <ArgumentChoice>, define generic action arguments (an input field) that auser will be required to provide prior to executing the generic action. In this example, the user will beasked to provide a command to execute and some command options.
<ArgumentChoice> <ArgumentString> <Name>COMMAND</Name> <Description>Enter a command to execute</Description> <DisplayName>Command to execute</DisplayName> <InputRequired>true</InputRequired> </ArgumentString></ArgumentChoice>
<ArgumentChoice> <ArgumentString> <Name>ARGUMENTS</Name> <Description>Enter any command arguments</Description> <DisplayName>Command arguments</DisplayName> <InputRequired>true</InputRequired> </ArgumentString></ArgumentChoice>
The following elements define a generic action argument:
<Name>COMMAND</Name> defines the CM internal name of the generic action argument.
<Description>Enter a command to execute</Description> is the description of theargument that will be displayed when a rollover of the field is triggered in CM.
<DisplayName>Command to execute</DisplayName> is the name of the argument thatwill be displayed by CM.
<InputRequired>true</InputRequired> lets CM know whether this is a required fieldand must be entered ("true" = is required to be entered).
Advanced Configuration 91
Copyright © 1992 - 2012 Altair Engineering Inc.
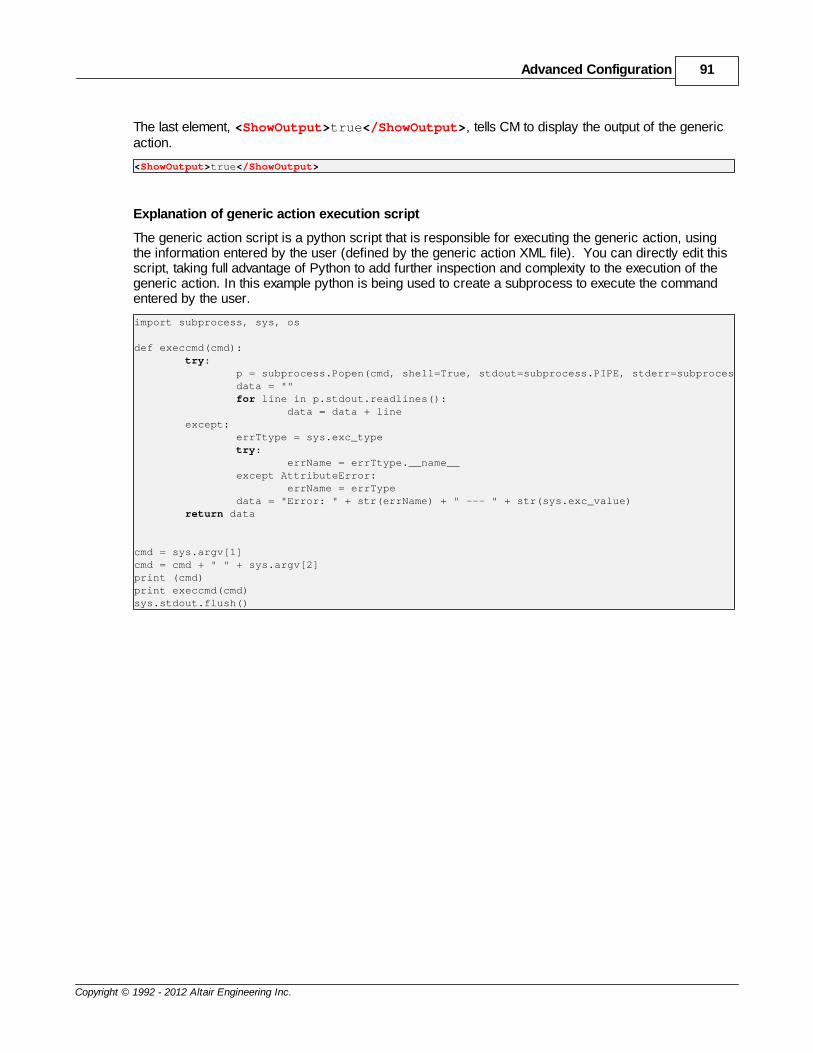
The last element, <ShowOutput>true</ShowOutput>, tells CM to display the output of the genericaction.
<ShowOutput>true</ShowOutput>
Explanation of generic action execution script
The generic action script is a python script that is responsible for executing the generic action, usingthe information entered by the user (defined by the generic action XML file). You can directly edit thisscript, taking full advantage of Python to add further inspection and complexity to the execution of thegeneric action. In this example python is being used to create a subprocess to execute the commandentered by the user.
import subprocess, sys, os
def execcmd(cmd): try: p = subprocess.Popen(cmd, shell=True, stdout=subprocess.PIPE, stderr=subprocess.STDOUT) data = "" for line in p.stdout.readlines(): data = data + line except: errTtype = sys.exc_type try: errName = errTtype.__name__ except AttributeError: errName = errType data = "Error: " + str(errName) + " --- " + str(sys.exc_value) return data
cmd = sys.argv[1]cmd = cmd + " " + sys.argv[2]print (cmd)print execcmd(cmd)sys.stdout.flush()
Installation and Administration Guide92
Copyright © 1992 - 2012 Altair Engineering Inc.
4.2 Configuring Access to CM
As of the CM 11.1 release, an Access Management Service (AMS) tool kit is available to manage usersand groups. In addition, AMS allows CM administrators further control over access to PBS ApplicationServices servers, as well as specific applications installed on the server. AMS controls this accessthrough resource policies. Using AMS, these resource policies can be exported to a file in XML format,modified, and then imported back into AMS (for more information about AMS see the AccessManagement Service Administrator's Toolkit Command Reference Guide, which can be downloadedfrom the HyperWorks or PBSWorks documentation user area). Currently, CM has two types ofresource policies:
registration of a PBS Application Services server
access to an application installed on a server
Once the installation of CM is complete, the HWE portal administrator must add a PBS ApplicationServices server via CM. Once the server is added, other users on the system can register with thatserver, and begin accessing applications installed on the server. By default all authenticated users haveaccess to all PBS Application Services servers, as well as all applications.
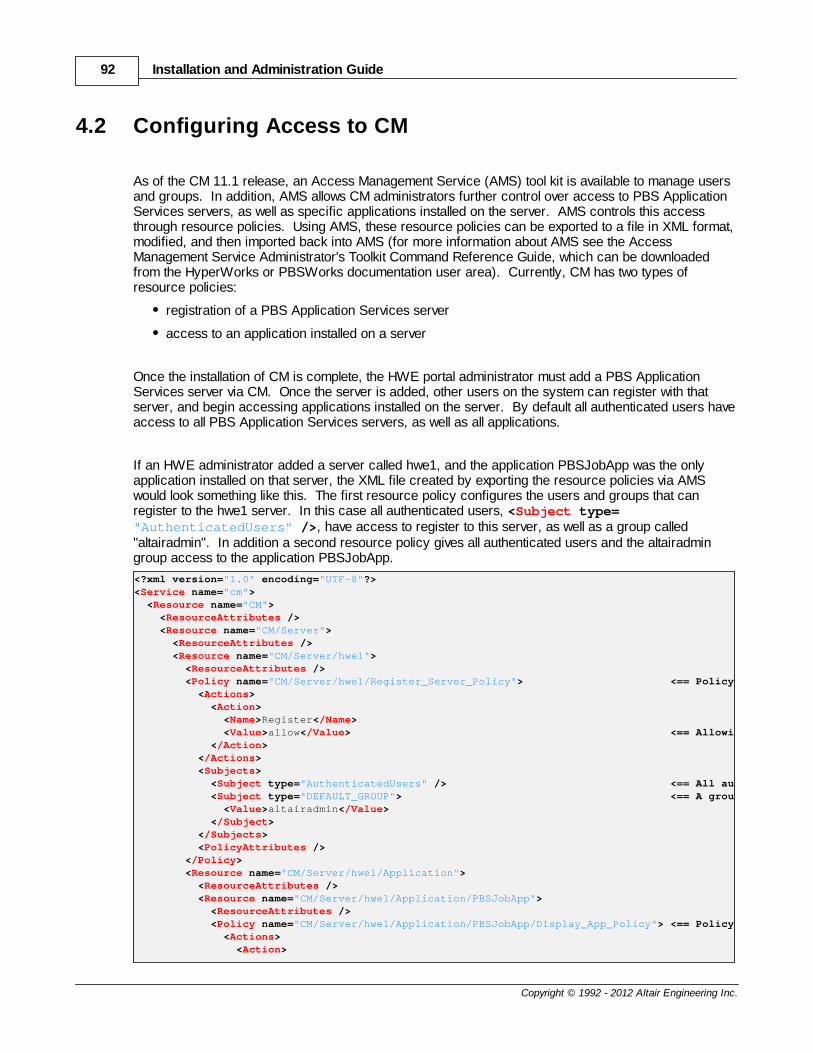
If an HWE administrator added a server called hwe1, and the application PBSJobApp was the onlyapplication installed on that server, the XML file created by exporting the resource policies via AMSwould look something like this. The first resource policy configures the users and groups that canregister to the hwe1 server. In this case all authenticated users, <Subject type="AuthenticatedUsers" />, have access to register to this server, as well as a group called"altairadmin". In addition a second resource policy gives all authenticated users and the altairadmingroup access to the application PBSJobApp.
<?xml version="1.0" encoding="UTF-8"?><Service name="cm"> <Resource name="CM"> <ResourceAttributes /> <Resource name="CM/Server"> <ResourceAttributes /> <Resource name="CM/Server/hwe1"> <ResourceAttributes /> <Policy name="CM/Server/hwe1/Register_Server_Policy"> <== Policy for registering the hwe1 server <Actions> <Action> <Name>Register</Name> <Value>allow</Value> <== Allowing registration of server </Action> </Actions> <Subjects> <Subject type="AuthenticatedUsers" /> <== All authenticated users can register with hwe1 <Subject type="DEFAULT_GROUP"> <== A group called altairadmin can register with hwe1 <Value>altairadmin</Value> </Subject> </Subjects> <PolicyAttributes /> </Policy> <Resource name="CM/Server/hwe1/Application"> <ResourceAttributes /> <Resource name="CM/Server/hwe1/Application/PBSJobApp"> <ResourceAttributes /> <Policy name="CM/Server/hwe1/Application/PBSJobApp/Display_App_Policy"> <== Policy for access to PBSJobApp <Actions> <Action>
Advanced Configuration 93
Copyright © 1992 - 2012 Altair Engineering Inc.
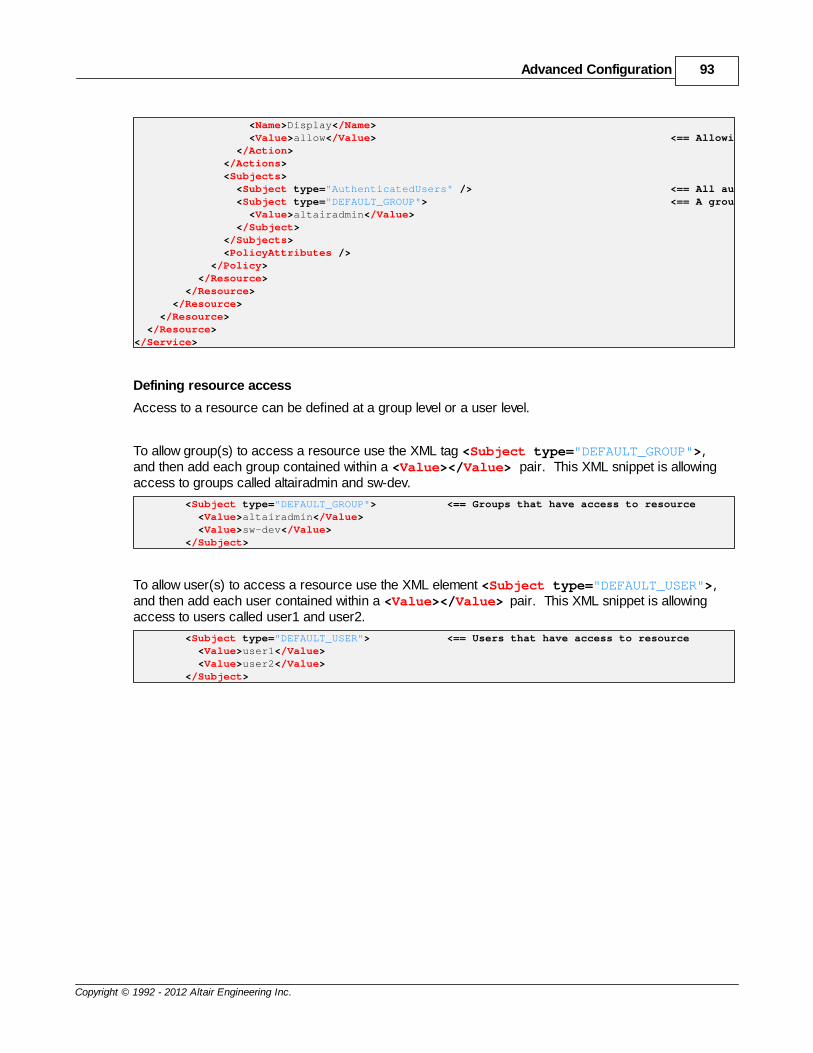
<Name>Display</Name> <Value>allow</Value> <== Allowing access to application </Action> </Actions> <Subjects> <Subject type="AuthenticatedUsers" /> <== All authenticated users have access to PBSJobApp <Subject type="DEFAULT_GROUP"> <== A group altairadmin has access to PBSJobApp <Value>altairadmin</Value> </Subject> </Subjects> <PolicyAttributes /> </Policy> </Resource> </Resource> </Resource> </Resource> </Resource></Service>
Defining resource access
Access to a resource can be defined at a group level or a user level.
To allow group(s) to access a resource use the XML tag <Subject type="DEFAULT_GROUP">,and then add each group contained within a <Value></Value> pair. This XML snippet is allowingaccess to groups called altairadmin and sw-dev.
<Subject type="DEFAULT_GROUP"> <== Groups that have access to resource <Value>altairadmin</Value> <Value>sw-dev</Value> </Subject>
To allow user(s) to access a resource use the XML element <Subject type="DEFAULT_USER">,and then add each user contained within a <Value></Value> pair. This XML snippet is allowingaccess to users called user1 and user2.
<Subject type="DEFAULT_USER"> <== Users that have access to resource <Value>user1</Value> <Value>user2</Value> </Subject>
Installation and Administration Guide94
Copyright © 1992 - 2012 Altair Engineering Inc.
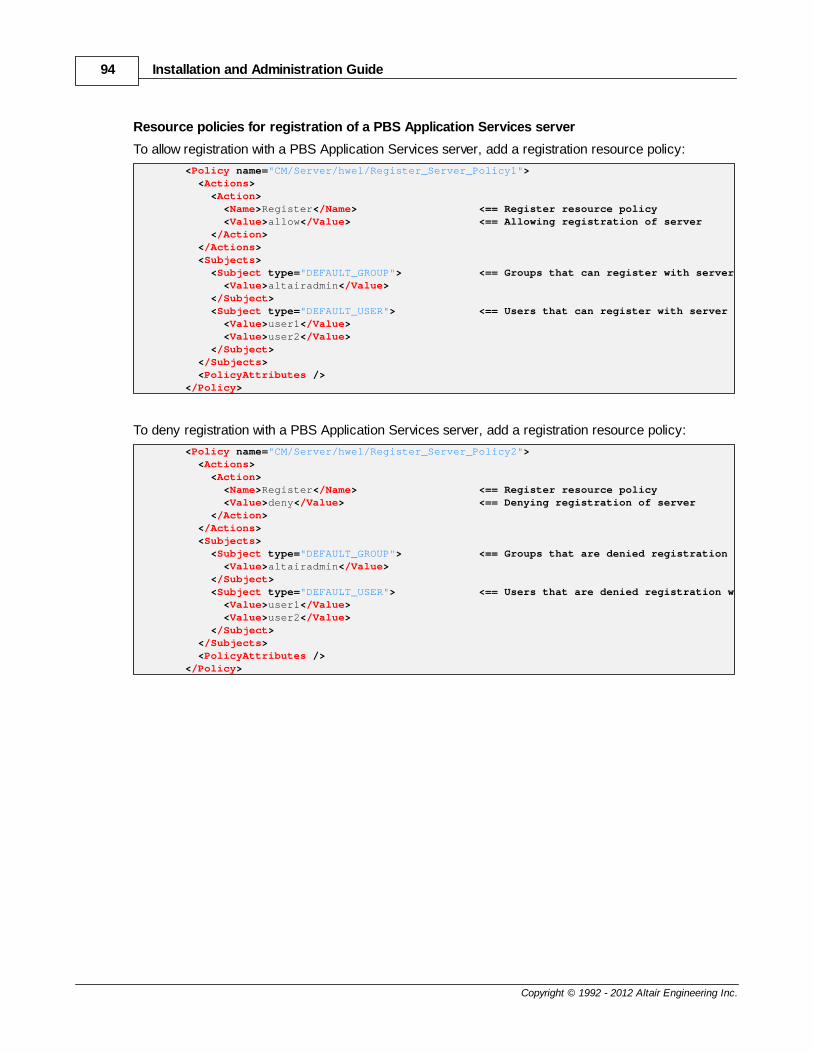
Resource policies for registration of a PBS Application Services server
To allow registration with a PBS Application Services server, add a registration resource policy:
<Policy name="CM/Server/hwe1/Register_Server_Policy1"> <Actions> <Action> <Name>Register</Name> <== Register resource policy <Value>allow</Value> <== Allowing registration of server </Action> </Actions> <Subjects> <Subject type="DEFAULT_GROUP"> <== Groups that can register with server <Value>altairadmin</Value> </Subject> <Subject type="DEFAULT_USER"> <== Users that can register with server <Value>user1</Value> <Value>user2</Value> </Subject> </Subjects> <PolicyAttributes /> </Policy>
To deny registration with a PBS Application Services server, add a registration resource policy:
<Policy name="CM/Server/hwe1/Register_Server_Policy2"> <Actions> <Action> <Name>Register</Name> <== Register resource policy <Value>deny</Value> <== Denying registration of server </Action> </Actions> <Subjects> <Subject type="DEFAULT_GROUP"> <== Groups that are denied registration with server <Value>altairadmin</Value> </Subject> <Subject type="DEFAULT_USER"> <== Users that are denied registration with server <Value>user1</Value> <Value>user2</Value> </Subject> </Subjects> <PolicyAttributes /> </Policy>
Advanced Configuration 95
Copyright © 1992 - 2012 Altair Engineering Inc.
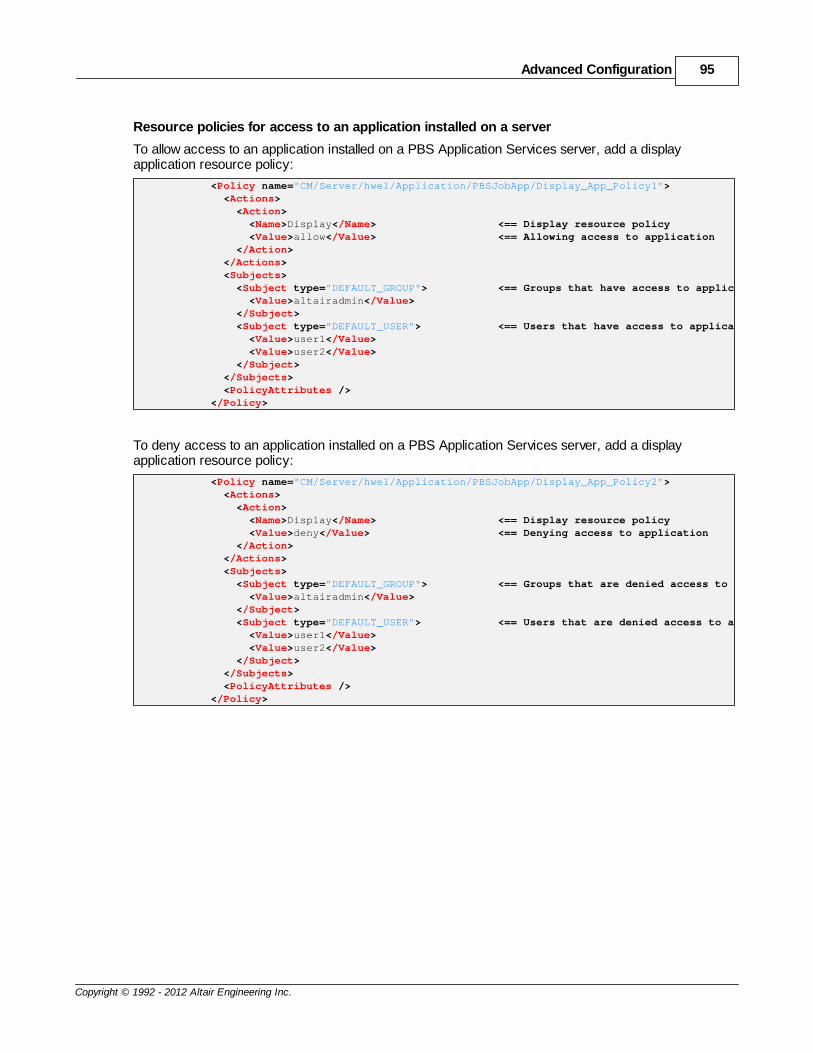
Resource policies for access to an application installed on a server
To allow access to an application installed on a PBS Application Services server, add a displayapplication resource policy:
<Policy name="CM/Server/hwe1/Application/PBSJobApp/Display_App_Policy1"> <Actions> <Action> <Name>Display</Name> <== Display resource policy <Value>allow</Value> <== Allowing access to application </Action> </Actions> <Subjects> <Subject type="DEFAULT_GROUP"> <== Groups that have access to application <Value>altairadmin</Value> </Subject> <Subject type="DEFAULT_USER"> <== Users that have access to application <Value>user1</Value> <Value>user2</Value> </Subject> </Subjects> <PolicyAttributes /> </Policy>
To deny access to an application installed on a PBS Application Services server, add a displayapplication resource policy:
<Policy name="CM/Server/hwe1/Application/PBSJobApp/Display_App_Policy2"> <Actions> <Action> <Name>Display</Name> <== Display resource policy <Value>deny</Value> <== Denying access to application </Action> </Actions> <Subjects> <Subject type="DEFAULT_GROUP"> <== Groups that are denied access to application <Value>altairadmin</Value> </Subject> <Subject type="DEFAULT_USER"> <== Users that are denied access to application <Value>user1</Value> <Value>user2</Value> </Subject> </Subjects> <PolicyAttributes /> </Policy>
Installation and Administration Guide96
Copyright © 1992 - 2012 Altair Engineering Inc.
4.3 Configuring Profile Sharing
As of the CM 11.1 release, an Access Management Service (AMS) tool kit is available to manage usersand groups. In order for users and groups to share job submission profiles, users and groups must beadded to AMS through the toolkit. For more information about AMS see the Access ManagementService Administrator's Toolkit Command Reference Guide, which can be downloaded from theHyperWorks or PBSWorks documentation user area.
Advanced Configuration 97
Copyright © 1992 - 2012 Altair Engineering Inc.
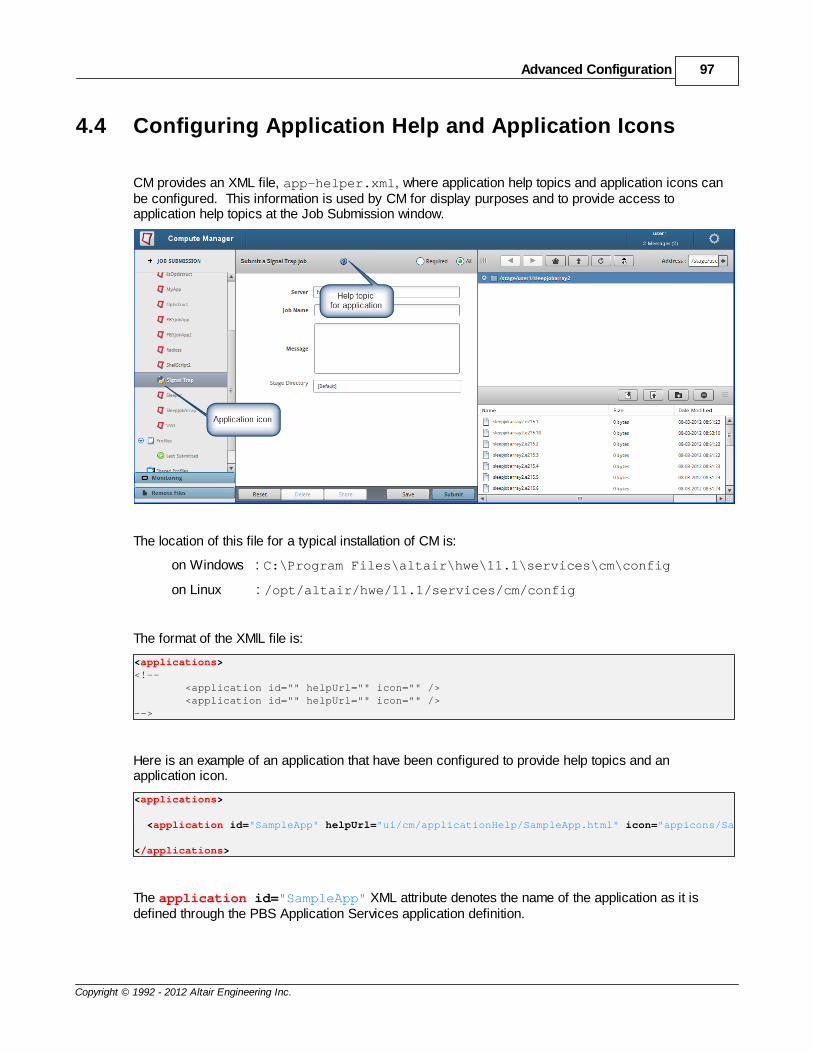
4.4 Configuring Application Help and Application Icons
CM provides an XML file, app-helper.xml, where application help topics and application icons canbe configured. This information is used by CM for display purposes and to provide access toapplication help topics at the Job Submission window.
The location of this file for a typical installation of CM is:
on Windows : C:\Program Files\altair\hwe\11.1\services\cm\config
on Linux : /opt/altair/hwe/11.1/services/cm/config
The format of the XMlL file is:
<applications><!-- <application id="" helpUrl="" icon="" /> <application id="" helpUrl="" icon="" />-->
Here is an example of an application that have been configured to provide help topics and anapplication icon.
<applications>
<application id="SampleApp" helpUrl="ui/cm/applicationHelp/SampleApp.html" icon="appicons/SampleApp.png" />
</applications>
The application id="SampleApp" XML attribute denotes the name of the application as it isdefined through the PBS Application Services application definition.
Installation and Administration Guide98
Copyright © 1992 - 2012 Altair Engineering Inc.
The HTML that is associated with the helpUrl attribute must be placed in the following location (for atypical installation of CM):
on Windows : C:\Program Files\altair\hwe\11.1\applications\cm\binaries\ui\applicationHelp
on Linux : /opt/altair/hwe/11.1/applications/cm/binaries/ui/applicationHelp
The icon image file associated with the icon attribute must be placed in the following location (for atypical installation of CM):
on Windows : C:\Program Files\altair\hwe\11.1\applications\cm\binaries\ui\appicons
on Linux : /opt/altair/hwe/11.1/applications/cm/binaries/ui/images/appicons
Advanced Configuration 99
Copyright © 1992 - 2012 Altair Engineering Inc.
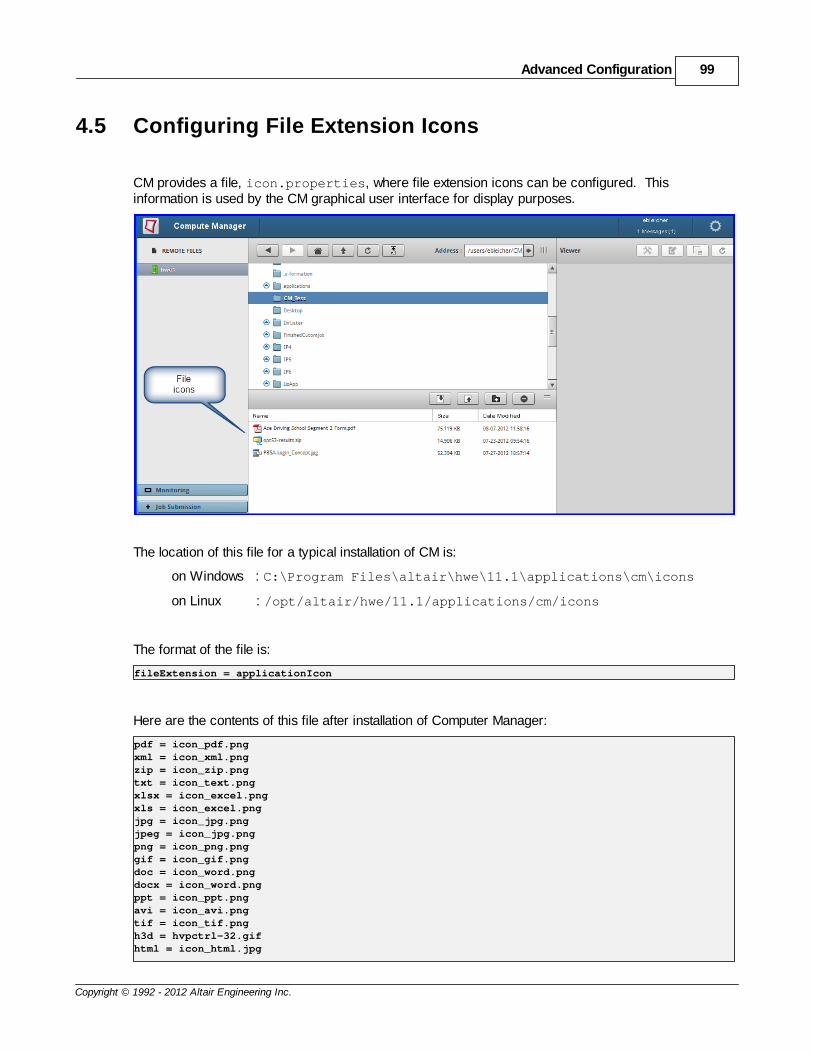
4.5 Configuring File Extension Icons
CM provides a file, icon.properties, where file extension icons can be configured. Thisinformation is used by the CM graphical user interface for display purposes.
The location of this file for a typical installation of CM is:
on Windows : C:\Program Files\altair\hwe\11.1\applications\cm\icons
on Linux : /opt/altair/hwe/11.1/applications/cm/icons
The format of the file is:
fileExtension = applicationIcon
Here are the contents of this file after installation of Computer Manager:
pdf = icon_pdf.pngxml = icon_xml.pngzip = icon_zip.pngtxt = icon_text.pngxlsx = icon_excel.pngxls = icon_excel.pngjpg = icon_jpg.pngjpeg = icon_jpg.pngpng = icon_png.pnggif = icon_gif.pngdoc = icon_word.pngdocx = icon_word.pngppt = icon_ppt.pngavi = icon_avi.pngtif = icon_tif.pngh3d = hvpctrl-32.gifhtml = icon_html.jpg
Installation and Administration Guide100
Copyright © 1992 - 2012 Altair Engineering Inc.
htm = icon_html.jpg
Advanced Configuration 101
Copyright © 1992 - 2012 Altair Engineering Inc.
4.6 Installing Google Chrome Frame
To install Google Chrome Frame:
1. Open Internet Explorer 8 or 9.
2. Go to http://www.google.com/chromeframe/.
3. Download Google Chrome Frame.
4. Close Internet Explorer.
5. Open Internet Explorer.
6. Go to Manage Add-ons to verify that the Google Chrome Frame plug-in is installed and enabled. If it is not enabled, then enable the plug-in.
Installation and Administration Guide102
Copyright © 1992 - 2012 Altair Engineering Inc.
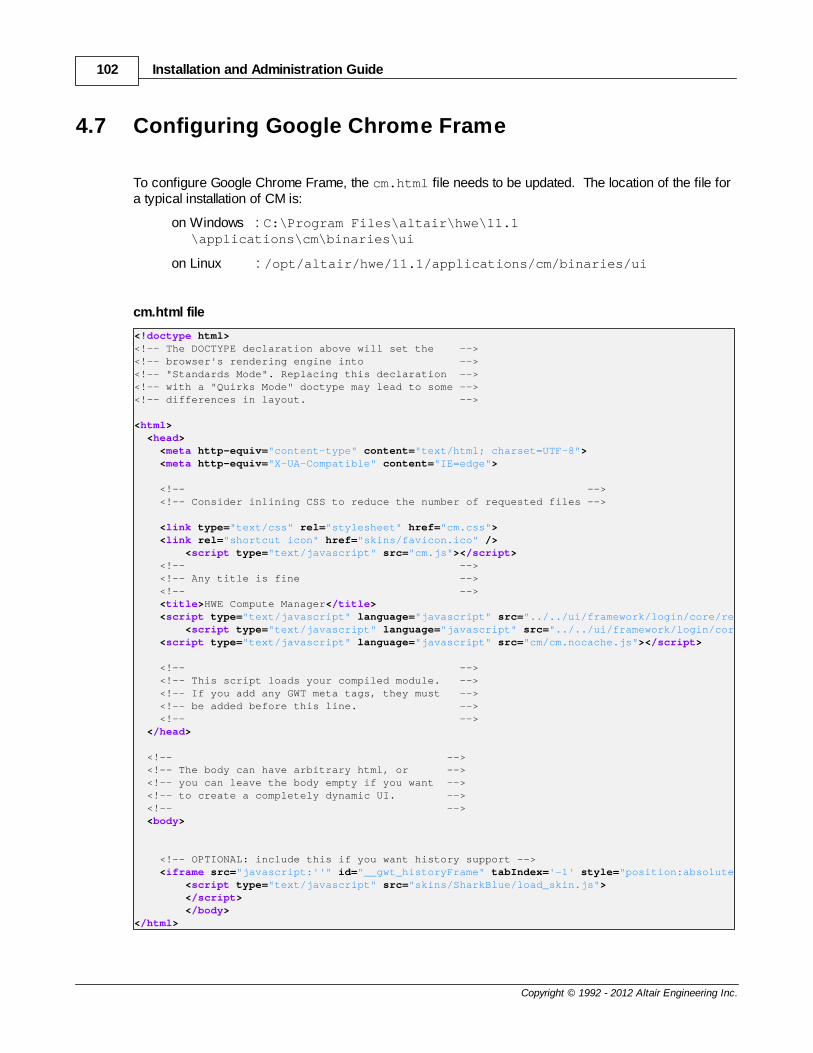
4.7 Configuring Google Chrome Frame
To configure Google Chrome Frame, the cm.html file needs to be updated. The location of the file fora typical installation of CM is:
on Windows : C:\Program Files\altair\hwe\11.1\applications\cm\binaries\ui
on Linux : /opt/altair/hwe/11.1/applications/cm/binaries/ui
cm.html file
<!doctype html><!-- The DOCTYPE declaration above will set the --><!-- browser's rendering engine into --><!-- "Standards Mode". Replacing this declaration --><!-- with a "Quirks Mode" doctype may lead to some --><!-- differences in layout. -->
<html> <head> <meta http-equiv="content-type" content="text/html; charset=UTF-8"> <meta http-equiv="X-UA-Compatible" content="IE=edge">
<!-- --> <!-- Consider inlining CSS to reduce the number of requested files -->
<link type="text/css" rel="stylesheet" href="cm.css"> <link rel="shortcut icon" href="skins/favicon.ico" /> <script type="text/javascript" src="cm.js"></script> <!-- --> <!-- Any title is fine --> <!-- --> <title>HWE Compute Manager</title> <script type="text/javascript" language="javascript" src="../../ui/framework/login/core/resources/scripts/awpf.js"></script> <script type="text/javascript" language="javascript" src="../../ui/framework/login/core/resources/scripts/tabstate.js"></script> <script type="text/javascript" language="javascript" src="cm/cm.nocache.js"></script>
<!-- --> <!-- This script loads your compiled module. --> <!-- If you add any GWT meta tags, they must --> <!-- be added before this line. --> <!-- --> </head>
<!-- --> <!-- The body can have arbitrary html, or --> <!-- you can leave the body empty if you want --> <!-- to create a completely dynamic UI. --> <!-- --> <body>
<!-- OPTIONAL: include this if you want history support --> <iframe src="javascript:''" id="__gwt_historyFrame" tabIndex='-1' style="position:absolute;width:0;height:0;border:0"></iframe> <script type="text/javascript" src="skins/SharkBlue/load_skin.js"> </script> </body></html>
Advanced Configuration 103
Copyright © 1992 - 2012 Altair Engineering Inc.
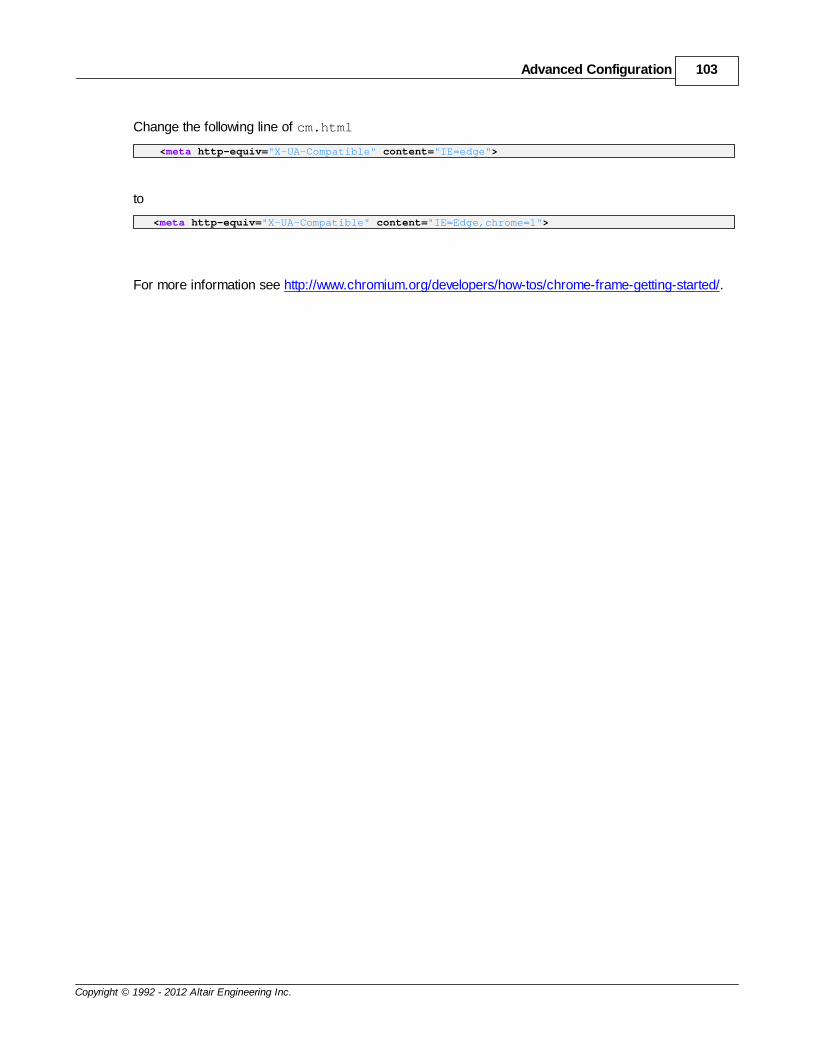
Change the following line of cm.html
<meta http-equiv="X-UA-Compatible" content="IE=edge">
to
<meta http-equiv="X-UA-Compatible" content="IE=Edge,chrome=1">
For more information see http://www.chromium.org/developers/how-tos/chrome-frame-getting-started/.
Installation and Administration Guide104
Copyright © 1992 - 2012 Altair Engineering Inc.
4.8 Enabling a Secure Connection between CM and PAS
Enabling a secure connection (SSL) between CM and PBS Application Services is done through theCM graphical user interface. When adding a PBS Application Services server to CM (see the Compute Manager User's Guide - Configuring Compute Manager - Managing Servers) a checkbox isavailable that enables the secure connection between CM and the PBS Application Server. No otherspecial configuration is required for CM. However, SSL must be enabled on the PBS ApplicationServices server. See Enabling a secure connection in the PBS Application Services AdministrativeGuide, for details for configuring SSL for PBS Application Services. This guide can be downloadedfrom the PBSWorks documentation user area
Advanced Configuration 105
Copyright © 1992 - 2012 Altair Engineering Inc.
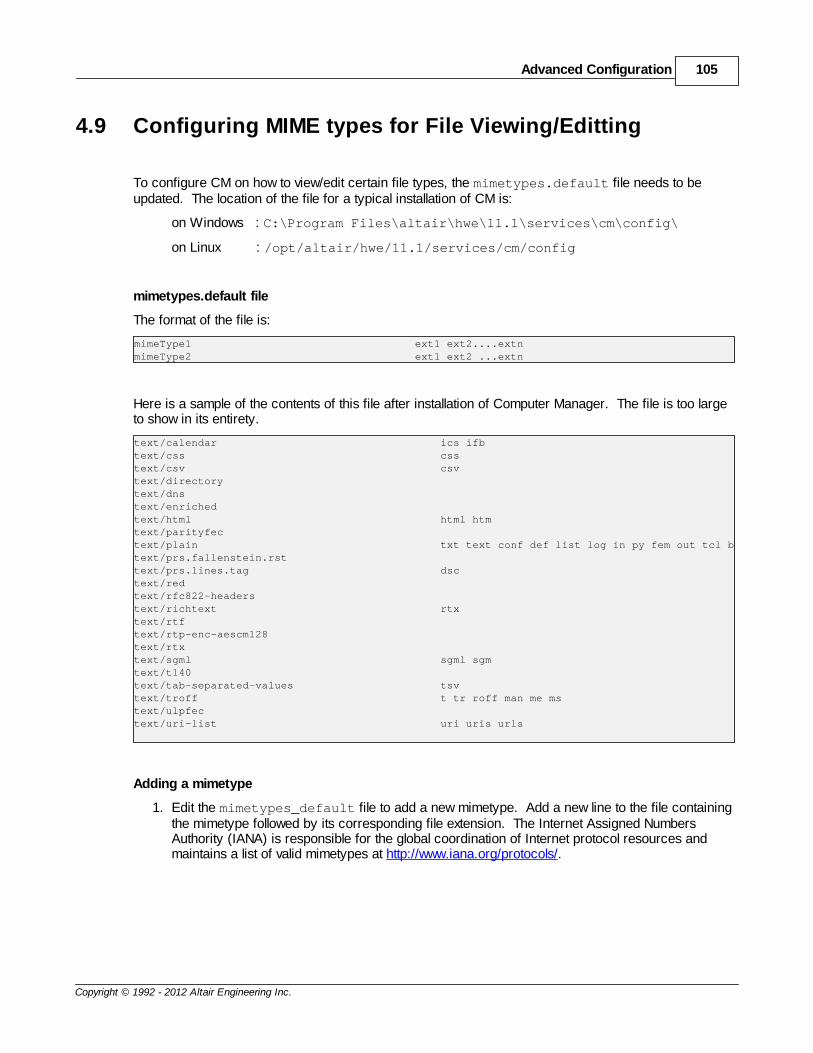
4.9 Configuring MIME types for File Viewing/Editting
To configure CM on how to view/edit certain file types, the mimetypes.default file needs to beupdated. The location of the file for a typical installation of CM is:
on Windows : C:\Program Files\altair\hwe\11.1\services\cm\config\
on Linux : /opt/altair/hwe/11.1/services/cm/config
mimetypes.default file
The format of the file is:
mimeType1 ext1 ext2....extnmimeType2 ext1 ext2 ...extn
Here is a sample of the contents of this file after installation of Computer Manager. The file is too largeto show in its entirety.
text/calendar ics ifbtext/css csstext/csv csvtext/directorytext/dnstext/enrichedtext/html html htmtext/parityfectext/plain txt text conf def list log in py fem out tcl bin envtext/prs.fallenstein.rsttext/prs.lines.tag dsctext/redtext/rfc822-headerstext/richtext rtxtext/rtftext/rtp-enc-aescm128text/rtxtext/sgml sgml sgmtext/t140text/tab-separated-values tsvtext/troff t tr roff man me mstext/ulpfectext/uri-list uri uris urls
Adding a mimetype
1. Edit the mimetypes_default file to add a new mimetype. Add a new line to the file containingthe mimetype followed by its corresponding file extension. The Internet Assigned NumbersAuthority (IANA) is responsible for the global coordination of Internet protocol resources andmaintains a list of valid mimetypes at http://www.iana.org/protocols/.
Installation and Administration Guide106
Copyright © 1992 - 2012 Altair Engineering Inc.
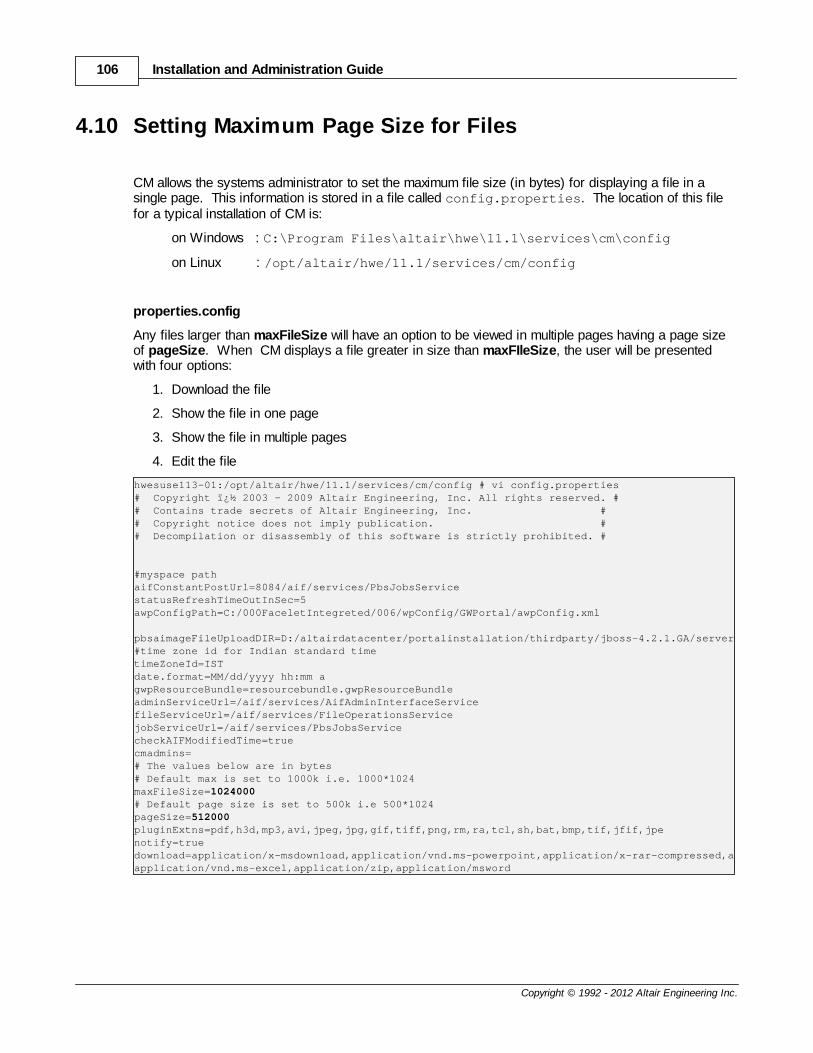
4.10 Setting Maximum Page Size for Files
CM allows the systems administrator to set the maximum file size (in bytes) for displaying a file in asingle page. This information is stored in a file called config.properties. The location of this filefor a typical installation of CM is:
on Windows : C:\Program Files\altair\hwe\11.1\services\cm\config
on Linux : /opt/altair/hwe/11.1/services/cm/config
properties.config
Any files larger than maxFileSize will have an option to be viewed in multiple pages having a page sizeof pageSize. When CM displays a file greater in size than maxFIleSize, the user will be presentedwith four options:
1. Download the file
2. Show the file in one page
3. Show the file in multiple pages
4. Edit the file
hwesuse113-01:/opt/altair/hwe/11.1/services/cm/config # vi config.properties# Copyright � 2003 - 2009 Altair Engineering, Inc. All rights reserved. ## Contains trade secrets of Altair Engineering, Inc. ## Copyright notice does not imply publication. ## Decompilation or disassembly of this software is strictly prohibited. #
#myspace pathaifConstantPostUrl=8084/aif/services/PbsJobsServicestatusRefreshTimeOutInSec=5awpConfigPath=C:/000FaceletIntegreted/006/wpConfig/GWPortal/awpConfig.xml
pbsaimageFileUploadDIR=D:/altairdatacenter/portalinstallation/thirdparty/jboss-4.2.1.GA/server/default/deploy/PBSPortal.war/amcharts/images#time zone id for Indian standard timetimeZoneId=ISTdate.format=MM/dd/yyyy hh:mm agwpResourceBundle=resourcebundle.gwpResourceBundleadminServiceUrl=/aif/services/AifAdminInterfaceServicefileServiceUrl=/aif/services/FileOperationsServicejobServiceUrl=/aif/services/PbsJobsServicecheckAIFModifiedTime=truecmadmins=# The values below are in bytes# Default max is set to 1000k i.e. 1000*1024maxFileSize=1024000# Default page size is set to 500k i.e 500*1024pageSize=512000pluginExtns=pdf,h3d,mp3,avi,jpeg,jpg,gif,tiff,png,rm,ra,tcl,sh,bat,bmp,tif,jfif,jpenotify=truedownload=application/x-msdownload,application/vnd.ms-powerpoint,application/x-rar-compressed,application/x-gtar,application/vnd.ms-excel,application/zip,application/msword
Advanced Configuration 107
Copyright © 1992 - 2012 Altair Engineering Inc.
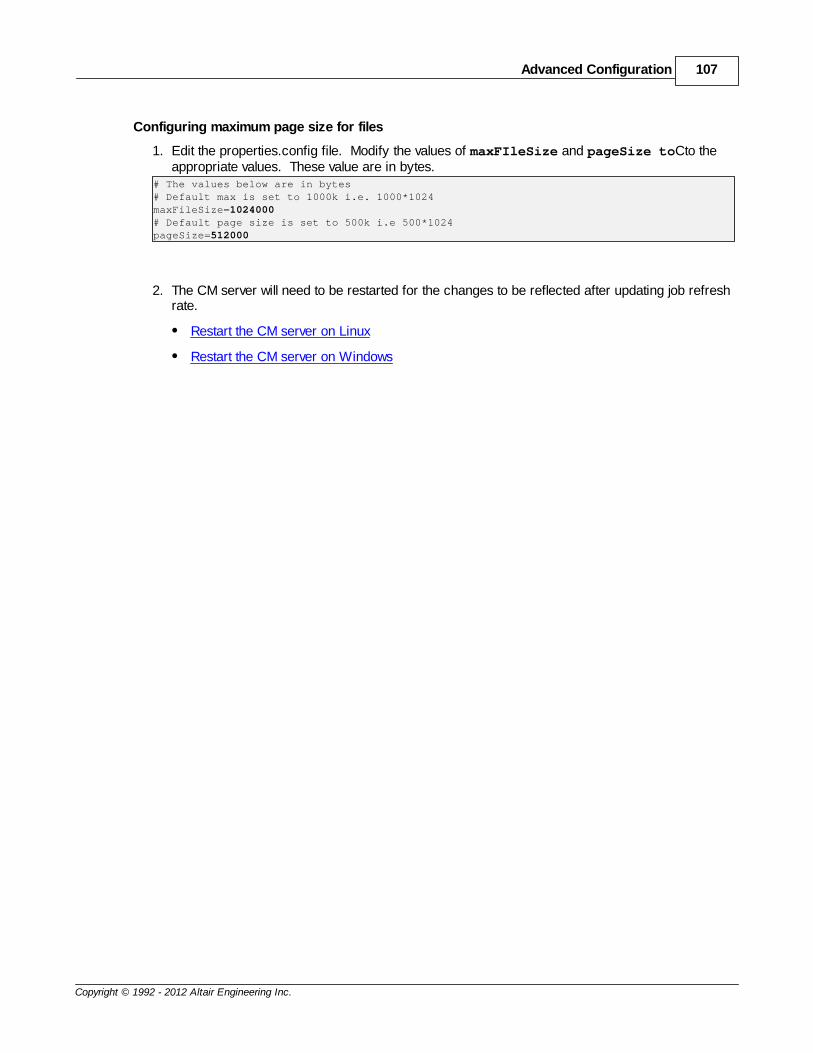
Configuring maximum page size for files
1. Edit the properties.config file. Modify the values of maxFIleSize and pageSize toCto theappropriate values. These value are in bytes.
# The values below are in bytes# Default max is set to 1000k i.e. 1000*1024maxFileSize=1024000# Default page size is set to 500k i.e 500*1024pageSize=512000
2. The CM server will need to be restarted for the changes to be reflected after updating job refreshrate.
Restart the CM server on Linux
Restart the CM server on Windows
Installation and Administration Guide108
Copyright © 1992 - 2012 Altair Engineering Inc.
4.11 Configuring the Job Refresh Rate
The default time interval for the CM scheduler to refresh the job details, such as job status and jobproperties, is two (2) minutes after the minute. This time interval can be configured by updating thecron expression in the spring-config.xml file. The location of the file for a typical installation ofCMis:
on Windows : C:\Program Files\altair\hwe\11.1\services\cm\config
on Linux : /opt/altair/hwe/11.1/services/cm/config
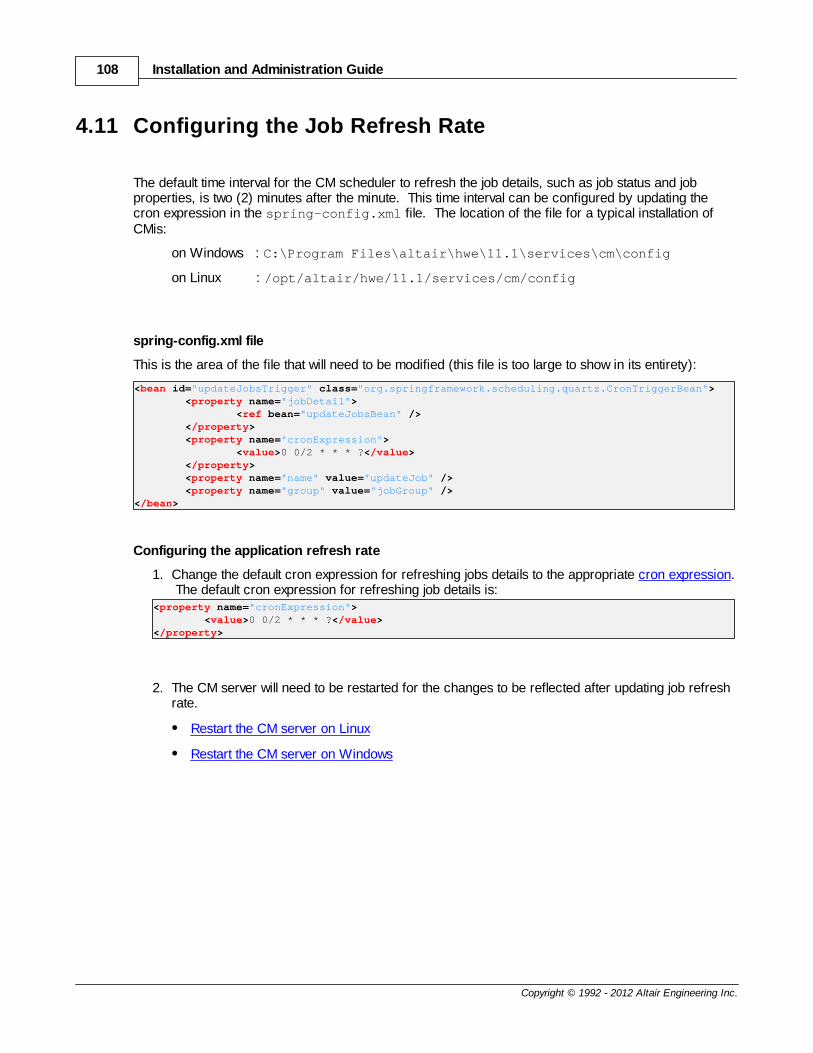
spring-config.xml file
This is the area of the file that will need to be modified (this file is too large to show in its entirety):
<bean id="updateJobsTrigger" class="org.springframework.scheduling.quartz.CronTriggerBean"> <property name="jobDetail"> <ref bean="updateJobsBean" /> </property> <property name="cronExpression"> <value>0 0/2 * * * ?</value> </property> <property name="name" value="updateJob" /> <property name="group" value="jobGroup" /></bean>
Configuring the application refresh rate
1. Change the default cron expression for refreshing jobs details to the appropriate cron expression. The default cron expression for refreshing job details is:
<property name="cronExpression"> <value>0 0/2 * * * ?</value></property>
2. The CM server will need to be restarted for the changes to be reflected after updating job refreshrate.
Restart the CM server on Linux
Restart the CM server on Windows
Advanced Configuration 109
Copyright © 1992 - 2012 Altair Engineering Inc.
4.12 Configuring the Application Refresh Rate
The default time interval for the CM scheduler to refresh PBS Application Services applications is three(3) minutes at 30 seconds after the minute. This time interval can be configured by updating the cronexpression in the spring-config.xml file. The location of the file for a typical installation of CM is:
on Windows : C:\Program Files\altair\hwe\11.1\services\cm\config
on Linux : /opt/altair/hwe/11.1/services/cm/config
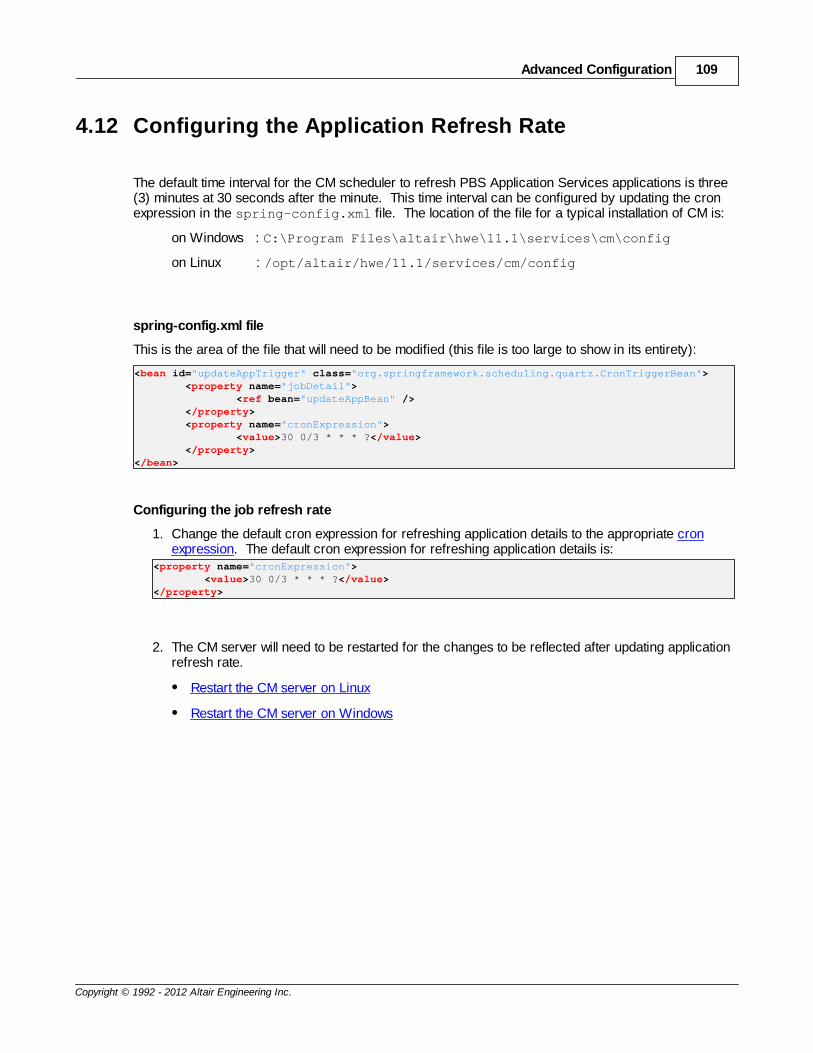
spring-config.xml file
This is the area of the file that will need to be modified (this file is too large to show in its entirety):
<bean id="updateAppTrigger" class="org.springframework.scheduling.quartz.CronTriggerBean"> <property name="jobDetail"> <ref bean="updateAppBean" /> </property> <property name="cronExpression"> <value>30 0/3 * * * ?</value> </property></bean>
Configuring the job refresh rate
1. Change the default cron expression for refreshing application details to the appropriate cronexpression. The default cron expression for refreshing application details is:
<property name="cronExpression"> <value>30 0/3 * * * ?</value></property>
2. The CM server will need to be restarted for the changes to be reflected after updating applicationrefresh rate.
Restart the CM server on Linux
Restart the CM server on Windows
Installation and Administration Guide110
Copyright © 1992 - 2012 Altair Engineering Inc.
4.13 Changing the PBS Application Services StagingDirectory
The PBS Application Services staging directory is where CM transfers the necessary job files, after jobsubmission, but prior to the job being submitted to PBS Application Services for transfer to PBSProfessional for execution. When PBS Professional selects the job for execution, the files are staged-into the execution host from the staging directory. Upon job completion, any files the job wants to retainare staged-out by PBS Professional to the staging directory, and CM retrieves them from there.Changing the stage directory is a function of PBS Application Services and can be done by editting aconfiguration file and restarting the PBS Application Services server. Please see Configuring PBSApplication Services in the PBS Application Services Administrator's Guide for more information. Thisguide can be downloaded from the PBSWorks documentation user area
All CM users will have to unregister and re-register with the server again to have the new stagingdirectory reflected within CM.
Advanced Configuration 111
Copyright © 1992 - 2012 Altair Engineering Inc.
4.14 Refreshing Application Definitions
PBS Application Services requires a predefined set of instructions, called application definitions, todescribe your application parameters to users, store their responses, and prepare those responses forjob execution via PBS Professional. These application definitions are stored in a central repository andwill make PBS Professional aware of each of them upon server startup.
If you have updated an application definition at the PBS Application Services layer, then you mustrefresh CM with the changes to the application definitions. This is accomplished by restarting the PBSApplication Services server, and then waiting for CM to refresh the application (see Configuring theApplication Refresh Rate). Once the application has been refreshed, then application will be availableto CM. if you are already logged into CM, then click on F5 to refresh the CM session.
Installation and Administration Guide112
Copyright © 1992 - 2012 Altair Engineering Inc.
4.15 Configuring JVM Performance
To ensure the proper scalability of larger job history counts, you may want to adjust the Java VirtualMachine (JVM) memory heap size of the portal. See Configuring JVM Performance in theHyperWorks Enterprise Administration Guide for more details. This guide can can be downloaded fromthe HyperWorks or PBSWorks documentation user area.
Advanced Configuration 113
Copyright © 1992 - 2012 Altair Engineering Inc.
4.16 Fine Tuning CM
Testing has shown that PBS Application Services + CM handles a total number of jobs up to 10k quitewell. Once the total number of job exceeds this limit, significant system slowdown occurs, eventuallycausing Java memory problems. This section offers suggestions for fine tuning CM by applyingrelevant configuration changes to reduce calls to the PBS Application Services server, and also byreducing the total number of jobs kept in the PBS Professional jobs history.
1. Reduce the PBS Professional job history interval. Ideally this value should be set so that the diskspace required for maintaining the job history remains under 10k.
2. Configure the CM job refresh rate (see Configuring the Job Refresh Rate) to provide accurateand timely job information, without overtaxing the application with continual calls to the PBSApplication Services server. The default job refresh rate is 2 minutes.
3. Whenever possible, do not install PBS Desktop on the same server as CM. PBS Desktopqueries the PBS Application Services server every minute by default, therefore eliminating PBSDesktop from the server environment will reduce the calls to the PBS Application Services server.
4. Do not deploy a cron job into the customer environment that removes the PBS ApplicationServices timestamp.txt file. PBS Application Services will update the list of available applicationdefinitions whenever this file is removed. This is a recommended configuration when developingapplication definitions, but should not be deployed into the customer environment.
5. Whenever possible, do not install CM on the same machine as PBS Application Services.
Installation and Administration Guide114
Copyright © 1992 - 2012 Altair Engineering Inc.
5 Location of CM Files
The CM installation directory, which will be referred to as <HWE_INSTALL_DIR>, for a typicalinstallation of CM is:
on Windows : C:\Program Files\altair\hwe\11.1
on Linux : /opt/altair/hwe/11.1
CM Service Configuration Properties File
The CM services configuration properties file can be found at <HWE_INSTALL_DIR>/services/cm/config/config.properties. This file is where maximum page size for files can beconfigured.
CM Spring Configuration File
The CM Spring configuration file can be found at <HWE_INSTALL_DIR>/services/cm/config/spring-config.xml. This file is where CM job refresh rates and application refresh rates can beconfigured.
CM MIME Types Configuration File
The CM MIME types configuration file can be found at <HWE_INSTALL_DIR>/services/cm/config/mimetypes.default
CM Generic Action Configuration Files
The CM generic action configuration files can be found at <HWE_INSTALL_DIR>/services/cm/config/genericActions. A separate XML file is required for each individual PBS ApplicationServices server registered in CM. The naming convention of the generic action XML files areservername.xml where servername is the name of the server as it was added by the HWE portaladministrator.
CM Application Help and Icon Configuration File
The CM application help configuration file can be found at <HWE_INSTALL_DIR>/services/cm/config/app-helper.xml
HTML files associated with application help can be found at <HWE_INSTALL_DIR>/applications/cm/binaries/ui/applicationHelp
Images for application icons can be found at <HWE_INSTALL_DIR>/applications/cm/binaries/ui/images/appicons
CM File Extension Icon Configuration File
The CM file extension icon configuration file can be found at <HWE_INSTALL_DIR>/applications/cm/icons/icon.properties
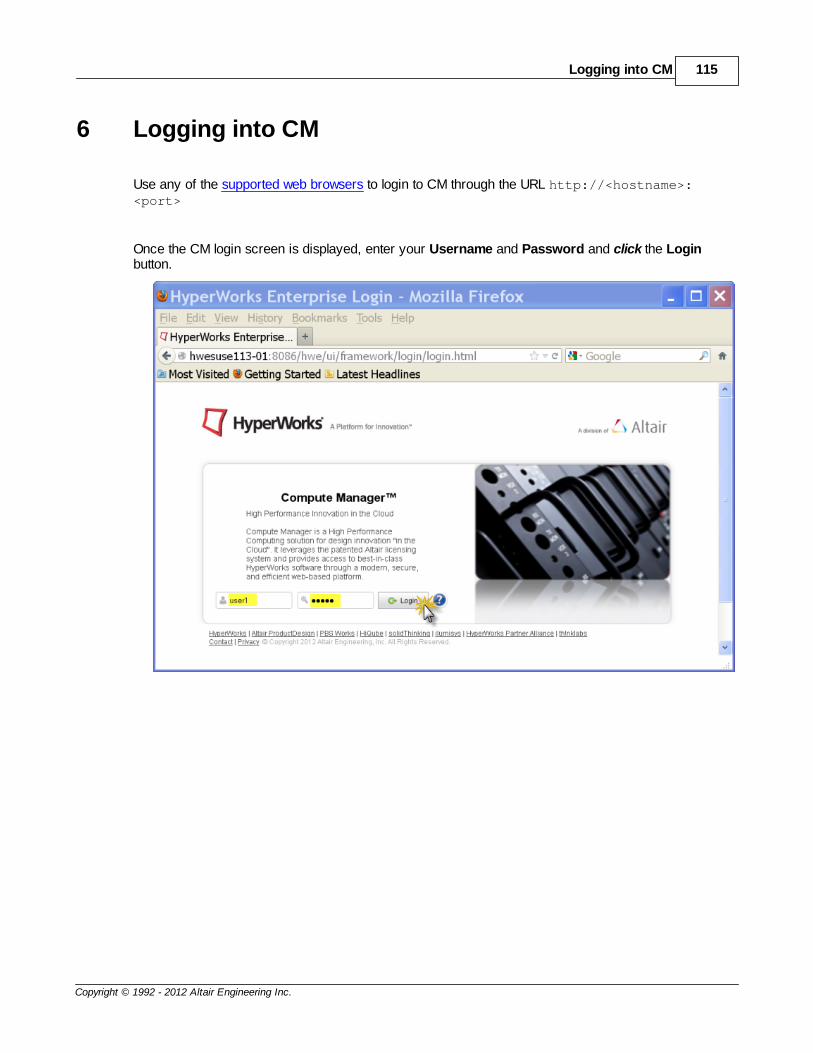
Logging into CM 115
Copyright © 1992 - 2012 Altair Engineering Inc.
6 Logging into CM
Use any of the supported web browsers to login to CM through the URL http://<hostname>:<port>
Once the CM login screen is displayed, enter your Username and Password and click the Loginbutton.
Installation and Administration Guide116
Copyright © 1992 - 2012 Altair Engineering Inc.
Index- A -access control 92
Access Management Service 4, 92
access to applications installed on a PAS server 92
access to PAS servers 92
Advanced Configuration 88
application help 97
application icons 97
application refresh rate 109
- C -changing PAS staging directory 110
CM status 84
Compute Manager 4
copyright 6
- F -file extensions 99
fine tuning 113
- G -Google Chrome Frame plug-in 9
- I -install 12, 38, 55
installation location of HWE 83
- J -job actions 89
- L -Linux console install 55
Linux console uninstall 80
Linux GUI install 38
Linux GUI uninstall 75
Linux installations 37
location of CM files 114
logging into CM 115
- M -MIME types 105
- R -refreshing application definitions 111
refreshing job rate 108
resource policies 92
restarting CM 36, 87
Results Visualization Service 4
- S -secure communication between CM and PAS 104
setting maximum page size for files 106
SSL 104
starting CM 34, 85
stopping CM 35, 86
supported browsers 9
supported platforms 9
system requirements for CM 7
system requirements for CM + RV 7
- T -third party licenses 6
trademark 6
- U -uninstall 29, 75, 80
- W -Window installations 11
Windows install 12
Windows uninstall 29