Embed Size (px)
Citation preview
8/3/2019 Compress Picturefv 392
http://slidepdf.com/reader/full/compress-picturefv-392 1/4
2Fall/ Winter 2002
The ProblemI often receive a Word document
by e-mail that is several hundred
kilobytes (KB), yet only com-
prises one page with a small,
embedded bitmap, such as arésumé photograph or a company
logo. The larger the document
size, the longer it takes Word to
“repaint” it while editing or view-
ing, the longer it takes to print,
and the longer it takes to e-mail
or download from a web site.
Whereas I probably would not
notice any appreciable delay with
a 1-page document, I would
notice the difference with a typi-
cal proposal document of several
tens of pages, each with an
embedded graphic of some kind.
For example, suppose you take a
picture with a digital camera of a
new employee to add to their
résumé. A 1-megapixel camera
produces a portrait bitmap image
of, typically, 864 pixels by 1152
pixels. This results in a JPEG file
of around 240 KB. Now, you
insert this picture into a Word
document—the employee’s
résumé. The picture is initially
very large, so you grab the corner
of the picture and shrink it down
to the required size, say, 1.5 inch-
es wide on the page, and you
might crop some unwanted areas
off the picture.
Happy with your results visually,
you save the document. The doc-ument now only contains a small
picture, right? Sorry, you’re
wrong! You have not compressed
the picture, merely squashed it.
The file will be around 240 KB
larger than before you inserted
the picture. That probably takes
a 1-page Word document up to
around 300 KB—or around a
minute of download time over
the Internet on a 56K dial-up
modem.
Extrapolate those figures to a typ-
ical proposal document and youcan end up with some enormous
file sizes, and corresponding long
download and printing times.
Large bitmaps also slow down
editing, because it takes Word
longer to repaint the screen
when you scroll the document.
“But,” I hear you say, “I want the
highest quality for my printed
documents!” Don’t we all, but we
don’t need huge bitmaps to
achieve it. In fact, printing a
bitmap at a resolution of more
than 150 to 200 pixels per inch
(PPI) achieves no noticeable
visual increase in quality. Even
high-end laser printers, such as
continued on page 3.◗
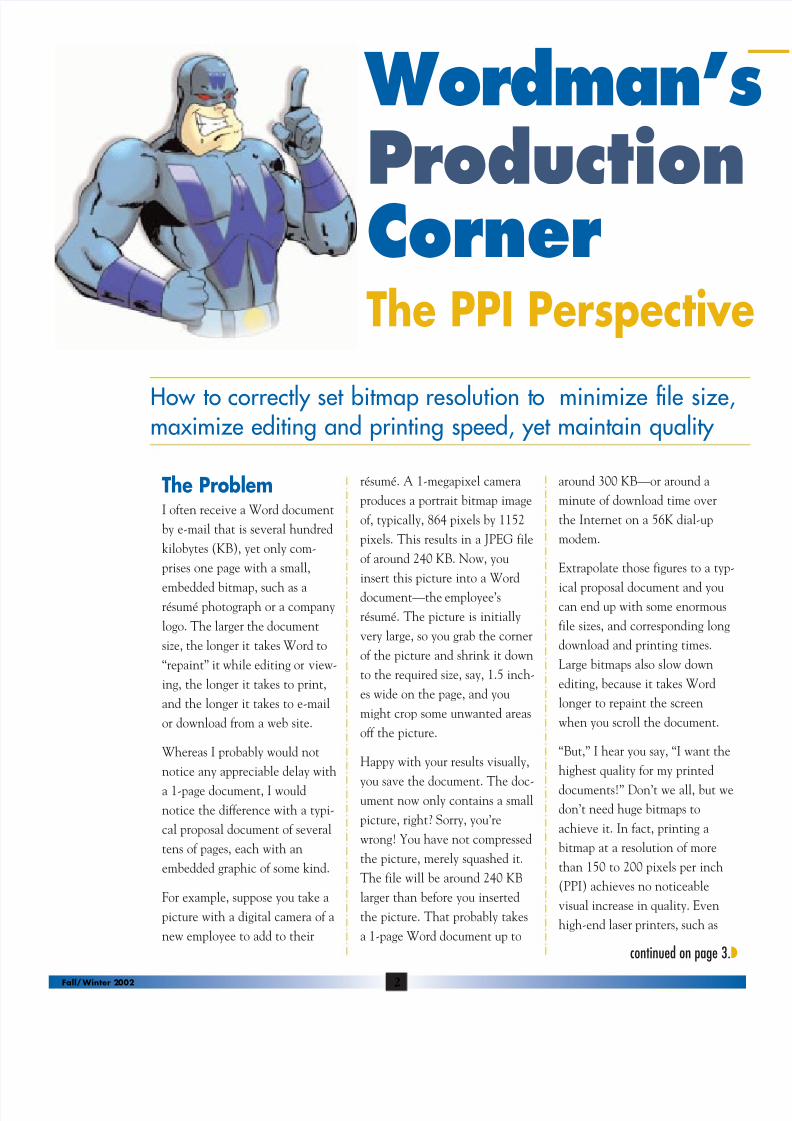
How to correctly set bitmap resolution to minimize file size,maximize editing and printing speed, yet maintain quality
Wordman’s
ProductionCornerThe PPI Perspective
8/3/2019 Compress Picturefv 392
http://slidepdf.com/reader/full/compress-picturefv-392 2/4
3 Fall/Winter 2002
continued on page 4.◗
◗ Continued from page 2.
the Xerox DocuColor, rarely print
at resolutions above 400 PPI.
Thanks to the characteristics of
the human eye, the printer needs
this resolution for crisp black and
white text, but not for color pic-
tures. (Note that PPI and DPI
(dots per inch) are virtually
interchangeable for the purposes
of this discussion.)
The SolutionUsing Word
So, how do we optimally change
the resolution of the bitmap? If
you are using Word 2002, part of
Microsoft® Office XP, you have a
built-in tool. Those of us who are
long-time Word users waited
years for this obviously needed
feature.
1. Size the picture how you wantit to look in the document.
Using our résumé example,
this would be 1.5 inches wide.
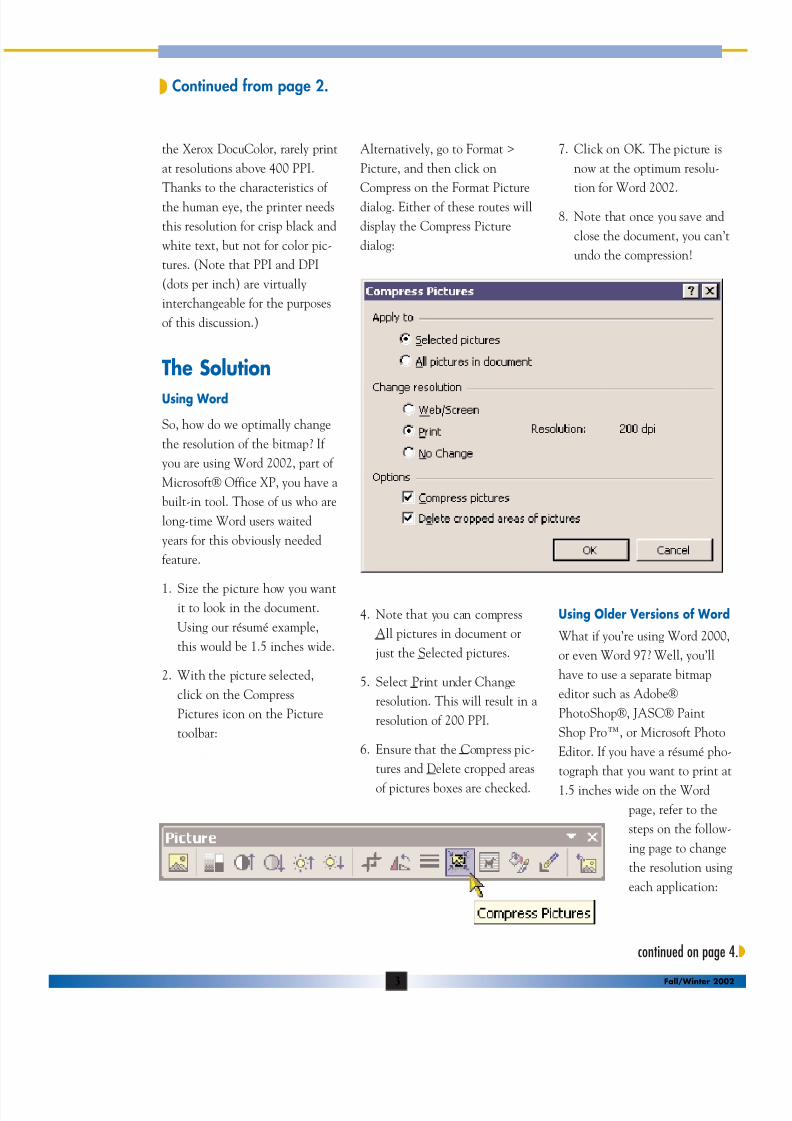
2. With the picture selected,
click on the Compress
Pictures icon on the Picture
toolbar:
Alternatively, go to Format >
Picture, and then click on
Compress on the Format Picture
dialog. Either of these routes will
display the Compress Picture
dialog:
4. Note that you can compress
All pictures in document or
just the Selected pictures.
5. Select Print under Change
resolution. This will result in a
resolution of 200 PPI.
6. Ensure that the Compress pic-
tures and Delete cropped areas
of pictures boxes are checked.
7. Click on OK. The picture is
now at the optimum resolu-
tion for Word 2002.
8. Note that once you save and
close the document, you can’t
undo the compression!
Using Older Versions of Word
What if you’re using Word 2000,
or even Word 97? Well, you’ll
have to use a separate bitmap
editor such as Adobe®
PhotoShop®, JASC® Paint
Shop Pro™, or Microsoft Photo
Editor. If you have a résumé pho-
tograph that you want to print at
1.5 inches wide on the Word
page, refer to the
steps on the follow-
ing page to change
the resolution using
each application:
8/3/2019 Compress Picturefv 392
http://slidepdf.com/reader/full/compress-picturefv-392 3/4
4Fall/ Winter 2002
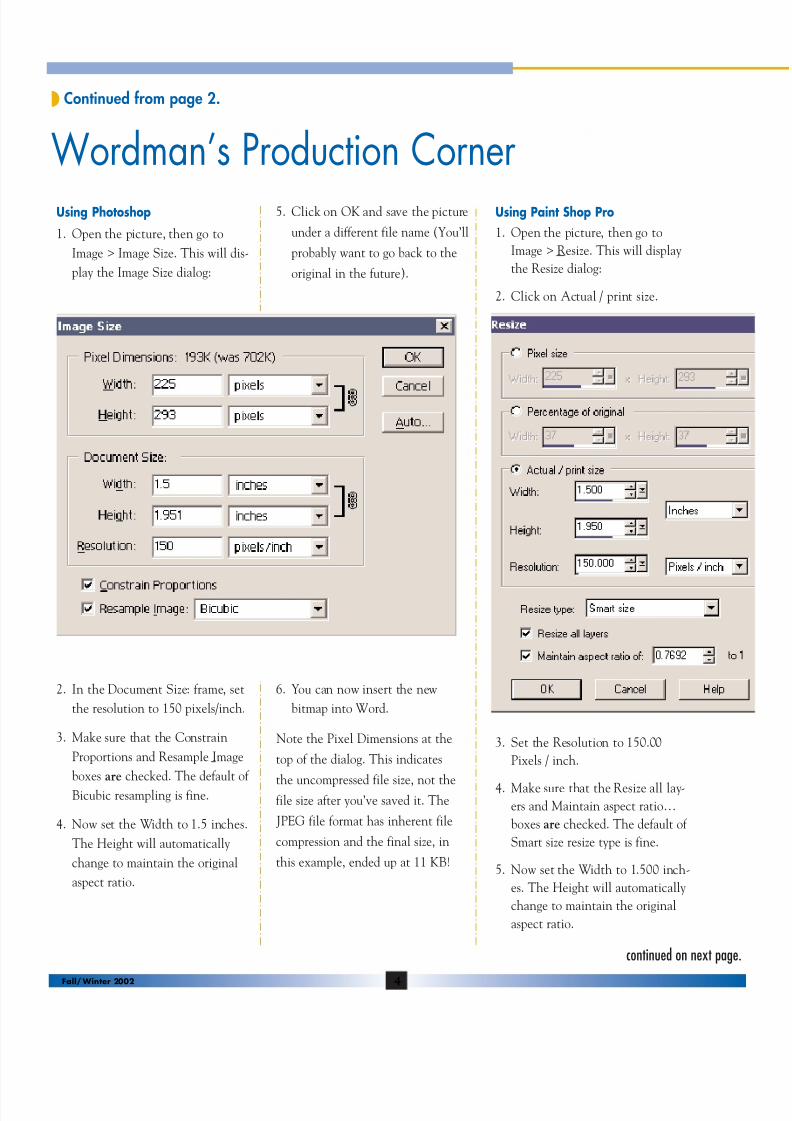
Using Photoshop
1. Open the picture, then go to
Image > Image Size. This will dis-
play the Image Size dialog:
2. In the Document Size: frame, set
the resolution to 150 pixels/inch.
3. Make sure that the Constrain
Proportions and Resample Image
boxes are checked. The default of
Bicubic resampling is fine.
4. Now set the Width to 1.5 inches.
The Height will automatically
change to maintain the original
aspect ratio.
5. Click on OK and save the picture
under a different file name (You’ll
probably want to go back to the
original in the future).
6. You can now insert the new
bitmap into Word.
Note the Pixel Dimensions at the
top of the dialog. This indicates
the uncompressed file size, not thefile size after you’ve saved it. The
JPEG file format has inherent file
compression and the final size, in
this example, ended up at 11 KB!
Using Paint Shop Pro
1. Open the picture, then go to
Image > Resize. This will display
the Resize dialog:
2. Click on Actual / print size.
3. Set the Resolution to 150.00
Pixels / inch.
4. Make sure that the Resize all lay-ers and Maintain aspect ratio…
boxes are checked. The default of
Smart size resize type is fine.
5. Now set the Width to 1.500 inch-
es. The Height will automatically
change to maintain the original
aspect ratio.
continued on next page.
Wordman’s Production Corner
◗ Continued from page 2.
8/3/2019 Compress Picturefv 392
http://slidepdf.com/reader/full/compress-picturefv-392 4/4
5
6. Click on OK and save the picture
under a different file name. You
can now insert the new bitmap
into Word.
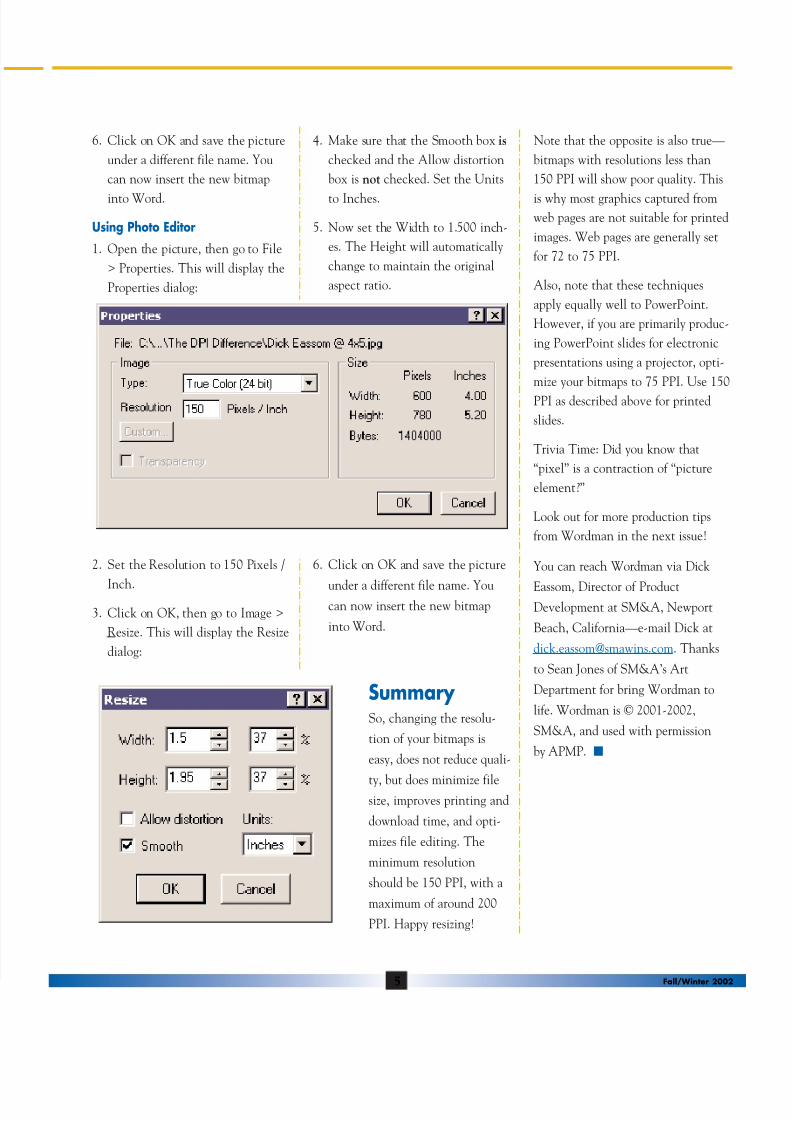
Using Photo Editor
1. Open the picture, then go to File
> Properties. This will display the
Properties dialog:
2. Set the Resolution to 150 Pixels /
Inch.
3. Click on OK, then go to Image >
Resize. This will display the Resize
dialog:
4. Make sure that the Smooth box is
checked and the Allow distortion
box is not checked. Set the Units
to Inches.
5. Now set the Width to 1.500 inch-
es. The Height will automatically
change to maintain the original
aspect ratio.
6. Click on OK and save the picture
under a different file name. Youcan now insert the new bitmap
into Word.
SummarySo, changing the resolu-
tion of your bitmaps is
easy, does not reduce quali-
ty, but does minimize filesize, improves printing and
download time, and opti-
mizes file editing. The
minimum resolution
should be 150 PPI, with a
maximum of around 200
PPI. Happy resizing!
Note that the opposite is also true—
bitmaps with resolutions less than
150 PPI will show poor quality. This
is why most graphics captured fromweb pages are not suitable for printed
images. Web pages are generally set
for 72 to 75 PPI.
Also, note that these techniques
apply equally well to PowerPoint.
However, if you are primarily produc-
ing PowerPoint slides for electronic
presentations using a projector, opti-
mize your bitmaps to 75 PPI. Use 150
PPI as described above for printed
slides.
Trivia Time: Did you know that
“pixel” is a contraction of “picture
element?”
Look out for more production tips
from Wordman in the next issue!
You can reach Wordman via Dick
Eassom, Director of ProductDevelopment at SM&A, Newport
Beach, California—e-mail Dick at
[email protected]. Thanks
to Sean Jones of SM&A’s Art
Department for bring Wordman to
life. Wordman is © 2001-2002,
SM&A, and used with permission
by APMP. ■
Fall/Winter 2002