Embed Size (px)
Citation preview
Comprehensive Medical Billing and Coding Student CD Quick Start Guide By Deborah Vines, Ann Braceland, Elizabeth Rollins Welcome! In this CD that accompanies your Comprehensive Medical Billing and Coding textbook you will be able to develop and practice your skills. The opening screen allows you to navigate easily through all the options available. We strongly suggest that you start with the Tutorial. The Tutorial will help you to understand how to interact with the CMS 1500 and UB04 activities in this CD. After completing the Tutorial you can move on to the Guided Practice exercises in the Insurance Forms section. After successfully completing the Guided Practice, you can then move on to the Test Yourself section! You will find it useful to refer to this Quick Start Guide as you have the CD open. This way you can follow along with the instructions. Later, when you master one part of the CD and are ready to begin a new section, remember to refer back to this guide for help in getting started on the new section. If you do not understand a specific statement, KEEP READING. Many times the next sentence will contain the answer to your question. This CD contains the following content. HELP – General help with navigating the CD ROM TUTORIAL – A guide to completing the CMS 1500 and UB04 claim forms INSURANCE FORMS –Tutorial, Guided Practice and Test Yourself on CMS 1500 and UB 04 QUIZ – Chapter specific and HIPAA questions to test your knowledge. GLOSSARY – Terms from the text with audio pronunciation and common abbreviations with definitions for all terms. GAMES – Vocabulary building games. This Quick Start guide will take through each element on this CD and give you instructions on how to use each section. Help This section of the CD is a walkthrough of the basic use of this CD. Left-click once on HELP, then roll over each icon with your mouse to read a short explanation of each button and its use. To close this window, click the message at the top center of the screen that states “Click here to close Help” and you will be brought back to the main page of the CD.

You can access this page from within the CD by clicking the help icon at the bottom left corner of your CD. To close this window, click the message at the top center of the screen that states “Click here to close Help” and you will be brought back to where you were working.
NAVIGATION To EXIT from anywhere within the program, click the X in the upper right corner of the screen. To select any activity, left click ONCE with your mouse. Click the “Back” button to go to the home page. Use the “breadcrumbs” at the top of the page to return to the previous screen. “Breadcrumbs” allow you to step back through the CD the way you came. Below is an example of Breadcrumbs navigation in this CD. For example, in the screen shown, click on “Guided Practice” or “Insurance Forms” to go back to that screen.
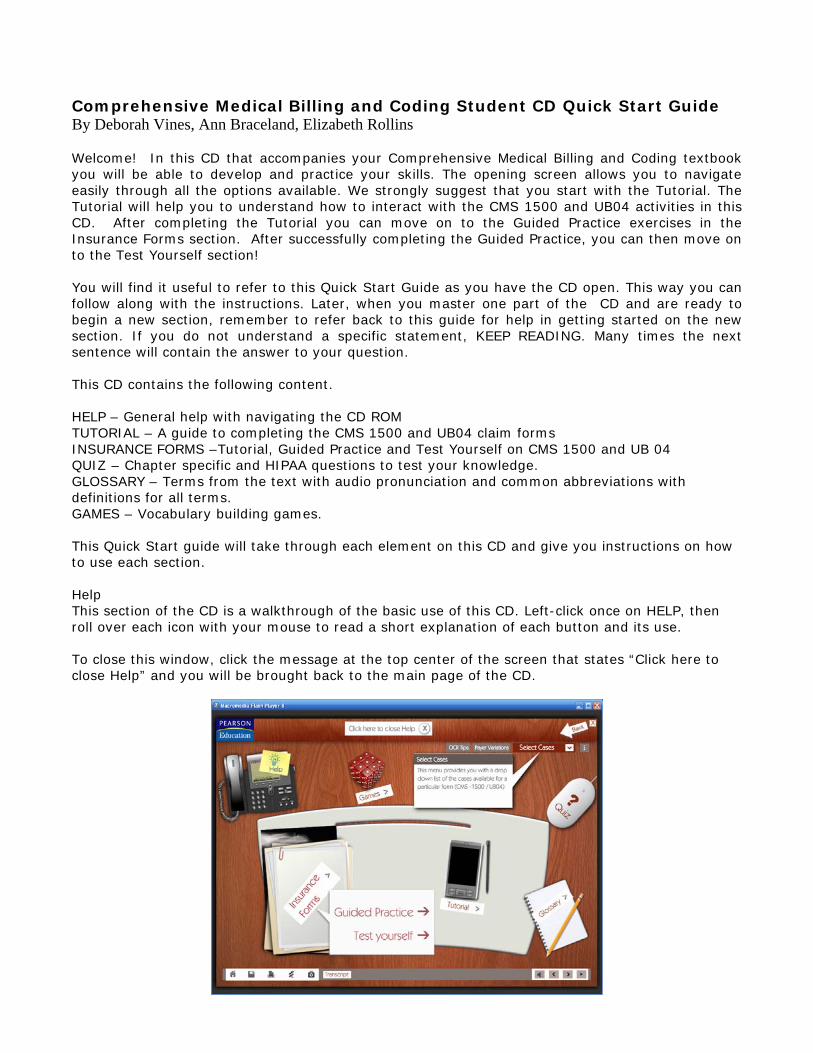
Tutorial Accurately completing a CMS1500 and a UB04 insurance form is the most important goal of this CD. This comprehensive tutorial will walk you through each section of the form, tell you what information is required and show where you can access the needed data. The tutorial begins with an audio introduction. If you return to the Tutorial later, you can skip this introduction by clicking the “skip” button at the bottom right corner of the screen. After the introduction, choose a form to review; the CMS 1500 or the UB04 form. Rolling your mouse over each option will give you a brief description of the form and when it is used. Left-click once to select the desired form.
After you choose a form, you will hear a short audio introduction to the form outlining its main sections. In the future, you can skip this audio portion by clicking the “skip” button at the bottom right corner of your screen. After the audio is complete, you will be asked to choose to either the Auto Play mode or the Clickable tour. Both options include an audio walkthrough of the entire form. These are described next.
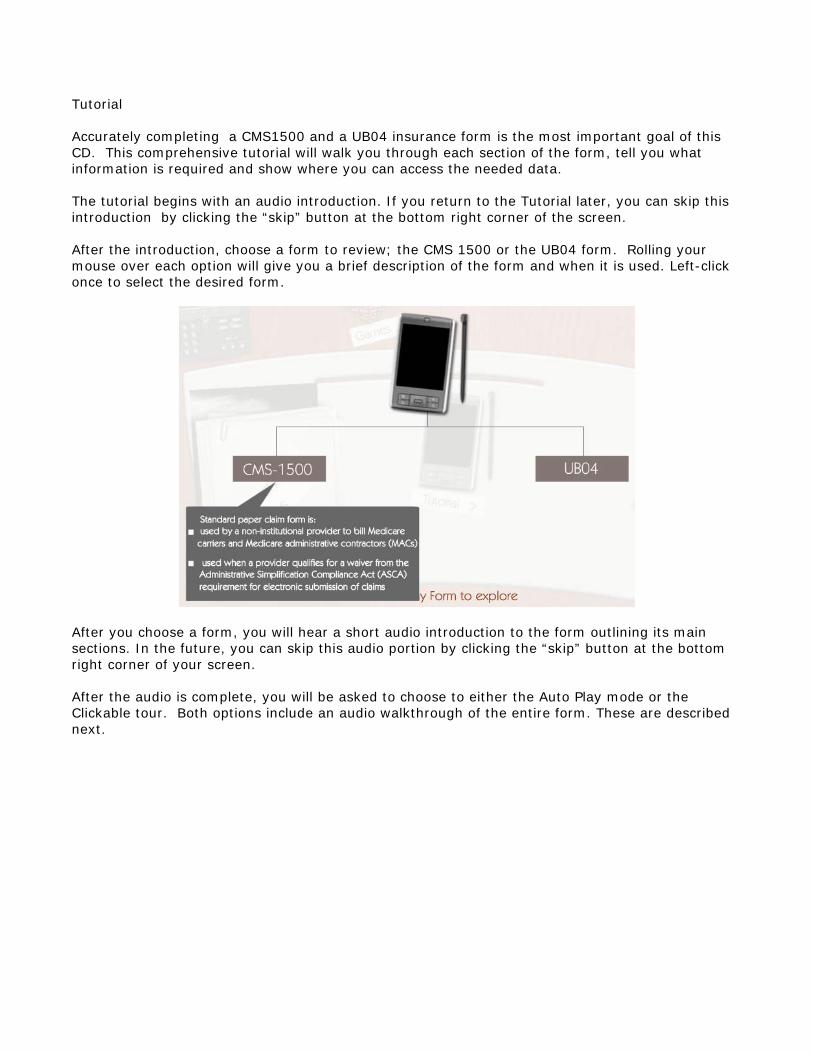
Tutorial Auto Play The Tutorial Auto Play will start at the beginning of the form and progress item by item through the form to the end in one continuous presentation. If you would like to read the audio portion of this tutorial in addition to listening, you can click the “Transcript” button at the bottom center of the screen which will give you an abbreviated version of the audio transcript.
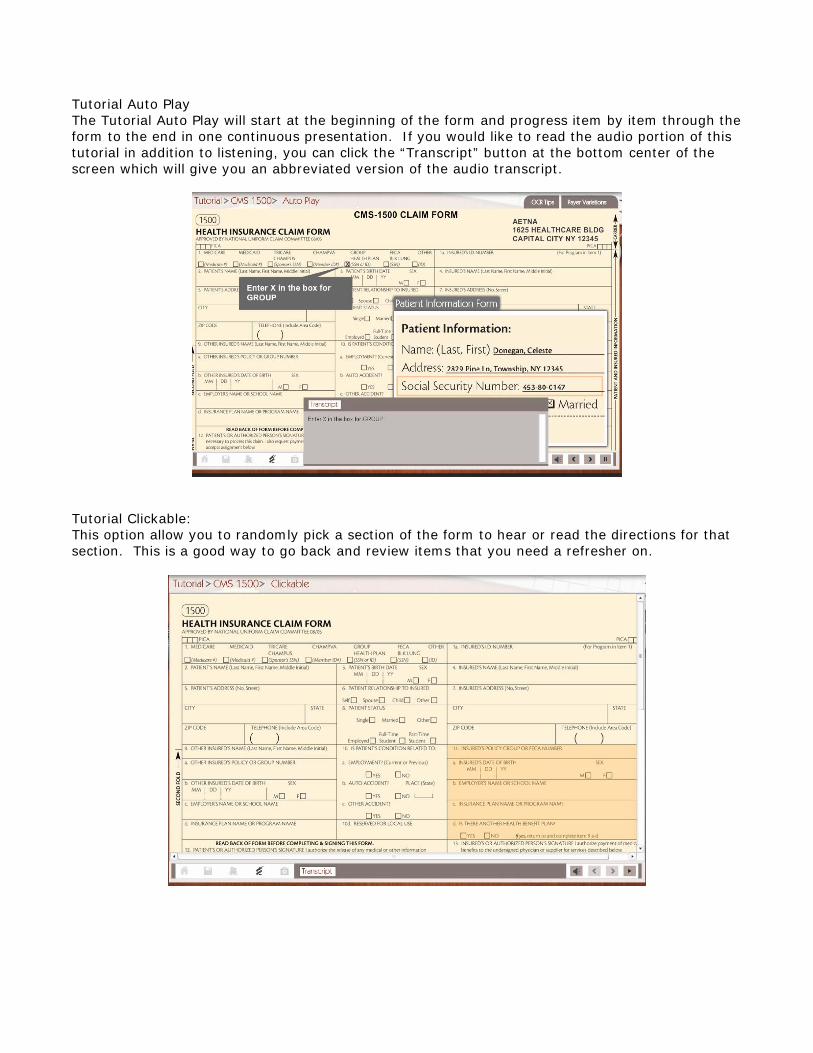
Tutorial Clickable: This option allow you to randomly pick a section of the form to hear or read the directions for that section. This is a good way to go back and review items that you need a refresher on.
INSURANCE FORMS – CMS 1500 and UB04 skill building After reviewing the Tutorial you should be ready to start this section of the CD ROM where you can practice completing the forms yourself. IMPORTANT POINTS TO REMEMBER:
1. All patient records and forms that have been incorporated into this CD can also be found in your textbook in Appendices A, B, and C.
a. Outpatient Billing (Diagnostic and Procedure Codes are provided for you) – Appendix A
b. Outpatient Billing with Diagnostic and Procedure Codes (You need to look up the codes yourself.) – Appendix B
c. Hospital Billing – Appendix C
2. You can view the patient records and forms in FOUR ways
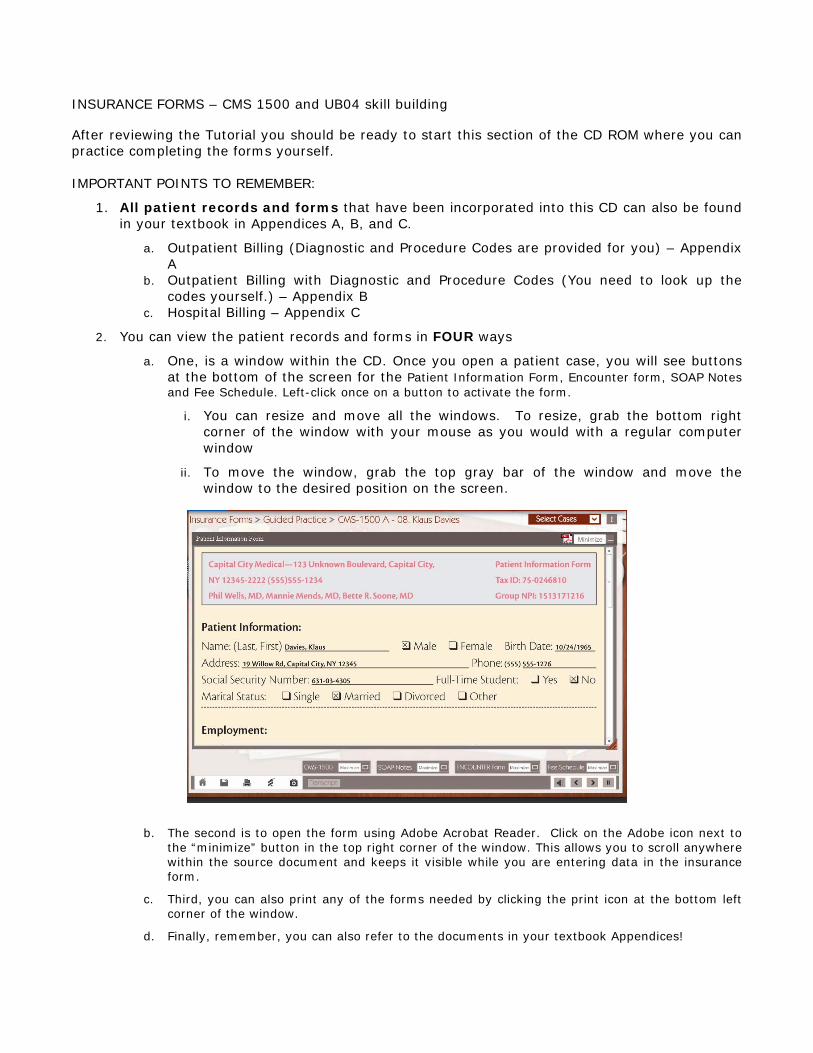
a. One, is a window within the CD. Once you open a patient case, you will see buttons at the bottom of the screen for the Patient Information Form, Encounter form, SOAP Notes and Fee Schedule. Left-click once on a button to activate the form.
i. You can resize and move all the windows. To resize, grab the bottom right corner of the window with your mouse as you would with a regular computer window
ii. To move the window, grab the top gray bar of the window and move the window to the desired position on the screen.
b. The second is to open the form using Adobe Acrobat Reader. Click on the Adobe icon next to the “minimize” button in the top right corner of the window. This allows you to scroll anywhere within the source document and keeps it visible while you are entering data in the insurance form.
c. Third, you can also print any of the forms needed by clicking the print icon at the bottom left corner of the window.
d. Finally, remember, you can also refer to the documents in your textbook Appendices!
3. There are two options for completing insurance forms; Guided Practice and Test Yourself.
a. Guided Practice – This section will step you through each form locator for every patient file. You must enter the information correctly before being allowed to move on. If you cannot correctly enter the data, you may choose to be shown the answer by clicking “Skip”. This will automatically populate the form locator and move you to the next cell.
b. Test Yourself – This section allows you to fill out the form without any prompts with the content you believe is accurate. At the end of the exercise, you will submit your answers for scoring. Correct answers are shown in Green and incorrect answers are shown in Red.
c. Instructions for each mode will be given in the following pages.
4. Blank CMS-1500 and UB04 forms can be printed from this CD for your own use. Click on the white CMS-1500 or UB04 buttons at the top of the page to download and print a blank form. To print the form you are working on with the data you have entered, click on the Print icon at the bottom of the screen.
5. The Clear All Forms button, in the top center of your screen, will delete all data in all cases. Do this only when you are sure you no longer want to access old data.

Guided Practice Completing the CMS 1500 and UB04 Guided Practice Activities This section will step you through each form locator for every patient file. You must enter the information correctly in each field before being allowed to move on to the next field. 1. From the home page click “Insurance Forms”.
2. Choose GUIDED PRACTICE. Choose the form you wish to complete: Outpatient Billing Outpatient Billing with Diagnostic and Procedure Codes Hospital Billing
3. Read the general instructions.
4. Left-click the arrow next to “Select Cases”, and choose a patient file to complete.
5. Click on the insurance form icon (CMS-1500 or UB04 depending on which part of the program you are in). This is where you will enter in the correct data.
6. Open the Patient Information form by clicking on the “Patient Information Form” button at the bottom of the screen. You will also need to open the Encounter form, SOAP Notes and Fee Schedule which also have buttons at the bottom of the page.
a. You will notice that when you first a documents, it overlaps previous documents and you cannot view all of them . To avoid this, resize each window as you open it.
i. To resize a window, grab the triangle in the bottom right corner of the window with your mouse as you would with a regular computer window and resize it as desired.
b. You can scroll both horizontally and vertically within each window. Use the small arrow buttons on the right side and bottom of the screen to scroll. Or, you can click and drag the bar between the arrows.
c. You can also move the windows around on your screen so that you can view them more easily. To move the window, grab the top gray bar of the window and move the window to the desired position on the screen.
d. There is no Encounter Form in the section “Outpatient Billing with Diagnostic and Procedure Codes” because part of the case is for you to perform the coding.
REMEMBER!! All of these forms can be printed, opened in a separate window using Adobe Acrobat Reader or found in your textbook Appendices for reference.
7. Gather the correct data and input that data into the form locator areas that are highlighted.
A few notes on navigation:
Use the ENTER key when more than one line is needed in a field, such as an address
The TAB key is not active in Guided Practice.
After you enter the correct information in a field, your cursor will automatically move to the next field.
If you enter data in a field and your cursor does not advance, it means there is an error in the data. Check the accuracy of your keying and also check your source document.
REMEMBER!! If you cannot identify the correct data, you may choose to have the program enter the information for you. To do this, click the “skip” button. The correct data will be entered, and
your cursor will move to the next field.
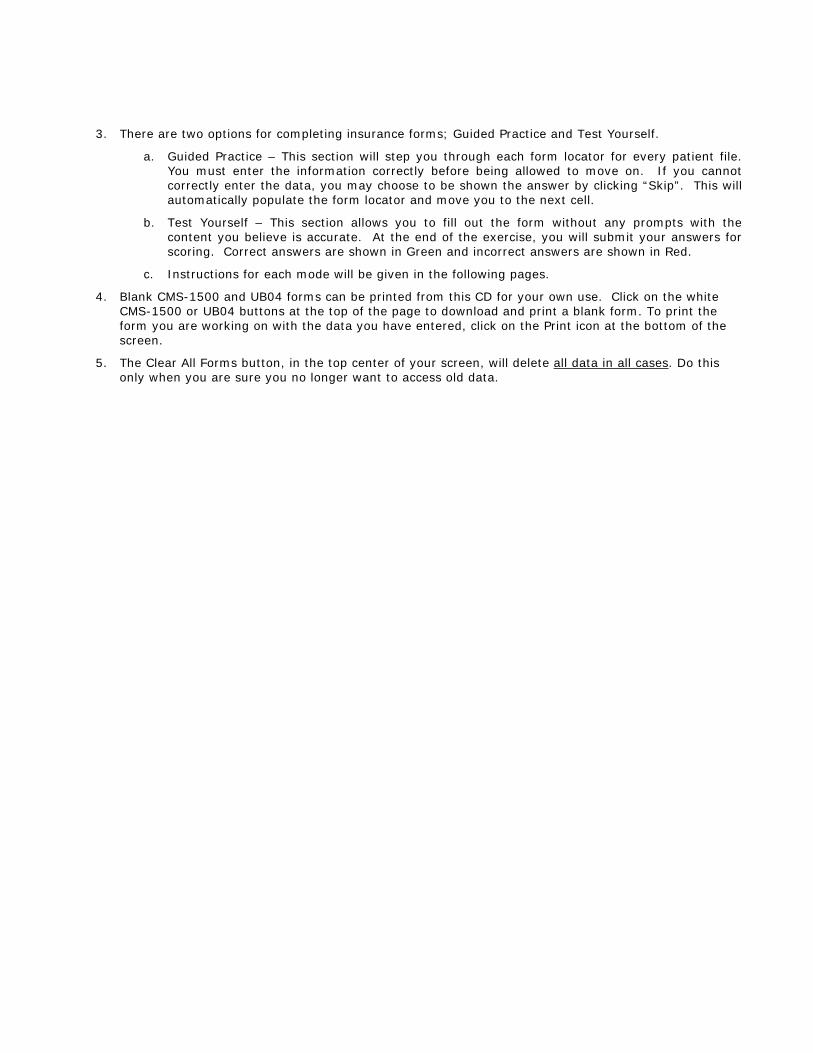
If you are having difficulty locating the correct data, you can go back and review the tutorial. The tutorial shows you where to find each piece of information. Use the Tutorial Clickable option to select the field you want to review.
Use the Payer Variations (CMS 1500) or Variations (UB 04) button at the top right of your screen to review how to complete the field for different payers or services.
8. You may save your progress at anytime by clicking the save button in the bottom left corner of the screen.
a. If you navigate away from this page, you will also be prompted to save your work. Your work will be saved on the computer you are currently working on, not on your disk or CD. If someone else uses the program on this computer, your data will be deleted. If you open the CD using a different computer, your data will not be available.
9. Once you have completed an exercise, you can move on to another patient file or you may choose to move to a different form.
10. If you click the Clear All Forms button in the top center of your screen, all data in all cases will be deleted. Do this only when you are sure you no longer want to access old data.
11. To navigate back to the form choices, use the breadcrumbs at the top left of the page or use the “back” button in the arrow in the top right corner.
Test Yourself Completing the CMS 1500 and UB04 Test Yourself Activities This section allows you to fill out the form with the content you believe is accurate. At the end of the exercise, you will submit your answers for scoring. Correct answers are shown in Green and incorrect answers are shown in Red. TIP: You may also use the Test Yourself section to complete a CMS 1500 or UB 04 form on any case in your workbook or textbook with a simple “work around”. Simply select any patient name from Select Cases and enter the data desired on your “extra” patient. However, do not submit the case for scoring. Only patients on the list can be scored. You can print out the completed form to turn in. Of course, you will not be able to save this “extra” data and the original patient at the same time, so it is best to pick a name that you do not need at the current time. Outpatient Billing Outpatient Billing with Diagnostic and Procedure Codes Hospital Billing 1. From the home page click “Insurance Forms”.
2. Choose TEST YOURSELF.
3. Choose the form you wish to complete.
4. Read the general instructions.
5. Click on the arrow next to “Select Cases” and choose a patient file to complete.
6. Click on the insurance form icon (CMS-1500 or UB04 depending on which part of the program you are in). This is where you will enter in the correct data.
7. Open the Patient Information form by clicking on the “Patient Information Form” button at the bottom of the screen. You will also need to open the Encounter form, SOAP Notes and Fee Schedule which also have buttons at the bottom of the page.
a. You will notice that when you first a documents, it overlaps previous documents and you cannot view all of them . To avoid this, resize each window as you open it.
i. To resize a window, grab the triangle in the bottom right corner of the window with your mouse as you would with a regular computer window and resize it as desired.
b. You can scroll both horizontally and vertically within each window. Use the small arrow buttons on the right side and bottom of the screen to scroll. Or, you can click and drag the bar between the arrows.
c. You can also move the windows around on your screen so that you can view them more easily. To move the window, grab the top gray bar of the window and move the window to the desired position on the screen. .
d. There is no Encounter Form in the section “Outpatient Billing with Diagnostic and Procedure Codes” because part of the case is for you to perform the coding.
REMEMBER!! All of these forms can be printed, opened in a separate window using Adobe Acrobat Reader or found in your textbook Appendices for reference.
8. Gather the correct data and input that data into the form locator.
Use the TAB key to move from one field to the next. You may skip a field by tabbing through it.
Or, Left-click with your mouse in any field to move to that field.
Use the ENTER key when more than one line is needed in a field, such as an address.
Use the Payer Variations (CMS 1500) or Variations (UB 04) button at the top right of your screen to review how to complete the field for different payers or services.
REMEMBER!! You can enter the content in any order you wish. You will be submitting your data for scoring at the end of the exercise.
9. You may save your progress at anytime by clicking the save button in the bottom left corner of the screen.
If you navigate away from this page, you will also be prompted to save your work. Your work will be saved on the computer you are currently working on, not on your disk or CD. If someone else uses the program on this computer, your data will be deleted. If you open the CD using a different computer, your data will not be available.
10. If you click the Clear All Forms button in the top center of your screen, all data in all cases will be deleted. Do this only when you are sure you no longer want to access old data.
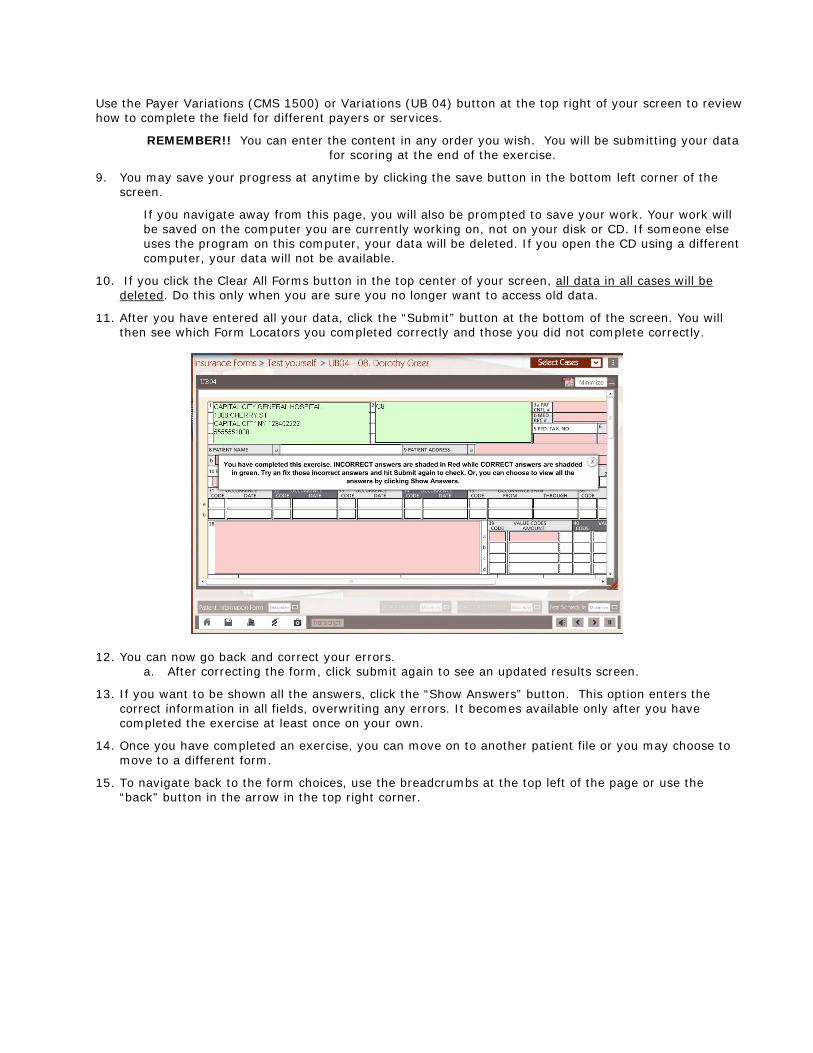
11. After you have entered all your data, click the “Submit” button at the bottom of the screen. You will then see which Form Locators you completed correctly and those you did not complete correctly.
12. You can now go back and correct your errors. a. After correcting the form, click submit again to see an updated results screen.
13. If you want to be shown all the answers, click the “Show Answers” button. This option enters the correct information in all fields, overwriting any errors. It becomes available only after you have completed the exercise at least once on your own.
14. Once you have completed an exercise, you can move on to another patient file or you may choose to move to a different form.
15. To navigate back to the form choices, use the breadcrumbs at the top left of the page or use the “back” button in the arrow in the top right corner.

QUIZ This CD contains two Quiz options; a chapter review and a HIPAA review. Chapter Review Questions These questions have been pulled from your textbook and presented here so you can test yourself on the content you’ve been learning in each chapter. To Navigate:
1. To close the window and return to the list of chapters, click the “X” in the right hand corner of the white box.
2. You can also navigate using the “bread crumbs” in the top left corner of the white box. This option allows you to step back through the layers of the CD.
To Use:
1. Choose a chapter number (for Chapter Quiz) or a topic (HIPAA Quiz) 2. The number of questions in each chapter will be shown in the top right corner of the question window. 3. You will be presented with the first question.
a. Read the question and choose the appropriate answer. b. Then click the “Submit” button.
i. You will be told if you answer the question correctly or incorrectly. 4. To move to the next question, click “Next”.
5. Click through all the questions until you reach the end.
a. After you have answered all of the questions, you will be shown a summary of all the questions.
b. You will be given the correct answer along with the answer you chose.

Glossary This glossary is composed of two parts, an abbreviation glossary and terms glossary both of which can be found in your textbook. To Use: 1. Click on the Glossary icon on the home page and choose either the terms or the
abbreviation glossary. 2. The abbreviation glossary has a list of abbreviations and their meanings. There is no audio
associated with this section.
3. The Terms glossary is a list of the terms and definitions found in your textbook. a. You can click any term and hear an audio pronunciation of the term.
4. To close the Glossary, click the white “X” in the top right corner of the glossary window. 5. This glossary can be accessed from anywhere in the CD by clicking the glossary icon in the
bottom left corner of the screen.