Embed Size (px)
Citation preview

Codamotion User
Guide
Note: These guidelines apply specifically to using the equipment in RB01 (teaching lab).
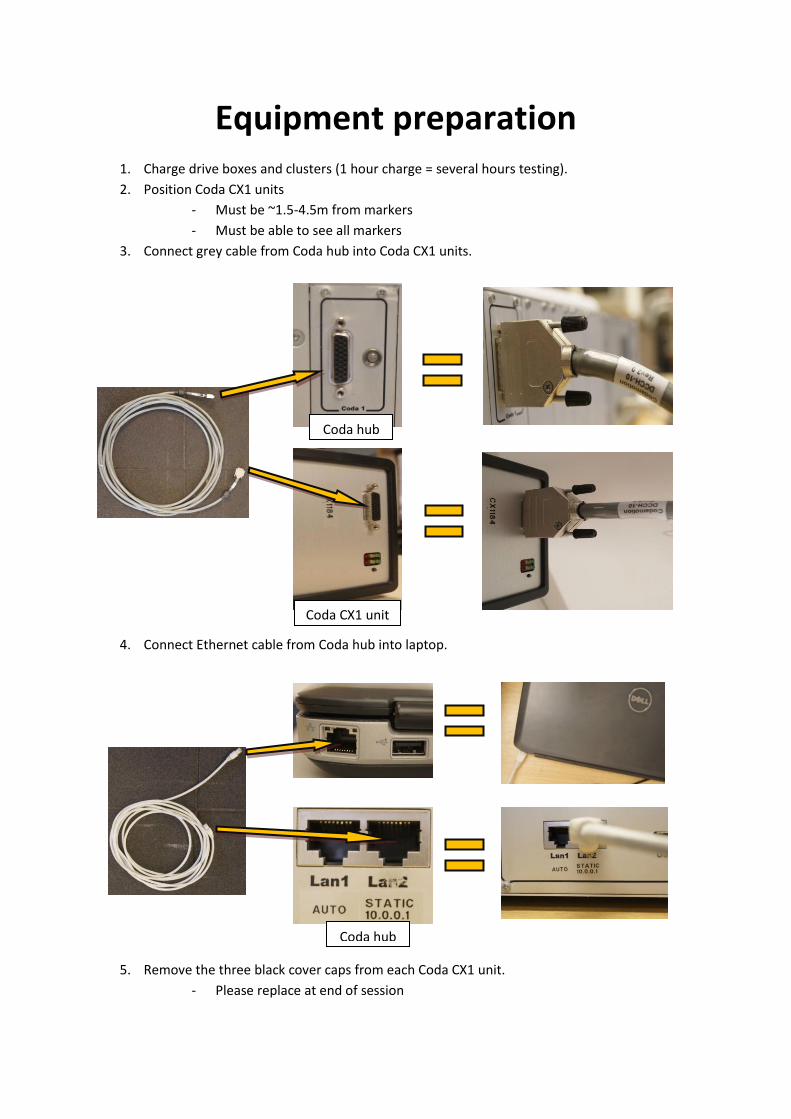
Equipment preparation 1. Charge drive boxes and clusters (1 hour charge = several hours testing).
2. Position Coda CX1 units
- Must be ~1.5-4.5m from markers
- Must be able to see all markers
3. Connect grey cable from Coda hub into Coda CX1 units.
4. Connect Ethernet cable from Coda hub into laptop.
5. Remove the three black cover caps from each Coda CX1 unit.
- Please replace at end of session
Coda hub
Coda CX1 unit
Coda hub
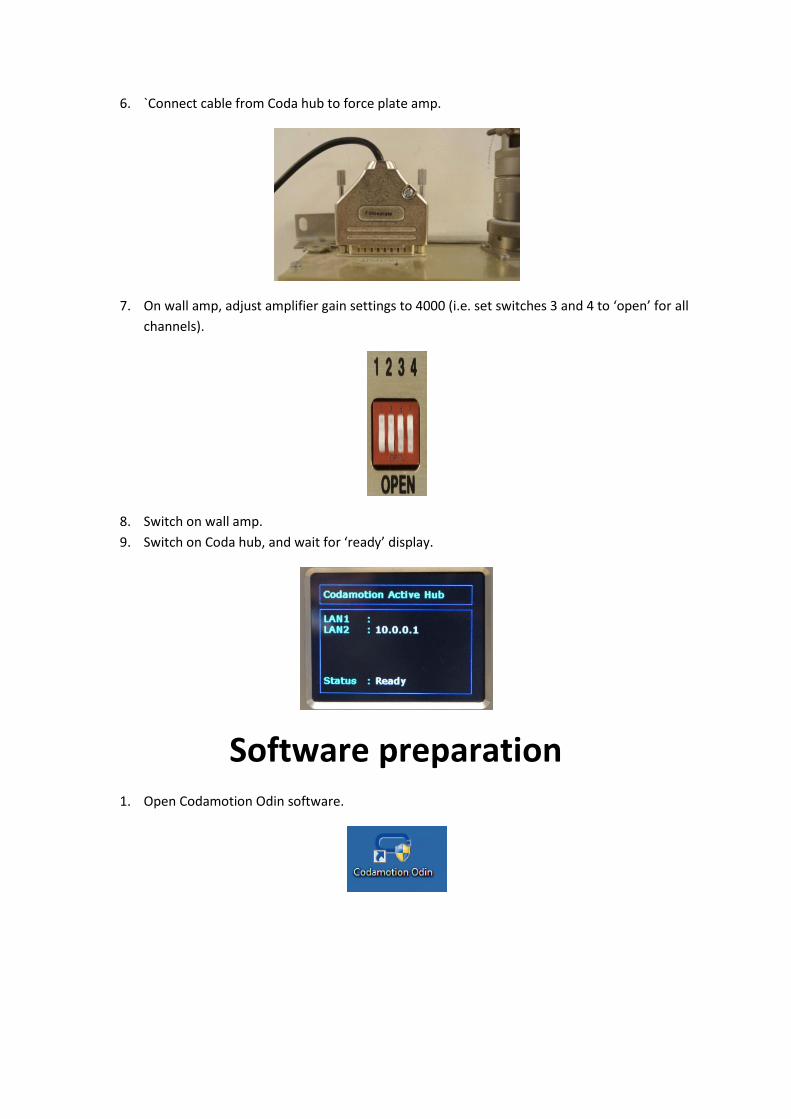
6. `Connect cable from Coda hub to force plate amp.
7. On wall amp, adjust amplifier gain settings to 4000 (i.e. set switches 3 and 4 to ‘open’ for all
channels).
8. Switch on wall amp.
9. Switch on Coda hub, and wait for ‘ready’ display.
Software preparation 1. Open Codamotion Odin software.
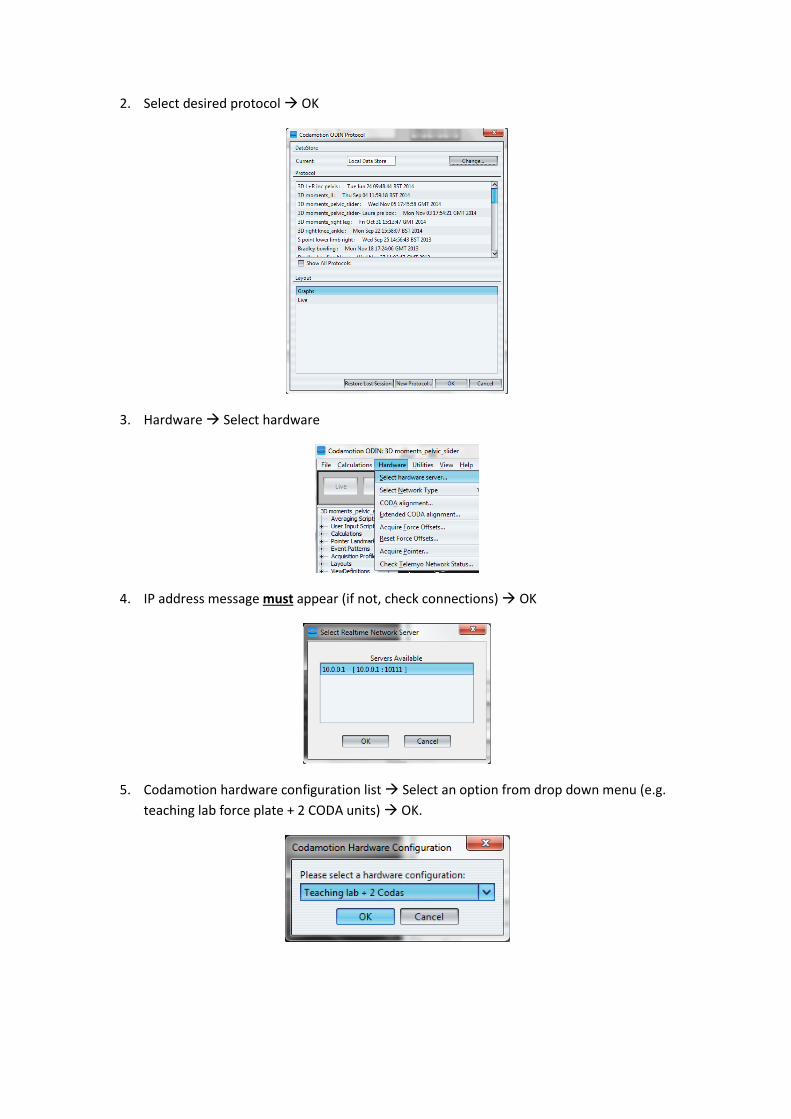
2. Select desired protocol OK
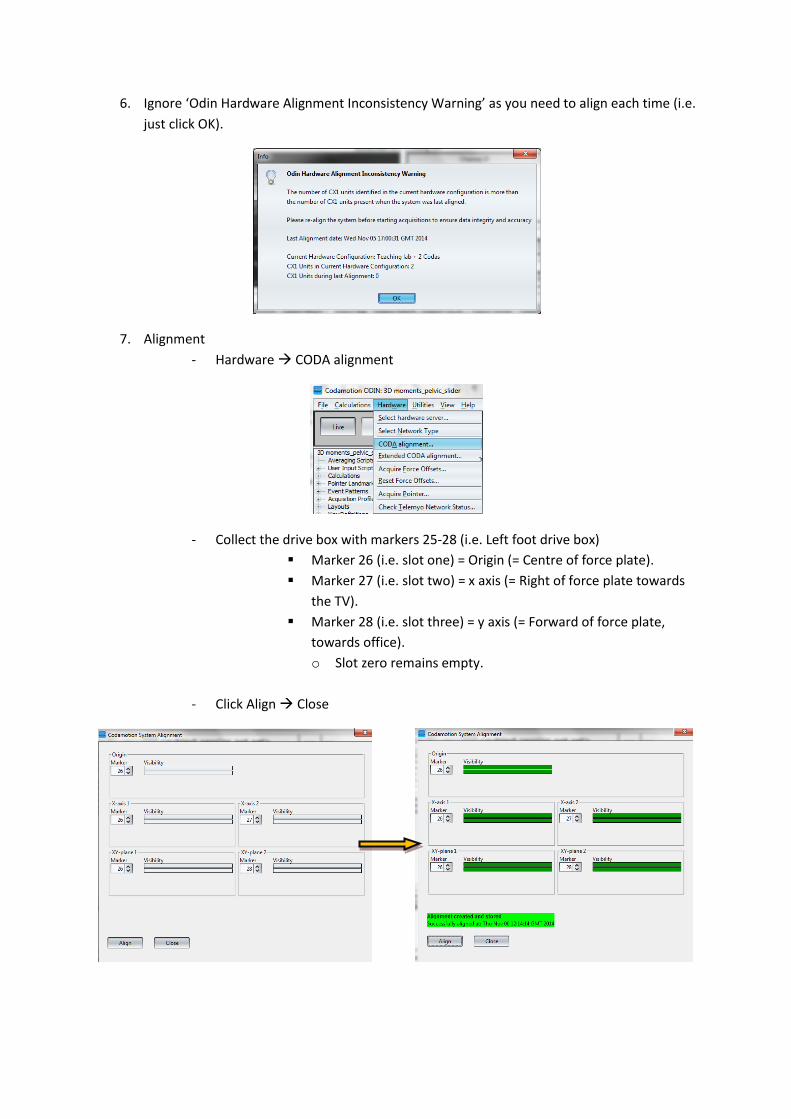
3. Hardware Select hardware
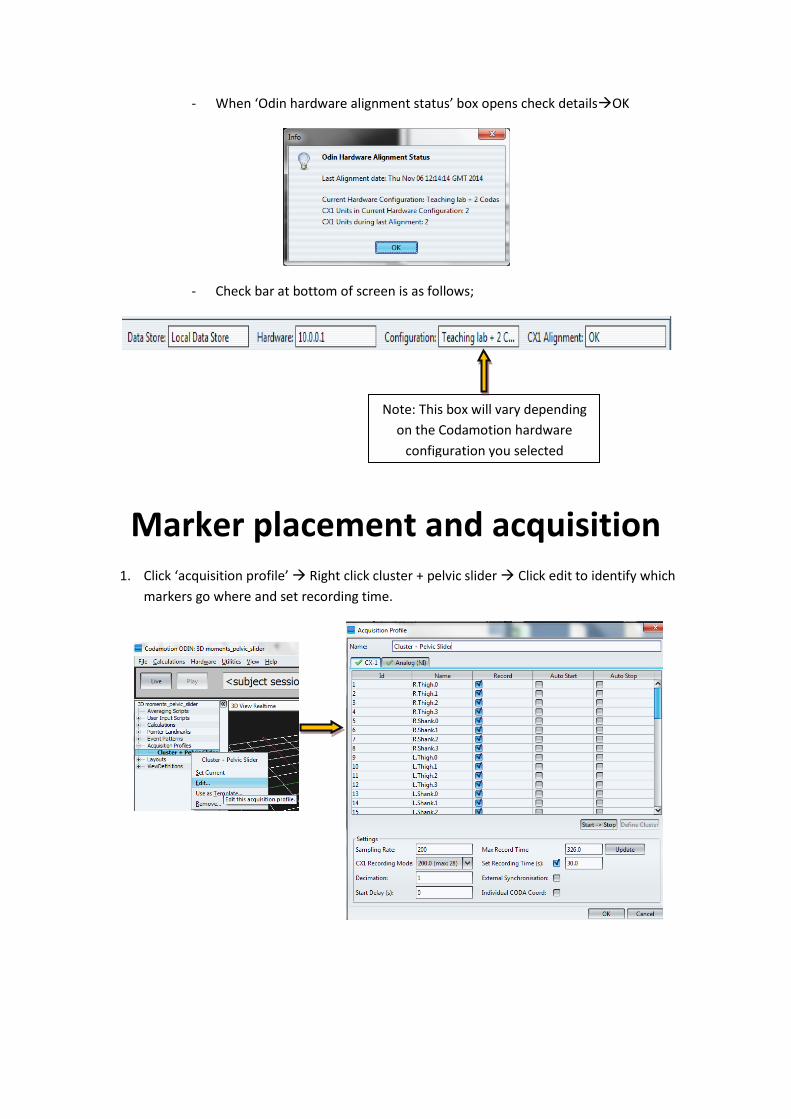
4. IP address message must appear (if not, check connections) OK
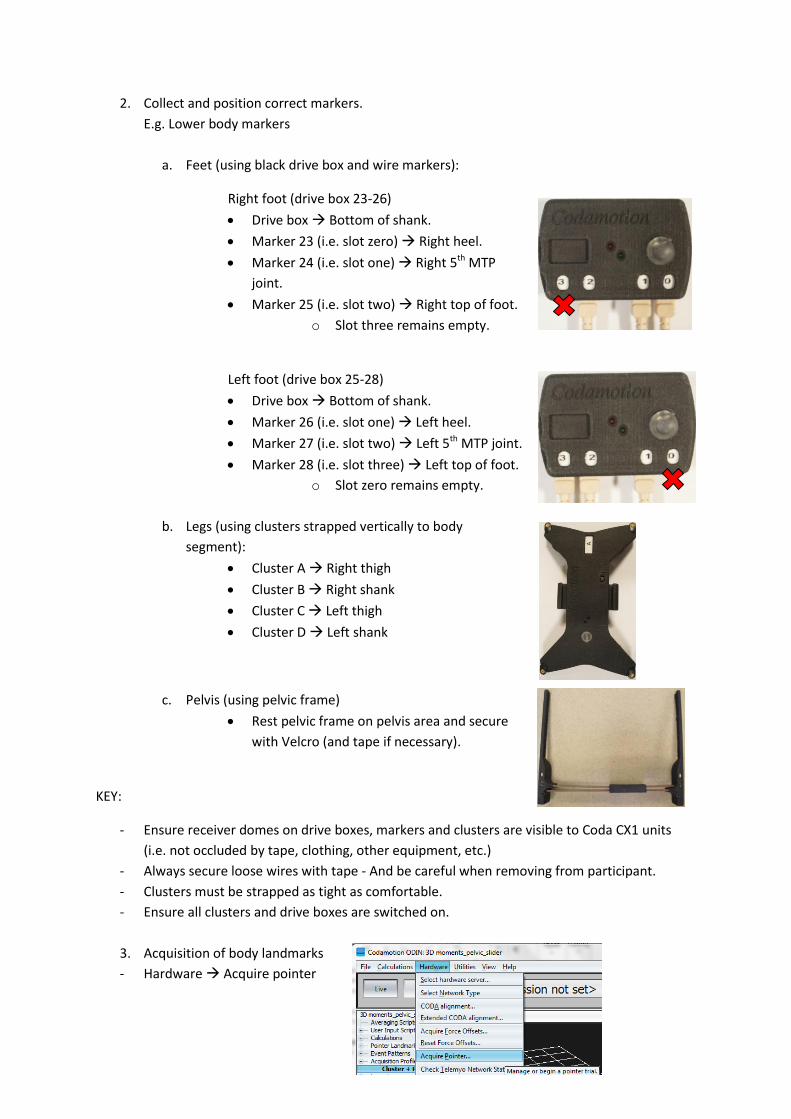
5. Codamotion hardware configuration list Select an option from drop down menu (e.g.
teaching lab force plate + 2 CODA units) OK.
6. Ignore ‘Odin Hardware Alignment Inconsistency Warning’ as you need to align each time (i.e.
just click OK).
7. Alignment
- Hardware CODA alignment
- Collect the drive box with markers 25-28 (i.e. Left foot drive box)
Marker 26 (i.e. slot one) = Origin (= Centre of force plate).
Marker 27 (i.e. slot two) = x axis (= Right of force plate towards
the TV).
Marker 28 (i.e. slot three) = y axis (= Forward of force plate,
towards office).
o Slot zero remains empty.
- Click Align Close
- When ‘Odin hardware alignment status’ box opens check detailsOK
- Check bar at bottom of screen is as follows;
Marker placement and acquisition 1. Click ‘acquisition profile’ Right click cluster + pelvic slider Click edit to identify which
markers go where and set recording time.
Note: This box will vary depending
on the Codamotion hardware
configuration you selected
2. Collect and position correct markers.
E.g. Lower body markers
a. Feet (using black drive box and wire markers):
Right foot (drive box 23-26)
Drive box Bottom of shank.
Marker 23 (i.e. slot zero) Right heel.
Marker 24 (i.e. slot one) Right 5th MTP
joint.
Marker 25 (i.e. slot two) Right top of foot.
o Slot three remains empty.
Left foot (drive box 25-28)
Drive box Bottom of shank.
Marker 26 (i.e. slot one) Left heel.
Marker 27 (i.e. slot two) Left 5th MTP joint.
Marker 28 (i.e. slot three) Left top of foot.
o Slot zero remains empty.
b. Legs (using clusters strapped vertically to body
segment):
Cluster A Right thigh
Cluster B Right shank
Cluster C Left thigh
Cluster D Left shank
c. Pelvis (using pelvic frame)
Rest pelvic frame on pelvis area and secure
with Velcro (and tape if necessary).
KEY:
- Ensure receiver domes on drive boxes, markers and clusters are visible to Coda CX1 units
(i.e. not occluded by tape, clothing, other equipment, etc.)
- Always secure loose wires with tape - And be careful when removing from participant.
- Clusters must be strapped as tight as comfortable.
- Ensure all clusters and drive boxes are switched on.
3. Acquisition of body landmarks
- Hardware Acquire pointer
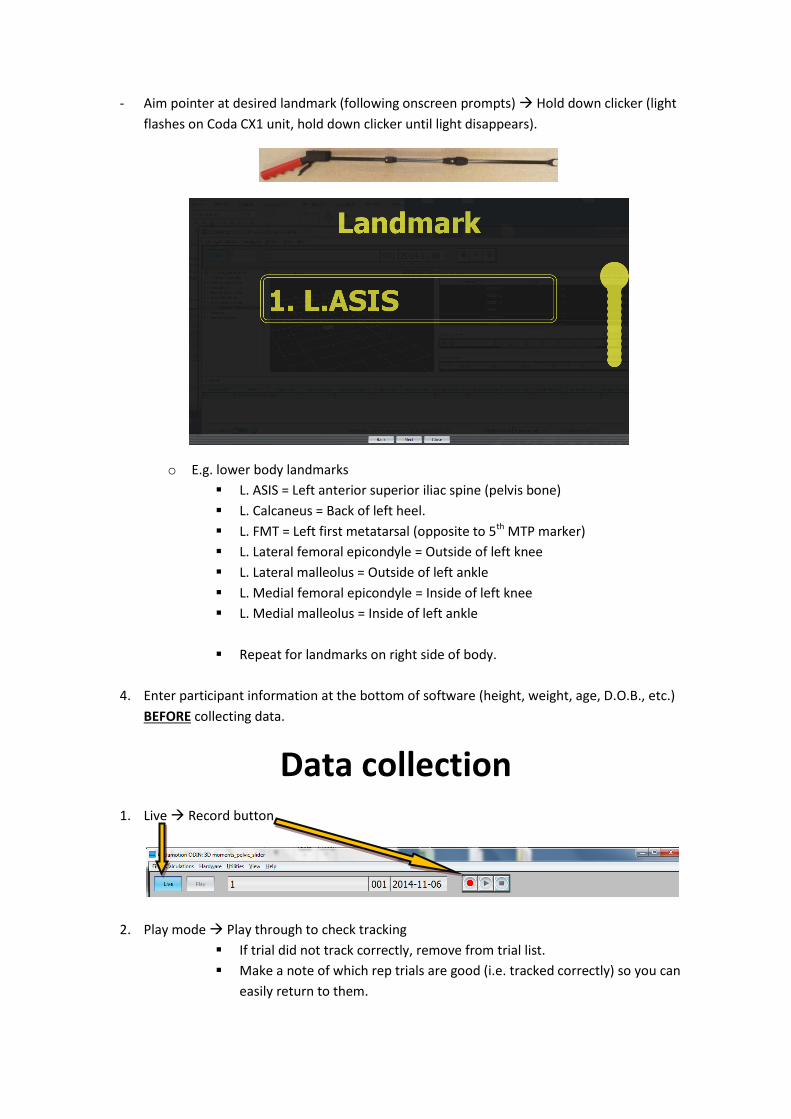
- Aim pointer at desired landmark (following onscreen prompts) Hold down clicker (light
flashes on Coda CX1 unit, hold down clicker until light disappears).
o E.g. lower body landmarks
L. ASIS = Left anterior superior iliac spine (pelvis bone)
L. Calcaneus = Back of left heel.
L. FMT = Left first metatarsal (opposite to 5th MTP marker)
L. Lateral femoral epicondyle = Outside of left knee
L. Lateral malleolus = Outside of left ankle
L. Medial femoral epicondyle = Inside of left knee
L. Medial malleolus = Inside of left ankle
Repeat for landmarks on right side of body.
4. Enter participant information at the bottom of software (height, weight, age, D.O.B., etc.)
BEFORE collecting data.
Data collection 1. Live Record button
2. Play mode Play through to check tracking
If trial did not track correctly, remove from trial list.
Make a note of which rep trials are good (i.e. tracked correctly) so you can
easily return to them.
3. File Save all and select ‘Save and Exit’ when closing the program.
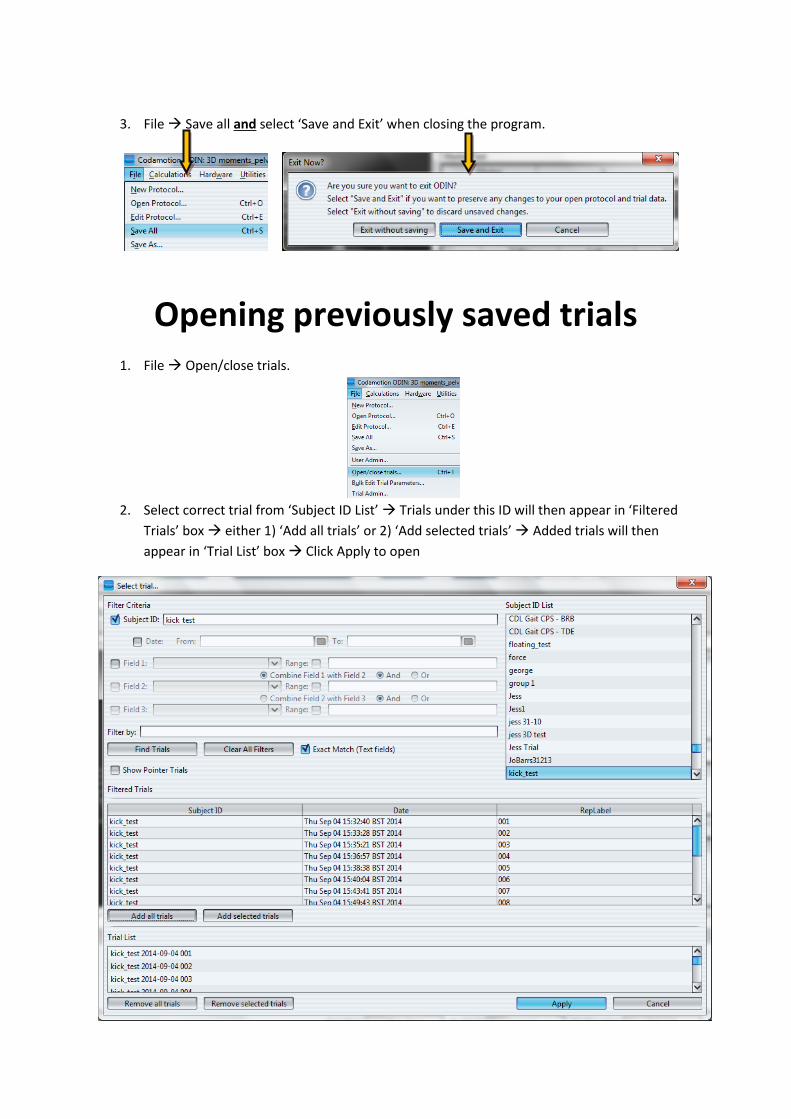
Opening previously saved trials 1. File Open/close trials.
2. Select correct trial from ‘Subject ID List’ Trials under this ID will then appear in ‘Filtered
Trials’ box either 1) ‘Add all trials’ or 2) ‘Add selected trials’ Added trials will then
appear in ‘Trial List’ box Click Apply to open

Troubleshooting 1. To overcome issues with marker alignment/detection try;
Draw curtains, close doors, switch off lights.
Close marker box/remove other drive boxes from the room to avoid
interference.
2. If you encounter an error whilst acquisition of body markers;
i. Hardware Acquire pointer Tick the landmarks you are missing
Redigitise.