Embed Size (px)
Citation preview

cloud-initRelease 20.2
Jul 06, 2020


Getting Started
1 Getting help 31.1 Availability . . . . . . . . . . . . . . . . . . . . . . . . . . . . . . . . . . . . . . . . . . . . . . . . 31.2 Boot Stages . . . . . . . . . . . . . . . . . . . . . . . . . . . . . . . . . . . . . . . . . . . . . . . . 51.3 CLI Interface . . . . . . . . . . . . . . . . . . . . . . . . . . . . . . . . . . . . . . . . . . . . . . . 71.4 FAQ . . . . . . . . . . . . . . . . . . . . . . . . . . . . . . . . . . . . . . . . . . . . . . . . . . . . 111.5 Reporting Bugs . . . . . . . . . . . . . . . . . . . . . . . . . . . . . . . . . . . . . . . . . . . . . . 151.6 User-Data Formats . . . . . . . . . . . . . . . . . . . . . . . . . . . . . . . . . . . . . . . . . . . . 161.7 Cloud config examples . . . . . . . . . . . . . . . . . . . . . . . . . . . . . . . . . . . . . . . . . . 201.8 Modules . . . . . . . . . . . . . . . . . . . . . . . . . . . . . . . . . . . . . . . . . . . . . . . . . 521.9 Merging User-Data Sections . . . . . . . . . . . . . . . . . . . . . . . . . . . . . . . . . . . . . . . 931.10 Instance Metadata . . . . . . . . . . . . . . . . . . . . . . . . . . . . . . . . . . . . . . . . . . . . 971.11 Datasources . . . . . . . . . . . . . . . . . . . . . . . . . . . . . . . . . . . . . . . . . . . . . . . . 1071.12 Vendor Data . . . . . . . . . . . . . . . . . . . . . . . . . . . . . . . . . . . . . . . . . . . . . . . 1301.13 Network Configuration . . . . . . . . . . . . . . . . . . . . . . . . . . . . . . . . . . . . . . . . . . 1311.14 Hacking on cloud-init . . . . . . . . . . . . . . . . . . . . . . . . . . . . . . . . . . . . . . . . . . 1521.15 Code Review Process . . . . . . . . . . . . . . . . . . . . . . . . . . . . . . . . . . . . . . . . . . 1621.16 Security Policy . . . . . . . . . . . . . . . . . . . . . . . . . . . . . . . . . . . . . . . . . . . . . . 1651.17 Testing and debugging cloud-init . . . . . . . . . . . . . . . . . . . . . . . . . . . . . . . . . . . . 1661.18 Logging . . . . . . . . . . . . . . . . . . . . . . . . . . . . . . . . . . . . . . . . . . . . . . . . . . 1701.19 Directory layout . . . . . . . . . . . . . . . . . . . . . . . . . . . . . . . . . . . . . . . . . . . . . 1721.20 Analyze . . . . . . . . . . . . . . . . . . . . . . . . . . . . . . . . . . . . . . . . . . . . . . . . . . 1741.21 Docs . . . . . . . . . . . . . . . . . . . . . . . . . . . . . . . . . . . . . . . . . . . . . . . . . . . 1791.22 Integration Testing . . . . . . . . . . . . . . . . . . . . . . . . . . . . . . . . . . . . . . . . . . . . 180
Python Module Index 193
Index 195
i

ii
cloud-init, Release 20.2
Cloud-init is the industry standard multi-distribution method for cross-platform cloud instance initialization. It issupported across all major public cloud providers, provisioning systems for private cloud infrastructure, and bare-metal installations.
Cloud instances are initialized from a disk image and instance data:
• Cloud metadata
• User data (optional)
• Vendor data (optional)
Cloud-init will identify the cloud it is running on during boot, read any provided metadata from the cloud and initializethe system accordingly. This may involve setting up the network and storage devices to configuring SSH access keyand many other aspects of a system. Later on the cloud-init will also parse and process any optional user or vendordata that was passed to the instance.
Getting Started 1

cloud-init, Release 20.2
2 Getting Started
CHAPTER 1
Getting help
Having trouble? We would like to help!
• Try the FAQ – its got answers to some common questions
• Ask a question in the #cloud-init IRC channel on Freenode
• Join and ask questions on the cloud-init mailing list
• Find a bug? Report bugs on Launchpad
1.1 Availability
Below outlines the current availability of cloud-init across distributions and clouds, both public and private.
Note: If a distribution or cloud does not show up in the list below contact them and ask for images to be generatedusing cloud-init!
1.1.1 Distributions
Cloud-init has support across all major Linux distributions, FreeBSD, NetBSD and OpenBSD:
• Ubuntu
• SLES/openSUSE
• RHEL/CentOS
• Fedora
• Gentoo Linux
• Debian
• ArchLinux
3
cloud-init, Release 20.2
• FreeBSD
• NetBSD
• OpenBSD
1.1.2 Clouds
Cloud-init provides support across a wide ranging list of execution environments in the public cloud:
• Amazon Web Services
• Microsoft Azure
• Google Cloud Platform
• Oracle Cloud Infrastructure
• Softlayer
• Rackspace Public Cloud
• IBM Cloud
• Digital Ocean
• Bigstep
• Hetzner
• Joyent
• CloudSigma
• Alibaba Cloud
• OVH
• OpenNebula
• Exoscale
• Scaleway
• CloudStack
• AltCloud
• SmartOS
Additionally, cloud-init is supported on these private clouds:
• Bare metal installs
• OpenStack
• LXD
• KVM
• Metal-as-a-Service (MAAS)
4 Chapter 1. Getting help

cloud-init, Release 20.2
1.2 Boot Stages
In order to be able to provide the functionality that it does, cloud-init must be integrated into the boot in fairly controlledway. There are five stages to boot:
1. Generator
2. Local
3. Network
4. Config
5. Final
1.2.1 Generator
When booting under systemd, a generator will run that determines if cloud-init.target should be included in the bootgoals. By default, this generator will enable cloud-init. It will not enable cloud-init if either:
• The file /etc/cloud/cloud-init.disabled exists
• The kernel command line as found in /proc/cmdline contains cloud-init=disabled. When runningin a container, the kernel command line is not honored, but cloud-init will read an environment variable namedKERNEL_CMDLINE in its place.
Again, these mechanisms for disabling cloud-init at runtime currently only exist in systemd.
1.2.2 Local
systemd service cloud-init-local.serviceruns as soon as possible with / mounted read-writeblocks as much of boot as possible, must block networkmodules none
The purpose of the local stage is to:
• locate “local” data sources.
• apply networking configuration to the system (including “Fallback”)
In most cases, this stage does not do much more than that. It finds the datasource and determines the network config-uration to be used. That network configuration can come from:
• datasource: cloud provided network configuration via metadata
• fallback: cloud-init’s fallback networking consists of rendering the equivalent to “dhcp on eth0”, which washistorically the most popular mechanism for network configuration of a guest
• none: network configuration can be disabled by writing the file /etc/cloud/cloud.cfg with the content:network: {config: disabled}
If this is an instance’s first boot, then the selected network configuration is rendered. This includes clearing of allprevious (stale) configuration including persistent device naming with old mac addresses.
This stage must block network bring-up or any stale configuration might already have been applied. That could havenegative effects such as DHCP hooks or broadcast of an old hostname. It would also put the system in an odd state torecover from as it may then have to restart network devices.
1.2. Boot Stages 5
cloud-init, Release 20.2
Cloud-init then exits and expects for the continued boot of the operating system to bring network configuration up asconfigured.
Note: In the past, local data sources have been only those that were available without network (such as ‘ConfigDrive’).However, as seen in the recent additions to the DigitalOcean datasource, even data sources that require a network canoperate at this stage.
1.2.3 Network
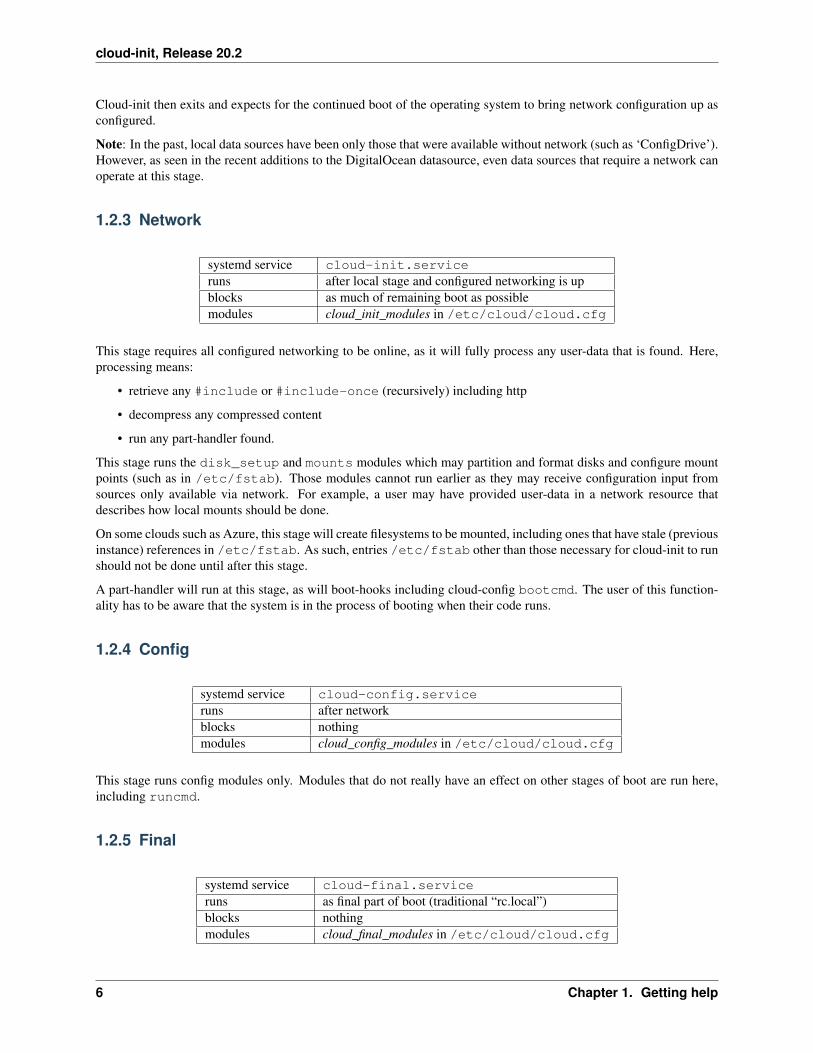
systemd service cloud-init.serviceruns after local stage and configured networking is upblocks as much of remaining boot as possiblemodules cloud_init_modules in /etc/cloud/cloud.cfg
This stage requires all configured networking to be online, as it will fully process any user-data that is found. Here,processing means:
• retrieve any #include or #include-once (recursively) including http
• decompress any compressed content
• run any part-handler found.
This stage runs the disk_setup and mounts modules which may partition and format disks and configure mountpoints (such as in /etc/fstab). Those modules cannot run earlier as they may receive configuration input fromsources only available via network. For example, a user may have provided user-data in a network resource thatdescribes how local mounts should be done.
On some clouds such as Azure, this stage will create filesystems to be mounted, including ones that have stale (previousinstance) references in /etc/fstab. As such, entries /etc/fstab other than those necessary for cloud-init to runshould not be done until after this stage.
A part-handler will run at this stage, as will boot-hooks including cloud-config bootcmd. The user of this function-ality has to be aware that the system is in the process of booting when their code runs.
1.2.4 Config
systemd service cloud-config.serviceruns after networkblocks nothingmodules cloud_config_modules in /etc/cloud/cloud.cfg
This stage runs config modules only. Modules that do not really have an effect on other stages of boot are run here,including runcmd.
1.2.5 Final
systemd service cloud-final.serviceruns as final part of boot (traditional “rc.local”)blocks nothingmodules cloud_final_modules in /etc/cloud/cloud.cfg
6 Chapter 1. Getting help

cloud-init, Release 20.2
This stage runs as late in boot as possible. Any scripts that a user is accustomed to running after logging into a systemshould run correctly here. Things that run here include
• package installations
• configuration management plugins (puppet, chef, salt-minion)
• user-scripts (i.e. shell scripts passed as user-data)
For scripts external to cloud-init looking to wait until cloud-init is finished, the cloud-init status subcommandcan help block external scripts until cloud-init is done without having to write your own systemd units dependencychains. See status for more info.
1.3 CLI Interface
For the latest list of subcommands and arguments use cloud-init’s --help option. This can be used against cloud-inititself or any of its subcommands.
$ cloud-init --helpusage: /usr/bin/cloud-init [-h] [--version] [--file FILES] [--debug] [--force]
{init,modules,single,query,dhclient-hook,features,analyze,→˓devel,collect-logs,clean,status}
...
optional arguments:-h, --help show this help message and exit--version, -v show program's version number and exit--file FILES, -f FILES
additional yaml configuration files to use--debug, -d show additional pre-action logging (default: False)--force force running even if no datasource is found (use at
your own risk)
Subcommands:{init,modules,single,query,dhclient-hook,features,analyze,devel,collect-logs,clean,
→˓status}init initializes cloud-init and performs initial modulesmodules activates modules using a given configuration keysingle run a single modulequery Query standardized instance metadata from the command
line.dhclient-hook Run the dhclient hook to record network info.features list defined featuresanalyze Devel tool: Analyze cloud-init logs and datadevel Run development toolscollect-logs Collect and tar all cloud-init debug infoclean Remove logs and artifacts so cloud-init can re-run.status Report cloud-init status or wait on completion.
The rest of this document will give an overview of each of the subcommands.
1.3.1 analyze
Get detailed reports of where cloud-init spends its time during the boot process. For more complete reference seeanalyze.
Possible subcommands include:
1.3. CLI Interface 7

cloud-init, Release 20.2
• blame: report ordered by most costly operations
• dump: machine-readable JSON dump of all cloud-init tracked events
• show: show time-ordered report of the cost of operations during each boot stage
• boot: show timestamps from kernel initialization, kernel finish initialization, and cloud-init start
1.3.2 clean
Remove cloud-init artifacts from /var/lib/cloud to simulate a clean instance. On reboot, cloud-init will re-runall stages as it did on first boot.
• –logs: optionally remove all cloud-init log files in /var/log/
• –reboot: reboot the system after removing artifacts
1.3.3 collect-logs
Collect and tar cloud-init generated logs, data files, and system information for triage. This subcommand is integratedwith apport.
Logs collected include:
• /var/log/cloud-init.log
• /var/log/cloud-init-output.log
• /run/cloud-init
• /var/lib/cloud/instance/user-data.txt
• cloud-init package version
• dmesg output
• journalctl output
Note: Ubuntu users can file bugs with ubuntu-bug cloud-init to automatically attach these logs to a bugreport
1.3.4 devel
Collection of development tools under active development. These tools will likely be promoted to top-level subcom-mands when stable.
Do NOT rely on the output of these commands as they can and will change.
Current subcommands:
• net-convert: manually use cloud-init’s network format conversion, useful for testing configuration or test-ing changes to the network conversion logic itself.
• render: use cloud-init’s jinja template render to process #cloud-config or custom-scripts, injecting any vari-ables from /run/cloud-init/instance-data.json. It accepts a user-data file containing the jinjatemplate header ## template: jinja and renders that content with any instance-data.json variablespresent.
8 Chapter 1. Getting help
cloud-init, Release 20.2
• schema: a #cloud-config format and schema validator. It accepts a cloud-config yaml file and annotatespotential schema errors locally without the need for deployment. Schema validation is work in progress andsupports a subset of cloud-config modules.
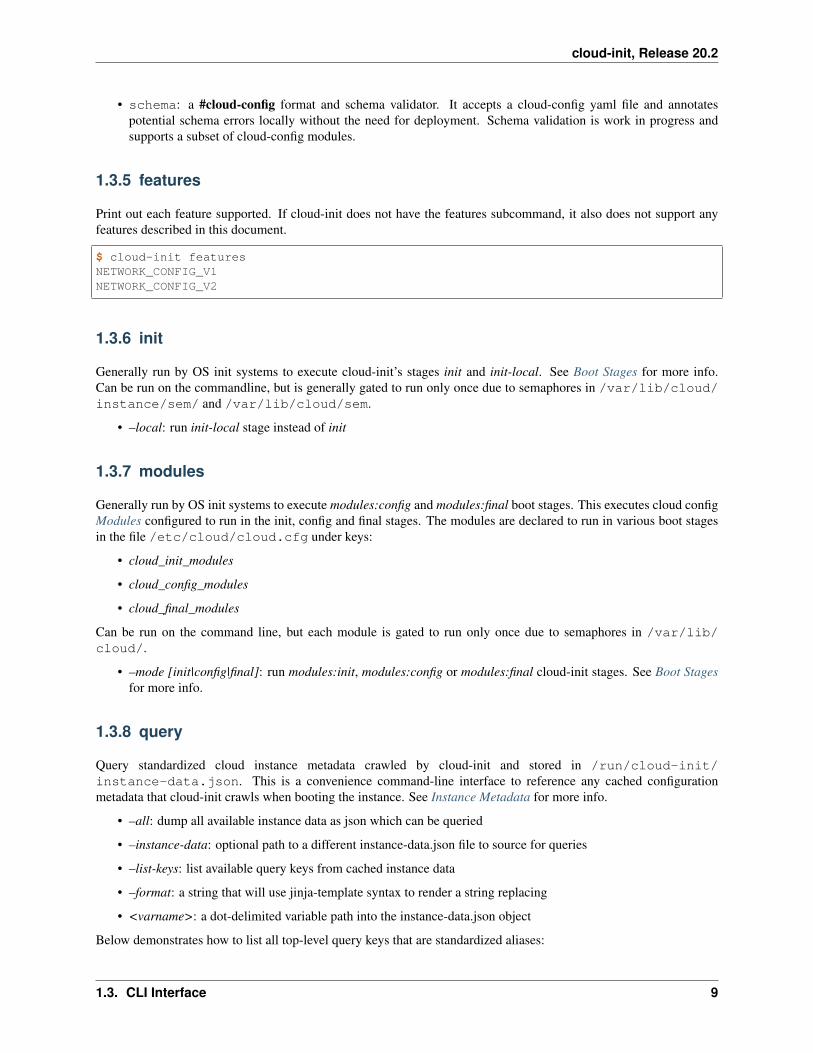
1.3.5 features
Print out each feature supported. If cloud-init does not have the features subcommand, it also does not support anyfeatures described in this document.
$ cloud-init featuresNETWORK_CONFIG_V1NETWORK_CONFIG_V2
1.3.6 init
Generally run by OS init systems to execute cloud-init’s stages init and init-local. See Boot Stages for more info.Can be run on the commandline, but is generally gated to run only once due to semaphores in /var/lib/cloud/instance/sem/ and /var/lib/cloud/sem.
• –local: run init-local stage instead of init
1.3.7 modules
Generally run by OS init systems to execute modules:config and modules:final boot stages. This executes cloud configModules configured to run in the init, config and final stages. The modules are declared to run in various boot stagesin the file /etc/cloud/cloud.cfg under keys:
• cloud_init_modules
• cloud_config_modules
• cloud_final_modules
Can be run on the command line, but each module is gated to run only once due to semaphores in /var/lib/cloud/.
• –mode [init|config|final]: run modules:init, modules:config or modules:final cloud-init stages. See Boot Stagesfor more info.
1.3.8 query
Query standardized cloud instance metadata crawled by cloud-init and stored in /run/cloud-init/instance-data.json. This is a convenience command-line interface to reference any cached configurationmetadata that cloud-init crawls when booting the instance. See Instance Metadata for more info.
• –all: dump all available instance data as json which can be queried
• –instance-data: optional path to a different instance-data.json file to source for queries
• –list-keys: list available query keys from cached instance data
• –format: a string that will use jinja-template syntax to render a string replacing
• <varname>: a dot-delimited variable path into the instance-data.json object
Below demonstrates how to list all top-level query keys that are standardized aliases:
1.3. CLI Interface 9

cloud-init, Release 20.2
$ cloud-init query --list-keys_beta_keysavailability_zonebase64_encoded_keyscloud_namedsinstance_idlocal_hostnameplatformpublic_ssh_keysregionsensitive_keyssubplatformuserdatav1vendordata
Below demonstrates how to query standardized metadata from clouds:
% cloud-init query v1.cloud_nameaws # or openstack, azure, gce etc.
# Any standardized instance-data under a <v#> key is aliased as a top-level key for→˓convenience.% cloud-init query cloud_nameaws # or openstack, azure, gce etc.
# Query datasource-specific metadata on EC2% cloud-init query ds.meta_data.public_ipv4
Note: The standardized instance data keys under v# are guaranteed not to change behavior or format. If using top-level convenience aliases for any standardized instance data keys, the most value (highest v#) of that key name is whatis reported as the top-level value. So these aliases act as a ‘latest’.
This data can then be formatted to generate custom strings or data:
# Generate a custom hostname fqdn based on instance-id, cloud and region% cloud-init query --format 'custom-{{instance_id}}.{{region}}.{{v1.cloud_name}}.com'custom-i-0e91f69987f37ec74.us-east-2.aws.com
1.3.9 single
Attempt to run a single named cloud config module.
• –name: the cloud-config module name to run
• –frequency: optionally override the declared module frequency with one of (always|once-per-instance|once)
The following example re-runs the cc_set_hostname module ignoring the module default frequency of once-per-instance:
$ cloud-init single --name set_hostname --frequency always
10 Chapter 1. Getting help

cloud-init, Release 20.2
Note: Mileage may vary trying to re-run each cloud-config module, as some are not idempotent.
1.3.10 status
Report whether cloud-init is running, done, disabled or errored. Exits non-zero if an error is detected in cloud-init.
• –long: detailed status information
• –wait: block until cloud-init completes
Below are examples of output when cloud-init is running, showing status and the currently running modules, as wellas when it is done.
$ cloud-init statusstatus: running
$ cloud-init status --longstatus: runningtime: Fri, 26 Jan 2018 21:39:43 +0000detail:Running in stage: init-local
$ cloud-init statusstatus: done
$ cloud-init status --longstatus: donetime: Wed, 17 Jan 2018 20:41:59 +0000detail:DataSourceNoCloud [seed=/var/lib/cloud/seed/nocloud-net][dsmode=net]
1.4 FAQ
1.4.1 How do I get help?
Having trouble? We would like to help!
• First go through this page with answers to common questions
• Use the search bar at the upper left to search these docs
• Ask a question in the #cloud-init IRC channel on Freenode
• Join and ask questions on the cloud-init mailing list
• Find a bug? Check out the Reporting Bugs topic for how to report one
1.4.2 Where are the logs?
Cloud-init uses two files to log to:
• /var/log/cloud-init-output.log: captures the output from each stage of cloud-init when it runs
• /var/log/cloud-init.log: very detailed log with debugging output, detailing each action taken
1.4. FAQ 11

cloud-init, Release 20.2
• /run/cloud-init: contains logs about how cloud-init decided to enable or disable itself, as well as what plat-forms/datasources were detected. These logs are most useful when trying to determine what cloud-init ran ordid not run.
Be aware that each time a system boots, new logs are appended to the files in /var/log. Therefore, the files may havemore than one boot worth of information present.
When reviewing these logs look for any errors or Python tracebacks to check for any errors.
1.4.3 Where are the configuration files?
Cloud-init config is provided in two places:
• /etc/cloud/cloud.cfg
• /etc/cloud/cloud.cfg.d/*.cfg
These files can define the modules that run during instance initialization, the datasources to evaluate on boot, and othersettings.
1.4.4 Where are the data files?
Inside the /var/lib/cloud/ directory there are two important subdirectories:
instance
The /var/lib/cloud/instance directory is a symbolic link that points to the most recenlty used instance-id directory.This folder contains the information cloud-init received from datasources, including vendor and user data. This can behelpful to review to ensure the correct data was passed.
It also contains the datasource file that containers the full information about what datasource was identified and usedto setup the system.
Finally, the boot-finished file is the last thing that cloud-init does.
data
The /var/lib/cloud/data directory contain information related to the previous boot:
• instance-id: id of the instance as discovered by cloud-init. Changing this file has no effect.
• result.json: json file will show both the datasource used to setup the instance, and if any errors occured
• status.json: json file shows the datasource used and a break down of all four modules if any errors occured andthe start and stop times.
1.4.5 What datasource am I using?
To correctly setup an instance, cloud-init must correctly identify the cloud that it is on. Therefore knowing whatdatasource is used on an instance launch can help aid in debugging.
To find what datasource is getting used run the cloud-id command:
$ cloud-idnocloud
12 Chapter 1. Getting help

cloud-init, Release 20.2
If the cloud-id is not what is expected, then running the ds-identify script in debug mode and providing that in a bugcan help aid in resolving any issues:
$ sudo DEBUG_LEVEL=2 DI_LOG=stderr /usr/lib/cloud-init/ds-identify --force
The force parameter allows the command to be run again since the instance has already launched. The other optionsincrease the verbosity of logging and put the logs to STDERR.
1.4.6 How can I re-run datasource detection and cloud-init?
If a user is developing a new datasource or working on debugging an issue it may be useful to re-run datasourcedetection and the initial setup of cloud-init.
To do this, force ds-identify to re-run, clean up any logs, and re-run cloud-init:
$ sudo DI_LOG=stderr /usr/lib/cloud-init/ds-identify --force$ sudo cloud-init clean --logs$ sudo cloud-init init --local$ sudo cloud-init init
1.4.7 How can I debug my user data?
Two of the most common issues with user data, that also happens to be cloud-config is:
1. Incorrectly formatted YAML
2. First line does not contain #cloud-config
To verify your YAML, we do have a short script called validate-yaml.py that can validate your user data offline.
Another option is to run the following on an instance when debugging:
$ sudo cloud-init query userdata > user-data.yaml$ cloud-init devel schema -c user-data.yaml --annotate
As launching instances in the cloud can cost money and take a bit longer, sometimes it is easier to launch instanceslocally using Multipass or LXD:
Multipass
Multipass is a cross-platform tool to launch Ubuntu VMs across Linux, Windows, and macOS.
When a user launches a Multipass VM, user data can be passed by adding the –cloud-init flag and the appropriateYAML file containing user data:
$ multipass launch bionic --name test-vm --cloud-init userdata.yaml
Multipass will validate the YAML syntax of the cloud-config file before attempting to start the VM! A nice additionto help save time when experimenting with launching instances with various cloud-configs.
Multipass only supports passing user-data and only as YAML cloud-config files. Passing a script, a MIME archive, orany of the other user-data formats cloud-init supports will result in an error from the YAML syntax validator.
1.4. FAQ 13

cloud-init, Release 20.2
LXD
LXD offers a streamlined user experience for using linux system containers. With LXD, a user can pass:
• user data
• vendor data
• metadata
• network configuration
The following initializes a container with user data:
$ lxc init ubuntu-daily:bionic test-container$ lxc config set test-container user.user-data - < userdata.yaml$ lxc start test-container
To avoid the extra commands this can also be done at launch:
$ lxc launch ubuntu-daily:bionic test-container --config=user.user-data="$(cat→˓userdata.yaml)"
Finally, a profile can be setup with the specific data if a user needs to launch this multiple times:
$ lxc profile create dev-user-data$ lxc profile set dev-user-data user.user-data - < cloud-init-config.yaml$ lxc launch ubuntu-daily:bionic test-container -p default -p dev-user-data
The above examples all show how to pass user data. To pass other types of configuration data use the config optionspecified below:
Data Config Optionuser data user.user-datavendor data user.vendor-datametadata user.meta-datanetwork config user.network-config
See the LXD Instance Configuration docs for more info about configuration values or the LXD Custom NetworkConfiguration document for more about custom network config.
1.4.8 Where can I learn more?
Below are some videos, blog posts, and white papers about cloud-init from a variety of sources.
• Cloud Instance Initialization with cloud-init (Whitepaper)
• cloud-init Summit 2018
• cloud-init - The cross-cloud Magic Sauce (PDF)
• cloud-init Summit 2017
• cloud-init - Building clouds one Linux box at a time (Video)
• cloud-init - Building clouds one Linux box at a time (PDF)
• Metadata and cloud-init
• The beauty of cloud-init
14 Chapter 1. Getting help

cloud-init, Release 20.2
• Introduction to cloud-init
1.5 Reporting Bugs
The following documents:
1) How to collect information for reporting bugs
2) How to file bugs to the upstream cloud-init project or for distro specific packages
1.5.1 Collect Logs
To aid in debugging, please collect the necessary logs. To do so, run the collect-logs subcommand to produce a tarfilethat you can easily upload:
$ cloud-init collect-logsWrote /home/ubuntu/cloud-init.tar.gz
If your version of cloud-init does not have the collect-logs subcommand, then please manually collect the base logfiles by doing the following:
$ dmesg > dmesg.txt$ sudo journalctl -o short-precise > journal.txt$ sudo tar -cvf cloud-init.tar dmesg.txt journal.txt /run/cloud-init \
/var/log/cloud-init.log /var/log/cloud-init-output.log
1.5.2 Report Upstream Bug
Bugs for upstream cloud-init are tracked using Launchpad. To file a bug:
1. Collect the necessary debug logs as described above
2. Create a Launchpad account or login to your existing account
3. Report an upstream cloud-init bug
If debug logs are not provided, you will be asked for them before any further time is spent debugging. If you areunable to obtain the required logs please explain why in the bug.
If your bug is for a specific distro using cloud-init, please first consider reporting it with the upstream distro or confirmthat it still occurs with the latest upstream cloud-init code. See below for details on specific distro reporting.
1.5.3 Distro Specific Issues
For issues specific to your distro please use one of the following distro specific reporting mechanisms:
Ubuntu
To report a bug on Ubuntu use the ubuntu-bug command on the affected system to automatically collect the necessarylogs and file a bug on Launchpad:
$ ubuntu-bug cloud-init
1.5. Reporting Bugs 15
cloud-init, Release 20.2
If that does not work or is not an option, please collect the logs using the commands in the above Collect Logs sectionand then report the bug on the Ubuntu bug tracker. Make sure to attach your collected logs!
Debian
To file a bug against the Debian package fo cloud-init please use the Debian bug tracker to file against ‘Package:cloud-init’. See the Debian bug reporting wiki wiki page for more details.
Red Hat, CentOS, & Fedora
To file a bug against the Red Hat or Fedora packages of cloud-init please use the Red Hat bugzilla.
SUSE & openSUSE
To file a bug against the SuSE packages of cloud-init please use the SUSE bugzilla.
Arch
To file a bug against the Arch package of cloud-init please use the Arch Linux Bugtracker. See the Arch bug reportingwiki for more details.
1.6 User-Data Formats
User data that will be acted upon by cloud-init must be in one of the following types.
1.6.1 Gzip Compressed Content
Content found to be gzip compressed will be uncompressed. The uncompressed data will then be used as if it werenot compressed. This is typically useful because user-data is limited to ~163841 bytes.
1.6.2 Mime Multi Part Archive
This list of rules is applied to each part of this multi-part file. Using a mime-multi part file, the user can specify morethan one type of data.
For example, both a user data script and a cloud-config type could be specified.
Supported content-types:
• text/cloud-boothook
• text/cloud-config
• text/cloud-config-archive
• text/jinja2
• text/part-handler
• text/upstart-job
1 See your cloud provider for applicable user-data size limitations. . .
16 Chapter 1. Getting help
cloud-init, Release 20.2
• text/x-include-once-url
• text/x-include-url
• text/x-shellscript
Helper script to generate mime messages
The cloud-init codebase includes a helper script to generate MIME multi-part files: make-mime.py.
make-mime.py takes pairs of (filename, “text/” mime subtype) separated by a colon (e.g. config.yaml:cloud-config) and emits a MIME multipart message to stdout. An example invocation, assuming youhave your cloud config in config.yaml and a shell script in script.sh and want to store the multipart messagein user-data:
./tools/make-mime.py -a config.yaml:cloud-config -a script.sh:x-shellscript > user-→˓data
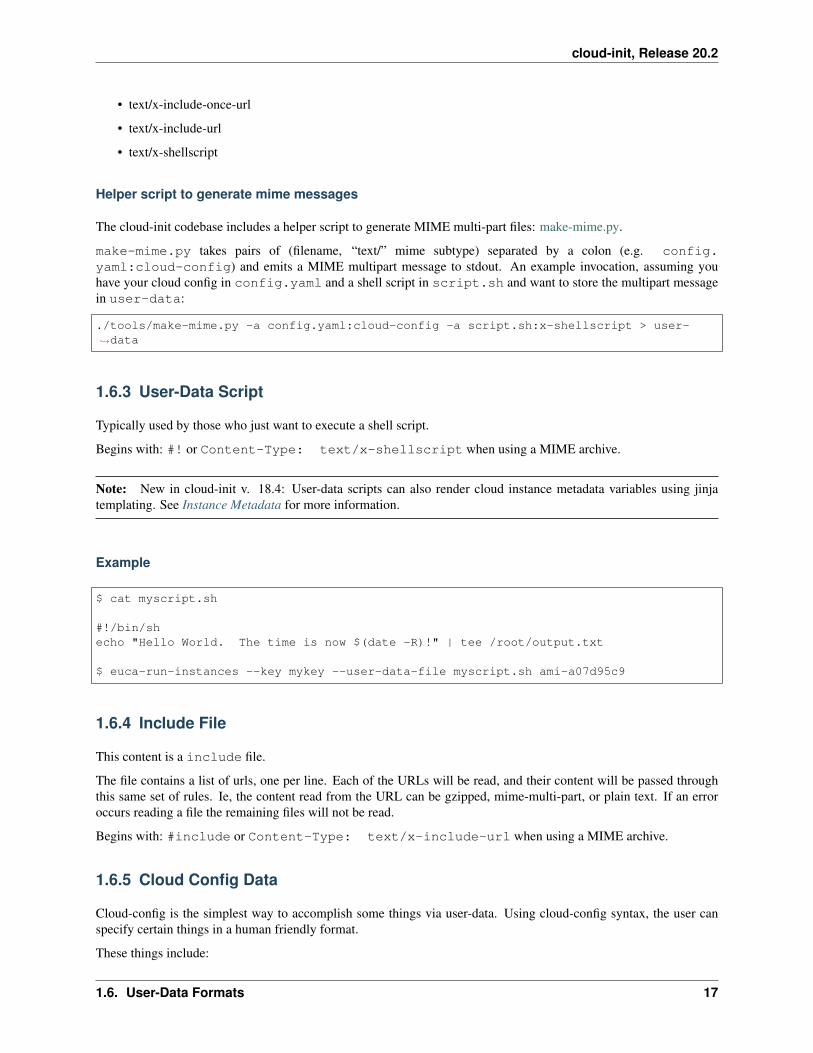
1.6.3 User-Data Script
Typically used by those who just want to execute a shell script.
Begins with: #! or Content-Type: text/x-shellscript when using a MIME archive.
Note: New in cloud-init v. 18.4: User-data scripts can also render cloud instance metadata variables using jinjatemplating. See Instance Metadata for more information.
Example
$ cat myscript.sh
#!/bin/shecho "Hello World. The time is now $(date -R)!" | tee /root/output.txt
$ euca-run-instances --key mykey --user-data-file myscript.sh ami-a07d95c9
1.6.4 Include File
This content is a include file.
The file contains a list of urls, one per line. Each of the URLs will be read, and their content will be passed throughthis same set of rules. Ie, the content read from the URL can be gzipped, mime-multi-part, or plain text. If an erroroccurs reading a file the remaining files will not be read.
Begins with: #include or Content-Type: text/x-include-url when using a MIME archive.
1.6.5 Cloud Config Data
Cloud-config is the simplest way to accomplish some things via user-data. Using cloud-config syntax, the user canspecify certain things in a human friendly format.
These things include:
1.6. User-Data Formats 17
cloud-init, Release 20.2
• apt upgrade should be run on first boot
• a different apt mirror should be used
• additional apt sources should be added
• certain SSH keys should be imported
• and many more. . .
Note: This file must be valid yaml syntax.
See the Cloud config examples section for a commented set of examples of supported cloud config formats.
Begins with: #cloud-config or Content-Type: text/cloud-config when using a MIME archive.
Note: New in cloud-init v. 18.4: Cloud config data can also render cloud instance metadata variables using jinjatemplating. See Instance Metadata for more information.
1.6.6 Upstart Job
Content is placed into a file in /etc/init, and will be consumed by upstart as any other upstart job.
Begins with: #upstart-job or Content-Type: text/upstart-job when using a MIME archive.
1.6.7 Cloud Boothook
This content is boothook data. It is stored in a file under /var/lib/cloud and then executed immediately. Thisis the earliest hook available. Note, that there is no mechanism provided for running only once. The boothook musttake care of this itself.
It is provided with the instance id in the environment variable INSTANCE_ID. This could be made use of to providea ‘once-per-instance’ type of functionality.
Begins with: #cloud-boothook or Content-Type: text/cloud-boothook when using a MIMEarchive.
1.6.8 Part Handler
This is a part-handler: It contains custom code for either supporting new mime-types in multi-part user data, oroverriding the existing handlers for supported mime-types. It will be written to a file in /var/lib/cloud/databased on its filename (which is generated).
This must be python code that contains a list_types function and a handle_part function. Once the sectionis read the list_types method will be called. It must return a list of mime-types that this part-handler handles.Because mime parts are processed in order, a part-handler part must precede any parts with mime-types it isexpected to handle in the same user data.
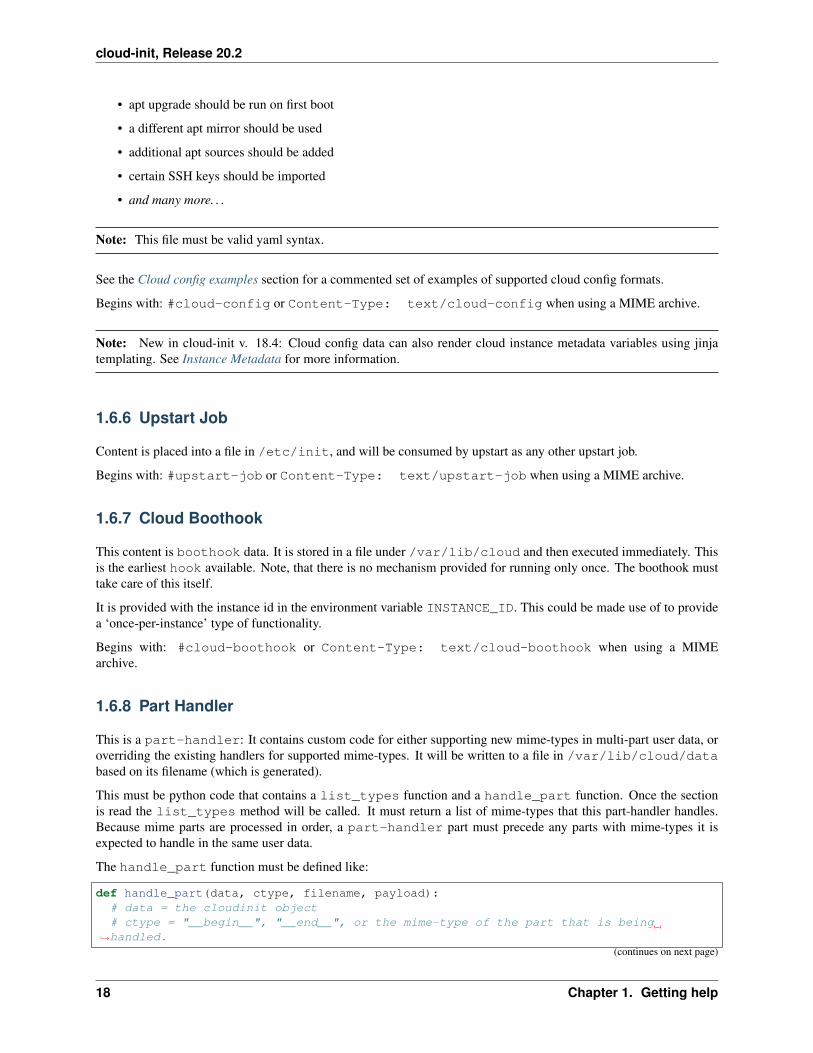
The handle_part function must be defined like:
def handle_part(data, ctype, filename, payload):# data = the cloudinit object# ctype = "__begin__", "__end__", or the mime-type of the part that is being
→˓handled.(continues on next page)
18 Chapter 1. Getting help

cloud-init, Release 20.2
(continued from previous page)
# filename = the filename of the part (or a generated filename if none is present→˓in mime data)# payload = the parts' content
Cloud-init will then call the handle_part function once before it handles any parts, once per part received, andonce after all parts have been handled. The '__begin__' and '__end__' sentinels allow the part handler to doinitialization or teardown before or after receiving any parts.
Begins with: #part-handler or Content-Type: text/part-handler when using a MIME archive.
Example
1 #part-handler2 # vi: syntax=python ts=43
4 def list_types():5 # return a list of mime-types that are handled by this module6 return(["text/plain", "text/go-cubs-go"])7
8 def handle_part(data,ctype,filename,payload):9 # data: the cloudinit object
10 # ctype: '__begin__', '__end__', or the specific mime-type of the part11 # filename: the filename for the part, or dynamically generated part if12 # no filename is given attribute is present13 # payload: the content of the part (empty for begin or end)14 if ctype == "__begin__":15 print "my handler is beginning"16 return17 if ctype == "__end__":18 print "my handler is ending"19 return20
21 print "==== received ctype=%s filename=%s ====" % (ctype,filename)22 print payload23 print "==== end ctype=%s filename=%s" % (ctype, filename)
Also this blog post offers another example for more advanced usage.
1.6.9 Kernel Command Line
When using the NoCloud datasource, users can pass user data via the kernel command line parameters. See theNoCloud datasource documentation for more details.
1.6.10 Disabling User-Data
Cloud-init can be configured to ignore any user-data provided to instance. This allows custom images to preventusers from accidentally breaking closed appliances. Setting allow_userdata: false in the configuration willdisable cloud-init from processing user-data.
1.6. User-Data Formats 19
cloud-init, Release 20.2
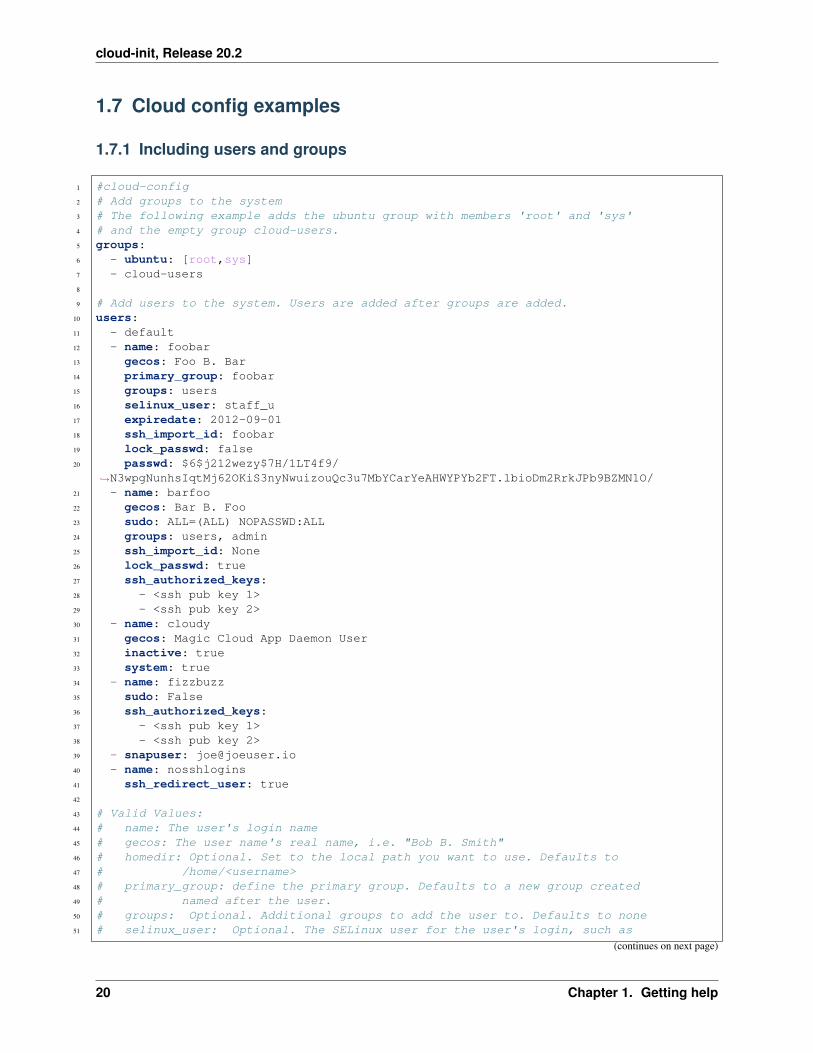
1.7 Cloud config examples
1.7.1 Including users and groups
1 #cloud-config2 # Add groups to the system3 # The following example adds the ubuntu group with members 'root' and 'sys'4 # and the empty group cloud-users.5 groups:6 - ubuntu: [root,sys]7 - cloud-users8
9 # Add users to the system. Users are added after groups are added.10 users:11 - default12 - name: foobar13 gecos: Foo B. Bar14 primary_group: foobar15 groups: users16 selinux_user: staff_u17 expiredate: 2012-09-0118 ssh_import_id: foobar19 lock_passwd: false20 passwd: $6$j212wezy$7H/1LT4f9/
→˓N3wpgNunhsIqtMj62OKiS3nyNwuizouQc3u7MbYCarYeAHWYPYb2FT.lbioDm2RrkJPb9BZMN1O/21 - name: barfoo22 gecos: Bar B. Foo23 sudo: ALL=(ALL) NOPASSWD:ALL24 groups: users, admin25 ssh_import_id: None26 lock_passwd: true27 ssh_authorized_keys:28 - <ssh pub key 1>29 - <ssh pub key 2>30 - name: cloudy31 gecos: Magic Cloud App Daemon User32 inactive: true33 system: true34 - name: fizzbuzz35 sudo: False36 ssh_authorized_keys:37 - <ssh pub key 1>38 - <ssh pub key 2>39 - snapuser: [email protected] - name: nosshlogins41 ssh_redirect_user: true42
43 # Valid Values:44 # name: The user's login name45 # gecos: The user name's real name, i.e. "Bob B. Smith"46 # homedir: Optional. Set to the local path you want to use. Defaults to47 # /home/<username>48 # primary_group: define the primary group. Defaults to a new group created49 # named after the user.50 # groups: Optional. Additional groups to add the user to. Defaults to none51 # selinux_user: Optional. The SELinux user for the user's login, such as
(continues on next page)
20 Chapter 1. Getting help
cloud-init, Release 20.2
(continued from previous page)
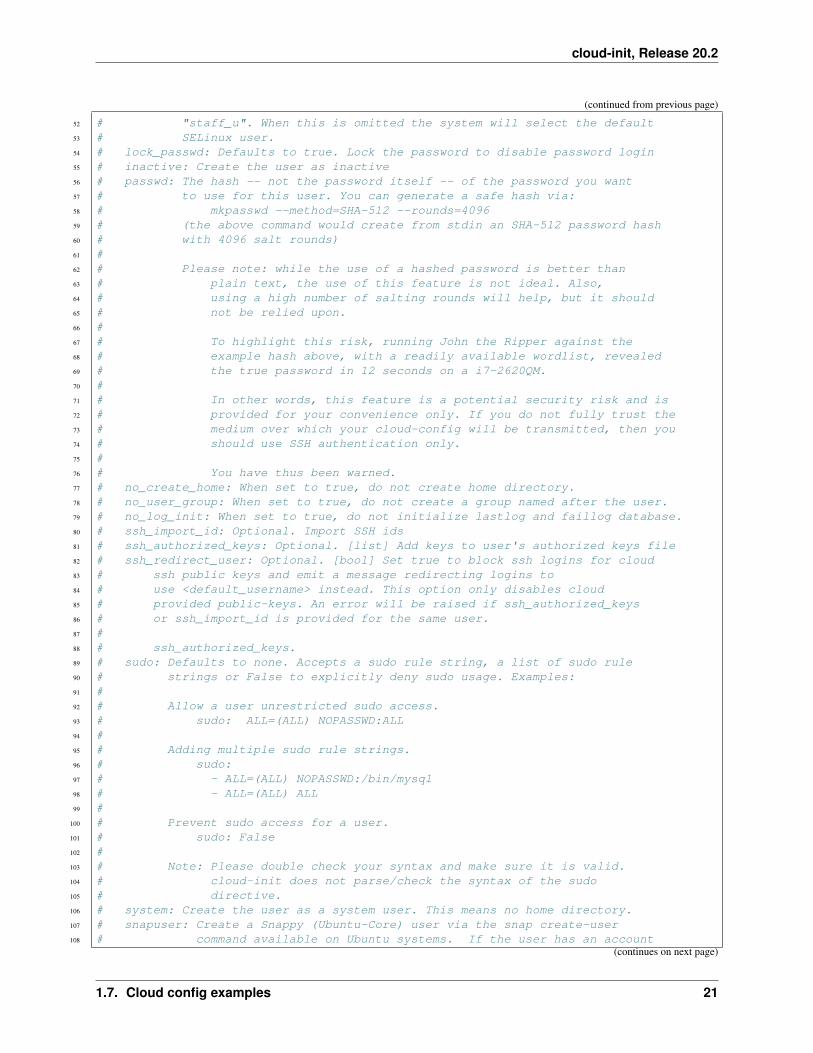
52 # "staff_u". When this is omitted the system will select the default53 # SELinux user.54 # lock_passwd: Defaults to true. Lock the password to disable password login55 # inactive: Create the user as inactive56 # passwd: The hash -- not the password itself -- of the password you want57 # to use for this user. You can generate a safe hash via:58 # mkpasswd --method=SHA-512 --rounds=409659 # (the above command would create from stdin an SHA-512 password hash60 # with 4096 salt rounds)61 #62 # Please note: while the use of a hashed password is better than63 # plain text, the use of this feature is not ideal. Also,64 # using a high number of salting rounds will help, but it should65 # not be relied upon.66 #67 # To highlight this risk, running John the Ripper against the68 # example hash above, with a readily available wordlist, revealed69 # the true password in 12 seconds on a i7-2620QM.70 #71 # In other words, this feature is a potential security risk and is72 # provided for your convenience only. If you do not fully trust the73 # medium over which your cloud-config will be transmitted, then you74 # should use SSH authentication only.75 #76 # You have thus been warned.77 # no_create_home: When set to true, do not create home directory.78 # no_user_group: When set to true, do not create a group named after the user.79 # no_log_init: When set to true, do not initialize lastlog and faillog database.80 # ssh_import_id: Optional. Import SSH ids81 # ssh_authorized_keys: Optional. [list] Add keys to user's authorized keys file82 # ssh_redirect_user: Optional. [bool] Set true to block ssh logins for cloud83 # ssh public keys and emit a message redirecting logins to84 # use <default_username> instead. This option only disables cloud85 # provided public-keys. An error will be raised if ssh_authorized_keys86 # or ssh_import_id is provided for the same user.87 #88 # ssh_authorized_keys.89 # sudo: Defaults to none. Accepts a sudo rule string, a list of sudo rule90 # strings or False to explicitly deny sudo usage. Examples:91 #92 # Allow a user unrestricted sudo access.93 # sudo: ALL=(ALL) NOPASSWD:ALL94 #95 # Adding multiple sudo rule strings.96 # sudo:97 # - ALL=(ALL) NOPASSWD:/bin/mysql98 # - ALL=(ALL) ALL99 #
100 # Prevent sudo access for a user.101 # sudo: False102 #103 # Note: Please double check your syntax and make sure it is valid.104 # cloud-init does not parse/check the syntax of the sudo105 # directive.106 # system: Create the user as a system user. This means no home directory.107 # snapuser: Create a Snappy (Ubuntu-Core) user via the snap create-user108 # command available on Ubuntu systems. If the user has an account
(continues on next page)
1.7. Cloud config examples 21

cloud-init, Release 20.2
(continued from previous page)
109 # on the Ubuntu SSO, specifying the email will allow snap to110 # request a username and any public ssh keys and will import111 # these into the system with username specifed by SSO account.112 # If 'username' is not set in SSO, then username will be the113 # shortname before the email domain.114 #115
116 # Default user creation:117 #118 # Unless you define users, you will get a 'ubuntu' user on ubuntu systems with the119 # legacy permission (no password sudo, locked user, etc). If however, you want120 # to have the 'ubuntu' user in addition to other users, you need to instruct121 # cloud-init that you also want the default user. To do this use the following122 # syntax:123 # users:124 # - default125 # - bob126 # - ....127 # foobar: ...128 #129 # users[0] (the first user in users) overrides the user directive.130 #131 # The 'default' user above references the distro's config:132 # system_info:133 # default_user:134 # name: Ubuntu135 # plain_text_passwd: 'ubuntu'136 # home: /home/ubuntu137 # shell: /bin/bash138 # lock_passwd: True139 # gecos: Ubuntu140 # groups: [adm, audio, cdrom, dialout, floppy, video, plugdev, dip, netdev]
1.7.2 Writing out arbitrary files
1 #cloud-config2 # vim: syntax=yaml3 #4 # This is the configuration syntax that the write_files module5 # will know how to understand. encoding can be given b64 or gzip or (gz+b64).6 # The content will be decoded accordingly and then written to the path that is7 # provided.8 #9 # Note: Content strings here are truncated for example purposes.
10 write_files:11 - encoding: b6412 content: CiMgVGhpcyBmaWxlIGNvbnRyb2xzIHRoZSBzdGF0ZSBvZiBTRUxpbnV4...13 owner: root:root14 path: /etc/sysconfig/selinux15 permissions: '0644'16 - content: |17 # My new /etc/sysconfig/samba file18
19 SMBDOPTIONS="-D"20 path: /etc/sysconfig/samba
(continues on next page)
22 Chapter 1. Getting help

cloud-init, Release 20.2
(continued from previous page)
21 - content: !!binary |22 f0VMRgIBAQAAAAAAAAAAAAIAPgABAAAAwARAAAAAAABAAAAAAAAAAJAVAAAAAAAAAAAAAEAAOAAI23 AEAAHgAdAAYAAAAFAAAAQAAAAAAAAABAAEAAAAAAAEAAQAAAAAAAwAEAAAAAAADAAQAAAAAAAAgA24 AAAAAAAAAwAAAAQAAAAAAgAAAAAAAAACQAAAAAAAAAJAAAAAAAAcAAAAAAAAABwAAAAAAAAAAQAA25 ....26 path: /bin/arch27 permissions: '0555'28 - encoding: gzip29 content: !!binary |30 H4sIAIDb/U8C/1NW1E/KzNMvzuBKTc7IV8hIzcnJVyjPL8pJ4QIA6N+MVxsAAAA=31 path: /usr/bin/hello32 permissions: '0755'
1.7.3 Adding a yum repository
1 #cloud-config2 # vim: syntax=yaml3 #4 # Add yum repository configuration to the system5 #6 # The following example adds the file /etc/yum.repos.d/epel_testing.repo7 # which can then subsequently be used by yum for later operations.8 yum_repos:9 # The name of the repository
10 epel-testing:11 # Any repository configuration options12 # See: man yum.conf13 #14 # This one is required!15 baseurl: http://download.fedoraproject.org/pub/epel/testing/5/$basearch16 enabled: false17 failovermethod: priority18 gpgcheck: true19 gpgkey: file:///etc/pki/rpm-gpg/RPM-GPG-KEY-EPEL20 name: Extra Packages for Enterprise Linux 5 - Testing
1.7.4 Configure an instances trusted CA certificates
1 #cloud-config2 #3 # This is an example file to configure an instance's trusted CA certificates4 # system-wide for SSL/TLS trust establishment when the instance boots for the5 # first time.6 #7 # Make sure that this file is valid yaml before starting instances.8 # It should be passed as user-data when starting the instance.9
10 ca-certs:11 # If present and set to True, the 'remove-defaults' parameter will remove12 # all the default trusted CA certificates that are normally shipped with13 # Ubuntu.14 # This is mainly for paranoid admins - most users will not need this
(continues on next page)
1.7. Cloud config examples 23
cloud-init, Release 20.2
(continued from previous page)
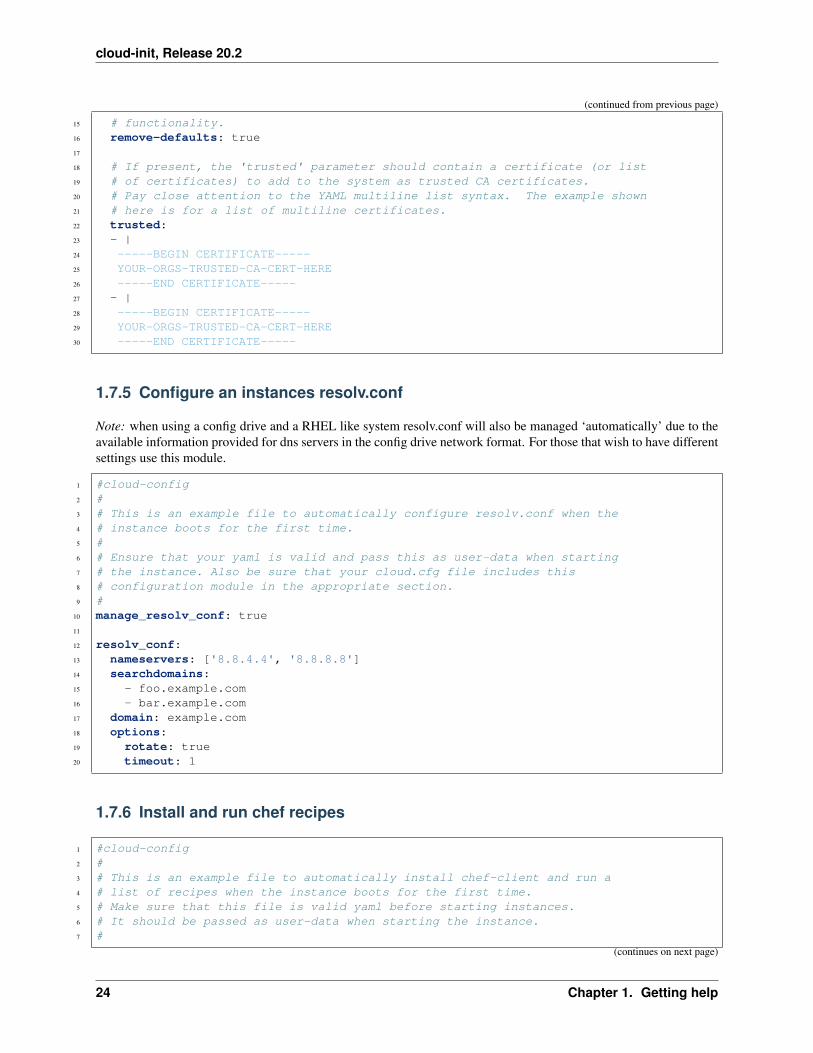
15 # functionality.16 remove-defaults: true17
18 # If present, the 'trusted' parameter should contain a certificate (or list19 # of certificates) to add to the system as trusted CA certificates.20 # Pay close attention to the YAML multiline list syntax. The example shown21 # here is for a list of multiline certificates.22 trusted:23 - |24 -----BEGIN CERTIFICATE-----25 YOUR-ORGS-TRUSTED-CA-CERT-HERE26 -----END CERTIFICATE-----27 - |28 -----BEGIN CERTIFICATE-----29 YOUR-ORGS-TRUSTED-CA-CERT-HERE30 -----END CERTIFICATE-----
1.7.5 Configure an instances resolv.conf
Note: when using a config drive and a RHEL like system resolv.conf will also be managed ‘automatically’ due to theavailable information provided for dns servers in the config drive network format. For those that wish to have differentsettings use this module.
1 #cloud-config2 #3 # This is an example file to automatically configure resolv.conf when the4 # instance boots for the first time.5 #6 # Ensure that your yaml is valid and pass this as user-data when starting7 # the instance. Also be sure that your cloud.cfg file includes this8 # configuration module in the appropriate section.9 #
10 manage_resolv_conf: true11
12 resolv_conf:13 nameservers: ['8.8.4.4', '8.8.8.8']14 searchdomains:15 - foo.example.com16 - bar.example.com17 domain: example.com18 options:19 rotate: true20 timeout: 1
1.7.6 Install and run chef recipes
1 #cloud-config2 #3 # This is an example file to automatically install chef-client and run a4 # list of recipes when the instance boots for the first time.5 # Make sure that this file is valid yaml before starting instances.6 # It should be passed as user-data when starting the instance.7 #
(continues on next page)
24 Chapter 1. Getting help
cloud-init, Release 20.2
(continued from previous page)
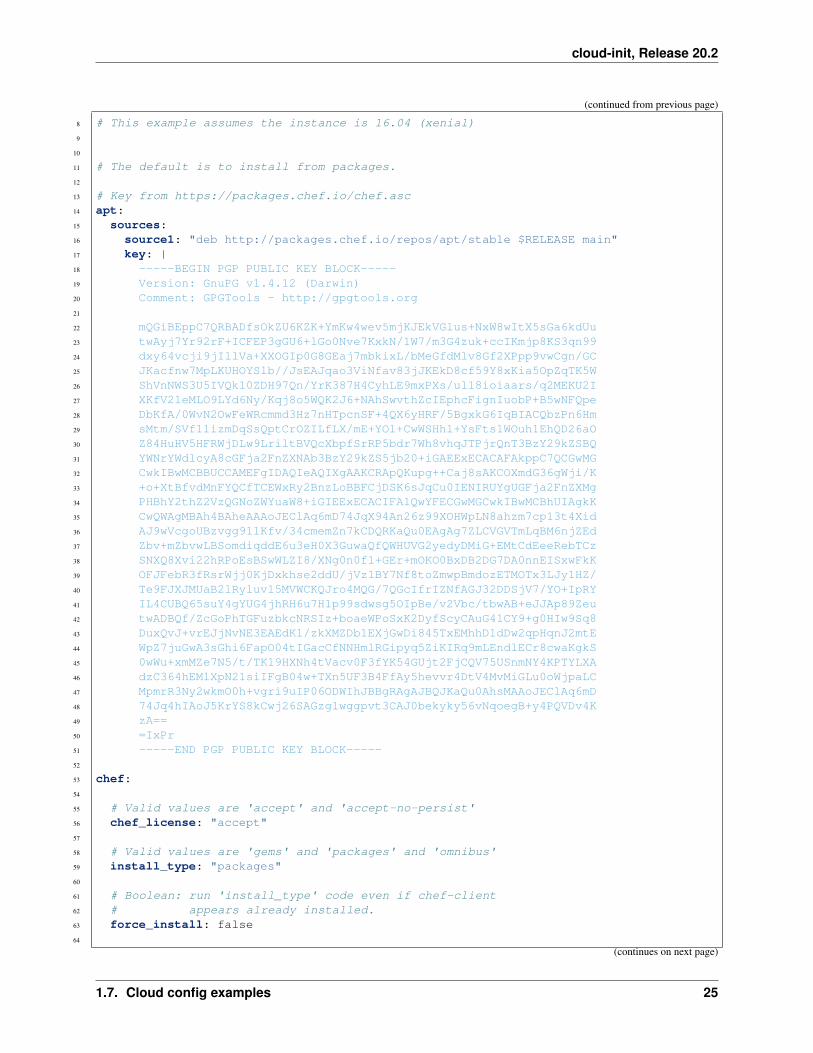
8 # This example assumes the instance is 16.04 (xenial)9
10
11 # The default is to install from packages.12
13 # Key from https://packages.chef.io/chef.asc14 apt:15 sources:16 source1: "deb http://packages.chef.io/repos/apt/stable $RELEASE main"17 key: |18 -----BEGIN PGP PUBLIC KEY BLOCK-----19 Version: GnuPG v1.4.12 (Darwin)20 Comment: GPGTools - http://gpgtools.org21
22 mQGiBEppC7QRBADfsOkZU6KZK+YmKw4wev5mjKJEkVGlus+NxW8wItX5sGa6kdUu23 twAyj7Yr92rF+ICFEP3gGU6+lGo0Nve7KxkN/1W7/m3G4zuk+ccIKmjp8KS3qn9924 dxy64vcji9jIllVa+XXOGIp0G8GEaj7mbkixL/bMeGfdMlv8Gf2XPpp9vwCgn/GC25 JKacfnw7MpLKUHOYSlb//JsEAJqao3ViNfav83jJKEkD8cf59Y8xKia5OpZqTK5W26 ShVnNWS3U5IVQk10ZDH97Qn/YrK387H4CyhLE9mxPXs/ul18ioiaars/q2MEKU2I27 XKfV21eMLO9LYd6Ny/Kqj8o5WQK2J6+NAhSwvthZcIEphcFignIuobP+B5wNFQpe28 DbKfA/0WvN2OwFeWRcmmd3Hz7nHTpcnSF+4QX6yHRF/5BgxkG6IqBIACQbzPn6Hm29 sMtm/SVf11izmDqSsQptCrOZILfLX/mE+YOl+CwWSHhl+YsFts1WOuh1EhQD26aO30 Z84HuHV5HFRWjDLw9LriltBVQcXbpfSrRP5bdr7Wh8vhqJTPjrQnT3BzY29kZSBQ31 YWNrYWdlcyA8cGFja2FnZXNAb3BzY29kZS5jb20+iGAEExECACAFAkppC7QCGwMG32 CwkIBwMCBBUCCAMEFgIDAQIeAQIXgAAKCRApQKupg++Caj8sAKCOXmdG36gWji/K33 +o+XtBfvdMnFYQCfTCEWxRy2BnzLoBBFCjDSK6sJqCu0IENIRUYgUGFja2FnZXMg34 PHBhY2thZ2VzQGNoZWYuaW8+iGIEExECACIFAlQwYFECGwMGCwkIBwMCBhUIAgkK35 CwQWAgMBAh4BAheAAAoJEClAq6mD74JqX94An26z99XOHWpLN8ahzm7cp13t4Xid36 AJ9wVcgoUBzvgg91lKfv/34cmemZn7kCDQRKaQu0EAgAg7ZLCVGVTmLqBM6njZEd37 Zbv+mZbvwLBSomdiqddE6u3eH0X3GuwaQfQWHUVG2yedyDMiG+EMtCdEeeRebTCz38 SNXQ8Xvi22hRPoEsBSwWLZI8/XNg0n0f1+GEr+mOKO0BxDB2DG7DA0nnEISxwFkK39 OFJFebR3fRsrWjj0KjDxkhse2ddU/jVz1BY7Nf8toZmwpBmdozETMOTx3LJy1HZ/40 Te9FJXJMUaB2lRyluv15MVWCKQJro4MQG/7QGcIfrIZNfAGJ32DDSjV7/YO+IpRY41 IL4CUBQ65suY4gYUG4jhRH6u7H1p99sdwsg5OIpBe/v2Vbc/tbwAB+eJJAp89Zeu42 twADBQf/ZcGoPhTGFuzbkcNRSIz+boaeWPoSxK2DyfScyCAuG41CY9+g0HIw9Sq843 DuxQvJ+vrEJjNvNE3EAEdKl/zkXMZDb1EXjGwDi845TxEMhhD1dDw2qpHqnJ2mtE44 WpZ7juGwA3sGhi6FapO04tIGacCfNNHmlRGipyq5ZiKIRq9mLEndlECr8cwaKgkS45 0wWu+xmMZe7N5/t/TK19HXNh4tVacv0F3fYK54GUjt2FjCQV75USnmNY4KPTYLXA46 dzC364hEMlXpN21siIFgB04w+TXn5UF3B4FfAy5hevvr4DtV4MvMiGLu0oWjpaLC47 MpmrR3Ny2wkmO0h+vgri9uIP06ODWIhJBBgRAgAJBQJKaQu0AhsMAAoJEClAq6mD48 74Jq4hIAoJ5KrYS8kCwj26SAGzglwggpvt3CAJ0bekyky56vNqoegB+y4PQVDv4K49 zA==50 =IxPr51 -----END PGP PUBLIC KEY BLOCK-----52
53 chef:54
55 # Valid values are 'accept' and 'accept-no-persist'56 chef_license: "accept"57
58 # Valid values are 'gems' and 'packages' and 'omnibus'59 install_type: "packages"60
61 # Boolean: run 'install_type' code even if chef-client62 # appears already installed.63 force_install: false64
(continues on next page)
1.7. Cloud config examples 25

cloud-init, Release 20.2
(continued from previous page)
65 # Chef settings66 server_url: "https://chef.yourorg.com"67
68 # Node Name69 # Defaults to the instance-id if not present70 node_name: "your-node-name"71
72 # Environment73 # Defaults to '_default' if not present74 environment: "production"75
76 # Default validation name is chef-validator77 validation_name: "yourorg-validator"78 # if validation_cert's value is "system" then it is expected79 # that the file already exists on the system.80 validation_cert: |81 -----BEGIN RSA PRIVATE KEY-----82 YOUR-ORGS-VALIDATION-KEY-HERE83 -----END RSA PRIVATE KEY-----84
85 # A run list for a first boot json, an example (not required)86 run_list:87 - "recipe[apache2]"88 - "role[db]"89
90 # Specify a list of initial attributes used by the cookbooks91 initial_attributes:92 apache:93 prefork:94 maxclients: 10095 keepalive: "off"96
97 # if install_type is 'omnibus', change the url to download98 omnibus_url: "https://www.chef.io/chef/install.sh"99
100 # if install_type is 'omnibus', pass pinned version string101 # to the install script102 omnibus_version: "12.3.0"103
104 # If encrypted data bags are used, the client needs to have a secrets file105 # configured to decrypt them106 encrypted_data_bag_secret: "/etc/chef/encrypted_data_bag_secret"107
108 # Capture all subprocess output into a logfile109 # Useful for troubleshooting cloud-init issues110 output: {all: '| tee -a /var/log/cloud-init-output.log'}
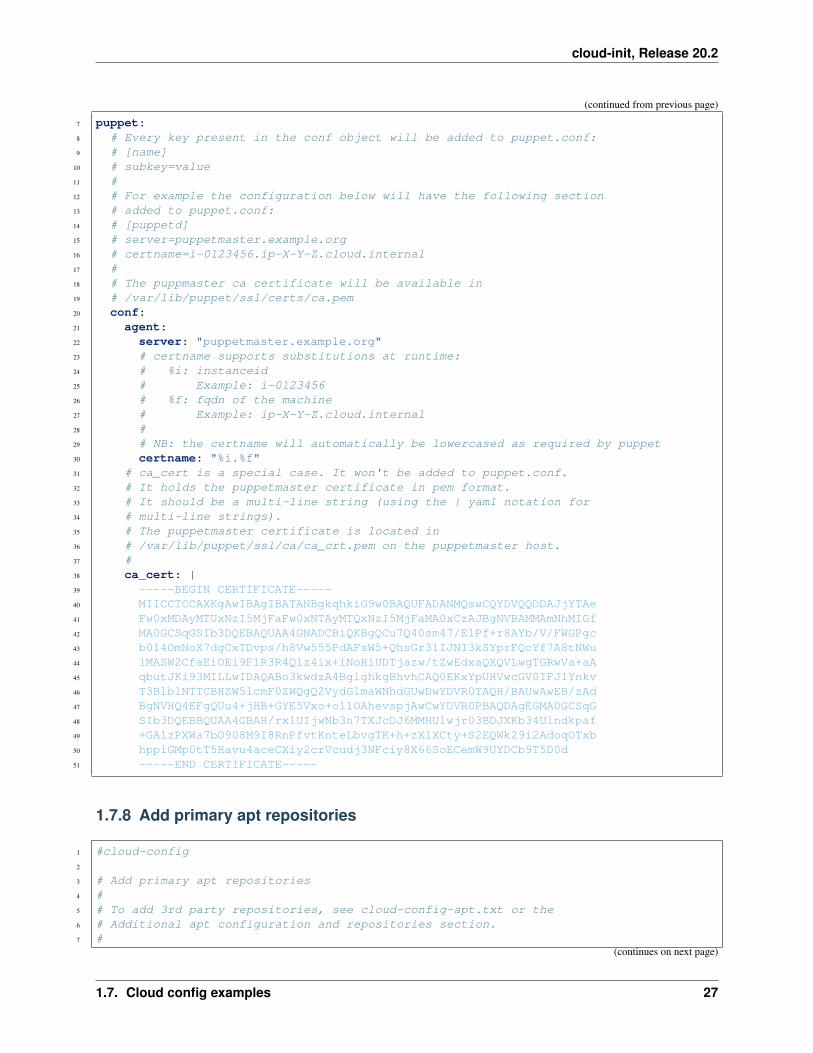
1.7.7 Setup and run puppet
1 #cloud-config2 #3 # This is an example file to automatically setup and run puppetd4 # when the instance boots for the first time.5 # Make sure that this file is valid yaml before starting instances.6 # It should be passed as user-data when starting the instance.
(continues on next page)
26 Chapter 1. Getting help
cloud-init, Release 20.2
(continued from previous page)
7 puppet:8 # Every key present in the conf object will be added to puppet.conf:9 # [name]
10 # subkey=value11 #12 # For example the configuration below will have the following section13 # added to puppet.conf:14 # [puppetd]15 # server=puppetmaster.example.org16 # certname=i-0123456.ip-X-Y-Z.cloud.internal17 #18 # The puppmaster ca certificate will be available in19 # /var/lib/puppet/ssl/certs/ca.pem20 conf:21 agent:22 server: "puppetmaster.example.org"23 # certname supports substitutions at runtime:24 # %i: instanceid25 # Example: i-012345626 # %f: fqdn of the machine27 # Example: ip-X-Y-Z.cloud.internal28 #29 # NB: the certname will automatically be lowercased as required by puppet30 certname: "%i.%f"31 # ca_cert is a special case. It won't be added to puppet.conf.32 # It holds the puppetmaster certificate in pem format.33 # It should be a multi-line string (using the | yaml notation for34 # multi-line strings).35 # The puppetmaster certificate is located in36 # /var/lib/puppet/ssl/ca/ca_crt.pem on the puppetmaster host.37 #38 ca_cert: |39 -----BEGIN CERTIFICATE-----40 MIICCTCCAXKgAwIBAgIBATANBgkqhkiG9w0BAQUFADANMQswCQYDVQQDDAJjYTAe41 Fw0xMDAyMTUxNzI5MjFaFw0xNTAyMTQxNzI5MjFaMA0xCzAJBgNVBAMMAmNhMIGf42 MA0GCSqGSIb3DQEBAQUAA4GNADCBiQKBgQCu7Q40sm47/E1Pf+r8AYb/V/FWGPgc43 b014OmNoX7dgCxTDvps/h8Vw555PdAFsW5+QhsGr31IJNI3kSYprFQcYf7A8tNWu44 1MASW2CfaEiOEi9F1R3R4Qlz4ix+iNoHiUDTjazw/tZwEdxaQXQVLwgTGRwVa+aA45 qbutJKi93MILLwIDAQABo3kwdzA4BglghkgBhvhCAQ0EKxYpUHVwcGV0IFJ1Ynkv46 T3BlblNTTCBHZW5lcmF0ZWQgQ2VydGlmaWNhdGUwDwYDVR0TAQH/BAUwAwEB/zAd47 BgNVHQ4EFgQUu4+jHB+GYE5Vxo+ol1OAhevspjAwCwYDVR0PBAQDAgEGMA0GCSqG48 SIb3DQEBBQUAA4GBAH/rxlUIjwNb3n7TXJcDJ6MMHUlwjr03BDJXKb34Ulndkpaf49 +GAlzPXWa7bO908M9I8RnPfvtKnteLbvgTK+h+zX1XCty+S2EQWk29i2AdoqOTxb50 hppiGMp0tT5Havu4aceCXiy2crVcudj3NFciy8X66SoECemW9UYDCb9T5D0d51 -----END CERTIFICATE-----
1.7.8 Add primary apt repositories
1 #cloud-config2
3 # Add primary apt repositories4 #5 # To add 3rd party repositories, see cloud-config-apt.txt or the6 # Additional apt configuration and repositories section.7 #
(continues on next page)
1.7. Cloud config examples 27

cloud-init, Release 20.2
(continued from previous page)
8 #9 # Default: auto select based on cloud metadata
10 # in ec2, the default is <region>.archive.ubuntu.com11 # apt:12 # primary:13 # - arches [default]14 # uri:15 # use the provided mirror16 # search:17 # search the list for the first mirror.18 # this is currently very limited, only verifying that19 # the mirror is dns resolvable or an IP address20 #21 # if neither mirror is set (the default)22 # then use the mirror provided by the DataSource found.23 # In EC2, that means using <region>.ec2.archive.ubuntu.com24 #25 # if no mirror is provided by the DataSource, but 'search_dns' is26 # true, then search for dns names '<distro>-mirror' in each of27 # - fqdn of this host per cloud metadata28 # - localdomain29 # - no domain (which would search domains listed in /etc/resolv.conf)30 # If there is a dns entry for <distro>-mirror, then it is assumed that there31 # is a distro mirror at http://<distro>-mirror.<domain>/<distro>32 #33 # That gives the cloud provider the opportunity to set mirrors of a distro34 # up and expose them only by creating dns entries.35 #36 # if none of that is found, then the default distro mirror is used37 apt:38 primary:39 - arches: [default]40 uri: http://us.archive.ubuntu.com/ubuntu/41 # or42 apt:43 primary:44 - arches: [default]45 search:46 - http://local-mirror.mydomain47 - http://archive.ubuntu.com48 # or49 apt:50 primary:51 - arches: [default]52 search_dns: True
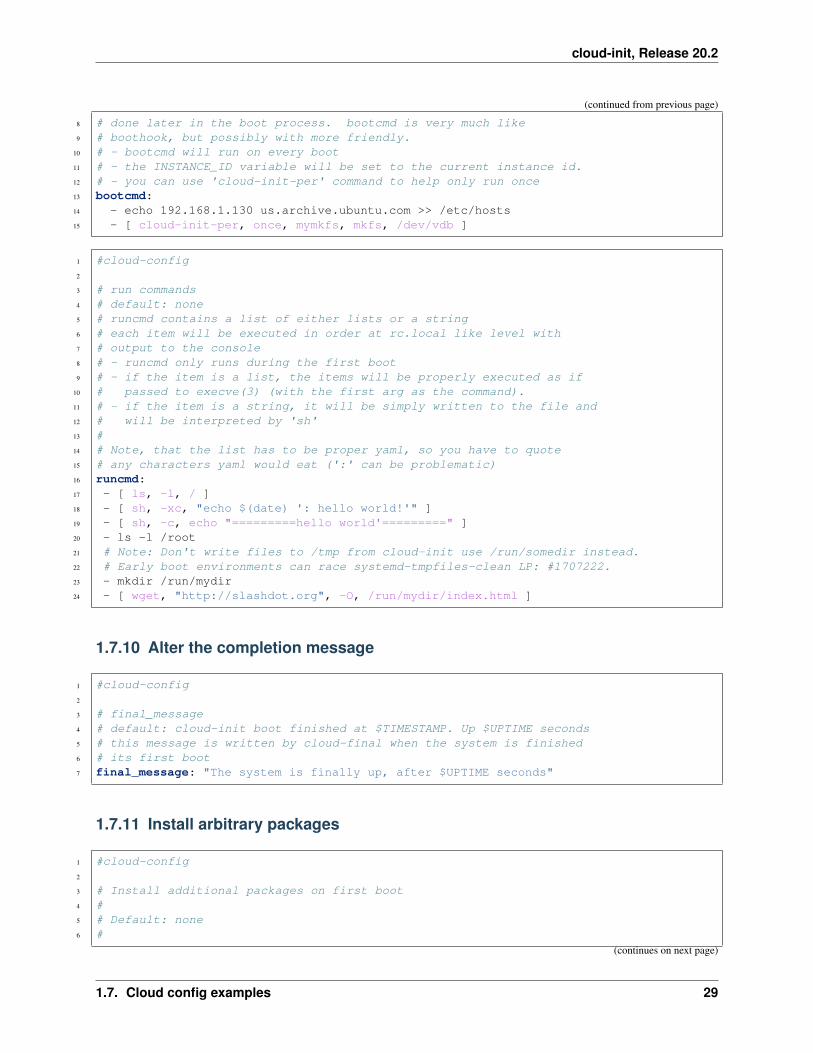
1.7.9 Run commands on first boot
1 #cloud-config2
3 # boot commands4 # default: none5 # this is very similar to runcmd, but commands run very early6 # in the boot process, only slightly after a 'boothook' would run.7 # bootcmd should really only be used for things that could not be
(continues on next page)
28 Chapter 1. Getting help
cloud-init, Release 20.2
(continued from previous page)
8 # done later in the boot process. bootcmd is very much like9 # boothook, but possibly with more friendly.
10 # - bootcmd will run on every boot11 # - the INSTANCE_ID variable will be set to the current instance id.12 # - you can use 'cloud-init-per' command to help only run once13 bootcmd:14 - echo 192.168.1.130 us.archive.ubuntu.com >> /etc/hosts15 - [ cloud-init-per, once, mymkfs, mkfs, /dev/vdb ]
1 #cloud-config2
3 # run commands4 # default: none5 # runcmd contains a list of either lists or a string6 # each item will be executed in order at rc.local like level with7 # output to the console8 # - runcmd only runs during the first boot9 # - if the item is a list, the items will be properly executed as if
10 # passed to execve(3) (with the first arg as the command).11 # - if the item is a string, it will be simply written to the file and12 # will be interpreted by 'sh'13 #14 # Note, that the list has to be proper yaml, so you have to quote15 # any characters yaml would eat (':' can be problematic)16 runcmd:17 - [ ls, -l, / ]18 - [ sh, -xc, "echo $(date) ': hello world!'" ]19 - [ sh, -c, echo "=========hello world'=========" ]20 - ls -l /root21 # Note: Don't write files to /tmp from cloud-init use /run/somedir instead.22 # Early boot environments can race systemd-tmpfiles-clean LP: #1707222.23 - mkdir /run/mydir24 - [ wget, "http://slashdot.org", -O, /run/mydir/index.html ]
1.7.10 Alter the completion message
1 #cloud-config2
3 # final_message4 # default: cloud-init boot finished at $TIMESTAMP. Up $UPTIME seconds5 # this message is written by cloud-final when the system is finished6 # its first boot7 final_message: "The system is finally up, after $UPTIME seconds"
1.7.11 Install arbitrary packages
1 #cloud-config2
3 # Install additional packages on first boot4 #5 # Default: none6 #
(continues on next page)
1.7. Cloud config examples 29
cloud-init, Release 20.2
(continued from previous page)
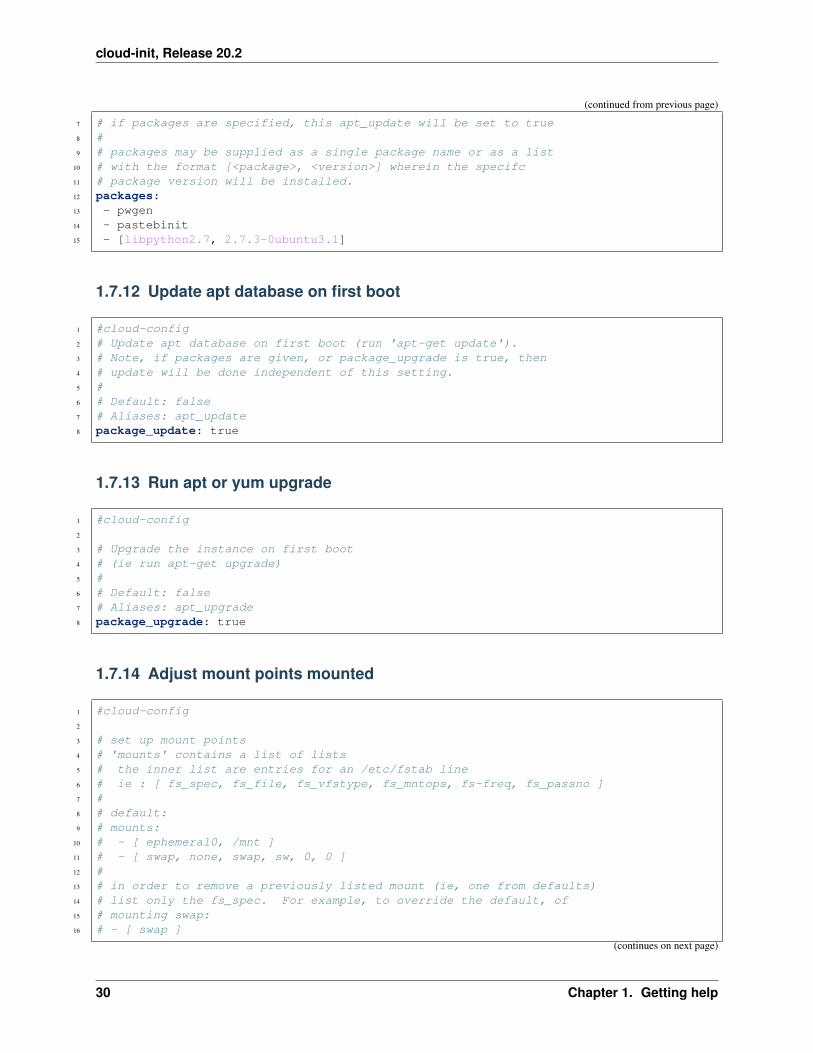
7 # if packages are specified, this apt_update will be set to true8 #9 # packages may be supplied as a single package name or as a list
10 # with the format [<package>, <version>] wherein the specifc11 # package version will be installed.12 packages:13 - pwgen14 - pastebinit15 - [libpython2.7, 2.7.3-0ubuntu3.1]
1.7.12 Update apt database on first boot
1 #cloud-config2 # Update apt database on first boot (run 'apt-get update').3 # Note, if packages are given, or package_upgrade is true, then4 # update will be done independent of this setting.5 #6 # Default: false7 # Aliases: apt_update8 package_update: true
1.7.13 Run apt or yum upgrade
1 #cloud-config2
3 # Upgrade the instance on first boot4 # (ie run apt-get upgrade)5 #6 # Default: false7 # Aliases: apt_upgrade8 package_upgrade: true
1.7.14 Adjust mount points mounted
1 #cloud-config2
3 # set up mount points4 # 'mounts' contains a list of lists5 # the inner list are entries for an /etc/fstab line6 # ie : [ fs_spec, fs_file, fs_vfstype, fs_mntops, fs-freq, fs_passno ]7 #8 # default:9 # mounts:
10 # - [ ephemeral0, /mnt ]11 # - [ swap, none, swap, sw, 0, 0 ]12 #13 # in order to remove a previously listed mount (ie, one from defaults)14 # list only the fs_spec. For example, to override the default, of15 # mounting swap:16 # - [ swap ]
(continues on next page)
30 Chapter 1. Getting help

cloud-init, Release 20.2
(continued from previous page)
17 # or18 # - [ swap, null ]19 #20 # - if a device does not exist at the time, an entry will still be21 # written to /etc/fstab.22 # - '/dev' can be ommitted for device names that begin with: xvd, sd, hd, vd23 # - if an entry does not have all 6 fields, they will be filled in24 # with values from 'mount_default_fields' below.25 #26 # Note, that you should set 'nofail' (see man fstab) for volumes that may not27 # be attached at instance boot (or reboot).28 #29 mounts:30 - [ ephemeral0, /mnt, auto, "defaults,noexec" ]31 - [ sdc, /opt/data ]32 - [ xvdh, /opt/data, "auto", "defaults,nofail", "0", "0" ]33 - [ dd, /dev/zero ]34
35 # mount_default_fields36 # These values are used to fill in any entries in 'mounts' that are not37 # complete. This must be an array, and must have 6 fields.38 mount_default_fields: [ None, None, "auto", "defaults,nofail", "0", "2" ]39
40
41 # swap can also be set up by the 'mounts' module42 # default is to not create any swap files, because 'size' is set to 043 swap:44 filename: /swap.img45 size: "auto" # or size in bytes46 maxsize: size in bytes
1.7.15 Call a url when finished
1 #cloud-config2
3 # phone_home: if this dictionary is present, then the phone_home4 # cloud-config module will post specified data back to the given5 # url6 # default: none7 # phone_home:8 # url: http://my.foo.bar/$INSTANCE/9 # post: all
10 # tries: 1011 #12 phone_home:13 url: http://my.example.com/$INSTANCE_ID/14 post: [ pub_key_dsa, pub_key_rsa, pub_key_ecdsa, instance_id ]
1.7.16 Reboot/poweroff when finished
1 #cloud-config2
(continues on next page)
1.7. Cloud config examples 31
cloud-init, Release 20.2
(continued from previous page)
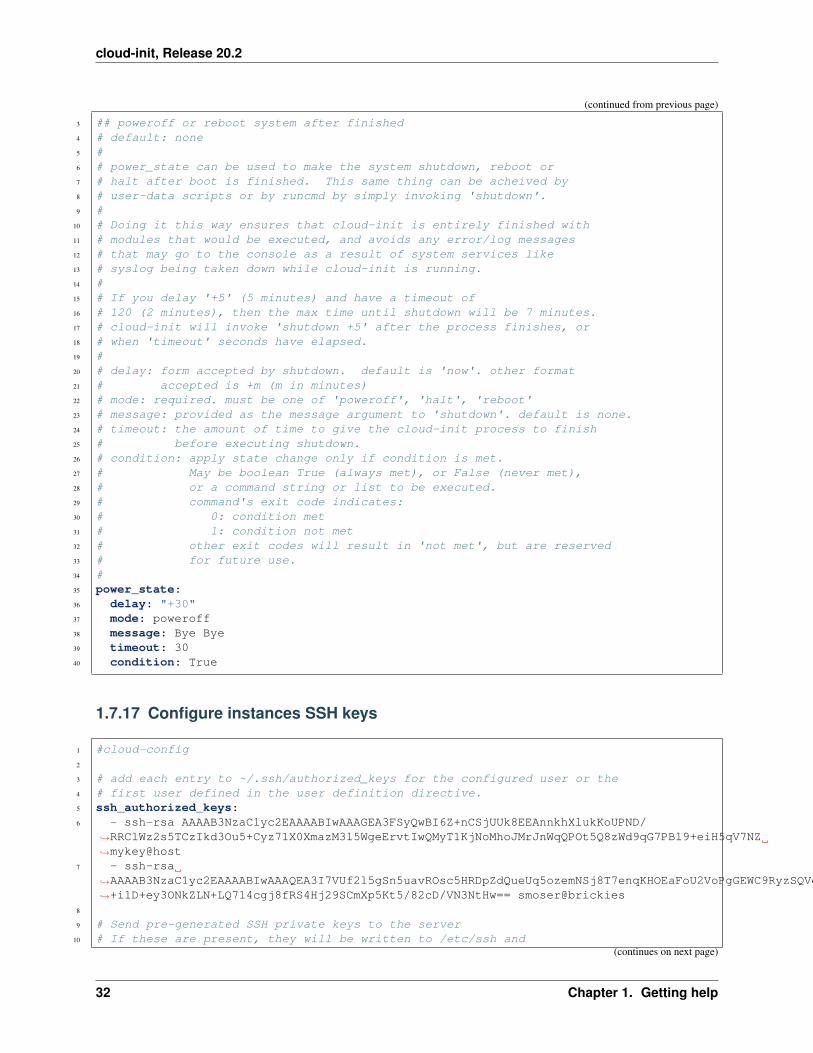
3 ## poweroff or reboot system after finished4 # default: none5 #6 # power_state can be used to make the system shutdown, reboot or7 # halt after boot is finished. This same thing can be acheived by8 # user-data scripts or by runcmd by simply invoking 'shutdown'.9 #
10 # Doing it this way ensures that cloud-init is entirely finished with11 # modules that would be executed, and avoids any error/log messages12 # that may go to the console as a result of system services like13 # syslog being taken down while cloud-init is running.14 #15 # If you delay '+5' (5 minutes) and have a timeout of16 # 120 (2 minutes), then the max time until shutdown will be 7 minutes.17 # cloud-init will invoke 'shutdown +5' after the process finishes, or18 # when 'timeout' seconds have elapsed.19 #20 # delay: form accepted by shutdown. default is 'now'. other format21 # accepted is +m (m in minutes)22 # mode: required. must be one of 'poweroff', 'halt', 'reboot'23 # message: provided as the message argument to 'shutdown'. default is none.24 # timeout: the amount of time to give the cloud-init process to finish25 # before executing shutdown.26 # condition: apply state change only if condition is met.27 # May be boolean True (always met), or False (never met),28 # or a command string or list to be executed.29 # command's exit code indicates:30 # 0: condition met31 # 1: condition not met32 # other exit codes will result in 'not met', but are reserved33 # for future use.34 #35 power_state:36 delay: "+30"37 mode: poweroff38 message: Bye Bye39 timeout: 3040 condition: True
1.7.17 Configure instances SSH keys
1 #cloud-config2
3 # add each entry to ~/.ssh/authorized_keys for the configured user or the4 # first user defined in the user definition directive.5 ssh_authorized_keys:6 - ssh-rsa AAAAB3NzaC1yc2EAAAABIwAAAGEA3FSyQwBI6Z+nCSjUUk8EEAnnkhXlukKoUPND/
→˓RRClWz2s5TCzIkd3Ou5+Cyz71X0XmazM3l5WgeErvtIwQMyT1KjNoMhoJMrJnWqQPOt5Q8zWd9qG7PBl9+eiH5qV7NZ→˓mykey@host
7 - ssh-rsa→˓AAAAB3NzaC1yc2EAAAABIwAAAQEA3I7VUf2l5gSn5uavROsc5HRDpZdQueUq5ozemNSj8T7enqKHOEaFoU2VoPgGEWC9RyzSQVeyD6s7APMcE82EtmW4skVEgEGSbDc1pvxzxtchBj78hJP6Cf5TCMFSXw+Fz5rF1dR23QDbN1mkHs7adr8GW4kSWqU7Q7NDwfIrJJtO7Hi42GyXtvEONHbiRPOe8stqUly7MvUoN+5kfjBM8Qqpfl2+FNhTYWpMfYdPUnE7u536WqzFmsaqJctz3gBxH9Ex7dFtrxR4qiqEr9Qtlu3xGn7Bw07/→˓+i1D+ey3ONkZLN+LQ714cgj8fRS4Hj29SCmXp5Kt5/82cD/VN3NtHw== smoser@brickies
8
9 # Send pre-generated SSH private keys to the server10 # If these are present, they will be written to /etc/ssh and
(continues on next page)
32 Chapter 1. Getting help

cloud-init, Release 20.2
(continued from previous page)
11 # new random keys will not be generated12 # in addition to 'rsa' and 'dsa' as shown below, 'ecdsa' is also supported13 ssh_keys:14 rsa_private: |15 -----BEGIN RSA PRIVATE KEY-----16 MIIBxwIBAAJhAKD0YSHy73nUgysO13XsJmd4fHiFyQ+00R7VVu2iV9Qcon2LZS/x17 1cydPZ4pQpfjEha6WxZ6o8ci/Ea/w0n+0HGPwaxlEG2Z9inNtj3pgFrYcRztfECb18 1j6HCibZbAzYtwIBIwJgO8h72WjcmvcpZ8OvHSvTwAguO2TkR6mPgHsgSaKy6GJo19 PUJnaZRWuba/HX0KGyhz19nPzLpzG5f0fYahlMJAyc13FV7K6kMBPXTRR6FxgHEg20 L0MPC7cdqAwOVNcPY6A7AjEA1bNaIjOzFN2sfZX0j7OMhQuc4zP7r80zaGc5oy6W21 p58hRAncFKEvnEq2CeL3vtuZAjEAwNBHpbNsBYTRPCHM7rZuG/iBtwp8Rxhc9I5w22 ixvzMgi+HpGLWzUIBS+P/XhekIjPAjA285rVmEP+DR255Ls65QbgYhJmTzIXQ2T923 luLvcmFBC6l35Uc4gTgg4ALsmXLn71MCMGMpSWspEvuGInayTCL+vEjmNBT+FAdO24 W7D4zCpI43jRS9U06JVOeSc9CDk2lwiA3wIwCTB/6uc8Cq85D9YqpM10FuHjKpnP25 REPPOyrAspdeOAV+6VKRavstea7+2DZmSUgE26 -----END RSA PRIVATE KEY-----27
28 rsa_public: ssh-rsa→˓AAAAB3NzaC1yc2EAAAABIwAAAGEAoPRhIfLvedSDKw7XdewmZ3h8eIXJD7TRHtVW7aJX1ByifYtlL/→˓HVzJ09nilCl+MSFrpbFnqjxyL8Rr/DSf7QcY/BrGUQbZn2Kc22PemAWthxHO18QJvWPocKJtlsDNi3→˓smoser@localhost
29
30 dsa_private: |31 -----BEGIN DSA PRIVATE KEY-----32 MIIBuwIBAAKBgQDP2HLu7pTExL89USyM0264RCyWX/CMLmukxX0Jdbm29ax8FBJT33 pLrO8TIXVY5rPAJm1dTHnpuyJhOvU9G7M8tPUABtzSJh4GVSHlwaCfycwcpLv9TX34 DgWIpSj+6EiHCyaRlB1/CBp9RiaB+10QcFbm+lapuET+/Au6vSDp9IRtlQIVAIMR35 8KucvUYbOEI+yv+5LW9u3z/BAoGBAI0q6JP+JvJmwZFaeCMMVxXUbqiSko/P1lsa36 LNNBHZ5/8MOUIm8rB2FC6ziidfueJpqTMqeQmSAlEBCwnwreUnGfRrKoJpyPNENY37 d15MG6N5J+z81sEcHFeprryZ+D3Ge9VjPq3Tf3NhKKwCDQ0240aPezbnjPeFm4mH38 bYxxcZ9GAoGAXmLIFSQgiAPu459rCKxT46tHJtM0QfnNiEnQLbFluefZ/yiI4DI339 8UzTCOXLhUA7ybmZha+D/csj15Y9/BNFuO7unzVhikCQV9DTeXX46pG4s1o23JKC40 /QaYWNMZ7kTRv+wWow9MhGiVdML4ZN4XnifuO5krqAybngIy66PMEoQCFEIsKKWv41 99iziAH0KBMVbxy03Trz42 -----END DSA PRIVATE KEY-----43
44 dsa_public: ssh-dss AAAAB3NzaC1kc3MAAACBAM/→˓Ycu7ulMTEvz1RLIzTbrhELJZf8Iwua6TFfQl1ubb1rHwUElOkus7xMhdVjms8AmbV1Meem7ImE69T0bszy09QAG3NImHgZVIeXBoJ/→˓JzByku/→˓1NcOBYilKP7oSIcLJpGUHX8IGn1GJoH7XRBwVub6Vqm4RP78C7q9IOn0hG2VAAAAFQCDEfCrnL1GGzhCPsr/→˓uS1vbt8/wQAAAIEAjSrok/4m8mbBkVp4IwxXFdRuqJKSj8/WWxos00Ednn/→˓ww5QibysHYULrOKJ1+54mmpMyp5CZICUQELCfCt5ScZ9GsqgmnI80Q1h3Xkwbo3kn7PzWwRwcV6muvJn4PcZ71WM+rdN/→˓c2EorAINDTbjRo97NueM94WbiYdtjHFxn0YAAACAXmLIFSQgiAPu459rCKxT46tHJtM0QfnNiEnQLbFluefZ/→˓yiI4DI38UzTCOXLhUA7ybmZha+D/csj15Y9/BNFuO7unzVhikCQV9DTeXX46pG4s1o23JKC/→˓QaYWNMZ7kTRv+wWow9MhGiVdML4ZN4XnifuO5krqAybngIy66PMEoQ= smoser@localhost
1.7.18 Additional apt configuration and repositories
1 #cloud-config2 # apt_pipelining (configure Acquire::http::Pipeline-Depth)3 # Default: disables HTTP pipelining. Certain web servers, such4 # as S3 do not pipeline properly (LP: #948461).5 # Valid options:6 # False/default: Disables pipelining for APT7 # None/Unchanged: Use OS default
(continues on next page)
1.7. Cloud config examples 33

cloud-init, Release 20.2
(continued from previous page)
8 # Number: Set pipelining to some number (not recommended)9 apt_pipelining: False
10
11 ## apt config via system_info:12 # under the 'system_info', you can customize cloud-init's interaction13 # with apt.14 # system_info:15 # apt_get_command: [command, argument, argument]16 # apt_get_upgrade_subcommand: dist-upgrade17 #18 # apt_get_command:19 # To specify a different 'apt-get' command, set 'apt_get_command'.20 # This must be a list, and the subcommand (update, upgrade) is appended to it.21 # default is:22 # ['apt-get', '--option=Dpkg::Options::=--force-confold',23 # '--option=Dpkg::options::=--force-unsafe-io', '--assume-yes', '--quiet']24 #25 # apt_get_upgrade_subcommand: "dist-upgrade"26 # Specify a different subcommand for 'upgrade. The default is 'dist-upgrade'.27 # This is the subcommand that is invoked for package_upgrade.28 #29 # apt_get_wrapper:30 # command: eatmydata31 # enabled: [True, False, "auto"]32 #33
34 # Install additional packages on first boot35 #36 # Default: none37 #38 # if packages are specified, this apt_update will be set to true39
40 packages: ['pastebinit']41
42 apt:43 # The apt config consists of two major "areas".44 #45 # On one hand there is the global configuration for the apt feature.46 #47 # On one hand (down in this file) there is the source dictionary which allows48 # to define various entries to be considered by apt.49
50 ##############################################################################51 # Section 1: global apt configuration52 #53 # The following examples number the top keys to ease identification in54 # discussions.55
56 # 1.1 preserve_sources_list57 #58 # Preserves the existing /etc/apt/sources.list59 # Default: false - do overwrite sources_list. If set to true then any60 # "mirrors" configuration will have no effect.61 # Set to true to avoid affecting sources.list. In that case only62 # "extra" source specifications will be written into63 # /etc/apt/sources.list.d/*64 preserve_sources_list: true
(continues on next page)
34 Chapter 1. Getting help

cloud-init, Release 20.2
(continued from previous page)
65
66 # 1.2 disable_suites67 #68 # This is an empty list by default, so nothing is disabled.69 #70 # If given, those suites are removed from sources.list after all other71 # modifications have been made.72 # Suites are even disabled if no other modification was made,73 # but not if is preserve_sources_list is active.74 # There is a special alias "$RELEASE" as in the sources that will be replace75 # by the matching release.76 #77 # To ease configuration and improve readability the following common ubuntu78 # suites will be automatically mapped to their full definition.79 # updates => $RELEASE-updates80 # backports => $RELEASE-backports81 # security => $RELEASE-security82 # proposed => $RELEASE-proposed83 # release => $RELEASE84 #85 # There is no harm in specifying a suite to be disabled that is not found in86 # the source.list file (just a no-op then)87 #88 # Note: Lines don't get deleted, but disabled by being converted to a comment.89 # The following example disables all usual defaults except $RELEASE-security.90 # On top it disables a custom suite called "mysuite"91 disable_suites: [$RELEASE-updates, backports, $RELEASE, mysuite]92
93 # 1.3 primary/security archives94 #95 # Default: none - instead it is auto select based on cloud metadata96 # so if neither "uri" nor "search", nor "search_dns" is set (the default)97 # then use the mirror provided by the DataSource found.98 # In EC2, that means using <region>.ec2.archive.ubuntu.com99 #
100 # define a custom (e.g. localized) mirror that will be used in sources.list101 # and any custom sources entries for deb / deb-src lines.102 #103 # One can set primary and security mirror to different uri's104 # the child elements to the keys primary and secondary are equivalent105 primary:106 # arches is list of architectures the following config applies to107 # the special keyword "default" applies to any architecture not explicitly108 # listed.109 - arches: [amd64, i386, default]110 # uri is just defining the target as-is111 uri: http://us.archive.ubuntu.com/ubuntu112 #113 # via search one can define lists that are tried one by one.114 # The first with a working DNS resolution (or if it is an IP) will be115 # picked. That way one can keep one configuration for multiple116 # subenvironments that select the working one.117 search:118 - http://cool.but-sometimes-unreachable.com/ubuntu119 - http://us.archive.ubuntu.com/ubuntu120 # if no mirror is provided by uri or search but 'search_dns' is121 # true, then search for dns names '<distro>-mirror' in each of
(continues on next page)
1.7. Cloud config examples 35

cloud-init, Release 20.2
(continued from previous page)
122 # - fqdn of this host per cloud metadata123 # - localdomain124 # - no domain (which would search domains listed in /etc/resolv.conf)125 # If there is a dns entry for <distro>-mirror, then it is assumed that126 # there is a distro mirror at http://<distro>-mirror.<domain>/<distro>127 #128 # That gives the cloud provider the opportunity to set mirrors of a distro129 # up and expose them only by creating dns entries.130 #131 # if none of that is found, then the default distro mirror is used132 search_dns: true133 #134 # If multiple of a category are given135 # 1. uri136 # 2. search137 # 3. search_dns138 # the first defining a valid mirror wins (in the order as defined here,139 # not the order as listed in the config).140 #141 - arches: [s390x, arm64]142 # as above, allowing to have one config for different per arch mirrors143 # security is optional, if not defined it is set to the same value as primary144 security:145 - uri: http://security.ubuntu.com/ubuntu146 # If search_dns is set for security the searched pattern is:147 # <distro>-security-mirror148
149 # if no mirrors are specified at all, or all lookups fail it will try150 # to get them from the cloud datasource and if those neither provide one fall151 # back to:152 # primary: http://archive.ubuntu.com/ubuntu153 # security: http://security.ubuntu.com/ubuntu154
155 # 1.4 sources_list156 #157 # Provide a custom template for rendering sources.list158 # without one provided cloud-init uses builtin templates for159 # ubuntu and debian.160 # Within these sources.list templates you can use the following replacement161 # variables (all have sane Ubuntu defaults, but mirrors can be overwritten162 # as needed (see above)):163 # => $RELEASE, $MIRROR, $PRIMARY, $SECURITY164 sources_list: | # written by cloud-init custom template165 deb $MIRROR $RELEASE main restricted166 deb-src $MIRROR $RELEASE main restricted167 deb $PRIMARY $RELEASE universe restricted168 deb $SECURITY $RELEASE-security multiverse169
170 # 1.5 conf171 #172 # Any apt config string that will be made available to apt173 # see the APT.CONF(5) man page for details what can be specified174 conf: | # APT config175 APT {176 Get {177 Assume-Yes "true";178 Fix-Broken "true";
(continues on next page)
36 Chapter 1. Getting help
cloud-init, Release 20.2
(continued from previous page)
179 };180 };181
182 # 1.6 (http_|ftp_|https_)proxy183 #184 # Proxies are the most common apt.conf option, so that for simplified use185 # there is a shortcut for those. Those get automatically translated into the186 # correct Acquire::*::Proxy statements.187 #188 # note: proxy actually being a short synonym to http_proxy189 proxy: http://[[user][:pass]@]host[:port]/190 http_proxy: http://[[user][:pass]@]host[:port]/191 ftp_proxy: ftp://[[user][:pass]@]host[:port]/192 https_proxy: https://[[user][:pass]@]host[:port]/193
194 # 1.7 add_apt_repo_match195 #196 # 'source' entries in apt-sources that match this python regex197 # expression will be passed to add-apt-repository198 # The following example is also the builtin default if nothing is specified199 add_apt_repo_match: '^[\w-]+:\w'200
201
202 ##############################################################################203 # Section 2: source list entries204 #205 # This is a dictionary (unlike most block/net which are lists)206 #207 # The key of each source entry is the filename and will be prepended by208 # /etc/apt/sources.list.d/ if it doesn't start with a '/'.209 # If it doesn't end with .list it will be appended so that apt picks up it's210 # configuration.211 #212 # Whenever there is no content to be written into such a file, the key is213 # not used as filename - yet it can still be used as index for merging214 # configuration.215 #216 # The values inside the entries consost of the following optional entries:217 # 'source': a sources.list entry (some variable replacements apply)218 # 'keyid': providing a key to import via shortid or fingerprint219 # 'key': providing a raw PGP key220 # 'keyserver': specify an alternate keyserver to pull keys from that221 # were specified by keyid222
223 # This allows merging between multiple input files than a list like:224 # cloud-config1225 # sources:226 # s1: {'key': 'key1', 'source': 'source1'}227 # cloud-config2228 # sources:229 # s2: {'key': 'key2'}230 # s1: {'keyserver': 'foo'}231 # This would be merged to232 # sources:233 # s1:234 # keyserver: foo235 # key: key1
(continues on next page)
1.7. Cloud config examples 37

cloud-init, Release 20.2
(continued from previous page)
236 # source: source1237 # s2:238 # key: key2239 #240 # The following examples number the subfeatures per sources entry to ease241 # identification in discussions.242
243
244 sources:245 curtin-dev-ppa.list:246 # 2.1 source247 #248 # Creates a file in /etc/apt/sources.list.d/ for the sources list entry249 # based on the key: "/etc/apt/sources.list.d/curtin-dev-ppa.list"250 source: "deb http://ppa.launchpad.net/curtin-dev/test-archive/ubuntu xenial main
→˓"251
252 # 2.2 keyid253 #254 # Importing a gpg key for a given key id. Used keyserver defaults to255 # keyserver.ubuntu.com256 keyid: F430BBA5 # GPG key ID published on a key server257
258 ignored1:259 # 2.3 PPA shortcut260 #261 # Setup correct apt sources.list line and Auto-Import the signing key262 # from LP263 #264 # See https://help.launchpad.net/Packaging/PPA for more information265 # this requires 'add-apt-repository'. This will create a file in266 # /etc/apt/sources.list.d automatically, therefore the key here is267 # ignored as filename in those cases.268 source: "ppa:curtin-dev/test-archive" # Quote the string269
270 my-repo2.list:271 # 2.4 replacement variables272 #273 # sources can use $MIRROR, $PRIMARY, $SECURITY and $RELEASE replacement274 # variables.275 # They will be replaced with the default or specified mirrors and the276 # running release.277 # The entry below would be possibly turned into:278 # source: deb http://archive.ubuntu.com/ubuntu xenial multiverse279 source: deb $MIRROR $RELEASE multiverse280
281 my-repo3.list:282 # this would have the same end effect as 'ppa:curtin-dev/test-archive'283 source: "deb http://ppa.launchpad.net/curtin-dev/test-archive/ubuntu xenial main
→˓"284 keyid: F430BBA5 # GPG key ID published on the key server285 filename: curtin-dev-ppa.list286
287 ignored2:288 # 2.5 key only289 #290 # this would only import the key without adding a ppa or other source spec
(continues on next page)
38 Chapter 1. Getting help

cloud-init, Release 20.2
(continued from previous page)
291 # since this doesn't generate a source.list file the filename key is ignored292 keyid: F430BBA5 # GPG key ID published on a key server293
294 ignored3:295 # 2.6 key id alternatives296 #297 # Keyid's can also be specified via their long fingerprints298 keyid: B59D 5F15 97A5 04B7 E230 6DCA 0620 BBCF 0368 3F77299
300 ignored4:301 # 2.7 alternative keyservers302 #303 # One can also specify alternative keyservers to fetch keys from.304 keyid: B59D 5F15 97A5 04B7 E230 6DCA 0620 BBCF 0368 3F77305 keyserver: pgp.mit.edu306
307
308 my-repo4.list:309 # 2.8 raw key310 #311 # The apt signing key can also be specified by providing a pgp public key312 # block. Providing the PGP key this way is the most robust method for313 # specifying a key, as it removes dependency on a remote key server.314 #315 # As with keyid's this can be specified with or without some actual source316 # content.317 key: | # The value needs to start with -----BEGIN PGP PUBLIC KEY BLOCK-----318 -----BEGIN PGP PUBLIC KEY BLOCK-----319 Version: SKS 1.0.10320
321 mI0ESpA3UQEEALdZKVIMq0j6qWAXAyxSlF63SvPVIgxHPb9Nk0DZUixn+akqytxG4zKCONz6322 qLjoBBfHnynyVLfT4ihg9an1PqxRnTO+JKQxl8NgKGz6Pon569GtAOdWNKw15XKinJTDLjnj323 9y96ljJqRcpV9t/WsIcdJPcKFR5voHTEoABE2aEXABEBAAG0GUxhdW5jaHBhZCBQUEEgZm9y324 IEFsZXN0aWOItgQTAQIAIAUCSpA3UQIbAwYLCQgHAwIEFQIIAwQWAgMBAh4BAheAAAoJEA7H325 5Qi+CcVxWZ8D/1MyYvfj3FJPZUm2Yo1zZsQ657vHI9+pPouqflWOayRR9jbiyUFIn0VdQBrP326 t0FwvnOFArUovUWoKAEdqR8hPy3M3APUZjl5K4cMZR/xaMQeQRZ5CHpS4DBKURKAHC0ltS5o327 uBJKQOZm5iltJp15cgyIkBkGe8Mx18VFyVglAZey328 =Y2oI329 -----END PGP PUBLIC KEY BLOCK-----
1.7.19 Disk setup
1 #cloud-config2 # Cloud-init supports the creation of simple partition tables and file systems3 # on devices.4
5 # Default disk definitions for AWS6 # --------------------------------7 # (Not implemented yet, but provided for future documentation)8
9 disk_setup:10 ephmeral0:11 table_type: 'mbr'12 layout: True13 overwrite: False
(continues on next page)
1.7. Cloud config examples 39

cloud-init, Release 20.2
(continued from previous page)
14
15 fs_setup:16 - label: None,17 filesystem: ext318 device: ephemeral019 partition: auto20
21 # Default disk definitions for Microsoft Azure22 # ------------------------------------------23
24 device_aliases: {'ephemeral0': '/dev/sdb'}25 disk_setup:26 ephemeral0:27 table_type: mbr28 layout: True29 overwrite: False30
31 fs_setup:32 - label: ephemeral033 filesystem: ext434 device: ephemeral0.135 replace_fs: ntfs36
37
38 # Data disks definitions for Microsoft Azure39 # ------------------------------------------40
41 disk_setup:42 /dev/disk/azure/scsi1/lun0:43 table_type: gpt44 layout: True45 overwrite: True46
47 fs_setup:48 - device: /dev/disk/azure/scsi1/lun049 partition: 150 filesystem: ext451
52
53 # Default disk definitions for SmartOS54 # ------------------------------------55
56 device_aliases: {'ephemeral0': '/dev/vdb'}57 disk_setup:58 ephemeral0:59 table_type: mbr60 layout: False61 overwrite: False62
63 fs_setup:64 - label: ephemeral065 filesystem: ext466 device: ephemeral0.067
68 # Caveat for SmartOS: if ephemeral disk is not defined, then the disk will69 # not be automatically added to the mounts.70
(continues on next page)
40 Chapter 1. Getting help

cloud-init, Release 20.2
(continued from previous page)
71
72 # The default definition is used to make sure that the ephemeral storage is73 # setup properly.74
75 # "disk_setup": disk partitioning76 # --------------------------------77
78 # The disk_setup directive instructs Cloud-init to partition a disk. The format is:79
80 disk_setup:81 ephmeral0:82 table_type: 'mbr'83 layout: 'auto'84 /dev/xvdh:85 table_type: 'mbr'86 layout:87 - 3388 - [33, 82]89 - 3390 overwrite: True91
92 # The format is a list of dicts of dicts. The first value is the name of the93 # device and the subsequent values define how to create and layout the94 # partition.95 # The general format is:96 # disk_setup:97 # <DEVICE>:98 # table_type: 'mbr'99 # layout: <LAYOUT|BOOL>
100 # overwrite: <BOOL>101 #102 # Where:103 # <DEVICE>: The name of the device. 'ephemeralX' and 'swap' are special104 # values which are specific to the cloud. For these devices105 # Cloud-init will look up what the real devices is and then106 # use it.107 #108 # For other devices, the kernel device name is used. At this109 # time only simply kernel devices are supported, meaning110 # that device mapper and other targets may not work.111 #112 # Note: At this time, there is no handling or setup of113 # device mapper targets.114 #115 # table_type=<TYPE>: Currently the following are supported:116 # 'mbr': default and setups a MS-DOS partition table117 # 'gpt': setups a GPT partition table118 #119 # Note: At this time only 'mbr' and 'gpt' partition tables120 # are allowed. It is anticipated in the future that121 # we'll also have "RAID" to create a mdadm RAID.122 #123 # layout={...}: The device layout. This is a list of values, with the124 # percentage of disk that partition will take.125 # Valid options are:126 # [<SIZE>, [<SIZE>, <PART_TYPE]]127 #
(continues on next page)
1.7. Cloud config examples 41

cloud-init, Release 20.2
(continued from previous page)
128 # Where <SIZE> is the _percentage_ of the disk to use, while129 # <PART_TYPE> is the numerical value of the partition type.130 #131 # The following setups two partitions, with the first132 # partition having a swap label, taking 1/3 of the disk space133 # and the remainder being used as the second partition.134 # /dev/xvdh':135 # table_type: 'mbr'136 # layout:137 # - [33,82]138 # - 66139 # overwrite: True140 #141 # When layout is "true" it means single partition the entire142 # device.143 #144 # When layout is "false" it means don't partition or ignore145 # existing partitioning.146 #147 # If layout is set to "true" and overwrite is set to "false",148 # it will skip partitioning the device without a failure.149 #150 # overwrite=<BOOL>: This describes whether to ride with saftey's on and151 # everything holstered.152 #153 # 'false' is the default, which means that:154 # 1. The device will be checked for a partition table155 # 2. The device will be checked for a file system156 # 3. If either a partition of file system is found, then157 # the operation will be _skipped_.158 #159 # 'true' is cowboy mode. There are no checks and things are160 # done blindly. USE with caution, you can do things you161 # really, really don't want to do.162 #163 #164 # fs_setup: Setup the file system165 # -------------------------------166 #167 # fs_setup describes the how the file systems are supposed to look.168
169 fs_setup:170 - label: ephemeral0171 filesystem: 'ext3'172 device: 'ephemeral0'173 partition: 'auto'174 - label: mylabl2175 filesystem: 'ext4'176 device: '/dev/xvda1'177 - cmd: mkfs -t %(filesystem)s -L %(label)s %(device)s178 label: mylabl3179 filesystem: 'btrfs'180 device: '/dev/xvdh'181
182 # The general format is:183 # fs_setup:184 # - label: <LABEL>
(continues on next page)
42 Chapter 1. Getting help

cloud-init, Release 20.2
(continued from previous page)
185 # filesystem: <FS_TYPE>186 # device: <DEVICE>187 # partition: <PART_VALUE>188 # overwrite: <OVERWRITE>189 # replace_fs: <FS_TYPE>190 #191 # Where:192 # <LABEL>: The file system label to be used. If set to None, no label is193 # used.194 #195 # <FS_TYPE>: The file system type. It is assumed that the there196 # will be a "mkfs.<FS_TYPE>" that behaves likes "mkfs". On a standard197 # Ubuntu Cloud Image, this means that you have the option of ext{2,3,4},198 # and vfat by default.199 #200 # <DEVICE>: The device name. Special names of 'ephemeralX' or 'swap'201 # are allowed and the actual device is acquired from the cloud datasource.202 # When using 'ephemeralX' (i.e. ephemeral0), make sure to leave the203 # label as 'ephemeralX' otherwise there may be issues with the mounting204 # of the ephemeral storage layer.205 #206 # If you define the device as 'ephemeralX.Y' then Y will be interpetted207 # as a partition value. However, ephermalX.0 is the _same_ as ephemeralX.208 #209 # <PART_VALUE>:210 # Partition definitions are overwriten if you use the '<DEVICE>.Y' notation.211 #212 # The valid options are:213 # "auto|any": tell cloud-init not to care whether there is a partition214 # or not. Auto will use the first partition that does not contain a215 # file system already. In the absence of a partition table, it will216 # put it directly on the disk.217 #218 # "auto": If a file system that matches the specification in terms of219 # label, type and device, then cloud-init will skip the creation of220 # the file system.221 #222 # "any": If a file system that matches the file system type and device,223 # then cloud-init will skip the creation of the file system.224 #225 # Devices are selected based on first-detected, starting with partitions226 # and then the raw disk. Consider the following:227 # NAME FSTYPE LABEL228 # xvdb229 # |-xvdb1 ext4230 # |-xvdb2231 # |-xvdb3 btrfs test232 # \-xvdb4 ext4 test233 #234 # If you ask for 'auto', label of 'test, and file system of 'ext4'235 # then cloud-init will select the 2nd partition, even though there236 # is a partition match at the 4th partition.237 #238 # If you ask for 'any' and a label of 'test', then cloud-init will239 # select the 1st partition.240 #241 # If you ask for 'auto' and don't define label, then cloud-init will
(continues on next page)
1.7. Cloud config examples 43
cloud-init, Release 20.2
(continued from previous page)
242 # select the 1st partition.243 #244 # In general, if you have a specific partition configuration in mind,245 # you should define either the device or the partition number. 'auto'246 # and 'any' are specifically intended for formating ephemeral storage or247 # for simple schemes.248 #249 # "none": Put the file system directly on the device.250 #251 # <NUM>: where NUM is the actual partition number.252 #253 # <OVERWRITE>: Defines whether or not to overwrite any existing254 # filesystem.255 #256 # "true": Indiscriminately destroy any pre-existing file system. Use at257 # your own peril.258 #259 # "false": If an existing file system exists, skip the creation.260 #261 # <REPLACE_FS>: This is a special directive, used for Microsoft Azure that262 # instructs cloud-init to replace a file system of <FS_TYPE>. NOTE:263 # unless you define a label, this requires the use of the 'any' partition264 # directive.265 #266 # Behavior Caveat: The default behavior is to _check_ if the file system exists.267 # If a file system matches the specification, then the operation is a no-op.
1.7.20 Register RedHat Subscription
1 #cloud-config2
3 # register your Red Hat Enterprise Linux based operating system4 #5 # this cloud-init plugin is capable of registering by username6 # and password *or* activation and org. Following a successfully7 # registration you can:8 # - auto-attach subscriptions9 # - set the service level
10 # - add subscriptions based on its pool ID11 # - enable yum repositories based on its repo id12 # - disable yum repositories based on its repo id13 # - alter the rhsm_baseurl and server-hostname in the14 # /etc/rhsm/rhs.conf file15
16 rh_subscription:17 username: [email protected]
19 ## Quote your password if it has symbols to be safe20 password: '1234abcd'21
22 ## If you prefer, you can use the activation key and23 ## org instead of username and password. Be sure to24 ## comment out username and password25
26 #activation-key: foobar(continues on next page)
44 Chapter 1. Getting help
cloud-init, Release 20.2
(continued from previous page)
27 #org: 1234528
29 ## Uncomment to auto-attach subscriptions to your system30 #auto-attach: True31
32 ## Uncomment to set the service level for your33 ## subscriptions34 #service-level: self-support35
36 ## Uncomment to add pools (needs to be a list of IDs)37 #add-pool: []38
39 ## Uncomment to add or remove yum repos40 ## (needs to be a list of repo IDs)41 #enable-repo: []42 #disable-repo: []43
44 ## Uncomment to alter the baseurl in /etc/rhsm/rhsm.conf45 #rhsm-baseurl: http://url46
47 ## Uncomment to alter the server hostname in48 ## /etc/rhsm/rhsm.conf49 #server-hostname: foo.bar.com
1.7.21 Configure data sources
1 #cloud-config2
3 # Documentation on data sources configuration options4 datasource:5 # Ec26 Ec2:7 # timeout: the timeout value for a request at metadata service8 timeout : 509 # The length in seconds to wait before giving up on the metadata
10 # service. The actual total wait could be up to11 # len(resolvable_metadata_urls)*timeout12 max_wait : 12013
14 #metadata_url: a list of URLs to check for metadata services15 metadata_urls:16 - http://169.254.169.254:8017 - http://instance-data:877318
19 MAAS:20 timeout : 5021 max_wait : 12022
23 # there are no default values for metadata_url or oauth credentials24 # If no credentials are present, non-authed attempts will be made.25 metadata_url: http://mass-host.localdomain/source26 consumer_key: Xh234sdkljf27 token_key: kjfhgb3n28 token_secret: 24uysdfx1w429
(continues on next page)
1.7. Cloud config examples 45
cloud-init, Release 20.2
(continued from previous page)
30 NoCloud:31 # default seedfrom is None32 # if found, then it should contain a url with:33 # <url>/user-data and <url>/meta-data34 # seedfrom: http://my.example.com/i-abcde35 seedfrom: None36
37 # fs_label: the label on filesystems to be searched for NoCloud source38 fs_label: cidata39
40 # these are optional, but allow you to basically provide a datasource41 # right here42 user-data: |43 # This is the user-data verbatim44 meta-data:45 instance-id: i-87018aed46 local-hostname: myhost.internal47
48 Azure:49 agent_command: [service, walinuxagent, start]50 set_hostname: True51 hostname_bounce:52 interface: eth053 policy: on # [can be 'on', 'off' or 'force']54
55 SmartOS:56 # For KVM guests:57 # Smart OS datasource works over a serial console interacting with58 # a server on the other end. By default, the second serial console is the59 # device. SmartOS also uses a serial timeout of 60 seconds.60 serial_device: /dev/ttyS161 serial_timeout: 6062
63 # For LX-Brand Zones guests:64 # Smart OS datasource works over a socket interacting with65 # the host on the other end. By default, the socket file is in66 # the native .zoncontrol directory.67 metadata_sockfile: /native/.zonecontrol/metadata.sock68
69 # a list of keys that will not be base64 decoded even if base64_all70 no_base64_decode: ['root_authorized_keys', 'motd_sys_info',71 'iptables_disable']72 # a plaintext, comma delimited list of keys whose values are b64 encoded73 base64_keys: []74 # a boolean indicating that all keys not in 'no_base64_decode' are encoded75 base64_all: False
1.7.22 Create partitions and filesystems
1 #cloud-config2 # Cloud-init supports the creation of simple partition tables and file systems3 # on devices.4
5 # Default disk definitions for AWS6 # --------------------------------
(continues on next page)
46 Chapter 1. Getting help
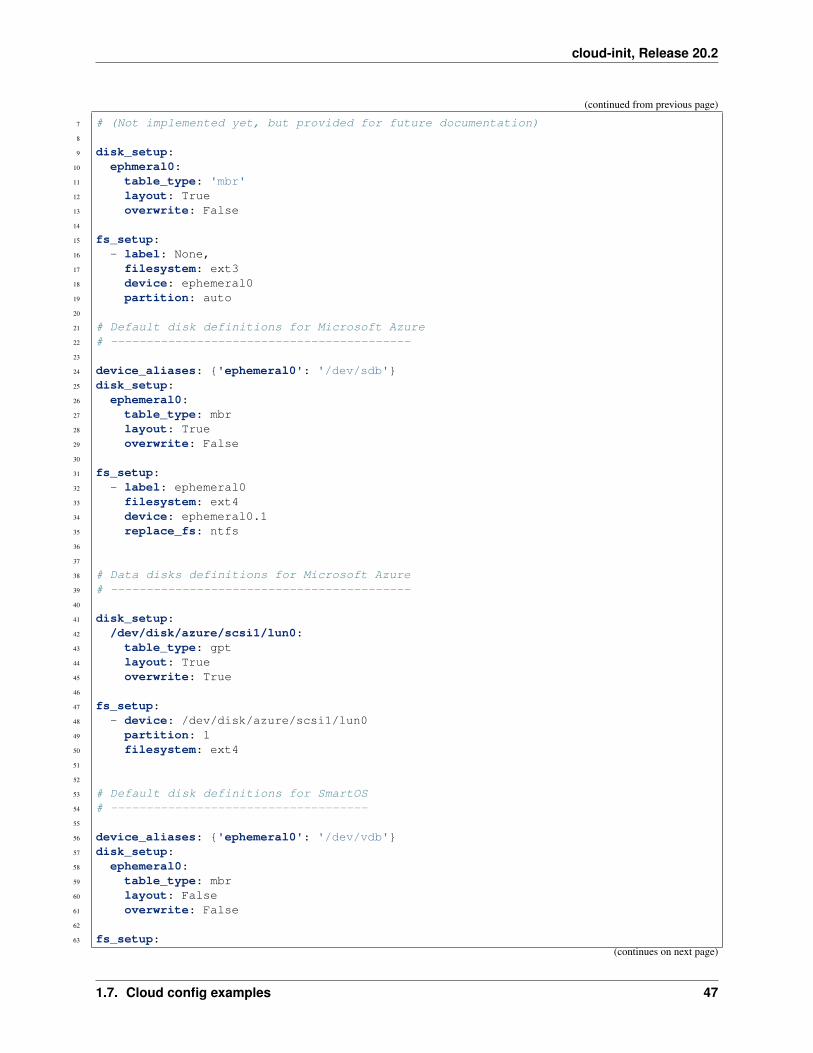
cloud-init, Release 20.2
(continued from previous page)
7 # (Not implemented yet, but provided for future documentation)8
9 disk_setup:10 ephmeral0:11 table_type: 'mbr'12 layout: True13 overwrite: False14
15 fs_setup:16 - label: None,17 filesystem: ext318 device: ephemeral019 partition: auto20
21 # Default disk definitions for Microsoft Azure22 # ------------------------------------------23
24 device_aliases: {'ephemeral0': '/dev/sdb'}25 disk_setup:26 ephemeral0:27 table_type: mbr28 layout: True29 overwrite: False30
31 fs_setup:32 - label: ephemeral033 filesystem: ext434 device: ephemeral0.135 replace_fs: ntfs36
37
38 # Data disks definitions for Microsoft Azure39 # ------------------------------------------40
41 disk_setup:42 /dev/disk/azure/scsi1/lun0:43 table_type: gpt44 layout: True45 overwrite: True46
47 fs_setup:48 - device: /dev/disk/azure/scsi1/lun049 partition: 150 filesystem: ext451
52
53 # Default disk definitions for SmartOS54 # ------------------------------------55
56 device_aliases: {'ephemeral0': '/dev/vdb'}57 disk_setup:58 ephemeral0:59 table_type: mbr60 layout: False61 overwrite: False62
63 fs_setup:(continues on next page)
1.7. Cloud config examples 47

cloud-init, Release 20.2
(continued from previous page)
64 - label: ephemeral065 filesystem: ext466 device: ephemeral0.067
68 # Caveat for SmartOS: if ephemeral disk is not defined, then the disk will69 # not be automatically added to the mounts.70
71
72 # The default definition is used to make sure that the ephemeral storage is73 # setup properly.74
75 # "disk_setup": disk partitioning76 # --------------------------------77
78 # The disk_setup directive instructs Cloud-init to partition a disk. The format is:79
80 disk_setup:81 ephmeral0:82 table_type: 'mbr'83 layout: 'auto'84 /dev/xvdh:85 table_type: 'mbr'86 layout:87 - 3388 - [33, 82]89 - 3390 overwrite: True91
92 # The format is a list of dicts of dicts. The first value is the name of the93 # device and the subsequent values define how to create and layout the94 # partition.95 # The general format is:96 # disk_setup:97 # <DEVICE>:98 # table_type: 'mbr'99 # layout: <LAYOUT|BOOL>
100 # overwrite: <BOOL>101 #102 # Where:103 # <DEVICE>: The name of the device. 'ephemeralX' and 'swap' are special104 # values which are specific to the cloud. For these devices105 # Cloud-init will look up what the real devices is and then106 # use it.107 #108 # For other devices, the kernel device name is used. At this109 # time only simply kernel devices are supported, meaning110 # that device mapper and other targets may not work.111 #112 # Note: At this time, there is no handling or setup of113 # device mapper targets.114 #115 # table_type=<TYPE>: Currently the following are supported:116 # 'mbr': default and setups a MS-DOS partition table117 # 'gpt': setups a GPT partition table118 #119 # Note: At this time only 'mbr' and 'gpt' partition tables120 # are allowed. It is anticipated in the future that
(continues on next page)
48 Chapter 1. Getting help
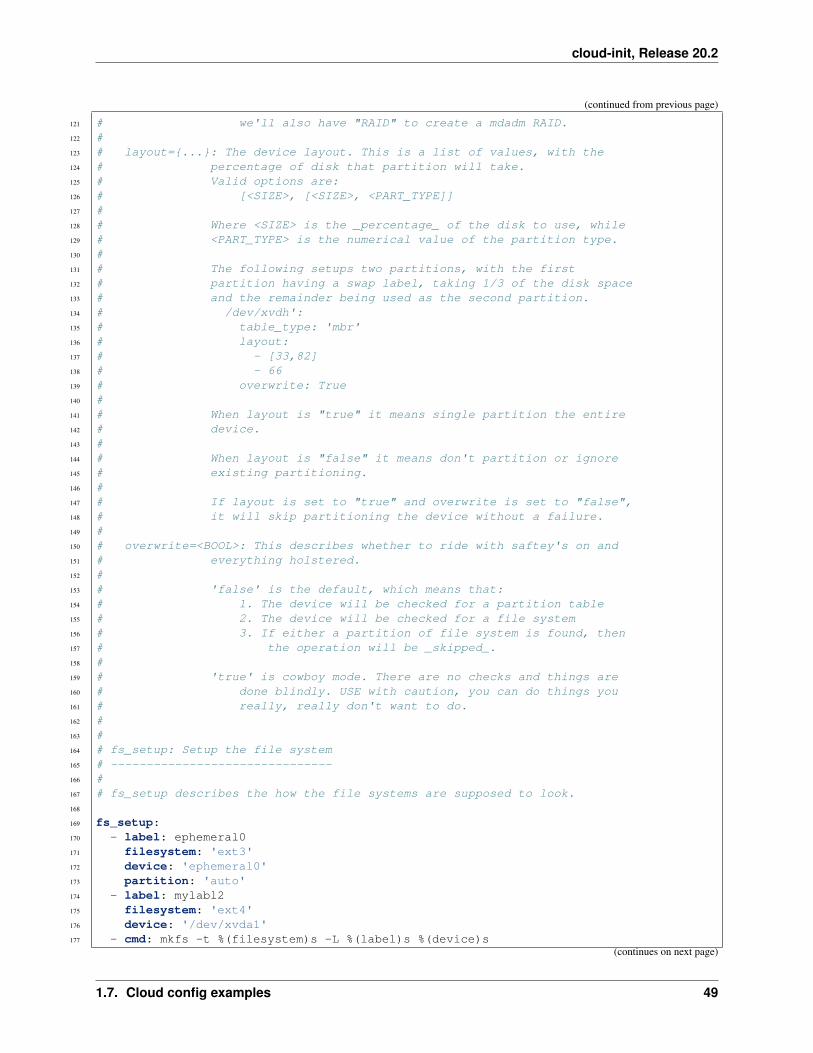
cloud-init, Release 20.2
(continued from previous page)
121 # we'll also have "RAID" to create a mdadm RAID.122 #123 # layout={...}: The device layout. This is a list of values, with the124 # percentage of disk that partition will take.125 # Valid options are:126 # [<SIZE>, [<SIZE>, <PART_TYPE]]127 #128 # Where <SIZE> is the _percentage_ of the disk to use, while129 # <PART_TYPE> is the numerical value of the partition type.130 #131 # The following setups two partitions, with the first132 # partition having a swap label, taking 1/3 of the disk space133 # and the remainder being used as the second partition.134 # /dev/xvdh':135 # table_type: 'mbr'136 # layout:137 # - [33,82]138 # - 66139 # overwrite: True140 #141 # When layout is "true" it means single partition the entire142 # device.143 #144 # When layout is "false" it means don't partition or ignore145 # existing partitioning.146 #147 # If layout is set to "true" and overwrite is set to "false",148 # it will skip partitioning the device without a failure.149 #150 # overwrite=<BOOL>: This describes whether to ride with saftey's on and151 # everything holstered.152 #153 # 'false' is the default, which means that:154 # 1. The device will be checked for a partition table155 # 2. The device will be checked for a file system156 # 3. If either a partition of file system is found, then157 # the operation will be _skipped_.158 #159 # 'true' is cowboy mode. There are no checks and things are160 # done blindly. USE with caution, you can do things you161 # really, really don't want to do.162 #163 #164 # fs_setup: Setup the file system165 # -------------------------------166 #167 # fs_setup describes the how the file systems are supposed to look.168
169 fs_setup:170 - label: ephemeral0171 filesystem: 'ext3'172 device: 'ephemeral0'173 partition: 'auto'174 - label: mylabl2175 filesystem: 'ext4'176 device: '/dev/xvda1'177 - cmd: mkfs -t %(filesystem)s -L %(label)s %(device)s
(continues on next page)
1.7. Cloud config examples 49

cloud-init, Release 20.2
(continued from previous page)
178 label: mylabl3179 filesystem: 'btrfs'180 device: '/dev/xvdh'181
182 # The general format is:183 # fs_setup:184 # - label: <LABEL>185 # filesystem: <FS_TYPE>186 # device: <DEVICE>187 # partition: <PART_VALUE>188 # overwrite: <OVERWRITE>189 # replace_fs: <FS_TYPE>190 #191 # Where:192 # <LABEL>: The file system label to be used. If set to None, no label is193 # used.194 #195 # <FS_TYPE>: The file system type. It is assumed that the there196 # will be a "mkfs.<FS_TYPE>" that behaves likes "mkfs". On a standard197 # Ubuntu Cloud Image, this means that you have the option of ext{2,3,4},198 # and vfat by default.199 #200 # <DEVICE>: The device name. Special names of 'ephemeralX' or 'swap'201 # are allowed and the actual device is acquired from the cloud datasource.202 # When using 'ephemeralX' (i.e. ephemeral0), make sure to leave the203 # label as 'ephemeralX' otherwise there may be issues with the mounting204 # of the ephemeral storage layer.205 #206 # If you define the device as 'ephemeralX.Y' then Y will be interpetted207 # as a partition value. However, ephermalX.0 is the _same_ as ephemeralX.208 #209 # <PART_VALUE>:210 # Partition definitions are overwriten if you use the '<DEVICE>.Y' notation.211 #212 # The valid options are:213 # "auto|any": tell cloud-init not to care whether there is a partition214 # or not. Auto will use the first partition that does not contain a215 # file system already. In the absence of a partition table, it will216 # put it directly on the disk.217 #218 # "auto": If a file system that matches the specification in terms of219 # label, type and device, then cloud-init will skip the creation of220 # the file system.221 #222 # "any": If a file system that matches the file system type and device,223 # then cloud-init will skip the creation of the file system.224 #225 # Devices are selected based on first-detected, starting with partitions226 # and then the raw disk. Consider the following:227 # NAME FSTYPE LABEL228 # xvdb229 # |-xvdb1 ext4230 # |-xvdb2231 # |-xvdb3 btrfs test232 # \-xvdb4 ext4 test233 #234 # If you ask for 'auto', label of 'test, and file system of 'ext4'
(continues on next page)
50 Chapter 1. Getting help

cloud-init, Release 20.2
(continued from previous page)
235 # then cloud-init will select the 2nd partition, even though there236 # is a partition match at the 4th partition.237 #238 # If you ask for 'any' and a label of 'test', then cloud-init will239 # select the 1st partition.240 #241 # If you ask for 'auto' and don't define label, then cloud-init will242 # select the 1st partition.243 #244 # In general, if you have a specific partition configuration in mind,245 # you should define either the device or the partition number. 'auto'246 # and 'any' are specifically intended for formating ephemeral storage or247 # for simple schemes.248 #249 # "none": Put the file system directly on the device.250 #251 # <NUM>: where NUM is the actual partition number.252 #253 # <OVERWRITE>: Defines whether or not to overwrite any existing254 # filesystem.255 #256 # "true": Indiscriminately destroy any pre-existing file system. Use at257 # your own peril.258 #259 # "false": If an existing file system exists, skip the creation.260 #261 # <REPLACE_FS>: This is a special directive, used for Microsoft Azure that262 # instructs cloud-init to replace a file system of <FS_TYPE>. NOTE:263 # unless you define a label, this requires the use of the 'any' partition264 # directive.265 #266 # Behavior Caveat: The default behavior is to _check_ if the file system exists.267 # If a file system matches the specification, then the operation is a no-op.
1.7.23 Grow partitions
1 #cloud-config2 #3 # growpart entry is a dict, if it is not present at all4 # in config, then the default is used ({'mode': 'auto', 'devices': ['/']})5 #6 # mode:7 # values:8 # * auto: use any option possible (any available)9 # if none are available, do not warn, but debug.
10 # * growpart: use growpart to grow partitions11 # if growpart is not available, this is an error.12 # * off, false13 #14 # devices:15 # a list of things to resize.16 # items can be filesystem paths or devices (in /dev)17 # examples:18 # devices: [/, /dev/vdb1]19 #
(continues on next page)
1.7. Cloud config examples 51

cloud-init, Release 20.2
(continued from previous page)
20 # ignore_growroot_disabled:21 # a boolean, default is false.22 # if the file /etc/growroot-disabled exists, then cloud-init will not grow23 # the root partition. This is to allow a single file to disable both24 # cloud-initramfs-growroot and cloud-init's growroot support.25 #26 # true indicates that /etc/growroot-disabled should be ignored27 #28 growpart:29 mode: auto30 devices: ['/']31 ignore_growroot_disabled: false
1.8 Modules
Table of Contents
• Modules
– Apt Configure
– Apt Pipelining
– Bootcmd
– Byobu
– CA Certs
– Chef
– Debug
– Disable EC2 Metadata
– Disk Setup
– Emit Upstart
– Fan
– Final Message
– Foo
– Growpart
– Grub Dpkg
– Keys to Console
– Landscape
– Locale
– LXD
– Mcollective
– Migrator
52 Chapter 1. Getting help

cloud-init, Release 20.2
– Mounts
– NTP
– Package Update Upgrade Install
– Phone Home
– Power State Change
– Puppet
– Resizefs
– Resolv Conf
– RedHat Subscription
– Rightscale Userdata
– Rsyslog
– Runcmd
– Salt Minion
– Scripts Per Boot
– Scripts Per Instance
– Scripts Per Once
– Scripts User
– Scripts Vendor
– Seed Random
– Set Hostname
– Set Passwords
– Snap
– Spacewalk
– SSH
* Authorized Keys
* Host Keys
– SSH Authkey Fingerprints
– SSH Import Id
– Timezone
– Ubuntu Advantage
– Ubuntu Drivers
– Update Etc Hosts
– Update Hostname
– Users and Groups
– Write Files
1.8. Modules 53
cloud-init, Release 20.2
– Yum Add Repo
1.8.1 Apt Configure
Summary: Configure apt for the user
This module handles both configuration of apt options and adding source lists. There are configuration options suchas apt_get_wrapper and apt_get_command that control how cloud-init invokes apt-get. These configurationoptions are handled on a per-distro basis, so consult documentation for cloud-init’s distro support for instructions onusing these config options.
Note: To ensure that apt configuration is valid yaml, any strings containing special characters, especially : should bequoted.
Note: For more information about apt configuration, see the Additional apt configuration example.
Internal name: cc_apt_configure
Module frequency: once-per-instance
Supported distros: ubuntu, debian
Config schema: apt: (object)
preserve_sources_list: (boolean) By default, cloud-init will generate a new sources list in /etc/apt/sources.list.d based on any changes specified in cloud config. To disable this behaviorand preserve the sources list from the pristine image, set preserve_sources_list to true.
The preserve_sources_list option overrides all other config keys that would altersources.list or sources.list.d, except for additional sources to be added to sources.list.d.
disable_suites: (array of string) Entries in the sources list can be disabled usingdisable_suites, which takes a list of suites to be disabled. If the string $RELEASE is present ina suite in the disable_suites list, it will be replaced with the release name. If a suite specified indisable_suites is not present in sources.list it will be ignored. For convenience, severalaliases are provided for disable_suites:
• updates => $RELEASE-updates
• backports => $RELEASE-backports
• security => $RELEASE-security
• proposed => $RELEASE-proposed
• release => $RELEASE.
When a suite is disabled using disable_suites, its entry in sources.list is not deleted; itis just commented out.
primary: (array) The primary and security archive mirrors can be specified using the primary andsecurity keys, respectively. Both the primary and security keys take a list of configs, allow-ing mirrors to be specified on a per-architecture basis. Each config is a dictionary which must have anentry for arches, specifying which architectures that config entry is for. The keyword defaultapplies to any architecture not explicitly listed. The mirror url can be specified with the uri key, or
54 Chapter 1. Getting help

cloud-init, Release 20.2
a list of mirrors to check can be provided in order, with the first mirror that can be resolved beingselected. This allows the same configuration to be used in different environment, with different hostsused for a local apt mirror. If no mirror is provided by uri or search, search_dns may be usedto search for dns names in the format <distro>-mirror in each of the following:
• fqdn of this host per cloud metadata,
• localdomain,
• domains listed in /etc/resolv.conf.
If there is a dns entry for <distro>-mirror, then it is assumed that there is a distro mir-ror at http://<distro>-mirror.<domain>/<distro>. If the primary key is de-fined, but not the security key, then then configuration for primary is also used forsecurity. If search_dns is used for the security key, the search pattern will be<distro>-security-mirror.
If no mirrors are specified, or all lookups fail, then default mirrors defined in the datasource are used.If none are present in the datasource either the following defaults are used:
• primary => http://archive.ubuntu.com/ubuntu.
• security => http://security.ubuntu.com/ubuntu
security: (array) Please refer to the primary config documentation
add_apt_repo_match: (string) All source entries in apt-sources that match regex inadd_apt_repo_match will be added to the system using add-apt-repository. Ifadd_apt_repo_match is not specified, it defaults to ^[\w-]+:\w
debconf_selections: (object of string) Debconf additional configurations can be specified as adictionary under the debconf_selections config key, with each key in the dict represent-ing a different set of configurations. The value of each key must be a string containing allthe debconf configurations that must be applied. We will bundle all of the values and passthem to debconf-set-selections. Therefore, each value line must be a valid entry fordebconf-set-selections, meaning that they must possess for distinct fields:
pkgname question type answer
Where:
• pkgname is the name of the package.
• question the name of the questions.
• type is the type of question.
• answer is the value used to ansert the question.
For example: ippackage ippackage/ip string 127.0.01
sources_list: (string) Specifies a custom template for rendering sources.list . If nosources_list template is given, cloud-init will use sane default. Within this template, the fol-lowing strings will be replaced with the appropriate values:
• $MIRROR
• $RELEASE
• $PRIMARY
• $SECURITY
conf: (string) Specify configuration for apt, such as proxy configuration. This configuration is spec-ified as a string. For multiline apt configuration, make sure to follow yaml syntax.
1.8. Modules 55

cloud-init, Release 20.2
https_proxy: (string) More convenient way to specify https apt proxy. https proxy url is specified inthe format https://[[user][:pass]@]host[:port]/.
http_proxy: (string) More convenient way to specify http apt proxy. http proxy url is specified inthe format http://[[user][:pass]@]host[:port]/.
proxy: (string) Alias for defining a http apt proxy.
ftp_proxy: (string) More convenient way to specify ftp apt proxy. ftp proxy url is specified in theformat ftp://[[user][:pass]@]host[:port]/.
sources: (object of string) Source list entries can be specified as a dictionary under the sourcesconfig key, with each key in the dict representing a different source file. The key of each sourceentry will be used as an id that can be referenced in other config entries, as well as the filename forthe source’s configuration under /etc/apt/sources.list.d. If the name does not end with .list, it will be appended. If there is no configuration for a key in sources, no file will be written,but the key may still be referred to as an id in other sources entries.
Each entry under sources is a dictionary which may contain any of the following optional keys:
• source: a sources.list entry (some variable replacements apply).
• keyid: a key to import via shortid or fingerprint.
• key: a raw PGP key.
• keyserver: alternate keyserver to pull keyid key from.
The source key supports variable replacements for the following strings:
• $MIRROR
• $PRIMARY
• $SECURITY
• $RELEASE
Examples:
apt:preserve_sources_list: falsedisable_suites:- $RELEASE-updates- backports- $RELEASE- mysuite
primary:- arches:
- amd64- i386- default
uri: 'http://us.archive.ubuntu.com/ubuntu'search:
- 'http://cool.but-sometimes-unreachable.com/ubuntu'- 'http://us.archive.ubuntu.com/ubuntu'
search_dns: <true/false>- arches:
- s390x- arm64
uri: 'http://archive-to-use-for-arm64.example.com/ubuntu'security:- arches:
(continues on next page)
56 Chapter 1. Getting help

cloud-init, Release 20.2
(continued from previous page)
- defaultsearch_dns: true
sources_list: |deb $MIRROR $RELEASE main restricteddeb-src $MIRROR $RELEASE main restricteddeb $PRIMARY $RELEASE universe restricteddeb $SECURITY $RELEASE-security multiverse
debconf_selections:set1: the-package the-package/some-flag boolean true
conf: |APT {
Get {Assume-Yes 'true';Fix-Broken 'true';
}}
proxy: 'http://[[user][:pass]@]host[:port]/'http_proxy: 'http://[[user][:pass]@]host[:port]/'ftp_proxy: 'ftp://[[user][:pass]@]host[:port]/'https_proxy: 'https://[[user][:pass]@]host[:port]/'sources:
source1:keyid: 'keyid'keyserver: 'keyserverurl'source: 'deb http://<url>/ xenial main'
source2:source: 'ppa:<ppa-name>'
source3:source: 'deb $MIRROR $RELEASE multiverse'key: |
------BEGIN PGP PUBLIC KEY BLOCK-------<key data>------END PGP PUBLIC KEY BLOCK-------
1.8.2 Apt Pipelining
Summary: configure apt pipelining
This module configures apt’s Acquite::http::Pipeline-Depth option, whcih controls how apt handlesHTTP pipelining. It may be useful for pipelining to be disabled, because some web servers, such as S3 do notpipeline properly (LP: #948461). The apt_pipelining config key may be set to false to disable pipeliningaltogether. This is the default behavior. If it is set to none, unchanged, or os, no change will be made to aptconfiguration and the default setting for the distro will be used. The pipeline depth can also be manually specified bysetting apt_pipelining to a number. However, this is not recommended.
Internal name: cc_apt_pipelining
Module frequency: per instance
Supported distros: ubuntu, debian
Config keys:: apt_pipelining: <false/none/unchanged/os/number>
1.8.3 Bootcmd
Summary: Run arbitrary commands early in the boot process
1.8. Modules 57

cloud-init, Release 20.2
This module runs arbitrary commands very early in the boot process, only slightly after a boothook would run. Thisis very similar to a boothook, but more user friendly. The environment variable INSTANCE_ID will be set to thecurrent instance id for all run commands. Commands can be specified either as lists or strings. For invocation details,see runcmd.
Note: bootcmd should only be used for things that could not be done later in the boot process.
Note: when writing files, do not use /tmp dir as it races with systemd-tmpfiles-clean LP: #1707222. Use /run/somedirinstead.
Internal name: cc_bootcmd
Module frequency: always
Supported distros: all
Config schema: bootcmd: (array of (array of string)/(string))
Examples:
bootcmd:- echo 192.168.1.130 us.archive.ubuntu.com > /etc/hosts- [ cloud-init-per, once, mymkfs, mkfs, /dev/vdb ]
1.8.4 Byobu
Summary: enable/disable byobu system wide and for default user
This module controls whether byobu is enabled or disabled system wide and for the default system user. If byobu is tobe enabled, this module will ensure it is installed. Likewise, if it is to be disabled, it will be removed if installed.
Valid configuration options for this module are:
• enable-system: enable byobu system wide
• enable-user: enable byobu for the default user
• disable-system: disable byobu system wide
• disable-user: disable byobu for the default user
• enable: enable byobu both system wide and for default user
• disable: disable byobu for all users
• user: alias for enable-user
• system: alias for enable-system
Internal name: cc_byobu
Module frequency: per instance
Supported distros: ubuntu, debian
Config keys:
byobu_by_default: <user/system>
58 Chapter 1. Getting help
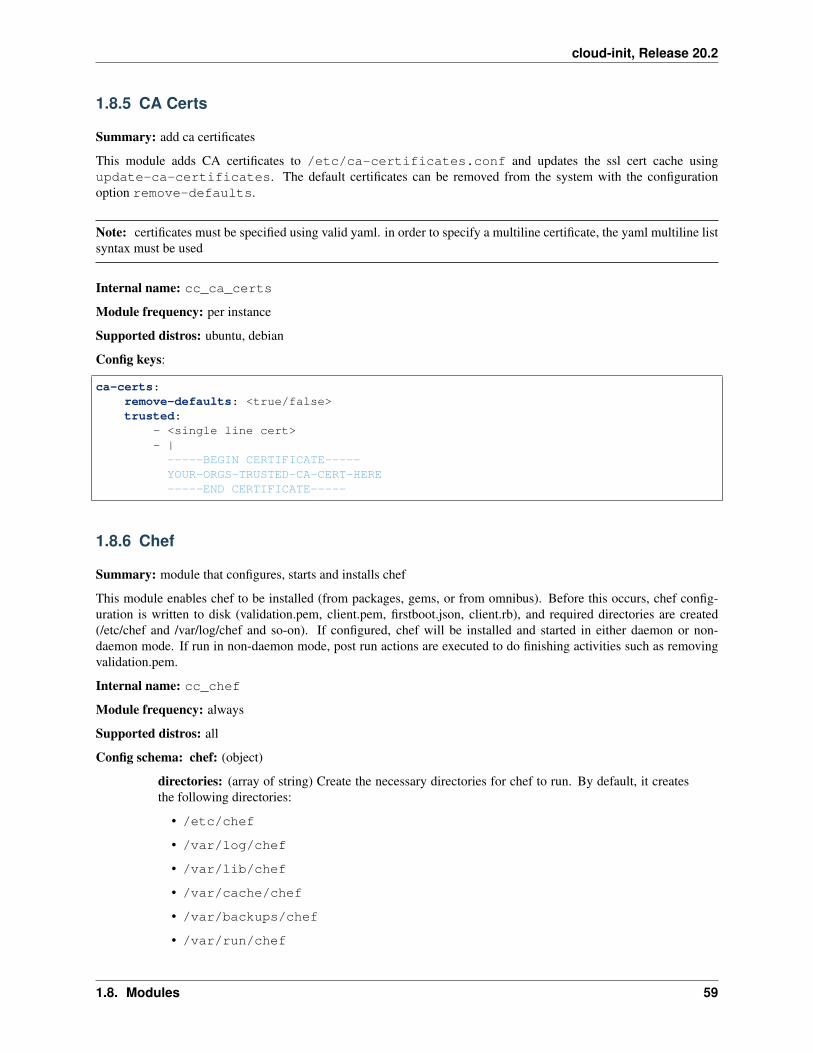
cloud-init, Release 20.2
1.8.5 CA Certs
Summary: add ca certificates
This module adds CA certificates to /etc/ca-certificates.conf and updates the ssl cert cache usingupdate-ca-certificates. The default certificates can be removed from the system with the configurationoption remove-defaults.
Note: certificates must be specified using valid yaml. in order to specify a multiline certificate, the yaml multiline listsyntax must be used
Internal name: cc_ca_certs
Module frequency: per instance
Supported distros: ubuntu, debian
Config keys:
ca-certs:remove-defaults: <true/false>trusted:
- <single line cert>- |-----BEGIN CERTIFICATE-----YOUR-ORGS-TRUSTED-CA-CERT-HERE-----END CERTIFICATE-----
1.8.6 Chef
Summary: module that configures, starts and installs chef
This module enables chef to be installed (from packages, gems, or from omnibus). Before this occurs, chef config-uration is written to disk (validation.pem, client.pem, firstboot.json, client.rb), and required directories are created(/etc/chef and /var/log/chef and so-on). If configured, chef will be installed and started in either daemon or non-daemon mode. If run in non-daemon mode, post run actions are executed to do finishing activities such as removingvalidation.pem.
Internal name: cc_chef
Module frequency: always
Supported distros: all
Config schema: chef: (object)
directories: (array of string) Create the necessary directories for chef to run. By default, it createsthe following directories:
• /etc/chef
• /var/log/chef
• /var/lib/chef
• /var/cache/chef
• /var/backups/chef
• /var/run/chef
1.8. Modules 59

cloud-init, Release 20.2
validation_cert: (string) Optional string to be written to file validation_key. Special value systemmeans set use existing file.
validation_key: (string) Optional path for validation_cert. default to /etc/chef/validation.pem.
firstboot_path: (string) Path to write run_list and initial_attributes keys that should also be presentin this configuration, defaults to /etc/chef/firstboot.json.
exec: (boolean) define if we should run or not run chef (defaults to false, unless a gem installed isrequested where this will then default to true).
client_key: (string) Optional path for client_cert. default to /etc/chef/client.pem.
encrypted_data_bag_secret: (string) Specifies the location of the secret key used by chef to encryptdata items. By default, this path is set to None, meaning that chef will have to look at the path /etc/chef/encrypted_data_bag_secret for it.
environment: (string) Specifies which environment chef will use. By default, it will use the_default configuration.
file_backup_path: (string) Specifies the location in which backup files are stored. By default, it usesthe /var/backups/chef location.
file_cache_path: (string) Specifies the location in which chef cache files will be saved. By default,it uses the /var/cache/chef location.
json_attribs: (string) Specifies the location in which some chef json data is stored. By default, ituses the /etc/chef/firstboot.json location.
log_level: (string) Defines the level of logging to be stored in the log file. By default this value is setto :info.
log_location: (string) Specifies the location of the chef lof file. By default, the location is specifiedat /var/log/chef/client.log.
node_name: (string) The name of the node to run. By default, we will use th instance id as the nodename.
omnibus_url: (string) Omnibus URL if chef should be installed through Omnibus. By default, ituses the https://www.chef.io/chef/install.sh.
omnibus_url_retries: (integer) The number of retries that will be attempted to reach the OmnibusURL
omnibus_version: (string) Optional version string to require for omnibus install.
pid_file: (string) The location in which a process identification number (pid) is saved. By default, itsaves in the /var/run/chef/client.pid location.
server_url: (string) The URL for the chef server
show_time: (boolean) Show time in chef logs
ssl_verify_mode: (string) Set the verify mode for HTTPS requests. We can have two possible valuesfor this parameter:
• :verify_none: No validation of SSL certificates.
• :verify_peer: Validate all SSL certificates.
By default, the parameter is set as :verify_none.
validation_name: (string) The name of the chef-validator key that Chef Infra Client uses to accessthe Chef Infra Server during the initial Chef Infra Client run.
60 Chapter 1. Getting help

cloud-init, Release 20.2
force_install: (boolean) If set to True, forces chef installation, even if it is already installed.
initial_attributes: (object of string) Specify a list of initial attributes used by the cookbooks.
install_type: (string) The type of installation for chef. It can be one of the following values:
• packages
• gems
• omnibus
run_list: (array of string) A run list for a first boot json.
chef_license: (string) string that indicates if user accepts or not license related to some of chefproducts
Examples:
chef:directories:- /etc/chef- /var/log/chef
validation_cert: systeminstall_type: omnibusinitial_attributes:apache:
prefork:maxclients: 100
keepalive: offrun_list:- recipe[apache2]- role[db]
encrypted_data_bag_secret: /etc/chef/encrypted_data_bag_secretenvironment: _defaultlog_level: :autoomnibus_url_retries: 2server_url: https://chef.yourorg.com:4000ssl_verify_mode: :verify_peervalidation_name: yourorg-validator
1.8.7 Debug
Summary: helper to debug cloud-init internal datastructures.
This module will enable for outputting various internal information that cloud-init sources provide to either a file or tothe output console/log location that this cloud-init has been configured with when running.
Note: Log configurations are not output.
Internal name: cc_debug
Module frequency: per instance
Supported distros: all
Config keys:
1.8. Modules 61

cloud-init, Release 20.2
debug:verbose: true/false (defaulting to true)output: (location to write output, defaulting to console + log)
1.8.8 Disable EC2 Metadata
Summary: disable aws ec2 metadata
This module can disable the ec2 datasource by rejecting the route to 169.254.169.254, the usual route to thedatasource. This module is disabled by default.
Internal name: cc_disable_ec2_metadata
Module frequency: per always
Supported distros: all
Config keys:
disable_ec2_metadata: <true/false>
1.8.9 Disk Setup
Summary: configure partitions and filesystems
This module is able to configure simple partition tables and filesystems.
Note: for more detail about configuration options for disk setup, see the disk setup example
For convenience, aliases can be specified for disks using the device_aliases config key, which takes a dictionaryof alias: path mappings. There are automatic aliases for swap and ephemeral<X>, where swap will always referto the active swap partition and ephemeral<X> will refer to the block device of the ephemeral image.
Disk partitioning is done using the disk_setup directive. This config directive accepts a dictionary where eachkey is either a path to a block device or an alias specified in device_aliases, and each value is the configurationoptions for the device. The table_type option specifies the partition table type, either mbr or gpt. The layoutoption specifies how partitions on the device are to be arranged. If layout is set to true, a single partition usingall the space on the device will be created. If set to false, no partitions will be created. Partitions can be specifiedby providing a list to layout, where each entry in the list is either a size or a list containing a size and the numericalvalue for a partition type. The size for partitions is specified in percentage of disk space, not in bytes (e.g. a size of33 would take up 1/3 of the disk space). The overwrite option controls whether this module tries to be safe aboutwriting partition talbes or not. If overwrite: false is set, the device will be checked for a partition table andfor a file system and if either is found, the operation will be skipped. If overwrite: true is set, no checks willbe performed.
Note: Using overwrite: true is dangerous and can lead to data loss, so double check that the correct devicehas been specified if using this option.
File system configuration is done using the fs_setup directive. This config directive accepts a list of filesystemconfigs. The device to create the filesystem on may be specified either as a path or as an alias in the format <aliasname>.<y> where <y> denotes the partition number on the device. The partition can also be specified by settingpartition to the desired partition number. The partition option may also be set to auto, in which this modulewill search for the existance of a filesystem matching the label, type and device of the fs_setup entry and
62 Chapter 1. Getting help

cloud-init, Release 20.2
will skip creating the filesystem if one is found. The partition option may also be set to any, in which case anyfile system that matches type and device will cause this module to skip filesystem creation for the fs_setupentry, regardless of label matching or not. To write a filesystem directly to a device, use partition: none. Alabel can be specified for the filesystem using label, and the filesystem type can be specified using filesystem.
Note: If specifying device using the <device name>.<partition number> format, the value ofpartition will be overwritten.
Note: Using overwrite: true for filesystems is dangerous and can lead to data loss, so double check the entryin fs_setup.
Note: replace_fs is ignored unless partition is auto or any.
Internal name: cc_disk_setup
Module frequency: per instance
Supported distros: all
Config keys:
device_aliases:<alias name>: <device path>
disk_setup:<alias name/path>:
table_type: <'mbr'/'gpt'>layout:
- [33,82]- 66
overwrite: <true/false>fs_setup:
- label: <label>filesystem: <filesystem type>device: <device>partition: <"auto"/"any"/"none"/<partition number>>overwrite: <true/false>replace_fs: <filesystem type>
1.8.10 Emit Upstart
Summary: emit upstart configuration
Emit upstart configuration for cloud-init modules on upstart based systems. No user configuration should be required.
Internal name: cc_emit_upstart
Module frequency: per always
Supported distros: ubuntu, debian
1.8.11 Fan
Summary: configure ubuntu fan networking
1.8. Modules 63

cloud-init, Release 20.2
This module installs, configures and starts the ubuntu fan network system. For more information about Ubuntu Fan,see: https://wiki.ubuntu.com/FanNetworking.
If cloud-init sees a fan entry in cloud-config it will:
• write config_path with the contents of the config key
• install the package ubuntu-fan if it is not installed
• ensure the service is started (or restarted if was previously running)
Internal name: cc_fan
Module frequency: per instance
Supported distros: ubuntu
Config keys:
fan:config: |
# fan 24010.0.0.0/8 eth0/16 dhcp10.0.0.0/8 eth1/16 dhcp off# fan 241241.0.0.0/8 eth0/16 dhcp
config_path: /etc/network/fan
1.8.12 Final Message
Summary: output final message when cloud-init has finished
This module configures the final message that cloud-init writes. The message is specified as a jinja template with thefollowing variables set:
• version: cloud-init version
• timestamp: time at cloud-init finish
• datasource: cloud-init data source
• uptime: system uptime
Internal name: cc_final_message
Module frequency: per always
Supported distros: all
Config keys:
final_message: <message>
1.8.13 Foo
Summary: example module
Example to show module structure. Does not do anything.
Internal name: cc_foo
Module frequency: per instance
64 Chapter 1. Getting help
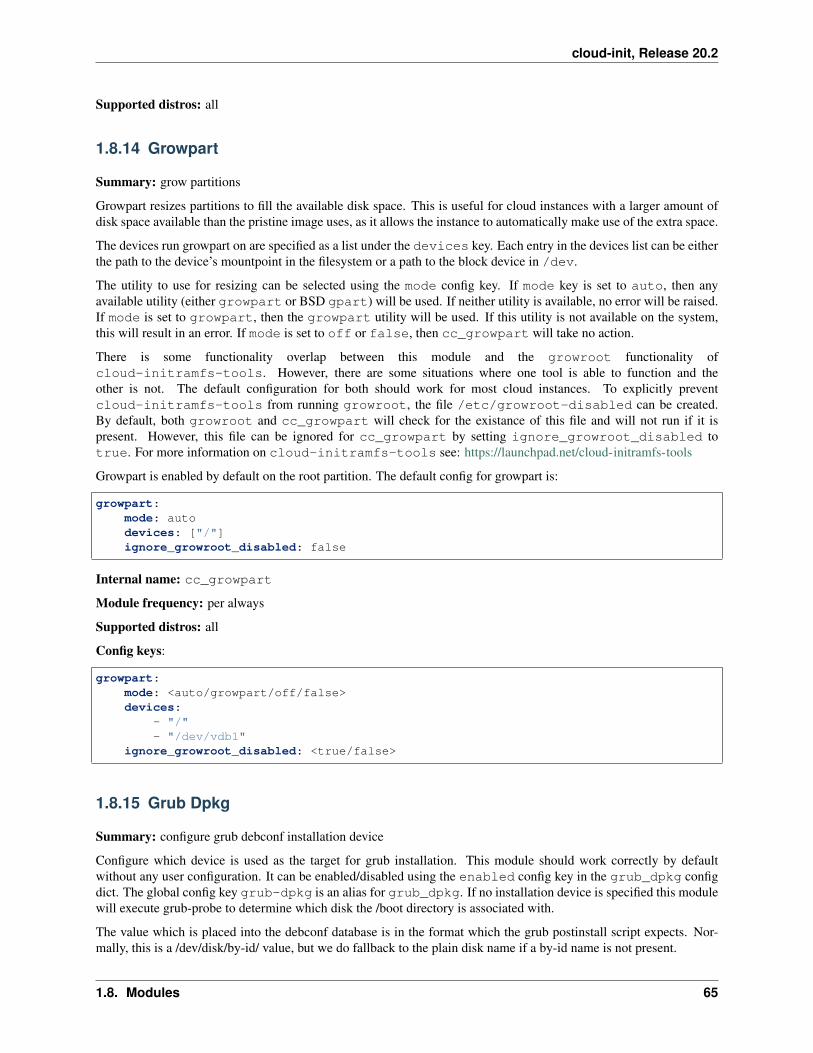
cloud-init, Release 20.2
Supported distros: all
1.8.14 Growpart
Summary: grow partitions
Growpart resizes partitions to fill the available disk space. This is useful for cloud instances with a larger amount ofdisk space available than the pristine image uses, as it allows the instance to automatically make use of the extra space.
The devices run growpart on are specified as a list under the devices key. Each entry in the devices list can be eitherthe path to the device’s mountpoint in the filesystem or a path to the block device in /dev.
The utility to use for resizing can be selected using the mode config key. If mode key is set to auto, then anyavailable utility (either growpart or BSD gpart) will be used. If neither utility is available, no error will be raised.If mode is set to growpart, then the growpart utility will be used. If this utility is not available on the system,this will result in an error. If mode is set to off or false, then cc_growpart will take no action.
There is some functionality overlap between this module and the growroot functionality ofcloud-initramfs-tools. However, there are some situations where one tool is able to function and theother is not. The default configuration for both should work for most cloud instances. To explicitly preventcloud-initramfs-tools from running growroot, the file /etc/growroot-disabled can be created.By default, both growroot and cc_growpart will check for the existance of this file and will not run if it ispresent. However, this file can be ignored for cc_growpart by setting ignore_growroot_disabled totrue. For more information on cloud-initramfs-tools see: https://launchpad.net/cloud-initramfs-tools
Growpart is enabled by default on the root partition. The default config for growpart is:
growpart:mode: autodevices: ["/"]ignore_growroot_disabled: false
Internal name: cc_growpart
Module frequency: per always
Supported distros: all
Config keys:
growpart:mode: <auto/growpart/off/false>devices:
- "/"- "/dev/vdb1"
ignore_growroot_disabled: <true/false>
1.8.15 Grub Dpkg
Summary: configure grub debconf installation device
Configure which device is used as the target for grub installation. This module should work correctly by defaultwithout any user configuration. It can be enabled/disabled using the enabled config key in the grub_dpkg configdict. The global config key grub-dpkg is an alias for grub_dpkg. If no installation device is specified this modulewill execute grub-probe to determine which disk the /boot directory is associated with.
The value which is placed into the debconf database is in the format which the grub postinstall script expects. Nor-mally, this is a /dev/disk/by-id/ value, but we do fallback to the plain disk name if a by-id name is not present.
1.8. Modules 65
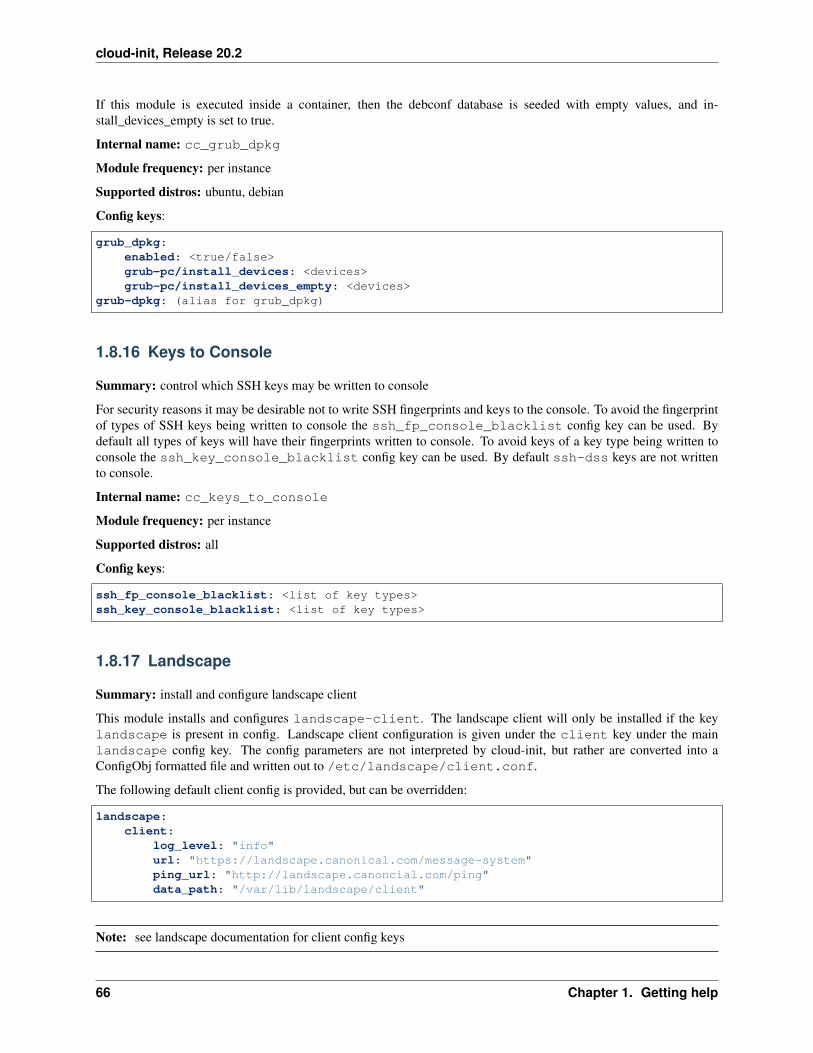
cloud-init, Release 20.2
If this module is executed inside a container, then the debconf database is seeded with empty values, and in-stall_devices_empty is set to true.
Internal name: cc_grub_dpkg
Module frequency: per instance
Supported distros: ubuntu, debian
Config keys:
grub_dpkg:enabled: <true/false>grub-pc/install_devices: <devices>grub-pc/install_devices_empty: <devices>
grub-dpkg: (alias for grub_dpkg)
1.8.16 Keys to Console
Summary: control which SSH keys may be written to console
For security reasons it may be desirable not to write SSH fingerprints and keys to the console. To avoid the fingerprintof types of SSH keys being written to console the ssh_fp_console_blacklist config key can be used. Bydefault all types of keys will have their fingerprints written to console. To avoid keys of a key type being written toconsole the ssh_key_console_blacklist config key can be used. By default ssh-dss keys are not writtento console.
Internal name: cc_keys_to_console
Module frequency: per instance
Supported distros: all
Config keys:
ssh_fp_console_blacklist: <list of key types>ssh_key_console_blacklist: <list of key types>
1.8.17 Landscape
Summary: install and configure landscape client
This module installs and configures landscape-client. The landscape client will only be installed if the keylandscape is present in config. Landscape client configuration is given under the client key under the mainlandscape config key. The config parameters are not interpreted by cloud-init, but rather are converted into aConfigObj formatted file and written out to /etc/landscape/client.conf.
The following default client config is provided, but can be overridden:
landscape:client:
log_level: "info"url: "https://landscape.canonical.com/message-system"ping_url: "http://landscape.canoncial.com/ping"data_path: "/var/lib/landscape/client"
Note: see landscape documentation for client config keys
66 Chapter 1. Getting help

cloud-init, Release 20.2
Note: if tags is defined, its contents should be a string delimited with , rather than a list
Internal name: cc_landscape
Module frequency: per instance
Supported distros: ubuntu
Config keys:
landscape:client:
url: "https://landscape.canonical.com/message-system"ping_url: "http://landscape.canonical.com/ping"data_path: "/var/lib/landscape/client"http_proxy: "http://my.proxy.com/foobar"https_proxy: "https://my.proxy.com/foobar"tags: "server,cloud"computer_title: "footitle"registration_key: "fookey"account_name: "fooaccount"
1.8.18 Locale
Summary: Set system locale
Configure the system locale and apply it system wide. By default use the locale specified by the datasource.
Internal name: cc_locale
Module frequency: once-per-instance
Supported distros: all
Config schema: locale: (string) The locale to set as the system’s locale (e.g. ar_PS)
locale_configfile: (string) The file in which to write the locale configuration (defaults to the distro’s defaultlocation)
Examples:
# Set the locale to ar_AElocale: ar_AE
# --- Example2 ---# Set the locale to fr_CA in /etc/alternate_path/localelocale: fr_CAlocale_configfile: /etc/alternate_path/locale
1.8.19 LXD
Summary: configure lxd with lxd init and optionally lxd-bridge
This module configures lxd with user specified options using lxd init. If lxd is not present on the system but lxdconfiguration is provided, then lxd will be installed. If the selected storage backend is zfs, then zfs will be installed ifmissing. If network bridge configuration is provided, then lxd-bridge will be configured accordingly.
Internal name: cc_lxd
1.8. Modules 67
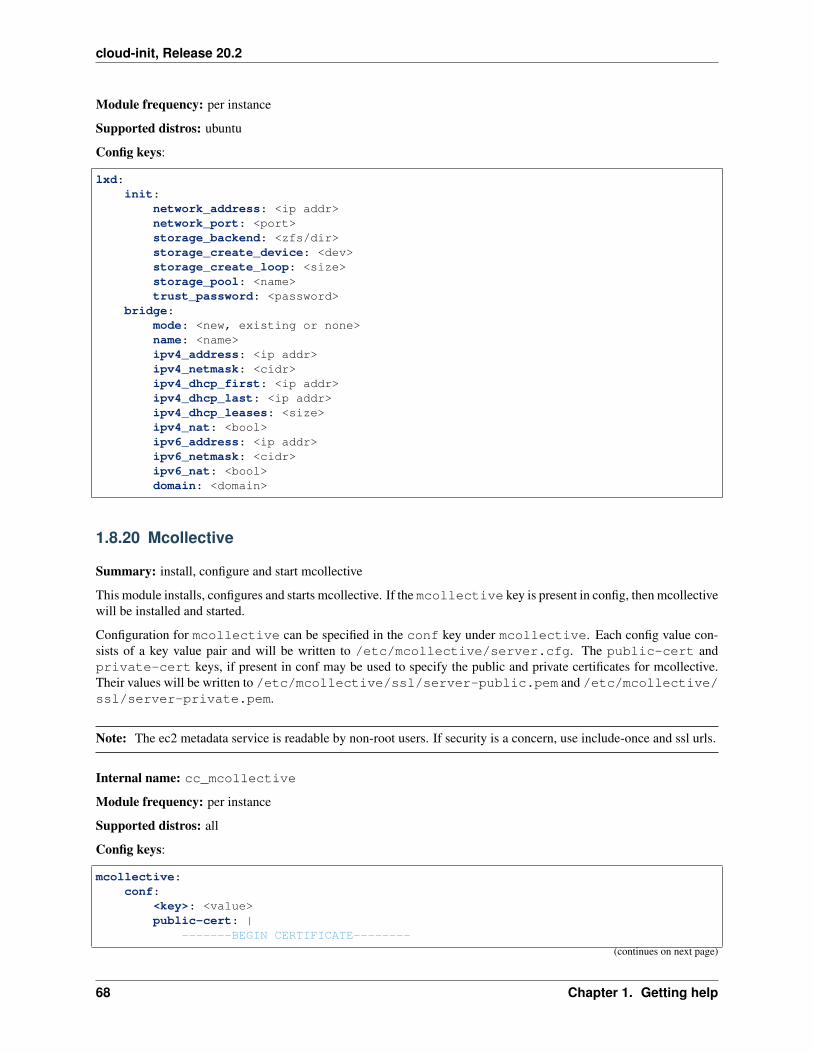
cloud-init, Release 20.2
Module frequency: per instance
Supported distros: ubuntu
Config keys:
lxd:init:
network_address: <ip addr>network_port: <port>storage_backend: <zfs/dir>storage_create_device: <dev>storage_create_loop: <size>storage_pool: <name>trust_password: <password>
bridge:mode: <new, existing or none>name: <name>ipv4_address: <ip addr>ipv4_netmask: <cidr>ipv4_dhcp_first: <ip addr>ipv4_dhcp_last: <ip addr>ipv4_dhcp_leases: <size>ipv4_nat: <bool>ipv6_address: <ip addr>ipv6_netmask: <cidr>ipv6_nat: <bool>domain: <domain>
1.8.20 Mcollective
Summary: install, configure and start mcollective
This module installs, configures and starts mcollective. If the mcollective key is present in config, then mcollectivewill be installed and started.
Configuration for mcollective can be specified in the conf key under mcollective. Each config value con-sists of a key value pair and will be written to /etc/mcollective/server.cfg. The public-cert andprivate-cert keys, if present in conf may be used to specify the public and private certificates for mcollective.Their values will be written to /etc/mcollective/ssl/server-public.pem and /etc/mcollective/ssl/server-private.pem.
Note: The ec2 metadata service is readable by non-root users. If security is a concern, use include-once and ssl urls.
Internal name: cc_mcollective
Module frequency: per instance
Supported distros: all
Config keys:
mcollective:conf:
<key>: <value>public-cert: |
-------BEGIN CERTIFICATE--------
(continues on next page)
68 Chapter 1. Getting help

cloud-init, Release 20.2
(continued from previous page)
<cert data>-------END CERTIFICATE--------
private-cert: |-------BEGIN CERTIFICATE--------<cert data>-------END CERTIFICATE--------
1.8.21 Migrator
Summary: migrate old versions of cloud-init data to new
This module handles moving old versions of cloud-init data to newer ones. Currently, it only handles renaming cloud-init’s per-frequency semaphore files to canonicalized name and renaming legacy semaphore names to newer ones. Thismodule is enabled by default, but can be disabled by specifying migrate: false in config.
Internal name: cc_migrator
Module frequency: per always
Supported distros: all
Config keys:
migrate: <true/false>
1.8.22 Mounts
Summary: configure mount points and swap files
This module can add or remove mountpoints from /etc/fstab as well as configure swap. The mounts config keytakes a list of fstab entries to add. Each entry is specified as a list of [ fs_spec, fs_file, fs_vfstype,fs_mntops, fs-freq, fs_passno ]. For more information on these options, consult the manual for /etc/fstab. When specifying the fs_spec, if the device name starts with one of xvd, sd, hd, or vd, the leading /devmay be omitted.
In order to remove a previously listed mount, an entry can be added to the mounts list containing fs_spec for thedevice to be removed but no mountpoint (i.e. [ sda1 ] or [ sda1, null ]).
The mount_default_fields config key allows default options to be specified for the values in a mounts entrythat are not specified, aside from the fs_spec and the fs_file. If specified, this must be a list containing 6 values.It defaults to:
mount_default_fields: [none, none, "auto", "defaults,nobootwait", "0", "2"]
On a systemd booted system that default is the mostly equivalent:
mount_default_fields: [none, none, "auto","defaults,nofail,x-systemd.requires=cloud-init.service", "0", "2"]
Note that nobootwait is an upstart specific boot option that somewhat equates to the more standard nofail.
Swap files can be configured by setting the path to the swap file to create with filename, the size of the swap filewith size maximum size of the swap file if using an size: auto with maxsize. By default no swap file iscreated.
Internal name: cc_mounts
1.8. Modules 69

cloud-init, Release 20.2
Module frequency: per instance
Supported distros: all
Config keys:
mounts:- [ /dev/ephemeral0, /mnt, auto, "defaults,noexec" ]- [ sdc, /opt/data ]- [ xvdh, /opt/data, "auto", "defaults,nofail", "0", "0" ]
mount_default_fields: [None, None, "auto", "defaults,nofail", "0", "2"]swap:
filename: <file>size: <"auto"/size in bytes>maxsize: <size in bytes>
1.8.23 NTP
Summary: enable and configure ntp
Handle ntp configuration. If ntp is not installed on the system and ntp configuration is specified, ntp will be installed.If there is a default ntp config file in the image or one is present in the distro’s ntp package, it will be copied to /etc/ntp.conf.dist before any changes are made. A list of ntp pools and ntp servers can be provided under thentp config key. If no ntp servers or pools are provided, 4 pools will be used in the format {0-3}.{distro}.pool.ntp.org.
Internal name: cc_ntp
Module frequency: once-per-instance
Supported distros: centos, debian, fedora, opensuse, rhel, sles, ubuntu
Config schema: ntp: (object/null)
pools: (array of string) List of ntp pools. If both pools and servers are empty, 4 default pool serverswill be provided of the format {0-3}.{distro}.pool.ntp.org.
servers: (array of string) List of ntp servers. If both pools and servers are empty, 4 default poolservers will be provided with the format {0-3}.{distro}.pool.ntp.org.
ntp_client: (string) Name of an NTP client to use to configure system NTP. When unprovided or‘auto’ the default client preferred by the distribution will be used. The following built-in client namescan be used to override existing configuration defaults: chrony, ntp, ntpdate, systemd-timesyncd.
enabled: (boolean) Attempt to enable ntp clients if set to True. If set to False, ntp client will not beconfigured or installed
config: (object) Configuration settings or overrides for the ntp_client specified.
confpath: (string) The path to where the ntp_client configuration is written.
check_exe: (string) The executable name for the ntp_client. For example, ntp servicecheck_exe is ‘ntpd’ because it runs the ntpd binary.
packages: (array of string) List of packages needed to be installed for the selectedntp_client.
service_name: (string) The systemd or sysvinit service name used to start and stop thentp_client service.
70 Chapter 1. Getting help

cloud-init, Release 20.2
template: (string) Inline template allowing users to define their own ntp_client config-uration template. The value must start with ‘## template:jinja’ to enable use of templatingsupport.
Examples:
# Override ntp with chrony configuration on Ubuntuntp:
enabled: truentp_client: chrony # Uses cloud-init default chrony configuration
# --- Example2 ---# Provide a custom ntp client configurationntp:
enabled: truentp_client: myntpclientconfig:
confpath: /etc/myntpclient/myntpclient.confcheck_exe: myntpclientdpackages:
- myntpclientservice_name: myntpclienttemplate: |
## template:jinja# My NTP Client config{% if pools -%}# pools{% endif %}{% for pool in pools -%}pool {{pool}} iburst{% endfor %}{%- if servers %}# servers{% endif %}{% for server in servers -%}server {{server}} iburst{% endfor %}
pools: [0.int.pool.ntp.org, 1.int.pool.ntp.org, ntp.myorg.org]servers:- ntp.server.local- ntp.ubuntu.com- 192.168.23.2
1.8.24 Package Update Upgrade Install
Summary: update, upgrade, and install packages
This module allows packages to be updated, upgraded or installed during boot. If any packages are to be installed or anupgrade is to be performed then the package cache will be updated first. If a package installation or upgrade requiresa reboot, then a reboot can be performed if package_reboot_if_required is specified. A list of packages toinstall can be provided. Each entry in the list can be either a package name or a list with two entries, the first being thepackage name and the second being the specific package version to install.
Internal name: cc_package_update_upgrade_install
Module frequency: per instance
Supported distros: all
Config keys:
1.8. Modules 71
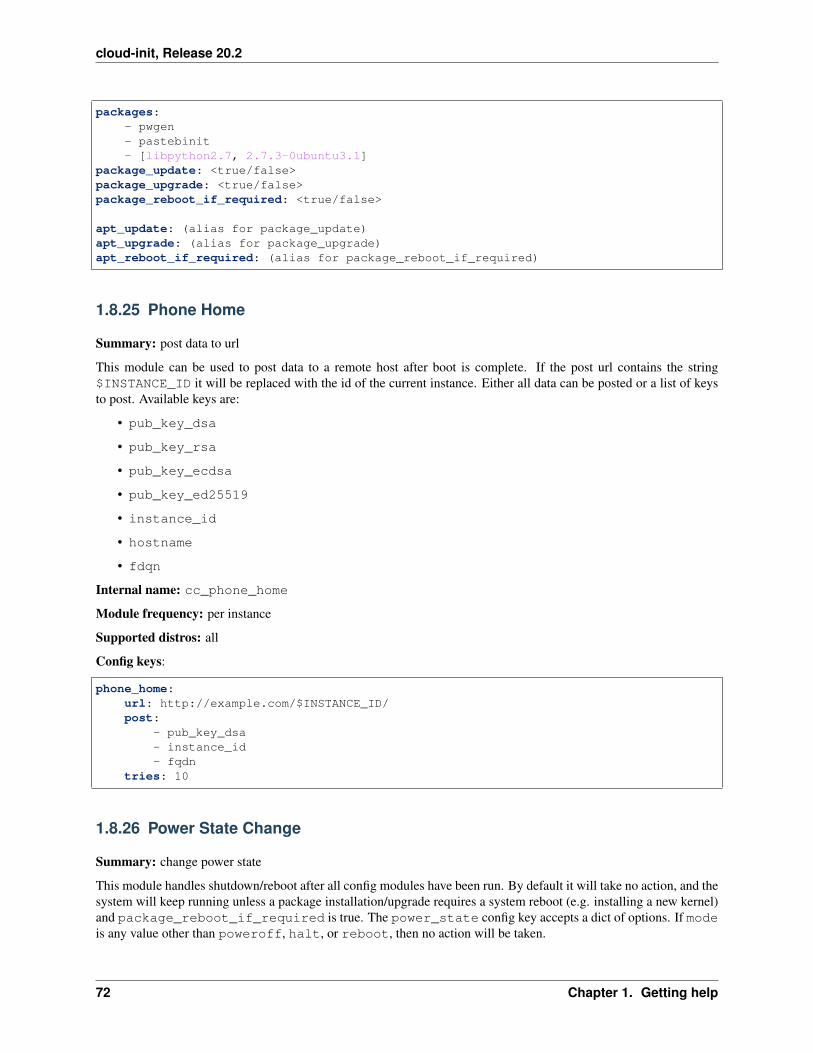
cloud-init, Release 20.2
packages:- pwgen- pastebinit- [libpython2.7, 2.7.3-0ubuntu3.1]
package_update: <true/false>package_upgrade: <true/false>package_reboot_if_required: <true/false>
apt_update: (alias for package_update)apt_upgrade: (alias for package_upgrade)apt_reboot_if_required: (alias for package_reboot_if_required)
1.8.25 Phone Home
Summary: post data to url
This module can be used to post data to a remote host after boot is complete. If the post url contains the string$INSTANCE_ID it will be replaced with the id of the current instance. Either all data can be posted or a list of keysto post. Available keys are:
• pub_key_dsa
• pub_key_rsa
• pub_key_ecdsa
• pub_key_ed25519
• instance_id
• hostname
• fdqn
Internal name: cc_phone_home
Module frequency: per instance
Supported distros: all
Config keys:
phone_home:url: http://example.com/$INSTANCE_ID/post:
- pub_key_dsa- instance_id- fqdn
tries: 10
1.8.26 Power State Change
Summary: change power state
This module handles shutdown/reboot after all config modules have been run. By default it will take no action, and thesystem will keep running unless a package installation/upgrade requires a system reboot (e.g. installing a new kernel)and package_reboot_if_required is true. The power_state config key accepts a dict of options. If modeis any value other than poweroff, halt, or reboot, then no action will be taken.
72 Chapter 1. Getting help

cloud-init, Release 20.2
The system can be shutdown before cloud-init has finished using the timeout option. The delay key specifies aduration to be added onto any shutdown command used. Therefore, if a 5 minute delay and a 120 second shutdownare specified, the maximum amount of time between cloud-init starting and the system shutting down is 7 minutes,and the minimum amount of time is 5 minutes. The delay key must have an argument in a form that the shutdownutility recognizes. The most common format is the form +5 for 5 minutes. See man shutdown for more options.
Optionally, a command can be run to determine whether or not the system should shut down. The command to be runshould be specified in the condition key. For command formatting, see the documentation for cc_runcmd. Thespecified shutdown behavior will only take place if the condition key is omitted or the command specified by thecondition key returns 0.
Internal name: cc_power_state_change
Module frequency: per instance
Supported distros: all
Config keys:
power_state:delay: <now/'+minutes'>mode: <poweroff/halt/reboot>message: <shutdown message>timeout: <seconds>condition: <true/false/command>
1.8.27 Puppet
Summary: install, configure and start puppet
This module handles puppet installation and configuration. If the puppet key does not exist in global configuration,no action will be taken. If a config entry for puppet is present, then by default the latest version of puppet will beinstalled. If install is set to false, puppet will not be installed. However, this will result in an error if puppetis not already present on the system. The version of puppet to be installed can be specified under version, anddefaults to none, which selects the latest version in the repos. If the puppet config key exists in the config archive,this module will attempt to start puppet even if no installation was performed.
The module also provides keys for configuring the new puppet 4 paths and installing the puppet packagefrom the puppetlabs repositories: https://docs.puppet.com/puppet/4.2/reference/whered_it_go.html The keys arepackage_name, conf_file, ssl_dir and csr_attributes_path. If unset, their values will default toones that work with puppet 3.x and with distributions that ship modified puppet 4.x that uses the old paths.
Puppet configuration can be specified under the conf key. The configuration is specified as a dictionary contain-ing high-level <section> keys and lists of <key>=<value> pairs within each section. Each section name and<key>=<value> pair is written directly to puppet.conf. As such, section names should be one of: main,master, agent or user and keys should be valid puppet configuration options. The certname key supportsstring substitutions for %i and %f, corresponding to the instance id and fqdn of the machine respectively. If ca_certis present, it will not be written to puppet.conf, but instead will be used as the puppermaster certificate. It shouldbe specified in pem format as a multi-line string (using the | yaml notation).
Additionally it’s possible to create a csr_attributes.yaml for CSR attributes and certificate extension requests. Seehttps://puppet.com/docs/puppet/latest/config_file_csr_attributes.html
Internal name: cc_puppet
Module frequency: per instance
Supported distros: all
Config keys:
1.8. Modules 73

cloud-init, Release 20.2
puppet:install: <true/false>version: <version>conf_file: '/etc/puppet/puppet.conf'ssl_dir: '/var/lib/puppet/ssl'csr_attributes_path: '/etc/puppet/csr_attributes.yaml'package_name: 'puppet'conf:
agent:server: "puppetmaster.example.org"certname: "%i.%f"ca_cert: |
-------BEGIN CERTIFICATE-------<cert data>-------END CERTIFICATE-------
csr_attributes:custom_attributes:
1.2.840.113549.1.9.7: 342thbjkt82094y0uthhor289jnqthpc2290extension_requests:
pp_uuid: ED803750-E3C7-44F5-BB08-41A04433FE2Epp_image_name: my_ami_imagepp_preshared_key: 342thbjkt82094y0uthhor289jnqthpc2290
1.8.28 Resizefs
Summary: Resize filesystem
Resize a filesystem to use all avaliable space on partition. This module is useful along with cc_growpart andwill ensure that if the root partition has been resized the root filesystem will be resized along with it. By default,cc_resizefs will resize the root partition and will block the boot process while the resize command is running.Optionally, the resize operation can be performed in the background while cloud-init continues running modules.This can be enabled by setting resize_rootfs to true. This module can be disabled altogether by settingresize_rootfs to false.
Internal name: cc_resizefs
Module frequency: always
Supported distros: all
Config schema: resize_rootfs: (true/false/noblock) Whether to resize the root partition. Default: ‘true’
Examples:
resize_rootfs: false # disable root filesystem resize operation
1.8.29 Resolv Conf
Summary: configure resolv.conf
This module is intended to manage resolv.conf in environments where early configuration of resolv.conf is necessaryfor further bootstrapping and/or where configuration management such as puppet or chef own dns configuration. AsDebian/Ubuntu will, by default, utilize resovlconf, and similarly RedHat will use sysconfig, this module is likely to beof little use unless those are configured correctly.
74 Chapter 1. Getting help

cloud-init, Release 20.2
Note: For RedHat with sysconfig, be sure to set PEERDNS=no for all DHCP enabled NICs.
Note: And, in Ubuntu/Debian it is recommended that DNS be configured via the standard /etc/network/interfacesconfiguration file.
Internal name: cc_resolv_conf
Module frequency: per instance
Supported distros: fedora, rhel, sles
Config keys:
manage_resolv_conf: <true/false>resolv_conf:
nameservers: ['8.8.4.4', '8.8.8.8']searchdomains:
- foo.example.com- bar.example.com
domain: example.comoptions:
rotate: <true/false>timeout: 1
1.8.30 RedHat Subscription
Summary: register red hat enterprise linux based system
Register a RedHat system either by username and password or activation and org. Following a sucessful registra-tion, you can auto-attach subscriptions, set the service level, add subscriptions based on pool id, enable/disable yumrepositories based on repo id, and alter the rhsm_baseurl and server-hostname in /etc/rhsm/rhs.conf. For moredetails, see the Register RedHat Subscription example config.
Internal name: cc_rh_subscription
Module frequency: per instance
Supported distros: rhel, fedora
Config keys:
rh_subscription:username: <username>password: <password>activation-key: <activation key>org: <org number>auto-attach: <true/false>service-level: <service level>add-pool: <list of pool ids>enable-repo: <list of yum repo ids>disable-repo: <list of yum repo ids>rhsm-baseurl: <url>server-hostname: <hostname>
1.8. Modules 75

cloud-init, Release 20.2
1.8.31 Rightscale Userdata
Summary: support rightscale configuration hooks
This module adds support for RightScale configuration hooks to cloud-init. RightScale adds a entry in the formatCLOUD_INIT_REMOTE_HOOK=http://... to ec2 user-data. This module checks for this line in the raw userdataand retrieves any scripts linked by the RightScale user data and places them in the user scripts configuration directory,to be run later by cc_scripts_user.
Note: the CLOUD_INIT_REMOTE_HOOK config variable is present in the raw ec2 user data only, not in any cloud-config parts
Internal name: cc_rightscale_userdata
Module frequency: per instance
Supported distros: all
Config keys:
CLOUD_INIT_REMOTE_HOOK=<url>
1.8.32 Rsyslog
Summary: configure system loggig via rsyslog
This module configures remote system logging using rsyslog.
The rsyslog config file to write to can be specified in config_filename, which defaults to 20-cloud-config.conf. The rsyslog config directory to write config files to may be specified in config_dir, which defaults to/etc/rsyslog.d.
A list of configurations for rsyslog can be specified under the configs key in the rsyslog config. Each entry inconfigs is either a string or a dictionary. Each config entry contains a configuration string and a file to write it to.For config entries that are a dictionary, filename sets the target filename and content specifies the config stringto write. For config entries that are only a string, the string is used as the config string to write. If the filename to writethe config to is not specified, the value of the config_filename key is used. A file with the selected filename willbe written inside the directory specified by config_dir.
The command to use to reload the rsyslog service after the config has been updated can be specified inservice_reload_command. If this is set to auto, then an appropriate command for the distro will be used. Thisis the default behavior. To manually set the command, use a list of command args (e.g. [systemctl, restart,rsyslog]).
Configuration for remote servers can be specified in configs, but for convenience it can be specified as key valuepairs in remotes. Each key is the name for an rsyslog remote entry. Each value holds the contents of the remoteconfig for rsyslog. The config consists of the following parts:
• filter for log messages (defaults to *.*)
• optional leading @ or @@, indicating udp and tcp respectively (defaults to @, for udp)
• ipv4 or ipv6 hostname or address. ipv6 addresses must be in [::1] format, (e.g. @[fd00::1]:514)
• optional port number (defaults to 514)
This module will provide sane defaults for any part of the remote entry that is not specified, so in most cases remotehosts can be specified just using <name>: <address>.
76 Chapter 1. Getting help
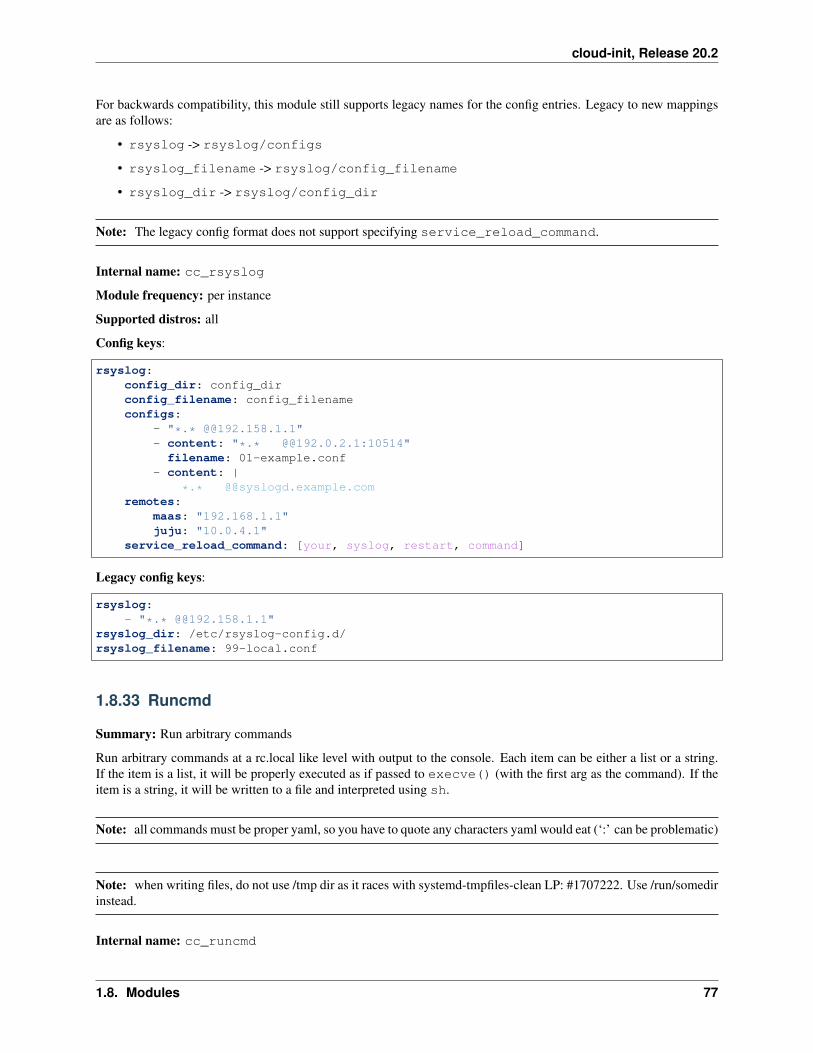
cloud-init, Release 20.2
For backwards compatibility, this module still supports legacy names for the config entries. Legacy to new mappingsare as follows:
• rsyslog -> rsyslog/configs
• rsyslog_filename -> rsyslog/config_filename
• rsyslog_dir -> rsyslog/config_dir
Note: The legacy config format does not support specifying service_reload_command.
Internal name: cc_rsyslog
Module frequency: per instance
Supported distros: all
Config keys:
rsyslog:config_dir: config_dirconfig_filename: config_filenameconfigs:
- "*.* @@192.158.1.1"- content: "*.* @@192.0.2.1:10514"filename: 01-example.conf
- content: |
*.* @@syslogd.example.comremotes:
maas: "192.168.1.1"juju: "10.0.4.1"
service_reload_command: [your, syslog, restart, command]
Legacy config keys:
rsyslog:- "*.* @@192.158.1.1"
rsyslog_dir: /etc/rsyslog-config.d/rsyslog_filename: 99-local.conf
1.8.33 Runcmd
Summary: Run arbitrary commands
Run arbitrary commands at a rc.local like level with output to the console. Each item can be either a list or a string.If the item is a list, it will be properly executed as if passed to execve() (with the first arg as the command). If theitem is a string, it will be written to a file and interpreted using sh.
Note: all commands must be proper yaml, so you have to quote any characters yaml would eat (‘:’ can be problematic)
Note: when writing files, do not use /tmp dir as it races with systemd-tmpfiles-clean LP: #1707222. Use /run/somedirinstead.
Internal name: cc_runcmd
1.8. Modules 77
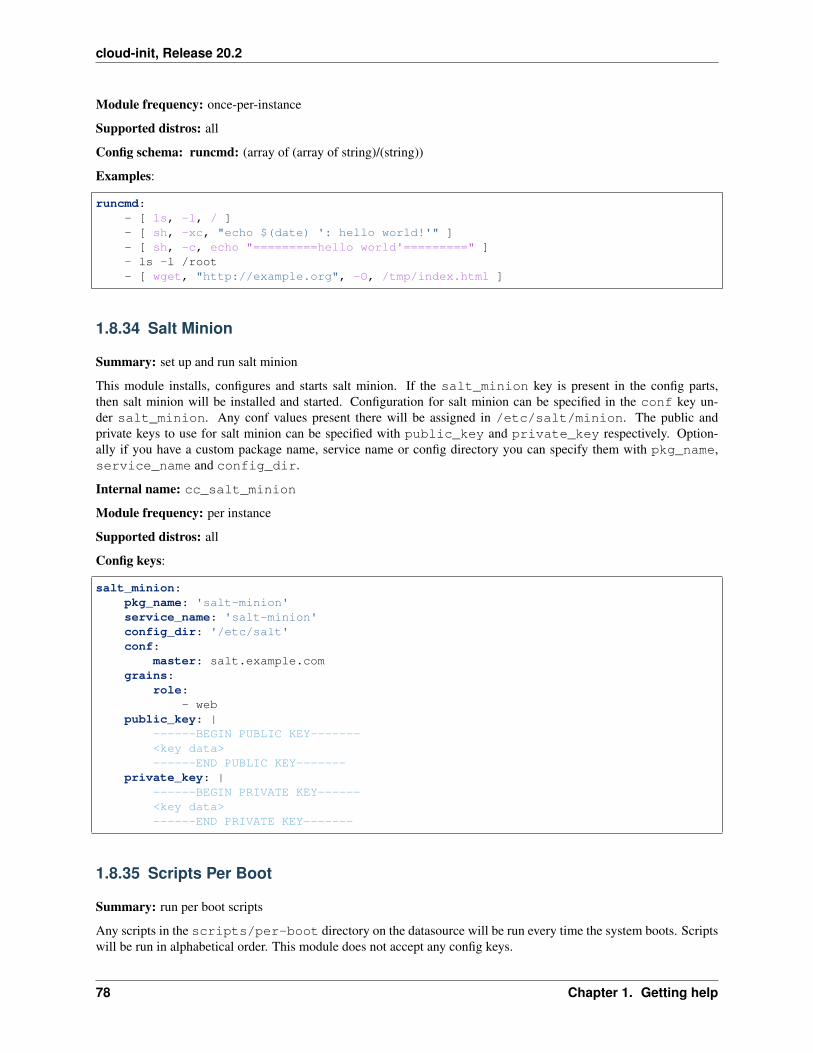
cloud-init, Release 20.2
Module frequency: once-per-instance
Supported distros: all
Config schema: runcmd: (array of (array of string)/(string))
Examples:
runcmd:- [ ls, -l, / ]- [ sh, -xc, "echo $(date) ': hello world!'" ]- [ sh, -c, echo "=========hello world'=========" ]- ls -l /root- [ wget, "http://example.org", -O, /tmp/index.html ]
1.8.34 Salt Minion
Summary: set up and run salt minion
This module installs, configures and starts salt minion. If the salt_minion key is present in the config parts,then salt minion will be installed and started. Configuration for salt minion can be specified in the conf key un-der salt_minion. Any conf values present there will be assigned in /etc/salt/minion. The public andprivate keys to use for salt minion can be specified with public_key and private_key respectively. Option-ally if you have a custom package name, service name or config directory you can specify them with pkg_name,service_name and config_dir.
Internal name: cc_salt_minion
Module frequency: per instance
Supported distros: all
Config keys:
salt_minion:pkg_name: 'salt-minion'service_name: 'salt-minion'config_dir: '/etc/salt'conf:
master: salt.example.comgrains:
role:- web
public_key: |------BEGIN PUBLIC KEY-------<key data>------END PUBLIC KEY-------
private_key: |------BEGIN PRIVATE KEY------<key data>------END PRIVATE KEY-------
1.8.35 Scripts Per Boot
Summary: run per boot scripts
Any scripts in the scripts/per-boot directory on the datasource will be run every time the system boots. Scriptswill be run in alphabetical order. This module does not accept any config keys.
78 Chapter 1. Getting help

cloud-init, Release 20.2
Internal name: cc_scripts_per_boot
Module frequency: per always
Supported distros: all
1.8.36 Scripts Per Instance
Summary: run per instance scripts
Any scripts in the scripts/per-instance directory on the datasource will be run when a new instance is firstbooted. Scripts will be run in alphabetical order. This module does not accept any config keys.
Some cloud platforms change instance-id if a significant change was made to the system. As a result per-instancescripts will run again.
Internal name: cc_scripts_per_instance
Module frequency: per instance
Supported distros: all
1.8.37 Scripts Per Once
Summary: run one time scripts
Any scripts in the scripts/per-once directory on the datasource will be run only once. Changes to the instancewill not force a re-run. The only way to re-run these scripts is to run the clean subcommand and reboot. Scripts willbe run in alphabetical order. This module does not accept any config keys.
Internal name: cc_scripts_per_once
Module frequency: per once
Supported distros: all
1.8.38 Scripts User
Summary: run user scripts
This module runs all user scripts. User scripts are not specified in the scripts directory in the datasource, but ratherare present in the scripts dir in the instance configuration. Any cloud-config parts with a #! will be treated as ascript and run. Scripts specified as cloud-config parts will be run in the order they are specified in the configuration.This module does not accept any config keys.
Internal name: cc_scripts_user
Module frequency: per instance
Supported distros: all
1.8.39 Scripts Vendor
Summary: run vendor scripts
Any scripts in the scripts/vendor directory in the datasource will be run when a new instance is first booted.Scripts will be run in alphabetical order. Vendor scripts can be run with an optional prefix specified in the prefixentry under the vendor_data config key.
1.8. Modules 79
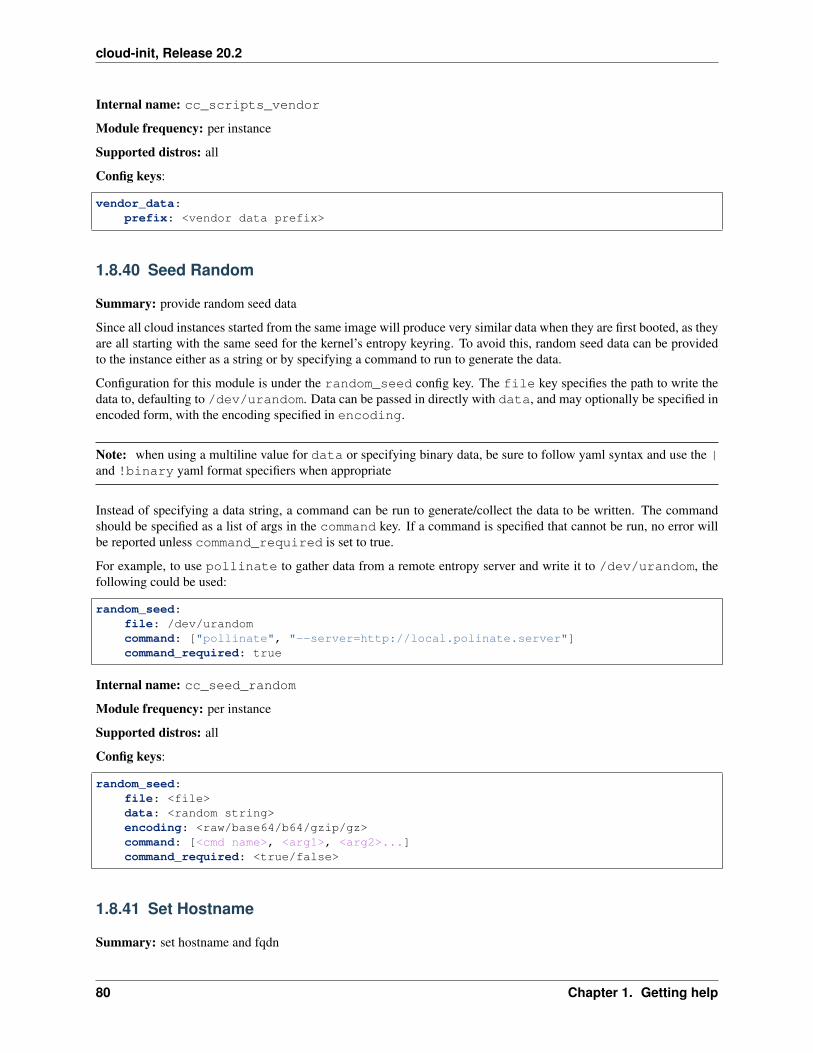
cloud-init, Release 20.2
Internal name: cc_scripts_vendor
Module frequency: per instance
Supported distros: all
Config keys:
vendor_data:prefix: <vendor data prefix>
1.8.40 Seed Random
Summary: provide random seed data
Since all cloud instances started from the same image will produce very similar data when they are first booted, as theyare all starting with the same seed for the kernel’s entropy keyring. To avoid this, random seed data can be providedto the instance either as a string or by specifying a command to run to generate the data.
Configuration for this module is under the random_seed config key. The file key specifies the path to write thedata to, defaulting to /dev/urandom. Data can be passed in directly with data, and may optionally be specified inencoded form, with the encoding specified in encoding.
Note: when using a multiline value for data or specifying binary data, be sure to follow yaml syntax and use the |and !binary yaml format specifiers when appropriate
Instead of specifying a data string, a command can be run to generate/collect the data to be written. The commandshould be specified as a list of args in the command key. If a command is specified that cannot be run, no error willbe reported unless command_required is set to true.
For example, to use pollinate to gather data from a remote entropy server and write it to /dev/urandom, thefollowing could be used:
random_seed:file: /dev/urandomcommand: ["pollinate", "--server=http://local.polinate.server"]command_required: true
Internal name: cc_seed_random
Module frequency: per instance
Supported distros: all
Config keys:
random_seed:file: <file>data: <random string>encoding: <raw/base64/b64/gzip/gz>command: [<cmd name>, <arg1>, <arg2>...]command_required: <true/false>
1.8.41 Set Hostname
Summary: set hostname and fqdn
80 Chapter 1. Getting help

cloud-init, Release 20.2
This module handles setting the system hostname and fqdn. If preserve_hostname is set, then the hostname willnot be altered.
A hostname and fqdn can be provided by specifying a full domain name under the fqdn key. Alternatively, a hostnamecan be specified using the hostname key, and the fqdn of the cloud wil be used. If a fqdn specified with thehostname key, it will be handled properly, although it is better to use the fqdn config key. If both fqdn andhostname are set, fqdn will be used.
This module will run in the init-local stage before networking is configured if the hostname is set by metadata or userdata on the local system.
This will occur on datasources like nocloud and ovf where metadata and user data are available locally. This ensuresthat the desired hostname is applied before any DHCP requests are preformed on these platforms where dynamic DNSis based on initial hostname.
Internal name: cc_set_hostname
Module frequency: per always
Supported distros: all
Config keys:
preserve_hostname: <true/false>fqdn: <fqdn>hostname: <fqdn/hostname>
1.8.42 Set Passwords
Summary: Set user passwords and enable/disable SSH password authentication
This module consumes three top-level config keys: ssh_pwauth, chpasswd and password.
The ssh_pwauth config key determines whether or not sshd will be configured to accept password authentication.True values will enable password auth, false values will disable password auth, and the literal string unchanged willleave it unchanged. Setting no value will also leave the current setting on-disk unchanged.
The chpasswd config key accepts a dictionary containing either or both of expire and list.
If the list key is provided, it should contain a list of username:password pairs. This can be either a YAMLlist (of strings), or a multi-line string with one pair per line. Each user will have the corresponding password set. Apassword can be randomly generated by specifying RANDOM or R as a user’s password. A hashed password, createdby a tool like mkpasswd, can be specified; a regex (r'\$(1|2a|2y|5|6)(\$.+){2}') is used to determine ifa password value should be treated as a hash.
Note: The users specified must already exist on the system. Users will have been created by the cc_users_groupsmodule at this point.
By default, all users on the system will have their passwords expired (meaning that they will have to be reset the nexttime the user logs in). To disable this behaviour, set expire under chpasswd to a false value.
If a list of user/password pairs is not specified under chpasswd, then the value of the password config key willbe used to set the default user’s password.
Internal name: cc_set_passwords
Module frequency: per instance
Supported distros: all
1.8. Modules 81
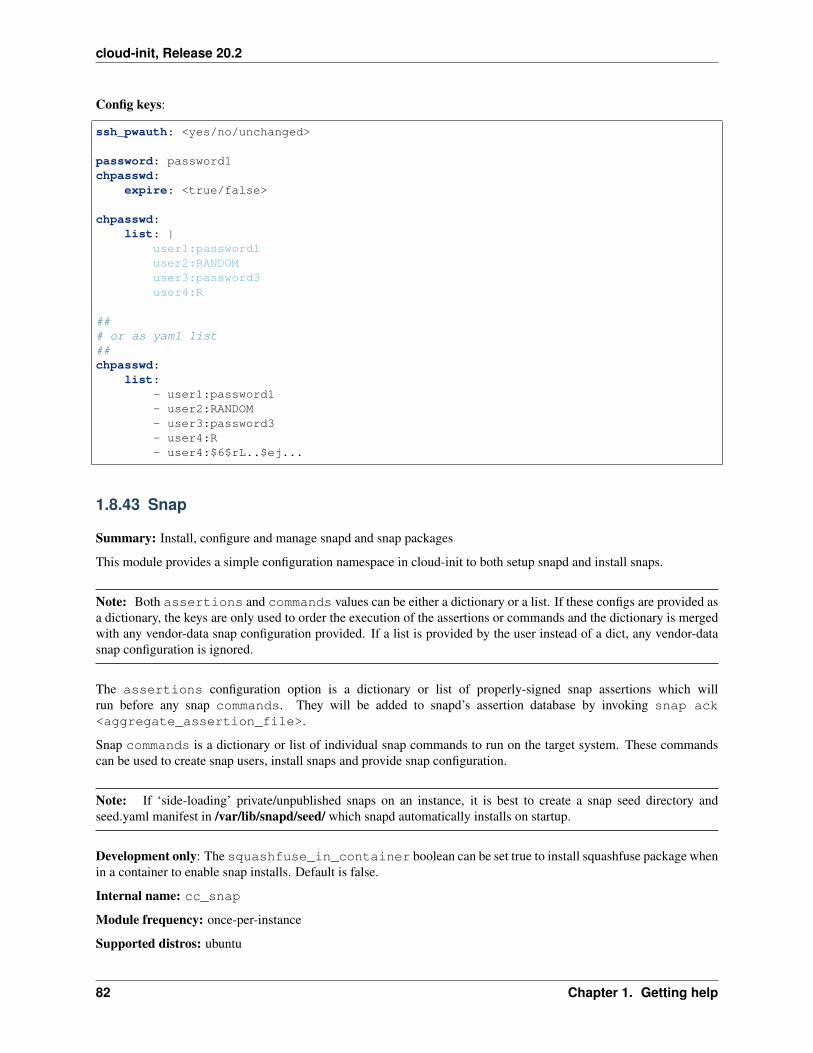
cloud-init, Release 20.2
Config keys:
ssh_pwauth: <yes/no/unchanged>
password: password1chpasswd:
expire: <true/false>
chpasswd:list: |
user1:password1user2:RANDOMuser3:password3user4:R
### or as yaml list##chpasswd:
list:- user1:password1- user2:RANDOM- user3:password3- user4:R- user4:$6$rL..$ej...
1.8.43 Snap
Summary: Install, configure and manage snapd and snap packages
This module provides a simple configuration namespace in cloud-init to both setup snapd and install snaps.
Note: Both assertions and commands values can be either a dictionary or a list. If these configs are provided asa dictionary, the keys are only used to order the execution of the assertions or commands and the dictionary is mergedwith any vendor-data snap configuration provided. If a list is provided by the user instead of a dict, any vendor-datasnap configuration is ignored.
The assertions configuration option is a dictionary or list of properly-signed snap assertions which willrun before any snap commands. They will be added to snapd’s assertion database by invoking snap ack<aggregate_assertion_file>.
Snap commands is a dictionary or list of individual snap commands to run on the target system. These commandscan be used to create snap users, install snaps and provide snap configuration.
Note: If ‘side-loading’ private/unpublished snaps on an instance, it is best to create a snap seed directory andseed.yaml manifest in /var/lib/snapd/seed/ which snapd automatically installs on startup.
Development only: The squashfuse_in_container boolean can be set true to install squashfuse package whenin a container to enable snap installs. Default is false.
Internal name: cc_snap
Module frequency: once-per-instance
Supported distros: ubuntu
82 Chapter 1. Getting help

cloud-init, Release 20.2
Config schema: snap: (object)
assertions: (object/array of string)
commands: (object/array of (array of string)/(string))
squashfuse_in_container: (boolean)
Examples:
snap:assertions:
00: |signed_assertion_blob_here
02: |signed_assertion_blob_here
commands:00: snap create-user --sudoer --known <snap-user>@mydomain.com01: snap install canonical-livepatch02: canonical-livepatch enable <AUTH_TOKEN>
# --- Example2 ---# LXC-based containers require squashfuse before snaps can be installedsnap:
commands:00: apt-get install squashfuse -y11: snap install emoj
# --- Example3 ---# Convenience: the snap command can be omitted when specifying commands# as a list and 'snap' will automatically be prepended.# The following commands are equivalent:snap:
commands:00: ['install', 'vlc']01: ['snap', 'install', 'vlc']02: snap install vlc03: 'snap install vlc'
# --- Example4 ---# You can use a list of commandssnap:
commands:- ['install', 'vlc']- ['snap', 'install', 'vlc']- snap install vlc- 'snap install vlc'
# --- Example5 ---# You can use a list of assertionssnap:
assertions:- signed_assertion_blob_here- |
signed_assertion_blob_here
1.8. Modules 83

cloud-init, Release 20.2
1.8.44 Spacewalk
Summary: install and configure spacewalk
This module installs spacewalk and applies basic configuration. If the spacewalk config key is present spacewalkwill be installed. The server to connect to after installation must be provided in the server in spacewalk configura-tion. A proxy to connect through and a activation key may optionally be specified.
For more information about spacewalk see: https://fedorahosted.org/spacewalk/
Internal name: cc_spacewalk
Module frequency: per instance
Supported distros: redhat, fedora
Config keys:
spacewalk:server: <url>proxy: <proxy host>activation_key: <key>
1.8.45 SSH
Summary: configure SSH and SSH keys (host and authorized)
This module handles most configuration for SSH and both host and authorized SSH keys.
Authorized Keys
Authorized keys are a list of public SSH keys that are allowed to connect to a a user account on a system. They arestored in .ssh/authorized_keys in that account’s home directory. Authorized keys for the default user defined in userscan be specified using ssh_authorized_keys. Keys should be specified as a list of public keys.
Note: see the cc_set_passwords module documentation to enable/disable SSH password authentication
Root login can be enabled/disabled using the disable_root config key. Root login options can be manuallyspecified with disable_root_opts. If disable_root_opts is specified and contains the string $USER, itwill be replaced with the username of the default user. By default, root login is disabled, and root login opts are set to:
no-port-forwarding,no-agent-forwarding,no-X11-forwarding
Host Keys
Host keys are for authenticating a specific instance. Many images have default host SSH keys, which can be removedusing ssh_deletekeys. This prevents re-use of a private host key from an image on multiple machines. Sinceremoving default host keys is usually the desired behavior this option is enabled by default.
Host keys can be added using the ssh_keys configuration key. The argument to this config key should be a dictionaryentries for the public and private keys of each desired key type. Entries in the ssh_keys config dict should havekeys in the format <key type>_private and <key type>_public, e.g. rsa_private: <key> andrsa_public: <key>. See below for supported key types. Not all key types have to be specified, ones leftunspecified will not be used. If this config option is used, then no keys will be generated.
84 Chapter 1. Getting help
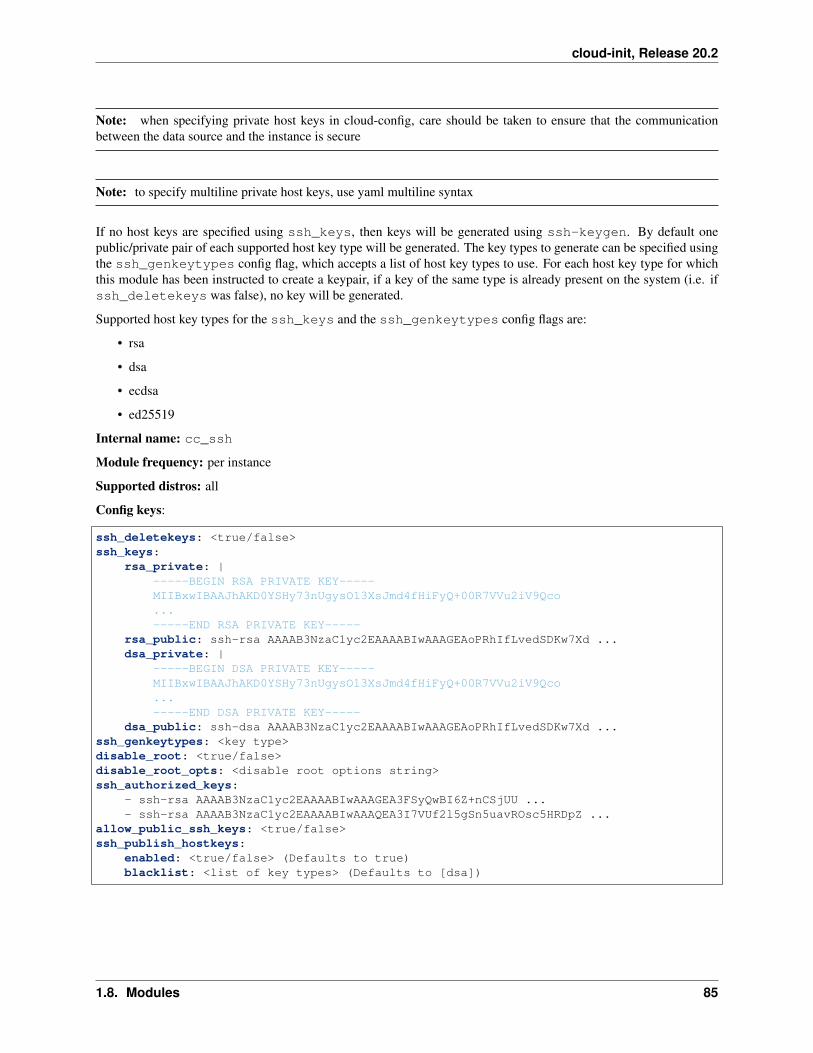
cloud-init, Release 20.2
Note: when specifying private host keys in cloud-config, care should be taken to ensure that the communicationbetween the data source and the instance is secure
Note: to specify multiline private host keys, use yaml multiline syntax
If no host keys are specified using ssh_keys, then keys will be generated using ssh-keygen. By default onepublic/private pair of each supported host key type will be generated. The key types to generate can be specified usingthe ssh_genkeytypes config flag, which accepts a list of host key types to use. For each host key type for whichthis module has been instructed to create a keypair, if a key of the same type is already present on the system (i.e. ifssh_deletekeys was false), no key will be generated.
Supported host key types for the ssh_keys and the ssh_genkeytypes config flags are:
• rsa
• dsa
• ecdsa
• ed25519
Internal name: cc_ssh
Module frequency: per instance
Supported distros: all
Config keys:
ssh_deletekeys: <true/false>ssh_keys:
rsa_private: |-----BEGIN RSA PRIVATE KEY-----MIIBxwIBAAJhAKD0YSHy73nUgysO13XsJmd4fHiFyQ+00R7VVu2iV9Qco...-----END RSA PRIVATE KEY-----
rsa_public: ssh-rsa AAAAB3NzaC1yc2EAAAABIwAAAGEAoPRhIfLvedSDKw7Xd ...dsa_private: |
-----BEGIN DSA PRIVATE KEY-----MIIBxwIBAAJhAKD0YSHy73nUgysO13XsJmd4fHiFyQ+00R7VVu2iV9Qco...-----END DSA PRIVATE KEY-----
dsa_public: ssh-dsa AAAAB3NzaC1yc2EAAAABIwAAAGEAoPRhIfLvedSDKw7Xd ...ssh_genkeytypes: <key type>disable_root: <true/false>disable_root_opts: <disable root options string>ssh_authorized_keys:
- ssh-rsa AAAAB3NzaC1yc2EAAAABIwAAAGEA3FSyQwBI6Z+nCSjUU ...- ssh-rsa AAAAB3NzaC1yc2EAAAABIwAAAQEA3I7VUf2l5gSn5uavROsc5HRDpZ ...
allow_public_ssh_keys: <true/false>ssh_publish_hostkeys:
enabled: <true/false> (Defaults to true)blacklist: <list of key types> (Defaults to [dsa])
1.8. Modules 85

cloud-init, Release 20.2
1.8.46 SSH Authkey Fingerprints
Summary: log fingerprints of user SSH keys
Write fingerprints of authorized keys for each user to log. This is enabled by default, but can be disabled usingno_ssh_fingerprints. The hash type for the keys can be specified, but defaults to sha256.
Internal name: ‘‘ cc_ssh_authkey_fingerprints‘‘
Module frequency: per instance
Supported distros: all
Config keys:
no_ssh_fingerprints: <true/false>authkey_hash: <hash type>
1.8.47 SSH Import Id
Summary: import SSH id
This module imports SSH keys from either a public keyserver, usually launchpad or github using ssh-import-id.Keys are referenced by the username they are associated with on the keyserver. The keyserver can be specified byprepending either lp: for launchpad or gh: for github to the username.
Internal name: cc_ssh_import_id
Module frequency: per instance
Supported distros: ubuntu, debian
Config keys:
ssh_import_id:- user- gh:user- lp:user
1.8.48 Timezone
Summary: set system timezone
Set the system timezone. If any args are passed to the module then the first will be used for the timezone. Otherwise,the module will attempt to retrieve the timezone from cloud config.
Internal name: cc_timezone
Module frequency: per instance
Supported distros: all
Config keys:
timezone: <timezone>
86 Chapter 1. Getting help
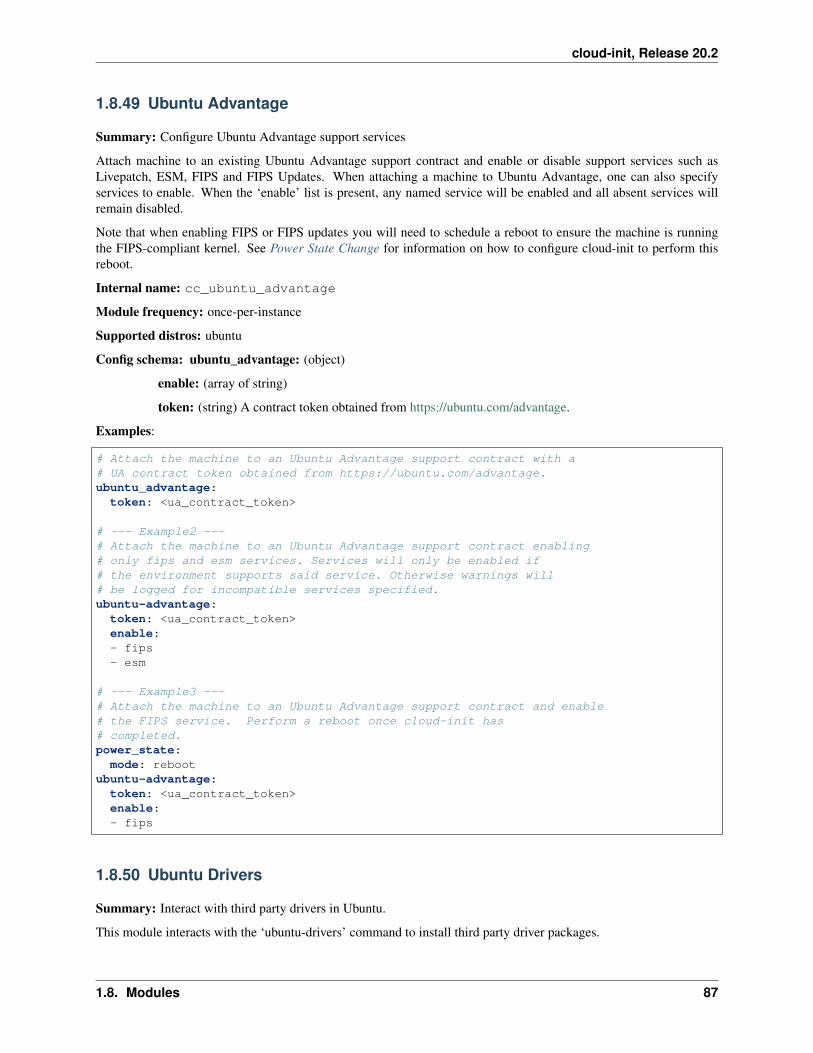
cloud-init, Release 20.2
1.8.49 Ubuntu Advantage
Summary: Configure Ubuntu Advantage support services
Attach machine to an existing Ubuntu Advantage support contract and enable or disable support services such asLivepatch, ESM, FIPS and FIPS Updates. When attaching a machine to Ubuntu Advantage, one can also specifyservices to enable. When the ‘enable’ list is present, any named service will be enabled and all absent services willremain disabled.
Note that when enabling FIPS or FIPS updates you will need to schedule a reboot to ensure the machine is runningthe FIPS-compliant kernel. See Power State Change for information on how to configure cloud-init to perform thisreboot.
Internal name: cc_ubuntu_advantage
Module frequency: once-per-instance
Supported distros: ubuntu
Config schema: ubuntu_advantage: (object)
enable: (array of string)
token: (string) A contract token obtained from https://ubuntu.com/advantage.
Examples:
# Attach the machine to an Ubuntu Advantage support contract with a# UA contract token obtained from https://ubuntu.com/advantage.ubuntu_advantage:token: <ua_contract_token>
# --- Example2 ---# Attach the machine to an Ubuntu Advantage support contract enabling# only fips and esm services. Services will only be enabled if# the environment supports said service. Otherwise warnings will# be logged for incompatible services specified.ubuntu-advantage:token: <ua_contract_token>enable:- fips- esm
# --- Example3 ---# Attach the machine to an Ubuntu Advantage support contract and enable# the FIPS service. Perform a reboot once cloud-init has# completed.power_state:
mode: rebootubuntu-advantage:
token: <ua_contract_token>enable:- fips
1.8.50 Ubuntu Drivers
Summary: Interact with third party drivers in Ubuntu.
This module interacts with the ‘ubuntu-drivers’ command to install third party driver packages.
1.8. Modules 87
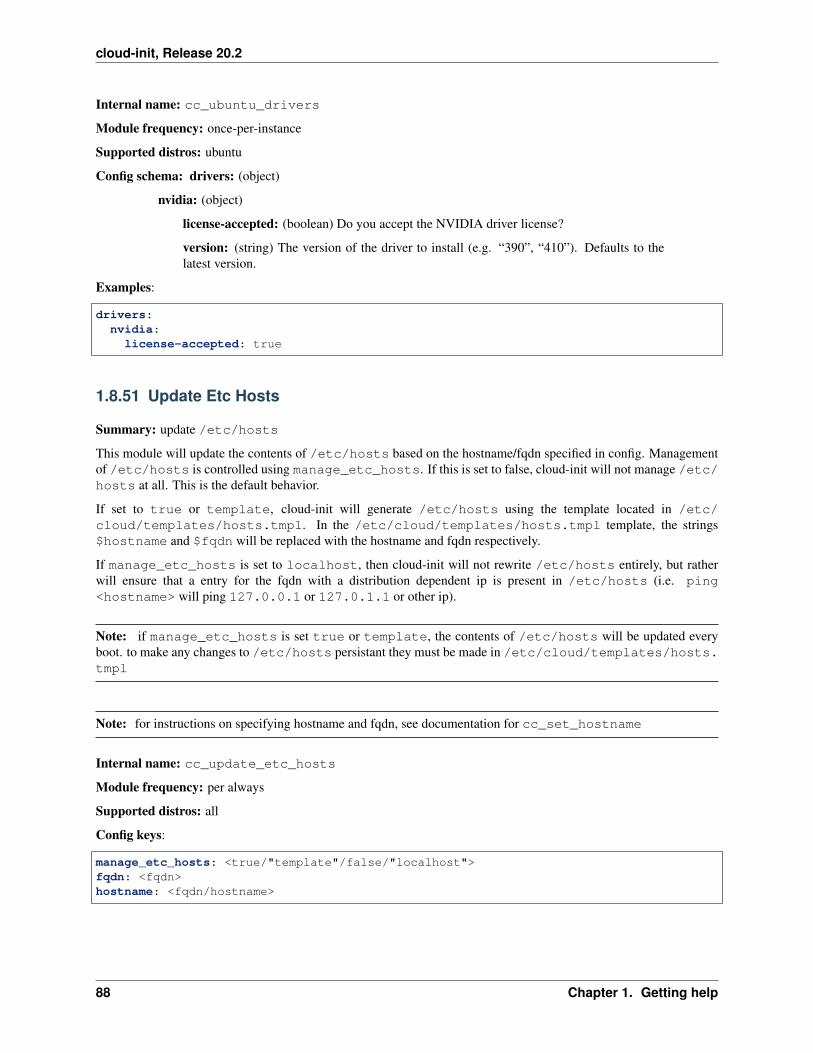
cloud-init, Release 20.2
Internal name: cc_ubuntu_drivers
Module frequency: once-per-instance
Supported distros: ubuntu
Config schema: drivers: (object)
nvidia: (object)
license-accepted: (boolean) Do you accept the NVIDIA driver license?
version: (string) The version of the driver to install (e.g. “390”, “410”). Defaults to thelatest version.
Examples:
drivers:nvidia:license-accepted: true
1.8.51 Update Etc Hosts
Summary: update /etc/hosts
This module will update the contents of /etc/hosts based on the hostname/fqdn specified in config. Managementof /etc/hosts is controlled using manage_etc_hosts. If this is set to false, cloud-init will not manage /etc/hosts at all. This is the default behavior.
If set to true or template, cloud-init will generate /etc/hosts using the template located in /etc/cloud/templates/hosts.tmpl. In the /etc/cloud/templates/hosts.tmpl template, the strings$hostname and $fqdn will be replaced with the hostname and fqdn respectively.
If manage_etc_hosts is set to localhost, then cloud-init will not rewrite /etc/hosts entirely, but ratherwill ensure that a entry for the fqdn with a distribution dependent ip is present in /etc/hosts (i.e. ping<hostname> will ping 127.0.0.1 or 127.0.1.1 or other ip).
Note: if manage_etc_hosts is set true or template, the contents of /etc/hosts will be updated everyboot. to make any changes to /etc/hosts persistant they must be made in /etc/cloud/templates/hosts.tmpl
Note: for instructions on specifying hostname and fqdn, see documentation for cc_set_hostname
Internal name: cc_update_etc_hosts
Module frequency: per always
Supported distros: all
Config keys:
manage_etc_hosts: <true/"template"/false/"localhost">fqdn: <fqdn>hostname: <fqdn/hostname>
88 Chapter 1. Getting help

cloud-init, Release 20.2
1.8.52 Update Hostname
Summary: update hostname and fqdn
This module will update the system hostname and fqdn. If preserve_hostname is set, then the hostname will notbe altered.
Note: for instructions on specifying hostname and fqdn, see documentation for cc_set_hostname
Internal name: cc_update_hostname
Module frequency: per always
Supported distros: all
Config keys:
preserve_hostname: <true/false>fqdn: <fqdn>hostname: <fqdn/hostname>
1.8.53 Users and Groups
Summary: configure users and groups
This module configures users and groups. For more detailed information on user options, see the Includingusers and groups config example.
Groups to add to the system can be specified as a list under the groups key. Each entry in the list should eithercontain a the group name as a string, or a dictionary with the group name as the key and a list of users who should bemembers of the group as the value. Note: Groups are added before users, so any users in a group list must alreadyexist on the system.
The users config key takes a list of users to configure. The first entry in this list is used as the default user for thesystem. To preserve the standard default user for the distro, the string default may be used as the first entry of theusers list. Each entry in the users list, other than a default entry, should be a dictionary of options for the user.Supported config keys for an entry in users are as follows:
• name: The user’s login name
• expiredate: Optional. Date on which the user’s login will be disabled. Default: none
• gecos: Optional. Comment about the user, usually a comma-separated string of real name and contact infor-mation. Default: none
• groups: Optional. Additional groups to add the user to. Default: none
• homedir: Optional. Home dir for user. Default is /home/<username>
• inactive: Optional. Mark user inactive. Default: false
• lock_passwd: Optional. Disable password login. Default: true
• no_create_home: Optional. Do not create home directory. Default: false
• no_log_init: Optional. Do not initialize lastlog and faillog for user. Default: false
• no_user_group: Optional. Do not create group named after user. Default: false
• passwd: Hash of user password
1.8. Modules 89
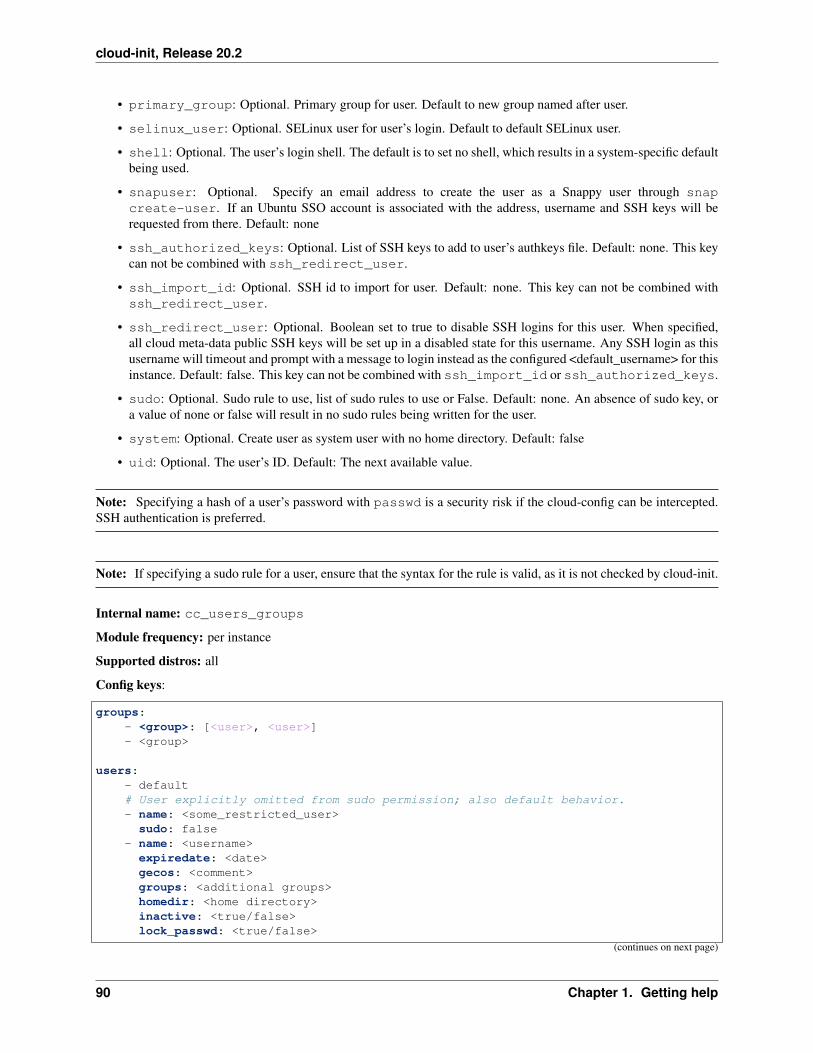
cloud-init, Release 20.2
• primary_group: Optional. Primary group for user. Default to new group named after user.
• selinux_user: Optional. SELinux user for user’s login. Default to default SELinux user.
• shell: Optional. The user’s login shell. The default is to set no shell, which results in a system-specific defaultbeing used.
• snapuser: Optional. Specify an email address to create the user as a Snappy user through snapcreate-user. If an Ubuntu SSO account is associated with the address, username and SSH keys will berequested from there. Default: none
• ssh_authorized_keys: Optional. List of SSH keys to add to user’s authkeys file. Default: none. This keycan not be combined with ssh_redirect_user.
• ssh_import_id: Optional. SSH id to import for user. Default: none. This key can not be combined withssh_redirect_user.
• ssh_redirect_user: Optional. Boolean set to true to disable SSH logins for this user. When specified,all cloud meta-data public SSH keys will be set up in a disabled state for this username. Any SSH login as thisusername will timeout and prompt with a message to login instead as the configured <default_username> for thisinstance. Default: false. This key can not be combined with ssh_import_id or ssh_authorized_keys.
• sudo: Optional. Sudo rule to use, list of sudo rules to use or False. Default: none. An absence of sudo key, ora value of none or false will result in no sudo rules being written for the user.
• system: Optional. Create user as system user with no home directory. Default: false
• uid: Optional. The user’s ID. Default: The next available value.
Note: Specifying a hash of a user’s password with passwd is a security risk if the cloud-config can be intercepted.SSH authentication is preferred.
Note: If specifying a sudo rule for a user, ensure that the syntax for the rule is valid, as it is not checked by cloud-init.
Internal name: cc_users_groups
Module frequency: per instance
Supported distros: all
Config keys:
groups:- <group>: [<user>, <user>]- <group>
users:- default# User explicitly omitted from sudo permission; also default behavior.- name: <some_restricted_user>
sudo: false- name: <username>
expiredate: <date>gecos: <comment>groups: <additional groups>homedir: <home directory>inactive: <true/false>lock_passwd: <true/false>
(continues on next page)
90 Chapter 1. Getting help

cloud-init, Release 20.2
(continued from previous page)
no_create_home: <true/false>no_log_init: <true/false>no_user_group: <true/false>passwd: <password>primary_group: <primary group>selinux_user: <selinux username>shell: <shell path>snapuser: <email>ssh_redirect_user: <true/false>ssh_authorized_keys:
- <key>- <key>
ssh_import_id: <id>sudo: <sudo config>system: <true/false>uid: <user id>
1.8.54 Write Files
Summary: write arbitrary files
Write out arbitrary content to files, optionally setting permissions. Parent folders in the path are createdif absent. Content can be specified in plain text or binary. Data encoded with either base64 or binary gzipdata can be specified and will be decoded before being written. For empty file creation, content can beomitted.
Note: if multiline data is provided, care should be taken to ensure that it follows yaml formatting standards. to specifybinary data, use the yaml option !!binary
Note: Do not write files under /tmp during boot because of a race with systemd-tmpfiles-clean that can cause tempfiles to get cleaned during the early boot process. Use /run/somedir instead to avoid race LP:1707222.
Internal name: cc_write_files
Module frequency: once-per-instance
Supported distros: all
Config schema: write_files: (array of object)
Each item in write_files list supports the following keys:
path: (string) Path of the file to which content is decoded and written
content: (string) Optional content to write to the provided path. When content is presentand encoding is not ‘text/plain’, decode the content prior to writing. Default: ‘’
owner: (string) Optional owner:group to chown on the file. Default: root:root
permissions: (string) Optional file permissions to set on path represented as an octalstring ‘0###’. Default: ‘0644’
encoding: (string) Optional encoding type of the content. Default is text/plain and nocontent decoding is performed. Supported encoding types are: gz, gzip, gz+base64,gzip+base64, gz+b64, gzip+b64, b64, base64.
1.8. Modules 91
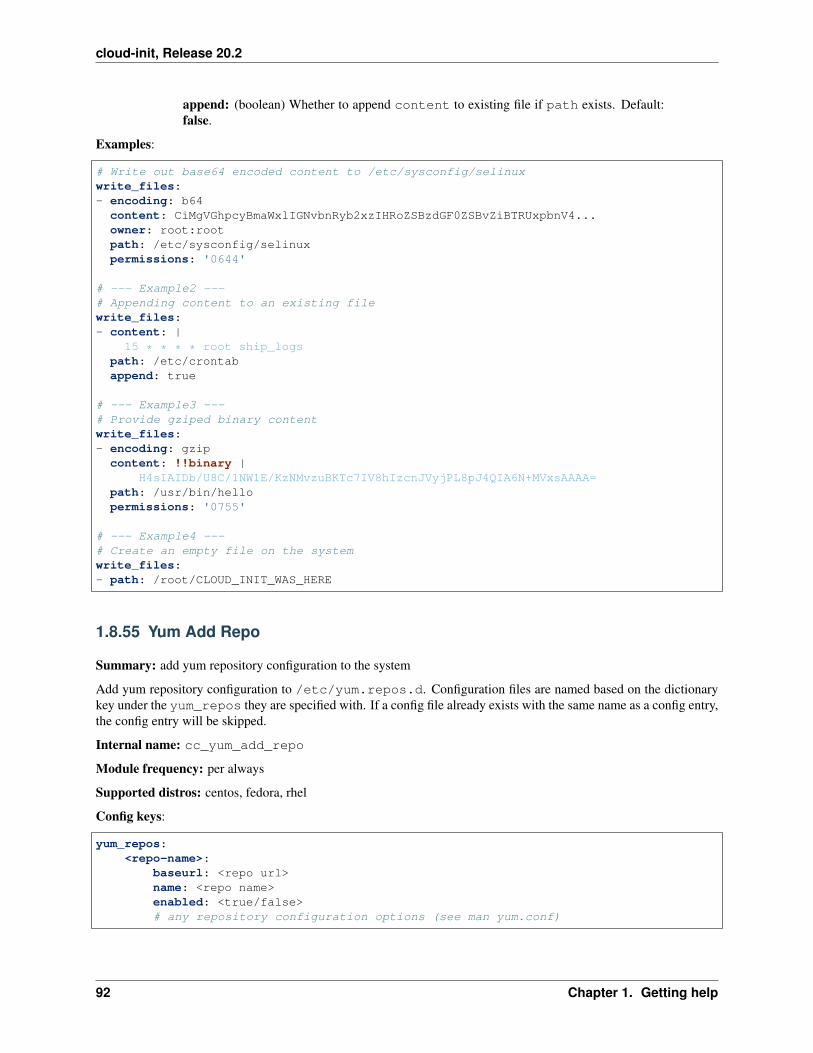
cloud-init, Release 20.2
append: (boolean) Whether to append content to existing file if path exists. Default:false.
Examples:
# Write out base64 encoded content to /etc/sysconfig/selinuxwrite_files:- encoding: b64
content: CiMgVGhpcyBmaWxlIGNvbnRyb2xzIHRoZSBzdGF0ZSBvZiBTRUxpbnV4...owner: root:rootpath: /etc/sysconfig/selinuxpermissions: '0644'
# --- Example2 ---# Appending content to an existing filewrite_files:- content: |
15 * * * * root ship_logspath: /etc/crontabappend: true
# --- Example3 ---# Provide gziped binary contentwrite_files:- encoding: gzip
content: !!binary |H4sIAIDb/U8C/1NW1E/KzNMvzuBKTc7IV8hIzcnJVyjPL8pJ4QIA6N+MVxsAAAA=
path: /usr/bin/hellopermissions: '0755'
# --- Example4 ---# Create an empty file on the systemwrite_files:- path: /root/CLOUD_INIT_WAS_HERE
1.8.55 Yum Add Repo
Summary: add yum repository configuration to the system
Add yum repository configuration to /etc/yum.repos.d. Configuration files are named based on the dictionarykey under the yum_repos they are specified with. If a config file already exists with the same name as a config entry,the config entry will be skipped.
Internal name: cc_yum_add_repo
Module frequency: per always
Supported distros: centos, fedora, rhel
Config keys:
yum_repos:<repo-name>:
baseurl: <repo url>name: <repo name>enabled: <true/false># any repository configuration options (see man yum.conf)
92 Chapter 1. Getting help
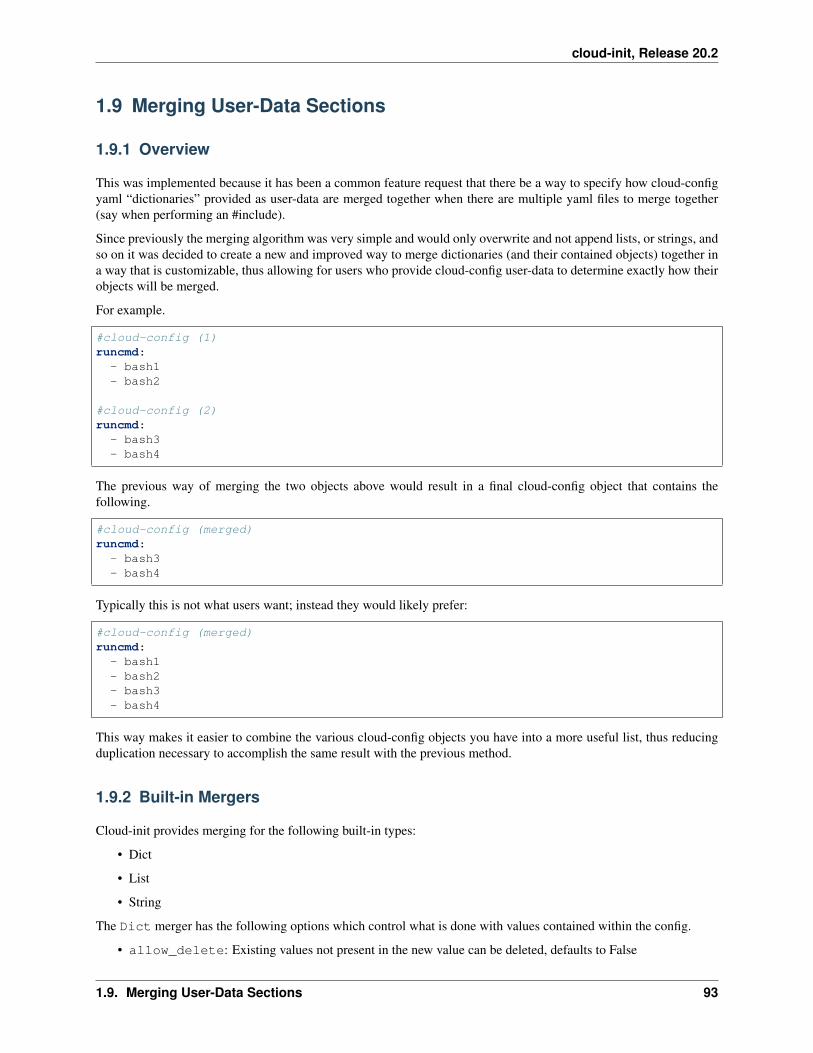
cloud-init, Release 20.2
1.9 Merging User-Data Sections
1.9.1 Overview
This was implemented because it has been a common feature request that there be a way to specify how cloud-configyaml “dictionaries” provided as user-data are merged together when there are multiple yaml files to merge together(say when performing an #include).
Since previously the merging algorithm was very simple and would only overwrite and not append lists, or strings, andso on it was decided to create a new and improved way to merge dictionaries (and their contained objects) together ina way that is customizable, thus allowing for users who provide cloud-config user-data to determine exactly how theirobjects will be merged.
For example.
#cloud-config (1)runcmd:
- bash1- bash2
#cloud-config (2)runcmd:
- bash3- bash4
The previous way of merging the two objects above would result in a final cloud-config object that contains thefollowing.
#cloud-config (merged)runcmd:
- bash3- bash4
Typically this is not what users want; instead they would likely prefer:
#cloud-config (merged)runcmd:
- bash1- bash2- bash3- bash4
This way makes it easier to combine the various cloud-config objects you have into a more useful list, thus reducingduplication necessary to accomplish the same result with the previous method.
1.9.2 Built-in Mergers
Cloud-init provides merging for the following built-in types:
• Dict
• List
• String
The Dict merger has the following options which control what is done with values contained within the config.
• allow_delete: Existing values not present in the new value can be deleted, defaults to False
1.9. Merging User-Data Sections 93

cloud-init, Release 20.2
• no_replace: Do not replace an existing value if one is already present, enabled by default.
• replace: Overwrite existing values with new ones.
The List merger has the following options which control what is done with the values contained within the config.
• append: Add new value to the end of the list, defaults to False.
• prepend: Add new values to the start of the list, defaults to False.
• no_replace: Do not replace an existing value if one is already present, enabled by default.
• replace: Overwrite existing values with new ones.
The Str merger has the following options which control what is done with the values contained within the config.
• append: Add new value to the end of the string, defaults to False.
Common options for all merge types which control how recursive merging is done on other types.
• recurse_dict: If True merge the new values of the dictionary, defaults to True.
• recurse_list: If True merge the new values of the list, defaults to False.
• recurse_array: Alias for recurse_list.
• recurse_str: If True merge the new values of the string, defaults to False.
1.9.3 Customizability
Because the above merging algorithm may not always be desired (just as the previous merging algorithm was notalways the preferred one), the concept of customized merging was introduced through ‘merge classes’.
A merge class is a class definition which provides functions that can be used to merge a given type with another giventype.
An example of one of these merging classes is the following:
class Merger(object):def __init__(self, merger, opts):
self._merger = mergerself._overwrite = 'overwrite' in opts
# This merging algorithm will attempt to merge with# another dictionary, on encountering any other type of object# it will not merge with said object, but will instead return# the original value## On encountering a dictionary, it will create a new dictionary# composed of the original and the one to merge with, if 'overwrite'# is enabled then keys that exist in the original will be overwritten# by keys in the one to merge with (and associated values). Otherwise# if not in overwrite mode the 2 conflicting keys themselves will# be merged.def _on_dict(self, value, merge_with):
if not isinstance(merge_with, (dict)):return value
merged = dict(value)for (k, v) in merge_with.items():
if k in merged:if not self._overwrite:
merged[k] = self._merger.merge(merged[k], v)
(continues on next page)
94 Chapter 1. Getting help

cloud-init, Release 20.2
(continued from previous page)
else:merged[k] = v
else:merged[k] = v
return merged
As you can see there is a ‘_on_dict’ method here that will be given a source value and a value to merge with. The resultwill be the merged object. This code itself is called by another merging class which ‘directs’ the merging to happenby analyzing the types of the objects to merge and attempting to find a know object that will merge that type. I willavoid pasting that here, but it can be found in the mergers/__init__.py file (see LookupMerger and UnknownMerger).
So following the typical cloud-init way of allowing source code to be downloaded and used dynamically, it is possiblefor users to inject there own merging files to handle specific types of merging as they choose (the basic ones includedwill handle lists, dicts, and strings). Note how each merge can have options associated with it which affect how themerging is performed, for example a dictionary merger can be told to overwrite instead of attempt to merge, or a stringmerger can be told to append strings instead of discarding other strings to merge with.
1.9.4 How to activate
There are a few ways to activate the merging algorithms, and to customize them for your own usage.
1. The first way involves the usage of MIME messages in cloud-init to specify multipart documents (this is oneway in which multiple cloud-config is joined together into a single cloud-config). Two new headers are lookedfor, both of which can define the way merging is done (the first header to exist wins). These new headers (inlookup order) are ‘Merge-Type’ and ‘X-Merge-Type’. The value should be a string which will satisfy the newmerging format definition (see below for this format).
2. The second way is actually specifying the merge-type in the body of the cloud-config dictionary. There are 2ways to specify this, either as a string or as a dictionary (see format below). The keys that are looked up for thisdefinition are the following (in order), ‘merge_how’, ‘merge_type’.
String format
The string format that is expected is the following.
classname1(option1,option2)+classname2(option3,option4)....
The class name there will be connected to class names used when looking for the class that can be used to merge andoptions provided will be given to the class on construction of that class.
For example, the default string that is used when none is provided is the following:
list()+dict()+str()
Dictionary format
A dictionary can be used when it specifies the same information as the string format (i.e. the second option above),for example:
{'merge_how': [{'name': 'list', 'settings': ['append']},{'name': 'dict', 'settings': ['no_replace', 'recurse_list']},{'name': 'str', 'settings': ['append']}]}
This would be the equivalent format for default string format but in dictionary form instead of string form.
1.9. Merging User-Data Sections 95
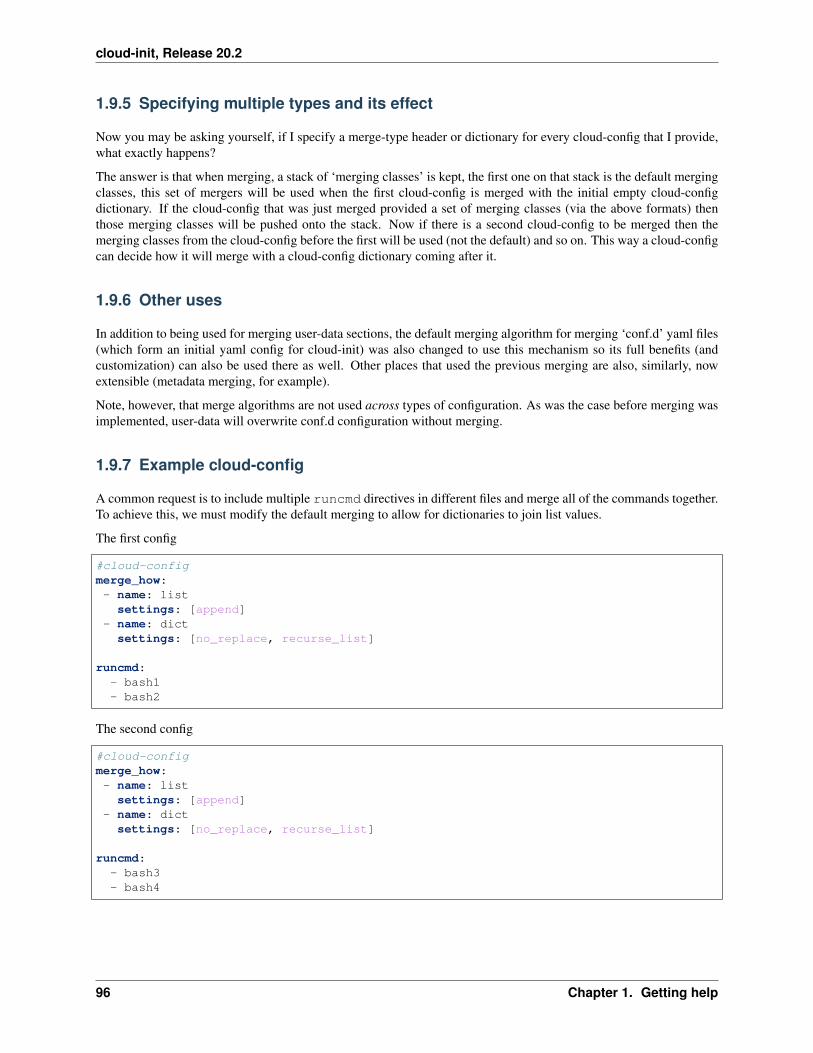
cloud-init, Release 20.2
1.9.5 Specifying multiple types and its effect
Now you may be asking yourself, if I specify a merge-type header or dictionary for every cloud-config that I provide,what exactly happens?
The answer is that when merging, a stack of ‘merging classes’ is kept, the first one on that stack is the default mergingclasses, this set of mergers will be used when the first cloud-config is merged with the initial empty cloud-configdictionary. If the cloud-config that was just merged provided a set of merging classes (via the above formats) thenthose merging classes will be pushed onto the stack. Now if there is a second cloud-config to be merged then themerging classes from the cloud-config before the first will be used (not the default) and so on. This way a cloud-configcan decide how it will merge with a cloud-config dictionary coming after it.
1.9.6 Other uses
In addition to being used for merging user-data sections, the default merging algorithm for merging ‘conf.d’ yaml files(which form an initial yaml config for cloud-init) was also changed to use this mechanism so its full benefits (andcustomization) can also be used there as well. Other places that used the previous merging are also, similarly, nowextensible (metadata merging, for example).
Note, however, that merge algorithms are not used across types of configuration. As was the case before merging wasimplemented, user-data will overwrite conf.d configuration without merging.
1.9.7 Example cloud-config
A common request is to include multiple runcmd directives in different files and merge all of the commands together.To achieve this, we must modify the default merging to allow for dictionaries to join list values.
The first config
#cloud-configmerge_how:- name: listsettings: [append]
- name: dictsettings: [no_replace, recurse_list]
runcmd:- bash1- bash2
The second config
#cloud-configmerge_how:- name: listsettings: [append]
- name: dictsettings: [no_replace, recurse_list]
runcmd:- bash3- bash4
96 Chapter 1. Getting help

cloud-init, Release 20.2
1.10 Instance Metadata
1.10.1 What is instance data?
Instance data is the collection of all configuration data that cloud-init processes to configure the instance. This config-uration typically comes from any number of sources:
• cloud-provided metadata services (aka metadata)
• custom config-drive attached to the instance
• cloud-config seed files in the booted cloud image or distribution
• vendordata provided from files or cloud metadata services
• userdata provided at instance creation
Each cloud provider presents unique configuration metadata in different formats to the instance. Cloud-init provides acache of any crawled metadata as well as a versioned set of standardized instance data keys which it makes availableon all platforms.
Cloud-init produces a simple json object in /run/cloud-init/instance-data.json which represents stan-dardized and versioned representation of the metadata it consumes during initial boot. The intent is to provide thefollowing benefits to users or scripts on any system deployed with cloud-init:
• simple static object to query to obtain a instance’s metadata
• speed: avoid costly network transactions for metadata that is already cached on the filesytem
• reduce need to recrawl metadata services for static metadata that is already cached
• leverage cloud-init’s best practices for crawling cloud-metadata services
• avoid rolling unique metadata crawlers on each cloud platform to get metadata configuration values
Cloud-init stores any instance data processed in the following files:
• /run/cloud-init/instance-data.json: world-readable json containing standardized keys, sensitivekeys redacted
• /run/cloud-init/instance-data-sensitive.json: root-readable unredacted json blob
• /var/lib/cloud/instance/user-data.txt: root-readable sensitive raw userdata
• /var/lib/cloud/instance/vendor-data.txt: root-readable sensitive raw vendordata
Cloud-init redacts any security sensitive content from instance-data.json, stores /run/cloud-init/instance-data.json as a world-readable json file. Because user-data and vendor-data can contain pass-words both of these files are readonly for root as well. The root user can also read /run/cloud-init/instance-data-sensitive.json which is all instance data from instance-data.json as well as unredactedsensitive content.
1.10.2 Format of instance-data.json
The instance-data.json and instance-data-sensitive.json files are well-formed JSON and record the set of keys andvalues for any metadata processed by cloud-init. Cloud-init standardizes the format for this content so that it can begeneralized across different cloud platforms.
There are three basic top-level keys:
• base64_encoded_keys: A list of forward-slash delimited key paths into the instance-data.json object whosevalue is base64encoded for json compatibility. Values at these paths should be decoded to get the original value.
1.10. Instance Metadata 97

cloud-init, Release 20.2
• sensitive_keys: A list of forward-slash delimited key paths into the instance-data.json object whose value isconsidered by the datasource as ‘security sensitive’. Only the keys listed here will be redacted from instance-data.json for non-root users.
• merged_cfg: Merged cloud-init ‘system_config’ from /etc/cloud/cloud.cfg and /etc/cloud/cloud-cfg.d. Valuesunder this key could contain sensitive information such as passwords, so it is included in the sensitive-keys listwhich is only readable by root.
• ds: Datasource-specific metadata crawled for the specific cloud platform. It should closely represent the struc-ture of the cloud metadata crawled. The structure of content and details provided are entirely cloud-dependent.Mileage will vary depending on what the cloud exposes. The content exposed under the ‘ds’ key is currentlyexperimental and expected to change slightly in the upcoming cloud-init release.
• sys_info: Information about the underlying os, python, architecture and kernel. This represents the data col-lected by cloudinit.util.system_info.
• v1: Standardized cloud-init metadata keys, these keys are guaranteed to exist on all cloud platforms. They willalso retain their current behavior and format and will be carried forward even if cloud-init introduces a newversion of standardized keys with v2.
The standardized keys present:
v1._beta_keys
List of standardized keys still in ‘beta’. The format, intent or presence of these keys can change. Do not consider themproduction-ready.
Example output:
• [subplatform]
v1.cloud_name
Where possible this will indicate the ‘name’ of the cloud the system is running on. This is different than the ‘platform’item. For example, the cloud name of Amazon Web Services is ‘aws’, while the platform is ‘ec2’.
If determining a specific name is not possible or provided in meta-data, then this filed may contain the same contentas ‘platform’.
Example output:
• aws
• openstack
• azure
• configdrive
• nocloud
• ovf
v1.distro, v1.distro_version, v1.distro_release
This shall be the distro name, version and release as determined by cloudinit.util.get_linux_distro.
Example output:
• centos, 7.5, core
98 Chapter 1. Getting help

cloud-init, Release 20.2
• debian, 9, stretch
• freebsd, 12.0-release-p10,
• opensuse, 42.3, x86_64
• opensuse-tumbleweed, 20180920, x86_64
• redhat, 7.5, ‘maipo’
• sles, 12.3, x86_64
• ubuntu, 20.04, focal
v1.instance_id
Unique instance_id allocated by the cloud.
Examples output:
• i-<hash>
v1.kernel_release
This shall be the running kernel uname -r
Example output:
• 5.3.0-1010-aws
v1.local_hostname
The internal or local hostname of the system.
Examples output:
• ip-10-41-41-70
• <user-provided-hostname>
v1.machine
This shall be the running cpu machine architecture uname -m
Example output:
• x86_64
• i686
• ppc64le
• s390x
1.10. Instance Metadata 99
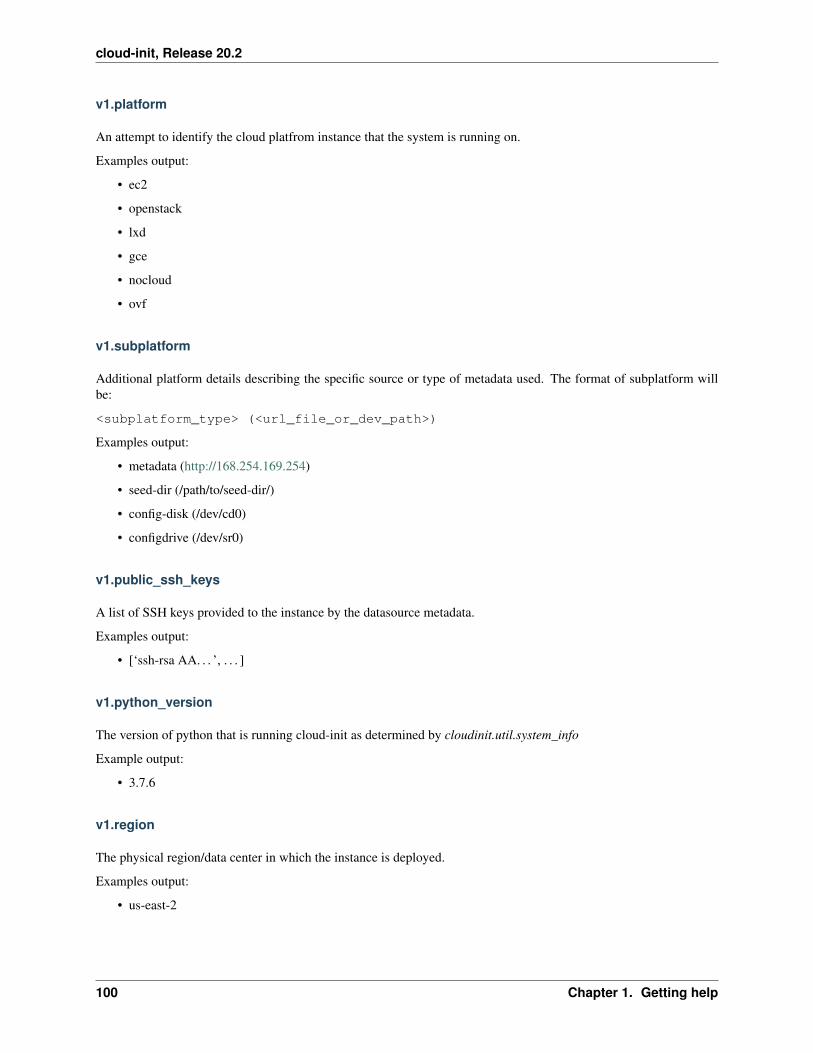
cloud-init, Release 20.2
v1.platform
An attempt to identify the cloud platfrom instance that the system is running on.
Examples output:
• ec2
• openstack
• lxd
• gce
• nocloud
• ovf
v1.subplatform
Additional platform details describing the specific source or type of metadata used. The format of subplatform willbe:
<subplatform_type> (<url_file_or_dev_path>)
Examples output:
• metadata (http://168.254.169.254)
• seed-dir (/path/to/seed-dir/)
• config-disk (/dev/cd0)
• configdrive (/dev/sr0)
v1.public_ssh_keys
A list of SSH keys provided to the instance by the datasource metadata.
Examples output:
• [‘ssh-rsa AA. . . ’, . . . ]
v1.python_version
The version of python that is running cloud-init as determined by cloudinit.util.system_info
Example output:
• 3.7.6
v1.region
The physical region/data center in which the instance is deployed.
Examples output:
• us-east-2
100 Chapter 1. Getting help

cloud-init, Release 20.2
v1.availability_zone
The physical availability zone in which the instance is deployed.
Examples output:
• us-east-2b
• nova
• null
Example Output
Below is an example of /run/cloud-init/instance-data-sensitive.json on an EC2 instance:
{"_beta_keys": ["subplatform"
],"availability_zone": "us-east-1b","base64_encoded_keys": [],"merged_cfg": {"_doc": "Merged cloud-init system config from /etc/cloud/cloud.cfg and /etc/cloud/
→˓cloud.cfg.d/","_log": ["[loggers]\nkeys=root,cloudinit\n\n[handlers]\nkeys=consoleHandler,
→˓cloudLogHandler\n\n[formatters]\nkeys=simpleFormatter,arg0Formatter\n\n[logger_→˓root]\nlevel=DEBUG\nhandlers=consoleHandler,cloudLogHandler\n\n[logger_→˓cloudinit]\nlevel=DEBUG\nqualname=cloudinit\nhandlers=\npropagate=1\n\n[handler_→˓consoleHandler]\nclass=StreamHandler\nlevel=WARNING\nformatter=arg0Formatter\nargs=(sys.→˓stderr,)\n\n[formatter_arg0Formatter]\nformat=%(asctime)s - %(filename)s[→˓%(levelname)s]: %(message)s\n\n[formatter_simpleFormatter]\nformat=[CLOUDINIT]→˓%(filename)s[%(levelname)s]: %(message)s\n",
"[handler_→˓cloudLogHandler]\nclass=FileHandler\nlevel=DEBUG\nformatter=arg0Formatter\nargs=('/→˓var/log/cloud-init.log',)\n",
"[handler_cloudLogHandler]\nclass=handlers.→˓SysLogHandler\nlevel=DEBUG\nformatter=simpleFormatter\nargs=(\"/dev/log\", handlers.→˓SysLogHandler.LOG_USER)\n"],"cloud_config_modules": ["emit_upstart","snap","ssh-import-id","locale","set-passwords","grub-dpkg","apt-pipelining","apt-configure","ubuntu-advantage","ntp","timezone","disable-ec2-metadata","runcmd","byobu"
],"cloud_final_modules": [
(continues on next page)
1.10. Instance Metadata 101

cloud-init, Release 20.2
(continued from previous page)
"package-update-upgrade-install","fan","landscape","lxd","ubuntu-drivers","puppet","chef","mcollective","salt-minion","rightscale_userdata","scripts-vendor","scripts-per-once","scripts-per-boot","scripts-per-instance","scripts-user","ssh-authkey-fingerprints","keys-to-console","phone-home","final-message","power-state-change"],"cloud_init_modules": ["migrator","seed_random","bootcmd","write-files","growpart","resizefs","disk_setup","mounts","set_hostname","update_hostname","update_etc_hosts","ca-certs","rsyslog","users-groups","ssh"],"datasource_list": ["Ec2","None"],"def_log_file": "/var/log/cloud-init.log","disable_root": true,"log_cfgs": [["[loggers]\nkeys=root,cloudinit\n\n[handlers]\nkeys=consoleHandler,
→˓cloudLogHandler\n\n[formatters]\nkeys=simpleFormatter,arg0Formatter\n\n[logger_→˓root]\nlevel=DEBUG\nhandlers=consoleHandler,cloudLogHandler\n\n[logger_→˓cloudinit]\nlevel=DEBUG\nqualname=cloudinit\nhandlers=\npropagate=1\n\n[handler_→˓consoleHandler]\nclass=StreamHandler\nlevel=WARNING\nformatter=arg0Formatter\nargs=(sys.→˓stderr,)\n\n[formatter_arg0Formatter]\nformat=%(asctime)s - %(filename)s[→˓%(levelname)s]: %(message)s\n\n[formatter_simpleFormatter]\nformat=[CLOUDINIT]→˓%(filename)s[%(levelname)s]: %(message)s\n",
"[handler_→˓cloudLogHandler]\nclass=FileHandler\nlevel=DEBUG\nformatter=arg0Formatter\nargs=('/→˓var/log/cloud-init.log',)\n"
(continues on next page)
102 Chapter 1. Getting help
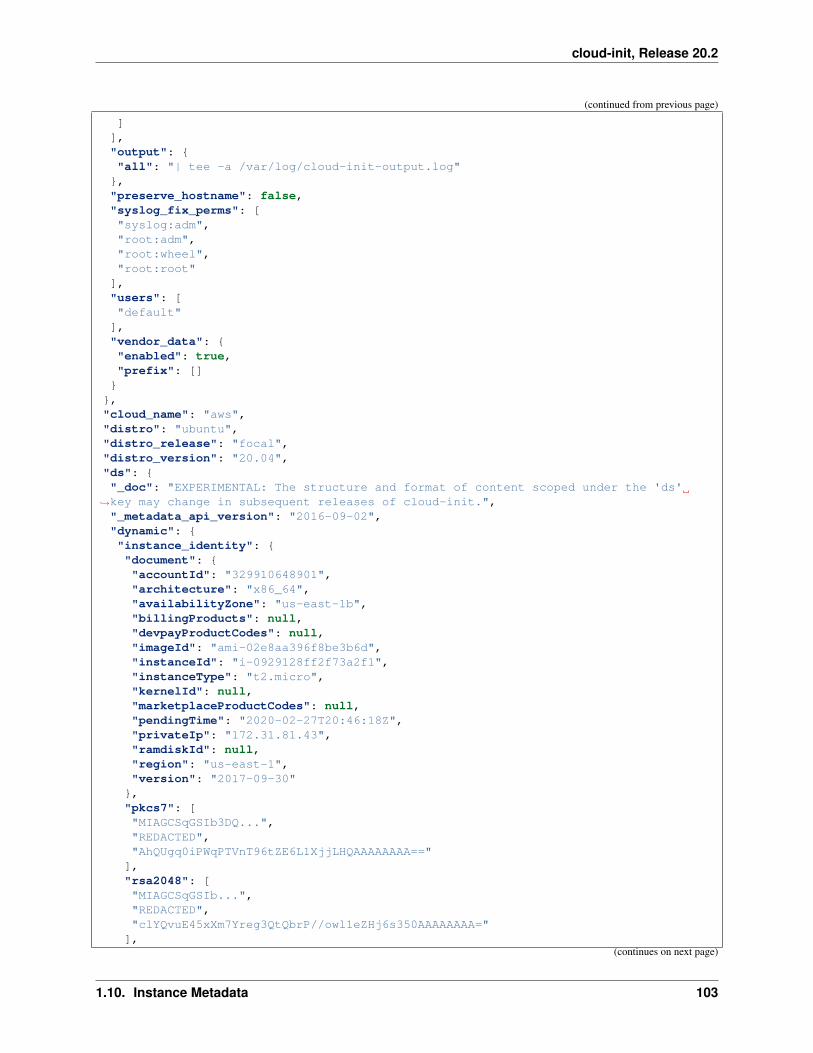
cloud-init, Release 20.2
(continued from previous page)
]],"output": {"all": "| tee -a /var/log/cloud-init-output.log"},"preserve_hostname": false,"syslog_fix_perms": ["syslog:adm","root:adm","root:wheel","root:root"],"users": ["default"],"vendor_data": {"enabled": true,"prefix": []}
},"cloud_name": "aws","distro": "ubuntu","distro_release": "focal","distro_version": "20.04","ds": {"_doc": "EXPERIMENTAL: The structure and format of content scoped under the 'ds'
→˓key may change in subsequent releases of cloud-init.","_metadata_api_version": "2016-09-02","dynamic": {"instance_identity": {"document": {"accountId": "329910648901","architecture": "x86_64","availabilityZone": "us-east-1b","billingProducts": null,"devpayProductCodes": null,"imageId": "ami-02e8aa396f8be3b6d","instanceId": "i-0929128ff2f73a2f1","instanceType": "t2.micro","kernelId": null,"marketplaceProductCodes": null,"pendingTime": "2020-02-27T20:46:18Z","privateIp": "172.31.81.43","ramdiskId": null,"region": "us-east-1","version": "2017-09-30"
},"pkcs7": ["MIAGCSqGSIb3DQ...","REDACTED","AhQUgq0iPWqPTVnT96tZE6L1XjjLHQAAAAAAAA=="
],"rsa2048": ["MIAGCSqGSIb...","REDACTED","clYQvuE45xXm7Yreg3QtQbrP//owl1eZHj6s350AAAAAAAA="
],(continues on next page)
1.10. Instance Metadata 103
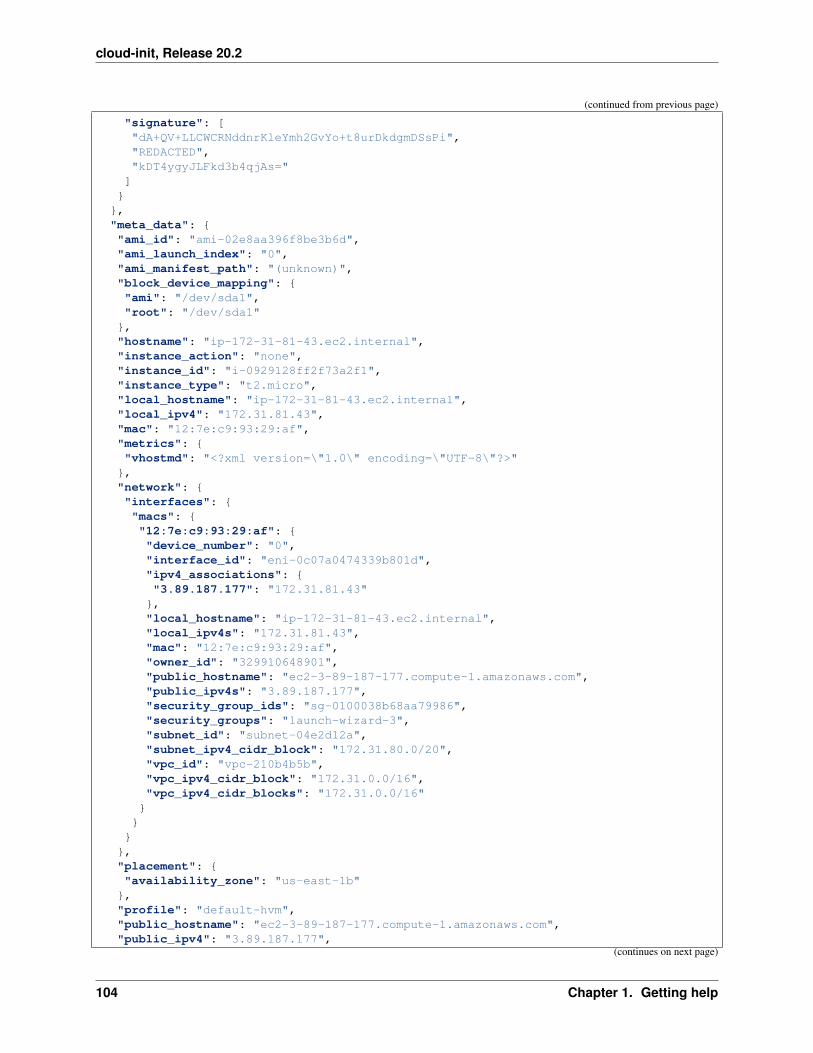
cloud-init, Release 20.2
(continued from previous page)
"signature": ["dA+QV+LLCWCRNddnrKleYmh2GvYo+t8urDkdgmDSsPi","REDACTED","kDT4ygyJLFkd3b4qjAs="
]}},"meta_data": {"ami_id": "ami-02e8aa396f8be3b6d","ami_launch_index": "0","ami_manifest_path": "(unknown)","block_device_mapping": {"ami": "/dev/sda1","root": "/dev/sda1"
},"hostname": "ip-172-31-81-43.ec2.internal","instance_action": "none","instance_id": "i-0929128ff2f73a2f1","instance_type": "t2.micro","local_hostname": "ip-172-31-81-43.ec2.internal","local_ipv4": "172.31.81.43","mac": "12:7e:c9:93:29:af","metrics": {"vhostmd": "<?xml version=\"1.0\" encoding=\"UTF-8\"?>"
},"network": {"interfaces": {"macs": {"12:7e:c9:93:29:af": {"device_number": "0","interface_id": "eni-0c07a0474339b801d","ipv4_associations": {"3.89.187.177": "172.31.81.43"},"local_hostname": "ip-172-31-81-43.ec2.internal","local_ipv4s": "172.31.81.43","mac": "12:7e:c9:93:29:af","owner_id": "329910648901","public_hostname": "ec2-3-89-187-177.compute-1.amazonaws.com","public_ipv4s": "3.89.187.177","security_group_ids": "sg-0100038b68aa79986","security_groups": "launch-wizard-3","subnet_id": "subnet-04e2d12a","subnet_ipv4_cidr_block": "172.31.80.0/20","vpc_id": "vpc-210b4b5b","vpc_ipv4_cidr_block": "172.31.0.0/16","vpc_ipv4_cidr_blocks": "172.31.0.0/16"
}}
}},"placement": {"availability_zone": "us-east-1b"
},"profile": "default-hvm","public_hostname": "ec2-3-89-187-177.compute-1.amazonaws.com","public_ipv4": "3.89.187.177",
(continues on next page)
104 Chapter 1. Getting help

cloud-init, Release 20.2
(continued from previous page)
"reservation_id": "r-0c481643d15766a02","security_groups": "launch-wizard-3","services": {"domain": "amazonaws.com","partition": "aws"
}}
},"instance_id": "i-0929128ff2f73a2f1","kernel_release": "5.3.0-1010-aws","local_hostname": "ip-172-31-81-43","machine": "x86_64","platform": "ec2","public_ssh_keys": [],"python_version": "3.7.6","region": "us-east-1","sensitive_keys": [],"subplatform": "metadata (http://169.254.169.254)","sys_info": {"dist": ["ubuntu","20.04","focal"
],"platform": "Linux-5.3.0-1010-aws-x86_64-with-Ubuntu-20.04-focal","python": "3.7.6","release": "5.3.0-1010-aws","system": "Linux","uname": ["Linux","ip-172-31-81-43","5.3.0-1010-aws","#11-Ubuntu SMP Thu Jan 16 07:59:32 UTC 2020","x86_64","x86_64"
],"variant": "ubuntu"
},"system_platform": "Linux-5.3.0-1010-aws-x86_64-with-Ubuntu-20.04-focal","userdata": "#cloud-config\nssh_import_id: [<my-launchpad-id>]\n...","v1": {"_beta_keys": ["subplatform"
],"availability_zone": "us-east-1b","cloud_name": "aws","distro": "ubuntu","distro_release": "focal","distro_version": "20.04","instance_id": "i-0929128ff2f73a2f1","kernel": "5.3.0-1010-aws","local_hostname": "ip-172-31-81-43","machine": "x86_64","platform": "ec2","public_ssh_keys": [],"python": "3.7.6","region": "us-east-1",
(continues on next page)
1.10. Instance Metadata 105

cloud-init, Release 20.2
(continued from previous page)
"subplatform": "metadata (http://169.254.169.254)","system_platform": "Linux-5.3.0-1010-aws-x86_64-with-Ubuntu-20.04-focal","variant": "ubuntu"
},"variant": "ubuntu","vendordata": ""
}
1.10.3 Using instance-data
As of cloud-init v. 18.4, any variables present in /run/cloud-init/instance-data.json can be used in:
• User-data scripts
• Cloud config data
• Command line interface via cloud-init query or cloud-init devel render
Many clouds allow users to provide user-data to an instance at the time the instance is launched. Cloud-init supports anumber of User-Data Formats.
Both user-data scripts and #cloud-config data support jinja template rendering. When the first line of the provideduser-data begins with, ## template: jinja cloud-init will use jinja to render that file. Any instance-data-sensitive.jsonvariables are surfaced as dot-delimited jinja template variables because cloud-config modules are run as ‘root’ user.
Below are some examples of providing these types of user-data:
• Cloud config calling home with the ec2 public hostname and availability-zone
## template: jinja#cloud-configruncmd:
- echo 'EC2 public hostname allocated to instance: {{ds.meta_data.public_hostname }}' > /tmp/instance_metadata
- echo 'EC2 availability zone: {{ v1.availability_zone }}' >>/tmp/instance_metadata
- curl -X POST -d '{"hostname": "{{ds.meta_data.public_hostname }}","availability-zone": "{{ v1.availability_zone }}"}'https://example.com
• Custom user-data script performing different operations based on region
## template: jinja#!/bin/bash{% if v1.region == 'us-east-2' -%}echo 'Installing custom proxies for {{ v1.region }}sudo apt-get install my-xtra-fast-stack{%- endif %}...
Note: Trying to reference jinja variables that don’t exist in instance-data.json will result in warnings in /var/log/cloud-init.log and the following string in your rendered user-data: CI_MISSING_JINJA_VAR/<your_varname>.
Cloud-init also surfaces a command line tool cloud-init query which can assist developers or scripts with obtaininginstance metadata easily. See query for more information.
106 Chapter 1. Getting help

cloud-init, Release 20.2
To cut down on keystrokes on the command line, cloud-init also provides top-level key aliases for any standardizedv# keys present. The preceding v1 is not required of v1.var_name These aliases will represent the value of thehighest versioned standard key. For example, cloud_name value will be v2.cloud_name if both v1 and v2 keysare present in instance-data.json. The query command also publishes userdata and vendordata keys to theroot user which will contain the decoded user and vendor data provided to this instance. Non-root users referencinguserdata or vendordata keys will see only redacted values.
# List all top-level instance-data keys available% cloud-init query --list-keys
# Find your EC2 ami-id% cloud-init query ds.metadata.ami_id
# Format your cloud_name and region using jinja template syntax% cloud-init query --format 'cloud: {{ v1.cloud_name }} myregion: {{% v1.region }}'
Note: To save time designing a user-data template for a specific cloud’s instance-data.json, use the ‘render’ cloud-initcommand on an instance booted on your favorite cloud. See devel for more information.
1.11 Datasources
Datasources are sources of configuration data for cloud-init that typically come from the user (e.g. userdata) or comefrom the cloud that created the configuration drive (e.g. metadata). Typical userdata would include files, yaml, andshell scripts while typical metadata would include server name, instance id, display name and other cloud specificdetails.
Since there are multiple ways to provide this data (each cloud solution seems to prefer its own way) internally adatasource abstract class was created to allow for a single way to access the different cloud systems methods toprovide this data through the typical usage of subclasses.
Any metadata processed by cloud-init’s datasources is persisted as /run/cloud-init/instance-data.json.Cloud-init provides tooling to quickly introspect some of that data. See Instance Metadata for more information.
1.11.1 Known Sources
The following is a list of documents for each supported datasource:
Alibaba Cloud (AliYun)
The AliYun datasource reads data from Alibaba Cloud ECS. Support is present in cloud-init since 0.7.9.
Metadata Service
The Alibaba Cloud metadata service is available at the well known url http://100.100.100.200/. For moreinformation see Alibaba Cloud ECS on metadata.
1.11. Datasources 107

cloud-init, Release 20.2
Versions
Like the EC2 metadata service, Alibaba Cloud’s metadata service provides versioned data under specific paths. As ofApril 2018, there are only 2016-01-01 and latest versions.
It is expected that the dated version will maintain a stable interface but latest may change content at a future date.
Cloud-init uses the 2016-01-01 version.
You can list the versions available to your instance with:
$ curl http://100.100.100.200/2016-01-01latest
Metadata
Instance metadata can be queried at http://100.100.100.200/2016-01-01/meta-data
$ curl http://100.100.100.200/2016-01-01/meta-datadns-conf/eipv4hostnameimage-idinstance-idinstance/macnetwork-typenetwork/ntp-conf/owner-account-idprivate-ipv4public-keys/region-idserial-numbersource-addresssub-private-ipv4-listvpc-cidr-blockvpc-id
Userdata
If provided, user-data will appear at http://100.100.100.200/2016-01-01/user-data. If no user-datais provided, this will return a 404.
$ curl http://100.100.100.200/2016-01-01/user-data#!/bin/shecho "Hello World."
Alt Cloud
The datasource altcloud will be used to pick up user data on RHEVm and vSphere.
108 Chapter 1. Getting help

cloud-init, Release 20.2
RHEVm
For RHEVm v3.0 the userdata is injected into the VM using floppy injection via the RHEVm dashboard “CustomProperties”.
The format of the Custom Properties entry must be:
floppyinject=user-data.txt:<base64 encoded data>
For example to pass a simple bash script:
% cat simple_script.bash#!/bin/bashecho "Hello Joe!" >> /tmp/JJV_Joe_out.txt
% base64 < simple_script.bashIyEvYmluL2Jhc2gKZWNobyAiSGVsbG8gSm9lISIgPj4gL3RtcC9KSlZfSm9lX291dC50eHQK
To pass this example script to cloud-init running in a RHEVm v3.0 VM set the “Custom Properties” when creating theRHEMv v3.0 VM to:
floppyinject=user-data.→˓txt:IyEvYmluL2Jhc2gKZWNobyAiSGVsbG8gSm9lISIgPj4gL3RtcC9KSlZfSm9lX291dC50eHQK
NOTE: The prefix with file name must be: floppyinject=user-data.txt:
It is also possible to launch a RHEVm v3.0 VM and pass optional user data to it using the Delta Cloud.
For more information on Delta Cloud see: http://deltacloud.apache.org
vSphere
For VMWare’s vSphere the userdata is injected into the VM as an ISO via the cdrom. This can be done using thevSphere dashboard by connecting an ISO image to the CD/DVD drive.
To pass this example script to cloud-init running in a vSphere VM set the CD/DVD drive when creating the vSphereVM to point to an ISO on the data store.
Note: The ISO must contain the user data.
For example, to pass the same simple_script.bash to vSphere:
Create the ISO
% mkdir my-iso
NOTE: The file name on the ISO must be: user-data.txt
% cp simple_script.bash my-iso/user-data.txt% genisoimage -o user-data.iso -r my-iso
Verify the ISO
1.11. Datasources 109

cloud-init, Release 20.2
% sudo mkdir /media/vsphere_iso% sudo mount -o loop user-data.iso /media/vsphere_iso% cat /media/vsphere_iso/user-data.txt% sudo umount /media/vsphere_iso
Then, launch the vSphere VM the ISO user-data.iso attached as a CDROM.
It is also possible to launch a vSphere VM and pass optional user data to it using the Delta Cloud.
For more information on Delta Cloud see: http://deltacloud.apache.org
Azure
This datasource finds metadata and user-data from the Azure cloud platform.
walinuxagent
walinuxagent has several functions within images. For cloud-init specifically, the relevant functionality it performs isto register the instance with the Azure cloud platform at boot so networking will be permitted. For more informationabout the other functionality of walinuxagent, see Azure’s documentation for more details. (Note, however, that onlyone of walinuxagent’s provisioning and cloud-init should be used to perform instance customisation.)
If you are configuring walinuxagent yourself, you will want to ensure that you have Provisioning.UseCloudInit set toy.
Builtin Agent
An alternative to using walinuxagent to register to the Azure cloud platform is to use the __builtin__ agentcommand. This section contains more background on what that code path does, and how to enable it.
The Azure cloud platform provides initial data to an instance via an attached CD formatted in UDF. That CD con-tains a ‘ovf-env.xml’ file that provides some information. Additional information is obtained via interaction with the“endpoint”.
To find the endpoint, we now leverage the dhcp client’s ability to log its known values on exit. The endpointserver is special DHCP option 245. Depending on your networking stack, this can be done by calling a scriptin /etc/dhcp/dhclient-exit-hooks or a file in /etc/NetworkManager/dispatcher.d. Both of these call a sub-command‘dhclient_hook’ of cloud-init itself. This sub-command will write the client information in json format to /run/cloud-init/dhclient.hook/<interface>.json.
In order for cloud-init to leverage this method to find the endpoint, the cloud.cfg file must contain:
datasource:Azure:set_hostname: Falseagent_command: __builtin__
If those files are not available, the fallback is to check the leases file for the endpoint server (again option 245).
You can define the path to the lease file with the ‘dhclient_lease_file’ configuration.
110 Chapter 1. Getting help

cloud-init, Release 20.2
IMDS
Azure provides the instance metadata service (IMDS) which is a REST service on 169.254.169.254 providingadditional configuration information to the instance. Cloud-init uses the IMDS for:
• network configuration for the instance which is applied per boot
• a preprovisioing gate which blocks instance configuration until Azure fabric is ready to provision
Configuration
The following configuration can be set for the datasource in system configuration (in /etc/cloud/cloud.cfg or/etc/cloud/cloud.cfg.d/).
The settings that may be configured are:
• agent_command: Either __builtin__ (default) or a command to run to getcw metadata. If __builtin__, getmetadata from walinuxagent. Otherwise run the provided command to obtain metadata.
• apply_network_config: Boolean set to True to use network configuration described by Azure’s IMDS endpointinstead of fallback network config of dhcp on eth0. Default is True. For Ubuntu 16.04 or earlier, default is False.
• data_dir: Path used to read metadata files and write crawled data.
• dhclient_lease_file: The fallback lease file to source when looking for custom DHCP option 245 from Azurefabric.
• disk_aliases: A dictionary defining which device paths should be interpreted as ephemeral images. Seecc_disk_setup module for more info.
• hostname_bounce: A dictionary Azure hostname bounce behavior to react to metadata changes. The‘hostname_bounce: command’ entry can be either the literal string ‘builtin’ or a command to execute.The command will be invoked after the hostname is set, and will have the ‘interface’ in its environment. Ifset_hostname is not true, then hostname_bounce will be ignored. An example might be:
command: ["sh", "-c", "killall dhclient; dhclient $interface"]
• hostname_bounce: A dictionary Azure hostname bounce behavior to react to metadata changes. Azure willthrottle ifup/down in some cases after metadata has been updated to inform dhcp server about updated host-names.
• set_hostname: Boolean set to True when we want Azure to set the hostname based on metadata.
Configuration for the datasource can also be read from a dscfg entry in theLinuxProvisioningConfigurationSet. Content in dscfg node is expected to be base64 encodedyaml content, and it will be merged into the ‘datasource: Azure’ entry.
An example configuration with the default values is provided below:
datasource:Azure:agent_command: __builtin__apply_network_config: truedata_dir: /var/lib/waagentdhclient_lease_file: /var/lib/dhcp/dhclient.eth0.leasesdisk_aliases:
ephemeral0: /dev/disk/cloud/azure_resourcehostname_bounce:interface: eth0command: builtin
(continues on next page)
1.11. Datasources 111

cloud-init, Release 20.2
(continued from previous page)
policy: truehostname_command: hostname
set_hostname: true
Userdata
Userdata is provided to cloud-init inside the ovf-env.xml file. Cloud-init expects that user-data will be providedas base64 encoded value inside the text child of a element named UserData or CustomData which is a di-rect child of the LinuxProvisioningConfigurationSet (a sibling to UserName) If both UserData andCustomData are provided behavior is undefined on which will be selected.
In the example below, user-data provided is ‘this is my userdata’, and the datasource config provided is{"agent_command": ["start", "walinuxagent"]}. That agent command will take affect as if it werespecified in system config.
Example:
<wa:ProvisioningSection><wa:Version>1.0</wa:Version><LinuxProvisioningConfigurationSet
xmlns="http://schemas.microsoft.com/windowsazure"xmlns:i="http://www.w3.org/2001/XMLSchema-instance">
<ConfigurationSetType>LinuxProvisioningConfiguration</ConfigurationSetType><HostName>myHost</HostName><UserName>myuser</UserName><UserPassword/><CustomData>dGhpcyBpcyBteSB1c2VyZGF0YQ===</CustomData><dscfg>eyJhZ2VudF9jb21tYW5kIjogWyJzdGFydCIsICJ3YWxpbnV4YWdlbnQiXX0=</dscfg><DisableSshPasswordAuthentication>true</DisableSshPasswordAuthentication><SSH><PublicKeys><PublicKey><Fingerprint>6BE7A7C3C8A8F4B123CCA5D0C2F1BE4CA7B63ED7</Fingerprint><Path>this-value-unused</Path>
</PublicKey></PublicKeys>
</SSH></LinuxProvisioningConfigurationSet>
</wa:ProvisioningSection>
hostname
When the user launches an instance, they provide a hostname for that instance. The hostname is provided to theinstance in the ovf-env.xml file as HostName.
Whatever value the instance provides in its dhcp request will resolve in the domain returned in the ‘search’ request.
The interesting issue is that a generic image will already have a hostname configured. The ubuntu cloud imageshave ‘ubuntu’ as the hostname of the system, and the initial dhcp request on eth0 is not guaranteed to occur after thedatasource code has been run. So, on first boot, that initial value will be sent in the dhcp request and that value willresolve.
In order to make the HostName provided in the ovf-env.xml resolve, a dhcp request must be made with the new value.Walinuxagent (in its current version) handles this by polling the state of hostname and bouncing (‘ifdown eth0;ifup eth0’ the network interface if it sees that a change has been made.
112 Chapter 1. Getting help

cloud-init, Release 20.2
cloud-init handles this by setting the hostname in the DataSource’s ‘get_data’ method via ‘hostname $HostName’,and then bouncing the interface. This behavior can be configured or disabled in the datasource config. See ‘Configu-ration’ above.
CloudSigma
This datasource finds metadata and user-data from the CloudSigma cloud platform. Data transfer occurs through avirtual serial port of the CloudSigma’s VM and the presence of network adapter is NOT a requirement, See servercontext in the public documentation for more information.
Setting a hostname
By default the name of the server will be applied as a hostname on the first boot.
Providing user-data
You can provide user-data to the VM using the dedicated meta field in the server context cloudinit-user-data.By default cloud-config format is expected there and the #cloud-config header could be omitted. However sincethis is a raw-text field you could provide any of the valid config formats.
You have the option to encode your user-data using Base64. In order to do that you have to add thecloudinit-user-data field to the base64_fields. The latter is a comma-separated field with all the metafields whit base64 encoded values.
If your user-data does not need an internet connection you can create a meta field in the server contextcloudinit-dsmode and set “local” as value. If this field does not exist the default value is “net”.
CloudStack
Apache CloudStack expose user-data, meta-data, user password and account SSH key thru the Virtual-Router. Thedatasource obtains the VR address via dhcp lease information given to the instance. For more details on meta-data anduser-data, refer the CloudStack Administrator Guide.
URLs to access user-data and meta-data from the Virtual Machine. data-server. is a well-known hostname providedby the CloudStack virtual router that points to the next UserData server (which is usually also the virtual router).
http://data-server./latest/user-datahttp://data-server./latest/meta-datahttp://data-server./latest/meta-data/{metadata type}
If data-server. cannot be resolved, cloud-init will try to obtain the virtual router’s address from the system’s DHCPleases. If that fails, it will use the system’s default gateway.
Configuration
The following configuration can be set for the datasource in system configuration (in /etc/cloud/cloud.cfg or/etc/cloud/cloud.cfg.d/ ).
The settings that may be configured are:
• max_wait: the maximum amount of clock time in seconds that should be spent searching metadata_urls. Avalue less than zero will result in only one request being made, to the first in the list. (default: 120)
1.11. Datasources 113

cloud-init, Release 20.2
• timeout: the timeout value provided to urlopen for each individual http request. This is used both when selectinga metadata_url and when crawling the metadata service. (default: 50)
An example configuration with the default values is provided below:
datasource:CloudStack:max_wait: 120timeout: 50datasource_list:- CloudStack
Config Drive
The configuration drive datasource supports the OpenStack configuration drive disk.
See the config drive extension and metadata introduction in the public documentation for more informa-tion.
By default, cloud-init does always consider this source to be a full-fledged datasource. Instead, the typical behavior isto assume it is really only present to provide networking information. Cloud-init will copy off the network information,apply it to the system, and then continue on. The “full” datasource could then be found in the EC2 metadata service.If this is not the case then the files contained on the located drive must provide equivalents to what the EC2 metadataservice would provide (which is typical of the version 2 support listed below)
Version 1
Note: Version 1 is legacy and should be considered deprecated. Version 2 has been supported in OpenStack since2012.2 (Folsom).
The following criteria are required to as a config drive:
1. Must be formatted with vfat filesystem
2. Must contain one of the following files
/etc/network/interfaces/root/.ssh/authorized_keys/meta.js
/etc/network/interfaces
This file is laid down by nova in order to pass static networking information to the guest. Cloud-init willcopy it off of the config-drive and into /etc/network/interfaces (or convert it to RH format) as soon as itcan, and then attempt to bring up all network interfaces.
/root/.ssh/authorized_keys
This file is laid down by nova, and contains the ssk keys that were provided to nova on instance creation(nova-boot –key . . . .)
/meta.js
meta.js is populated on the config-drive in response to the user passing “meta flags” (nova boot –metakey=value . . . ). It is expected to be json formatted.
114 Chapter 1. Getting help

cloud-init, Release 20.2
Version 2
The following criteria are required to as a config drive:
1. Must be formatted with vfat or iso9660 filesystem or have a filesystem label of config-2
2. The files that will typically be present in the config drive are:
openstack/- 2012-08-10/ or latest/- meta_data.json- user_data (not mandatory)
- content/- 0000 (referenced content files)- 0001- ....
ec2- latest/- meta-data.json (not mandatory)
Keys and values
Cloud-init’s behavior can be modified by keys found in the meta.js (version 1 only) file in the following ways.
dsmode:values: local, net, passdefault: pass
This is what indicates if configdrive is a final data source or not. By default it is ‘pass’, meaning this datasource shouldnot be read. Set it to ‘local’ or ‘net’ to stop cloud-init from continuing on to search for other data sources after networkconfig.
The difference between ‘local’ and ‘net’ is that local will not require networking to be up before user-data actions (orboothooks) are run.
instance-id:default: iid-dsconfigdrive
This is utilized as the metadata’s instance-id. It should generally be unique, as it is what is used to determine “is this anew instance”.
public-keys:default: None
If present, these keys will be used as the public keys for the instance. This value overrides the content in autho-rized_keys.
Note: it is likely preferable to provide keys via user-data
user-data:default: None
This provides cloud-init user-data. See examples for what all can be present here.
1.11. Datasources 115
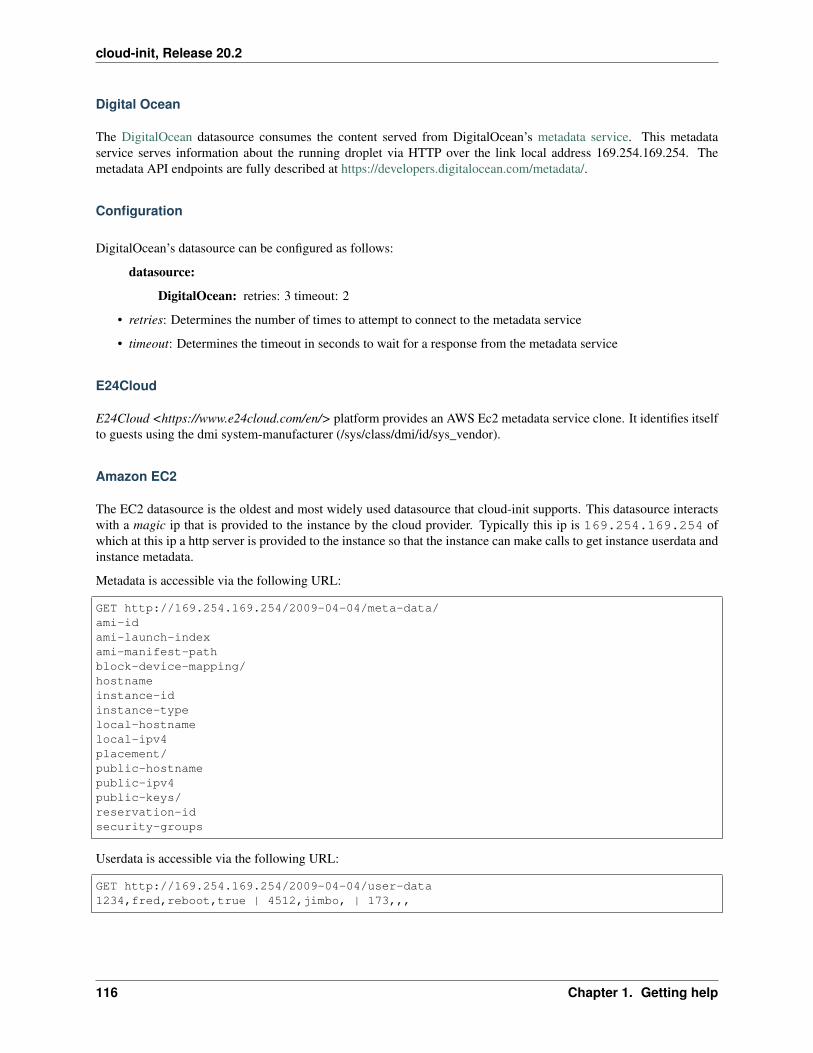
cloud-init, Release 20.2
Digital Ocean
The DigitalOcean datasource consumes the content served from DigitalOcean’s metadata service. This metadataservice serves information about the running droplet via HTTP over the link local address 169.254.169.254. Themetadata API endpoints are fully described at https://developers.digitalocean.com/metadata/.
Configuration
DigitalOcean’s datasource can be configured as follows:
datasource:
DigitalOcean: retries: 3 timeout: 2
• retries: Determines the number of times to attempt to connect to the metadata service
• timeout: Determines the timeout in seconds to wait for a response from the metadata service
E24Cloud
E24Cloud <https://www.e24cloud.com/en/> platform provides an AWS Ec2 metadata service clone. It identifies itselfto guests using the dmi system-manufacturer (/sys/class/dmi/id/sys_vendor).
Amazon EC2
The EC2 datasource is the oldest and most widely used datasource that cloud-init supports. This datasource interactswith a magic ip that is provided to the instance by the cloud provider. Typically this ip is 169.254.169.254 ofwhich at this ip a http server is provided to the instance so that the instance can make calls to get instance userdata andinstance metadata.
Metadata is accessible via the following URL:
GET http://169.254.169.254/2009-04-04/meta-data/ami-idami-launch-indexami-manifest-pathblock-device-mapping/hostnameinstance-idinstance-typelocal-hostnamelocal-ipv4placement/public-hostnamepublic-ipv4public-keys/reservation-idsecurity-groups
Userdata is accessible via the following URL:
GET http://169.254.169.254/2009-04-04/user-data1234,fred,reboot,true | 4512,jimbo, | 173,,,
116 Chapter 1. Getting help

cloud-init, Release 20.2
Note that there are multiple versions of this data provided, cloud-init by default uses 2009-04-04 but newer versions canbe supported with relative ease (newer versions have more data exposed, while maintaining backward compatibilitywith the previous versions). Version 2016-09-02 is required for secondary IP address support.
To see which versions are supported from your cloud provider use the following URL:
GET http://169.254.169.254/1.02007-01-192007-03-012007-08-292007-10-102007-12-152008-02-012008-09-012009-04-04...latest
Configuration
The following configuration can be set for the datasource in system configuration (in /etc/cloud/cloud.cfg or/etc/cloud/cloud.cfg.d/ ).
The settings that may be configured are:
• metadata_urls: This list of urls will be searched for an Ec2 metadata service. The first entry that successfullyreturns a 200 response for <url>/<version>/meta-data/instance-id will be selected. (default: [‘http://169.254.169.254’, ‘http://instance-data:8773’]).
• max_wait: the maximum amount of clock time in seconds that should be spent searching metadata_urls. Avalue less than zero will result in only one request being made, to the first in the list. (default: 120)
• timeout: the timeout value provided to urlopen for each individual http request. This is used both when selectinga metadata_url and when crawling the metadata service. (default: 50)
• apply_full_imds_network_config: Boolean (default: True) to allow cloud-init to configure any secondary NICsand secondary IPs described by the metadata service. All network interfaces are configured with DHCP (v4)to obtain an primary IPv4 address and route. Interfaces which have a non-empty ‘ipv6s’ list will also enableDHCPv6 to obtain a primary IPv6 address and route. The DHCP response (v4 and v6) return an IP that matchesthe first element of local-ipv4s and ipv6s lists respectively. All additional values (secondary addresses) in thestatic ip lists will be added to interface.
An example configuration with the default values is provided below:
datasource:Ec2:metadata_urls: ["http://169.254.169.254:80", "http://instance-data:8773"]max_wait: 120timeout: 50apply_full_imds_network_config: true
Notes
• There are 2 types of EC2 instances network-wise: VPC ones (Virtual Private Cloud) and Classic ones (alsoknown as non-VPC). One major difference between them is that Classic instances have their MAC address
1.11. Datasources 117

cloud-init, Release 20.2
changed on stop/restart operations, so cloud-init will recreate the network config file for EC2 Classic instancesevery boot. On VPC instances this file is generated only in the first boot of the instance. The check for theinstance type is performed by is_classic_instance() method.
• For EC2 instances with multiple network interfaces (NICs) attached, dhcp4 will be enabled to obtain the primaryprivate IPv4 address of those NICs. Wherever dhcp4 or dhcp6 is enabled for a NIC, a dhcp route-metric willbe added with the value of <device-number + 1> * 100 to ensure dhcp routes on the primary NIC arepreferred to any secondary NICs. For example: the primary NIC will have a DHCP route-metric of 100, thenext NIC will be 200.
Exoscale
This datasource supports reading from the metadata server used on the Exoscale platform.
Use of the Exoscale datasource is recommended to benefit from new features of the Exoscale platform.
The datasource relies on the availability of a compatible metadata server (http://169.254.169.254 is used bydefault) and its companion password server, reachable at the same address (by default on port 8080).
Crawling of metadata
The metadata service and password server are crawled slightly differently:
• The “metadata service” is crawled every boot.
• The password server is also crawled every boot (the Exoscale datasource forces the password module to runwith “frequency always”).
In the password server case, the following rules apply in order to enable the “restore instance password” functionality:
• If a password is returned by the password server, it is then marked “saved” by the cloud-init datasource. Subse-quent boots will skip setting the password (the password server will return “saved_password”).
• When the instance password is reset (via the Exoscale UI), the password server will return the non-emptypassword at next boot, therefore causing cloud-init to reset the instance’s password.
Configuration
Users of this datasource are discouraged from changing the default settings unless instructed to by Exoscale support.
The following settings are available and can be set for the datasource in system configuration (in/etc/cloud/cloud.cfg.d/ ).
The settings available are:
• metadata_url: The URL for the metadata service (defaults to http://169.254.169.254)
• api_version: The API version path on which to query the instance metadata (defaults to 1.0)
• password_server_port: The port (on the metadata server) on which the password server listens (defaults to8080).
• timeout: the timeout value provided to urlopen for each individual http request. (defaults to 10)
• retries: The number of retries that should be done for an http request (defaults to 6)
An example configuration with the default values is provided below:
118 Chapter 1. Getting help
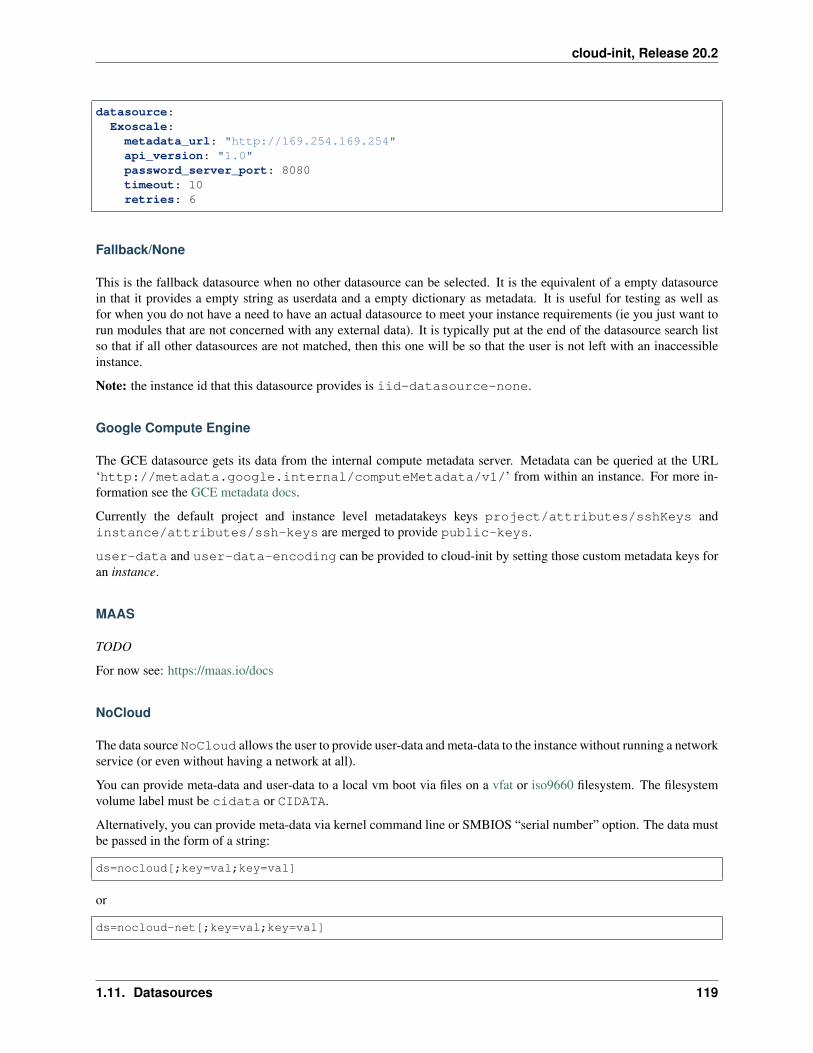
cloud-init, Release 20.2
datasource:Exoscale:metadata_url: "http://169.254.169.254"api_version: "1.0"password_server_port: 8080timeout: 10retries: 6
Fallback/None
This is the fallback datasource when no other datasource can be selected. It is the equivalent of a empty datasourcein that it provides a empty string as userdata and a empty dictionary as metadata. It is useful for testing as well asfor when you do not have a need to have an actual datasource to meet your instance requirements (ie you just want torun modules that are not concerned with any external data). It is typically put at the end of the datasource search listso that if all other datasources are not matched, then this one will be so that the user is not left with an inaccessibleinstance.
Note: the instance id that this datasource provides is iid-datasource-none.
Google Compute Engine
The GCE datasource gets its data from the internal compute metadata server. Metadata can be queried at the URL‘http://metadata.google.internal/computeMetadata/v1/’ from within an instance. For more in-formation see the GCE metadata docs.
Currently the default project and instance level metadatakeys keys project/attributes/sshKeys andinstance/attributes/ssh-keys are merged to provide public-keys.
user-data and user-data-encoding can be provided to cloud-init by setting those custom metadata keys foran instance.
MAAS
TODO
For now see: https://maas.io/docs
NoCloud
The data source NoCloud allows the user to provide user-data and meta-data to the instance without running a networkservice (or even without having a network at all).
You can provide meta-data and user-data to a local vm boot via files on a vfat or iso9660 filesystem. The filesystemvolume label must be cidata or CIDATA.
Alternatively, you can provide meta-data via kernel command line or SMBIOS “serial number” option. The data mustbe passed in the form of a string:
ds=nocloud[;key=val;key=val]
or
ds=nocloud-net[;key=val;key=val]
1.11. Datasources 119

cloud-init, Release 20.2
The permitted keys are:
• h or local-hostname
• i or instance-id
• s or seedfrom
With ds=nocloud, the seedfrom value must start with / or file://. With ds=nocloud-net, theseedfrom value must start with http:// or https://.
e.g. you can pass this option to QEMU:
-smbios type=1,serial=ds=nocloud-net;s=http://10.10.0.1:8000/
to cause NoCloud to fetch the full meta-data from http://10.10.0.1:8000/meta-data after the network initialization iscomplete.
These user-data and meta-data files are expected to be in the following format.
/user-data/meta-data
Basically, user-data is simply user-data and meta-data is a yaml formatted file representing what you’d find in the EC2metadata service.
You may also optionally provide a vendor-data file in the following format.
/vendor-data
Given a disk ubuntu 12.04 cloud image in ‘disk.img’, you can create a sufficient disk by following the example below.
## create user-data and meta-data files that will be used## to modify image on first boot$ { echo instance-id: iid-local01; echo local-hostname: cloudimg; } > meta-data
$ printf "#cloud-config\npassword: passw0rd\nchpasswd: { expire: False }\nssh_pwauth:→˓True\n" > user-data
## create a disk to attach with some user-data and meta-data$ genisoimage -output seed.iso -volid cidata -joliet -rock user-data meta-data
## alternatively, create a vfat filesystem with same files## $ truncate --size 2M seed.img## $ mkfs.vfat -n cidata seed.img## $ mcopy -oi seed.img user-data meta-data ::
## create a new qcow image to boot, backed by your original image$ qemu-img create -f qcow2 -b disk.img boot-disk.img
## boot the image and login as 'ubuntu' with password 'passw0rd'## note, passw0rd was set as password through the user-data above,## there is no password set on these images.$ kvm -m 256 \
-net nic -net user,hostfwd=tcp::2222-:22 \-drive file=boot-disk.img,if=virtio \-drive file=seed.iso,if=virtio
Note: that the instance-id provided (iid-local01 above) is what is used to determine if this is “first boot”. So ifyou are making updates to user-data you will also have to change that, or start the disk fresh.
120 Chapter 1. Getting help

cloud-init, Release 20.2
Also, you can inject an /etc/network/interfaces file by providing the content for that file in thenetwork-interfaces field of metadata.
Example metadata:
instance-id: iid-abcdefgnetwork-interfaces: |iface eth0 inet staticaddress 192.168.1.10network 192.168.1.0netmask 255.255.255.0broadcast 192.168.1.255gateway 192.168.1.254
hostname: myhost
Network configuration can also be provided to cloud-init in either Networking Config Version 1 or Networking ConfigVersion 2 by providing that yaml formatted data in a file named network-config. If found, this file will overridea network-interfaces file.
See an example below. Note specifically that this file does not have a top level network key as it it is already assumedto be network configuration based on the filename.
version: 1config:
- type: physicalname: interface0mac_address: "52:54:00:12:34:00"subnets:
- type: staticaddress: 192.168.1.10netmask: 255.255.255.0gateway: 192.168.1.254
version: 2ethernets:interface0:match:
mac_address: "52:54:00:12:34:00"set-name: interface0addresses:- 192.168.1.10/255.255.255.0
gateway4: 192.168.1.254
OpenNebula
The OpenNebula (ON) datasource supports the contextualization disk.
See contextualization overview, contextualizing VMs and network configuration in the public documen-tation for more information.
OpenNebula’s virtual machines are contextualized (parametrized) by CD-ROM image, which contains a shell scriptcontext.sh with custom variables defined on virtual machine start. There are no fixed contextualization variables, butthe datasource accepts many used and recommended across the documentation.
1.11. Datasources 121
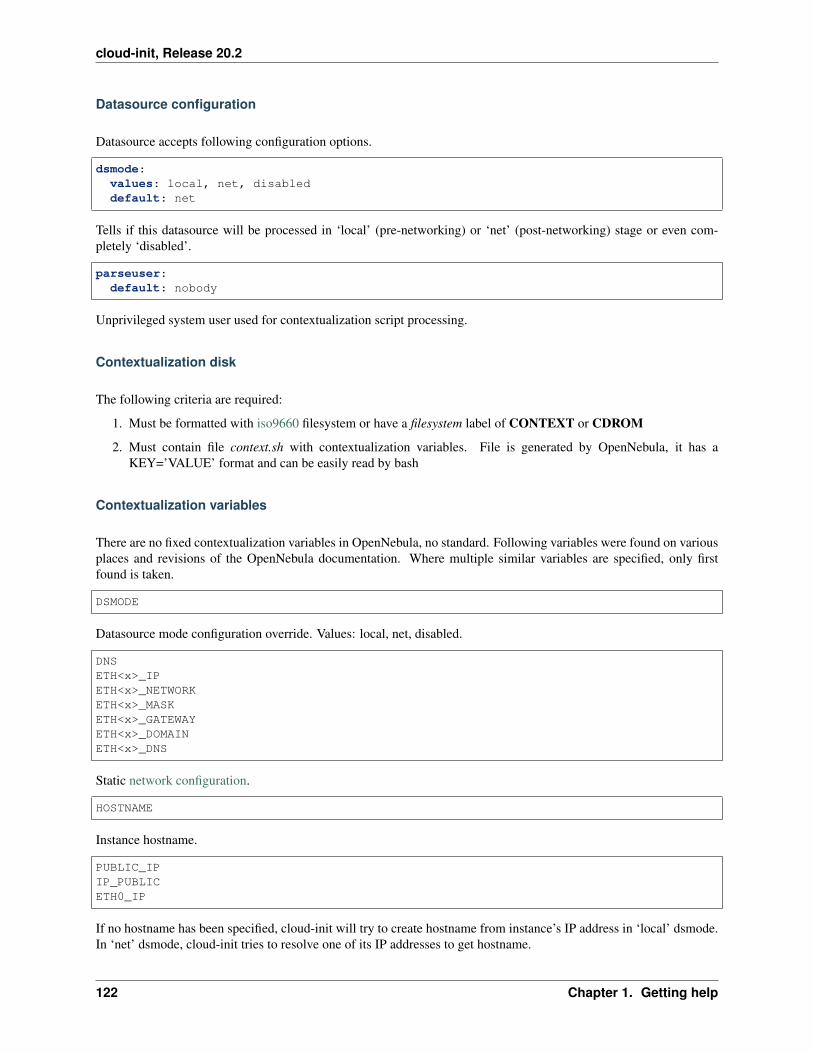
cloud-init, Release 20.2
Datasource configuration
Datasource accepts following configuration options.
dsmode:values: local, net, disableddefault: net
Tells if this datasource will be processed in ‘local’ (pre-networking) or ‘net’ (post-networking) stage or even com-pletely ‘disabled’.
parseuser:default: nobody
Unprivileged system user used for contextualization script processing.
Contextualization disk
The following criteria are required:
1. Must be formatted with iso9660 filesystem or have a filesystem label of CONTEXT or CDROM
2. Must contain file context.sh with contextualization variables. File is generated by OpenNebula, it has aKEY=’VALUE’ format and can be easily read by bash
Contextualization variables
There are no fixed contextualization variables in OpenNebula, no standard. Following variables were found on variousplaces and revisions of the OpenNebula documentation. Where multiple similar variables are specified, only firstfound is taken.
DSMODE
Datasource mode configuration override. Values: local, net, disabled.
DNSETH<x>_IPETH<x>_NETWORKETH<x>_MASKETH<x>_GATEWAYETH<x>_DOMAINETH<x>_DNS
Static network configuration.
HOSTNAME
Instance hostname.
PUBLIC_IPIP_PUBLICETH0_IP
If no hostname has been specified, cloud-init will try to create hostname from instance’s IP address in ‘local’ dsmode.In ‘net’ dsmode, cloud-init tries to resolve one of its IP addresses to get hostname.
122 Chapter 1. Getting help
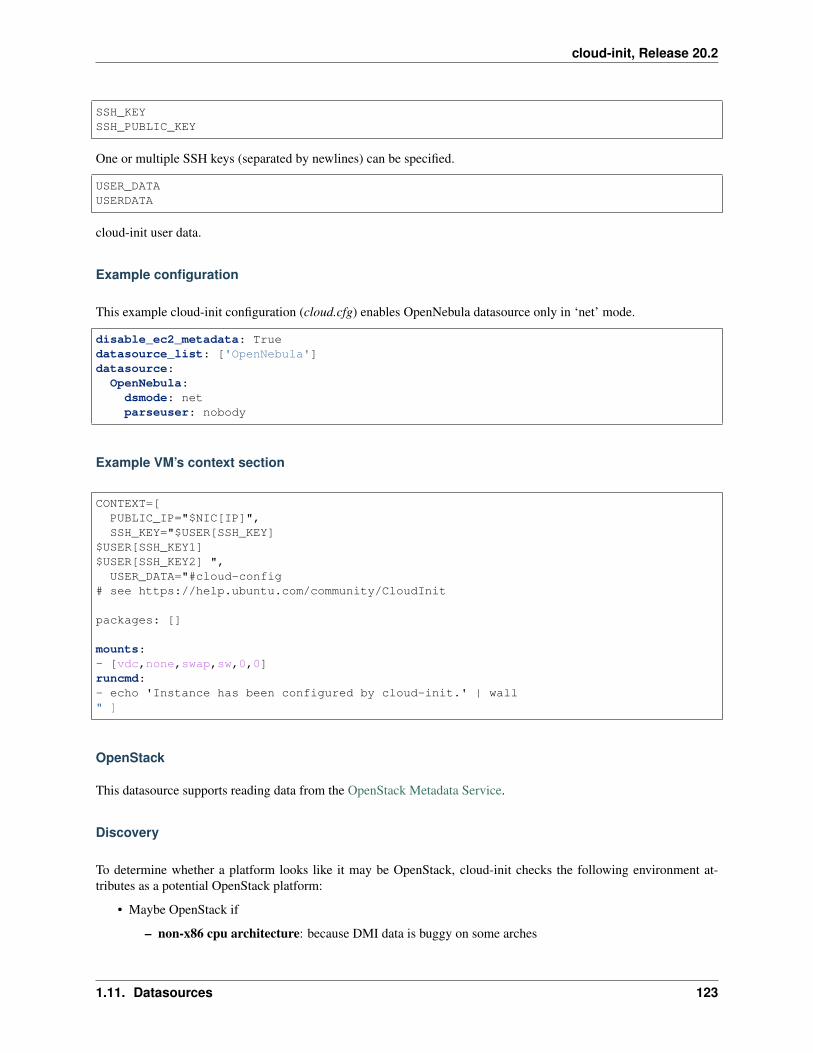
cloud-init, Release 20.2
SSH_KEYSSH_PUBLIC_KEY
One or multiple SSH keys (separated by newlines) can be specified.
USER_DATAUSERDATA
cloud-init user data.
Example configuration
This example cloud-init configuration (cloud.cfg) enables OpenNebula datasource only in ‘net’ mode.
disable_ec2_metadata: Truedatasource_list: ['OpenNebula']datasource:
OpenNebula:dsmode: netparseuser: nobody
Example VM’s context section
CONTEXT=[PUBLIC_IP="$NIC[IP]",SSH_KEY="$USER[SSH_KEY]
$USER[SSH_KEY1]$USER[SSH_KEY2] ",
USER_DATA="#cloud-config# see https://help.ubuntu.com/community/CloudInit
packages: []
mounts:- [vdc,none,swap,sw,0,0]runcmd:- echo 'Instance has been configured by cloud-init.' | wall" ]
OpenStack
This datasource supports reading data from the OpenStack Metadata Service.
Discovery
To determine whether a platform looks like it may be OpenStack, cloud-init checks the following environment at-tributes as a potential OpenStack platform:
• Maybe OpenStack if
– non-x86 cpu architecture: because DMI data is buggy on some arches
1.11. Datasources 123
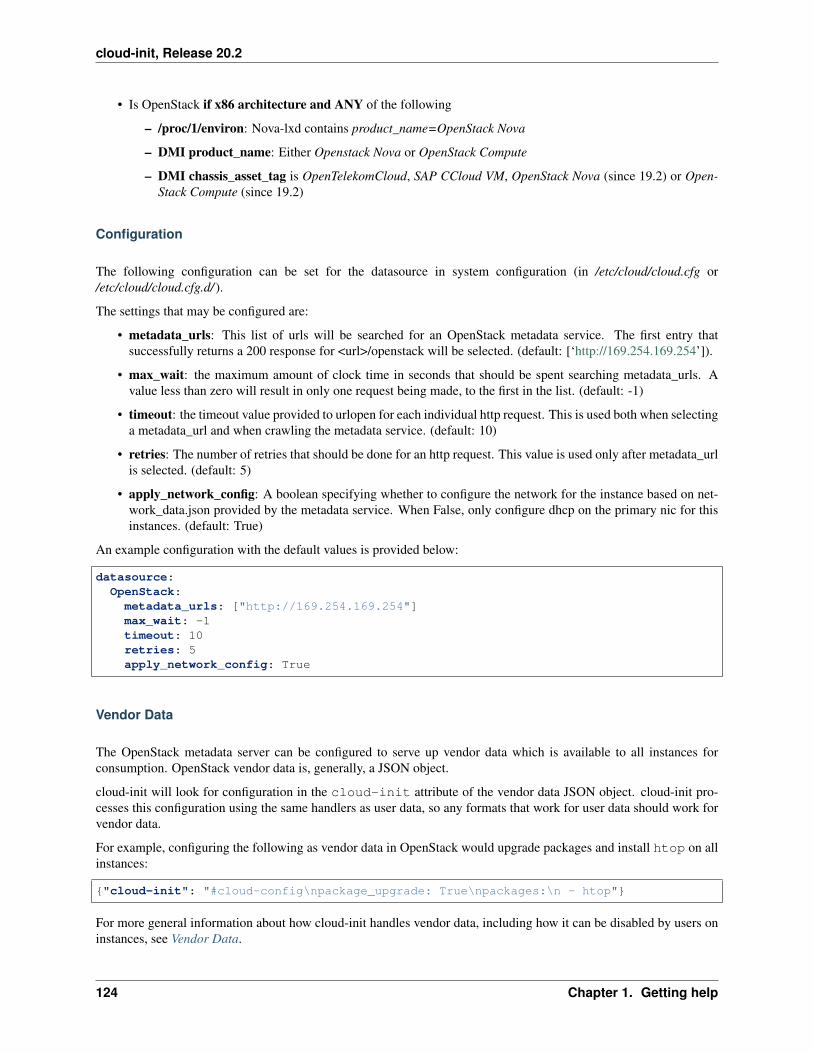
cloud-init, Release 20.2
• Is OpenStack if x86 architecture and ANY of the following
– /proc/1/environ: Nova-lxd contains product_name=OpenStack Nova
– DMI product_name: Either Openstack Nova or OpenStack Compute
– DMI chassis_asset_tag is OpenTelekomCloud, SAP CCloud VM, OpenStack Nova (since 19.2) or Open-Stack Compute (since 19.2)
Configuration
The following configuration can be set for the datasource in system configuration (in /etc/cloud/cloud.cfg or/etc/cloud/cloud.cfg.d/ ).
The settings that may be configured are:
• metadata_urls: This list of urls will be searched for an OpenStack metadata service. The first entry thatsuccessfully returns a 200 response for <url>/openstack will be selected. (default: [‘http://169.254.169.254’]).
• max_wait: the maximum amount of clock time in seconds that should be spent searching metadata_urls. Avalue less than zero will result in only one request being made, to the first in the list. (default: -1)
• timeout: the timeout value provided to urlopen for each individual http request. This is used both when selectinga metadata_url and when crawling the metadata service. (default: 10)
• retries: The number of retries that should be done for an http request. This value is used only after metadata_urlis selected. (default: 5)
• apply_network_config: A boolean specifying whether to configure the network for the instance based on net-work_data.json provided by the metadata service. When False, only configure dhcp on the primary nic for thisinstances. (default: True)
An example configuration with the default values is provided below:
datasource:OpenStack:metadata_urls: ["http://169.254.169.254"]max_wait: -1timeout: 10retries: 5apply_network_config: True
Vendor Data
The OpenStack metadata server can be configured to serve up vendor data which is available to all instances forconsumption. OpenStack vendor data is, generally, a JSON object.
cloud-init will look for configuration in the cloud-init attribute of the vendor data JSON object. cloud-init pro-cesses this configuration using the same handlers as user data, so any formats that work for user data should work forvendor data.
For example, configuring the following as vendor data in OpenStack would upgrade packages and install htop on allinstances:
{"cloud-init": "#cloud-config\npackage_upgrade: True\npackages:\n - htop"}
For more general information about how cloud-init handles vendor data, including how it can be disabled by users oninstances, see Vendor Data.
124 Chapter 1. Getting help
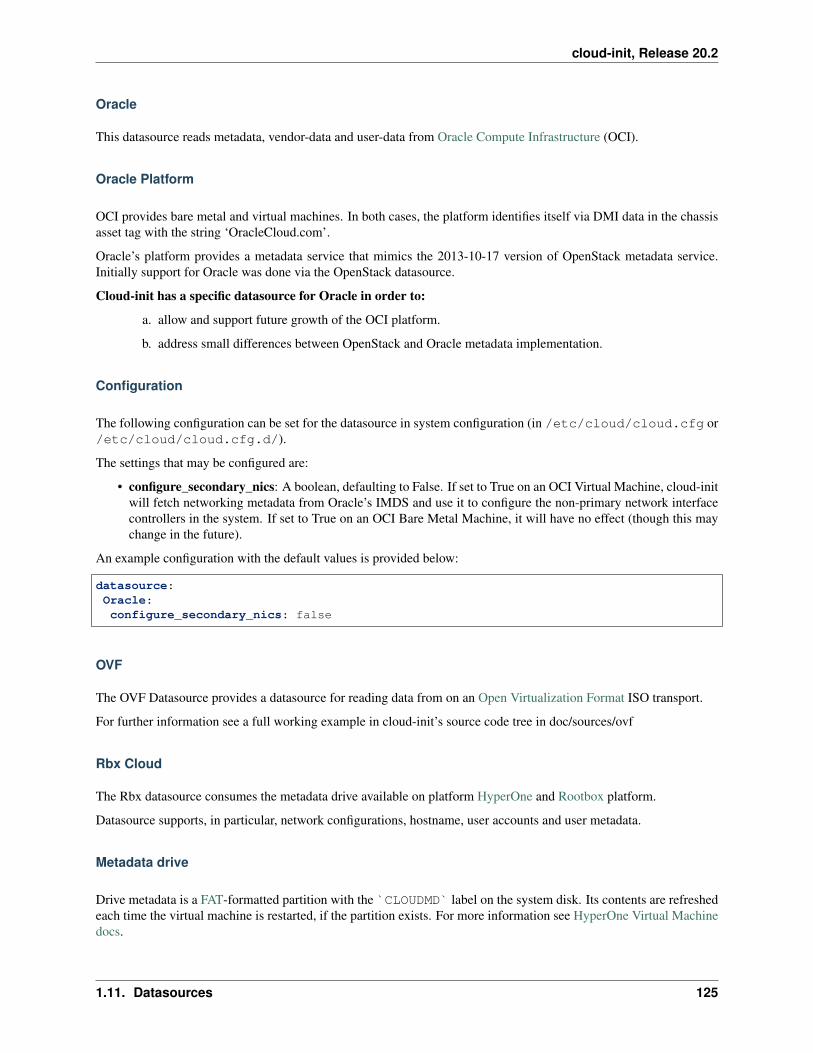
cloud-init, Release 20.2
Oracle
This datasource reads metadata, vendor-data and user-data from Oracle Compute Infrastructure (OCI).
Oracle Platform
OCI provides bare metal and virtual machines. In both cases, the platform identifies itself via DMI data in the chassisasset tag with the string ‘OracleCloud.com’.
Oracle’s platform provides a metadata service that mimics the 2013-10-17 version of OpenStack metadata service.Initially support for Oracle was done via the OpenStack datasource.
Cloud-init has a specific datasource for Oracle in order to:
a. allow and support future growth of the OCI platform.
b. address small differences between OpenStack and Oracle metadata implementation.
Configuration
The following configuration can be set for the datasource in system configuration (in /etc/cloud/cloud.cfg or/etc/cloud/cloud.cfg.d/).
The settings that may be configured are:
• configure_secondary_nics: A boolean, defaulting to False. If set to True on an OCI Virtual Machine, cloud-initwill fetch networking metadata from Oracle’s IMDS and use it to configure the non-primary network interfacecontrollers in the system. If set to True on an OCI Bare Metal Machine, it will have no effect (though this maychange in the future).
An example configuration with the default values is provided below:
datasource:Oracle:configure_secondary_nics: false
OVF
The OVF Datasource provides a datasource for reading data from on an Open Virtualization Format ISO transport.
For further information see a full working example in cloud-init’s source code tree in doc/sources/ovf
Rbx Cloud
The Rbx datasource consumes the metadata drive available on platform HyperOne and Rootbox platform.
Datasource supports, in particular, network configurations, hostname, user accounts and user metadata.
Metadata drive
Drive metadata is a FAT-formatted partition with the `CLOUDMD` label on the system disk. Its contents are refreshedeach time the virtual machine is restarted, if the partition exists. For more information see HyperOne Virtual Machinedocs.
1.11. Datasources 125

cloud-init, Release 20.2
SmartOS Datasource
This datasource finds metadata and user-data from the SmartOS virtualization platform (i.e. Joyent).
Please see http://smartos.org/ for information about SmartOS.
SmartOS Platform
The SmartOS virtualization platform uses meta-data to the instance via the second serial console. On Linux, this is/dev/ttyS1. The data is a provided via a simple protocol: something queries for the data, the console responds respondswith the status and if “SUCCESS” returns until a single “.n”.
New versions of the SmartOS tooling will include support for base64 encoded data.
Meta-data channels
Cloud-init supports three modes of delivering user/meta-data via the flexible channels of SmartOS.
• user-data is written to /var/db/user-data
– per the spec, user-data is for consumption by the end-user, not provisioning tools
– cloud-init entirely ignores this channel other than writing it to disk
– removal of the meta-data key means that /var/db/user-data gets removed
– a backup of previous meta-data is maintained as /var/db/user-data.<timestamp>. <timestamp> is the epochtime when cloud-init ran
• user-script is written to /var/lib/cloud/scripts/per-boot/99_user_data
– this is executed each boot
– a link is created to /var/db/user-script
– previous versions of the user-script is written to /var/lib/cloud/scripts/per-boot.backup/99_user_script.<timestamp>. - <timestamp> is the epoch time when cloud-init ran.
– when the ‘user-script’ meta-data key goes missing, the user-script is removed from the file system, althougha backup is maintained.
– if the script does not start with a shebang (i.e. starts with #!<executable>), then or is not an executable,cloud-init will add a shebang of “#!/bin/bash”
• cloud-init:user-data is treated like on other Clouds.
– this channel is used for delivering _all_ cloud-init instructions
– scripts delivered over this channel must be well formed (i.e. must have a shebang)
Cloud-init supports reading the traditional meta-data fields supported by the SmartOS tools. These are:
• root_authorized_keys
• hostname
• enable_motd_sys_info
• iptables_disable
Note: At this time iptables_disable and enable_motd_sys_info are read but are not actioned.
126 Chapter 1. Getting help
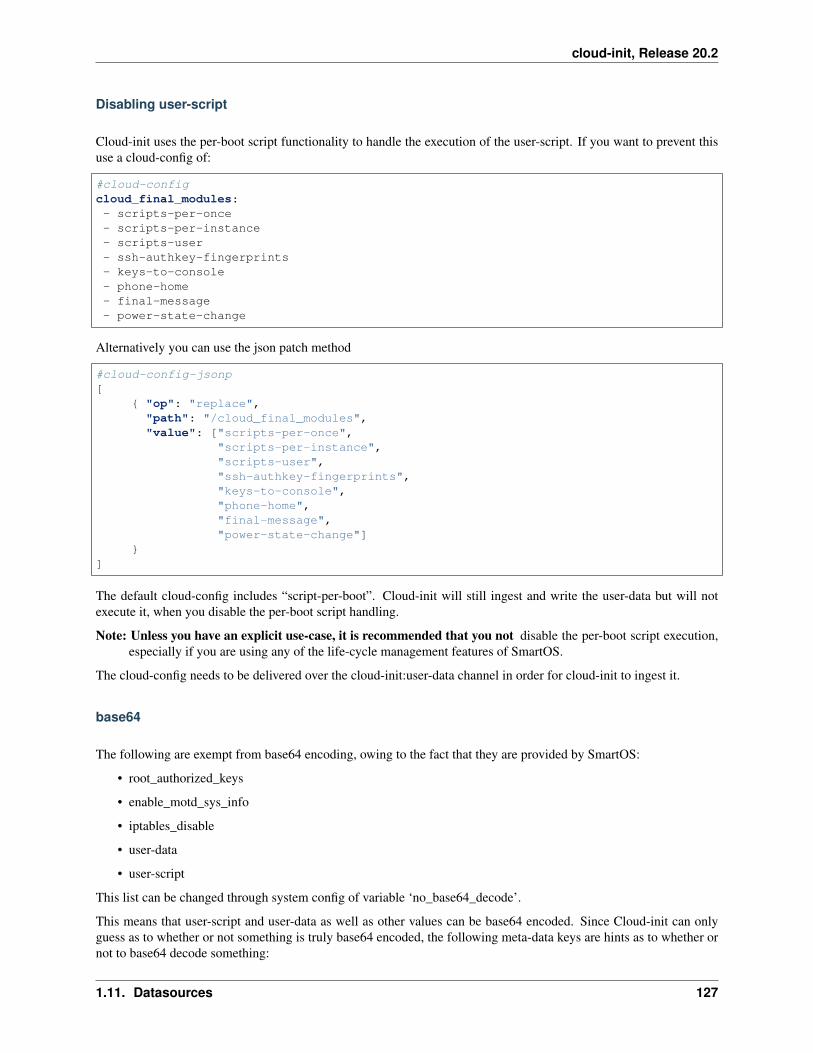
cloud-init, Release 20.2
Disabling user-script
Cloud-init uses the per-boot script functionality to handle the execution of the user-script. If you want to prevent thisuse a cloud-config of:
#cloud-configcloud_final_modules:- scripts-per-once- scripts-per-instance- scripts-user- ssh-authkey-fingerprints- keys-to-console- phone-home- final-message- power-state-change
Alternatively you can use the json patch method
#cloud-config-jsonp[
{ "op": "replace","path": "/cloud_final_modules","value": ["scripts-per-once",
"scripts-per-instance","scripts-user","ssh-authkey-fingerprints","keys-to-console","phone-home","final-message","power-state-change"]
}]
The default cloud-config includes “script-per-boot”. Cloud-init will still ingest and write the user-data but will notexecute it, when you disable the per-boot script handling.
Note: Unless you have an explicit use-case, it is recommended that you not disable the per-boot script execution,especially if you are using any of the life-cycle management features of SmartOS.
The cloud-config needs to be delivered over the cloud-init:user-data channel in order for cloud-init to ingest it.
base64
The following are exempt from base64 encoding, owing to the fact that they are provided by SmartOS:
• root_authorized_keys
• enable_motd_sys_info
• iptables_disable
• user-data
• user-script
This list can be changed through system config of variable ‘no_base64_decode’.
This means that user-script and user-data as well as other values can be base64 encoded. Since Cloud-init can onlyguess as to whether or not something is truly base64 encoded, the following meta-data keys are hints as to whether ornot to base64 decode something:
1.11. Datasources 127
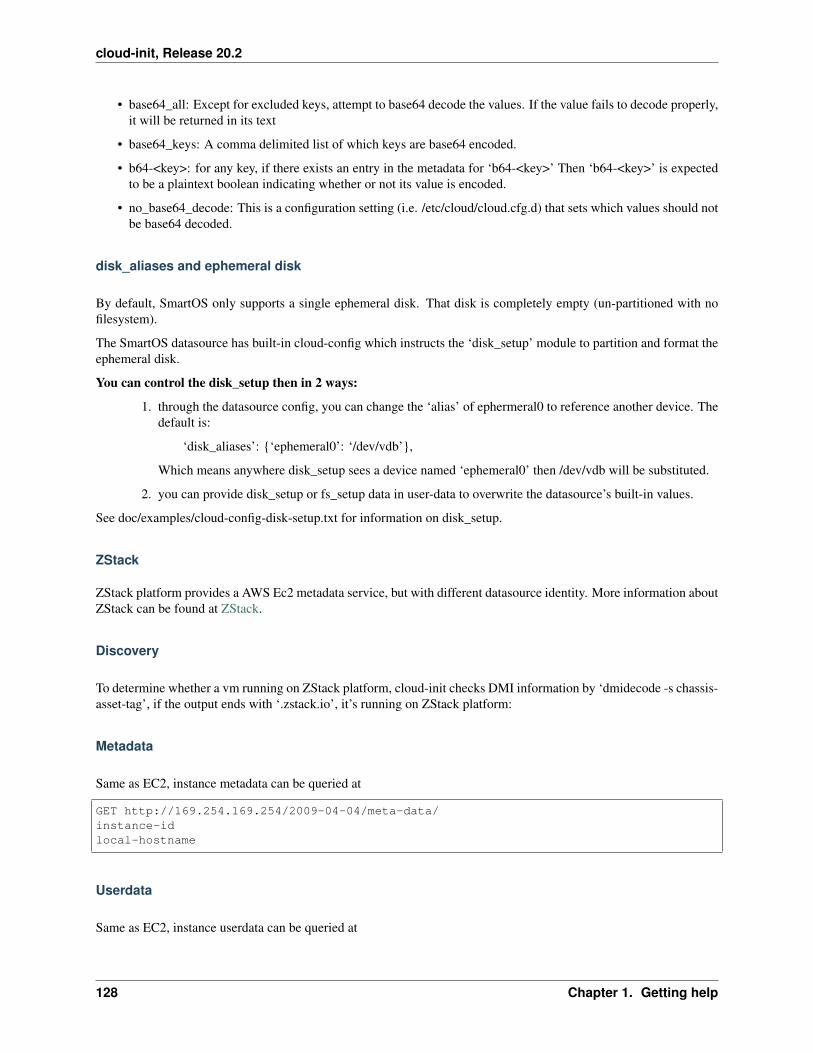
cloud-init, Release 20.2
• base64_all: Except for excluded keys, attempt to base64 decode the values. If the value fails to decode properly,it will be returned in its text
• base64_keys: A comma delimited list of which keys are base64 encoded.
• b64-<key>: for any key, if there exists an entry in the metadata for ‘b64-<key>’ Then ‘b64-<key>’ is expectedto be a plaintext boolean indicating whether or not its value is encoded.
• no_base64_decode: This is a configuration setting (i.e. /etc/cloud/cloud.cfg.d) that sets which values should notbe base64 decoded.
disk_aliases and ephemeral disk
By default, SmartOS only supports a single ephemeral disk. That disk is completely empty (un-partitioned with nofilesystem).
The SmartOS datasource has built-in cloud-config which instructs the ‘disk_setup’ module to partition and format theephemeral disk.
You can control the disk_setup then in 2 ways:
1. through the datasource config, you can change the ‘alias’ of ephermeral0 to reference another device. Thedefault is:
‘disk_aliases’: {‘ephemeral0’: ‘/dev/vdb’},
Which means anywhere disk_setup sees a device named ‘ephemeral0’ then /dev/vdb will be substituted.
2. you can provide disk_setup or fs_setup data in user-data to overwrite the datasource’s built-in values.
See doc/examples/cloud-config-disk-setup.txt for information on disk_setup.
ZStack
ZStack platform provides a AWS Ec2 metadata service, but with different datasource identity. More information aboutZStack can be found at ZStack.
Discovery
To determine whether a vm running on ZStack platform, cloud-init checks DMI information by ‘dmidecode -s chassis-asset-tag’, if the output ends with ‘.zstack.io’, it’s running on ZStack platform:
Metadata
Same as EC2, instance metadata can be queried at
GET http://169.254.169.254/2009-04-04/meta-data/instance-idlocal-hostname
Userdata
Same as EC2, instance userdata can be queried at
128 Chapter 1. Getting help
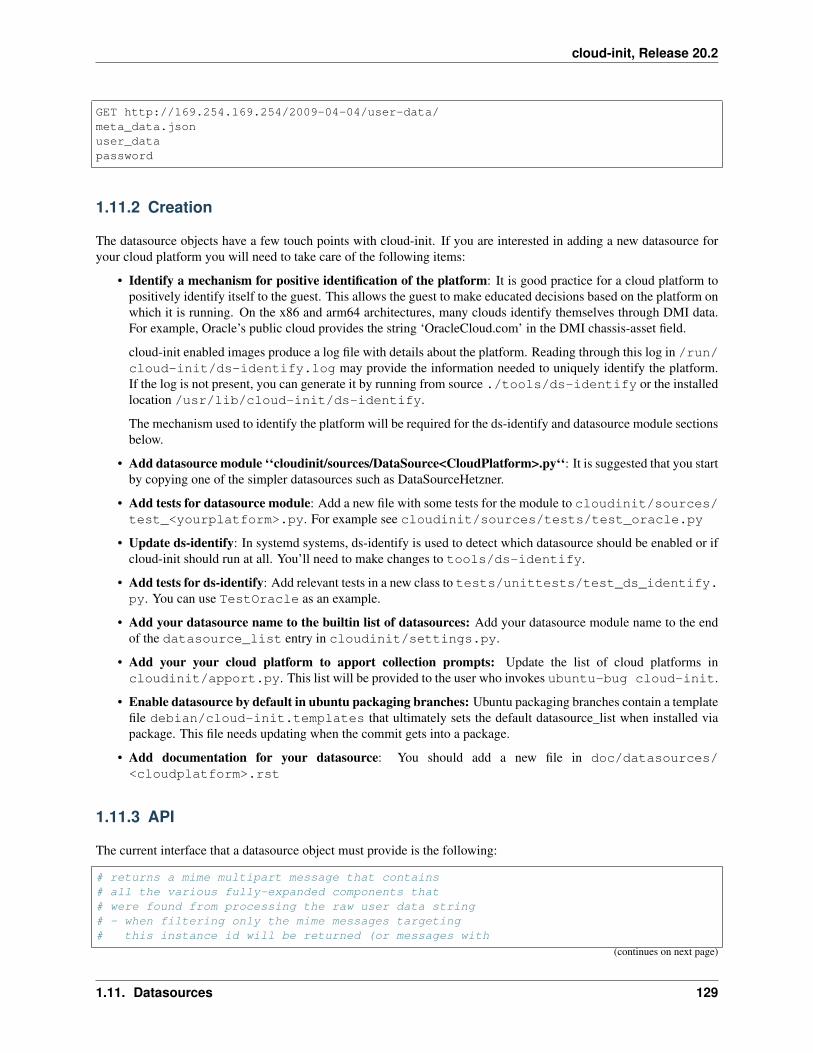
cloud-init, Release 20.2
GET http://169.254.169.254/2009-04-04/user-data/meta_data.jsonuser_datapassword
1.11.2 Creation
The datasource objects have a few touch points with cloud-init. If you are interested in adding a new datasource foryour cloud platform you will need to take care of the following items:
• Identify a mechanism for positive identification of the platform: It is good practice for a cloud platform topositively identify itself to the guest. This allows the guest to make educated decisions based on the platform onwhich it is running. On the x86 and arm64 architectures, many clouds identify themselves through DMI data.For example, Oracle’s public cloud provides the string ‘OracleCloud.com’ in the DMI chassis-asset field.
cloud-init enabled images produce a log file with details about the platform. Reading through this log in /run/cloud-init/ds-identify.log may provide the information needed to uniquely identify the platform.If the log is not present, you can generate it by running from source ./tools/ds-identify or the installedlocation /usr/lib/cloud-init/ds-identify.
The mechanism used to identify the platform will be required for the ds-identify and datasource module sectionsbelow.
• Add datasource module ‘‘cloudinit/sources/DataSource<CloudPlatform>.py‘‘: It is suggested that you startby copying one of the simpler datasources such as DataSourceHetzner.
• Add tests for datasource module: Add a new file with some tests for the module to cloudinit/sources/test_<yourplatform>.py. For example see cloudinit/sources/tests/test_oracle.py
• Update ds-identify: In systemd systems, ds-identify is used to detect which datasource should be enabled or ifcloud-init should run at all. You’ll need to make changes to tools/ds-identify.
• Add tests for ds-identify: Add relevant tests in a new class to tests/unittests/test_ds_identify.py. You can use TestOracle as an example.
• Add your datasource name to the builtin list of datasources: Add your datasource module name to the endof the datasource_list entry in cloudinit/settings.py.
• Add your your cloud platform to apport collection prompts: Update the list of cloud platforms incloudinit/apport.py. This list will be provided to the user who invokes ubuntu-bug cloud-init.
• Enable datasource by default in ubuntu packaging branches: Ubuntu packaging branches contain a templatefile debian/cloud-init.templates that ultimately sets the default datasource_list when installed viapackage. This file needs updating when the commit gets into a package.
• Add documentation for your datasource: You should add a new file in doc/datasources/<cloudplatform>.rst
1.11.3 API
The current interface that a datasource object must provide is the following:
# returns a mime multipart message that contains# all the various fully-expanded components that# were found from processing the raw user data string# - when filtering only the mime messages targeting# this instance id will be returned (or messages with
(continues on next page)
1.11. Datasources 129

cloud-init, Release 20.2
(continued from previous page)
# no instance id)def get_userdata(self, apply_filter=False)
# returns the raw userdata string (or none)def get_userdata_raw(self)
# returns a integer (or none) which can be used to identify# this instance in a group of instances which are typically# created from a single command, thus allowing programmatic# filtering on this launch index (or other selective actions)@propertydef launch_index(self)
# the data sources' config_obj is a cloud-config formatted# object that came to it from ways other than cloud-config# because cloud-config content would be handled elsewheredef get_config_obj(self)
# returns a list of public SSH keysdef get_public_ssh_keys(self)
# translates a device 'short' name into the actual physical device# fully qualified name (or none if said physical device is not attached# or does not exist)def device_name_to_device(self, name)
# gets the locale string this instance should be applying# which typically used to adjust the instances locale settings filesdef get_locale(self)
@propertydef availability_zone(self)
# gets the instance id that was assigned to this instance by the# cloud provider or when said instance id does not exist in the backing# metadata this will return 'iid-datasource'def get_instance_id(self)
# gets the fully qualified domain name that this host should be using# when configuring network or hostname related settings, typically# assigned either by the cloud provider or the user creating the vmdef get_hostname(self, fqdn=False)
def get_package_mirror_info(self)
1.12 Vendor Data
1.12.1 Overview
Vendordata is data provided by the entity that launches an instance (for example, the cloud provider). This data can beused to customize the image to fit into the particular environment it is being run in.
Vendordata follows the same rules as user-data, with the following caveats:
1. Users have ultimate control over vendordata. They can disable its execution or disable handling of specific parts
130 Chapter 1. Getting help

cloud-init, Release 20.2
of multipart input.
2. By default it only runs on first boot
3. Vendordata can be disabled by the user. If the use of vendordata is required for the instance to run, thenvendordata should not be used.
4. user supplied cloud-config is merged over cloud-config from vendordata.
Users providing cloud-config data can use the ‘#cloud-config-jsonp’ method to more finely control their modificationsto the vendor supplied cloud-config. For example, if both vendor and user have provided ‘runcmd’ then the defaultmerge handler will cause the user’s runcmd to override the one provided by the vendor. To append to ‘runcmd’, theuser could better provide multipart input with a cloud-config-jsonp part like:
#cloud-config-jsonp[{ "op": "add", "path": "/runcmd", "value": ["my", "command", "here"]}]
Further, we strongly advise vendors to not ‘be evil’. By evil, we mean any action that could compromise a system.Since users trust you, please take care to make sure that any vendordata is safe, atomic, idempotent and does not putyour users at risk.
1.12.2 Input Formats
cloud-init will download and cache to filesystem any vendor-data that it finds. Vendordata is handled exactly likeuser-data. That means that the vendor can supply multipart input and have those parts acted on in the same way asuser-data.
The only differences are:
• user-scripts are stored in a different location than user-scripts (to avoid namespace collision)
• user can disable part handlers by cloud-config settings. For example, to disable handling of ‘part-handlers’ invendor-data, the user could provide user-data like this:
#cloud-configvendordata: {excluded: 'text/part-handler'}
1.12.3 Examples
There are examples in the examples subdirectory.
Additionally, the ‘tools’ directory contains ‘write-mime-multipart’, which can be used to easily generate mime-multi-part files from a list of input files. That data can then be given to an instance.
See ‘write-mime-multipart –help’ for usage.
1.13 Network Configuration
• Default Behavior
• Disabling Network Configuration
• Fallback Networking
• Network Configuration Sources
• Network Configuration Outputs
1.13. Network Configuration 131

cloud-init, Release 20.2
• Network Output Policy
• Network Configuration Tools
• Examples
1.13.1 Default Behavior
Cloud-init ‘s searches for network configuration in order of increasing precedence; each item overriding the previous.
Datasource
For example, OpenStack may provide network config in the MetaData Service.
System Config
A network: entry in /etc/cloud/cloud.cfg.d/* configuration files.
Kernel Command Line
ip= or network-config=<Base64 encoded YAML config string>
User-data cannot change an instance’s network configuration. In the absence of network configuration in any of theabove sources , Cloud-init will write out a network configuration that will issue a DHCP request on a “first” networkinterface.
Note: The network-config value is expected to be a Base64 encoded YAML string in Networking Config Version 1 orNetworking Config Version 2 format. Optionally it can be compressed with gzip prior to Base64 encoding.
1.13.2 Disabling Network Configuration
Users may disable Cloud-init ‘s network configuration capability and rely on other methods, such as embedded con-figuration or other customizations.
Cloud-init supports the following methods for disabling cloud-init.
Kernel Command Line
Cloud-init will check additionally check for the parameter network-config=disabledwhich will automaticallydisable any network configuration.
Example disabling kernel command line entry:
network-config=disabled
cloud config
In the combined cloud-init configuration dictionary, merged from /etc/cloud/cloud.cfg and /etc/cloud/cloud.cfg.d/*:
network:config: disabled
If Cloud-init ‘s networking config has not been disabled, and no other network information is found, then it willproceed to generate a fallback networking configuration.
132 Chapter 1. Getting help
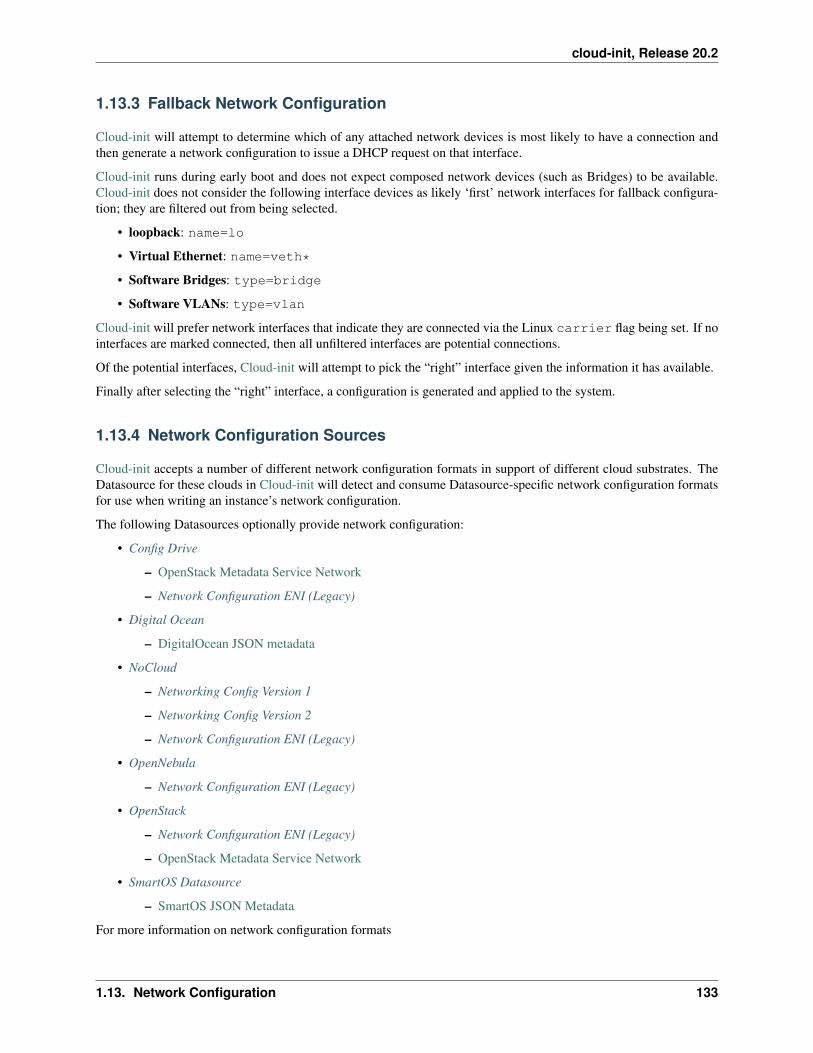
cloud-init, Release 20.2
1.13.3 Fallback Network Configuration
Cloud-init will attempt to determine which of any attached network devices is most likely to have a connection andthen generate a network configuration to issue a DHCP request on that interface.
Cloud-init runs during early boot and does not expect composed network devices (such as Bridges) to be available.Cloud-init does not consider the following interface devices as likely ‘first’ network interfaces for fallback configura-tion; they are filtered out from being selected.
• loopback: name=lo
• Virtual Ethernet: name=veth*• Software Bridges: type=bridge
• Software VLANs: type=vlan
Cloud-init will prefer network interfaces that indicate they are connected via the Linux carrier flag being set. If nointerfaces are marked connected, then all unfiltered interfaces are potential connections.
Of the potential interfaces, Cloud-init will attempt to pick the “right” interface given the information it has available.
Finally after selecting the “right” interface, a configuration is generated and applied to the system.
1.13.4 Network Configuration Sources
Cloud-init accepts a number of different network configuration formats in support of different cloud substrates. TheDatasource for these clouds in Cloud-init will detect and consume Datasource-specific network configuration formatsfor use when writing an instance’s network configuration.
The following Datasources optionally provide network configuration:
• Config Drive
– OpenStack Metadata Service Network
– Network Configuration ENI (Legacy)
• Digital Ocean
– DigitalOcean JSON metadata
• NoCloud
– Networking Config Version 1
– Networking Config Version 2
– Network Configuration ENI (Legacy)
• OpenNebula
– Network Configuration ENI (Legacy)
• OpenStack
– Network Configuration ENI (Legacy)
– OpenStack Metadata Service Network
• SmartOS Datasource
– SmartOS JSON Metadata
For more information on network configuration formats
1.13. Network Configuration 133

cloud-init, Release 20.2
Network Configuration ENI (Legacy)
Cloud-init supports reading and writing network config in the ENI format which is consumed by the ifupdown toolto parse and apply network configuration.
As an input format this is legacy. In cases where ENI format is available and another format is also available, it willprefer to use the other format. This can happen in either NoCloud or OpenStack datasources.
Please reference existing documentation for the /etc/network/interfaces(5) format.
Networking Config Version 1
This network configuration format lets users customize their instance’s networking interfaces by assigning subnetconfiguration, virtual device creation (bonds, bridges, vlans) routes and DNS configuration.
Required elements of a Network Config Version 1 are config and version.
Cloud-init will read this format from system config. For example the following could be present in /etc/cloud/cloud.cfg.d/custom-networking.cfg:
network:version: 1config:- type: physicalname: eth0subnets:- type: dhcp
The NoCloud datasource can also provide cloud-init networking configuration in this Format.
Configuration Types
Within the network config portion, users include a list of configuration types. The current list of support typevalues are as follows:
• Physical (physical)
• Bond (bond)
• Bridge (bridge)
• VLAN (vlan)
• Nameserver (nameserver)
• Route (route)
Physical, Bond, Bridge and VLAN types may also include IP configuration under the key subnets.
• Subnet/IP (subnets)
Physical
The physical type configuration represents a “physical” network device, typically Ethernet-based. At least oneof of these entries is required for external network connectivity. Type physical requires only one key: name. Aphysical device may contain some or all of the following keys:
name: <desired device name>
134 Chapter 1. Getting help

cloud-init, Release 20.2
A devices name must be less than 15 characters. Names exceeding the maximum will be truncated. This is a limitationof the Linux kernel network-device structure.
mac_address: <MAC Address>
The MAC Address is a device unique identifier that most Ethernet-based network devices possess. Specifying a MACAddress is optional.
Note: Cloud-init will handle the persistent mapping between a device’s name and the mac_address.
mtu: <MTU SizeBytes>
The MTU key represents a device’s Maximum Transmission Unit, the largest size packet or frame, specified in octets(eight-bit bytes), that can be sent in a packet- or frame-based network. Specifying mtu is optional.
Note: The possible supported values of a device’s MTU is not available at configuration time. It’s possible to specifya value too large or to small for a device and may be ignored by the device.
Physical Example:
network:version: 1config:# Simple network adapter- type: physical
name: interface0mac_address: 00:11:22:33:44:55
# Second nic with Jumbo frames- type: physical
name: jumbo0mac_address: aa:11:22:33:44:55mtu: 9000
# 10G pair- type: physical
name: gbe0mac_address: cd:11:22:33:44:00
- type: physicalname: gbe1mac_address: cd:11:22:33:44:02
Bond
A bond type will configure a Linux software Bond with one or more network devices. A bond type requires thefollowing keys:
name: <desired device name>
A devices name must be less than 15 characters. Names exceeding the maximum will be truncated. This is a limitationof the Linux kernel network-device structure.
mac_address: <MAC Address>
When specifying MAC Address on a bond this value will be assigned to the bond device and may be different than theMAC address of any of the underlying bond interfaces. Specifying a MAC Address is optional. If mac_address isnot present, then the bond will use one of the MAC Address values from one of the bond interfaces.
1.13. Network Configuration 135

cloud-init, Release 20.2
bond_interfaces: <List of network device names>
The bond_interfaces key accepts a list of network device name values from the configuration. This list may beempty.
mtu: <MTU SizeBytes>
The MTU key represents a device’s Maximum Transmission Unit, the largest size packet or frame, specified in octets(eight-bit bytes), that can be sent in a packet- or frame-based network. Specifying mtu is optional.
Note: The possible supported values of a device’s MTU is not available at configuration time. It’s possible to specifya value too large or to small for a device and may be ignored by the device.
params: <Dictionary of key: value bonding parameter pairs>
The params key in a bond holds a dictionary of bonding parameters. This dictionary may be empty. For more detailson what the various bonding parameters mean please read the Linux Kernel Bonding.txt.
Valid params keys are:
• active_slave: Set bond attribute
• ad_actor_key: Set bond attribute
• ad_actor_sys_prio: Set bond attribute
• ad_actor_system: Set bond attribute
• ad_aggregator: Set bond attribute
• ad_num_ports: Set bond attribute
• ad_partner_key: Set bond attribute
• ad_partner_mac: Set bond attribute
• ad_select: Set bond attribute
• ad_user_port_key: Set bond attribute
• all_slaves_active: Set bond attribute
• arp_all_targets: Set bond attribute
• arp_interval: Set bond attribute
• arp_ip_target: Set bond attribute
• arp_validate: Set bond attribute
• downdelay: Set bond attribute
• fail_over_mac: Set bond attribute
• lacp_rate: Set bond attribute
• lp_interval: Set bond attribute
• miimon: Set bond attribute
• mii_status: Set bond attribute
• min_links: Set bond attribute
• mode: Set bond attribute
• num_grat_arp: Set bond attribute
136 Chapter 1. Getting help

cloud-init, Release 20.2
• num_unsol_na: Set bond attribute
• packets_per_slave: Set bond attribute
• primary: Set bond attribute
• primary_reselect: Set bond attribute
• queue_id: Set bond attribute
• resend_igmp: Set bond attribute
• slaves: Set bond attribute
• tlb_dynamic_lb: Set bond attribute
• updelay: Set bond attribute
• use_carrier: Set bond attribute
• xmit_hash_policy: Set bond attribute
Bond Example:
network:version: 1config:# Simple network adapter- type: physical
name: interface0mac_address: 00:11:22:33:44:55
# 10G pair- type: physical
name: gbe0mac_address: cd:11:22:33:44:00
- type: physicalname: gbe1mac_address: cd:11:22:33:44:02
- type: bondname: bond0bond_interfaces:
- gbe0- gbe1
params:bond-mode: active-backup
Bridge
Type bridge requires the following keys:
• name: Set the name of the bridge.
• bridge_interfaces: Specify the ports of a bridge via their name. This list may be empty.
• params: A list of bridge params. For more details, please read the bridge-utils-interfaces manpage.
Valid keys are:
• bridge_ageing: Set the bridge’s ageing value.
• bridge_bridgeprio: Set the bridge device network priority.
• bridge_fd: Set the bridge’s forward delay.
1.13. Network Configuration 137
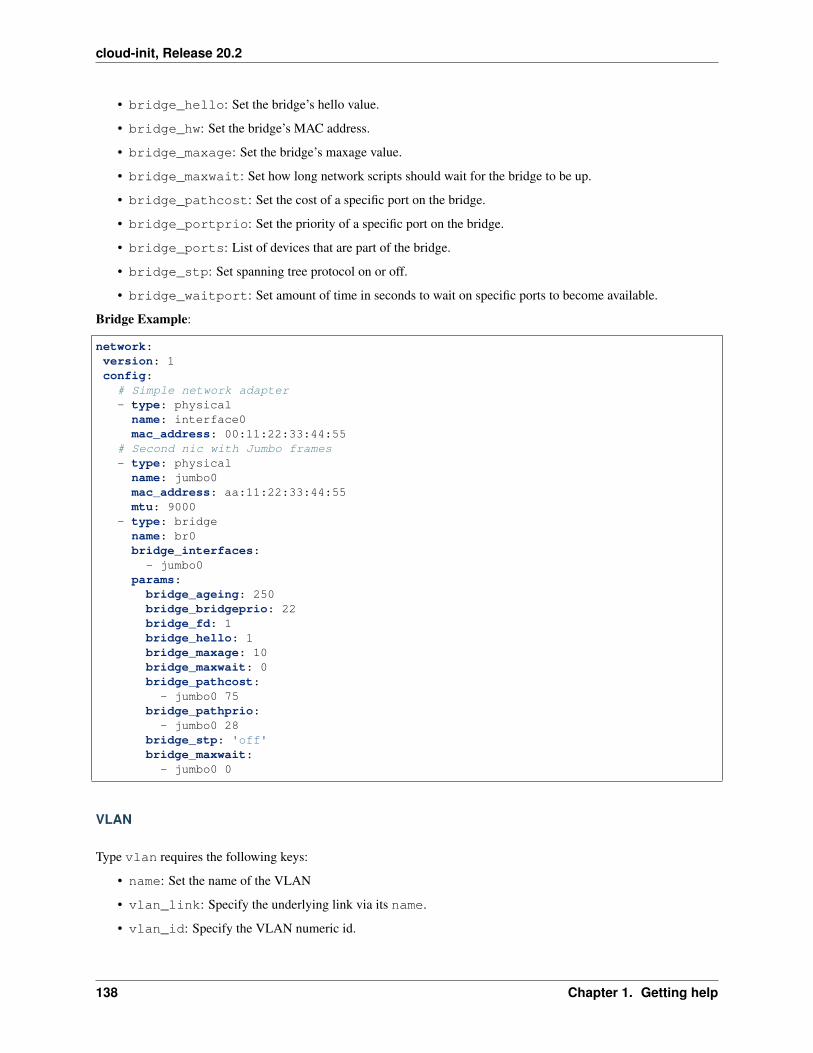
cloud-init, Release 20.2
• bridge_hello: Set the bridge’s hello value.
• bridge_hw: Set the bridge’s MAC address.
• bridge_maxage: Set the bridge’s maxage value.
• bridge_maxwait: Set how long network scripts should wait for the bridge to be up.
• bridge_pathcost: Set the cost of a specific port on the bridge.
• bridge_portprio: Set the priority of a specific port on the bridge.
• bridge_ports: List of devices that are part of the bridge.
• bridge_stp: Set spanning tree protocol on or off.
• bridge_waitport: Set amount of time in seconds to wait on specific ports to become available.
Bridge Example:
network:version: 1config:# Simple network adapter- type: physical
name: interface0mac_address: 00:11:22:33:44:55
# Second nic with Jumbo frames- type: physical
name: jumbo0mac_address: aa:11:22:33:44:55mtu: 9000
- type: bridgename: br0bridge_interfaces:
- jumbo0params:bridge_ageing: 250bridge_bridgeprio: 22bridge_fd: 1bridge_hello: 1bridge_maxage: 10bridge_maxwait: 0bridge_pathcost:- jumbo0 75
bridge_pathprio:- jumbo0 28
bridge_stp: 'off'bridge_maxwait:- jumbo0 0
VLAN
Type vlan requires the following keys:
• name: Set the name of the VLAN
• vlan_link: Specify the underlying link via its name.
• vlan_id: Specify the VLAN numeric id.
138 Chapter 1. Getting help

cloud-init, Release 20.2
The following optional keys are supported:
mtu: <MTU SizeBytes>
The MTU key represents a device’s Maximum Transmission Unit, the largest size packet or frame, specified in octets(eight-bit bytes), that can be sent in a packet- or frame-based network. Specifying mtu is optional.
Note: The possible supported values of a device’s MTU is not available at configuration time. It’s possible to specifya value too large or to small for a device and may be ignored by the device.
VLAN Example:
network:version: 1config:# Physical interfaces.- type: physical
name: eth0mac_address: "c0:d6:9f:2c:e8:80"
# VLAN interface.- type: vlan
name: eth0.101vlan_link: eth0vlan_id: 101mtu: 1500
Nameserver
Users can specify a nameserver type. Nameserver dictionaries include the following keys:
• address: List of IPv4 or IPv6 address of nameservers.
• search: List of of hostnames to include in the resolv.conf search path.
Nameserver Example:
network:version: 1config:- type: physical
name: interface0mac_address: 00:11:22:33:44:55subnets:
- type: staticaddress: 192.168.23.14/27gateway: 192.168.23.1
- type: nameserver:address:
- 192.168.23.2- 8.8.8.8
search:- exemplary
1.13. Network Configuration 139
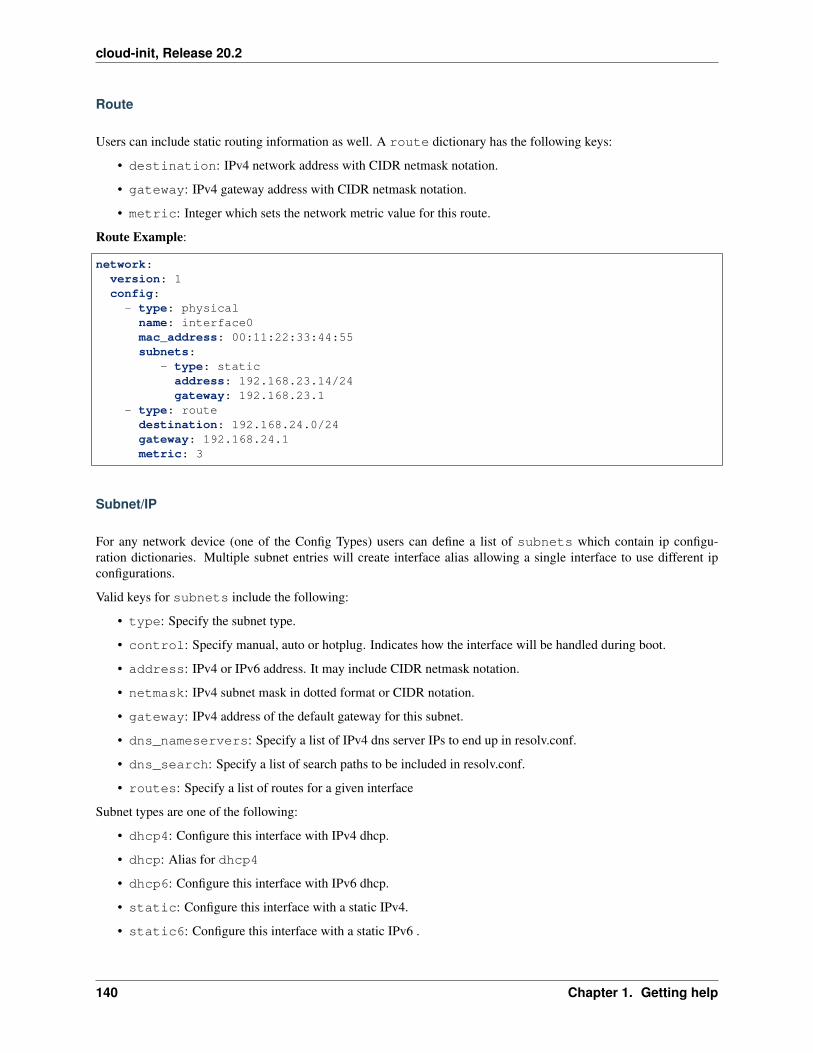
cloud-init, Release 20.2
Route
Users can include static routing information as well. A route dictionary has the following keys:
• destination: IPv4 network address with CIDR netmask notation.
• gateway: IPv4 gateway address with CIDR netmask notation.
• metric: Integer which sets the network metric value for this route.
Route Example:
network:version: 1config:- type: physical
name: interface0mac_address: 00:11:22:33:44:55subnets:
- type: staticaddress: 192.168.23.14/24gateway: 192.168.23.1
- type: routedestination: 192.168.24.0/24gateway: 192.168.24.1metric: 3
Subnet/IP
For any network device (one of the Config Types) users can define a list of subnets which contain ip configu-ration dictionaries. Multiple subnet entries will create interface alias allowing a single interface to use different ipconfigurations.
Valid keys for subnets include the following:
• type: Specify the subnet type.
• control: Specify manual, auto or hotplug. Indicates how the interface will be handled during boot.
• address: IPv4 or IPv6 address. It may include CIDR netmask notation.
• netmask: IPv4 subnet mask in dotted format or CIDR notation.
• gateway: IPv4 address of the default gateway for this subnet.
• dns_nameservers: Specify a list of IPv4 dns server IPs to end up in resolv.conf.
• dns_search: Specify a list of search paths to be included in resolv.conf.
• routes: Specify a list of routes for a given interface
Subnet types are one of the following:
• dhcp4: Configure this interface with IPv4 dhcp.
• dhcp: Alias for dhcp4
• dhcp6: Configure this interface with IPv6 dhcp.
• static: Configure this interface with a static IPv4.
• static6: Configure this interface with a static IPv6 .
140 Chapter 1. Getting help

cloud-init, Release 20.2
When making use of dhcp types, no additional configuration is needed in the subnet dictionary.
Subnet DHCP Example:
network:version: 1config:- type: physical
name: interface0mac_address: 00:11:22:33:44:55subnets:
- type: dhcp
Subnet Static Example:
network:version: 1config:- type: physical
name: interface0mac_address: 00:11:22:33:44:55subnets:
- type: staticaddress: 192.168.23.14/27gateway: 192.168.23.1dns_nameservers:- 192.168.23.2- 8.8.8.8
dns_search:- exemplary.maas
The following will result in an interface0 using DHCP and interface0:1 using the static subnet configuration.
Multiple subnet Example:
network:version: 1config:- type: physical
name: interface0mac_address: 00:11:22:33:44:55subnets:
- type: dhcp- type: staticaddress: 192.168.23.14/27gateway: 192.168.23.1dns_nameservers:- 192.168.23.2- 8.8.8.8
dns_search:- exemplary
Subnet with routes Example:
network:version: 1config:- type: physical
name: interface0(continues on next page)
1.13. Network Configuration 141
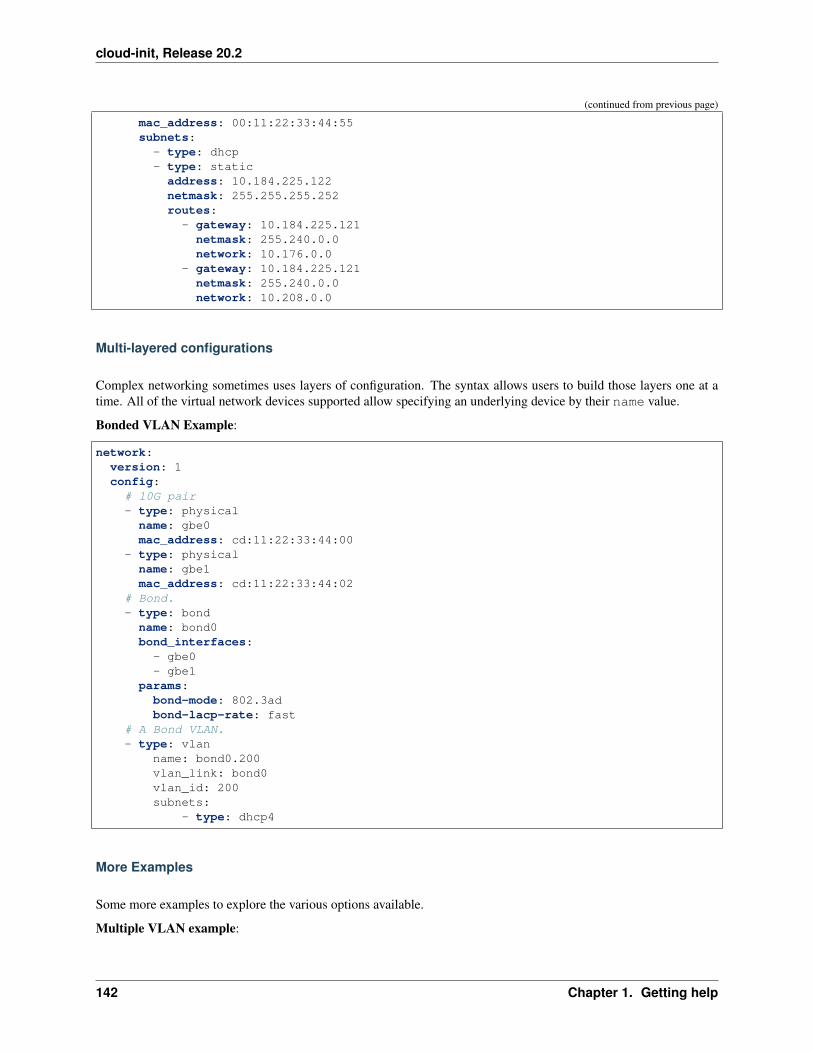
cloud-init, Release 20.2
(continued from previous page)
mac_address: 00:11:22:33:44:55subnets:
- type: dhcp- type: staticaddress: 10.184.225.122netmask: 255.255.255.252routes:- gateway: 10.184.225.121netmask: 255.240.0.0network: 10.176.0.0
- gateway: 10.184.225.121netmask: 255.240.0.0network: 10.208.0.0
Multi-layered configurations
Complex networking sometimes uses layers of configuration. The syntax allows users to build those layers one at atime. All of the virtual network devices supported allow specifying an underlying device by their name value.
Bonded VLAN Example:
network:version: 1config:# 10G pair- type: physical
name: gbe0mac_address: cd:11:22:33:44:00
- type: physicalname: gbe1mac_address: cd:11:22:33:44:02
# Bond.- type: bond
name: bond0bond_interfaces:
- gbe0- gbe1
params:bond-mode: 802.3adbond-lacp-rate: fast
# A Bond VLAN.- type: vlan
name: bond0.200vlan_link: bond0vlan_id: 200subnets:
- type: dhcp4
More Examples
Some more examples to explore the various options available.
Multiple VLAN example:
142 Chapter 1. Getting help

cloud-init, Release 20.2
network:version: 1config:- id: eth0mac_address: d4:be:d9:a8:49:13mtu: 1500name: eth0subnets:- address: 10.245.168.16/21
dns_nameservers:- 10.245.168.2gateway: 10.245.168.1type: static
type: physical- id: eth1mac_address: d4:be:d9:a8:49:15mtu: 1500name: eth1subnets:- address: 10.245.188.2/24
dns_nameservers: []type: static
type: physical- id: eth1.2667mtu: 1500name: eth1.2667subnets:- address: 10.245.184.2/24
dns_nameservers: []type: static
type: vlanvlan_id: 2667vlan_link: eth1
- id: eth1.2668mtu: 1500name: eth1.2668subnets:- address: 10.245.185.1/24
dns_nameservers: []type: static
type: vlanvlan_id: 2668vlan_link: eth1
- id: eth1.2669mtu: 1500name: eth1.2669subnets:- address: 10.245.186.1/24
dns_nameservers: []type: static
type: vlanvlan_id: 2669vlan_link: eth1
- id: eth1.2670mtu: 1500name: eth1.2670subnets:
(continues on next page)
1.13. Network Configuration 143

cloud-init, Release 20.2
(continued from previous page)
- address: 10.245.187.2/24dns_nameservers: []type: static
type: vlanvlan_id: 2670vlan_link: eth1
- address: 10.245.168.2search:- dellstacktype: nameserver
Networking Config Version 2
Cloud-init’s support for Version 2 network config is a subset of the version 2 format defined for the netplan tool.Cloud-init supports both reading and writing of Version 2; the latter support requires a distro with netplan present.
The network key has at least two required elements. First it must include version: 2 and one or more ofpossible device types..
Cloud-init will read this format from system config. For example the following could be present in /etc/cloud/cloud.cfg.d/custom-networking.cfg:
network:version: 2ethernets: []
It may also be provided in other locations including the NoCloud, see Default Behavior for other places.
Supported device types values are as follows:
• Ethernets (ethernets)
• Bonds (bonds)
• Bridges (bridges)
• VLANs (vlans)
Each type block contains device definitions as a map where the keys (called “configuration IDs”). Each entry underthe types may include IP and/or device configuration.
Cloud-init does not current support wifis type that is present in native netplan.
Device configuration IDs
The key names below the per-device-type definition maps (like ethernets:) are called “ID”s. They must be uniquethroughout the entire set of configuration files. Their primary purpose is to serve as anchor names for compositedevices, for example to enumerate the members of a bridge that is currently being defined.
There are two physically/structurally different classes of device definitions, and the ID field has a different interpreta-tion for each:
Physical devices
: (Examples: ethernet, wifi) These can dynamically come and go between reboots and even during runtime (hot-plugging). In the generic case, they can be selected by match: rules on desired properties, such as name/namepattern, MAC address, driver, or device paths. In general these will match any number of devices (unless they
144 Chapter 1. Getting help

cloud-init, Release 20.2
refer to properties which are unique such as the full path or MAC address), so without further knowledge aboutthe hardware these will always be considered as a group.
It is valid to specify no match rules at all, in which case the ID field is simply the interface name to be matched.This is mostly useful if you want to keep simple cases simple, and it’s how network device configuration hasbeen done for a long time.
If there are match: rules, then the ID field is a purely opaque name which is only being used for referencesfrom definitions of compound devices in the config.
Virtual devices
: (Examples: veth, bridge, bond) These are fully under the control of the config file(s) and the network stack. I.e. these devices are being created instead of matched. Thus match: and set-name: are not applicable forthese, and the ID field is the name of the created virtual device.
Common properties for physical device types
match: <(mapping)>
This selects a subset of available physical devices by various hardware properties. The following configuration willthen apply to all matching devices, as soon as they appear. All specified properties must match. The followingproperties for creating matches are supported:
name: <(scalar)>
Current interface name. Globs are supported, and the primary use case for matching on names, as selecting one fixedname can be more easily achieved with having no match: at all and just using the ID (see above). Note that currentlyonly networkd supports globbing, NetworkManager does not.
macaddress: <(scalar)>
Device’s MAC address in the form “XX:XX:XX:XX:XX:XX”. Globs are not allowed.
driver: <(scalar)>
Kernel driver name, corresponding to the DRIVER udev property. Globs are supported. Matching on driver is onlysupported with networkd.
Examples:
# all cards on second PCI busmatch:
name: enp2*
# fixed MAC addressmatch:
macaddress: 11:22:33:AA:BB:FF
# first card of driver ``ixgbe``match:
driver: ixgbename: en*s0
set-name: <(scalar)>
When matching on unique properties such as path or MAC, or with additional assumptions such as “there will onlyever be one wifi device”, match rules can be written so that they only match one device. Then this property can beused to give that device a more specific/desirable/nicer name than the default from udev’s ifnames. Any additionaldevice that satisfies the match rules will then fail to get renamed and keep the original kernel name (and dmesg willshow an error).
1.13. Network Configuration 145

cloud-init, Release 20.2
wakeonlan: <(bool)>
Enable wake on LAN. Off by default.
Common properties for all device types
renderer: <(scalar)>
Use the given networking backend for this definition. Currently supported are networkd and NetworkManager.This property can be specified globally in networks:, for a device type (in e. g. ethernets:) or for a particulardevice definition. Default is networkd.
Note: Cloud-init only supports networkd backend if rendering version2 config to the instance.
dhcp4: <(bool)>
Enable DHCP for IPv4. Off by default.
dhcp6: <(bool)>
Enable DHCP for IPv6. Off by default.
addresses: <(sequence of scalars)>
Add static addresses to the interface in addition to the ones received through DHCP or RA. Each sequence entryis in CIDR notation, i. e. of the form addr/prefixlen . addr is an IPv4 or IPv6 address as recognized byinet_pton``(3) and ``prefixlen the number of bits of the subnet.
Example: addresses: [192.168.14.2/24, 2001:1::1/64]
gateway4: or gateway6: <(scalar)>
Set default gateway for IPv4/6, for manual address configuration. This requires setting addresses too. GatewayIPs must be in a form recognized by inet_pton(3)
Example for IPv4: gateway4: 172.16.0.1 Example for IPv6: gateway6: 2001:4::1
mtu: <MTU SizeBytes>
The MTU key represents a device’s Maximum Transmission Unit, the largest size packet or frame, specified in octets(eight-bit bytes), that can be sent in a packet- or frame-based network. Specifying mtu is optional.
nameservers: <(mapping)>
Set DNS servers and search domains, for manual address configuration. There are two supported fields: addresses:is a list of IPv4 or IPv6 addresses similar to gateway*, and search: is a list of search domains.
Example:
nameservers:search: [lab, home]addresses: [8.8.8.8, FEDC::1]
routes: <(sequence of mapping)>
Add device specific routes. Each mapping includes a to, via key with an IPv4 or IPv6 address as value. metric isan optional value.
Example:
146 Chapter 1. Getting help
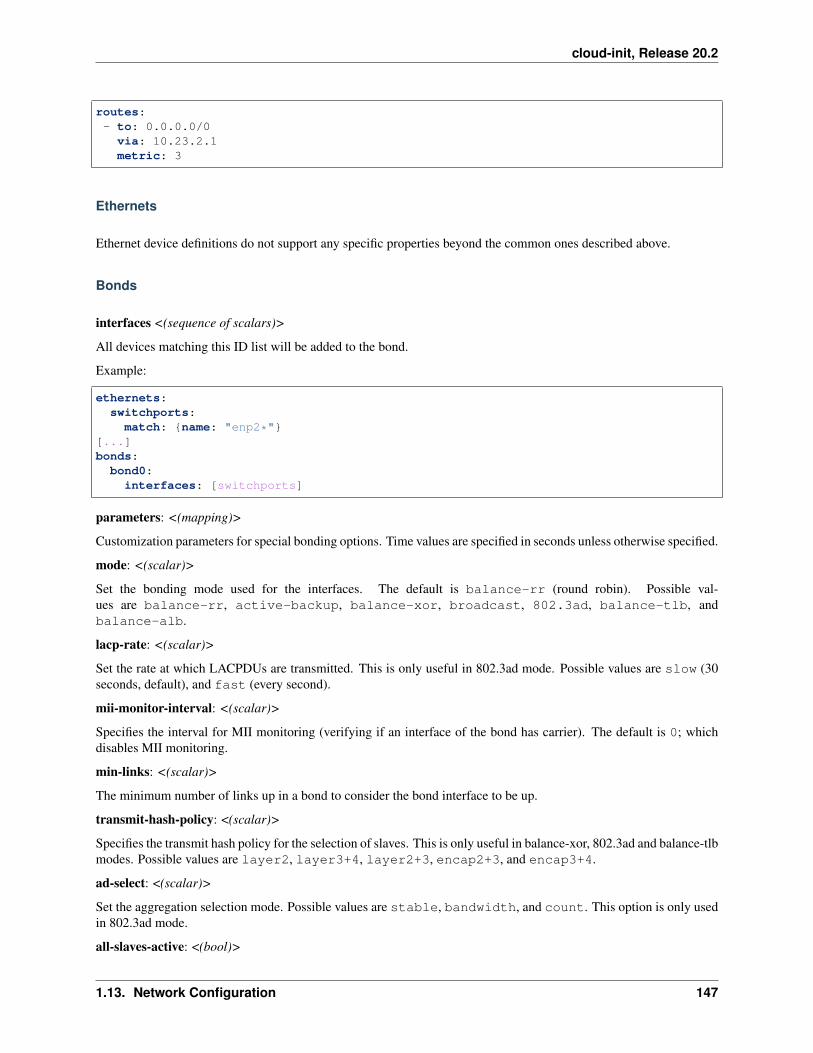
cloud-init, Release 20.2
routes:- to: 0.0.0.0/0via: 10.23.2.1metric: 3
Ethernets
Ethernet device definitions do not support any specific properties beyond the common ones described above.
Bonds
interfaces <(sequence of scalars)>
All devices matching this ID list will be added to the bond.
Example:
ethernets:switchports:match: {name: "enp2*"}
[...]bonds:
bond0:interfaces: [switchports]
parameters: <(mapping)>
Customization parameters for special bonding options. Time values are specified in seconds unless otherwise specified.
mode: <(scalar)>
Set the bonding mode used for the interfaces. The default is balance-rr (round robin). Possible val-ues are balance-rr, active-backup, balance-xor, broadcast, 802.3ad, balance-tlb, andbalance-alb.
lacp-rate: <(scalar)>
Set the rate at which LACPDUs are transmitted. This is only useful in 802.3ad mode. Possible values are slow (30seconds, default), and fast (every second).
mii-monitor-interval: <(scalar)>
Specifies the interval for MII monitoring (verifying if an interface of the bond has carrier). The default is 0; whichdisables MII monitoring.
min-links: <(scalar)>
The minimum number of links up in a bond to consider the bond interface to be up.
transmit-hash-policy: <(scalar)>
Specifies the transmit hash policy for the selection of slaves. This is only useful in balance-xor, 802.3ad and balance-tlbmodes. Possible values are layer2, layer3+4, layer2+3, encap2+3, and encap3+4.
ad-select: <(scalar)>
Set the aggregation selection mode. Possible values are stable, bandwidth, and count. This option is only usedin 802.3ad mode.
all-slaves-active: <(bool)>
1.13. Network Configuration 147

cloud-init, Release 20.2
If the bond should drop duplicate frames received on inactive ports, set this option to false. If they should bedelivered, set this option to true. The default value is false, and is the desirable behavior in most situations.
arp-interval: <(scalar)>
Set the interval value for how frequently ARP link monitoring should happen. The default value is 0, which disablesARP monitoring.
arp-ip-targets: <(sequence of scalars)>
IPs of other hosts on the link which should be sent ARP requests in order to validate that a slave is up. This option isonly used when arp-interval is set to a value other than 0. At least one IP address must be given for ARP linkmonitoring to function. Only IPv4 addresses are supported. You can specify up to 16 IP addresses. The default valueis an empty list.
arp-validate: <(scalar)>
Configure how ARP replies are to be validated when using ARP link monitoring. Possible values are none, active,backup, and all.
arp-all-targets: <(scalar)>
Specify whether to use any ARP IP target being up as sufficient for a slave to be considered up; or if all the targetsmust be up. This is only used for active-backup mode when arp-validate is enabled. Possible values areany and all.
up-delay: <(scalar)>
Specify the delay before enabling a link once the link is physically up. The default value is 0.
down-delay: <(scalar)>
Specify the delay before disabling a link once the link has been lost. The default value is 0.
fail-over-mac-policy: <(scalar)>
Set whether to set all slaves to the same MAC address when adding them to the bond, or how else the system shouldhandle MAC addresses. The possible values are none, active, and follow.
gratuitious-arp: <(scalar)>
Specify how many ARP packets to send after failover. Once a link is up on a new slave, a notification is sent andpossibly repeated if this value is set to a number greater than 1. The default value is 1 and valid values are between 1and 255. This only affects active-backup mode.
packets-per-slave: <(scalar)>
In balance-rr mode, specifies the number of packets to transmit on a slave before switching to the next. Whenthis value is set to 0, slaves are chosen at random. Allowable values are between 0 and 65535. The default value is1. This setting is only used in balance-rr mode.
primary-reselect-policy: <(scalar)>
Set the reselection policy for the primary slave. On failure of the active slave, the system will use this policy to decidehow the new active slave will be chosen and how recovery will be handled. The possible values are always, better,and failure.
learn-packet-interval: <(scalar)>
Specify the interval between sending learning packets to each slave. The value range is between 1 and 0x7fffffff.The default value is 1. This option only affects balance-tlb and balance-alb modes.
148 Chapter 1. Getting help
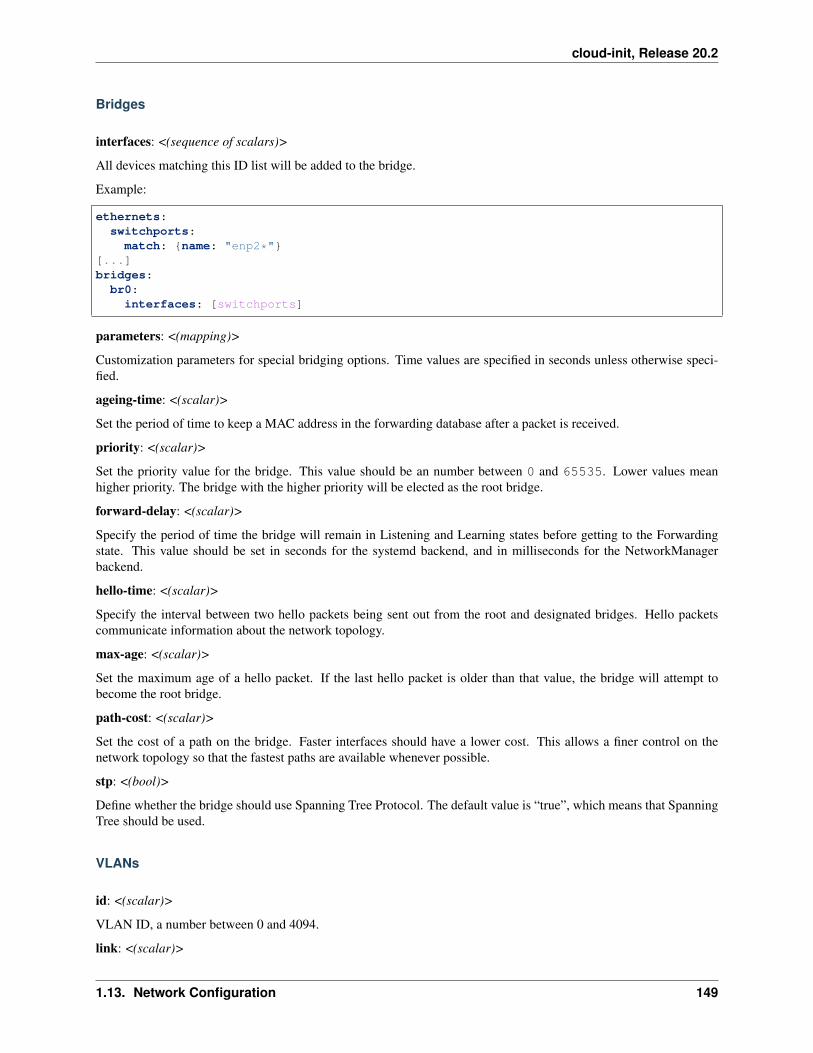
cloud-init, Release 20.2
Bridges
interfaces: <(sequence of scalars)>
All devices matching this ID list will be added to the bridge.
Example:
ethernets:switchports:match: {name: "enp2*"}
[...]bridges:br0:interfaces: [switchports]
parameters: <(mapping)>
Customization parameters for special bridging options. Time values are specified in seconds unless otherwise speci-fied.
ageing-time: <(scalar)>
Set the period of time to keep a MAC address in the forwarding database after a packet is received.
priority: <(scalar)>
Set the priority value for the bridge. This value should be an number between 0 and 65535. Lower values meanhigher priority. The bridge with the higher priority will be elected as the root bridge.
forward-delay: <(scalar)>
Specify the period of time the bridge will remain in Listening and Learning states before getting to the Forwardingstate. This value should be set in seconds for the systemd backend, and in milliseconds for the NetworkManagerbackend.
hello-time: <(scalar)>
Specify the interval between two hello packets being sent out from the root and designated bridges. Hello packetscommunicate information about the network topology.
max-age: <(scalar)>
Set the maximum age of a hello packet. If the last hello packet is older than that value, the bridge will attempt tobecome the root bridge.
path-cost: <(scalar)>
Set the cost of a path on the bridge. Faster interfaces should have a lower cost. This allows a finer control on thenetwork topology so that the fastest paths are available whenever possible.
stp: <(bool)>
Define whether the bridge should use Spanning Tree Protocol. The default value is “true”, which means that SpanningTree should be used.
VLANs
id: <(scalar)>
VLAN ID, a number between 0 and 4094.
link: <(scalar)>
1.13. Network Configuration 149

cloud-init, Release 20.2
ID of the underlying device definition on which this VLAN gets created.
Example:
ethernets:eno1: {...}
vlans:en-intra:id: 1link: eno1dhcp4: yes
en-vpn:id: 2link: eno1address: ...
Examples
Configure an ethernet device with networkd, identified by its name, and enable DHCP:
network:version: 2ethernets:eno1:
dhcp4: true
This is a complex example which shows most available features:
network:version: 2ethernets:# opaque ID for physical interfaces, only referred to by other stanzasid0:
match:macaddress: 00:11:22:33:44:55
wakeonlan: truedhcp4: trueaddresses:- 192.168.14.2/24- 2001:1::1/64
gateway4: 192.168.14.1gateway6: 2001:1::2nameservers:
search: [foo.local, bar.local]addresses: [8.8.8.8]
lom:match:driver: ixgbe
# you are responsible for setting tight enough match rules# that only match one device if you use set-nameset-name: lom1dhcp6: true
switchports:# all cards on second PCI bus; unconfigured by themselves, will be added# to br0 belowmatch:
name: enp2*(continues on next page)
150 Chapter 1. Getting help
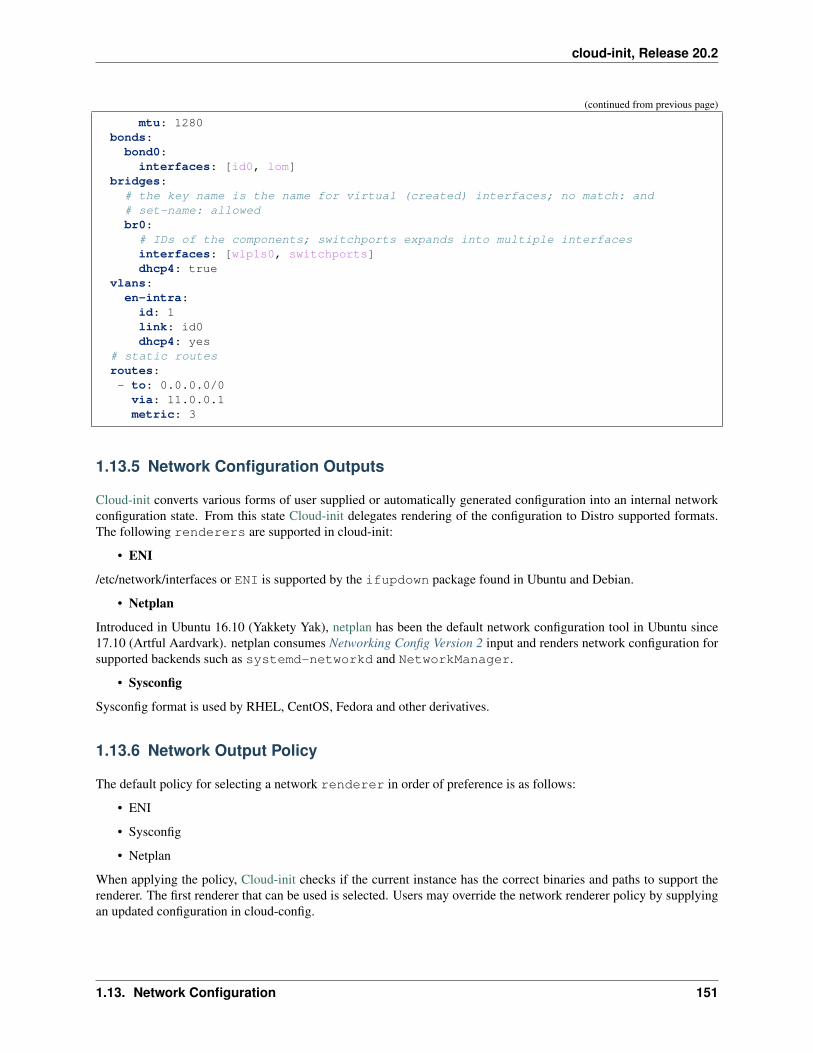
cloud-init, Release 20.2
(continued from previous page)
mtu: 1280bonds:bond0:
interfaces: [id0, lom]bridges:# the key name is the name for virtual (created) interfaces; no match: and# set-name: allowedbr0:
# IDs of the components; switchports expands into multiple interfacesinterfaces: [wlp1s0, switchports]dhcp4: true
vlans:en-intra:
id: 1link: id0dhcp4: yes
# static routesroutes:- to: 0.0.0.0/0
via: 11.0.0.1metric: 3
1.13.5 Network Configuration Outputs
Cloud-init converts various forms of user supplied or automatically generated configuration into an internal networkconfiguration state. From this state Cloud-init delegates rendering of the configuration to Distro supported formats.The following renderers are supported in cloud-init:
• ENI
/etc/network/interfaces or ENI is supported by the ifupdown package found in Ubuntu and Debian.
• Netplan
Introduced in Ubuntu 16.10 (Yakkety Yak), netplan has been the default network configuration tool in Ubuntu since17.10 (Artful Aardvark). netplan consumes Networking Config Version 2 input and renders network configuration forsupported backends such as systemd-networkd and NetworkManager.
• Sysconfig
Sysconfig format is used by RHEL, CentOS, Fedora and other derivatives.
1.13.6 Network Output Policy
The default policy for selecting a network renderer in order of preference is as follows:
• ENI
• Sysconfig
• Netplan
When applying the policy, Cloud-init checks if the current instance has the correct binaries and paths to support therenderer. The first renderer that can be used is selected. Users may override the network renderer policy by supplyingan updated configuration in cloud-config.
1.13. Network Configuration 151
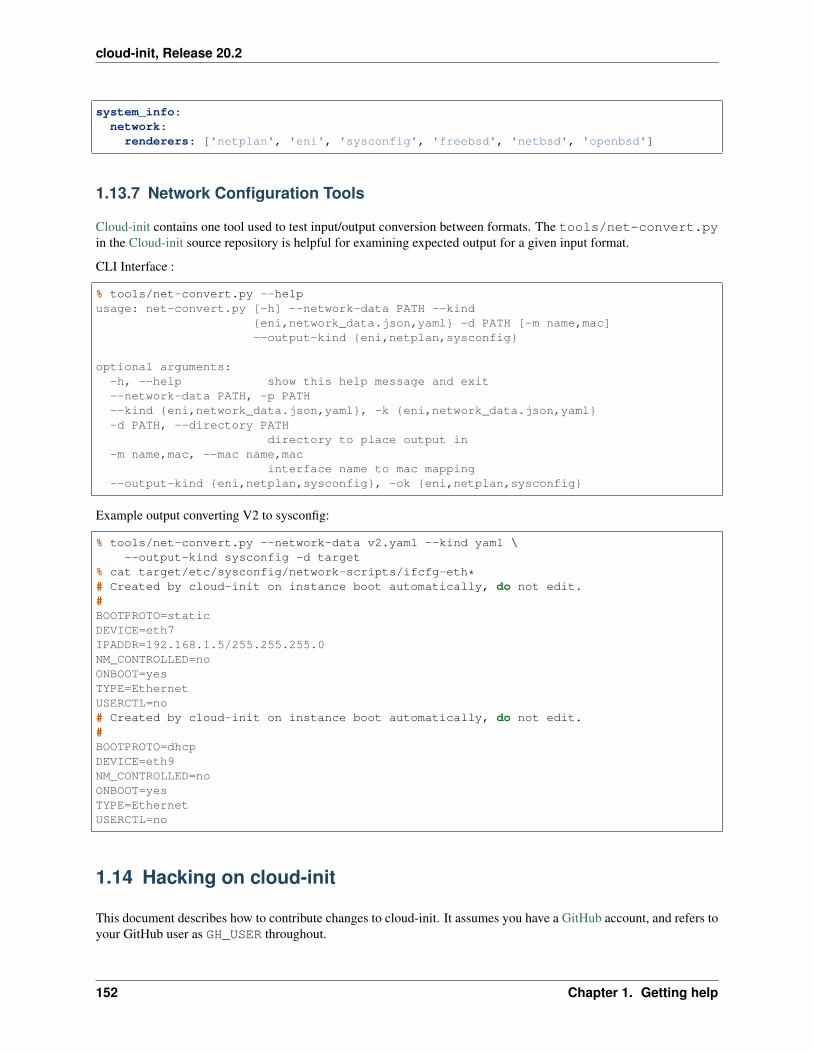
cloud-init, Release 20.2
system_info:network:renderers: ['netplan', 'eni', 'sysconfig', 'freebsd', 'netbsd', 'openbsd']
1.13.7 Network Configuration Tools
Cloud-init contains one tool used to test input/output conversion between formats. The tools/net-convert.pyin the Cloud-init source repository is helpful for examining expected output for a given input format.
CLI Interface :
% tools/net-convert.py --helpusage: net-convert.py [-h] --network-data PATH --kind
{eni,network_data.json,yaml} -d PATH [-m name,mac]--output-kind {eni,netplan,sysconfig}
optional arguments:-h, --help show this help message and exit--network-data PATH, -p PATH--kind {eni,network_data.json,yaml}, -k {eni,network_data.json,yaml}-d PATH, --directory PATH
directory to place output in-m name,mac, --mac name,mac
interface name to mac mapping--output-kind {eni,netplan,sysconfig}, -ok {eni,netplan,sysconfig}
Example output converting V2 to sysconfig:
% tools/net-convert.py --network-data v2.yaml --kind yaml \--output-kind sysconfig -d target
% cat target/etc/sysconfig/network-scripts/ifcfg-eth*# Created by cloud-init on instance boot automatically, do not edit.#BOOTPROTO=staticDEVICE=eth7IPADDR=192.168.1.5/255.255.255.0NM_CONTROLLED=noONBOOT=yesTYPE=EthernetUSERCTL=no# Created by cloud-init on instance boot automatically, do not edit.#BOOTPROTO=dhcpDEVICE=eth9NM_CONTROLLED=noONBOOT=yesTYPE=EthernetUSERCTL=no
1.14 Hacking on cloud-init
This document describes how to contribute changes to cloud-init. It assumes you have a GitHub account, and refers toyour GitHub user as GH_USER throughout.
152 Chapter 1. Getting help

cloud-init, Release 20.2
1.14.1 Submitting your first pull request
Follow these steps to submit your first pull request to cloud-init:
• To contribute to cloud-init, you must sign the Canonical contributor license agreement
– If you have already signed it as an individual, your Launchpad user will be listed in the contributor-agreement-canonical group. (Unfortunately there is no easy way to check if an organization or companyyou are doing work for has signed.)
– When signing it:
* ensure that you fill in the GitHub username field.
* when prompted for ‘Project contact’ or ‘Canonical Project Manager’, enter ‘Rick Harding’.
– If your company has signed the CLA for you, please contact us to help in verifying which Launch-pad/GitHub accounts are associated with the company.
– For any questions or help with the process, please email Rick Harding with the subject, “Cloud-Init CLA”
– You also may contact user rick_h in the #cloud-init channel on the Freenode IRC network.
• Configure git with your email and name for commit messages.
Your name will appear in commit messages and will also be used in changelogs or release notes. Give yourselfcredit!:
git config user.name "Your Name"git config user.email "Your Email"
• Sign into your GitHub account
• Fork the upstream repository on Github and clicking on the Fork button
• Create a new remote pointing to your personal GitHub repository.
git clone git://github.com/canonical/cloud-initcd cloud-initgit remote add GH_USER [email protected]:GH_USER/cloud-init.gitgit push GH_USER master
• Read through the cloud-init Code Review Process, so you understand how your changes will end up in cloud-init’s codebase.
• Submit your first cloud-init pull request, adding yourself to the in-repository list that we use to track CLAsignatures: tools/.github-cla-signers
– See PR #344 and PR #345 for examples of what this pull request should look like.
– Note that .github-cla-signers is sorted alphabetically.
– (If you already have a change that you want to submit, you can also include the change to tools/.github-cla-signers in that pull request, there is no need for two separate PRs.)
Transferring CLA Signatures from Launchpad to Github
For existing contributors who have signed the agreement in Launchpad before the Github username field was included,we need to verify the link between your Launchpad account and your GitHub account. To enable us to do this, we askthat you create a branch with both your Launchpad and GitHub usernames against both the Launchpad and GitHubcloud-init repositories. We’ve added a tool (tools/migrate-lp-user-to-github) to the cloud-init repositoryto handle this migration as automatically as possible.
1.14. Hacking on cloud-init 153
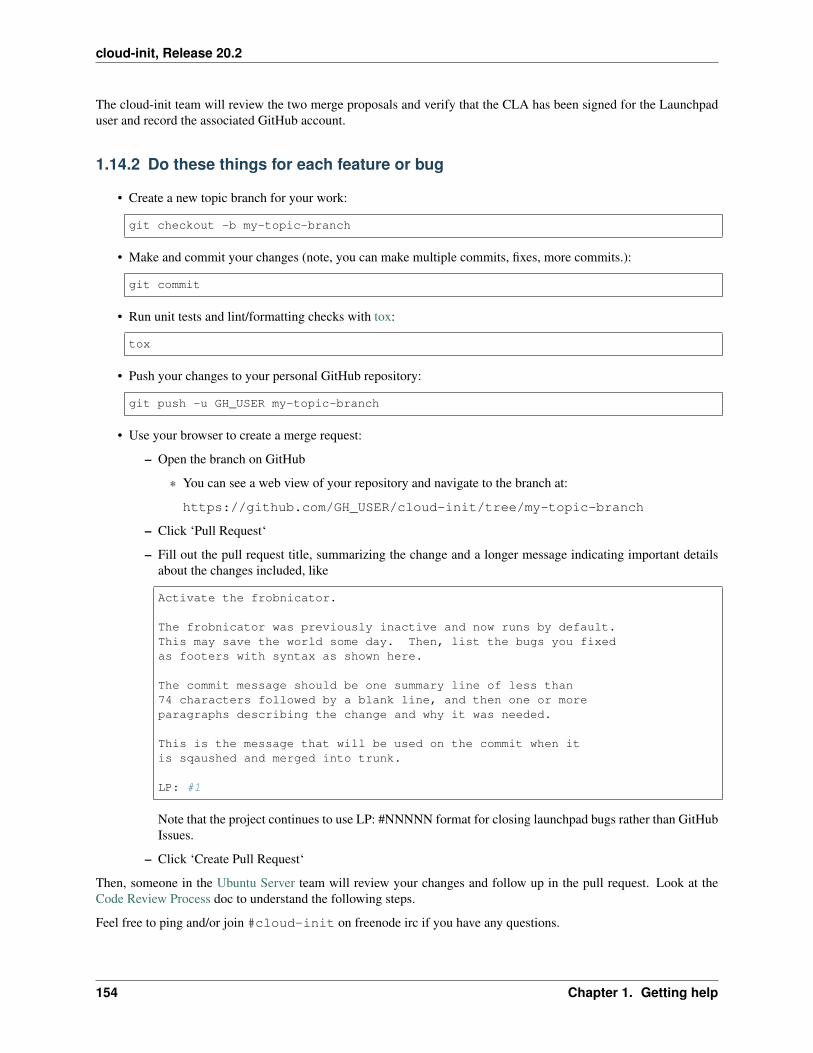
cloud-init, Release 20.2
The cloud-init team will review the two merge proposals and verify that the CLA has been signed for the Launchpaduser and record the associated GitHub account.
1.14.2 Do these things for each feature or bug
• Create a new topic branch for your work:
git checkout -b my-topic-branch
• Make and commit your changes (note, you can make multiple commits, fixes, more commits.):
git commit
• Run unit tests and lint/formatting checks with tox:
tox
• Push your changes to your personal GitHub repository:
git push -u GH_USER my-topic-branch
• Use your browser to create a merge request:
– Open the branch on GitHub
* You can see a web view of your repository and navigate to the branch at:
https://github.com/GH_USER/cloud-init/tree/my-topic-branch
– Click ‘Pull Request‘
– Fill out the pull request title, summarizing the change and a longer message indicating important detailsabout the changes included, like
Activate the frobnicator.
The frobnicator was previously inactive and now runs by default.This may save the world some day. Then, list the bugs you fixedas footers with syntax as shown here.
The commit message should be one summary line of less than74 characters followed by a blank line, and then one or moreparagraphs describing the change and why it was needed.
This is the message that will be used on the commit when itis sqaushed and merged into trunk.
LP: #1
Note that the project continues to use LP: #NNNNN format for closing launchpad bugs rather than GitHubIssues.
– Click ‘Create Pull Request‘
Then, someone in the Ubuntu Server team will review your changes and follow up in the pull request. Look at theCode Review Process doc to understand the following steps.
Feel free to ping and/or join #cloud-init on freenode irc if you have any questions.
154 Chapter 1. Getting help

cloud-init, Release 20.2
1.14.3 Design
This section captures design decisions that are helpful to know when hacking on cloud-init.
Cloud Config Modules
• Any new modules should use underscores in any new config options and not hyphens (e.g. new_option and notnew-option).
Unit Testing
cloud-init uses pytest to run its tests, and has tests written both as unittest.TestCase sub-classes and as un-subclassed pytest tests. The following guidelines should be followed:
• For ease of organisation and greater accessibility for developers not familiar with pytest, all cloud-init unit testsmust be contained within test classes
– Put another way, module-level test functions should not be used
• pytest test classes should use pytest fixtures to share functionality instead of inheritance
• As all tests are contained within classes, it is acceptable to mix TestCase test classes and pytest test classeswithin the same test file
– These can be easily distinguished by their definition: pytest classes will not use inheritance at all (e.g.TestGetPackageMirrorInfo), whereas TestCase classes will subclass (indirectly) from TestCase (e.g.TestPrependBaseCommands)
• pytest tests should use bare assert statements, to take advantage of pytest’s assertion introspection
– For == and other commutative assertions, the expected value should be placed before the value under test:assert expected_value == function_under_test()
• As we still support Ubuntu 16.04 (Xenial Xerus), we can only use pytest features that are available in v2.8.7.This is an inexhaustive list of ways in which this may catch you out:
– Support for using yield in pytest.fixture functions was only introduced in pytest 3.0. Such func-tions must instead use the pytest.yield_fixture decorator.
– Only the following built-in fixtures are available1:
* cache
* capfd
* caplog (provided by python3-pytest-catchlog on xenial)
* capsys
* monkeypatch
* pytestconfig
* record_xml_property
* recwarn
1 This list of fixtures (with markup) can be reproduced by running:
py.test-3 --fixtures -q | grep "^[^ -]" | grep -v '\(no\|capturelog\)' | sort | sed 's/.*/*→˓``\0``/'
in a xenial lxd container with python3-pytest-catchlog installed.
1.14. Hacking on cloud-init 155
cloud-init, Release 20.2
* tmpdir_factory
* tmpdir
– On xenial, the objects returned by the tmpdir fixture cannot be used where paths are required; they arerejected as invalid paths. You must instead use their .strpath attribute.
* For example, instead of util.write_file(tmpdir.join("some_file"), ...), youshould write util.write_file(tmpdir.join("some_file").strpath, ...).
• Variables/parameter names for Mock or MagicMock instances should start with m_ to clearly distinguish themfrom non-mock variables
– For example, m_readurl (which would be a mock for readurl)
• The assert_* methods that are available on Mock and MagicMock objects should be avoided, as typos inthese method names may not raise AttributeError (and so can cause tests to silently pass). An importantexception: if a Mock is autospecced then misspelled assertion methods will raise an AttributeError, sothese assertion methods may be used on autospecced Mock objects.
For non-autospecced Mock s, these substitutions can be used (m is assumed to be a Mock):
– m.assert_any_call(*args, **kwargs) => assert mock.call(*args, **kwargs)in m.call_args_list
– m.assert_called() => assert 0 != m.call_count
– m.assert_called_once() => assert 1 == m.call_count
– m.assert_called_once_with(*args, **kwargs) => assert [mock.call(*args,
**kwargs)] == m.call_args_list
– m.assert_called_with(*args, **kwargs) => assert mock.call(*args,
**kwargs) == m.call_args_list[-1]
– m.assert_has_calls(call_list, any_order=True) => for call in call_list:assert call in m.call_args_list
* m.assert_has_calls(...) and m.assert_has_calls(..., any_order=False)are not easily replicated in a single statement, so their use when appropriate is acceptable.
– m.assert_not_called() => assert 0 == m.call_count
• Test arguments should be ordered as follows:
– mock.patch arguments. When used as a decorator, mock.patch partially applies its generated Mockobject as the first argument, so these arguments must go first.
– pytest.mark.parametrize arguments, in the order specified to the parametrize decorator.These arguments are also provided by a decorator, so it’s natural that they sit next to the mock.patcharguments.
– Fixture arguments, alphabetically. These are not provided by a decorator, so they are last, and their orderhas no defined meaning, so we default to alphabetical.
• It follows from this ordering of test arguments (so that we retain the property that arguments left-to-right corre-spond to decorators bottom-to-top) that test decorators should be ordered as follows:
– pytest.mark.parametrize
– mock.patch
• When there are multiple patch calls in a test file for the module it is testing, it may be desirable to capture theshared string prefix for these patch calls in a module-level variable. If used, such variables should be namedM_PATH or, for datasource tests, DS_PATH.
156 Chapter 1. Getting help

cloud-init, Release 20.2
Type Annotations
The cloud-init codebase uses Python’s annotation support for storing type annotations in the style specified by PEP-484. Their use in the codebase is encouraged but with one important caveat: types from the typing module cannotbe used.
cloud-init still supports Python 3.4, which doesn’t have the typing module in the stdlib. This means that the useof any types from the typing module in the codebase would require installation of an additional Python moduleon platforms using Python 3.4. As such platforms are generally in maintenance mode, the introduction of a newdependency may act as a break in compatibility in practical terms.
Similarly, only function annotations are appropriate for use, as the variable annotations specified in PEP-526 wereintroduced in Python 3.6.
Feature Flags
Feature flags are used as a way to easily toggle configuration at build time. They are provided to accommodate featuredeprecation and downstream configuration changes.
Currently used upstream values for feature flags are set in cloudinit/features.py. Overrides to these values(typically via quilt patch) can be placed in a file called feature_overrides.py in the same directory. Any valueset in feature_overrides.py will override the original value set in features.py.
Each flag should include a short comment regarding the reason for the flag and intended lifetime.
Tests are required for new feature flags, and tests must verify all valid states of a flag, not just the default state.
cloudinit.features.ALLOW_EC2_MIRRORS_ON_NON_AWS_INSTANCE_TYPES = FalseWhen configuring apt mirrors, old behavior is to allow the use of ec2 mirrors if the datasource availability_zoneformat matches one of the possible aws ec2 regions. After the 20.2 release, we no longer publish ec2 regionmirror urls on non-AWS cloud platforms. Besides feature_overrides.py, users can override this by providing#cloud-config apt directives.
cloudinit.features.ERROR_ON_USER_DATA_FAILURE = TrueIf there is a failure in obtaining user data (i.e., #include or decompress fails), old behavior is to log a warningand proceed. After the 20.2 release, we instead raise an exception. This flag can be removed after Focal is nolonger supported
1.14.4 Ongoing Refactors
This captures ongoing refactoring projects in the codebase. This is intended as documentation for developers involvedin the refactoring, but also for other developers who may interact with the code being refactored in the meantime.
cloudinit.net -> cloudinit.distros.networking Hierarchy
cloudinit.net was imported from the curtin codebase as a chunk, and then modified enough that it integratedwith the rest of the cloud-init codebase. Over the ~4 years since, the fact that it is not fully integrated into the Distrohierarchy has caused several issues.
The common pattern of these problems is that the commands used for networking are different across distribu-tions and operating systems. This has lead to cloudinit.net developing its own “distro determination” logic:get_interfaces_by_mac is probably the clearest example of this. Currently, these differences are primarily split alongLinux/BSD lines. However, it would be short-sighted to only refactor in a way that captures this difference: we cananticipate that differences will develop between Linux-based distros in future, or there may already be differences intooling that we currently work around in less obvious ways.
1.14. Hacking on cloud-init 157

cloud-init, Release 20.2
The high-level plan is to introduce a hierarchy of networking classes in cloudinit.distros.networking,which each Distro subclass will reference. These will capture the differences between networking on our variousdistros, while still allowing easy reuse of code between distros that share functionality (e.g. most of the Linux network-ing behaviour). Distro objects will instantiate the networking classes at self.net, so callers will call distro.net.<func> instead of cloudinit.net.<func>; this will necessitate access to an instantiated Distro object.
An implementation note: there may be external consumers of the cloudinit.net module. We don’t consider thisa public API, so we will be removing it as part of this refactor. However, we will ensure that the new API is completefrom its introduction, so that any such consumers can move over to it wholesale. (Note, however, that this new API isstill not considered public or stable, and may not replicate the existing API exactly.)
In more detail:
• The root of this hierarchy will be the cloudinit.distros.networking.Networking class. Thisclass will have a corresponding method for every cloudinit.net function that we identify to be involvedin refactoring. Initially, these methods’ implementations will simply call the corresponding cloudinit.netfunction. (This gives us the complete API from day one, for existing consumers.)
• As the biggest differentiator in behaviour, the next layer of the hierarchy will be two subclasses:LinuxNetworking and BSDNetworking. These will be introduced in the initial PR.
• When a difference in behaviour for a particular distro is identified, a new Networking subclass will be created.This new class should generally subclass either LinuxNetworking or BSDNetworking.
• To be clear: Networking subclasses will only be created when needed, we will not create a full hierarchy ofper-Distro subclasses up-front.
• Each Distro class will have a class variable (cls.networking_cls) which points at the appropriatenetworking class (initially this will be either LinuxNetworking or BSDNetworking).
• When Distro classes are instantiated, they will instantiate cls.networking_cls and store the instanceat self.net. (This will be implemented in cloudinit.distros.Distro.__init__.)
• A helper function will be added which will determine the appropriate Distro subclass for the current system,instantiate it and return its net attribute. (This is the entry point for existing consumers to migrate to.)
• Callers of refactored functions will change from calling cloudinit.net.<func> to distro.net.<func>, where distro is an instance of the appropriate Distro class for this system. (This will requiremaking such an instance available to callers, which will constitute a large part of the work in this project.)
After the initial structure is in place, the work in this refactor will consist of replacing the cloudinit.net.some_func call in each cloudinit.distros.networking.Networking method with the actual imple-mentation. This can be done incrementally, one function at a time:
• pick an unmigrated cloudinit.distros.networking.Networking method
• find it in the the list of bugs tagged net-refactor and assign yourself to it (see Managing Work/Tracking Progressbelow for more details)
• refactor all of its callers to call the distro.net.<func> method on Distro instead of the cloudinit.net.<func> function. (This is likely to be the most time-consuming step, as it may require plumbing Distroobjects through to places that previously have not consumed them.)
• refactor its implementation from cloudinit.net into the Networking hierarchy (e.g. if it has an if/elseon BSD, this is the time to put the implementations in their respective subclasses)
– if part of the method contains distro-independent logic, then you may need to create new methods tocapture this distro-specific logic; we don’t want to replicate common logic in different Networkingsubclasses
– if after the refactor, the method on the root Networking class no longer has any implementation, itshould be converted to an abstractmethod
158 Chapter 1. Getting help
cloud-init, Release 20.2
• ensure that the new implementation has unit tests (either by moving existing tests, or by writing new ones)
• ensure that the new implementation has a docstring
• add any appropriate type annotations
– note that we must follow the constraints described in the “Type Annotations” section above, so you maynot be able to write complete annotations
– we have type aliases defined in cloudinit.distros.networking which should be used whenapplicable
• finally, remove it (and any other now-unused functions) from cloudinit.net (to avoid having two parallel imple-mentations)
cloudinit.net Functions/Classes
The functions/classes that need refactoring break down into some broad categories:
• helpers for accessing /sys (that should not be on the top-level Networking class as they are Linux-specific):
– get_sys_class_path
– sys_dev_path
– read_sys_net
– read_sys_net_safe
– read_sys_net_int
• those that directly access /sys (via helpers) and should (IMO) be included in the API of the Networkingclass:
– generate_fallback_config
* the config_driver parameter is used and passed as a boolean, so we can change the default valueto False (instead of None)
– get_ib_interface_hwaddr
– get_interface_mac
– interface_has_own_mac
– is_bond
– is_bridge
– is_physical
– is_renamed
– is_up
– is_vlan
– wait_for_physdevs
• those that directly access /sys (via helpers) but may be Linux-specific concepts or names:
– get_master
– device_devid
– device_driver
1.14. Hacking on cloud-init 159

cloud-init, Release 20.2
• those that directly use ip:
– _get_current_rename_info
* this has non-distro-specific logic so should potentially be refactored to use helpers on self in-stead of ip directly (rather than being wholesale reimplemented in each of BSDNetworking orLinuxNetworking)
* we can also remove the check_downable argument, it’s never specified so is always True
– _rename_interfaces
* this has several internal helper functions which use ip directly, and it calls_get_current_rename_info. That said, there appears to be a lot of non-distro-specificlogic that could live in a function on Networking, so this will require some careful refactoring toavoid duplicating that logic in each of BSDNetworking and LinuxNetworking.
* only the renames and current_info parameters are ever passed in (and current_info onlyby tests), so we can remove the others from the definition
– EphemeralIPv4Network
* this is another case where it mixes distro-specific and non-specific functionality. Specifically,__init__, __enter__ and __exit__ are non-specific, and the remaining methods are distro-specific.
* when refactoring this, the need to track cleanup_cmds likely means that the distro-specific be-haviour cannot be captured only in the Networking class. See this comment in PR #363 for morethoughts.
• those that implicitly use /sys via their call dependencies:
– master_is_bridge_or_bond
* appends to get_master return value, which is a /sys path
– extract_physdevs
* calls device_driver and device_devid in both _version_* impls
– apply_network_config_names
* calls extract_physdevs
* there is already a Distro.apply_network_config_names which in the default implementa-tion calls this function; this and its BSD subclass implementations should be refactored at the sametime
* the strict_present and strict_busy parameters are never passed, nor are they used in thefunction definition, so they can be removed
– get_interfaces
* calls device_driver, device_devid amongst others
– get_ib_hwaddrs_by_interface
* calls get_interfaces
• those that may fall into the above categories, but whose use is only related to netfailover (which relies ona Linux-specific network driver, so is unlikely to be relevant elsewhere without a substantial refactor; theseprobably only need implementing in LinuxNetworking):
– get_dev_features
– has_netfail_standby_feature
160 Chapter 1. Getting help

cloud-init, Release 20.2
* calls get_dev_features
– is_netfailover
– is_netfail_master
* this is called from generate_fallback_config
– is_netfail_primary
– is_netfail_standby
– N.B. all of these take an optional driver argument which is used to pass around a value to avoid havingto look it up by calling device_driver every time. This is something of a leaky abstraction, and isbetter served by caching on device_driver or storing the cached value on self, so we can drop theparameter from the new API.
• those that use /sys (via helpers) and have non-exhaustive BSD logic:
– get_devicelist
• those that already have separate Linux/BSD implementations:
– find_fallback_nic
– get_interfaces_by_mac
• those that have no OS-specific functionality (so do not need to be refactored):
– ParserError
– RendererNotFoundError
– has_url_connectivity
– is_ip_address
– is_ipv4_address
– natural_sort_key
Note that the functions in cloudinit.net use inconsistent parameter names for “string that contains a devicename”; we can standardise on devname (the most common one) in the refactor.
Managing Work/Tracking Progress
To ensure that we won’t have multiple people working on the same part of the refactor at the same time, there is a bugfor each function. You can see the current status by looking at the list of bugs tagged net-refactor.
When you’re working on refactoring a particular method, ensure that you have assigned yourself to the correspondingbug, to avoid duplicate work.
Generally, when considering what to pick up to refactor, it is best to start with functions in cloudinit.net whichare not called by anything else in cloudinit.net. This allows you to focus only on refactoring that function andits callsites, rather than having to update the other cloudinit.net function also.
References
• Mina Galic’s email the the cloud-init ML in 2018 (plus its thread)
• Mina Galic’s email to the cloud-init ML in 2019 (plus its thread)
1.14. Hacking on cloud-init 161

cloud-init, Release 20.2
• PR #363, the discussion which prompted finally starting this refactor (and where a lot of the above details werehashed out)
1.15 Code Review Process
In order to manage incoming pull requests effectively, and provide timely feedback and/or acceptance this documentserves as a guideline for the review process and outlines the expectations for those submitting code to the project aswell as those reviewing the code. Code is reviewed for acceptance by at least one core team member (later referred toas committers), but comments and suggestions from others are encouraged and welcome.
The process is intended to provide timely and actionable feedback for any submission.
1.15.1 Asking For Help
cloud-init contributors, potential contributors, community members and users are encouraged to ask for any help thatthey need. If you have questions about the code review process, or at any point during the code review process, theseare the available avenues:
• if you have an open Pull Request, comment on that pull request
• join the #cloud-init channel on the Freenode IRC network and ask away
• send an email to the cloud-init mailing list, [email protected]
These are listed in rough order of preference, but use whichever of them you are most comfortable with.
1.15.2 Goals
This process has the following goals:
• Ensure code reviews occur in a timely fashion and provide actionable feedback if changes are desired.
• Ensure the minimization of ancillary problems to increase the efficiency for those reviewing the submitted code
1.15.3 Role Definitions
Any code review process will have (at least) two involved parties. For our purposes, these parties are referred to asProposer and Reviewer. (We also have the Committer role which is a special case of the Reviewer role.) The termsare defined here (and the use of the singular form is not meant to imply that they refer to a single person):
Proposer The person proposing a pull request (hereafter known as a PR).
Reviewer A person who is reviewing a PR.
Committer A cloud-init core developer (i.e. a person who has permission to merge PRs into master).
1.15.4 Prerequisites For Landing Pull Requests
Before a PR can be landed into master, the following conditions must be met:
• the CLA has been signed by the Proposer (or is covered by an entity-level CLA signature)
• all required status checks are passing
• at least one “Approve” review from a Committer
162 Chapter 1. Getting help
cloud-init, Release 20.2
• no “Request changes” reviews from any Committer
The following conditions should be met:
• any Python functions/methods/classes have docstrings added/updated
• any changes to config module behaviour are captured in the documentation of the config module
• any Python code added has corresponding unit tests
• no “Request changes” reviews from any Reviewer
These conditions can be relaxed at the discretion of the Committers on a case-by-case basis. Generally, for account-ability, this should not be the decision of a single Committer, and the decision should be documented in commentson the PR.
(To take a specific example, the cc_phone_home module had no tests at the time PR #237 was submitted, so theProposer was not expected to write a full set of tests for their minor modification, but they were expected to updatethe config module docs.)
1.15.5 Non-Committer Reviews
Reviews from non-Committers are always welcome. Please feel empowered to review PRs and leave your thoughtsand comments on any submitted PRs, regardless of the Proposer.
Much of the below process is written in terms of the Committers. This is not intended to reflect that reviews shouldonly come from that group, but acknowledges that we are ultimately responsible for maintaining the standards of thecodebase. It would be entirely reasonable (and very welcome) for a Reviewer to only examine part of a PR, but itwould not be appropriate for a Committer to merge a PR without full scrutiny.
1.15.6 Opening Phase
In this phase, the Proposer is responsible for opening a pull request and meeting the prerequisites laid out above.
If they need help understanding the prerequisites, or help meeting the prerequisites, then they can (and should!) askfor help. See the Asking For Help section above for the ways to do that.
These are the steps that comprise the opening phase:
1. The Proposer opens PR
2. CI runs automatically, and if
CI fails The Proposer is expected to fix CI failures. If the Proposer doesn’t understand the nature of thefailures they are seeing, they should comment in the PR to request assistance, or use another way ofAsking For Help.
(Note that if assistance is not requested, the Committers will assume that the Proposer is working onaddressing the failures themselves. If you require assistance, please do ask for help!)
CI passes Move on to the Review Phase.
1.15.7 Review Phase
In this phase, the Proposer and the Reviewers will iterate together to, hopefully, get the PR merged into the cloud-initcodebase. There are three potential outcomes: merged, rejected permanently, and temporarily closed. (The first twoare covered in this section; see Inactive Pull Requests for details about temporary closure.)
1.15. Code Review Process 163

cloud-init, Release 20.2
(In the below, when the verbs “merge” or “squash merge” are used, they should be understood to mean “squash mergedusing the GitHub UI”, which is the only way that changes can land in cloud-init’s master branch.)
These are the steps that comprise the review phase:
1. The Committers assign a Committer to the PR
This Committer is expected to shepherd the PR to completion (and merge it, if that is the outcome reached).This means that they will perform an initial review, and monitor the PR to ensure that the Proposer is receivingany assistance that they require. The Committers will perform this assignment on a daily basis.
This assignment is intended to ensure that the Proposer has a clear point of contact with a cloud-init coredeveloper, and that they get timely feedback after submitting a PR. It is not intended to preclude reviews fromany other Reviewers, nor to imply that the Committer has ownership over the review process.
The assigned Committer may choose to delegate the code review of a PR to another Reviewer if they think thatthey would be better suited.
(Note that, in GitHub terms, this is setting an Assignee, not requesting a review.)
2. That Committer performs an initial review of the PR, resulting in one of the following:
Approve If the submitted PR meets all of the Prerequisites For Landing Pull Requests and passes code review,then the Committer will squash merge immediately.
There may be circumstances where a PR should not be merged immediately. The wip label will be appliedto PRs for which this is true. Only Committers are able to apply labels to PRs, so anyone who believesthat this label should be applied to a PR should request its application in a comment on the PR.
The review process is DONE.
Approve (with nits) If the Proposer submits their PR with “Allow edits from maintainer” enabled, and theonly changes the Committer requests are minor “nits”, the Committer can push fixes for those nits andimmediately squash merge. If the Committer does not wish to fix these nits but believes they should blocka straight-up Approve, then their review should be “Needs Changes” instead.
A nit is understood to be something like a minor style issue or a spelling error, generally confined to asingle line of code.
If a Committer is unsure as to whether their requested change is a nit, they should not treat it as a nit.
(If a Proposer wants to opt-out of this, then they should uncheck “Allow edits from maintainer” whensubmitting their PR.)
The review process is DONE.
Outright rejection The Committer will close the PR, with useful messaging for the Proposer as to why thishas happened.
This is reserved for cases where the proposed change is completely unfit for landing, and there is noreasonable path forward. This should only be used sparingly, as there are very few cases where proposalsare completely unfit.
If a different approach to the same problem is planned, it should be submitted as a separate PR. TheCommitter should include this information in their message when the PR is closed.
The review process is DONE.
Needs Changes The Committer will give the Proposer a clear idea of what is required for an Approve voteor, for more complex PRs, what the next steps towards an Approve vote are.
The Proposer will ask questions if they don’t understand, or disagree with, the Committer’s reviewcomments.
Once consensus has been reached, the Proposer will address the review comments.
164 Chapter 1. Getting help

cloud-init, Release 20.2
Once the review comments are addressed (as well as, potentially, in the interim), CI will run. If CI fails,the Proposer is expected to fix CI failures. If CI passes, the Proposer should indicate that the PR is readyfor re-review (by @ing the assigned reviewer), effectively moving back to the start of this section.
1.15.8 Inactive Pull Requests
PRs will be temporarily closed if they have been waiting on Proposer action for a certain amount of time withoutactivity. A PR will be marked as stale (with an explanatory comment) after 14 days of inactivity. It will be closed aftera further 7 days of inactivity.
These closes are not considered permanent, and the closing message should reflect this for the Proposer. However,if a PR is reopened, it should effectively enter the Opening Phase again, as it may need some work done to get CIpassing again.
1.16 Security Policy
The following documents the upstream cloud-init security policy.
1.16.1 Reporting
If a user finds a security issue, they are requested to file a private security bug on Launchpad. To ensure the informationstays private, change the “This bug contains information that is:” from “Public” to “Private Security” when filing.
After the bug is received, the issue is triaged within 2 working days of being reported and a response is sent to thereporter.
1.16.2 cloud-init-security
The cloud-init-security Launchpad team is a private, invite-only team used to discuss and coordinate security issueswith the project.
Any issues disclosed to the cloud-init-security mailing list are considered embargoed and should only be discussedwith other members of the cloud-init-security mailing list before the coordinated release date, unless specific exceptionis granted by the administrators of the mailing list. This includes disclosure of any details related to the vulnerabilityor the presence of a vulnerability itself. Violation of this policy may result in removal from the list for the company orindividual involved.
1.16.3 Evaluation
If the reported bug is deemed a real security issue a CVE is assigned by the Canonical Security Team as CVE Num-bering Authority (CNA).
If it is deemed a regular, non-security, issue, the reporter will be asked to follow typical bug reporting procedures.
In addition to the disclosure timeline, the core Canonical cloud-init team will enlist the expertise of the Ubuntu Securityteam for guidance on industry-standard disclosure practices as necessary.
If an issue specifically involves another distro or cloud vendor, additional individuals will be informed of the issue tohelp in evaluation.
1.16. Security Policy 165

cloud-init, Release 20.2
1.16.4 Disclosure
Disclosure of security issues will be made with a public statement. Once the determined time for disclosure has arrivedthe following will occur:
• A public bug is filed/made public with vulnerability details, CVE, mitigations and where to obtain the fix
• An email is sent to the public cloud-init mailing list
The disclosure timeframe is coordinated with the reporter and members of the cloud-init-security list. This dependson a number of factors:
• The reporter might have their own disclosure timeline (e.g. Google Project Zero and many others use a 90-daysafter initial report OR when a fix becomes public)
• It might take time to decide upon and develop an appropriate fix
• A distros might want extra time to backport any possible fixes before the fix becomes public
• A cloud may need additional time to prepare to help customers or impliment a fix
• The issue might be deemed low priority
• May wish to to align with an upcoming planned release
1.17 Testing and debugging cloud-init
1.17.1 Overview
This topic will discuss general approaches for test and debug of cloud-init on deployed instances.
1.17.2 Boot Time Analysis - cloud-init analyze
Occasionally instances don’t appear as performant as we would like and cloud-init packages a simple facility to inspectwhat operations took cloud-init the longest during boot and setup.
The script /usr/bin/cloud-init has an analyze sub-command analyze which parses any cloud-init.log file into formattedand sorted events. It allows for detailed analysis of the most costly cloud-init operations are to determine the long-polein cloud-init configuration and setup. These subcommands default to reading /var/log/cloud-init.log.
• analyze show Parse and organize cloud-init.log events by stage and include each sub-stage granularity withtime delta reports.
$ cloud-init analyze show -i my-cloud-init.log-- Boot Record 01 --The total time elapsed since completing an event is printed after the "@"character.The time the event takes is printed after the "+" character.
Starting stage: modules-config|`->config-emit_upstart ran successfully @05.47600s +00.00100s|`->config-snap_config ran successfully @05.47700s +00.00100s|`->config-ssh-import-id ran successfully @05.47800s +00.00200s|`->config-locale ran successfully @05.48000s +00.00100s...
• analyze dump Parse cloud-init.log into event records and return a list of dictionaries that can be consumedfor other reporting needs.
166 Chapter 1. Getting help

cloud-init, Release 20.2
$ cloud-init analyze dump -i my-cloud-init.log[{"description": "running config modules","event_type": "start","name": "modules-config","origin": "cloudinit","timestamp": 1510807493.0
},...
• analyze blame Parse cloud-init.log into event records and sort them based on highest time cost for quickassessment of areas of cloud-init that may need improvement.
$ cloud-init analyze blame -i my-cloud-init.log-- Boot Record 11 --
00.01300s (modules-final/config-scripts-per-boot)00.00400s (modules-final/config-final-message)00.00100s (modules-final/config-rightscale_userdata)...
• analyze boot Make subprocess calls to the kernel in order to get relevant pre-cloud-init timestamps, suchas the kernel start, kernel finish boot, and cloud-init start.
$ cloud-init analyze boot-- Most Recent Boot Record --
Kernel Started at: 2019-06-13 15:59:55.809385Kernel ended boot at: 2019-06-13 16:00:00.944740Kernel time to boot (seconds): 5.135355Cloud-init start: 2019-06-13 16:00:05.738396Time between Kernel boot and Cloud-init start (seconds): 4.793656
Analyze quickstart - LXC
To quickly obtain a cloud-init log try using lxc on any ubuntu system:
$ lxc init ubuntu-daily:xenial x1$ lxc start x1$ # Take lxc's cloud-init.log and pipe it to the analyzer$ lxc file pull x1/var/log/cloud-init.log - | cloud-init analyze dump -i -$ lxc file pull x1/var/log/cloud-init.log - | \
python3 -m cloudinit.analyze dump -i -
Analyze quickstart - KVM
To quickly analyze a KVM a cloud-init log:
1. Download the current cloud image
$ wget https://cloud-images.ubuntu.com/daily/server/xenial/current/xenial-server-→˓cloudimg-amd64.img
2. Create a snapshot image to preserve the original cloud-image
$ qemu-img create -b xenial-server-cloudimg-amd64.img -f qcow2 \test-cloudinit.qcow2
1.17. Testing and debugging cloud-init 167

cloud-init, Release 20.2
3. Create a seed image with metadata using cloud-localds
$ cat > user-data <<EOF#cloud-configpassword: passw0rdchpasswd: { expire: False }EOF
$ cloud-localds my-seed.img user-data
4. Launch your modified VM
$ kvm -m 512 -net nic -net user -redir tcp:2222::22 \-drive file=test-cloudinit.qcow2,if=virtio,format=qcow2 \-drive file=my-seed.img,if=virtio,format=raw
5. Analyze the boot (blame, dump, show)
$ ssh -p 2222 ubuntu@localhost 'cat /var/log/cloud-init.log' | \cloud-init analyze blame -i -
1.17.3 Running single cloud config modules
This subcommand is not called by the init system. It can be called manually to load the configured datasourceand run a single cloud-config module once using the cached userdata and metadata after the instance has booted.Each cloud-config module has a module FREQUENCY configured: PER_INSTANCE, PER_BOOT, PER_ONCE orPER_ALWAYS. When a module is run by cloud-init, it stores a semaphore file in /var/lib/cloud/instance/sem/config_<module_name>.<frequency> which marks when the module last successfully ran. Presenceof this semaphore file prevents a module from running again if it has already been run. To ensure that a module is runagain, the desired frequency can be overridden on the commandline:
$ sudo cloud-init single --name cc_ssh --frequency always...Generating public/private ed25519 key pair...
Inspect cloud-init.log for output of what operations were performed as a result.
1.17.4 Stable Release Updates (SRU) testing for cloud-init
Once an Ubuntu release is stable (i.e. after it is released), updates for it must follow a special procedure called a “stablerelease update” (or SRU).
The cloud-init project has a specific process it follows when validating a cloud-init SRU, documented in the Cloudini-tUpdates wiki page.
Generally an SRU test of cloud-init performs the following:
• Install a pre-release version of cloud-init from the -proposed APT pocket (e.g. bionic-proposed)
• Upgrade cloud-init and attempt a clean run of cloud-init to assert the new version of cloud-init works properlythe specific platform and Ubuntu series
• Check for tracebacks or errors in behavior
168 Chapter 1. Getting help

cloud-init, Release 20.2
Manual SRU verification procedure
Below are steps to manually test a pre-release version of cloud-init from -proposed
Note: For each Ubuntu SRU, the Ubuntu Server team manually validates the new version of cloud-init on theseplatforms: Amazon EC2, Azure, GCE, OpenStack, Oracle, Softlayer (IBM), LXD, KVM
1. Launch a VM on your favorite platform, providing this cloud-config user-data and replacing<YOUR_LAUNCHPAD_USERNAME> with your username:
## template: jinja#cloud-configssh_import_id: [<YOUR_LAUNCHPAD_USERNAME>]hostname: SRU-worked-{{v1.cloud_name}}
2. Wait for current cloud-init to complete, replace <YOUR_VM_IP> with the IP address of the VM that youlaunched in step 1:
CI_VM_IP=<YOUR_VM_IP># Make note of the datasource cloud-init detected in --long output.# In step 5, you will use this to confirm the same datasource is detected after→˓upgrade.ssh ubuntu@$CI_VM_IP -- cloud-init status --wait --long
3. Set up the -proposed pocket on your VM and upgrade to the -proposed cloud-init:
# Create a script that will add the -proposed pocket to APT's sources# and install cloud-init from that pocketcat > setup_proposed.sh <<EOF#/bin/bashmirror=http://archive.ubuntu.com/ubuntuecho deb \$mirror \$(lsb_release -sc)-proposed main | tee \
/etc/apt/sources.list.d/proposed.listapt-get update -qapt-get install -qy cloud-initEOF
scp setup_proposed.sh ubuntu@$CI_VM_IP:.ssh ubuntu@$CI_VM_IP -- sudo bash setup_proposed.sh
4. Change hostname, clean cloud-init’s state, and reboot to run cloud-init from scratch:
ssh ubuntu@$CI_VM_IP -- sudo hostname something-elsessh ubuntu@$CI_VM_IP -- sudo cloud-init clean --logs --reboot
5. Validate -proposed cloud-init came up without error
# Block until cloud-init completes and verify from --long the datasource# from step 1. Errors would show up in --long
ssh ubuntu@$CI_VM_IP -- cloud-init status --wait --long# Make sure hostname was set properly to SRU-worked-<cloud name>ssh ubuntu@$CI_VM_IP -- hostname# Check for any errors or warnings in cloud-init logs.# (This should produce no output if successful.)ssh ubuntu@$CI_VM_IP -- grep Trace "/var/log/cloud-init*"
1.17. Testing and debugging cloud-init 169

cloud-init, Release 20.2
6. If you encounter an error during SRU testing:
• Create a new cloud-init bug reporting the version of cloud-init affected
• Ping upstream cloud-init on Freenode’s #cloud-init IRC channel
1.18 Logging
Cloud-init supports both local and remote logging configurable through python’s built-in logging configuration andthrough the cloud-init rsyslog module.
1.18.1 Command Output
Cloud-init can redirect its stdout and stderr based on config given under the output config key. The output of anycommands run by cloud-init and any user or vendor scripts provided will also be included here. The output keyaccepts a dictionary for configuration. Output files may be specified individually for each stage (init, config, andfinal), or a single key all may be used to specify output for all stages.
The output for each stage may be specified as a dictionary of output and error keys, for stdout and stderr respec-tively, as a tuple with stdout first and stderr second, or as a single string to use for both. The strings passed to allof these keys are handled by the system shell, so any form of redirection that can be used in bash is valid, includingpiping cloud-init’s output to tee, or logger. If only a filename is provided, cloud-init will append its output to thefile as though >> was specified.
By default, cloud-init loads its output configuration from /etc/cloud/cloud.cfg.d/05_logging.cfg. Thedefault config directs both stdout and stderr from all cloud-init stages to /var/log/cloud-init-output.log.The default config is given as
output: { all: "| tee -a /var/log/cloud-init-output.log" }
For a more complex example, the following configuration would output the init stage to /var/log/cloud-init.out and /var/log/cloud-init.err, for stdout and stderr respectively, replacing anything that was previouslythere. For the config stage, it would pipe both stdout and stderr through tee -a /var/log/cloud-config.log. For the final stage it would append the output of stdout and stderr to /var/log/cloud-final.out and/var/log/cloud-final.err respectively.
output:init:
output: "> /var/log/cloud-init.out"error: "> /var/log/cloud-init.err"
config: "tee -a /var/log/cloud-config.log"final:
- ">> /var/log/cloud-final.out"- "/var/log/cloud-final.err"
Python Logging
Cloud-init uses the python logging module, and can accept config for this module using the standard python fileConfigformat. Cloud-init looks for config for the logging module under the logcfg key.
Note: the logging configuration is not yaml, it is python fileConfig format, and is passed through directly to thepython logging module. please use the correct syntax for a multi-line string in yaml.
170 Chapter 1. Getting help

cloud-init, Release 20.2
By default, cloud-init uses the logging configuration provided in /etc/cloud/cloud.cfg.d/05_logging.cfg. The default python logging configuration writes all cloud-init events with a priority of WARNING or higher toconsole, and writes all events with a level of DEBUG or higher to /var/log/cloud-init.log and via syslog.
Python’s fileConfig format consists of sections with headings in the format [title] and key value pairs in each sec-tion. Configuration for python logging must contain the sections [loggers], [handlers], and [formatters],which name the entities of their respective types that will be defined. The section name for each defined logger, han-dler and formatter will start with its type, followed by an underscore (_) and the name of the entity. For example, if alogger was specified with the name log01, config for the logger would be in the section [logger_log01].
Logger config entries contain basic logging set up. They may specify a list of handlers to send logging events to aswell as the lowest priority level of events to handle. A logger named root must be specified and its configuration(under [logger_root]) must contain a level and a list of handlers. A level entry can be any of the following:DEBUG, INFO, WARNING, ERROR, CRITICAL, or NOTSET. For the root logger the NOTSET option will allow alllogging events to be recorded.
Each configured handler must specify a class under the python’s logging package namespace. A handler mayspecify a message formatter to use, a priority level, and arguments for the handler class. Common handlers areStreamHandler, which handles stream redirects (i.e. logging to stderr), and FileHandler which outputs toa log file. The logging module also supports logging over net sockets, over http, via smtp, and additional complexconfigurations. For full details about the handlers available for python logging, please see the documentation forpython logging handlers.
Log messages are formatted using the logging.Formatter class, which is configured using formatter configentities. A default format of %(message)s is given if no formatter configs are specified. Formatter config entitiesaccept a format string which supports variable replacements. These may also accept a datefmt string which may beused to configure the timestamp used in the log messages. The format variables %(asctime)s, %(levelname)sand %(message)s are commonly used and represent the timestamp, the priority level of the event and the eventmessage. For additional information on logging formatters see python logging formatters.
Note: by default the format string used in the logging formatter are in python’s old style %s form. the str.format() and string.Template styles can also be used by using { or $ in place of % by setting the styleparameter in formatter config.
A simple, but functional python logging configuration for cloud-init is below. It will log all messages of priorityDEBUG or higher both stderr and /tmp/my.log using a StreamHandler and a FileHandler, using the defaultformat string %(message)s:
logcfg: |[loggers]keys=root,cloudinit[handlers]keys=ch,cf[formatters]keys=[logger_root]level=DEBUGhandlers=[logger_cloudinit]level=DEBUGqualname=cloudinithandlers=ch,cf[handler_ch]class=StreamHandlerlevel=DEBUGargs=(sys.stderr,)
(continues on next page)
1.18. Logging 171

cloud-init, Release 20.2
(continued from previous page)
[handler_cf]class=FileHandlerlevel=DEBUGargs=('/tmp/my.log',)
For additional information about configuring python’s logging module, please see the documentation for python log-ging config.
Rsyslog Module
Cloud-init’s cc_rsyslog module allows for fully customizable rsyslog configuration under the rsyslog configkey. The simplest way to use the rsyslog module is by specifying remote servers under the remotes key in rsyslogconfig. The remotes key takes a dictionary where each key represents the name of an rsyslog server and each valueis the configuration for that server. The format for server config is:
• optional filter for log messages (defaults to *.*)
• optional leading @ or @@, indicating udp and tcp respectively (defaults to @, for udp)
• ipv4 or ipv6 hostname or address. ipv6 addresses must be in [::1] format, (e.g. @[fd00::1]:514)
• optional port number (defaults to 514)
For example, to send logging to an rsyslog server named log_serv with address 10.0.4.1, using port number514, over udp, with all log messages enabled one could use either of the following.
With all options specified:
rsyslog:remotes:
log_serv: "*.* @10.0.4.1:514"
With defaults used:
rsyslog:remotes:
log_serv: "10.0.4.1"
For more information on rsyslog configuration, see Rsyslog.
1.19 Directory layout
Cloud-init’s directory structure is somewhat different from a regular application:
/var/lib/cloud/- data/
- instance-id- previous-instance-id- datasource- previous-datasource- previous-hostname
- handlers/- instance- instances/
i-00000XYZ/
(continues on next page)
172 Chapter 1. Getting help

cloud-init, Release 20.2
(continued from previous page)
- boot-finished- cloud-config.txt- datasource- handlers/- obj.pkl- scripts/- sem/- user-data.txt- user-data.txt.i
- scripts/- per-boot/- per-instance/- per-once/
- seed/- sem/
/var/lib/cloud
The main directory containing the cloud-init specific subdirectories. It is typically located at /var/libbut there are certain configuration scenarios where this can be altered.
TBD, describe this overriding more.
data/
Contains information related to instance ids, datasources and hostnames of the previous and current in-stance if they are different. These can be examined as needed to determine any information related to aprevious boot (if applicable).
handlers/
Custom part-handlers code is written out here. Files that end up here are written out with in thescheme of part-handler-XYZ where XYZ is the handler number (the first handler found starts at 0).
instance
A symlink to the current instances/ subdirectory that points to the currently active instance (which isactive is dependent on the datasource loaded).
instances/
All instances that were created using this image end up with instance identifier subdirectories (and corre-sponding data for each instance). The currently active instance will be symlinked the instance symlinkfile defined previously.
scripts/
Scripts that are downloaded/created by the corresponding part-handler will end up in one of thesesubdirectories.
seed/
TBD
sem/
Cloud-init has a concept of a module semaphore, which basically consists of the module name and itsfrequency. These files are used to ensure a module is only ran per-once, per-instance, per-always. Thisfolder contains semaphore files which are only supposed to run per-once (not tied to the instance id).
1.19. Directory layout 173

cloud-init, Release 20.2
1.20 Analyze
The analyze subcommand was added to cloud-init in order to help analyze cloud-init boot time performance. It isloosely based on systemd-analyze where there are four subcommands:
• blame
• show
• dump
• boot
1.20.1 Usage
The analyze command requires one of the four subcommands:
$ cloud-init analyze blame$ cloud-init analyze show$ cloud-init analyze dump$ cloud-init analyze boot
1.20.2 Availability
The analyze subcommand is generally available across all distributions with the exception of Gentoo and FreeBSD.
1.20.3 Subcommands
Blame
The blame action matches systemd-analyze blame where it prints, in descending order, the units that tookthe longest to run. This output is highly useful for examining where cloud-init is spending its time during execution.
$ cloud-init analyze blame-- Boot Record 01 --
00.80300s (init-network/config-growpart)00.64300s (init-network/config-resizefs)00.62100s (init-network/config-ssh)00.57300s (modules-config/config-grub-dpkg)00.40300s (init-local/search-NoCloud)00.38200s (init-network/config-users-groups)00.19800s (modules-config/config-apt-configure)00.03700s (modules-final/config-keys-to-console)00.02100s (init-network/config-update_etc_hosts)00.02100s (init-network/check-cache)00.00800s (modules-final/config-ssh-authkey-fingerprints)00.00800s (init-network/consume-vendor-data)00.00600s (modules-config/config-timezone)00.00500s (modules-final/config-final-message)00.00400s (init-network/consume-user-data)00.00400s (init-network/config-mounts)00.00400s (init-network/config-disk_setup)00.00400s (init-network/config-bootcmd)00.00400s (init-network/activate-datasource)
(continues on next page)
174 Chapter 1. Getting help
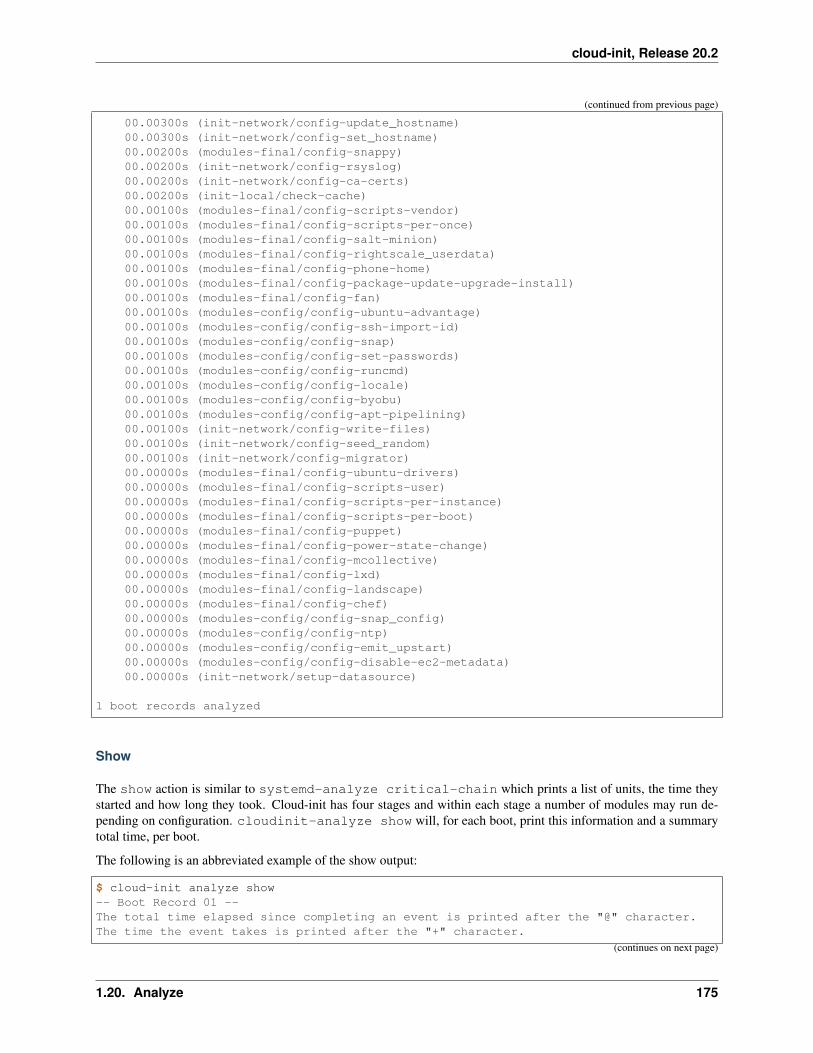
cloud-init, Release 20.2
(continued from previous page)
00.00300s (init-network/config-update_hostname)00.00300s (init-network/config-set_hostname)00.00200s (modules-final/config-snappy)00.00200s (init-network/config-rsyslog)00.00200s (init-network/config-ca-certs)00.00200s (init-local/check-cache)00.00100s (modules-final/config-scripts-vendor)00.00100s (modules-final/config-scripts-per-once)00.00100s (modules-final/config-salt-minion)00.00100s (modules-final/config-rightscale_userdata)00.00100s (modules-final/config-phone-home)00.00100s (modules-final/config-package-update-upgrade-install)00.00100s (modules-final/config-fan)00.00100s (modules-config/config-ubuntu-advantage)00.00100s (modules-config/config-ssh-import-id)00.00100s (modules-config/config-snap)00.00100s (modules-config/config-set-passwords)00.00100s (modules-config/config-runcmd)00.00100s (modules-config/config-locale)00.00100s (modules-config/config-byobu)00.00100s (modules-config/config-apt-pipelining)00.00100s (init-network/config-write-files)00.00100s (init-network/config-seed_random)00.00100s (init-network/config-migrator)00.00000s (modules-final/config-ubuntu-drivers)00.00000s (modules-final/config-scripts-user)00.00000s (modules-final/config-scripts-per-instance)00.00000s (modules-final/config-scripts-per-boot)00.00000s (modules-final/config-puppet)00.00000s (modules-final/config-power-state-change)00.00000s (modules-final/config-mcollective)00.00000s (modules-final/config-lxd)00.00000s (modules-final/config-landscape)00.00000s (modules-final/config-chef)00.00000s (modules-config/config-snap_config)00.00000s (modules-config/config-ntp)00.00000s (modules-config/config-emit_upstart)00.00000s (modules-config/config-disable-ec2-metadata)00.00000s (init-network/setup-datasource)
1 boot records analyzed
Show
The show action is similar to systemd-analyze critical-chain which prints a list of units, the time theystarted and how long they took. Cloud-init has four stages and within each stage a number of modules may run de-pending on configuration. cloudinit-analyze show will, for each boot, print this information and a summarytotal time, per boot.
The following is an abbreviated example of the show output:
$ cloud-init analyze show-- Boot Record 01 --The total time elapsed since completing an event is printed after the "@" character.The time the event takes is printed after the "+" character.
(continues on next page)
1.20. Analyze 175

cloud-init, Release 20.2
(continued from previous page)
Starting stage: init-local|``->no cache found @00.01700s +00.00200s|`->found local data from DataSourceNoCloud @00.11000s +00.40300sFinished stage: (init-local) 00.94200 seconds
Starting stage: init-network|`->restored from cache with run check: DataSourceNoCloud [seed=/dev/sr0][dsmode=net]→˓@04.79500s +00.02100s|`->setting up datasource @04.88900s +00.00000s|`->reading and applying user-data @04.90100s +00.00400s|`->reading and applying vendor-data @04.90500s +00.00800s|`->activating datasource @04.95200s +00.00400sFinished stage: (init-network) 02.72100 seconds
Starting stage: modules-config|`->config-emit_upstart ran successfully @15.43100s +00.00000s|`->config-snap ran successfully @15.43100s +00.00100s...|`->config-runcmd ran successfully @16.22300s +00.00100s|`->config-byobu ran successfully @16.23400s +00.00100sFinished stage: (modules-config) 00.83500 seconds
Starting stage: modules-final|`->config-snappy ran successfully @16.87400s +00.00200s|`->config-package-update-upgrade-install ran successfully @16.87600s +00.00100s...|`->config-final-message ran successfully @16.93700s +00.00500s|`->config-power-state-change ran successfully @16.94300s +00.00000sFinished stage: (modules-final) 00.10300 seconds
Total Time: 4.60100 seconds
1 boot records analyzed
If additional boot records are detected then they are printed out from oldest to newest.
Dump
The dump action simply dumps the cloud-init logs that the analyze module is performing the analysis on and returnsa list of dictionaries that can be consumed for other reporting needs. Each element in the list is a boot entry.
$ cloud-init analyze dump[{
"description": "starting search for local datasources","event_type": "start","name": "init-local","origin": "cloudinit","timestamp": 1567057578.037
},{
"description": "attempting to read from cache [check]","event_type": "start","name": "init-local/check-cache",
(continues on next page)
176 Chapter 1. Getting help

cloud-init, Release 20.2
(continued from previous page)
"origin": "cloudinit","timestamp": 1567057578.054
},{
"description": "no cache found","event_type": "finish","name": "init-local/check-cache","origin": "cloudinit","result": "SUCCESS","timestamp": 1567057578.056
},{
"description": "searching for local data from DataSourceNoCloud","event_type": "start","name": "init-local/search-NoCloud","origin": "cloudinit","timestamp": 1567057578.147
},{
"description": "found local data from DataSourceNoCloud","event_type": "finish","name": "init-local/search-NoCloud","origin": "cloudinit","result": "SUCCESS","timestamp": 1567057578.55
},{
"description": "searching for local datasources","event_type": "finish","name": "init-local","origin": "cloudinit","result": "SUCCESS","timestamp": 1567057578.979
},{
"description": "searching for network datasources","event_type": "start","name": "init-network","origin": "cloudinit","timestamp": 1567057582.814
},{
"description": "attempting to read from cache [trust]","event_type": "start","name": "init-network/check-cache","origin": "cloudinit","timestamp": 1567057582.832
},...{
"description": "config-power-state-change ran successfully","event_type": "finish","name": "modules-final/config-power-state-change","origin": "cloudinit","result": "SUCCESS","timestamp": 1567057594.98
},(continues on next page)
1.20. Analyze 177
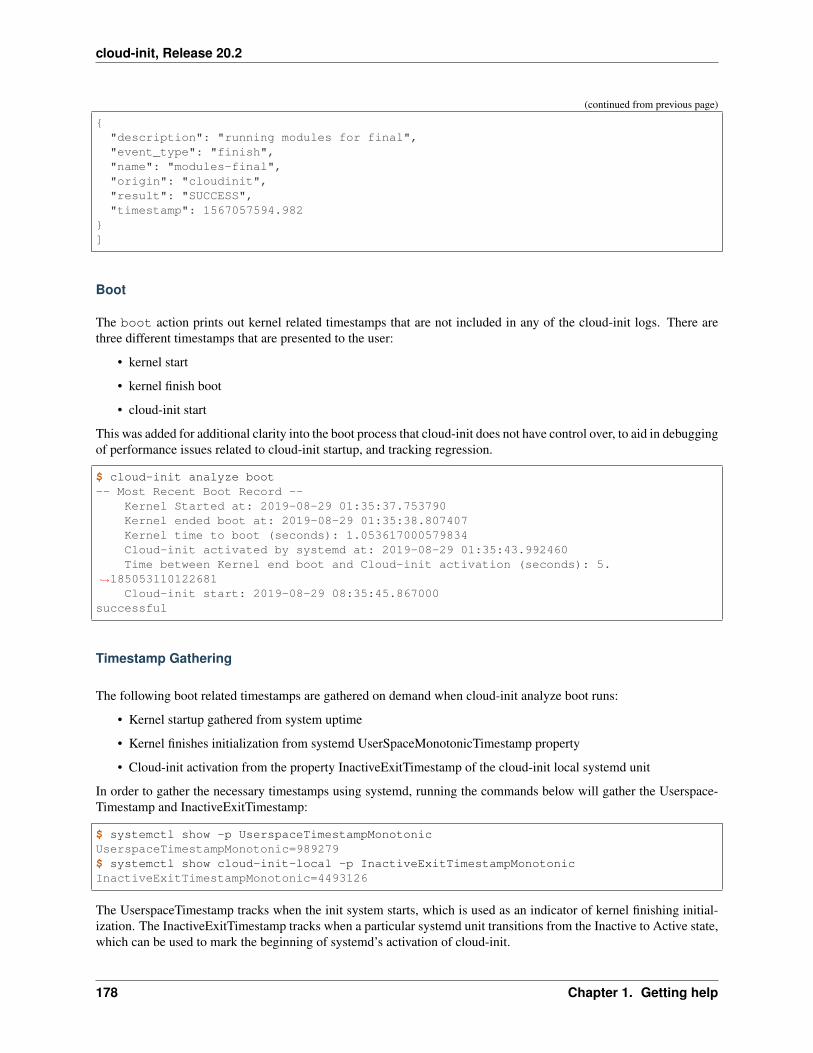
cloud-init, Release 20.2
(continued from previous page)
{"description": "running modules for final","event_type": "finish","name": "modules-final","origin": "cloudinit","result": "SUCCESS","timestamp": 1567057594.982
}]
Boot
The boot action prints out kernel related timestamps that are not included in any of the cloud-init logs. There arethree different timestamps that are presented to the user:
• kernel start
• kernel finish boot
• cloud-init start
This was added for additional clarity into the boot process that cloud-init does not have control over, to aid in debuggingof performance issues related to cloud-init startup, and tracking regression.
$ cloud-init analyze boot-- Most Recent Boot Record --
Kernel Started at: 2019-08-29 01:35:37.753790Kernel ended boot at: 2019-08-29 01:35:38.807407Kernel time to boot (seconds): 1.053617000579834Cloud-init activated by systemd at: 2019-08-29 01:35:43.992460Time between Kernel end boot and Cloud-init activation (seconds): 5.
→˓185053110122681Cloud-init start: 2019-08-29 08:35:45.867000
successful
Timestamp Gathering
The following boot related timestamps are gathered on demand when cloud-init analyze boot runs:
• Kernel startup gathered from system uptime
• Kernel finishes initialization from systemd UserSpaceMonotonicTimestamp property
• Cloud-init activation from the property InactiveExitTimestamp of the cloud-init local systemd unit
In order to gather the necessary timestamps using systemd, running the commands below will gather the Userspace-Timestamp and InactiveExitTimestamp:
$ systemctl show -p UserspaceTimestampMonotonicUserspaceTimestampMonotonic=989279$ systemctl show cloud-init-local -p InactiveExitTimestampMonotonicInactiveExitTimestampMonotonic=4493126
The UserspaceTimestamp tracks when the init system starts, which is used as an indicator of kernel finishing initial-ization. The InactiveExitTimestamp tracks when a particular systemd unit transitions from the Inactive to Active state,which can be used to mark the beginning of systemd’s activation of cloud-init.
178 Chapter 1. Getting help

cloud-init, Release 20.2
Currently this only works for distros that use systemd as the init process. We will be expanding support for otherdistros in the future and this document will be updated accordingly.
If systemd is not present on the system, dmesg is used to attempt to find an event that logs the beginning of theinit system. However, with this method only the first two timestamps are able to be found; dmesg does not monitoruserspace processes, so no cloud-init start timestamps are emitted like when using systemd.
1.21 Docs
These docs are hosted on Read the Docs. The following will explain how to contribute to and build these docs locally.
The documentation is primarily written in reStructuredText.
1.21.1 Building
There is a makefile target to build the documentation for you:
$ tox -e doc
This will do two things:
• Build the documentation using sphinx
• Run doc8 against the documentation source code
Once build the HTML files will be viewable in doc/rtd_html. Use your web browser to open index.html toview and navigate the site.
1.21.2 Style Guide
Headings
The headings used across the documentation use the following hierarchy:
• *****: used once atop of a new page
• =====: each sections on the page
• -----: subsections
• ^^^^^: sub-subsections
• """"": paragraphs
The top level header ###### is reserved for the first page.
If under and overline are used, their length must be identical. The length of the underline must be at least as long asthe title itself
Line Length
Please keep the line lengths to a maximum of 79 characters. This ensures that the pages and tables do not get too widethat side scrolling is required.
1.21. Docs 179

cloud-init, Release 20.2
Header
Adding a link at the top of the page allows for the page to be referenced by other pages. For example for the FAQ pagethis would be:
.. _faq:
Footer
The footer should include the textwidth
.. vi: textwidth=79
Vertical Whitespace
One newline between each section helps ensure readability of the documentation source code.
Common Words
There are some common words that should follow specific usage:
• cloud-init: always lower case with a hyphen, unless starting a sentence in which case only the ‘C’ iscapitalized (e.g. Cloud-init).
• metadata: one word
• user data: two words, not to be combined
• vendor data: like user data, it is two words
1.22 Integration Testing
1.22.1 Overview
This page describes the execution, development, and architecture of the cloud-init integration tests:
• Execution explains the options available and running of tests
• Development shows how to write test cases
• Architecture explains the internal processes
1.22.2 Execution
Overview
In order to avoid the need for dependencies and ease the setup and configuration users can run the integration tests viatox:
$ git clone https://github.com/canonical/cloud-init$ cd cloud-init$ tox -e citest -- -h
180 Chapter 1. Getting help

cloud-init, Release 20.2
Everything after the double dash will be passed to the integration tests. Executing tests has several options:
• run an alias to run both collect and verify. The tree_run command does the same thing, except usesa deb built from the current working tree.
• collect deploys on the specified platform and distro, patches with the requested deb or rpm, and finallycollects output of the arbitrary commands. Similarly, `tree_collect will collect output using a deb builtfrom the current working tree.
• verify given a directory of test data, run the Python unit tests on it to generate results.
• bddeb will build a deb of the current working tree.
Run
The first example will provide a complete end-to-end run of data collection and verification. There are additionalexamples below explaining how to run one or the other independently.
$ git clone https://github.com/canonical/cloud-init$ cd cloud-init$ tox -e citest -- run --verbose \
--os-name stretch --os-name xenial \--deb cloud-init_0.7.8~my_patch_all.deb \--preserve-data --data-dir ~/collection \--preserve-instance
The above command will do the following:
• run both collect output and run tests the output
• --verbose verbose output
• --os-name stretch on the Debian Stretch release
• --os-name xenial on the Ubuntu Xenial release
• --deb cloud-init_0.7.8~patch_all.deb use this deb as the version of cloud-init to run with
• --preserve-data always preserve collected data, do not remove data after successful test run
• --preserve-instance do not destroy the instance after test to allow for debugging the stopped instanceduring integration test development. By default, test instances are destroyed after the test completes.
• --data-dir ~/collection write collected data into ~/collection, rather than using a temporary directory
For a more detailed explanation of each option see below.
Note: By default, data collected by the run command will be written into a temporary directory and deleted after asuccessful. If you would like to preserve this data, please use the option --preserve-data.
Collect
If developing tests it may be necessary to see if cloud-config works as expected and the correct files are pulled down.In this case only a collect can be ran by running:
$ tox -e citest -- collect -n xenial --data-dir /tmp/collection
The above command will run the collection tests on xenial and place all results into /tmp/collection.
1.22. Integration Testing 181
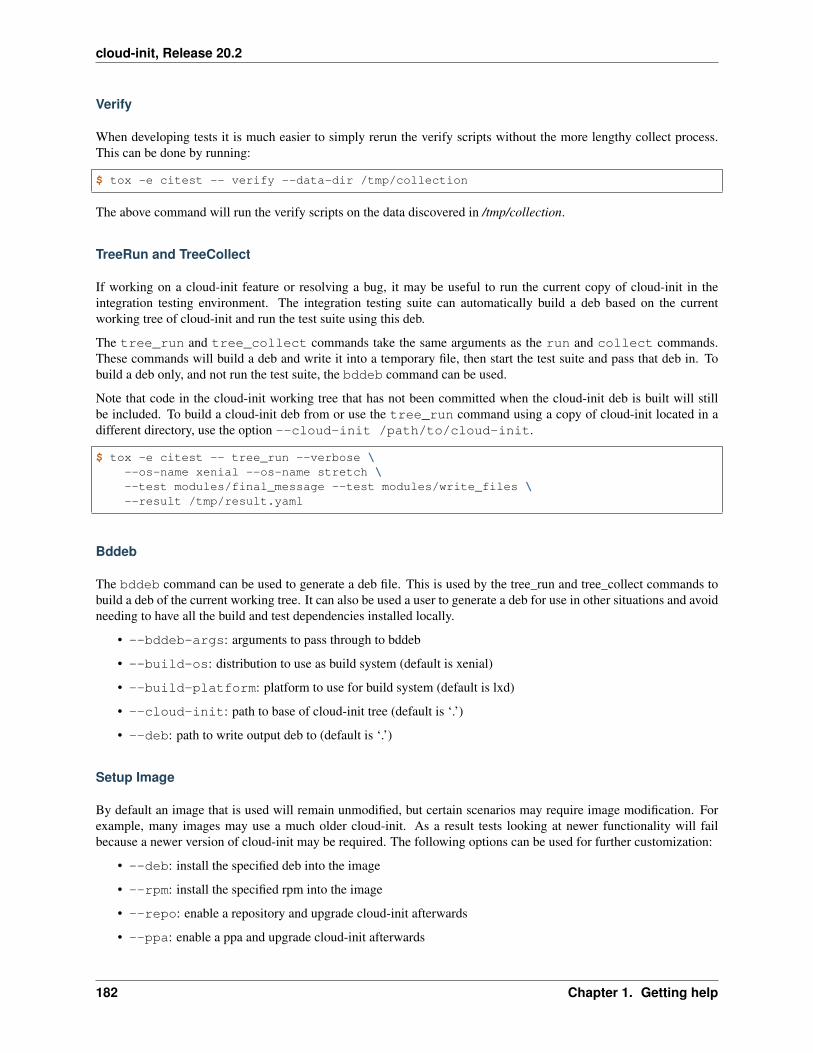
cloud-init, Release 20.2
Verify
When developing tests it is much easier to simply rerun the verify scripts without the more lengthy collect process.This can be done by running:
$ tox -e citest -- verify --data-dir /tmp/collection
The above command will run the verify scripts on the data discovered in /tmp/collection.
TreeRun and TreeCollect
If working on a cloud-init feature or resolving a bug, it may be useful to run the current copy of cloud-init in theintegration testing environment. The integration testing suite can automatically build a deb based on the currentworking tree of cloud-init and run the test suite using this deb.
The tree_run and tree_collect commands take the same arguments as the run and collect commands.These commands will build a deb and write it into a temporary file, then start the test suite and pass that deb in. Tobuild a deb only, and not run the test suite, the bddeb command can be used.
Note that code in the cloud-init working tree that has not been committed when the cloud-init deb is built will stillbe included. To build a cloud-init deb from or use the tree_run command using a copy of cloud-init located in adifferent directory, use the option --cloud-init /path/to/cloud-init.
$ tox -e citest -- tree_run --verbose \--os-name xenial --os-name stretch \--test modules/final_message --test modules/write_files \--result /tmp/result.yaml
Bddeb
The bddeb command can be used to generate a deb file. This is used by the tree_run and tree_collect commands tobuild a deb of the current working tree. It can also be used a user to generate a deb for use in other situations and avoidneeding to have all the build and test dependencies installed locally.
• --bddeb-args: arguments to pass through to bddeb
• --build-os: distribution to use as build system (default is xenial)
• --build-platform: platform to use for build system (default is lxd)
• --cloud-init: path to base of cloud-init tree (default is ‘.’)
• --deb: path to write output deb to (default is ‘.’)
Setup Image
By default an image that is used will remain unmodified, but certain scenarios may require image modification. Forexample, many images may use a much older cloud-init. As a result tests looking at newer functionality will failbecause a newer version of cloud-init may be required. The following options can be used for further customization:
• --deb: install the specified deb into the image
• --rpm: install the specified rpm into the image
• --repo: enable a repository and upgrade cloud-init afterwards
• --ppa: enable a ppa and upgrade cloud-init afterwards
182 Chapter 1. Getting help

cloud-init, Release 20.2
• --upgrade: upgrade cloud-init from repos
• --upgrade-full: run a full system upgrade
• --script: execute a script in the image. This can perform any setup required that is not covered by the otheroptions
1.22.3 Test Case Development
Overview
As a test writer you need to develop a test configuration and a verification file:
• The test configuration specifies a specific cloud-config to be used by cloud-init and a list of arbitrary commandsto capture the output of (e.g my_test.yaml)
• The verification file runs tests on the collected output to determine the result of the test (e.g. my_test.py)
The names must match, however the extensions will of course be different, yaml vs py.
Configuration
The test configuration is a YAML file such as ntp_server.yaml below:
## Empty NTP config to setup using defaults## NOTE: this should not require apt feature, use 'which' rather than 'dpkg -l'# NOTE: this should not require no_ntpdate feature, use 'which' to check for# installation rather than 'dpkg -l', as 'grep ntp' matches 'ntpdate'# NOTE: the verifier should check for any ntp server not 'ubuntu.pool.ntp.org'cloud_config: |#cloud-configntp:servers:
- pool.ntp.orgrequired_features:
- apt- no_ntpdate- ubuntu_ntp
collect_scripts:ntp_installed_servers: |#!/bin/bashdpkg -l | grep ntp | wc -l
ntp_conf_dist_servers: |#!/bin/bashls /etc/ntp.conf.dist | wc -l
ntp_conf_servers: |#!/bin/bashcat /etc/ntp.conf | grep '^server'
There are several keys, 1 required and some optional, in the YAML file:
1. The required key is cloud_config. This should be a string of valid YAML that is exactly what wouldnormally be placed in a cloud-config file, including the cloud-config header. This essentially sets up the scenariounder test.
1.22. Integration Testing 183

cloud-init, Release 20.2
2. One optional key is collect_scripts. This key has one or more sub-keys containing strings of arbitrarycommands to execute (e.g. `cat /var/log/cloud-config-output.log`). In the example above theoutput of dpkg is captured, grep for ntp, and the number of lines reported. The name of the sub-key is important.The sub-key is used by the verification script to recall the output of the commands ran.
3. The optional enabled key enables or disables the test case. By default the test case will be enabled.
4. The optional required_features key may be used to specify a list of features flags that an image musthave to be able to run the test case. For example, if a test case relies on an image supporting apt, then the configfor the test case should include required_features: [ apt ].
Default Collect Scripts
By default the following files will be collected for every test. There is no need to specify these items:
• /var/log/cloud-init.log
• /var/log/cloud-init-output.log
• /run/cloud-init/.instance-id
• /run/cloud-init/result.json
• /run/cloud-init/status.json
• `dpkg-query -W -f='${Version}' cloud-init`
Verification
The verification script is a Python file with unit tests like the one, ntp_server.py, below:
# This file is part of cloud-init. See LICENSE file for license information.
"""cloud-init Integration Test Verify Script"""from tests.cloud_tests.testcases import base
class TestNtp(base.CloudTestCase):"""Test ntp module"""
def test_ntp_installed(self):"""Test ntp installed"""out = self.get_data_file('ntp_installed_empty')self.assertEqual(1, int(out))
def test_ntp_dist_entries(self):"""Test dist config file has one entry"""out = self.get_data_file('ntp_conf_dist_empty')self.assertEqual(1, int(out))
def test_ntp_entires(self):"""Test config entries"""out = self.get_data_file('ntp_conf_empty')self.assertIn('pool 0.ubuntu.pool.ntp.org iburst', out)self.assertIn('pool 1.ubuntu.pool.ntp.org iburst', out)self.assertIn('pool 2.ubuntu.pool.ntp.org iburst', out)self.assertIn('pool 3.ubuntu.pool.ntp.org iburst', out)
# vi: ts=4 expandtab
184 Chapter 1. Getting help

cloud-init, Release 20.2
Here is a breakdown of the unit test file:
• The import statement allows access to the output files.
• The class can be named anything, but must import the base.CloudTestCase, either directly or via anothertest class.
• There can be 1 to N number of functions with any name, however only functions starting with test_* will beexecuted.
• There can be 1 to N number of classes in a test module, however only classes inheriting from base.CloudTestCase will be loaded.
• Output from the commands can be accessed via self.get_data_file('key') where key is the sub-keyof collect_scripts above.
• The cloud config that the test ran with can be accessed via self.cloud_config, or any entry from the cloudconfig can be accessed via self.get_config_entry('key').
• See the base CloudTestCase for additional helper functions.
Layout
Integration tests are located under the tests/cloud_tests directory. Test configurations are placed under configs and thetest verification scripts under testcases:
cloud-init$ tree -d tests/cloud_tests/tests/cloud_tests/
configsbugsexamplesmainmodules
testcasesbugsexamplesmainmodules
The sub-folders of bugs, examples, main, and modules help organize the tests. View the README.md in each tounderstand in more detail each directory.
Test Creation Helper
The integration testing suite has a built in helper to aid in test development. Help can be invoked via tox -ecitest -- create --help. It can create a template test case config file with user data passed in from thecommand line, as well as a template test case verifier module.
The following would create a test case named example under the modules category with the given description, andcloud config data read in from /tmp/user_data.
$ tox -e citest -- create modules/example \-d "a simple example test case" -c "$(< /tmp/user_data)"
Development Checklist
• Configuration File
1.22. Integration Testing 185

cloud-init, Release 20.2
– Named ‘your_test.yaml’
– Contains at least a valid cloud-config
– Optionally, commands to capture additional output
– Valid YAML
– Placed in the appropriate sub-folder in the configs directory
– Any image features required for the test are specified
• Verification File
– Named ‘your_test.py’
– Valid unit tests validating output collected
– Passes pylint & pep8 checks
– Placed in the appropriate sub-folder in the test cases directory
• Tested by running the test:
$ tox -e citest -- run -verbose \--os-name <release target> \--test modules/your_test.yaml \[--deb <build of cloud-init>]
1.22.4 Platforms
EC2
To run on the EC2 platform it is required that the user has an AWS credentials configuration file specifying his or heraccess keys and a default region. These configuration files are the standard that the AWS cli and other AWS toolsutilize for interacting directly with AWS itself and are normally generated when running aws configure:
$ cat $HOME/.aws/credentials[default]aws_access_key_id = <KEY HERE>aws_secret_access_key = <KEY HERE>
$ cat $HOME/.aws/config[default]region = us-west-2
Azure Cloud
To run on Azure Cloud platform users login with Service Principal and export credentials file. Region is defaultedand can be set in tests/cloud_tests/platforms.yaml. The Service Principal credentials are the standardauthentication for Azure SDK to interact with Azure Services:
Create Service Principal account or login
$ az ad sp create-for-rbac --name "APP_ID" --password "STRONG-SECRET-PASSWORD"
$ az login --service-principal --username "APP_ID" --password "STRONG-SECRET-PASSWORD"
186 Chapter 1. Getting help

cloud-init, Release 20.2
Export credentials
$ az ad sp create-for-rbac --sdk-auth > $HOME/.azure/credentials.json
{"clientId": "<Service principal ID>","clientSecret": "<Service principal secret/password>","subscriptionId": "<Subscription associated with the service principal>","tenantId": "<The service principal's tenant>","activeDirectoryEndpointUrl": "https://login.microsoftonline.com","resourceManagerEndpointUrl": "https://management.azure.com/","activeDirectoryGraphResourceId": "https://graph.windows.net/","sqlManagementEndpointUrl": "https://management.core.windows.net:8443/","galleryEndpointUrl": "https://gallery.azure.com/","managementEndpointUrl": "https://management.core.windows.net/"
}
Set region in platforms.yaml
azurecloud:enabled: trueregion: West US 2vm_size: Standard_DS1_v2storage_sku: standard_lrstag: ci
1.22.5 Architecture
The following section outlines the high-level architecture of the integration process.
Overview
The process flow during a complete end-to-end LXD-backed test.
1. Configuration
• The back end and specific distro releases are verified as supported
• The test or tests that need to be run are determined either by directory or by individual yaml
2. Image Creation
• Acquire the request LXD image
• Install the specified cloud-init package
• Clean the image so that it does not appear to have been booted
• A snapshot of the image is created and reused by all tests
3. Configuration
• For each test, the cloud-config is injected into a copy of the snapshot and booted
• The framework waits for /var/lib/cloud/instance/boot-finished (up to 120 seconds)
• All default commands are ran and output collected
• Any commands the user specified are executed and output collected
4. Verification
1.22. Integration Testing 187

cloud-init, Release 20.2
• The default commands are checked for any failures, errors, and warnings to validate basic functional-ity of cloud-init completed successfully
• The user generated unit tests are then ran validating against the collected output
5. Results
• If any failures were detected the test suite returns a failure
• Results can be dumped in yaml format to a specified file using the -r <result_file_name>.yaml option
Configuring the Test Suite
Most of the behavior of the test suite is configurable through several yaml files. These control the behavior of thetest suite’s platforms, images, and tests. The main config files for platforms, images and test cases are platforms.yaml, releases.yaml and testcases.yaml.
Config handling
All configurable parts of the test suite use a defaults + overrides system for managing config entries. All base configitems are dictionaries.
Merging is done on a key-by-key basis, with all keys in the default and override represented in the final result. If akey exists both in the defaults and the overrides, then the behavior depends on the type of data the key refers to. If itis atomic data or a list, then the overrides will replace the default. If the data is a dictionary then the value will be theresult of merging that dictionary from the default config and that dictionary from the overrides.
Merging is done using the function tests.cloud_tests.config.merge_config, which can be examinedfor more detail on config merging behavior.
The following demonstrates merge behavior:
defaults:list_item:- list_entry_1- list_entry_2
int_item_1: 123int_item_2: 234dict_item:subkey_1: 1subkey_2: 2subkey_dict:
subsubkey_1: asubsubkey_2: b
overrides:list_item:- overridden_list_entry
int_item_1: 0dict_item:subkey_2: falsesubkey_dict:subsubkey_2: 'new value'
result:list_item:
(continues on next page)
188 Chapter 1. Getting help
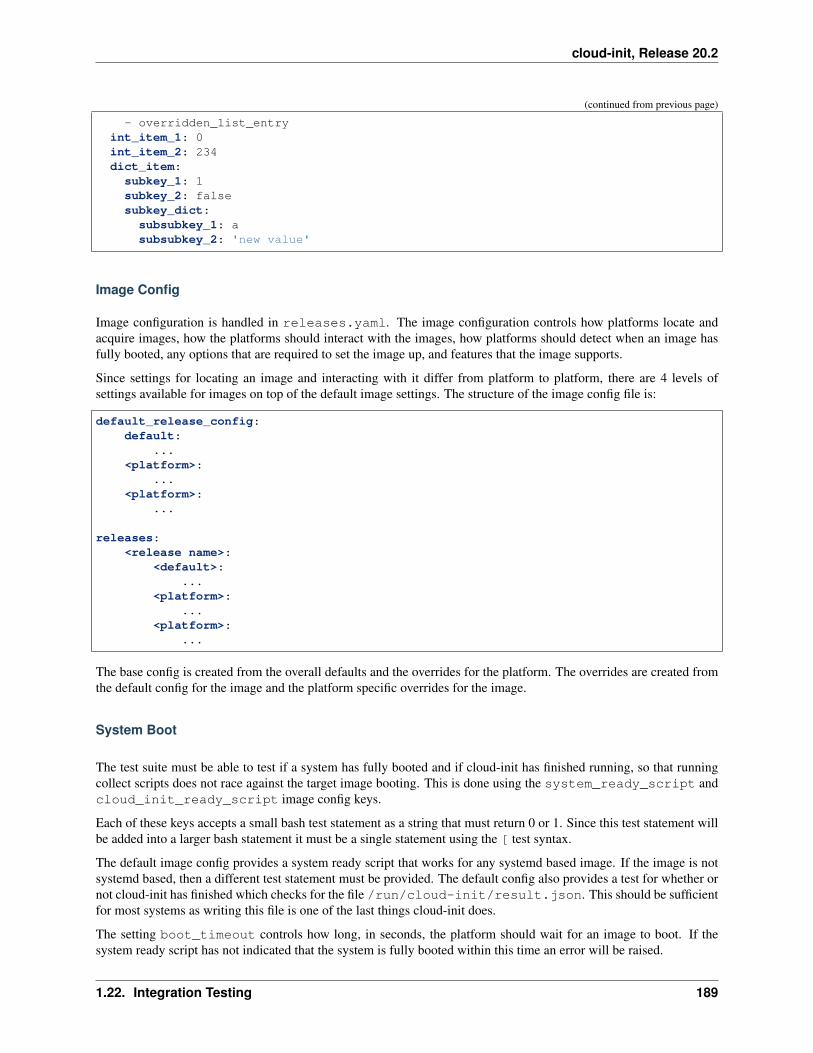
cloud-init, Release 20.2
(continued from previous page)
- overridden_list_entryint_item_1: 0int_item_2: 234dict_item:subkey_1: 1subkey_2: falsesubkey_dict:subsubkey_1: asubsubkey_2: 'new value'
Image Config
Image configuration is handled in releases.yaml. The image configuration controls how platforms locate andacquire images, how the platforms should interact with the images, how platforms should detect when an image hasfully booted, any options that are required to set the image up, and features that the image supports.
Since settings for locating an image and interacting with it differ from platform to platform, there are 4 levels ofsettings available for images on top of the default image settings. The structure of the image config file is:
default_release_config:default:
...<platform>:
...<platform>:
...
releases:<release name>:
<default>:...
<platform>:...
<platform>:...
The base config is created from the overall defaults and the overrides for the platform. The overrides are created fromthe default config for the image and the platform specific overrides for the image.
System Boot
The test suite must be able to test if a system has fully booted and if cloud-init has finished running, so that runningcollect scripts does not race against the target image booting. This is done using the system_ready_script andcloud_init_ready_script image config keys.
Each of these keys accepts a small bash test statement as a string that must return 0 or 1. Since this test statement willbe added into a larger bash statement it must be a single statement using the [ test syntax.
The default image config provides a system ready script that works for any systemd based image. If the image is notsystemd based, then a different test statement must be provided. The default config also provides a test for whether ornot cloud-init has finished which checks for the file /run/cloud-init/result.json. This should be sufficientfor most systems as writing this file is one of the last things cloud-init does.
The setting boot_timeout controls how long, in seconds, the platform should wait for an image to boot. If thesystem ready script has not indicated that the system is fully booted within this time an error will be raised.
1.22. Integration Testing 189

cloud-init, Release 20.2
Feature Flags
Not all test cases can work on all images due to features the test case requires not being present on that image. If a testcase requires features in an image that are not likely to be present across all distros and platforms that the test suitesupports, then the test can be skipped everywhere it is not supported.
Feature flags, which are names for features supported on some images, but not all that may be required by test cases.Configuration for feature flags is provided in releases.yaml under the features top level key. The featuresconfig includes a list of all currently defined feature flags, their meanings, and a list of feature groups.
Feature groups are groups of features that many images have in common. For example, the Ubuntu_specificfeature group includes features that should be present across most Ubuntu releases, but may or may not be for otherdistros. Feature groups are specified for an image as a list under the key feature_groups.
An image’s feature flags are derived from the features groups that that image has and any feature overrides provided.Feature overrides can be specified under the features key which accepts a dictionary of {<feature_name>:true/false} mappings. If a feature is omitted from an image’s feature flags or set to false in the overrides then thetest suite will skip any tests that require that feature when using that image.
Feature flags may be overridden at run time using the --feature-override command line argument. It accepts afeature flag and value to set in the format <feature name>=true/false. Multiple --feature-overrideflags can be used, and will all be applied to all feature flags for images used during a test.
Setup Overrides
If an image requires some of the options for image setup to be used, then it may specify overrides for the commandline arguments passed into setup image. These may be specified as a dictionary under the setup_overrides key.When an image is set up, the arguments that control how it is set up will be the arguments from the command line,with any entries in setup_overrides used to override these arguments.
For example, images that do not come with cloud-init already installed should have setup_overrides:{upgrade: true} specified so that in the event that no additional setup options are given, cloud-init will beinstalled from the image’s repos before running tests. Note that if other options such as --deb are passed in on thecommand line, these will still work as expected, since apt’s policy for cloud-init would prefer the locally installed debover an older version from the repos.
Platform Specific Options
There are many platform specific options in image configuration that allow platforms to locate images and that controladditional setup that the platform may have to do to make the image usable. For information on how these work,please consult the documentation for that platform in the integration testing suite and the releases.yaml file forexamples.
Error Handling
The test suite makes an attempt to run as many tests as possible even in the event of some failing so that automatedruns collect as much data as possible. In the event that something goes wrong while setting up for or running a test,the test suite will attempt to continue running any tests which have not been affected by the error.
For example, if the test suite was told to run tests on one platform for two releases and an error occurred setting up thefirst image, all tests for that image would be skipped, and the test suite would continue to set up the second image andrun tests on it. Or, if the system does not start properly for one test case out of many to run on that image, that testcase will be skipped and the next one will be run.
190 Chapter 1. Getting help

cloud-init, Release 20.2
Note that if any errors occur, the test suite will record the failure and where it occurred in the result data and write itout to the specified result file.
Results
The test suite generates result data that includes how long each stage of the test suite took and which parts were andwere not successful. This data is dumped to the log after the collect and verify stages, and may also be written out inyaml format to a file. If part of the setup failed, the traceback for the failure and the error message will be included inthe result file. If a test verifier finds a problem with the collected data from a test run, the class, test function and testwill be recorded in the result data.
Exit Codes
The test suite counts how many errors occur throughout a run. The exit code after a run is the number of errors thatoccurred. If the exit code is non-zero then something is wrong either with the test suite, the configuration for an image,a test case, or cloud-init itself.
Note that the exit code does not always directly correspond to the number of failed test cases, since in some cases, asingle error during image setup can mean that several test cases are not run. If run is used, then the exit code will bethe sum of the number of errors in the collect and verify stages.
Data Dir
When using run, the collected data is written into a temporary directory. In the event that all tests pass, this directoryis deleted, but if a test fails or an error occurs, this data will be left in place, and a message will be written to the loggiving the location of the data.
1.22. Integration Testing 191

cloud-init, Release 20.2
192 Chapter 1. Getting help

Python Module Index
ccloudinit.config.cc_apt_configure, 54cloudinit.config.cc_apt_pipelining, 57cloudinit.config.cc_bootcmd, 57cloudinit.config.cc_byobu, 58cloudinit.config.cc_ca_certs, 58cloudinit.config.cc_chef, 59cloudinit.config.cc_debug, 61cloudinit.config.cc_disable_ec2_metadata,
62cloudinit.config.cc_disk_setup, 62cloudinit.config.cc_emit_upstart, 63cloudinit.config.cc_fan, 63cloudinit.config.cc_final_message, 64cloudinit.config.cc_foo, 64cloudinit.config.cc_growpart, 65cloudinit.config.cc_grub_dpkg, 65cloudinit.config.cc_keys_to_console, 66cloudinit.config.cc_landscape, 66cloudinit.config.cc_locale, 67cloudinit.config.cc_lxd, 67cloudinit.config.cc_mcollective, 68cloudinit.config.cc_migrator, 69cloudinit.config.cc_mounts, 69cloudinit.config.cc_ntp, 70cloudinit.config.cc_package_update_upgrade_install,
71cloudinit.config.cc_phone_home, 72cloudinit.config.cc_power_state_change,
72cloudinit.config.cc_puppet, 73cloudinit.config.cc_resizefs, 74cloudinit.config.cc_resolv_conf, 74cloudinit.config.cc_rh_subscription, 75cloudinit.config.cc_rightscale_userdata,
75cloudinit.config.cc_rsyslog, 76cloudinit.config.cc_runcmd, 77cloudinit.config.cc_salt_minion, 78
cloudinit.config.cc_scripts_per_boot,78
cloudinit.config.cc_scripts_per_instance,79
cloudinit.config.cc_scripts_per_once,79
cloudinit.config.cc_scripts_user, 79cloudinit.config.cc_scripts_vendor, 79cloudinit.config.cc_seed_random, 80cloudinit.config.cc_set_hostname, 80cloudinit.config.cc_set_passwords, 81cloudinit.config.cc_snap, 82cloudinit.config.cc_spacewalk, 83cloudinit.config.cc_ssh, 84cloudinit.config.cc_ssh_authkey_fingerprints,
85cloudinit.config.cc_ssh_import_id, 86cloudinit.config.cc_timezone, 86cloudinit.config.cc_ubuntu_advantage,
86cloudinit.config.cc_ubuntu_drivers, 87cloudinit.config.cc_update_etc_hosts,
88cloudinit.config.cc_update_hostname, 88cloudinit.config.cc_users_groups, 89cloudinit.config.cc_write_files, 91cloudinit.config.cc_yum_add_repo, 92cloudinit.features, 157
193

cloud-init, Release 20.2
194 Python Module Index

Index
AALLOW_EC2_MIRRORS_ON_NON_AWS_INSTANCE_TYPES
(in module cloudinit.features), 157
Ccloudinit.config.cc_apt_configure (mod-
ule), 54cloudinit.config.cc_apt_pipelining (mod-
ule), 57cloudinit.config.cc_bootcmd (module), 57cloudinit.config.cc_byobu (module), 58cloudinit.config.cc_ca_certs (module), 58cloudinit.config.cc_chef (module), 59cloudinit.config.cc_debug (module), 61cloudinit.config.cc_disable_ec2_metadata
(module), 62cloudinit.config.cc_disk_setup (module),
62cloudinit.config.cc_emit_upstart (mod-
ule), 63cloudinit.config.cc_fan (module), 63cloudinit.config.cc_final_message (mod-
ule), 64cloudinit.config.cc_foo (module), 64cloudinit.config.cc_growpart (module), 65cloudinit.config.cc_grub_dpkg (module), 65cloudinit.config.cc_keys_to_console
(module), 66cloudinit.config.cc_landscape (module), 66cloudinit.config.cc_locale (module), 67cloudinit.config.cc_lxd (module), 67cloudinit.config.cc_mcollective (module),
68cloudinit.config.cc_migrator (module), 69cloudinit.config.cc_mounts (module), 69cloudinit.config.cc_ntp (module), 70cloudinit.config.cc_package_update_upgrade_install
(module), 71cloudinit.config.cc_phone_home (module),
72cloudinit.config.cc_power_state_change
(module), 72cloudinit.config.cc_puppet (module), 73cloudinit.config.cc_resizefs (module), 74cloudinit.config.cc_resolv_conf (module),
74cloudinit.config.cc_rh_subscription
(module), 75cloudinit.config.cc_rightscale_userdata
(module), 75cloudinit.config.cc_rsyslog (module), 76cloudinit.config.cc_runcmd (module), 77cloudinit.config.cc_salt_minion (module),
78cloudinit.config.cc_scripts_per_boot
(module), 78cloudinit.config.cc_scripts_per_instance
(module), 79cloudinit.config.cc_scripts_per_once
(module), 79cloudinit.config.cc_scripts_user (mod-
ule), 79cloudinit.config.cc_scripts_vendor (mod-
ule), 79cloudinit.config.cc_seed_random (module),
80cloudinit.config.cc_set_hostname (mod-
ule), 80cloudinit.config.cc_set_passwords (mod-
ule), 81cloudinit.config.cc_snap (module), 82cloudinit.config.cc_spacewalk (module), 83cloudinit.config.cc_ssh (module), 84cloudinit.config.cc_ssh_authkey_fingerprints
(module), 85cloudinit.config.cc_ssh_import_id (mod-
ule), 86cloudinit.config.cc_timezone (module), 86cloudinit.config.cc_ubuntu_advantage
195
cloud-init, Release 20.2
(module), 86cloudinit.config.cc_ubuntu_drivers (mod-
ule), 87cloudinit.config.cc_update_etc_hosts
(module), 88cloudinit.config.cc_update_hostname
(module), 88cloudinit.config.cc_users_groups (mod-
ule), 89cloudinit.config.cc_write_files (module),
91cloudinit.config.cc_yum_add_repo (mod-
ule), 92cloudinit.features (module), 157
EERROR_ON_USER_DATA_FAILURE (in module clou-
dinit.features), 157
196 Index


![Cloud init and cloud provisioning [openstack summit vancouver]](https://img.pdfslide.us/doc/110x75/58a2fffb1a28abea508b4a2f/cloud-init-and-cloud-provisioning-openstack-summit-vancouver.jpg)