Embed Size (px)
Citation preview
Egg-riculturalEgg-speriences
ClassroomChick Hatch Program
Guidebook
Nova Scotia Department of Agriculture

The Nova Scotia Agricultural Awareness Committee would like to acknowledge the following for their contribution to this document.
• Cornell Cooperative Extension who provided a major source of information for this manual.
• We would also like to acknowledge the Chicken Farmers of Nova Scotia, Nova Scotia Egg Producers’, and Atlantic Poultry Inc. for their contributions to this project.
• Funding and support for this manual was provided by the Nova Scotia Department of Agriculture and Marketing and Agri Focus 2000.
• This manual was prepared by Geneve Newcombe on behalf of the Nova Scotia Agricultural Awareness Committee.
Original Publication 2005; Revised 2011, 2013Nova Scotia Department of Agriculture
Table of Contents
INTRODUCTION . . . . . . . . . . . . . . 1
INCUBATOR SETUP ANDPROCEDUREChecklist . . . . . . . . . . . . . . . . . . . 2Incubating Eggs . . . . . . . . . . . . . . 3
- Prehatch- Incubator- Selection and Care of Eggs- Temperature- Humidity- Ventillation- Turning- Candling- After the Chick Hatches- When the Project is Over
Incubation Troubleshooting . . . . 7Frequently Asked Questions. . . . . 8
RECOMMENDED READINGReproductive Systems andFertilization. . . . . . . . . . . . . . . . 11Avian Egg and its Parts . . . . . . . 13Timing of Major EmbryonicDevelopments . . . . . . . . . . . . . . 14
Daily Changes in Weight fromDeveloping Chick Embryo . . . . . 15
Nova Scotia Poultry Industry . . . 16- Egg Production . . . . . . . . . . . . 16- Chicken Production . . . . . . . . 16- Turkey Production . . . . . . . . . 17
Poultry Trivia. . . . . . . . . . . . . . . 18
ACTIVITIES1 Web of Knowledge . . . . . . . . . . . . 202 Know the Parts of an Egg. . . . . . . 21
Learning About Eggs activity sheet . 223 Learning About Incubation. . . . . . 23
- Poultry “What Have You Learned” activity sheet . . . . . . . . . . . . . . . . . 25- Crossword puzzle . . . . . . . . . . . . . 26
4 Learning About Chicks. . . . . . . . . 27Chick Checklist . . . . . . . . . . . . . . . . 28
5 Egg Hatching Game . . . . . . . . . . . 29Game sheet . . . . . . . . . . . . . . . . . . . 30
6 Learning About Temperatures . . . 31Learning About Thermometers worksheet . . . . . . . . . . . . . . . . . . . 32
7 Where Do I Live? . . . . . . . . . . . . . 33Housing Comparison Chart . . . . . . . 33
8 How Strong is an Egg? . . . . . . . . . 349 Learning About Egg Production . . 35
- The Eggs Journey activity sheet . . 35- From Hen to Home activity sheet. . 36- Match the Egg to its Size activity sheet . . . . . . . . . . . . . . . . . 37
10 Learning About ChickenProduction. . . . . . . . . . . . . . . . . . 38- Word search activity sheet. . . . . . . 39- Favorite Chicken Parts graph & tally activity sheet . . . . . . 39
11 Raw Eggs or Cooked?. . . . . . . . . . 4112 Fresh or Stale Eggs? . . . . . . . . . . 4213 Tying Chicken Bones in Knots . . . 4214 Egg Vacuum. . . . . . . . . . . . . . . . . 4315 Careers in the Poultry Industry . . 44
ADDITIONAL ACTIVITIES . . . . . . . . . 45ACTIVITY ANSWERS . . . . . . . . . . . . . 46
Web Sites Worth Visiting . . . . . . . . . 47Glossary . . . . . . . . . . . . . . . . . . . . . . 48References/Resources . . . . . . . . . . . 50
APPENDIXIncubation Quick Reference sheetIncubator Setup Directions sheetEvaluation Form
- Incubation Record Sheet . . . . . . . . 24

INTRODUCTION
The hatching of chick eggs is an ideal opportunity to provide students with a valuable and memorable learning experience. For many students this will be their first exposure to farming. It also gives students an opportunity to observe the miracle of life.
Before undertaking this project, teachers are encouraged to read this manual and to discuss with their students that not all the eggs will hatch and that there is a possibility that a chick that does hatch may not be strong enough to survive. Even when the utmost of care is taken the chances of a one hundred percent hatch is unlikely.
Through this project students will have an opportunity to learn about the incubation process, embryonic development, practice animal care and handling, develop a greater appreciation and understanding of agriculture and specifically the poultry industry, and learn to perform specific skills such as reading a thermometer and candling an egg. This manual contains a section of classroom activities to help integrate the project into the school curriculum.
Before undertaking this project make arrangements for the chicks that will be hatched. If chicks are going to a local farm, arrangements must be made well ahead of incubation. If you require assistance in finding a home, contact your nearest agricultural office.
Remember, children learn best when involved in hands-on, real life experiences. The life cycle of the chicken is made real through the student’s participation in this chick hatching program.
For more information or additional resources, contact:
Nova Scotia Agricultural Education LiaisonPO Box 890 (Harlow Building)Truro, NS B2N 5G6Ph: (902) 893-7495Fax: (902) 893-0244
1
It is important that students understand there are two different types of eggs that look identical — eggs for hatching and eggs for consumption. Eggs for consumption (bought at retail)are not fertilized so they will never contain an embryo and cannot be incubated to hatch a chick.

INCUBATOR SETUP & PROCEDURE
Checklist
The following items should be included in your chick hatch kit. If any are missing or damaged then please notify the office where you obtained your kit.
incubator top and bottom
wire rack
thermostat (including wafer,adjusting screw, and wingnut)
accurate thermometer
waterer top and bottom
feeder
heat lamp with bulb (plug in to ensure bulb does not need replacing)
hand-held candler
Chick Hatch Program Guidebook(contains detailed instructions and classroom activities)
Incubation Quick Reference sheet
posters
You will need to make arrangements for these additional items:
hatching eggs (one dozen)
feed (chick starter)
litter for the brood box
cheesecloth
a home for the chicks upon conclusion of the project
2
Incubating Eggs
PREHATCHBefore beginning the chick hatch project review the checklist (page 2) to ensure that you have all the necessary components to begin. If you require assistance in obtaining any of the items refer to the resource section for contacts. Once all the necessary components are gathered you are ready to begin your chick hatch.
INCUBATORThe first step in the incubation process is to set up the incubator. The location of the incubator is important to the success of the hatch. The incubator should be placed in a location where room temperature is fairly constant; away from drafts, windows and radiators. The incubator should be set on a sturdy table where it will not receive bumps. Fill the shorter of the two moisture troughs in the incubator bottom with warm water. The incubator should run for at least one day to ensure the temperature remains stable before setting the eggs. If you need more detailed information on setting up the incubator then refer to incubator setup direction sheet included at the back of this guidebook. It is usually recommended that you start the incubator on a Friday and set your eggs on Monday.
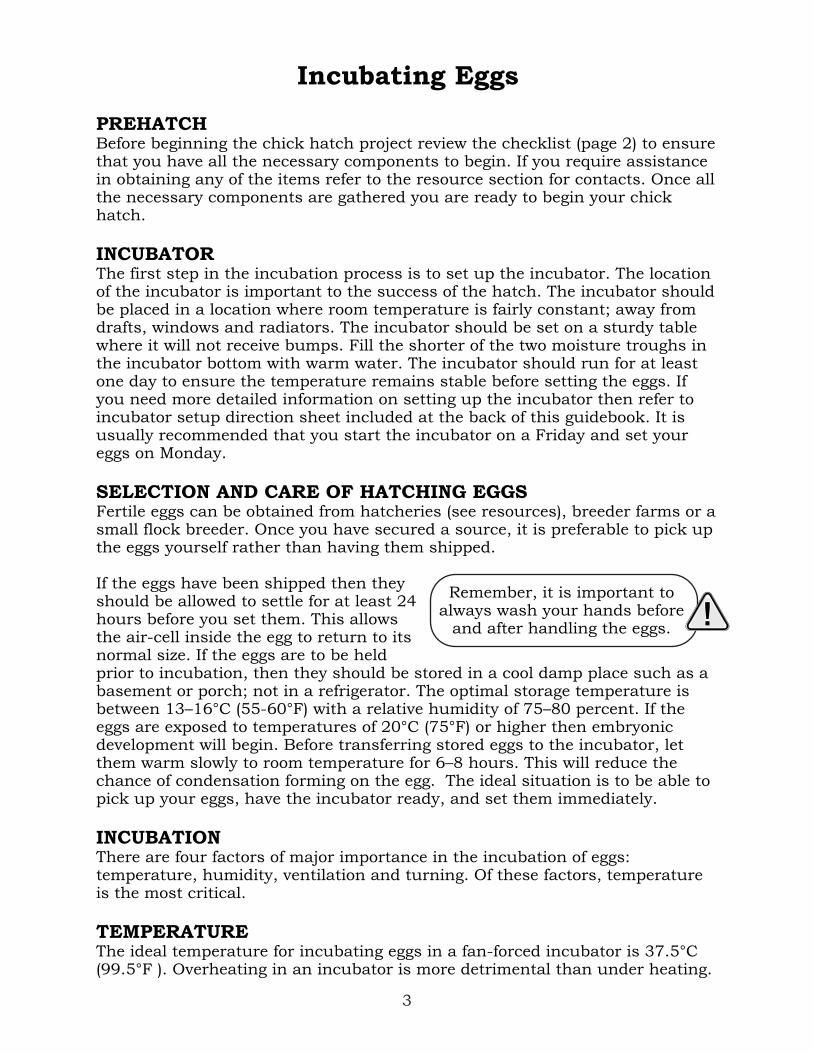
SELECTION AND CARE OF HATCHING EGGSFertile eggs can be obtained from hatcheries (see resources), breeder farms or a small flock breeder. Once you have secured a source, it is preferable to pick up the eggs yourself rather than having them shipped.
If the eggs have been shipped then they should be allowed to settle for at least 24 hours before you set them. This allows the air-cell inside the egg to return to its normal size. If the eggs are to be held prior to incubation, then they should be stored in a cool damp place such as a basement or porch; not in a refrigerator. The optimal storage temperature is between 13–16°C (55-60°F) with a relative humidity of 75–80 percent. If the eggs are exposed to temperatures of 20°C (75°F) or higher then embryonic development will begin. Before transferring stored eggs to the incubator, let them warm slowly to room temperature for 6–8 hours. This will reduce the chance of condensation forming on the egg. The ideal situation is to be able to pick up your eggs, have the incubator ready, and set them immediately.
INCUBATIONThere are four factors of major importance in the incubation of eggs: temperature, humidity, ventilation and turning. Of these factors, temperature is the most critical.
TEMPERATUREThe ideal temperature for incubating eggs in a fan-forced incubator is 37.5°C (99.5°F ). Overheating in an incubator is more detrimental than under heating.
3
Remember, it is important to always wash your hands before
and after handling the eggs.
Operating the incubator at 40°C (104°F) will seriously affect the embryos while operating it at 32°C (90°F) for a few hours will only slow the chick’s metabolic rate. When the eggs are first placed in the incubator the temperature will drop.Do not adjust the incubator temperature during the first 24 hours as it takes time for the eggs to warm up to the set temperature. Adjusting the temperature upwards on the first day has ruined hatches.
4
Is Your Thermometer Accurate?It is advisable to check the accuracy of your thermometer. Heat a pail of water to approximately 38°C (100°F) checked with an accurate thermometer (clinical or laboratory). Place the thermometer in the water and stir to keep the water temperature uniform. While the thermometer is in the water check the reading.
In Case of Power OutageIf you experience a power failure, do not scrap the hatch. The key is to keep the eggs as warm as possible until the power returns. This can be done by placing towels or a blanket on top of the incubator for additional insulation. Most of the time a power outage will only delay the hatch and may decrease the hatchability.
HUMIDITYThe relative humidity of the air within the incubator, for the first eighteen days, should be about 60 percent. Too little moisture in the incubator results in excessive evaporation, causing chicks to stick to the shell at hatching time. Too much moisture in the incubator prevents normal evaporation and results in a decreased hatch. Excessive moisture is seldom a problem in small incubators.
By keeping water in the shorter moisture trough, the proper humidity should be maintained in the incubator. Whenever you add water to an incubator, it should be about the same temperature as the incubator so that it does not stress the eggs or the incubator. Add water which is warm to the touch. It is also important not to get the eggs wet when adding water. Water will probably need to be added to the shorter trough every few days.
During the last three days (the hatching period) the relative humidity should be 70–75 percent. Increasing the humidity prevents the chick’s beak from sticking to the shell and allows for freer movement of the chick’s head at the time of pipping. The relative humidity is increased by filling both moisture troughs on day 18. It is the amount of surface water and not the depth of water that determines the humidity in the incubator. The relative humidity in an incubator can be determined by using a wet-bulb thermometer or a hygrometer.
VENTILATIONVentilation refers to the air movement within the incubator and air exchange with air outside the incubator. As the embryo grows, oxygen is taken up and

carbon dioxide released through the pores in the eggshells. It is important to properly ventilate the incubator so that a buildup of carbon dioxide does not occur. To help control the exchange of air there are two vent plugs in the top of the incubator. Three days after setting the eggs, remove the back vent plug and leave it out for the remainder of the incubation. During the hatching period (the last 3 days), if condensation appears on the incubator window, then remove the other vent plug. Be sure to replace the vent plugs before returning the incubator.
TURNINGTurning the eggs during the incubation period prevents the developing chick from sticking to the shell membrane. The eggs should be turned at least twice daily starting on day 2 and continuing until day 18. Do not turn the eggs during the last three days of incubation (days 19–21). In a classroom situation, it may be difficult to turn the eggs on weekends. Every effort should be made to come in and turn the eggs at least once a day during weekends. Also remember to use care when turning the eggs as rough handling can rupture blood vessels.
To insure proper turning, the eggs should be marked with a pencil. Pens and markers are not recommended as ink can be absorbed into the egg. Eggs may be marked with an “x” on one side and an “o” on the opposite side. Alternatively, numbering the eggs gives them individuality and adds excitement when candling and during hatch time. It does not matter which system you choose as long as you mark the eggs. When the eggs are turned all the “x’s” or writing will be on the bottom or out of sight. At the next turning, the markings will be in view, and so on.
From the 19th day on, do not turn or handle the eggs. Do not move or open the incubator until the chicks have hatched. When turning the eggs for the last time, place a layer of cheesecloth on the screen under the eggs. This will make cleaning the incubator easier after hatching.
CANDLINGIncubated eggs are candled to determine whether they are fertile and, if fertile, to check the growth and development of the embryo. Included in the chick hatch kit is a small handheld candler. Candling works best when done in a darkened room with curtains drawn and lights off. Candling is not a specific art, rather it is a comparison of eggs at the same stage. Brown eggs, because of the colour of their shell, are more difficult to candle than white eggs. Even so, students will be able to determine if eggs are fertilized and observe the developing embryo.
Placing the larger end of the egg on the candler will allow you to observe the air cell. The darkest area in the egg will be the developing embryo. If the light shines through the egg (egg is clear) then it is an infertile egg and should be removed. Eggs may be candled from day 5 to day 17. Candling eggs several times during the incubation is an excellent way to observe the embryo’s growth.
5
Washing hands prior to handling the eggs will help keep microbes and dirt from entering the pores in the eggshell that allow respiration.
With each successive candling the students will see the embryo occupying more space in the egg as it approaches hatch day. Candling eggs will not harm them if they are handled gently.
AFTER THE CHICKS HATCHChicks should not be moved from the incubator to the brooder until they are dry and fluffy (usually a few hours following hatch). Students may handle the chicks once they are dry. Remember it takes a lot of effort for the chick to get out of its shell so it will be tired and will need rest. Do not be alarmed if the chicks are not very active this first day.
A simple brooding unit may be used to keep a few chicks for a short period of time (3- 5 days). A large cardboard box or container may be used as a brooder. Provide feed and water to the chicks as soon as they are moved from the incubator to the brooder. It is a good idea to dip the chick’s beak in the feed and water. Chick starter can be purchased from a feed dealer. As a temporary measure, if you are unable to locate chick starter, some of the high protein, vitamin and mineral dry cat food can be crushed and fed to the chicks.
The litter or bedding in the brooder serves as insulation and as an absorptive material. Shavings, sawdust, straw or sand may be used. Do not use newspaper or kitty litter. Never place chicks on a smooth surface, because they cannot grip a slippery surface, their toes will curl, and their legs will spread out to the side. This may result in permanent leg damage.
A suspended heat source should be provided to maintain the proper temperature for brooding chicks. The temperature under the light should be about 28°C (82°F). To determine if the chicks are at the proper temperature:If the chicks are moving to the outer edges of the brooder box (away from the heat source ) then the light should be raised as it is too hot; if the chicks are huddled together directly under the light, they are cold, so the light should be lowered. Comfortable chicks are usually distributed evenly throughout the brooder.
Remember, all domestic animals depend on humans for survival. Make sure the chicks are properly housed, kept warm and out of drafts, and have plenty of food and fresh water. This means checking the brooder first thing in the morning, at noon, and at the end of the day.
WHEN THE PROJECT IS OVERSend the chicks to their new home that you arranged before beginning the project.
Once dry, pack in box. Wash and dry waterer and feeder. Photocopy and complete evaluation form from manual. Review the checklist (page 2) to ensure all materials are accounted for. Return chick hatch kit.
Sanitize the incubator at the end of the project. The incubator bottom, liner and wire floor rack should be washed with hot soapy water after use. After rinsing with clean water, the incubator bottom, liner and rack should be sprayed with 10 percent bleach solution. Cover with the top of the incubator and allow to soak for one hour. Rinse the bottom, liner and rack with clean water and allow to dry thoroughly.
6

Incubation Troubleshooting
Observations
• Chicks hatching early
• Draggy hatch: some chicks early but slow in finishing
• Delayed hatch: eggs not pipping until 21st day or later
• Short down on chicks
• Small chicks
• Large staggering chicks
• Shell sticks to chick
• Chicks smeared with egg contents
• Soft chicks
• Rough navels
• Crippled or deformed chicks
• Albumen is left in the egg
• If chick starts to pip egg but is unable to get out
• If embryo dies in shell
• Large number of clear eggs
Probable Cause
• Incubator temperature is too high
• Incubator temperature is too high
• Incubator temperature is too low
• High temperature or low humidity
• Low humidity or eggs produced in hot weather
• High humidity
• Low humidity at hatching time
• Low average temperature; high humidity
• Unsanitary incubator or temperature too low between days 1–19 or humidity too high 20–21 days
• High temperature, low humidity or temperature variations.
• Mostly chance. Poor nutrition of parent stock or heredity.
• Humidity too high, eggs not turned often enough, temperature too high
• Low vitality or improper position; eggs not turned; temperature too high day 20–21
• Low vitality, malnutrition or poor environmental conditions of parent stock; insufficient turning; unsanitary conditions
• Infertile eggs or very early embryonic mortality
7
Frequently Asked Questions
1. Can I hatch eggs from the store?No, the eggs bought at the store are not fertilized and only fertilized eggs will hatch.
2. Where can I get fertilized eggs?Fertilized eggs can be bought at a hatchery or from a farm that has both hens and roosters.
3. Where should eggs be stored, if they cannot be set right away?If the eggs cannot be put in an incubator immediately, then they should be kept, small-end down, in a cool room at a temperature between 13 and 16°C (55-60°F).
4. What is the maximum length of time eggs can be held before incubating?No more than seven days.
5. What temperature is required to hatch eggs?The circulated air incubator should run at a temperature of 37.5°C (99.5°F).
6. Why is it important to wash hands before handling the eggs?Microbes, perspiration from the hands or any sort of grease is injurious, because it clogs up the pores of the shell.
7. Why is it important to turn the eggs?The eggs are turned to prevent the embryo from sticking to the shell membrane, and is similar to what the mother hen does when she sets.
8. How often should the eggs be turned?The eggs should be turned at least twice daily.
9. When do we stop turning the eggs?Do not turn the eggs on days 19 – 21.
10. What happens if the eggs are not turned?If the eggs are not turned the embryo will die about day 11.
11. What should I use to mark the eggs?A lead pencil.
12. Why is water added to the incubator?Water is needed to maintain proper relative humidity in the incubator. If the relative humidity is too low then the chick will stick to the shell membrane and death will occur.
13. How can I be sure that I have enough humidity?If the appropriate troughs are kept full of water then the correct humidity should be maintained. You may also check humidity using a wet-bulb thermometer or a hygrometer.
14. How can I tell if I have too much humidity?There will be a great deal of condensation on the inside of the incubator window.
8

15. How do I add the water?Add warm water with a squeeze bottle being careful not to get the eggs wet.
16. What is candling?Candling involves shining a bright light through the egg (in a darkened room) to determine egg quality, if the egg is fertile and to check embryonic development.
17. When should the eggs be candled?Eggs may be candled anytime between day 5 of incubation through to day 17.
18. How long should the eggs be kept out of the incubator?No more than 5 to 10 minutes at a time.
19. What should I do if I find a clear egg?A clear egg will not hatch and should be removed from the incubator and disposed of.
20. What if there is a power outage?You should place a blanket or towels over the incubator to help insulate it. If the power outage is going to last more than 12 hours then you should make arrangements to move the incubator to a location with power.
21. How long does it take for the eggs to hatch?Normal hatch time for chicken eggs is 21 days.
22. How long should I leave the eggs in the incubator if they do not hatch on the twenty-first day?Leave the unhatched eggs until the twenty-third or twenty-fourth day. If they still have not hatched then dispose of them.
23. Will all the eggs hatch?In most hatches there will be a few eggs that will not hatch even though you have followed the directions; this is just a fact of nature.
24. Should I help the chick out of the shell?This is not recommended and is often painful for the chick.
25. Can we hold the chicks as soon as they hatch?The chicks should not be handled until they are completely dry and fluffed up. After they are dry they may be handled but remember to be gentle.
26. What is a brooder box ?A brooder box is a temporary home for baby chicks up to one week of age. It contains bedding, feed, water and a heat source suspended above the container.
27. When should I move the chicks to the brooder box?The chicks should be moved once they are dry, usually within 24 hours of hatching.
28. When do the chicks need water?The chicks need to drink water when they are moved to the brooder.
9

10
29. When do the chicks need food?The chicks should have food the first day but can survive for up to three days after hatching.
30. Do I need to teach the chicks to eat and drink?Yes, it is a good idea to dip the chick’s beak in the water and feed so that they know where it is.
31. What do the chick’s eat?They need chick starter which is comprised of various grains, vitamins and minerals.
32. What if I cannot find any chick starter?If you are unable to get chick starter then you may feed a high protein dry cat food (crumble it) as a temporary measure.
33. What should be used for bedding in the brooder box?You can use wood shavings, chopped straw, sawdust or sand. Do not use cat litter or newspaper.
34. What temperature should the brooder box be?Brooding temperature will vary with conditions however, a temperature of 28°C (82°F) is recommened. The chicks themselves are the best indicator of correct temperature. If the chicks are at the edges of the brooder then they are too hot and the temperature needs to be lowered. If the chicks are huddled under the heat source then they are cold and the temperature needs to be raised.
35. How do I adjust the temperature in the brooder box?By lowering the heat source you will increase the temperature and by raising it you will lower the temperature.
36. How can you tell a hen from a rooster?It is difficult to tell at hatch unless they are a strain that can be feathersexed.
37. How do you feathersex?In feathersexing the female wing feathers are longer than the male wing feathers at 3–4 days of age.
38. How long do chickens live?Broilers reach market weight at 6–8 weeks. On most commercial egg farms laying hens are usually kept for 18–20 months. Records show that when allowed to live out their lives naturally they can live for 6–10 years.
39. Can I take one of the chicks home?No, chicks cannot go home with students as they do not have the proper facilities for raising chickens. The chicks must go to a farm to live.
40. Do chickens make good pets?No, baby chicks grow very quickly into largechickens with sharp claws and areunable to be house broken.

Ovary Oviduct
RECOMMENDED READING
The Reproductive System and Fertilization
THE HENThe reproductive system in the female chicken is in twoparts: the ovary and the oviduct. Unlike most femaleanimals, which have two functioning ovaries, the chickenusually has only one. The right ovary stops developingwhen the female chick hatches, but the left one continuesto mature.
OVARYThe ovary is a cluster of developing yolks, attached to theback about midway between the neck and the tail. It is fullyformed when the chicken hatches and contains severalthousand tiny ova, each ovum within its own follicle. As thefemale matures, these ova develop a few at a time into yolk.
11
OVIDUCTThe oviduct is a tube like organ lying along the backbone between the ovary and the tail. In a mature hen, it is approximately 63-69 cm (25-27 inches) long. The yolk is completely formed in the ovary. When a yolk is fully developed, its follicle ruptures, releasing it from the ovary. It then enters the infundibulum or entrance of the oviduct. All other parts of the egg are added to the yolk as it passes through the oviduct. The chalazae, albumen, shell membrane, and shell are formed around the yolk to make the complete egg, which is then laid. This complete cycle usually requires a little more than 24 hours. About 30 minutes after the egg is laid, another yolk is released and the process repeats itself. The ovary and parts of the oviduct are shown below.
Testes
Vasdeferens
Cloaca
THE ROOSTERThe male fowl has two testes which are situated high up in the abdominal cavity, along the back. These never descend into an external scrotum, as in the case with other animals. They produce semen, the liquid vehicle for the sperm.
OVARY
Magnum
Infundibulum
Cloaca
Isthmus
Uterus
Vent
Vagina
Mature yolkwithin yolk sac orfollicle
Immature yolk
Empty Follicle
OVIDUCT
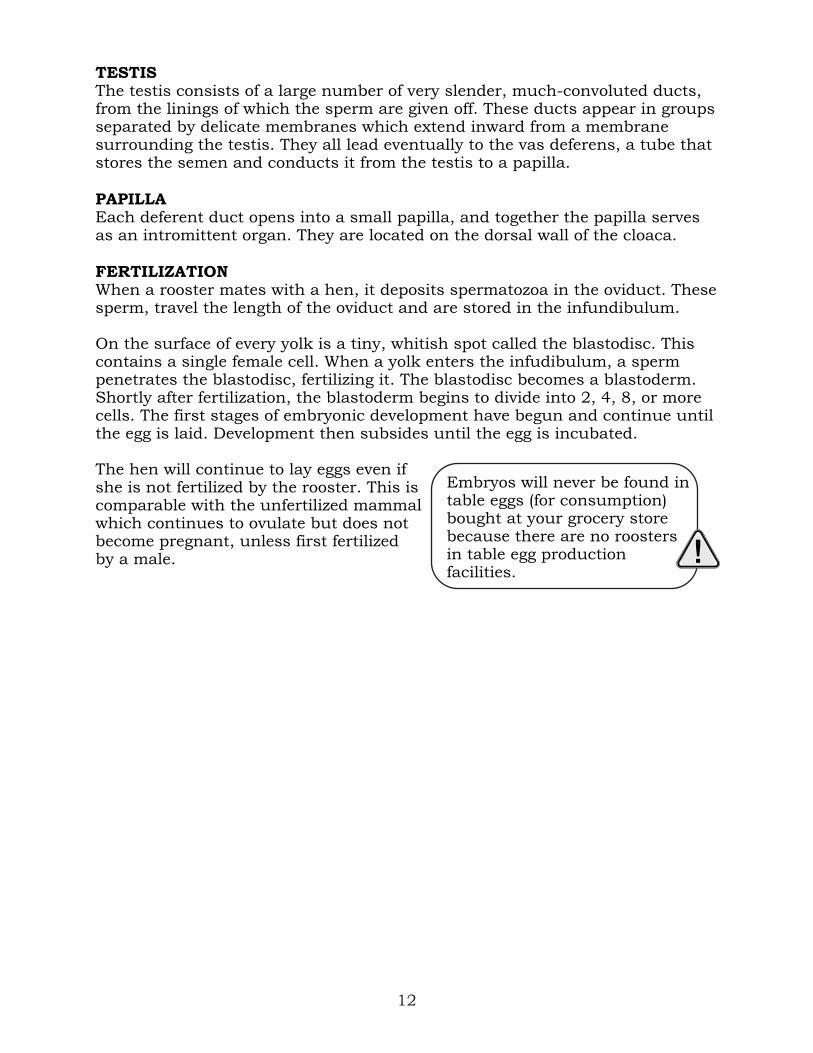
TESTISThe testis consists of a large number of very slender, much-convoluted ducts, from the linings of which the sperm are given off. These ducts appear in groups separated by delicate membranes which extend inward from a membrane surrounding the testis. They all lead eventually to the vas deferens, a tube that stores the semen and conducts it from the testis to a papilla.
PAPILLAEach deferent duct opens into a small papilla, and together the papilla serves as an intromittent organ. They are located on the dorsal wall of the cloaca.
FERTILIZATIONWhen a rooster mates with a hen, it deposits spermatozoa in the oviduct. These sperm, travel the length of the oviduct and are stored in the infundibulum.
On the surface of every yolk is a tiny, whitish spot called the blastodisc. This contains a single female cell. When a yolk enters the infudibulum, a sperm penetrates the blastodisc, fertilizing it. The blastodisc becomes a blastoderm. Shortly after fertilization, the blastoderm begins to divide into 2, 4, 8, or more cells. The first stages of embryonic development have begun and continue until the egg is laid. Development then subsides until the egg is incubated.
The hen will continue to lay eggs even if she is not fertilized by the rooster. This is comparable with the unfertilized mammal which continues to ovulate but does not become pregnant, unless first fertilized by a male.
12
Embryos will never be found in table eggs (for consumption) bought at your grocery store because there are no roosters in table egg production facilities.
13
The Avian Egg and Its PartsSee Activity 2: Know the Parts of an Egg
The word egg to most people, means a versatile and nutritious food. The chicken egg is actually a very complex structure designed to nourish and protect the growing chick embryo. Although human nutritional requirements are not the same as those of the chick, they are similar in so many respects that the egg has become a convenient, economical source of many of the essential proteins, vitamins and minerals necessary to our good health.
Looking at the egg from the outside we see the shell which is the first line of defence against bacteria. The shell is a hard protective covering composed primarily of calcium carbonate. The shell is porous, containing approximately 8,000 to 10,000 tiny pores. The pores allow for the transfer of gases and moisture in and out of the egg.
Immediately beneath the shell are two membranes, the outer and inner shell membranes. These membranes are composed of thin layers of protein fibres. They are the second line of defence against bacteria and prevent liquid from evaporating too rapidly from inside the egg.
The shell membranes surround and contain the albumen or white of the egg. The albumen, which is comprised mainly of water and high quality proteins, provides the liquid medium in which the embryo grows and the protein necessary for proper development.
The albumen surrounds the yolk of the egg. The yolk is the egg`s major source of vitamins, minerals, essential fatty acids, carbohydrates and protein. These nutrients provide an abundant source of metabolic energy for the embryo. The yolk is contained by the vitelline membrane.
The germinal disc (or blastodisc) appears as a slight depression on the surface of the yolk. It is the entry point for the fertilization of the egg.
In a fresh egg, you can see two white cords attached to the yolk. These two cords, called chalazae, are made of twisted strands of mucin fibre, a special form of protein. The role of the chalazae are to anchor the yolk in the centre of the egg. Chalazae are not noticeable when the egg is cooked. After being laid, the contents of the egg cool and contract. This creates a vacuum and air is drawn into the egg through the pores at the large end of the egg, forming an air space between the shell and the outer membrane. The fresher the egg the smaller the air cell. The air cell acts as a tiny shock absorber during early development of the embryo.
The Timing of Major Embryonic Developments
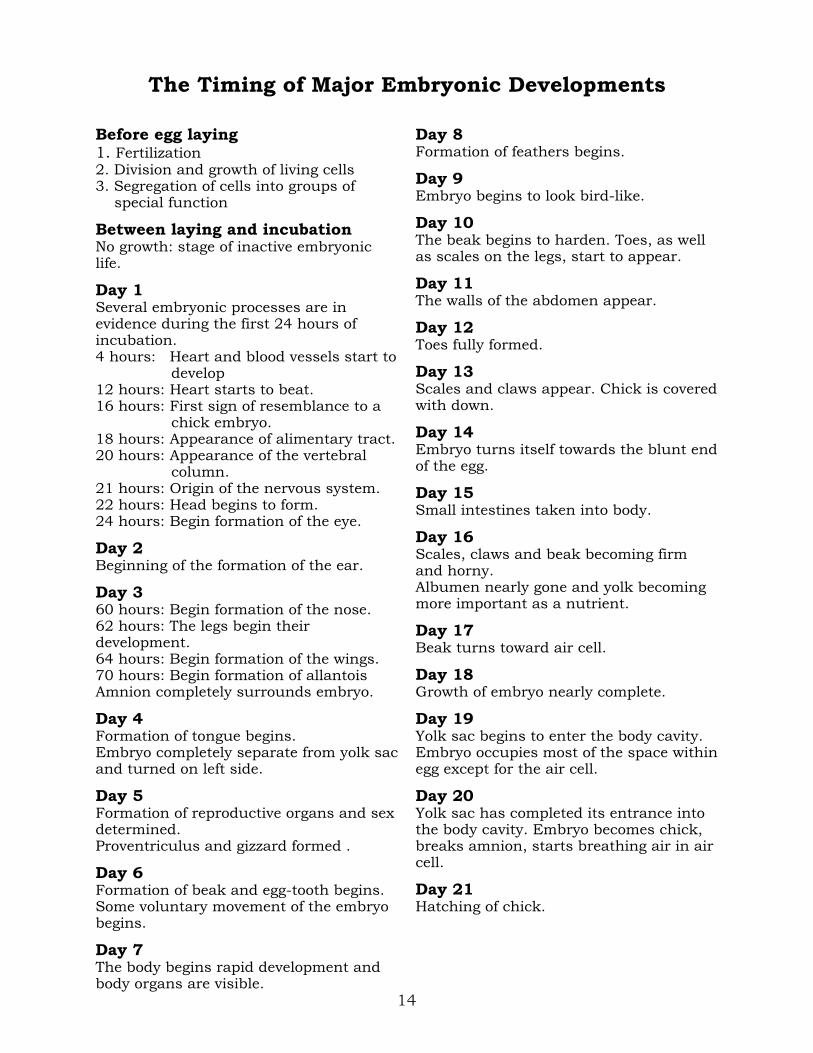
Before egg laying1. Fertilization2. Division and growth of living cells3. Segregation of cells into groups of
special function
Between laying and incubationNo growth: stage of inactive embryonic life.
Day 1Several embryonic processes are in evidence during the first 24 hours of incubation.4 hours: Heart and blood vessels start to
develop12 hours: Heart starts to beat.16 hours: First sign of resemblance to a
chick embryo.18 hours: Appearance of alimentary tract.20 hours: Appearance of the vertebral
column.21 hours: Origin of the nervous system.22 hours: Head begins to form.24 hours: Begin formation of the eye.
Day 2Beginning of the formation of the ear.
Day 360 hours: Begin formation of the nose.62 hours: The legs begin their development.64 hours: Begin formation of the wings.70 hours: Begin formation of allantoisAmnion completely surrounds embryo.
Day 4Formation of tongue begins.Embryo completely separate from yolk sac and turned on left side.
Day 5Formation of reproductive organs and sex determined.Proventriculus and gizzard formed .
Day 6Formation of beak and egg-tooth begins.Some voluntary movement of the embryo begins.
Day 7The body begins rapid development and body organs are visible.
Day 8Formation of feathers begins.
Day 9Embryo begins to look bird-like.
Day 10The beak begins to harden. Toes, as well as scales on the legs, start to appear.
Day 11The walls of the abdomen appear.
Day 12Toes fully formed.
Day 13Scales and claws appear. Chick is covered with down.
Day 14Embryo turns itself towards the blunt end of the egg.
Day 15Small intestines taken into body.
Day 16Scales, claws and beak becoming firm and horny.Albumen nearly gone and yolk becoming more important as a nutrient.
Day 17Beak turns toward air cell.
Day 18Growth of embryo nearly complete.
Day 19Yolk sac begins to enter the body cavity. Embryo occupies most of the space within egg except for the air cell.
Day 20Yolk sac has completed its entrance into the body cavity. Embryo becomes chick, breaks amnion, starts breathing air in air cell.
Day 21Hatching of chick.
14

15
Daily Changes in Weight and Form ofDeveloping Chick Embryo
8 days(1.15 g)
9 days(1.53 g)
10 days(2.26 g)
11 days(3.69 g)
12 days(5.07 g)
13 days(7.37 g)
14 days(10 g)
15 days(12 g)
16 days(16 g)
17 days(19 g)
18 days(22 g)
19 days(26 g)
20 days(30 g)
21 days(32-35 g)
1 day(0.0002g)
2 days(0.003g)
3 days(0.02g)
4 days(0.05g)
5 days(0.13g)
6 days(0.29g)
7 days(0.57g)

16
Nova Scotia Poultry Industry
Egg Production
Egg producers are located throughout the province with over half of the laying hens in Nova Scotia located in the Annapolis Valley. Farm sizes range from approximately 500 to over 150,000 laying hens. Hens begin laying at about 19 weeks of age and continue for about 12 months. On average, a hen lays about 300 eggs during that period. In total, over 20 million dozen eggs are produced in Nova Scotia annually. The provincial farm-gate value of eggs is approximately $30 million.
How are eggs produced?Most laying hens are housed indoors where farmers provide adequate light, air, a well-balanced nutritious diet, fresh water, and comfortable surroundings. Cage style housing can provide a safe, healthy environment for egg production since droppings fall outside the cage, away from the hens and the eggs. Free run eggs are produced by hens that are housed indoors, in pens which allow free roaming. Free range eggs are produced by hens which also have access to the outdoors. Organic certification has specific requirements for both feed and housing.
Laying hens are fed a diet of grains, proteins, vitamins, and minerals. The hens' diet does not contain hormones or antibiotics, the use of each being illegal in Canada.
Eggs are usually collected twice a day and are stored in a temperature and humidity-controlled atmosphere until they are sent to a grading station. Here, eggs are washed, sanitized and candled. The eggs are graded according to quality standards having to do with interior quality, weight, cleanliness and shell quality. All eggs sold in grocery stores have been graded and packed before distribution.
How are eggs used?Eggs can be served with any meal, breakfast, lunch, and dinner, and are often a key ingredient in baking.
Processed eggs are pasteurized before being further processed and packaged in liquid, frozen, or dried form and are used in manufacturing many foods, such as mayonnaise, noodles, and baked goods. They are also used to make non-food items, including pharmaceuticals, shampoo, pet foods, and adhesives.
Chicken Production
There are more than 80 registered chicken farmers in Nova Scotia, and they produce more than 45 million kg of chicken each year generating over $70 million in farm-gate sales annually. Kings County chicken farmers produce approximately 85% of the provincial output while Lunenburg, Antigonish and Annapolis Counties produce the remaining 15% of commercial production.
17
How are chickens produced?Eggs are collected from broiler breeder operations and taken to hatcheries. At the hatchery, the eggs are placed in large incubators which electronically control temperature, humidity and turning. Upon hatching, the sex of each chick is determined and the chicks are vaccinated to prevent illness. Within twenty-four hours of hatching, the chicks are transported to chicken farms in heated trucks.
At the chicken farm, barns are thoroughly cleaned and disinfected to prevent disease and keep the new flock healthy. These barns are specially designed to ensure that proper temperature, humidity and air quality are maintained. Clean, chopped straw or wood shavings are spread on the barn floor. Broiler chickens are not kept in cages but are floor-raised.
To ensure nutritional requirements are met, Nova Scotia chickens are fed a diet of grains, soybean meal and canola meal, fats, vitamins and minerals. A clean, fresh supply of water is also an important element of a chicken’s diet.
What happens after chickens leave the farm?When the chickens reach market weight of 2 to 3 kg (approximately 37 days for broilers and 50 days for roasters) they are transported to a processing plant in trucks specially designed for shipping live poultry. At the plants, inspectors check the chicken to ensure the birds are healthy and safe for us to eat. Chicken products are then shipped to grocery stores, restaurants, or factories for further processing.
How is chicken used?Chicken meat is sold either fresh or frozen, and birds are sold whole or halved or cut into pieces and sold in packages containing breasts, thighs, drumsticks, or wings. These may be sold whole, skinless, or skinless and boneless. Chicken can be prepared in a variety of ways, usually baked, fried, roasted, broiled, or grilled. It is of course also processed further, by manufacturers of such products as precooked chicken pieces, soups, boullion, stews, and pies.
Turkey Production
Nova Scotia has about 20 registered turkey farms producing 3,014,000 kg of turkey. Kings County has the most turkey producers, followed by Annapolis, Lunenburg, and Antigonish counties.
How are turkeys produced?Commercial breeders use artificial insemination (AI) to fertilize eggs. The eggs are collected and incubated for 28 days. Once hatched, day-old poults are shipped to farms in temperature-controlled trucks. Most turkeys are grown in large, modern poultry barns that are heated and ventilated to provide the proper temperature, humidity, and air circulation and wood shavings on the floor.
There are two stages to a turkey's production cycle. The brooding stage lasts from day-old to about five weeks where the barn temperature is gradually
o oreduced from 35 C to 21 C. The growth stage is from 6 weeks to market age,

which varies depending on the sex of the birds and the desired market size. Depending on the breed, most hens reach market weight of 5.9 to 8.7 kg in about 11 to 15 weeks. The toms require 18 to 24 weeks to reach their market weight of 15.7 to 21.3 kg. Some turkeys are sold as broilers, which are marketed at a smaller size of about 5.5 kg.
Turkeys require about 2.3 kg of feed per kilogram of weight gain. The diet consists of mixed grains and oilseeds, which typically include corn, soya, wheat, barley, and canola. Turkeys are not fed hormones or steroids and are fed non-medicated feed before going to market.
What happens after turkeys leave the farm?When turkeys are ready for market they are trucked to a primary processing plant. Once processed, they are packaged or sent to be further processed into turkey products. Food inspectors check each bird that moves through the processing plant to ensure it is safe for human consumption. The turkey products are then sent to retail outlets, institutions, hotels, and restaurants.
How are turkeys used?Turkey is not only consumed as a seasonal favourite at Easter, Thanksgiving, and Christmas, but year-round for everyday meals. Turkey is now processed into products such as fresh-cut segments and ground meat, as well as conveniently packaged frozen products. These products have resulted in a more even distribution of demand for turkey throughout the year. As well, health conscious consumers value turkey meat for its high quality protein that is low in cholesterol and fat.
For further information on the Egg, Chicken and Turkey Sectors in Nova Scotia see “On Nova Scotia Farm Teacher’s Guide to Nova Scotia Agriculture”and visit the respective websites listed on page 47 of this guidebook.
Poultry Trivia
• The average meat chicken consumes approximately 1.8 to 2.0 kg of feed to gain 1 kg of weight.
• Laying hens will start to lay eggs at about 19 weeks of age.
• Chicks normally come out of the big end of the egg. If they come out the small end, the hatching of the chick may be difficult or unsuccessful.
• Did you know that turkey and duck eggs take 28 days to hatch while chickens hatch in 21 days?
• According to a research study at Iowa State University a sitting hen will “turn” (shift) her eggs an average of 96 times in 24 hours.
• Brown and white shelled eggs are equally nutritious.
• The use of hormones in poultry is not legal in Canada.
• Commercial incubators turn eggs hourly.
18
19
• Table eggs are candled to determine the condition of the air cell, yolk and white; to detect blood spots, or meat spots.
• All chickens in Nova Scotia are grain fed, usually a blend of wheat, corn, barley and soybean meal, vitamins and minerals.
• Most hens lay an egg every 23–26 hours.
• A maple leaf, with an A in the center, means the poultry product is Canada grade A.
• A mature male chicken is called a rooster; a mature female, a hen. A cockerel is a male chicken under one year of age, while a pullet is a female chicken less than 19 weeks of age. Baby chickens receive the diminutive, chicks.
• A broiler is a young chicken bred for meat, usually weighing between 1.7 and 2.5 kg. It takes 35 to 40 days for the bird to reach this weight. A roaster, also bred for meat, usually weighs about 3 kg and takes about 50 days to reach this weight.
• Chickens do not have teeth to chew their feed. They use an organ, called a gizzard, to grind food into smaller particles for digestion.
• No hormones are used in the production of chicken in Nova Scotia. In fact, the use of hormones in poultry feed has not been allowed in Canada since the 1970s.
• The most common laying hen in Nova Scotia is the White Leghorn, which lays white eggs. Rhode Island Red hens produce brown eggs, and the province of Nova Scotia has one of the highest percentages of brown egg production in Canada at 14 percent. However, the colour of the shell does not affect the nutritional value of the egg.
• Hens begin laying at about 19 weeks of age and continue for about 12 months. On average, a hen lays about 300 eggs during that period.
• There are many types of eggs available to consumers today. Besides ordinary eggs, there are those that come from hens housed or fed in a special way. Specialty types include Omega-3 enhanced eggs, eggs from free-run and free-range chickens, vitamin enhanced eggs, as well as organic and vegetarian eggs.
• Approximately 30% of Nova Scotia's total egg production is shipped to the processing market.
• Male turkeys are called toms; females, hens; and the young, poults.
• A snood is a distinctive fleshy growth that hangs down over the beak of a turkey. Both toms and hens have the growth, but the snood of toms is larger than that of hens.
• A wattle is a fleshy part on the throat of the turkey. It is used in warm environments to dispel excess body heat.
20
Activity 1: A Web of Knowledge
Subject areas: science, language arts
Grades: all
Objective: Students will learn about hatching eggs and the poultry industry.
Materials: chart paper and markers
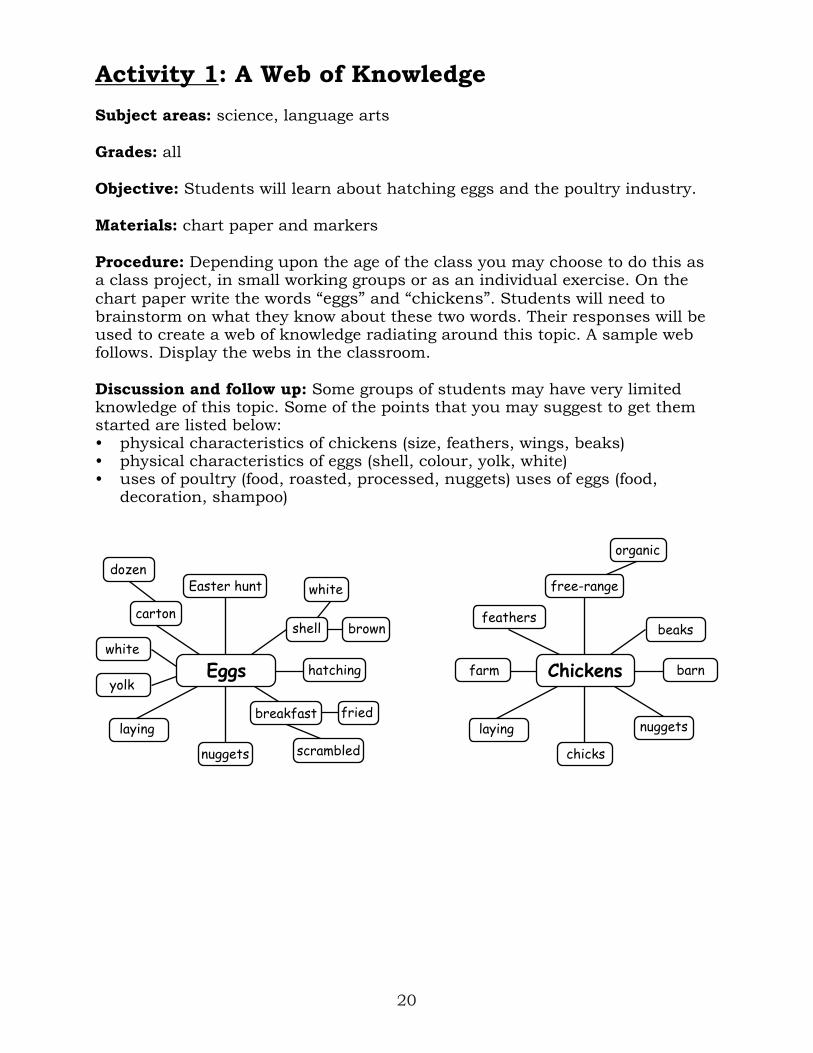
Procedure: Depending upon the age of the class you may choose to do this as a class project, in small working groups or as an individual exercise. On the chart paper write the words “eggs” and “chickens”. Students will need to brainstorm on what they know about these two words. Their responses will be used to create a web of knowledge radiating around this topic. A sample web follows. Display the webs in the classroom.
Discussion and follow up: Some groups of students may have very limited knowledge of this topic. Some of the points that you may suggest to get them started are listed below:• physical characteristics of chickens (size, feathers, wings, beaks)• physical characteristics of eggs (shell, colour, yolk, white)• uses of poultry (food, roasted, processed, nuggets) uses of eggs (food,
decoration, shampoo)
Chickens
feathers
free-range
barn
chicks
nuggets
farm
organic
beaks
laying
Eggs
carton
Easter hunt
hatching
nuggets
breakfast
yolk
brown
laying
dozen
white
white
shell
fried
scrambled

21
Activity 2: “Know The Parts of An Egg”
SUBJECT AREAS: language arts, science
GRADES: primary and up
OBJECTIVE: Students will observe the composition of an egg and will learn to identify the parts of the egg.
MATERIALS: fresh eggs, hard-cooked eggs, saucers, student activity sheets coloured pencils and magnifying glasses (optional).
PROCEDURE: Crack open a fresh egg into a saucer and try to locate all the parts: shell, shell membranes (inner and outer), albumen, yolk, air cell, blastoderm, vitelline membrane and chalazae. Have students examine the yolk and the white with vitelline membrane and chalazae. Have students find the papery white “skin” that is stuck to the shell and peel some of it off. Examine it and then let it dry five minutes. Reexamine it. Crack and peel a hard-cooked egg. Try to locate all parts. Students may complete one of the activity sheets on egg parts. Older students may wish to draw their own diagram of the egg.
DISCUSSION AND FOLLOW UP: Discuss with students what they discovered while examining the eggs. Could they identify all the parts on the fresh egg? Could they identify all the parts on the hard-cooked egg? Why or why not? Was the papery white skin stretchy? What was it like after five minutes? How had it changed? How did the different parts of the egg feel when they touched them? Which parts of the egg do we eat? Do you know the function of each part?
Yolk
Blastodisk
Albumen
Vitelline membrane
Outer shell membrane
Inner shell membrane
Shell
Chalaza
Air cell
It is important that students understand there are two different types of eggs that look identical — eggs for hatching and eggs for consumption. Eggs for consumption (bought at retail)are not fertilized so they will never contain an embryo and cannot be incubated to hatch a chick.
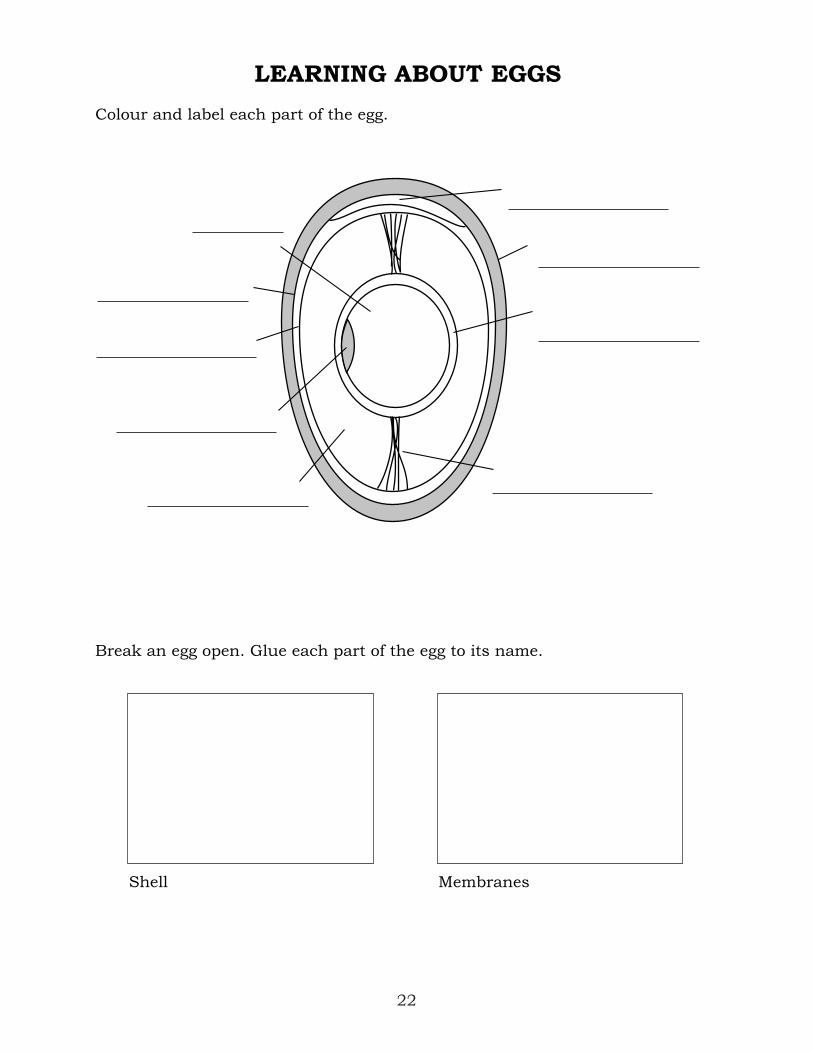
LEARNING ABOUT EGGS
Colour and label each part of the egg.
Break an egg open. Glue each part of the egg to its name.
Shell Membranes
22
Activity 3: Learning About Incubation
SUBJECT AREAS: language arts, science, math
GRADES: all grades
OBJECTIVE: Students will gain an understanding of factors that are important in the incubation of eggs.
MATERIALS: incubation record sheet and pencil
PROCEDURE: Make a copy of the incubation record sheet and have students responsible for completing it daily. Teachers may wish to complete it with the class in the younger age groups.
DISCUSSION AND FOLLOW UP: Discuss the importance of temperature, humidity, ventilation and turning of the eggs with the students. Have younger students count the number of eggs set. Younger students can also count the number of days until the eggs hatch. Students should also be encouraged to keep individual journals on the incubation and chick hatching. Younger students may wish to keep their work in a chicken-shaped portfolio. Primary students can follow the process by using a calendar and recording an interesting fact or observance each day.
Additional activities may include the “Poultry- What have you learned?” worksheet and/or the crossword puzzle.
23
It is important that students understand there are two different types of eggs that look identical — eggs for hatching and eggs for consumption. Eggs for consumption (bought at retail)are not fertilized so they will never contain an embryo and cannot be incubated to hatch a chick.
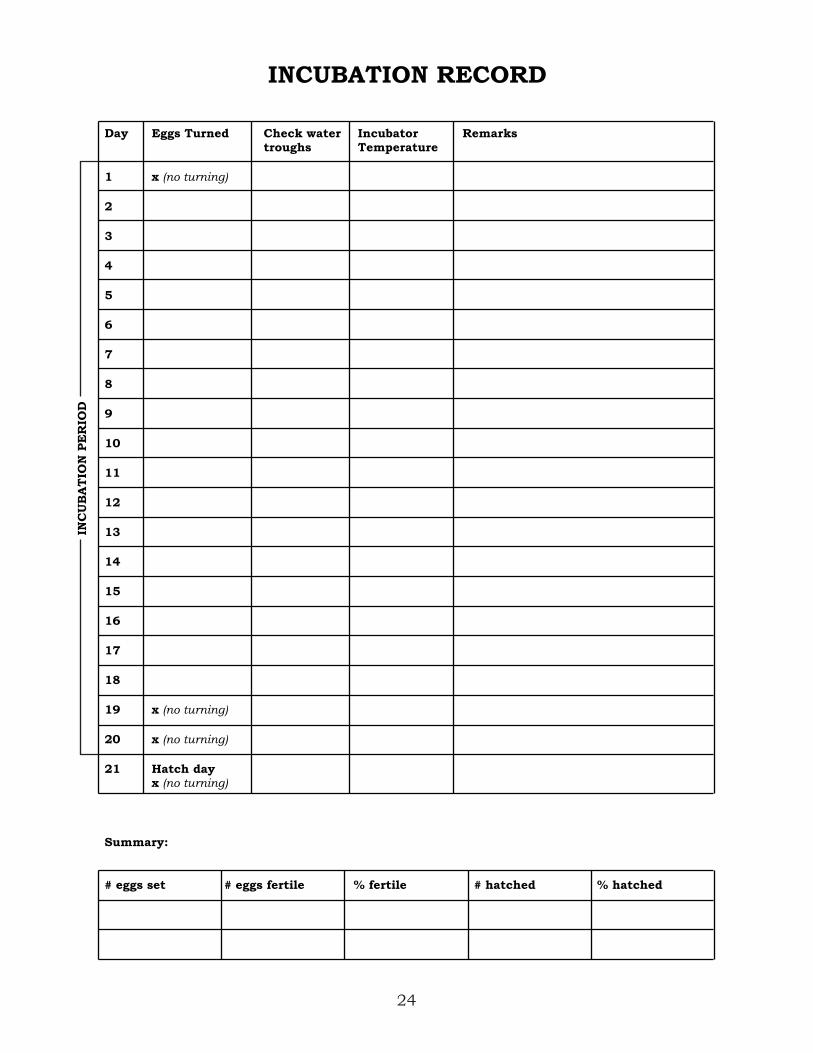
INCUBATION RECORD
Day Eggs Turned Check water Incubator Remarkstroughs Temperature
1 x (no turning)
2
3
4
5
6
7
8
9
10
11
12
13
14
15
16
17
18
19 x (no turning)
20 x (no turning)
21 Hatch dayx (no turning)
Summary:
# eggs set # eggs fertile % fertile # hatched % hatched
24
INC
UB
AT
ION
PE
RIO
D

Poultry - What Have You Learned?
Match the word on the left with the correct phrase on the right. Write the letter of the matching phrase on the line provided by the word.
_____ 1. Incubator a. female chicken
_____ 2. Chick b. the hard outer surface of an egg
_____ 3. Yolk c. how a chick breaks through the shell
_____ 4. Humidity d. tiny sharp projection on a chick’s beak
_____ 5. Thermometer e. the red part on top of a chicken’s head
_____ 6. Broiler f. air space between the two shell membranes
_____ 7. Hen g. building where chicks are hatched
_____ 8. Poult h. soft, fine, hair-like feathers
_____ 9. Egg tooth i. a male chicken
_____ 10. Rooster j. yellow part of the egg
_____ 11. Candling k. equipment used to hatch eggs
_____ 12. White l. a baby chicken
_____ 13. Hatchery m. a meat type chicken
_____ 14. Brood box n. moisture in the air
_____ 15. Layer o. observing inside the egg with a bright light
_____ 16. Down p. instrument used to measure temperature
_____ 17. Shell q. temporary home with feed, water and heat
_____ 18. Pip r. colourless part of the egg
_____ 19. Comb s. hens for egg production
_____ 20. Air cell t. baby turkey
25
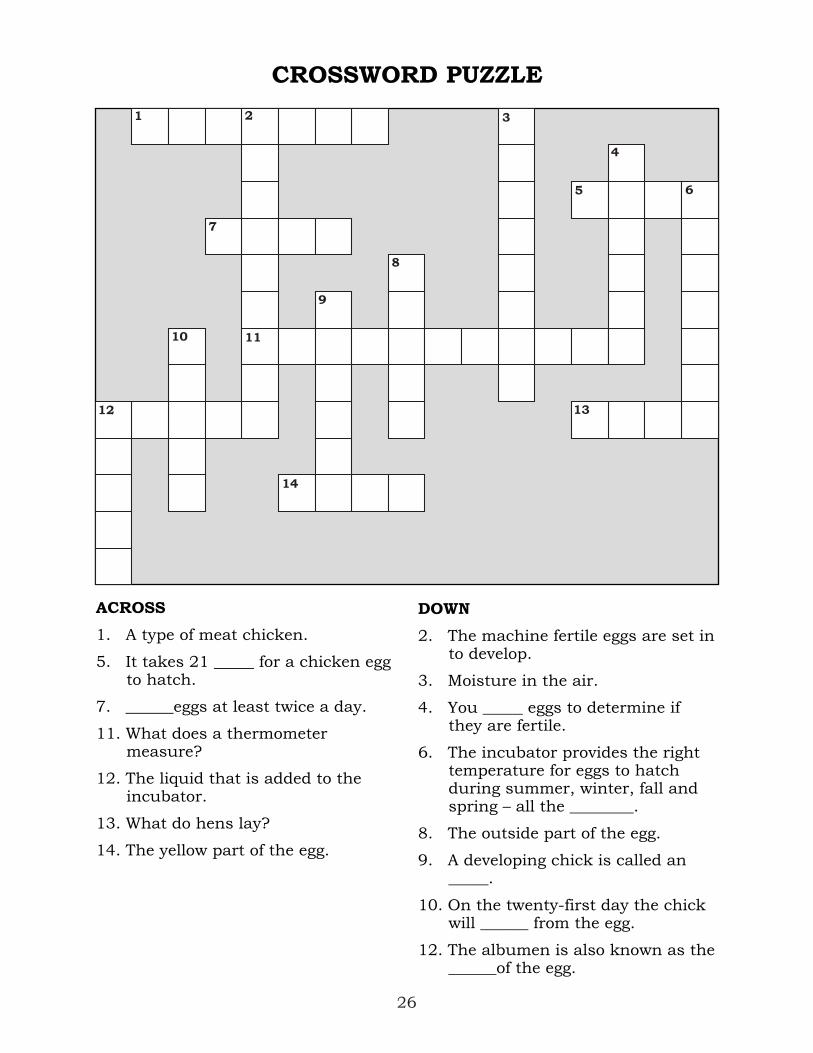
ACROSS
1. A type of meat chicken.
5. It takes 21 _____ for a chicken egg to hatch.
7. ______eggs at least twice a day.
11. What does a thermometer measure?
12. The liquid that is added to the incubator.
13. What do hens lay?
14. The yellow part of the egg.
CROSSWORD PUZZLE
1 2
7
10
12
11
9
8
14
5
4
6
3
13
DOWN
2. The machine fertile eggs are set in to develop.
3. Moisture in the air.
4. You _____ eggs to determine if they are fertile.
6. The incubator provides the right temperature for eggs to hatch during summer, winter, fall and spring – all the ________.
8. The outside part of the egg.
9. A developing chick is called an _____.
10. On the twenty-first day the chick will ______ from the egg.
12. The albumen is also known as the ______of the egg.
26

Activity 4: Learning About Chicks
Subject areas: language arts, science
Grades: all grades
Objective: Students will learn about the development and growth of chicks.
Materials: pencils and chick check list, scale (optional)
Procedure: Have students observe the chicks and record their observations on the chick check list. The chart can be completed as a class exercise, in working groups or as an individual project. Students may also wish to weigh the chicks and calculate how much they grew during their time in class.
Discussion and follow up: Can you identify the egg tooth? At the end of the week is the egg tooth still present? How long was it before the chicks began to eat? Did they eat more at the end of the week than the start? How much weight did the chick gain? Try weighing how much food the chicks ate. Then calculate how much food (grams) is needed to gain a gram of weight. When can you notice feather changes? Are you able to feathersex the chicks? When did you move the chicks to the brood box?
27

CHICK CHECK LIST
What to look for: # of days old
Feather change
Presence of egg tooth
How long before chicks start eating?
Weight of newborn chick
Weight of 3-day-old chick
Other Observations:
28

Activity 5: Egg Hatching Game
Subject areas: language arts, science, math
Grades: 2–6
Objective: Students will gain an understanding of factors that influence the hatchability of eggs, as well as learn about the stages of embryology.
Materials: game board, 12 paper eggs per participant, coin and markers
Procedure: Have students play the game individually or in small groups. Each participant starts with 12 eggs. Students can cut egg shapes out of scrap paper. The students flip a coin to determine how many spaces they move. Heads moves 2 spaces while tails moves 1. The students keep track of their eggs throughout the game placing lost eggs to one side. The student or team with the most eggs at the end of the game is declared the winner.
Discussion and follow up: What factors caused you to lose eggs? Which of these factors can be controlled by humans? Which ones are out of our control? What does the term “clear egg ” mean? What is the
29
It is important that students understand there are two different types of eggs that look identical — eggs for hatching and eggs for consumption. Eggs for consumption (bought at retail)are not fertilized so they will never contain an embryo and cannot be incubated to hatch a chick.

DAY 1Heart
is beating
DAY 7Feathers
have startedto form
Removeback
vent plug
Wings &legs havestartedto grow
Forgot tocheck
thermometeraccuracyLOSE 1
EGG
DAY 5Egg tooth
beginsto form
Forgot toadd waterLOSE 1
EGG
DAY 21Movechicks
to broodbox
DAY 20Eggs startto hatch
Forgot tofill bothwater
troughsLOSE 1
EGG
DAY 18 Chick gets into hatching position
Checkedtemperature
GOAGAIN
DAY 9Embryo is
beginning toresemblea chick
Candled eggsremoved clear
onesLOSE 1
EGG
DAY 12Chickdown
is present
Forgot toturn eggsLOSE 1
EGG
Forgot tocheck
temperatureLOSE 1
EGG
Candledeggs
removedduds
LOSE 1EGG
Forgot towash hands
LOSE 1EGG
Rememberedto stop
turning eggs
Rememberedto add warm
water
GOAGAIN
GOAGAIN
STARTBegin with
12 eggs
EGG HATCHING GAME
Heads - move 2 spacesTails - move 1 space
WINNER!
EGG HATCHING GAME
30

Activity 6: Learning About Temperatures
SUBJECT AREAS: language arts, mathematics
GRADES: primary – 3
OBJECTIVE: Students will learn to read a thermometer and gain an understanding of temperatures.
MATERIALS: indoor and outdoor thermometers, red pencil or crayon, and the Learning About Thermometers worksheet
PROCEDURE: Examine a thermometer with the students. Show students how to read the thermometer. Take the temperature of the classroom, outdoors and the brooder. Read the thermometer in the incubator. Students will colour the temperatures recorded on their worksheets.
DISCUSSION AND FOLLOW UP: Discuss with the students what thermometers are used for. Have them name some other times thermometers are used. (eg. when someone has a fever) At what temperature should the incubator be maintained? What happens to the incubator temperature when the cover is lifted? What do you think would happen if we added cold water to the moisture troughs? Where did you find the lowest temperature? What was the highest temperature? Which temperatures should remain constant? Which temperatures will probably change during the day?
31
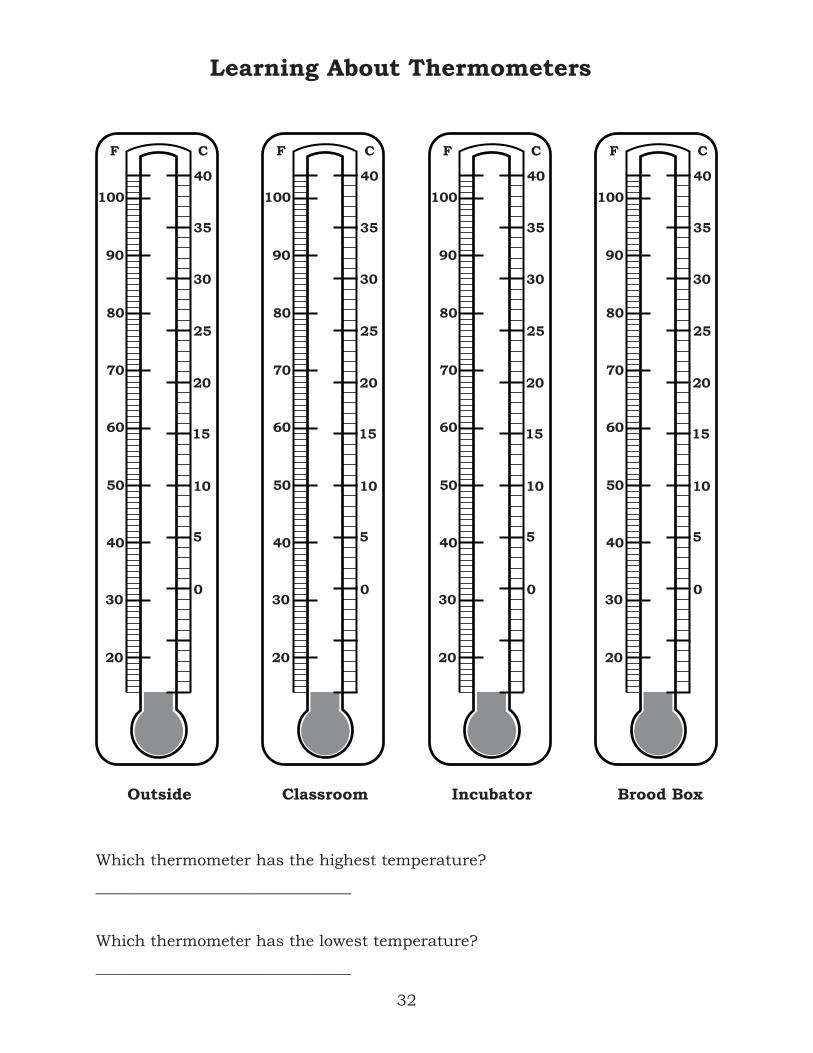
Learning About Thermometers
Outside Classroom Incubator Brood Box
Which thermometer has the highest temperature?
________________________________
Which thermometer has the lowest temperature?
________________________________
32
100
90
70
60
50
40
30
80
F
35
40
25
30
15
20
5
10
0
C
20
100
90
70
60
50
40
30
80
F
35
40
25
30
15
20
5
10
0
C
20
100
90
70
60
50
40
30
80
F
35
40
25
30
15
20
5
10
0
C
20
100
90
70
60
50
40
30
80
F
35
40
25
30
15
20
5
10
0
C
20

Activity 7: Where Do I Live ?
SUBJECT AREAS: language arts, social studies
GRADES: 2–6
OBJECTIVE: Students will gain an understanding of their habitat as well as the similarities and differences between their homes and poultry barns.
MATERIALS: paper, pencils and Housing Comparison Chart
PROCEDURE: Have students draw a picture of their home. Show students a picture of a poultry barn. Let students examine the two buildings. Have students complete the worksheet entitled “Housing Comparison Chart”.
DISCUSSION AND FOLLOW UP: What are the similarities of the two structures? What are the differences? Students may also be encouraged to make a model of a barn which would include the feed tank, feeders, drinkers and fans.
HOUSING COMPARISON CHART
Requirements Human Chicken
Heat
Light
Protection
How is food brought in
Air
Water (source of)
How is it cleaned
Other
33

Activity 8: How Strong are Eggs?
SUBJECT AREAS: science, mathematics
GRADES: all grades
OBJECTIVE: Students will discover how strong an egg is. Note: This activity will be done using table eggs, so it is another opportunity to distinguish between the table eggs and the hatching eggs.
MATERIALS: table eggs, masking tape, scissors, hardcover books, scale
PROCEDURE: Take your eggs and break them so that you have four egg shell halves that are the same size. Wrap masking tape around the broken edges. Cut the jagged, taped edges off so the shell will sit on a flat surface. Form a square with the shells and gently place a book on top of the eggs. Carefully add more books to the pile until one of the eggs cracks. Use the scale to determine the weight of the books used.
DISCUSSION AND FOLLOW UP: How many books did the egg shells support?How much weight were the egg shells able to support? This experiment demonstrates an architectural theory. Do you know what this theory is? Can you think of any other theories that are demonstrated in agriculture?
Another method for younger students to see how strong eggs are is to hold the egg upright between the palms of their hands and squeeze it. It will not break unless it has a crack in it. Students can then discuss why they were unable to break the egg.
A third method for testing the strength of eggs is to use 4 eggs and, with the assistance of modeling clay to support the eggs, form a square with the eggs and place a board on top. Books are then piled on top of the board. If you choose to use this method it is advisable to place a drop cloth beneath the eggs.
34

Activity 9: Learning About Egg Production
SUBJECT AREAS: language arts, social studies, mathematics
GRADES: primary – 6
OBJECTIVE: To gain an understanding of the egg industry and how the egg gets from the farm to your home.
MATERIALS: student activity sheets and pencils
PROCEDURE: Have students complete one or more of the following activity sheets: The Egg’s Journey and The Amazing Egg: From Hen to Home
DISCUSSION AND FOLLOW UP: Discuss the egg’s journey with the students. Why are eggs candled? How are eggs graded? What are some of the jobs created by the egg industry? Weigh some eggs in class and determine what size they are (eg: medium, large) What size of egg is the most popular? What do you think happens to the peewees?
Note: It is important that student’s understand that this is the journey of the table eggs (bought at the grocery store) not the hatching type eggs.
THE EGG’S JOURNEY
Follow the egg’s journey from beginning to end.
These sentences are mixed up. You put them in the correct sequences, from 1-10.
___ 1. The egg is washed to keep it fresh.
___ 2. The cleaned egg is passed over a strong light (candled) to determine if it is grade “A”.
___ 3. You buy the egg at the store along with the other eggs in the carton. You take them home and refrigerate them.
___ 4. Grade “A” eggs are weighed and put into cartons with eggs of the same size (small, medium, large and extra-large).
___ 5. The refrigerated truck picks up the egg and stores it in a safe place.
___ 6. The farmer collects the egg and stores it in a safe place.
___ 7. A random choice of eggs are inspected by an inspector.
___ 8. The refrigerated truck picks the egg up in a carton and delivers it to the store.
___ 9. You prepare the egg in your favorite way for lunch and eat it!
___ 10. The hen lays the egg.
35

- THE A*MAZE*ING EGG: FROM HEN TO HOME -
Below are the steps that the egg follows on the journey from the hen to home.Number the pictures to show the same order. Trace the steps through the maze until the egg reaches your refrigerator. Don`t get lost along the way!
1. Laying 4. Treating 7. Sorting 10. Shipping2. Collecting 5. Candling 8. Packing 11. Selling3. Washing 6. Grading 9. Cooling 12. Storing
FO RSA L E
eggs
eggs
X - LARGE
MEDIUM
LARGE
SMALL
eggs
EGGSEGGS
36

MATCH THE EGG TO ITS SIZE
• Extra Large
• Medium
• Jumbo
• Pee Wee
• Large
• Small
less than41 grams
42-48 grams
49-55 grams
56-62 grams
63-69 grams
70 gramsor more
37

Activity 10: Learning About Chicken Production
SUBJECT AREAS: language arts, social studies, mathematics
GRADES: all grades
OBJECTIVE: To gain an understanding of the chicken industry and how the chicken gets from the farm to your plate.
MATERIALS: paper and pencils
PROCEDURE: Ask one student to volunteer to be a chicken. Find another volunteer to be a chicken nugget. Each of the remaining students will write an occupation on a piece of paper (every student is to have a different job). Younger students can brain storm about the various occupations that would be needed. Once all the students have an occupation then they need to find their place in the chain between the chicken and the nugget. After all the students have found their place, they can share with the class who they are.
DISCUSSION AND FOLLOW UP: Discuss the chicken’s journey with the students. Have students discuss the various occupations they came up with. Did they realize that so many people are involved in the food chain? Did they consider secondary occupations such as accountants? What are some other secondary occupations involved with agriculture? What would happen if some of the jobs were removed from the chain? What portion of the price of the nuggets do you think the farmer receives?
Students may also wish to complete one of the following activity sheets on chicken production.
38
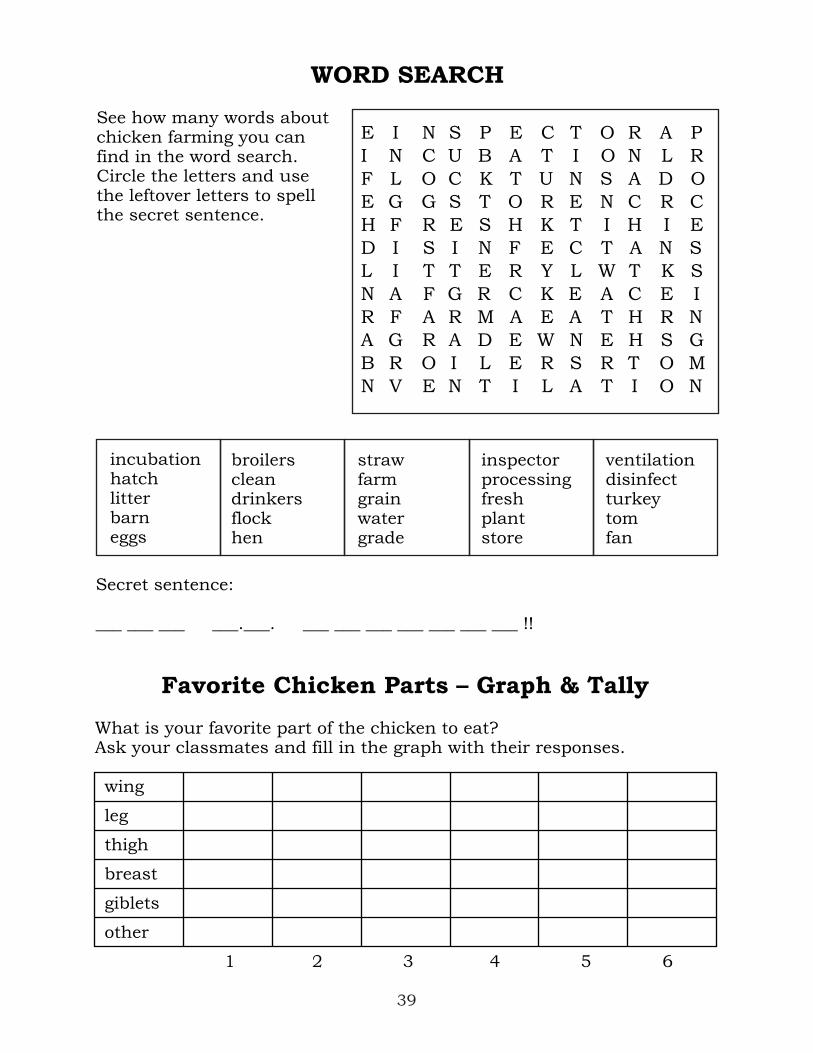
WORD SEARCH
See how many words aboutchicken farming you canfind in the word search.Circle the letters and usethe leftover letters to spellthe secret sentence.
Favorite Chicken Parts – Graph & Tally
What is your favorite part of the chicken to eat?Ask your classmates and fill in the graph with their responses.
wing
leg
thigh
breast
giblets
other
1 2 3 4 5 6
E I N S P E C T O R A PI N C U B A T I O N L RF L O C K T U N S A D OE G G S T O R E N C R CH F R E S H K T I H I ED I S I N F E C T A N SL I T T E R Y L W T K SN A F G R C K E A C E IR F A R M A E A T H R NA G R A D E W N E H S GB R O I L E R S R T O MN V E N T I L A T I O N
39
incubationhatchlitterbarneggs
broilerscleandrinkersflockhen
strawfarmgrainwatergrade
inspectorprocessingfreshplantstore
ventilationdisinfectturkeytomfan
Secret sentence:
___ ___ ___ ___.___. ___ ___ ___ ___ ___ ___ ___ !!

Activity 11: Raw Eggs or Cooked?
SUBJECT AREAS: language arts, science
GRADES: primary and up
OBJECTIVE: If you could not crack the egg how could you tell if it has been cooked or not?
MATERIALS: fresh eggs, hard-cooked eggs
PROCEDURE: Have students examine the eggs and try to determine which one is cooked and which one is not. If students are having difficulty suggest that they try spinning the eggs. Have the students note or record their observations. Have students touch the eggs as they spin.
DISCUSSION AND FOLLOW UP: What were the differences in the way the two eggs spun? (the raw egg should wobble when spun because the insides do not spin with the shell) What happened when you touched the uncooked egg as it was spinning? What happened when you touched the spinning hard cooked egg? What was the difference? Why do you think this occurred?
Can you think of other ways to differentiate between the two eggs? Try candling the two eggs. What difference did you notice when you candled?
40

Activity 12: Fresh or Stale Eggs?
SUBJECT AREAS: mathematics, science
GRADES: 4 and up
OBJECTIVE: If students were unable to taste or smell the eggs, how could they determine if they are fresh or stale?
MATERIALS: Fresh table eggs, stale table eggs (to ensure the eggs are stale, leave them on the counter for two weeks), scale, 750–1000 mL graduated cylinder, water, spoon, pencil and paper.
PROCEDURE: Have students weigh the egg in grams. This will be the mass of the egg. Pour some water into the cylinder and record the volume in mL. Put the egg into the graduated cylinder and record the new volume. The difference between the two measurements is the volume of the egg. Use the formula: density= mass/volume (d=m/v). This will enable the students to determine the density of the egg. Repeat this procedure with all the eggs.
DISCUSSION AND FOLLOW UP: Do fresh eggs and stale eggs have the same or different densities? Did your eggs float or sink? Why do you think there was a difference? What must a farmer do to ensure the eggs stay fresh? What happens to an egg as it goes stale? Try candling the eggs to determine which is fresh and which one is stale. What do you observe about the air cell when you candle?
Try adding salt to the water to make it heavier, or more dense, than the egg. This should cause fresh eggs to float. With a bit of experimenting, you can add just enough salt to make the egg float halfway in the glass.
41
NOTE: Table eggs should be stored in their original carton in the main body of the refrigerator and not the refrigerator door.
Activity 13: Tying Chicken Bones in Knots
SUBJECT AREAS: science, health
GRADES: 2–8
OBJECTIVE: To gain an understanding of the importance of calcium in diets.
MATERIALS: large glass container with cover or plastic wrap, vinegar, chicken bones in various sizes
PROCEDURE: Clean and dry the chicken bones. Put the chicken bones in the glass container and pour the vinegar over the bones until they are completely covered. Place plastic wrap, or a cover, over the container. Find a location for the container where it will not be disturbed. Leave the bones in the vinegar for 3 or 4 days. Remove the bones from the vinegar and try to tie them in knots.
DISCUSSION AND FOLLOW UP: What makes bones strong? What happened to the calcium in the bones when they were placed in the vinegar? Where did the calcium go? Set the bones aside to dry. When they are dry do they get hard again? Why? What form does the calcium take after the bones dry? Are the bones brittle? Compare them to bones that have not been in vinegar. How do we get calcium for our bones? Where do chickens get calcium to make bones? What are some good sources of calcium?
42
Vinegar is a mild acid that can dissolve calcium in the bone. When the calcium is dissolved only the soft
tissue of the bone remains.
Activity 14: Egg Vacuum
SUBJECT AREAS: science
GRADES: 3 and up
OBJECTIVE: Students will learn how to evacuate an egg using laws of physics.
MATERIALS: two-litre plastic pop bottle, modeling clay, eggs, water, needle, large bowl, hole punch
PROCEDURE: Punch a hole in the bottom of the pop bottle. Pierce the egg shell at both ends. Using the needle scramble the yolk inside the egg. With the clay form a ring around the mouth of the bottle that will support the large end of the egg. Fill the bottle with water (seal the bottom hole with your finger). Fit the large end of the egg onto the clay mouth of the bottle. Holding the egg firmly in place, release a stream of water from the hole in the bottle.
DISCUSSION AND FOLLOW UP: What happened to the egg when the water stream began? What do you think caused this? Try releasing and covering the top hole in the egg. What happens? Does the level of water lower at a constant rate? Did air leak around the hole in the shell of the egg? Would changing the size of the hole in the pop bottle alter the speed at which the egg emptied? Would changing the size of the bottle alter the experiment?
43
Activity 15: Careers in the Poultry Industry
SUBJECT AREAS: language arts, social studies
GRADES: 10–12
OBJECTIVE: Students will gain an awareness of the job opportunities that are available in the poultry industry.
PROCEDURE: Have students research job opportunities that are available in the poultry industry. Students should share their reports with the rest of the class.
DISCUSSION AND FOLLOW UP: Some of the fields that the students may wish to investigate are genetics, pharmaceuticals, nutrition, engineering, production, food sciences, processing and agri-business.
Did the students realize that there were so many professional jobs connected to the poultry industry ? What types of training, or education, would be required for each job ? Where could one go to acquire the necessary skills ?
44
Additional Activities
egg carton art
decorating eggs
paint a picture of a chicken using a feather instead of a paint brush
do a mural in the hall or classroom on poultry production or chick hatching
make “hatch announcements” and record the chick’s height and weight
read stories and poems about poultry and eggs
make a picture using different grains
invite a poultry farmer into your class
watch a movie on poultry production
try a favorite recipe that uses poultry or eggs
make an egg shell mosaic
make egg animals
plant wheat or grass in an eggshell (draw a face on the shell) the grass will become the hair
OLDER STUDENTS
look at the nutritive value of eggs and/or chicken and/or turkey
design or build your own incubator
determine the costs involved in raising poultry
design and construct your own candler
read and outline an article on embryology
invite a veterinarian into the class
investigate the various by products of the poultry and egg industries
have a poultry producer come speak to the class
write a report on the value of poultry manure – you could call it “the smell of wealth”
look at the holiday traditions surrounding eggs, turkey and chicken
collect ethnic recipes that feature poultry and eggs – perhaps you could even try a few
45

46
Answer Sheet
Activity 3:Poultry - What HaveYou Learned?1. k2. l3. j4. n5. p6. m7. a8. t9. d10. i11. o12. r13. g14. q15. s16. h17. b18. c19. e20. f
Activity 3:Crossword PuzzleACROSS1. broiler5. days7. turn11. temperature12. water13. eggs14. yolk
DOWN2. incubator3. humidity4. candle6. seasons8. shell9. embryo10. hatch12. white
E I N S P E C T O R A PI N C U B A T I O N L RF L O C K T U N S A D OE G G S T O R E N C R CH F R E S H K T I H I ED I S I N F E C T A N SL I T T E R Y L W T K SN A F G R C K E A C E IR F A R M A E A T H R NA G R A D E W N E H S GB R O I L E R S R T O MN V E N T I L A T I O N
Activity 10: Word Search
E A T N S C H I C K E N
Activity 9:The Egg’s Journey1. 32. 43. 94. 65. 76. 27. 58. 89. 1010. 1
Activity 9:Match the Egg to its SizeExtra Large (63-69 g)Medium (49-55 g)Jumbo (70 g or more)Pee Wee (less than 41 g)Large (56-62 g)Small (42-48 g)

47
Web Sites Worth VisitingBelow are some good web sites to enhance your chick hatch experience.
www.nschicken.com – Chicken Farmers of Nova Scotia
www.nsegg.ca – Nova Scotia Egg Producers
www.turkeyfarmersofnovascotia.com – Nova Scotia Turkey Producers
chicken.ca – Chicken Farmers of CanadaHere you will find information on the association, chicken production in Canada, recipes and cooking tips.
www.eggs.ca – Egg Farmers of CanadaThe site contains sections on the egg industry, market information, recipes, nutritional information, educational activities and children’s activities. An excellent site well worth the visit.
www.turkeyfarmersofcanada.ca – Canada’s Turkey FarmersThe site contains sections entitled, everything you wanted to know about Canadian turkey, recipes, cooking tips, food safety and links to turkey professionals.
– Further Poultry Processors Association of Canada. This site includes information on who they are, company profiles, product lines, suppliers, food safety and labelling.
www.poultryconnection.comAn informative site which contains numerous links and information relating to the poultry industry.
chickscope.beckman.uiuc.eduA website designed for the highschool classroom that has access to the internet. Using classroom computers, students and teachers are able to access data generated from the latest scientific instruments.
www.agr.gc.ca – Agriculture and AgriFood Canada.
novascotia.ca/agri/ – Nova Scotia Department of Agriculture, this site can connect you to the web page of the Nova Scotia Agricultural Awareness Committee.
www.learnagriculture.orgThis site has an extensive AgLinks library.
www.sci-ctr.edu.sg/There are numerous excellent science sites on the web, offering help with topics like animal classification and growth development. This website serves as a good starting point in searching the web.
www.lancaster.unl.edu/4h/Embryology/University of Nebraska-Lincoln - (includes an “Egg cam” with a live camera in an incubator & much more) -
www3.sympatico.ca/fppac/
Canadian Egg Producers
? Egg Farmers of Canada
48
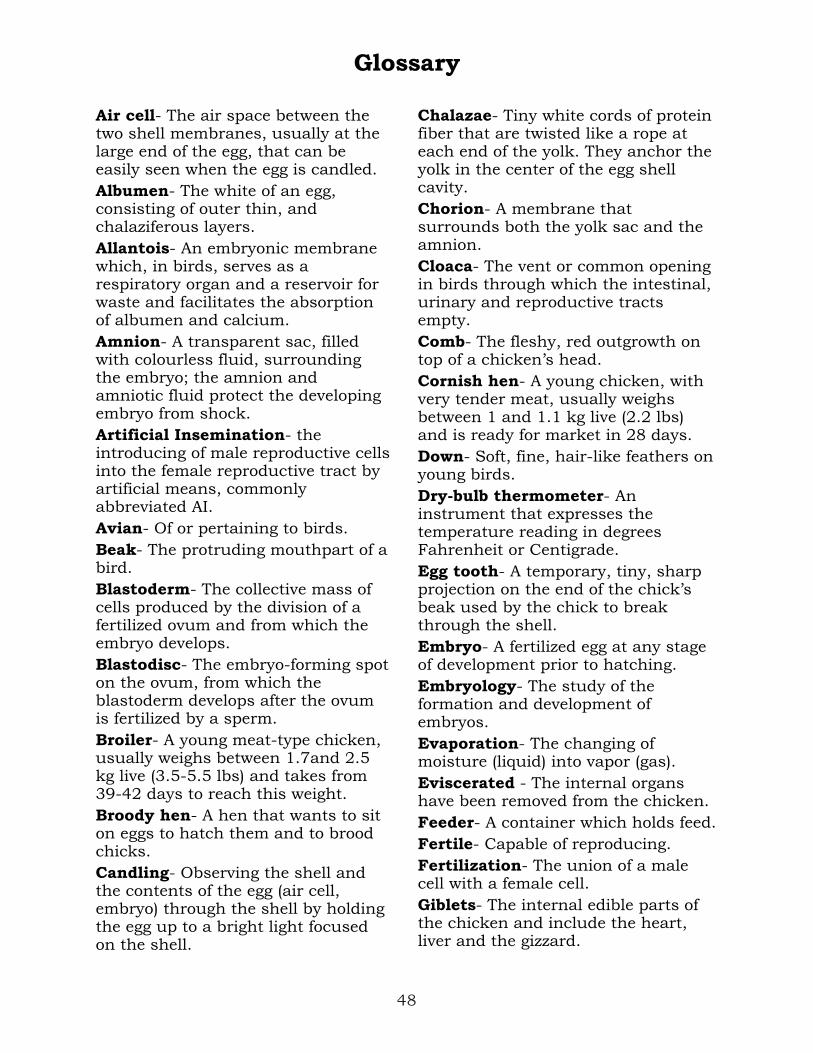
Glossary
Air cell- The air space between the two shell membranes, usually at the large end of the egg, that can be easily seen when the egg is candled.
Albumen- The white of an egg, consisting of outer thin, and chalaziferous layers.
Allantois- An embryonic membrane which, in birds, serves as a respiratory organ and a reservoir for waste and facilitates the absorption of albumen and calcium.
Amnion- A transparent sac, filled with colourless fluid, surrounding the embryo; the amnion and amniotic fluid protect the developing embryo from shock.
Artificial Insemination- the introducing of male reproductive cells into the female reproductive tract by artificial means, commonly abbreviated AI.
Avian- Of or pertaining to birds.
Beak- The protruding mouthpart of a bird.
Blastoderm- The collective mass of cells produced by the division of a fertilized ovum and from which the embryo develops.
Blastodisc- The embryo-forming spot on the ovum, from which the blastoderm develops after the ovum is fertilized by a sperm.
Broiler- A young meat-type chicken, usually weighs between 1.7and 2.5 kg live (3.5-5.5 lbs) and takes from 39-42 days to reach this weight.
Broody hen- A hen that wants to sit on eggs to hatch them and to brood chicks.
Candling- Observing the shell and the contents of the egg (air cell, embryo) through the shell by holding the egg up to a bright light focused on the shell.
Chalazae- Tiny white cords of protein fiber that are twisted like a rope at each end of the yolk. They anchor the yolk in the center of the egg shell cavity.
Chorion- A membrane that surrounds both the yolk sac and the amnion.
Cloaca- The vent or common opening in birds through which the intestinal, urinary and reproductive tracts empty.
Comb- The fleshy, red outgrowth on top of a chicken’s head.
Cornish hen- A young chicken, with very tender meat, usually weighs between 1 and 1.1 kg live (2.2 lbs) and is ready for market in 28 days.
Down- Soft, fine, hair-like feathers on young birds.
Dry-bulb thermometer- An instrument that expresses the temperature reading in degrees Fahrenheit or Centigrade.
Egg tooth- A temporary, tiny, sharp projection on the end of the chick’s beak used by the chick to break through the shell.
Embryo- A fertilized egg at any stage of development prior to hatching.
Embryology- The study of the formation and development of embryos.
Evaporation- The changing of moisture (liquid) into vapor (gas).
Eviscerated - The internal organs have been removed from the chicken.
Feeder- A container which holds feed.
Fertile- Capable of reproducing.
Fertilization- The union of a male cell with a female cell.
Giblets- The internal edible parts of the chicken and include the heart, liver and the gizzard.

49
Gizzard- An internal organ of birds used for crushing and grinding foods by muscular action and with pebbles or grit.
Gonad- A gland that produces reproductive cells; the ovary or testis.
Hatching eggs- A fertilized egg with the potential for producing a chick.
Incubate- To maintain favourable conditions for developing and hatching fertile eggs.
Incubator- A container with the proper humidity and temperature for hatching fertile eggs.
Infundibulum- The entrance to the oviduct.
Layers- Mature female chickens kept for egg production.
Litter- Any bedding material which provides animals with safe footing, and keeps them warm, clean and comfortable.
Membrane- A thin, soft, pliable sheet or layer of tissue covering an organ.
Navel- The navel is the place where the abdomen closes after surrounding the remains of the yolk.
Ovary- The female reproductive gland in which eggs (ova) are formed.
Oviduct- The tube through which eggs pass after leaving the ovary.
Ovum- The female reproductive cell.
Papilla- In the rooster, tiny projections in the cloaca through which semen is ejected.
Pipping- A baby chick breaking from its shell.
Pores- In the shell of an egg, thousands of minute openings through which gases are exchanged.
Poult- A baby turkey.
Poultry-domesticated fowl raised for meat and eggs, usually chickens and turkeys.
Pullet- A female chicken under 19 weeks of age.
Relative humidity- The amount of moisture in the air compared to the amount the air could contain at that temperature; expressed as a percentage.
Roaster- A young meat-type chicken, of either sex, that can be cooked tender by roasting, and usually weighing about 3 kg live (6.6lbs) and is grown in 50 days.
Sac- A bag like part of an animal or plant, often containing some special fluid.
Semen- The fluid secreted by the male reproductive organs. Serves as a vehicle for the sperm.
Set- To put eggs in an incubator or under a broody hen to hatch them.
Shell- The hard outer surface of an egg made up largely of calcium carbonate.
Shell membranes- Two thin membranes next to the shell and surrounding the albumen and yolk; known as inner and outer shell membranes.
Sperm- The male reproductive cell.
Stewing hen- A mature chicken (generally a laying hen) about one year old, having tougher meat, less fat and more connective tissue than a younger chicken.
Table Eggs- Unfertilized eggs produced for human consumption.
Testes- The male genital glands (singular - testis).
Ventilation- The movement or exchange of stale air for fresh air.
Wattles- The fleshy, red growths that hang from the side and base of the chicken’s beak.
Wet-bulb thermometer- A device that measures moisture or water vapor in the air.
Yolk- The round yellow mass upon which the true egg is located and that provides nutrients for the developing embryo.

50
References
MacGillivray Slade, Charlene A.A. Discover Agricultural Science Projects.Manitoba Agriculture in the Classroom.
North, Mack O. 1984 Commercial Chicken Production Manual. Connecticut: The AVI Publishing Company, INC.
Ontario Egg Producers’ Marketing Board, A Teacher’s Guide to Hatching Eggs in the Classroom. Stromberg, Janet . 1975. A Guide to better hatching. Minnesota: Stromberg Publishing Company.
University of Illinois Extension. Incubation and Embryology.
Virginia Co-operative Extension. Fact sheet: Incubating eggs.
Winstead, Christina S. From Egg to Chick. Cornell Cooperative Extension Publication.
Resources
For an up-to-date list of department regional offices, hatcheries and producer organizations, contact your Agricultural Education Coordinator or visit the website at: www.gov.ns.ca/agri/.
Stromberg, Janet. 1975. A Guide to Better Hatching. Minnesota: Stromberg Publishing Company.
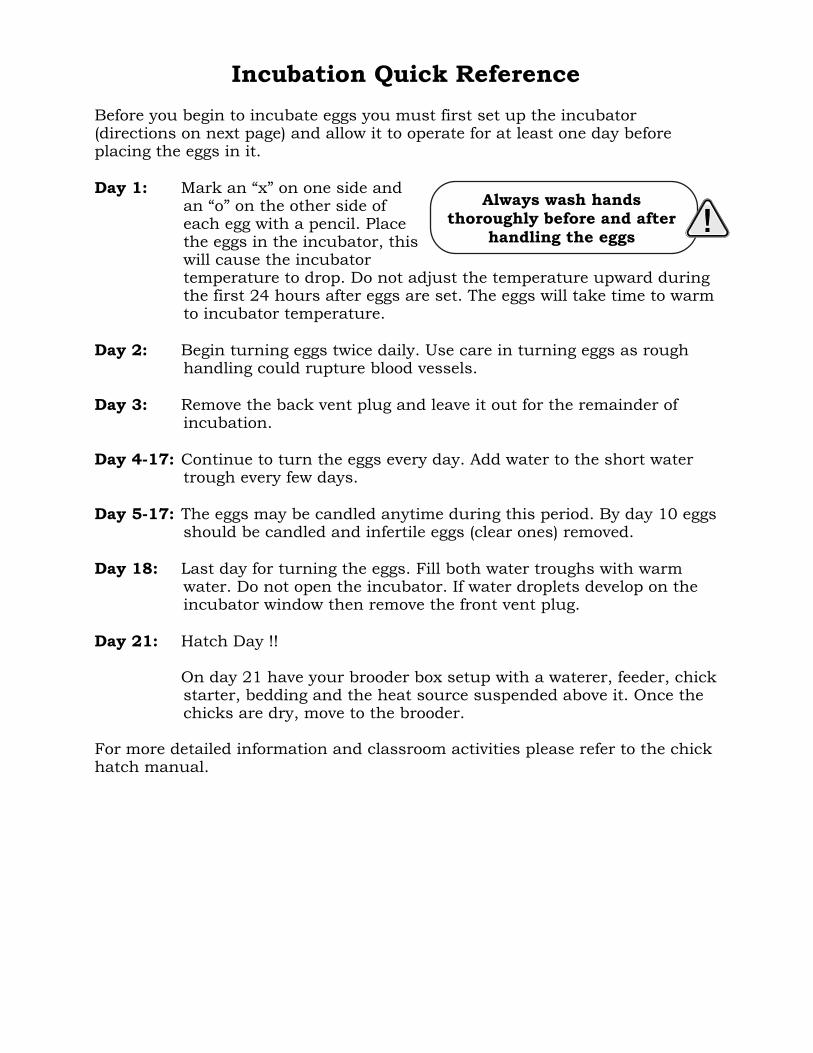
Incubation Quick Reference
Before you begin to incubate eggs you must first set up the incubator (directions on next page) and allow it to operate for at least one day before placing the eggs in it.
Day 1: Mark an “x” on one side and an “o” on the other side of each egg with a pencil. Place the eggs in the incubator, this will cause the incubator temperature to drop. Do not adjust the temperature upward during the first 24 hours after eggs are set. The eggs will take time to warm to incubator temperature.
Day 2: Begin turning eggs twice daily. Use care in turning eggs as rough handling could rupture blood vessels.
Day 3: Remove the back vent plug and leave it out for the remainder of incubation.
Day 4-17: Continue to turn the eggs every day. Add water to the short water trough every few days.
Day 5-17: The eggs may be candled anytime during this period. By day 10 eggs should be candled and infertile eggs (clear ones) removed.
Day 18: Last day for turning the eggs. Fill both water troughs with warm water. Do not open the incubator. If water droplets develop on the incubator window then remove the front vent plug.
Day 21: Hatch Day !!
On day 21 have your brooder box setup with a waterer, feeder, chick starter, bedding and the heat source suspended above it. Once the chicks are dry, move to the brooder.
For more detailed information and classroom activities please refer to the chick hatch manual.
Always wash hands thoroughly before and after
handling the eggs

Directions for Setting up the Hova-bator(circulated air model) Incubator
Note: This is the incubator that is provided in all the Nova Scotia Agricultural Awareness chick hatch kits. If you are using an incubator you acquired elsewhere, then please refer to the directions included with that model.
1. Unpack the incubator from the box. Remove the thermometer, thermostat wafer, wingnut and adjusting screw from the bottom.
2. Set the incubator on a sturdy level table and away from direct sunlight and drafts. It is also desirable to find a location where the risk of being bumped is minimized.
3. Place wire rack in bottom.
4. Fill the shorter of the two moisture troughs (in incubator bottom) with warm water. Place the thermometer on the screen.
5. Place red vent plugs in holes on incubator top. If a vent plug is missing then cover the vent hole with adhesive tape.
6. Attach wingnut to adjusting screw into top and onto wafer on inside top (refer to diagram below).
7. Place top over bottom and plug in incubator. Check the temperature by looking through the window and reading the thermometer.
8. Turn the adjusting screw counter-clockwise to increase the temperature or clockwise to decrease the temperature. For chicken eggs the optimum temperature is 37.5°C (99.5°C). Turn the adjusting screw until this temperature is obtained.
9. Once the desired setting is obtained, tighten the wingnut to secure the setting. The red light will come on when the heat is on. Allow the incubator to operate for at least a day to stabilize the setting before putting in eggs.
THERMOSTAT
Adjusting Screw
Bracket
Wafer
Wingnut
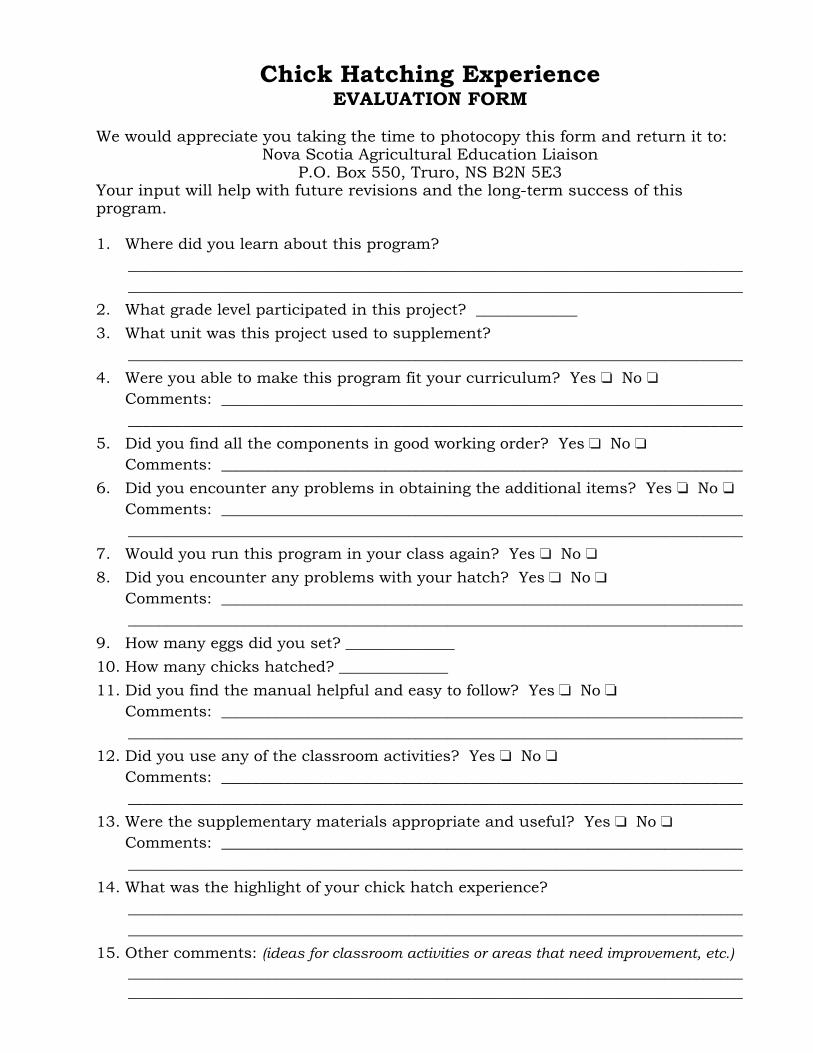
Chick Hatching ExperienceEVALUATION FORM
We would appreciate you taking the time to photocopy this form and return it to:Nova Scotia Agricultural Education Liaison
P.O. Box 550, Truro, NS B2N 5E3Your input will help with future revisions and the long-term success of thisprogram.
1. Where did you learn about this program?
_______________________________________________________________________________
_______________________________________________________________________________
2. What grade level participated in this project? _____________
3. What unit was this project used to supplement?
_______________________________________________________________________________
4. Were you able to make this program fit your curriculum? Yes No
Comments: ___________________________________________________________________
_______________________________________________________________________________
5. Did you find all the components in good working order? Yes No
Comments: ___________________________________________________________________
6. Did you encounter any problems in obtaining the additional items? Yes No
Comments: ___________________________________________________________________
_______________________________________________________________________________
7. Would you run this program in your class again? Yes No
8. Did you encounter any problems with your hatch? Yes No
Comments: ___________________________________________________________________
_______________________________________________________________________________
9. How many eggs did you set? ______________
10. How many chicks hatched? ______________
11. Did you find the manual helpful and easy to follow? Yes No
Comments: ___________________________________________________________________
_______________________________________________________________________________
12. Did you use any of the classroom activities? Yes No
Comments: ___________________________________________________________________
_______________________________________________________________________________
13. Were the supplementary materials appropriate and useful? Yes No
Comments: ___________________________________________________________________
_______________________________________________________________________________
14. What was the highlight of your chick hatch experience?
_______________________________________________________________________________
_______________________________________________________________________________
15. Other comments: (ideas for classroom activities or areas that need improvement, etc.)
______________________________________________________________________________________________________________________________________________________________