Embed Size (px)
Citation preview
CLABSI Caregiver
Toolkit
Clinical Performance Improvement
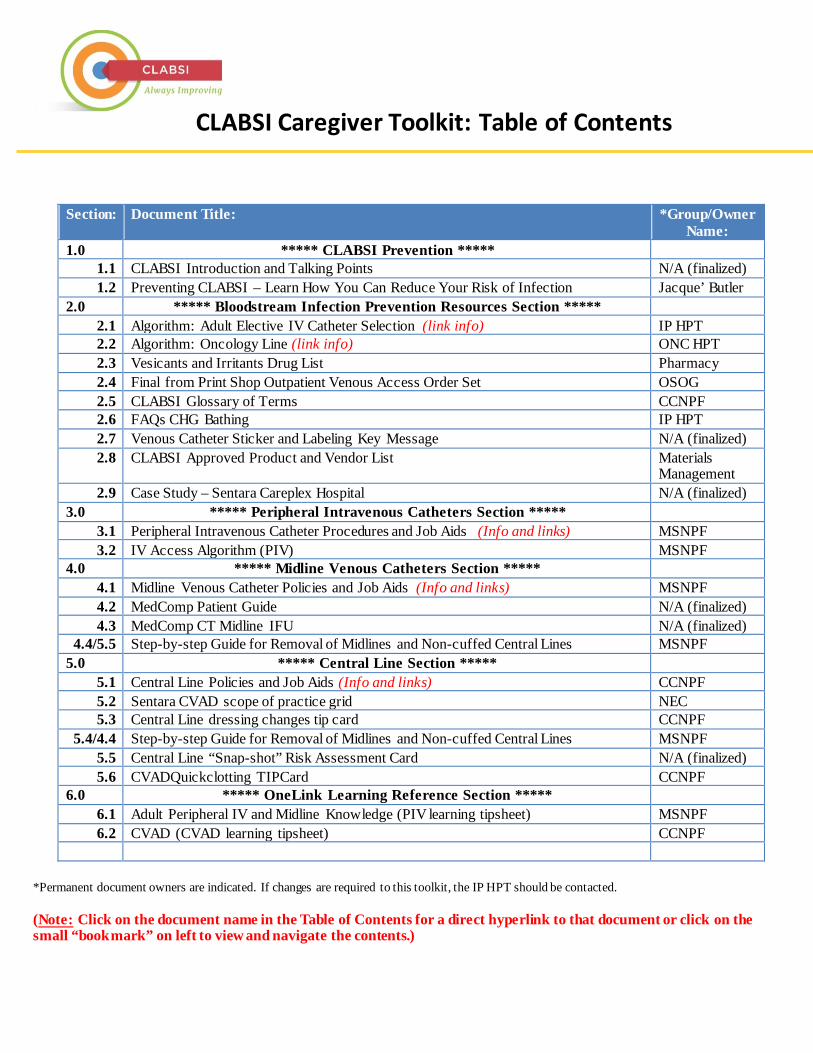
Section: Document Title: *Group/OwnerName:
1.0 ***** CLABSI Prevention ***** 1.1 CLABSI Introduction and Talking Points N/A (finalized) 1.2 Preventing CLABSI – Learn How You Can Reduce Your Risk of Infection Jacque’ Butler
2.0 ***** Bloodstream Infection Prevention Resources Section ***** 2.1 Algorithm: Adult Elective IV Catheter Selection (link info) IP HPT 2.2 Algorithm: Oncology Line (link info) ONC HPT 2.3 Vesicants and Irritants Drug List Pharmacy 2.4 Final from Print Shop Outpatient Venous Access Order Set OSOG 2.5 CLABSI Glossary of Terms CCNPF 2.6 FAQs CHG Bathing IP HPT 2.7 Venous Catheter Sticker and Labeling Key Message N/A (finalized) 2.8 CLABSI Approved Product and Vendor List Materials
Management 2.9 Case Study – Sentara Careplex Hospital N/A (finalized)
3.0 ***** Peripheral Intravenous Catheters Section ***** 3.1 Peripheral Intravenous Catheter Procedures and Job Aids (Info and links) MSNPF 3.2 IV Access Algorithm (PIV) MSNPF
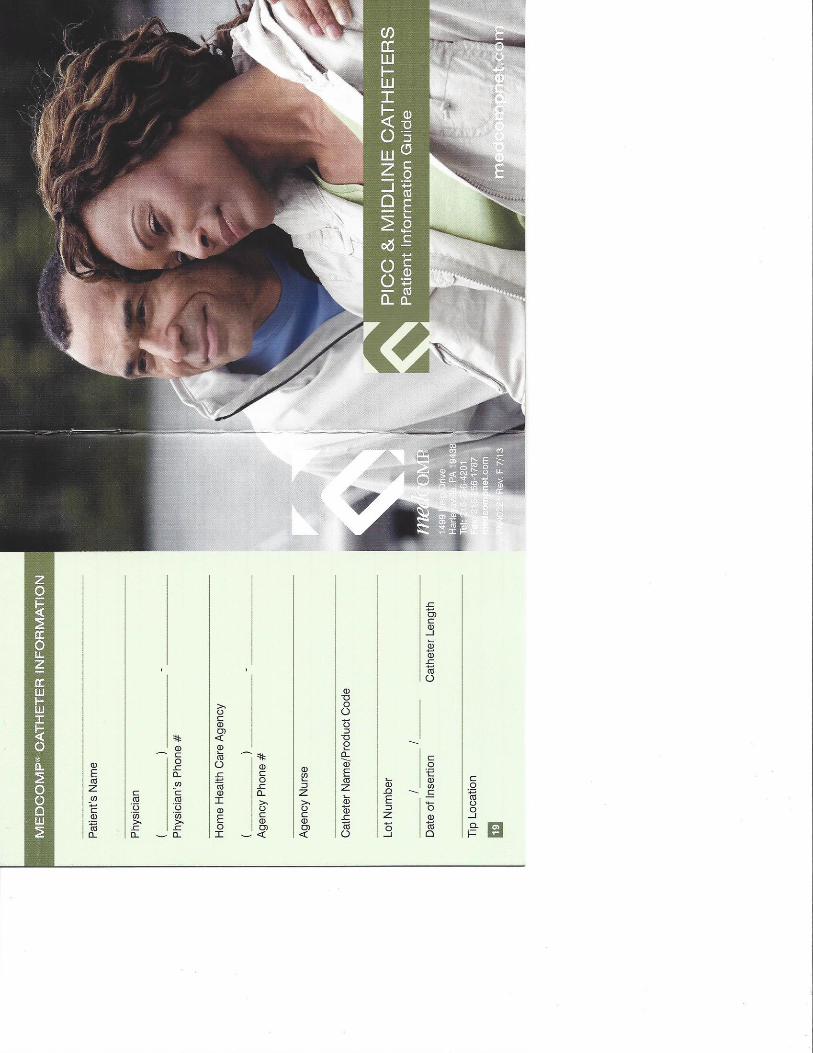
4.0 ***** Midline Venous Catheters Section ***** 4.1 Midline Venous Catheter Policies and Job Aids (Info and links) MSNPF 4.2 MedComp Patient Guide N/A (finalized) 4.3 MedComp CT Midline IFU N/A (finalized)
4.4/5.5 Step-by-step Guide for Removal of Midlines and Non-cuffed Central Lines MSNPF 5.0 ***** Central Line Section *****
5.1 Central Line Policies and Job Aids (Info and links) CCNPF 5.2 Sentara CVAD scope of practice grid NEC 5.3 Central Line dressing changes tip card CCNPF
5.4/4.4 Step-by-step Guide for Removal of Midlines and Non-cuffed Central Lines MSNPF 5.5 Central Line “Snap-shot” Risk Assessment Card N/A (finalized) 5.6 CVADQuickclotting TIPCard CCNPF
6.0 ***** OneLink Learning Reference Section ***** 6.1 Adult Peripheral IV and Midline Knowledge (PIV learning tipsheet) MSNPF 6.2 CVAD (CVAD learning tipsheet) CCNPF
*Permanent document owners are indicated. If changes are required to this toolkit, the IP HPT should be contacted.
(Note: Click on the document name in the Table of Contents for a direct hyperlink to that document or click on the small “bookmark” on left to view and navigate the contents.)
CLABSI Caregiver Toolkit: Table of Contents
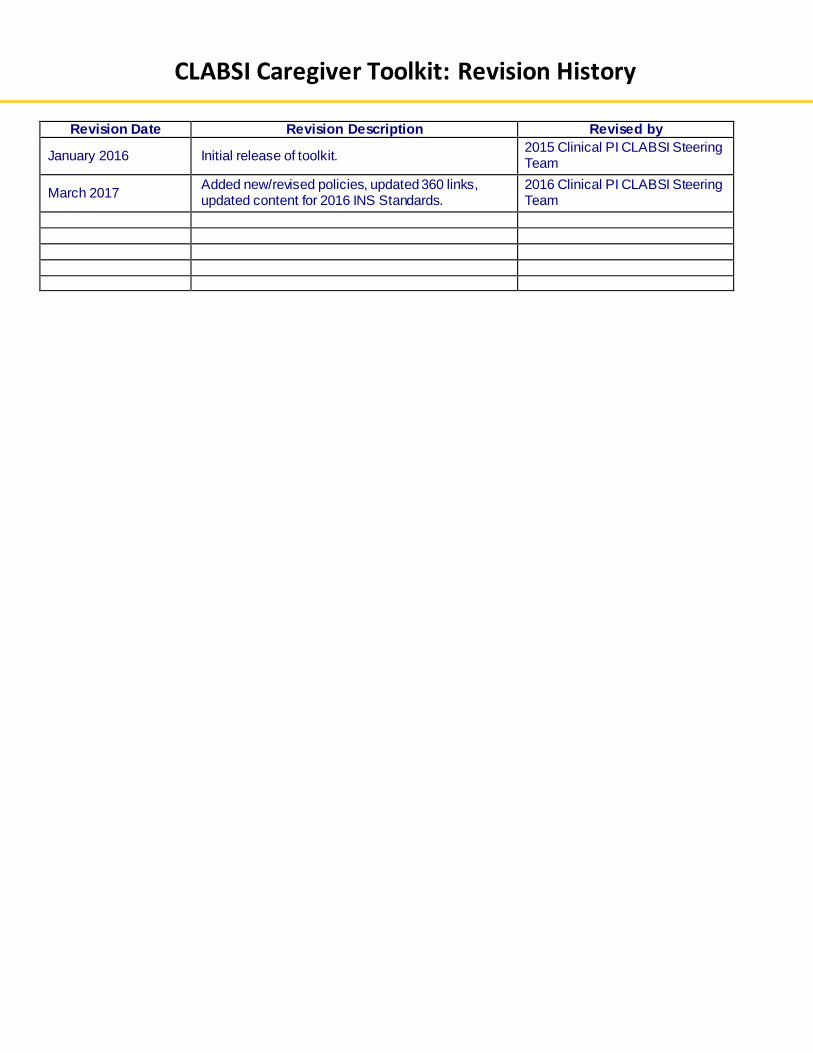
Revision Date Revision Description Revised by
January 2016 Initial release of toolkit. 2015 Clinical PI CLABSI Steering Team
March 2017 Added new/revised policies, updated 360 links, updated content for 2016 INS Standards.
2016 Clinical PI CLABSI Steering Team
CLABSI Caregiver Toolkit: Revision History
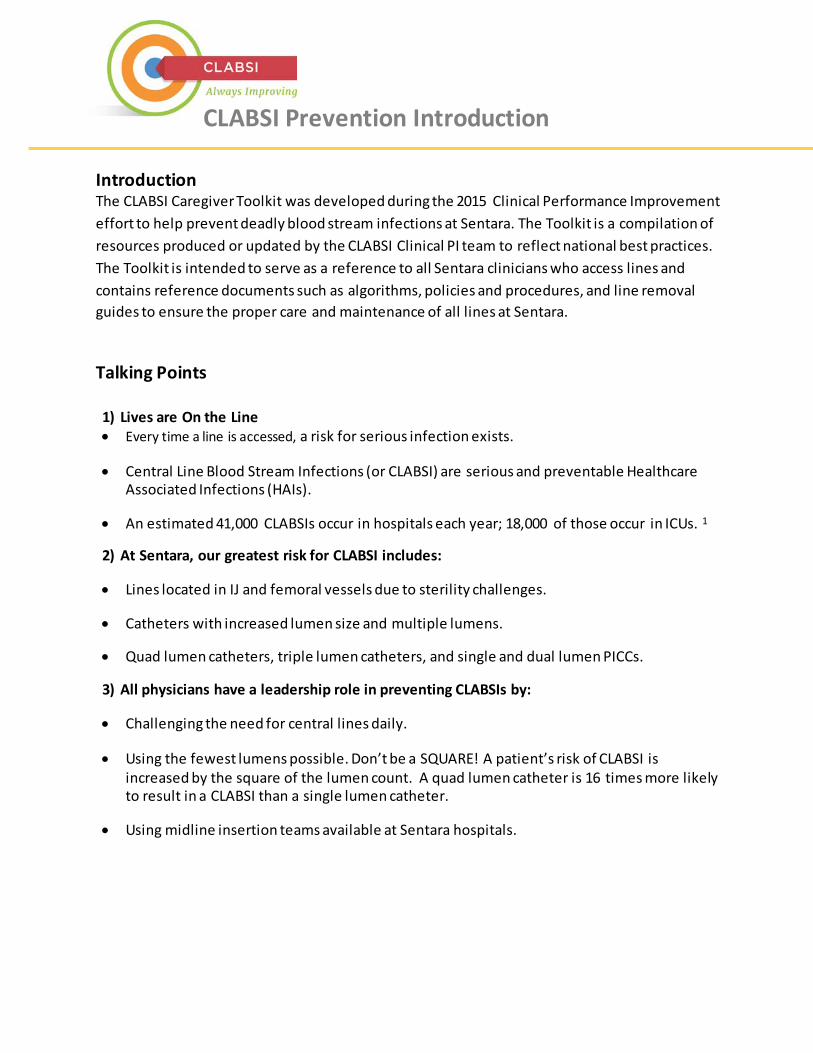
CLABSI Prevention Introduction
Introduction The CLABSI Caregiver Toolkit was developed during the 2015 Clinical Performance Improvement effort to help prevent deadly blood stream infections at Sentara. The Toolkit is a compilation of resources produced or updated by the CLABSI Clinical PI team to reflect national best practices. The Toolkit is intended to serve as a reference to all Sentara clinicians who access lines and contains reference documents such as algorithms, policies and procedures, and line removal guides to ensure the proper care and maintenance of all lines at Sentara.
Talking Points 1) Lives are On the Line • Every time a line is accessed, a risk for serious infection exists.
• Central Line Blood Stream Infections (or CLABSI) are serious and preventable Healthcare Associated Infections (HAIs).
• An estimated 41,000 CLABSIs occur in hospitals each year; 18,000 of those occur in ICUs. 1
2) At Sentara, our greatest risk for CLABSI includes:
• Lines located in IJ and femoral vessels due to sterility challenges.
• Catheters with increased lumen size and multiple lumens.
• Quad lumen catheters, triple lumen catheters, and single and dual lumen PICCs.
3) All physicians have a leadership role in preventing CLABSIs by:
• Challenging the need for central lines daily.
• Using the fewest lumens possible. Don’t be a SQUARE! A patient’s risk of CLABSI is increased by the square of the lumen count. A quad lumen catheter is 16 times more likely to result in a CLABSI than a single lumen catheter.
• Using midline insertion teams available at Sentara hospitals.
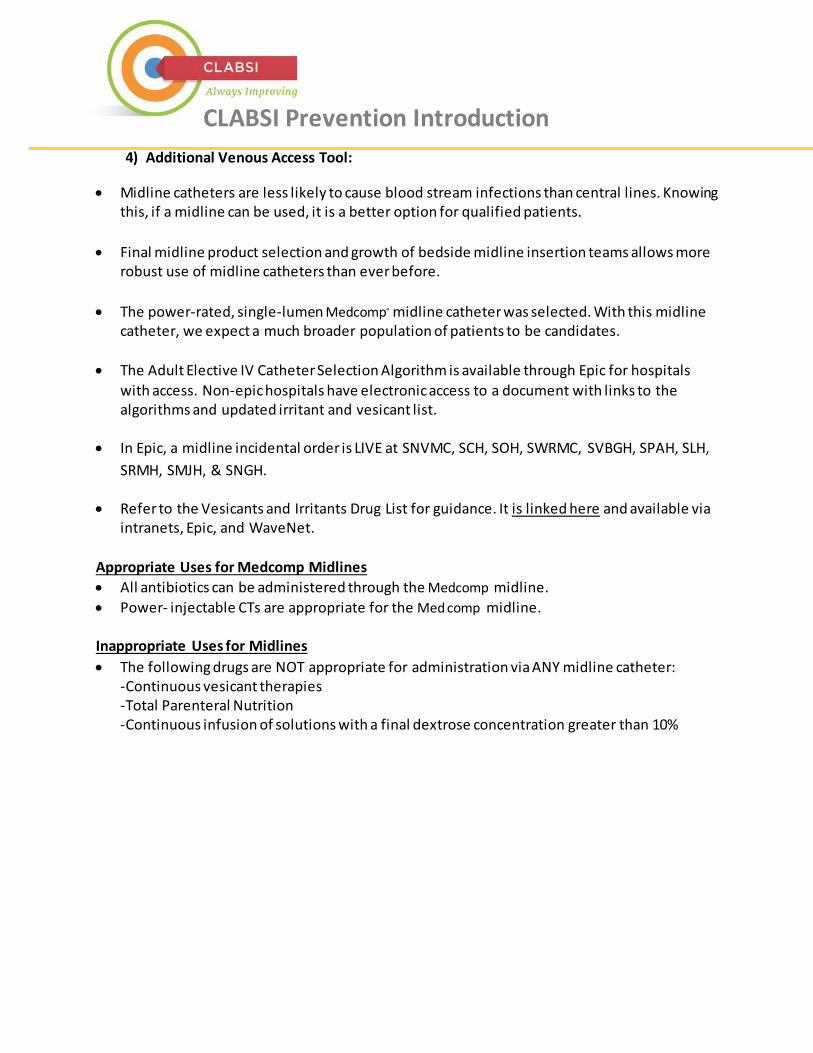
CLABSI Prevention Introduction 4) Additional Venous Access Tool:
• Midline catheters are less likely to cause blood stream infections than central lines. Knowing this, if a midline can be used, it is a better option for qualified patients.
• Final midline product selection and growth of bedside midline insertion teams allows more robust use of midline catheters than ever before.
• The power-rated, single-lumen Medcomp® midline catheter was selected. With this midline catheter, we expect a much broader population of patients to be candidates.
• The Adult Elective IV Catheter Selection Algorithm is available through Epic for hospitals with access. Non-epic hospitals have electronic access to a document with links to the algorithms and updated irritant and vesicant list.
• In Epic, a midline incidental order is LIVE at SNVMC, SCH, SOH, SWRMC, SVBGH, SPAH, SLH,
SRMH, SMJH, & SNGH.
• Refer to the Vesicants and Irritants Drug List for guidance. It is linked here and available via intranets, Epic, and WaveNet.
Appropriate Uses for Medcomp Midlines • All antibiotics can be administered through the Medcomp midline. • Power- injectable CTs are appropriate for the Med comp midline.
Inappropriate Uses for Midlines • The following drugs are NOT appropriate for administration via ANY midline catheter:
-Continuous vesicant therapies -Total Parenteral Nutrition -Continuous infusion of solutions with a final dextrose concentration greater than 10%
CLABSI Prevention Introduction
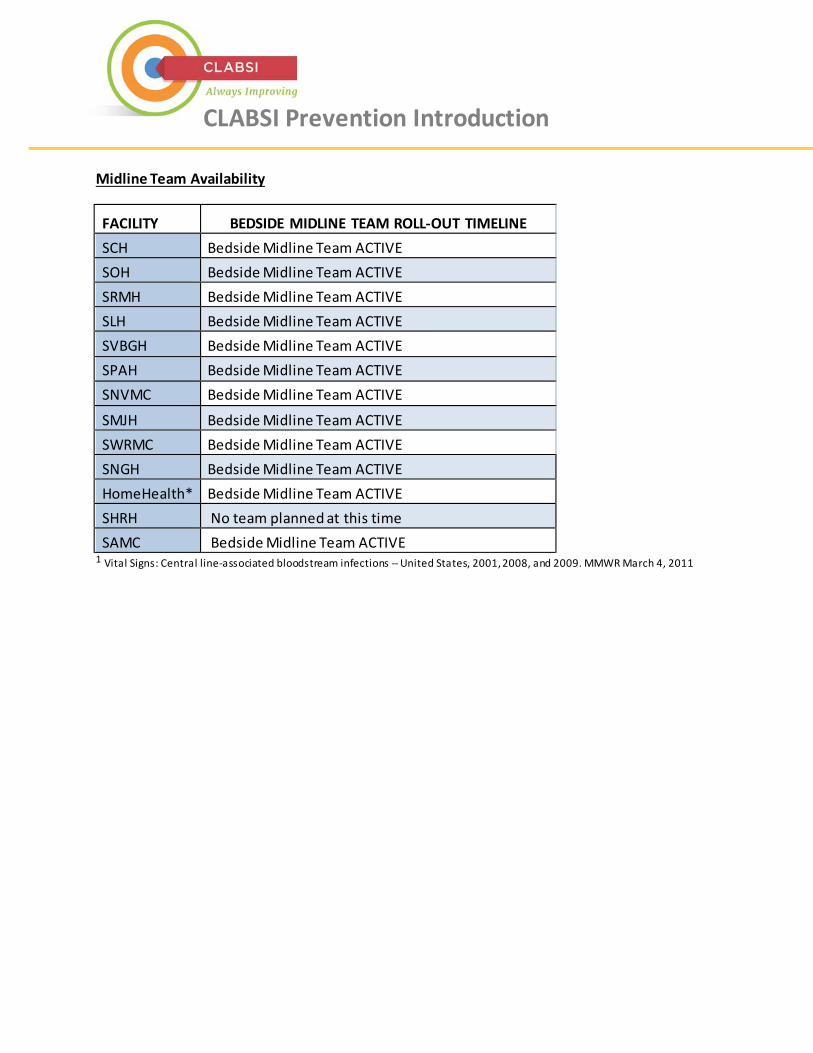
Midline Team Availability
FACILITY BEDSIDE MIDLINE TEAM ROLL-OUT TIMELINE SCH Bedside Midline Team ACTIVE SOH Bedside Midline Team ACTIVE SRMH Bedside Midline Team ACTIVE SLH Bedside Midline Team ACTIVE SVBGH Bedside Midline Team ACTIVE SPAH Bedside Midline Team ACTIVE SNVMC Bedside Midline Team ACTIVE
SMJH Bedside Midline Team ACTIVE SWRMC Bedside Midline Team ACTIVE SNGH Bedside Midline Team ACTIVE HomeHealth* Bedside Midline Team ACTIVE SHRH No team planned at this time SAMC Bedside Midline Team ACTIVE
1 Vital Signs: Central line-associated bloodstream infections -- United States, 2001, 2008, and 2009. MMWR March 4, 2011
Preventing CLABSILearn How You Can Reduce Your Risk of Infection
sentara.comYour community not-for-profit health partner 8/2015
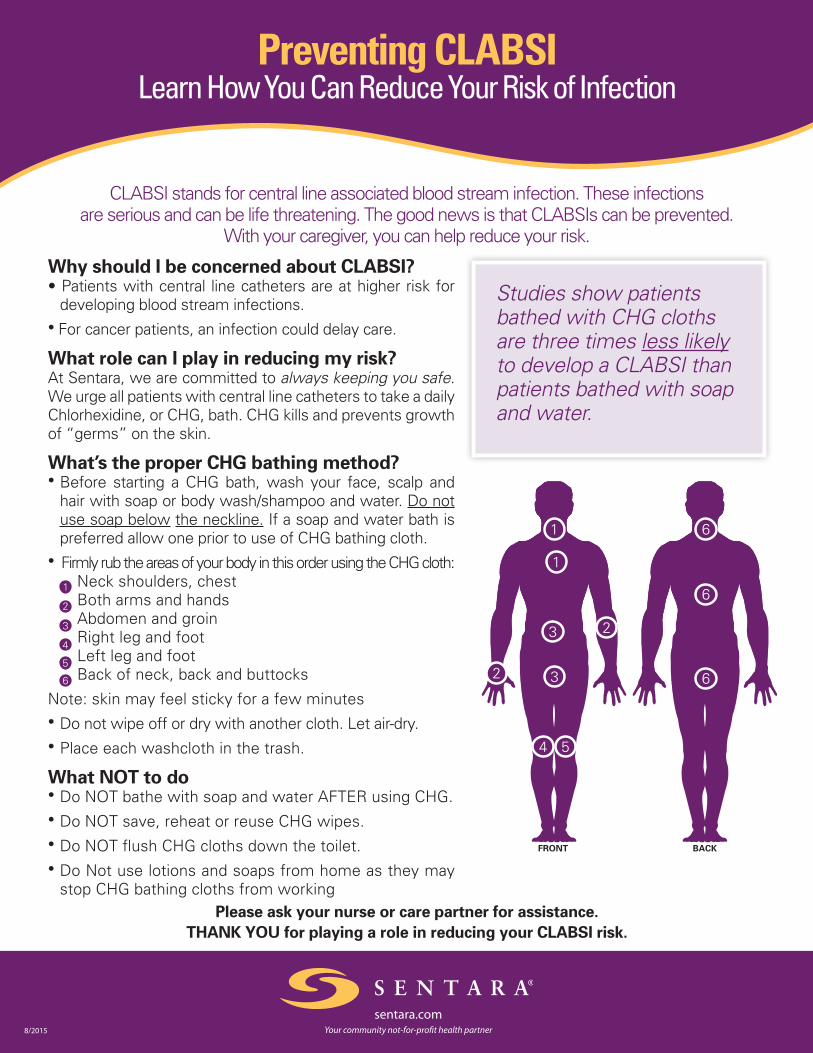
CLABSI stands for central line associated blood stream infection. These infections are serious and can be life threatening. The good news is that CLABSIs can be prevented.
With your caregiver, you can help reduce your risk.
Why should I be concerned about CLABSI? • Patients with central line catheters are at higher risk for
developing blood stream infections. • For cancer patients, an infection could delay care.
What role can I play in reducing my risk? At Sentara, we are committed to always keeping you safe. We urge all patients with central line catheters to take a daily Chlorhexidine, or CHG, bath. CHG kills and prevents growth of “germs” on the skin.
What’s the proper CHG bathing method? • Before starting a CHG bath, wash your face, scalp and
hair with soap or body wash/shampoo and water. Do not use soap below the neckline. If a soap and water bath is preferred allow one prior to use of CHG bathing cloth.
• Firmly rub the areas of your body in this order using the CHG cloth: Neck shoulders, chest Both arms and hands Abdomen and groin Right leg and foot Left leg and foot 6 Back of neck, back and buttocks
Note: skin may feel sticky for a few minutes • Do not wipe off or dry with another cloth. Let air-dry. • Place each washcloth in the trash.
What NOT to do • Do NOT bathe with soap and water AFTER using CHG.• Do NOT save, reheat or reuse CHG wipes. • Do NOT flush CHG cloths down the toilet. • Do Not use lotions and soaps from home as they may
stop CHG bathing cloths from workingPlease ask your nurse or care partner for assistance.
THANK YOU for playing a role in reducing your CLABSI risk.
FRONT BACK
Studies show patients bathed with CHG cloths are three times less likely to develop a CLABSI than patients bathed with soap and water.
CLABSI
**** The following clinical guidance document is located on the Sentara Media Server, and is available for viewing from all internet access points. Click on the diagram below to be rerouted. ****
Adult Elective IV Catheter Selection Algorithm:
CLABSI
**** The following clinical guidance document is located on the Sentara Media Server, and is available for viewing from all internet access points. Click on the diagram below to be rerouted. ****
Oncology Line Selection Algorithm:
CLABSI
**** The following clinical guidance document is located on the Sentara Media Server, and is available for viewing from all internet access points. Click on the diagram below to be rerouted. ****
Vesicants and Irritants Drug List:
MDORD502 Created 5-2015; revised 8-25-2016
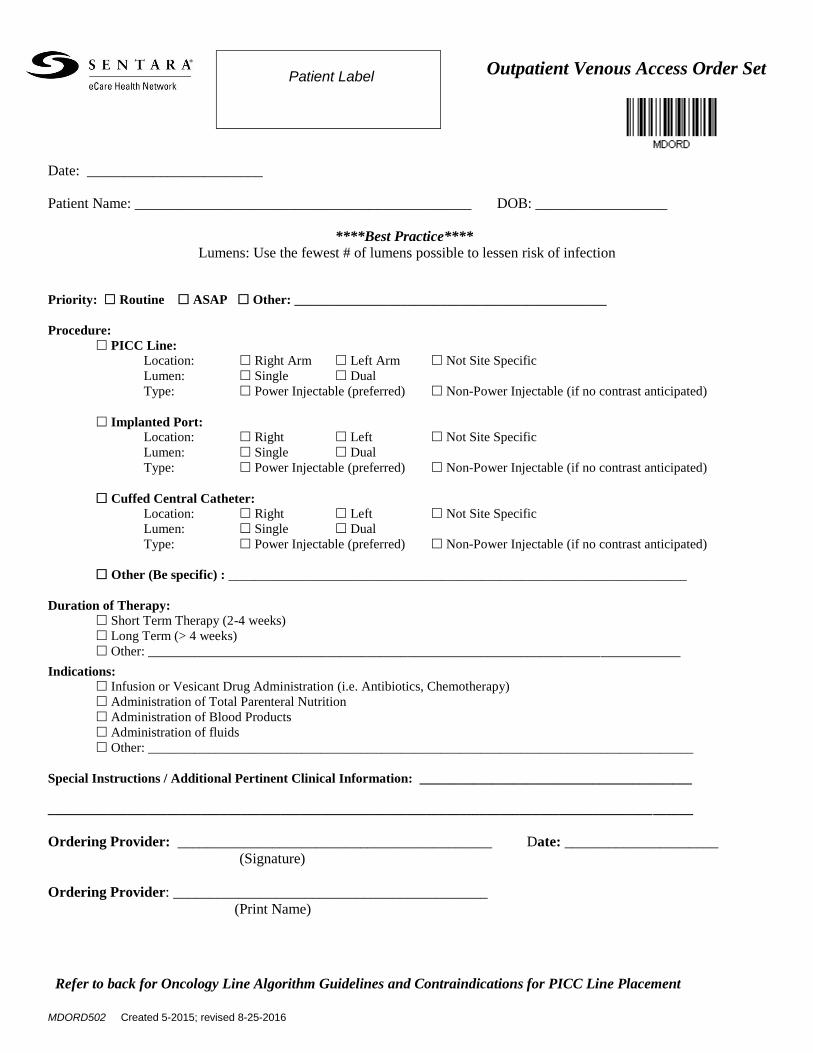
Outpatient Venous Access Order Set
Date: ________________________
Patient Name: ______________________________________________ DOB: __________________
****Best Practice****
Lumens: Use the fewest # of lumens possible to lessen risk of infection
Priority: Routine ASAP Other: _______________________________________________
Procedure:
PICC Line:
Location: Right Arm Left Arm Not Site Specific
Lumen: Single Dual
Type: Power Injectable (preferred) Non-Power Injectable (if no contrast anticipated)
Implanted Port:
Location: Right Left Not Site Specific
Lumen: Single Dual
Type: Power Injectable (preferred) Non-Power Injectable (if no contrast anticipated)
Cuffed Central Catheter:
Location: Right Left Not Site Specific
Lumen: Single Dual
Type: Power Injectable (preferred) Non-Power Injectable (if no contrast anticipated)
Other (Be specific) : _____________________________________________________________________
Duration of Therapy:
Short Term Therapy (2-4 weeks)
Long Term (> 4 weeks)
Other: ________________________________________________________________________________
Indications:
Infusion or Vesicant Drug Administration (i.e. Antibiotics, Chemotherapy)
Administration of Total Parenteral Nutrition
Administration of Blood Products
Administration of fluids
Other: __________________________________________________________________________________
Special Instructions / Additional Pertinent Clinical Information: _________________________________________
_________________________________________________________________________________________________
Ordering Provider: ___________________________________________ Date: _____________________
(Signature)
Ordering Provider: ___________________________________________
(Print Name)
Refer to back for Oncology Line Algorithm Guidelines and Contraindications for PICC Line Placement
Patient Label
MDORD502 Created 5-2015; revised 8-25-2016
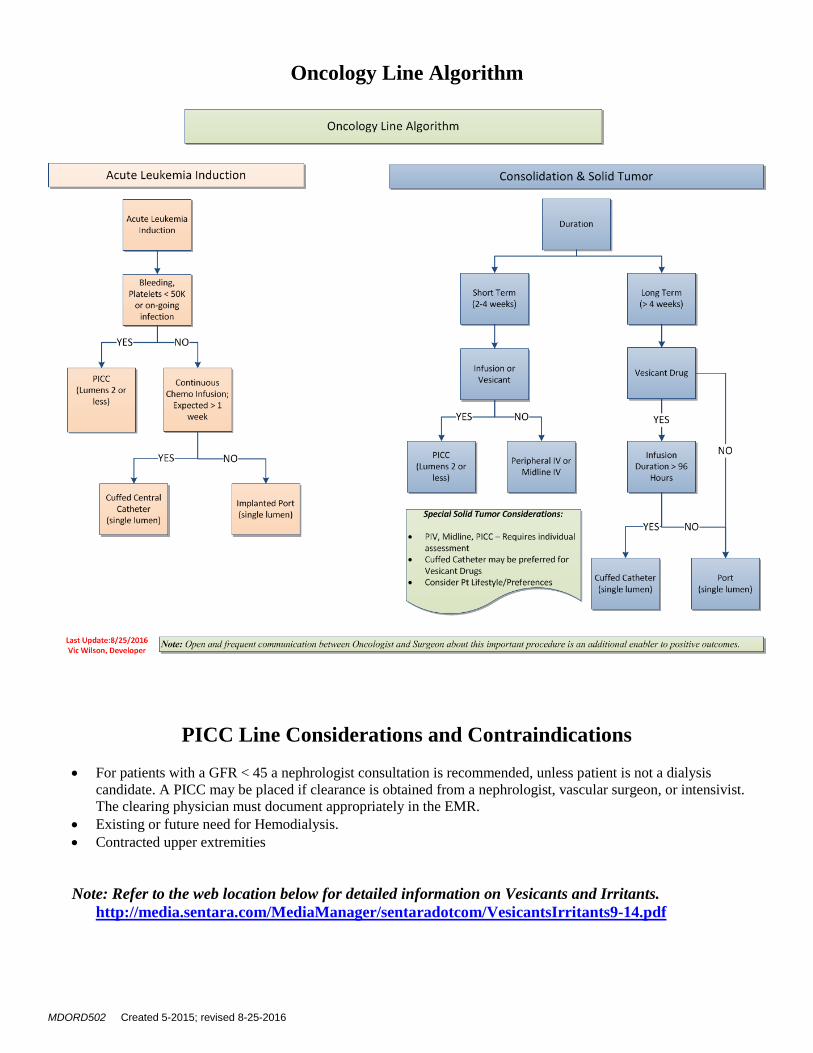
Oncology Line Algorithm
PICC Line Considerations and Contraindications
For patients with a GFR < 45 a nephrologist consultation is recommended, unless patient is not a dialysis
candidate. A PICC may be placed if clearance is obtained from a nephrologist, vascular surgeon, or intensivist.
The clearing physician must document appropriately in the EMR.
Existing or future need for Hemodialysis.
Contracted upper extremities
Note: Refer to the web location below for detailed information on Vesicants and Irritants.
http://media.sentara.com/MediaManager/sentaradotcom/VesicantsIrritants9-14.pdf
Page 1 Last Updated: February 27, 2017
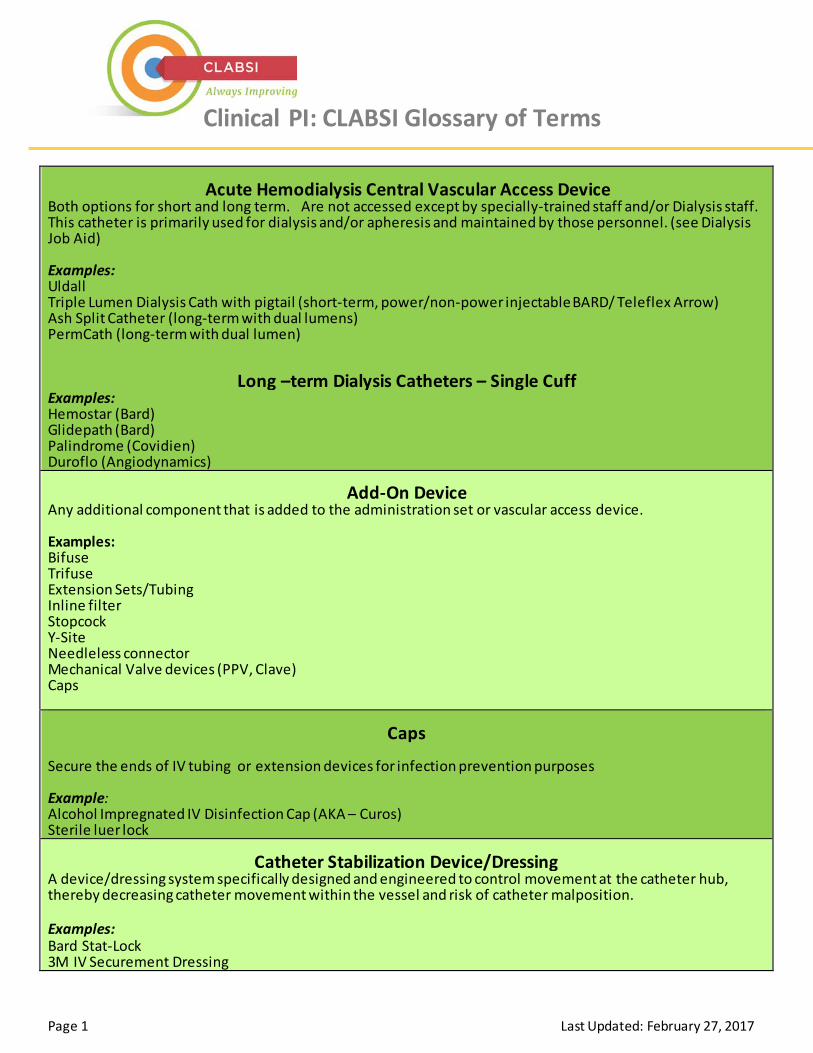
Clinical PI: CLABSI Glossary of Terms
Acute Hemodialysis Central Vascular Access Device Both options for short and long term. Are not accessed except by specially-trained staff and/or Dialysis staff. This catheter is primarily used for dialysis and/or apheresis and maintained by those personnel. (see Dialysis Job Aid) Examples: Uldall Triple Lumen Dialysis Cath with pigtail (short-term, power/non-power injectable BARD/ Teleflex Arrow) Ash Split Catheter (long-term with dual lumens) PermCath (long-term with dual lumen)
Long –term Dialysis Catheters – Single Cuff Examples: Hemostar (Bard) Glidepath (Bard) Palindrome (Covidien) Duroflo (Angiodynamics)
Add-On Device Any additional component that is added to the administration set or vascular access device. Examples: Bifuse Trifuse Extension Sets/Tubing Inline filter Stopcock Y-Site Needleless connector Mechanical Valve devices (PPV, Clave) Caps
Caps
Secure the ends of IV tubing or extension devices for infection prevention purposes Example: Alcohol Impregnated IV Disinfection Cap (AKA – Curos) Sterile luer lock
Catheter Stabilization Device/Dressing A device/dressing system specifically designed and engineered to control movement at the catheter hub, thereby decreasing catheter movement within the vessel and risk of catheter malposition. Examples: Bard Stat-Lock 3M IV Securement Dressing

Page 2 Last Updated: February 27, 2017
Clinical PI: CLABSI Glossary of Terms
Central Vascular Access Device (CVAD) Device which permits access to the central vascular system. Catheter tip is residing either in the lower one-third of the superior vena cava, or above the level of the diaphragm in the inferior vena cava.
CVAD –“Cuffed” (Tunneled) A vascular access device whose proximal end is tunneled subcutaneously from the insertion site and brought out through the skin at an exit site. “Long-term.” A “Cuffed” catheter includes a Dacron cuff built into the line which promotes tissue growth for a natural barrier of bacteria to develop. Examples: Broviac Groshong Hickman Quinton Hohn
CVAD – “Non-Cuffed” (Non-Tunneled) A vascular access device inserted by puncture directly through the skin and to the intended location without passing through subcutaneous tissue. “ Short Term” A “Non-Cuffed” catheter lacks the Dacron cuff in the line and therefore lacks a means to develop a barrier for bacteria, causing a higher risk for bacteria migration to be likely. Examples: Central Vascular Acute Access Single/Double/Triple/Quad Lumen Catheters (Teleflex Arrow/ Edwards) Peripherally Inserted Central Catheter (PICC) Acute Dialysis Catheters (see below) Swan Ganz Introducer Sheaths and Catheters Hohn Powerline (Bard)
Implanted Vascular Access Device (Also known as Port/ Mediport) “Long-term” Implanted device – Surgically placed catheter into a vessel, body cavity, or organ and is attached to a reservoir located under the skin. Examples: Vortex by Angiodynamics Groshong by Bard XPort P Port Powerport (Power Injectable) Port-a-Cath P.A.S Port Cath
“Non-coring” needles - A 90 Degree Implanted Port Access Needle. Examples: Huber PowerLOC (only used with Powerport) Gripper
Page 3 Last Updated: February 27, 2017
Clinical PI: CLABSI Glossary of Terms
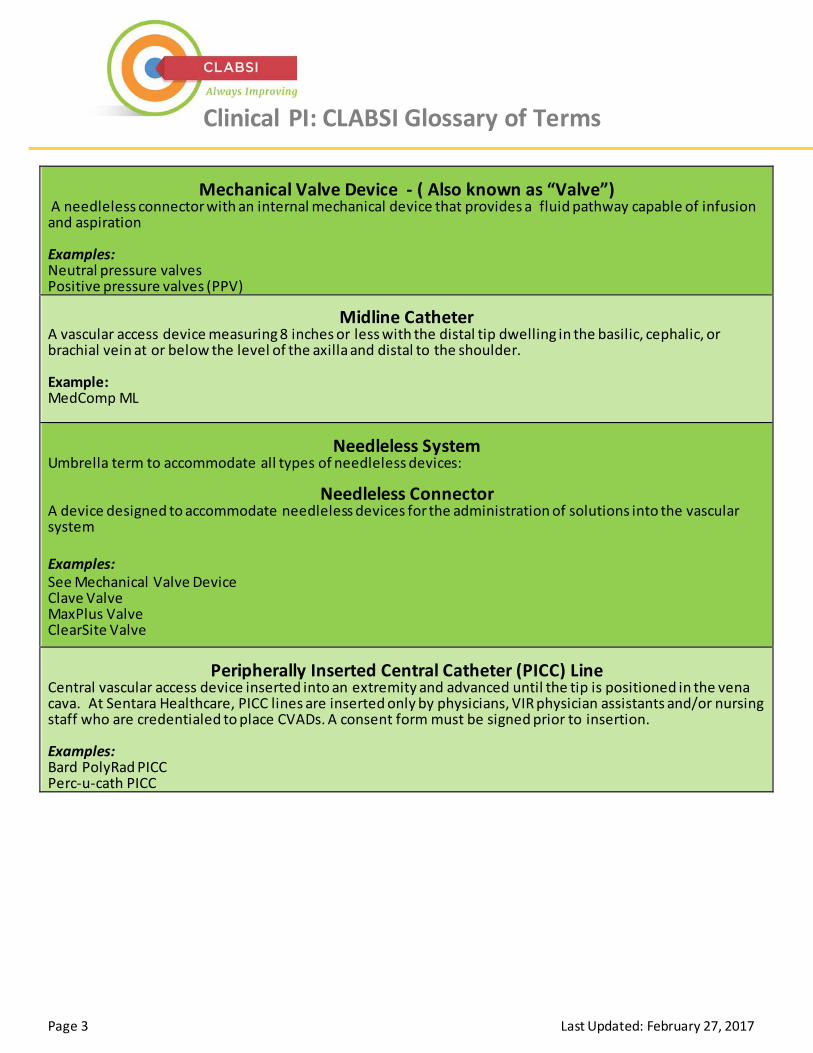
Mechanical Valve Device - ( Also known as “Valve”) A needleless connector with an internal mechanical device that provides a fluid pathway capable of infusion and aspiration Examples: Neutral pressure valves Positive pressure valves (PPV)
Midline Catheter A vascular access device measuring 8 inches or less with the distal tip dwelling in the basilic, cephalic, or brachial vein at or below the level of the axilla and distal to the shoulder.
Example: MedComp ML
Needleless System Umbrella term to accommodate all types of needleless devices:
Needleless Connector A device designed to accommodate needleless devices for the administration of solutions into the vascular system Examples: See Mechanical Valve Device Clave Valve MaxPlus Valve ClearSite Valve
Peripherally Inserted Central Catheter (PICC) Line Central vascular access device inserted into an extremity and advanced until the tip is positioned in the vena cava. At Sentara Healthcare, PICC lines are inserted only by physicians, VIR physician assistants and/or nursing staff who are credentialed to place CVADs. A consent form must be signed prior to insertion. Examples: Bard PolyRad PICC Perc-u-cath PICC
Page 4 Last Updated: February 27, 2017
Clinical PI: CLABSI Glossary of Terms
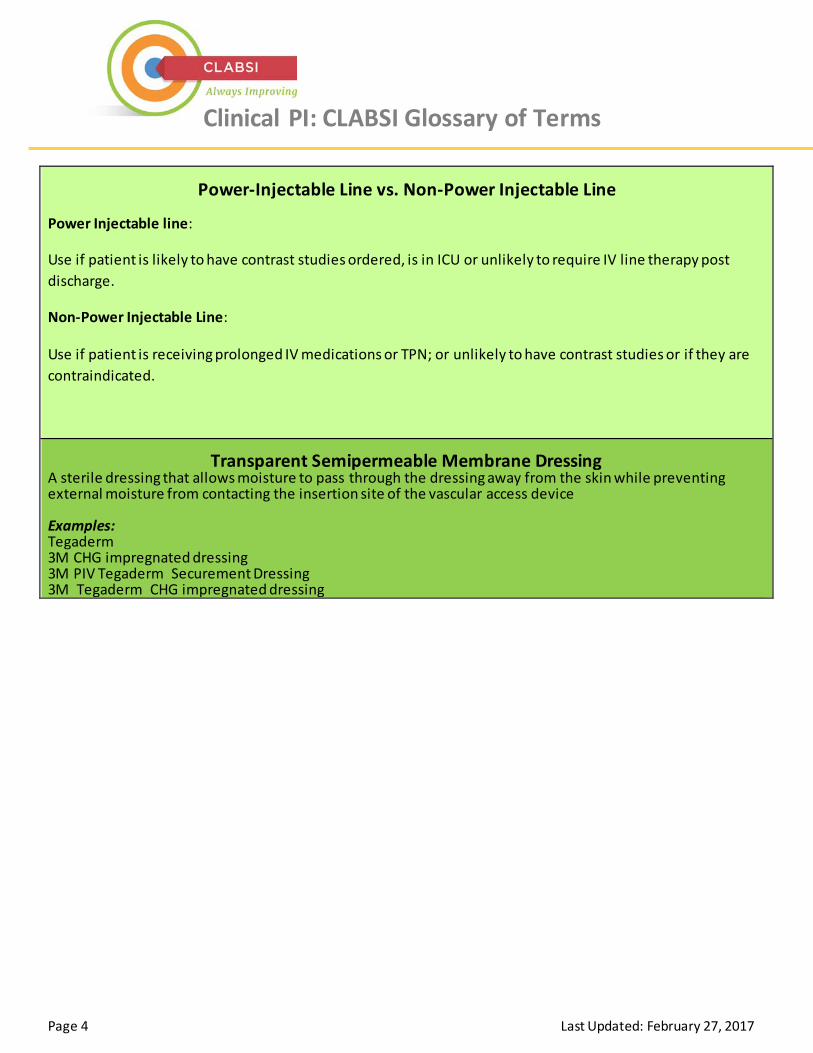
Power-Injectable Line vs. Non-Power Injectable Line
Power Injectable line:
Use if patient is likely to have contrast studies ordered, is in ICU or unlikely to require IV line therapy post discharge.
Non-Power Injectable Line:
Use if patient is receiving prolonged IV medications or TPN; or unlikely to have contrast studies or if they are contraindicated.
Transparent Semipermeable Membrane Dressing A sterile dressing that allows moisture to pass through the dressing away from the skin while preventing external moisture from contacting the insertion site of the vascular access device Examples: Tegaderm 3M CHG impregnated dressing 3M PIV Tegaderm Securement Dressing 3M Tegaderm CHG impregnated dressing
FAQs
CHG Bathing 1) When will Surgical Services be implementing Pre-op CHG Bathing? The only determination the
Sentara Infection Prevention Committee (SHIP-C) has made for CHG bathing in the surgical population is for inpatients that require surgery following admission (e.g. hip fractures).
Ship-C MDRO Subcommittee Recommendations:
• SHIP-C has not endorsed routine pre-operative bathing with CHG as there is no proven benefit of its use decreasing post-operative infections.
• Because pre-operative bathing with CHG is endorsed by some professional organizations, it may be used for specific procedures according to local preference. When pre-operative bathing with CHG is used routinely for a specific procedure, the SHIP-C requests supporting evidence be provided from the literature or professional society recommendations.
2) What about patients who are having invasive procedures (i.e. Cardiac Caths), OB patients having a C Section, or ED patients? CHG bathing is not needed for these patients.
3) How do we address patients who refuse CHG baths? An approved patient education brochure is available to help all patients with central lines understand their role in CLABSI prevention including CHG bathing. If a patient refuses, engage Infection Preventionists as a resource to help educate patients. Document patient/family refusal according to the current facility guidelines for a patient who refuses treatment.
4) Is it safe for radiation oncology patients? The following protocol has been developed by the radiation oncology team: • For patients with central venous lines who are receiving radiation therapy, the nurse will consult
the radiation oncologist for orders regarding the use of CHG bath cloths in the radiation treatment field.
• CHG bath cloths shall not be used in the radiation field unless an order is received by the radiation oncologist to do so.
• CHG bathing may be used on all other body parts (as outlined in the procedure) outside of the radiation field.
• If nursing staff members are unclear about the location of the radiation treatment area, they should call the radiation oncologist for clarification and clearly document the limitations.
5) Should CHG cloths be used for foley care? CHG bathing cloths should not be used for routine foley care. Follow the normal foley care bundle or protocol. Note: CHG does not inactivate the current agent Sentara uses for foley care. CHG is safe to use on perineal areas, including external mucosa. If
Clinical Performance Improvement
FAQs CHG Bathing (continued)
2
Last updated August 7, 2015
a patient has a foley and requires a CHG bath for an approved indication, it is recommended to clean the external perineal area and the catheter itself with the CHG cloth within six (6) inches from point of insertion or connection. CHG is also safe for superficial wounds, including stage 1 and stage 2 decubitus ulcers. Therefore, any patient with a central line should receive the CHG bath once per day per protocol whether or not they have a foley catheter.
6) Do we re-bathe patients who are incontinent? Is a CHG cloth used every time or something CHG compatible? CHG cloths are used one time daily for patients with central lines, following recommendations. Sage Comfort Shield Wipes are in stock and recommended for incontinence.
7) How many baths should be administered for inpatients going to surgery? For inpatients with central lines going to surgery, a CHG bath is recommended one time daily preoperatively. If an inpatient is scheduled for surgery following admission, a CHG bath should be given daily until the surgery is performed.
8) What about skin issues for patients with psoriasis or Eczema, etc.? We have posed this question to the SAGE technical team and are awaiting their response. Patients with skin issues (psoriasis, eczema etc.) should not be bathed with the CHG cloths in any areas where skin is irritated or not intact. Consult a physician with additional questions regarding that patient. Placing a central line in the area with any skin irritation should be avoided unless it is absolutely imperative to place in that area. We will provide updates, as new information is available.
9) Is there a standardized place for documenting and care plan? Document daily CHG bathing under the Adult Patient Care Summary in the Skin Interventions Section, which includes a specific component for CHG Bathing. For new nurses your preceptor should be checking this off as part of your orientation to central line care.
10) Is this going to be included with the CVL education? Yes. CHG bathing is part of the central venous line care education.
11) What is the recognized guideline/recommendation for CHG bathing? Sentara consulted two resources to arrive at its protocol. We have referenced the AHRQ tool kit and SAGE clinical resources.
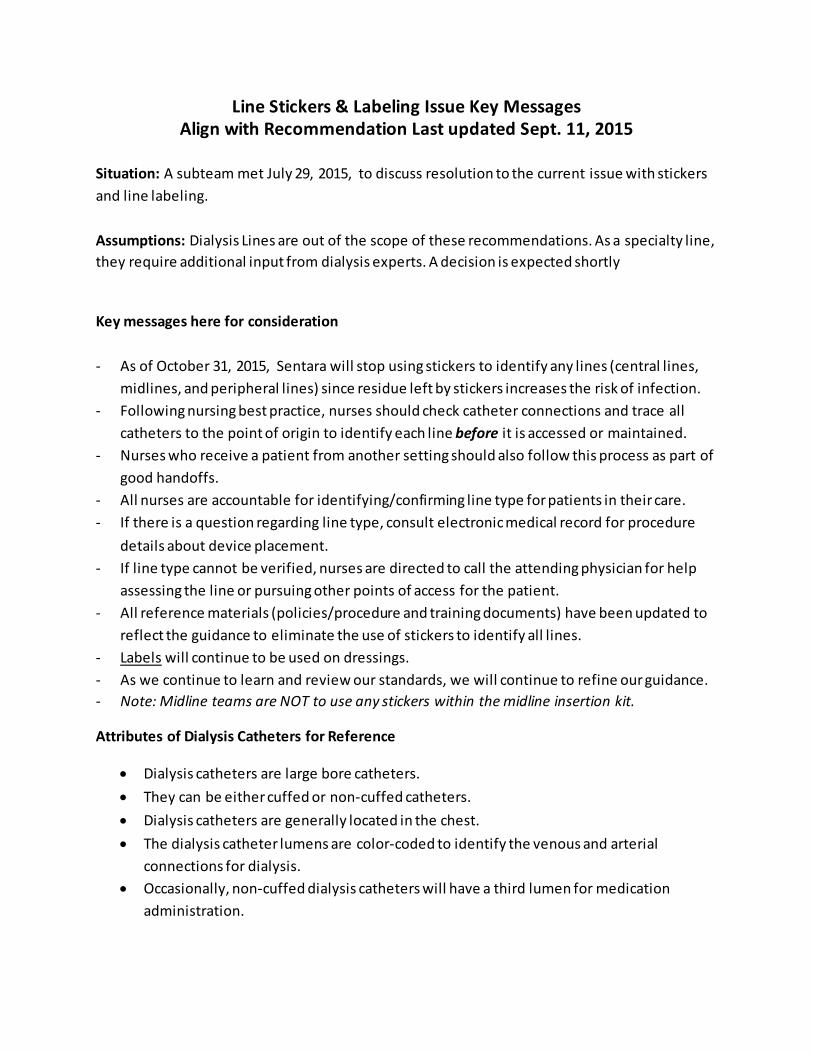
Line Stickers & Labeling Issue Key Messages Align with Recommendation Last updated Sept. 11, 2015
Situation: A subteam met July 29, 2015, to discuss resolution to the current issue with stickers and line labeling. Assumptions: Dialysis Lines are out of the scope of these recommendations. As a specialty line, they require additional input from dialysis experts. A decision is expected shortly
Key messages here for consideration
- As of October 31, 2015, Sentara will stop using stickers to identify any lines (central lines,
midlines, and peripheral lines) since residue left by stickers increases the risk of infection. - Following nursing best practice, nurses should check catheter connections and trace all
catheters to the point of origin to identify each line before it is accessed or maintained. - Nurses who receive a patient from another setting should also follow this process as part of
good handoffs. - All nurses are accountable for identifying/confirming line type for patients in their care. - If there is a question regarding line type, consult electronic medical record for procedure
details about device placement. - If line type cannot be verified, nurses are directed to call the attending physician for help
assessing the line or pursuing other points of access for the patient. - All reference materials (policies/procedure and training documents) have been updated to
reflect the guidance to eliminate the use of stickers to identify all lines. - Labels will continue to be used on dressings. - As we continue to learn and review our standards, we will continue to refine our guidance. - Note: Midline teams are NOT to use any stickers within the midline insertion kit.
Attributes of Dialysis Catheters for Reference
• Dialysis catheters are large bore catheters. • They can be either cuffed or non-cuffed catheters. • Dialysis catheters are generally located in the chest. • The dialysis catheter lumens are color-coded to identify the venous and arterial
connections for dialysis. • Occasionally, non-cuffed dialysis catheters will have a third lumen for medication
administration.
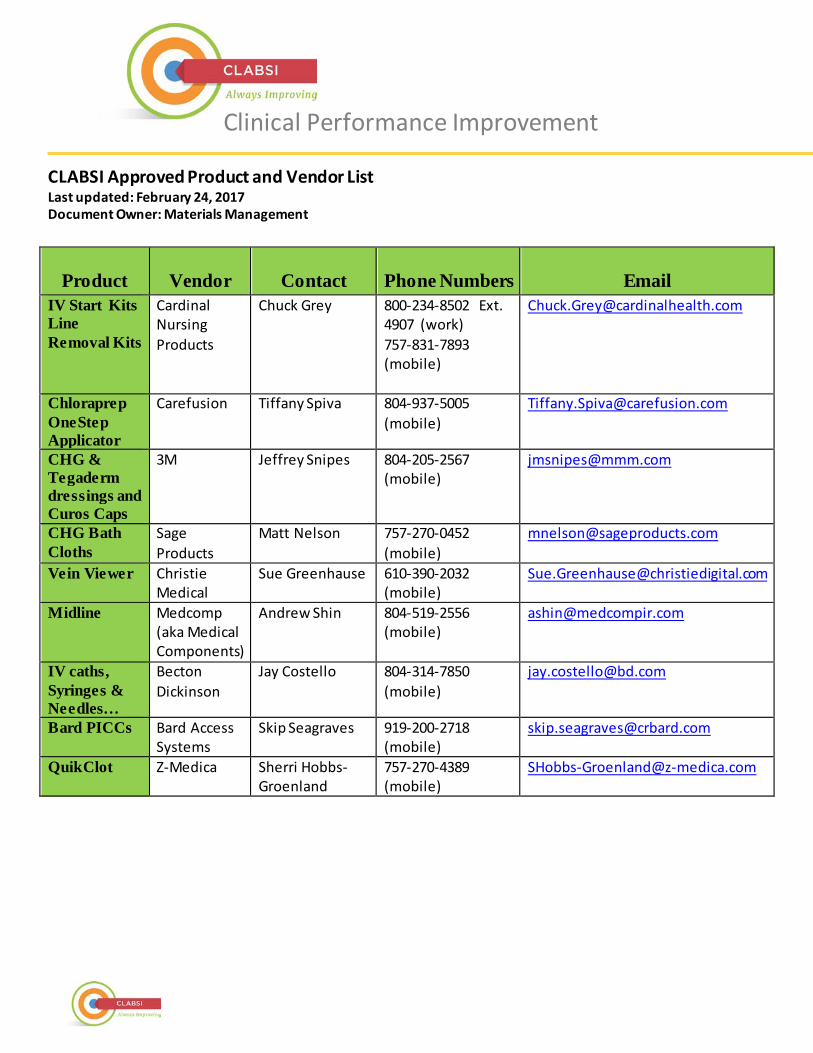
CLABSI Approved Product and Vendor List Last updated: February 24, 2017 Document Owner: Materials Management
Clinical Performance Improvement
Product Vendor Contact Phone Numbers Email IV Start Kits Line Removal Kits
Cardinal Nursing Products
Chuck Grey 800-234-8502 Ext. 4907 (work) 757-831-7893 (mobile)
Chloraprep OneStep Applicator
Carefusion Tiffany Spiva 804-937-5005 (mobile)
CHG & Tegaderm dressings and Curos Caps
3M Jeffrey Snipes 804-205-2567 (mobile)
CHG Bath Cloths
Sage Products
Matt Nelson 757-270-0452 (mobile)
Vein Viewer Christie Medical
Sue Greenhause 610-390-2032 (mobile)
Midline Medcomp (aka Medical Components)
Andrew Shin 804-519-2556 (mobile)
IV caths, Syringes & Needles…
Becton Dickinson
Jay Costello 804-314-7850 (mobile)
Bard PICCs Bard Access Systems
Skip Seagraves 919-200-2718 (mobile)
QuikClot Z-Medica Sherri Hobbs-Groenland
757-270-4389 (mobile)
1
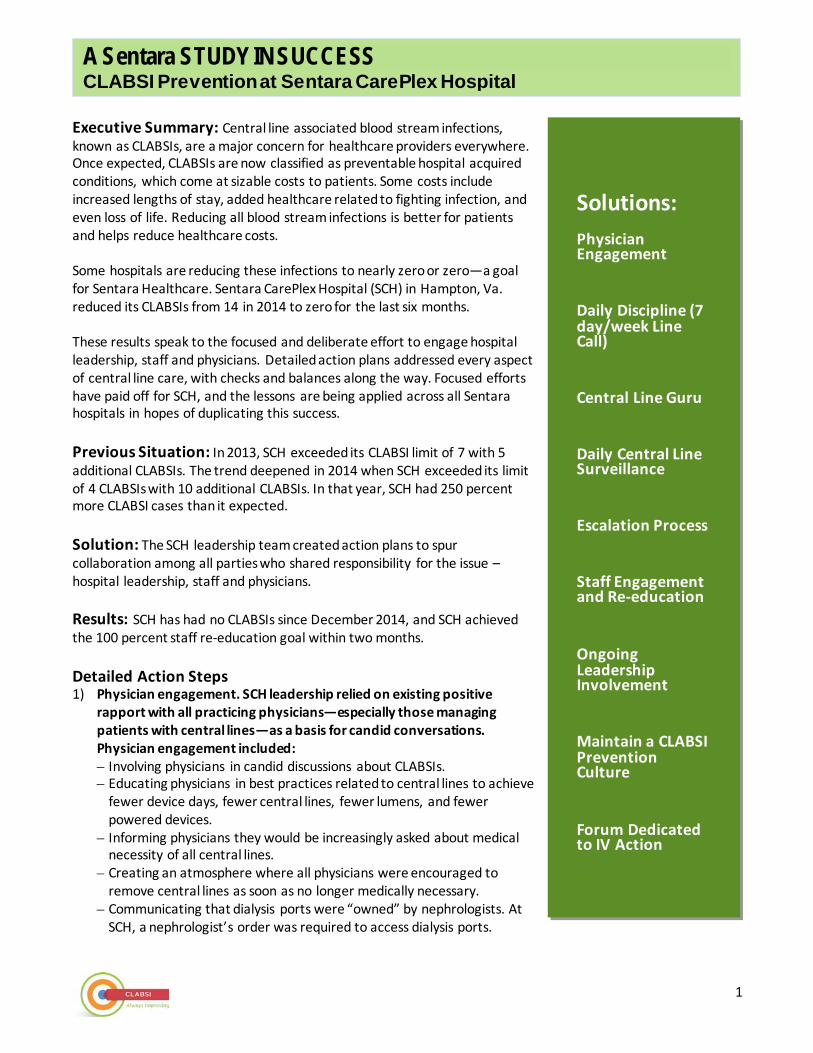
Executive Summary: Central line associated blood stream infections, known as CLABSIs, are a major concern for healthcare providers everywhere. Once expected, CLABSIs are now classified as preventable hospital acquired conditions, which come at sizable costs to patients. Some costs include increased lengths of stay, added healthcare related to fighting infection, and even loss of life. Reducing all blood stream infections is better for patients and helps reduce healthcare costs. Some hospitals are reducing these infections to nearly zero or zero—a goal for Sentara Healthcare. Sentara CarePlex Hospital (SCH) in Hampton, Va. reduced its CLABSIs from 14 in 2014 to zero for the last six months. These results speak to the focused and deliberate effort to engage hospital leadership, staff and physicians. Detailed action plans addressed every aspect of central line care, with checks and balances along the way. Focused efforts have paid off for SCH, and the lessons are being applied across all Sentara hospitals in hopes of duplicating this success. Previous Situation: In 2013, SCH exceeded its CLABSI limit of 7 with 5 additional CLABSIs. The trend deepened in 2014 when SCH exceeded its limit of 4 CLABSIs with 10 additional CLABSIs. In that year, SCH had 250 percent more CLABSI cases than it expected. Solution: The SCH leadership team created action plans to spur collaboration among all parties who shared responsibility for the issue – hospital leadership, staff and physicians. Results: SCH has had no CLABSIs since December 2014, and SCH achieved the 100 percent staff re-education goal within two months. Detailed Action Steps 1) Physician engagement. SCH leadership relied on existing positive
rapport with all practicing physicians—especially those managing patients with central lines—as a basis for candid conversations. Physician engagement included: – Involving physicians in candid discussions about CLABSIs. – Educating physicians in best practices related to central lines to achieve
fewer device days, fewer central lines, fewer lumens, and fewer powered devices.
– Informing physicians they would be increasingly asked about medical necessity of all central lines.
– Creating an atmosphere where all physicians were encouraged to remove central lines as soon as no longer medically necessary.
– Communicating that dialysis ports were “owned” by nephrologists. At SCH, a nephrologist’s order was required to access dialysis ports.
A Sentara STUDY IN SUCCESS CLABSI Prevention at Sentara CarePlex Hospital
Solutions: Physician Engagement
Daily Discipline (7 day/week Line Call)
Central Line Guru
Daily Central Line Surveillance
Escalation Process
Staff Engagement and Re-education
Ongoing Leadership Involvement
Maintain a CLABSI Prevention Culture
Forum Dedicated to IV Action
2
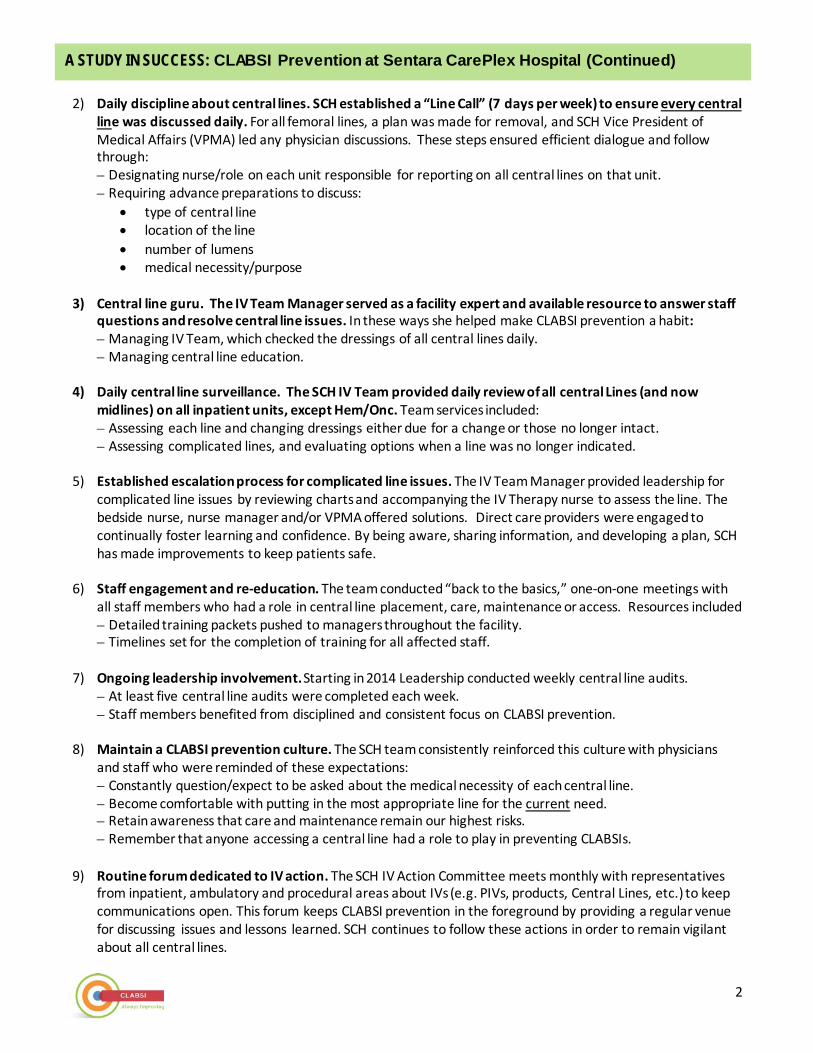
A STUDY IN SUCCESS: CLABSI Prevention at Sentara CarePlex Hospital (Continued)
2) Daily discipline about central lines. SCH established a “Line Call” (7 days per week) to ensure every central line was discussed daily. For all femoral lines, a plan was made for removal, and SCH Vice President of Medical Affairs (VPMA) led any physician discussions. These steps ensured efficient dialogue and follow through: – Designating nurse/role on each unit responsible for reporting on all central lines on that unit. – Requiring advance preparations to discuss:
• type of central line • location of the line • number of lumens • medical necessity/purpose
3) Central line guru. The IV Team Manager served as a facility expert and available resource to answer staff
questions and resolve central line issues. In these ways she helped make CLABSI prevention a habit: – Managing IV Team, which checked the dressings of all central lines daily. – Managing central line education.
4) Daily central line surveillance. The SCH IV Team provided daily review of all central Lines (and now
midlines) on all inpatient units, except Hem/Onc. Team services included: – Assessing each line and changing dressings either due for a change or those no longer intact. – Assessing complicated lines, and evaluating options when a line was no longer indicated.
5) Established escalation process for complicated line issues. The IV Team Manager provided leadership for
complicated line issues by reviewing charts and accompanying the IV Therapy nurse to assess the line. The bedside nurse, nurse manager and/or VPMA offered solutions. Direct care providers were engaged to continually foster learning and confidence. By being aware, sharing information, and developing a plan, SCH has made improvements to keep patients safe.
6) Staff engagement and re-education. The team conducted “back to the basics,” one-on-one meetings with
all staff members who had a role in central line placement, care, maintenance or access. Resources included – Detailed training packets pushed to managers throughout the facility. – Timelines set for the completion of training for all affected staff.
7) Ongoing leadership involvement. Starting in 2014 Leadership conducted weekly central line audits.
– At least five central line audits were completed each week. – Staff members benefited from disciplined and consistent focus on CLABSI prevention.
8) Maintain a CLABSI prevention culture. The SCH team consistently reinforced this culture with physicians
and staff who were reminded of these expectations: – Constantly question/expect to be asked about the medical necessity of each central line. – Become comfortable with putting in the most appropriate line for the current need. – Retain awareness that care and maintenance remain our highest risks. – Remember that anyone accessing a central line had a role to play in preventing CLABSIs.
9) Routine forum dedicated to IV action. The SCH IV Action Committee meets monthly with representatives from inpatient, ambulatory and procedural areas about IVs (e.g. PIVs, products, Central Lines, etc.) to keep communications open. This forum keeps CLABSI prevention in the foreground by providing a regular venue for discussing issues and lessons learned. SCH continues to follow these actions in order to remain vigilant about all central lines.
CLABSI
Peripheral Intravenous Catheter Procedures and Job Aids
Procedures:
• Insertion and Maintenance of an Adult Peripheral Short IV Catheter Procedure
Job Aids:
• Adult Peripheral Intravenous (PIV) Access Job Aid
• Insertion and Maintenance of a Peripheral IV Short Catheter Checklist
• Nursing Phlebotomy Competency Checklist
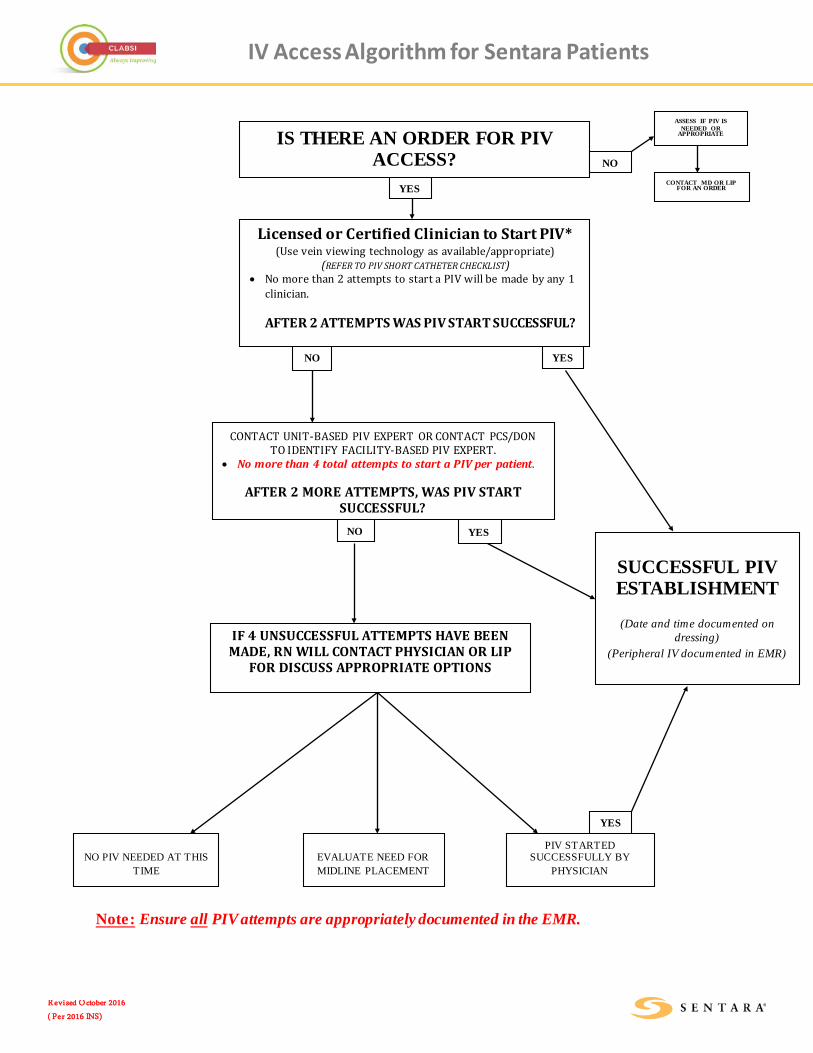
IV Access Algorithm for Sentara Patients
Revi sed October 2016
( Per 2016 INS)
Note: Ensure all PIV attempts are appropriately documented in the EMR.
Licensed or Certified Clinician to Start PIV* (Use vein viewing technology as available/appropriate)
(REFER TO PIV SHORT CATHETER CHECKLIST) • No more than 2 attempts to start a PIV will be made by any 1
clinician. AFTER 2 ATTEMPTS WAS PIV START SUCCESSFUL?
CONTACT UNIT-BASED PIV EXPERT OR CONTACT PCS/DON TO IDENTIFY FACILITY-BASED PIV EXPERT.
• No more than 4 total attempts to start a PIV per patient.
AFTER 2 MORE ATTEMPTS, WAS PIV START SUCCESSFUL?
SUCCESSFUL PIV ESTABLISHMENT
(Date and time documented on
dressing) (Peripheral IV documented in EMR)
IF 4 UNSUCCESSFUL ATTEMPTS HAVE BEEN MADE, RN WILL CONTACT PHYSICIAN OR LIP
FOR DISCUSS APPROPRIATE OPTIONS
NO PIV NEEDED AT THIS
TIME
EVALUATE NEED FOR MIDLINE PLACEMENT
IS THERE AN ORDER FOR PIV ACCESS?
ASSESS IF PIV IS NEEDED OR
APPROPRIATE
CONTACT MD OR LIP FOR AN ORDER
NO
YES
NO
YES NO
YES
PIV STARTED SUCCESSFULLY BY
PHYSICIAN
YES
CLABSI
Midline Venous Catheter Policies and Job Aids
Policies:
• Midline Catheter Insertion, Maintenance, and Removal Policy
Job Aids:
• Midline Catheter Insertion, Maintenance, and Removal Job Aid
• Midline Candidate Screening Tool
• Midline Insertion Checklist
• Midline and CVAD Dressing Change Checklist
• Midline Catheter and Non-Tunneled CVAD Removal Competency Checklist


WARNINGS:
• Therapies not appropriate for midline catheters include those therapies
requiring central venous access. Refer to standards of practice and institutional policies.
• In the rare event that a hub or connector separates from any component during insertion or use, take all necessary steps and precautions to prevent blood loss or air embolism and remove the catheter.
• Do not advance the guidewire or catheter if unusual resistance is encountered.
• Do not insert or withdraw the guidewire forcibly from any component. The wire may break or unravel. If the guidewire becomes damaged, the introducer needle or sheath/dilator and guidewire must be removed together.
• Federal Law (USA) restricts this device to sale by or on the order of a physician.
• This catheter is for Single Use Only.
• Do not re-sterilize the catheter or accessories by any method.
• Re-Use may lead to infection or illness/ injury.
• The manufacturer shall not be liable for any damages caused by reuse or
re-sterilization of this catheter or accessories.
• Contents sterile and non-pyrogenic in unopened, undamaged package.STERILIZED BY ETHYLENE OXIDE
• Do not use catheter or accessories if package is opened or damaged.
• Do not use catheter or accessories if any sign of product damage is visible.
CATHETER PRECAUTIONS:
• Small syringes will generate excessive pressure and may damage the catheter. The use of 10cc or larger syringes are
recommended.
• Do not use sharp instruments near the extension lines or catheter lumen.
• Do not use scissors to remove dressing.
• Catheter will be damaged if clamps other than what is provided with this kit are used.
• Clamping of the tubing repeatedly in the same location will weaken tubing. Avoid clamping near the luer(s) and hub of the catheter.
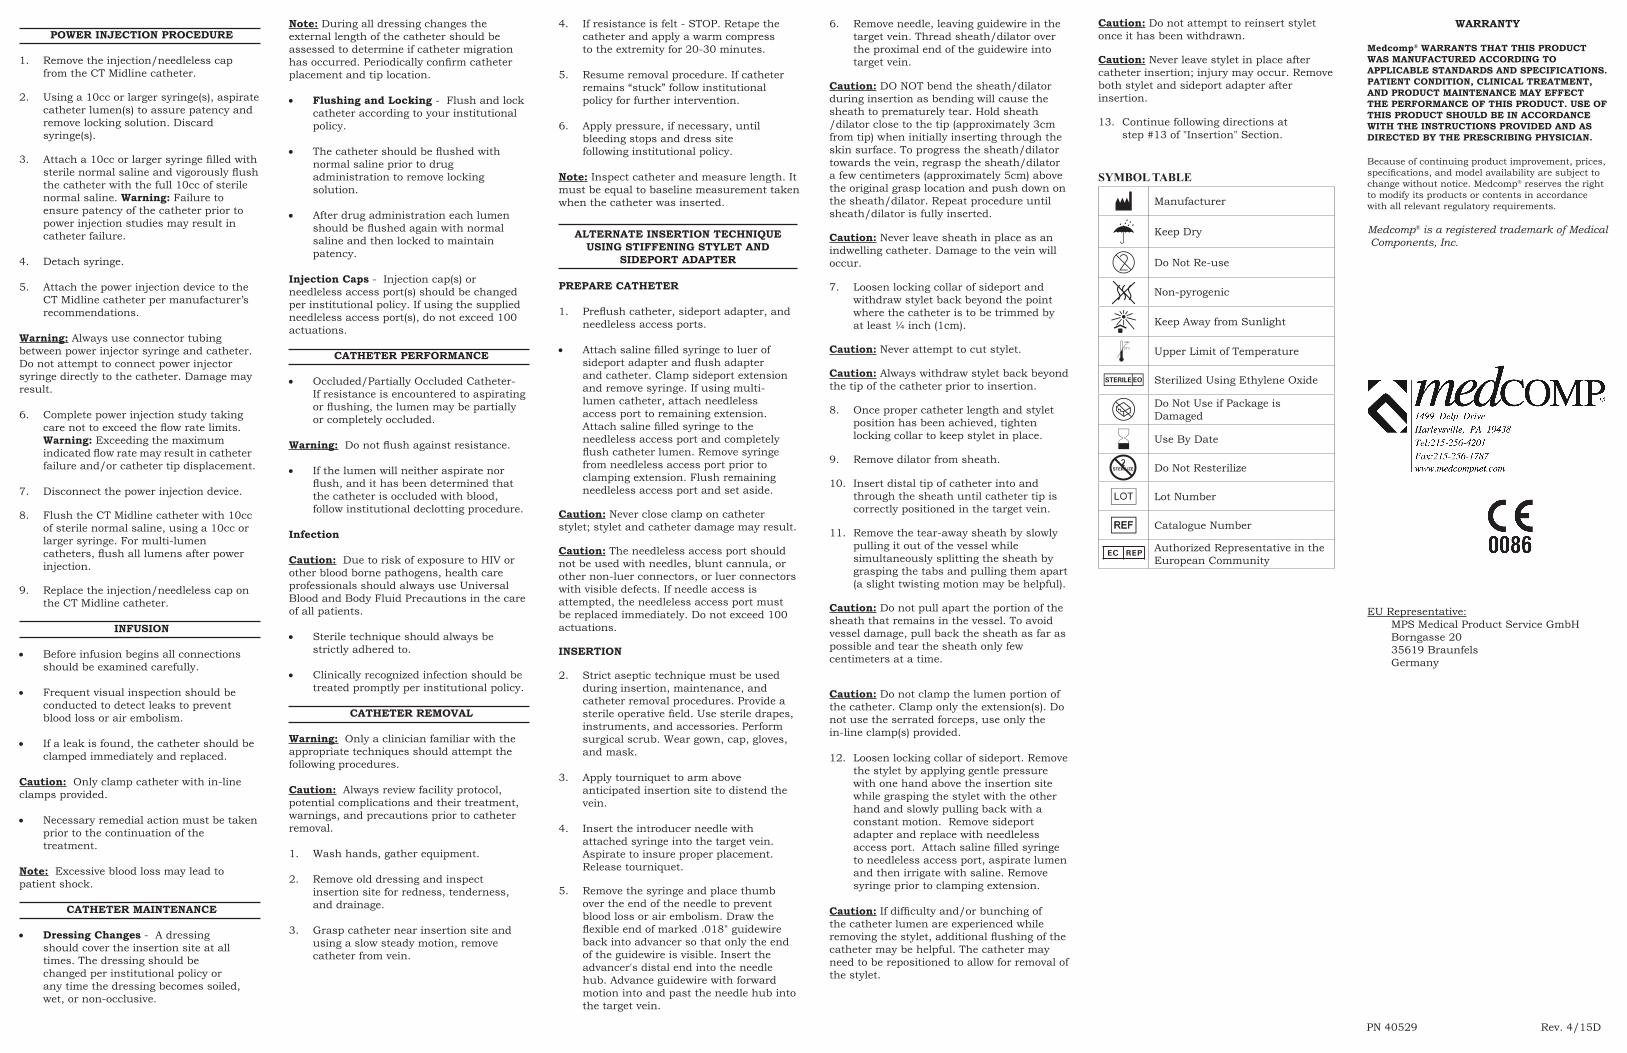
CT MIDLINE CATHETERINSTRUCTIONS FOR USE
INDICATIONS FOR USE:
• The CT Midlines are indicated for Short-Term peripheral access to the peripheral venous system for selected intravenous therapies , blood sampling, and power injection of contrast media. The
maximum recommended infusion rate varies by catheter French size and is printed on the catheter.
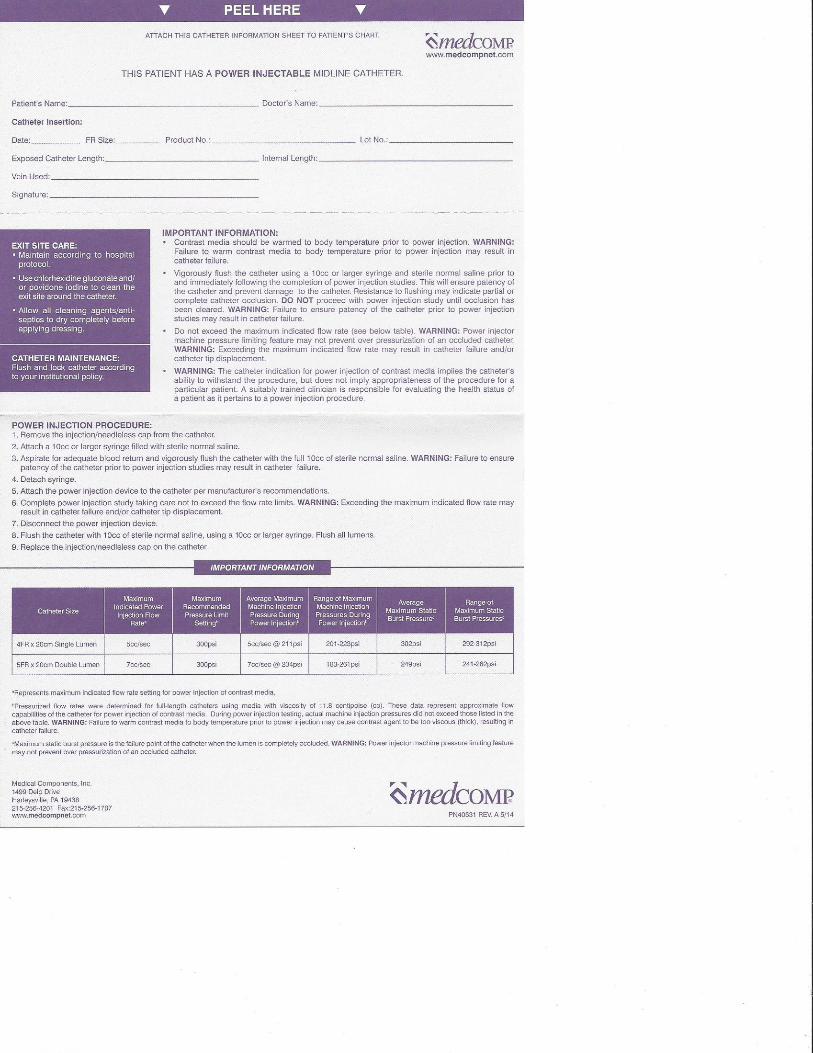
IMPORTANT INFORMATION PERTAINING TO POWER INJECTION:
• Contrast media should be warmed to body temperature prior to power
injection. Warning: Failure to warm contrast to body temperature prior to
power injection may result in catheter failure.
• Vigorously flush the CT Midline catheter using a 10cc or larger syringe and sterile normal saline prior to and immediately following the completion of power
injection studies. This will ensure the patency of the catheter and prevent damage to the catheter. Resistance to flushing may indicate partial or complete catheter occlusion. Do not proceed with power injection study until occlusion has been cleared. Warning: Failure to ensure patency of the catheter prior to power injection studies may result in catheter failure.
• Do not exceed the maximum flow rate printed on the catheter. Warning: Power injector machine pressure limiting
feature may not prevent over pressurization of an occluded catheter.
Warning: Exceeding the maximum indicated flow rate may result in catheter failure and/or catheter tip displacement.
• Warning: CT Midline catheter indication of power injection of contrast
media implies the catheter’s ability to withstand the procedure, but does not imply appropriateness of the procedure for a particular patient. A suitably trained clinician is responsible
for evaluating the health status of a patient as it pertains to a power injection procedure.
DESCRIPTION:
• This catheter is manufactured from soft radiopaque polyurethane material that provides increased patient comfort and excellent biocompatibility.
• Examine catheter lumen and extension(s) before and after each infusion for
damage.
• To prevent accidents, assure the security of all caps and connections prior to and between treatments.
• Use only Luer Lock (threaded) Connectors with this catheter.
• Repeated over tightening of luer lock connections, syringes, and caps will reduce connector life and could lead to potential connector failure.
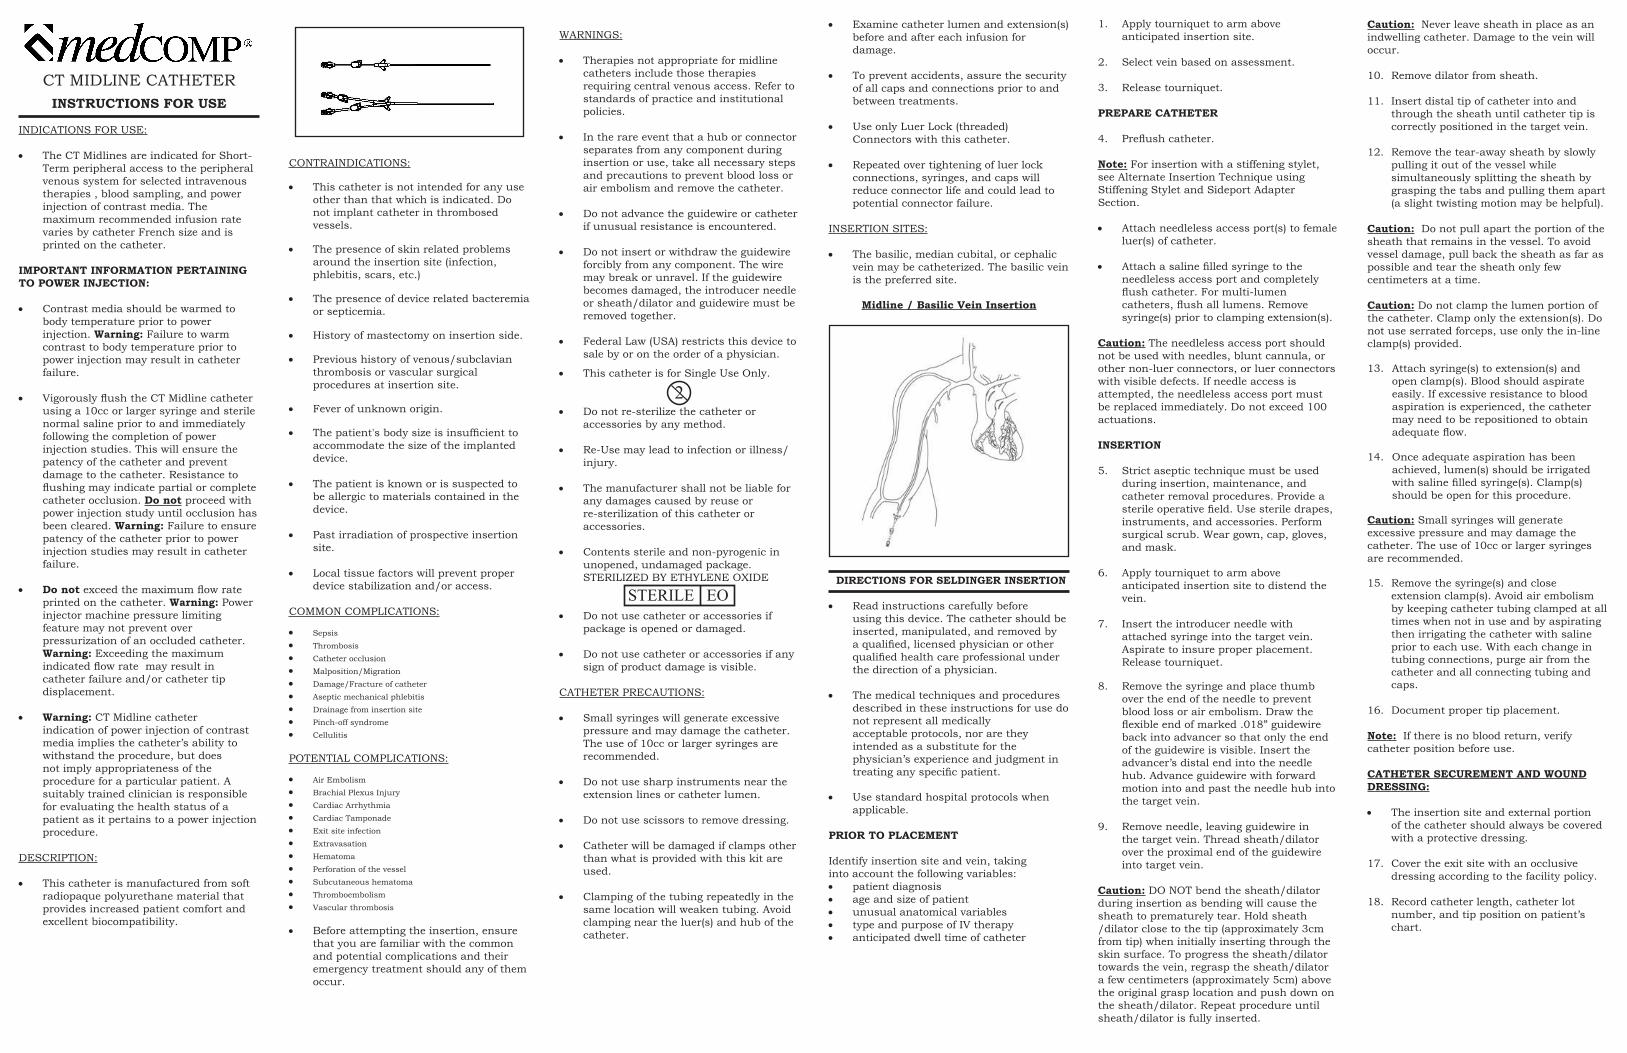
INSERTION SITES:
• The basilic, median cubital, or cephalic vein may be catheterized. The basilic vein is the preferred site.
Midline / Basilic Vein Insertion
DIRECTIONS FOR SELDINGER INSERTION
• Read instructions carefully before using this device. The catheter should be
inserted, manipulated, and removed by a qualified, licensed physician or other qualified health care professional under the direction of a physician.
• The medical techniques and procedures described in these instructions for use do not represent all medically
acceptable protocols, nor are they intended as a substitute for the physician’s experience and judgment in
treating any specific patient.
• Use standard hospital protocols when applicable.
PRIOR TO PLACEMENT
Identify insertion site and vein, takinginto account the following variables:• patient diagnosis• age and size of patient• unusual anatomical variables• type and purpose of IV therapy• anticipated dwell time of catheter
1. Apply tourniquet to arm above anticipated insertion site.
2. Select vein based on assessment.
3. Release tourniquet.
PREPARE CATHETER
4. Preflush catheter.
Note: For insertion with a stiffening stylet, see Alternate Insertion Technique using Stiffening Stylet and Sideport AdapterSection.
• Attach needleless access port(s) to female luer(s) of catheter.
• Attach a saline filled syringe to the needleless access port and completely
flush catheter. For multi-lumen catheters, flush all lumens. Remove syringe(s) prior to clamping extension(s).
Caution: The needleless access port shouldnot be used with needles, blunt cannula, or other non-luer connectors, or luer connectorswith visible defects. If needle access is attempted, the needleless access port must be replaced immediately. Do not exceed 100actuations.
INSERTION
5. Strict aseptic technique must be used during insertion, maintenance, and catheter removal procedures. Provide a sterile operative field. Use sterile drapes, instruments, and accessories. Perform surgical scrub. Wear gown, cap, gloves, and mask.
6. Apply tourniquet to arm above anticipated insertion site to distend the
vein.
7. Insert the introducer needle with attached syringe into the target vein.
Aspirate to insure proper placement. Release tourniquet.
8. Remove the syringe and place thumb over the end of the needle to prevent blood loss or air embolism. Draw the flexible end of marked .018” guidewire
back into advancer so that only the end of the guidewire is visible. Insert the advancer’s distal end into the needle hub. Advance guidewire with forward motion into and past the needle hub into the target vein.
9. Remove needle, leaving guidewire in the target vein. Thread sheath/dilator over the proximal end of the guidewire into target vein.
Caution: DO NOT bend the sheath/dilator during insertion as bending will cause the sheath to prematurely tear. Hold sheath/dilator close to the tip (approximately 3cm from tip) when initially inserting through the skin surface. To progress the sheath/dilator towards the vein, regrasp the sheath/dilator a few centimeters (approximately 5cm) above the original grasp location and push down on the sheath/dilator. Repeat procedure until sheath/dilator is fully inserted.
STERILE EO
2
Caution: Never leave sheath in place as an indwelling catheter. Damage to the vein will occur.
10. Remove dilator from sheath.
11. Insert distal tip of catheter into and through the sheath until catheter tip is correctly positioned in the target vein.
12. Remove the tear-away sheath by slowly pulling it out of the vessel while
simultaneously splitting the sheath by grasping the tabs and pulling them apart (a slight twisting motion may be helpful).
Caution: Do not pull apart the portion of the sheath that remains in the vessel. To avoid vessel damage, pull back the sheath as far as possible and tear the sheath only few centimeters at a time.
Caution: Do not clamp the lumen portion of the catheter. Clamp only the extension(s). Do not use serrated forceps, use only the in-line clamp(s) provided.
13. Attach syringe(s) to extension(s) and open clamp(s). Blood should aspirate easily. If excessive resistance to blood aspiration is experienced, the catheter may need to be repositioned to obtain adequate flow.
14. Once adequate aspiration has been achieved, lumen(s) should be irrigated with saline filled syringe(s). Clamp(s) should be open for this procedure.
Caution: Small syringes will generate excessive pressure and may damage the catheter. The use of 10cc or larger syringes are recommended.
15. Remove the syringe(s) and close extension clamp(s). Avoid air embolism
by keeping catheter tubing clamped at all times when not in use and by aspirating then irrigating the catheter with saline prior to each use. With each change in tubing connections, purge air from the catheter and all connecting tubing and caps.
16. Document proper tip placement.
Note: If there is no blood return, verifycatheter position before use.
CATHETER SECUREMENT AND WOUNDDRESSING:
• The insertion site and external portion of the catheter should always be covered with a protective dressing.
17. Cover the exit site with an occlusive dressing according to the facility policy.
18. Record catheter length, catheter lot number, and tip position on patient’s
chart.
CONTRAINDICATIONS:
• This catheter is not intended for any use other than that which is indicated. Do not implant catheter in thrombosed
vessels.
• The presence of skin related problems around the insertion site (infection,
phlebitis, scars, etc.)
• The presence of device related bacteremia or septicemia.
• History of mastectomy on insertion side.
• Previous history of venous/subclavian thrombosis or vascular surgical
procedures at insertion site.
• Fever of unknown origin.
• The patient's body size is insufficient to accommodate the size of the implanted device.
• The patient is known or is suspected to be allergic to materials contained in the device.
• Past irradiation of prospective insertion site.
• Local tissue factors will prevent proper device stabilization and/or access.
COMMON COMPLICATIONS:
• Sepsis• Thrombosis• Catheter occlusion• Malposition/Migration• Damage/Fracture of catheter• Aseptic mechanical phlebitis• Drainage from insertion site• Pinch-off syndrome• Cellulitis
POTENTIAL COMPLICATIONS:
• Air Embolism• Brachial Plexus Injury• Cardiac Arrhythmia• Cardiac Tamponade• Exit site infection• Extravasation• Hematoma• Perforation of the vessel• Subcutaneous hematoma• Thromboembolism• Vascular thrombosis
• Before attempting the insertion, ensure that you are familiar with the common and potential complications and their emergency treatment should any of them occur.
4. If resistance is felt - STOP. Retape the catheter and apply a warm compress to the extremity for 20-30 minutes.
5. Resume removal procedure. If catheter remains “stuck” follow institutional policy for further intervention.
6. Apply pressure, if necessary, until bleeding stops and dress site following institutional policy.
Note: Inspect catheter and measure length. It must be equal to baseline measurement taken when the catheter was inserted.
ALTERNATE INSERTION TECHNIQUEUSING STIFFENING STYLET AND
SIDEPORT ADAPTER
PREPARE CATHETER
1. Preflush catheter, sideport adapter, and needleless access ports.
• Attach saline filled syringe to luer of sideport adapter and flush adapter and catheter. Clamp sideport extension and remove syringe. If using multi- lumen catheter, attach needleless access port to remaining extension. Attach saline filled syringe to the needleless access port and completely flush catheter lumen. Remove syringe from needleless access port prior to clamping extension. Flush remaining needleless access port and set aside.
Caution: Never close clamp on catheter stylet; stylet and catheter damage may result.
Caution: The needleless access port should not be used with needles, blunt cannula, or other non-luer connectors, or luer connectorswith visible defects. If needle access is attempted, the needleless access port must be replaced immediately. Do not exceed 100 actuations.
INSERTION
2. Strict aseptic technique must be used during insertion, maintenance, and catheter removal procedures. Provide a sterile operative field. Use sterile drapes, instruments, and accessories. Perform surgical scrub. Wear gown, cap, gloves, and mask.
3. Apply tourniquet to arm above anticipated insertion site to distend the vein.
4. Insert the introducer needle with attached syringe into the target vein. Aspirate to insure proper placement. Release tourniquet.
5. Remove the syringe and place thumb over the end of the needle to prevent blood loss or air embolism. Draw the flexible end of marked .018" guidewire back into advancer so that only the end of the guidewire is visible. Insert the advancer's distal end into the needle hub. Advance guidewire with forward motion into and past the needle hub into the target vein.
Caution: Do not attempt to reinsert stylet once it has been withdrawn.
Caution: Never leave stylet in place after catheter insertion; injury may occur. Remove both stylet and sideport adapter after insertion.
13. Continue following directions at step #13 of "Insertion" Section.
PN 40529 Rev. 4/15D
6. Remove needle, leaving guidewire in the target vein. Thread sheath/dilator over the proximal end of the guidewire into target vein.
Caution: DO NOT bend the sheath/dilator during insertion as bending will cause the sheath to prematurely tear. Hold sheath/dilator close to the tip (approximately 3cm from tip) when initially inserting through the skin surface. To progress the sheath/dilator towards the vein, regrasp the sheath/dilator a few centimeters (approximately 5cm) above the original grasp location and push down onthe sheath/dilator. Repeat procedure until sheath/dilator is fully inserted.
Caution: Never leave sheath in place as an indwelling catheter. Damage to the vein will occur.
7. Loosen locking collar of sideport and withdraw stylet back beyond the point where the catheter is to be trimmed by at least ¼ inch (1cm).
Caution: Never attempt to cut stylet.
Caution: Always withdraw stylet back beyond the tip of the catheter prior to insertion.
8. Once proper catheter length and stylet position has been achieved, tighten locking collar to keep stylet in place.
9. Remove dilator from sheath.
10. Insert distal tip of catheter into and through the sheath until catheter tip is correctly positioned in the target vein.
11. Remove the tear-away sheath by slowly pulling it out of the vessel while simultaneously splitting the sheath by grasping the tabs and pulling them apart (a slight twisting motion may be helpful).
Caution: Do not pull apart the portion of the sheath that remains in the vessel. To avoid vessel damage, pull back the sheath as far as possible and tear the sheath only few centimeters at a time.
Caution: Do not clamp the lumen portion of the catheter. Clamp only the extension(s). Do not use the serrated forceps, use only the in-line clamp(s) provided.
12. Loosen locking collar of sideport. Remove the stylet by applying gentle pressure with one hand above the insertion site while grasping the stylet with the other hand and slowly pulling back with a constant motion. Remove sideport adapter and replace with needleless access port. Attach saline filled syringe to needleless access port, aspirate lumen and then irrigate with saline. Remove syringe prior to clamping extension.
Caution: If difficulty and/or bunching of the catheter lumen are experienced while removing the stylet, additional flushing of the catheter may be helpful. The catheter may need to be repositioned to allow for removal of the stylet.
Note: During all dressing changes the external length of the catheter should be assessed to determine if catheter migration has occurred. Periodically confirm catheter placement and tip location.
• Flushing and Locking - Flush and lock catheter according to your institutional policy.
• The catheter should be flushed with normal saline prior to drug administration to remove locking solution.
• After drug administration each lumen should be flushed again with normal
saline and then locked to maintain patency.
Injection Caps - Injection cap(s) or needleless access port(s) should be changedper institutional policy. If using the suppliedneedleless access port(s), do not exceed 100actuations.
CATHETER PERFORMANCE
• Occluded/Partially Occluded Catheter- If resistance is encountered to aspirating
or flushing, the lumen may be partially or completely occluded.
Warning: Do not flush against resistance.
• If the lumen will neither aspirate nor flush, and it has been determined that the catheter is occluded with blood,
follow institutional declotting procedure.
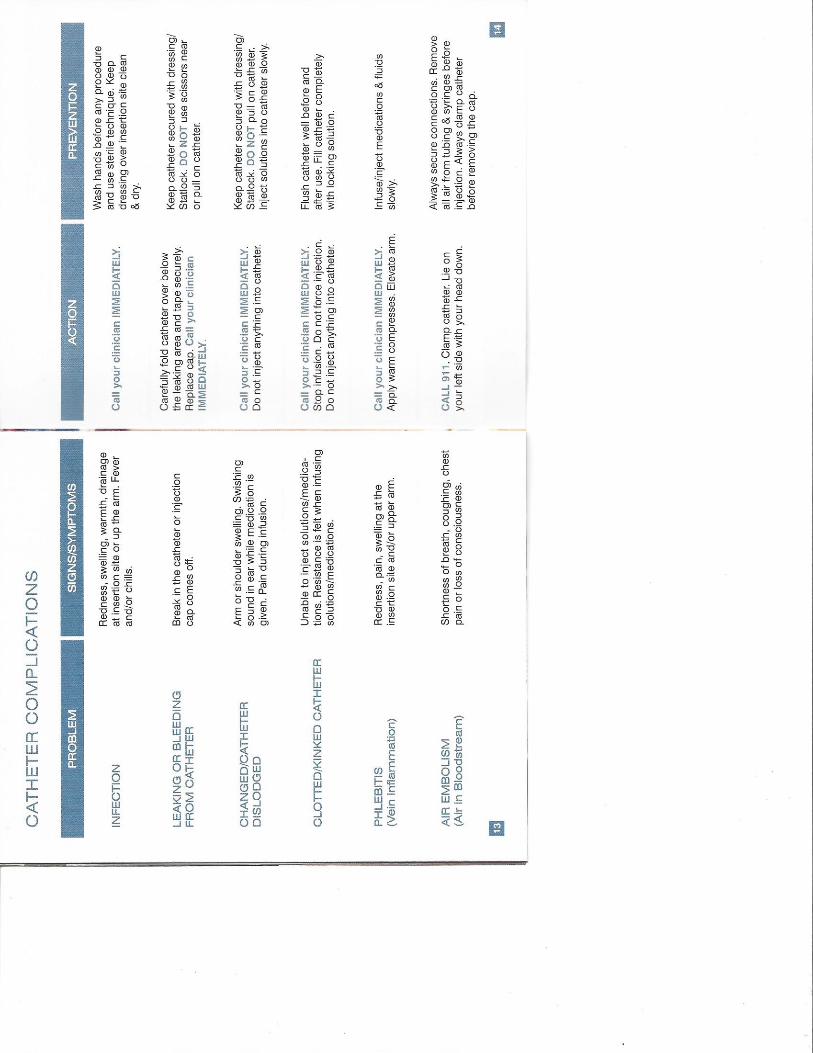
Infection
Caution: Due to risk of exposure to HIV or other blood borne pathogens, health care professionals should always use Universal Blood and Body Fluid Precautions in the care of all patients.
• Sterile technique should always be strictly adhered to.
• Clinically recognized infection should be treated promptly per institutional policy.
CATHETER REMOVAL
Warning: Only a clinician familiar with the appropriate techniques should attempt the following procedures.
Caution: Always review facility protocol, potential complications and their treatment, warnings, and precautions prior to catheter removal.
1. Wash hands, gather equipment.
2. Remove old dressing and inspect insertion site for redness, tenderness, and drainage.
3. Grasp catheter near insertion site and using a slow steady motion, remove catheter from vein.
WARRANTY
Medcomp® WARRANTS THAT THIS PRODUCTWAS MANUFACTURED ACCORDING TOAPPLICABLE STANDARDS AND SPECIFICATIONS.PATIENT CONDITION, CLINICAL TREATMENT,AND PRODUCT MAINTENANCE MAY EFFECTTHE PERFORMANCE OF THIS PRODUCT. USE OFTHIS PRODUCT SHOULD BE IN ACCORDANCEWITH THE INSTRUCTIONS PROVIDED AND ASDIRECTED BY THE PRESCRIBING PHYSICIAN.
Because of continuing product improvement, prices,specifications, and model availability are subject tochange without notice. Medcomp® reserves the right to modify its products or contents in accordance with all relevant regulatory requirements.
Medcomp® is a registered trademark of Medical Components, Inc.
EU Representative: MPS Medical Product Service GmbH Borngasse 20 35619 Braunfels Germany
POWER INJECTION PROCEDURE
1. Remove the injection/needleless cap from the CT Midline catheter.
2. Using a 10cc or larger syringe(s), aspirate catheter lumen(s) to assure patency and remove locking solution. Discard syringe(s).
3. Attach a 10cc or larger syringe filled with sterile normal saline and vigorously flush the catheter with the full 10cc of sterile normal saline. Warning: Failure to ensure patency of the catheter prior to power injection studies may result in catheter failure.
4. Detach syringe.
5. Attach the power injection device to the CT Midline catheter per manufacturer’s recommendations.
Warning: Always use connector tubing between power injector syringe and catheter. Do not attempt to connect power injector syringe directly to the catheter. Damage may result.
6. Complete power injection study taking care not to exceed the flow rate limits. Warning: Exceeding the maximum indicated flow rate may result in catheter failure and/or catheter tip displacement.
7. Disconnect the power injection device.
8. Flush the CT Midline catheter with 10cc of sterile normal saline, using a 10cc or larger syringe. For multi-lumen catheters, flush all lumens after power injection.
9. Replace the injection/needleless cap on the CT Midline catheter.
INFUSION
• Before infusion begins all connections should be examined carefully.
• Frequent visual inspection should be conducted to detect leaks to prevent blood loss or air embolism.
• If a leak is found, the catheter should be clamped immediately and replaced.
Caution: Only clamp catheter with in-line clamps provided.
• Necessary remedial action must be taken prior to the continuation of the
treatment.
Note: Excessive blood loss may lead topatient shock.
CATHETER MAINTENANCE
• Dressing Changes - A dressing should cover the insertion site at all times. The dressing should be changed per institutional policy or any time the dressing becomes soiled, wet, or non-occlusive.
SYMBOL TABLE
Manufacturer
Keep Dry
Do Not Re-use
Non-pyrogenic
Keep Away from Sunlight
Upper Limit of Temperature
Sterilized Using Ethylene Oxide
Do Not Use if Package is Damaged
Use By Date
Do Not Resterilize
Lot Number
Catalogue Number
Authorized Representative in the European Community

Clinical Performance Improvement
Sentara Healthcare proprietary information, for internal use only
10/2015, r 9/8/2016
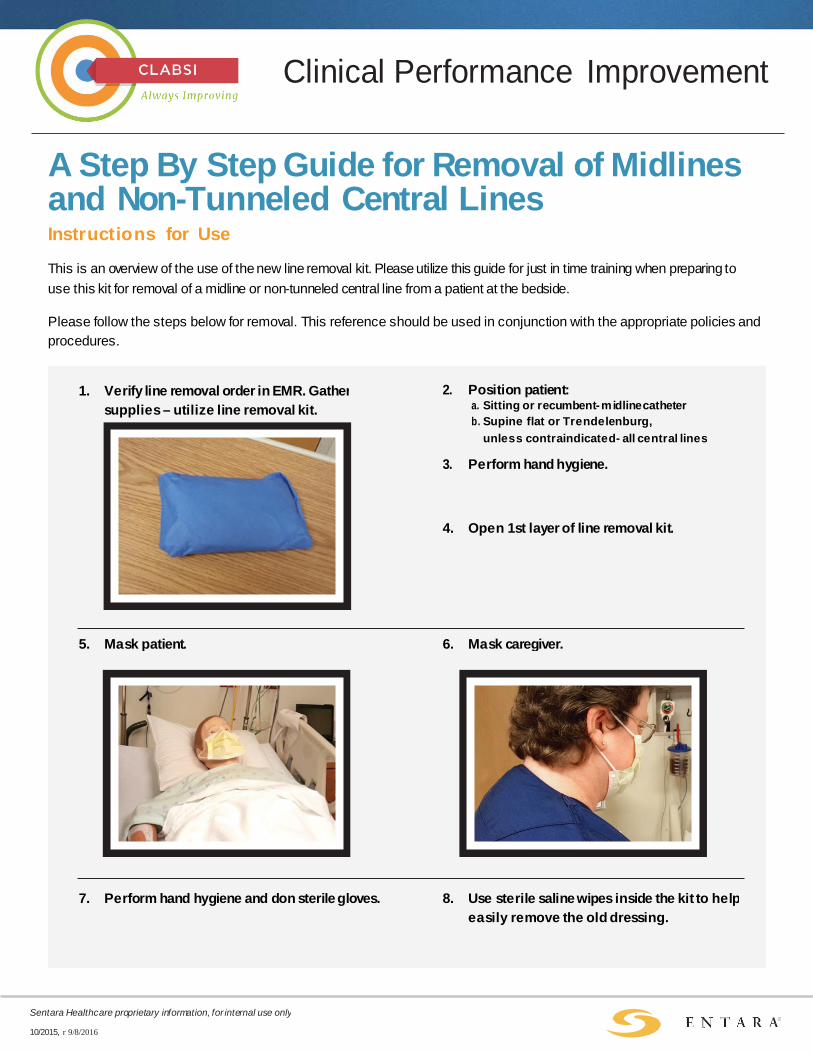
A Step By Step Guide for Removal of Midlines and Non-Tunneled Central Lines Instructions for Use
This is an overview of the use of the new line removal kit. Please utilize this guide for just in time training when preparing to use this kit for removal of a midline or non-tunneled central line from a patient at the bedside.
Please follow the steps below for removal. This reference should be used in conjunction with the appropriate policies and procedures.
1. Verify line removal order in EMR. Gather supplies – utilize line removal kit.
2. Position patient: a. Sitting or recumbent- midline catheter b. Supine flat or Trendelenburg,
unless contraindicated- all central lines 3. Perform hand hygiene.
4. Open 1st layer of line removal kit.
5. Mask patient. 6. Mask caregiver.
7. Perform hand hygiene and don sterile gloves. 8. Use sterile saline wipes inside the kit to help easily remove the old dressing.

Clinical Performance Improvement
Sentara Healthcare proprietary information, for internal use only
10/2015, r 9/8/2016
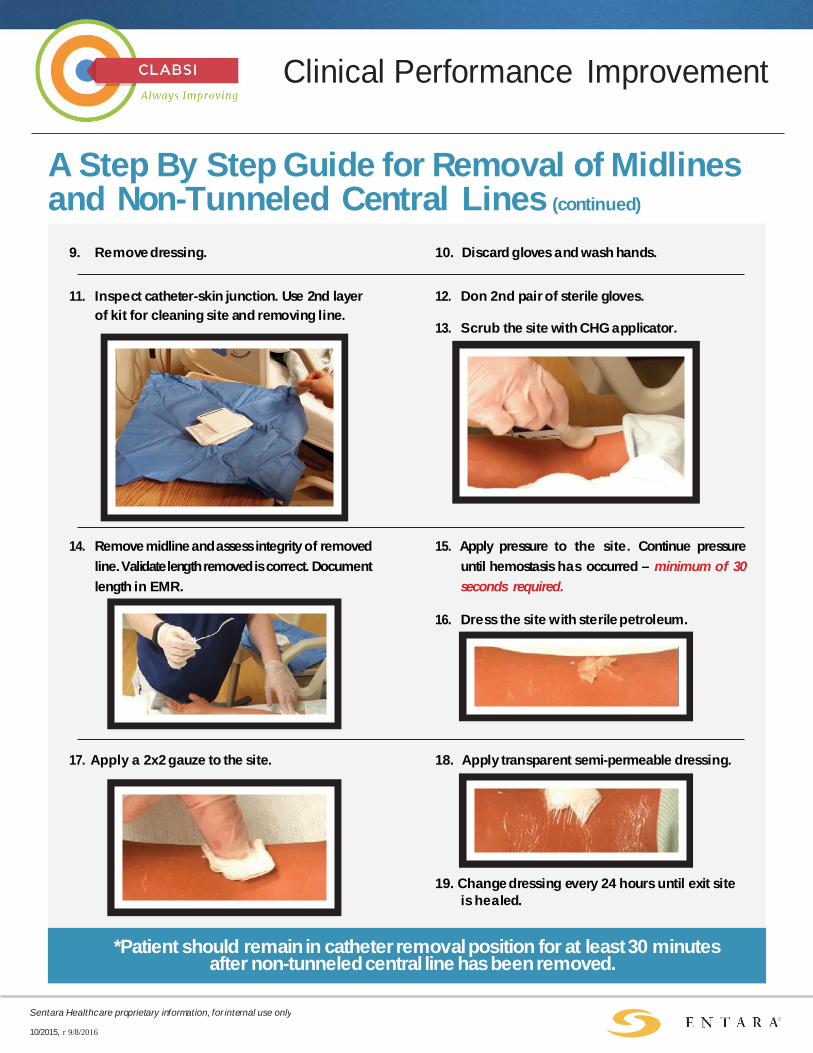
A Step By Step Guide for Removal of Midlines and Non-Tunneled Central Lines (continued)
9. Remove dressing. 10. Discard gloves and wash hands.
11. Inspect catheter-skin junction. Use 2nd layer of kit for cleaning site and removing line.
12. Don 2nd pair of sterile gloves.
13. Scrub the site with CHG applicator.
14. Remove midline and assess integrity of removed line. Validate length removed is correct. Document length in EMR.
15. Apply pressure to the site. Continue pressure until hemostasis has occurred – minimum of 30 seconds required.
16. Dress the site with sterile petroleum.
17. Apply a 2x2 gauze to the site. 18. Apply transparent semi-permeable dressing.
19. Change dressing every 24 hours until exit site is healed.
*Patient should remain in catheter removal position for at least 30 minutes after non-tunneled central line has been removed.
CLABSI
Central Line Policies and Job Aids
Policies:
• Adult CVAD Insertion, Care, Maintenance, Removal Policy
• Adult CVAD Flushing Guidelines Policy
• Nursing Care of Adult Patients with CVADs Present on Admission Policy
• Central Line Catheter Guidewire Exchange Policy
Job Aids:
• CVAD Dressing Change, Maintenance, and Blood Sampling Checklist
• Midline and CVAD Dressing Change Checklist
• Midline Catheter and Non-Tunneled CVAD Removal Competency Checklist
Approved, CLABSI Steering Committee 3/3/2017
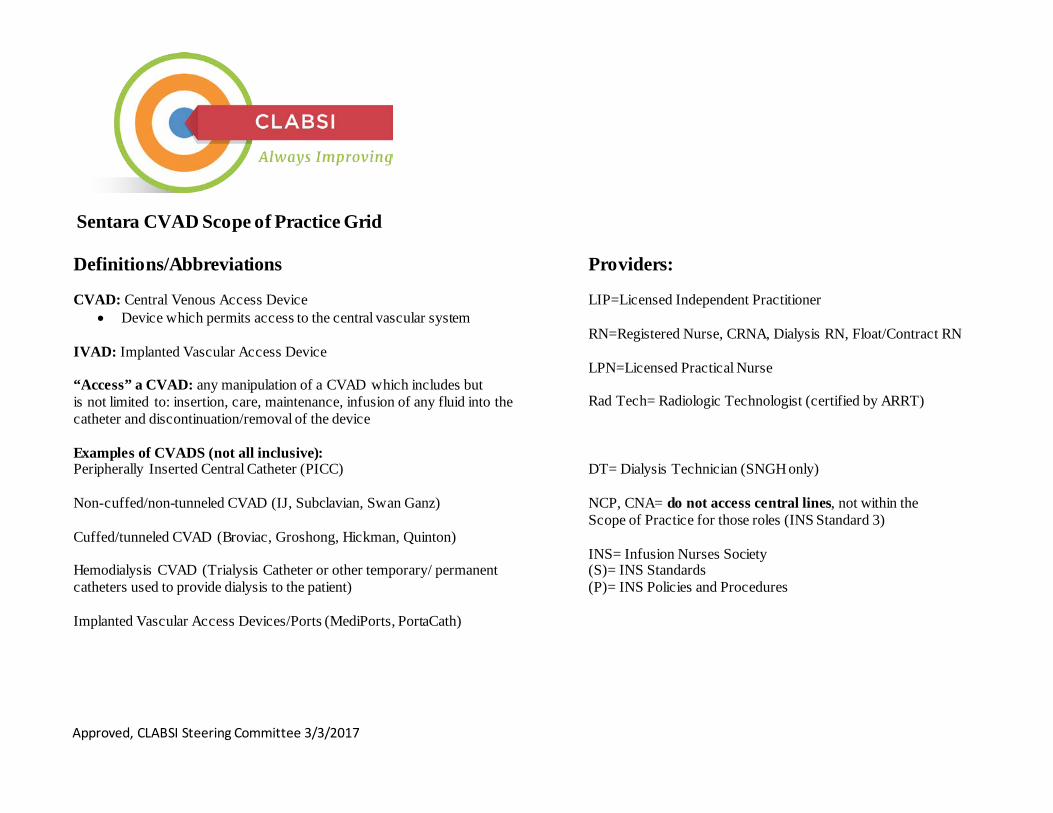
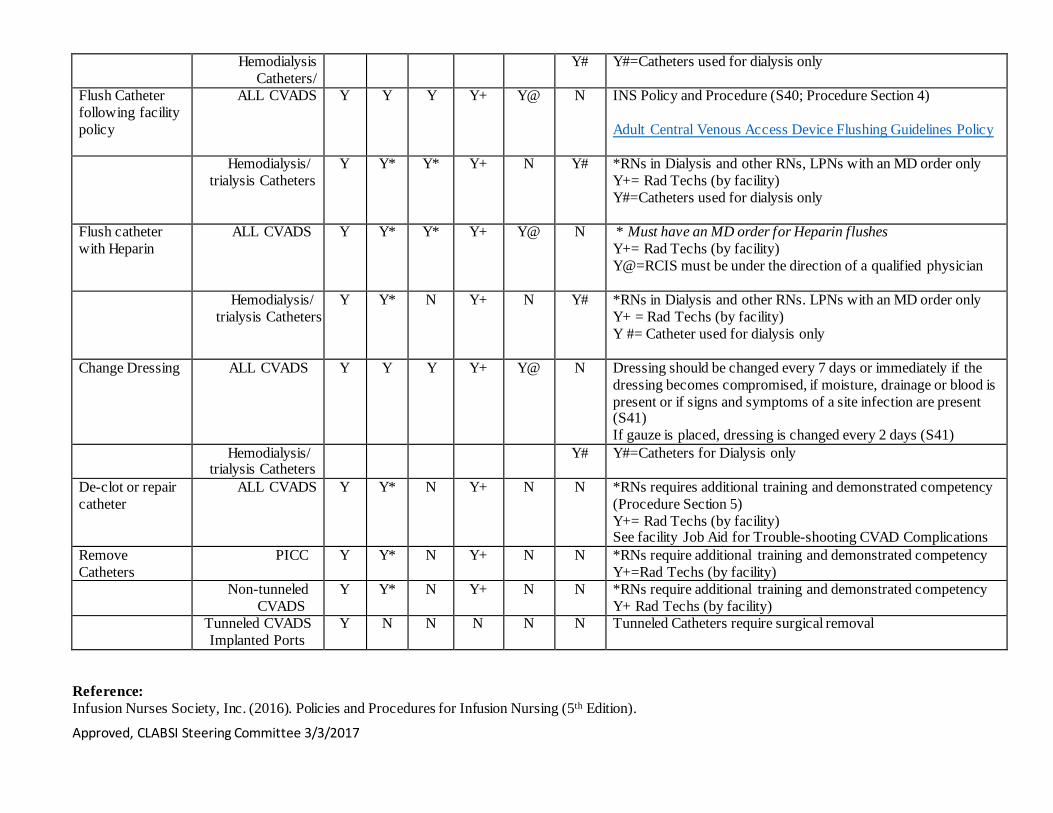
Sentara CVAD Scope of Practice Grid
Definitions/Abbreviations CVAD: Central Venous Access Device
• Device which permits access to the central vascular system IVAD: Implanted Vascular Access Device “Access” a CVAD: any manipulation of a CVAD which includes but is not limited to: insertion, care, maintenance, infusion of any fluid into the catheter and discontinuation/removal of the device
Providers: LIP=Licensed Independent Practitioner RN=Registered Nurse, CRNA, Dialysis RN, Float/Contract RN LPN=Licensed Practical Nurse Rad Tech= Radiologic Technologist (certified by ARRT)
Examples of CVADS (not all inclusive): Peripherally Inserted Central Catheter (PICC) Non-cuffed/non-tunneled CVAD (IJ, Subclavian, Swan Ganz) Cuffed/tunneled CVAD (Broviac, Groshong, Hickman, Quinton) Hemodialysis CVAD (Trialysis Catheter or other temporary/ permanent catheters used to provide dialysis to the patient)
DT= Dialysis Technician (SNGH only) NCP, CNA= do not access central lines, not within the Scope of Practice for those roles (INS Standard 3) INS= Infusion Nurses Society (S)= INS Standards (P)= INS Policies and Procedures
Implanted Vascular Access Devices/Ports (MediPorts, PortaCath)
Approved, CLABSI Steering Committee 3/3/2017
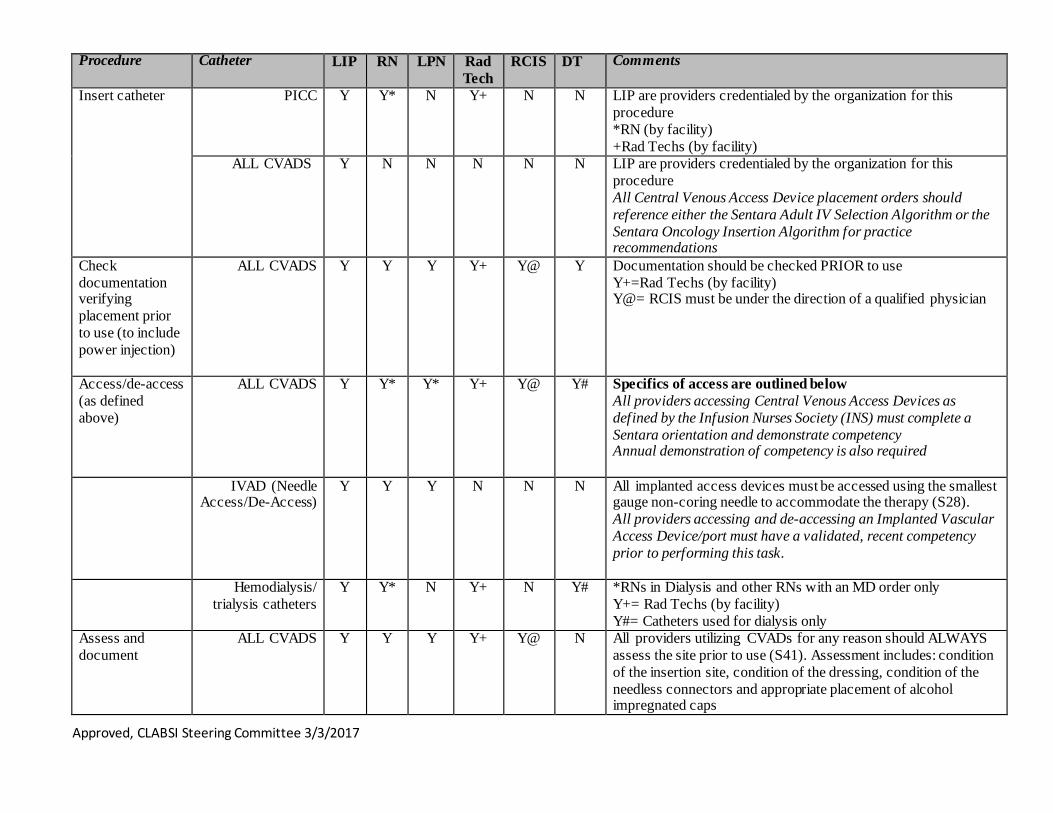
Procedure Catheter LIP RN LPN Rad Tech
RCIS DT Comments
Insert catheter PICC Y Y* N Y+ N N LIP are providers credentialed by the organization for this procedure *RN (by facility) +Rad Techs (by facility)
ALL CVADS
Y N N N N N LIP are providers credentialed by the organization for this procedure All Central Venous Access Device placement orders should reference either the Sentara Adult IV Selection Algorithm or the Sentara Oncology Insertion Algorithm for practice recommendations
Check documentation verifying placement prior to use (to include power injection)
ALL CVADS Y Y Y Y+ Y@ Y Documentation should be checked PRIOR to use Y+=Rad Techs (by facility) Y@= RCIS must be under the direction of a qualified physician
Access/de-access (as defined above)
ALL CVADS Y Y* Y* Y+ Y@ Y# Specifics of access are outlined below All providers accessing Central Venous Access Devices as defined by the Infusion Nurses Society (INS) must complete a Sentara orientation and demonstrate competency Annual demonstration of competency is also required
IVAD (Needle Access/De-Access)
Y Y Y N N N All implanted access devices must be accessed using the smallest gauge non-coring needle to accommodate the therapy (S28). All providers accessing and de-accessing an Implanted Vascular Access Device/port must have a validated, recent competency prior to performing this task.
Hemodialysis/ trialysis catheters
Y Y* N Y+ N Y# *RNs in Dialysis and other RNs with an MD order only Y+= Rad Techs (by facility) Y#= Catheters used for dialysis only
Assess and document
ALL CVADS Y Y Y Y+ Y@ N All providers utilizing CVADs for any reason should ALWAYS assess the site prior to use (S41). Assessment includes: condition of the insertion site, condition of the dressing, condition of the needless connectors and appropriate placement of alcohol impregnated caps
Approved, CLABSI Steering Committee 3/3/2017
Hemodialysis Catheters/
Y# Y#=Catheters used for dialysis only
Flush Catheter following facility policy
ALL CVADS Y Y Y Y+ Y@ N INS Policy and Procedure (S40; Procedure Section 4) Adult Central Venous Access Device Flushing Guidelines Policy
Hemodialysis/ trialysis Catheters
Y Y* Y* Y+ N Y# *RNs in Dialysis and other RNs, LPNs with an MD order only Y+= Rad Techs (by facility) Y#=Catheters used for dialysis only
Flush catheter with Heparin
ALL CVADS Y Y* Y* Y+ Y@ N * Must have an MD order for Heparin flushes Y+= Rad Techs (by facility) Y@=RCIS must be under the direction of a qualified physician
Hemodialysis/ trialysis Catheters
Y Y* N Y+ N Y# *RNs in Dialysis and other RNs. LPNs with an MD order only Y+ = Rad Techs (by facility) Y #= Catheter used for dialysis only
Change Dressing ALL CVADS Y Y Y Y+ Y@ N Dressing should be changed every 7 days or immediately if the dressing becomes compromised, if moisture, drainage or blood is present or if signs and symptoms of a site infection are present (S41) If gauze is placed, dressing is changed every 2 days (S41)
Hemodialysis/ trialysis Catheters
Y# Y#=Catheters for Dialysis only
De-clot or repair catheter
ALL CVADS Y Y* N Y+ N N *RNs requires additional training and demonstrated competency (Procedure Section 5) Y+= Rad Techs (by facility) See facility Job Aid for Trouble-shooting CVAD Complications
Remove Catheters
PICC Y Y* N Y+ N N *RNs require additional training and demonstrated competency Y+=Rad Techs (by facility)
Non-tunneled CVADS
Y Y* N Y+ N N *RNs require additional training and demonstrated competency Y+ Rad Techs (by facility)
Tunneled CVADS Implanted Ports
Y N N N N N Tunneled Catheters require surgical removal
Reference: Infusion Nurses Society, Inc. (2016). Policies and Procedures for Infusion Nursing (5th Edition).
1
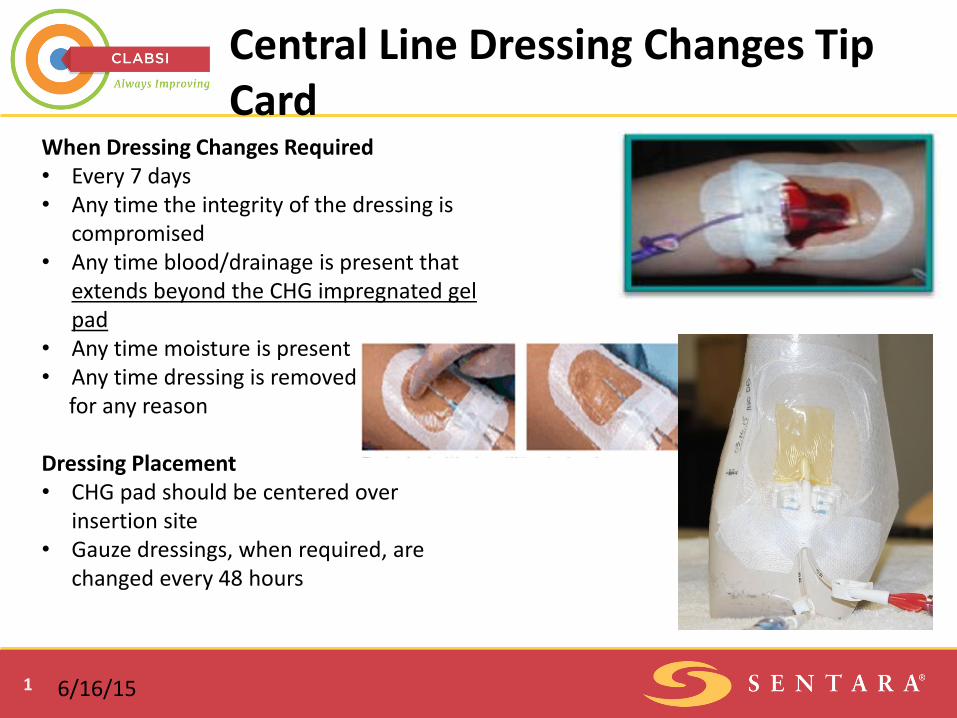
Central Line Dressing Changes Tip Card
When Dressing Changes Required • Every 7 days • Any time the integrity of the dressing is
compromised • Any time blood/drainage is present that
extends beyond the CHG impregnated gel pad
• Any time moisture is present • Any time dressing is removed for any reason
Dressing Placement • CHG pad should be centered over
insertion site • Gauze dressings, when required, are
changed every 48 hours
6/16/15
Clinical Performance Improvement
Sentara Healthcare proprietary information, for internal use only
10/2015, r 9/8/2016
A Step By Step Guide for Removal of Midlines and Non-Tunneled Central Lines Instructions for Use
This is an overview of the use of the new line removal kit. Please utilize this guide for just in time training when preparing to use this kit for removal of a midline or non-tunneled central line from a patient at the bedside.
Please follow the steps below for removal. This reference should be used in conjunction with the appropriate policies and procedures.
1. Verify line removal order in EMR. Gather supplies – utilize line removal kit.
2. Position patient: a. Sitting or recumbent- midline catheter b. Supine flat or Trendelenburg,
unless contraindicated- all central lines 3. Perform hand hygiene.
4. Open 1st layer of line removal kit.
5. Mask patient. 6. Mask caregiver.
7. Perform hand hygiene and don sterile gloves. 8. Use sterile saline wipes inside the kit to help easily remove the old dressing.
Clinical Performance Improvement
Sentara Healthcare proprietary information, for internal use only
10/2015, r 9/8/2016
A Step By Step Guide for Removal of Midlines and Non-Tunneled Central Lines (continued)
9. Remove dressing. 10. Discard gloves and wash hands.
11. Inspect catheter-skin junction. Use 2nd layer of kit for cleaning site and removing line.
12. Don 2nd pair of sterile gloves.
13. Scrub the site with CHG applicator.
14. Remove midline and assess integrity of removed line. Validate length removed is correct. Document length in EMR.
15. Apply pressure to the site. Continue pressure until hemostasis has occurred – minimum of 30 seconds required.
16. Dress the site with sterile petroleum.
17. Apply a 2x2 gauze to the site. 18. Apply transparent semi-permeable dressing.
19. Change dressing every 24 hours until exit site is healed.
*Patient should remain in catheter removal position for at least 30 minutes after non-tunneled central line has been removed.
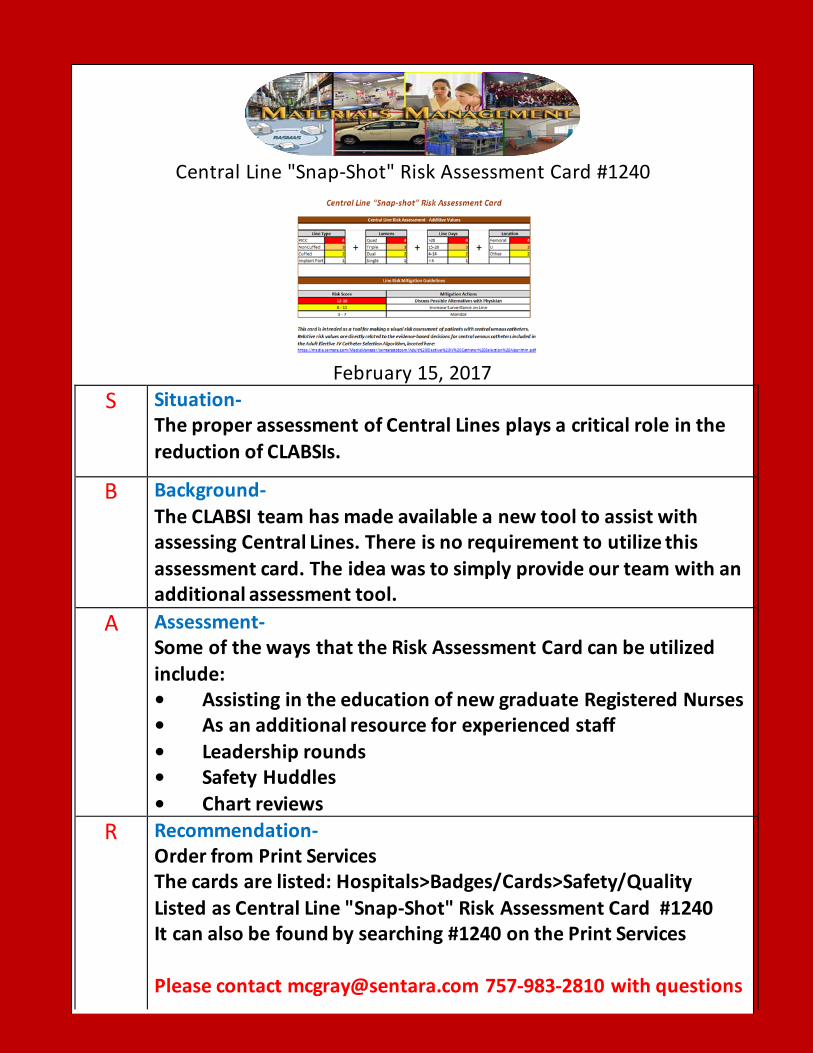
Central Line "Snap-Shot" Risk Assessment Card #1240
February 15, 2017
S Situation- The proper assessment of Central Lines plays a critical role in the reduction of CLABSIs.
B Background- The CLABSI team has made available a new tool to assist with assessing Central Lines. There is no requirement to utilize this assessment card. The idea was to simply provide our team with an additional assessment tool.
A Assessment- Some of the ways that the Risk Assessment Card can be utilized include: • Assisting in the education of new graduate Registered Nurses • As an additional resource for experienced staff • Leadership rounds • Safety Huddles • Chart reviews
R Recommendation- Order from Print Services The cards are listed: Hospitals>Badges/Cards>Safety/Quality Listed as Central Line "Snap-Shot" Risk Assessment Card #1240 It can also be found by searching #1240 on the Print Services Please contact [email protected] 757-983-2810 with questions
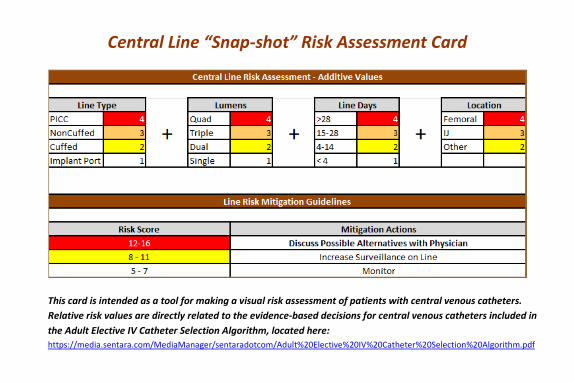
Central Line “Snap-shot” Risk Assessment Card
This card is intended as a tool for making a visual risk assessment of patients with central venous catheters. Relative risk values are directly related to the evidence-based decisions for central venous catheters included in the Adult Elective IV Catheter Selection Algorithm, located here: https://media.sentara.com/MediaManager/sentaradotcom/Adult%20Elective%20IV%20Catheter%20Selection%20Algorithm.pdf
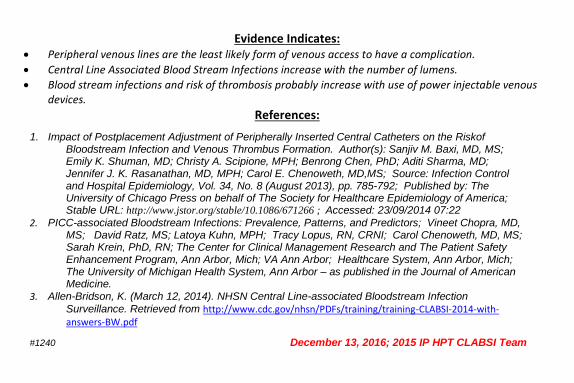
Evidence Indicates: • Peripheral venous lines are the least likely form of venous access to have a complication. • Central Line Associated Blood Stream Infections increase with the number of lumens. • Blood stream infections and risk of thrombosis probably increase with use of power injectable venous
devices. References:
1. Impact of Postplacement Adjustment of Peripherally Inserted Central Catheters on the Riskof Bloodstream Infection and Venous Thrombus Formation. Author(s): Sanjiv M. Baxi, MD, MS; Emily K. Shuman, MD; Christy A. Scipione, MPH; Benrong Chen, PhD; Aditi Sharma, MD; Jennifer J. K. Rasanathan, MD, MPH; Carol E. Chenoweth, MD,MS; Source: Infection Control and Hospital Epidemiology, Vol. 34, No. 8 (August 2013), pp. 785-792; Published by: The University of Chicago Press on behalf of The Society for Healthcare Epidemiology of America; Stable URL: http://www.jstor.org/stable/10.1086/671266 ; Accessed: 23/09/2014 07:22
2. PICC-associated Bloodstream Infections: Prevalence, Patterns, and Predictors; Vineet Chopra, MD, MS; David Ratz, MS; Latoya Kuhn, MPH; Tracy Lopus, RN, CRNI; Carol Chenoweth, MD, MS; Sarah Krein, PhD, RN; The Center for Clinical Management Research and The Patient Safety Enhancement Program, Ann Arbor, Mich; VA Ann Arbor; Healthcare System, Ann Arbor, Mich; The University of Michigan Health System, Ann Arbor – as published in the Journal of American Medicine.
3. Allen-Bridson, K. (March 12, 2014). NHSN Central Line-associated Bloodstream Infection Surveillance. Retrieved from http://www.cdc.gov/nhsn/PDFs/training/training-CLABSI-2014-with-answers-BW.pdf
#1240 December 13, 2016; 2015 IP HPT CLABSI Team
1
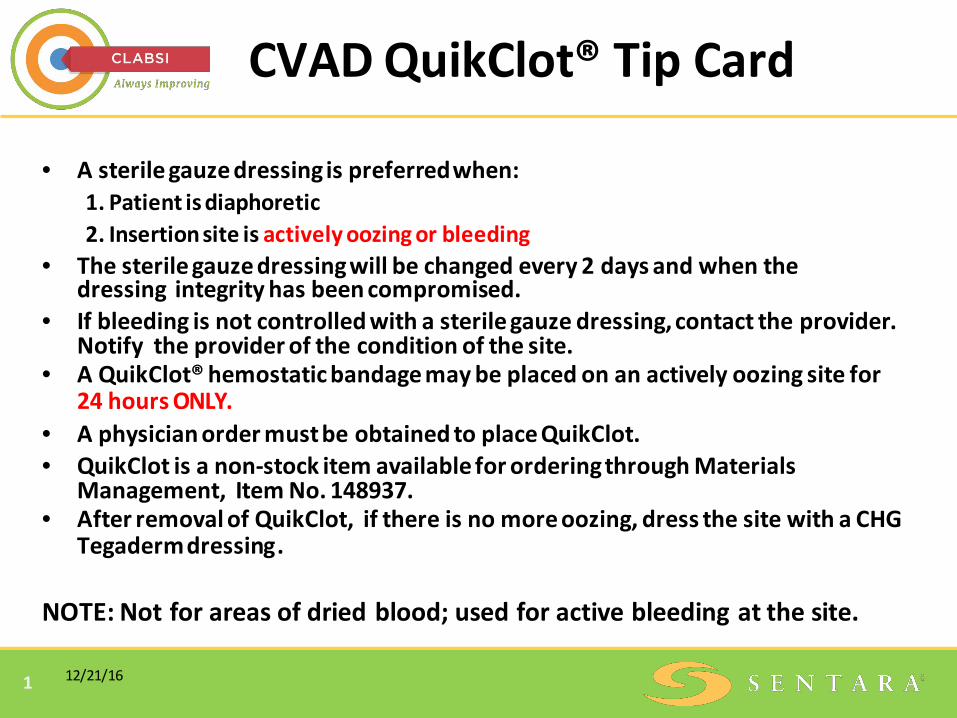
CVAD QuikClot® Tip Card
• A sterile gauze dressing is preferredwhen:1. Patient is diaphoretic2. Insertion site is actively oozing or bleeding
• The sterile gauze dressing will be changed every 2 days and when thedressing integrity has been compromised.
• If bleeding is not controlled with a sterile gauze dressing, contact the provider. Notify the provider of the condition of the site.
• A QuikClot® hemostatic bandage may be placed on an actively oozing site for24 hours ONLY.
• A physician order must be obtained to place QuikClot.• QuikClot is a non-stock item available for ordering through Materials
Management, Item No. 148937.• After removal of QuikClot, if there is no more oozing, dress the site with a CHG
Tegaderm dressing.
NOTE: Not for areas of dried blood; used for active bleeding at the site.
12/21/16

PIV/ML Tip Sheet December 2015
Once Logged into PeopleSoft you can search for the Title of the learning required.
Select Learning from the Wavenet page and drop down to choose OneLink Learning
Launch OneLink & Sign in
Use the Search Field to Find the Learning you are looking for. Key words will work to filter the results, such as: “PIV” and “Midline”. You can also filter by learning type and select Web Based Training to narrow the results further.
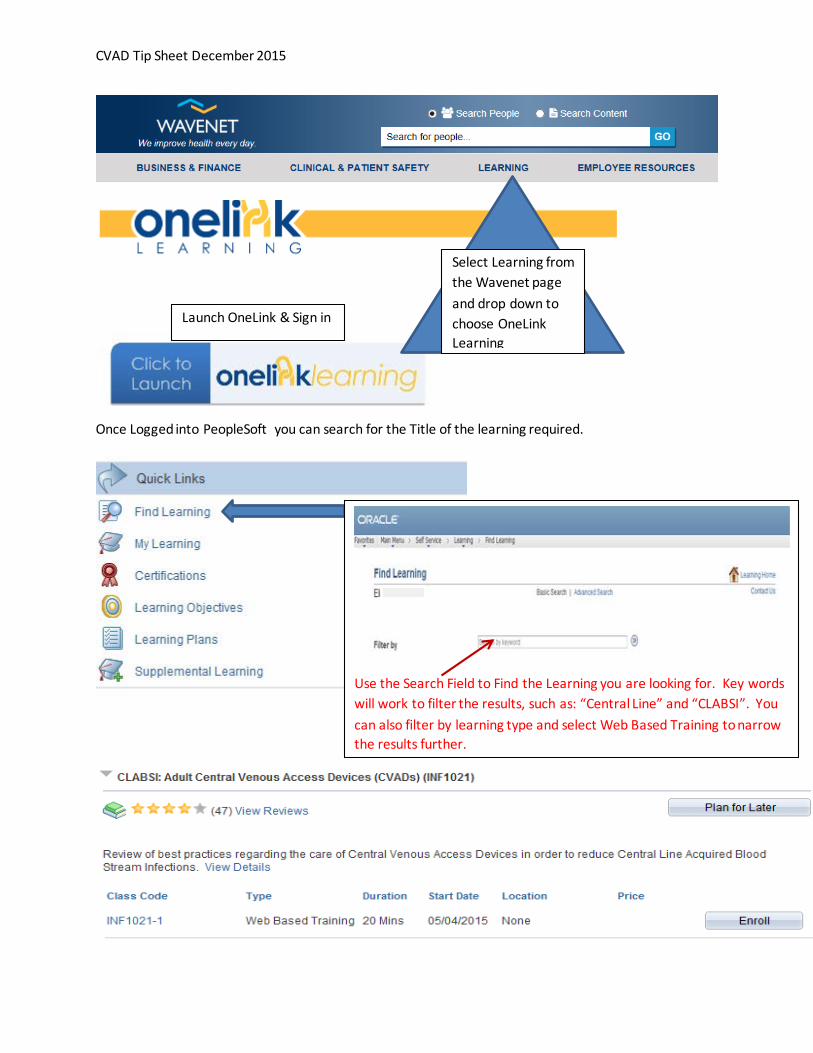
CVAD Tip Sheet December 2015
Once Logged into PeopleSoft you can search for the Title of the learning required.
Select Learning from the Wavenet page and drop down to choose OneLink Learning
Launch OneLink & Sign in
Use the Search Field to Find the Learning you are looking for. Key words will work to filter the results, such as: “Central Line” and “CLABSI”. You can also filter by learning type and select Web Based Training to narrow the results further.