Embed Size (px)
Citation preview

Chromebook: UNNPP Office 365 from Home
Follow the steps in this document to install and configure a smartcard reader on a Chromebook for access to Office 365.
Requirements: Chromebook, HID Omnikey SmartCard Reader
NOTE: Make sure to only insert your picture badge.
1) Plug the Smart Card Reader into a USB Port on your Chromebook.
2) Install the Smart Card Connector app
Install the app by clicking the following link: Smart Card Connector app
or
Open Chrome and browse to or copy and paste the following link:
https://chrome.google.com/webstore/detail/smart-card-connector/khpfeaanjngmcnplbdlpegiifgpfgdco
Select Add to Chrome
Select Add App

3) Install the Smart Card middleware app
Install the app by clicking the following link: Smart Card Middleware app
or
Open Chrome and browse to or copy and paste the following link:
https://chrome.google.com/webstore/detail/charismathics-smart-
card/haeblkpifdemlfnkogkipmghfcbonief?hl=en
Select Add to Chrome
Select Add App
When Prompted, Select Allow middleware to communicate with the Smart Card Connector

4) Install all UNNPP Certificates
Download UNNPP Certificates
Click or browse to the following link and save files to Downloads
https://navalnuclearlab.energy.gov/ckfinder/userfiles/files/InstallPIVCerts.zip
Select Show In Folder
Double click InstallPIVCerts.zip
Select three dots in upper right hand corner and Select all

Select three dots in upper right hand corner and Select Copy

Select Downloads
Select three dots in upper right hand corner and Select Paste
Import UNNPP Certificates
Open Chrome browser and connect to chrome://certificate-manager

Click the AUTHORITIES (tab)
Click IMPORT
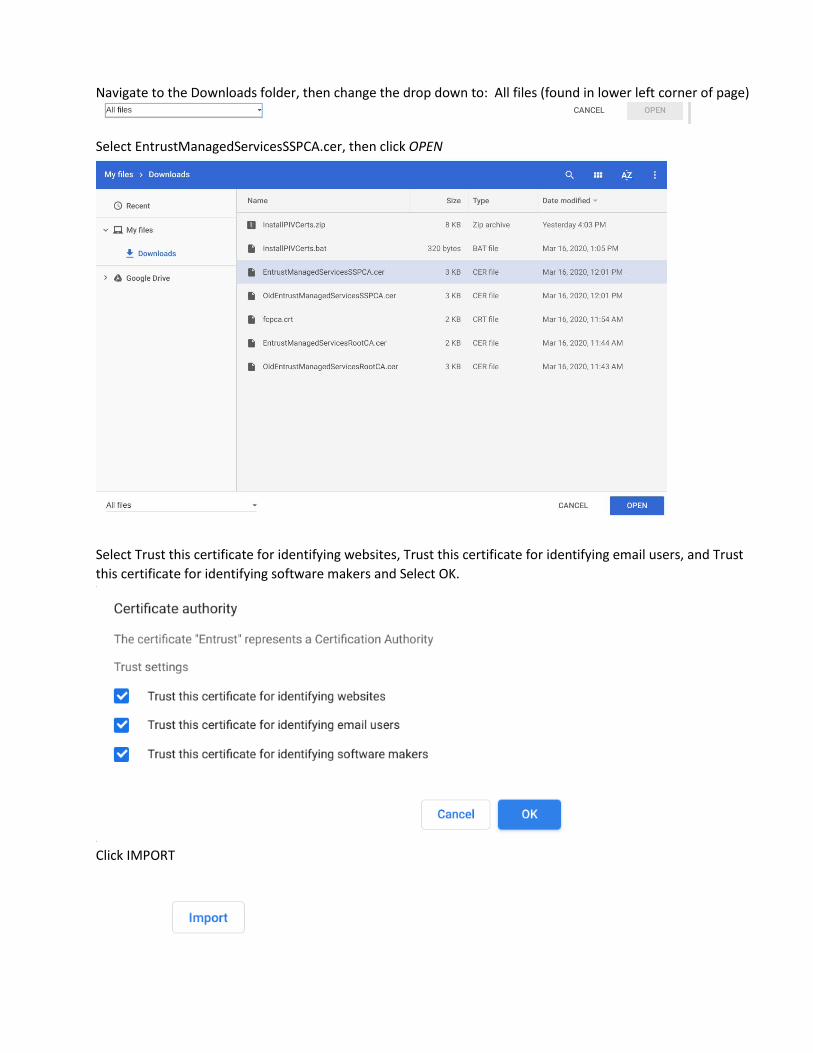
Navigate to the Downloads folder, then change the drop down to: All files (found in lower left corner of page)
Select EntrustManagedServicesRootCA.cer, then click OPEN

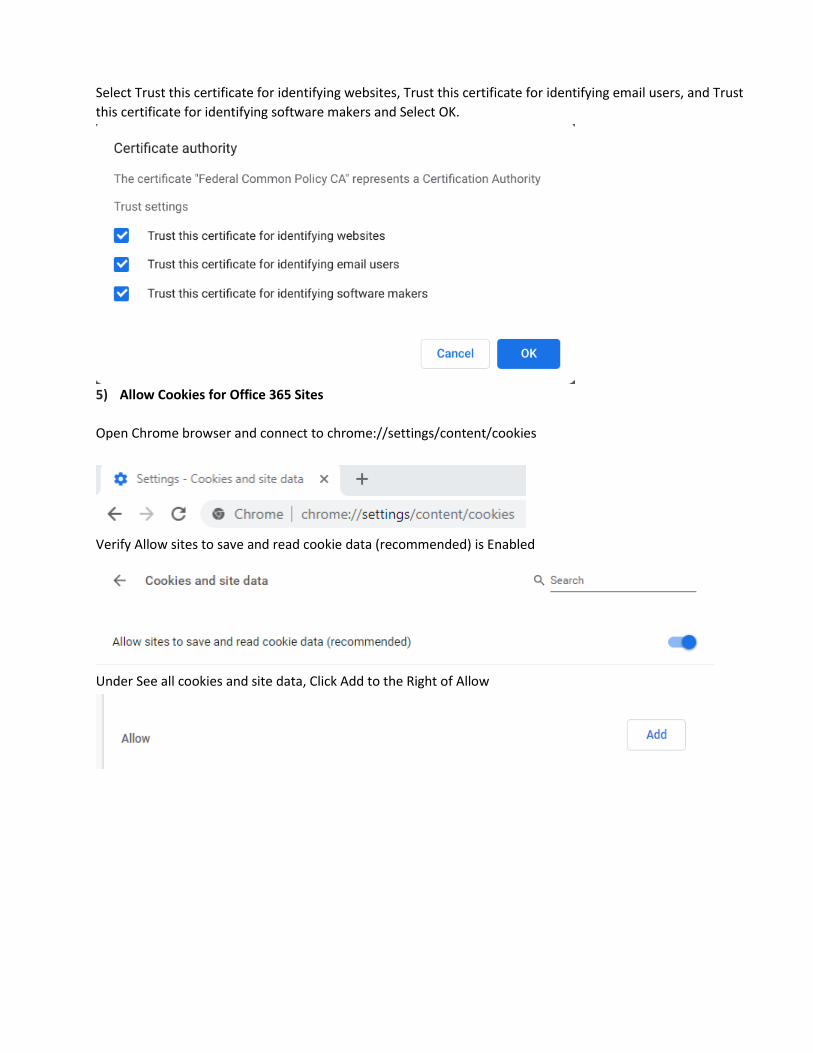
Select Trust this certificate for identifying websites, Trust this certificate for identifying email users, and Trust
this certificate for identifying software makers and Select OK.
Click IMPORT
Navigate to the Downloads folder, then change the drop down to: All files (found in lower left corner of page)

Select OldEntrustManagedServicesRootCA.cer, then click OPEN
Select Trust this certificate for identifying websites, Trust this certificate for identifying email users, and Trust
this certificate for identifying software makers and Select OK.
Click IMPORT
Navigate to the Downloads folder, then change the drop down to: All files (found in lower left corner of page)
Select EntrustManagedServicesSSPCA.cer, then click OPEN
Select Trust this certificate for identifying websites, Trust this certificate for identifying email users, and Trust
this certificate for identifying software makers and Select OK.
Click IMPORT

Navigate to the Downloads folder, then change the drop down to: All files (found in lower left corner of page)
Select OldEntrustManagedServicesSSPCA.cer, then click OPEN
Select Trust this certificate for identifying websites, Trust this certificate for identifying email users, and Trust
this certificate for identifying software makers and Select OK.
Click IMPORT

Navigate to the Downloads folder, then change the drop down to: All files (found in lower left corner of page)
Select Fcpca.crt, then click OPEN
Select Trust this certificate for identifying websites, Trust this certificate for identifying email users, and Trust
this certificate for identifying software makers and Select OK.
5) Allow Cookies for Office 365 Sites
Open Chrome browser and connect to chrome://settings/content/cookies
Verify Allow sites to save and read cookie data (recommended) is Enabled
Under See all cookies and site data, Click Add to the Right of Allow

In the Add a site dialogue box, enter https://login.microsoftonline.com, Click Add
Under See all cookies and site data, Click Add to the Right of Allow
In the Add a site dialogue box, enter https://login.microsoftonline.us, Click Add
Under See all cookies and site data, Click Add to the Right of Allow
In the Add a site dialogue box, enter https://office365.us, Click Add

When complete your Cookies and site data should be as follows
You are now ready to use your smart card to login to Microsoft Office 365!
6) Close and Re-open Google Chrome to ensure the settings are applied properly.
Click the 3 dots in the top right corner of the Chrome window. A menu will appear. Click on “New Incognito
Window”
7) In the Incognito Window, type portal.office365.us to navigate to the Office 365 login.

8) At the Office 365 login webpage, type your unclassified Office 365 email address in and click “Next”
9) You should arrive at the NNL Sign in Portal. Insert your Unclassified Picture badge into the HID card
reader. Click “Sign in with Badge and Pin”

10) A window asking you to “Select a certificate” will pop up. Your name will appear in the subject category.
Use the first certificate in the list, and click the “OK” button.
11) Windows Security will pop up in a new window asking for your pin. Enter the pin that you use to login to
Office 365 and click “OK”.

12) A window will appear asking if you want to stay signed in. Click “No”.
13) You are now logged into Office 365.
14) When you are finished, sign out by clicking your profile picture in the top right, and selecting sign out.
Afterward, close the browser and remove your Picture badge.
Document Location:
https://navalnuclearlab.energy.gov/ckfinder/userfiles/files/chromeOS_cardreader_install.pdf