Embed Size (px)
Citation preview

Castle/Fort Unit Introduction
By Judy T. Sweeney
Overview of Unit: This unit focuses on the geography of where castles and forts are built. A castle in Wales and a fort in Oregon are studied and compared. Buildings in the students’ community are sketched and examined. Students explore why structures are built where they are. Lessons invite students to design a castle or fort using geography as a decision making tool. Students establish the best location in their town to build an imaginary castle or fort and also build a model of the castle or fort, which they have designed. This unit is designed for students in grades 2-6. Students participate in hands-on activities, inquiry, fieldwork and discussion to learn about landforms, physical environment, and human activities that influence the building of structures. The unit integrates math, science, geography, history, and architecture. Students acquire skills through mapping, analyzing, and creating models to scale. What is a castle? The name castle has been given to many places, which have walls, towers and ditches. Usually when we think of a castle, we mean a special type of medieval building. A medieval castle was built to protect a family and to be the family home. It was the place where the owner conducted business concerning the land he owned. The king or queen in exchange for military support gave the land to him or her in times of war. The land provided the family wealth from crops and animals.

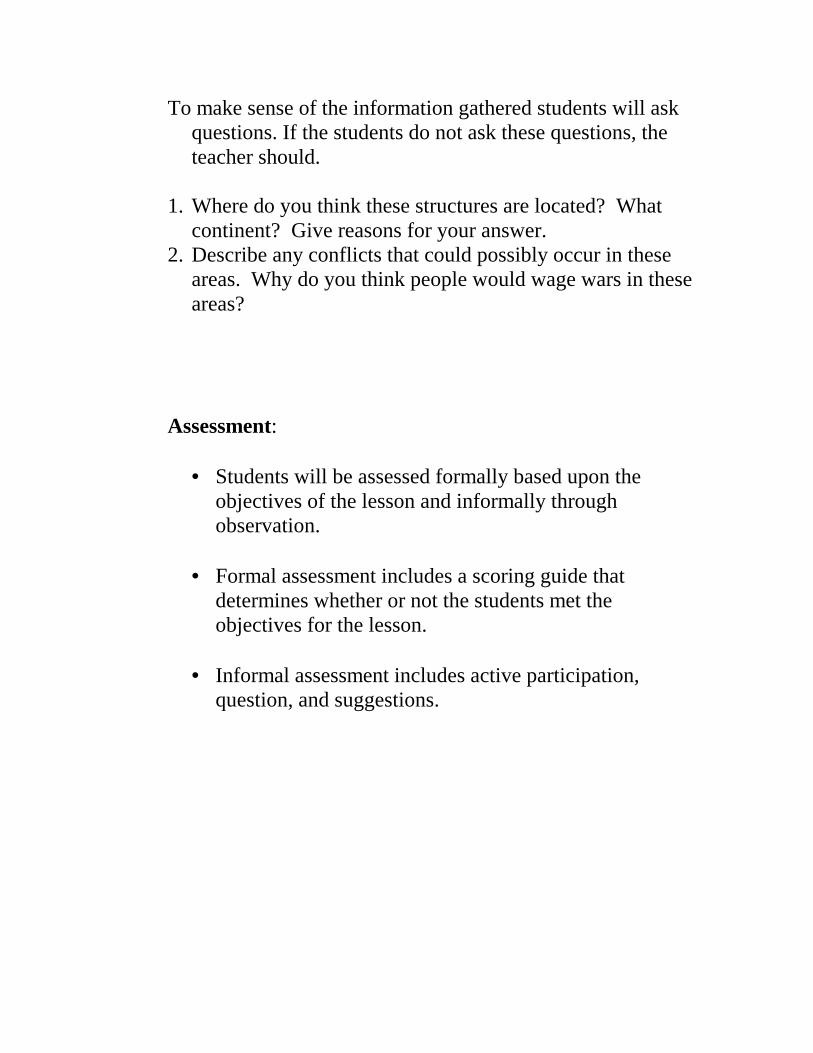
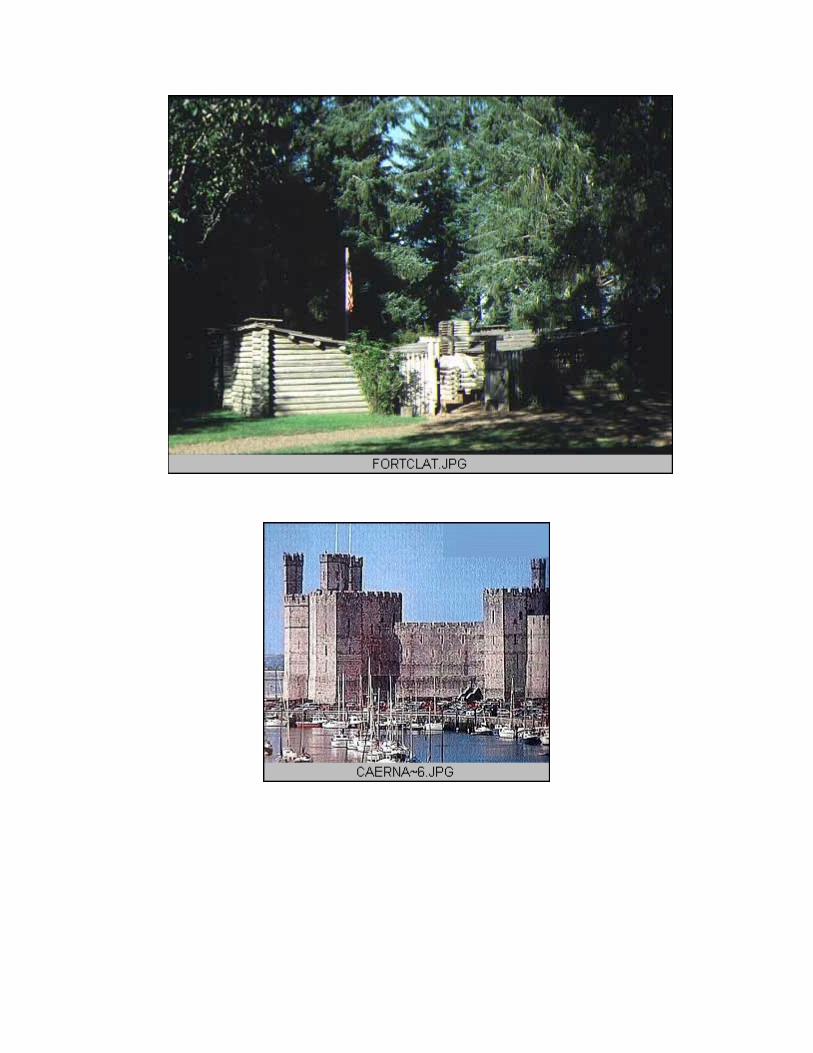
In 1283 Caernarfon Castle was constructed by King Edward I in Wales at the southern end of the Menai Strait. This castle was built for a fortress and for the government center. King Edward’s son was born in the castle in 1284 and was known as the English Prince of Wales. The eldest son has customarily become the ‘Prince of Wales’. In 1969, his mother, Queen Elizabeth, crowned Prince Charles at Caernarfon. What is a fort? By the 19th century warfare had changed. Enemies had guns instead of arrows and catapults. Forts were built to protect and to show ownership of the land. There was a person appointed to direct the building and the activities of the fort. When one thinks of a fort, a picture comes to mind of a military fort with wooden stockades, but most of the forts first established in the west were trading posts. Fort Clatsop was built to shelter the Lewis and Clark Expedition throughout the winter of 1805. The 55 sq. foot fort was built in the land of the Clatsop Indians, near to elk for food and clothes, and close to the ocean for salt. The fort is positioned in the wetlands of the Coast Range in Oregon next to the Columbia River Estuary. The Geographical Question How do physical and cultural factors influence the location of structures in a community? The Unit This unit compares a castle in Wales with a fort in Oregon. Students find out why castles and forts are built where they are and
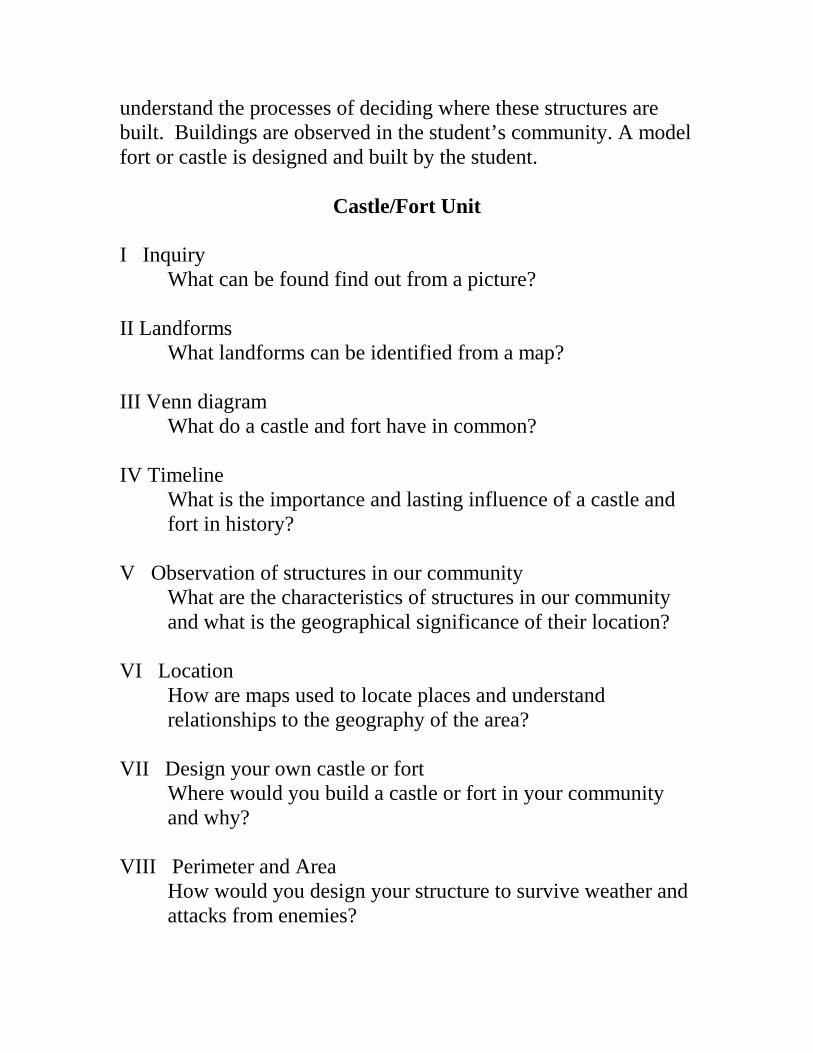
understand the processes of deciding where these structures are built. Buildings are observed in the student’s community. A model fort or castle is designed and built by the student.
Castle/Fort Unit I Inquiry What can be found find out from a picture? II Landforms What landforms can be identified from a map? III Venn diagram What do a castle and fort have in common? IV Timeline
What is the importance and lasting influence of a castle and fort in history?
V Observation of structures in our community What are the characteristics of structures in our community and what is the geographical significance of their location?
VI Location
How are maps used to locate places and understand relationships to the geography of the area?
VII Design your own castle or fort Where would you build a castle or fort in your community and why?
VIII Perimeter and Area How would you design your structure to survive weather and attacks from enemies?

IX Assessment How will a model show accurate information and appropriate materials for a structure to be functional?
Resources I Fort Clatsop Bruchac, Joseph. Sacajawea. Scholastic, New York: 2000. Fifer, Barbara. Going Along with Lewis and Clark. American &
World Geographic Publishing, Helena Montana: 2000. Kroll, Steven. Lewis and Clark, Explorers of the American West.
Holiday House, New York: 1994.
Smith, Roland. The Captain’s Dog, My Journey with the Lewis and Clark Tribe. Harcourt Brace & Company, Orlando: 1999. Sullivan, George. Lewis and Clark. Scholastic, New York: 1999. Wilmore, Kathy. “Lewis & Clark.” Kids Discover Magazine. Edpress, New York: 1996. II Caernarfon Castle Alderton, David. Castles. Ladybird Books, New York: 1996, 2nd Edition. Cooper, Michael, and Mike Corbishley. Real Castles, Digital Time Traveller. TAG Publishing, Ltd, Gravesend: 2000.

Gee, Robyn. Living in Castle Times. Usborne Publishing Ltd, London: 1991, Revised Edition. Gravett, Christopher. Castle. EyeWitness Books. Dorling Kindersley Publishing, Inc., New York: 2000, 2nd Edition. Hindley, Judy. The Time Traveller Book of Knights and Castles. Usborne Publishing Ltd, Belgium: 1976, 2nd Edition. Macaulay, David. Castle. Houghton Mifflin Company, Boston: 1984, 4th Impression. Nolan, Dennis. The Castle Builder. Macmillan Publishing Company, New York: 1993, 2nd Edition. Taylor, Arnold. Caernarfon Castle and Town Walls. Cadw: Welsh Historic Monuments, Cathays Park: 2001, 5th Edition. Web Sites I Fort Clatsop www.lewis-clark.org. Multi-media site called “Discovering Lewis and Clark.” www.lewisandclark.com Information, books for sale, and useful links. www.lewisandclark.org Site of Lewis and Clark Trail Heritage Foundation. www.nps.gov/focl/journey4.htm Lewis and Clark information. II Caernarfon Castle

www.castlewales.com/caernarf.html Information about Caernarfon; location, history and pictures. www.travelbritain.com/wales/castles/tour/caernarfon.html Information about Caernarfon; location, history and pictures.

Castle/Fort Inquiry, Lesson l
Overview: This unit answers the question “What can I find out from a picture?” This lesson is an inquiry regarding two structures. Students examine pictures and discover information about the structures.
Teaching Level: 2-6 Time Frame: 45 minutes
Connection to State Content Standards: Benchmark 2 Identify and analyze physical and human characteristics of places and region, the processes that have shaped them, and their geographic significance. Understand how humans affect the human environment.
National Geography Standards Addressed: Standard #1 How to use maps and other geographic representations, tools and technologies to acquire, process, and report information from a spatial perspective
Standard #4 The physical and human characteristics of places
Materials list: Labeled picture of Caernarfon or any castle (1 picture for each group of 4) Labeled picture of Ft. Clatsop or any fort (1 picture for each group of 4) Pencils Inquiry Worksheet

Introduction: This lesson is an ideal introduction to the study of a castle and a fort. Without prior knowledge, students learn from the pictures of the two places by making observations. As a group, the students place the information into two categories: fact and opinion. Questions are then generated.
Vocabulary: Landforms Vegetation Natural resources Environment Location Fact Opinion
Procedure:
• Review or introduce vocabulary words. • Divide the class into groups of 2. • Pass out pictures of the fort and the castle. It does not
matter which picture is examined first. • With the whole group, ask what the students see in their
pictures. After a few questions, pass out the worksheets. • Instruct the students to look at the pictures and answer
the questions or draw their observations. • Each student will complete a worksheet about the fort
and the castle. • After the students have had an opportunity to review
each picture, discuss their findings. • On the chalkboard or overhead make three categories:
Fact, Opinion, Question and write down the information gathered from the group discussion in the correct category.
To make sense of the information gathered students will ask questions. If the students do not ask these questions, the teacher should.
1. Where do you think these structures are located? What
continent? Give reasons for your answer. 2. Describe any conflicts that could possibly occur in these
areas. Why do you think people would wage wars in these areas?
Assessment:
• Students will be assessed formally based upon the objectives of the lesson and informally through observation.
• Formal assessment includes a scoring guide that
determines whether or not the students met the objectives for the lesson.
• Informal assessment includes active participation,
question, and suggestions.
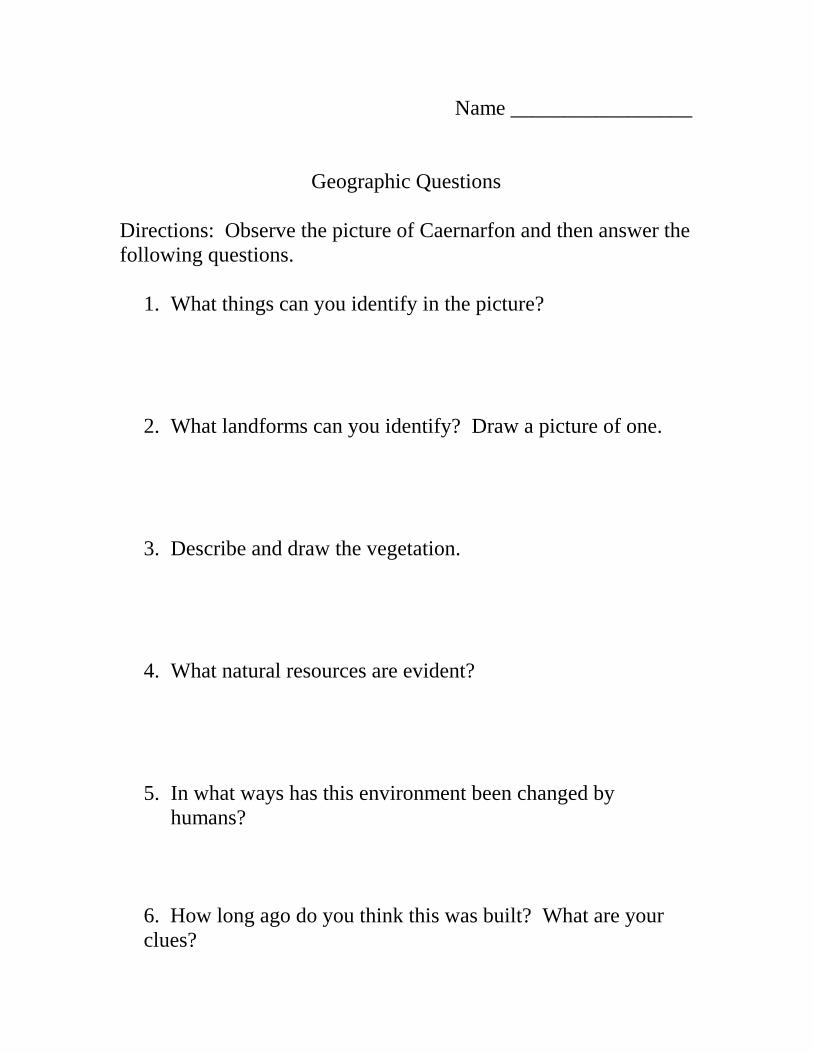
Name _________________ Geographic Questions Directions: Observe the picture of Caernarfon and then answer the following questions.
1. What things can you identify in the picture?
2. What landforms can you identify? Draw a picture of one.
3. Describe and draw the vegetation.
4. What natural resources are evident?
5. In what ways has this environment been changed by
humans?
6. How long ago do you think this was built? What are your clues?

Name _________________ Geographic Questions Directions: Observe the picture of Fort Clatsop and then answer the following questions.
6. What things can you identify in the picture?
7. What landforms can you identify? Draw a picture of one.
8. Describe and draw the vegetation.
9. What natural resources are evident?
10. In what ways has this environment been changed by
humans?
6. How long ago do you think this was built? What are your clues?
Castle/Fort
Landforms, Lesson 2
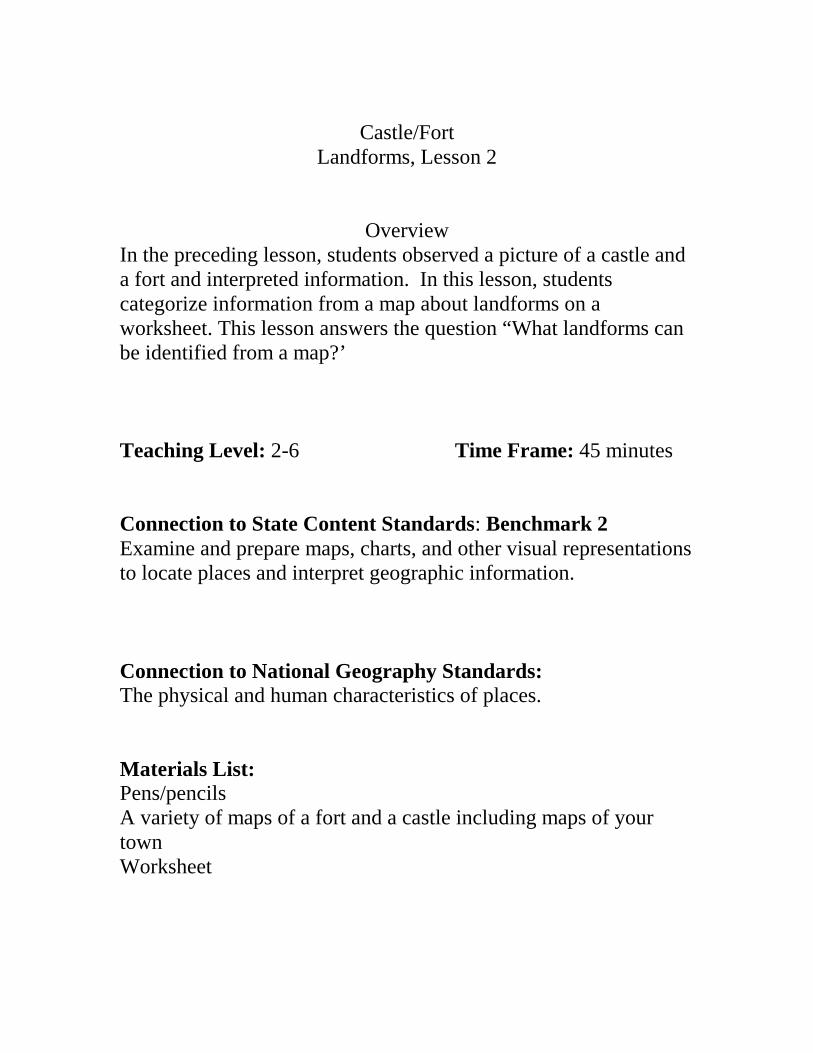
Overview In the preceding lesson, students observed a picture of a castle and a fort and interpreted information. In this lesson, students categorize information from a map about landforms on a worksheet. This lesson answers the question “What landforms can be identified from a map?’ Teaching Level: 2-6 Time Frame: 45 minutes Connection to State Content Standards: Benchmark 2 Examine and prepare maps, charts, and other visual representations to locate places and interpret geographic information. Connection to National Geography Standards: The physical and human characteristics of places. Materials List: Pens/pencils A variety of maps of a fort and a castle including maps of your town Worksheet

Introduction: Students evaluate geographic information through the close study of maps. Students analyze various maps and identify landforms. Vocabulary:
Bay Lake Peninsula Mountain Coastline River Ocean Island Strait Procedure:
• Review or introduce vocabulary words • Pass out maps • Ask for observations about maps and questions that arise
from the observations “ I wonder….” • Pass out the worksheets • Instruct the students to look at the maps and identify
landforms for each map on the worksheet. • Discuss their findings • Questions • What are different types of maps that you have looked at?
How are they used differently and who uses them? • Are the maps similar to each other? • Are there any significant geographical features in the region
of the castle and fort?

Assessment Students will be evaluated based on written responses on the worksheet and participation in class discussions.


Bay Lake Peninsula Mountain Coastline River Ocean Island StraitFort Clatsop
Caernarfon
Your town
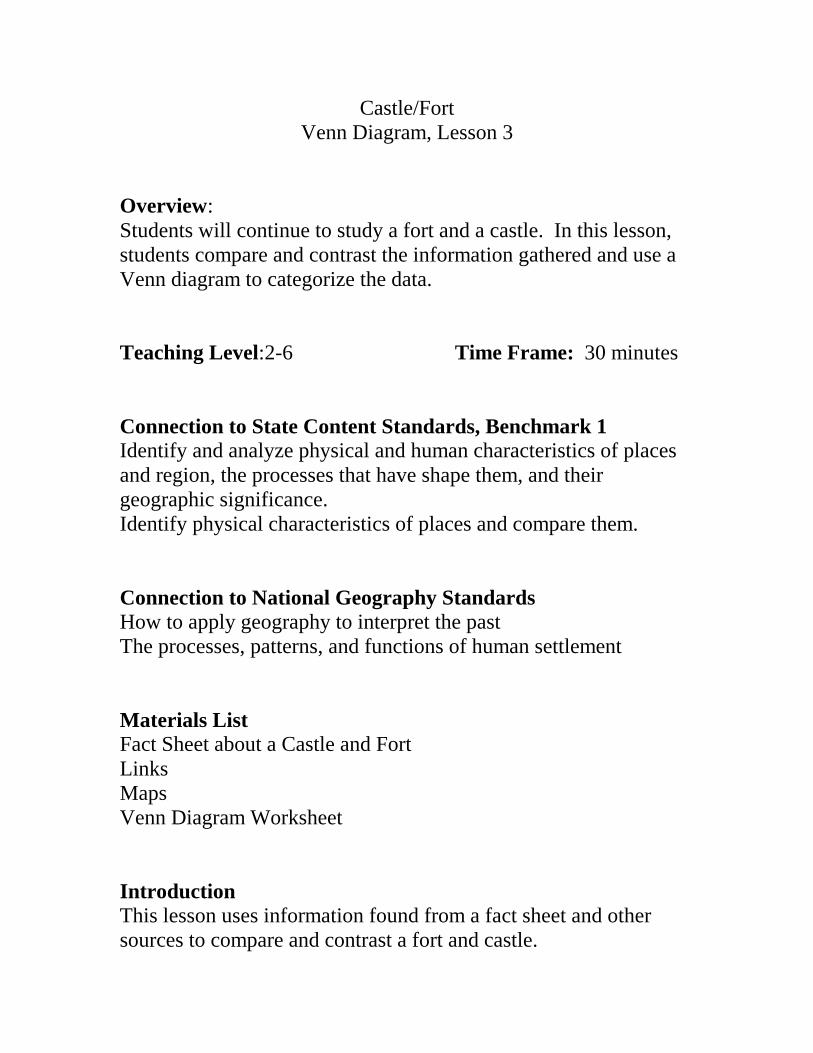
Castle/Fort Venn Diagram, Lesson 3
Overview: Students will continue to study a fort and a castle. In this lesson, students compare and contrast the information gathered and use a Venn diagram to categorize the data. Teaching Level:2-6 Time Frame: 30 minutes Connection to State Content Standards, Benchmark 1 Identify and analyze physical and human characteristics of places and region, the processes that have shape them, and their geographic significance. Identify physical characteristics of places and compare them. Connection to National Geography Standards How to apply geography to interpret the past The processes, patterns, and functions of human settlement Materials List Fact Sheet about a Castle and Fort Links Maps Venn Diagram Worksheet Introduction This lesson uses information found from a fact sheet and other sources to compare and contrast a fort and castle.

Procedure: • Review what students have learned about a castle and fort. • Introduce a Venn diagram. • Divide the class into groups of 2 • Pass out fact sheets • Model how to classify the information from the fact sheets • Students may use links to find additional information • Discuss information gathered and ask further questions.
Assessment
� Students will be assessed formally based upon the completion of their Venn Diagram using a scoring guide.
� Informal assessment includes active participation,
questions, and suggestions.

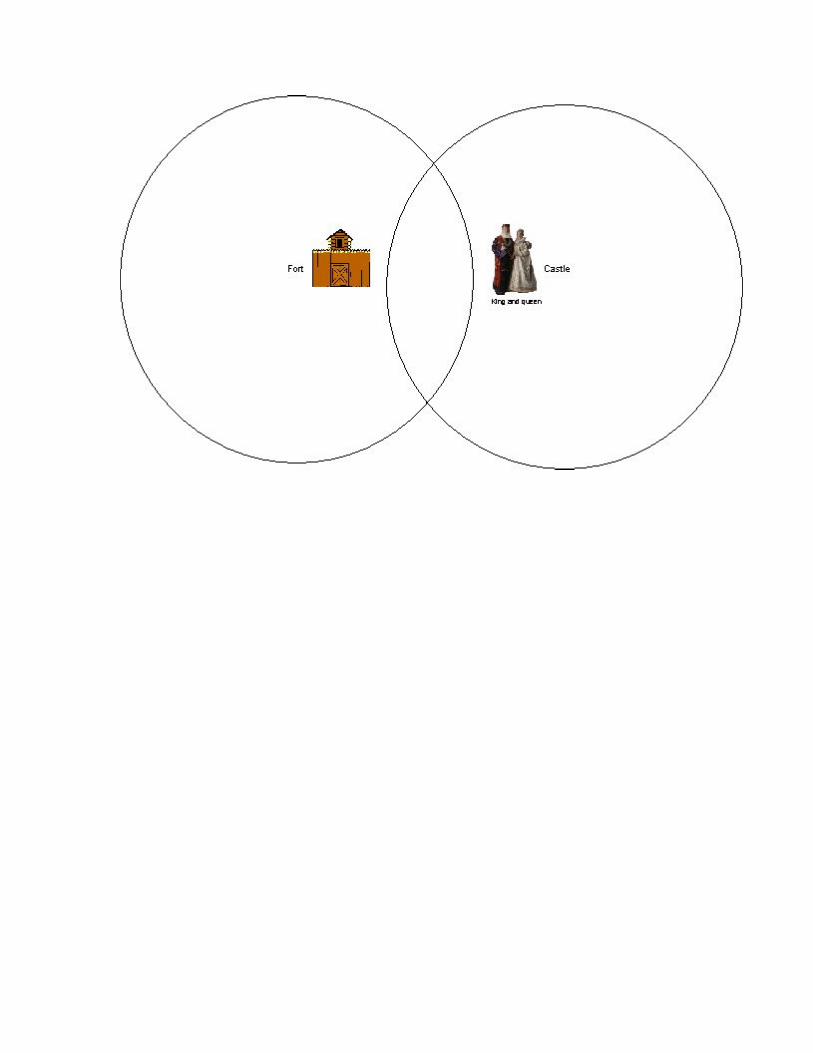
Castle/Fort Venn Diagram, Lesson 3
Student Worksheet Read the facts, and use links to find out more information. Use the pattern to create a Venn diagram based on what you learned. This lesson answers the question “What do a castle and fort have in common?”
Fact Sheet Caernarfon Castle In 1283, the English invaded Wales. King Edward I needed a castle that was near water so he could have access to ships, and he also needed rich land to grow food. He decided to build his castle in Northern Wales. Edward had wood and stone shipped in, and started to construct his powerful castle. For more information on Caernarfon Castle, try… http://www.travelbritain.com/wales/castles/tour/caernarfon.html http://www.castlewales.com/caernarf.html Fort Clatsop It was on Christmas Eve day in 1805 that the members of the Lewis & Clark Expedition finished building a fort surrounded by forest, wetlands, and wildlife. The men, women and child needed a place to stay the winter. They had to build in a location that had game to hunt, hills around to block the cold winds of the ocean, and the area had to be close, for winter was coming. After cutting logs to build the fort, the 33-member expedition stayed for the winter of 1805-1806.�
��
�
For additional information about the Lewis and Clark Expedition’s Fort Clatsop, try… http://www.nps.gov/focl/journey4.htm http://www.uky.edu/ArtsSciences/ModernStudies/HumSocSci/lc94/Section1/PhaseX/Dates/Date3.html
�
�
��
�

Castle/Fort Timeline, Lesson 4
Overview: This lesson answers the question “What is the importance and lasting influence of a castle and fort in history?” This lesson plan was developed to use after students have acquired a basic knowledge about a castle or fort. Students investigate the timeline of Lewis and Clark to make sense of the early history of the United States. When this history is compared to the history of a castle, students gain a perspective of chronological time in centuries. Teaching Level: 2-6 Time Frame: 45 minutes Connection to State Content Standards: Benchmark 2 Understand that there are different ways for governments to be organized and to hold power. Understand the distribution and movement of people, ideas, and products. Understand, analyze and evaluate the consequences of population changes resulting form economic, cultural, or environmental factors. Interpret and reconstruct chronological relationships. Identify and analyze various perspectives and interpretations of historical issues and events. Understand the importance and lasting influence of issue, events, people, and developments in world history. Connection to National Geography Standards: The processes, patterns, and functions of human settlement How to apply geography to interpret the past

Materials List: Example of a castle’s timeline Multiple copies of the timeline of Lewis and Clark from Pbs.org/lewisandclark Index cards Pencils Introduction: Students will investigate a timeline of a castle, construct a timeline of Lewis and Clarks journey, and compare the two. Procedure:
• Ask students what a timeline is. • Give examples and show a model of a timeline of a castle. • Together locate the timeline from PBS. • Read the Lewis and Clark Timeline. • Decide what the key events are. • Begin with 1801 and emphasize 1805 at Fort Clatsop. • Cut information from the timeline and glue onto index cards. • Construct a timeline using the index cards. • Divide the timeline into 6 periods. • Divide the class into 6 groups. • Each group should illustrate the important events from their
time period. • Display timeline and discuss.
Assessment: Monitor the students as they are illustrating the timeline to see how they understand the information and key events. Observe the level of comprehension during the discussion when comparing the timeline of Lewis and Clark and the castle.


Castle/Fort Observing a Structure in Your Neighborhood, Lesson 5
Overview: This activity is a continuation in the unit study of castles and forts. Students are provided the opportunity to study buildings. Students may not comprehend the obstacles and problems in building a structure. Students will understand how structural problems are solved according to temperature, geography and material resources. In this fieldwork the students will examine buildings in our community. They will consider location, building materials, climate, functions and architectural style. If it is not possible for your students to visit buildings in your town, the instructor may videotape the buildings for the students. In the next lesson, students will plan and design a fort or castle for a specific location in our town using their geographic knowledge of the required site in accordance of safety, defense, water and food availability and proximity to transportation. Teaching Level: 2-6 Time Frame: 2 hours Connection to State Content Standards Benchmark 2 Understand and use geographic skills and concepts to interpret contemporary and historical issues. Identify and analyze physical and human characteristics of places and regions, the processes that have shaped them, and their geographic significance. Connection to National Geography Standards The physical and human characteristics of places

How human actions modify the physical environment How to apply geography to interpret the past Materials List: Paper Worksheets Maps of the community Air photos Clipboards Procedure:
• After discussion of the roles of government buildings in our community, students examine the maps of the area and take note where the buildings are built.
• In groups of four, students brainstorm why the buildings are built where they are. Before going into the field, the students will identify geographic questions. Some examples could be o How have materials and technology influenced the style
and structure of the building design? o What are the advantages and disadvantages of building
materials? • How have inventions and discoveries changed the way
structures are designed? • What is the architectural style of the surrounding buildings? • How do the size, shape and location effect the function of the
building? • After discussion, students are asked to draw a sketch of local • buildings using clipboards and paper. • Compare and display student sketches. Using the sketches,
group the buildings together in a variety of ways (age,

building materials, size, style, geographical location). Discuss elements of use, time and materials.
Assessment: Students analyze and summarize their findings.

Castle/Fort Location, Lesson 6
Overview This unit answers the question “How do landforms influence the location of structures?’ Lesson V explores the uses of coordinate grid systems. It is important to find out where these structures are. Where is Caernarfon Castle? Where is Fort Clatsop? On a map they can be located by latitude and longitude or by a highway system. The student will demonstrate knowledge of a grid system by developing an imaginary fort or castle on a graph paper using a grid system. Connection with the Curriculum 4th Grade Curriculum includes westward expansion, including the adventures of Lewis and Clark and the history of the state of Oregon. Teaching Level: 2-6 Time Frame: 45 Minutes Connection to State Content Standards Benchmark 2 Locate places and understand and use geographic information or relationships by reading, interpreting, and preparing maps and other geographic representations. Understand and interpret events, issues, and development in local history.

Connection to National Geography Standards Standard#1 How to use maps and other geographic representations, tools and technologies to acquire, process, and report information from a spatial perspective. Standard #4 The physical and human characteristics of places Materials List
• Maps of Wales • Maps of Oregon • Colored pencils • Graph paper
Introduction To find the absolute location of a place using a flat map, a geographic grid system is used instead of longitude and latitude. Each line in such a grid is selected by letters or numbers around the margins of the map. Caernarfon Castle and Fort Clatsop can be found by naming the two lines that overlap nearest to them. The coordinate grid system allows us to see absolute location, the direction and distance of one place. The locations of the Columbia River and the Menai Strait can be significant to know. These are permanent features in our environment. Relative locations are important also. In Oregon, there are relative locations of people that arise from cultural history such as the Clatsop Indians. In Wales there are distinctions in areas where the language of Welsh is spoken.

Vocabulary:
• Absolute location • Relative location • Coordinates • Longitude • Latitude • Grid
Procedure
• Present a map and point out latitude and longitude. Explain how these lines help locate places on a map such as Caernarfon Castle and Fort Clatsop. This lesson will teach them to use maps with coordinates.
• Explain absolute and relative location. Give examples of each. To practice relative location ask students questions such as “How many meters is it to the high school?”
• Practice by giving coordinates and directing the students to place their fingers on the directed place.
• Direct students to pair with a partner and partners and write coordinates to a secret place on a piece of paper. Their partner must find their secret place and take turns giving coordinates.
• Students will now create an imaginary structure in their town of a castle or a fort on grid paper. In a later lesson students will determine the area and perimeter of their imaginary structure.

• Students must use letters and numbers to designate grid coordinates on their map.

Castle/Fort Designing Your Own Castle or Fort, Lesson 7
Overview: In earlier lessons, students have examined structures in our community and planned where they would build an imaginary fort or castle. Students have analyzed geographic elements, which would determine the success of their structure. They must now identify the function of the structure they are going to build. This determines the size, shape, location, and how it is constructed. Students will complete a planning worksheet and then draw a fort or castle design. Teaching Level: 2-6 Time Frame: Two 45 minute sessions Connection to State Content Standards Benchmark 2 Understand and use spatial concepts of geography Locate places and understand and use geographic information or relationships by reading, interpreting, and preparing maps and other geographic representations. Understand how humans affect the physical environment. Understand how physical characteristics in the environment and changes in the environment affect human activities. Connection to National Geography Standards How to use maps and other geographic representations tools and technologies to acquire, process, and report information from a special perspective The physical and human characteristics of places The processes, patterns, and functions of human settlement How to apply geography to interpret the past

Materials List: Worksheet to plan structure Paper Large Graph Paper Examples of floor plans of castles, forts Procedures:
• Tell students they will now design their fort or castle. Show them examples of architectural drawings and floor plans.
• Brainstorm what would make a good fort or castle. Have students launch questions such as:
• What is essential for a shelter? What should be the geography of the site for the shelter? What is the occupants’ lifestyle? What technology is available? What year is it? Do they fear enemies? How will the building site influence the structures design? What choices of building materials would be available? What would be the population of the castle or fort?
• Discuss who would be building the fort or castle and how. • Students should realize the inter-relationship of various
developments such as government, leadership and cooperation.
• Each student should complete the student worksheet “Design a Castle or a Fort.”
• Students draw their castle or fort plan floor plan on graph paper.
• Students draw an architectural drawing of the castle or fort. Assessment: Students will present their design to the class.

Castle or Fort Design Your Own
Student Worksheet Name ________________
1. Create a brief history describing the major historical events concerning the reasons your castle or fort is being built.
2. Describe the geography of your building site. How will you design your castle or fort to suit the site?
3. Who will live in your castle or fort? What sort of rooms do they need?
4. What materials will you need to build your castle or fort?
5. On the back of this paper sketch your floor plan.

Castle/Fort Perimeter, Lesson 8
Overview: This lesson answers the question “How would you design your structure to survive weather and attacks from enemies?” Connection with the Curriculum: Students estimate and use measures of perimeter to interpret the utility of a structure. Teaching Level: 2-6 Time Frame: 50 minutes Connection to State Content Standards Benchmark 2 Understand how humans affect the physical environment. Understand how physical characteristics in the environment and changes in the environment affect human activities. Connection to National Geography Standards How human actions modify the physical environment. How culture and experience influence people’s perceptions of places and regions. Materials List: Graph Paper Pencils Overhead projector Example of a floor plan from Ft. Clatsop, assorted castles and forts Various blueprints Maps
Introduction: In this integrated lesson, math is used in the design of the castle or fort the student builds as the assessment piece of the unit. The student will use problem-solving techniques to determine perimeter measurements for the castle or fort. Procedure:
• Introduce rectangle perimeter. Use the “dot” method. The “dot” method helps students to make sure that all sides are counted. o “Put a dot in the upper left corner then go clockwise,
adding sides as you go.” • Introduce composite rectangular shapes. • Students must draw a line separating the rectangles from each
other. Students add the perimeter of each rectangle. • Measurements are added to graph paper, so that one
centimeter of the graph paper is equal to one meter. • Model on the overhead and together graph the floor plan of
Ft. Clatsop using the floor plan on www.fortclatsop.com • Look at floor plans of castles and discuss why they were built
using particular floor plans. • Using creative procedures, each student will design a floor
plan of their imaginary fort or castle. In the last lesson, students planned their structure and now will use their sketch to make a floor plan. Students will build their fort or castle in accordance with this floor plan.
Assessment: The castle or fort floor plan will have correct measurement conversions.

Students will analyze why they think their structure’s design would be successful.
Castle/Fort
Assessment, Lesson 9
Overview: In this concluding activity, students build their castle or fort from the plan they have made in an earlier lesson. Students have analyzed geographic elements, which would determine the success of their structure. Students have identified the function of the structure and determined the place in our community where the structure should be built. Teaching Level: 2-6 Time Frame:
Homework time, 2 weeks Class time-Four 45 minute
periods Connection to State Content Standards Benchmark 2 Use maps to organize information about people, places, and environments in a spatial context Explain how humans and the physical environment influence each other. Connection to National Geography Standards How human actions modify the physical environment The processes, patterns, and functions of a human settlement Materials List: Recycled materials such as Styrofoam, cardboard, paper Large board to build on

Papermache, clay, salt dough Glue, scissors, stapler Paint, paintbrushes Procedure:
• Students will now build their model castle or fort from their plan
• Brainstorm materials to build with • Discuss how the structure will be built • Discuss a timeline for the structure to be completed • Discuss whether students may work in a group, with a
partner, or in an individual project. Assessment Students will present their projects to the class.


![Sweeney Todd [VocalScore]](https://img.pdfslide.us/doc/110x75/5695d1d01a28ab9b029801d6/sweeney-todd-vocalscore.jpg)