Embed Size (px)
Citation preview
Card Software
01.00- © 2008 Number Five
Card Software2
© 2008 Number Five
Table of Contents
Chapter I - Working Area 10
................................................................................................................................... 101 Design View
......................................................................................................................................................... 10The Title Bar
......................................................................................................................................................... 10Minimize, Maximize Button
......................................................................................................................................................... 10Restore Button
......................................................................................................................................................... 10Close Button
......................................................................................................................................................... 10Close Window Button
......................................................................................................................................................... 10The Menu Bar
......................................................................................................................................................... 11The Toolbars
......................................................................................................................................................... 11The Rulers
......................................................................................................................................................... 11The Grid
......................................................................................................................................................... 11The Cross Hair
......................................................................................................................................................... 11The Standard Status Bar
......................................................................................................................................................... 11Screen Setup
.................................................................................................................................................. 12Zooming the Card Image
.................................................................................................................................................. 12User Metrics
......................................................................................................................................................... 12Working with the Card Software Commands
.................................................................................................................................................. 12Toolbar Commands
.................................................................................................................................................. 12Menu Commands
.................................................................................................................................................. 12Mouse Shortcuts
.................................................................................................................................................. 13Shortcut Keys
................................................................................................................................... 132 Dashboard
......................................................................................................................................................... 14Source Dashboard
......................................................................................................................................................... 14Position Dashboard
......................................................................................................................................................... 15Line Dashboard
......................................................................................................................................................... 15Fill Dashboard
......................................................................................................................................................... 15Text Dashboard
......................................................................................................................................................... 15Image Dashboard
......................................................................................................................................................... 16Effects Dashboard
......................................................................................................................................................... 16Bar Code Dashboard
......................................................................................................................................................... 162D Bar Code Dashboard
......................................................................................................................................................... 16Clip-art Dashboard
......................................................................................................................................................... 16Database Dashboard
................................................................................................................................... 173 Card Designs Section
................................................................................................................................... 174 Database View
......................................................................................................................................................... 17The Toolbar
......................................................................................................................................................... 18The Record View
......................................................................................................................................................... 18The Browse view
......................................................................................................................................................... 18The Horizontal Split Window
......................................................................................................................................................... 18The Dashboard
Chapter II - Creating Cards 20
................................................................................................................................... 201 Opening and Saving Card Files
......................................................................................................................................................... 20Opening Card Files
......................................................................................................................................................... 20If you don’t see the Card you want
3Contents
© 2008 Number Five
......................................................................................................................................................... 20Saving Card Files
......................................................................................................................................................... 20Naming a Document
......................................................................................................................................................... 21Displaying Card Information
................................................................................................................................... 212 Creating a Basic Card
......................................................................................................................................................... 21Card Setup
......................................................................................................................................................... 21Adding a Line
......................................................................................................................................................... 22Adding a Rectangle
......................................................................................................................................................... 22Adding an Ellipse
......................................................................................................................................................... 23Adding Text
......................................................................................................................................................... 23Adding a Bar Code
......................................................................................................................................................... 24Adding a Bar Code 2D
......................................................................................................................................................... 25Adding an Image
Chapter III - Working with Objects 27
................................................................................................................................... 271 Card Software Objects
......................................................................................................................................................... 27Terms That Apply to Objects
......................................................................................................................................................... 27Selecting and Deselecting Objects
................................................................................................................................... 282 Resizing Objects
......................................................................................................................................................... 28Resizing a Line
......................................................................................................................................................... 28Resizing a Rectangle
......................................................................................................................................................... 28Resizing an Ellipse
......................................................................................................................................................... 29Resizing a Text
......................................................................................................................................................... 29Resizing a Bar Code
......................................................................................................................................................... 29Resizing a Bar Code 2D
......................................................................................................................................................... 29Resizing an Image
................................................................................................................................... 293 Moving and Aligning Objects
......................................................................................................................................................... 30Moving Objects
......................................................................................................................................................... 30Aligning Objects
......................................................................................................................................................... 31Distribute Objects
......................................................................................................................................................... 31Rotating Objects
......................................................................................................................................................... 31Stacking Objects
......................................................................................................................................................... 31Duplicating Objects
................................................................................................................................... 314 Editing Object Properties
......................................................................................................................................................... 32Line Properties
......................................................................................................................................................... 32Rectangle Properties
......................................................................................................................................................... 33Text Properties
.................................................................................................................................................. 33Selecting and Editing Text
.................................................................................................................................................. 33Deleting Text
.................................................................................................................................................. 33Cutting, Copying and Pasting Text
Chapter IV - Working with Variables 35
................................................................................................................................... 351 Variable Data
......................................................................................................................................................... 35Available Variable Sources
Chapter V - Magnetic Encoding 37
................................................................................................................................... 371 About Magnetic Stripe
................................................................................................................................... 372 Encoding a Magnetic Stripe
......................................................................................................................................................... 38Encoding with Specific Printer Properties
......................................................................................................................................................... 38Magnetic Encoder Tool
......................................................................................................................................................... 38Encoding with a Windows Printer Driver
Card Software4
© 2008 Number Five
Chapter VI - Contact Smart Card Encoding 41
................................................................................................................................... 411 Chip Card Process
......................................................................................................................................................... 41Chip Card Properties
......................................................................................................................................................... 42Chip Card Encoding
Chapter VII - Overlay 44
................................................................................................................................... 441 Defining an Overlay
......................................................................................................................................................... 45Bitmap Based Overlay
Chapter VIII - Card Software and Database 47
................................................................................................................................... 471 Introduction to ODBC
......................................................................................................................................................... 47ODBC Basics
......................................................................................................................................................... 47File Formats
......................................................................................................................................................... 47Purpose of ODBC
......................................................................................................................................................... 47Desktop versus Server/Client
......................................................................................................................................................... 48SQL
......................................................................................................................................................... 48Card Software Sources
................................................................................................................................... 482 Database Structure
................................................................................................................................... 483 Data Type
......................................................................................................................................................... 48About Data Types
......................................................................................................................................................... 48Card Software Internal Database Data Type
................................................................................................................................... 494 Data Source
......................................................................................................................................................... 49Introduction
................................................................................................................................... 495 Card Software Internal Database
......................................................................................................................................................... 49Create a New Internal Database
.................................................................................................................................................. 49Open an Internal Database
.................................................................................................................................................. 49Disconnect from a Database
................................................................................................................................... 496 Card Software Internal Text Data Source
......................................................................................................................................................... 50Connecting to a Internal Text data source
................................................................................................................................... 507 Working With Tables
......................................................................................................................................................... 50Create a new Table
................................................................................................................................... 518 Edit an existing Table
......................................................................................................................................................... 51Remove a Table
................................................................................................................................... 519 Connect to an External Database
......................................................................................................................................................... 51ODBC Source Selection
................................................................................................................................... 5110 Working with N5 Database Interface
................................................................................................................................... 5211 The Card Software Database Functions
......................................................................................................................................................... 52Editing a Database
......................................................................................................................................................... 53Moving between Records
......................................................................................................................................................... 53Hide/Unhide Fields
......................................................................................................................................................... 53Database Image Properties
................................................................................................................................... 5312 The Card Software Database Reports
......................................................................................................................................................... 53Create Database Report
......................................................................................................................................................... 54Open a Database Report
................................................................................................................................... 5413 The Auto Print Function
......................................................................................................................................................... 54Preparing the Card Software for Auto Print
5Contents
© 2008 Number Five
Chapter IX - Logins and Passwords 57
................................................................................................................................... 571 Administrator Login
................................................................................................................................... 572 Create User Login
................................................................................................................................... 573 Permissions
Chapter X - Menu Commands 59
................................................................................................................................... 591 Main Window
......................................................................................................................................................... 59File Menu Commands
.................................................................................................................................................. 59New Command
.................................................................................................................................................. 59Open Command
.................................................................................................................................................. 59Close Command
.................................................................................................................................................. 59Save Command
.................................................................................................................................................. 60Save As Command
.................................................................................................................................................. 60Card Setup Command
.................................................................................................................................................. 60Card Print Command
.................................................................................................................................................. 61Logins Command
.................................................................................................................................................. 61Batch Print File Management command
.................................................................................................................................................. 61Exit command
......................................................................................................................................................... 61Edit Menu Commands
.................................................................................................................................................. 62Undo Command
.................................................................................................................................................. 62Redo Command
.................................................................................................................................................. 63Empty Command History
.................................................................................................................................................. 63Cut Command
.................................................................................................................................................. 63Copy Command
.................................................................................................................................................. 63Paste Command
.................................................................................................................................................. 63Duplicate Command
.................................................................................................................................................. 63Export to Image Command
.................................................................................................................................................. 63Select All Command
.................................................................................................................................................. 64Adjust Bounding Command
.................................................................................................................................................. 64Fit to Card Command
.................................................................................................................................................. 64Send to Front Command
.................................................................................................................................................. 64Send to Back Command
.................................................................................................................................................. 64Align Command
.................................................................................................................................................. 65Distribution Command
.................................................................................................................................................. 65Object Properties Command
.................................................................................................................................................. 65Use Private Clipboard Command
.................................................................................................................................................. 65Use Window's Clipboard Command
.................................................................................................................................................. 66Manufacturer Keys command
.................................................................................................................................................. 66Predefined Names List Editor command
......................................................................................................................................................... 66View Menu Commands
.................................................................................................................................................. 66Card Front Command
.................................................................................................................................................. 67Card Back Command
.................................................................................................................................................. 67Zoom In Command
.................................................................................................................................................. 67Zoom Out Command
.................................................................................................................................................. 67Fit Workspace Command
.................................................................................................................................................. 67Preview Mode Command
.................................................................................................................................................. 68Object Tooltips Command
.................................................................................................................................................. 68Rulers Command
.................................................................................................................................................. 68Guidelines Command
.................................................................................................................................................. 68Grid Command
.................................................................................................................................................. 68Cross Hair Command

Card Software6
© 2008 Number Five
.................................................................................................................................................. 68Show Bounding Boxes Command
.................................................................................................................................................. 68Card Properties Command
.................................................................................................................................................. 69Card Layout Command
.................................................................................................................................................. 69Database Layout Command
......................................................................................................................................................... 69Draw Menu Commands
.................................................................................................................................................. 70Selector Command
.................................................................................................................................................. 70Line Command
.................................................................................................................................................. 70Shapes Command
.................................................................................................................................................. 70Text Command
.................................................................................................................................................. 70Image Command
.................................................................................................................................................. 71Bar Code Command
.................................................................................................................................................. 712D Bar Code
.................................................................................................................................................. 71Overlay Varnish Command
.................................................................................................................................................. 71Magnetic Encode Command
.................................................................................................................................................. 72Contact Smart Card Command
.................................................................................................................................................. 73Contactless Smart Card command
.................................................................................................................................................. 73Camera Command
.................................................................................................................................................. 73Biometrics Command
.................................................................................................................................................. 74Keep Placing Objects Command
......................................................................................................................................................... 74Options Menu Commands
.................................................................................................................................................. 74Autosave Options Command
.................................................................................................................................................. 75Snap to Grid Command
.................................................................................................................................................. 75Activate Object Protection Command
.................................................................................................................................................. 75Video Sources Command
.................................................................................................................................................. 75Biometrics Sources Command
.................................................................................................................................................. 75Enable Print Log Command
.................................................................................................................................................. 75Metrics command
.................................................................................................................................................. 75Rulers Settings Command
.................................................................................................................................................. 75Grid Settings Command
.................................................................................................................................................. 75Front & Back Command
.................................................................................................................................................. 76Card color Command
.................................................................................................................................................. 76Workspace Color Command
.................................................................................................................................................. 76Default Line Width Command
.................................................................................................................................................. 76Default Text Font Command
.................................................................................................................................................. 76Monochrome Conversion Command
......................................................................................................................................................... 76Database Menu Commands
.................................................................................................................................................. 77Connect Command
.................................................................................................................................................. 77Disconnect Command
.................................................................................................................................................. 77Browse View Command
.................................................................................................................................................. 78First Command
.................................................................................................................................................. 78Previous Command
.................................................................................................................................................. 78Next Command
.................................................................................................................................................. 78Last Command
.................................................................................................................................................. 78Refresh Command
.................................................................................................................................................. 78Find Command
.................................................................................................................................................. 78Query Command
.................................................................................................................................................. 79Add Command
.................................................................................................................................................. 79Delete Command
.................................................................................................................................................. 79Save Command
.................................................................................................................................................. 79Report Command
.................................................................................................................................................. 80Properties Command
.................................................................................................................................................. 80Define View Command
.................................................................................................................................................. 80Auto Print Command
......................................................................................................................................................... 80Window Menu Commands
7Contents
© 2008 Number Five
......................................................................................................................................................... 80Help Menu Commands
.................................................................................................................................................. 81Contents Command
.................................................................................................................................................. 81Using Help Command
.................................................................................................................................................. 81About Command
Chapter XI - Keyboard Shortcut 83
................................................................................................................................... 831 Shortcut Keys
......................................................................................................................................................... 83General
......................................................................................................................................................... 83Card Work Area
......................................................................................................................................................... 83Database Window
Chapter XII - About Bar Codes 85
................................................................................................................................... 851 Bar Codes
......................................................................................................................................................... 85Introduction
......................................................................................................................................................... 85Bar Code Standards
......................................................................................................................................................... 85Symbologies
................................................................................................................................... 862 Card Software Symbologies
......................................................................................................................................................... 86Codabar
......................................................................................................................................................... 86Code 128
......................................................................................................................................................... 86Code 39
......................................................................................................................................................... 87Code 93
......................................................................................................................................................... 87EAN//JAN-13
......................................................................................................................................................... 87EAN//JAN-8
......................................................................................................................................................... 87Extended Code 39
......................................................................................................................................................... 87Extended Code 93
......................................................................................................................................................... 87HIBC (3 of 9)
......................................................................................................................................................... 88Interleave 2 of 5
......................................................................................................................................................... 88MSI Plessey
......................................................................................................................................................... 88Telepen
......................................................................................................................................................... 88UCC/EAN-128
......................................................................................................................................................... 88UPC-A
......................................................................................................................................................... 88UPC-E
......................................................................................................................................................... 89Zip+4 POSTNET
Chapter XIII - About Two-dimensional Bar Codes 91
................................................................................................................................... 911 PDF417
................................................................................................................................... 922 Photo in PDF
......................................................................................................................................................... 92Photo Reader
.................................................................................................................................................. 92Limitations
Chapter XIV - Printing 94
................................................................................................................................... 941 Printing Process
......................................................................................................................................................... 94Printer Setup
......................................................................................................................................................... 94Printing Cards
......................................................................................................................................................... 94Print Manager
......................................................................................................................................................... 95Printing to a File
......................................................................................................................................................... 95The Batch Print File Manager
......................................................................................................................................................... 95Batch Print Options
......................................................................................................................................................... 96Print with Windows Driver
.................................................................................................................................................. 96Printer Types
.................................................................................................................................................. 96Card Setup

Card Software8
© 2008 Number Five
......................................................................................................................................................... 96Print to a Specific Printer (via DCL)
......................................................................................................................................................... 96Specific Printers
0

Chapter
I
10 Card Software
© 2008 Number Five
1 Working Area
The main Card Software window, with its accompanying toolbars and menus, closely resemblesthe windows you work in for other Windows based programs. You will be working in the mainwindow (and its sub-windows) as you design and print your cards.
1.1 Design View
All your work to layout a card is done in the Card Work Area.This area displays a card outline depicting the physical limits of the card. Any objects placed outsidethe card borders will not be printed.
The Title Bar
The Title Bar displays the name of the Card Software program and the name of the active cardfile.
Minimize, Maximize Button
Using the mouse, you can click the Maximize button to enlarge the active program window so thatit fills the entire desktop, or you can click the Minimize button to reduce the window to an icon.
Restore Button
Using the mouse, you can click the Restore button to resize a window to its previous size andlocation. The restore button is only available when your window is maximized.
Close Button
Using the mouse, you can click the Close button to end your Card Software session.
Close Window Button
Close Window Button (in the top right of Card Software interface) closes the actual window (withthe actual document) of Card Software without quit application.
Close Window Button:
The Menu Bar
The Menu Bar lists the available menus. A menu contains a list of commands, or actions, you cancarry out with the Card Software.
11Working Area
© 2008 Number Five
The Toolbars
You can use Toolbars for quick access to some of the most commonly used commands andtools.Tooltips explaining the functions of each button are displayed if you hold the mouse pointer overthe desired button.
Note: You must use a mouse to choose buttons on the Toolbars. You cannot use the keyboard.
The Rulers
Card Software includes Rulers to help you align your artwork and arrange image elementssymmetrically. Rulers can be configured to display inches or centimeters. Set your unit ofmeasure, from the Options menu Metrics. To display the rulers, choose Rulers from the Viewmenu. To hide the rulers, choose Rulers from the View menu again.
The Grid
An invisible network of lines covering the card. As you draw objects, they will co-interact with thegrid, if Snap To Grid is checked in the Grid Settings Dialog box (Options Menu). You can turn iton and off using the Grid command from the View menu.
The Cross Hair
The Cross Hair represent the cursor position within the card document. You can turn it on and offusing the Cross Hair command from the View menu.
The Standard Status Bar
Messages appear at the bottom of the window in areas called Status Bars. These messagesdescribe what you are seeing and doing in the Card Software window as you work. The StatusBar displays the x and y coordinates of the pointer, and the type, location, and size of the currentlyselected card object. Displays also the name of the tool when selecting the tool’s button and whenyou choose a command provides a short message telling you what that command will do.
Screen Setup
The command Cross Hair from the View menu toggles the cross hair cursor.Using the command Grid on the View menu you can, display or hide the layout grid (CTRL+G).Use the Grid Settings command from the Options menu to control snap to grid; show / hide gridand grid spacing.Using the command Guidelines on the View menu you can, display or hide the card-edgeguidelines (CTRL+L).Using the command Rulers on the View menu you can, display or hide the rulers layout. Use theRulers Settings command from the Options menu to control the rulers behaviour. Use theMetrics command from the Options menu to change the measurement unit.Use the Object Tooltips from the View menu to displays a brief description of the objects namesand size. A ToolTip is displayed when the mouse pointer rests over the object.
12 Card Software
© 2008 Number Five
Zooming the Card Image
The size of the card image can be changed by using the Zoom In (+) and Zoom Out (-)commands on the View menu. Exact placement of objects on the card is sometimes easier if theimage is larger.Using the command Fit Workspace on the View menu, you can display the entire card page.
Zoom In Button
Zoom Out Button
User Metrics
From the Options menu select the command Metrics. Choose between millimetres or inch. Allmeasurements are displayed in the selected unit.
Working with the Card Software Commands
A Command is an instruction that tells the Card Software to perform an operation. The CardSoftware provides several ways for you to choose commands. You can choose commands from amenu or toolbar, or you can use shortcut keys.
Toolbar Commands
The Card Software Toolbars provide you with one-step access to lots of tasks. You can draw arectangle, place a photograph, define a bar code, edit text and much more - all with just one clickof a mouse button on one of the Card Software tools.
Menu Commands
Commands are grouped in menus. Some Commands carry out an action immediately; othersdisplay a dialog box so that you can select options. You’ll know that a Command will display adialog box, if it is followed by three periods (...).
Mouse Shortcuts
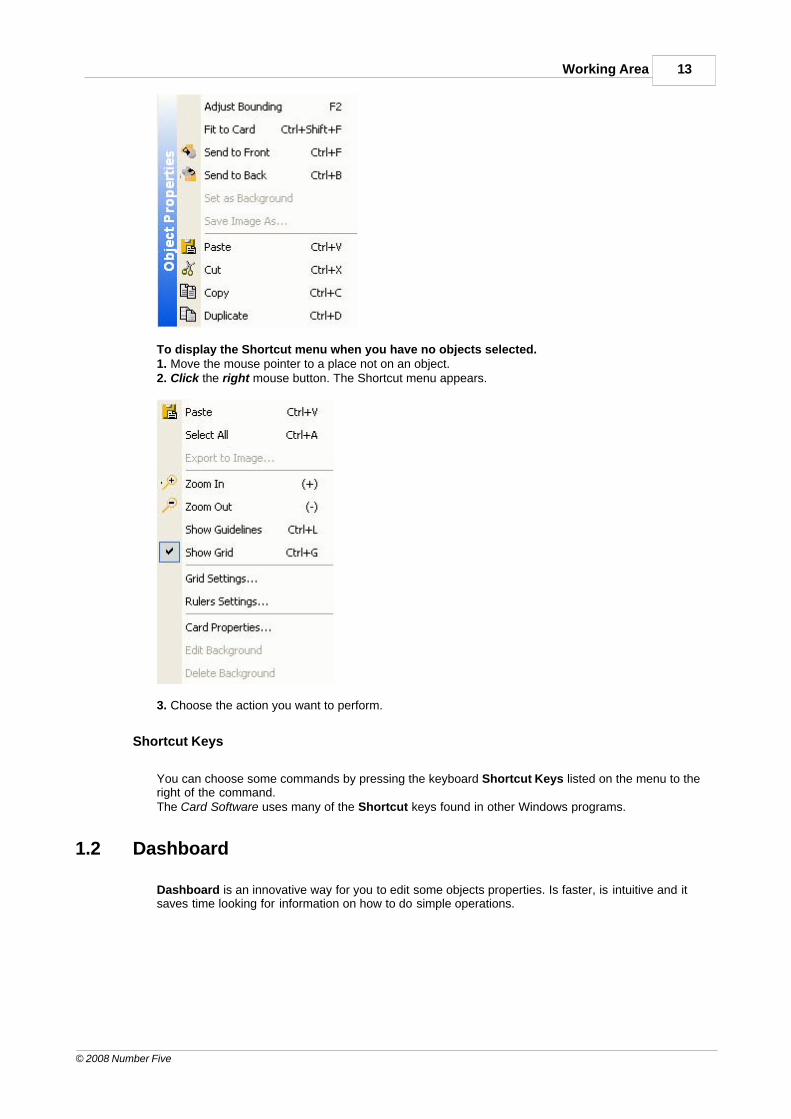
You can use a Mouse Shortcut to give you quick access an object’s property sheet or to display ashortcut menu.
To display an object’s property sheet.1. Point to the object.2. Click the right mouse button. The Shortcut menu appears.
13Working Area
© 2008 Number Five
To display the Shortcut menu when you have no objects selected.1. Move the mouse pointer to a place not on an object.2. Click the right mouse button. The Shortcut menu appears.
3. Choose the action you want to perform.
Shortcut Keys
You can choose some commands by pressing the keyboard Shortcut Keys listed on the menu to theright of the command.The Card Software uses many of the Shortcut keys found in other Windows programs.
1.2 Dashboard
Dashboard is an innovative way for you to edit some objects properties. Is faster, is intuitive and itsaves time looking for information on how to do simple operations.
14 Card Software
© 2008 Number Five
Source Dashboard
Properties button lets you edit object properties.
Get button lets you get a new object.
Edit opens Imager to edit selected object.
Edit after acquire allows the user to choose to edit an image immediately after acquisition.
Acquire on print will acquire image source on print.
Display only will only show selected object on screen and will not be printed if this option isactivated. It works with all kind of objects.
Protected will protect object from being selected and edited preventing future modifications. Itworks with all kind of objects.
Silent mode defines that image acquisition will be made in silent mode, so the Imager will not pop-up for the user to make selections and edition.
Variable name is the name of the object selected on card.
Position Dashboard
Position
It works with all kind of objects.Horizontal position adjust object position and show actual horizontal position of an object.Vertical position adjust object position and show actual vertical position of an object.
Size
It works with all kind of objects.Horizontal size adjust object size and show actual horizontal size of an object.Vertical size adjust object size and show actual vertical size of an object.
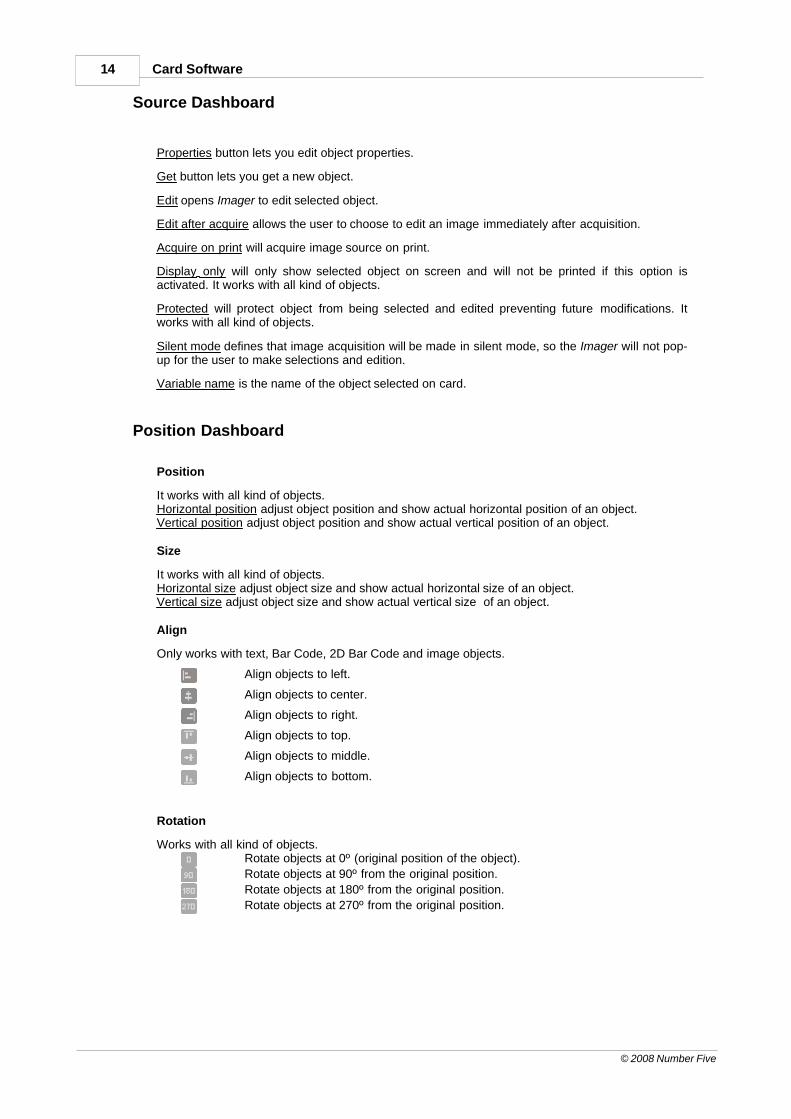
Align
Only works with text, Bar Code, 2D Bar Code and image objects.
Align objects to left.
Align objects to center.
Align objects to right.
Align objects to top.
Align objects to middle.
Align objects to bottom.
Rotation
Works with all kind of objects.Rotate objects at 0º (original position of the object).
Rotate objects at 90º from the original position.
Rotate objects at 180º from the original position.
Rotate objects at 270º from the original position.
15Working Area
© 2008 Number Five
Line Dashboard
Line Dashboard lets you customize your objects borders such as text box or graphic images (line,elipse, rectangle and text). Choose line color from Color Box or enable Black Panel to change colorto black. Choose the thickness of your lines and style from drop down menu.
Fill Dashboard
Fill Dashboard allows you to color the fill of some objects (ellipse, rectangles and text) with onecolor, gradient or Black Panel.
One ColorTo use one color for the background of your object leave disable the Black Panel and Gradient Fillbuttons and select your color from the Color 1 drop down menu.
Black PanelChoosing Black Panel will automatically change the object fill into black and disable the colorselectors.
Gradient FillTo use Gradient Fill select Gradient Fill button and choose 2 colors from color selectors. The resultwill be a combination of defined colors with degrade transition in horizontal or vertical direction.
Text Dashboard
Text Dashboard allows to define text properties such as Font, Size, Bold, Italic, Underline, Color(using Black Panel will disable Color selector).
Multiline text allows text in more than one line.
Word Wrap is an option when Multiline is selected and shows all text in the text box.
Shrink to Fit will fit text in text box when Word Wrap is disable.
Lowercase changes text to "aaa".
Uppercase changes text to "AAA".
Capitalized changes text to "Aaa Bbb Ccc".
Image Dashboard
Image Dashboard allows to make some simple changes on image.
Keep original size enables image transform on its size and allows its distortion.
Stretch transform images without loosing original aspect.
Crop enables preview image to select and cut.
Crop to Bounding Ratio enables preview image to crop without loosing original ratio.
16 Card Software
© 2008 Number Five
Cut Out Color enables color selection to cut out with tolerance level defined by user.
Effects Dashboard
Effects Dashboard enable effects on some objects: lines, ellipses, rectangles, text and image.Define Shadow Distance; add some Transparency to objects; Rounded Corners and Reflectionwith degrade to transparency.
Bar Code Dashboard
Bar Code Dashboard edits Bar Code properties. You can choose a Bar Code style from a dropdown list; add transparency background; invert colors; show or hide digits from Bar Code image;define Ratio and Check Sum style.
2D Bar Code Dashboard
2D Bar Code Dashboard appears when a 2D Bar Code is created on card. Then somecustomizations are enable like Style; Horizontal Resolution; Vertical Resolution; Number of Rows;Number of Columns; Flip Option; ECC Level and ECC Percent. You can also use check boxes to:
· Reduce width;
· Reduce height;
· Truncated;
· Binary encode.
Clip-art Dashboard
Clip-Art Dashboard is a new way to display images and interact with the software "library". Withthis new Clip-Art you are able to import your images to Clip-Art, edit them and navigate or searchby keywords with preview images.
Database Dashboard
Database Dashboard allow Database navigation and it is a simple way to drag-and-drop contentsinto card direct from Database.By default your Database appears empty. You need to connect to a Database by clicking on"Connect..." from Database Menu.
How to drag-and-drop?To drag-and-drop simple click on item title and drag it into card.
17Working Area
© 2008 Number Five
1.3 Card Designs Section
The Card Design Area is all the area that you can use to design your card.
1.4 Database View
Displays all data field names and provides a field to enter or edit data, for the current Database.You need to be connected to Database to edit / view entries.
The Toolbar
The Toolbar is located on the top of Card Software window where you are able to find severalbuttons to proceed with main functions of current window.
View Button: change from Database View into Card Design View.
DB Open / Close Button: connect / disconnect from Database.
Database Properties Button: edit Database properties.
Back: go to the first record on Database.
Back: go to the previous record on Database.
Add: add record to Database.
End of Fields: if selected on Database properties, allows to execute the "end of fields"operations at any moment.
Save: save record / data on Database.
Remove: remove record from Database.
Forward: go to the next record on Database.
Forward: go to the last record on Database.
Print Button: print card.
18 Card Software
© 2008 Number Five
The Record View
The Record View (on Database Window) allows you to edit records on Database.
Record fields are presented in a form like view, having the image fields (binary fields) shown onthe right side of the view.
The Browse view
The Browse view shows Database records when connected to Database.
It allows the user to scroll up and down the list of records, refreshing the "Record View" currentrecord where the user may edit it.
The Browse View Title Bar allows the user to Select, Find and Seek records on the Database.
Use:· Seek choosing a Database Field, and type the characters that match the text you want to find
on the selected field. Current record will be automatically repositioned;· Select by choosing a Database Field, using Starting With or Containing operator and the text
you want to use on your simple query, press the "ok" button to get a smaller list of records;· Find on choosing a Database Field, using Starting With or Containing operator, the text you
want to use, and press the "ok" button to find a record matching your request;
The Horizontal Split Window
Used to separate horizontally the Record View from the Browse View. The split window can besized with the mouse.
The Dashboard
The Dashboard on Database View enables a Card Preview while you are working on Database;Record Selection and Encoding actions.
The Record Selection Slider allows the user tho create and execute record selection instructions(queries), using the simple drop-down fields to define the querie conditions, or by editing theconditions directly on the text box.
The Encoding Slider enables Processing and Reading operations directly from the databaseview, as well as defining the Card Serial Number storing condition.

Chapter
II
20 Card Software
© 2008 Number Five
2 Creating Cards
This section explains the procedures for opening existing card files, saving your work and creatingthe layout of a new card.
2.1 Opening and Saving Card Files
You’ll find that opening and saving your card files are pretty much the same as in other Windowsprograms.
Opening Card Files
To open a card file go to File Menu and select Open... command. The Open Dialog Box willappear. Simply select the card document you want to open and click Open Button.
You can have a preview of the select card before open it. To disable this function uncheck thePreview Check Box.
To preview the back of selected card, check the View Back Check Box.
You can also use the Ctrl + O shortcut to open a card file.
If you don’t see the Card you want
The File Name box initially lists card files in the directory in which you last saved or opened a card.If the card file you want is not listed, click another drive and / or directory.If you choose, you can open several card files during a Card Software session. Use the methodslisted above to select the desired card files. If more than one window is open, the title bar for theactive window (the one in which you are working) is a different color or intensity than other titlebars.
Saving Card Files
Until you give a new card document a unique name, the Card Software displays in the title bar atemporary name. The first new document is CARD1, the second, CARD2 and so on.
To save a card on disk, select Save command from File Menu or use the Ctrl + S shortcut. Whenyou save a card for the first time, the Card Software displays the Save As dialog box so that youcan type a name for the card file.
Naming a Document
To make it easier to find your documents, you can use long, descriptive filenames. The completepath to the file, including drive letter, server name, folder path, and filename, can contain up to 255characters. Filenames cannot include any of the following characters: forward slash (/), backslash(\), greaterthan sign (>), less-than sign (<), asterisk (*), question mark (?), quotation mark (“), pipesymbol (|), colon (:), or semicolon (;).
21Creating Cards
© 2008 Number Five
Displaying Card Information
You can display information about the current card. From the View menu, choose CardProperties. The Card Properties dialog box appears.
General TabDisplays a brief card description, card dimensions and card and workspace colors.
File InformationDisplay the card document full path, name of the person who last saved and printed the card aswell as the date.
Object ListYou can change object properties directly from this dialog box, useful if you want to change smallor hidden items. You also can export images from this dialog box.Note: Lines and Rectangles will not show a preview.
· Select: Click this button to select on the card the selected object on the card items list.· Properties...: Select any object and click this button. The corresponding Object Properties
dialog box opens. Perform the changes you want and confirm with OK. Changes areapplied immediately at the card workspace.
· Export...: Select an image and click this button to export it. The Save As dialog boxappears. Provide a filename for your image and select the type you want to use to save theimage, you can choose between; Windows Bitmap Format (*.bmp), Zsoft PCX Format(*.pcx), and Tagged Information File (*.Tif).
· Delete: Click this button to delete permanently the selected item. Confirm with OK.· Close: Exit Edit Item List dialog box.
Embedded FontsAllows you to include the font types used on the card design in to the card document file. Thisoption will avoid the card design to be changed in case of the used fonts isn’t installed on yoursystem. If you check the Install Embedded fonts when load the document options the fonts listedin the Embedded fonts section will be automatically installed in your system.
2.2 Creating a Basic Card
This section explains the processes involved in creating a Basic Card using a few of the mostcommon tools.
Card Setup
A card can be created in either portrait (print across the narrow side of the card) or landscape
(print across the wide side of the card) orientation. The card defaults to landscapeorientation. To set the card orientation to portrait, on the File menu choose Card Setup. Then clickon Properties from Dimensions area. In the Card Properties dialog box, click Portrait. The cardorientation can be changed at any time.
Adding a Line
To add a horizontal or vertical line1. On the Drawing toolbar, click the Line tool; the pointer changes to a hand with the Line icon.2. Move the pointer to the point on the card where you want to place one end of the line.
22 Card Software
© 2008 Number Five
3. Press and hold the left mouse button and drag in a horizontal or vertical direction. As you drag,a line is drawn, with one end fixed where you began to drag and the other end following thepointer. Continue dragging until the line is the desired length.4. Release the mouse button. The line appears on the card.
To add a horizontal or vertical diagonal line1. Proceed like to draw a line but press SHIFT before dragging the mouse pointer.2. Release the mouse button. The line appears on the card.
After Line creation you can change its settings on the following Dashboards:· Source Dashboard;· Position Dashboard;· Line Dashboard.
Adding a Rectangle
To add a Rectangle1. On the Drawing toolbar, click the Rectangle tool; the pointer changes to a hand with theRectangle icon.2. Move the pointer to the point on the card where you want to place the upper left corner of therectangle.3. Press and hold the left mouse button and drag in any direction. As you drag, a rectangle formswith one corner fixed where you began to drag, and the other corner following the pointer.Continue dragging until the rectangle is the desired size.4. Release the mouse button. The rectangle appears on the card.
After Rectangle creation you can change its settings on the following Dashboards:· Source Dashboard;· Position Dashboard;· Line Dashboard;· Fill Dashboard;· Effects Dashboard.
Adding an Ellipse
To add a Ellipse1. On the Drawing toolbar, click the Ellipse tool; the pointer changes to a hand with the Ellipseicon.2. Move the pointer to the point on the card where you want to place the upper left side of theEllipse.3. Press and hold the left mouse button and drag in any direction. As you drag, an Ellipse formswith one side fixed where you began to drag, and the other side following the pointer. Continuedragging until the Ellipse is the desired size.4. Release the mouse button. The Ellipse appears on the card.
After Ellipse creation you can change its settings on the following Dashboards:· Source Dashboard;· Position Dashboard;· Line Dashboard;· Fill Dashboard;
23Creating Cards
© 2008 Number Five
Adding Text
To add text1. On the Drawing toolbar, click the Text tool; the pointer changes to a hand with the Text icon.2. Move the pointer to the point on the card where you want to place a corner.3. Press and hold the left mouse button and drag in any direction. As you drag, a rectangle formswith one corner fixed where you began to drag, and the other corner following the pointer.Continue dragging until the rectangle is the desired size.4. Release the mouse button. The Text Box appears.
After Text creation you can change its settings on the following Dashboards:· Source Dashboard;· Position Dashboard;· Line Dashboard;· Fill Dashboard;· Text Dashboard;· Effects Dashboard.
Adding a Bar Code
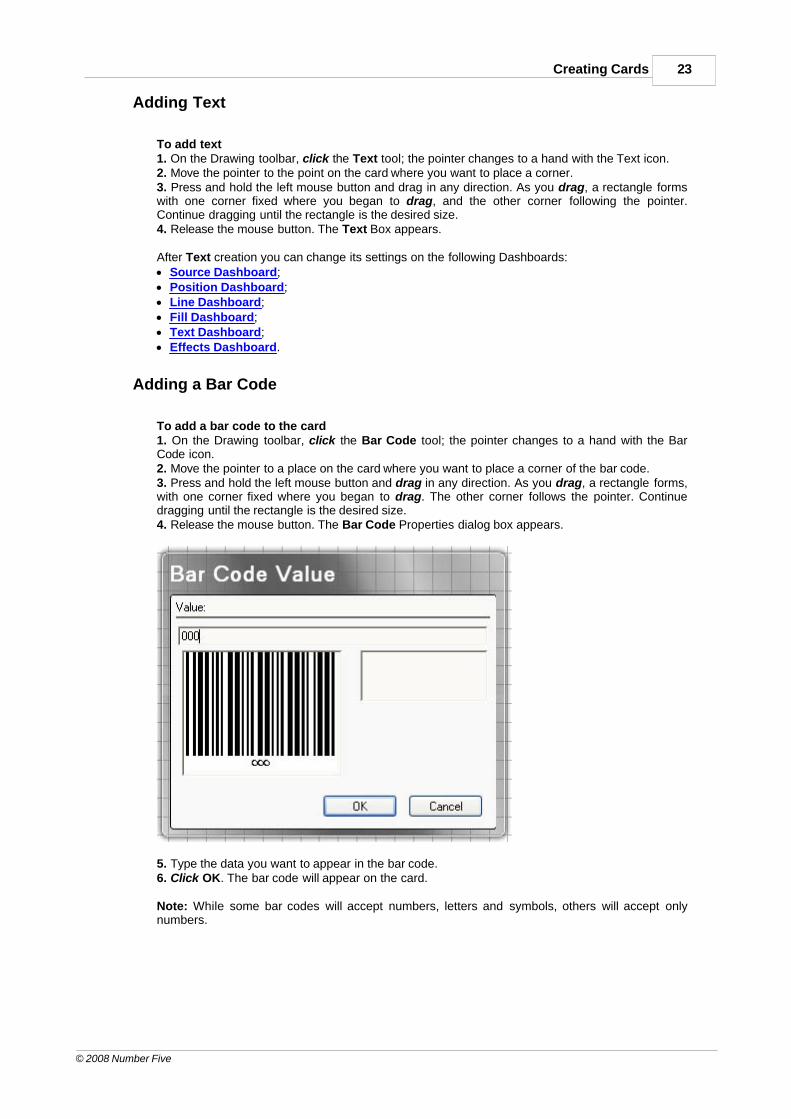
To add a bar code to the card1. On the Drawing toolbar, click the Bar Code tool; the pointer changes to a hand with the BarCode icon.2. Move the pointer to a place on the card where you want to place a corner of the bar code.3. Press and hold the left mouse button and drag in any direction. As you drag, a rectangle forms,with one corner fixed where you began to drag. The other corner follows the pointer. Continuedragging until the rectangle is the desired size.4. Release the mouse button. The Bar Code Properties dialog box appears.
5. Type the data you want to appear in the bar code.6. Click OK. The bar code will appear on the card.
Note: While some bar codes will accept numbers, letters and symbols, others will accept onlynumbers.
24 Card Software
© 2008 Number Five
After Bar Code creation you can change its settings on the following Dashboards:· Source Dashboard;· Position Dashboard;· Line Dashboard;· Text Dashboard;· Bar Code Dashboard.
Adding a Bar Code 2D
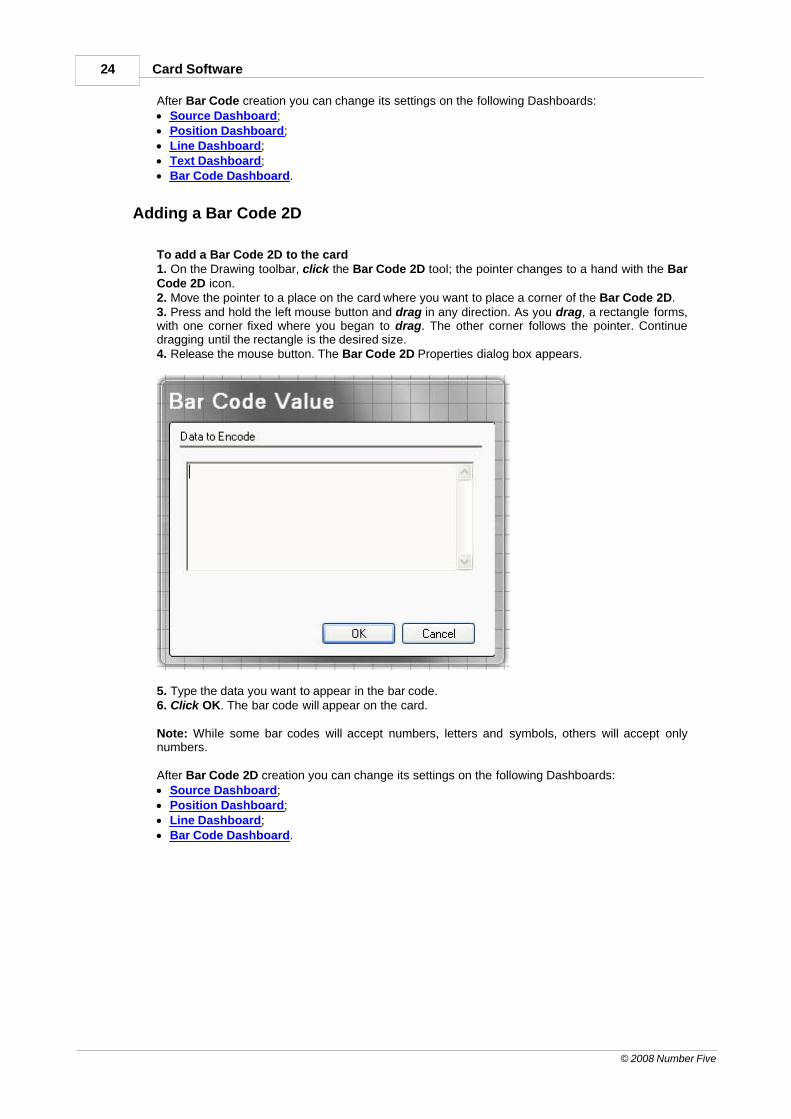
To add a Bar Code 2D to the card1. On the Drawing toolbar, click the Bar Code 2D tool; the pointer changes to a hand with the BarCode 2D icon.2. Move the pointer to a place on the card where you want to place a corner of the Bar Code 2D.3. Press and hold the left mouse button and drag in any direction. As you drag, a rectangle forms,with one corner fixed where you began to drag. The other corner follows the pointer. Continuedragging until the rectangle is the desired size.4. Release the mouse button. The Bar Code 2D Properties dialog box appears.
5. Type the data you want to appear in the bar code.6. Click OK. The bar code will appear on the card.
Note: While some bar codes will accept numbers, letters and symbols, others will accept onlynumbers.
After Bar Code 2D creation you can change its settings on the following Dashboards:· Source Dashboard;· Position Dashboard;· Line Dashboard;· Bar Code Dashboard.
25Creating Cards
© 2008 Number Five
Adding an Image
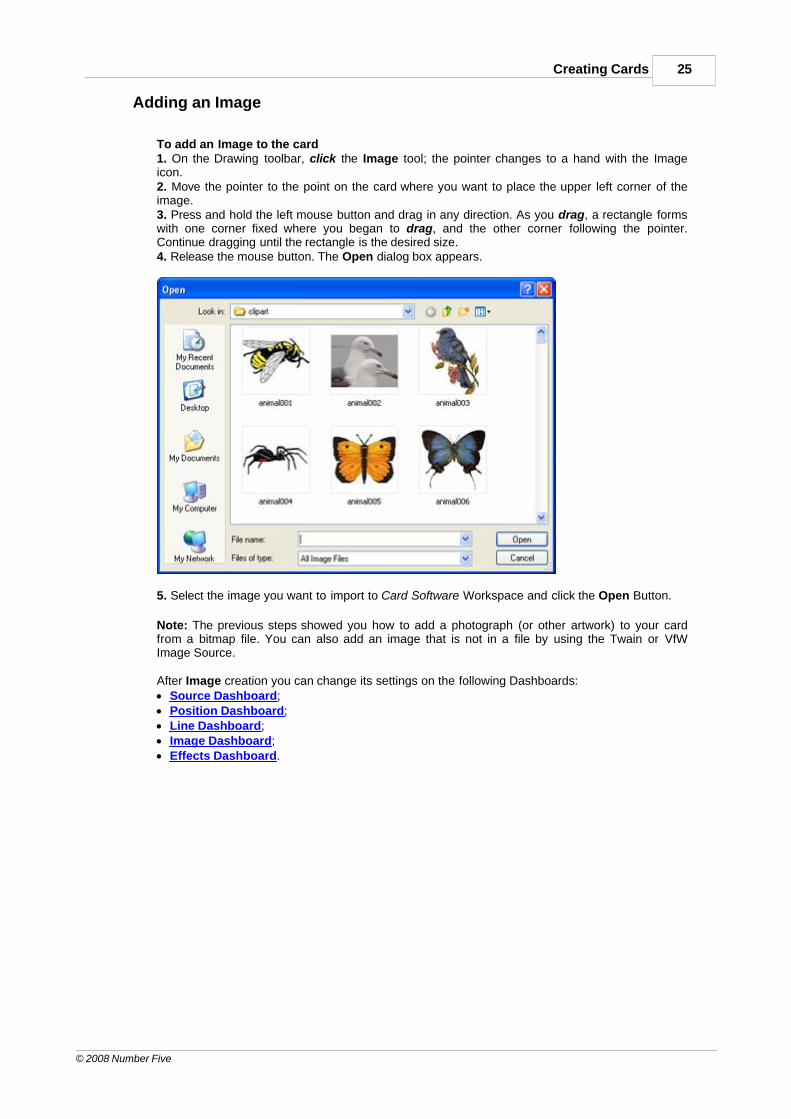
To add an Image to the card1. On the Drawing toolbar, click the Image tool; the pointer changes to a hand with the Imageicon.2. Move the pointer to the point on the card where you want to place the upper left corner of theimage.3. Press and hold the left mouse button and drag in any direction. As you drag, a rectangle formswith one corner fixed where you began to drag, and the other corner following the pointer.Continue dragging until the rectangle is the desired size.4. Release the mouse button. The Open dialog box appears.
5. Select the image you want to import to Card Software Workspace and click the Open Button.
Note: The previous steps showed you how to add a photograph (or other artwork) to your cardfrom a bitmap file. You can also add an image that is not in a file by using the Twain or VfWImage Source.
After Image creation you can change its settings on the following Dashboards:· Source Dashboard;· Position Dashboard;· Line Dashboard;· Image Dashboard;· Effects Dashboard.

Chapter
III
27Working with Objects
© 2008 Number Five
3 Working with Objects
This section provides information on objects, their properties, and how to edit them.
3.1 Card Software Objects
With the exception of magnetic encoding information and Smart Card data, all cards are made upof objects. Lines, text, images, bar codes are objects. What you can do with an object depends onwhether you created it in the Card Software or you inserted it from another application.Once you know how to manipulate the different types of objects, you’ve mastered a lot of what’sinvolved in creating cards.
Terms That Apply to Objects
As you’ve already discovered, objects are the key building blocks in the Card Software. Just abouteverything you work on is an object. There are different types of objects and the behavior of anobject depends on its type. The Card Software objects are native to the Card Software; embeddedobjects are objects you create in another application. Some of the terms used to describe workingwith objects may be new to you.
Object: The text, lines, and bar codes that you create using the Card Software tools and thepictures you import from other applications.Property: Each aspect of an object that you can manipulate using the Card Software tools andcommands, including size, color, line width, and content.Sizing handle: The square at each corner and along the sides of a selected object. Dragging asizing handle resizes the object.Bounding Box: The box framed by the sizing handles when an object is selected. When you clickan object to select it, the selection rectangle appears.Picture: An image from another application. It can have some, but not all, of the attributes of anobject created in the Card Software. You can move and resize a picture and change its rotation.Stacking: Placing objects on top of one another. Each object is separate from any other object aswell as from the card background. Although the objects seem to be drawn on a flat card, it’shelpful to think of objects as pieces of paper in a stack. The object you draw first is on the bottomof the stack; the most recently drawn object is added to the top of the stack. The “stacking order”is important because the object on the top of the stack can cover those underneath it. You can seethis effect when you stack one filled rectangle on top of an-other.
Selecting and Deselecting Objects
You need to tell to the Card Software, which object you want to work with. To do this, you mustselect it.
To select one object1. Touch a visible part of the object with the mouse pointer and then click. You select an object ina stack in the same way.
2. Once it’s selected, you’re free to rotate it, change its size, or color, or move it to anotherlocation.
To select multiple objects1. Hold down the SHIFT key and click each object you want to select.- or -2. Move the pointer outside of the objects you want to select.3. Press and hold the left mouse button and drag in any direction. As you drag, a rectangle forms,
28 Card Software
© 2008 Number Five
with one corner fixed where you began to drag, and the other corner following the pointer.Continue dragging until the rectangle encloses all the objects you want to select.4. Release the browse button. The objects enclosed by the rectangle are selected.
To select all objects1. From the Edit menu, choose All, or press CTRL+A.
To deselect objects1. Click anywhere outside the object(s).
Tip: An object will be selected automatically if you right-click the object to edit its properties.
3.2 Resizing Objects
You can change the size of an object by dragging one of the sizing handles that surround a selectedobject.
Tip: If you want to resize an object (except a PDF Symbol) by an exact amount or to a specific size,use the Position Dashboard and change the object size.
To resize an object1. Select the object.2. Move the mouse pointer over a sizing handle. The pointer changes appearance to indicate thedirection in which you can resize the object.3. Click and drag a sizing handle until the outline of the object is the right shape and size.
Resizing a Line
To resize a Line1. Select the Line. Sizing handles appear on each end of the line.2. Drag one of the sizing handles to make the Line the length you want.
Resizing a Rectangle
To resize a Rectangle1. Select the Rectangle. Sizing handles appear on each end of the object.2. Drag one of the sizing handles to make the Rectangle the size you want.
To maintain the object's proportions, hold down SHIFT while you drag the the Sizing Handles onworkspace.
Resizing an Ellipse
To resize an Ellipse1. Select the Ellipse. Sizing handles appear on each end of the object.2. Drag one of the sizing handles to make the Ellipse the size you want.
To maintain the object's proportions, hold down SHIFT while you drag the the Sizing Handles onworkspace.
29Working with Objects
© 2008 Number Five
Resizing a Text
To resize Text1. Select the Text object.2. Open Text Dashboard.3. Select the desired size from drop-down menu.
Resizing a Bar Code
To resize a Bar Code1. Select the Bar Code object. Sizing handles appear on each end of the object.2. Drag one of the sizing handles to make the Bar Code the size you want.
To maintain the object's proportions, hold down SHIFT while you drag the the Sizing Handles onworkspace.
Important: Resizing a Bar Code requires special consideration to maintain the correct aspectratio and data density for the Bar Code type being printed.
Resizing a Bar Code 2D
To resize a Bar Code 2D1. Select the Bar Code object.2. Open the Bar Code Dashboard and edit its number of rows and columns.
Important: Resizing a Bar Code requires special consideration to maintain the correct aspectratio and data density for the Bar Code type being printed.
Resizing an Image
To resize an Image1. Select the Image. Sizing handles appear on each end of the object.2. Drag one of the sizing handles to make the Image the size you want.
or
1. Open Position Dashboard.2. Edit image size.
To maintain the object's proportions, hold down SHIFT while you drag the the Sizing Handles onworkspace.
3.3 Moving and Aligning Objects
Naturally, you’ll want to move objects on your cards as you create them. And sometimes you’llneed to line up objects in a particular way - along the bottom of the card, perhaps, or with eachother.
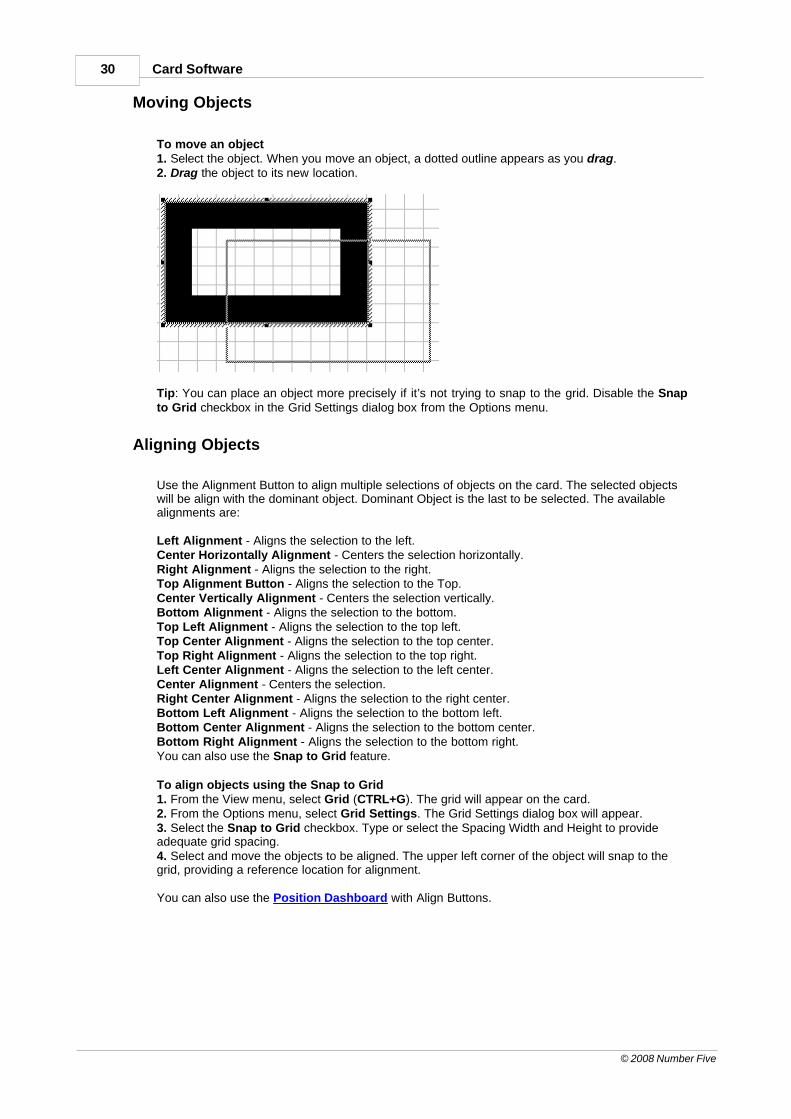
30 Card Software
© 2008 Number Five
Moving Objects
To move an object1. Select the object. When you move an object, a dotted outline appears as you drag.2. Drag the object to its new location.
Tip: You can place an object more precisely if it’s not trying to snap to the grid. Disable the Snapto Grid checkbox in the Grid Settings dialog box from the Options menu.
Aligning Objects
Use the Alignment Button to align multiple selections of objects on the card. The selected objectswill be align with the dominant object. Dominant Object is the last to be selected. The availablealignments are:
Left Alignment - Aligns the selection to the left.Center Horizontally Alignment - Centers the selection horizontally.Right Alignment - Aligns the selection to the right.Top Alignment Button - Aligns the selection to the Top.Center Vertically Alignment - Centers the selection vertically.Bottom Alignment - Aligns the selection to the bottom.Top Left Alignment - Aligns the selection to the top left.Top Center Alignment - Aligns the selection to the top center.Top Right Alignment - Aligns the selection to the top right.Left Center Alignment - Aligns the selection to the left center.Center Alignment - Centers the selection.Right Center Alignment - Aligns the selection to the right center.Bottom Left Alignment - Aligns the selection to the bottom left.Bottom Center Alignment - Aligns the selection to the bottom center.Bottom Right Alignment - Aligns the selection to the bottom right.You can also use the Snap to Grid feature.
To align objects using the Snap to Grid1. From the View menu, select Grid (CTRL+G). The grid will appear on the card.2. From the Options menu, select Grid Settings. The Grid Settings dialog box will appear.3. Select the Snap to Grid checkbox. Type or select the Spacing Width and Height to provideadequate grid spacing.4. Select and move the objects to be aligned. The upper left corner of the object will snap to thegrid, providing a reference location for alignment.
You can also use the Position Dashboard with Align Buttons.
31Working with Objects
© 2008 Number Five
Distribute Objects
Use the Distribution Button to Distribute objects on card.
Rotating Objects
You can rotate bar codes, PDF symbols, images and single lines of text in 90 degrees increments.
To rotate an object1. Select the object you want to rotate an open the Position Dashboard.2. Use the Rotation buttons (0º; 90º; 180º; 270º).
Tip: To rotate the entire card 180 degrees when the card is printed, select Rotate 180 degrees inthe Card Print dialog box.
Stacking Objects
When you’re working with objects, you’ll find that you sometimes stack them to get the effect youwant. When you stack objects on top of each other, they overlap. Sometimes you’ll want to changetheir order - put the top object on the bottom, for example.The Card Software has two commands you can use to move objects up or down in a stack.Having these commands means you don’t have to keep track of the order of the objects as youdraw them. That is, you don’t have to draw the bottom object first, then the object that would benext on the stack and so on.You can draw objects in any order and then move them up and down the stack as needed.
To stack an object1. Select the object you want to move up or down in the stack.2. Select the Send to Front (Ctrl + F) command or the Send to Back (Ctrl + B) command fromEdit Menu.3. The selected object will be placed at the front or the back of the stack.
Tip: If you are working with stack of three objects and want to place the front object in the middle,select the middle object and move it to the front.
Duplicating Objects
Duplicating an object creates a copy of the object that’s slightly offset from the original.The Duplicate command doesn’t place a copy of the object on the Clipboard.
To duplicate an object1. Select the object.2. From the Edit menu, choose Duplicate or press CTRL+D.3. The duplicated item appears on top of the object you selected. Drag it to place it where youwant it.
Tip: You can use the Duplicate command to make an array of objects.
3.4 Editing Object Properties
Each object has certain properties associated with it. You can change the properties of an objectediting its Object Properties dialog box.
32 Card Software
© 2008 Number Five
Line Properties
Line properties can be edited on Line Dashboard:Color: choose Line color.Black Panel: enable / disable Black Panel.Thickness: enter the desired line thickness.Style: choose Line style from drop-down menu.
Note: You can set a default line width. From the Options menu, choose Default Line Width. Enterthe desired default line width. Click OK. All new line objects, including rectangles, will be drawnwith the new width.
Rectangle Properties
Rectangle properties can be edited on Source Dashboard; Position Dashboard; LineDashboard; Fill Dashboard and Effect Dashboard:
Source DashboardProperties: lets you edit Imager (Cardfive image browser and editor) properties.Get: lets you get and edit images with Imager.Show image tools: show Imager on image acquire.Acquire on print: acquire image source on print.Display only: show selected object on screen and will not be printed if this option is activated. Itworks with all kind of objects.Protected: will protect object from being selected and edited preventing future modifications. Itworks with all kind of objects.Variable name: is the name of the object selected on card.
Position DashboardPosition: edit object position.Size: edit object size.Align: edit object alignment.Rotation: rotate object.
Line DashboardColor: choose Line color.Black Panel: enable / disable Black Panel.Thickness: enter the desired line width.Style: choose Line style from drop-down menu.
Fill DashboardColor 1: choose Rectangle Color 1.Color 2: choose Rectangle Color 2.Black Panel: enable / disable Black Panel.Gradient Fill: enable / disable Gradient Fill (choose between vertical or horizontal).
Effects DashboardTransparency: use slider to add transparency to your object.Rounded Corners: use slider to add Rounded Corners to your object.Reflection: add reflection to your object.
Note: You can set a default line width. From the Options menu, choose Default Line Width. Enterthe desired default line width. Click OK. All new line objects, including rectangles, will be drawnwith the new width.
33Working with Objects
© 2008 Number Five
Text Properties
Text Properties affect the position of the text on the card, and its appearance. How your text looksdepends on the attributes you assign to it (think of an attribute as a characteristic of the text - itsfont, size, color, whether it is italic or boldface, and so on).
Style Examples of text attributesRegular: Card Software works wonders.Bold: Card Software works wonders.Italic: Card Software works wonders.Bold Italic: Card Software works wonders.You use the Font and the Font Color dialog boxes to change text attributes.
Note: the attributes you select apply to all the text comprising the selected text object. You cannot,for example, make one word bold and leave the rest of the text regular. If you want text withdifferent attributes, use the Text tool to create another text object. Then, apply the desiredattributes to the new text object.
You can edit Text properties on Text Dashboard.
Selecting and Editing Text
To Select and Edit Text on Card Software double-click on text box and edit the text.
Use Text Dashboard to define text properties such as Font, Size, Bold, Italic, Underline, Color(using Black Panel will disable Color selector).Multiline text allows text in more than one line.Word Wrap is an option when Multiline is selected and shows all text in the text box.Shrink to Fit will fit text in text box when Word Wrap is disable.Lowercase changes text to "aaa".Uppercase changes text to "AAA".Capitalized changes text to "Aaa".
Deleting Text
Delete a character1. Position the pointer after the character you want to delete, click and then press BACKSPACE.
To delete a block of text1. Drag across the text to highlight it, and then press BACKSPACE or DELETE.
Cutting, Copying and Pasting Text
Cut or copy and paste a block of text1. Drag the text to select it; then, press CTRL+X (cut) or CTRL+C (copy).2. Position the pointer where you want to paste the text and click.3. With text on the Windows clipboard (cut or copied), press CTRL+V (paste).

Chapter
IV
35Working with Variables
© 2008 Number Five
4 Working with Variables
This section explains how to use variable data with the Card Software.
4.1 Variable Data
Contrary to fixed data, which is edited when the card is designed, variable data changes. It isedited or becomes available at the time the card is printed. When you design thecard, instead of typing the actual data, you create a placeholder called a variable. At print time, thevariable data replaces your named variable at its location on the card.Some of the sources for variable data are: the computer keyboard, internal information that thecomputer system keeps track of the date and time, ODBC sources and concatenation of sources.Before variable data can be used with the tools that support it (text, bar code, PDF, image ormagnetic encoding), you must create and name a variable field for each piece of information youwish to add to the card at print time. This named field then becomes the “target” for the data whenyou print thecard.This eliminates the need to manually edit the card to enter each piece of data before printing. Youcan use the same card format, knowing that your card design will remain constant, with only thevariable data changing from card to card.
Available Variable Sources
Global Counter: An integer counter that starts at a number that you choose, and, each time youprint a card, is increased by the value of a second number that you choose.
Printer Counter: An integer counter that starts at 1 and is increased by 1 each time you print acard.
Keyboard Input: Data that you type from the computer system’s keyboard.
Date/Time: The Date/Time kept by your computer system.
Concatenation: Data that result from the concatenation of two or more sources. In the Prefix,Separator and Suffix boxes you can edit constant data. To achieve multi-line concatenation pressCtrl + Enter in the Separator box.
Image Sources:File Choose Image: At print time, the Card Software will prompt you to select the name of animage file.Scan Image: An image acquired from any twain compliant source at print time. See Chapter 11 - “Image acquisition”.Video: An image acquired using the Video for windows (VFW) interface (see chapter 11 -“ImageAcquisition”).ODBC Data from internal or external database that you can access using ODBC (see Chapter 11 - “Image Acquisition”).

Chapter
V
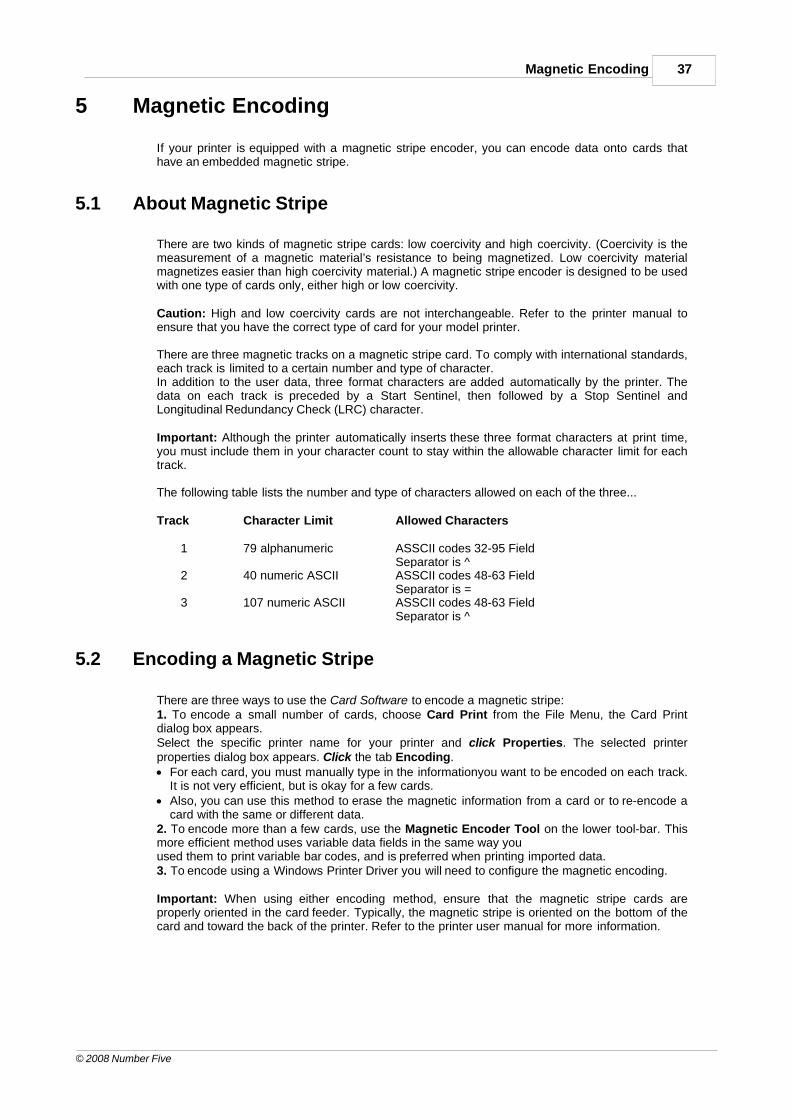
37Magnetic Encoding
© 2008 Number Five
5 Magnetic Encoding
If your printer is equipped with a magnetic stripe encoder, you can encode data onto cards thathave an embedded magnetic stripe.
5.1 About Magnetic Stripe
There are two kinds of magnetic stripe cards: low coercivity and high coercivity. (Coercivity is themeasurement of a magnetic material’s resistance to being magnetized. Low coercivity materialmagnetizes easier than high coercivity material.) A magnetic stripe encoder is designed to be usedwith one type of cards only, either high or low coercivity.
Caution: High and low coercivity cards are not interchangeable. Refer to the printer manual toensure that you have the correct type of card for your model printer.
There are three magnetic tracks on a magnetic stripe card. To comply with international standards,each track is limited to a certain number and type of character.In addition to the user data, three format characters are added automatically by the printer. Thedata on each track is preceded by a Start Sentinel, then followed by a Stop Sentinel andLongitudinal Redundancy Check (LRC) character.
Important: Although the printer automatically inserts these three format characters at print time,you must include them in your character count to stay within the allowable character limit for eachtrack.
The following table lists the number and type of characters allowed on each of the three...
Track Character Limit Allowed Characters
1 79 alphanumeric ASSCII codes 32-95 FieldSeparator is ^
2 40 numeric ASCII ASSCII codes 48-63 FieldSeparator is =
3 107 numeric ASCII ASSCII codes 48-63 FieldSeparator is ^
5.2 Encoding a Magnetic Stripe
There are three ways to use the Card Software to encode a magnetic stripe:1. To encode a small number of cards, choose Card Print from the File Menu, the Card Printdialog box appears.Select the specific printer name for your printer and click Properties. The selected printerproperties dialog box appears. Click the tab Encoding.· For each card, you must manually type in the informationyou want to be encoded on each track.
It is not very efficient, but is okay for a few cards.· Also, you can use this method to erase the magnetic information from a card or to re-encode a
card with the same or different data.2. To encode more than a few cards, use the Magnetic Encoder Tool on the lower tool-bar. Thismore efficient method uses variable data fields in the same way youused them to print variable bar codes, and is preferred when printing imported data.3. To encode using a Windows Printer Driver you will need to configure the magnetic encoding.
Important: When using either encoding method, ensure that the magnetic stripe cards areproperly oriented in the card feeder. Typically, the magnetic stripe is oriented on the bottom of thecard and toward the back of the printer. Refer to the printer user manual for more information.
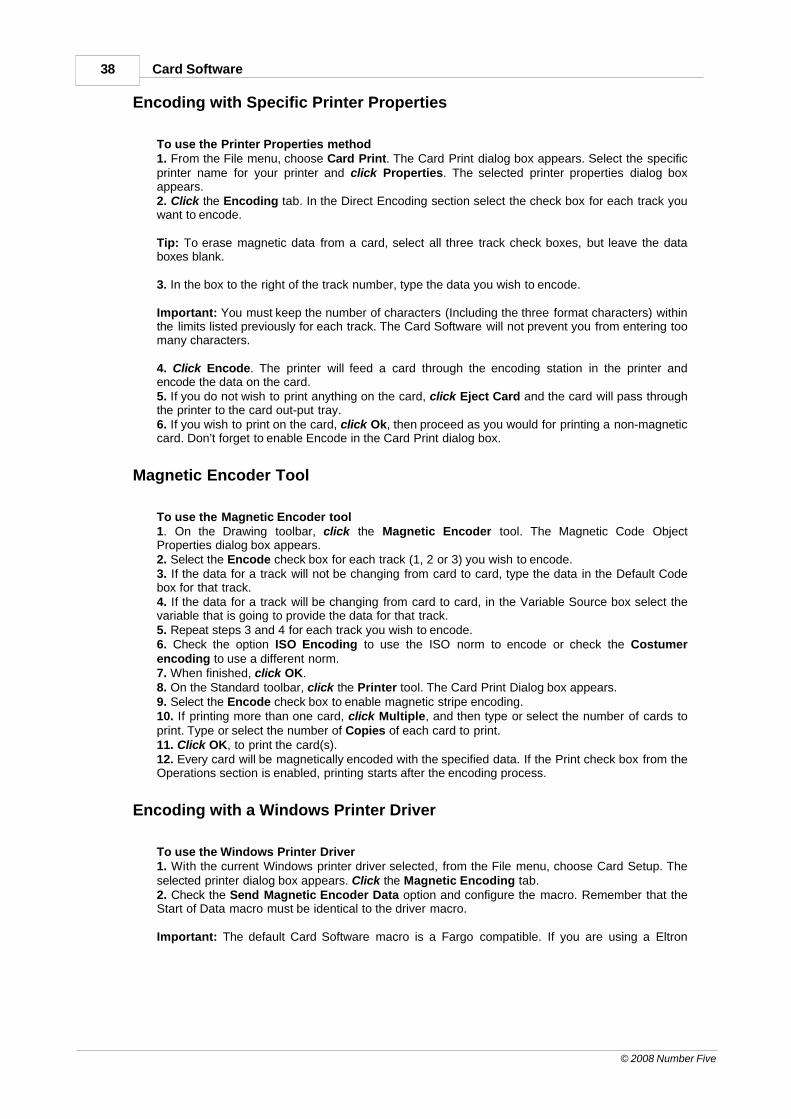
38 Card Software
© 2008 Number Five
Encoding with Specific Printer Properties
To use the Printer Properties method1. From the File menu, choose Card Print. The Card Print dialog box appears. Select the specificprinter name for your printer and click Properties. The selected printer properties dialog boxappears.2. Click the Encoding tab. In the Direct Encoding section select the check box for each track youwant to encode.
Tip: To erase magnetic data from a card, select all three track check boxes, but leave the databoxes blank.
3. In the box to the right of the track number, type the data you wish to encode.
Important: You must keep the number of characters (Including the three format characters) withinthe limits listed previously for each track. The Card Software will not prevent you from entering toomany characters.
4. Click Encode. The printer will feed a card through the encoding station in the printer andencode the data on the card.5. If you do not wish to print anything on the card, click Eject Card and the card will pass throughthe printer to the card out-put tray.6. If you wish to print on the card, click Ok, then proceed as you would for printing a non-magneticcard. Don’t forget to enable Encode in the Card Print dialog box.
Magnetic Encoder Tool
To use the Magnetic Encoder tool1. On the Drawing toolbar, click the Magnetic Encoder tool. The Magnetic Code ObjectProperties dialog box appears.2. Select the Encode check box for each track (1, 2 or 3) you wish to encode.3. If the data for a track will not be changing from card to card, type the data in the Default Codebox for that track.4. If the data for a track will be changing from card to card, in the Variable Source box select thevariable that is going to provide the data for that track.5. Repeat steps 3 and 4 for each track you wish to encode.6. Check the option ISO Encoding to use the ISO norm to encode or check the Costumerencoding to use a different norm.7. When finished, click OK.8. On the Standard toolbar, click the Printer tool. The Card Print Dialog box appears.9. Select the Encode check box to enable magnetic stripe encoding.10. If printing more than one card, click Multiple, and then type or select the number of cards toprint. Type or select the number of Copies of each card to print.11. Click OK, to print the card(s).12. Every card will be magnetically encoded with the specified data. If the Print check box from theOperations section is enabled, printing starts after the encoding process.
Encoding with a Windows Printer Driver
To use the Windows Printer Driver1. With the current Windows printer driver selected, from the File menu, choose Card Setup. Theselected printer dialog box appears. Click the Magnetic Encoding tab.2. Check the Send Magnetic Encoder Data option and configure the macro. Remember that theStart of Data macro must be identical to the driver macro.
Important: The default Card Software macro is a Fargo compatible. If you are using a Eltron

39Magnetic Encoding
© 2008 Number Five
Printer, for example, you will have to delete the last character of the Start of Data and keep theEnd of Data blank. For more information about other printers macros please consult the printermanual and/or the printers manufacture.
Note: If your printer track list is 0, 1, 2 please replace the X (capital case) for a x (lower case) onthe macro.
3. From the File menu, choose Card Print. The Card Print dialog box appears. Check the Encodeoption, confirm all the others print operations and click Ok.

Chapter
VI
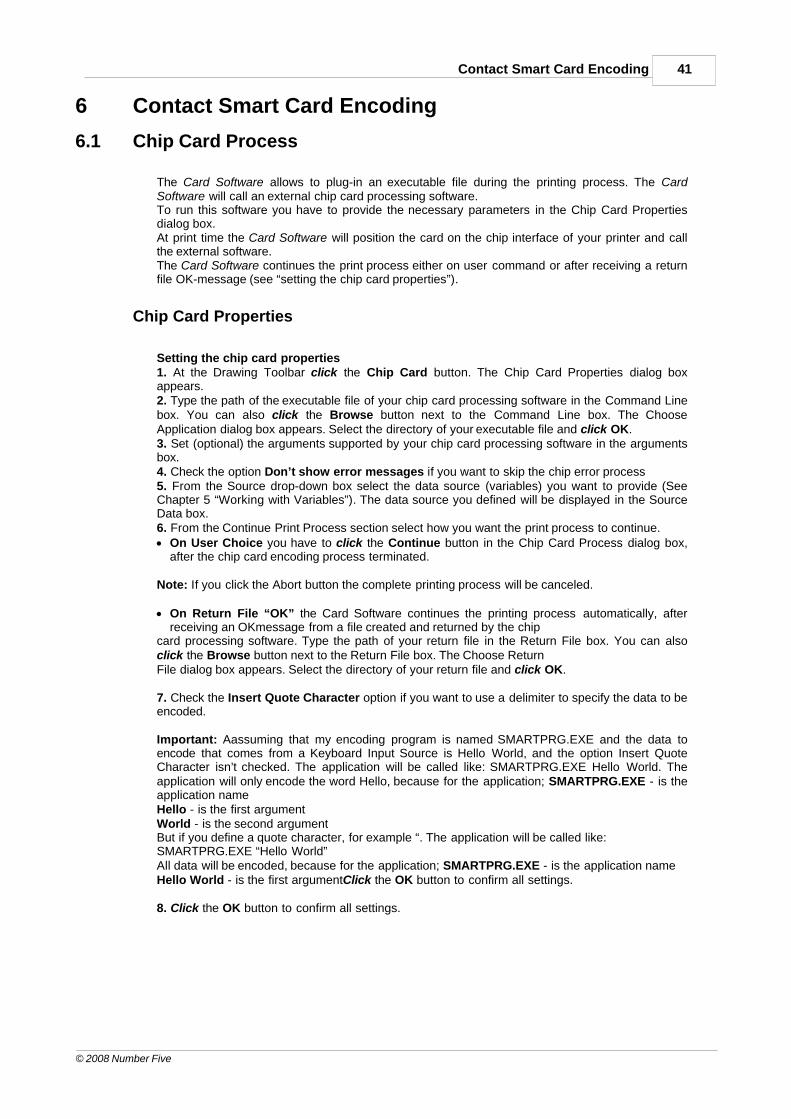
41Contact Smart Card Encoding
© 2008 Number Five
6 Contact Smart Card Encoding
6.1 Chip Card Process
The Card Software allows to plug-in an executable file during the printing process. The CardSoftware will call an external chip card processing software.To run this software you have to provide the necessary parameters in the Chip Card Propertiesdialog box.At print time the Card Software will position the card on the chip interface of your printer and callthe external software.The Card Software continues the print process either on user command or after receiving a returnfile OK-message (see “setting the chip card properties”).
Chip Card Properties
Setting the chip card properties1. At the Drawing Toolbar click the Chip Card button. The Chip Card Properties dialog boxappears.2. Type the path of the executable file of your chip card processing software in the Command Linebox. You can also click the Browse button next to the Command Line box. The ChooseApplication dialog box appears. Select the directory of your executable file and click OK.3. Set (optional) the arguments supported by your chip card processing software in the argumentsbox.4. Check the option Don’t show error messages if you want to skip the chip error process5. From the Source drop-down box select the data source (variables) you want to provide (SeeChapter 5 “Working with Variables”). The data source you defined will be displayed in the SourceData box.6. From the Continue Print Process section select how you want the print process to continue.· On User Choice you have to click the Continue button in the Chip Card Process dialog box,
after the chip card encoding process terminated.
Note: If you click the Abort button the complete printing process will be canceled.
· On Return File “OK” the Card Software continues the printing process automatically, afterreceiving an OKmessage from a file created and returned by the chip
card processing software. Type the path of your return file in the Return File box. You can alsoclick the Browse button next to the Return File box. The Choose ReturnFile dialog box appears. Select the directory of your return file and click OK.
7. Check the Insert Quote Character option if you want to use a delimiter to specify the data to beencoded.
Important: Aassuming that my encoding program is named SMARTPRG.EXE and the data toencode that comes from a Keyboard Input Source is Hello World, and the option Insert QuoteCharacter isn’t checked. The application will be called like: SMARTPRG.EXE Hello World. Theapplication will only encode the word Hello, because for the application; SMARTPRG.EXE - is theapplication nameHello - is the first argumentWorld - is the second argumentBut if you define a quote character, for example “. The application will be called like:SMARTPRG.EXE “Hello World”All data will be encoded, because for the application; SMARTPRG.EXE - is the application nameHello World - is the first argumentClick the OK button to confirm all settings.
8. Click the OK button to confirm all settings.

42 Card Software
© 2008 Number Five
Chip Card Encoding
The chip card encoding process1. From the File menu choose Card Print. The Card Print Dialog Box appears (see Chapter 19. “Printing”). Select in the operation section the Chip Card Processing check box. Click OK to startthe chip card encoding process.
Note: You can also select Print and Encode in the operation section. The operation sequence isset as: first chip card encoding, second magnetic encoding and third print.
2. Depending on your setting of the runtime options, either the Chip Card Process dialog boxappears or the Card Software waits for a return file (see “setting the chip card properties”).

Chapter
VII
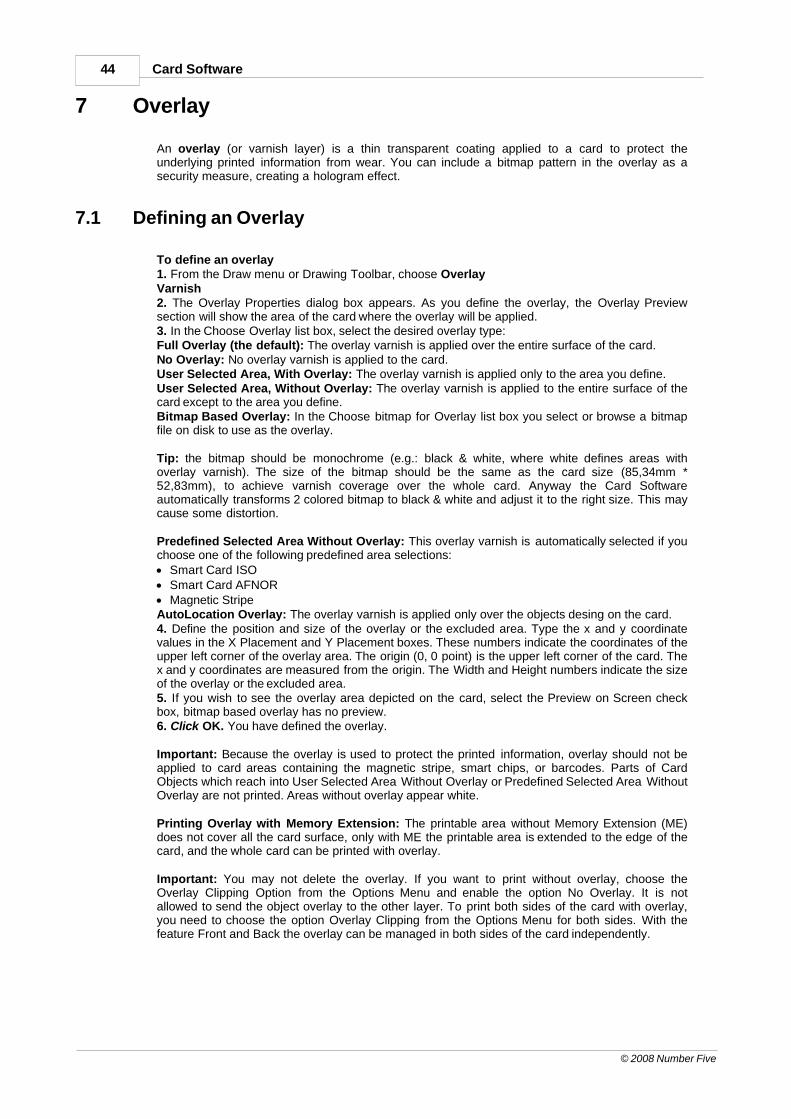
44 Card Software
© 2008 Number Five
7 Overlay
An overlay (or varnish layer) is a thin transparent coating applied to a card to protect theunderlying printed information from wear. You can include a bitmap pattern in the overlay as asecurity measure, creating a hologram effect.
7.1 Defining an Overlay
To define an overlay1. From the Draw menu or Drawing Toolbar, choose OverlayVarnish2. The Overlay Properties dialog box appears. As you define the overlay, the Overlay Previewsection will show the area of the card where the overlay will be applied.3. In the Choose Overlay list box, select the desired overlay type:Full Overlay (the default): The overlay varnish is applied over the entire surface of the card.No Overlay: No overlay varnish is applied to the card.User Selected Area, With Overlay: The overlay varnish is applied only to the area you define.User Selected Area, Without Overlay: The overlay varnish is applied to the entire surface of thecard except to the area you define.Bitmap Based Overlay: In the Choose bitmap for Overlay list box you select or browse a bitmapfile on disk to use as the overlay.
Tip: the bitmap should be monochrome (e.g.: black & white, where white defines areas withoverlay varnish). The size of the bitmap should be the same as the card size (85,34mm *52,83mm), to achieve varnish coverage over the whole card. Anyway the Card Softwareautomatically transforms 2 colored bitmap to black & white and adjust it to the right size. This maycause some distortion.
Predefined Selected Area Without Overlay: This overlay varnish is automatically selected if youchoose one of the following predefined area selections:· Smart Card ISO· Smart Card AFNOR· Magnetic StripeAutoLocation Overlay: The overlay varnish is applied only over the objects desing on the card.4. Define the position and size of the overlay or the excluded area. Type the x and y coordinatevalues in the X Placement and Y Placement boxes. These numbers indicate the coordinates of theupper left corner of the overlay area. The origin (0, 0 point) is the upper left corner of the card. Thex and y coordinates are measured from the origin. The Width and Height numbers indicate the sizeof the overlay or the excluded area.5. If you wish to see the overlay area depicted on the card, select the Preview on Screen checkbox, bitmap based overlay has no preview.6. Click OK. You have defined the overlay.
Important: Because the overlay is used to protect the printed information, overlay should not beapplied to card areas containing the magnetic stripe, smart chips, or barcodes. Parts of CardObjects which reach into User Selected Area Without Overlay or Predefined Selected Area WithoutOverlay are not printed. Areas without overlay appear white.
Printing Overlay with Memory Extension: The printable area without Memory Extension (ME)does not cover all the card surface, only with ME the printable area is extended to the edge of thecard, and the whole card can be printed with overlay.
Important: You may not delete the overlay. If you want to print without overlay, choose theOverlay Clipping Option from the Options Menu and enable the option No Overlay. It is notallowed to send the object overlay to the other layer. To print both sides of the card with overlay,you need to choose the option Overlay Clipping from the Options Menu for both sides. With thefeature Front and Back the overlay can be managed in both sides of the card independently.

45Overlay
© 2008 Number Five
Bitmap Based Overlay
To prepare a bitmap and define overlay properties1. Use a Windows™ application, like Paint to draw the bitmap. Set width = 85.3mm and height =52.8mm. Type the number in the area where you want it later to appear on your card. Use blackletters. Save the image as bitmap (phone.bmp)
2. From the Draw menu, choose Overlay Varnish. The Overlay Properties dialog box appears. Inthe Overlay Properties dialog box choose Bitmap Based Overlay. Browse to the overlay bitmap,you have created before. The overlay is printed in all white areas, sparing out the black number.Holding the printed card against the light, the number appears as a kind of hologram. Click Ok.You have created and selected a bitmap file to be used as overlay.
Note: you may only use one kind of overlay types for the same card side.

Chapter
VIII
47Card Software and Database
© 2008 Number Five
8 Card Software and Database
This section explains how to work with the Card Software and databases. Learn how to create yourown database from within the Card Software and how to connect to an external database usingODBC drivers.
8.1 Introduction to ODBC
ODBC Basics
The Card Software accesses databases through ODBC drivers, using SQL language.The Open Database Connectivity (ODBC) interface allows accessing data in DatabaseManagement Systems (DBMS) using Structured Query Language (SQL) as a standard foraccessing data.ODBC allows different database technologies to be used by defining a standard interface.
File Formats
To access any database format from the Card Software you will need the ODBC driver for thatstandard. The default drivers, which come with the Card Software CD-ROM supply the mostcommon formats:· Microsoft Access Driver (*.MDB)· Microsoft dBase Driver (*.DBF)· Microsoft Excel Driver(*.XLS)· Microsoft FoxPro Driver(*.DBF)· Microsoft Paradox Driver(*.DB)· Microsoft Text Files Driver(*.TXT ; *.CSV)· Microsoft Visual FoxPro Driver· SQL Server
Note: You can add anytime your specific drivers to meet your needs. Just as an example, you canadd drivers to access AS400 files directly from the Card Software.
Purpose of ODBC
ODBC was created as a way of setting a standard to access data on files. Using concepts likelayers and layer abstraction, it allows the user to access data on his hard disk, in a local networkor even in a Wide Area Network, using desktop or server/client specifications, in any databaseformat that have available ODBC driver.
Desktop versus Server/Client
Desktop file access means, that the file is accessed opening it as a disk file, in the local hard diskor even in a local network. Server/Client supposes that somewhere a DBMS server is running. Thelocal machine sends requests to the server resulting in data available to the client. The CardSoftware does the access to both types in an easy and similar way. One difference will be that in aDBMS Server the user will need to “login” the database.
48 Card Software
© 2008 Number Five
SQL
SQL (Structured Query Language) is the standard that the Card Software uses to “talk” to ODBC,issuing commands to read and write data on the files.
Card Software Sources
Card Software classifies data in two classes:Internal Data Sources, which it assures to exist and automatically configures.External Data Sources, which must be configured by the user running the ODBC administrator togain access to his files.Basically both data types use the same methods. Internal DataSources make life easier for a user, who does not have a database system already installed.
8.2 Database Structure
Database, Table, Record, Field, Data: Those five terms build the structure of a database. It is easyto understand which meaning each term has, if you imagine an office closet.Database: the office closet itselfTable: a card-index box inside the closetRecord: a file-card inside the card-index boxField (Column): a predefined part of the file-card, for example name field or address field, etc.Data: the particulars typed in the name field.
8.3 Data Type
About Data Types
Database columns are defined to contain a certain type of data, the most commonly used datatype is maybe CHAR (stands for character). You need to define different data types for eachcolumn, if you want to store data like images directly in a column.Each database format supports different data types, which are translated by the ODBC driver intoa SQL data type. This allows an application to interact with a database bidirectionally.This interaction is not 100%, though, as each different driver imposes certain limitations.
Card Software Internal Database Data Type
The Card Software supports five Data types: Text, Number, Integer Number, Photo and Memo.Text: The data type text builds a single lined field, which may contain up to 254 characters.Number: The data type number builds a single lined field, which may contain any value between1.7e-308 to 1.7e+308Integer Number: The data type integer number builds a single lined field, which may contain anyvalue between - 2,147,483,648 and 2,147,483,647Memo: The data type Memo builds a multi-line field for text editing.Photo: The data type Photo builds a field, which allows the storage of an image.
49Card Software and Database
© 2008 Number Five
8.4 Data Source
Introduction
Before you can access data with an ODBC driver, you must add a data source for it. You canchange or delete a data source at any time. A data source contains the information which ODBCdriver is to be used, including driver specific setup and the indication where to find the databaseitself.See section External Database later in this chapter to learn, how to work with data sources.
8.5 Card Software Internal Database
Create a New Internal Database
Creating an internal Card Software Database1. From the Database menu choose Connect. The ODBC Source Selection dialog box appears.Select Create Database.2. The Create Database dialog box appears. Type the database name, for example COMPANYand click Create.3. Select the Database you just created and click Next. The list of the available tables appearsand prompts you to select the table you want to work with. As there is no table available yet, youhave to create it, by clicking New Table.4. The Database Table Structure dialog box appears. Proceed as explained later in this chapter “Create a New Table”.
Creating a Card Software Database1. Some editions of the Card Software are specially designed to access an external , alreadyexisting database. If you need to create a database from within the Card Software you must usethe MsAccess ODBC driver setup (see later in this chapter at section “Setup MsAccess DataSource”).
Open an Internal Database
Opening an Internal Card Software Database1. From the Database menu choose Connect. The ODBC Source Selection dialog box appears.Select the database filename you want and click Next.2. Select the operation you want to perform, and proceed as explained later in the chapter section “Working with Tables”.
Disconnect from a Database
1. From the Database menu choose Disconnect.
Note: As soon as you link a database field to the card layout, this option is disabled.
8.6 Card Software Internal Text Data Source
Card Software allows you to connect directly to a text file (*.asc, *.csv, *tab or *.txt), which areASCII text files with data sets in individual lines and fields separated by comma, tab or customdelimiter. This type of file are read only, you cannot use Card Software to edit data.

50 Card Software
© 2008 Number Five
Connecting to a Internal Text data source
1. From the Database menu choose Connect. The ODBC Source Selection dialog box appears.Select “Card Software Text Data Source”, and click Next to continue.2. A list of available text files appears. Select the file you want to work with and click Next.
Note: If you don’t see the file you want, use the Browse button to select the directory where youstored the file(s).
3. The Define Text File Format dialog box appears. Make sure all the settings are correct and clickFinish to open the table.
Selected File - Specifies the selected text file.Has Column Header - Specifies weather the columns of the selected table first row will be usedas column names.Format - Lists all the available formats:Comma Separated Values,Tab Separated Values,Pipe Separated Values orCustom DefinedIf Custom Defined, indicates the type of delimiter used.Delimiter - The custom delimiter character to be used to separate columns. Must be only onecharacter in length, and double quotation marks (“) cannot be used. Enable when Custom Definedis selected from the Format list box.Columns - Lists the column names for each column in the table selected in the Selected File andreflects the order of the columns in the table.Name - Displays the name of the selected column. Can be used to specify a new column name foran existing column.Data Type - Displays the data type.Width - The width of the column.
8.7 Working With Tables
Create a new Table
1. After connecting successfully to an Internal Card Software database the select table dialog boxappears.2. Click New. The Database Table Structure dialog box appears.3. Type the table name (e.g.: Clients_Hardware); You may not use the space character doseparate words, as it provokes a syntax error in the create table statement..4. Define the columns. For each column you want to create provide column name (e.g.: Name,Idnumber and Photo) or use the default name (Field1, Field2, Field3).5. Select column data type (see section Card Software internal database data type earlier in thischapter) and length (if necessary).6. Provide the type of Index you want to apply to the column. An index is used to control datastorage and queries in a column. Choose between None (in this case, no indexing occurs), Unique(indexed, each record must contain unique data, used to set a primary key) or Duplicate (indexed,but allows equal data, speeds up queries).
Note: The field RECORD_NR is automatically created and indexed as unique to provide at leastone column, where data differs in all records (primary key). This is to avoid affection on multiplerecords at delete or edit operations. You may delete this column, but you should provide at leastone column indexed as unique.
7. Remove a column: choose this options if you want to remove a column from your table.8. Create your table by clicking Finish. The Select Table dialog box appears. Your table namedClients is highlighted. Choose it by clicking Finish.
51Card Software and Database
© 2008 Number Five
9. The database view appears in a split-window next to the card view. Use the database toolbar tonavigate, add new, modify or delete records (see as explained later in this chapter section “TheCard Software Database Functions”).
8.8 Edit an existing Table
Edit a table1. After connecting successfully to an internal Card Software database the select table dialog boxappears. Select the table you want to change.2. Click Modify. The Database Table Structure dialog box appears.3. Add and Remove Columns as explained in the section Create a New Table earlier in thischapter.
Remove a Table
1. After connecting successfully to an internal Card Software database the select table dialog boxappears. Select the table you want to remove.2. Select the table you want to remove and click Remove. The Card Software prompts you with awarning message. If you really want to remove permanently the table you selected confirm byclicking Yes.
8.9 Connect to an External Database
ODBC Source Selection
Before you can connect to a database you must define a data source first (as explained earlier inthis chapter in section “Data Source). When you connect to a database for the first time, you willfind default data sources listed in the Data Source Selection dialog box. These sources are set foreach of the installed drivers, defining the default driver settings and the default database directory,which is c:\windows\system\. To connect to your database you have to setup a new data sourcefor it first (or edit an existing source). The next sections explains, driver specific, the ODBC datasource setup.
Note: See our web site for more information about how to setup the different ODBC data sources.
8.10 Working with N5 Database Interface
After connecting successfully to a database, the selected table is displayed in a split window nextto the card design area. To access the record information of a column you have to create CardSoftware objects and connect them with the database fields.
How to link database fields with the card layout:Linking a Text Object
Note: you can easily create a Text Object linked to the database by drag and drop the field namefrom the database area into the card work area.
1. Open a text object and select ODBC Source as Variable Source.2. The Source ODBC Source Selection dialog box appears. Select the column which contains therecords you want to appear in your text object and click Finish.3. Edit the font properties you want and confirm clicking OK.4. In the card work area resize, if necessary, the selection rectangle of the text box in a way thatmakes the largest record of your column fit inside.
52 Card Software
© 2008 Number Five
5. Save your card layout. Your card and the database are connected. Whenever you’ll open yourcard, the database automatically will be found and opened as well.
Linking an Image ObjectThere are two forms image information is stored in a database. Either the image is part of thedatabase itself, stored in an image field (ODBC, point to image field), or the complete pathdirectory of an image field is stored in an text field, like c:\images\001.bmp (ODBC, point to imagefile). The Card Software supports multiple image field and/or image file linking.
Note: you can easily create a Text Object linked to the database by drag and drop the field namefrom the database area into the card work area.
1. Open an image object and choose either ODBC, point to image field or ODBC, point to imagefile.2. Select the column which contains the information of your image and click Finish.3. Confirm the Source Image Properties, clicking OK. In the image Object dialog box, choose theoptions (rotation, keep aspect, protected) you want to apply and click OK.4. In the card work area resize, if necessary, you can resize the image with the mouse.5. Save your card layout. Your card and the database are connected. Whenever you’ll open yourcard, the database automatically will be found and opened as well.
Linking a Bar Code Object1. Open an bar code object and select ODBC Source as Variable Source.2. The Source ODBC Source Selection dialog box appears. Select the column which contains therecords you want to appear in your bar code object and click Finish.3. Set the Bar Code Object Properties you want to apply, and confirm clicking OK.4. In the card work area, if necessary, you can resize the bar code with the mouse.5. Save your card layout. Your card and the database are connected. Whenever you’ll open yourcard, the database automatically will be found and opened as well.
Linking a PDF Symbol Object1. Open a PDF symbol object and select ODBC Source as Variable Source.2. The Source ODBC Source Selection dialog box appears. Select the column which contains therecords you want to appear in your PDF symbol object and click Finis.3. Set the PDF symbol Object Properties you want to apply, and confirm clicking OK.4. Save your card layout. Your card and the database are connected. Whenever you’ll open yourcard, the database automatically will be found and opened as well.
Linking a Magnetic Code Object1. Open a Magnetic Code object and select for the track(s) (1 to 3) you want to encode ODBCSource as Variable Source.2. The Source ODBC Source Selection dialog box appears. Select the column which contains therecords you want to encode in each track and click Finish.3. Save your card layout. Your card and the database are connected. Whenever you’ll open yourcard, the database automatically will be found and opened as well.
8.11 The Card Software Database Functions
Editing a Database
· To add a new record to your database select Add from the database menu. You also can clickthe Add Record button at your database toolbar.
· Edit the record and save it clicking the Save Record button at your database toolbar.· To delete a record select Delete from the database menu.
53Card Software and Database
© 2008 Number Five
You also can click the Delete Record button at your database toolbar.
Moving between Records
· To move to the first record, select Move First from the database menu. You also can click theMove First button at your database toolbar.
· To move to the last record, select Move Last from the database menu. You also can click theMove Last button at your database toolbar.
· To move to the next record, select Move Next from the database menu. You also can click theMove Next button at your database toolbar.
· To move to the previous record, select Move Previous from the database menu. You also canclick the Move Previous button at your database toolbar.
Hide/Unhide Fields
Besides moving you can also Hide/Unhide fields.
How to Hide Fields1. Click the Define View button from the database toolbar.2. Right-click on the field name you want to hide and choose Hide.
How to Unhide Fields1. Click the Define View button from the database toolbar.2. Right-click anywhere on the database area and choose Unhide.3. The Unhide dialog box appears, select the field you want to unhide one by one or click UnhideAll to show all the database fields in the database area.
Database Image Properties
To open the database image properties dialog box right-click the database image field. Image size,resolution and compression ratio are displayed.
8.12 The Card Software Database Reports
The Card Software Database Report is an useful tool, providing you to create, save and print acustomizable listing of your whole database or selections thereof.
Create Database Report
Creating a new database report1. From the Database menu, select Reports or click the Report button in the Database Toolbar.The Database Report dialog box appears. Type the listing title. Select a field you want in yourreport from the Database Field box and click the Move Right button. You also can doubleclickthe field to move it to the Fields to Print box. To deselect a field from the Fields to Print box, selectit and click the Move Left button. You also can double-click the field to move it back to theDatabase Field box.
Attention: Make sure that the sum of field characters to print isn’t larger than the paper width,otherwise the print result will be truncated. If you need you can reduce de display size for a field,for that just enter a lower value in the Size of the Database Report dialog box. You can alsochange the font size.
54 Card Software
© 2008 Number Five
2. Save your database report, clicking the Save button. The Save As dialog box appears. Type afilename and click OK.3. Use eventually the Card Software Filter Functions to make a selection of records.4. To select the font style and size you want your report printed with click the Font… button. TheFont dialog box appears. Make your choice and click OK.5. Optionally you can change your Printer Setup. Click the Print Setup… button and make yourchoices (page layout, default printer, print to file, etc.) and click OK.6. To print your report click the Print button in the Database Report dialog box.
Attention: If you click the Close button without saving your database report, the selection youmade will be permanently lost.
Open a Database Report
1. From the Database menu, select Reports. The Database Report dialog box appears. Click theOpen button. The Open dialog box appears.2. Make your selection and click OK. The Database Dialog box appears, containing the data ofyour saved report.
8.13 The Auto Print Function
The Auto Print concept is a powerful additional database/ print function which permits databaseedition and automatic print on one or in different workstations. Information about which cards(records) were already printed is automatically added to the database, the Card Software keepstrack of the printing process and only newly edited cards (records) will be printed.
Preparing the Card Software for Auto Print
Prepare a Database for Auto PrintPlan the layout of the database to be used for auto print, adding all fields you need to store theinformation you require.Create one extra field (field type must be numeric or char), which will store the information if cards(records) were printed or not. This field may not be indexed ‘unique’. Make sure you choose adatabase format which comes with an ODBC driver permitting bi-directional editing (like dBase,Access, etc.). If you need to use an already existing database, add one filed which will contain theprint information of the cards (records).If you define an already existing field to contain these information, all data in this field will beerased. The database file must be shareable between different users (may not be exclusive, readonly, etc.).
Prepare WorkstationsOn the first workstation prepare all settings to edit the database you have prepared in step 1. Inthe second workstation create the card layout and link it to the database (as explained earlier inthis chapter). Make sure the Allow data edition check box in the database interface propertiesdialog box is enabled.Make sure the right printer/ribbon settings are defined (see Appendix B ). Save the card document.
Start Auto Print1. From the database menu select Auto Print…. The Auto Print Configuration dialog box appears.2. Define the Print Control Field. From the scroll down menu select the control field you definedbefore in step 1. If the print control field is text type, it’s data will be replaced by a “*” (or and if thefield is big enough the data will be replaced by the print date and time) if the print process wasperformed correctly, otherwise by “E”. If the print control field is numeric type, it’s data will bereplaced by “1” if the print process was performed correctly, otherwise by “9”.

55Card Software and Database
© 2008 Number Five
3. Define a Guide field. Choose a field which identifies best each card (record), like a field whichincludes a name, id-number or similar. Besides the print date and time its contents is displayed inthe Auto Print dialog box, helping you to control the print process.4. Set the Poll Delay. This value indicates the time (in seconds) the Card Software will wait beforerefreshing the database table.After refreshing the table all cards (records), which were not printed yet are sent to the printer.5. Create Icon on Desktop and Start when opened. Pressing the Create Icon button will create anicon with a shortcut to the Auto Print card document at your desktop. If the start when openedcheck box is enabled, the Auto Print process starts performing immediately.6. If you want to apply a filter to the database click the Query Filter button (see earlier in thischapter).7. Mark all as printed/not printed: These buttons allow to change the information of the completerecord set to printed/not printed status.8. OK/Cancel. The OK button saves the Auto Print settings and closes the Auto Print Configurationdialog box. Press Cancel to leave the Auto Print dialog box without saving any changes/ settings.9. Start Auto Print. The final step. Click this button to perform Auto Print on workstation 2. TheAuto Print dialog box appears.10. Stop/Close: Stops the Auto Print function and closes the Auto Print dialog box11. Save History. Click this button if you want to save the information displayed in the Auto Printdialog box as *.txt file.

Chapter
IX
57Logins and Passwords
© 2008 Number Five
9 Logins and Passwords
The Card Software provides customizable security and access level. Whenever you startthe Card Software the Login Dialog box appears, if the Disable Logins check box iscleared.The default login and password is admin. Login means an access level, password theaccess authorization.
9.1 Administrator Login
Edit Administrator Logins1. From the File menu, select Logins. The Logins dialog box appears.2. Clear the Disable Logins check box to activate this security feature.3. Select Administrator and click the Edit button. The Edit User Properties dialog box appears.4. Type a login of your choice. Proceed equal with your Card Software password and confirm it.The database login and password give access authorization to an external database of yours.Make sure all areas are selected.
9.2 Create User Login
Add User Login1. From the File menu, select Logins. The Logins dialog box appears. Click the New button. TheNew User dialog box appears.2. Edit user name, login and password, as well as Database login and password, if necessary.3. Depending on what kind of job you want your employee may perform select one or multipleaccess areas.
9.3 Permissions
No area selected: The following operations are available for any access area:- File Menu: open, close cards, exit program.- View Menu: turn on/off database window, obtain printer info, zoom in/out, view front/back side.- Window Menu: cascade, tile, arrange icons.- Help menu: contents, using help, about the Card Software.
· Login Control: allows to edit logins and passwords.· Edit Cards: allows all card editing functions, including magnetic encoding and chip card setting.· Print Cards: allows print cards.· Edit Configurations: allows to operate all print functions and configurations.· Edit database: allows to edit all databases accessible (after Cardfive restart).

Chapter
X
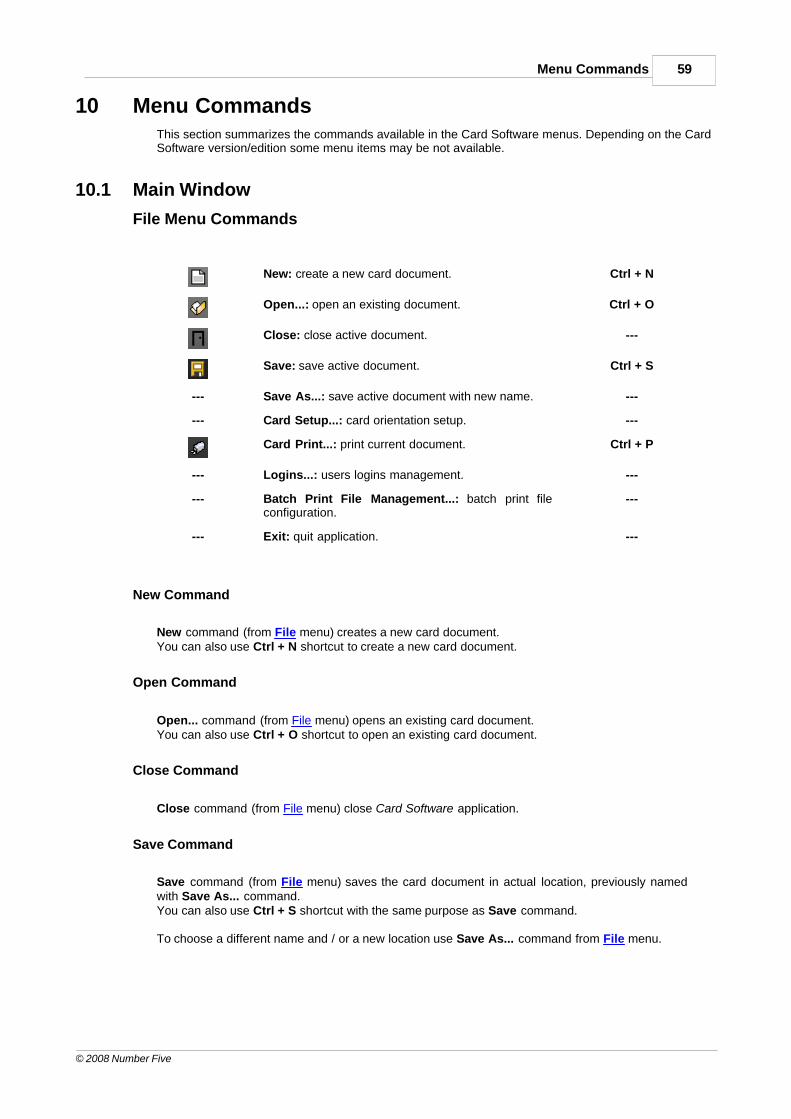
59Menu Commands
© 2008 Number Five
10 Menu CommandsThis section summarizes the commands available in the Card Software menus. Depending on the CardSoftware version/edition some menu items may be not available.
10.1 Main Window
File Menu Commands
New: create a new card document. Ctrl + N
Open...: open an existing document. Ctrl + O
Close: close active document. ---
Save: save active document. Ctrl + S
--- Save As...: save active document with new name. ---
--- Card Setup...: card orientation setup. ---
Card Print...: print current document. Ctrl + P
--- Logins...: users logins management. ---
--- Batch Print File Management...: batch print fileconfiguration.
---
--- Exit: quit application. ---
New Command
New command (from File menu) creates a new card document.You can also use Ctrl + N shortcut to create a new card document.
Open Command
Open... command (from File menu) opens an existing card document.You can also use Ctrl + O shortcut to open an existing card document.
Close Command
Close command (from File menu) close Card Software application.
Save Command
Save command (from File menu) saves the card document in actual location, previously namedwith Save As... command.You can also use Ctrl + S shortcut with the same purpose as Save command.
To choose a different name and / or a new location use Save As... command from File menu.

60 Card Software
© 2008 Number Five
Save As Command
Save As... command (from File menu) opens the Save dialog box where it is possible to choose afile name; type of document and location where card document will be stored.To save a document previously named and with its location defined, only need to use the Savecommand from File menu or Ctrl + S shortcut.
Card Setup Command
Select a card orientation. When you change the orientation of a card, Card Software transfers theTop and Bottom margin measurements to the Left and Right margin measurements and viceversa.
portrait horizontal
Card Size: allows you to select the size of media (card) on which you are printing. Click on theCard Size down arrow. A list of card size selections will appear. Select the card size option that isappropriate for the media size you are using. Special Note: This option is only available via driver.Click Print Self-test to send a test card to your printer. You might want to do this to make sureyour printer is set up correctly.
Card Print Command
To print a card select one of the following methods:· Select Card Print... command (from File menu);· Click on Print button from Design Toolbar;· Use Ctrl + P shortcut.
Card Print dialog box:Destination Identifies the active printer.Click the Properties button to display the printer properties (dialog box). Send to Batch Print Manager: check this option to print the job into a batch print file.
OperationsYou can combine the different operations to better suite your needs. Print: check this option to print a card. Magnetic Encode: check this option to encode a card. Hologram: check this option to print hologram ribbon. Contact Smart Card: check this option to start the Smart Card process. Contactless Smart Card: check this options to encode contactless smart cards.Biometrics: check this option to activate the biometrics which allows you to acquire a fingerprint.Select the operation you want to perform from the dropdown list (only available when connected toa database).
LayoutPrint Front: check this option to print the front card layout. Print Back: check this option to print the back card layout. Flip on Long Edge: check this option to reverse the back side of the card, when printing bothsides.Rotate 180 Degrees: check this option to rotate all the card items 180 degrees, this option isavailable for front and back card layout.Select ribbons: select ribbons to be used.
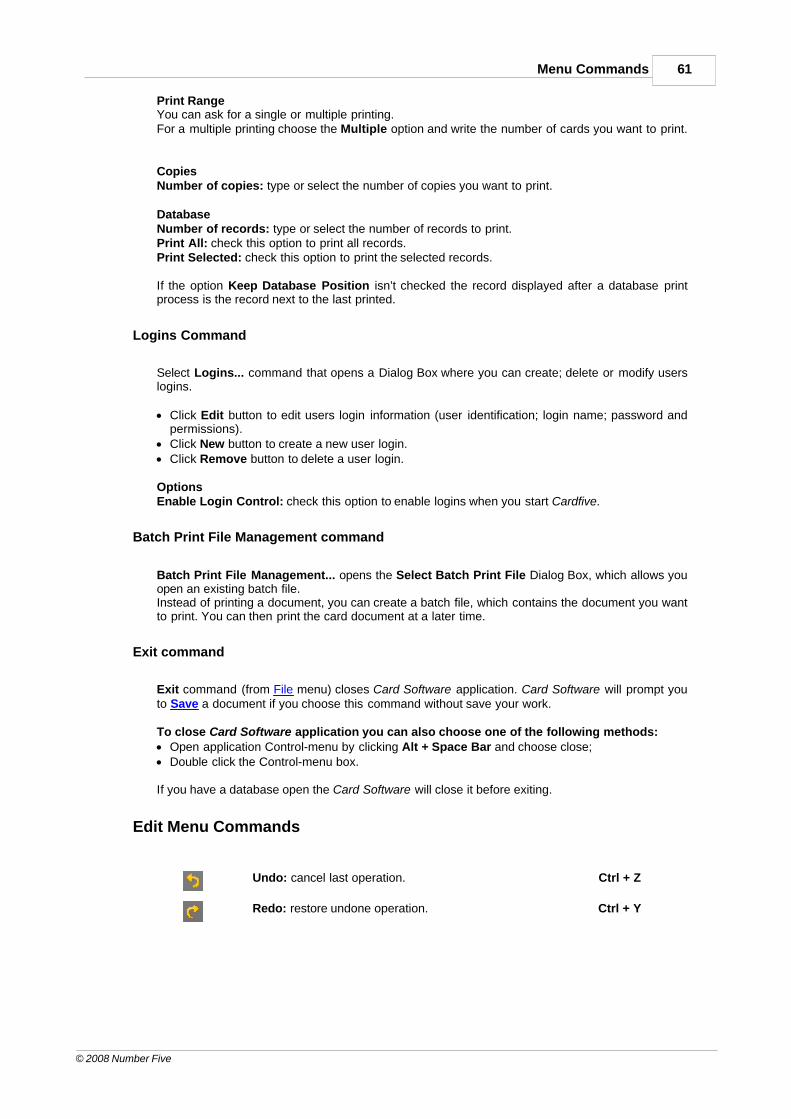
61Menu Commands
© 2008 Number Five
Print RangeYou can ask for a single or multiple printing. For a multiple printing choose the Multiple option and write the number of cards you want to print.
Copies Number of copies: type or select the number of copies you want to print.
DatabaseNumber of records: type or select the number of records to print. Print All: check this option to print all records. Print Selected: check this option to print the selected records.
If the option Keep Database Position isn’t checked the record displayed after a database printprocess is the record next to the last printed.
Logins Command
Select Logins... command that opens a Dialog Box where you can create; delete or modify userslogins.
· Click Edit button to edit users login information (user identification; login name; password andpermissions).
· Click New button to create a new user login.· Click Remove button to delete a user login.
OptionsEnable Login Control: check this option to enable logins when you start Cardfive.
Batch Print File Management command
Batch Print File Management... opens the Select Batch Print File Dialog Box, which allows youopen an existing batch file.Instead of printing a document, you can create a batch file, which contains the document you wantto print. You can then print the card document at a later time.
Exit command
Exit command (from File menu) closes Card Software application. Card Software will prompt youto Save a document if you choose this command without save your work.
To close Card Software application you can also choose one of the following methods:· Open application Control-menu by clicking Alt + Space Bar and choose close;· Double click the Control-menu box.
If you have a database open the Card Software will close it before exiting.
Edit Menu Commands
Undo: cancel last operation. Ctrl + Z
Redo: restore undone operation. Ctrl + Y
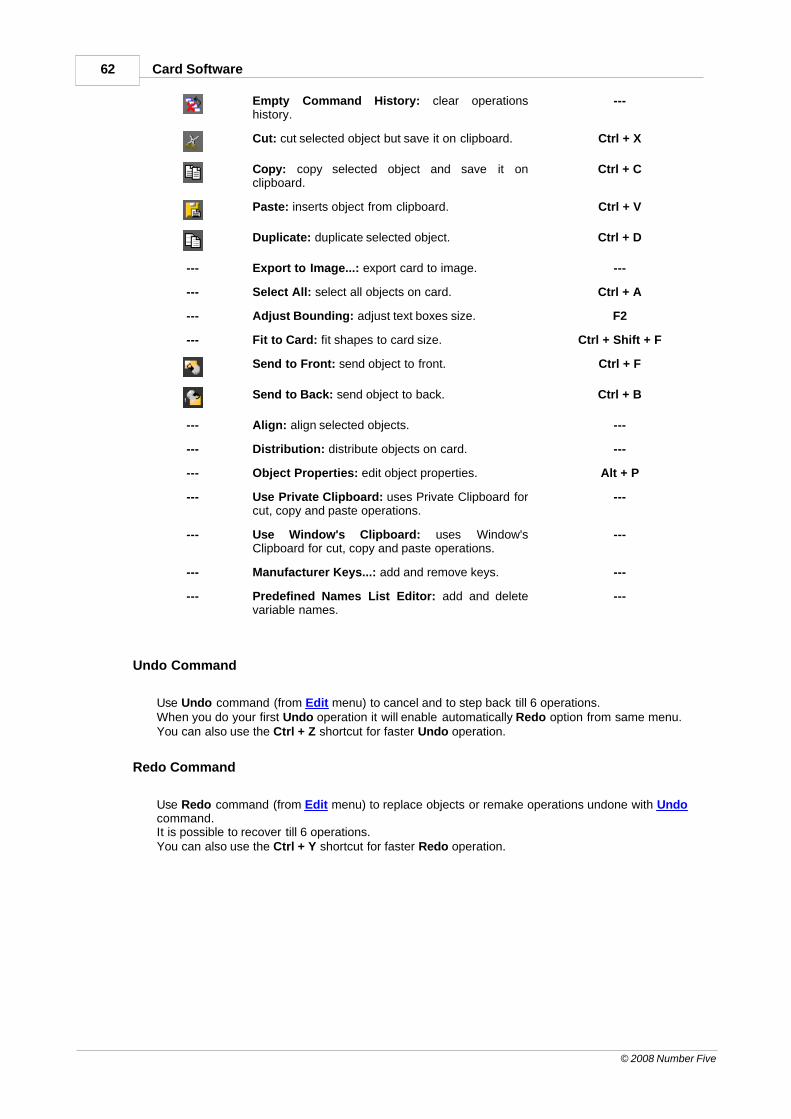
62 Card Software
© 2008 Number Five
Empty Command History: clear operationshistory.
---
Cut: cut selected object but save it on clipboard. Ctrl + X
Copy: copy selected object and save it onclipboard.
Ctrl + C
Paste: inserts object from clipboard. Ctrl + V
Duplicate: duplicate selected object. Ctrl + D
--- Export to Image...: export card to image. ---
--- Select All: select all objects on card. Ctrl + A
--- Adjust Bounding: adjust text boxes size. F2
--- Fit to Card: fit shapes to card size. Ctrl + Shift + F
Send to Front: send object to front. Ctrl + F
Send to Back: send object to back. Ctrl + B
--- Align: align selected objects. ---
--- Distribution: distribute objects on card. ---
--- Object Properties: edit object properties. Alt + P
--- Use Private Clipboard: uses Private Clipboard forcut, copy and paste operations.
---
--- Use Window's Clipboard: uses Window'sClipboard for cut, copy and paste operations.
---
--- Manufacturer Keys...: add and remove keys. ---
--- Predefined Names List Editor: add and deletevariable names.
---
Undo Command
Use Undo command (from Edit menu) to cancel and to step back till 6 operations.When you do your first Undo operation it will enable automatically Redo option from same menu.You can also use the Ctrl + Z shortcut for faster Undo operation.
Redo Command
Use Redo command (from Edit menu) to replace objects or remake operations undone with Undocommand.It is possible to recover till 6 operations.You can also use the Ctrl + Y shortcut for faster Redo operation.
63Menu Commands
© 2008 Number Five
Empty Command History
Use Empty Command History (from Edit menu) to clear operations history.
Cut Command
Use Cut command (from Edit menu) to remove objects from card and place them in the clipboard.The object will remain in the clipboard until you cut or copy another one.
You can also use one of the following methods to cut objects:· Select object and use Ctrl + X shortcut;· Select object and use Ctrl + Del shortcut.
Copy Command
Use Copy command (from Edit menu) to place objects in the clipboard to use after with Pastecommand.You can also use Ctrl + C shortcut for Copy operation.
Paste Command
Use Paste command (from Edit menu) to use objects from clipboard on card.You can also use Ctrl + V shortcut for Paste operation.
Duplicate Command
Duplicate command (from Edit menu) is an useful tool to duplicate objects on card. You just needto select the object you want to duplicate and use the command to complete operation or use Ctrl+ D shortcut.
Export to Image Command
Export to Image... command (from Edit menu) lets you export your whole card as an image withsome options enabled. With this command you do not export an object, but the whole document.After selecting the command, a Save As Dialog Box will open to prompt you to save a card in oneof the following formats:
· Bitmaps (*.bmp)· JPEG documents (*.jpg)· PCX documents (*.pcx)· TIFF documents (*.tif)· TGA documents (*.tga)· GIF documents (*.gif)
When you Export to Image your card layout to a .jpg format, another Dialog Box will appear to letyou adjust the image quality with a slide bar.
Select All Command
Select All command (from Edit menu) lets you Select All objects in a card.You can also use Ctrl + A shortcut to Select All objects.
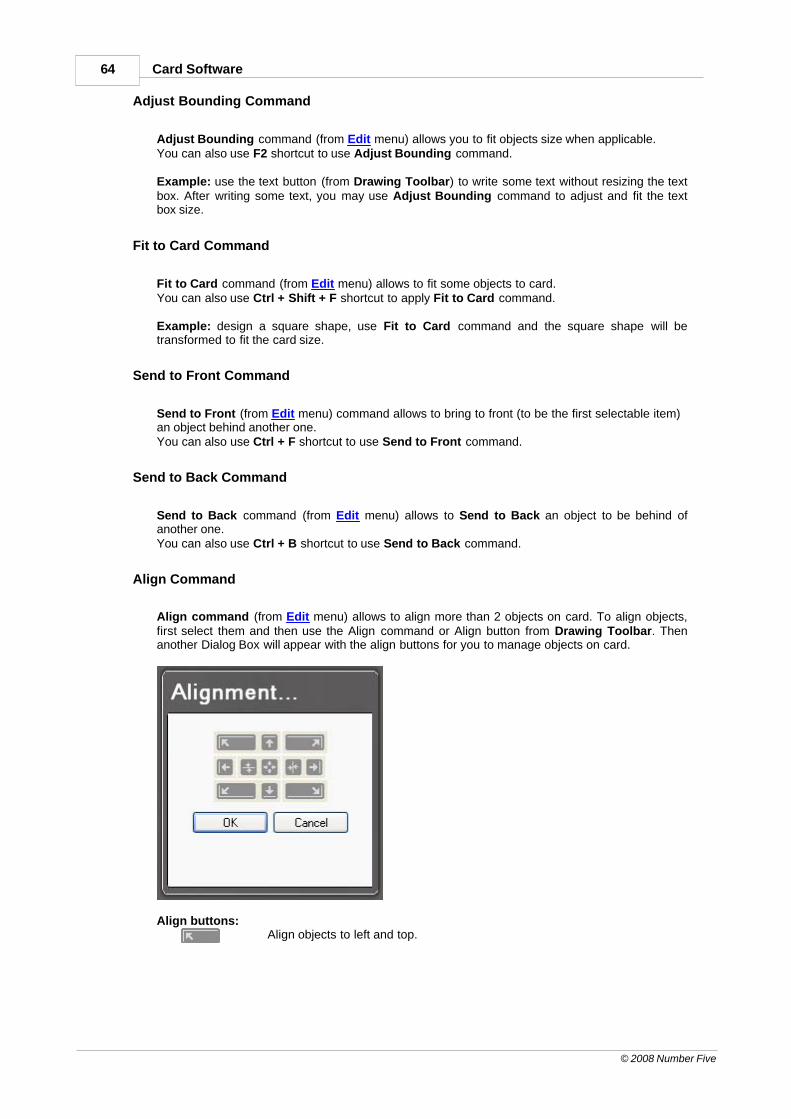
64 Card Software
© 2008 Number Five
Adjust Bounding Command
Adjust Bounding command (from Edit menu) allows you to fit objects size when applicable.You can also use F2 shortcut to use Adjust Bounding command.
Example: use the text button (from Drawing Toolbar) to write some text without resizing the textbox. After writing some text, you may use Adjust Bounding command to adjust and fit the textbox size.
Fit to Card Command
Fit to Card command (from Edit menu) allows to fit some objects to card.You can also use Ctrl + Shift + F shortcut to apply Fit to Card command.
Example: design a square shape, use Fit to Card command and the square shape will betransformed to fit the card size.
Send to Front Command
Send to Front (from Edit menu) command allows to bring to front (to be the first selectable item)an object behind another one.You can also use Ctrl + F shortcut to use Send to Front command.
Send to Back Command
Send to Back command (from Edit menu) allows to Send to Back an object to be behind ofanother one.You can also use Ctrl + B shortcut to use Send to Back command.
Align Command
Align command (from Edit menu) allows to align more than 2 objects on card. To align objects,first select them and then use the Align command or Align button from Drawing Toolbar. Thenanother Dialog Box will appear with the align buttons for you to manage objects on card.
Align buttons:Align objects to left and top.
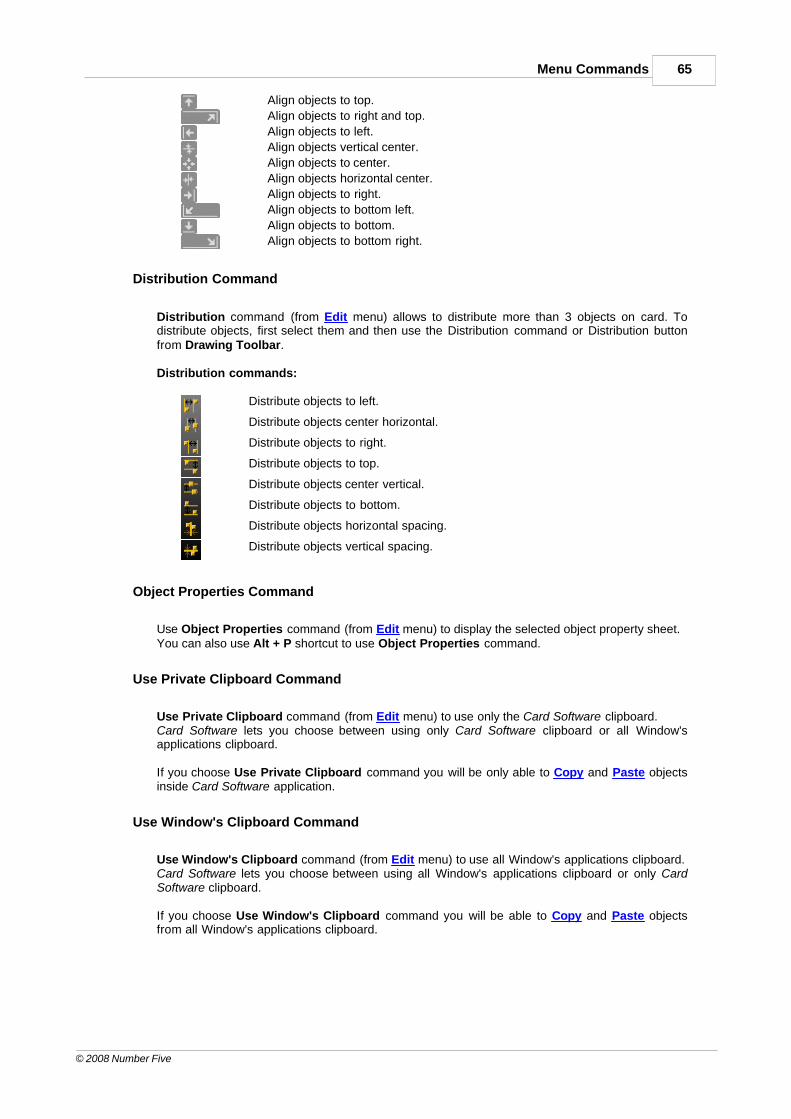
65Menu Commands
© 2008 Number Five
Align objects to top.
Align objects to right and top.
Align objects to left.
Align objects vertical center.
Align objects to center.
Align objects horizontal center.
Align objects to right.
Align objects to bottom left.
Align objects to bottom.
Align objects to bottom right.
Distribution Command
Distribution command (from Edit menu) allows to distribute more than 3 objects on card. Todistribute objects, first select them and then use the Distribution command or Distribution buttonfrom Drawing Toolbar.
Distribution commands:
Distribute objects to left.
Distribute objects center horizontal.
Distribute objects to right.
Distribute objects to top.
Distribute objects center vertical.
Distribute objects to bottom.
Distribute objects horizontal spacing.
Distribute objects vertical spacing.
Object Properties Command
Use Object Properties command (from Edit menu) to display the selected object property sheet.You can also use Alt + P shortcut to use Object Properties command.
Use Private Clipboard Command
Use Private Clipboard command (from Edit menu) to use only the Card Software clipboard.Card Software lets you choose between using only Card Software clipboard or all Window'sapplications clipboard.
If you choose Use Private Clipboard command you will be only able to Copy and Paste objectsinside Card Software application.
Use Window's Clipboard Command
Use Window's Clipboard command (from Edit menu) to use all Window's applications clipboard.Card Software lets you choose between using all Window's applications clipboard or only CardSoftware clipboard.
If you choose Use Window's Clipboard command you will be able to Copy and Paste objectsfrom all Window's applications clipboard.
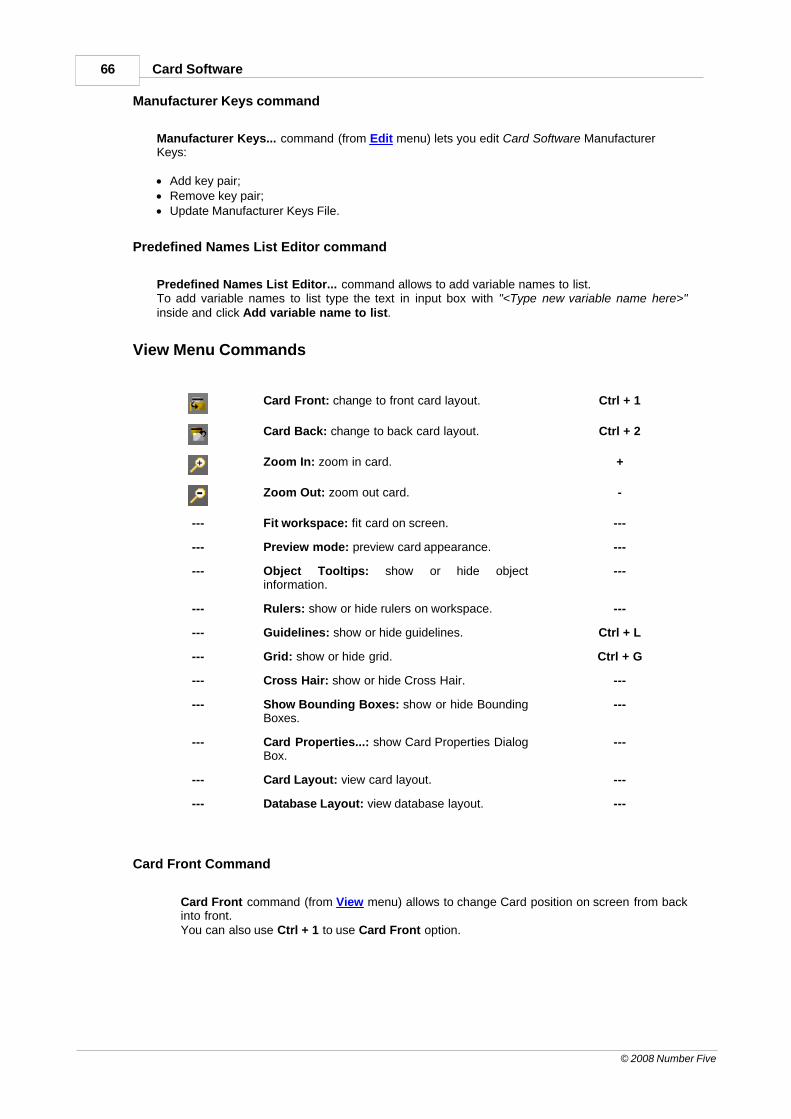
66 Card Software
© 2008 Number Five
Manufacturer Keys command
Manufacturer Keys... command (from Edit menu) lets you edit Card Software ManufacturerKeys:
· Add key pair;· Remove key pair;· Update Manufacturer Keys File.
Predefined Names List Editor command
Predefined Names List Editor... command allows to add variable names to list.To add variable names to list type the text in input box with "<Type new variable name here>"inside and click Add variable name to list.
View Menu Commands
Card Front: change to front card layout. Ctrl + 1
Card Back: change to back card layout. Ctrl + 2
Zoom In: zoom in card. +
Zoom Out: zoom out card. -
--- Fit workspace: fit card on screen. ---
--- Preview mode: preview card appearance. ---
--- Object Tooltips: show or hide objectinformation.
---
--- Rulers: show or hide rulers on workspace. ---
--- Guidelines: show or hide guidelines. Ctrl + L
--- Grid: show or hide grid. Ctrl + G
--- Cross Hair: show or hide Cross Hair. ---
--- Show Bounding Boxes: show or hide BoundingBoxes.
---
--- Card Properties...: show Card Properties DialogBox.
---
--- Card Layout: view card layout. ---
--- Database Layout: view database layout. ---
Card Front Command
Card Front command (from View menu) allows to change Card position on screen from backinto front.You can also use Ctrl + 1 to use Card Front option.
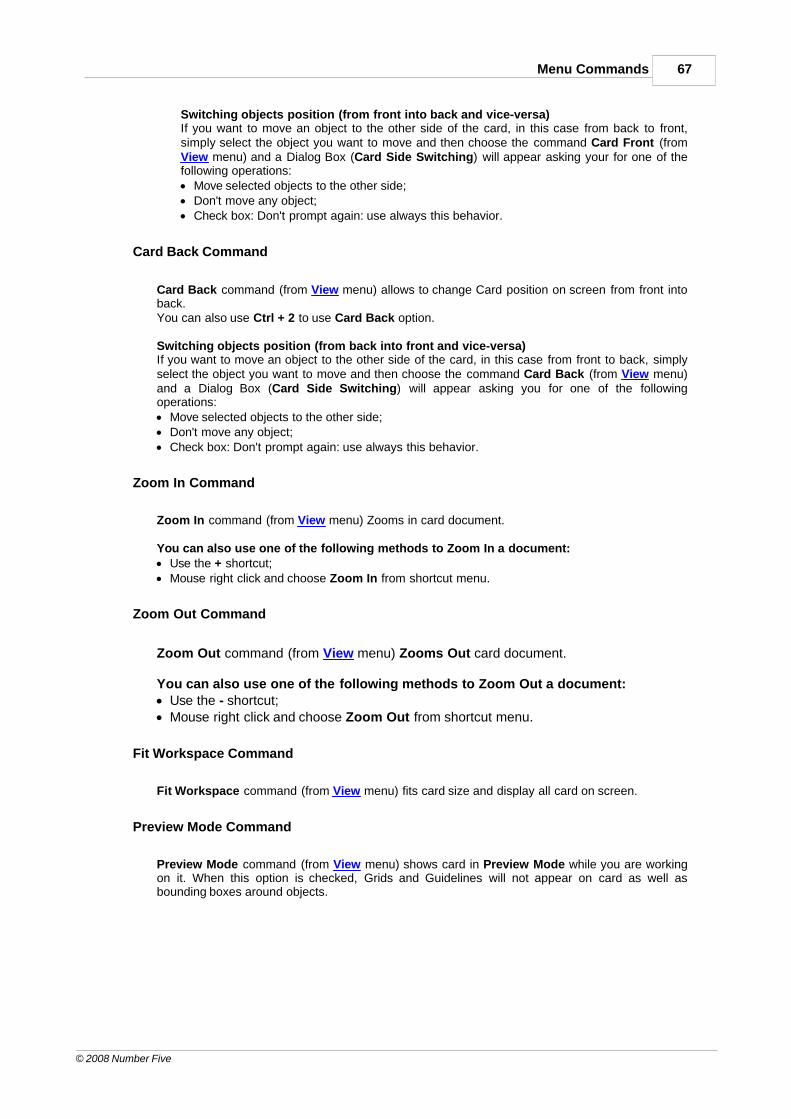
67Menu Commands
© 2008 Number Five
Switching objects position (from front into back and vice-versa)If you want to move an object to the other side of the card, in this case from back to front,simply select the object you want to move and then choose the command Card Front (fromView menu) and a Dialog Box (Card Side Switching) will appear asking your for one of thefollowing operations:· Move selected objects to the other side;· Don't move any object;· Check box: Don't prompt again: use always this behavior.
Card Back Command
Card Back command (from View menu) allows to change Card position on screen from front intoback.You can also use Ctrl + 2 to use Card Back option.
Switching objects position (from back into front and vice-versa)If you want to move an object to the other side of the card, in this case from front to back, simplyselect the object you want to move and then choose the command Card Back (from View menu)and a Dialog Box (Card Side Switching) will appear asking you for one of the followingoperations:· Move selected objects to the other side;· Don't move any object;· Check box: Don't prompt again: use always this behavior.
Zoom In Command
Zoom In command (from View menu) Zooms in card document.
You can also use one of the following methods to Zoom In a document:· Use the + shortcut;· Mouse right click and choose Zoom In from shortcut menu.
Zoom Out Command
Zoom Out command (from View menu) Zooms Out card document.
You can also use one of the following methods to Zoom Out a document:· Use the - shortcut;· Mouse right click and choose Zoom Out from shortcut menu.
Fit Workspace Command
Fit Workspace command (from View menu) fits card size and display all card on screen.
Preview Mode Command
Preview Mode command (from View menu) shows card in Preview Mode while you are workingon it. When this option is checked, Grids and Guidelines will not appear on card as well asbounding boxes around objects.

68 Card Software
© 2008 Number Five
Object Tooltips Command
Object Tooltips command (from View menu) will show or hide object information when mouserollover. The information displayed are type of object and dimensions.
Rulers Command
Rulers command (from View menu) shows or hides the rulers on card.
Guidelines Command
Guidelines command (from View menu) shows or hides Guidelines on card, an instrument thatdelimits the printable area on card.You can also use Ctrl + L to show or hide Guidelines.
Grid Command
Grid command (from View menu) shows or hides Grid on card.You can also use Ctrl + G to show or hide Grid on card.
Cross Hair Command
Cross Hair command (from View menu) shows or hides Cross Hair on screen.
Show Bounding Boxes Command
Show bounding boxes command (from View menu) enables or disables bounding boxes aroundobjects.
Card Properties Command
Card Properties command (from View menu) gives you information about the current carddocument.
General· Card Description: add card description.· Card Dimensions: shows card dimensions.· Display Colors: display card and workspace colors.
File Information· Card File Path: display full card file pathname.· Created: shows author and date of creation.· Last Printed: shows last user that printed the card and date.· Last Saved: shows last user that saved the card and date.
Objects List· Displays list of objects in a selectable box.· Preview: preview object.· Select object; Overlay Properties; Exports and Delete object.
Embedded Fonts
69Menu Commands
© 2008 Number Five
· Fonts used in document: lists fonts used in document.· Embedded Fonts: shows embedded Fonts.· Install Embedded fonts when load document (use this check box to enable).
Card Layout Command
Card Layout command (from View menu) changes Card Software View from Database Layoutinto Card Layout.To do same operation you can also use View Button from Design Toolbar.
View Button
Database Layout Command
Database Layout command (from View menu) changes Card Software View from Card Layoutinto Database Layout.To do same operation you can also use View Button from Design Toolbar.
View Button
Draw Menu Commands
Selector: select, move, resize and edit. Shift + S
Line: draw Lines. Shift + L
--- Shapes...: draw Shapes. ---
Text...: add Text. Shift + T
Image...: add Image. Shift + I
Barcode...: add Bar code. Shift + U
2D Barcode...: add 2D Bar code. Shift + P
--- Overlay Varnish...: configures Overlay printing. ---
--- Magnetic Encode...: define magnetic encodeoption.
---
--- Contact Smart Card...: define Smart Cardoptions.
---
--- Contactless Smart Card...: define ContactlessSmart Card options.
---
Camera...: acquire images from Camera. ---
--- Biometrics...: define and proceed to Biometricsenrollment.
---
--- Keep Placing Objects: keep current tool active. Ctrl + K
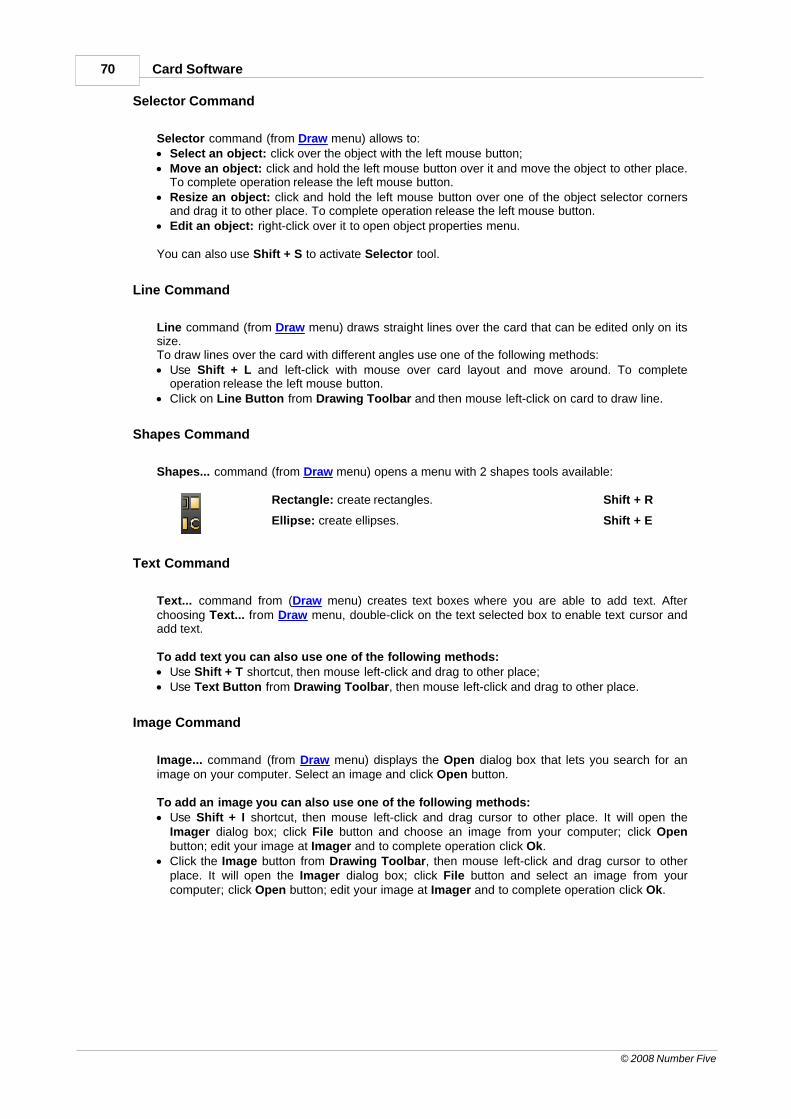
70 Card Software
© 2008 Number Five
Selector Command
Selector command (from Draw menu) allows to:· Select an object: click over the object with the left mouse button;· Move an object: click and hold the left mouse button over it and move the object to other place.
To complete operation release the left mouse button.· Resize an object: click and hold the left mouse button over one of the object selector corners
and drag it to other place. To complete operation release the left mouse button.· Edit an object: right-click over it to open object properties menu.
You can also use Shift + S to activate Selector tool.
Line Command
Line command (from Draw menu) draws straight lines over the card that can be edited only on itssize.To draw lines over the card with different angles use one of the following methods:· Use Shift + L and left-click with mouse over card layout and move around. To complete
operation release the left mouse button.· Click on Line Button from Drawing Toolbar and then mouse left-click on card to draw line.
Shapes Command
Shapes... command (from Draw menu) opens a menu with 2 shapes tools available:
Rectangle: create rectangles. Shift + R
Ellipse: create ellipses. Shift + E
Text Command
Text... command from (Draw menu) creates text boxes where you are able to add text. Afterchoosing Text... from Draw menu, double-click on the text selected box to enable text cursor andadd text.
To add text you can also use one of the following methods:· Use Shift + T shortcut, then mouse left-click and drag to other place;· Use Text Button from Drawing Toolbar, then mouse left-click and drag to other place.
Image Command
Image... command (from Draw menu) displays the Open dialog box that lets you search for animage on your computer. Select an image and click Open button.
To add an image you can also use one of the following methods:· Use Shift + I shortcut, then mouse left-click and drag cursor to other place. It will open the
Imager dialog box; click File button and choose an image from your computer; click Openbutton; edit your image at Imager and to complete operation click Ok.
· Click the Image button from Drawing Toolbar, then mouse left-click and drag cursor to otherplace. It will open the Imager dialog box; click File button and select an image from yourcomputer; click Open button; edit your image at Imager and to complete operation click Ok.
71Menu Commands
© 2008 Number Five
Bar Code Command
Bar Code... command (from Draw menu) opens Bar Code Value Dialog Box where you can typevalues (numbers or capital letters). Add values and click Ok to complete operation.
To add a Bar Code you can also use one of the following methods:· Use Shift + U, then left-click and drag to other place. Bar Code Value Dialog Box appears;
enter values and click Ok or Cancel to complete operation.· Use Bar Code button from Drawing Toolbar, then left-click and drag to other place. Bar Code
Value Dialog Box appears; enter values and click Ok or Cancel to complete operation.
2D Bar Code
2D Bar Code... command (from Draw menu) opens the 2D Bar Code Properties Dialog Boxwhere you are able to insert Data to Encode; define FaceSnap and SnapFive Plug-ins properties.
To add a 2D Bar Code you can also use one of the following methods:· Use Shift + P shortcut, then mouse left-click and drag and drop the cursor. The 2D Bar Code
Properties Dialog Box will appear and you are able to insert data.· Use 2D Bar Code button from Drawing Toolbar; mouse left-click and drag and drop the cursor.
The 2D Bar Code Properties Dialog Box will appear and you are able to insert data.
Overlay Varnish Command
Overlay Varnish... command (from Draw menu) opens Overlay Properties Dialog Box where youare able to choose Overlay type with preview mode; define placement and browse a File forBitmap Based Overlay.
To use Overlay Varnish... you can also use Overlay Varnish button from Design Toolbar.
Magnetic Encode Command
Magnetic Encode... command (from Draw menu) it opens Magnetic Encode Properties DialogBox that allows the user to insert data encoded on a magnetic stripe on the card.
You can also use Magnetic Encode Button from Design Toolbar to access Magnetic EncodeProperties.
Magnetic Encode Button:
This Tool can only be used in cards with magnetic stripe.Data encoded on a magnetic stripe can be read and re-written many times. All data are precededby a START sentinel and ended by a STOP sentinel followed by an LRC (LongitudinalRedundancy Check). These characters are inserted by the printer automatically.
To open the Magnetic Encode panel, you can also use the Magnetic Encode button fromDesign Toolbar.
Note: is not possible to read in Lower Coercivity a card saved in High Coercivity or vice versa.
72 Card Software
© 2008 Number Five
Contact Smart Card Command
Contact Smart Card... command (from Draw menu) allows to define Contact Smart CardProperties.
You can also use Contact Smart Card from Design Toolbar Button to access Contact SmartCard Properties.
Contact Smart Card Button:
Contact Smart Card Properties Dialog Box:Command LineProvides a space where you can type the path for the external Smart card processing software.Click on Browse button to display the Choose Application File Dialog Box to select the defaultpath for Command Line.
ArgumentsProvides a space for you to type arguments supported by the external Smart card processingsoftware.
Data to EncodeAllows you to type the data to be encoded.
Data is passed to the external application invoked by the Smart Card Plug-in mechanism throughthe positional arguments of the command line. Using a Concatenation variable source with theadequate separators can pass multiple data items.If the application involves writing binary data to the smart card it must have access to thedatabase record as well. In this case, at least one of the External Plug-in arguments should be anODBC Source set to a field that uniquely identifies the record to be processed, such as its primarykey. This will allow the external application to select the involved database record and access itsdata directly.
Don’t show error messages - Check this option to skip the chip error process.Variable Source Allows you to select the kind of source. By default Source = none. The availablesource are:· Global Counter Source;· Print Counter Source;· Keyboard Input Source;· Date / Time Source;· Concatenation Source;· ODBC Source;
Continue Print Process Allows you to decide how the print process will continue. On User Choice - Check this option if you need a waiting period before clicking on "Continue" or"Abort". On Return File ''OK'' - Choose this options to use a result file. Provides a space for you to typethe path for the return file. Click on Browse button to display the Choose Return File Dialog box where you can select thedefault path for the Return File.
Quote Character Insert Quote Character Check this option if you want to use a delimiter to specify the data to be encoded.· Assuming that my encoding program is named SMARTPRG.EXE and the data to encode that
comes from a Keyboard Input Source is Hello World, and the option Insert Quote Characterisn’t checked. The application will be called like:
73Menu Commands
© 2008 Number Five
SMARTPRG.EXE Hello World The application will only encode the word Hello, because for the application; SMARTPRG.EXE - is the application name Hello - is the first argument World - is the second argument · But if you define a quote character, for example '' . The application will be called like: SMARTPRG.EXE ''Hello World'' All data will be encoded, because for the application; SMARTPRG.EXE - is the application name Hello World - is the first argument
If an error occurs you are able to choose one of the following options:· Abort whole printing process;· Ignore current card and move to next one. Feed another card;· Retry the current card (1 retry; 2 retries; 5 retries).
Contactless Smart Card command
Contactless Smart Card... command (from Draw menu) enables Contactless Smart Card SetupDialog Box, where you are able to configure card technology.
You can also use Contactless Smart Card Button from Design Toolbar to access ContactlessSmart Card Setup Dialog Box.
Contactless Smart Card Button:
Camera Command
Camera... command (from Draw menu) allows you to capture images from camera device.
You can also use Camera Button from Drawing Toolbar to capture images from camera device.Click Camera Button, mouse left-click and drag and drop the cursor to open Camera Dialog Box.
Camera Button:
Biometrics Command
Biometrics... command (from Draw menu) displays Biometric Enrollment Dialog Box where youare able to import fingerprints from a biometric terminal.
You can also use Biometrics Button from Drawing Toolbar to access Biometric EnrollmentDialog Box. Click the Biometrics Button, mouse left-click and drag and drop cursor.
Biometrics Button:
Terminal ID: shows terminal ID.Template ID: shows template ID, Enrollee name and displays a graphic where you are able todefine which finger will you print from Biometric terminal.
74 Card Software
© 2008 Number Five
Keep Placing Objects Command
Keep Placing Objects command (from Draw menu) keep same tool enabled for next operationswithout switching to Selector tool.You can also use Ctrl + K shortcut to use Keep Placing Objects command.
Options Menu Commands
--- Autosave Options...: define Autosave settings. ---
--- Snap to Grid...: Snap to Grid operation. Ctrl + H
--- Activate Object Protection: Object Protection. ---
--- Video Sources... setup Video Sources. ---
--- Biometrics Sources...: Bioscrypt configuration. ---
--- Enable Print Log...: Print Log. ---
--- Metrics...: define type of Metrics. ---
--- Rulers Settings...: define Rulers Settings. ---
--- Grid Settings...: define Grid Settings. ---
--- Front & Back...: card side switching behavior. ---
--- Card Color...: change card background color. ---
--- Workspace Color...: change Workspace Color. ---
--- Default Line Width...: define Default Line Width. ---
--- Default Text Font...: define Default Text Font. ---
--- Monochrome Conversion...: define MonochromeConversion.
---
--- Force Internal Monochrome Conversion: ApplyInternal Monochrome Conversion.
---
--- Reset Card Warnings: Reset Card Warning. ---
Autosave Options Command
Autosave Options... (from Options menu) allows you to define autosave options.
Enable Time AutosaveCheck this option if you want Card Software to automatically save your work with time youchoose.
Autosave on closeCheck this option if you want Card Software to save your work every time you close theapplication.
Enable Crash RecoveryCheck Enable Crash Recovery if you want Card Software to restore your work next time you startapplication. This option might slow down your PC.
75Menu Commands
© 2008 Number Five
Snap to Grid Command
Snap to Grid command (from Options menu) lets you align objects to Grid.You can also activate Snap to Grid option by using the Ctrl + H shortcut.
Activate Object Protection Command
Activate Object Protection command (from Options menu) allows to turn the object notselectable.The Protected option is available for all drawing objects.
Video Sources Command
Video Sources command (from Options menu) allows to acquire images from TWAIN interface;VfW (Video for Windows) interface and serial port combined with a proper application.Card Software supports the use of any camcorder and VCR, with video output as well as digitalcameras to acquire images.Use this menu command to configure the Twain and Video for Windows Sources.
Biometrics Sources Command
Biometrics Sources command (from Options menu) lets you edit Bioscrypt configuration.
Enable Print Log Command
Enable Print Log command (from Options menu) lets you enable or disable Print Log. Toactivate this option simply select it from Options menu.
Metrics command
Metrics command (from Options menu) lets you choose which type of metrics better fits youractual work. You can choose between Millimeter or Inch.
Rulers Settings Command
Rulers Settings command (from Options menu) allows you to edit Rulers Settings.Use the Show Rulers check box to show or hide (uncheck) rulers on workspace.Show Item Selection on Rulers check box enables a bar from each object selected that indicatesthe exact position of an object.
Grid Settings Command
Grid Settings command (from Options menu) opens the Grid Settings Dialog Box where youare able to edit Grid Settings, such as Show / Hide Grid; Snap to Grid and bars spacing.
Front & Back Command
Front & Back... command (from Options menu...) opens Card Side Switching Behavior. To usethis option from menu you first need to select an object (or more); then select Front & Back...from Options menu and choose one of the following options:
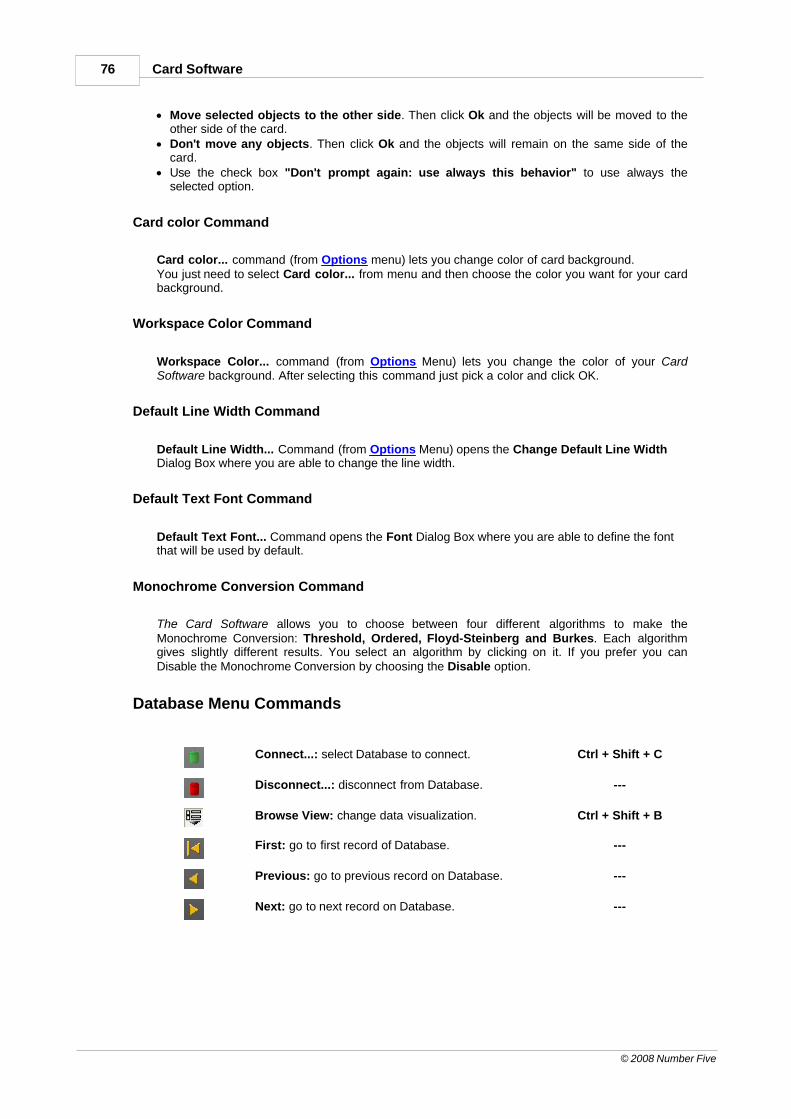
76 Card Software
© 2008 Number Five
· Move selected objects to the other side. Then click Ok and the objects will be moved to theother side of the card.
· Don't move any objects. Then click Ok and the objects will remain on the same side of thecard.
· Use the check box "Don't prompt again: use always this behavior" to use always theselected option.
Card color Command
Card color... command (from Options menu) lets you change color of card background.You just need to select Card color... from menu and then choose the color you want for your cardbackground.
Workspace Color Command
Workspace Color... command (from Options Menu) lets you change the color of your CardSoftware background. After selecting this command just pick a color and click OK.
Default Line Width Command
Default Line Width... Command (from Options Menu) opens the Change Default Line WidthDialog Box where you are able to change the line width.
Default Text Font Command
Default Text Font... Command opens the Font Dialog Box where you are able to define the fontthat will be used by default.
Monochrome Conversion Command
The Card Software allows you to choose between four different algorithms to make theMonochrome Conversion: Threshold, Ordered, Floyd-Steinberg and Burkes. Each algorithmgives slightly different results. You select an algorithm by clicking on it. If you prefer you canDisable the Monochrome Conversion by choosing the Disable option.
Database Menu Commands
Connect...: select Database to connect. Ctrl + Shift + C
Disconnect...: disconnect from Database. ---
Browse View: change data visualization. Ctrl + Shift + B
First: go to first record of Database. ---
Previous: go to previous record on Database. ---
Next: go to next record on Database. ---
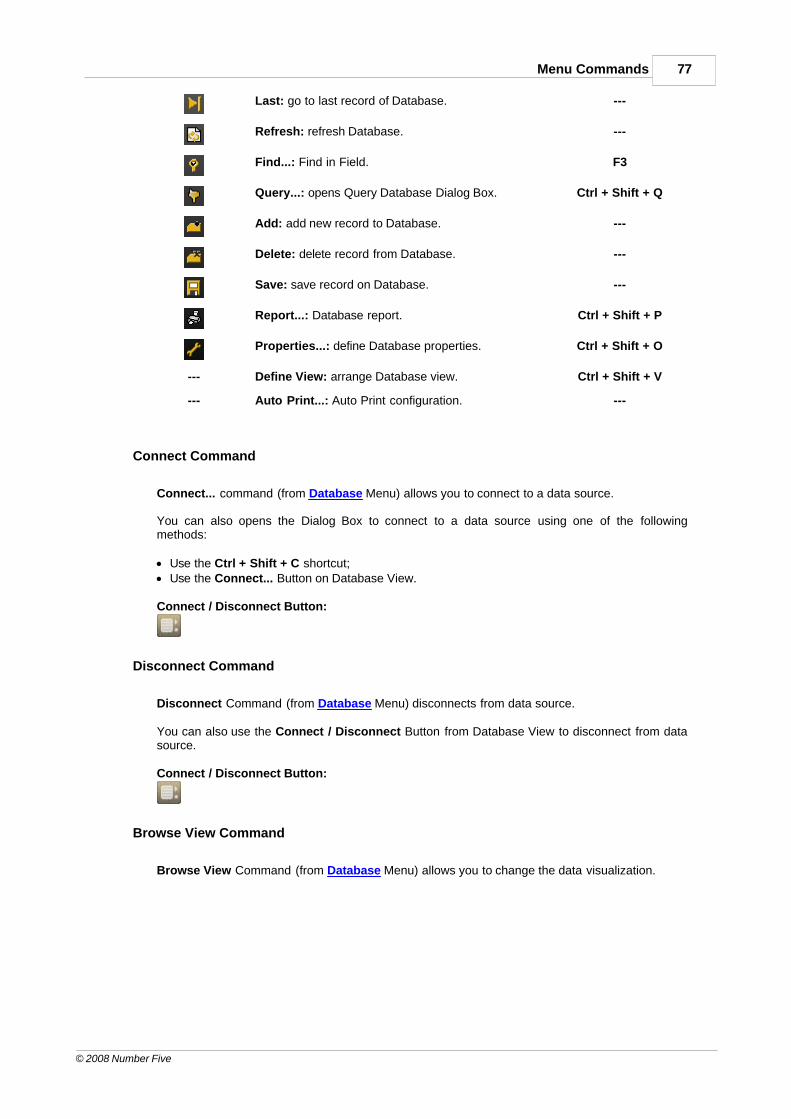
77Menu Commands
© 2008 Number Five
Last: go to last record of Database. ---
Refresh: refresh Database. ---
Find...: Find in Field. F3
Query...: opens Query Database Dialog Box. Ctrl + Shift + Q
Add: add new record to Database. ---
Delete: delete record from Database. ---
Save: save record on Database. ---
Report...: Database report. Ctrl + Shift + P
Properties...: define Database properties. Ctrl + Shift + O
--- Define View: arrange Database view. Ctrl + Shift + V
--- Auto Print...: Auto Print configuration. ---
Connect Command
Connect... command (from Database Menu) allows you to connect to a data source.
You can also opens the Dialog Box to connect to a data source using one of the followingmethods:
· Use the Ctrl + Shift + C shortcut;· Use the Connect... Button on Database View.
Connect / Disconnect Button:
Disconnect Command
Disconnect Command (from Database Menu) disconnects from data source.
You can also use the Connect / Disconnect Button from Database View to disconnect from datasource.
Connect / Disconnect Button:
Browse View Command
Browse View Command (from Database Menu) allows you to change the data visualization.
78 Card Software
© 2008 Number Five
First Command
First Command (from Database Menu) shows the first record on Database.
You can also use First Button from Database View.
Previous Command
Previous Command (from Database Menu) shows the previous record on Database.
You can also use the Previous Button from Database View.
Previous Button:
Next Command
Next Command (from Database Menu) shows the next record on Database.
You can also use the Next Button from Database View.
Next Button:
Last Command
Last Command (from Database Menu) shows the last record on Database.
You can also use Last Button from Database View.
Last Button:
Refresh Command
Refresh Command (from Database Menu) does a reload on Database.
Find Command
Find... Command (from Database Menu) opens Find in Field Dialog Box that lets you search inDatabase using keywords filtered by item.
You can also open Find in Field Dialog Box by using F3 shortcut.
Query Command
Query Command (from Database Menu) displays the Query Database Dialog Box which allowsyou to make a question about your data.
79Menu Commands
© 2008 Number Five
You can also use Ctrl + Shift + Q to access Query Database Dialog Box.
Add Command
Add Command (from Database Menu) opens an empty record on Database.
You can also use Add Button from Database View to add new records.
Add Button:
Delete Command
Delete Command (from Database Menu) deletes selected record from Database.
You can also use Delete Button from Database view to delete records.
Delete Button:
Save Command
Save Command (from Database View) saves current data to Database.
You can also use Save Button from Database View.
Save Button:
Report Command
Report Command (from Database Menu) opens Database Report Dialog Box, which allows youto create, save and print a customizable listing of your whole database or selections thereof.
You can also use the Ctrl + Shift + P shortcut to open the Database Report Dialog Box.
Database Report (Dialog box)
Listing TitleProvides a space for you to type the Report Title.
Database FieldsLists all the current Database fields name. Use the button -> to add the selected column to the Fields to Print List, and the <- to remove theselected column from the Fields to Print List.
Fields to PrintLists all the selected fields to print.
Selected ColumnDisplays information about the selected column.Title - Display the column title.
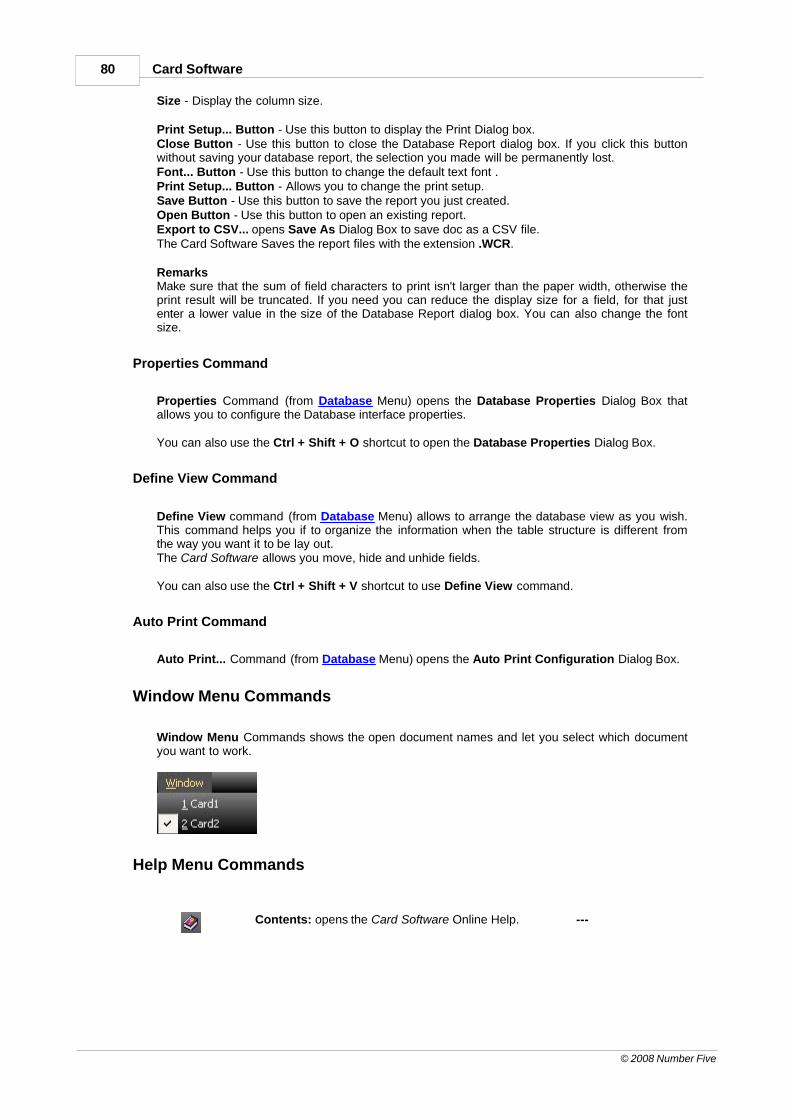
80 Card Software
© 2008 Number Five
Size - Display the column size.
Print Setup... Button - Use this button to display the Print Dialog box.Close Button - Use this button to close the Database Report dialog box. If you click this buttonwithout saving your database report, the selection you made will be permanently lost.Font... Button - Use this button to change the default text font .Print Setup... Button - Allows you to change the print setup.Save Button - Use this button to save the report you just created.Open Button - Use this button to open an existing report.Export to CSV... opens Save As Dialog Box to save doc as a CSV file.The Card Software Saves the report files with the extension .WCR.
RemarksMake sure that the sum of field characters to print isn't larger than the paper width, otherwise theprint result will be truncated. If you need you can reduce the display size for a field, for that justenter a lower value in the size of the Database Report dialog box. You can also change the fontsize.
Properties Command
Properties Command (from Database Menu) opens the Database Properties Dialog Box thatallows you to configure the Database interface properties.
You can also use the Ctrl + Shift + O shortcut to open the Database Properties Dialog Box.
Define View Command
Define View command (from Database Menu) allows to arrange the database view as you wish.This command helps you if to organize the information when the table structure is different fromthe way you want it to be lay out. The Card Software allows you move, hide and unhide fields.
You can also use the Ctrl + Shift + V shortcut to use Define View command.
Auto Print Command
Auto Print... Command (from Database Menu) opens the Auto Print Configuration Dialog Box.
Window Menu Commands
Window Menu Commands shows the open document names and let you select which documentyou want to work.
Help Menu Commands
Contents: opens the Card Software Online Help. ---
81Menu Commands
© 2008 Number Five
--- Using Help: learn about Help. ---
--- About...: About Card Software. ---
Contents Command
Contents Command (from Help Menu) shows the Card Software Help file.
Using Help Command
Using Help Command (from Help Menu) to learn about using help on Card Software.
About Command
About... (from Help Menu) lets you get information about Card Software.

Chapter
XI
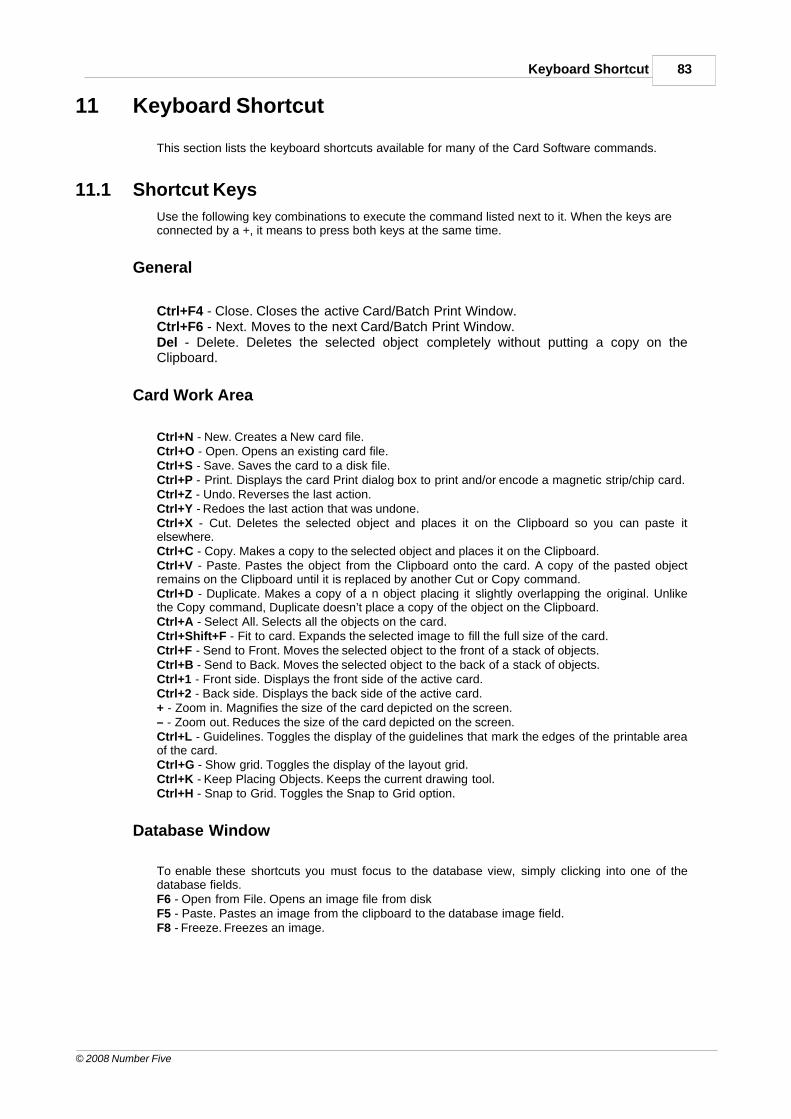
83Keyboard Shortcut
© 2008 Number Five
11 Keyboard Shortcut
This section lists the keyboard shortcuts available for many of the Card Software commands.
11.1 Shortcut Keys
Use the following key combinations to execute the command listed next to it. When the keys areconnected by a +, it means to press both keys at the same time.
General
Ctrl+F4 - Close. Closes the active Card/Batch Print Window.Ctrl+F6 - Next. Moves to the next Card/Batch Print Window.Del - Delete. Deletes the selected object completely without putting a copy on theClipboard.
Card Work Area
Ctrl+N - New. Creates a New card file.Ctrl+O - Open. Opens an existing card file.Ctrl+S - Save. Saves the card to a disk file.Ctrl+P - Print. Displays the card Print dialog box to print and/or encode a magnetic strip/chip card.Ctrl+Z - Undo. Reverses the last action.Ctrl+Y - Redoes the last action that was undone.Ctrl+X - Cut. Deletes the selected object and places it on the Clipboard so you can paste itelsewhere.Ctrl+C - Copy. Makes a copy to the selected object and places it on the Clipboard.Ctrl+V - Paste. Pastes the object from the Clipboard onto the card. A copy of the pasted objectremains on the Clipboard until it is replaced by another Cut or Copy command.Ctrl+D - Duplicate. Makes a copy of a n object placing it slightly overlapping the original. Unlikethe Copy command, Duplicate doesn’t place a copy of the object on the Clipboard.Ctrl+A - Select All. Selects all the objects on the card.Ctrl+Shift+F - Fit to card. Expands the selected image to fill the full size of the card.Ctrl+F - Send to Front. Moves the selected object to the front of a stack of objects.Ctrl+B - Send to Back. Moves the selected object to the back of a stack of objects.Ctrl+1 - Front side. Displays the front side of the active card.Ctrl+2 - Back side. Displays the back side of the active card.+ - Zoom in. Magnifies the size of the card depicted on the screen.– - Zoom out. Reduces the size of the card depicted on the screen.Ctrl+L - Guidelines. Toggles the display of the guidelines that mark the edges of the printable areaof the card.Ctrl+G - Show grid. Toggles the display of the layout grid.Ctrl+K - Keep Placing Objects. Keeps the current drawing tool.Ctrl+H - Snap to Grid. Toggles the Snap to Grid option.
Database Window
To enable these shortcuts you must focus to the database view, simply clicking into one of thedatabase fields.F6 - Open from File. Opens an image file from diskF5 - Paste. Pastes an image from the clipboard to the database image field.F8 - Freeze. Freezes an image.

Chapter
XII
85About Bar Codes
© 2008 Number Five
12 About Bar Codes
12.1 Bar Codes
Introduction
A bar code is a machine-readable symbol representing human readable information.The information represented can be alpha or numeric only, limited alphanumeric, or the fullcharacter set. The human readable alpha or numeric characters are represented in the bar codesymbol by a series of varying width vertical lines (called bars) and spaces. Bars and spacestogether are elements.An element can be a wide black bar or white space, or a narrow black bar or white space. Eachelement is assigned a binary value of either “1” or “0”. To represent the necessary character in thebar code, the elements must follow a precise sequential order as part of a group.
Scanning is the process of acquiring or “reading” the information encoded in a bar code symbol.To read the information contained in a bar code symbol, a scanning device such as a light pen ismoved across the symbol from one side to the other. As the scanning device is moved across thesymbol, the width pattern of the bars and spaces is translated back into the original information.Bar code is an optical technique because information is scanned using light that reflects off dark orlight regions of the symbol.
Bar Code Standards
The number of elements and their order is defined by the bar code standard used.There are many bar code standards to choose from and each standard was developed for thespecific data requirements of various industries. Each standard dictates the maximum number ofcharacters a symbol can represent, as well as what kind of data is represented.Consequently, the number of characters in the information field and the type of informationrepresented will play a role in which bar code standard can be used.Other considerations include what standard(s) trading partners use, the scanning environment(type of scanner, printable area, symbol durability, etc.) and the symbol printing requirements.
Symbologies
Symbology is the term used to describe the rules specifying the way data is encoded into theelements (bar and space widths) that comprise a bar code standard. Various characteristicsfurther describe the symbology. Some of these characteristics are described below.
· The Character Set is the range of data characters that can be encoded into a given symbology.Numeric symbologies only encode numbers; others can encode numbers and letters and arecalled alphanumeric.
· The Symbology Type can be either discrete or continuous. In a discrete type, each characterstands alone and can be decoded separately from adjacent characters. A continuous type hasno inter-character gaps; the end of one character is the start of the next. This results in a higherdensity symbology than the discrete type, allowing more information to be encoded in lessspace, resulting in a smaller bar code symbol.
· The Number of Element Widths is either two (wide and narrow) or multiple. Multiple elementwidth symbology is usually the higher density continuous type.
· The symbology Length can be fixed or variable.
· Density describes the amount of data that can be encoded in a given unit of length.

86 Card Software
© 2008 Number Five
· A symbology is said to be Self Checking if a single printing defect will not cause a character tobe transposed into another character in the same symbology.
· A Start Code is a particular pattern of lines and spaces indicating the beginning of the bar codesymbol. A Stop Code indicates the end of the symbol. The start and stop codes are sometimesalso used to indicate the scanning direction. In the most common symbology, Code 39, the startand stop codes are asterisks.
· The Check Character is used by the scanner to validate that the correct data has beendecoded. It is placed in a predetermined position and its value is based on a mathematicalrelationship of the other characters in the symbol. A Check Digit is a check character that canassume only numeric values.
· A Bi-directional symbology can be successfully scanned in either direction. Almost allsymbologies in use today are bi-directional.
12.2 Card Software Symbologies
Codabar
Codabar is a numeric, variable length, discrete, self-checking, two-element width symbology usedmostly by libraries, package tracking systems, and blood banks. Developed in 1972, it was one ofthe original bar code symbologies. The numbers 0 through 9 and the following six characterscomprise its character set: $ : / . + -
Code 128
Code 128 is a variable length, alphanumeric, continuous, multiple-element width, high-densitysymbology used in the shipping industry and on labels. The Code 128 character set comprises106 different printed characters, and will use the least amount of space for data of six charactersor more of any one-dimensional symbology. Each printed character can have one of three differentmeanings, depending on which of three different character sets (A, B or C) is employed. Threedifferent start characters tell the scanner which of the character sets is initially being used, andthree shift codes permit changing character sets inside a symbol. Every Code 128 symbol endswith a check character.
Code Subset A: includes all of the standard uppercase alphanumeric keyboard characters plusthe control and special characters.Code Subset B: includes all of the standard uppercase alphanumeric keyboard characters pluslowercase alphabetic and the special characters.Code Subset C: includes the set of 100 digits pairs from 00 to 99 inclusive, as well as specialcharacters. This enables doubledensity numeric digits (two digits per bar-coded character) to beencoded.
Code 39
Code 39 (also called 3 of 9) is a variable length, discrete, selfchecking, two-element widthsymbology that was the first alphanumeric symbology to be developed. Code 39 is currently themost widely used bar code for industrial and commercial (non-retail) purposes in the world. EveryCode 39 character has five bars and four spaces, making a total of nine elements.Three of the elements are wide, hence the name 3 of 9. While being very accurate, Code 39 is nota very dense bar code symbology, taking many bars and spaces to represent a single character.The Code 39 character set consists of the numbers 0 through 9, the upper-case alphabet, and thefollowing characters: - . $ / + % and Space. Asterisks are reserved as the start and stopcharacters.
87About Bar Codes
© 2008 Number Five
Code 93
Code 93 is a variable length, alphanumeric, continuous, fourelement width symbology specificallydesigned to complement Code 39. The two symbologies can be freely mixed in an environmentwith no software change required. Because of its small size, it is used on electronic components,but it is a not very popular bar code symbology.Code 93 encodes 43 data characters consisting of: 0-9, A-Z, 6 symbols and space, four controlcharacters and a unique start/ stop character. The entire ASCII character set can be encodedusing the expanded version similar to Code 39. Code 93 can encode the same characters asCode 39, but has the advantage of being smaller.
EAN//JAN-13
EAN-13 is one of two versions of the European Article Numbering system (EAN) and is a supersetof UPC. EAN-13 has the same number of bar as UPC version A, but encodes 13th digit. The 12thand 13th define the country code. The codes 00-04 and 06-09 are assigned to the United States.The EAN-13 code numbers are assigned by numerous international agencies. EAN-13 codesupport the numeric characters:0123456789EAN-13 bar code height, by specification, is six (6) individualEAN-13 bar code characters high.
EAN//JAN-8
European Article Numbering, now also called IAN (International Article Numbering), is theinternational standard bar code for retail food packages corresponding to the Universal ProductCode (UPC) in the United States. The symbology is used to encode a seven-digit EAN-8 number.A eight digit is a check digit that is automatically generated by the printer.The EAN code number and check digit are assigned by numerous international agencies.EAN-8 code support the numeric characters:0123456789EAN-8 bar code height, by specification, is six (6) individual EAN-8 bar code characters high.
Extended Code 39
The Extended Code 39 bar code supports every character in the ASCII set, except for ASCII 0and those above ASCII 127.This enables full support of upper case and lower case letters, as well as control codes.
Extended Code 93
The Extended Code 93 bar code uses Code 93 to encode the entire 128 ASCII characters.
HIBC (3 of 9)
The Health Industry Bar Code (HIBC) is a modified Code 39 bar code. This bar code uses all ofthe characters of Code 39.The application automatically inserts the required ‘+’ character after the start character and beforethe stop character.
88 Card Software
© 2008 Number Five
Interleave 2 of 5
The name Interleaved 2 of 5 is derived from the method used to encode two characters. In thesymbol, two characters are paired, using bars to represent the first and the interleaved spaces torepresent the second character. Each character has two sets, one bars and one spaces. Eachconsisting of two wide elements and three narrow elements. Bars and spaces are wide or narrowand the wide bars are set by the ratio.Interleaved Two of Five code support the numeric characters:0123456789It will be automatically added a leading zero (0) to the odd number of bar code data characters.The supported ratio of narrow bar to wide bar widths are:2:1, 2:5 (2.5:1), and 3:1.The minimum recommended height of a Code 2/5 bar code is 0.25 inches (6.35 mm) or 75 dots.
MSI Plessey
MSI is a numeric, variable-length (up to 15 digits), continuous, low-density, symbology developedin the early 1970s for (mainly) retail shelf marking and inventory control.Each four-bit character is 12 units wide, with each zero bit being a one-unit bar followed by atwo-unit space, and each one bit being a two-unit bar followed by a one-unit space.The complete symbol includes a start pattern, data characters, one or two check digits, and a stoppattern. Though MSI is a variable-length symbology, it is usually used in a fixed-length formatsince it is not self-checking. The character set comprises the ten digits plus six additionalcharacters.
Telepen
Telepen is an old, numeric two-part symbology used mainly in England.
UCC/EAN-128
UCC-128 is the name given by the Uniform Code Council to a specially defined subset of Code128 used most often for shipping containers.
UPC-A
UPC-A (Universal Product Code) is a numeric, fixed-length (12 digits), continuous, four-elementwidth symbology and encoding system, used since 1973 almost exclusively by the retail industry.This makes UPC the most widely used bar code in North America.It was designed to uniquely identify a product and its manufacturer. In the U.S., manufacturersnumbers are assigned by the Uniform Code Council in Dayton, Ohio.It is important to differentiate between the UPC coding scheme and the UPC symbology. Theactual UPC code is a 10-digit code: the first five digits represent the manufacturer, and the nextfive digits contain a unique product number. This 10- digit code is preceded by a “number system”digit and followed by a check digit, based on the preceding 11 digits and used for error detection.
UPC-E
UPC-E is also a numeric, fixed-length symbology, but is limited to six digits versus the 10 digits ofUPC-A. It is used where space is at a premium, such as a small product label.The application supports three forms of UPC-E. You can select UPC-E System 0 to enter sixnumbers an let the application give you a bar code with those same digits for system number 0.

89About Bar Codes
© 2008 Number Five
Choosing UPC-E System 1 gives you the same six numbers for system number 1. If you chose eUPC-E11, you are required to perform a zero-suppression check.
Zip+4 POSTNET
The Zip+4 Postal Code (POSTNET Bar Code) is a bar code that is placed on envelopes orpostcards to be mailed. It is used by the United States Postal Service (USPS).The POSTNET bar code is made up of evenly-spaced tall and short bars. There 5, 9 or 11 digitsplus a correction digit encoded into every POSTNET.

Chapter
XIII
91About Two-dimensional Bar Codes
© 2008 Number Five
13 About Two-dimensional Bar Codes
The typical bar codes we have been discussing in Chapter 16, “About Bar codes” are one-dimensional. Since they have height and width, you may wonder why they are called onedimensional.
It’s because when they are read, it is only the width of the bars and spaces that is taken intoaccount. The height of the bars is only to give the symbol some built-in redundancy. Typical barcode symbols, therefore, are only read in one dimension. Another important aspect of onedimensional bar code symbols is that they seldom represent more than a dozen characters.Therefore, the bar code usually does not contain any data, per se. Rather, the bar code most oftenrepresents the key to a record in a database, where therelated information is stored.
Two-dimensional (2D) bar code symbols surpass these two preclusions. Data is encoded in boththe height and width of the symbol, and the amount of data that can be contained in a singlesymbol is significantly greater than that stored in a one-dimensional symbol. In fact, over athousand alphanumeric characters can be placed in a single symbol the size of a large postagestamp! Obviously, the main advantage of using 2D bar codes is that potentially a large amount ofeasily and accurately read data can accompany the item towhich it is attached. There are new applications being created for 2D bar code technology everyday.
The reading (scanning) of 2D codes is accomplished using different scanners than those made toscan 1D symbols. Two strategies are currently used. The first and most common, uses a movinglaser beam scanner that not only sweeps back and forth across the symbol, but also up and downin what is termed a “raster” pattern. Alternately, CCD (charge-coupled device) scanners are used.CCD scanners use a two dimensional array of photo-sensors to scan the image in its entirety.
One of the beneficial aspects of two-dimensional symbols is their potential durability. To sabotagethe readability of a 1D symbol, one only has to add another bar to the beginning or end of thesymbol or draw a line through the symbol, parallel to the stripes.This throws off the checks and balances, built into the decoding algorithms of a 1D decoder andmakes the symbol unreadable. By comparison, many degrees of redundancy can be built into a2D symbol. While it makes the symbol somewhat larger, the remaining symbol is remarkablysecure.
There are a number of two-dimensional symbologies in growing use today. The 2D bar codesupported by the Card Software is PDF417.
13.1 PDF417
PDF417 is a multi-row, two-dimensional, high-capacity, highdensity bar code developed bySymbol Technologies, Inc. and announced in 1990. It essentially consists of a stacked set ofsmaller bar codes. The symbology is capable of encoding the entire (255 character) ASCII set.PDF stands for “Portable Data File” because it can encode as many as 2725 data characters in asingle bar code comprising 17 modules, each containing 4 bars and spaces (thus the number“417”). Each symbol has a start and stop bar group that extends the height of the symbol.
The complete specification for PDF417 provides many encoding options including datacompression options, error detection and correction options, and variable size and aspect ratiosymbols. The low level structure of a PDF417 symbol consists of an array of code words (smallbar and space patterns) that are grouped together and stacked on top of each other to produce thecomplete printed symbol. An individual code word consists of a bar and space pattern, 17 moduleswide. The user may specify the module width, themodule height, and the overall aspect ratio (overall height to width ratio) for the complete symbol.A complete PDF417 symbol consists of at least 3 rows of up to 30 code words and may contain upto 90 code word rows per symbol with a maximum of 928 code words per symbol.
92 Card Software
© 2008 Number Five
The code words in a PDF417 symbol are generated using one of three data compression modescurrently defined in the symbology specifications. This allows more than one character to beencoded into a single data code word. Because different data compression algorithms may beused, it is possible for different printed symbols to be created from the same input data.
The symbology also allows for varying degrees of data security or error correction and detection.Nine different security levels are available with each higher level adding additional overhead to theprinted symbol. Using a higher level of security will give you a better chance to decode informationin a damaged bar code. The error-correction capability uses built-in error detection code words, toreconstruct partially destroyed bar codes. It works by checking the value of columns and rows, andthen calculating and rebuilding the data missing from any damaged cells.
13.2 Photo in PDF
The Card Software provides the possibility to encode the information of an image or photo in yourdatabase into a PDF symbol. The maximum size of an image, which still can be encoded, is 80 x80 pixels. If the height or width of an image is larger than 80 pixels, its size will be recalculated tothis value, maintaining the image’s proportions.
Photo Reader
The Photo Reader is a security tool, which you can use in combination with a PDF card reader todecode the image information of a PDF symbol.
Limitations
The PDF417 symbol used by the Card Software may contain up to 64K of data. Anyhow, the photoencoding process is limited to 1,5K of data, which composes a PDF symbol still fitting onto the card.Therefore the Card Software uses 3 methods of data compression:· Colored images are converted to grayscale.
· The maximum size of an image, which still can be encoded, is 80 x 80 pixels. If the height or width ofan image is larger than 80 pixels, its size will be recalculated to this value,maintaining the image’sproportions.
· The Card Software uses the JPEG logarithm, one of the most powerful data compression formats, toreduce image size to make it still encodable.
· Use uniforme, highly contrasted backgrounds when acquiring an image. Try to reduce the imagesize to a still acceptable minimum.

Chapter
XIV
94 Card Software
© 2008 Number Five
14 Printing
This section explains how to setup your printer, the setup for ribbon and the procedure to print yourcards. For specific information about your printer, see the printer user manual.
14.1 Printing Process
Printer Setup
Before you use a specific printer for the first time you must tell the program which printer port touse, the ribbon type and other specific options. In most cases the default configuration makes thisstep obsolete.
Printing Cards
Printing Cards with the Card Software is easy. It’s the final step after the card design process.
To print cards1. From the File menu, choose Card Print; the Card Print dialog box appears.2. Select the Destination corresponding to the installed card printer. Use the properties button tochange the selected printer configuration. Destination may be a specific printers (see further in thischapter section Specific Printers) or any printer through Windows driver (see further in this chaptersection Print with Windows Driver).3. In the Operation section, select the operation(s) to perform when printing.· Print will print a card containing all the objects you placed on the card.· Magnetic Encode will write data to the magnetic stripe on the card (see Chapter 7 - “Magnetic
Encoding”).· Smart Card will call an external chip card processing application (see Chapter 8 - “Chip Card”).· Hologram will print a hologram on your cards. Contact your ribbon supplier to inform you about
hologram ribbons.4. If you are using a printer with a card-flip assembly check both Print Front and Print Back toprint both sides of the card in one passage. Select Rotate 180 Degrees if you want the card to beprinted “upside down” , this options is available for each card layer separately. This feature can beused if, for example, you wish to punch a hole in the card on the opposite side of the magneticstripe, avoiding that way to damage the stripe. Check the Flip on Long Edge option to reverse theback side of the card, when printing both sides of the card. Information about the selectedribbon(s) will be displayed.5. In the Print Range section select Single (1) or Multiple (2 or more) cards to print. If printingmultiple, enter the number of cards to be printed.6. If you using a database (Advanced Feature only) select the Print All box to print all records, orthe type the Number of Records to be printed. If you want to print thepreviously selected range of records check the option Print Seleced (see earlier Chapter 9 - “CardSoftware and Database” section Browse View). If the Keep Database Position is not checked, therecord displayed after a database print process is the record next to the last printed.7. In the Copies section enter the number of copies of each card to be printed.8. Click OK. If you are printing variable data, you may be prompted to enter data from thekeyboard, select an image file or acquire an image. Otherwise, your card will be printed, whileon-screen messages keep you informed of the progress.
Print Manager
The Card Software allows you to create a batch file, which contains data of one or more carddocuments instead of printing the card documents right away.
95Printing
© 2008 Number Five
Printing to a File
To create a batch print file1. From the File menu, choose Card Print. You can also press the shortcut Ctrl+P. The CardPrint dialog box appears.2. In the Destination section check the option Send to Batch Print Manager. All other optionswork the same way as printing a card document directly (see above “Printing Cards”). If you wantto print multiple cards and/or multiple copies, perform magnetic encoding or chip card processingyou have to set these options before you proceed with step 3.3. Click OK. The Select Batch Print File dialog box appears.4. Select the file you want to append, or create a new batch print file giving a new name.5. Click Open to complete the action. The Batch Print Job List and Batch Print Preview windowsopen.
The Batch Print File Manager
To print cards1. From the File menu, choose Batch Print File Management. The Select Batch Print File dialogbox appears. Select the name of the document you want to open and click OK. The Batch PrintJob List and Batch Print Preview windows appear.
Note: The Batch Print Job List contains card documents (*.car) itself and the (multiple) cardsinside each card document.
2. Browse through the Batch Print Job list using the Move buttons at your Batch Print Toolbar.You can also use the up and down arrows of your keyboard.3. You can control the card design and its variable fields (in case your card document containsmultiple cards) in the Batch Print Preview window. To toggle between both sides of the card clickthe Front/Back View button.4. Select the card document you want to print. Click the Print button at your Batch Print Toolbar.
Tip: If the selected card document contains multiple cards, you can print one specific card byselecting it instead of the card document itself.
Batch Print Options
Print Status SymbolsTo Print: Cards marked with this symbol are ready to print.Error: If an error occurrs while printing, the card marked is with this symbol.Printed: Cards marked with this symbol were printed properly.Held: Cards marked with this symbol are excluded from printing.· Printing using Print Status: Over the card document click the print button. The Status to Print
dialog box appears. Select the status you want. All cards marked with the corresponding symbolwill be printed. Click Continue to proceed.
Tip: You can manually change the Print Status of each card. Select the card you want to change.Click the status symbol you want at the Batch Print Toolbar. If you want to change the print statusequally for all card included in the card document, select the card document and click the statusbutton you want apply.

96 Card Software
© 2008 Number Five
Print with Windows Driver
Printer Types
The Card Software allows you to print on any printer which is provided with a proper Windowsdriver.
Card PrinterUsing the proper Windows printer driver for your card printer the Card Software allows you to useany card printer. For special printer/ribbon settings see your card printer documentation as well asrelated help files.Besides that the Card Software allows you to use any card printer it also permits to work on cardlayout, database edition, etc. at print time simultaneously.
Label PrinterThe Card Software allows you to print on any Label printer which is provided with its properWindows driver.
Note: the label size settings must have the same measurements as the standard plastic cardformat (88.7 x 54.2 millimeters).
Paper PrintersThe Card Software permits to print on paper with any Laser, Ink Jet or Needle printer, whichcomes with a proper windows driver. The Card Software’ s special column and row settings permitto print front and back side of the card on the same sheet as well as several cards on one sheet.This concept permits to print card proofs on paper or creating low cost cards using paperlamination.
Card Setup
Setting up the card1. To setup the card, using a Windows Printer Driver, from the File menu choose Card Print.Choose the printer name you want to work with. Click Close.2. The properties button allows you to perform driver driver specific settings (see your printerdocumentation) like paper size, orientation, etc.3. From the File menu choose the Card Setup. The selected printer dialog box appears.4. Set the card orientation to Portrait or Landscape and select the correct card size. The papersection displays the paper size you defined when setting your printer properties (see above, steep2). The Card Software allows you to print both sides of the card on the same page (when usingpaper), for that select 2 in the cols section.The Card Software allows you to print several cards by page (when using paper) for that select thenumber of rows to print (max 5).
Print to a Specific Printer (via DCL)
Specific printer is a printer to which the Card Software communicates through DCL - DirectLanguage Command.
Specific Printers
The available specific printers are:Apprint series - see Appendix B1 for more informationAtlantek series - see Appendix B2 for more informationCIM series - see Appendix B3 for more information

97Printing
© 2008 Number Five
Digicard series - see Appendix B4 for more informationEltron series - see Appendix B5 for more informationFargo series - see Appendix B6 for more informationMagicard series - see Appendix B7 for more informationNBS series - see Appendix B8 for more informationNew Hermes series - see Appendix B9 for more informationNisca series - see Appendix B10 for more informationPolaroid series - see Appendix B11 for more informationPrintherm series - see Appendix B12 for more informationUlrich series - see Appendix B13 for more information
HQ - PortugalNumber Five Software
Edificio OneWorldUrb. Belo Horizonte, Lt20
2655-241 Ericeira - PortugalPhone: + 351-261 860 450
Fax: + 351-261 865 647E-mail: [email protected]
Technical Support: [email protected]: [email protected]
Adm. Services: [email protected]
USA2045 Royal Ave., Suite 126, Simi Valley
Ca. 93065, Los AngelesCalifornia - USA
Phone: + 1 805 522 99 06Fax: + 1 805 577 9672
E-mail: [email protected] Support: [email protected]
Toll Free (888) 935 1555 (only inside US)Sales: [email protected]
ITALYVia De Carolis, 44
40133 BolognaITALY
Phone: + 39 051 617 8229Fax: + 39 051 618 3541
E-mail: [email protected]: + 39 051 617 8229
Sales e-mail: [email protected] Support: + 39 051 617 8229
Technical Support: [email protected]
Copyright © 1994 - 2008 Number FiveAll Rights reserved.
All other trademarks belong to their respective owners.No part of this manual may be reproduced or transmitted in any form or by any means, electronic ormechanical, including photocopying and recording, for any purpose without the written permission of
Number Five.