Embed Size (px)
Citation preview

C~8~ter
Basic Chemistry for the Biotechnician
A research associate uses a 50-ml pipet and an automated pipet pump to dispense solution into replicate reaction chambers. The solution has been prepared at a specific volume and concentration. Photo courtesy of Cell Genesys, Inc.
Yinually every chemical reaction in a lab or manufacturing facility. as in cells. occurs in a watelY environment Of solution. A lab technician. therefore. must be able to quickly prepare any volume of solution at any concentration of molecules.
Solution preparation (solution prep) is the most basic laboratory skill required of every scientist or technician. Solution prep im-olves measuring liquid volumes ""jth a variety of instruments, weighing chemicals \yith a babnce or scale. and mixing them together in the correct proportions. In the following laboratory :1cti\'ities. vou will learn 11<)\\ to use several instruments to measure ingredient:; and prepare solutions. The skills you will develop include the following:
• measuring liqUid volumes using gradu3ted cylinders. pipets. and micropipeLs • measuring solids using tabletop and anahlical balances • performing calculations that determine the Jmount of solids or liquids needed in a solution • preparing solutions of varying amounts (concentrations) of solute and solvent • preparing dilutions of concentrated solutions
\\/hen conducting research experiments or manufacturing products. scientists and technicians routinely make hundreds of solutions. Preparing solutions can be challenging at first because of the calculations required, Ho\\'ever. with practice. you \yiJl master the calcul3tions so that preparing solutions at various concentrations \\'iIl become second nature to you. In later chapters, you will learn to adjust the ,Kid/hase le\'el (pH) of the solutions you prepare, which is another skill required to ""ork as an independent lab technician.
Chapler 3 laboralory Manual
Laboratory 3a Measuring Small Volumes in aBiotechnology lab
l 4
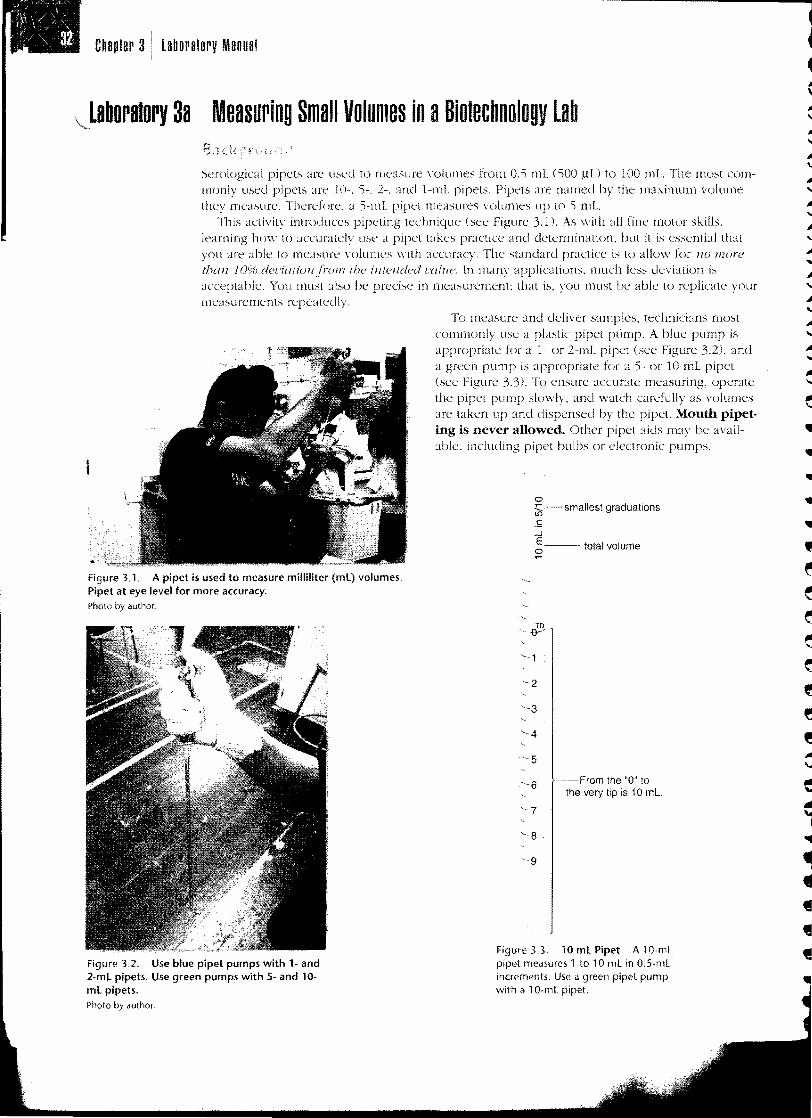
Serological pipets arc used to measure \'olumes from 0.5 mL (500 ilL) to 100 tnL The most commonly used pipets are 10-. 5-. 2-. and I-mL pipets. Pipets are named by the maximum volume they measure. Therefore. a 5-mL pipet measures wJiumes up to 5 mL
This activity introduces pipeting technique (see Figure 3.1 l. As with all fine motor skills, learning how to accurately use a pipet takes practice and determination, but it is essential that you are able to measure \olumes \\'jth accuracy. The standard practice is to allo,\! for no '{lore fball lOCf6 del'iatioll./iwl7 tbe ilzteJlc/ed callie. [n many applications, much less deviation is acceptable. You must also be precise in measurement; that is. you must be able to replicate your measurements repeatedly.
To measure and deliver samples, technicians most .. commonly use a plastic pipet plimp. A blue pump is " appropriate for a 1- or 2-mL pipet Figure 3.2), and a green pump is appropriate for a 5- or lO-mL pipet (sec Figure 3.3). To ensure accurate measuring, operate the pipet pump slowly, and watch carefully as volumes are taken up and dispensed by the pipet. Mouth pipeting is never allowed. Other pipet aids may be avail • able. including pipet bulbs or electronic pumps. •
• o 55-smallest graduations •
•-.J
~--- total volume
Figure 3.1. A pipet is used to measure milliliter (ml) volumes. Pipet at eye level for more accuracy. Photo by author.
Figure 32. Use blue pipet pumps with 1- and 2-ml pipets. Use green pumps with 5- and 10ml pipets. Photo by author.
"-2
"-4 .. '" From the "0" to '-6
the very tip is 10 mL.
'-7
Figure 3.3. 10 ml Pipet A 10-mL pipet measures 1 to 10 mL in O.S-mL increments. Use a green pipet pump with a 1 O-mL pipet.

Basic Chemistry lor the Biotechnician
Follo\\ the.,;e for correct pipeling technique:
PipetingTechnique Using a Pipet Pump
1. Cse a blue pipet pump for 1- or 2-111L pipets. Use a green pipet pump for 5- or 10-mL pipets. Use a red pipet pump for 25- or 50-IllL pipets. Make sure YOLI can understand the "alues of the graduations on the
2. Insert the pipet into a pipet pump. t\,ist and push the top of the lend with labe!) into the pump jllst IIlltil it is held secllre~v. Do not push too far as this may damage the inside of the pump.
3. Put the pipet tip into the solution. He careful the sample does not overflow the container due to displacement.
4. the tip under the surface and holding the container at eye level. roll the pump wheel up to pull solution into the Pull the solution up until the bottom of the menisclls (the conca\'e surface of the in the pipet) is at the volume value desired.
=). ,\loY(' the pipet into the recipient container. Roll the pump wheel down (all the way) to solution from the pipet. Touch the tip to the side of the container so that adhe
sion pulls off any liquid on the side of the pipet. Allow the solution to leave the pipet, but do not force out the last tiny bit. The pipets labeled "TD" measure "to delivery." If the last remaining drop is hlown out a mismeasurement will occur.
6. Remove the pipet from the container. Holding the pipet pump oottom, gently twist and pull the pipet out of the pump. Discard the pipet if it is disposable. Clean it if it is reusable .....
,,; .... ....
• Use a pipet pump to withdraw and dispense liquid.'i (see Figure
Do not pipet by mouth. • Hold the bottom of the pipet
pump when inserting and removing the pipet. The bottom part of the pipet pump sometimes sticks to the pipet. and can accidentally be pulled out and thrown a·way. The pipet pump is useless if this happens.
• Always keep the pipet in an almost vertical position when there is fluid in the tip. To d\oicl contamination, do not allow liqUid to accidentalh' run back into the pipet pump. Figure 3.4. Always use a pipet pump or pipet aid with a
• Use your thumb to roll the pipet- pipet. Never pipet by mouth! Keep the pipet almost vertical when pipeting.
ing gear up and down. Do not pull Photo by author.
or push on top of pipet pump. • Do not pipet a liquid sample into another liquid, unless directed to do so. Instead,
pipet a sample onto the inside of the recipient n:ssel and allow it to flow down the vessel. This practice minimizes cross contamination of mix by finger flicking, vortexing. or invel1ing the container. A\oid bubbling.
Which pipets are best used to measure specific \'olumes' Ho\\' precisely can you measure using each pipet (1. 2, 5. and 10 mlY How accurately can you prepare samples using each pipet (L 2, j, and 10 mL)i

Chapter 3 i labnralory Manual
Tubes, glass, 13xlOO 111m Green dye (1 mL dye: Pipets,S mL Plug caps for 13xlOO mm rubes 499 mL dH:z.O) Pipets, 10 mL JI//M
Permanent lab marker pens Yellow ch'e (1 mL Pipet pump, blue ' Red dye (1 mL dye: 499 mL dH.P) Pipet pump, green
499 mL dHpl Peg racks for 13x 100 111m tubes Tubes, 50 111L sterile Blue dye (1 mL dye: 1 IllL Tube racks for 50 mL rubes
tj 99 mL dHP) Pipets. 2 mL Plastic beaker. 1000 1 L ' Tap ,vater
1. Csing a permanent marker, lahel four empty 13- x 100·mm rubes \vith L II, III, and IV, your initials, and the date.
L Carefully, study each pipet available for lise. \'V'hat is the maximum amount each pipet can measure? vV'hat is the \alue of the smallest graduation on e:lch pipet~ For e:lch pipet, randomly put your thumbnail some\\here on the graduations, If you elre\v up liquid to that height, what \"olume \\'flUld be measured? Record all of this information. Check with your lab colleagues to ensure that you are reading the pipet correctly. Also, check to see if there is a "TTY label on the piper. If there is, that means that the pipet is accurate '"to delivery"' and that the drop Idt in the bottom of the pipet after dispensing should not be forced out WI
3, tTsing the smallest ripet possible, measure the following dye solutions into each tube according to the matrix shO\\'n in Table 3. L'nless told otherwise, add the smallest volume .. first Add the next volume to the inside of the tube, allowing it to flow down to the bottom. Finger flick the tube to mix the HJlumes. ...Compare the 1\0, 1 through '5 tubes with the "'ke\'"" tuhes provided by the instmctor, These are the standards for comparison. For each sample tube, check the le\'e1 of the final volume, the final color (inclicati\'e of accurate measurement and thorough mixing), and proper labeling,
Table 3,1, Practicing with Pipets Matrix
I
I
...
.
..
..
I Tubes I Solution I Solution II Solution III I Solution IV Solution V
I I 6,3 ml O.S ml O.1S ml I - . ...
I 2 I 2.4 ml 1.08 ml . I 0,19 ml 0,73 ml
I 3 I 4.0 ml I,S ml O,S ml . . . ...
4 I 3.S ml i 1,0 ml .. I 0.25 mL 0.2 ml
5. If the volume of any tube is not \\"ithin one meniscus of the tubes, it should be remade, Keep track of your attempts to prepare the sample tubes. Make a data table to record your e\'alu:Jtion of your tube preparation \\"ith all the obselTations from Procedure steps 3 through ,'Ie.
6, Make a table to collect data on hm\' many students in the class had their first Tube 1 samples fall within the one meniscus range of acceptable \'ariation.
For volumes bet\\'een 0.1 mL and 10 mL explain which pipet and pump are appropriate to use for measuring and dispensing, :'\Iake three suggestions that other technicians can lise to improve their pipeting accuracy, Based on the Tube 1 class data. describe how mllch precision the students in the class demonstrated in preparing these samples,

Laboratory 3b
Basic Chemistry lor Ihe Biolechnician
1. A 2,)O-!iL sample is needed from a sterile \'essel that is too thin to use with anything but a sterile pipet. Which pipet and pipet pump could he used to \\'ithdraw the mL equivalent to 2')0 !iL from the \esseP
2. A I."') mL sample is needed for an experiment. Both a 2- and a )-mL piret will measure this amount. \'Vhich pipet is hest to llse and whyl
3. Pr;lCtice pireting samples to create the mixtures in Table 3.2. !'>Ieasure all solutions into 13x100-mlll tubes. Label each rube with the tuhe letter. your initials. and the date.
h. Although you may each olher. pireting the as inderendently as is better practice.
Table 3.2. Pipeting Practice Matrix
Red Dye Volume (mL) Blue Dye Volume (mL) Green Dye Volume (mL) Total Volume (mL)
1.1 1.7 OJ3 1.27 0.85 2.9
0.7 2.8 1.8
0 1.6 1.9 0.66
• Cse the smallest instrumem possible for each measurement. • More than one pipet Illa\' be necessary to measure these amounts. • Evaluation criteria: labels. final Hllume. and final color mixing.
Measuring Very Small Volumes in 8Biotechnology Inspired by a Gene Connection Lab. Gene Connection is a San Mateo County, California, biotechnology education organization.
Very tiny amounts of chemicals and hiological reagents are used in many biotechnology experiments. To measure these minute \'olumes. technicians use micropipets that measure microliter (!iL) amounts.
This acth'ity introduces microripeting As \'\'ith all fine motor skills. learning how to
use a micropipet takes practice anel determination. You must be able to measure these very tiny volumes with accuracy" Operate the micropipet and carefully.
Picking and Setting the \Iicropipel 1. Check that you have the correct micropipet for the job. Most labs have three sizes of
micropipet:;: J P-1O (for 0.') to 10 ilL), a P-lOO (for 10 to 100 ilL), and a P-1000 (for 100 to
1000 !iL (see 35). Note: Some laboratories have a P-20 (for 2 to 20 ilL) instead of a P-IO. or P-200 (for 20 to
200 ilL) instead of a P-lOO. ) Dial the desired \"olume. Do YOU understand ho\\' to read the scale::' If not. ask your instruc
tor or revie\\' the information in the text. Hint: By knowing the maximum n)lume of the micropipet. YOU can figure out what each of the digits on the readout means.
3. Push the end of the pipet into the tip. The smaiL \\'hite tips are for Ihe P-1O: the medium-size. yellm'\' tips are for the P-20. P-100, and P-200; the larger blue tips are for the P-WOO. The an: disposahle and intended for one use.

Chapter 3 laboratory Manual
plunger
ejector
.--hundreds
• --'-tens
.--ones
0.2
Use yellow tips.
Figure ,3.5. P-l00 Micropipet. Different models of micropipets are operated slightly differently. Make sure you know how to operate and read the micropipet before using it.
Figure 3,6, To ensure that the entire sample is released, push the plunger all the way down to the second and final stop as you withdraw the tip from the collection tube. Photo by author.
How to Take tp a Sample with a \lkropipet 4. Before picking up the micropipet. open the cap or lid of the tube from which
vou are fluid. (Or, have your lab partner do this.) 5. Flold the micropipet in one hane!. at a 459 angle from vertical. In this way, con
taminants from your hands or the micropipet will not fall into the tube. Hold the test tube in your other hancl. Both should be alrnost at eye level.
6. Depress the plunger of the micropipet to the f'U'st stop. and hold it in this position. Place the tip into the solution to be pipeted .
8. Draw fluid into the tip Iw releasing the plunger.
How to Expel a Sample from the ,\1icropipet 9. With your other hand. open the cap or lid of the tube you are filling.
10. Hold the micropipet in one hand. at about a 45Q angle from vertical. Hold the tube in your other hand. Both should be at about eye level.
11. Gently touch the micropipet tip to the inside wall of the reaction tube into which YOll \yant to expel the sample. This creates a tiny surface-tension effect that helps draw the fluid out of the tip.
12. SlmYly. depress the plunger of the micropipet to the first stop. Then. continue to the second stop to expel the last bit of nuid, and hold the plunger in this position (see Figure
13. . remme the pipet from the tube. keeping the plunger depressed to a\'oid cir;m'ing any liquid back into the tip.
H. Al"ays change tips for each ne" reagent you pipet. To eject a tip. depress the ejector button on the top of the micropipet.
• Set pipet \'olume ol/(r ,,'ithin the range specified for that micropipet. Do nor attempt to set a H)lume beyond the pipet's minimum or maximum values.
• When using a micropipet. first apply a Failure to do this will cause liquid to enter into the nose cone. Since a micropipet works air displacement. its internal mechanism must remain dr\"
• Always keep a micropipet in 3 \'eitical position when there is t1uid in the tip. Do not allo,,' liquid to accidentally run back into the nose cone.
• Lse your thumb to control the speed at which the plunger rises after taking up or ejecting fluid. Releasing the plunger too abruptly will cause or bubbles that will trap air and make the measurement inaccurate.
\'\'hich micropipets are best used to measure specific yolumes? HO\\' precisely Gm YOll measure using each micropipet? Ho,,' accurately can vou prepare samples using each micropipet'
Tube rack for 1.'C' 111L tubes Reaction tubes. 1.'C' 111L Permanent lab marker pens Pack of -l colors. package of'+ Red dye (1 I11L dye:-l99 mL dB20) Blue dye (1 111L mL dH20) Green d\'e (1 I11L dye:-t99 I11L dHzO) YelJo\\' (1 I11L dyeA99 mL dllz0) \licropipet. P,lO ;\licropipet. P-lOO 2I.Iicropipet. P-lOOO .l\1icropipet tips for P-lO
..
.
...

.., Basic Chemistry lor the Biotechnician --" .J
'.licropipct tips for P-lOO '.heropipet tips for P-1000 Tubes. 50 mL sterile Tube racks for 50 mL tubes Plastic beaker. 1000 IL Microcentrifuge Wax paper
Practicing with a P-IO or P-20 1. Using a permanent marker. label two empty reaction tubes with A and B, and your initials. 2. Add the specified amounts of each solution to tube A or B, as listed in Table 3.3. Unless
told othenvise. add the smallest volume first. Add each volume to the inside of the tube without letting the drops touch. The drop will stick because of adhesion. When all volumes have been added, bring the drops to the bottom of the tube with a quick wrist flick.
Table 3,3, P-10 or P-20 Practice Matrix
I Reaction Tubes Solution I I Solution II I Solution III I Solution IV Solution V
A 4.0 III I 5.0 III i 2.0 III I - -. . . B 6.5 III J 2.5 III i . - ... 2.0 III
3. Spin tubes A and B in the microcentrifuge for 1 to 2 seconds to pool the solutions, See the centrifuge instmctions at the end of the procedures,
4, After centrifuging, compare your tubes with the standard "key" tubes and other A and B tubes in the class, Both tubes A and B should contain 11 ilL Check the tube volume, color/mixing, and labding,
5, As an additional check of accuracy, set the micropipet to 11 ilL and carefully withdraw all of the fluid in tube A, The contents should just fill the tip, with no air space at the bottom of the tip and no leftover fluid in the tube, Repeat with rube B,
6, Is there any liquid left in the microtest tube? If so, determine its volume, What percent error did you ha\"e in your pipeting of this small volume? Use the equation below to determine the percent error in pipeting this sample:
amount left in test tuhe " x 100 = (Vo error in measurement total amount pipeted
Practicing with a P-200 or P-IOO 1, Label an empty reaction tube C. 2, To tube C, add the solution volumes shown in Table 3.4, Unless told otherwise, add the
smallest volume first. Add each volume to the inside of the tube without letting the drops touch, The drop will stick because of adhesion. When all volumes have been added, bring the drops to the hottom of the tube with a quick wrist flick.
Table 3.4. P-100 or P-200 Practice Matrix
I Reaction Tube I Solution I Solution II Solution III Solution IV Solution V
I ( I 22,3 III 31.6 III ... 44.4 III . ..
3, Spin tube C for 1 to 2 seconds, Make sure that you balance the microcentrifuge with another tube that contains the same volume.
if. Check the accuracy of your technique with the P-100 or P-200, Set the micropipet to 98,3 ilL and "'ithdraw the contents of tube C. Also, compare your tube with the standard "key" tubes and other "C" tubes, The contents should just fill the tip, with no air space at the
I I

-J Chapter 3 laboratory Manual .... ...
bottom of the tip, and no leftO\'er Huid in the tube. Check the tube volurne, color/mixing, r:and labeling.
5. Is there any liquid left in the minotest tube' If so. determine its volume. \Xrhat percent error ~ did you ha\'e in your preparation of this ~
Practicing with a P-IOOO ~ 1. Label an empty reaction tube as tube D, 2. To tube D. add the solution volumes shO\\n in Table 3.5. ~
('" Table 3,5. P-1000 Practice Matrix ",.
"" ",. \0",. \0
3. Along \\'itl1 a balance tube, spin tulJC D in the microcentrifuge for 1 to 2 seconds (see \0"""" 3.7>. ' '1. Check the accuracy of your technique \\'ith the P-lOOO. Set the pipet fa '810 I-lL and with """"
dra\\' the contents of tube D, Also, compare your tube with the standard "key" tube, Check """" the tube \OIUllle, color!rnixing. and '" ~ ,), Is there any liqUid left in the microtest tube? If so, determine its volume. What percent error did nJU have in preparing this sample;
Centrifuge Instructions • Tightly close tbe caps on all of the tubes to be placed in the microcentrifuge (also called
microfuge).
The centrifuge must be "balanced."
microcentrifuge with a 6-sample rotor
12-tube rotor balanced with 2 samples
12-tube rotor balanced with 3 samples
12-tube rotor balanced with 4 samples
12-tube rotor balanced with 5 samples
and 1 balance tube
Figure 3.7. Centrifuge Basics.
To balance the centrifuge, make sure there are samples of equal mass (and volume) placed at equal distance from each other.
6-tube rotor balanced with 2 samples
6-tube rotor balanced with 3 samples
6-tube rotor balanced with 4 samples

Basic Chemistry for Ihe BioI8Cllfli~!an
• The microfuge (sample holder) rotor must always he balanced. You cannot. for example. spin one tube in a microfuge. Spinning in an unbalanced arrangement like this would damage the motor and ruin the centrifuge.
• The volume and mass of sample in the tubes should be the same. Otherwise, the rotor will spin une\'enly (like "'et to"Tls spinning Ollt of balance in a washing machine). You can always prepare a "blank" rube "'jth the same Hllume of liquid to balance a single tube.
• After you ha\t" replaced the metal top (if your type of microfuge has a rotor top) and secured the lid of the microfuge. gi\e the tubes a 1- to 2-second This will mix and pool all the reagents into a droplet in the bottom of eaeh tube.
For volumes between 1 and 1000 ilL explain ,,-hieh micropipet is appropriate to use for measllrand dbpensing. Make three suggestions that other technicians can use to improve their
micropipeting accuracy_
(_.1.'y-, " ."11
1. For most experiments. se\'eral reagents must be added to the same tube, Propose a method to keep track of the samples that ha\'e jleen added to a reaction tube,
2, Demonstrate the effect of micropipeting incorrectly by doing the following: a, Set a P-20 or P-1O to 2. ilL. b, Purposely, misuse the P-20 or P-lO pipet. and depress the plunger to the second stop. e. Suck up this apparent 2-IlL \'olume and release onto a piece of \vax paper. d, Now, correcth' collect a 2-111. \'olume using the P-20 or P-1O, e, Release it onto the wax paper next to the other drop, Are the drops noticeably different
in size' f. How much more is there in the "misused" wllume? (Use the pipet to suck up the mis
used \'olumc in increments,) g, If a balance or scale is ,l\'ailable, and YOU have been trained [0 use it. make these mea
surements on it, Determine the percentage error that would occur if you were to accidentally misuse the pipet in this fashion.
j, Practice micropipeting samples to create mixtures by producing the four tubes in Table 3,(-), a. i\Ieasure all solutions into '7-111L microtubes, Label all tubes with the tube number,
your initials, and the date, b. Although you may help each other, micropipeting as independently as possible is better
practice,
Table 3,6, Micropipeting Practice Matrix
I
I
ube No. I Red Dye Volume (jJl) Blue Dye Volume (jJl) Green Dye Volume (jJl) I Total Volume (mL)
1 I 27.2 313.0 59.3
2 i 555.0 I 222.0 7.8
3 133.3 19.8 235.0
4 9.4 4.1 i 2.25
I
I
I
• t;se the smallest instrument possible for all measurements, • Change e\'elT time. • More than one pipet may be necessary to measure amounts, • Total \'olumes may be checked by using a P-IOOO, • E\'aluation criteria: labels, final yolume, and final color mixing.

,
Chapter 3 laboratory Manual
Laboratory 3c Measuring Mass Back
Lsing DKA enzymes. and other reagents in the laboratOlY requires \yeighing small amounts. or masses, of these chemicals, ."vleasurements must be made using precision instruments, In a biotechnology laboratory. mass measurements are performed on electronic balances or scales. There are se\eral different kinds of balances with different features. depending on the manubcturer and the cost.
Basically. electronic balances come in two forms: 1) tabletop/ portable (see Figure 3.8) ranging from S300 to S1500 each. and 2) ana1)1ical balances. beginning in price at about S1500 each (sec Figure 3,9),
The tabletop (top-loading) balances \'ary in the precision they measure. and each balance has a maximum mass th<lt may he measured, Some measure to "ithin 1 g, some measure to \\'ithin 0,1 g. and some measure to 0,01 g, The last decimal place is an approximation,
Each balance is used in a similar fashion, The weighing protocol that follm\'s ensures that the balance is used properly and is not damaged, ..
Figure 3,8, This electronic tabletop balance ... reads to 0.01 g. Weighing Protocol Photo by author,
Note: Wear goggles and gloves when using chemicals. ...1. Set the balance on a clean. dry. flat surface, ) If there is a leyeling apparatus, level the balance, 3, Check that the pmyer cord is plugged in properly, Press the
"0:\" button. The balance "ill undergo a series of self-checks. 4, Check to make sure that the balance is displaying a "g." to
show that it "'ill be measuring in grams. If it is not displaying the "g." press the ""lODE" button until it does,
5. ;\Iake sure that the 'weigh pan is clean, 6. Press the "TARE" or "zero" button to zero the balance. 7 Add a ,,'eigh boat or a piece of ,veigh paper, Never place
chemicals directly on the weighing pan. Weigh boats and weigh paper are single-use-only items.
R, Press the "'IARE" button again to zero the balance. 9, a clean scoop, add the chemical to be weighed to the
,,'eigh boat until the desired mass is obtained, Keep the stock bottle directh' mer the weigh boat to minimize spills.
10. Remm'e the weigh boat/paper. Close bottles and rerurn them to the chemical stock area, Clean am' spilled chemicals,
e-'..."",
In this activity. you "'ill prepare and test glucose solutions using
Figure 3,9, reads to 0.0001 g. Photo by author.
This electronic tabletop balance
(Bayer Diagnostics) brand glucose test strips, The test strips, ,,;hich detect the presence of glucose in urine and other solutions, measure in mglelL One elL. or deciliter. is equal to 0.1 L. or 100 mL Esing the B +- ~ S Rule, one can convert bet\\'een clL and mL

Basic Chemistry for the Biulechnician
To measure small amounts of glucose on an appropriate balance, To make glucose solutions \\'ith a gi\'en mass of glucose in a specified volume, To \·erify mass and \'olume measurements,
Balance, analy1ical Glucose (dextrose) Permanent lab marker pens Balance, tabletop milligram Lab scoops Pipets, 10 mL \X'eigh paper. 7,6x7,6 em Tubes, 1'5 mL sterile Pipet pump, green Weigh boat. 3.5"x3.5" Tube racks for 15 mL tubes Glucose test strips
1, Measure the required mass of glucose to prepare the solutions listed in Tahle 3 ' Cse an electronic balance for the first t\H) solutions and the ;malnical balance for the third,
2, Prepare each solution in a 1 '5-mL conical tube, ;\1ix well to dissolye, Label each tube \yith the name and concentration in mglelL of the sample, \ our initials, and the clate,
.,), Obtain a Diastix0':: glucose test strip, Folkm the directions FigurE' 3,10, The indicator squares on the glucose test strips on the package, allo\\ing the are matched to the key on the back of the bottle. Glucose con
solution to react for a total of centrations are reported in % and mg/dL
90 seconds, Photo by author,
4, Determine the concentration of the prepared samples lw matching the color of the test strips to the standard concentration key on the Diastix1" package (see Figure 3,10), Record the Diastix® data for each sample in a data table similar to Table 3,1,
'S, Determine ho\\' closely the measured concentration is to the expected concentration, What do the clata say about ;iOur mass measuring technique'
Table 3.7, Glucose Mass Testing
Solution to be Prepared
(mgldL)
Equivalent Concentration
(glmL)
Final Volume
(mL)
Mass of Glucose
(g)
Diastix Test Result
(mgldL)
Diastix Value (glmL) Comments
250,0 0,0025
Does it appear that your measurements and the solutions were made correcth'I Gi\(~ C\'idence for your statements, Identify two technical errors that could be made that would result in inaccurate concentration readings,

Chapter 3. laboratory Manual •
..
1. ]n this activity, what is the value of the "0 mgidL" tube' 2, ]n your opinion, how are the test strips in measuring glucose concentration Give
' evidence,
3. Suggest how the glucose test strips might be Llsed for some other application. Complete the Metric Instrument and Com~ersion Re\'iew Sheet that follcTws,
Convert each unit and select the appropriate instrument for its measurement.
Instrument Choices graduated 10-mL pipet 5-mL pipet 2-mL pipet I-mL pipet tabletop balance P-1000 P-200 P-lOO
P20 P-1O analy1ical balance
1. example
mg = 0,07534 g
analv1ical balance
2.
4,3 mL = UL
3,
CUll 111L = )1L
4.
mL= 1
I
5
66 mg =_ )1g
6,
3,33 g )1g
7,
130,2 111L = L
8, example
O1L = O.007'i4 L I
10-mL oinet
9, I
0.34 g = mg
10.
34,0 g kg
11,
0,004 L = ml
12.
80.34 )1L = mL
13.
4,67 )1L = mL
l4,
0.022 g rng
15. example
7 g = 75'i4 mg
tabletoo balance
16.
L= mL
17.
34 mg = !lg
!
!
154 mg g
19.
1308 g = kg:
20.
99,1 g = mg
21,
0,2,) 111l )1l

Basic Chemistry lor the
Laboratory 3d Checking the Accuracy of Micropipets Using aBalance
A balance can be used to determine if a micropipet is measuring within an acceptable range. Since 1 mL of \yater weighs 1.0 g. you can estimate the expected mass for any volume of \vater (see 3.11J. For example.
1.5 mL of \yater should \yeigh 1.5 g. 0.25 mL of water should weigh 025 g. 150 ilL (= 0.15 mL) of water should \\eigh 0.15 g.
2
1 mL
1 milliliter of water takes up a cubic centimeter of space and weighs 1 gram.
Figure 3.11. MasslVolume Equivalents.
Water dispensed by a micropipet can be \\'eighed on a balance. By comparing the actual observed mass to the expected mass. you can make an error determination. For any measurement, calculate the error using the follO'\\'ing equation:
_((_)b_s_e_"n_'_e_d_n_1_a_s_s__'--__I_TI_<I_S_S) x 100 expected mass
To measure small volumes of water on an appropriclte balance. To check the accuracy of a micropipet measurement.
Balance. analvtical '\licropipet. P-lOOO Balance. tabletop milligram ~licropipet tips for P-lO \'Veigh paper. .6x7.6 em ~licropipet tips for P-lOO Micropipet. P-I0 yIicropipet tips for P-1000 Micropipet. P-IOO Tap ,yater
1. Re\'iew the use of pipets. pipet pumps. micropipets. and electronic and analytical balancc~. Specifically. check the follO\\ing: a. Make sure you can read and set the micropipets. b. Make sure that you are \\ithdw'\\'ing and dispensing volumes properly. Remember to
check the feel of tbe first and second stops on the micropipets.

Chapter 3 laboralory Manual
c. Reyiew the proper w<\\" to set up (zero· tare) anu reau the electronic and analytical balances. U. Reyie\\ the proper way to COl1yert bet:\\'een metric units, specifically mL and ~L (ie, use
the B +- -+ S Rule). For each micropipet. measure the specified yolume of tap ,vater onto a piece of weigh paper on a "tareu" balance. In a (bra table similar to Table 5.H, record the mass of the volllme of water measured. Record the type of balance used.
Table 3.8, Pipeting Precision: Mass versus Volume
of Used
3, Determine if the micropipet is measuring \\'itl1in the ~1Cceptable range of error. C::llculate and record the percentage error for each micropipet deli\'ery using the 0,/0 error equation:
amount left in test tube ---~-.-..-----.--~.- x 100 = error in measurement
towl amount pipeted
For any error that is outside of the acceptahle range. [cmeasure. "-lake sure that you arc using the instruments (balances and micropipet,,) correctly. Get help if necessarv. If you still getting measurements outside the range of acceptable error. the pipet may be out of calibration. Make the measurement \\'ith another student's pipet in order to check the calibration of your pipet. Record conm1ent~. i\otify your instructor or lab supenisor of any equipment that does not appear to function correctly.
~.".!i!i.·..:., \
LrhJ Suppose another lab technician in your group is dispensing 100 ~L yolumes into 10 L7-mL tubes. On inspection of the sampJes. ,se\'eral are \isihly differenl from the others and not within the acceptable range of error.
1" Suggest one thing that the technician could cia in his operation of the micropipet to imprO\e his pipeting technique.
2. Suggest something that the technician could do to ensure that the micropipet is measuring correcTly.

Basic Chemistry lor the BiolBCOniGian
Labo~ato~y 3e Making Solutions 01 Oiffe~ing Mass/Volume Concentrations
Solutions are prepared with a certain mass of solute in a certain volume similar to the solutions made in the actidty. Any metric mass in any metric volume is possi
ble. but the most common units of Illass·yolume concentrations are as follows:
g.mL grams per milliliter g. L grarns per liter mg.mL milligrams per milliliter ~gimL micrograms per milliliter ~g/ JlL micrograms per microliter ngtL nanograms per liter ng~L nanograms per microliter
Although concentrations can he in any mass \olume units. these mass/volume units are the most common in applications. The prefix "nano-" means one-billionth. A nanogram is equal to 0.001 ~g. and there is 1000 ng in 1 ~g.
To determine how to prepare a certain \'olume of a solution :It a certain mass/volume concentration. use the equation that foIl0\\'5, '\lake sure units that are used can he cancelled and comert any units, if necessaf\',
MassNolume Concentration Equation
concentration desired x total volume desired mass of solute in the total volume desired, (for example. g 111L) (for rnL) (for
that a technician needs '::;0 mL of 111L pepsin solution for an experiment. is a protein-digesting enzyme thar is and functions in the stomach, Csing the
concentration in mass/yolume equation.
50 mL xIS mgmL ""50 mg = 0.75 g pepsin
Notice hm..- the IllL units cancel out during multiplication so as to leave the answer in mg to
be our. Since (he balances measure in grams. the mg must be conve11ed to g. To make this solution. (].75 g of pepsin is measured and put into a graduated 50-mL tube. Solvent (deionized water or buffer) is added to reach a total \o]ume of 50 mL (see Figure .1,12).
Reminder: The math is easiest if the units of measurement are the same. Cse the B E- ~ S Rule to COlwel1 between units. Here are the units of metric measurement:
L E- ~ mL E- ~ JlL km E- ~ m E- ~ cm E- ~ mm E- ~ Jlm
kg E- ~ g E- ~ mg E- ~ Ilg E- ~ ng
To make copper sulfate (euSO) solutions of mass H)]ume concentrations.

Chapler 3
Environmental Health and Safety Officer
Balance, analytical Balance. tabletop milligram \'Veigh paper. -;',6x'7,6 cm \'('eigh boat. 3.5"x,3,5" Lah scoops
laboratory Manllal
measured volume of
solvent
measured mass of solute
Fi9ure 3,12, How To Prepare a Mass/Volume Solution.
Caution: Wear goggles and gloves when measuring chemicals.
• Label all tubes \yith the sample name and concentration, your initials, and the date. • Re\'iew the use of the balance and boats before beginning,
1. Prepare the -;o/utions in Table 3,9 for tube numhers 1 through ), 'Cse the Mass/Volume Equation to determine the mass of CuSO'! to measure in order to give the correct concentration at the yolume desired for each sample. Create and fill a matrix similar to Table 3,10 that shc)\\s which solutions are made. HRlr mathematical calculations, and a diagram of how to prepare each solution, Be sure to a11o\\ adequate space in the column that will contain your dra',yings,
Table CuS04 MassIVolume Solution Preparation
Tube No. CuS04 Solution To Be Made
1 5.0 ml of 300 mg/ml
2 4.5 mL of ISO mg/ml
3 4.0 ml of 75 mg/ml
4 3.5 mL of 37.5 mg/mL
5 3.0 mL of 18.75 mg/mL
Slowly add solute to solvent,
allowing time for the solvent
to absorb, IIfIIlII' '
~ -50mL
'-""'" .lflii' " .lflii' ".lflii'
" ' """" ' """" Add the solvent to
the desired volume, """"
sulfate 5-hydrate Tubes, 15 mL. capped Tube racks for 15 mL tubes Deionized water Permanent lah marker pens
Tubes, 13xlOO mm Peg racks for 13xl00 mm tubes Pipets, 5 mL Pipet pump, green Spectrophotometer, Spectronic 20 D+

Basic Chemisirv !op the Biolechn!cian
Reaction Matrix for CuS04 Mass/Volume Solutions
I Tube No. Ii Total Volume (mL)
Concentration (mglmL)
I
I Calculation of
Mass Needed (g) I
i
Diagram of Solution Preparation
I
I I I i
2 i
r 3
4
I
I
5 I
2, Prepare the solutions in labeled 15-mL capped, conical tubes, using deionized water as the soh'ent.
3. Is the difference in concentration of the tubes oiwiou:5 in one tube versus another' Explain. If any yolumes or colors are ob\'iously wrong, dump them out and remake them. Compare your tuhes' colors and \'olumes to the standard "key" solutions prepared by the instructor and to solutions prepared by other technicians in the lab.
'i. Cse a spectrophotometer to check )iour solution preparation folloWing the steps below, A spectrophotometer shines light on a sample and "detects" the amollnt of light absorbed by the molecules in the solution. If you are using the spectrophotometer correctly, and there are more molecules in one solution \'ersus another. more absorbance of light occurs (the absorbance unit fauJ goes up). This is a brief introduction to spectrophotometry. Spectrophotometers and their use in biotechnology are discussed in detail in Chapter 7.
Using the Spectrophotometer to Check Copper Sulfate Samples
a. Turn on the spectrophotometer (Spec 20D). It needs 15 minutes to warm up. b. Set the wavelength to 590 nm. c. Transfer 3 mL of each sample, numbers 1 through 5. to 13xlOO-mm tuhes, Label
the tuhes, along the top, with numbers and initials. d. Prepare a blank by placing 3 mL of \\'ater into a 13xlOO-mm tube. A blank has every
thing in the sample except the molecule of interest (in this case, copper sulfate). e. Calibrate the spectrophotometer.
• Set the transmittance to 0 turning the left knob) The smnple holder should be empty and closed,
• Place the blank into the sample holder. Set the transmittance to 10()f;,{j (rigbt knob). That means 100% of the light is going through whatever is in the sample holder. Now the spectrophotometer is ignoring the glass tube and sokent.
L Set the mode to absorbance and read the absorbance of all five sample tubes. Ahsorbance is measured in au. Since the spectrophotometer is ignoring the and solyent. an absorbance reading abO\'e 0.02 au is due to the amount of copper sulfate in the sample,
g. Record the absorbance data for each concentration of CuSO.} in a data table, Do the absorbance data make sense for the solution concentrations you prepared? Compare your data to those of other technicians in the lab, Are the data values similar' Why or why not?
11, L'sing Microsoft{j(; ExceFJ(, prepare a line graph comparing the absorbance of each concentration of sample.
I. Look at the data on the graph. Do they create a straight line (or almost a straight line)? \'(!hy is a straight line expected? If most of the data points appear to be in a straight line, but a single data point is not on the line, what can be said ahout the data or sample? Haye the supervisor approve your tubes and graph before you proceed to step 5.

CHapter 3 laboratory Manual
5. :\ow. add enough deionized ,yater to each of the five tubes to bring the total volume of each to 10 mL. What has happened to the concentration of CuS04 in the five tubes? Consider 11m\' much mass of CuSO-'! is dissolved in hm\' much total volume. Create a data table similar to Table .3.11 to shuw calculations and report data. Report the final concentration in both glmL and mgi mL.
6. l1sing the graph. make predictions of what you think the absorbance of each new sample will be. Check your absorbance predictions on the spectrophotometer. Record the absorbance of these samples in the data table.
Table 3.11. New Concentrations of the CuS04 Solution Tubes
I i Mass of CuS04 (g) [
New Concentration of Absorbance I Tube No. Total Volume (mL) in Each Tube Each Tube (glmL and mglmL) (au)
I 10 ml i
1 10 ml I 3 10 ml I
I 5 10 ml I
I i I i
I
Observe the tubes prepared in step -!. Do these tubes appear to be the correct concentration for their obsef\'ed color? Explain. Besides spectrophotometry. suggest a method of checking to see if the concentrations of these tubes are actually' accurate. Also. identify the errors that a technician might make that could result in erroneous concentrations. Describe some ways that a technician could minimize his or her solution preparation error.
1. Most solutions used in a biotechnology facility are colorless. How can the concentration of a colorless solution be checked? A technician needs to read the absorbance of se\'eral samples on a spectrophotometer. But. after calibrating the spectrophotometer for reading the samples. he or she finds that all of the \'alues are oyer the upper limit of 2.0 au. Why are all of the absorbance readings so high? \'\'hat might the technician do to be able to use the spectrophotometer to check the samples?
3. Complete the '\\aking Solutions RC\ie\\' Sheet :\0. 1.
....

Basic Chemistry lor the Biolechnician
Convert the values as indicated. Specify the appropriate instrument with which the final measurements should be made. For items 10 through 17, shO\\' the calculation (equation and units) for the preparation of each solution, Then. dra\\' a diagram of how to make the solution in an appropriate container.
InstnlI11ent Choices graduated cylinder lO-ml pipet 5-ml pipet 2-ml pipet 1-ml pipet tabletop balance P-1000 P-200 P-lOO P-20 P-lO analytical halance
4. 7.1.
73.12 Ilg = mg3.4 ml = III 10.5 III = ml
8.2. 5.
7.')03 mL = III43.9 ml = 1 5.39 g = mg
6. 9.3.
0.17 mL = ilL 30.6 g = mg 33 Ilg = mg
Solution To Be Prepared Diagram of How To Prepare It
10. 25 ml of 2.5 g/ml NaCl solution 11.
12. 10 ml of 50 mg/ml CuS0c{ solution 13.
14. 2 1 of O. ') g/mL dextrose solution 15.
16. 100 ml of 0.005 g/ml l'\aOH solution 17.
Chapter 3 laboratory Manual
Laboratory 31
Environmental Health and Safety Officer
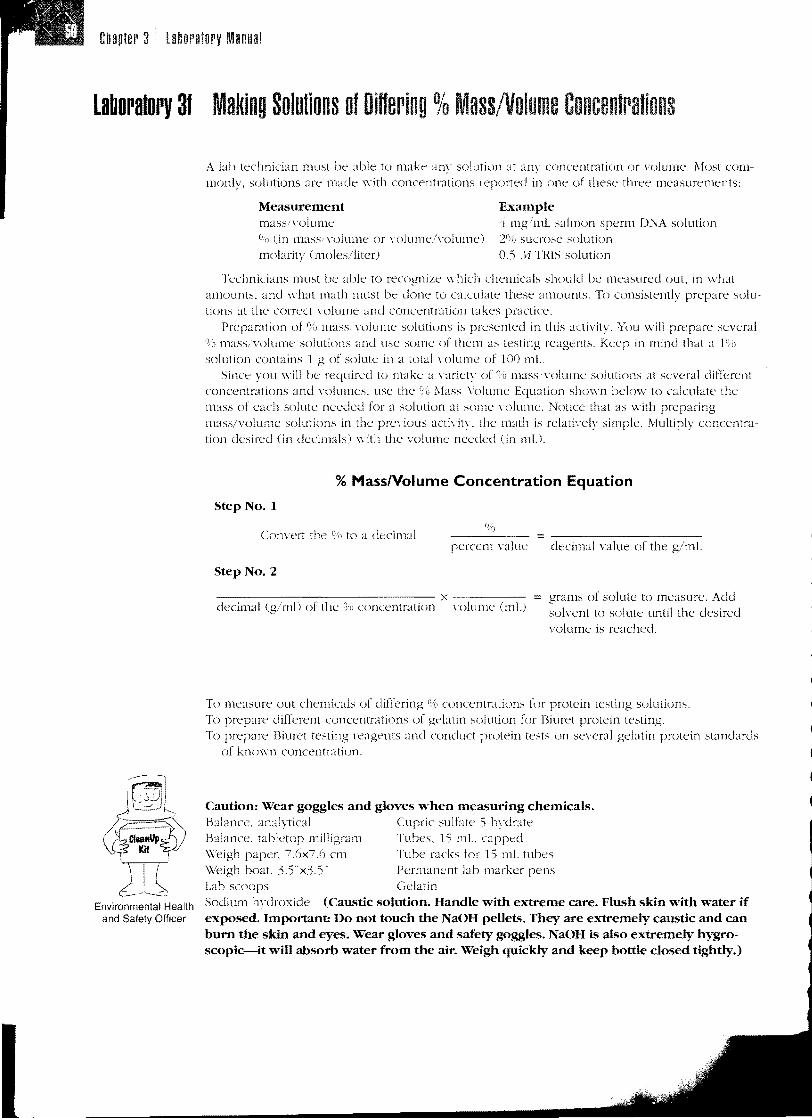
Making Solutions of Differing % Mass!Volume Concentrations
A lab technician must be able to make any solution at any concentration or volume, Most commonly, solutions are made ";ith concentrations reported in one of these three measurements:
Measurement Example mass/Yolume 4 mgmL salmon sperm D.'\A solution
(in mass\'olume or Hllume/volume) 2C)\) sucrose solution molarity (moles/liter) 0.5 ,H TRIS solution
Technicians must be able ro recognize \\'hich chemicals should be measured out, in what amounts, and what math must be done ro calculate these amounts, To consistently prepare solutions at the correct volume and concentration takes
Preparation of % mass, yolume solutions is presented in this activity, You will prepare several % mass/volume solutions and use some of them as resting reagents, Keep in mind that a 1")1;)
solution contains 1 g of solute in a total \'olume of 100 mL Since }'()u will be required to make a \'ariety of % mass \'olurne solutions at several clifTerent
concentrations and volumes, use the Mass Volume Equation shown below to calculate the mass of each solute needed for a solution at some volume, "Jot ice that as with preparing mass/volume solutions in the previous acti"ity, the math is relati\-ely simple, Multiply concentration desired (in decimals) \\'ith the volume needed (in mL),
% MassNolume Concentration Equation
Step No.1
Convert the % to a decimal = percent value decimal value of the
Step No.2
--------------------------------- x ---------- decimal (g'mD of the (;'0 concentration \'olume (mL)
grams of solute to measure, Add soh'ent to solute until the desired \'olume is reached,
To measure out chemicals of differing q'b concentrations for protein solutions, To prepare different concentrations of gelatin solution for Biuret protein testing, To prepare Biuret testing reagents and conduct protein tests on several gelatin protein standards
of known concentration,
Caution: Wear goggles and gloves when measuring chemicals. Balance, analytical Cupric sulfate 5-hvdrate Balance. tabletop milligram Tubes. 15 mL. capped \'\'eigh paper. 7,6x 7 ,6 cm Tube racks for 15 mL tubes \Veigh boat 3S'x3S' Permanent lab marker pens Lab scoops Gelatin Sodium hydroxide (Caustic solution. Handle with extreme care. Flush skin with water if exposed. Important! Do not touch the NaOH pellets. 'They are extremely caustic and can burn the skin and eyes. Wear gloves and safety goggles. NaOH is also extremely hygroscopic-it will absorb water from the air. Weigh quickly and keep bottle closed tightly.)

Environmental Health and Safety Officer
Basic Chemistry for Ihe 8iolecbnician
Tubes. glass. 13xlOO 111111
Plug caps for 13x 100 111m tubes racks for 13xlOO nun tubes
Glass rods. 200 111111
Beakers. 250 mL Hot plate stirrers. 7"x7" Test tube holder (Stoddard) '\Jicropipet. P-1000 Micropipet for P-1000 Spectrophotometer, Spectronic 20 D+
Show ~ill calculations and make labeled diagr~1l11s to show ho\\' all solutions are prepared.
Part I: Prepare':; nIL of 10'U" :\aOH Solution
Remember not to touch the NaOH pellets. They are extremely caustic and can burn the skin and eyes. Use gloves and safety goggles when measuring. NaOH is also extremely hygroscopic, meaning it will absorb water from the air. Weigh it quickly and keep the bottle closed tightly.
1. Calculate the amount of :\aOH needed to l11~lke =; mL of l()Cyb :\aOH. Shmv the calculations and create solution preparation dra\\·ings.
2. Confirm your math by checking \\ith other lab groups. 3. ese a ubletop electronic balance to \\'eigh out the NaOH. 'f. Add 3 mL of deionized \V:lter to a 15-mL conical tube. =; Add each NaOH one at time. to the \\',lter in the tube. Cap and gentlv invert to mix
after each pellet. You may feel heat being released during the solution preparation. (1. SIO\\'ly. add dH/) to bring the mixture to a total n)lume of =; mL ;\lake sure the NaOH is
dissolved. Wipe any spills with a clamp paper towel. Cap the tuhe. Label it \\'ith the sample name and concentration. your initials. and the date.
8. Store at room temperature for lip to 2 \\'eeks.
Part II: Prepare 5 mI. of SOo CuSO-! Pentahydratc Solution 1. Calculate the amount of CuS0-f needed to make 5 mL of CuSO-fojH20. Show your cal
culations and create solution preparation drawings. 2. Confirm your l11ath by checking with other lab groups. 3. ese a tabletop electronic balance to weigh out the CuS01.
4. Pour the CuS0-f into a 15-mL conical tube. 5. Slo\\'ly, add dH20 to bring the mixture to a total volume of 5 mL. Make :;\.1re the chemical
dissol\'es into the \yater. 6. the tube. Label it \\'ith the sample name and concentration. your initials. and the date. 7. Store at ro0111 temperature for up to 2 \\·eeks.
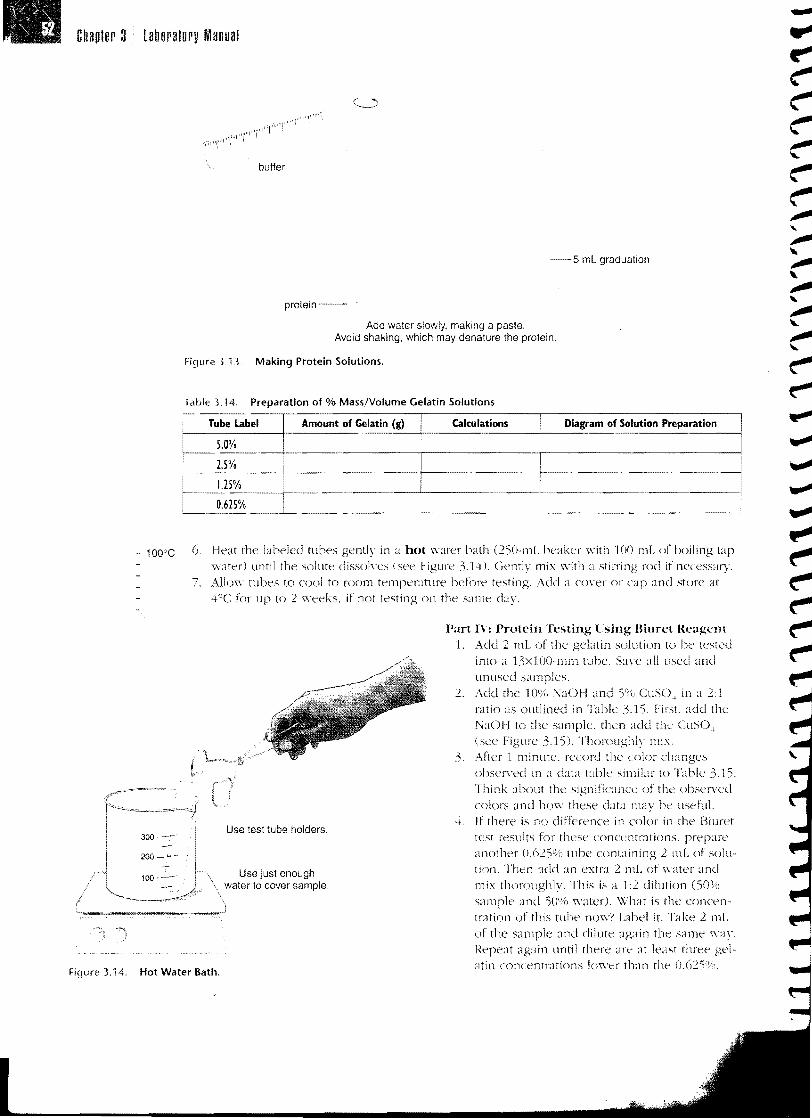
Part Ill: Pn~pare ; mI. each of 5"/0, 2.;o/\}, 1.250/0, and 0.62;0(() Gelatin Solutions Note: Proteins are not \ err soluble. Add water slO\dy. mixing it to make a paste and then into a solution (sec Figure 3.13). Do not shake the solution or it will get bubbly.
1. Calculate the amount of gelatin needed to make each gelatin solution. Show the calculations and drawings of the solution preparations in a table similar to Table 3.14.
2. Connrm your math by checking \\'ith other lab groups. 3. Lse either a lab top electronic or an analy1ical balance (where appropriate) to weigh out
tile gelatin samples. -to Pour each gelatin sample into the appropriately labeled 13xlOO-mm tubes.
Note: It is essential that all mass and \'olume measurements be as accurate as since you are looking for a proportional decrease in concentration.
.=; Slo\y)y. add dH2() to hring the 111ixture to a tonll volun1e of -5 nlL in each tube. Place 5 111L of water in an empty tube and mark the bottom of the meniscus. ese this tuhe as a gauge \\'hen filling the other tubes.
I
------------
Chapter 3 laboratory Manual
..... .... r" ~ ~ ~ ~
buffer ~ ~ ",. .... ",.
--5 mL graduation "",. "IIIfI'
protein " IIIfI' Add water slowly, making a paste,
Avoid shaking, which may denature the protein. " ~ 3,13 Making Protein Solutions, ~
~ Table 3.14 Preparation of % Mass!Volume Gelatin Solutions
100°C 6, Heat the labeled tubes gently in a hot water bath (250-1111. beaker with 100 mL of boiling tap t!!'" water) until the solute dissoln:s (see Figure 3.1q}. Gently 1111." \vith a stirring rod if necessary.
7 Allow tubes to cool to room temperature before testing. Add a cover or cap and store at ~ 4°C for up to 2 weeks, if not testing 011 the same ~
Part 1\: Protein Testing l'sing Biuret Heag('m ~ 1, Add 2 mL of the gelatin solution to be tested """"
into a 13xlOO-mm rube. Save all llsed and ~ unused samples.
.......--
and dilute again the same way,
2. Add the lCY',<) NaOH and 5% CuSO+ in a 2: 1 ratio as outlined in Table 3.1 "i. First. add the Y'iaOH to the sample, then add tlle CuS04
(see 3.15). Thoroughlv mix. 3. After 1 minute. record the color changes
observed in a data table similar to Table 3.15. Think about the significance of the observed colors and how these (bra may he useful.
4. If there is no difference in color in the Biuret Use test tube holders,
tCSt results for these concl:ntrations, prepare another 0,625% lube containing 2 tnL of solution, Then add an extra 2 111L of water andUse just enough
water to cover sample. mix thoroughlv. This is a 1:2 dilution (50% and 50% \\·atcr). \X'hdt is the concen
tration of this tube now? Lahel it. Take 2 mL of the Repeat again until there are at least three atin concenrrations 10\\'er than the
Figure 3.14, Hot Water Bath.

Basic Chemislry lop lhe BiolechniGian
;',tli" 3.1:'>. Color Change from Biuret Testing of Gelatin Samples of Differing Concentrations
250.ul 5% CuS04
Samples
s.o% gelatin
2.5% gelatin
1.25% gelatin
0.625% gelatin
10% NaOH (J1l) 5% CuS04(J1l)
SOD 250 I
500
500
500
•
500,uL 10% NaOH
250
250
250
I
I
I
Color Comments I
Figure 3.15. Biuret Testing. Biuret testing is done using two reagents, 10% NaOH and 5% CuS04 in a 2:1 ratio.
Conduct a Biuret test on each of these and record these additional lest results in your data table.
Describe the results of the Biuret testing of the solutions of decreasing concentration. Do the colors indicate the expected difference in concentration' How so or not? Describe any errors in that could result in misleading data. \Vhat might be done to decrease the chances of erroneous data or interpretation' Explain how the results of these Biuret protein tests could be to testing of other solutions of unknown concentration.
1. The solutions prepared in this acti\"ity are as % mass/n)]ume concentration. Hcm \\"oukl the follo\\'ing 0/1) mass, \olume concentrations be reported in gimL units'
10"11 "aOH g. ml "aOB ')Ojj CuSO I ___ g ml euso, 1.2')nt,) ___ g 111l gelatin

Chapter 3 Laboralory Manual
2. Some protein solutions, such as hemoglobin in solution, are colorful. Hcm' might the color of hemoglobin impact Biuret indicator testing?
3. Fullowing the protocol in Lab 3e, use the spectrophotometer to check the gelatin solutions' concenrration and preparation.
4. Complete the ,\-Iaking Solutions Re\'iew Sheet ]\'0. 2 that follows.
Convert the values as indicated. Specify the appropriate instrumenr \\'ith \vhich the final measurements should be made. For items 10 through 17, sho\\' the calculation (equation and units) for the preparation of each solution. Then draw a diagram of how to make the solution,
Instrunwnt Chokes graduated cylinder 10-mL 5-mL pipet 2-mL pipet 1-mL pipet tabletop balance P-lOOO P-200 P-I00 P-20 P-10 analytical balance
1.
O-t179 L
2,
___mL
10.72 ilL = ____,
4.
9.22 111g
5.
-----g
841 Ilg = _____'''6
6,
g= ____111g
Q.OH5 mL = -----t"
mL
9,
0.19 g = _.__.... yg
~olution To Be Prepared I Diagram of How To Prepare It
10. 40 mL of 6.5 mg/mL CuSO t penrahydrate solution
i 11.
12. 200 mL of 8c)'{) NaCI solution 13.
14. 0.75 L of 5%) dextrose solution 15.
10 mL of 1.25% ]\'aOH I
i

Chemistry
Laboratory 30 Making Solutions of DiOering Molarity ConcenWations The concentration of many solutions is reportcu as molcs.ijiter (11101/L or !l'[; the M is spoken "molar") or some fraction of those units, 111is concentration measurement is called !nola,rit}'. Molarity is sometimes a challenging concept to underst~,n(L Howen?r, ""ith VOUf recently acquired solution preparation skills. \'OU ""ill see that making molar solutions requires one extra calculation.
To understand how to make a solution of a gh-en molarity. YOll must know what a "mole" is. A mole of a compound is equal to 6.02x molecules, but that is not really a very useful number. So, in biotech, it is easier to use this definition: The unit "1 mole" is the mass, in grams, equal to the molecular weight (MW), also called "formula \veight'· (FW), of the substance (see Figure .3.16). The FW can be determined by a Periodic Table or by adding the atomic weights of the atoms in the molecule. An easy \yay, though. is to just read the label of a chemical reagent bottle. which lists the "l\!\X'" or "f\X'," The molecular ",'eight of NaCI is 58.'::; atomic
mass units (arnu) since the Na atom weighs 23 amu, and a Cl atom weighs .35.'::; amu,
.\lolarity concentrations are reported as the number of moles per liter (mol/L or JD. If the concentration is very low, then the concentration could he reported in millimolesliter (mmol/L or m;'l4). If you wanted a 1-J11 NaCl solution, you ",'oulcl measure out 1 mole of NaCl (5R. 5 g) and dissolve it in water to a total volume of 1 L This gh'es you 1 rnole of :'\aCl per liter of solution, 1 .11 NaCl.
A liter of solution is a large \'olumc for most research and development purposes. In research and development labs, mL or ilL quantities are usually used. To determine how to mix up a smaller volume of a solution of some molarity. follow the example below.
Multiply the volume desired (L) by the concentration (molarity) desired as you did in the mass volume calculations. Then, multiply the result the compound's molecular weight (g/mol) to account for measuring in as in the following equation:
Molarity Concentration Equation
volume x molarity x molecular ",'eight grams of solute to be dissolved in wanted desired of the solute solvent to the final desired volume
(L) (mol;1)
Convert smaller or units to these as necessary. The "L" units cancel out and the "mol" units cancel out. leaving the mass in grams of the solute needed to make the solution.
Remember that the math is easiest if the units of measure can he cancelled during multiplication. Use the B ~ -+ S Rule to convert bet\\'een these metric units of measure:
L ~ -+ mL ~ -+ ilL Km ~ -+ m ~ -+ em ~ -+ mOl ~ -+ 11m
~ -+ g ~ -+ mg ~ -+ ~tg Jf ~ -+ mJ1 ~ -+ I1J1
Since I cannot measure out individual molecules, I measure out moles of molecules. Then I know how many I am getting.
Figure .3 .16 Measuring Moles. A mole is a convenient method of measuring a large number of molecules (6,Q2xl 023)
at one time. A mole of salt (NaCl) is 58.5 g since the molecular weight of NaCI is 58.5 amu.
Chapl8P 3. labopatory Manual
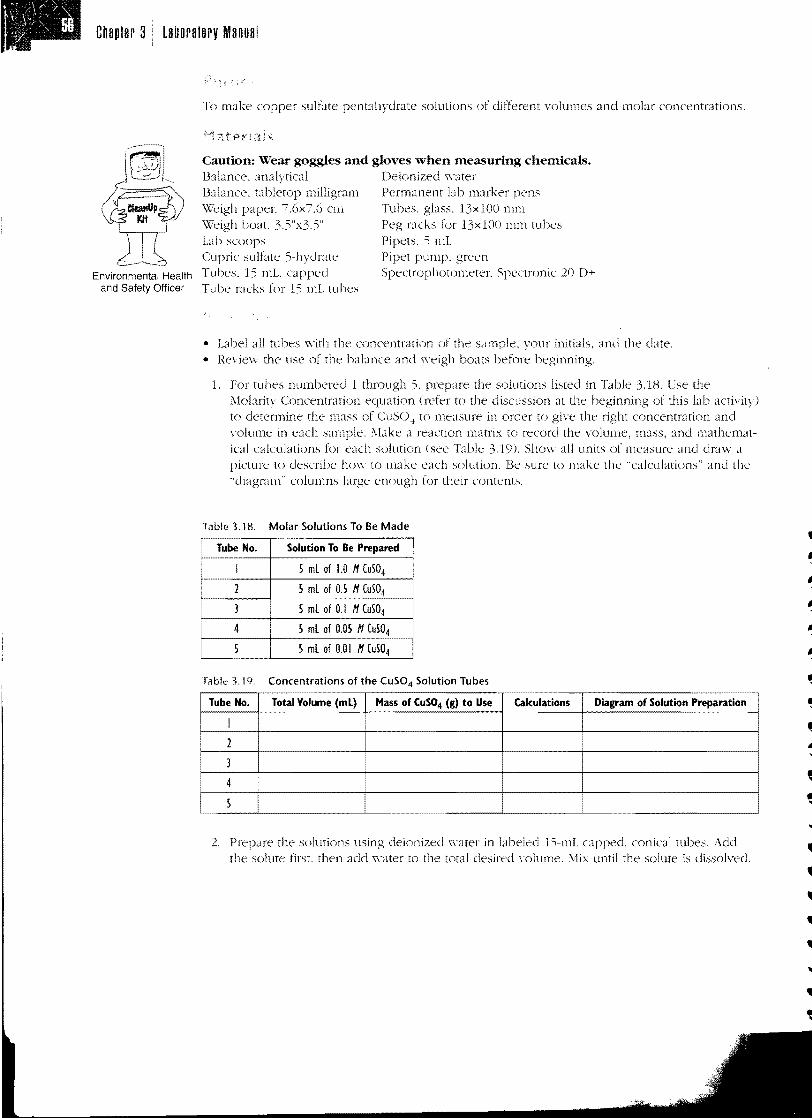
Environmental Health and Safety Officer
To make copper sulfate l,r,(lr"tp solutions of different volumes and molar concentrations.
Caution: Wear goggles and gloves when measuring chemicals. Balance. analytical Deionized ""'ater Balance. tabletop milligram Permanent lab marker pens Weigh paper. 7.6x7.6 CI11 Tubes. glass. I3xIOO 111111
\Veigh boat. 3.5"x3.5" racks for 13xlOO mm tubes Lab scoops Pipets. 'i mL Cupric sulfate 5-hydrate Pipet pump. green Tuhes. 15 1111, capped Spectrophotometer. Spectronic 20 D+ Tube racks for 15 mL tuhes
• Label all tubes ""'ith the concentration of the sample. your initials, and the date. • Reyiev..; the use of rhe balance and weigh boats before beginning.
1. For tubes numbered 1 5. prepare the solutiom listed in Table 3.1H. Use the Molariry Concentration equation (refer to the discussion at the of this lab activity) to determine the mass of to measure in order to give the right concentration and \'olume in each sample. \[ake reaction matrix to record the H)lume, mass, and mathematical calculations for each solution (see Table 3.19). Show all units of measure and draw a picture to describe hem- to make each solution. Be sure to make the "calculations" and the "diagram" columns large enough for their contents.
Table 3.18. Molar Solutions To Be Made
Tube No.
I
1
I 3 4
5
,• .. ..5 ml of 0.1 11 (uS04
5 ml of 0.05 11 (uS04 .. 5 ml of 0.0 I 11 (uS04 ..
•
•••
Solution To Be Prepared I
5 ml of 1.0 11 (uS04
5 ml of 0.5 11 (uS04 = fable 3.19. Concentrations of the CUS04 Solution Tubes
Tube No. Total Volume (mL) Mass of CuS04 (g) to Use Calculations Diagram of Solution Preparation
2. the solutions using deionized ",,'ater in labeled 1 ')-111L capped. conical tubes. Add the solute first. rhen ade! ",,',Iter to the total desired \'Olume. !vEx until the solute is dissolved.
•
Basic Chemislry lor Ihe Biotechnician
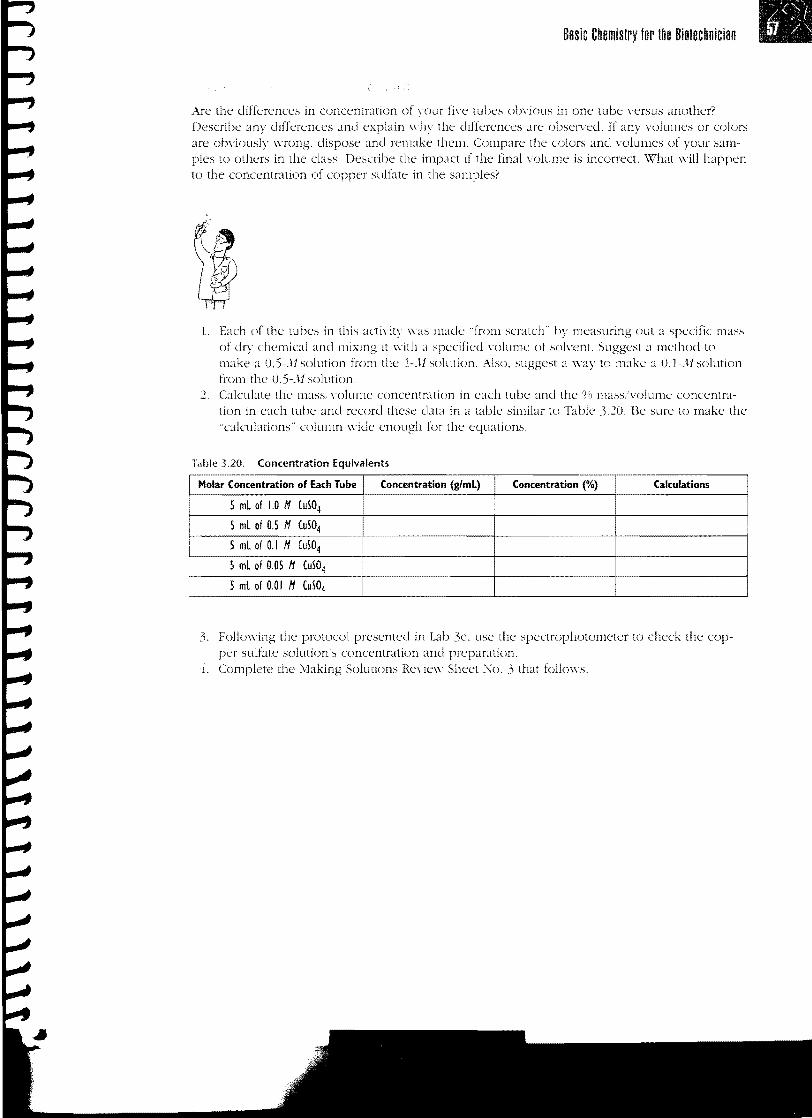
Are the differences in concemration of your nYe tubes ohvious in one tube \'ersus another? Describe any differences and why the ditlerences are obselTed, If any volumes or colors are ob\'iously \\Tong. and remake thcm. Compare the colors and \'olumes of your sam
to others in thc class. Describe the impact if the final volume is incorrect. \v'hat will happen to the concemration of copper sulfate in the samples>
1. Each of the tubes in this actiyitv \\'as made "from scratch" by out a specific mass of dry chemical and mixing it with specified \olume of soh'ent. a method to make a O.5-J!solmion from the I-Jl solution. Also. suggest a way to make a O.l-Jlsolution from the O.5-"11 solution.
2, Calculate the mass. Hllume concentration in each tube and the (H) mass/volume concentration in each tube and record these data in a table similar to Table .).20. He sure to make the "calculations" column \\'ide enough for the equations.
Table 3.20, Concentration Equivalents
Molar Concentration of Each Tube Concentration (glmL) Concentration (%) Calculations
5 mL of 1.0 11 (uS04 I
5 ml of 0.5 11 (US04
5 ml of 0.1 11 (uS04
5 mL of 0.05 11 (uS04
5 mL of 0.01 11 CuS04
3. Follcm'ing the protocol presented in Lab 3e. lise the spectrophotometer to check the copper sulfate solution's concentration and preparation.
-1. Complete the '\1aking Solutions Re\ie\\' Sheet '\0. ,) that follo\\'s.

Chapler 3 laboratory Manual
Conn~rt the \',dues as indicated. Specd\ the appropriate instrument \\"ith \\hich the final measurements should be made. For items - through 16. sho\\' the calculation (equation and units) for the preparation of each solution. Then dra\\' a diagram si1o\\'ing ho\\' to make the solution.
Instrument Choices graduated cylinder lO-mL pipet S-mL pipet 2-mL pipet I-mL pipet tabletop balance P-IOOO P-200 P-20 P-I00 P-I0 analytical balance
..
...
...
1. 3. 5
0.42 g = ~g 0.0285 mL = ~L90.22 ~g = g
-I. 6.2.
80.-11 mL = ~L 70.503 mg = g999 ~L = mL
Solution To Be Prepared Diagram of How To Prepare It
7. 550 mL of 9.5 mg/mL :\aOH solution 8.
9. 150 mL of 2% CuS04·5H~O solution 10.
11. 3 L of 0.025% dextrose solution 12.
13. 125 mL of 1O"H l'\aOH 1'1.
15. 75 mL of 0.1 Jl '(aCI 16.

Basic Chemistry lor the BiofechnlCl3c
laboratory 3h Making Dilutions of Concentrated Solutions
:'laking dilutions of concentrated solutions is a common practice in a biotechnology lab. A concentrated solution is generally called a "stock solution." and the dLluted solution is called the "\vorking solution." Preparing a concentrated stock solution saves a lot of time and is easier to store than large "olumes of diluted \\"orking solutions. Making a 'working solution simply requires diluting some "olume of stock solution to the concentration needed.
The 'working concentration of a solution is represented as IX. A concentrated solution could be represented as lOX if it has 10 times the amount of solute per lInit volume compared with the ","orking solution. A 50X stock has 50 times the concentration of solute as a working solution. For example. an enzyme storage buffer may be used at a concentration of 0.01 M TRIS. This is the \vorking concentration of the TRiS solution (IX). But because of shipping costs, a small amount of the enZyme buffer is shipped as a lOX solution \vith a. concentration of 0.1 1\;[
TRIS. When the technician is ready to use the buffer. it is diluted with deionized water down to IX (().m JfTRISl.
\X!hen a number of dilutions must he made, and each is propOltionally the same dilution as the one before, it is called a serial dilutioJl (see Figure 3,17). Doing a serial dilution makes sense for many experiments ",hen many samples of ,'arying concentrations are needed. A serial dilution is also useful for preparing \"ery dilute solutions that are hard to make from scratch. because the solute masses can be too small to measure on a balance.
Each succeding sample is made with the same ratio of sample and diluent as the
one before.
500 mL 500 mL 500 mL 500 mL 500 mL 1M NaGI 0.5M NaGI 0.25M NaGI 0.125M NaGI 0.0625M NaGI
~ ~~~~ trash
1M NaCI ,.'~O,5M N~CI) ~-.. -.J
mix mix mix mix SOOmL 500mL 500ml 500 me water water water water
1M NaGI 0.5M NaGI 0.25M NaGI 0.125M NaGI 0.0625M NaGI
Figure 3.17. Serial Dilution. Each of these dilutions is one part (previous) sample and one part solvent This is called a 1:2 dilution, or one part sample in two total parts. This could be read "1 to 2," which could erroneously result in a preparation with three parts, In practice, by convention, a 1:2 dilution is actually "1 in 2" total parts.
If the technician needs 150 111L of the 0.1 JITRIS, then a dilution of the concentrated 1 lvf TRIS can be calculated. To figure out how to dilute something from a concentrated solution, we use a simple ratio equation as shown in the folimYing equation:
Diluting Concentrated Solutions Equation
c] VI Cz V2
Where the concentration of the concentrated stock solution (the starting solution), C1 Vj = the volume to use of the stock solution in the diluted sample.
the desired concentration of the diluted sample. V2 "" the desired volume of the diluted sample.

Ghapter 3 laboratory Manual
The VI C.2 V 2 equation may be used \yith any concentration units Cie, mass/volume, or molar) as long as the units are the same on each side of the equation (for canceling purposes). Using the equation with the scenario abm'e in which the technician needs 150 mL of the 0.1 JITRIS,
= 0.1 JITRIS starting solution) C1 VI = amount of the concentrate to use for the dilution
0.01 .11 TRIS (the \vorking solution) V = 150 mL
(01 .14) (VI) = (Om ,11) 050 mL)
' _ (0.01 ,H)(150 mL)\ 1 -
0.1 J[
Therefore. to make 150 mL of 0.01 JJTRIS fi'om the concentrated stock measure out 15 mL of the concentrated 0.1 J[ TRIS stock and add 135 mL of deionized \vater to it and mix well.
To make dilutions of concentrated solutions and report their concentration in different ways.
Caution: Wear goggles and gloves when mea'>uring chemicals. Balance, analytical Deionized \\'ater Balance, tabletop milligram Permanent lab marker pens Weigh paper. 7.6x7.6 cm Tubes, glass. 13x100 ml11 Weigh boat, 3.5"x35" Peg racks for 13xlOO mm tubes Lab scoops Pipets. 5 mL Cupric sulfate 5-hydrate Pipet pump. green Tubes. 15 mL capped Spectrophotometer. Spectronic 20 D+ Tube racks for 15 mL tubes
• In matrixes similar to those shown in Tables 3.21 and 3.22. record all your calculations and diagrams. Confirm your calculations \\'itl1 another person's calculations before you begin. Dra\\' a diagram to show 110\\' each sample is diluted. Cse the C 1 VI = V 2 to make the calculations. Be sure to make the columns the appropriate width for the material they will contain.
• Label all tubes \\'ith the name and concentration of the sample. your initials. and the date.
Table 321. Dilutions of the 300X Stock CUS04
I V':!ume To Be Concentration To
~ade (mL) Be Made (X~)~-l-_~~~~~~--J~~~~~~~~~~~~~~~ • S ISOX
Environmental Health and Safety Officer
1. Prepare 2'5 mL of 300-mg/mL CuSO I solution. '\Iix well. Do not use preViously made solutions. Consider this a 300X stock solution.
• .""" -

BasIc Chemlstrv luI' tile Biolecnnican
~I :-;110\\ the calculations for the :.;olution preparation and dr~l\\ a diagram of hem it is made, h, Determine the mass yolume for this solution,
DetLTmine the of this solution, Record these \,ilues,
) .\lake the rolle J\\ing dilutions in Tahle 321 from the concentrated stock C)OOx), Prepare the solutions deionizeci \\'~lter. in labeled 15 mL tubes, '\Iicropipets may be required to make some meaSllremems,
3, L',-;ing a matri, simiLlr to Table 3,22, prepare ~ldditional dilutions from the more concentrated solutions, the solutions using deionized \\aler, in labeled 13xlOO-mm rubes. Make the columns the \\'idth for the material the\' \\'ill contain.
Tablc),n, Diluting Samples
Volume To Be- Starting Final Solution Concentration (X) Concentration (X)Made (ml) Calculations Preparation DiagramI
5,0 150X 15X
2.0 lOX lOX
5,0 I 15X ! IX
2.5 3X IX
2.0 IX O.5X •
4. ,I 1:2 dilutioll of the concentrated UOO mg. mU stock ClISO, to make a 150 mg/mL solution, TI1l'll prepare a 110 serial dilution (refer to Figure 3,1-) of the 150 CuSO j
solution to make three more ~olLltions (see Table 3,23), Prepare the solutions using deionized ';\ater. in labeled 15 mL tubes, .\1icropipets may be required to make some measurements,
". Check the ahsoriJances of thec;e solutions on the spectrophotometer the procedures in Lab 3e,
Llble ;23. Preparation and Dilutions of the 150X CuS04 Solution
Volume To Be Concentration To I Volume of Sample (VI) Made (ml) Be Made (m Calculations To Be Used btl)
3 150.0
1 15.0 I
3 1.5
3 0.15
Ts the difference in concentration within each set of tuhes obvious in one tuhe versus another and as had been expected from the kind of dilution that \'-as made' Ho\\' so or noe If any volumes or colors are \\Tong, them out and remake them. Compare your tubes' colors and \'o\umes to others in the class, Describe the vallie of ha\'ing a 300X solution versus a IX.
the :-laking Solutions Re\ ie\\' Sheet '\0. 4 that follows.

Chapter 3 laboratory MHnual
Complete the Making Solutions Re\'ie\\' Sheet ~o, 4 that follO\\'S.
Show the calculation (equar.ion and units) for the preparation of each solution. Then draw a diagram of huw to make the solution. AIlO\y extra space in the column for the draWings,
L~o:(~~:o:~:m:~n~:~'~:~~U[iOnI from 100 mg/mL :'\aOH
I Diagram of How to Prepare It
· 3, 10 mL of 0.5 M CllS.0~-5H20 solution 4,
from 10 J1 CuSO~-"iH::OI ---h~5, 2 L of 5 mg/mL gelatin solution I from 1 g/mL gelatin I
L----------+-------~---_!
of IX CuSO~ - 5H20 solution 8,
from 25X CuSO I "iH20
of 0.2 M dextrose solution
,