Embed Size (px)
Citation preview
Building Cantera 1.7with Visual C++ .NET
D. G. GoodwinCaltech
November 2006

This presentation…
explains how to compile and install Canterafrom source code on a PC running Windows
If you just want to use Cantera from Pythonor MATLAB, you can alternatively get thebinary Cantera distribution and skipeverything described here
System Requirements
Windows 2000 or XP Visual C++ .NET
Optional: MATLAB Only needed if you want to build the Cantera
MATLAB Toolbox Version 7.0 or greater is required
Getting Ready
If you are installing Cantera for the first time, you need to first Install Python Install numarray* Install SUNDIALS* Set environment variables Set up MATLAB*
If you are upgrading from a previous Cantera installation andhave already done these steps before, there is no need to dothem again, unless you want to install newer versions of Pythonor numarray
*optional
Installing Python
Python 2.4 or greater is required, since earlier versions of Pythonwere compiled with Visual C++ 6.0, not Visual C++ .NET
If you have Python 2.4 already, you can keep it, or you candownload the current version (Python 2.5) from www.python.org
If you do update Python, be sure to uninstall any older version ofPython first
Click the link below to get the Python 2.5 installer now: http://www.python.org/ftp/python/2.5/python-2.5.msi
Installing numarray
This step is only required if you plan to use Canterafrom Python (but is highly recommended in anycase, and only takes a minute).
Get and run the numarray Windows binary installerfor Python 2.4 or 2.5 fromhttp://sourceforge.net/projects/numpy
Note: get the Windows installer for numarray, notthe newer numpy package that Cantera does notyet support
Setting environmentvariables The build process runs batch files that invoke
Python and MATLAB
These batch files use environment variablesPYTHON_CMD and MATLAB_CMD
To set these: From the control panel, select System Select the Advanced tab, and press the Environment
Variables button
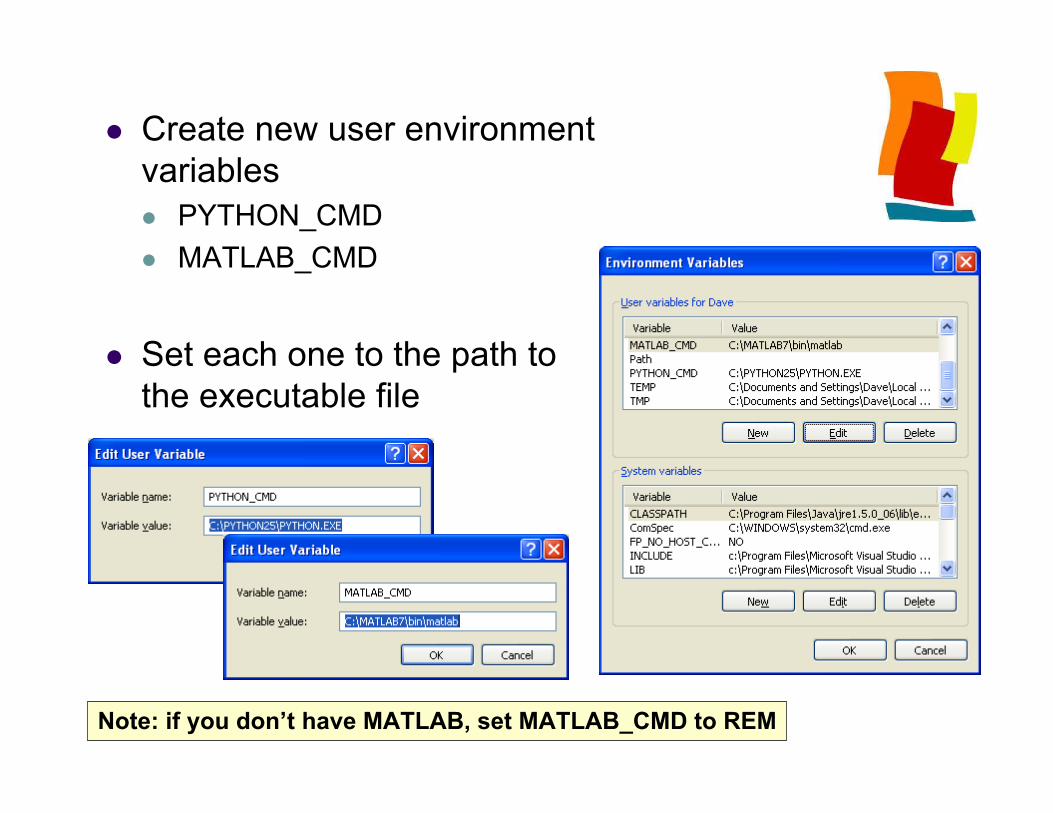
Create new user environmentvariables PYTHON_CMD MATLAB_CMD
Set each one to the path tothe executable file
Note: if you don’t have MATLAB, set MATLAB_CMD to REM
Configuring MATLAB
MATLAB needs to know which C/C++ compiler youwant to use to build the Cantera MATLAB Toolbox
Start MATLAB, and at the MATLAB prompt type:>> mex –setup
Select Visual C++ from the list of available compilers
Exit MATLAB

Getting the Cantera sourcecode
The Cantera source code is athttp://sourceforge.net/projects/cantera
You can either download the latest Windows source distribution,
or Check out the source code using CVS
Which method should youuse?
Downloading the source distribution in a zip file Pro: Simple. Con: Updated infrequently. New features or bug fixes are
not available until the next source distribution is released.
Using CVS Pro: access to latest Cantera code. New features, bug
fixes available immediately. Con: requires a CVS client program. (WinCVS is a good
GUI CVS program.) Tags inserted into the repository at each new release
allow checking out the same code as in the zip file, even iflater changes to the code in the repository have beenmade. Or you can get the latest development version.

Option 1: Downloading thesource distribution
At the Cantera Sourceforge site, select‘Download Cantera’, then select the latestWindows source distribution (*-src.zip)
Currently this is cantera-1.7.0-src.zip
Extract the files in the zip archive into sometemporary directory
Option 2: Getting Cantera viaCVS
These instructions assume you have a CVS client that runsfrom the command line If you have a graphical CVS client like WinCVS, use the analogous
procedures for that client
First log in by typing
cvs -d:pserver:[email protected]:/cvsroot/cantera login
Now check out module cantera:
cvs -z3 -d:pserver:[email protected]:/cvsroot/cantera cocantera
Getting Cantera via CVS (cont’d)
After the checkout procedure finishes, you will find a new foldercalled ‘cantera’
This folder contains the Cantera source code, and unix Makefiles,but not Visual C++ .NET project files. To get these, go into the‘cantera’ folder/directory, and check out module ‘win32’:
cd canteracvs -z3 -d:pserver:anonymous@cantera/cvs.sourceforge.net:/cvsroot/cantera cowin32
The end result should be that you now have a ‘win32’ folder withinthe ‘cantera’ folder.

Updating Cantera via CVS
If you checked out Cantera previously using CVS, you can update itby typing
cvs update –d
from the top Cantera directory. This will download all files in allsubdirectories that have changed since you checked out or lastupdated Cantera
If you want to specifically check out Cantera 1.7.0, do this:
cvs update –d –r Release_1_7_0

SUNDIALS
Cantera uses the CVODES ODE integrator fromthe “SUNDIALS” package to integrate reactornetwork ODES and to calculate sensitivitycoefficients
It is possible to build Cantera without SUNDIALS,since an older version of the CVODE integrator isincluded in the Cantera source distribution (butthen you can’t do sensitivity analysis). For thisoption, use solution file Cantera_no_sundials
The Cantera build procedure will build SUNDIALStoo.
Getting SUNDIALS
Go to www.llnl.gov/casc/sundials/ and download the latestsource distribution (currently sundials-2.3.0.tar.gz)
SUNDIALS is only distributed in unix “tar.gz” format, but most PCfile compression utilities can handle this format.
Get the entire SUNDIALS distribution, not the separatecomponents
Extract the files from the archive file; this should create a foldercalled sundials-2.3.0 (or similar)
Building SUNDIALS
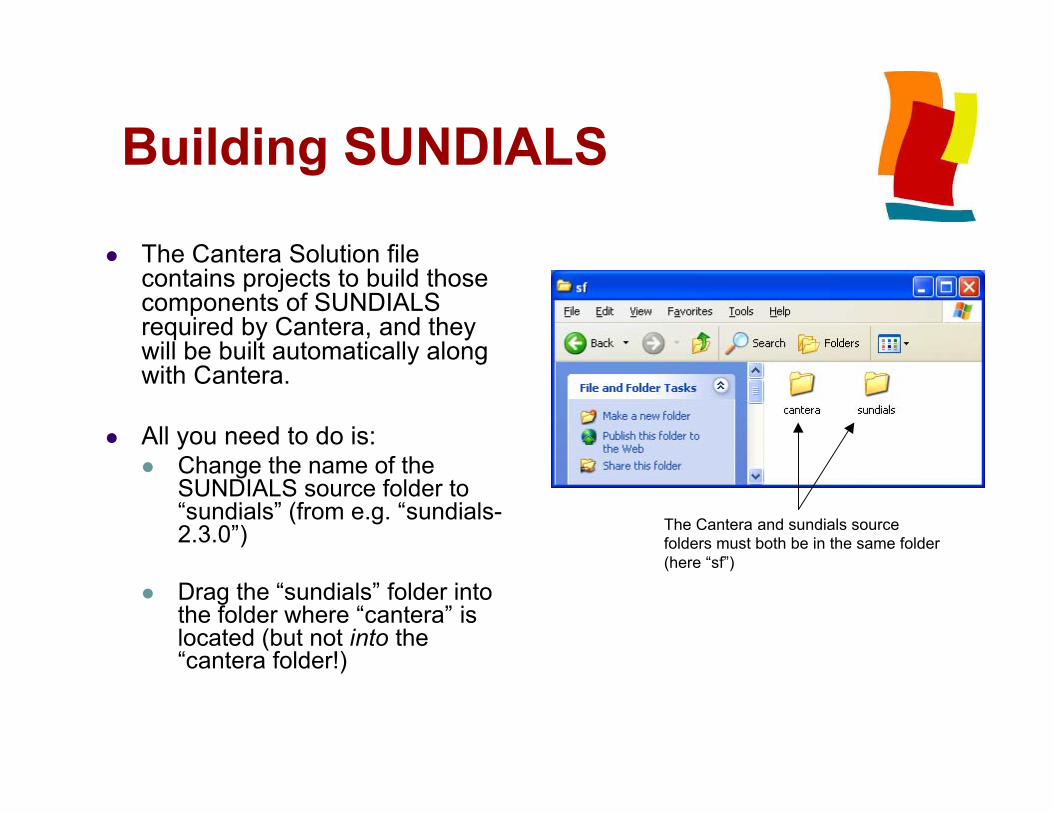
The Cantera Solution filecontains projects to build thosecomponents of SUNDIALSrequired by Cantera, and theywill be built automatically alongwith Cantera.
All you need to do is: Change the name of the
SUNDIALS source folder to“sundials” (from e.g. “sundials-2.3.0”)
Drag the “sundials” folder intothe folder where “cantera” islocated (but not into the“cantera folder!)
The Cantera and sundials sourcefolders must both be in the same folder(here “sf”)

Open the Cantera solution inVisual Studio
Now that we have the sourcecode, and the VC++ .NETproject files, we’re ready tobuild.
So start Visual Studio, andfrom the File menu select‘Open Solution’
Navigate to‘cantera\win32\vc7’ and opensolution ‘cantera’
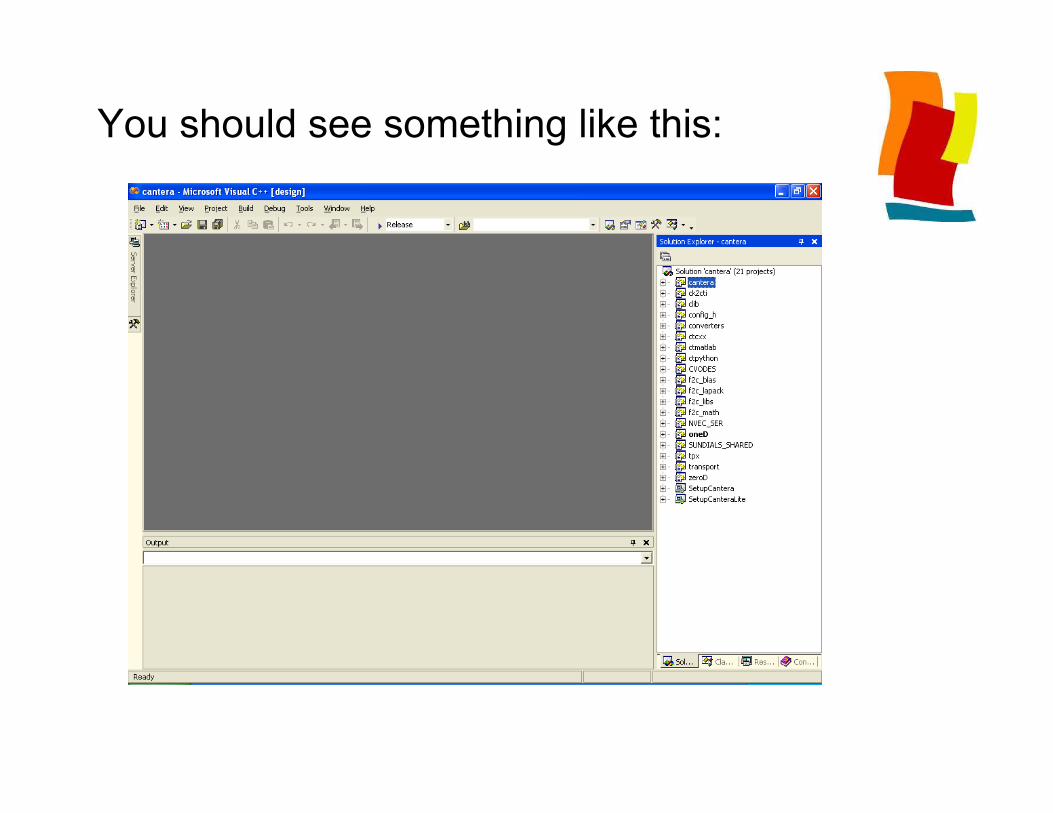
You should see something like this:

Building Cantera
Change the configuration to ‘Release’
From the Build menu, select ‘Build Solution’
This will build: The Cantera static libraries A few sundials static libraries The ‘clib’ DLL used to access Cantera from
Python and MATLAB The Python and MATLAB interface modules

Source distribution layout
The Cantera source distribution is laid out for theconvenience of Cantera developers, not Cantera users/ application programmers The Cantera kernel is in ‘Cantera/src’, and the language
interfaces each occupy a directory within ‘Cantera’ All source, header, demo, and tutorial files for each
language are within its directory. Other directories contain application programs, tools for
testing or generating documentation, etc. Many things in the source distribution are useful only on
unix-like systems (Makefiles, configure, etc.)
Installation Layout
The build process installs Cantera files in a separatedirectory (folder)
This directory is laid out so that Utility programs (ck2cti.exe) are easy to find Python and MATLAB demo scripts are easily accessible Header and library files for C++ application programs are
collected together in one place
Data files and the clib DLL are put in special locationswhere Cantera can find them
Building a Cantera Installer
Running ‘Build Solution’ in Visual Studio skips twoprojects (SetupCantera and SetupCanteraLite)
Right-click on SetupCantera, and select ‘Build’
This will create a binary Windows Installer file forCantera named Cantera.msi
This installer can be used on any Windows PC toinstall Cantera, and includes the static librariesneeded to build C++ applications, and a set ofC++ demonstration programs.

Running the Installer
To install Cantera, right-click again on ‘SetupCantera’ andselect ‘Install’
This will run the Cantera.msi installer you created, and willinstall Cantera at a location you specify. Make sure this is notthe same as the source directory where you have builtCantera!
If you have done a previous installation of Cantera, theinstaller will automatically remove it before installing the newinstallation. However, it won’t remove output files, so youmight want to clean up the folder or remove it yourself beforeinstalling the new Cantera files.
SetupCantera andSetupCanteraLite
SetupCanteraLite Creates a Windows installer
(Cantera.msi) file that can be usedto install Cantera on any WindowsPC, including ones without VisualC++
Installs in the Cantera installationfolder: An installer for the Cantera
Python package The MATLAB toolbox Python and MATLAB demos MixMaster ck2cti.exe
Use this installer when Cantera willonly be used from Python and/orMATLAB
SetupCantera Everything that SetupCanteraLite
installs, but in addition installs Cantera C++ header files Cantera and SUNDIALS static
libraries to use to link C++programs
C++ demo programs
Install Cantera using this installeron machines where Cantera C++programs need to be compiled
Note that it is not necessary tobuild Cantera from source onevery machine – this installerprovides everything needed tobuild Cantera C++ applications
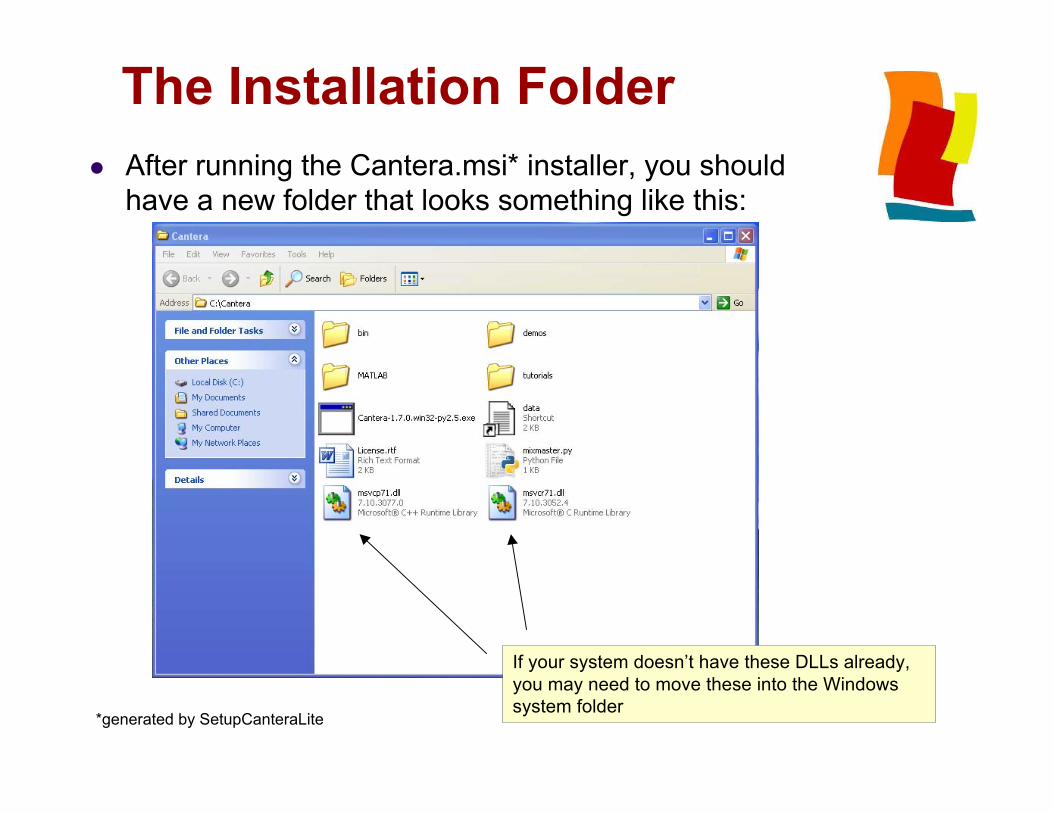
The Installation Folder After running the Cantera.msi* installer, you should
have a new folder that looks something like this:
If your system doesn’t have these DLLs already,you may need to move these into the Windowssystem folder
*generated by SetupCanteraLite
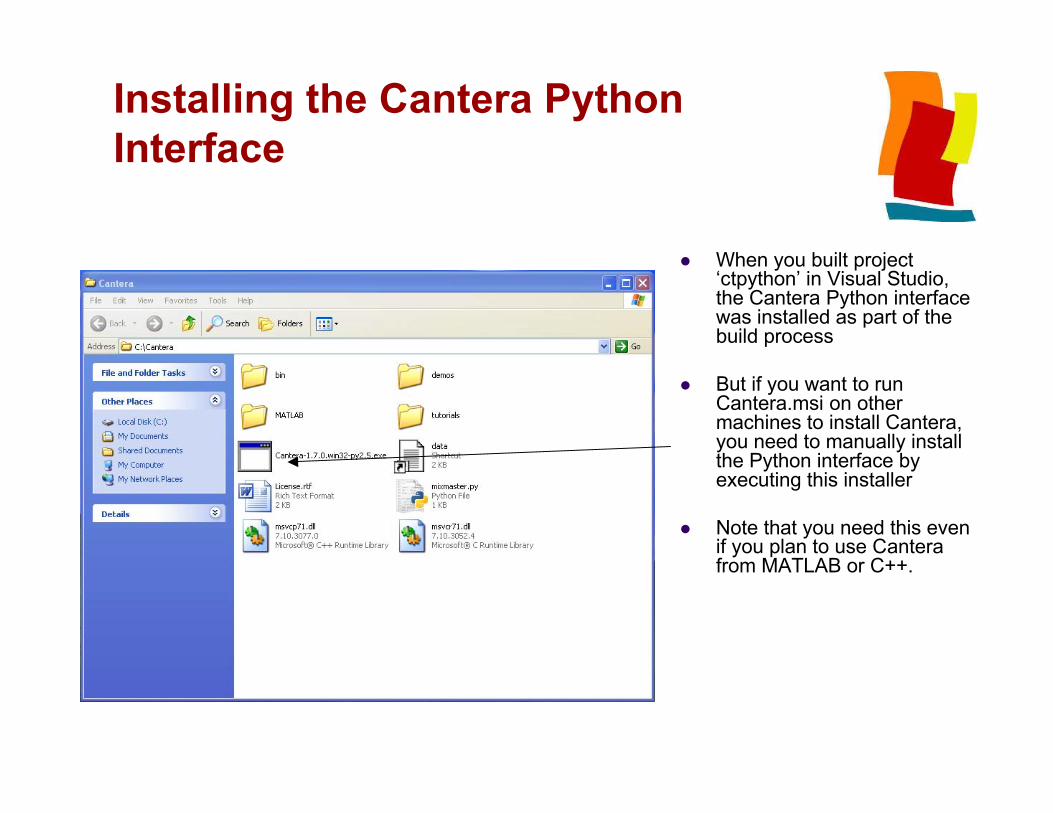
Installing the Cantera PythonInterface
When you built project‘ctpython’ in Visual Studio,the Cantera Python interfacewas installed as part of thebuild process
But if you want to runCantera.msi on othermachines to install Cantera,you need to manually installthe Python interface byexecuting this installer
Note that you need this evenif you plan to use Canterafrom MATLAB or C++.
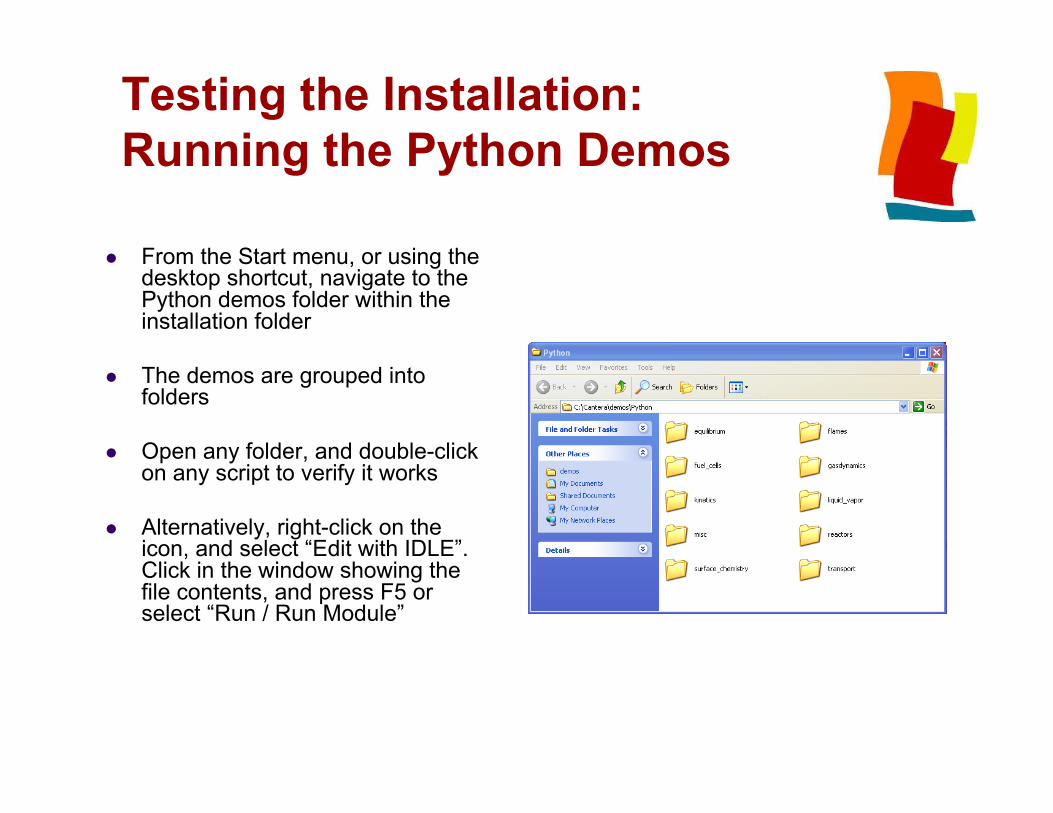
Testing the Installation:Running the Python Demos
From the Start menu, or using thedesktop shortcut, navigate to thePython demos folder within theinstallation folder
The demos are grouped intofolders
Open any folder, and double-clickon any script to verify it works
Alternatively, right-click on theicon, and select “Edit with IDLE”.Click in the window showing thefile contents, and press F5 orselect “Run / Run Module”
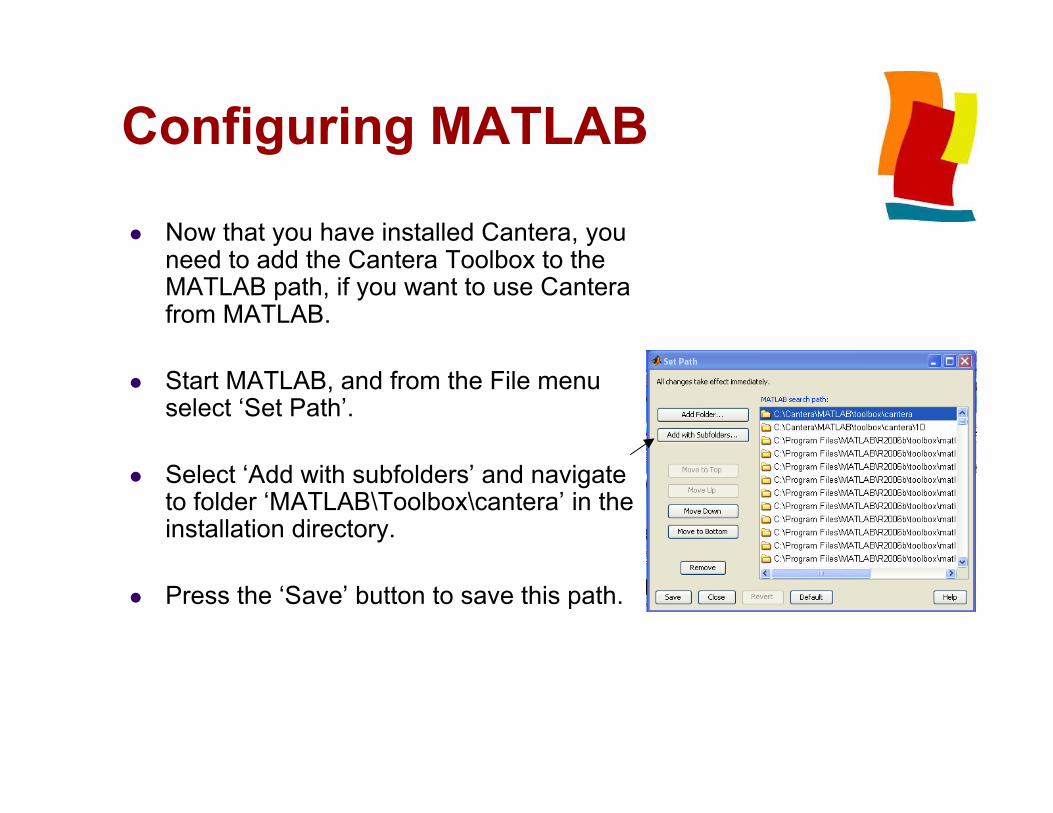
Configuring MATLAB
Now that you have installed Cantera, youneed to add the Cantera Toolbox to theMATLAB path, if you want to use Canterafrom MATLAB.
Start MATLAB, and from the File menuselect ‘Set Path’.
Select ‘Add with subfolders’ and navigateto folder ‘MATLAB\Toolbox\cantera’ in theinstallation directory.
Press the ‘Save’ button to save this path.
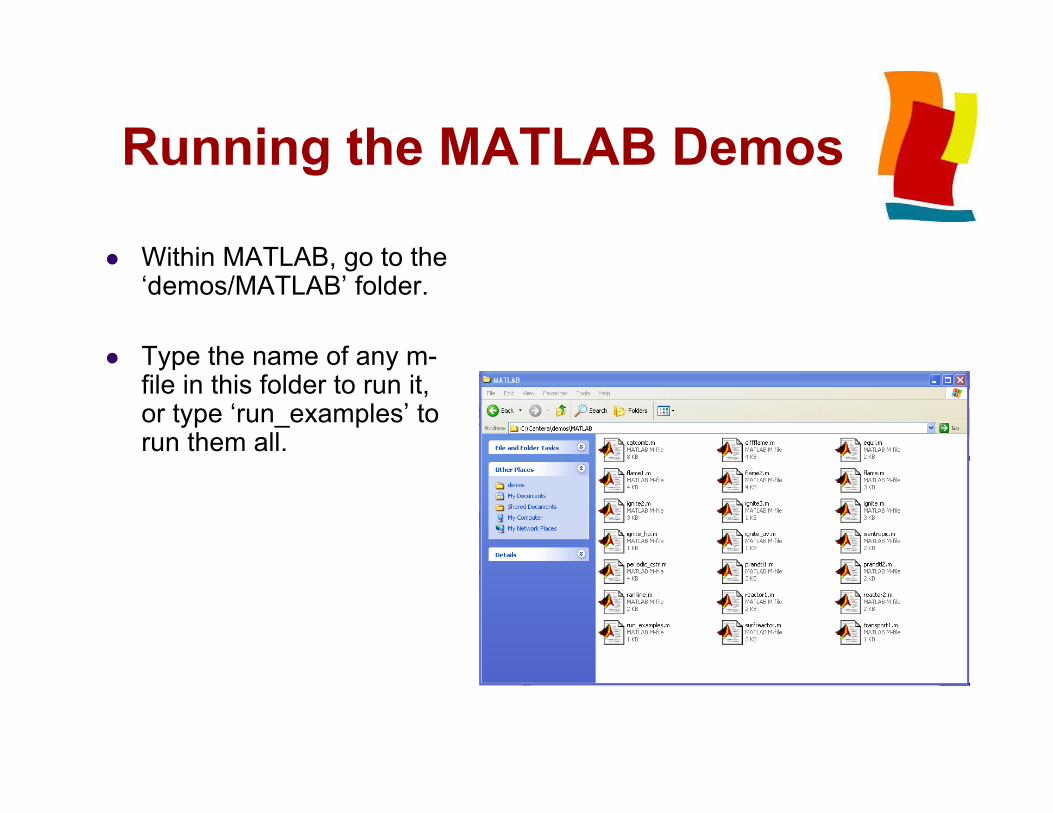
Running the MATLAB Demos
Within MATLAB, go to the‘demos/MATLAB’ folder.
Type the name of any m-file in this folder to run it,or type ‘run_examples’ torun them all.
Running the C++ Demos
Go to the C++ demo folder, and double-click onCanteraDemos.vdproj
This will start Visual Studio .NET
Build the solution, and verify that the projects run.
Note: if Cantera is not installed in C:\CANTERA, theproject files may need to be edited before lodingthem.
Buiding your own C++Cantera application To start a new project, the best thing to do is to copy
one of the C++ demo project files (*.vcproj)
The open it in Visual Studio, and change the sourcefiles to those for your application
This process will insure that include and librarypaths are set correctly.

If you have problems…
Look at the messages at the Cantera User’s Groupsite to see if someone else has already dealt withthe issue
If not, send a message to the Cantera User’s Groupdescribing the problem, and probably someone willbe able to help.
And if you run into a problem in the build procedureand fix it, let us know so we can update the sourcedistribution and CVS repository.