Embed Size (px)
Citation preview
Browser Document 2013
Published on 3/18/2013 1 | P a g e
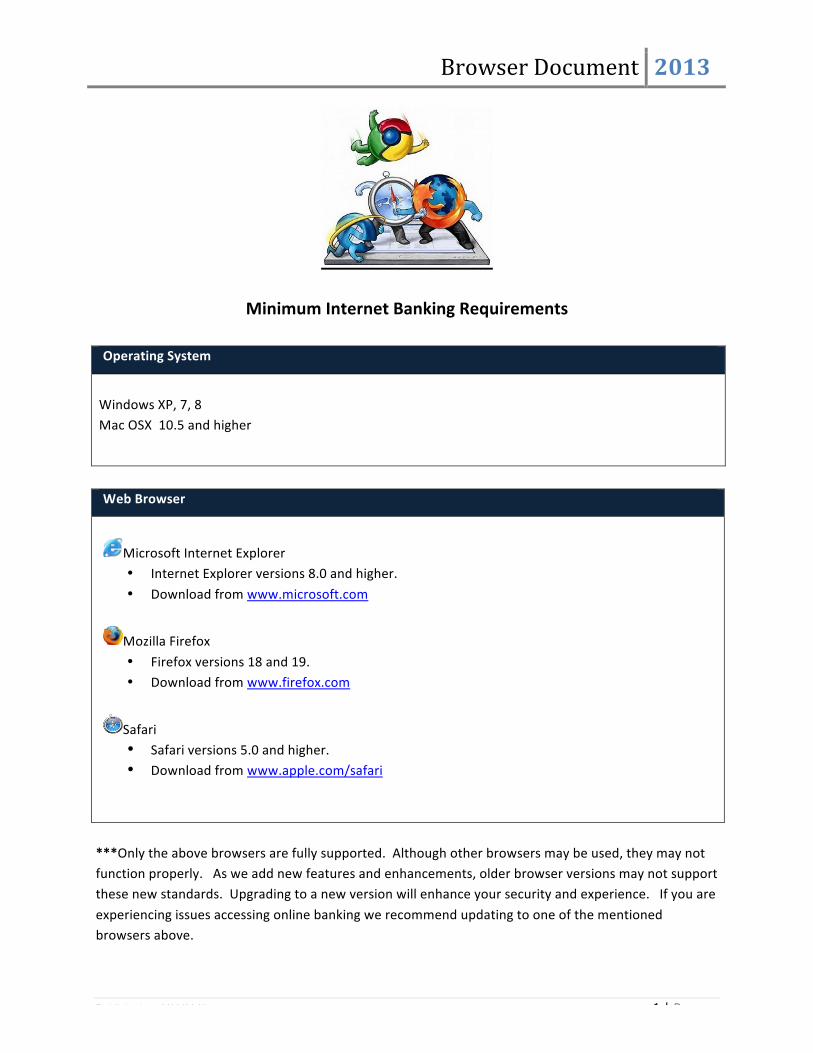
Minimum Internet Banking Requirements
Operating System
Windows XP, 7, 8 Mac OSX 10.5 and higher
Web Browser
Microsoft Internet Explorer • Internet Explorer versions 8.0 and higher.
• Download from www.microsoft.com
Mozilla Firefox
• Firefox versions 18 and 19. • Download from www.firefox.com
Safari • Safari versions 5.0 and higher. • Download from www.apple.com/safari
***Only the above browsers are fully supported. Although other browsers may be used, they may not function properly. As we add new features and enhancements, older browser versions may not support these new standards. Upgrading to a new version will enhance your security and experience. If you are
experiencing issues accessing online banking we recommend updating to one of the mentioned browsers above.
Browser Document 2013
Published on 3/18/2013 2 | P a g e
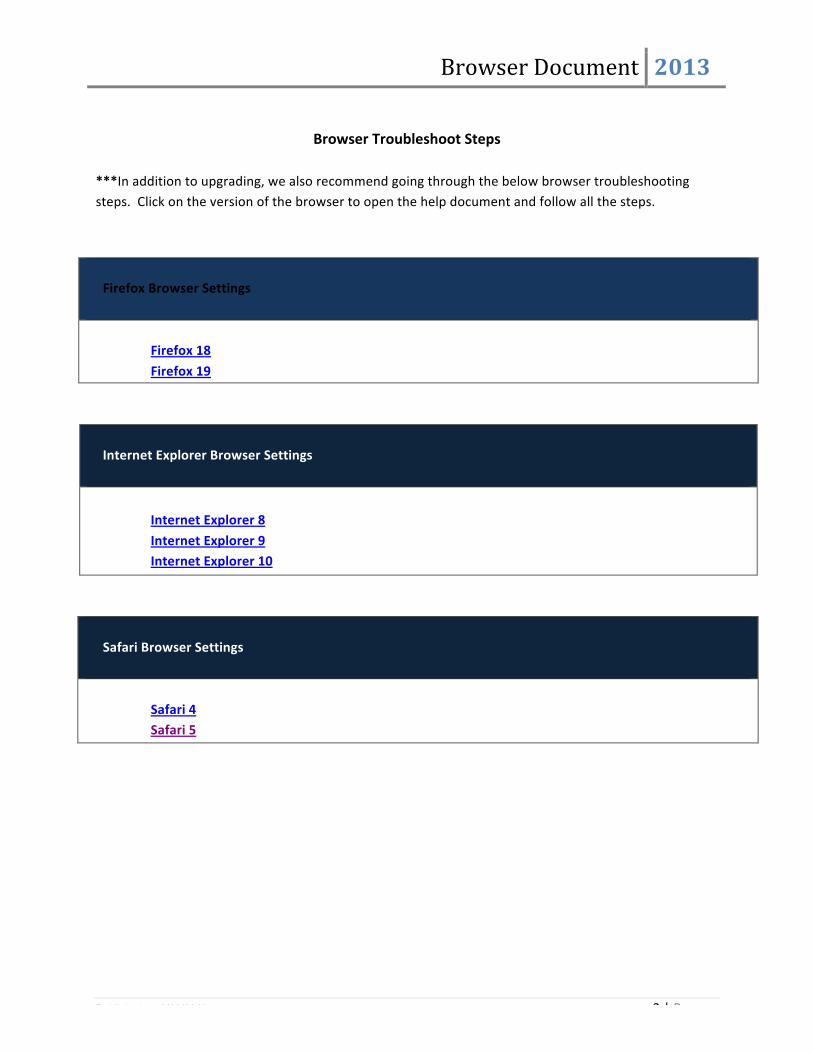
Browser Troubleshoot Steps
***In addition to upgrading, we also recommend going through the below browser troubleshooting steps. Click on the version of the browser to open the help document and follow all the steps.
Firefox Browser Settings
Firefox 18
Firefox 19
Internet Explorer Browser Settings
Internet Explorer 8
Internet Explorer 9 Internet Explorer 10
Safari Browser Settings
Safari 4 Safari 5
Browser Document 2013
Published on 3/18/2013 3 | P a g e
2.00 Firefox 18 Browser Settings
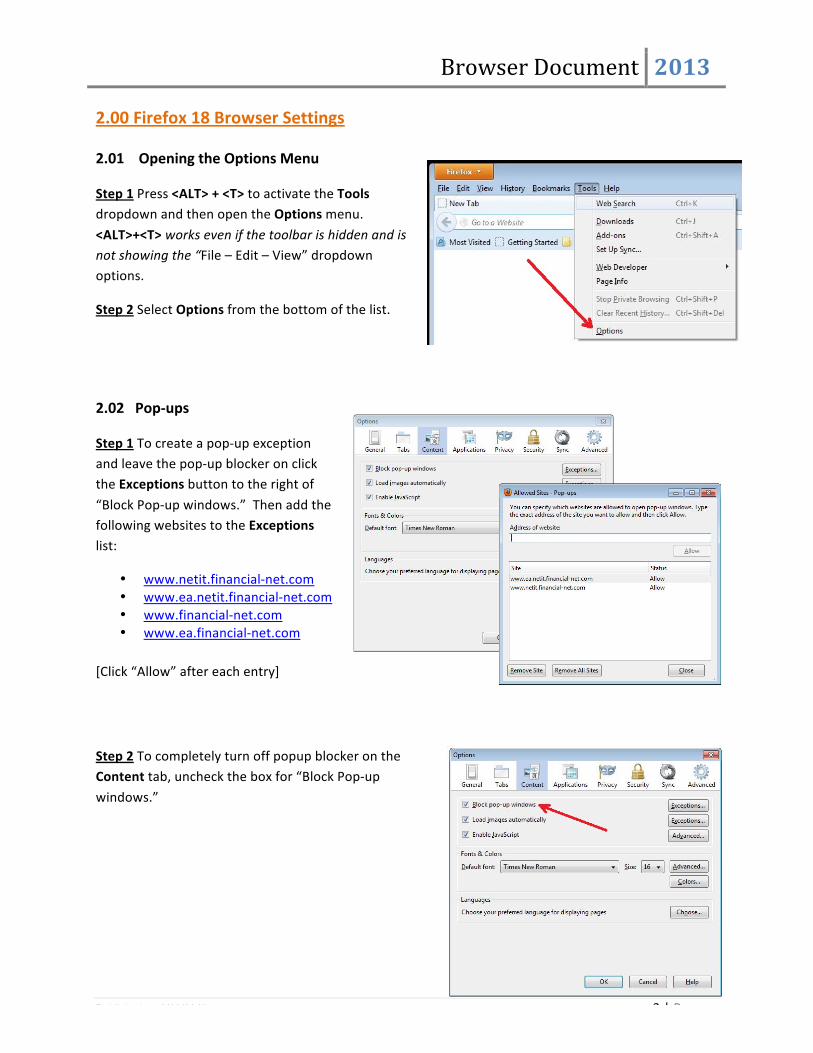
2.01 Opening the Options Menu
Step 1 Press <ALT> + <T> to activate the Tools dropdown and then open the Options menu.
<ALT>+<T> works even if the toolbar is hidden and is not showing the “File – Edit – View” dropdown options.
Step 2 Select Options from the bottom of the list.
2.02 Pop-‐ups
Step 1 To create a pop-‐up exception and leave the pop-‐up blocker on click the Exceptions button to the right of
“Block Pop-‐up windows.” Then add the following websites to the Exceptions list:
• www.netit.financial-‐net.com • www.ea.netit.financial-‐net.com • www.financial-‐net.com • www.ea.financial-‐net.com
[Click “Allow” after each entry]
Step 2 To completely turn off popup blocker on the Content tab, uncheck the box for “Block Pop-‐up
windows.”
Browser Document 2013
Published on 3/18/2013 4 | P a g e
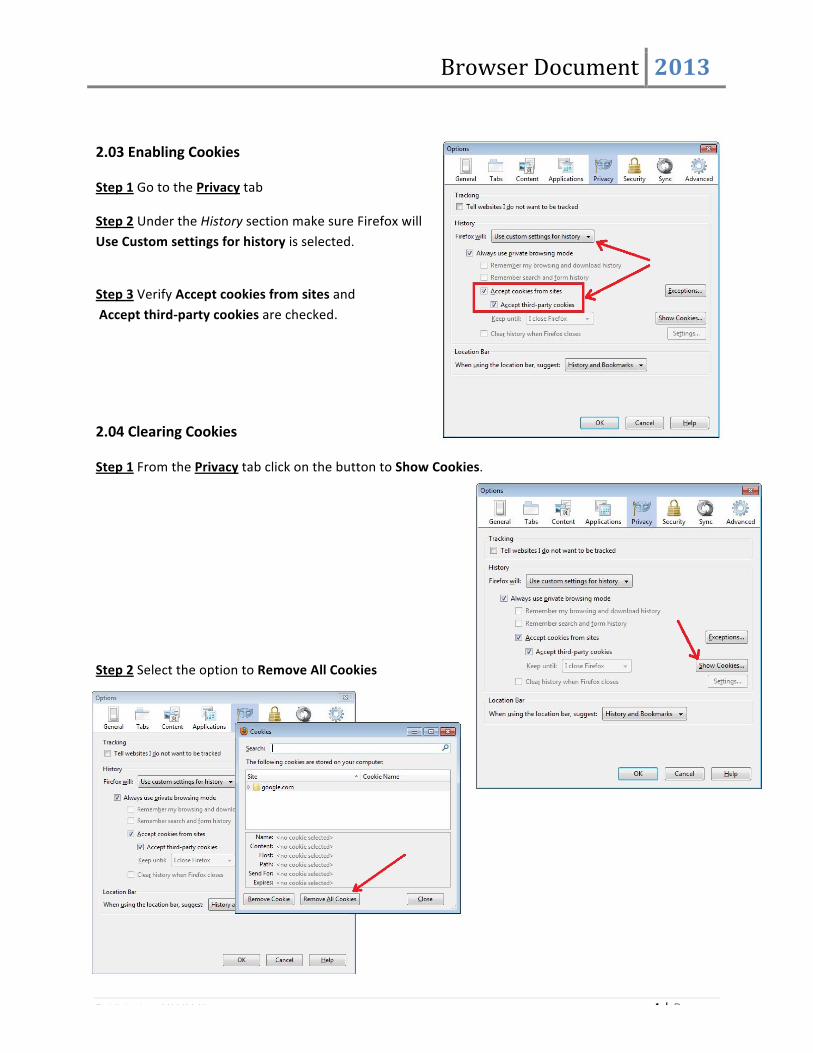
2.03 Enabling Cookies
Step 1 Go to the Privacy tab
Step 2 Under the History section make sure Firefox will Use Custom settings for history is selected.
Step 3 Verify Accept cookies from sites and Accept third-‐party cookies are checked.
2.04 Clearing Cookies
Step 1 From the Privacy tab click on the button to Show Cookies.
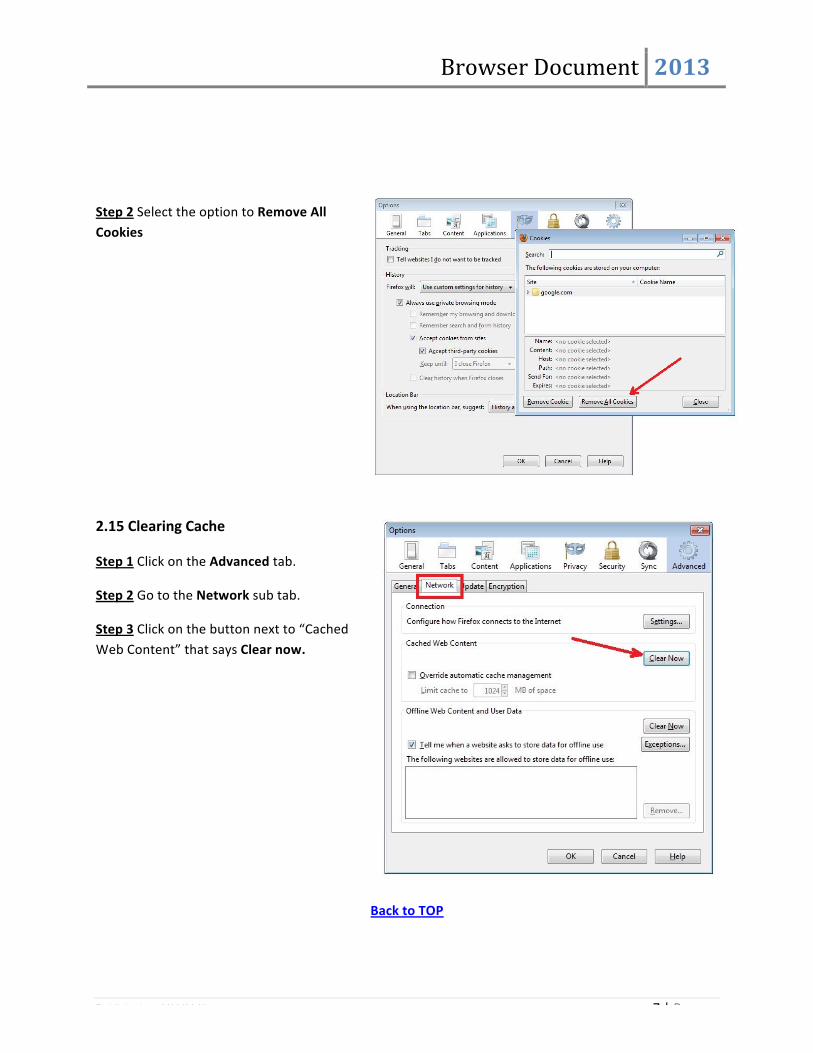
Step 2 Select the option to Remove All Cookies
Browser Document 2013
Published on 3/18/2013 5 | P a g e
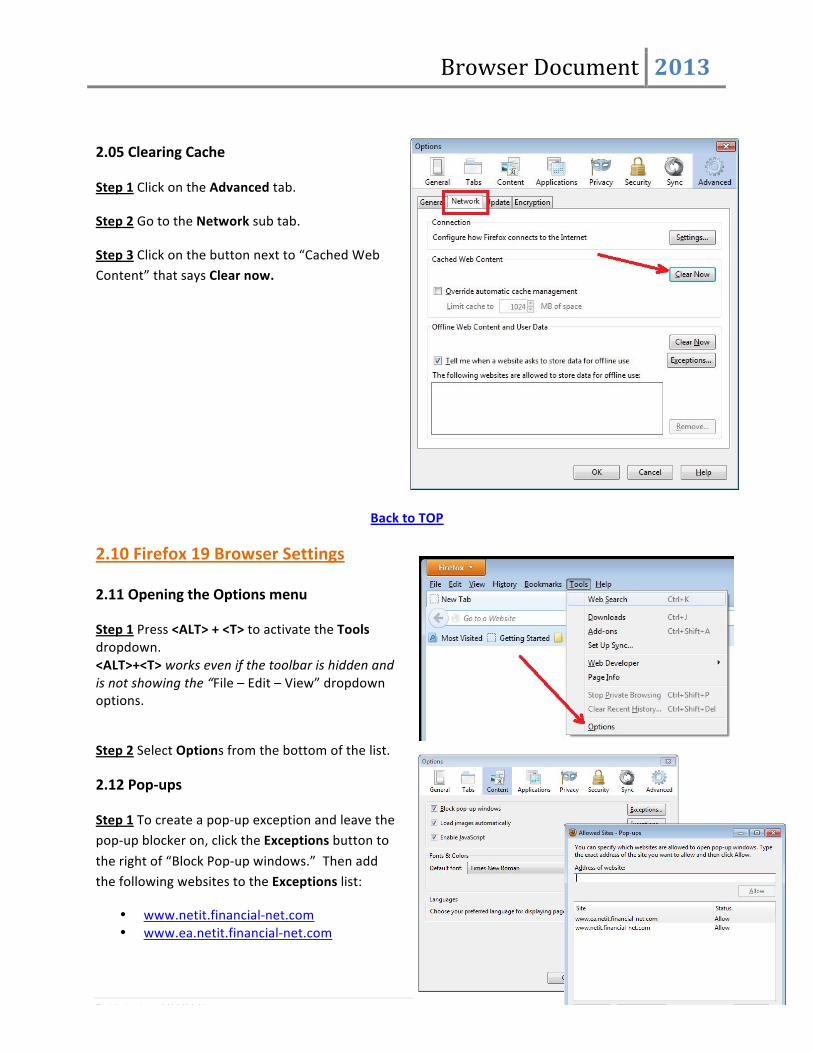
2.05 Clearing Cache
Step 1 Click on the Advanced tab.
Step 2 Go to the Network sub tab.
Step 3 Click on the button next to “Cached Web Content” that says Clear now.
Back to TOP
2.10 Firefox 19 Browser Settings
2.11 Opening the Options menu
Step 1 Press <ALT> + <T> to activate the Tools dropdown. <ALT>+<T> works even if the toolbar is hidden and is not showing the “File – Edit – View” dropdown options.
Step 2 Select Options from the bottom of the list.
2.12 Pop-‐ups
Step 1 To create a pop-‐up exception and leave the pop-‐up blocker on, click the Exceptions button to
the right of “Block Pop-‐up windows.” Then add the following websites to the Exceptions list:
• www.netit.financial-‐net.com • www.ea.netit.financial-‐net.com
Browser Document 2013
Published on 3/18/2013 6 | P a g e
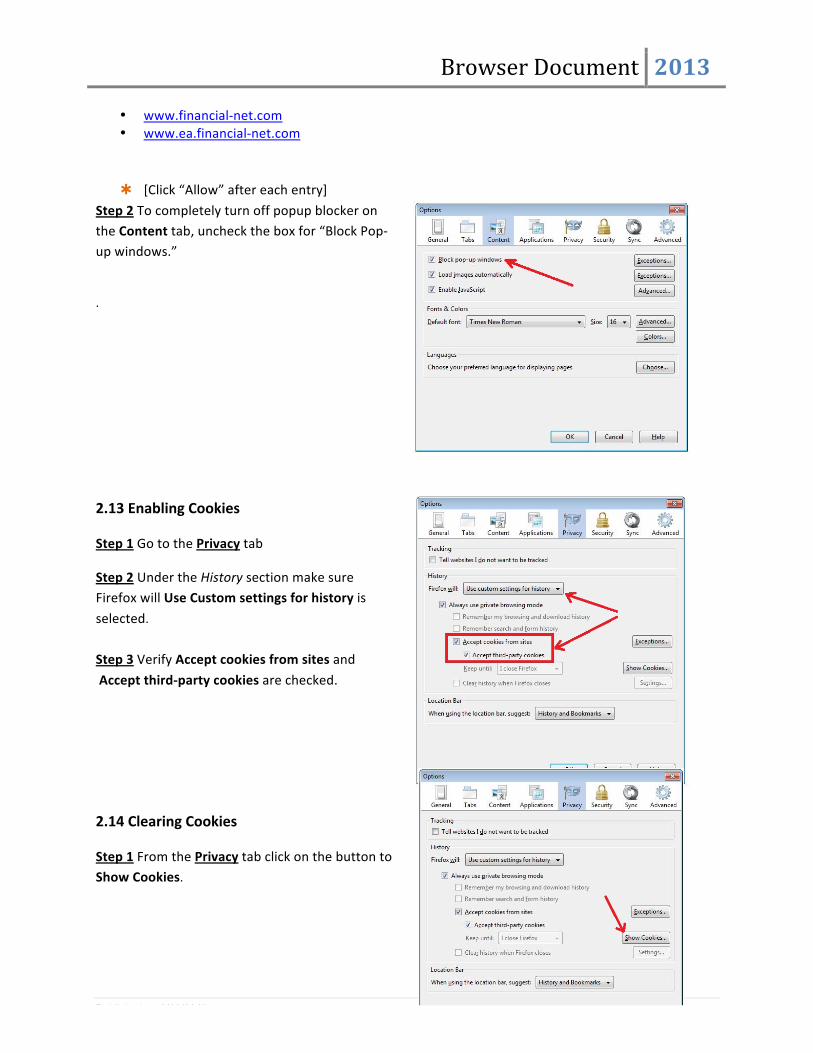
• www.financial-‐net.com • www.ea.financial-‐net.com
! [Click “Allow” after each entry]
Step 2 To completely turn off popup blocker on the Content tab, uncheck the box for “Block Pop-‐up windows.”
.
2.13 Enabling Cookies
Step 1 Go to the Privacy tab
Step 2 Under the History section make sure Firefox will Use Custom settings for history is
selected. Step 3 Verify Accept cookies from sites and
Accept third-‐party cookies are checked.
2.14 Clearing Cookies
Step 1 From the Privacy tab click on the button to Show Cookies.
Browser Document 2013
Published on 3/18/2013 7 | P a g e
Step 2 Select the option to Remove All Cookies
2.15 Clearing Cache
Step 1 Click on the Advanced tab.
Step 2 Go to the Network sub tab.
Step 3 Click on the button next to “Cached Web Content” that says Clear now.
Back to TOP
Browser Document 2013
Published on 3/18/2013 8 | P a g e
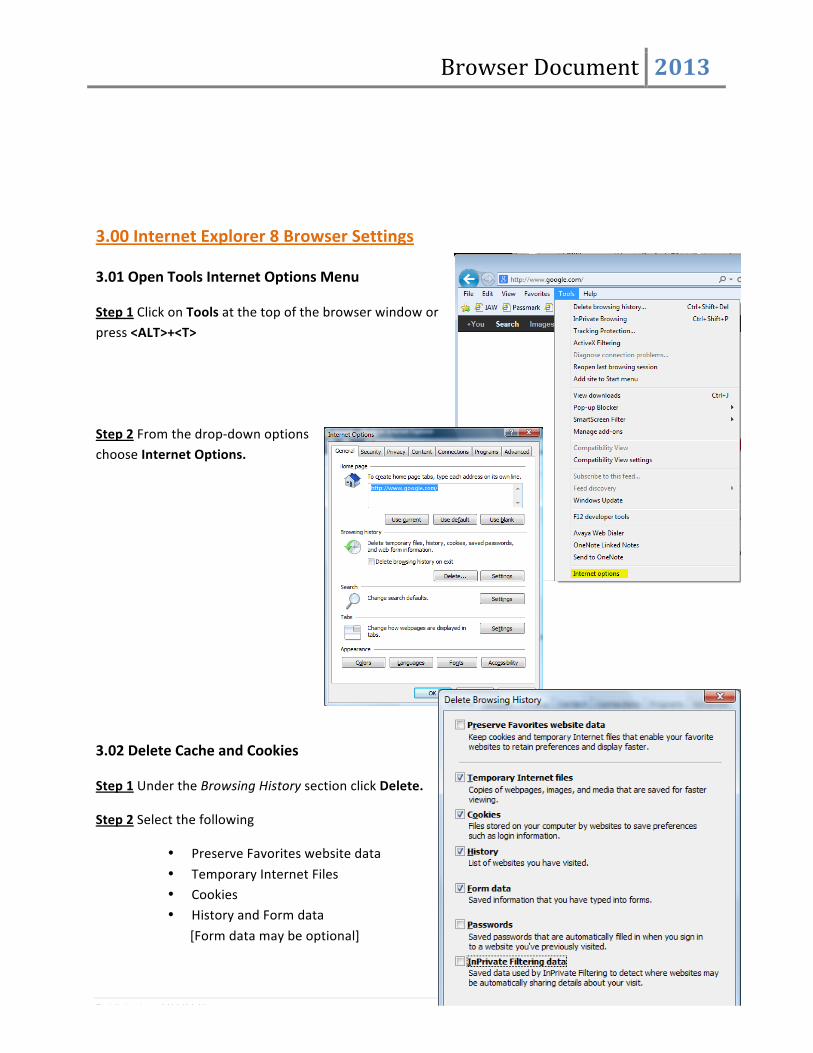
3.00 Internet Explorer 8 Browser Settings
3.01 Open Tools Internet Options Menu
Step 1 Click on Tools at the top of the browser window or press <ALT>+<T>
Step 2 From the drop-‐down options choose Internet Options.
3.02 Delete Cache and Cookies
Step 1 Under the Browsing History section click Delete.
Step 2 Select the following
• Preserve Favorites website data
• Temporary Internet Files • Cookies • History and Form data
[Form data may be optional]
Browser Document 2013
Published on 3/18/2013 9 | P a g e
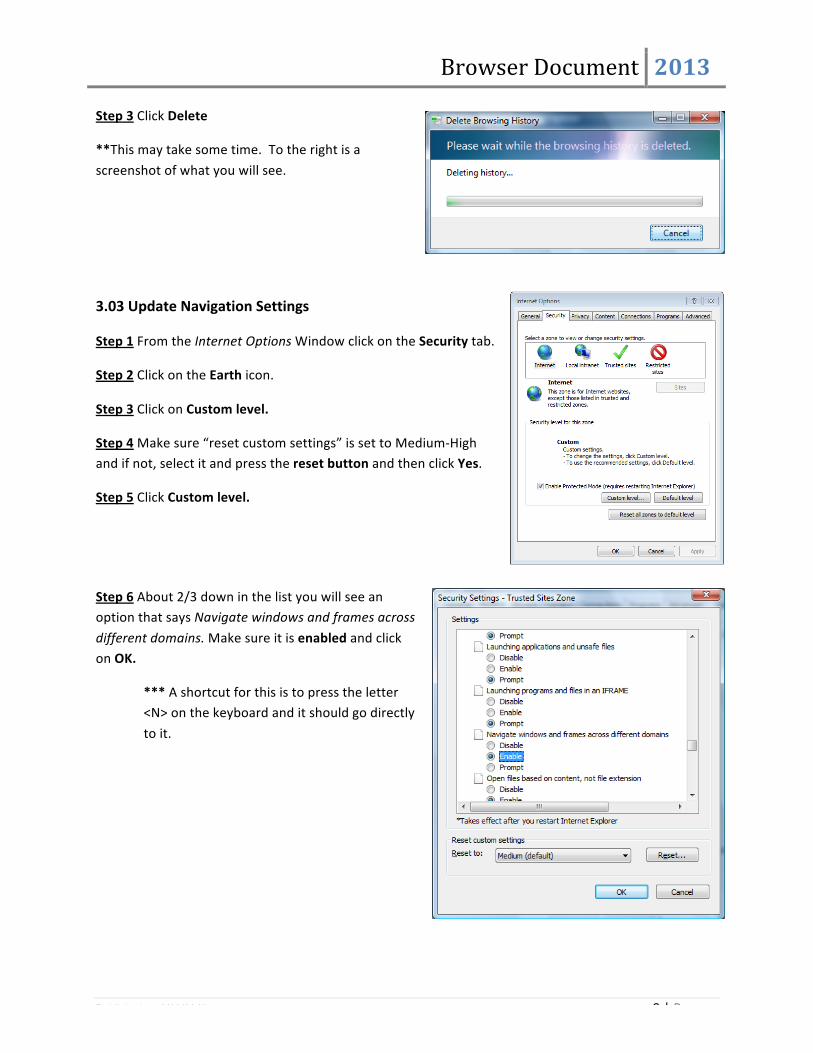
Step 3 Click Delete
**This may take some time. To the right is a
screenshot of what you will see.
3.03 Update Navigation Settings
Step 1 From the Internet Options Window click on the Security tab.
Step 2 Click on the Earth icon.
Step 3 Click on Custom level.
Step 4 Make sure “reset custom settings” is set to Medium-‐High and if not, select it and press the reset button and then click Yes.
Step 5 Click Custom level.
Step 6 About 2/3 down in the list you will see an option that says Navigate windows and frames across
different domains. Make sure it is enabled and click on OK.
*** A shortcut for this is to press the letter <N> on the keyboard and it should go directly
to it.
Browser Document 2013
Published on 3/18/2013 10 | P a g e
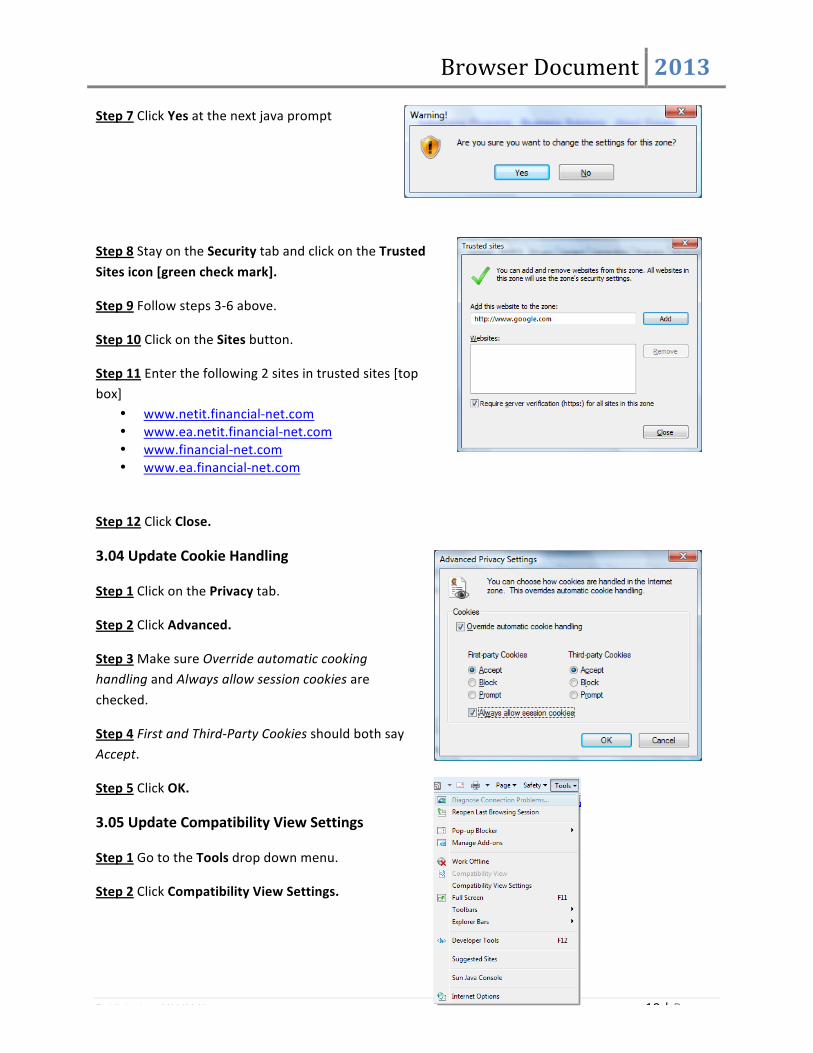
Step 7 Click Yes at the next java prompt
Step 8 Stay on the Security tab and click on the Trusted
Sites icon [green check mark].
Step 9 Follow steps 3-‐6 above.
Step 10 Click on the Sites button.
Step 11 Enter the following 2 sites in trusted sites [top box]
• www.netit.financial-‐net.com • www.ea.netit.financial-‐net.com • www.financial-‐net.com • www.ea.financial-‐net.com
Step 12 Click Close.
3.04 Update Cookie Handling
Step 1 Click on the Privacy tab.
Step 2 Click Advanced.
Step 3 Make sure Override automatic cooking handling and Always allow session cookies are
checked.
Step 4 First and Third-‐Party Cookies should both say Accept.
Step 5 Click OK.
3.05 Update Compatibility View Settings
Step 1 Go to the Tools drop down menu.
Step 2 Click Compatibility View Settings.
Browser Document 2013
Published on 3/18/2013 11 | P a g e
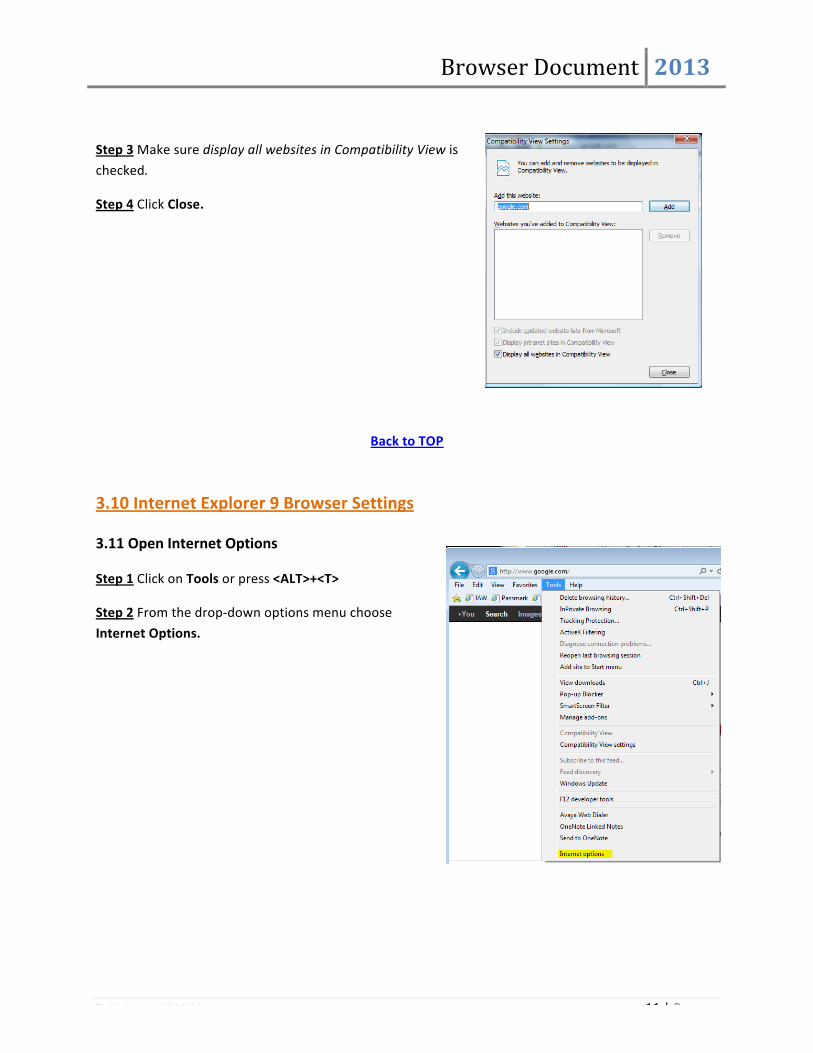
Step 3 Make sure display all websites in Compatibility View is
checked.
Step 4 Click Close.
Back to TOP
3.10 Internet Explorer 9 Browser Settings
3.11 Open Internet Options
Step 1 Click on Tools or press <ALT>+<T>
Step 2 From the drop-‐down options menu choose
Internet Options.
Browser Document 2013
Published on 3/18/2013 12 | P a g e
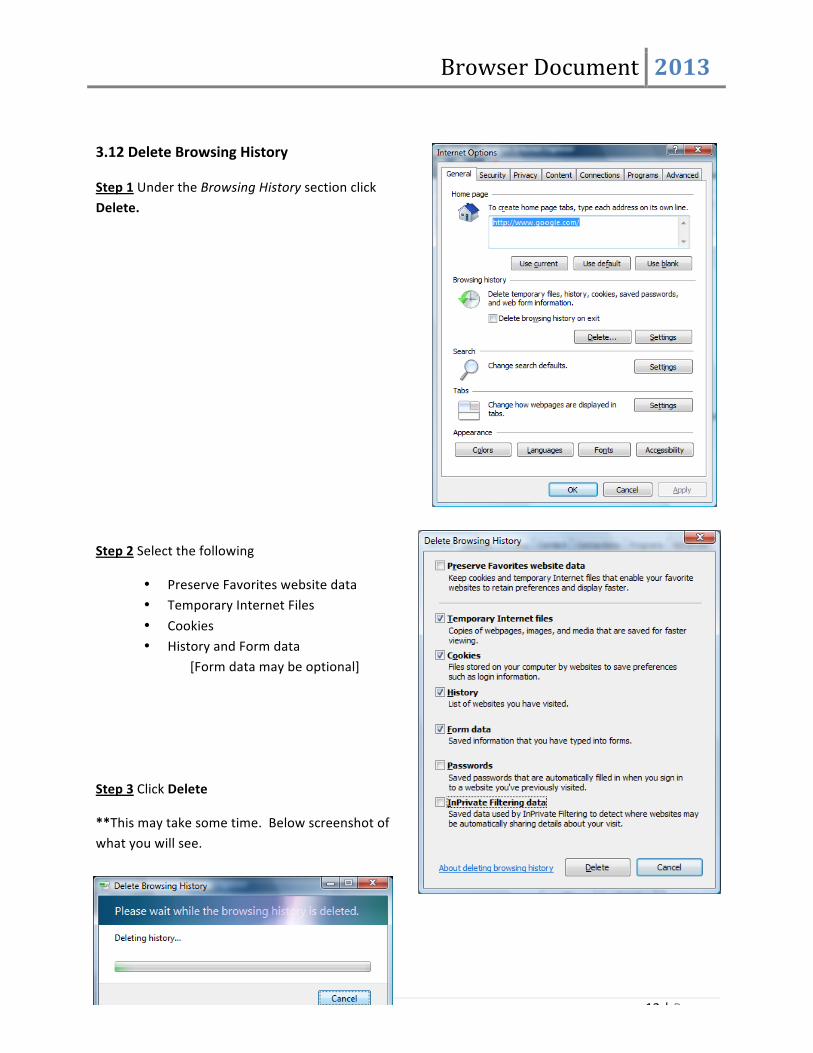
3.12 Delete Browsing History
Step 1 Under the Browsing History section click Delete.
Step 2 Select the following
• Preserve Favorites website data • Temporary Internet Files
• Cookies • History and Form data [Form data may be optional]
Step 3 Click Delete
**This may take some time. Below screenshot of what you will see.

Browser Document 2013
Published on 3/18/2013 13 | P a g e
3.13 Update Navigation Settings
Step 1 From the Internet Options Window click on the Security tab.
Step 2 Click on the Earth icon.
Step 3 Click on Custom level.
Step 4 Make sure “reset custom settings” is set to
Medium-‐High and if not, select it and press the reset button and then click Yes.
Step 5 Click Custom level.
Step 6 About 2/3 down in the list you will see an option that says Navigate windows and frames across different domains. Make sure it is enabled
and click on OK.
*** A shortcut for this is to press the letter <N> on the keyboard and it should go directly to it.
.
Step 7 Click Yes at the next java prompt
Browser Document 2013
Published on 3/18/2013 14 | P a g e
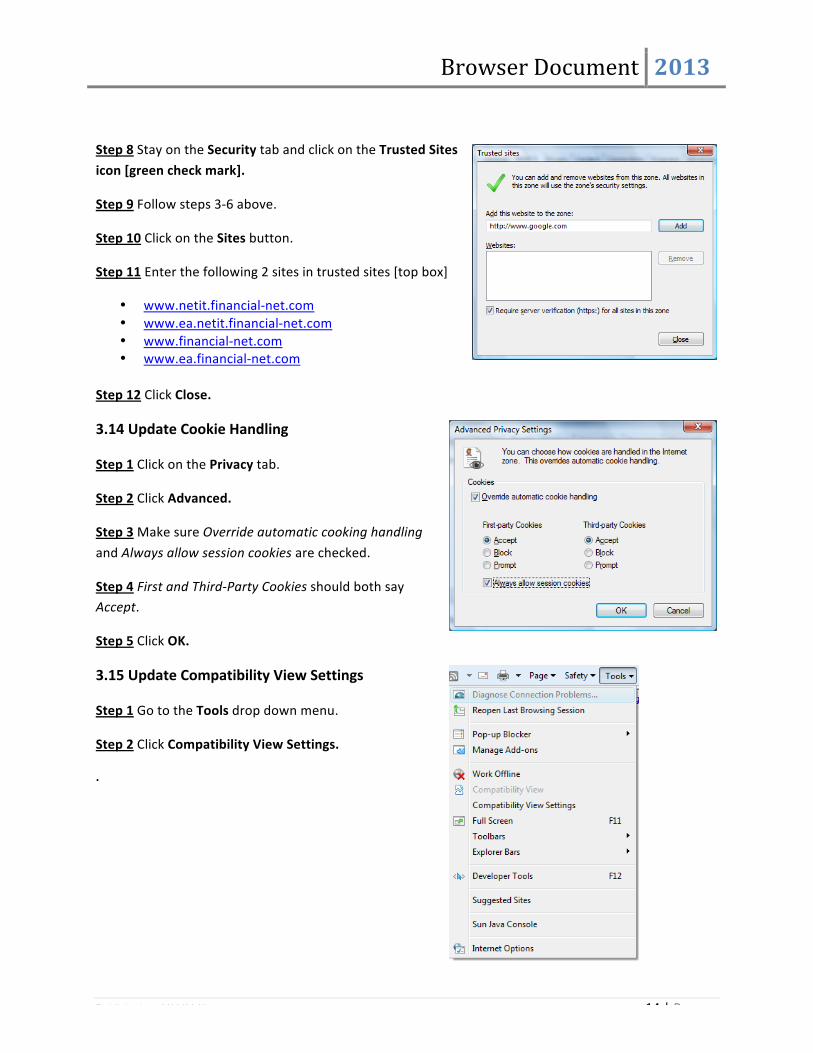
Step 8 Stay on the Security tab and click on the Trusted Sites
icon [green check mark].
Step 9 Follow steps 3-‐6 above.
Step 10 Click on the Sites button.
Step 11 Enter the following 2 sites in trusted sites [top box]
• www.netit.financial-‐net.com • www.ea.netit.financial-‐net.com • www.financial-‐net.com • www.ea.financial-‐net.com
Step 12 Click Close.
3.14 Update Cookie Handling
Step 1 Click on the Privacy tab.
Step 2 Click Advanced.
Step 3 Make sure Override automatic cooking handling
and Always allow session cookies are checked.
Step 4 First and Third-‐Party Cookies should both say Accept.
Step 5 Click OK.
3.15 Update Compatibility View Settings
Step 1 Go to the Tools drop down menu.
Step 2 Click Compatibility View Settings.
.
Browser Document 2013
Published on 3/18/2013 15 | P a g e
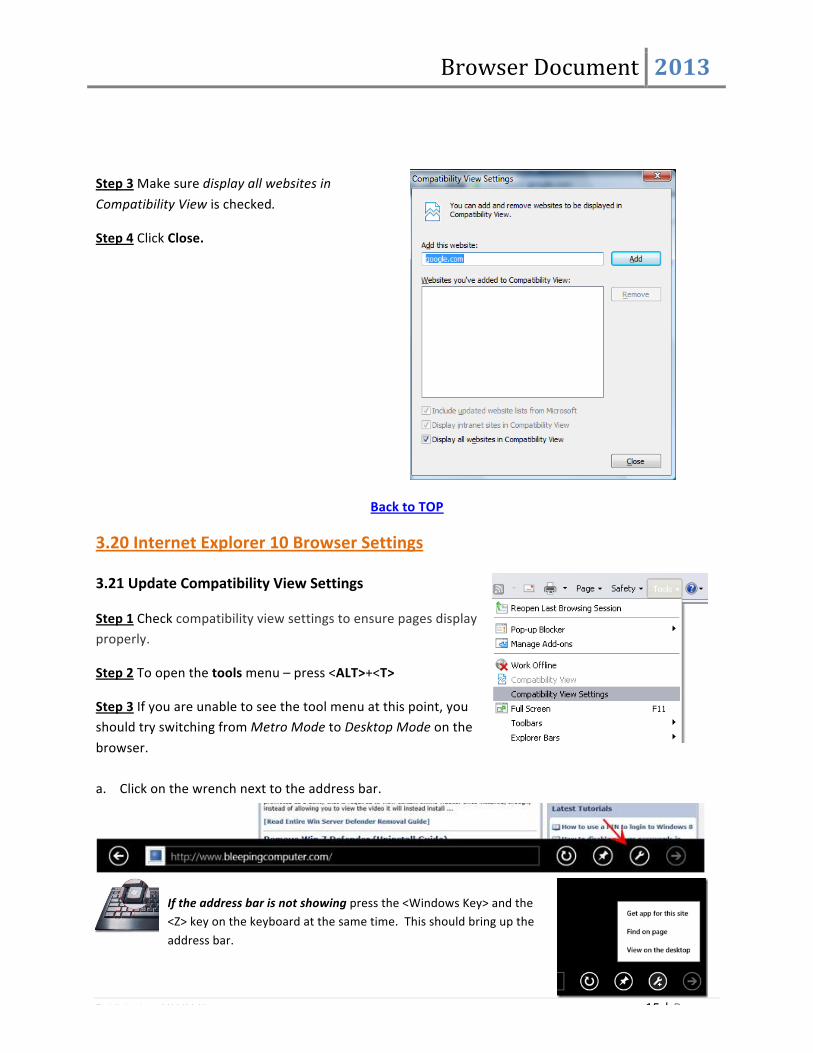
Step 3 Make sure display all websites in
Compatibility View is checked.
Step 4 Click Close.
Back to TOP
3.20 Internet Explorer 10 Browser Settings
3.21 Update Compatibility View Settings
Step 1 Check compatibility view settings to ensure pages display properly.
Step 2 To open the tools menu – press <ALT>+<T>
Step 3 If you are unable to see the tool menu at this point, you should try switching from Metro Mode to Desktop Mode on the
browser. a. Click on the wrench next to the address bar.
If the address bar is not showing press the <Windows Key> and the <Z> key on the keyboard at the same time. This should bring up the
address bar.
Browser Document 2013
Published on 3/18/2013 16 | P a g e
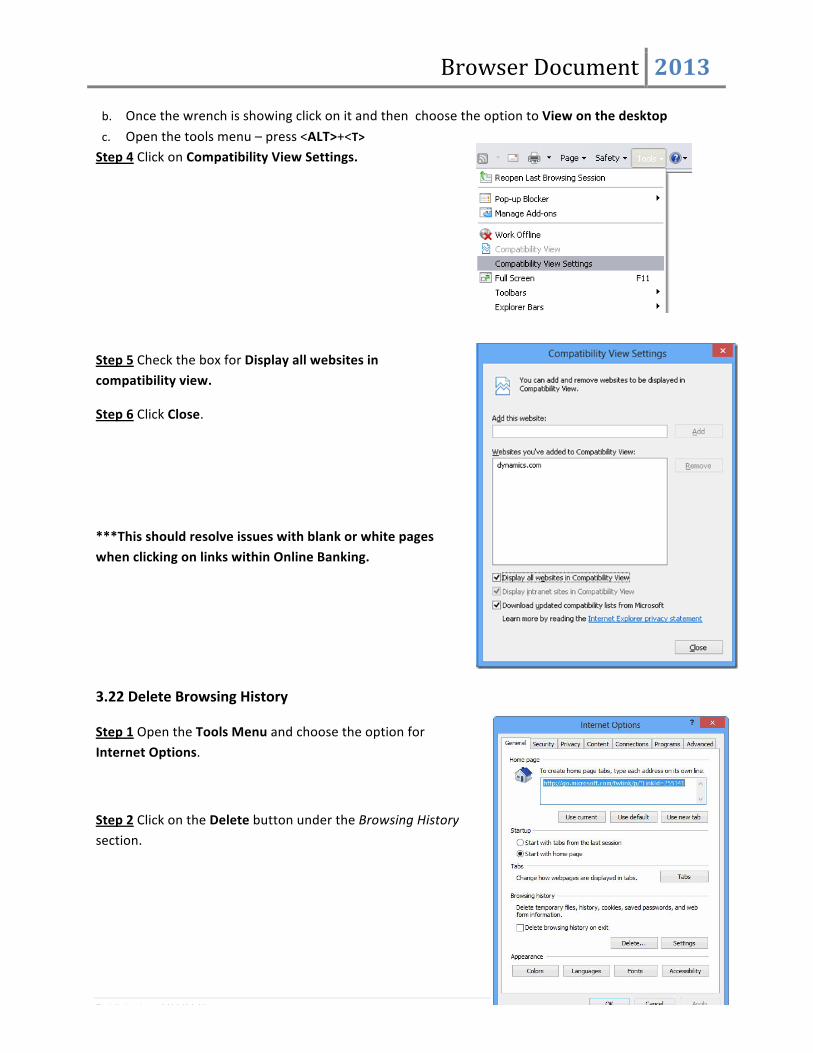
b. Once the wrench is showing click on it and then choose the option to View on the desktop
c. Open the tools menu – press <ALT>+<T> Step 4 Click on Compatibility View Settings.
Step 5 Check the box for Display all websites in compatibility view.
Step 6 Click Close.
***This should resolve issues with blank or white pages when clicking on links within Online Banking.
3.22 Delete Browsing History
Step 1 Open the Tools Menu and choose the option for Internet Options.
Step 2 Click on the Delete button under the Browsing History section.
Browser Document 2013
Published on 3/18/2013 17 | P a g e
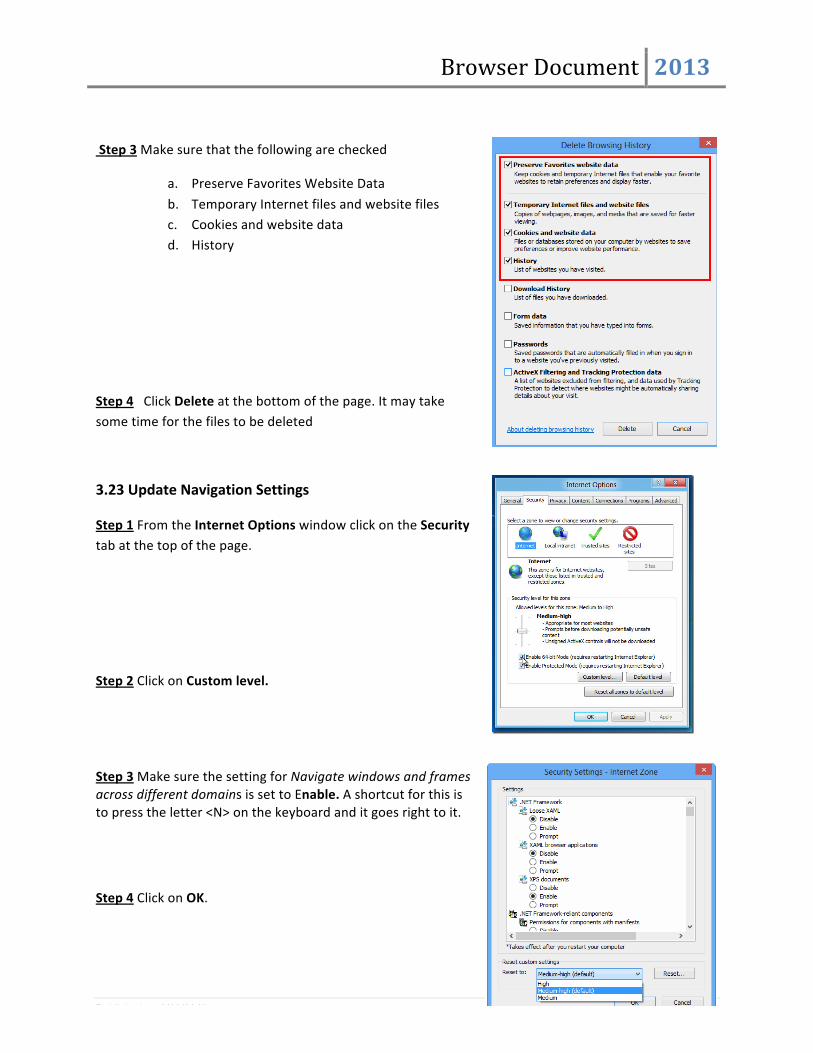
Step 3 Make sure that the following are checked
a. Preserve Favorites Website Data
b. Temporary Internet files and website files c. Cookies and website data d. History
Step 4 Click Delete at the bottom of the page. It may take some time for the files to be deleted
3.23 Update Navigation Settings
Step 1 From the Internet Options window click on the Security tab at the top of the page.
Step 2 Click on Custom level.
Step 3 Make sure the setting for Navigate windows and frames across different domains is set to Enable. A shortcut for this is to press the letter <N> on the keyboard and it goes right to it.
Step 4 Click on OK.
Browser Document 2013
Published on 3/18/2013 18 | P a g e
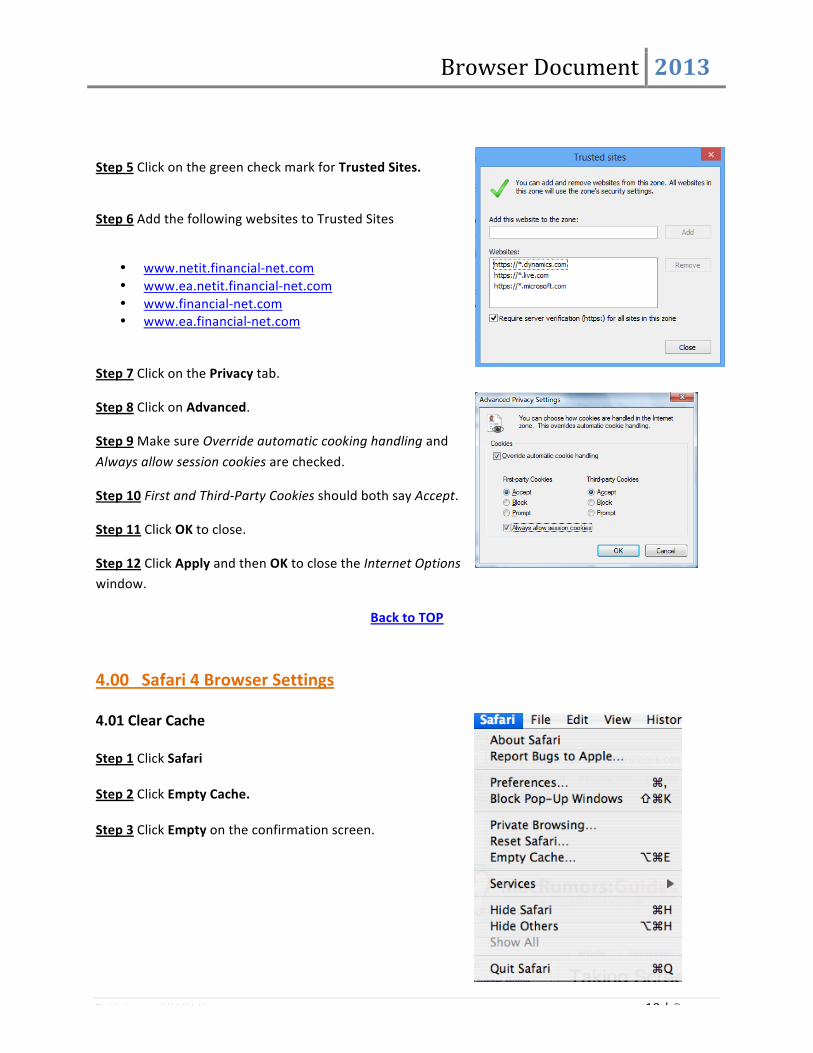
Step 5 Click on the green check mark for Trusted Sites.
Step 6 Add the following websites to Trusted Sites
• www.netit.financial-‐net.com • www.ea.netit.financial-‐net.com • www.financial-‐net.com • www.ea.financial-‐net.com
Step 7 Click on the Privacy tab.
Step 8 Click on Advanced.
Step 9 Make sure Override automatic cooking handling and
Always allow session cookies are checked.
Step 10 First and Third-‐Party Cookies should both say Accept.
Step 11 Click OK to close.
Step 12 Click Apply and then OK to close the Internet Options window.
Back to TOP
4.00 Safari 4 Browser Settings 4.01 Clear Cache Step 1 Click Safari Step 2 Click Empty Cache. Step 3 Click Empty on the confirmation screen.
Browser Document 2013
Published on 3/18/2013 19 | P a g e
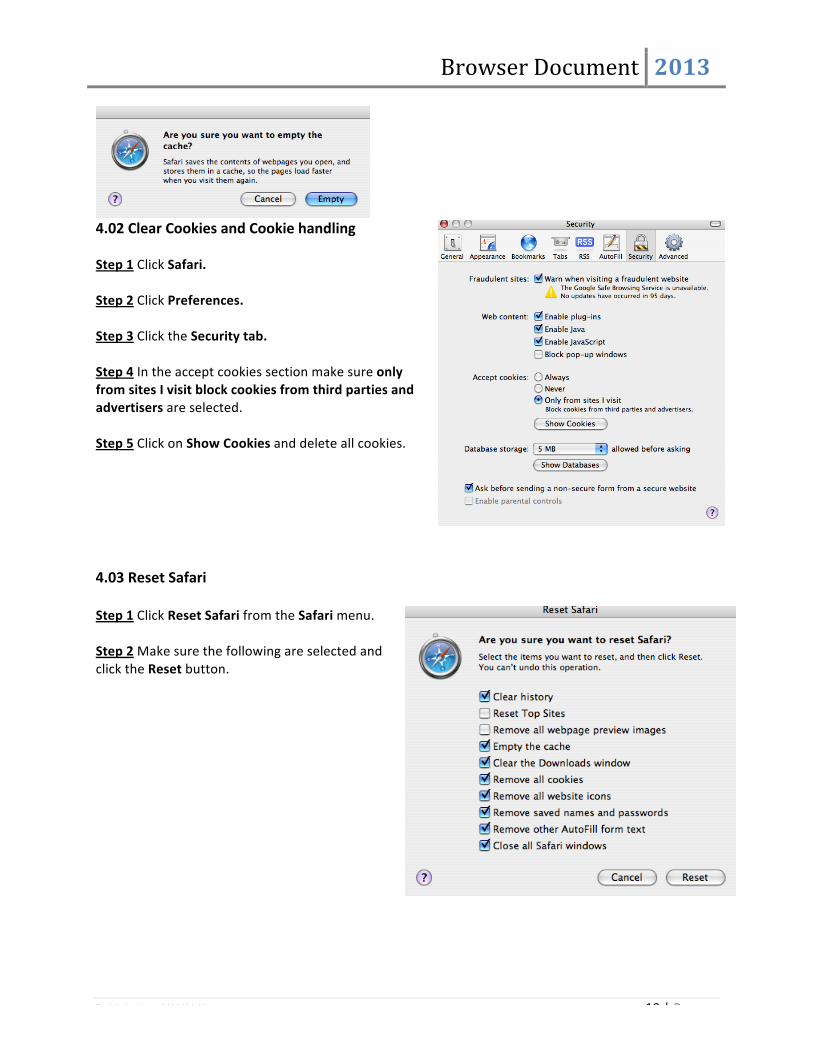
4.02 Clear Cookies and Cookie handling Step 1 Click Safari. Step 2 Click Preferences. Step 3 Click the Security tab. Step 4 In the accept cookies section make sure only from sites I visit block cookies from third parties and advertisers are selected. Step 5 Click on Show Cookies and delete all cookies. 4.03 Reset Safari Step 1 Click Reset Safari from the Safari menu. Step 2 Make sure the following are selected and click the Reset button.
Browser Document 2013
Published on 3/18/2013 20 | P a g e
Back to TOP
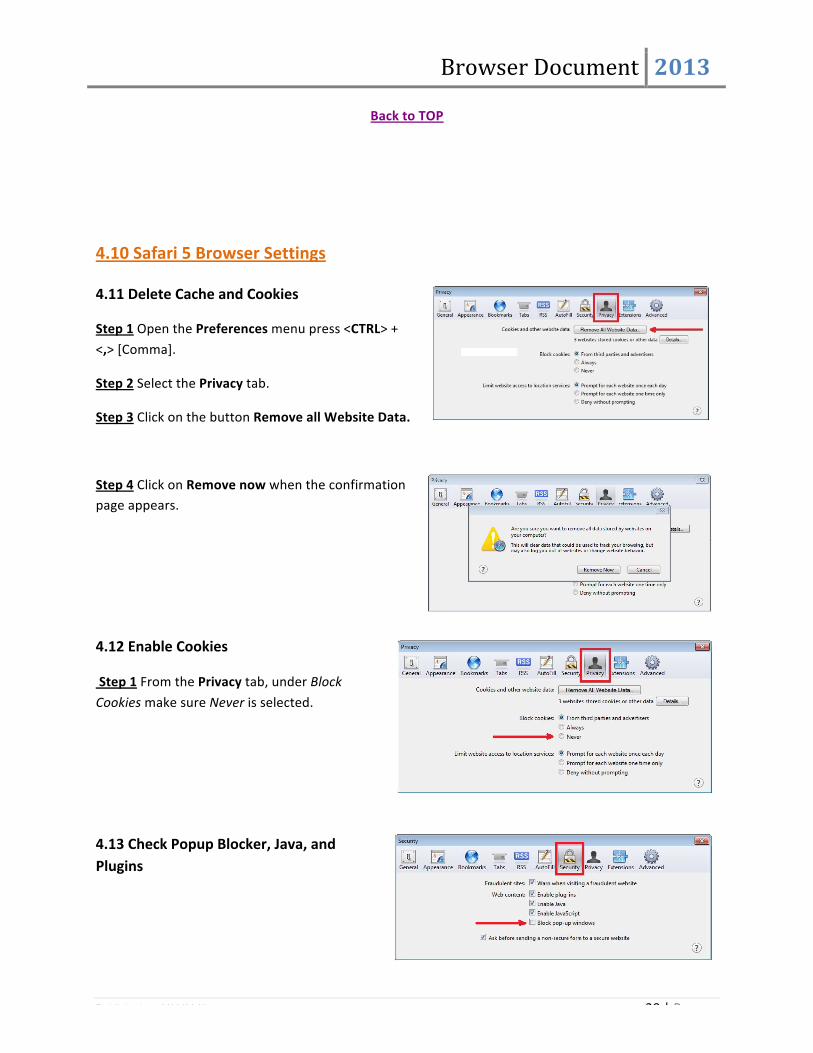
4.10 Safari 5 Browser Settings
4.11 Delete Cache and Cookies
Step 1 Open the Preferences menu press <CTRL> +
<,> [Comma].
Step 2 Select the Privacy tab.
Step 3 Click on the button Remove all Website Data.
Step 4 Click on Remove now when the confirmation page appears.
4.12 Enable Cookies
Step 1 From the Privacy tab, under Block
Cookies make sure Never is selected.
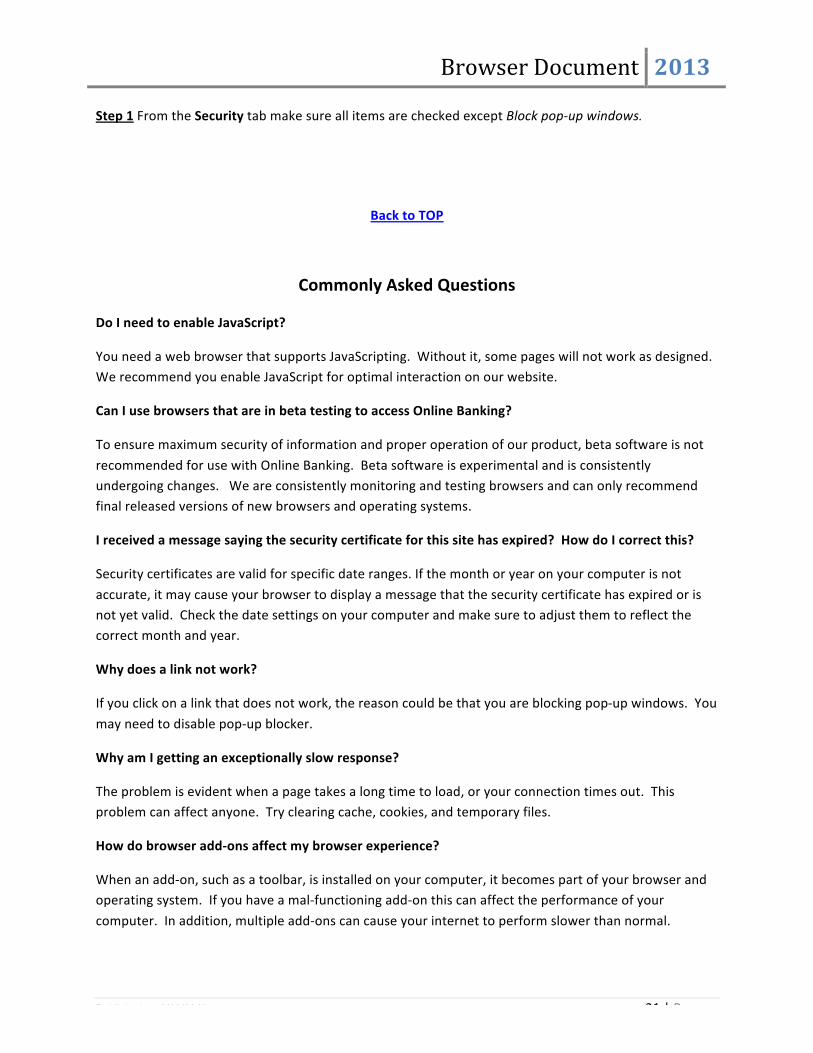
4.13 Check Popup Blocker, Java, and Plugins
Browser Document 2013
Published on 3/18/2013 21 | P a g e
Step 1 From the Security tab make sure all items are checked except Block pop-‐up windows.
Back to TOP
Commonly Asked Questions
Do I need to enable JavaScript?
You need a web browser that supports JavaScripting. Without it, some pages will not work as designed. We recommend you enable JavaScript for optimal interaction on our website.
Can I use browsers that are in beta testing to access Online Banking?
To ensure maximum security of information and proper operation of our product, beta software is not
recommended for use with Online Banking. Beta software is experimental and is consistently undergoing changes. We are consistently monitoring and testing browsers and can only recommend final released versions of new browsers and operating systems.
I received a message saying the security certificate for this site has expired? How do I correct this?
Security certificates are valid for specific date ranges. If the month or year on your computer is not
accurate, it may cause your browser to display a message that the security certificate has expired or is not yet valid. Check the date settings on your computer and make sure to adjust them to reflect the correct month and year.
Why does a link not work?
If you click on a link that does not work, the reason could be that you are blocking pop-‐up windows. You
may need to disable pop-‐up blocker.
Why am I getting an exceptionally slow response?
The problem is evident when a page takes a long time to load, or your connection times out. This problem can affect anyone. Try clearing cache, cookies, and temporary files.
How do browser add-‐ons affect my browser experience?
When an add-‐on, such as a toolbar, is installed on your computer, it becomes part of your browser and operating system. If you have a mal-‐functioning add-‐on this can affect the performance of your
computer. In addition, multiple add-‐ons can cause your internet to perform slower than normal.

Browser Document 2013
Published on 3/18/2013 22 | P a g e
Back to TOP