Embed Size (px)
Citation preview
BOXING STAND OWNER’S MANUAL
FOR MODEL : FW3015

Introduction
Important Precautions
Before You Begin
Assembly Instructions
Conditioning Guidelines
3
4
5
8
12
CONGRATULATIONS and THANK YOU for your purchase of this Treo Boxing Stand!
Whether your goal is to tone your muscles, increase your strength or simply enjoy a fuller, healthierlifestyle, a Treo Boxing Stand can help you attain it. We’re committed to designing fitness equipment from the inside out, so we use only the highest quality components.
You want exercise equipment that offers the most comfort, the best reliability and the highest quality in itsclass. A Treo Boxing Stand delivers!
INTRODUCTION
TABLE OF CONTENTS
3
SAVE THESE INSTRUCTIONSRead all instructions before using this Treo Boxing Stand. It is the responsibility of the owner to ensure that all users of this Boxing Stand are adequately informed of all warnings and precautions.
Close supervision is necessary when this Boxing Stand is used by, on, or near children or disable persons.Use this appliance (or Boxing Stand) only for its intended use as described in this manual. Do not use heavy bag weighing more than 60kg.Never drop or insert any object into any opening.The Boxing Stand is intended for in-home use only. Do not use this Boxing Stand in any commercial, rental, school or institutional setting. Failure to comply will void the warranty.Do not use outdoors.Keep the Treo Boxing Stand indoors, away from moisture and dust. Place the Treo Boxing Stand on a leveled surface, with a mat beneath it to protect the floor or carpet. Make sure that there is enough clearance around the Treo Boxing Stand to mount, dismount, and use the Treo Boxing Stand.Keep hands and feet away from moving parts.
IMPORTANT PRECAUTONS
FOR HOUSEHOLD USE ONLY
TO REDUCE THE RISK OF INJURY TO PERSONS:
At NO time should pets or children under the age of 12 be closer to the Boxing Stand than 3 m (10 feet).At NO time should children under the age of 12 use the Boxing Stand.Children over the age of 12 should not use the Boxing Stand without adult supervision.
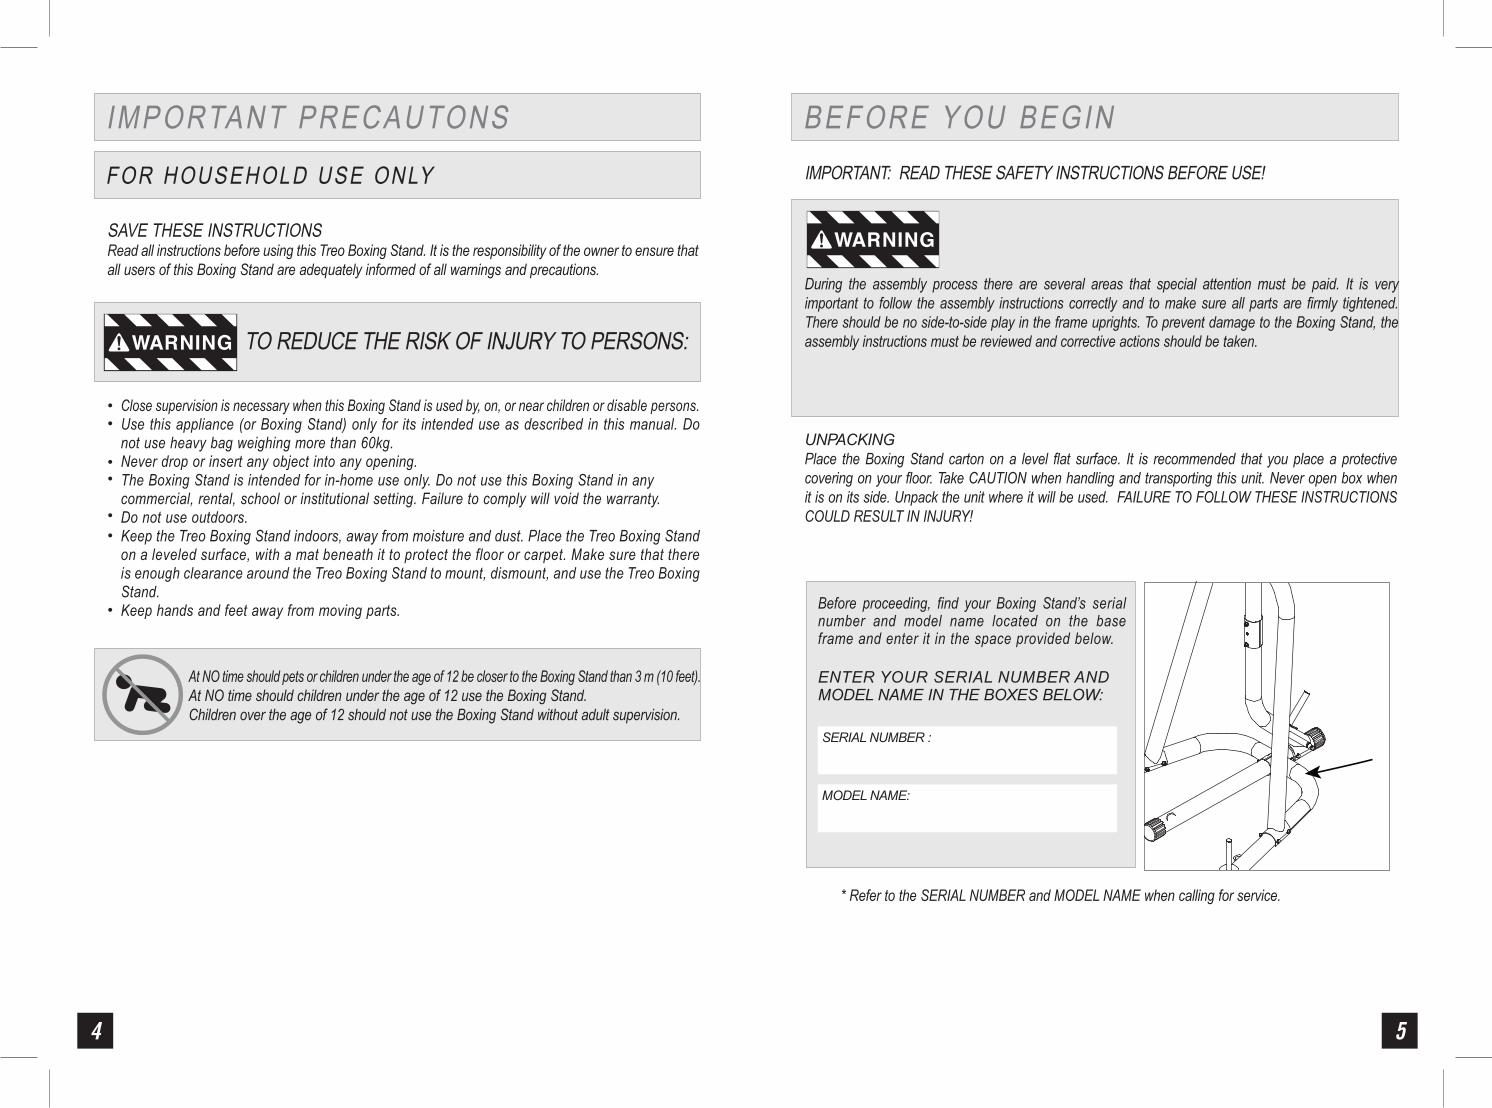
IMPORTANT: READ THESE SAFETY INSTRUCTIONS BEFORE USE!
UNPACKINGPlace the Boxing Stand carton on a level flat surface. It is recommended that you place a protective covering on your floor. Take CAUTION when handling and transporting this unit. Never open box when it is on its side. Unpack the unit where it will be used. FAILURE TO FOLLOW THESE INSTRUCTIONS COULD RESULT IN INJURY!
* Refer to the SERIAL NUMBER and MODEL NAME when calling for service.
BEFORE YOU BEGIN
During the assembly process there are several areas that special attention must be paid. It is very important to follow the assembly instructions correctly and to make sure all parts are firmly tightened. There should be no side-to-side play in the frame uprights. To prevent damage to the Boxing Stand, the assembly instructions must be reviewed and corrective actions should be taken.
Before proceeding, find your Boxing Stand’s serial number and model name located on the base frame and enter it in the space provided below.
ENTER YOUR SERIAL NUMBER AND MODEL NAME IN THE BOXES BELOW:
SERIAL NUMBER :
MODEL NAME:
54
WARNING
WARNING
• •
• •
• •
•

76
PARTS LISTDESCRIPTIONITEM NO# QTY
1R1L234R4L56789101112131415161718192021222324252627282930313233343536
11111112111414112241443117125114222124422
RIGHT BASE STABILIZERLEFT BASE STABILIZERCENTER BASE FRAMEHEAVY BAG SUPPORT FRAMERIGHT VERTICAL SUPPORTLEFT VERTICAL SUPPORTCURVED LOWER UPRIGHT TUBEROD-BOLT DOWN WEIGHT HORNREAR WEIGHT HORNSPEED BAG SUPPORT FRAMET-LOCK PIN1/4” x 1-1/2” ALLEN BOLTSPEED BAG PLATFORMM8 x 50 ALLEN BOLTSWIVEL HOOKSWIVEL KITSQUARE PLASTIC BUSHINGSQUARE INNER CAPROUND FOOT CAPSPRING PIN1/4” LOCKNUT1/4” WASHER3/8” WASHER3/8” LOCKNUT3/8” x 3-7/8” HEX BOLT1” ROUND INNER CAPHEAVY BAG EYE BOLTSIT-UP ROD25 x 50 END CAPFOAM COVERANCHOR BRACKETSPEED BAG PLATFORM SUPPORT TUBEBALL HEAD END CAP3/8” x 4” HEX BOLTM8 LOCKNUTM8 WASHERREINFORCEMENT PLATE3/8” x 4-1/8” ALLEN BOLT

98
ASSEMBLY INSTRUCTIONS
STEP 1Mount the LEFT BASE STABILIZER (1L) and RIGHT BASE STABILIZER (1R) on to the CENTER BASE FRAME (2), align and secure them with 2 x HEX BOLTS (23), 4 x WASHERS (21) AND 2 x LOCKNUTS (22) as shown in diagram below.If needed, insert the ROUND FOOT CAPS (17) into each ends of the BASE TUBES (1R,1L).
STEP 2Attach the Mounting Bracket of CURVED LOWER UPRIGHT TUBE (5) on the CENTER BASE FRAME(2) by using 2 x HEX BOLTS (23), 4 x WASHERS(21) and 2 x LOCKNUTS (22).
STEP 3Mount the ROD-BOLT DOWN WEIGHT HORNS (6) and ANCHOR BRACKETS (29) on each ends of BASE STABILIZER (1R,1L) by using 2 x HEX BOLTS (32) , 4 x WASHERS (21) and 2 x LOCKNUTS (22).
STEP 4Insert SIT-UP ROD (26) through the CURVED LOWER UPRIGHT TUBE (5), then secure the REAR WEIGHT HORN (7) to CURVED LOWER UPRIGHT TUBE (5).Insert 1” ROUND INNER CAP (24) if needed.
STEP 5If not pre-assembled, attach the SQUARE PLASTIC BUSHINGS (15) onto the square tube of HEAVY BAG SUPPORT FRAME (3).
STEP 6Insert the HEAVY BAG EYE BOLT (25) into the bolt hole and secure it with HEAVY BAG SUPPORT FRAME (3) with 1 x WASHER (21) and 1 x LOCKNUT (22). (Please leave enough room for HEAVY BAG EYE BOLT (25) to turn after installed)
STEP 7Attach the HEAVY BAG SUPPORT FRAME (3) into the CURVED LOWER UPRIGHT TUBE (5) from above and secure 2 tubes with 2 x Reinforcement Plates (35) by using 2 x HEX BOLTS (23), 4 x WASHERS (21) and 2 x LOCKNUTS (22).
10 11
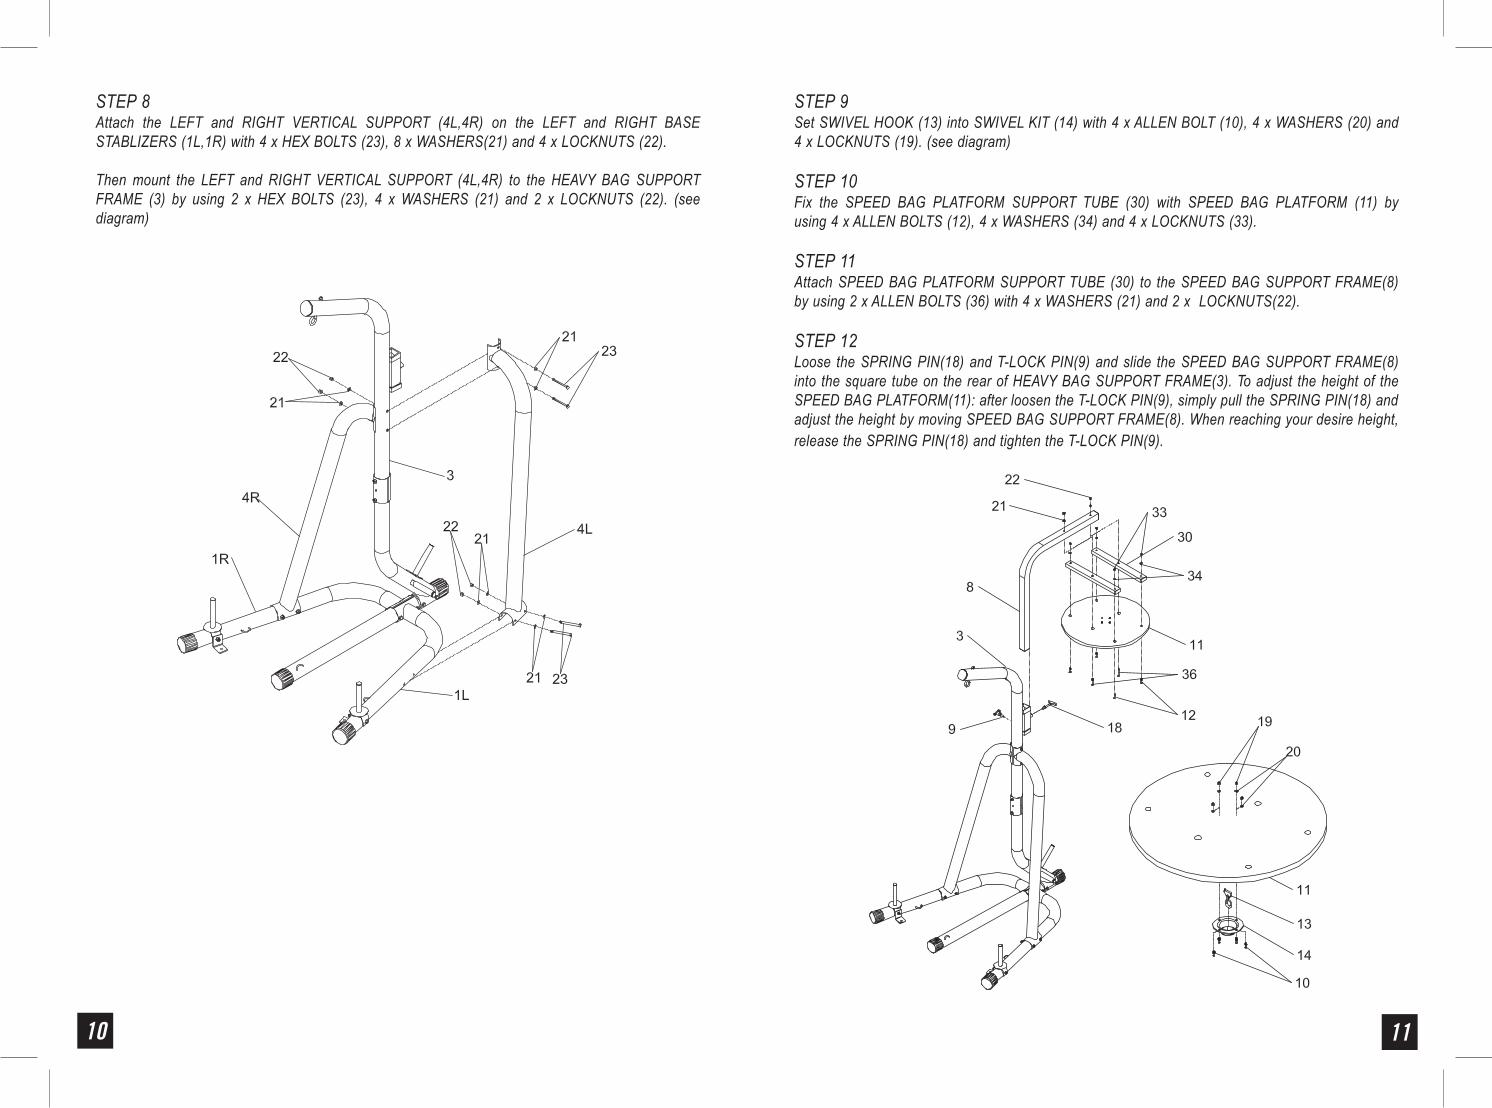
STEP 8Attach the LEFT and RIGHT VERTICAL SUPPORT (4L,4R) on the LEFT and RIGHT BASE STABLIZERS (1L,1R) with 4 x HEX BOLTS (23), 8 x WASHERS(21) and 4 x LOCKNUTS (22).
Then mount the LEFT and RIGHT VERTICAL SUPPORT (4L,4R) to the HEAVY BAG SUPPORT FRAME (3) by using 2 x HEX BOLTS (23), 4 x WASHERS (21) and 2 x LOCKNUTS (22). (see diagram)
STEP 9Set SWIVEL HOOK (13) into SWIVEL KIT (14) with 4 x ALLEN BOLT (10), 4 x WASHERS (20) and 4 x LOCKNUTS (19). (see diagram)
STEP 10Fix the SPEED BAG PLATFORM SUPPORT TUBE (30) with SPEED BAG PLATFORM (11) by using 4 x ALLEN BOLTS (12), 4 x WASHERS (34) and 4 x LOCKNUTS (33).
STEP 11Attach SPEED BAG PLATFORM SUPPORT TUBE (30) to the SPEED BAG SUPPORT FRAME(8) by using 2 x ALLEN BOLTS (36) with 4 x WASHERS (21) and 2 x LOCKNUTS(22).
STEP 12Loose the SPRING PIN(18) and T-LOCK PIN(9) and slide the SPEED BAG SUPPORT FRAME(8) into the square tube on the rear of HEAVY BAG SUPPORT FRAME(3). To adjust the height of the SPEED BAG PLATFORM(11): after loosen the T-LOCK PIN(9), simply pull the SPRING PIN(18) and adjust the height by moving SPEED BAG SUPPORT FRAME(8). When reaching your desire height, release the SPRING PIN(18) and tighten the T-LOCK PIN(9).
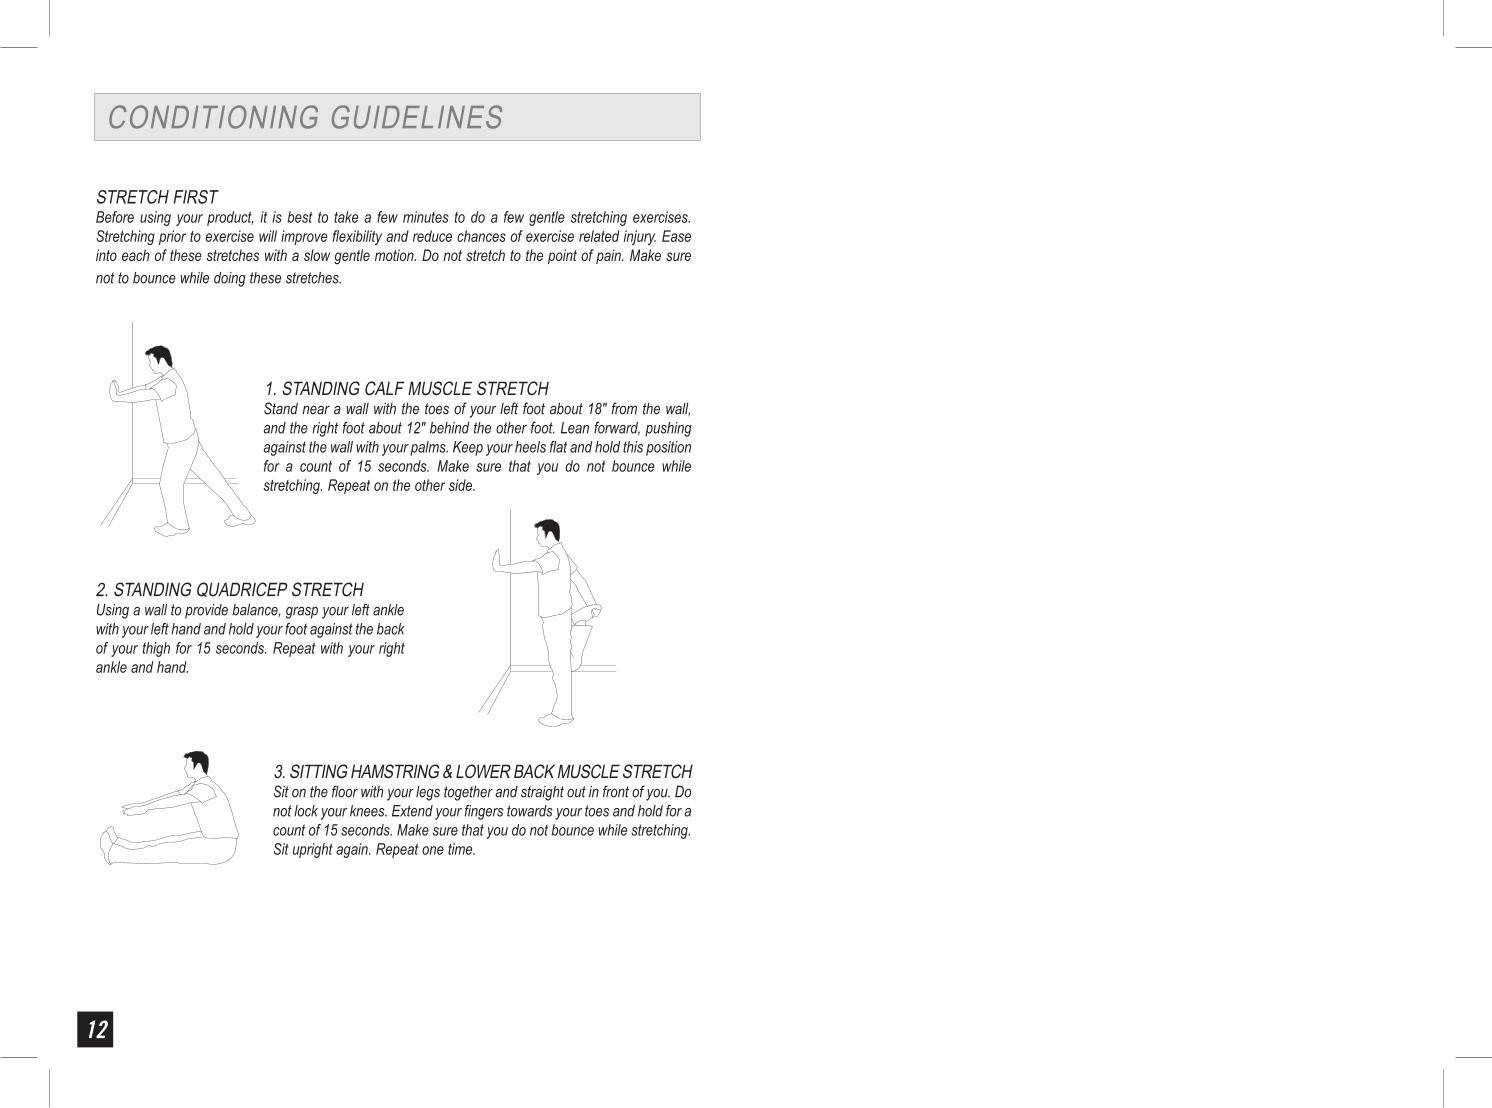
STRETCH FIRSTBefore using your product, it is best to take a few minutes to do a few gentle stretching exercises. Stretching prior to exercise will improve flexibility and reduce chances of exercise related injury. Ease into each of these stretches with a slow gentle motion. Do not stretch to the point of pain. Make sure not to bounce while doing these stretches.
1. STANDING CALF MUSCLE STRETCHStand near a wall with the toes of your left foot about 18" from the wall, and the right foot about 12" behind the other foot. Lean forward, pushing against the wall with your palms. Keep your heels flat and hold this position for a count of 15 seconds. Make sure that you do not bounce while stretching. Repeat on the other side.
2. STANDING QUADRICEP STRETCHUsing a wall to provide balance, grasp your left ankle with your left hand and hold your foot against the back of your thigh for 15 seconds. Repeat with your right ankle and hand.
3. SITTING HAMSTRING & LOWER BACK MUSCLE STRETCHSit on the floor with your legs together and straight out in front of you. Do not lock your knees. Extend your fingers towards your toes and hold for a count of 15 seconds. Make sure that you do not bounce while stretching. Sit upright again. Repeat one time.
12
CONDITIONING GUIDELINES


FW3015 052710’ © 2010 Treo Fitness Products | Made in China