Embed Size (px)
Citation preview

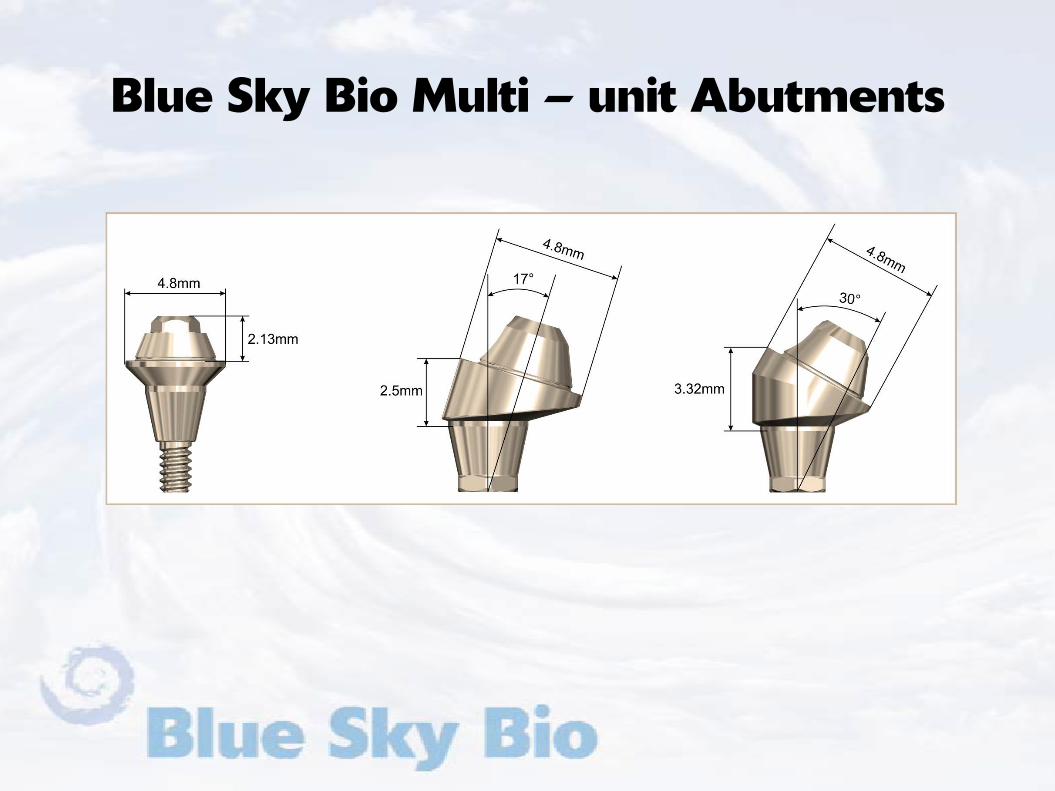
Blue Sky Bio Multi – unit AbutmentsBIO | Multi-Units are available for all our Bone Level
Implants
Multi-Units abutments are ideal for following restorative plans
Blue Sky Bio Multi – unit Abutments
Blue Sky Bio Multi – unit Abutments
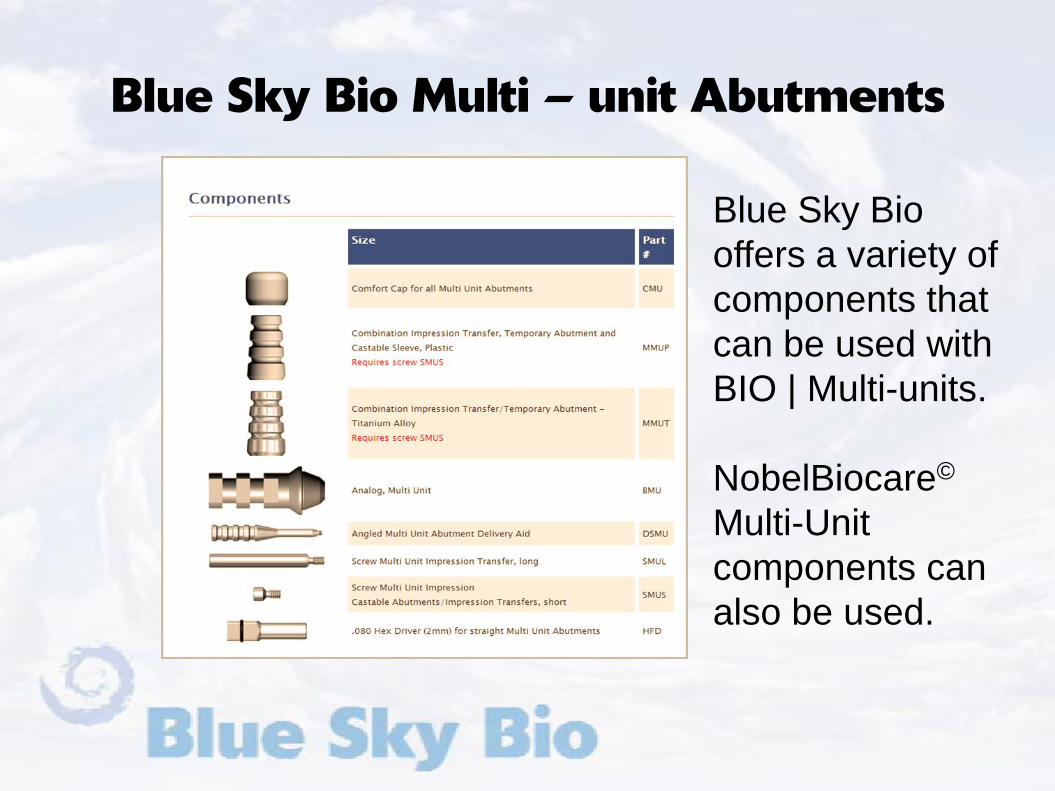
Blue Sky Bio offers a variety of components that can be used with BIO | Multi-units.
NobelBiocare©
Multi-Unit components can also be used.
Blue Sky Bio Multi – unit Abutments
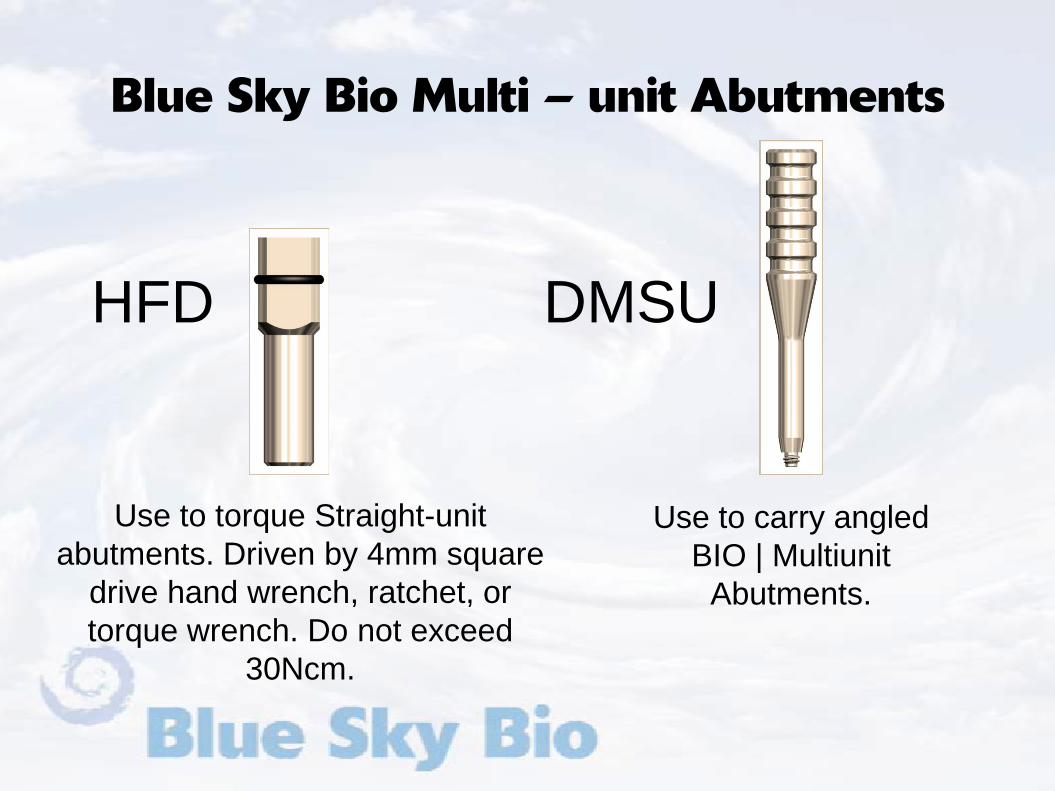
Use to carry angled BIO | Multiunit
Abutments.
Use to torque Straight-unit abutments. Driven by 4mm square
drive hand wrench, ratchet, or torque wrench. Do not exceed
30Ncm.
HFD DMSU

Blue Sky Bio Multi – unit Abutments
BIO | Multi-Unit Abutments Placement
Delivering Straight Multi-unit Abutments
080 Hex Driver
StraightBIO | Multiunit
Abutment
Blue Sky Bio Multi – unit Abutments
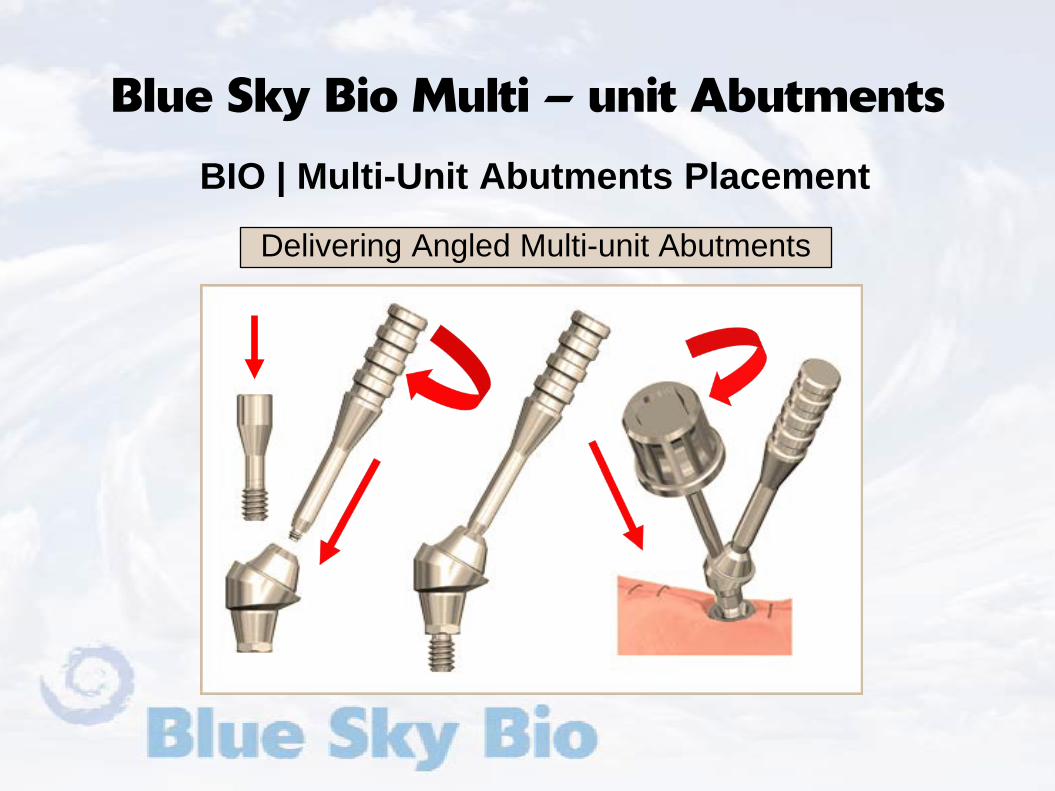
BIO | Multi-Unit Abutments Placement
Delivering Angled Multi-unit Abutments
Blue Sky Bio Multi – unit Abutments
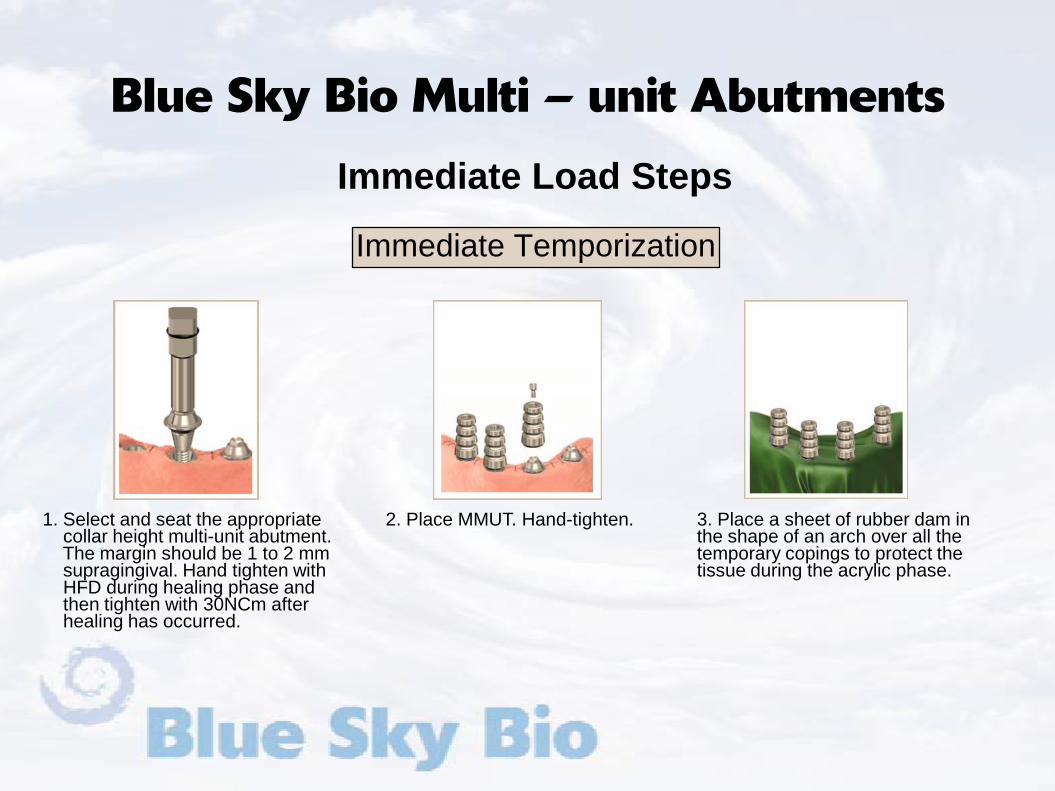
Immediate Load Steps
Immediate Temporization
1. Select and seat the appropriate collar height multi-unit abutment. The margin should be 1 to 2 mm supragingival. Hand tighten with HFD during healing phase and then tighten with 30NCm after healing has occurred.
2. Place MMUT. Hand-tighten. 3. Place a sheet of rubber dam in the shape of an arch over all the temporary copings to protect the tissue during the acrylic phase.
Blue Sky Bio Multi – unit Abutments
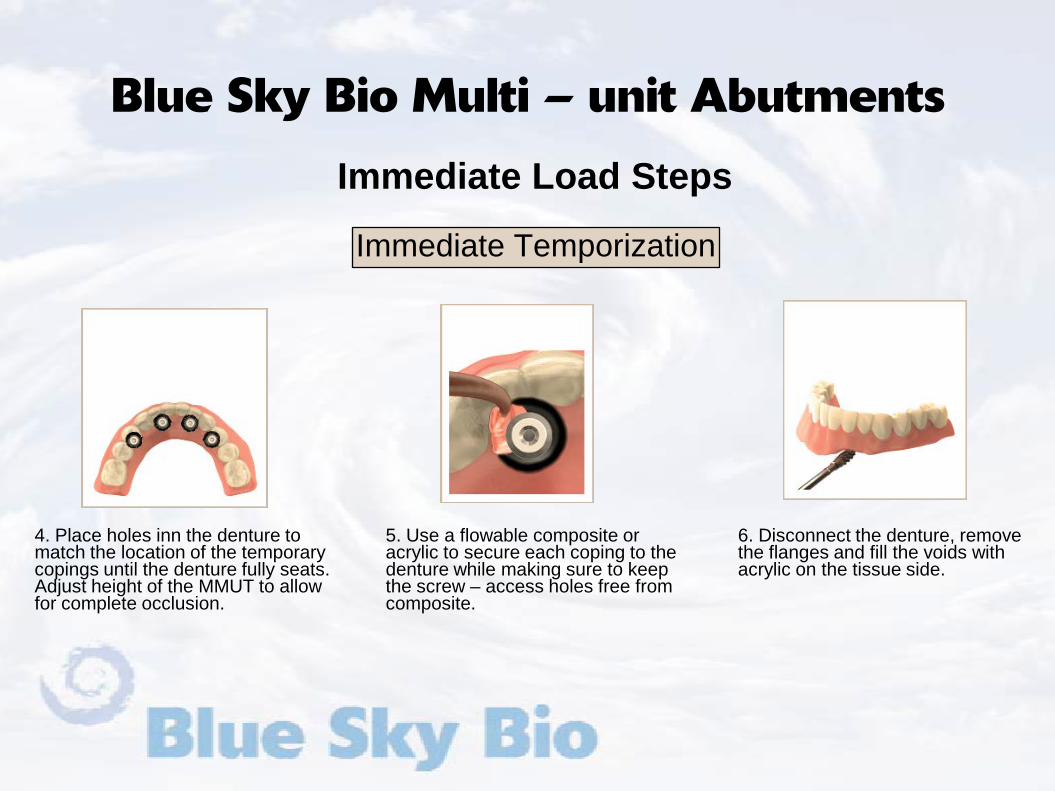
Immediate Load Steps
Immediate Temporization
4. Place holes inn the denture to match the location of the temporary copings until the denture fully seats. Adjust height of the MMUT to allow for complete occlusion.
5. Use a flowable composite or acrylic to secure each coping to the denture while making sure to keep the screw – access holes free from composite.
6. Disconnect the denture, remove the flanges and fill the voids with acrylic on the tissue side.
Blue Sky Bio Multi – unit Abutments
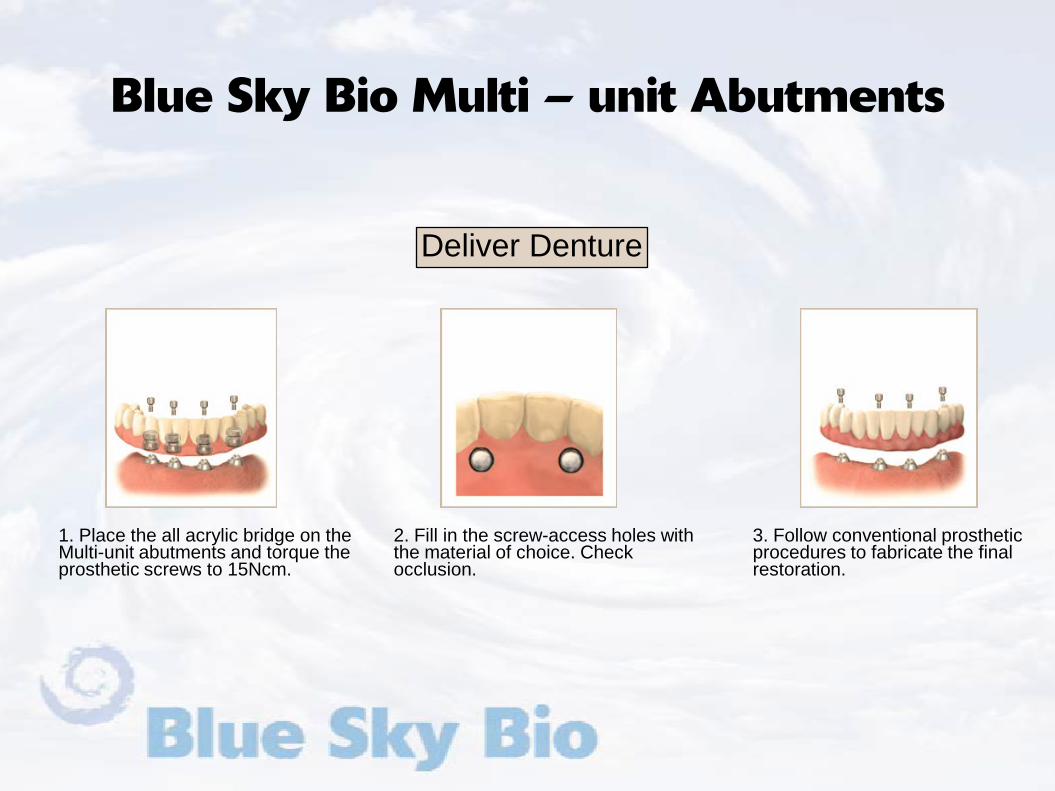
Deliver Denture
1. Place the all acrylic bridge on the Multi-unit abutments and torque the prosthetic screws to 15Ncm.
2. Fill in the screw-access holes with the material of choice. Check occlusion.
3. Follow conventional prosthetic procedures to fabricate the final restoration.
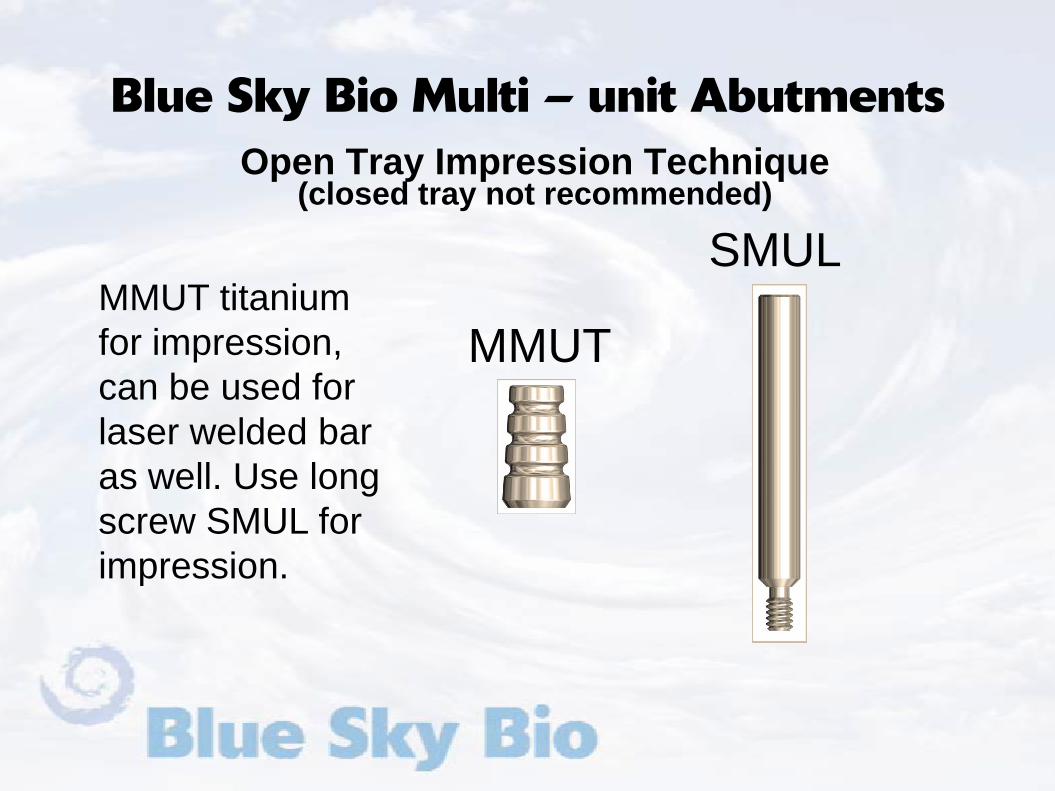
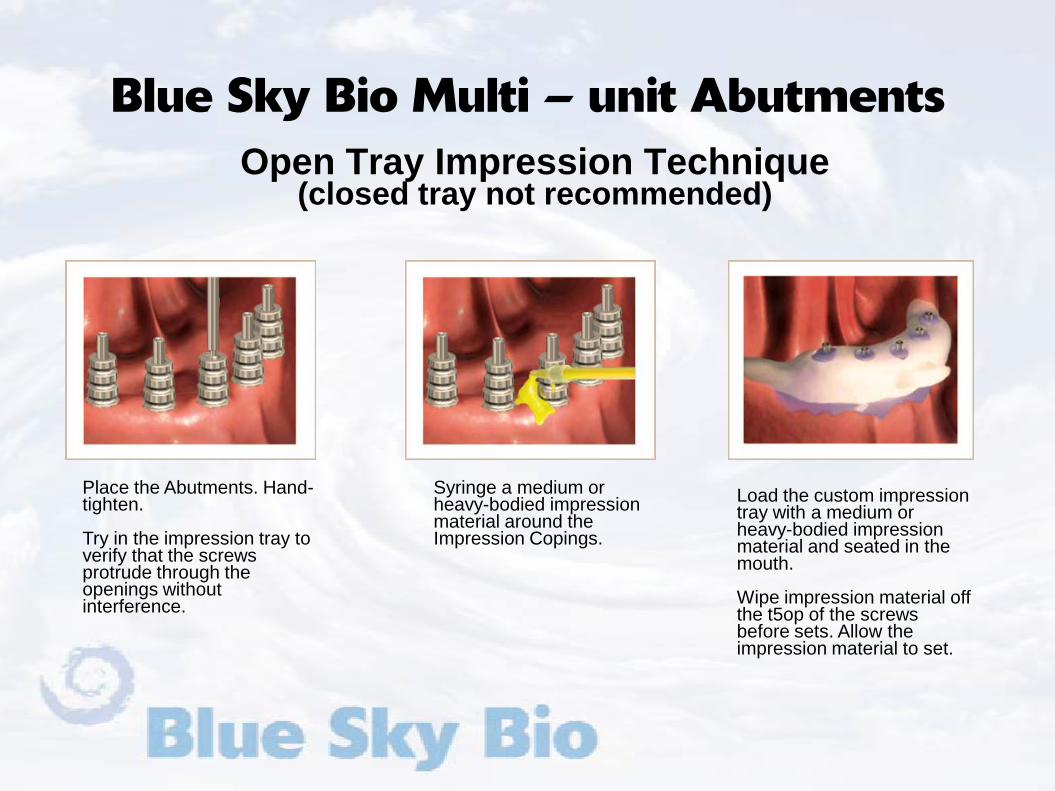
Blue Sky Bio Multi – unit AbutmentsOpen Tray Impression Technique
(closed tray not recommended)
MMUT titanium for impression, can be used for laser welded bar as well. Use long screw SMUL for impression.
MMUT
SMUL
Blue Sky Bio Multi – unit AbutmentsOpen Tray Impression Technique
(closed tray not recommended)
Place the Abutments. Hand-tighten.
Try in the impression tray to verify that the screws protrude through the openings without interference.
Syringe a medium or heavy-bodied impression material around the Impression Copings.
Load the custom impression tray with a medium or heavy-bodied impression material and seated in the mouth.
Wipe impression material off the t5op of the screws before sets. Allow the impression material to set.

Blue Sky Bio Multi – unit Abutments
After the impression material has set, remove the long screw. Remove the impression from the mouth. Verify that the impression material is completely adapted around the copings. Place the Cover Caps on the Abutments for Screw and hand-tighten.
Blue Sky Bio Multi – unit Abutments
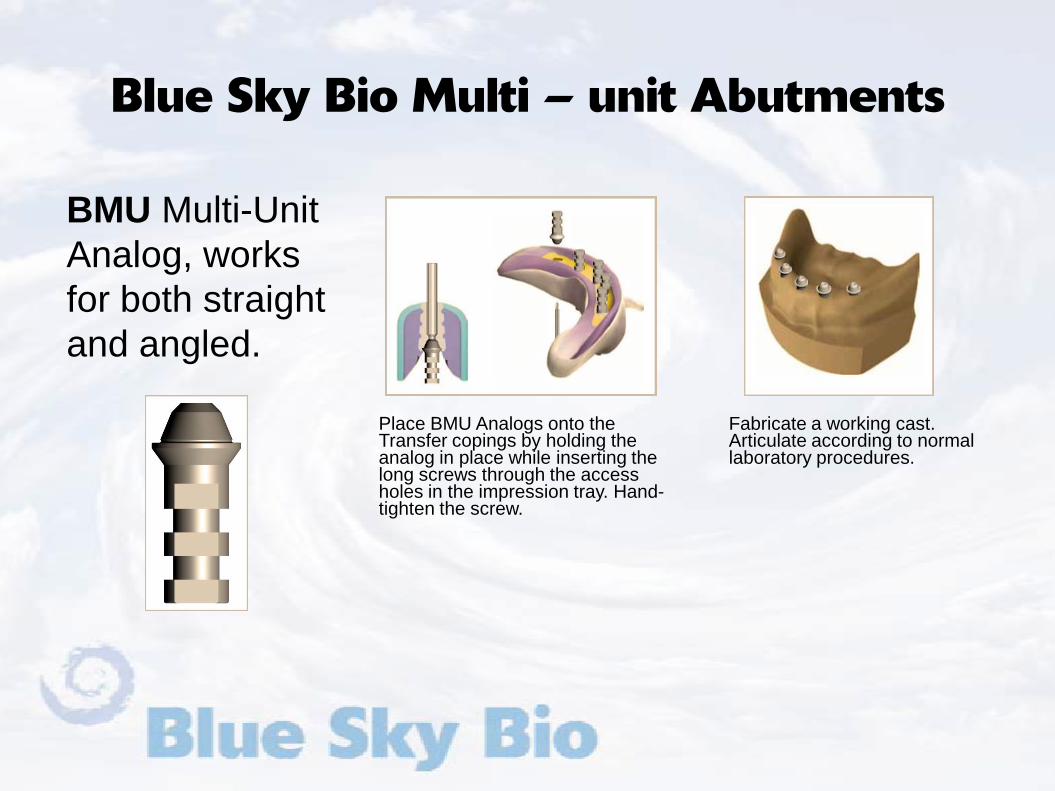
Place BMU Analogs onto the Transfer copings by holding the analog in place while inserting the long screws through the access holes in the impression tray. Hand-tighten the screw.
Fabricate a working cast. Articulate according to normal laboratory procedures.
BMU Multi-Unit Analog, works for both straight and angled.
Blue Sky Bio Multi – unit Abutments
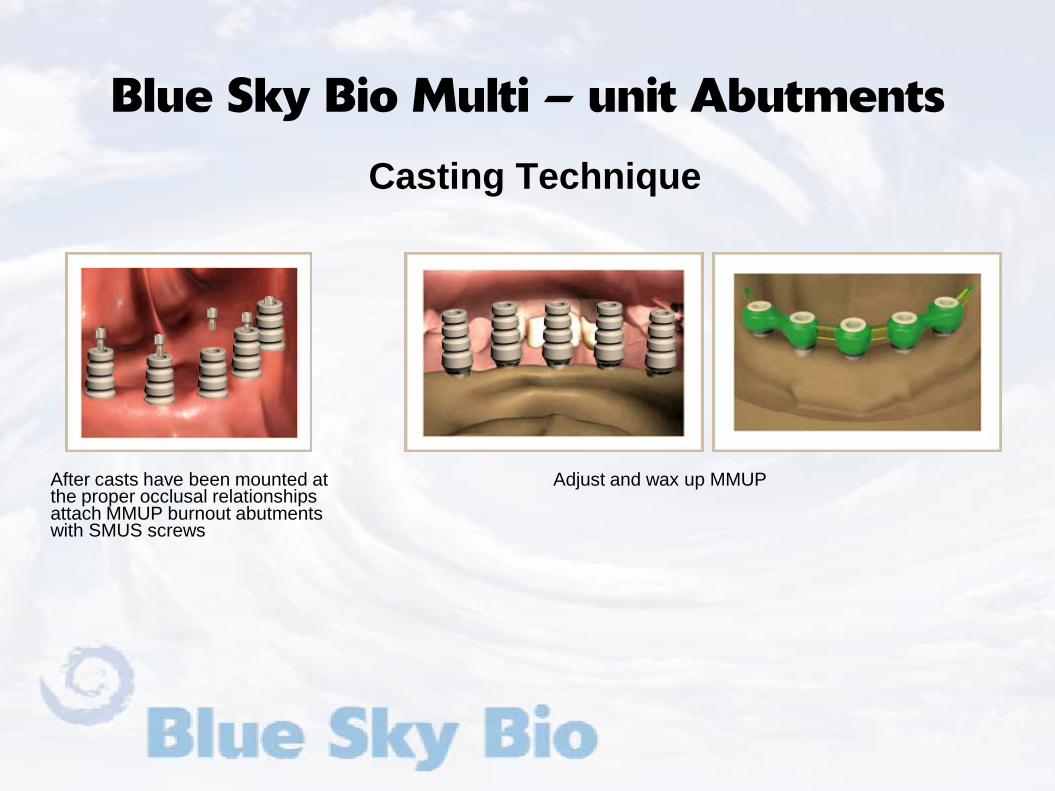
Casting Technique
After casts have been mounted at the proper occlusal relationships attach MMUP burnout abutments with SMUS screws
Adjust and wax up MMUP
Blue Sky Bio Multi – unit Abutments
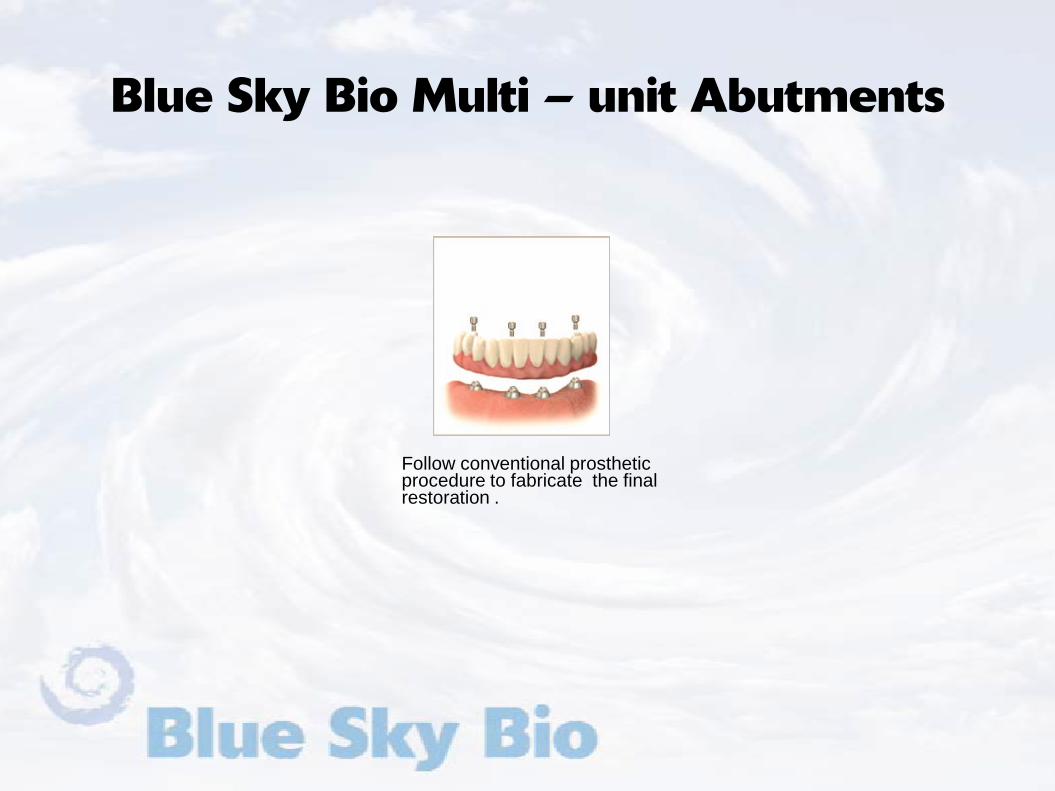
Follow conventional prosthetic procedure to fabricate the final restoration .