Embed Size (px)
Citation preview

1
BLU Vivo 4.3 User Manual

2
Table of Contents
Phone Safety Information .............................................................. 3
Appearance and Key Functions .................................................... 4
Installation and Charging ............................................................... 5
Phone Operation ........................................................................... 7
Communication ........................................................................... 10
Camera ....................................................................................... 11
Gallery ......................................................................................... 12
Music ........................................................................................... 12
Network Connections .................................................................. 12
3
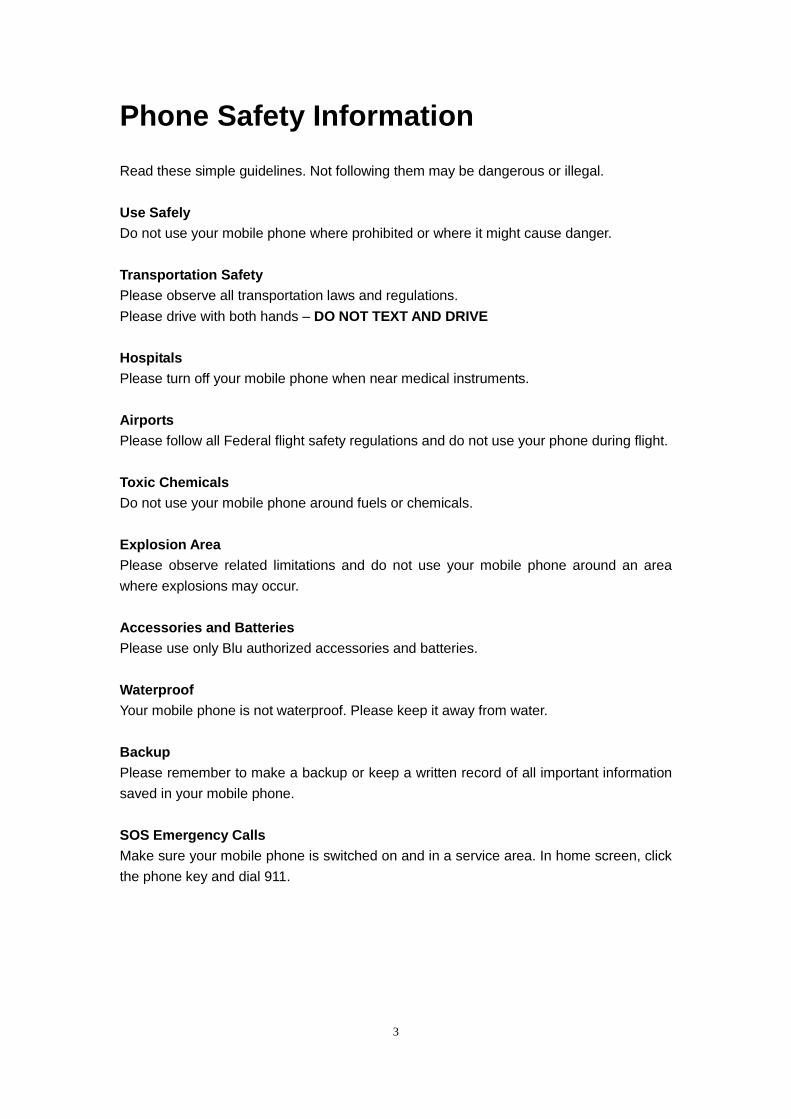
Phone Safety Information
Read these simple guidelines. Not following them may be dangerous or illegal.
Use Safely
Do not use your mobile phone where prohibited or where it might cause danger.
Transportation Safety
Please observe all transportation laws and regulations.
Please drive with both hands – DO NOT TEXT AND DRIVE
Hospitals
Please turn off your mobile phone when near medical instruments.
Airports
Please follow all Federal flight safety regulations and do not use your phone during flight.
Toxic Chemicals
Do not use your mobile phone around fuels or chemicals.
Explosion Area
Please observe related limitations and do not use your mobile phone around an area
where explosions may occur.
Accessories and Batteries
Please use only Blu authorized accessories and batteries.
Waterproof
Your mobile phone is not waterproof. Please keep it away from water.
Backup
Please remember to make a backup or keep a written record of all important information
saved in your mobile phone.
SOS Emergency Calls
Make sure your mobile phone is switched on and in a service area. In home screen, click
the phone key and dial 911.
4
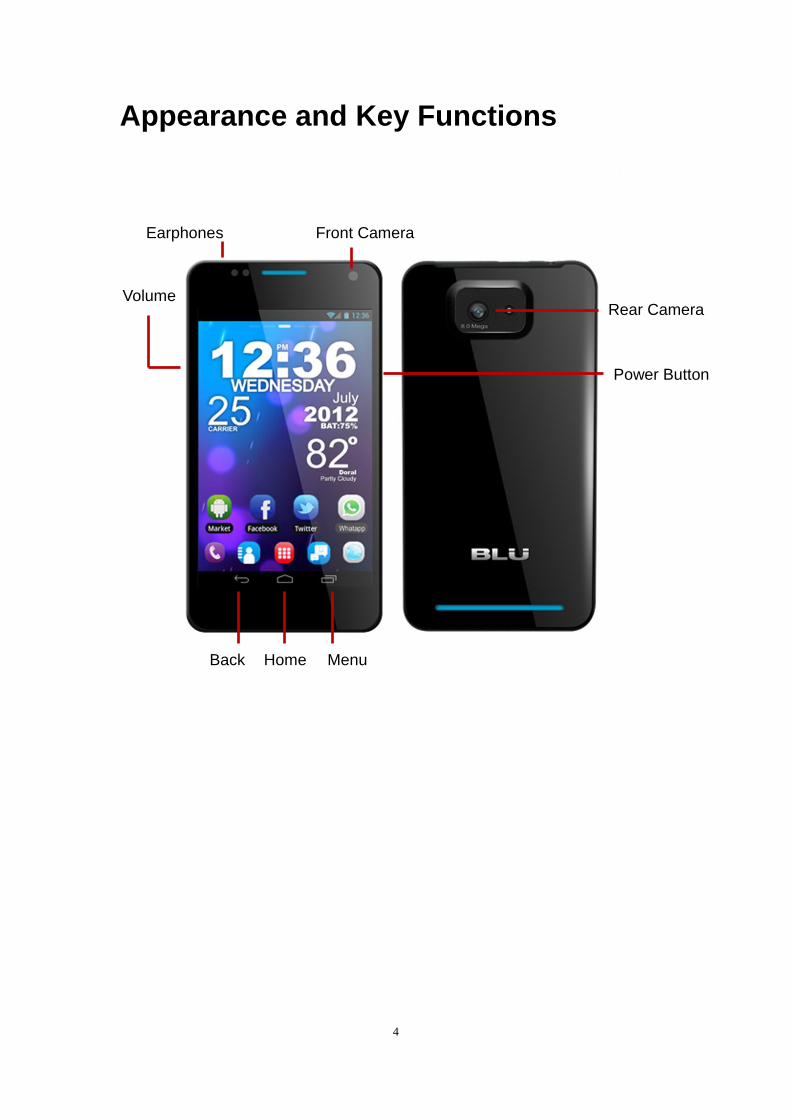
Appearance and Key Functions
Rear Camera
Front Camera
Home Back Menu
Earphones
Power Button
Volume

5
Installation and Charging
Insert SIM card
The Vivo 4.3 is a Dual SIM mobile phone allowing you to use the facility of two networks.
To insert SIM card(s):
1. Switch off the mobile phone and remove the rear cover and battery.
2. Insert the SIM card correctly in the card slot(s) (See figure below).
3. Insert the battery and replace the rear cover of the mobile phone.
Note: The SIM card is a small object; please keep the card out of the reach of children to
avoid any accidents. Do not touch the metal surface of the SIM card and keep it away
from electromagnetism to avoid loss and damage of the data. You will not be able to
connect to the network if the SIM card is damaged.
Insert Memory card
Use only compatible memory cards for use with this device. Incompatible memory cards
may damage the card or the device and corrupt the data stored in the card.
To insert the memory card:
1. Power off the mobile phone, and then remove the rear cover and battery.

6
2. Insert the memory card into the slot (See figure)
3. Finally insert the battery and the rear cover of the mobile phone.
Remove or Insert Battery
You may need to remove the battery to insert SIM cards, Memory card or for replacing the
battery.
1. Invert the back of the mobile phone upward and then take off the rear cover.
2. Insert the battery or remove the batter (See figure).
3. Insert the rear cover of the mobile phone.
Note: Please use original BLU battery and accessories.
Charging the Phone
1. Connect the charger to the wall outlet.
2. Connect the charger to the charging port. Once the charging starts, an animated icon
will appear.
3. When the charging icon stops, the battery is full.
4. Disconnect the charger from the phone.
Note: Slight heating during charging is normal.

7
Phone Operation
Power on/off your phone
Turn on the phone
Long press the power key to power up the phone. If you have a SIM card 1/2 lock, please
enter SIM card 1/2 PIN.
Turn off the phone
Long press the power key, a context menu will prompt, touch “Power off” to switch off the
phone.
To wake up the phone
If the phone is not used for a while, the Home screen or other screen you are viewing
is replaced with the lock screen and the phone darkens to conserve the battery.
1. Press the Power button.
2. Drag the lock icon rightward. The last screen you were working on reopens.
Home Screen
The Home screen is your starting point to access all the features on your phone. It
displays application icons, widgets, shortcuts, and other features. You may customize the
Home screen with different wallpaper and display the items you want.
Drag the lock icon
rightward to wake
up the phone
Home Screen
Application
Menu
Notification
Bar
8
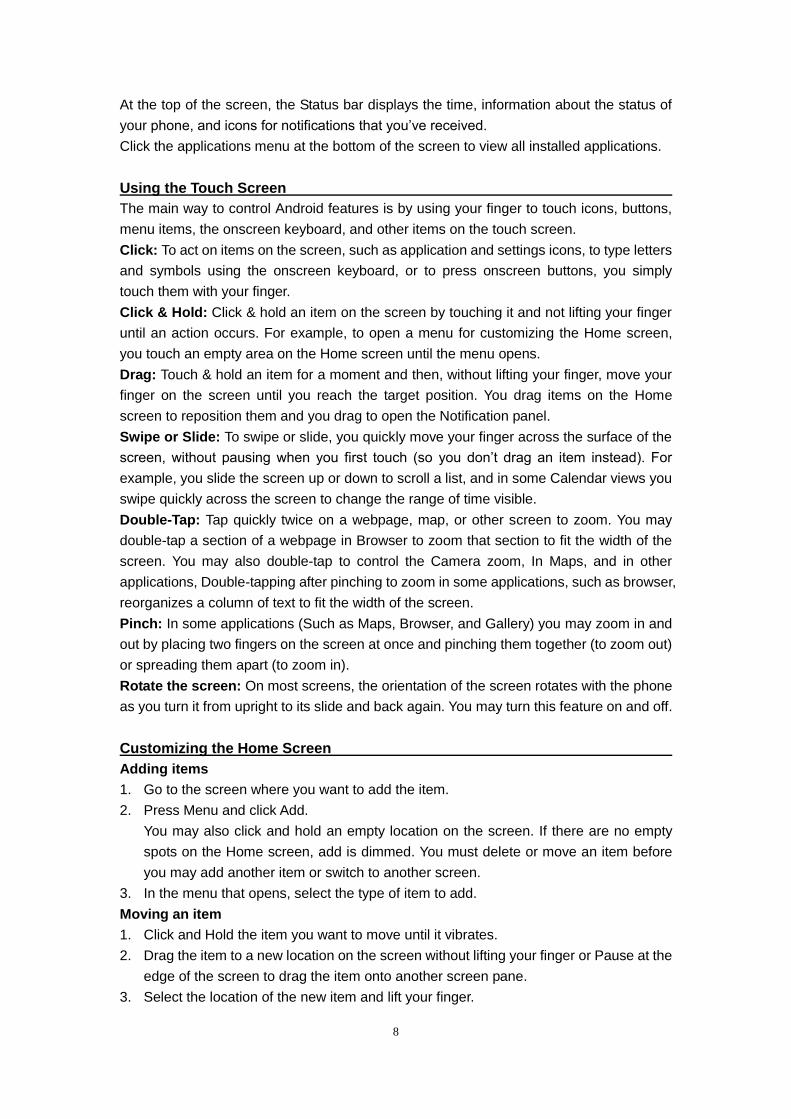
At the top of the screen, the Status bar displays the time, information about the status of
your phone, and icons for notifications that you’ve received.
Click the applications menu at the bottom of the screen to view all installed applications.
Using the Touch Screen
The main way to control Android features is by using your finger to touch icons, buttons,
menu items, the onscreen keyboard, and other items on the touch screen.
Click: To act on items on the screen, such as application and settings icons, to type letters
and symbols using the onscreen keyboard, or to press onscreen buttons, you simply
touch them with your finger.
Click & Hold: Click & hold an item on the screen by touching it and not lifting your finger
until an action occurs. For example, to open a menu for customizing the Home screen,
you touch an empty area on the Home screen until the menu opens.
Drag: Touch & hold an item for a moment and then, without lifting your finger, move your
finger on the screen until you reach the target position. You drag items on the Home
screen to reposition them and you drag to open the Notification panel.
Swipe or Slide: To swipe or slide, you quickly move your finger across the surface of the
screen, without pausing when you first touch (so you don’t drag an item instead). For
example, you slide the screen up or down to scroll a list, and in some Calendar views you
swipe quickly across the screen to change the range of time visible.
Double-Tap: Tap quickly twice on a webpage, map, or other screen to zoom. You may
double-tap a section of a webpage in Browser to zoom that section to fit the width of the
screen. You may also double-tap to control the Camera zoom, In Maps, and in other
applications, Double-tapping after pinching to zoom in some applications, such as browser,
reorganizes a column of text to fit the width of the screen.
Pinch: In some applications (Such as Maps, Browser, and Gallery) you may zoom in and
out by placing two fingers on the screen at once and pinching them together (to zoom out)
or spreading them apart (to zoom in).
Rotate the screen: On most screens, the orientation of the screen rotates with the phone
as you turn it from upright to its slide and back again. You may turn this feature on and off.
Customizing the Home Screen
Adding items
1. Go to the screen where you want to add the item.
2. Press Menu and click Add.
You may also click and hold an empty location on the screen. If there are no empty
spots on the Home screen, add is dimmed. You must delete or move an item before
you may add another item or switch to another screen.
3. In the menu that opens, select the type of item to add.
Moving an item
1. Click and Hold the item you want to move until it vibrates.
2. Drag the item to a new location on the screen without lifting your finger or Pause at the
edge of the screen to drag the item onto another screen pane.
3. Select the location of the new item and lift your finger.
9
Deleting an Item
1. Click and Hold the item until it vibrates.
2. Drag the item to the Trash icon without lifting your finger.
3. When the icon turns red, lift your finger.
Text Input
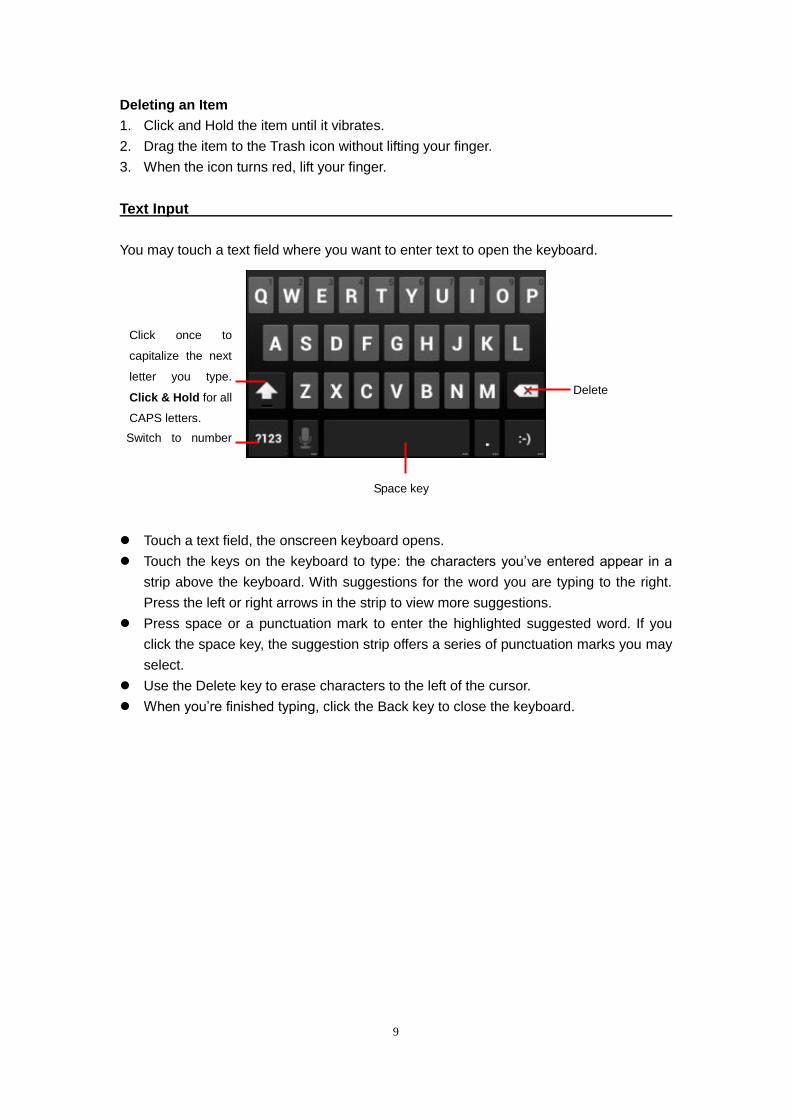
You may touch a text field where you want to enter text to open the keyboard.
Touch a text field, the onscreen keyboard opens.
Touch the keys on the keyboard to type: the characters you’ve entered appear in a
strip above the keyboard. With suggestions for the word you are typing to the right.
Press the left or right arrows in the strip to view more suggestions.
Press space or a punctuation mark to enter the highlighted suggested word. If you
click the space key, the suggestion strip offers a series of punctuation marks you may
select.
Use the Delete key to erase characters to the left of the cursor.
When you’re finished typing, click the Back key to close the keyboard.
Space key
Delete
Switch to number
input
Click once to
capitalize the next
letter you type.
Click & Hold for all
CAPS letters.

10
Communication
Placing a Phone Call
Click the phone icon on the Home screen or if you’re already working with
Contacts or the Call log, touch the Phone tab.
Enter the phone number you want to dial;
Touch the phone icon to dial the number that you entered. You may select voice
call.
Messaging
You may use this phone to exchange text messages and multimedia messages with your
friends on their mobile phones. The messages to and from the same contact or phone
number will be saved into a single conversation so you may see your entire message
history conveniently.
Click to show a list of calling
options.
Click & hold to enter “+”
Click to make a call
Click to make a video
call

11
Camera
Camera is a combination camera and camcorder that you use to shoot and share pictures
and videos.
Adjust your exposure, flash, and other settings if you wish. Or leave them on
automatic.
Frame your subject on screen.
Touch the Shutter icon on screen.
Video Recording
Drag the control to the video if in camera mode
Adjust the quality, color effect, flash, and other settings if you wish. Or leave them on
automatic.
Point the lens and frame the scene where you want to start.
Click the record icon to start recording the video.
Click Stop video icon to stop recording. An image from your most recent video is
displayed as a thumbnail at the bottom right.
Click to view the pictures Click to switch between camera
and video.
Click to take a picture or shoot a
video.
Click to adjust settings

12
Gallery
Click the Gallery icon in the Launcher to view albums of your pictures and videos. Gallery
presents the pictures and videos on your SD card, including those you’ve taken with
Camera and those you downloaded from the web or other locations.
You may do the following operations:
To share pictures: you may share your pictures through MMS and Bluetooth.
To delete pictures: You may delete pictures in the gallery.
To get details about the picture: You may view additional details about the picture.
Music
The music application allows you to listen to music and other audio files that you have
transferred to your SD card from your computer or that you have downloaded.
Network Connections
Your phone may connect to a variety of networks and devices, including mobile networks
for voice and data transmission, Wi-Fi data networks, and Bluetooth devices such as
headsets. You may also connect your phone to a computer, to transfer files from your
phone’s SD card, and share your phone’s mobile data connection via USB or as a
portable Wi-Fi hotspot.
Touch to open the current playlist
Touch to shuffle the current playlist
Touch to repeat the current playlist; touch
again to repeat the current track

13
WIFI
Wi-Fi is a wireless networking technology that may provide internet access at distance of
up to 100 meters, depending on the Wi-Fi router and your surroundings. You may
configure the WLAN as follow:
Main menu--> Settings-->Wi-Fi, check Wi-Fi to turn it on.
The phone searches for available Wi-Fi networks and displays the search results.
Click on a network to connect to it.
If the network is open, you are prompted to confirm that you want to connect to that
network by touching connect. Secured networks are indicated with a Lock icon and
will require a password.
Bluetooth
Bluetooth is a short-range wireless communications technology that devices may use to
exchange information over a distance of about 10 meters. The most common Bluetooth
devices are headphones for making calls or listening to music, hands-free kits for cars,
and other portable device including laptops.
To send a file
Main menu--> settings-->Bluetooth, check Bluetooth to turn it on.
Enter File manager to select a file and long press it, Select Send--> Bluetooth.
Click Scan for devices, the phone will stay for and display the IDs of all available
Bluetooth devices in range.
Touch the ID of the other device in the list to pair them. After paired the file will be sent.
To receive a file
Main menu--> settings-->Bluetooth, check Bluetooth to turn it on. Ensure the
Bluetooth settings--> Discoverable is on.
After paired, the phone will receive the file. The file you received will save to the
“Bluetooth” file folder on the SD card.
To connect to a Handsfree device
Main menu--> settings--> Bluetooth, Select “Search”
Turn on the Hands free device; Select the Hands free device in the list to pair.
After paired, you may use the Hands free device to listen to music or receive calls
Connecting to a computer via USB
You may connect your phone to a computer with a USB cable, to transfer music, pictures,
and other files between your phone’s SD card and the computer. When connecting your
phone to a computer and mounting its SD card, you must follow your computer’s
instructions for connecting and disconnecting USB devices, to avoid damaging or
corrupting the files on your SD card. You can’t share your phone’s data connection and
SD card via USB cable at the same time.

14
To connect your phone to a computer via USB
1. Use the USB cable that came with your phone to connect the phone to a USB port on
your computer. You receive a notification that the USB is connected.
2. Open the notification panel and touch USB connected.
3. Touch Turn on USB storage in the screen that opens to confirm that you want to
transfer files. When the phone is connected as USB storage, the screen indicates that
USB storage is in use and you receive a notification. You phone’s SD card is mounted as
a drive on your computer. You may now copy files to and from the SD card.
During this time, you cannot access the SD card from your phone, so you will not be able
to use applications that rely on the SD card such as Camera, Gallery, and Music. You also
will not be able to share your phone’s data connection with your computer via USB.
Airplane Mode
Some locations may require you to turn off your phones mobile, Wi-Fi, and Bluetooth
wireless connections. You may turn off all these wireless connections at once by placing
your phone in Airplane mode.
1. Press & hold the Power button
2. Select Airplane mode