Embed Size (px)
Citation preview
BIG-IP® Virtual Edition Setup Guide forLinux KVM
Version 11.6

Table of Contents
Legal Notices.....................................................................................................5
Chapter 1: Getting Started with BIG-IP Virtual Edition...........................................................7
What is BIG-IP Virtual Edition?..........................................................................................8
About BIG-IP VE compatibility with KVM hypervisor products................................8
Chapter 2: Deploying BIG-IP Virtual Edition..........................................................................11
Host machine requirements and recommendations.........................................................12
About BIG-IP VE KVM deployment..................................................................................12
Deploying the BIG-IP VE virtual machine..............................................................13
Powering on the virtual machine...........................................................................14
Assigning a management IP address to a virtual machine...................................14
Turning off LRO/GRO from the VE guest to optimize PEM performance..............14
Chapter 3: Updating a BIG-IP VE Virtual Machine.................................................................17
About VE disk space........................................................................................................18
Increasing the disk space allotted to the BIG-IP virtual machine .........................18
About updates to the BIG-IP VE virtual machine.............................................................19
Downloading and importing a BIG-IP VE update..................................................19
Installing a BIG-IP VE update................................................................................20
Rebooting after a BIG-IP VE update.....................................................................20
Appendix A: Deployment Best Practices...............................................................................23
Best practices for deploying BIG-IP VE on KVM..............................................................24
3
Table of Contents

4
Table of Contents

Legal Notices
Publication Date
This document was published on May 27, 2015.
Publication Number
MAN-0437-04
Copyright
Copyright © 2014-2015, F5 Networks, Inc. All rights reserved.
F5 Networks, Inc. (F5) believes the information it furnishes to be accurate and reliable. However, F5 assumesno responsibility for the use of this information, nor any infringement of patents or other rights of thirdparties which may result from its use. No license is granted by implication or otherwise under any patent,copyright, or other intellectual property right of F5 except as specifically described by applicable userlicenses. F5 reserves the right to change specifications at any time without notice.
Trademarks
AAM, Access Policy Manager, Advanced Client Authentication, Advanced Firewall Manager, AdvancedRouting, AFM, Application Acceleration Manager, Application Security Manager, APM, ARX, AskF5,ASM, BIG-IP, BIG-IQ, Cloud Extender, CloudFucious, Cloud Manager, Clustered Multiprocessing, CMP,COHESION, Data Manager, DevCentral, DevCentral [DESIGN], DNS Express, DSC, DSI, Edge Client,Edge Gateway, Edge Portal, ELEVATE, EM, EnterpriseManager, ENGAGE, F5, F5 [DESIGN], F5 Certified[DESIGN], F5 Networks, F5 SalesXchange [DESIGN], F5 Synthesis, f5 Synthesis, F5 Synthesis [DESIGN],F5 TechXchange [DESIGN], Fast Application Proxy, Fast Cache, FirePass, Global Traffic Manager, GTM,GUARDIAN, iApps, IBR, iCall, Intelligent Browser Referencing, Intelligent Compression, IPv6 Gateway,iControl, iHealth, iQuery, iRules, iRules OnDemand, iSession, L7 Rate Shaping, LC, Link Controller,LineRate, LineRate Systems [DESIGN], Local Traffic Manager, LROS, LTM, Message Security Manager,MobileSafe, MSM, OneConnect, Packet Velocity, PEM, Policy Enforcement Manager, Protocol SecurityManager, PSM, Real Traffic Policy Builder, SalesXchange, ScaleN, SDAC (except in Japan), SDC, SignallingDelivery Controller, Solutions for an application world, Software Designed Applications Services, SSLAcceleration, StrongBox, SuperVIP, SYN Check, TCP Express, TDR, TechXchange, TMOS, TotALL,Traffic Management Operating System, Traffix (except Germany), Traffix [DESIGN] (except Germany),Transparent Data Reduction, UNITY, VAULT, vCMP, VE F5 [DESIGN], Versafe, Versafe [DESIGN],VIPRION, Virtual Clustered Multiprocessing, WebSafe, and ZoneRunner, are trademarks or service marksof F5 Networks, Inc., in the U.S. and other countries, and may not be used without F5's express writtenconsent.
All other product and company names herein may be trademarks of their respective owners.
Patents
This product may be protected by one or more patents indicated at:http://www.f5.com/about/guidelines-policies/patents


Chapter
1Getting Started with BIG-IP Virtual Edition
• What is BIG-IP Virtual Edition?
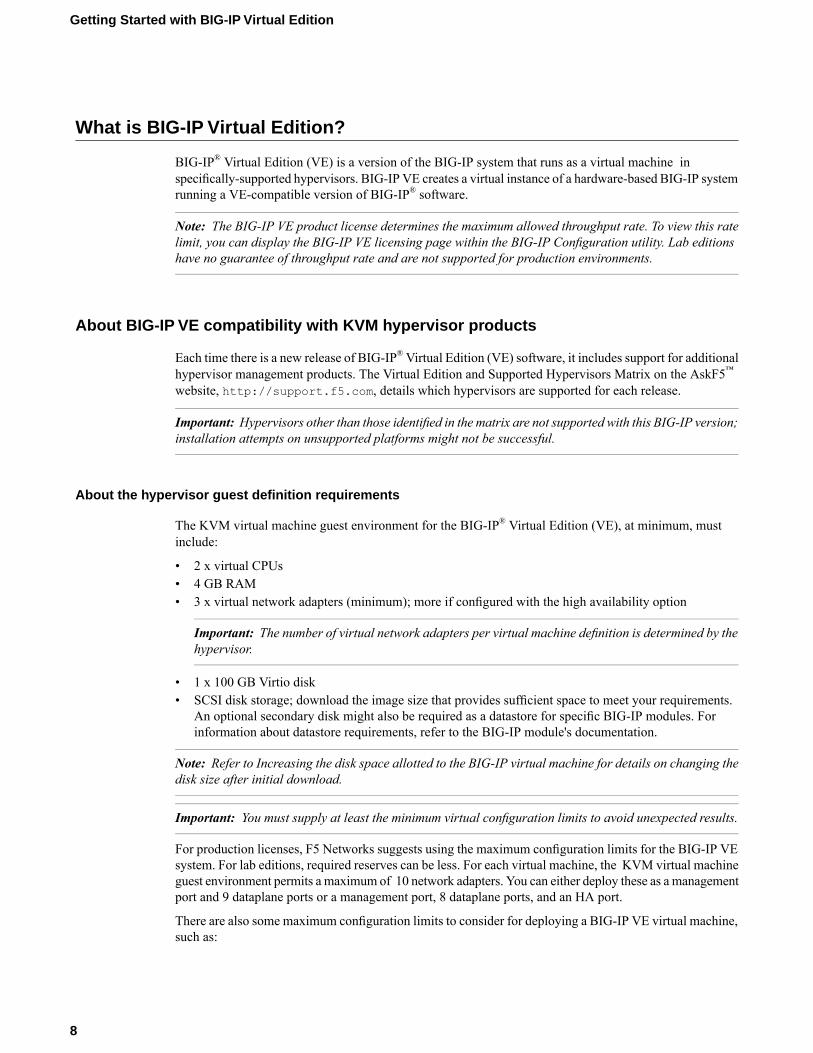
What is BIG-IP Virtual Edition?
BIG-IP® Virtual Edition (VE) is a version of the BIG-IP system that runs as a virtual machine inspecifically-supported hypervisors. BIG-IP VE creates a virtual instance of a hardware-based BIG-IP systemrunning a VE-compatible version of BIG-IP® software.
Note: The BIG-IP VE product license determines the maximum allowed throughput rate. To view this ratelimit, you can display the BIG-IP VE licensing page within the BIG-IP Configuration utility. Lab editionshave no guarantee of throughput rate and are not supported for production environments.
About BIG-IP VE compatibility with KVM hypervisor products
Each time there is a new release of BIG-IP®Virtual Edition (VE) software, it includes support for additionalhypervisor management products. The Virtual Edition and Supported Hypervisors Matrix on the AskF5™
website, http://support.f5.com, details which hypervisors are supported for each release.
Important: Hypervisors other than those identified in the matrix are not supported with this BIG-IP version;installation attempts on unsupported platforms might not be successful.
About the hypervisor guest definition requirements
The KVM virtual machine guest environment for the BIG-IP® Virtual Edition (VE), at minimum, mustinclude:
• 2 x virtual CPUs• 4 GB RAM• 3 x virtual network adapters (minimum); more if configured with the high availability option
Important: The number of virtual network adapters per virtual machine definition is determined by thehypervisor.
• 1 x 100 GB Virtio disk• SCSI disk storage; download the image size that provides sufficient space to meet your requirements.
An optional secondary disk might also be required as a datastore for specific BIG-IP modules. Forinformation about datastore requirements, refer to the BIG-IP module's documentation.
Note: Refer to Increasing the disk space allotted to the BIG-IP virtual machine for details on changing thedisk size after initial download.
Important: You must supply at least the minimum virtual configuration limits to avoid unexpected results.
For production licenses, F5 Networks suggests using the maximum configuration limits for the BIG-IP VEsystem. For lab editions, required reserves can be less. For each virtual machine, the KVM virtual machineguest environment permits a maximum of 10 network adapters. You can either deploy these as a managementport and 9 dataplane ports or a management port, 8 dataplane ports, and an HA port.
There are also some maximum configuration limits to consider for deploying a BIG-IP VE virtual machine,such as:
8
Getting Started with BIG-IP Virtual Edition
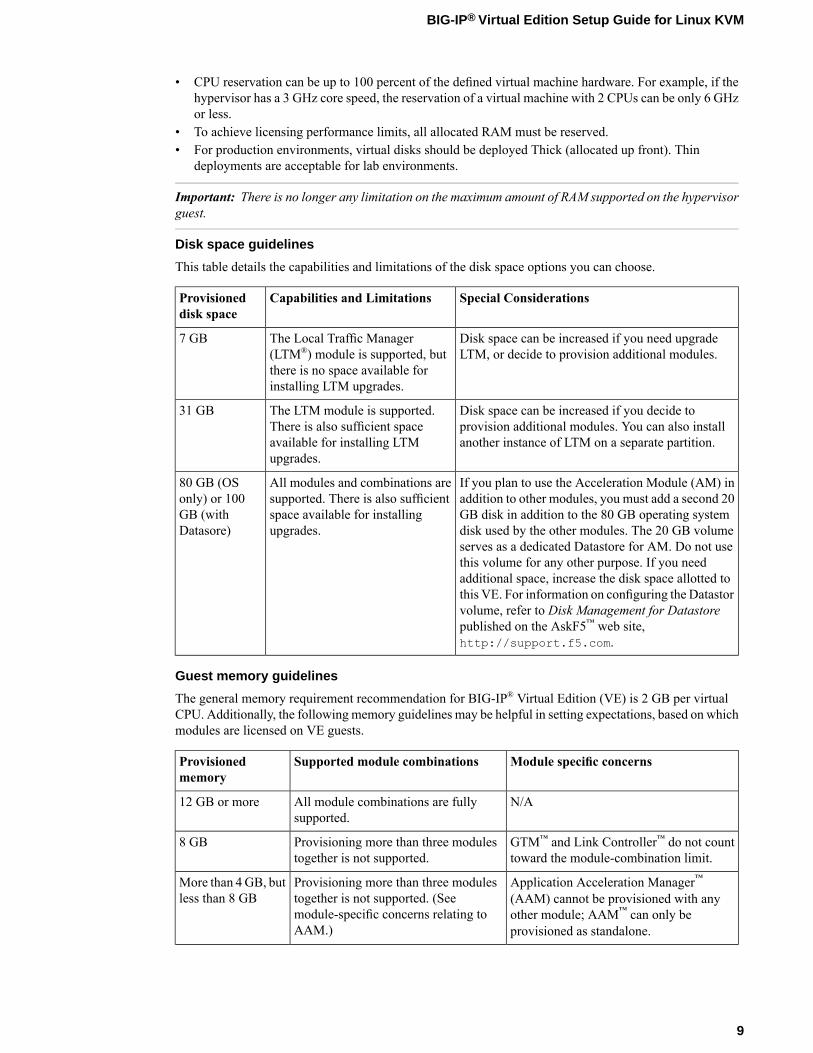
• CPU reservation can be up to 100 percent of the defined virtual machine hardware. For example, if thehypervisor has a 3 GHz core speed, the reservation of a virtual machine with 2 CPUs can be only 6 GHzor less.
• To achieve licensing performance limits, all allocated RAM must be reserved.• For production environments, virtual disks should be deployed Thick (allocated up front). Thin
deployments are acceptable for lab environments.
Important: There is no longer any limitation on the maximum amount of RAM supported on the hypervisorguest.
Disk space guidelines
This table details the capabilities and limitations of the disk space options you can choose.
Special ConsiderationsCapabilities and LimitationsProvisioneddisk space
Disk space can be increased if you need upgradeLTM, or decide to provision additional modules.
The Local Traffic Manager(LTM®) module is supported, butthere is no space available forinstalling LTM upgrades.
7 GB
Disk space can be increased if you decide toprovision additional modules. You can also installanother instance of LTM on a separate partition.
The LTM module is supported.There is also sufficient spaceavailable for installing LTMupgrades.
31 GB
If you plan to use the Acceleration Module (AM) inaddition to other modules, you must add a second 20
All modules and combinations aresupported. There is also sufficient
80 GB (OSonly) or 100
GB disk in addition to the 80 GB operating systemspace available for installingupgrades.
GB (withDatasore) disk used by the other modules. The 20 GB volume
serves as a dedicated Datastore for AM. Do not usethis volume for any other purpose. If you needadditional space, increase the disk space allotted tothis VE. For information on configuring the Datastorvolume, refer to Disk Management for Datastorepublished on the AskF5™ web site,http://support.f5.com.
Guest memory guidelines
The general memory requirement recommendation for BIG-IP® Virtual Edition (VE) is 2 GB per virtualCPU. Additionally, the following memory guidelines may be helpful in setting expectations, based on whichmodules are licensed on VE guests.
Module specific concernsSupported module combinationsProvisionedmemory
N/AAll module combinations are fullysupported.
12 GB or more
GTM™ and Link Controller™ do not counttoward the module-combination limit.
Provisioning more than three modulestogether is not supported.
8 GB
Application Acceleration Manager™
(AAM) cannot be provisioned with anyProvisioning more than three modulestogether is not supported. (Seemodule-specific concerns relating toAAM.)
More than 4GB, butless than 8 GB
other module; AAM™ can only beprovisioned as standalone.
9
BIG-IP® Virtual Edition Setup Guide for Linux KVM
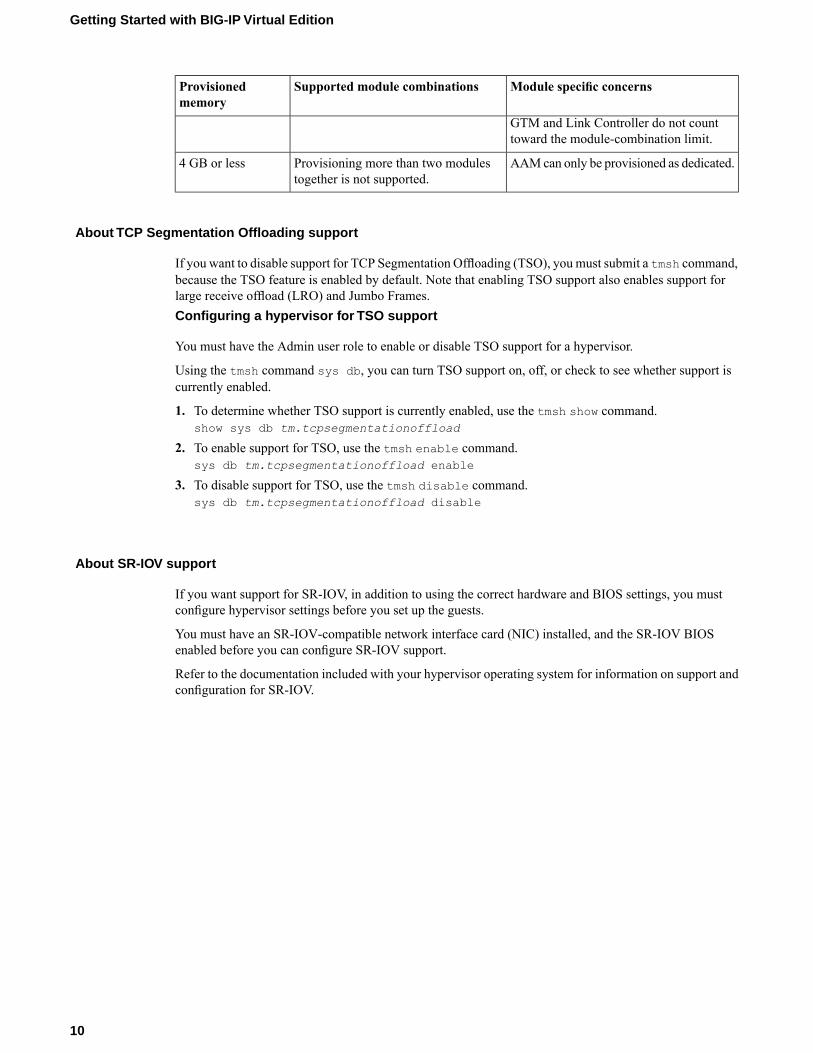
Module specific concernsSupported module combinationsProvisionedmemory
GTM and Link Controller do not counttoward the module-combination limit.
AAMcan only be provisioned as dedicated.Provisioning more than two modulestogether is not supported.
4 GB or less
About TCP Segmentation Offloading support
If you want to disable support for TCP Segmentation Offloading (TSO), youmust submit a tmsh command,because the TSO feature is enabled by default. Note that enabling TSO support also enables support forlarge receive offload (LRO) and Jumbo Frames.Configuring a hypervisor for TSO support
You must have the Admin user role to enable or disable TSO support for a hypervisor.
Using the tmsh command sys db, you can turn TSO support on, off, or check to see whether support iscurrently enabled.
1. To determine whether TSO support is currently enabled, use the tmsh show command.show sys db tm.tcpsegmentationoffload
2. To enable support for TSO, use the tmsh enable command.sys db tm.tcpsegmentationoffload enable
3. To disable support for TSO, use the tmsh disable command.sys db tm.tcpsegmentationoffload disable
About SR-IOV support
If you want support for SR-IOV, in addition to using the correct hardware and BIOS settings, you mustconfigure hypervisor settings before you set up the guests.
You must have an SR-IOV-compatible network interface card (NIC) installed, and the SR-IOV BIOSenabled before you can configure SR-IOV support.
Refer to the documentation included with your hypervisor operating system for information on support andconfiguration for SR-IOV.
10
Getting Started with BIG-IP Virtual Edition
Chapter
2Deploying BIG-IP Virtual Edition
• Host machine requirements andrecommendations
• About BIG-IP VE KVM deployment
Host machine requirements and recommendations
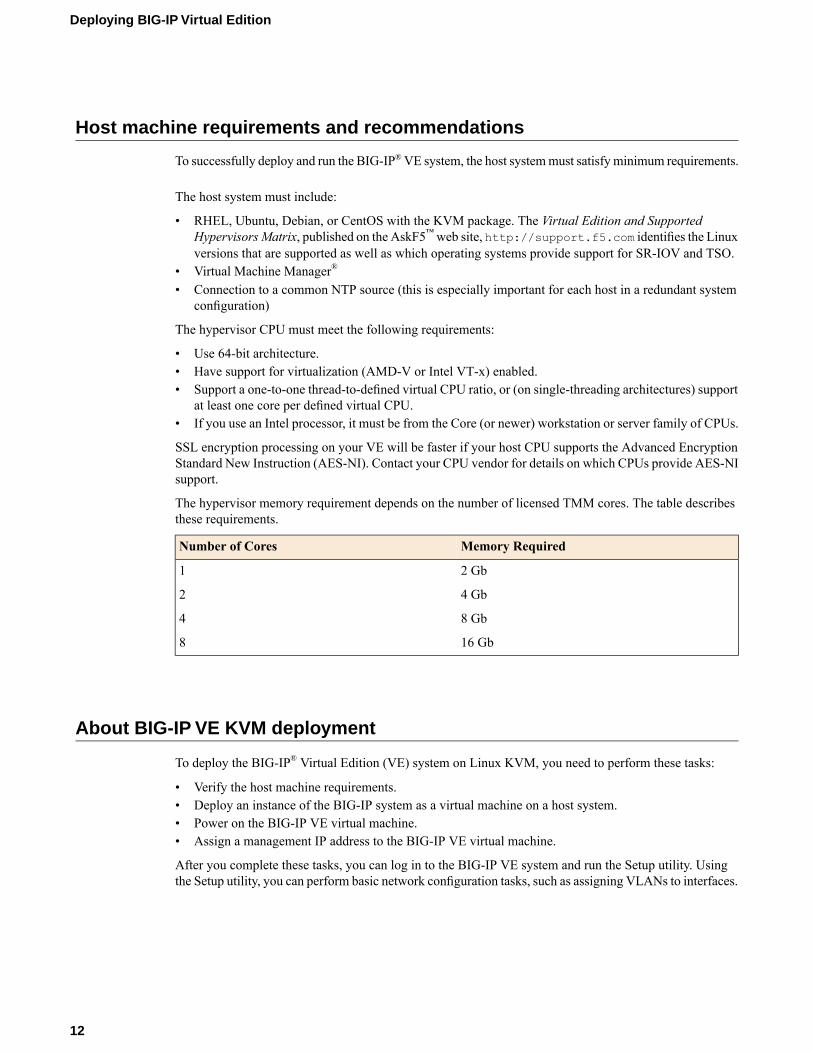
To successfully deploy and run the BIG-IP®VE system, the host systemmust satisfy minimum requirements.
The host system must include:
• RHEL, Ubuntu, Debian, or CentOS with the KVM package. The Virtual Edition and SupportedHypervisorsMatrix, published on the AskF5™web site, http://support.f5.com identifies the Linuxversions that are supported as well as which operating systems provide support for SR-IOV and TSO.
• Virtual Machine Manager®
• Connection to a common NTP source (this is especially important for each host in a redundant systemconfiguration)
The hypervisor CPU must meet the following requirements:
• Use 64-bit architecture.• Have support for virtualization (AMD-V or Intel VT-x) enabled.• Support a one-to-one thread-to-defined virtual CPU ratio, or (on single-threading architectures) support
at least one core per defined virtual CPU.• If you use an Intel processor, it must be from the Core (or newer) workstation or server family of CPUs.
SSL encryption processing on your VE will be faster if your host CPU supports the Advanced EncryptionStandard New Instruction (AES-NI). Contact your CPU vendor for details on which CPUs provide AES-NIsupport.
The hypervisor memory requirement depends on the number of licensed TMM cores. The table describesthese requirements.
Memory RequiredNumber of Cores
2 Gb1
4 Gb2
8 Gb4
16 Gb8
About BIG-IP VE KVM deployment
To deploy the BIG-IP® Virtual Edition (VE) system on Linux KVM, you need to perform these tasks:
• Verify the host machine requirements.• Deploy an instance of the BIG-IP system as a virtual machine on a host system.• Power on the BIG-IP VE virtual machine.• Assign a management IP address to the BIG-IP VE virtual machine.
After you complete these tasks, you can log in to the BIG-IP VE system and run the Setup utility. Usingthe Setup utility, you can perform basic network configuration tasks, such as assigning VLANs to interfaces.
12
Deploying BIG-IP Virtual Edition
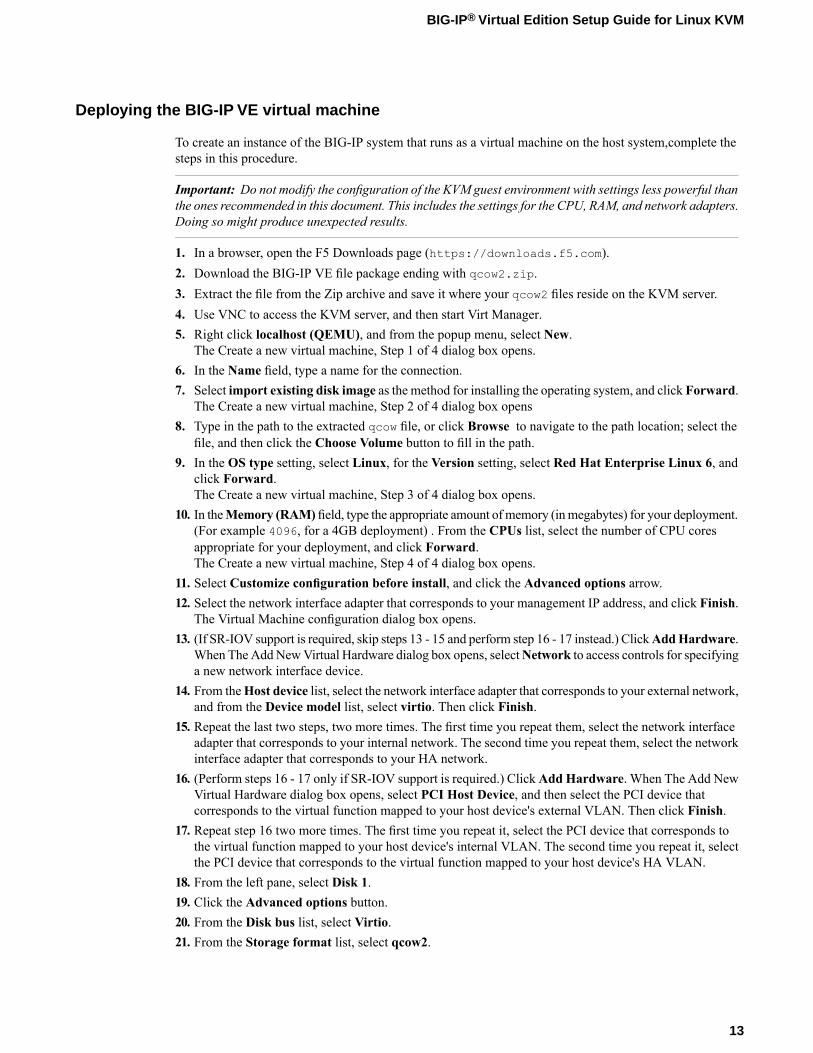
Deploying the BIG-IP VE virtual machine
To create an instance of the BIG-IP system that runs as a virtual machine on the host system,complete thesteps in this procedure.
Important: Do not modify the configuration of the KVM guest environment with settings less powerful thanthe ones recommended in this document. This includes the settings for the CPU, RAM, and network adapters.Doing so might produce unexpected results.
1. In a browser, open the F5 Downloads page (https://downloads.f5.com).2. Download the BIG-IP VE file package ending with qcow2.zip.3. Extract the file from the Zip archive and save it where your qcow2 files reside on the KVM server.4. Use VNC to access the KVM server, and then start Virt Manager.5. Right click localhost (QEMU), and from the popup menu, select New.
The Create a new virtual machine, Step 1 of 4 dialog box opens.6. In the Name field, type a name for the connection.7. Select import existing disk image as the method for installing the operating system, and click Forward.
The Create a new virtual machine, Step 2 of 4 dialog box opens8. Type in the path to the extracted qcow file, or click Browse to navigate to the path location; select the
file, and then click the Choose Volume button to fill in the path.9. In the OS type setting, select Linux, for the Version setting, select Red Hat Enterprise Linux 6, and
click Forward.The Create a new virtual machine, Step 3 of 4 dialog box opens.
10. In theMemory (RAM) field, type the appropriate amount ofmemory (inmegabytes) for your deployment.(For example 4096, for a 4GB deployment) . From the CPUs list, select the number of CPU coresappropriate for your deployment, and click Forward.The Create a new virtual machine, Step 4 of 4 dialog box opens.
11. Select Customize configuration before install, and click the Advanced options arrow.12. Select the network interface adapter that corresponds to your management IP address, and click Finish.
The Virtual Machine configuration dialog box opens.13. (If SR-IOV support is required, skip steps 13 - 15 and perform step 16 - 17 instead.) ClickAddHardware.
When The AddNewVirtual Hardware dialog box opens, selectNetwork to access controls for specifyinga new network interface device.
14. From theHost device list, select the network interface adapter that corresponds to your external network,and from the Device model list, select virtio. Then click Finish.
15. Repeat the last two steps, two more times. The first time you repeat them, select the network interfaceadapter that corresponds to your internal network. The second time you repeat them, select the networkinterface adapter that corresponds to your HA network.
16. (Perform steps 16 - 17 only if SR-IOV support is required.) ClickAdd Hardware. When The Add NewVirtual Hardware dialog box opens, select PCI Host Device, and then select the PCI device thatcorresponds to the virtual function mapped to your host device's external VLAN. Then click Finish.
17. Repeat step 16 two more times. The first time you repeat it, select the PCI device that corresponds tothe virtual function mapped to your host device's internal VLAN. The second time you repeat it, selectthe PCI device that corresponds to the virtual function mapped to your host device's HA VLAN.
18. From the left pane, select Disk 1.19. Click the Advanced options button.20. From the Disk bus list, select Virtio.21. From the Storage format list, select qcow2.
13
BIG-IP® Virtual Edition Setup Guide for Linux KVM
22. Click Apply.23. Click Begin Installation.
Virtual Machine Manager creates the virtual machine just as you configured it.
Powering on the virtual machine
You power on the virtual machine so that you can begin assigning IP addresses.
1. Open Virtual Machine Manager.2. Right click the virtual machine that you want to power on, and then from the popup menu, selectOpen.
The virtual machine opens, but in a powered-off state.3. From the toolbar, select the Power on the virtual machine (right-arrow) button.
The virtual machine boots and then displays a login prompt.
There are two default accounts used for initial configuration and setup:
• The root account provides access locally, or using SSH, or using the F5 Configuration utility. The rootaccount password is default.
• The admin account provides access through the web interface. The admin account password is admin.
You should change passwords for both accounts before bringing a system into production.
Assigning a management IP address to a virtual machine
The virtual machine needs an IP address assigned to its virtual management port.
Tip: The default configuration for new deployments and installations is for DHCP to acquire the managementport IP address.
1. At the login prompt, type root.2. At the password prompt, type default.3. Type config and press Enter.
The F5 Management Port Setup screen opens.4. Click OK.5. If you want DHCP to automatically assign an address for the management port, select Yes. Otherwise,
select No and follow the instructions for manually assigning an IP address and netmask for themanagement port.
You can use a hypervisor generic statement such as tmsh show sys management-ip to confirm thatthe management IP address has been properly assigned.
Tip: F5 Networks highly recommends that you specify a default route for the virtual management port, butit is not required for operating the virtual machine.
Turning off LRO/GRO from the VE guest to optimize PEM performance
Before you can access the VE guest to turn off LRO and GRO, you must have assigned the guest amanagement IP address.
14
Deploying BIG-IP Virtual Edition

To optimize performance if you use the virtual machine with the PEM module, you must turn off largereceive offload (LRO) and generic receive offload (GRO) for each network interface card (NIC) that is usedto pass traffic. You must also use SR-IOV. Although there are a number of ways to turn off LRO, the mostreliable way is to connect to the VE guest and use the ethtool utility.
1. Use an SSH tool to access the management IP address of the BIG-IP® VE system.2. From the command line, log in as root.3. Use the ethtool to turn off rx-checksumming for the NIC.
ethtool -K eth<X> rx off
Important: In this example, substitute the NIC number for <X>.
4. Use the ethtool to turn off LRO for the NIC.ethtool -K eth<X> lro off
Important: In this example, substitute the NIC number for <X>.
5. Use the ethtool to turn off GRO for the NIC.ethtool -K eth<X> gro off
Important: In this example substitute the NIC number for <X>.
6. Use the ethtool to confirm that LRO and GRO are successfully turned off for the NIC.ethtool -k eth<X>
In the system response to your command, you should see this info:
generic-receive-offload: off
large-receive-offload: off
If either of these responses is on, your attempt to turn them off was not successful.
Important: In this example substitute the NIC number for <X>.
7. Repeat the previous three steps for each of the NICs that the BIG-IP VE uses to pass traffic.
With LRO and GRO successfully turned off, the performance of the PEMmodule on the BIG-IP VE systemwill have better performance and stability.
You can achieve optimum performance (throughput and stability) with the PEM module only if you enableSR-IOV.
15
BIG-IP® Virtual Edition Setup Guide for Linux KVM


Chapter
3Updating a BIG-IP VE Virtual Machine
• About VE disk space• About updates to the BIG-IP VE virtual
machine

About VE disk space
BIG-IP® VE can be deployed in a number of different disk space configurations. Because disk space canbe a costly resource, it makes sense to install the smallest disk space configuration that is practical for youroperation. If you opt for a smaller disk size, but later determine that you need additional space so you caninstall upgrades and hot fixes, or to run additional module combinations, you can increase the size of thedisk space the BIG-IP VE uses to suit your needs.
Important: At the time of this release, decreasing the VE disk size is not supported. If you decide that youneed a smaller disk size, first install a smaller disk size version of BIG-IP VE, and then increase the size towhat you want. For example, you might install the 31Gb disk version of BIG-IP VE, but then decide youonly need 20Gb. You could install the 7Gb version, and then increase the disk size to 20Gb.
Increasing the disk space allotted to the BIG-IP virtual machine
You can customize the amount of resources available by using a sequence of hypervisor-specific steps toincrease the disk space the hypervisor uses, and follow those with a sequence of tmsh commands to increasethe size of the directories that BIG-IP® VE uses.
1. The process of expanding the virtual disk size of your hypervisor depends on which hypervisor you use.Consult your hypervisor documentation for specific instructions.
2. After you complete the steps for expanding your hypervisor disk size, reboot the BIG-IP VE to see thatnew disk size.
Important: Before the BIG-IP VE can use the additional disk space, you need to increase the size ofthe directories on the disk.
3. Submit the following sequence of tmsh commands to schedule expansion of the directories in whichyou need more room.
Tip:
There are four disk directories that can be resized.
• /config
• /shared
• /var
• /var/log
a) List the current size of the directories on your disk so you can determine which ones need to beresized.(tmsh show sys disk directory)
b) Expand the size of the directories in which you need additional space.(tmsh modify sys disk directory <directory name> new-size <new directorysize in 1KB blocks>)For example, use tmsh modify sys disk directory /config new-size 3145740 toincrease the size of /config directory to 3145740 1KB blocks (or roughly 3,221,237,760 bytes).
c) To confirm that the command you just submitted is properly scheduled, you can show the new listof directories again.
18
Updating a BIG-IP VE Virtual Machine
(tmsh show sys disk directory)d) If you change your mind about a submitted size change, you can revoke that size change.
(tmsh modify sys disk directory /config new-size 0)In this example, the size of the /config directory is left as is, revoking any scheduled size changes.
After you submit this sequence of tmsh commands, the directory size changes will be scheduled. Thatis, the next time the BIG-IP VE is rebooted, the disk directories are re-sized.
4. Reboot the BIG-IP VE.During the reboot, the directory size increases finish.
About updates to the BIG-IP VE virtual machine
BIG-IP® VE updates within the same major version are installed in the same manner as updates to BIG-IPsoftware already installed on BIG-IP hardware. You do not need to reinstall BIG-IP VE in the hypervisorguest environment to upgrade your system. To update a BIG-IP VE virtual machine, you can use the SoftwareManagement tool in the Configuration utility, or you can upgrade the software from the command line. Theupdate procedure described here uses the Software Management tool.
Downloading and importing a BIG-IP VE update
To install an update, BIG-IP software needs access to the ISO file. If the update is a hotfix, you need theISO files for both the base version and the hotfix before you can successfully import and install a hotfixupdate.
1. In a browser, open the F5 Downloads page (https://downloads.f5.com).2. Download the version's base ISO file, such as 11.5, and its associated MD5 checksum file.
Tip: The location to which you download ISO files is not significant. Just make sure you can navigateto that location when you perform the import task.
3. Download the update ISO file, such as Hotfix-BIGIP-11.5.1-511.0-HF3.iso, and its associatedMD5 checksum file.
Important: Before you perform the installation, F5 recommends testing the integrity of the ISO files toverify that you have downloaded clean copies. Use an MD5 verification program to ensure that thedownloaded ISO file's checksums match the values in their corresponding MD5 files.
4. On the Main tab, click System > Software Management > Image List > Import.The Import Software Image screen opens.
5. Click Browse to navigate to the downloaded base level installation file.6. When the image name appears in the Software Image field, click Import to begin the operation.
Important: Do not navigate away from this screen before the operation completes; the system mightnot import the image successfully. Wait for the operation to complete before continuing with any otherwork on the BIG-IP VE system.
The system presents a progress indicator during the operation; when the import is complete, the Importpage closes and the downloaded base image displays as an available image.
19
BIG-IP® Virtual Edition Setup Guide for Linux KVM
7. Click the Hotfix List tab.The Available Images portion of the screen displays any hotfixes you have imported previously.
8. At the right side of the screen, click Import.The Import Hotfix screen opens.
9. Click Browse to navigate to the downloaded hotfix installation file.10. When the image name appears in the Software Image field, click Import to begin the operation.
Important: Do not navigate away from this screen before the operation completes; the system mightnot import the image successfully. Wait for the operation to complete before continuing with any otherwork on the BIG-IP VE system.
The system presents a progress indicator during the operation; when the import is complete, the Importpage closes and the downloaded hotfix displays in the list of available images.
Installing a BIG-IP VE update
After you download and import the software installation image, you can initiate the installation operation.There are three boot locations on which you can install images on the BIG-IP® system. The process forinstalling a hotfix or a base version is essentially the same.
1. On the Main tab of the navigation pane, click System > Software Management.The Software Management Image List screen opens.
2. In the Available Images area, select the software image you want to install and click Install.The Install Software Image popup screen opens.
3. Select the disk you want to install the image on, and then type or select a volume name, and click Install.The upgrade process installs the software on the inactive disk location that you specify. This processusually takes between three and ten minutes.
Tip: If there is a problem during installation, you can use log messages to troubleshoot a solution. Thesystem stores the installation log file as /var/log/liveinstall.log.
The software image is installed.
When the installation operation is complete, you can safely reboot the newly installed volume or partition.
Rebooting after a BIG-IP VE update
When the installation operation is complete, you can safely reboot into the newly installed volume orpartition.
1. On the Main tab, click System > Software Management.The Software Management Image List screen opens.
2. On the menu bar, click Boot Locations.The Boot Locations screen opens.
3. In the Boot Location column, click the link representing the boot location you want to activate.The properties screen for the boot location opens.
4. Click Activate.A confirmation screen opens.
5. Click OK to initiate the reboot operation.The system presents progress messages during the restart operation.
20
Updating a BIG-IP VE Virtual Machine

When the BIG-IP® VE system reboot is complete, the system presents the login screen. To configure thesystem, log in using an account that has administrative permissions.
21
BIG-IP® Virtual Edition Setup Guide for Linux KVM


Appendix
ADeployment Best Practices
• Best practices for deploying BIG-IP VE onKVM
Best practices for deploying BIG-IP VE on KVM
When deploying BIG-IP® Virtual Edition (VE) on a KVM host, use these best practices.
RecommendationIssue
F5 Networks recommends turning offHyper-Threading Technology when using host
Disable hyper-threading on older processors
machines with Intel Pentium 4 era processors. Doingso will prevent possible timing issues with BIG-IPVE.
Important: Production licenses are not supportedon Pentium 4 processors.
24
Deployment Best Practices

Index
A
active/standby configuration 24Automatic Shutdown Action 13
B
best practicesfor deployment 24for redundant system configuration 24
BIG-IP Virtual Editionabout increasing disk size 18and KVM host machine requirements 12updating 19
C
CPUand best practices for 24and guest definition 8and host machine requirements 12
D
default route for virtual management port 14deployment overview 12disk size, See virtual disk sizedisk space 9downloads
and importing update 19of ISO base file 19of ISO update file 19
E
environment, for guest 8
G
GROturning off 14
guest environment 8
H
host machine, CPU requirements 12hypervisor
about 8configuring for TSO 10
hypervisor guest definition 8
I
installationrebooting after 20
installation operation 20
IP address, management port 14ISO file
and location on virtual machine 19downloading 19downloading base file 19downloading update file 19
K
Kernel-based Virtual Machineand compatible versions 8
KVM virtual machinecreating 13
L
log fileand location 20and media speed messages 20
log inafter updating 20assigning management IP address 14deploying BIG-IP VE virtual machine 13
LROturning off 14
M
management port IP address, assigning 14maximum allowed throughput rate 8memory guidelines 9
N
Network Adapteradding 13
P
PEM performanceoptimizing 14
power-on procedure, virtual machine 14product license 8progress indicator, for update 19
R
reboot operationafter updating 20
redundant system configurationand host machine requirements 12and NTP requirement 12deploying 24
resource reservations 24
25
Index

S
Setup utility 12SR-IOV support 10system reboot, See reboot operation.system update procedure 19
T
task listfor deploying on virtual machine 12for updating on virtual machine 19
TCP Segmentation Offloading support 10TSO support
configuring hypervisor for 10
U
updatedownloading and importing 19installing 20
update progress indicator 19
V
VHD file 13virtual configuration, and hypervisor guest definition 8virtual disk size
extending 18increasing 18
virtual machine settings 8virtual machine, powering-on 14virtual management port 14
26
Index